Forum adverts like this one are shown to any user who is not logged in. Join us by filling out a tiny 3 field form and you will get your own, free, dakka user account which gives a good range of benefits to you:
No adverts like this in the forums anymore.
Times and dates in your local timezone.
Full tracking of what you have read so you can skip to your first unread post, easily see what has changed since you last logged in, and easily see what is new at a glance.
Email notifications for threads you want to watch closely.
Being a part of the oldest wargaming community on the net.
If you are already a member then feel free to login now.
2014/05/15 22:22:48
Subject: Terrain project: Imperial Cathedral: 11/05/14 - underneath the arches...
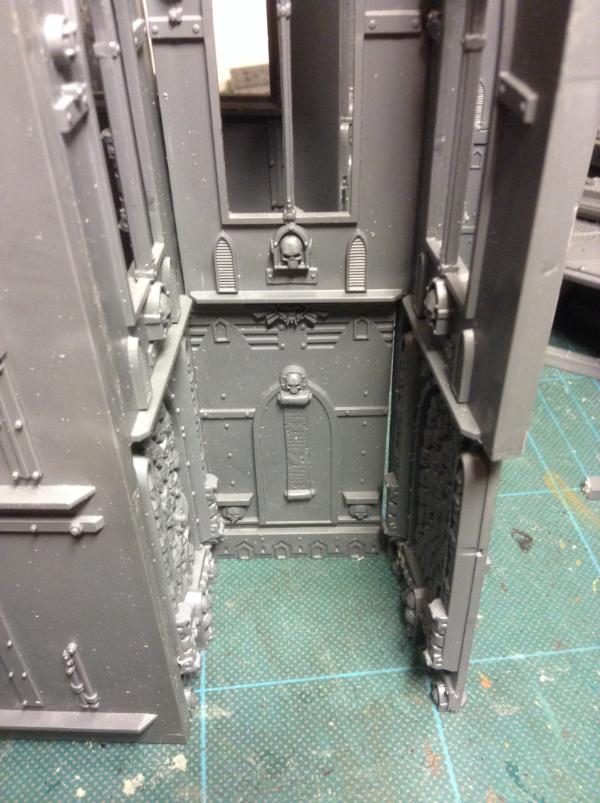
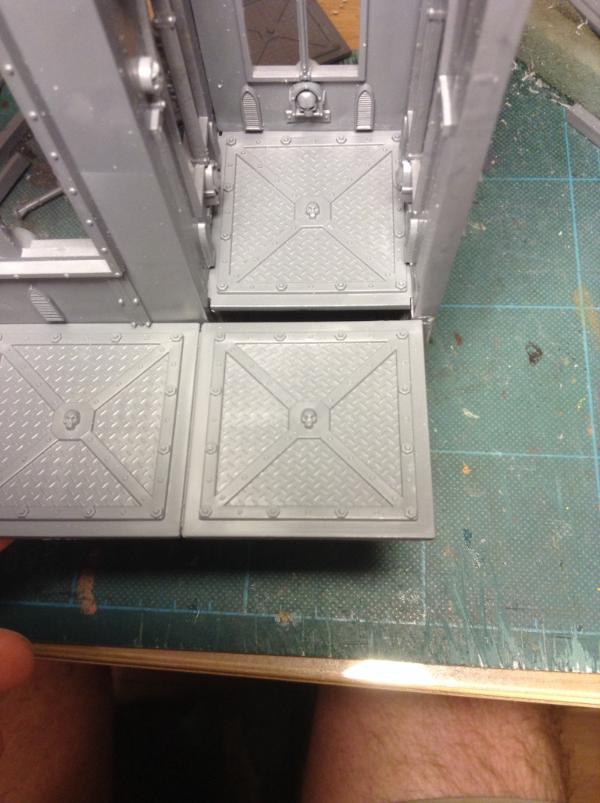
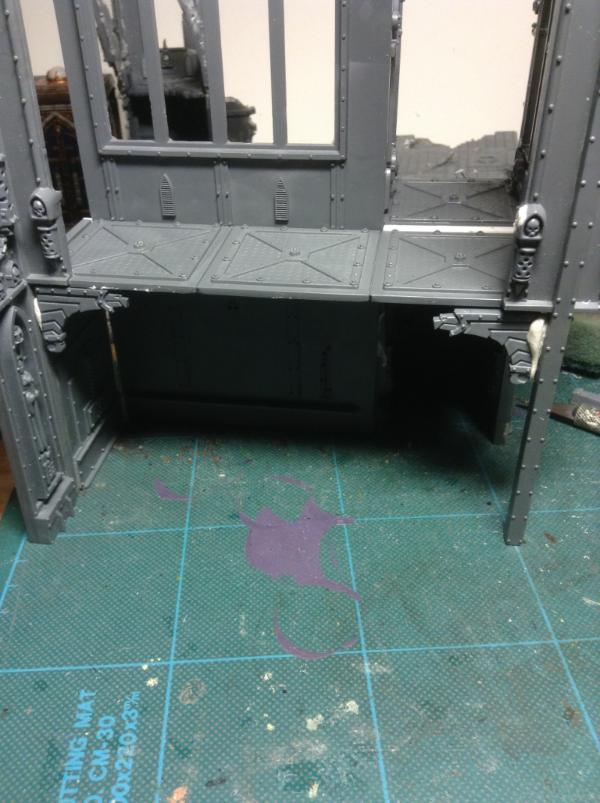
Wanted to give a sense of the commitment I'm making to this thing, so bear with me. As mentioned in the last major update, have been working on the lower walkway and the "inserts" to the bits of the walls the stick out. Trouble is I'd already glued the three, three story walls together, so had to very carefully break the lower panels off to be able to get to the (now in the way) floor supports in order to trim them away. Here's what they looked like before:
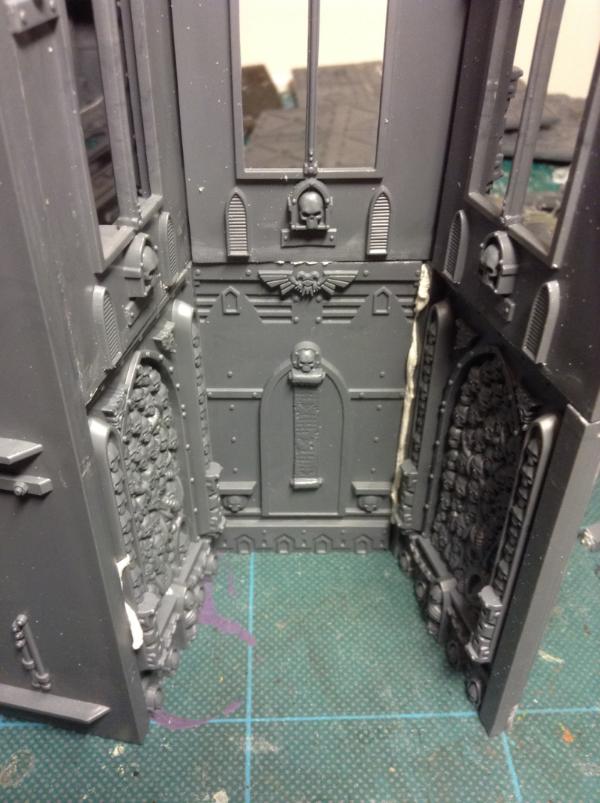
- totally impossible to get a floor tile in that gap as the 'lip' was hitting the raised part of the floor tile. So they all needed cutting back - here's how they look after:
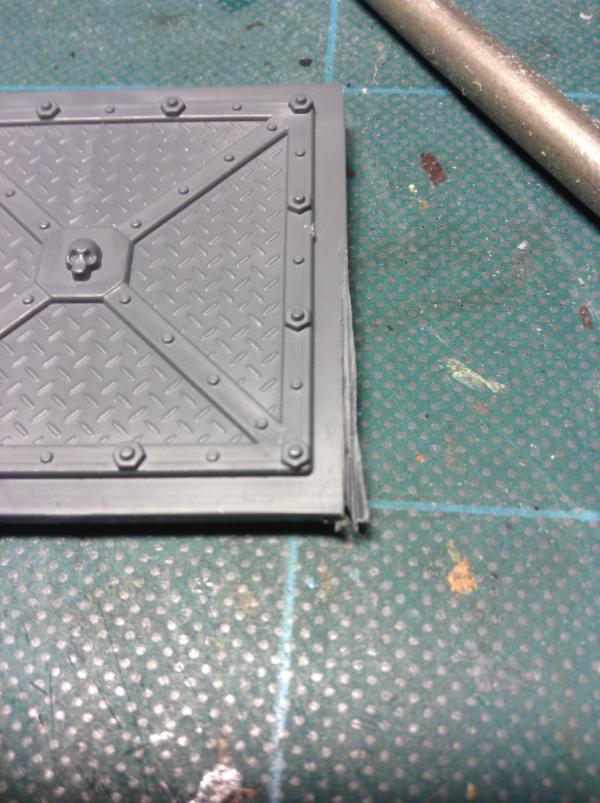
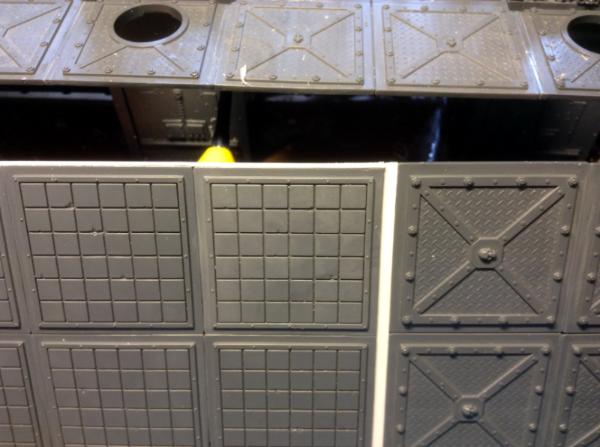
This now allows a floor tile to be inserted. But not easily, oh no... The sides needed to be cut down - and just to show the tolerances I'm having to deal with:
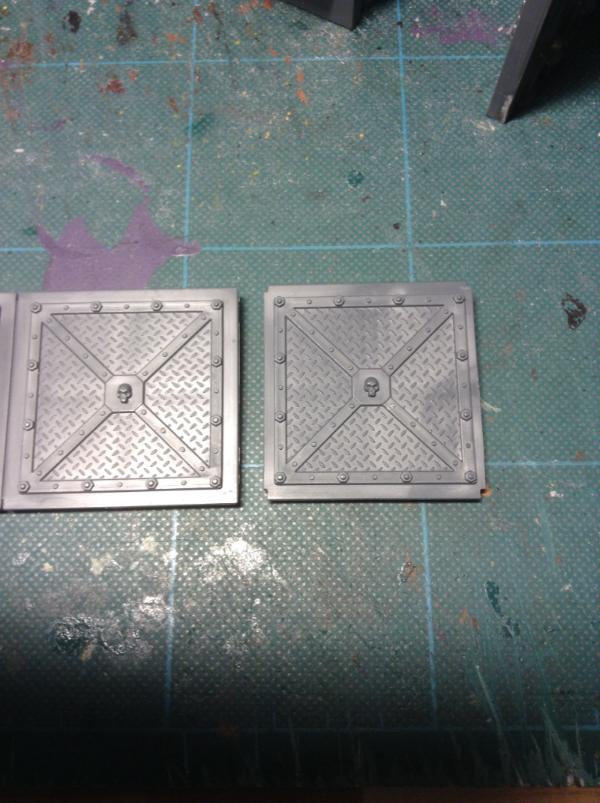
Basically the thickness of the saw blade I'm using, off both sides. One slip and the whole thing gets buggered... But not only that, once the sides are fine, due to the wall girders being on the INSIDE of the gap rather than outside, needed to cut some small notches out of the corners of the tiles to accommodate them:
(A before and after comparison pic with a standard tile)
So now it fits. Except there's a gap to the rest of the walkway that needed to be filled:
Step forward a bit of plasti-card cut to size:
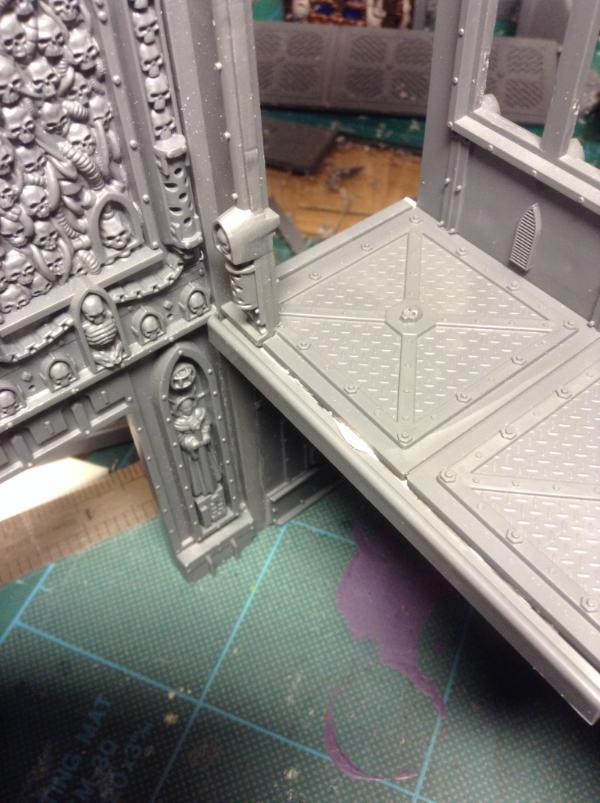
Spot the gap on the far left of the tiles? Yep, that needed to be cut away to accommodate the arch support on the tower wall, as the section is just too wide to fit snuggle behind it and up against the exterior wall:
(Note in this pic the old trusty movement tray edges being deployed as trim to the walkway - more on that in a bit...)
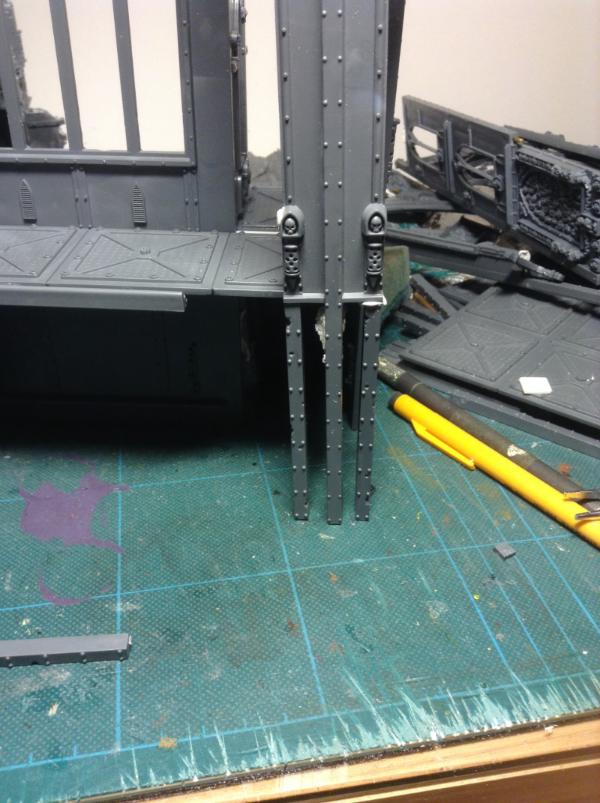
So was looking at the arch girders and thinking they looked a bit weedy, so toyed with the idea of additional girder supports:
But to be honest didn't really like the results, so instead I think I'm going to leave the walkways edges bare, but with eagle supports beneath:
Be interested to hear what others think about the two options as I'm not yet 100% swayed in either direction...
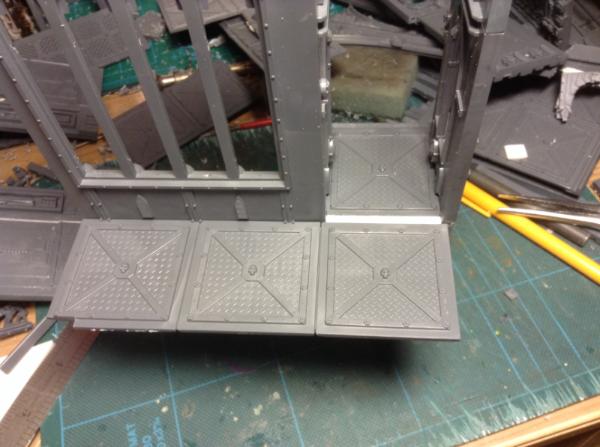
So having repeated the whole thing twice, am left with this:
the gap between the two sections needs to be filled properly, as well as additional gaps cut to support the central arch support, but as that will effectively hide it I'm not overly worried about that ATM - so the final piece will look (probably) something like this once I've tidied everything up:
Mastodon: @DrH@dice.camp
The army- ~2295 points (built).
* -=]_,=-eague Spruemeister General. * A (sprue) Hut tutorial * Dsteingass - Dr. H..You are a role model for Internet Morality! // inmygravenimage - Dr H is a model to us all Theophony - Sprue for the spruemeister, plastic for his plastic throne! // Shasolenzabi - Toilets, more complex than folks take time to think about!
I have so much to say! so soooooo so much but it all comes down to this.
DAAAAAAAAAAAAAAAAAAAAAAAAAAAAAAAAAAAAAAAAAAAAAAAAAAAAAAAAAAAAAAAAAAAAAAAAAAAAAAMN U GOT GAME SON
This is a masterpiece of everything I wish people would strive for when it comes to terrain. Terrain makes the story come alive and people don't appreciate what a good board can do for your games. This amazingly detailed building is a pinnacle. A true pinnacle of beauty. I truly love the pinning on the beams as well to keep it modular, I had the same idea myself but fell short as I didn't have the patience to plan out something as intricate as you have here. The roof sections, cutting out window beams to put between the tiles, getting it all flush, the chandelier. Just blown away. And the paint job! Actually painted details on a COD piece is hard to see as most are drybrushed and left like that. I applaud you good sir! BRING ON MORE!
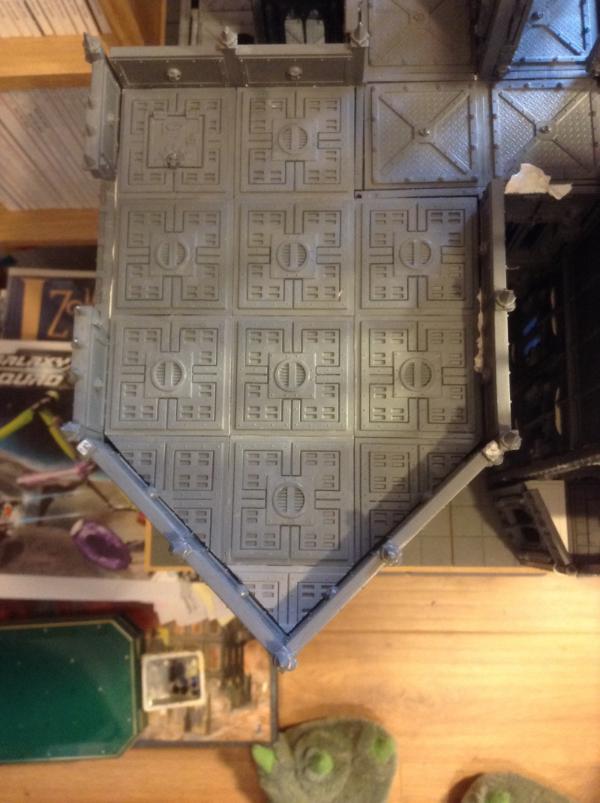
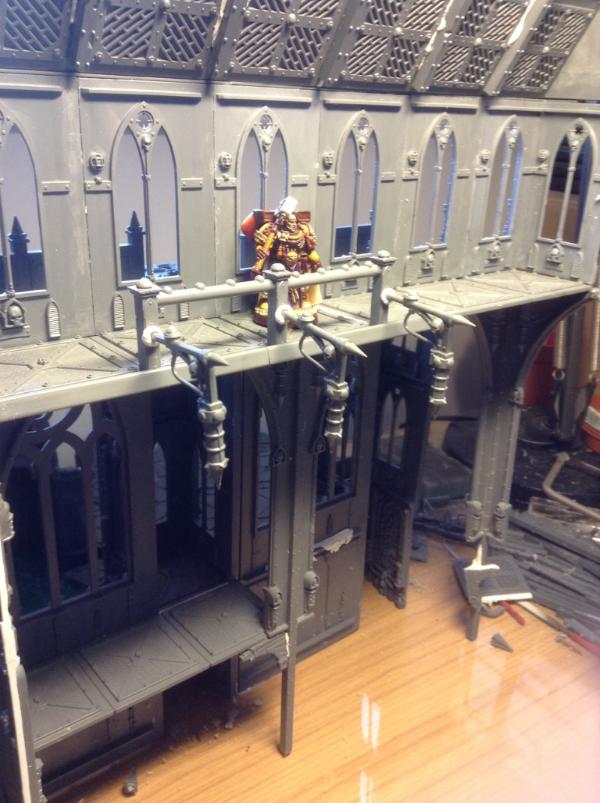
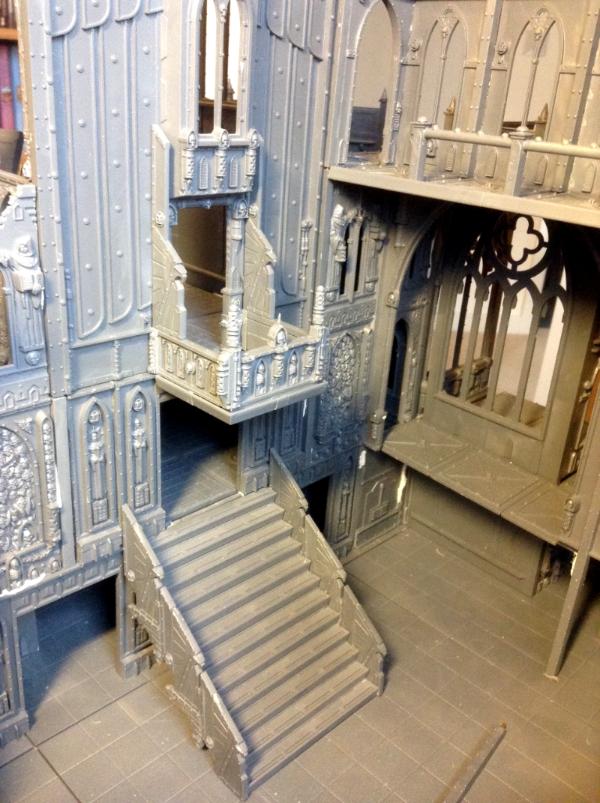
Today I have mostly been working on the upper internal walkway. I'd considered using the COD' crenellations' to line the area, but this would block out too much of any models up there, so instead came up with the following, continuing the handrail from the lower walkway, but with more supports:
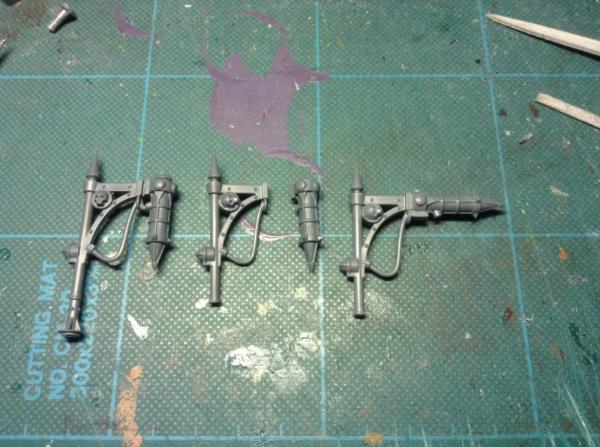
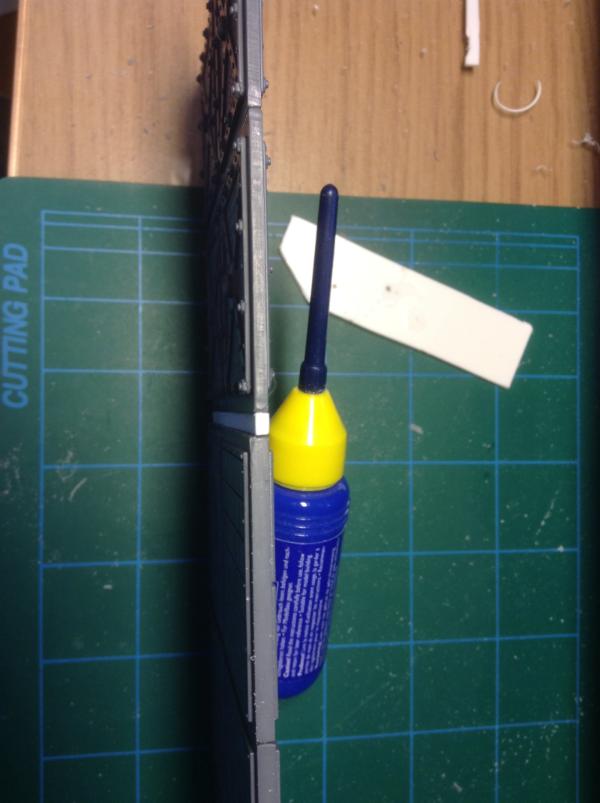
This means you can actually see the majority of the model while also offering positions to hang the internal lighting I mentioned a few posts back. Speaking of which, here's a quick step-by-step guide to how to do them incase anyone wants to do likewise:
Note that the 'bump' from the top of the lamp has been recycled on top of the handrail supports. This a) cuts down the vertical height of the posts rather than the original pointy bit and b) fits nicely with the bumps on the handrail itself! Never throw anything away kids!
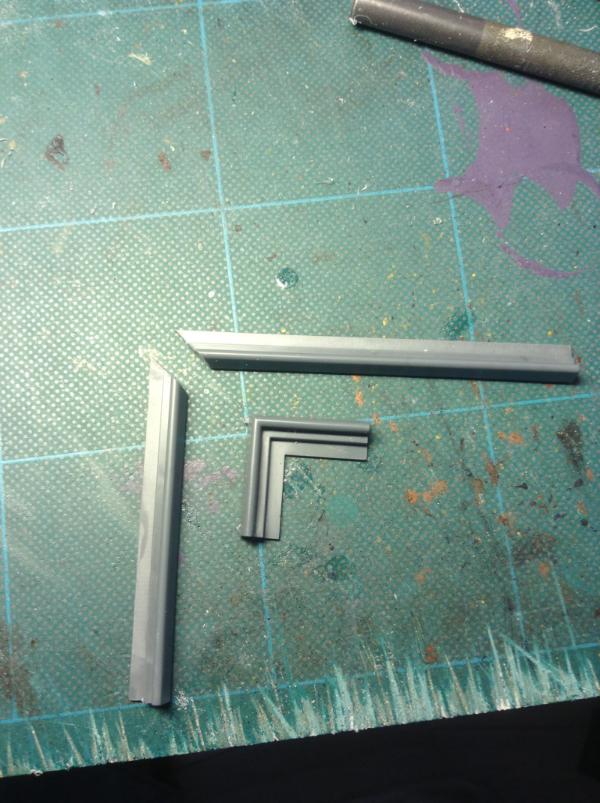
Unlike the lower walkway, however, I've decided to use the movement tray bits to line the edges (I figure you wouldn't want to loose your footing in this universe, plus it hides the join with the handrail supports) - the downside being corner - in order to get round this had to cut the bits at right angels to, in effect, reverse the actual corners:
Have also been working on the corner, which I'd hoped to have finished by now but a) it's fiddly and b) realised that after two failed attempts, I've got some spacing issues to resolve, so will have to update this at a later stage....
Mastodon: @DrH@dice.camp
The army- ~2295 points (built).
* -=]_,=-eague Spruemeister General. * A (sprue) Hut tutorial * Dsteingass - Dr. H..You are a role model for Internet Morality! // inmygravenimage - Dr H is a model to us all Theophony - Sprue for the spruemeister, plastic for his plastic throne! // Shasolenzabi - Toilets, more complex than folks take time to think about!
This is a really great project. Surprised I didn't see it before! It's really coming along and I love the incredible dedication to detail you're putting into it. Keep up the fantastic work!
GrimDork wrote: Things not lining up? Take a break if you have to, but don't let it get you down, it's an amazing work!
Sigh... Hit the nail on the head Grim, that and being ill over the last couple of days, my patience has been sorely tested by my stupid need for perfection. Or as least as I can get with kits that we're never meant to be tortured into the shapes I'm trying to create...
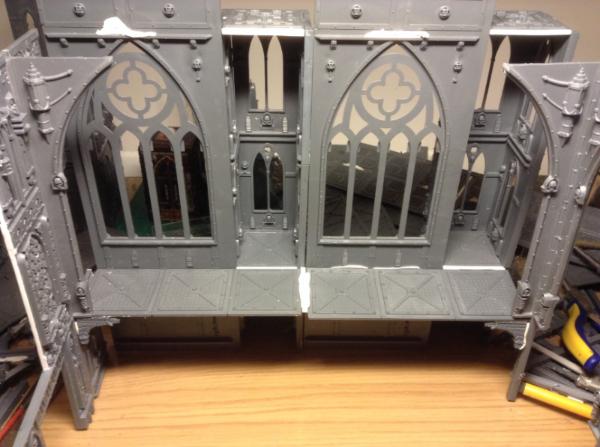
Anyway, have been tidying bits n bobs up while being full of snot and coughs, such as FINALLY gluing the side towers back together after breaking them up to do the internal floors, and at last putting the lower external roof together into one piece:
So feeling a bit more human today and while it's pi$$ing down with rain have finally gotten to the part I've been dreading: trying to tie the rear of the building with the side.... I've been putting this off for months cos I knew it was going to be a pain in the arse to do, as it involves cutting up a load of plasticard and gluing floors together, as the way things are constructed to date means thee are gaps that need bridging.
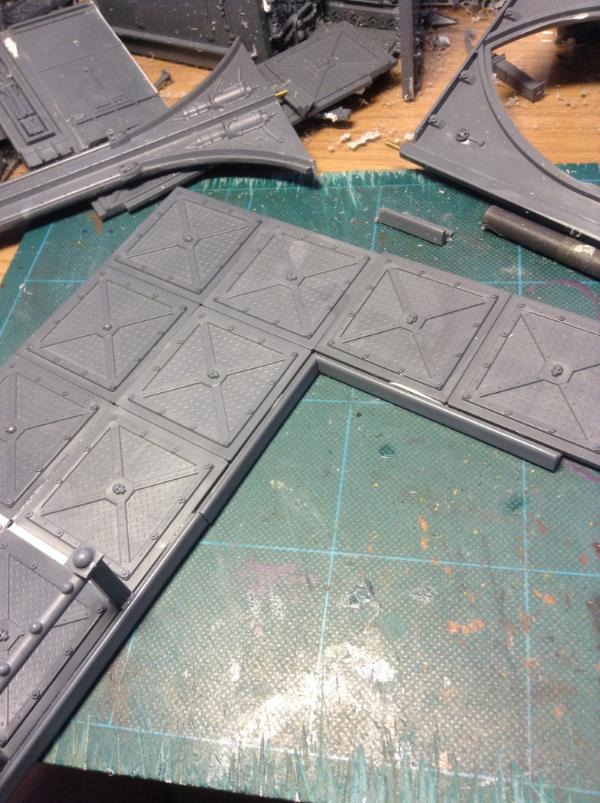
What I hadn't quite realised is the the floor/roof tiles in the Shrine of the Aquila and the other COD sets aren't quite the same size/shape - the SOTA ones are slightly thinner than the others, so the rear tower of the building, where interior (COD) meet exterior (SOTA) had to be glued just right otherwise the floors don't line up properly:
- not helped by having to fit a spacer between them. Also needed to add a very thin strip to fill a gap on one edge too:
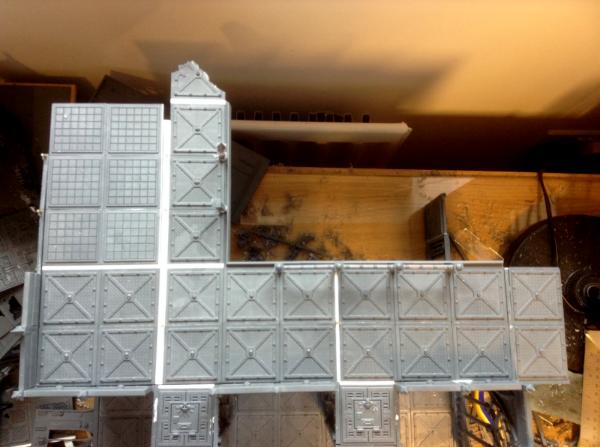
These then are too far away from the rest of the upper walkway, so needed a thicker strip to bridge that gap, through with needed to drill holes to locate the pins from the archway supports beneath. I' frankly couldn't be arsed to take pics of all the stages to this, so you'll have to make do with the 'final' results:
(Nb, not yet glued the back bit to the interior "L" as I still figure it'll be 'easier' to(eventually) paint if things are in smaller sections...
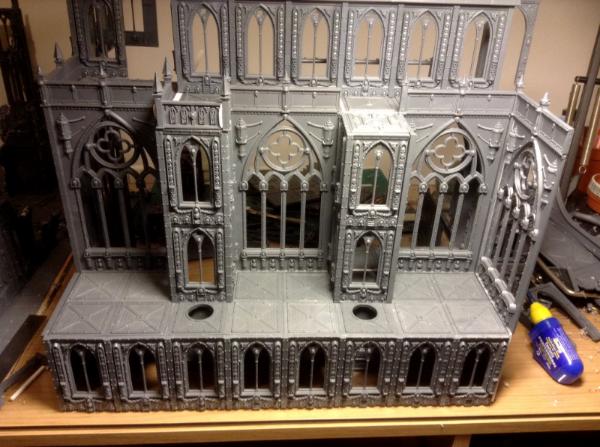
And with the wall pieces slotted on top:
Thankfully most of the additional material will be covered by walls or buttresses, but in hindsight I would have done things slightly differently if I could start over. HA!!
The most annoying part is that the corner by the doorway leading from exterior to interior at the back stubbornly refuses to line up how I want in the dry fit - I SHOULD work when glued, but for now it's a pain and will be a weak point when finally all glued. Oh well... As long as I don't drop the bloody thing....
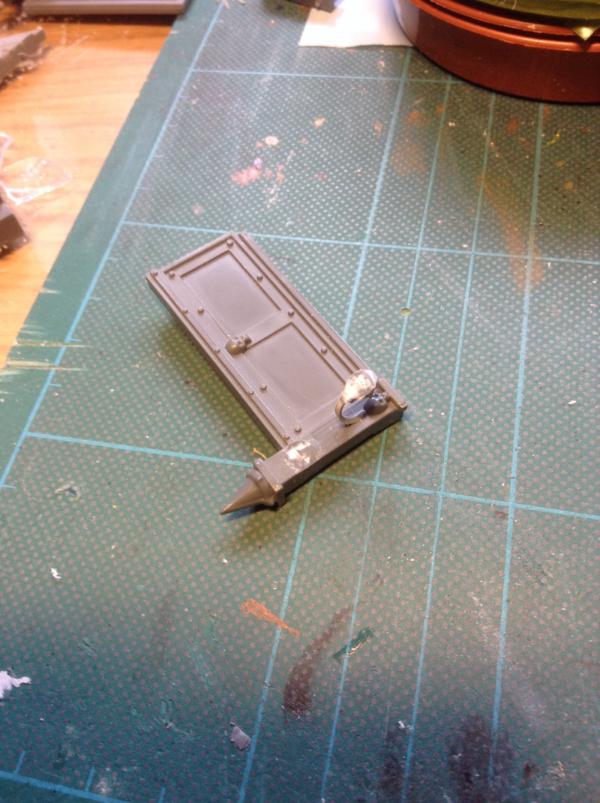
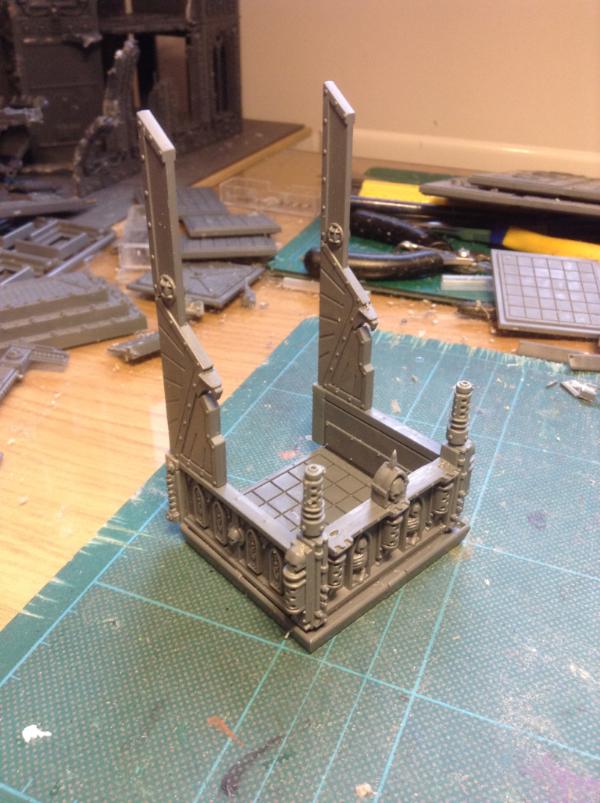
Well, I didn't play with any kittens but took a couple of days away from things... But back today and have spent all day making a new piece for the cathedral - not going to bore you with how (if you're really interested pm me) but suffice it to say it's taken ages to get everything cut to size and lined up properly bit I think it's well worth the effort:
Ok, doesn't look that impressive by itself, but I'm that happy with it that I'm going to show it in its proper context by using my first ever spoiler Worked out what it is yet? No? Ok, here it is:
Spoiler:
Every Cathedral needs an over the top pulpit, right?!
Btw - that's not glued in place - just fits so snugly that it stays in place all by itself!
Mastodon: @DrH@dice.camp
The army- ~2295 points (built).
* -=]_,=-eague Spruemeister General. * A (sprue) Hut tutorial * Dsteingass - Dr. H..You are a role model for Internet Morality! // inmygravenimage - Dr H is a model to us all Theophony - Sprue for the spruemeister, plastic for his plastic throne! // Shasolenzabi - Toilets, more complex than folks take time to think about!
Cheers guys, thanks for the feedback - not sure if I'm boring eveyone to death these days with updates ( ) , as lots of views but not many comments, but hey ho - here's a pic heavy update anyway....
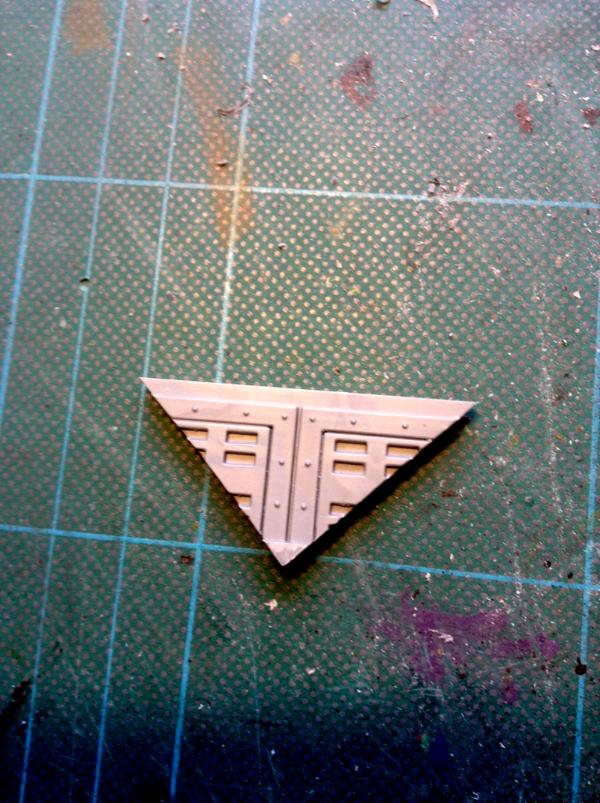
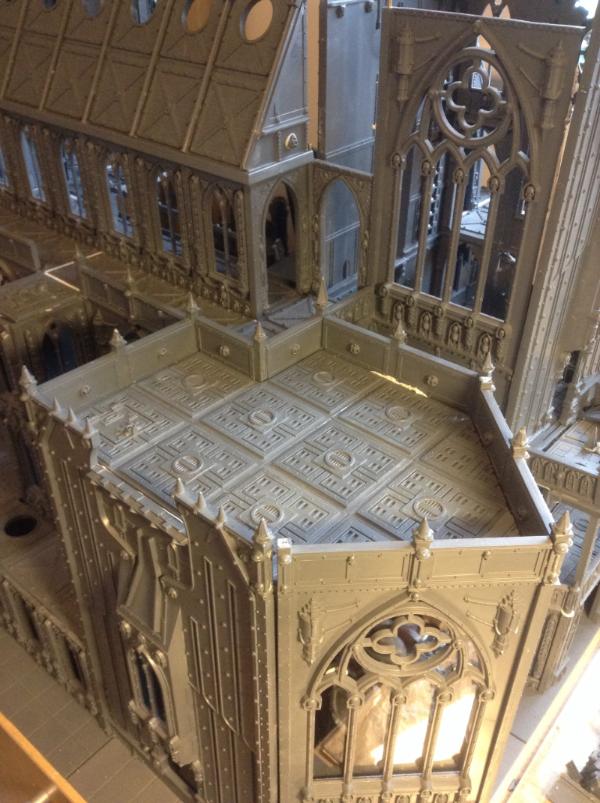
As lots of the major build elements are now complete, got to focus on the myriad small details that need completing. Today: the Chapel roof. So the main elements have long been glued together, but left three triangular sections at the 'prow' to do. So... Cue lots of cutting and filing of tiles:
Initial cut to shape. But to sit on the wall supporting ledge needs filing on the reverse. Before (with areas to cut back incised):
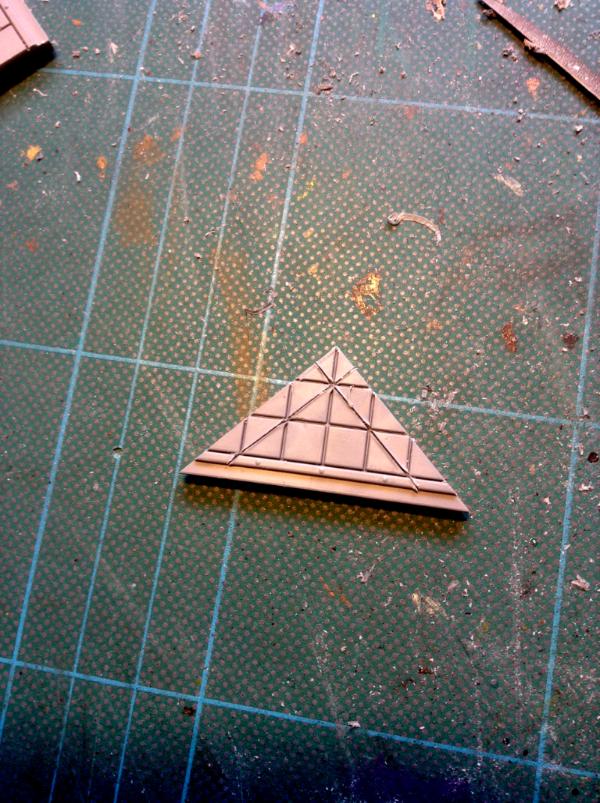
And after:
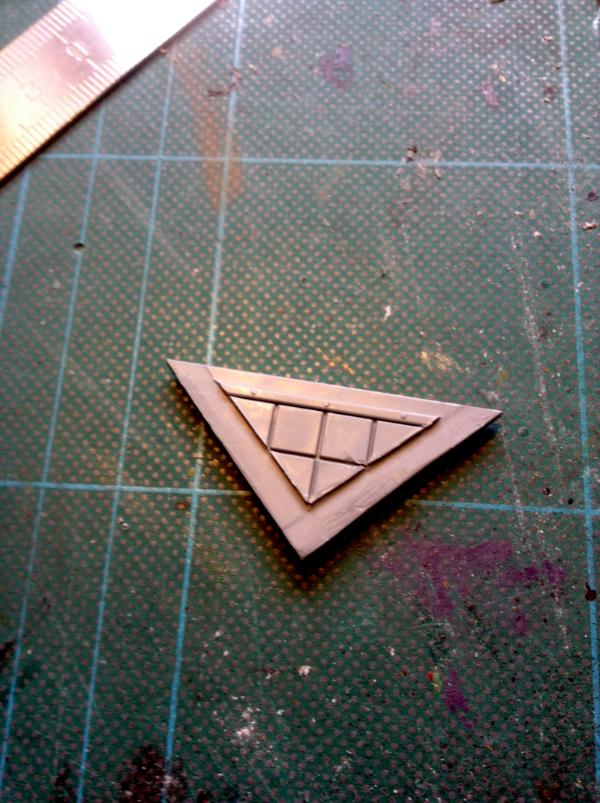
Repeat twice more on the outer sections and then glued to the rest of the roof plate - reverse with the filed areas (tbh wish I'd gone with this side as the top of the roof, but too late now..):
(And yes, all this will be painted, even though it'll be virtually impossible to see....)
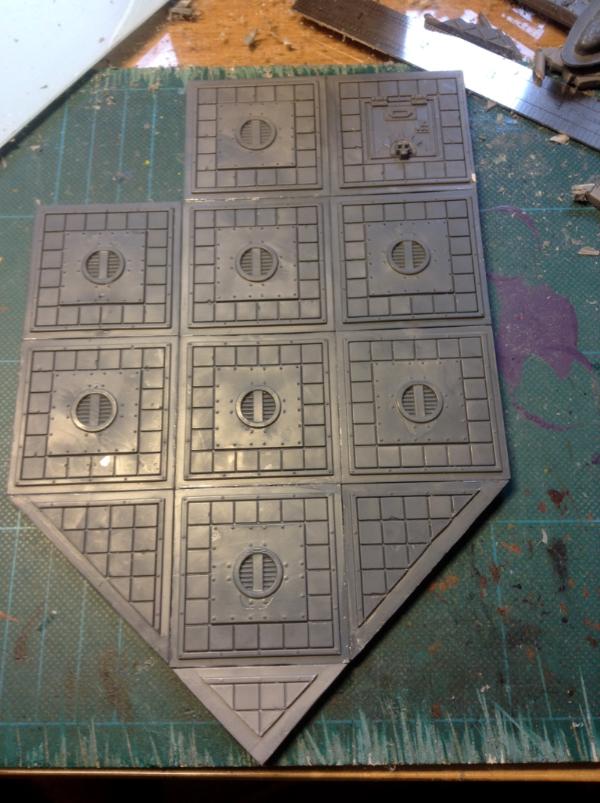
And the top, in situ:
Ok, so the edges don't quite line up with the walls, but frankly even I don't care at this point
So next up is the area between the Chapel roof and the walkway round the main roof leading to the front tower - need to disguise the joins here. Thankfully had some of the Shrine of the Aquila wall top sections spare that had been cut off earlier, just needed some trimming and gluing to get into shape. First, needed to cut off the wall light (more on this bit later... ):
Joined with a further cut down piece and a COD wall section:
And in situ:
Now, because I HAVEto have things as symmetrical as possible, I couldn't let the 'prow' girder remain looking like this:
So, remember that wall light carefully shaved off a minute ago well, here's where it got transplanted to:
- along with the painfully tedious and irritating job of gluing on previously harvested rivets... Only 52 to put on, great fun.... But the final result:
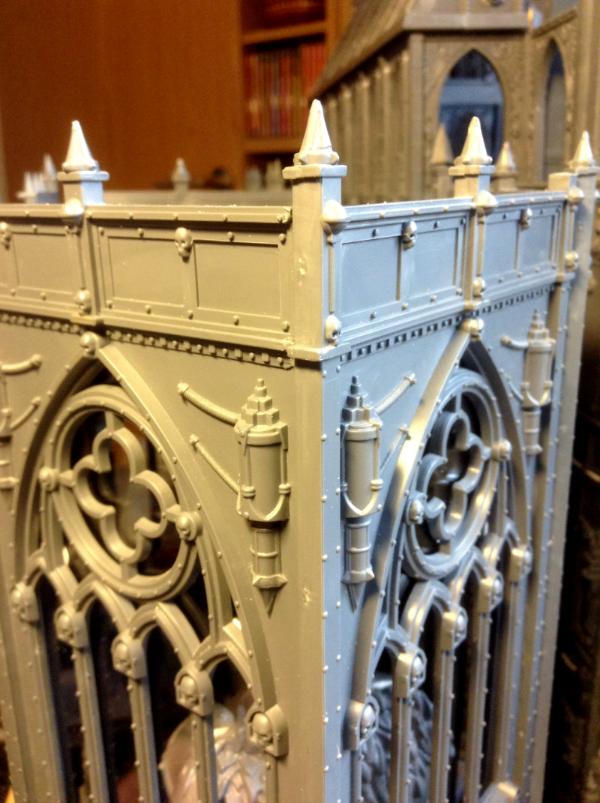
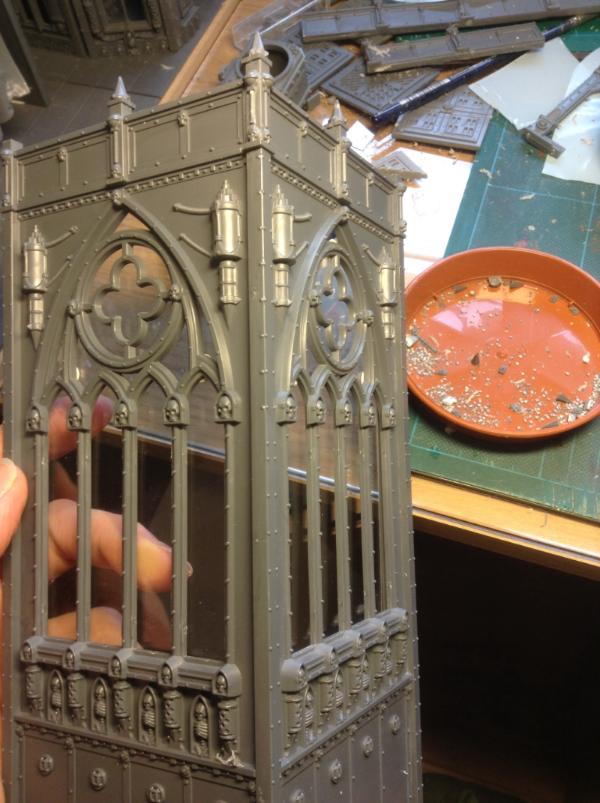
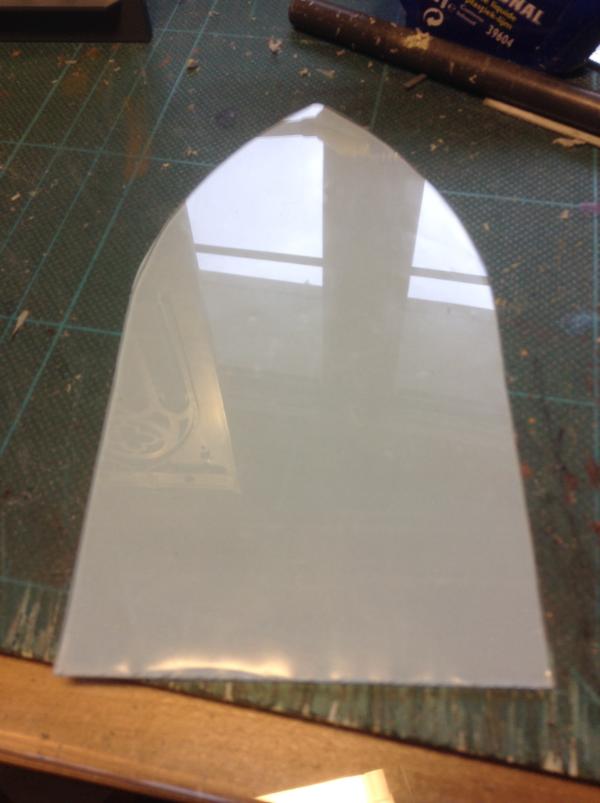
So those of you still following may recall my crazy idea about glazing the windows of the building, or the Chapel at least. Well, frankly that idea, while still fun, would have been hugely impractical to complete, so have gone for the far easier (if less satisfying) approach of one large piece of clear plastic behind the window supports - cut to shape:
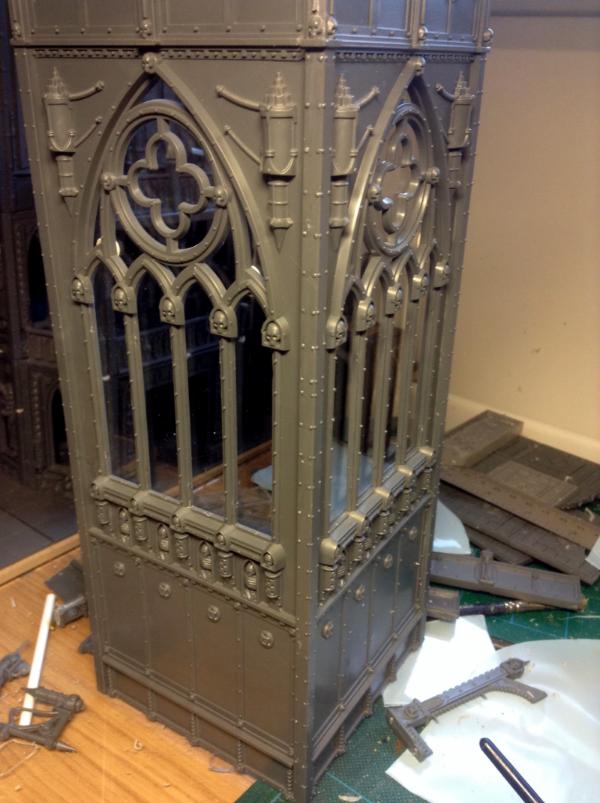
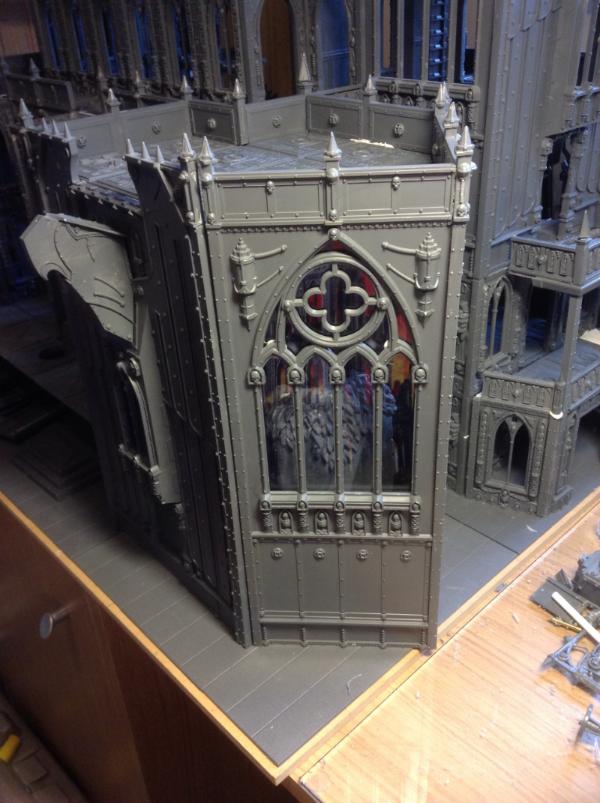
And in place (along with repositioned girder tops)
Only 3 more of those to do (once I restock supplies) in the Chapel windows - and then potentially 8 more in the rest of the Cathedral....
Well, that's today's progress. Apologies if this has sent you to sleep - just think how I feel, actually having to do it all!!!
I find it all very interesting to see how others work. No sleeping here.
Good work. Keep at it. It will be worth it in the end.
Mastodon: @DrH@dice.camp
The army- ~2295 points (built).
* -=]_,=-eague Spruemeister General. * A (sprue) Hut tutorial * Dsteingass - Dr. H..You are a role model for Internet Morality! // inmygravenimage - Dr H is a model to us all Theophony - Sprue for the spruemeister, plastic for his plastic throne! // Shasolenzabi - Toilets, more complex than folks take time to think about!
Try to think of it more as leaving your audience stunned into silence than lulled into sleep
Personally, I'm a fan of being shown all the steps in the process....not only for any knowledge and useful tips gained, but also to demonstrate the effort you put into this.
Really impressed with the low wall surrounding the roof, the fact you've kept it separate from the walkway helps sell it in a way I feel most people would have missed if building it themselves (me included).
Whilst perhaps not as OCD-satisfying as individually glazing the windows, the one piece is infinitely more practical. (perhaps you could just very lightly glue them in place, and use the previous templates for a re-visit after completion.....insert evil snigger....)
I see you have reached the OGIJWTBD* portion of a major construction project.
--B.
*Oh God I just Want To Be Done
Falling down is the same as being hit by a planet — "I paint to the 20 foot rule, it saves a lot of time." -- Me
ddogwood wrote:People who feel the need to cheat at Warhammer deserve pity, not anger. I mean, how pathetic does your life have to be to make you feel like you need to cheat at your toy army soldiers game?
Briancj wrote:I see you have reached the OGIJWTBD* portion of a major construction project.
--B.
*Oh God I just Want To Be Done
You have no idea Briancj.... I've only been at this now for... Well, getting on two years....
monkeytroll wrote:Try to think of it more as leaving your audience stunned into silence than lulled into sleep
Personally, I'm a fan of being shown all the steps in the process....not only for any knowledge and useful tips gained, but also to demonstrate the effort you put into this.
Really impressed with the low wall surrounding the roof, the fact you've kept it separate from the walkway helps sell it in a way I feel most people would have missed if building it themselves (me included).
Whilst perhaps not as OCD-satisfying as individually glazing the windows, the one piece is infinitely more practical. (perhaps you could just very lightly glue them in place, and use the previous templates for a re-visit after completion.....insert evil snigger....)
NO! Once this is done, it's done, I'm not revisiting, or doing anything this stupidly complicated, time consuming or bank balance breaking ever again.
Well......
Does it count that I'm already starting to obsess over another idea for another Armies on Parade display board???
Brilliant work, the 'how-to' pics and explanations are great - no sleeping here, just read through this entire thread in one sitting!
I applaud your conviction to perfection... however, if it's really driving you crazy, remember that even with terrain, 'battle damage' is your friend, in both construction and paint!
(Perfectly concievable that even the Cathedral might have suffered damage here and there - it's 40k, right? !!!)
One sitting?! Crazy!! But thanks anyway Lamby. It's good to finally be getting close to the stage where painting might actually begin in earnest... Although that opens up a whole new headache in terms of getting the paint job just right...!


 // inmygravenimage - Dr H is a model to us all

 DIY 3450pts


 10000+pts
 2000pts
 No pity! No remorse! No fear
 )
)


 ) , as lots of views but not many comments, but hey ho - here's a pic heavy update anyway....