| Author |
Message |
 |
|
|
|
|
Advert
|
Forum adverts like this one are shown to any user who is not logged in. Join us by filling out a tiny 3 field form and you will get your own, free, dakka user account which gives a good range of benefits to you:
- No adverts like this in the forums anymore.
- Times and dates in your local timezone.
- Full tracking of what you have read so you can skip to your first unread post, easily see what has changed since you last logged in, and easily see what is new at a glance.
- Email notifications for threads you want to watch closely.
- Being a part of the oldest wargaming community on the net.
If you are already a member then feel free to login now. |
|
 |
2016/04/05 22:14:37
Subject: (Not) Santas Workshop of the Strange, Wierd, and Wonderful - 5 Apr - Scouts Meet - pg 60!
|
|

Gargantuan Great Squiggoth
|
Well you are definitely back with a vengeance. Fantastic work.
|
|
|
|
 |
|
2016/04/05 23:12:52
Subject: Re:(Not) Santas Workshop of the Strange, Wierd, and Wonderful - 5 Apr - Scouts Meet - pg 60!
|
|
Omnious Orc Shaman
A long time ago in a galaxy far, far, away...
|
What can I say that hasn't been said before 
Will enjoy watching this Klaus 
|
|
|
|
|
|
2016/04/06 08:03:59
Subject: Re:(Not) Santas Workshop of the Strange, Wierd, and Wonderful - 6 Apr - Scouts Meet - pg 61!
|
|

Dakka Veteran
|
Thank yopu guys!
@Oguhmek -thanks 
I'm always glad when my ramblings and babblings help others - that's the best praise I can get 
Just a very short update today - 4 more shots of the current status:

Cheers Guys!
|
|
|
|
|
|
2016/04/06 10:24:15
Subject: (Not) Santas Workshop of the Strange, Wierd, and Wonderful - 6 Apr - Scouts Meet - pg 61!
|
|

Combat Jumping Ragik
|
Round is quite easy to scratch built, Klaus. There is only one side to worry about, after all... 
I like seeing what else is on the workbench in the step by steps. Interesting to see the tools of the trade others use.
|
|
|
|
|
|
2016/04/10 20:58:11
Subject: (Not) Santas Workshop of the Strange, Wierd, and Wonderful - 6 Apr - Scouts Meet - pg 61!
|
|
Mastering Non-Metallic Metal
|
Top job, Klaus. Looks great. 
|
     Mastodon: @DrH@warhammer.social Mastodon: @DrH@warhammer.social
The army-                   ~2295 points (built). ~2295 points (built).
 
* -=]_,=-eague Spruemeister General. * A (sprue) Hut tutorial *
Dsteingass - Dr. H..You are a role model for Internet Morality! // inmygravenimage - Dr H is a model to us all
Theophony - Sprue for the spruemeister, plastic for his plastic throne! // Shasolenzabi - Toilets, more complex than folks take time to think about! |
|
|
|
|
2016/04/11 09:06:57
Subject: Re:(Not) Santas Workshop of the Strange, Wierd, and Wonderful - 11 Apr - Scouts Meet - pg 61!
|
|
Dakka Veteran
|
Thank you guys!
I hope you all had a good week and hopefully some pleasant spring weather.
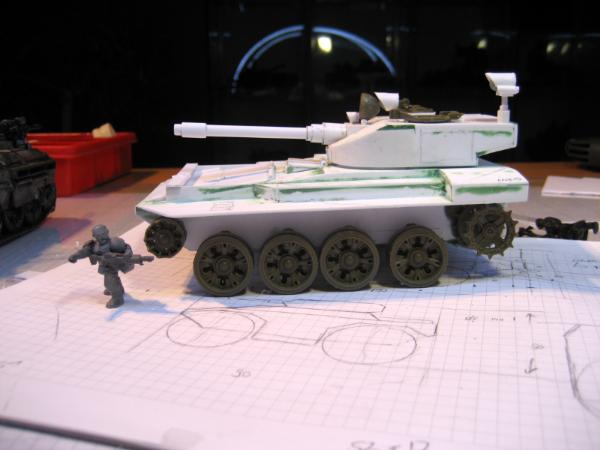
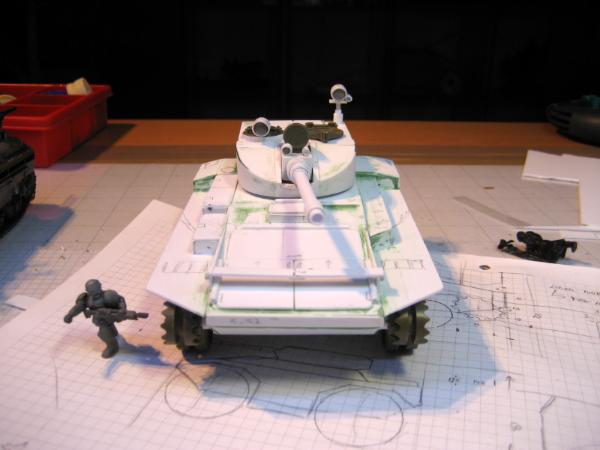
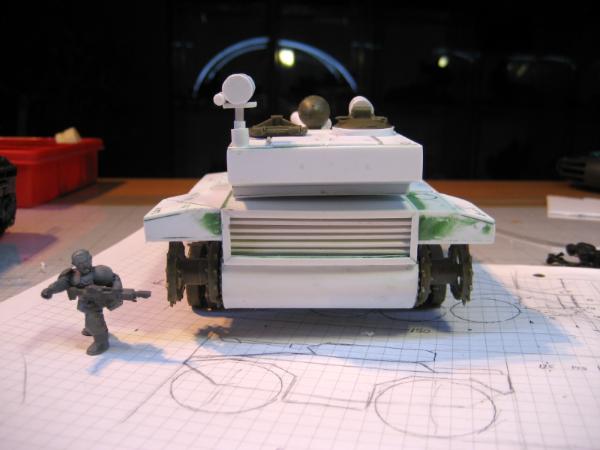
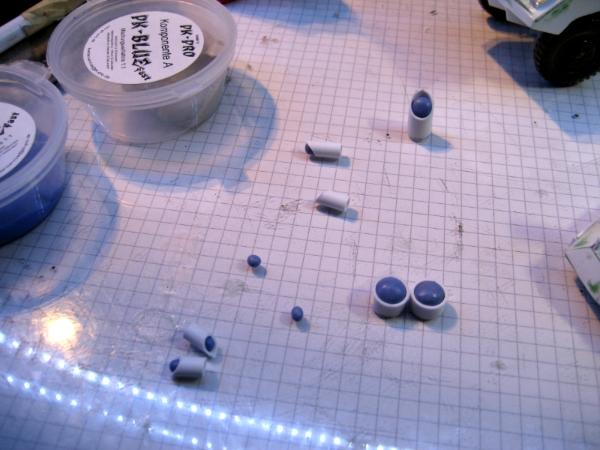
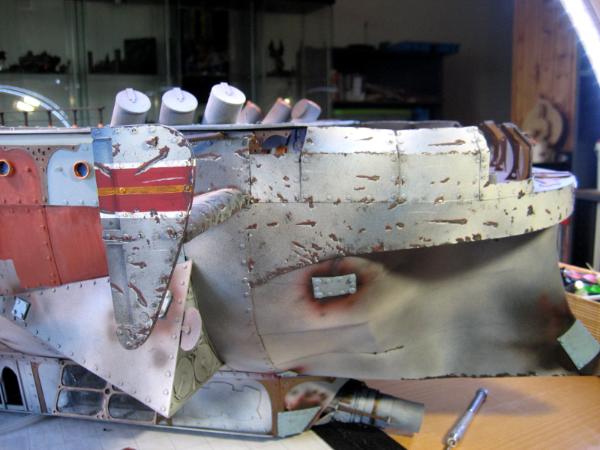
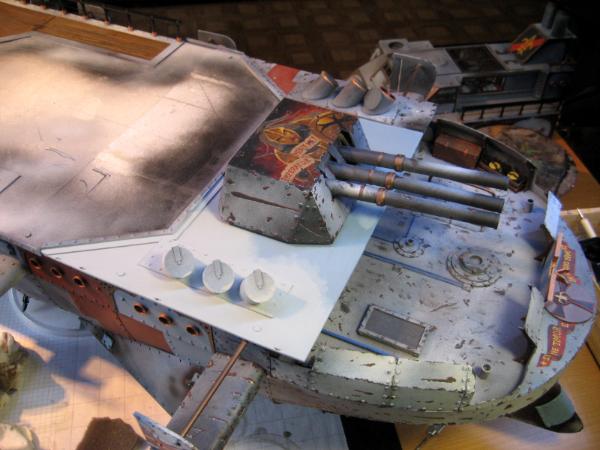
Since the last update I added some more details, like the remaining sights and vision blocks.
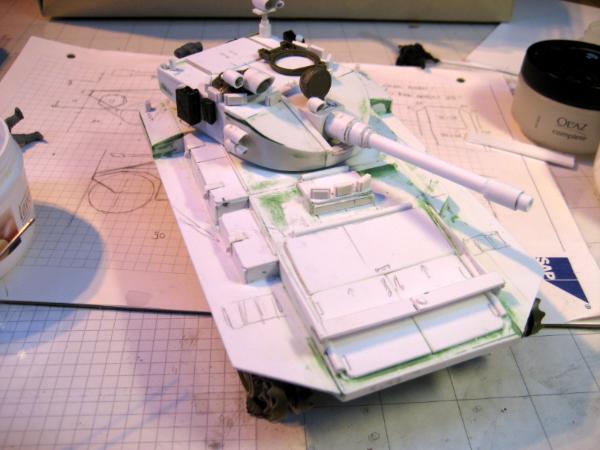
But also the latches for the storage boxes.
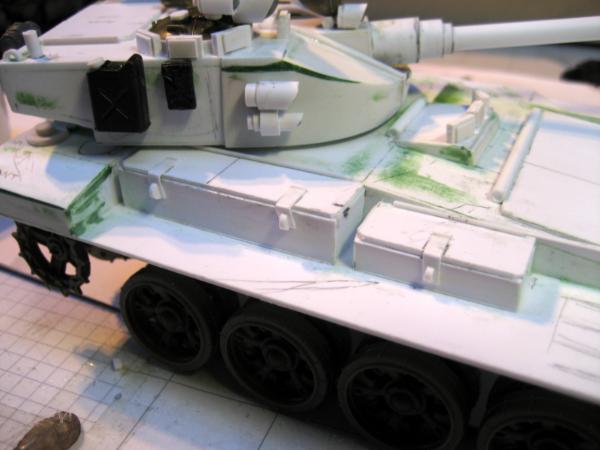
and external luggage.
Then the kind of iconic headlights.
Small details like these handles for the hatches to the engine.
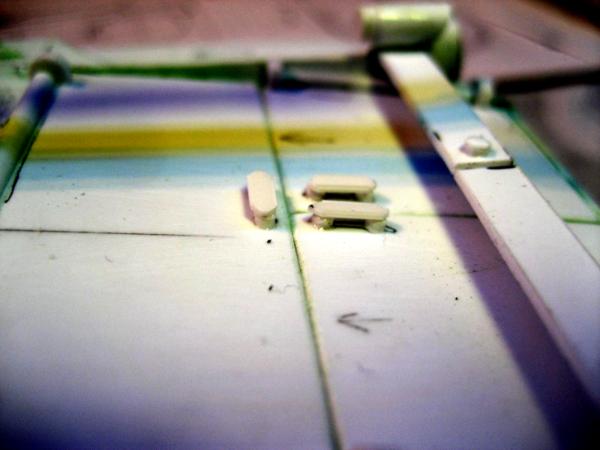
And for the ammo hatch.
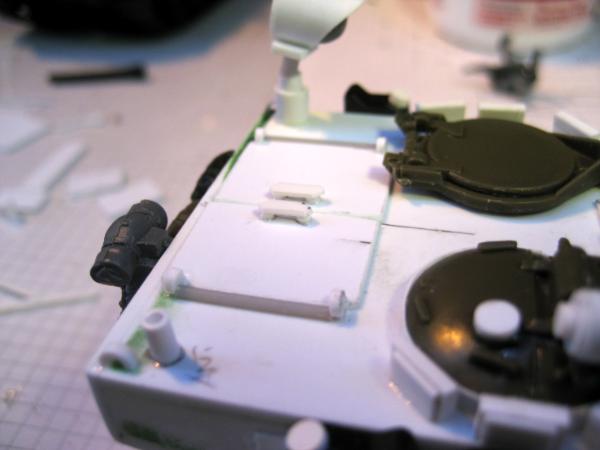
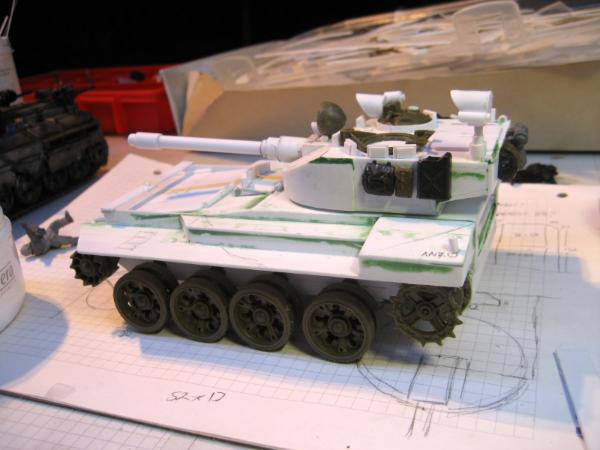
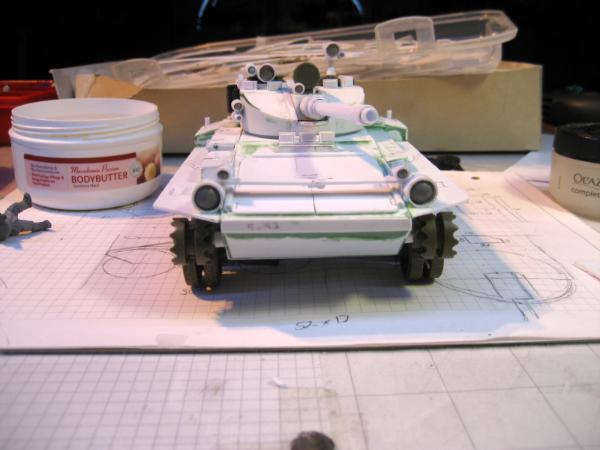
With this the PHRIKE is pretty much complete and ready for the rivets.
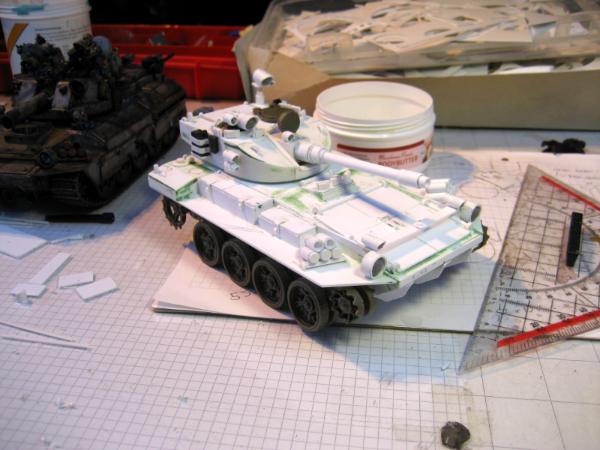
I'm always amazed how much the simple application of some rivets change the appearance of the vehicle.
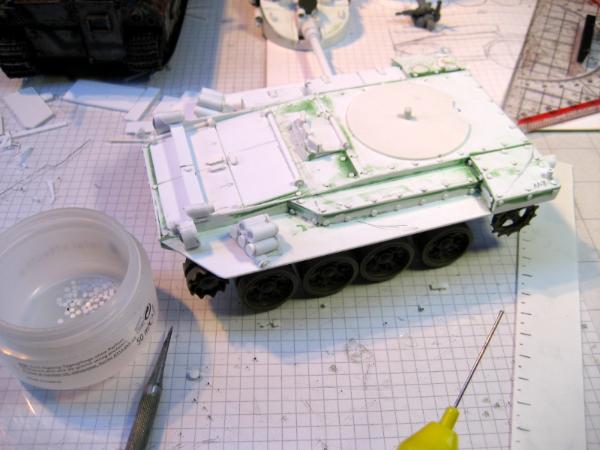
I'm quite pleased
Next up will be the tracks - and I decided to make that a separate post, as it is also a product review.
Cheers
Klaus
|
|
|
|
|
|
2016/04/11 09:24:27
Subject: (Not) Santas Workshop of the Strange, Wierd, and Wonderful - 11 Apr - Scouts Meet - pg 61!
|
|
Longtime Dakkanaut
|
That is beautiful Klaus. How do you get your plasticard to bend so nicely? My heatgun skills just aren't there yet.
|
|
|
|
|
|
2016/04/11 09:46:47
Subject: (Not) Santas Workshop of the Strange, Wierd, and Wonderful - 11 Apr - Scouts Meet - pg 61!
|
|
Dakka Veteran
|
 Stormwall wrote: Stormwall wrote:That is beautiful Klaus. How do you get your plasticard to bend so nicely? My heatgun skills just aren't there yet.
No heating at all
I cheated and used the thinner .5mm plasticard, which bents nicely and with the rather fast curing Revell glue it was quite easy
Automatically Appended Next Post:
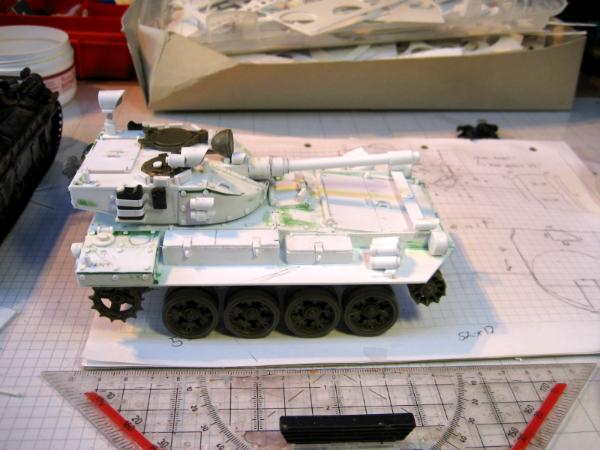
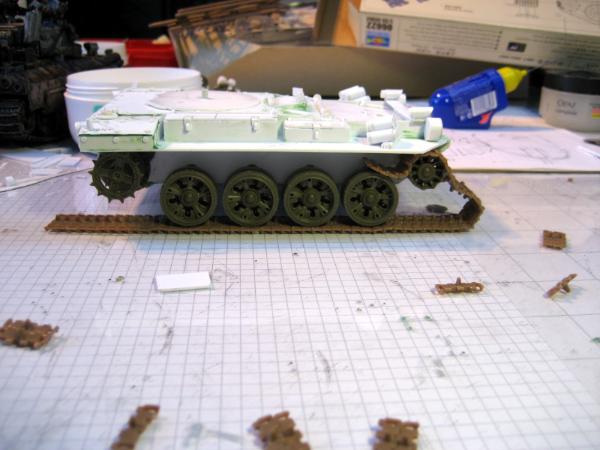
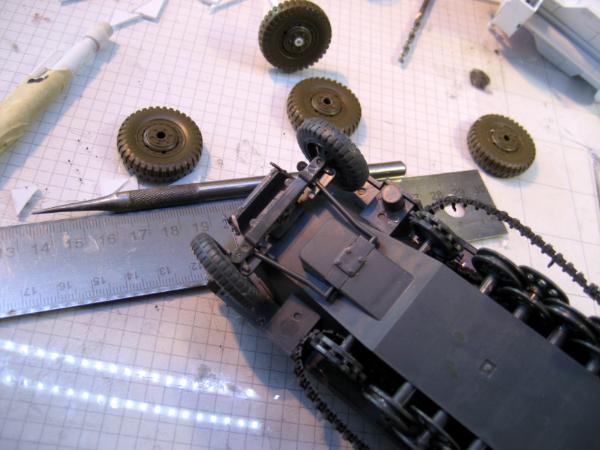
So, after the rather traumatic experience with the rubber tracks for the EPIALES vehicle, I decided to try the Trumpeter plastic track links instead.
For this PHRIKE vehicle I used the suspension, road wheels, return roller and drive sprocket of the Trumpeter T-54B kit that "Baynerd" sent me as a gift
The kit contains rubber tracks, which are usually very twisted and bent, and somehow I never gotten around to find the proper means to glue it in place.
I was amazed to find the kit on Amazon for a reasonable price - 10.79€ - and Prime shipping.
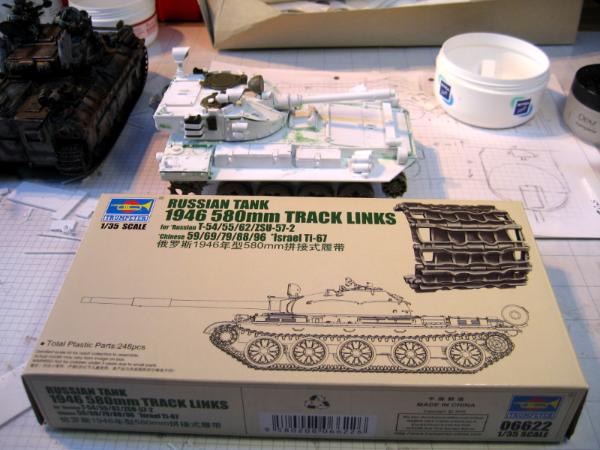
The kit seems rather straight forward consisting of 248 separate pieces.
Since I only use 4 road wheels and the vehicle is considerable shorter, I won't need all of them.
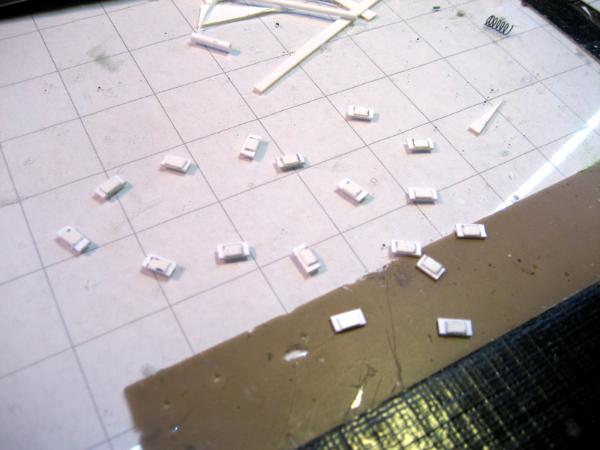
First task is to clean up the pieces.
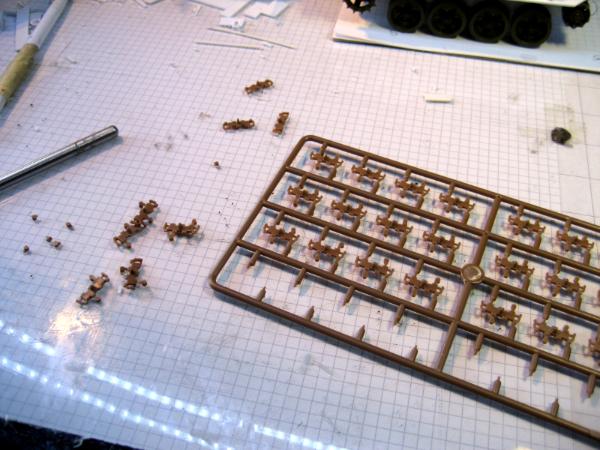
A nice little pile - very little flash, just getting it out of the sprue and removing the little positioning pieces.
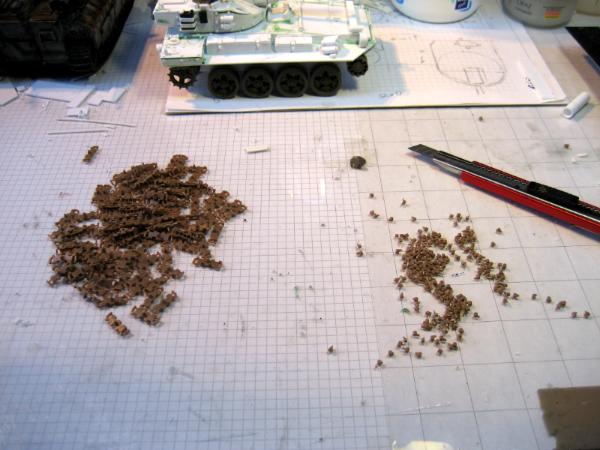
The instructions are also quite simple.
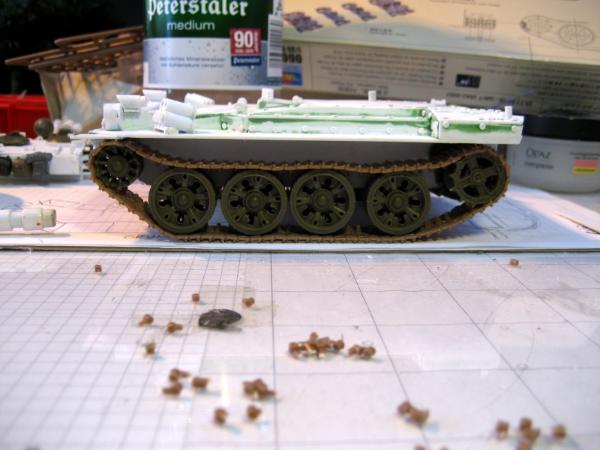
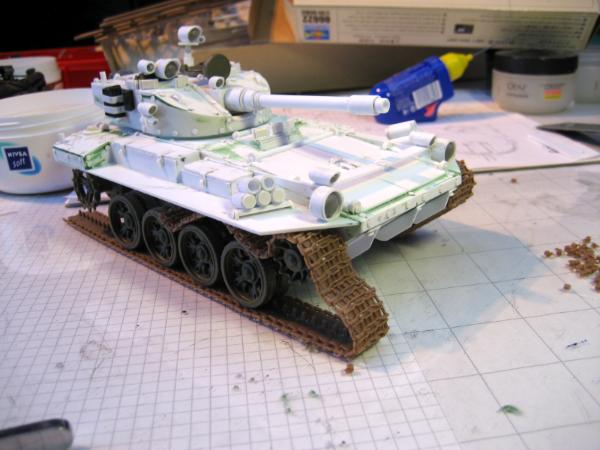
I mounted them first in pairs and then sections of fours.
5 sections of 4 were needed for the base area.
The mounting of the sections is easy, they work well with the glue and fit nicely to the kit.
But then I got to the drive sprocket and got a nasty surprise!
The links did not quite fit the sprocket's teeth.
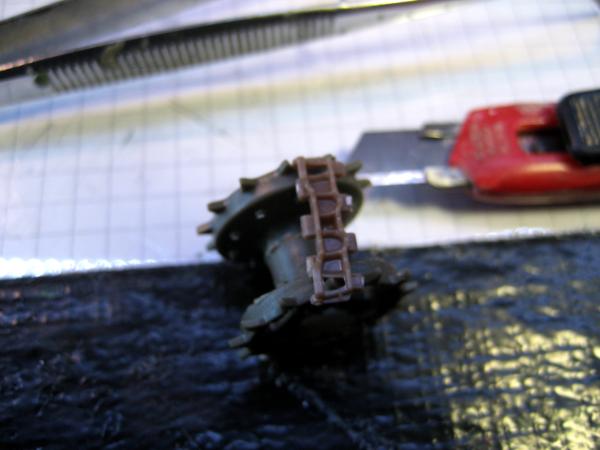
Despite both being Trumpeter and the links being explicitly for the T-54.
I didn't expect that.
So I quickly shaved off the inner teeth.
This then worked to get the links mounted around the drive sprocket.
I was lucky that the tracks counted out perfectly and they met without stretching
Just the way I wanted them!
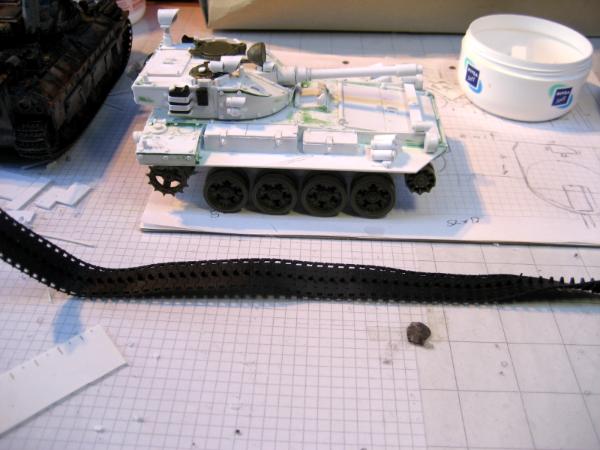
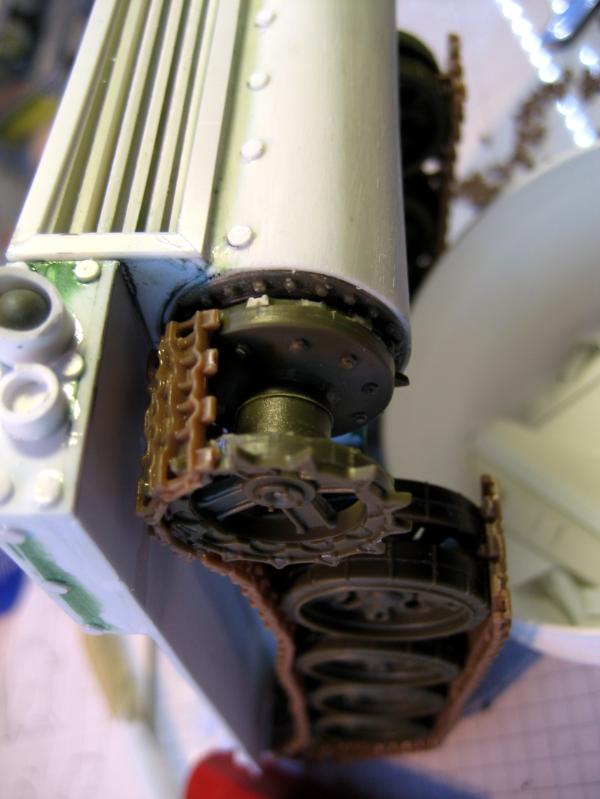
For the other side of the PHRIKE I need to display a thrown track in the process of being re-mounted.
With the exact link count from the other side, I first mounted the ground section and then the thrown pieces.
Again, the pieces work together quite nicely and are very easy to position the way needed.
So, despite the surprise with the drive sprocket, the track links work like a charm.
Especially if you want to picture the tracks in an unusual position the plastic track links are a lot better than the original rubber ones and in my opinion worth the price.
A clear recommendation form my side!
Cheers
Klaus
|
|
This message was edited 2 times. Last update was at 2016/04/11 09:55:15
|
|
|
|
|
2016/04/11 11:29:29
Subject: Re:(Not) Santas Workshop of the Strange, Wierd, and Wonderful - 11 Apr - Scouts Meet - pg 61!
|
|

Xenohunter Acolyte with Alacrity
|
Top job building from scratch, can't wait to see some colour on it!
The way you've done the tread, it's juuuust droopy enough.
I feel like most tank models have the treads way too taut
|
|
|
|
|
|
2016/04/13 08:48:15
Subject: Re:(Not) Santas Workshop of the Strange, Wierd, and Wonderful - 13 Apr - Scouts Meet - pg 61!
|
|
Dakka Veteran
|
Hi all,
thank you for the feedback
One thing left for the PHRIKE were antennae. So I heated some plastic from a leftover sprue and slowly pulled it apart, creating nice thin antennae.
Since it is a scout tank, I opted for 3 antennae.
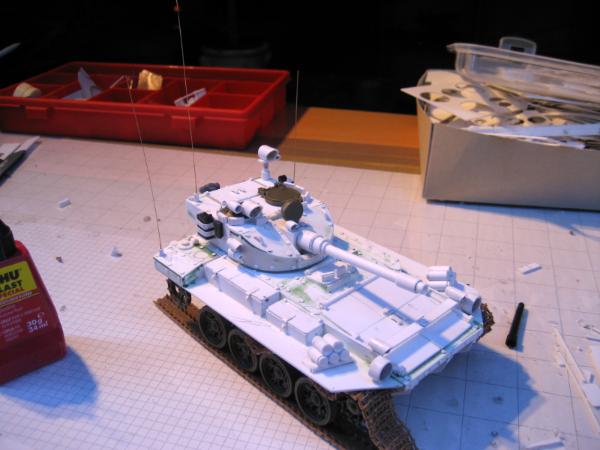
This completed the actual build for the PHRIKE.
As I had mentioned in the first post, the diorama idea is the meeting of scouts, with the PHRIKE having thrown a track, and a KAIROS armored reconnaissance vehicle being also on the scene.
The KAIROS will be loosely based on the UK Fox Armored Reconnaissance Vehicles
https://en.wikipedia.org/wiki/Fox_armoured_reconnaissance_vehicle
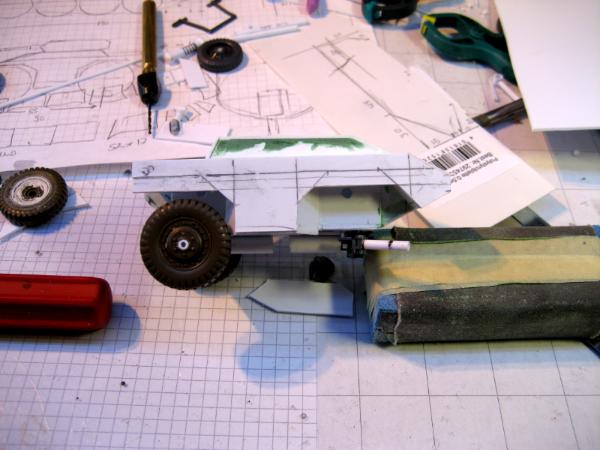
Somehow I had the idea to build it with a almost functioning suspension (don't ask me what brain-fart had ridden me)
I had some wheels from a Tamiya US M3 Scout Car that I wanted to used. Together with some springs retrieved from a ballpoint pen I started out.
Pretty simple.

Since I wanted to picture the KAIROS with turned front wheels I thought I needed to also build functioning steering.
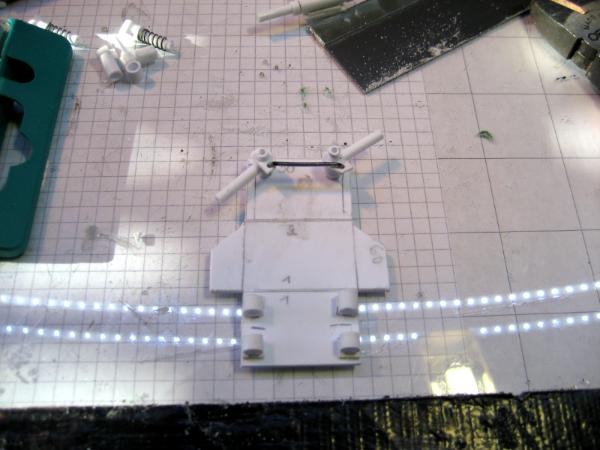
Basic function accomplished, I started to built the sides based on my plans.
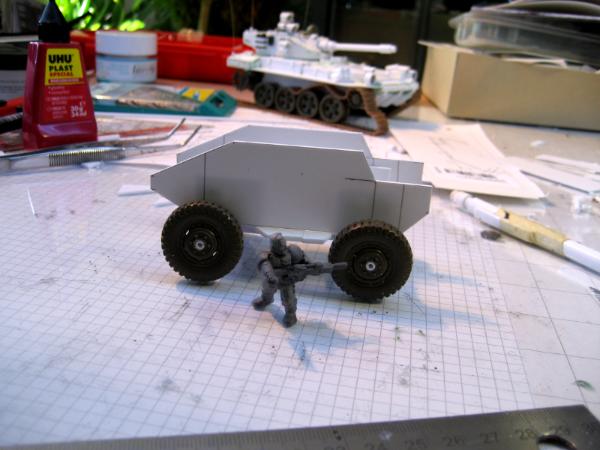
But during the building of the hull I kept on breaking the steering. So I cannibalized an old Tamiya SdKfz 251/1.
This seemed to be a bit more stable and so I continued with the hull. During sanding I broke the axles again (sigh)
With the basic hull completed, I realized I had build the whole vehicle rather wrong, and I was about to throw it away and start anew.
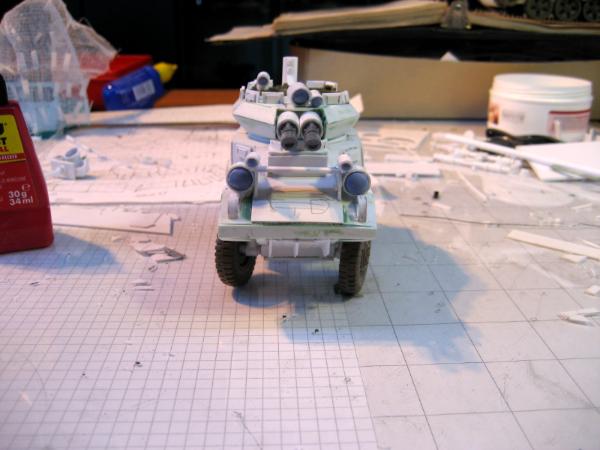
But I bit my teeth together, glued the front wheels in position and rebuilt most of the upper superstructure.
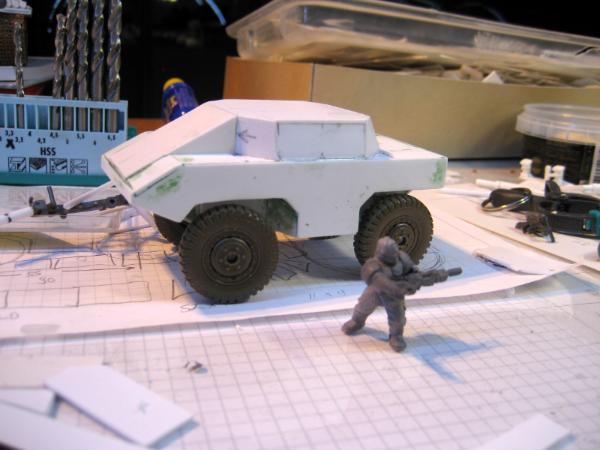
I think it now comes rather close to the Fox, isn't it?

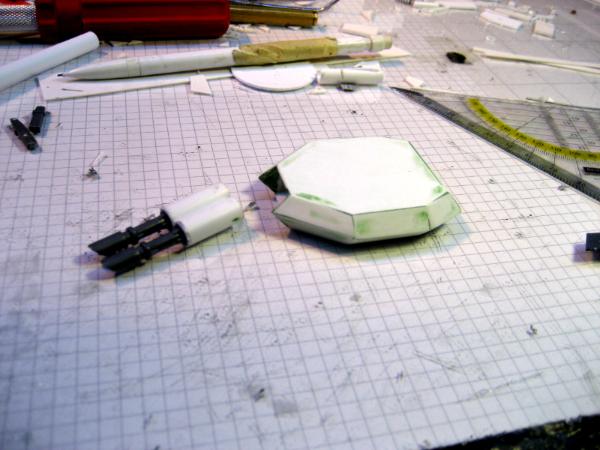
And once it has the headlights, it will fit into the PONOS family nicely. For the turret I'm also orienting towards the original Fox turret, but with twin Lasers.
The first version however was too high. Looked very unbalanced.

So the second version is 1cm high instead of the initial 1.5cm - and with lots of putty.
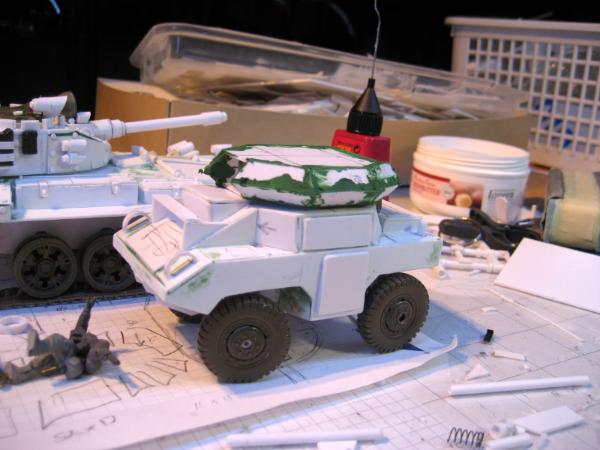
Now, what do you think?
Is the KAIROS OK?
Thanks
Klaus
|
|
|
|
|
|
2016/04/14 06:51:32
Subject: (Not) Santas Workshop of the Strange, Wierd, and Wonderful - 13 Apr - Scouts Meet - pg 61!
|
|
Oozing Plague Marine Terminator
|
Yes, it's fantastic. But we expect no less from you....
|
You are waaaaay beyond crazy my friend -DSteingass
Yes, everything that changes the entire fething world is overrated..... - DSteingass
...yep... some of the dakka chaps here sure made the joints of my jaw quite loose..Viktor Von Domm
...they put Space Marines in tin cans and drop them from orbit, I don't think fuel consumption or aerodynamics is a concern - DSteingass
I think once again my motormouth has brought me into deep... - Viktor Von Domm
he knows no pain...nor fear, he is a riveteer - Viktor Von Domm
We don't do generic, mainstream, normal, or anything of the sort! ^^ - Shrike
You build fething Titans Henry Ford style Max!! - DSteingass
 |
|
|
|
|
2016/04/14 07:15:14
Subject: (Not) Santas Workshop of the Strange, Wierd, and Wonderful - 13 Apr - Scouts Meet - pg 61!
|
|
Pious Palatine
|
Wow. And that doesn't even cover it.
Amazing work, really really impressive.
EDC
|
|
|
|
|
2016/04/14 08:23:10
Subject: Re:(Not) Santas Workshop of the Strange, Wierd, and Wonderful - 14 Apr - Scouts Meet - pg 61!
|
|
Dakka Veteran
|
Hi all,
thank you evildrcheese and mxwlmdr
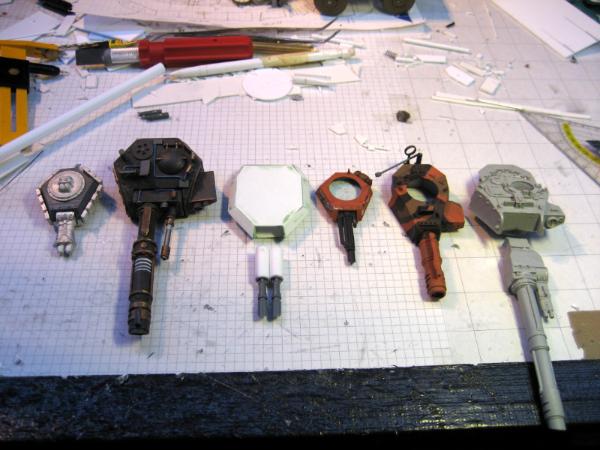
last night I was able to work some more on the turret.
After sanding the turret looks quite nice.
And with the Lasers mounted on the KAIROS
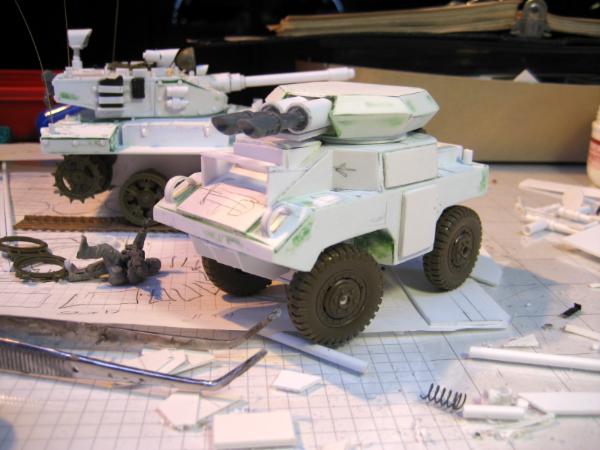
Noble Korhedron over at Warseer wrote:
New turret is grand, just don't expect me to believe a man can fit in there!!
Well, if I compare it to the other WH40K turrets, I think it is even on the large side
Especially since it is a Laser-Gun, which would have no recoil and no ammo feed or loading mechanism...
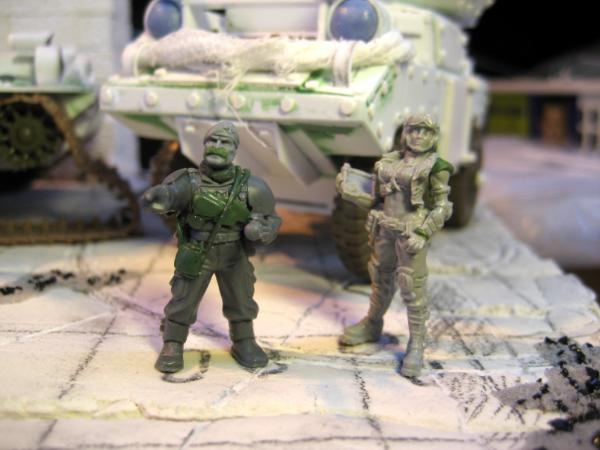
But anyhow, a man doesn't need to fit in there - it'll be two ladies
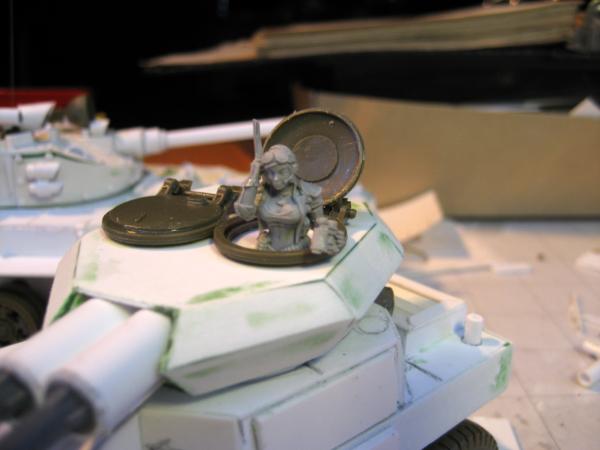
These two are from the Raging Heroes Kickstarter "The Toughest Girls of the Galaxy"
I really like their look.
They are tiny compared to the bulky 40K trooper, but I think they will mix well in the diorama.
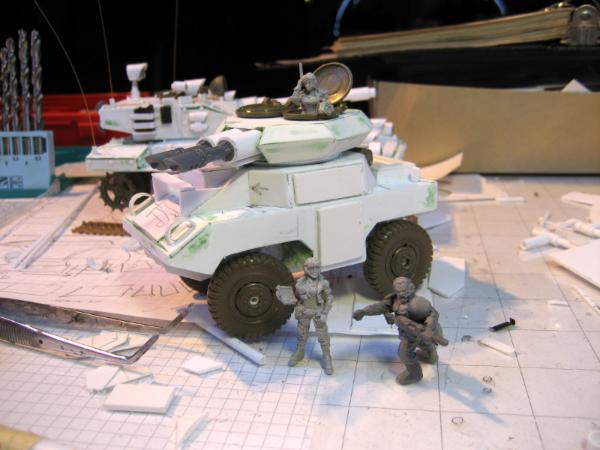
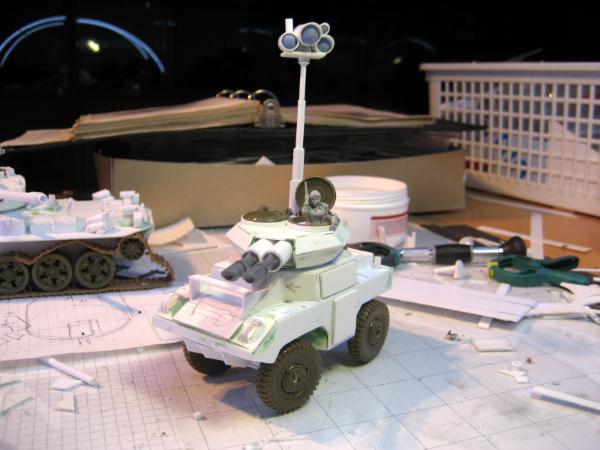
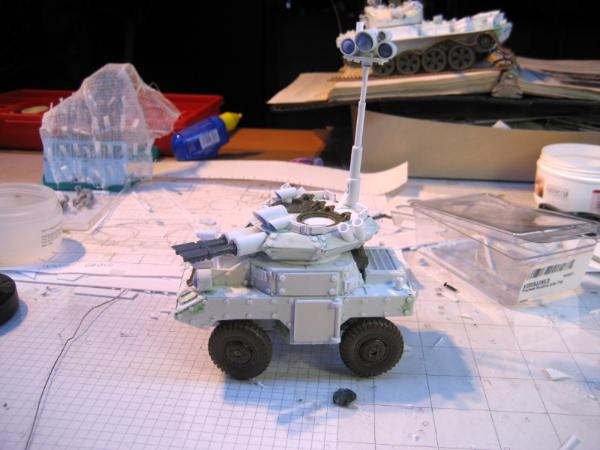
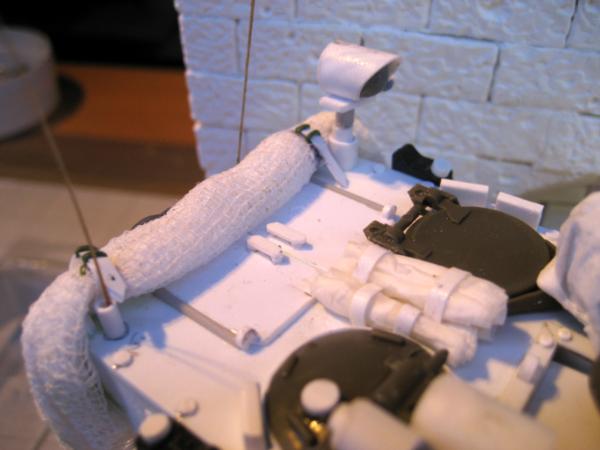
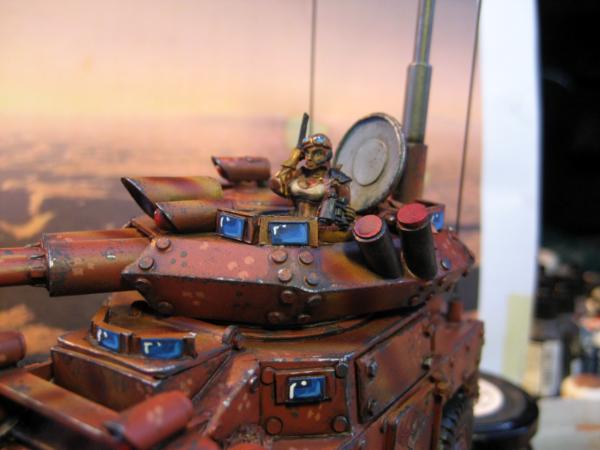
Last not least I put together the elevated sensor platform for the KAIROS.
What do you think?
Will that work?
It still needs all the vision blocks, sights, lights, luggage and camo nets - and of course rivets
Let me know what you think.
Cheers
Klaus
|
|
|
|
|
|
2016/04/14 20:00:39
Subject: (Not) Santas Workshop of the Strange, Wierd, and Wonderful - 14 Apr - Scouts Meet - pg 61!
|
|
Growlin' Guntrukk Driver with Killacannon
|
The sensors might be slightly to big, however i think the over exaggeration suits the guard well so it will work! excellent scratch building.
|
|
|
|
|
|
2016/04/19 21:34:44
Subject: (Not) Santas Workshop of the Strange, Wierd, and Wonderful - 14 Apr - Scouts Meet - pg 61!
|
|
Mastering Non-Metallic Metal
|
Nice design on the little wheeled tank.
|
Mastodon: @DrH@warhammer.social
The army- ~2295 points (built).
* -=]_,=-eague Spruemeister General. * A (sprue) Hut tutorial *
Dsteingass - Dr. H..You are a role model for Internet Morality! // inmygravenimage - Dr H is a model to us all
Theophony - Sprue for the spruemeister, plastic for his plastic throne! // Shasolenzabi - Toilets, more complex than folks take time to think about! |
|
|
|
|
2016/04/26 11:56:28
Subject: Re:(Not) Santas Workshop of the Strange, Wierd, and Wonderful - 26 Apr - Scouts Meet - pg 61!
|
|
Dakka Veteran
|
Thank you all!
A bit of time passed since the last update.
But I was able to complete the build-phase for this dio.
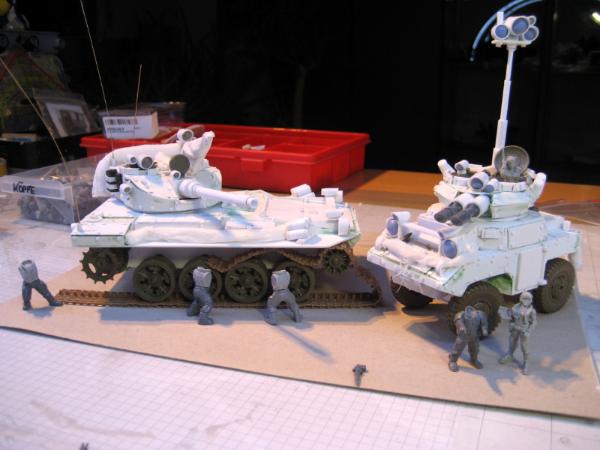
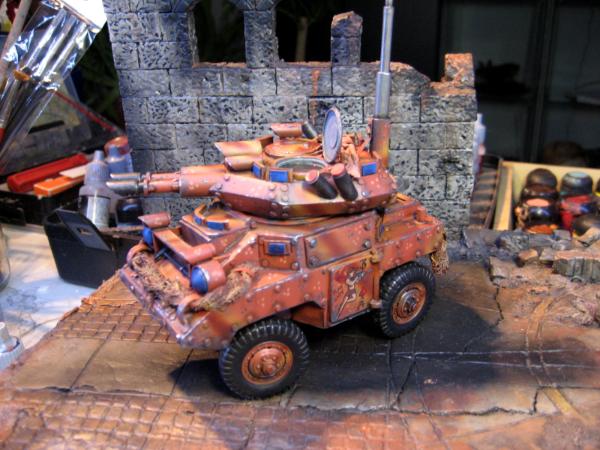
I created the vision ports for the KAIROS,
as well as the sights and lights.
And mounted them - for this I had to remove the smoke launchers on the fenders again, as they were firing into the headlights * lol*
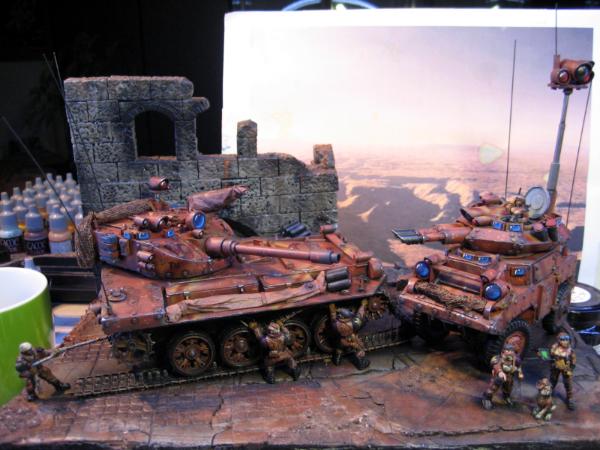
Here you can also see the new mount for the sensor platform.
I think it looks better now.
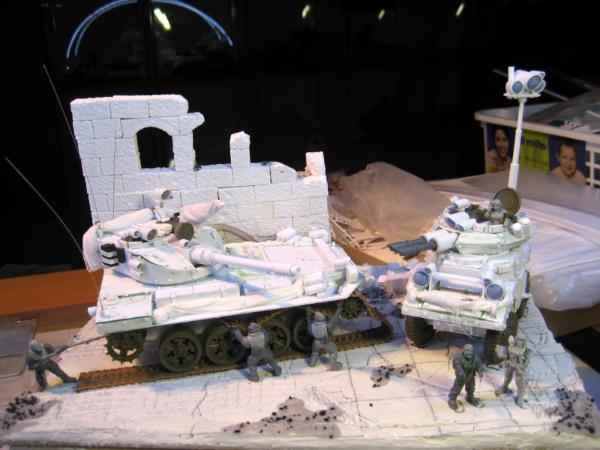
Both vehicles completed.
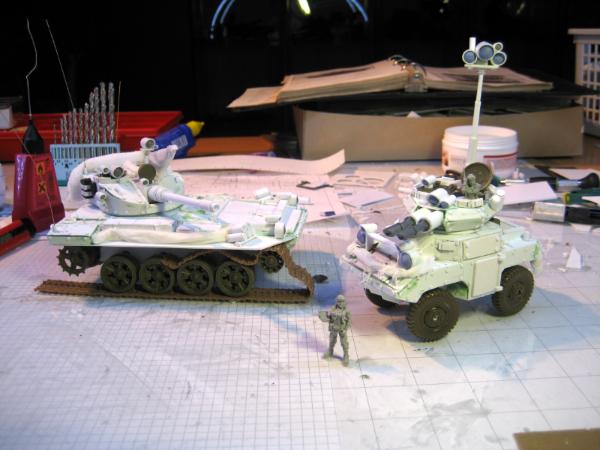
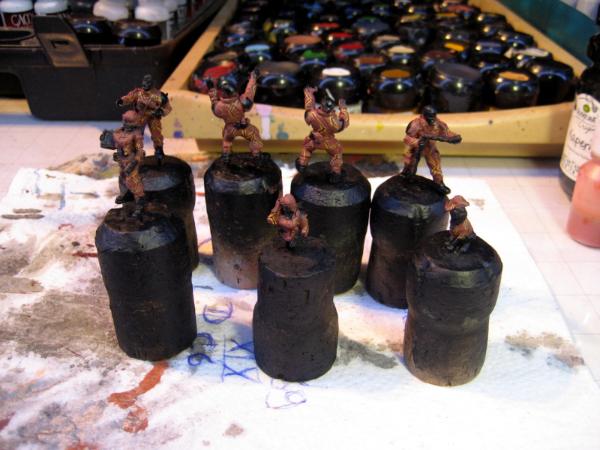
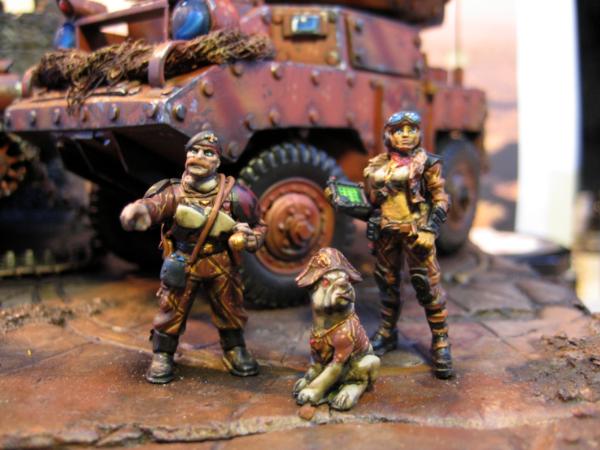
So I started to work on the crew. I recently received a bunch of Catachan legs, which I think are perfect for tankers.
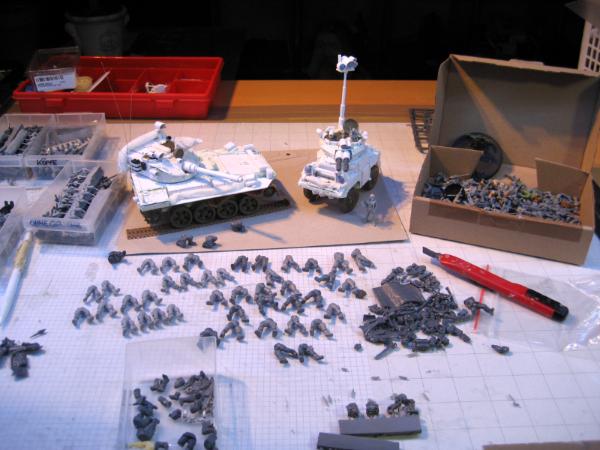
Together with the Mad Robot Flak Vest Torsos ( https://madrobotminiatures.com/index.php?main_page=product_info&cPath=9_14&products_id=102), they are just what I needed.
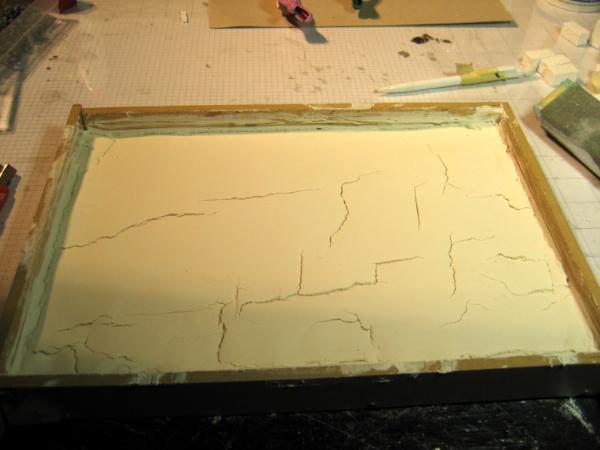
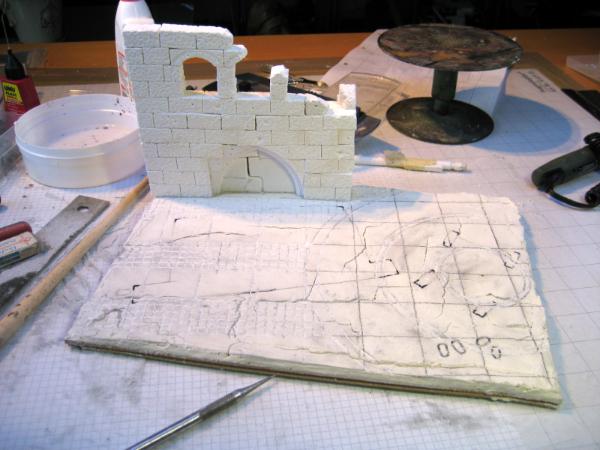
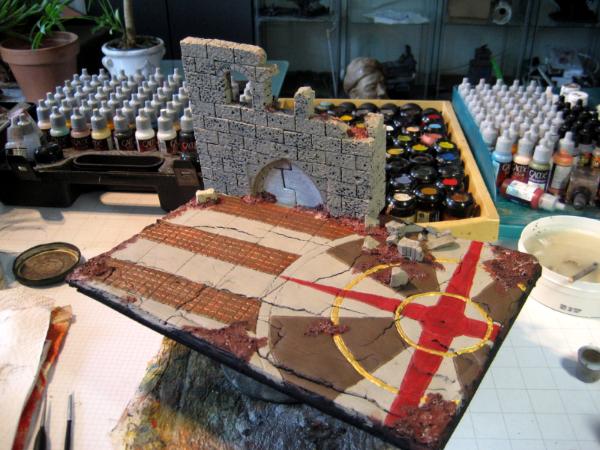
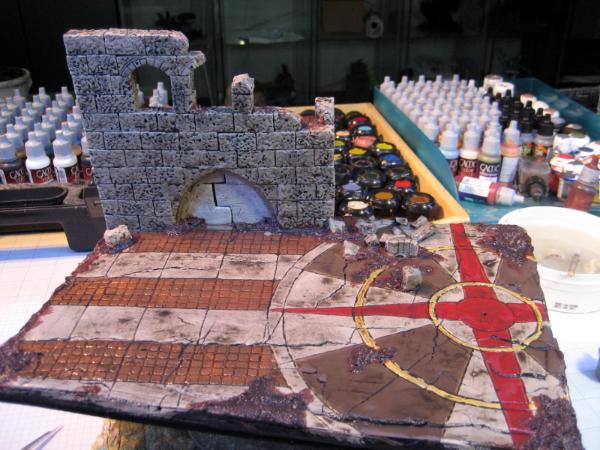
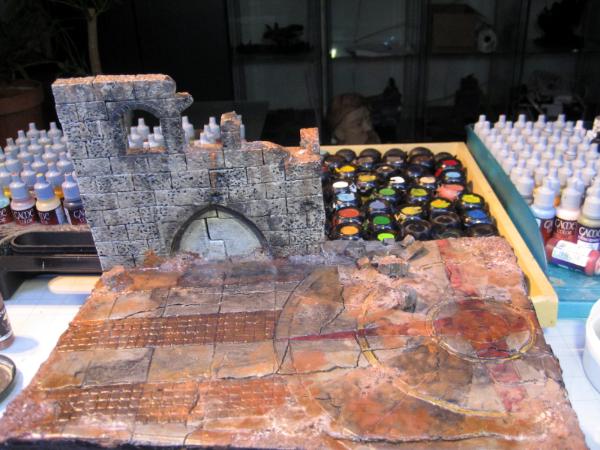
With the crew settled, I started the diorama base. As usual I used "Molto-Fill Compact" as I can manipulated it pretty well during curing and I can ensure to have nice cracks.
I also used my Hirst Arts brick molds with Stewalin to create the bricks for the caravansary.
As envisioned, the base has some nice cracks - it is relatively easy, when the top of the mass is starting to cure and getting solid, while the deeper mass is still a bit liquid to manipulate the top and create cracks.
With the caravansary erected.
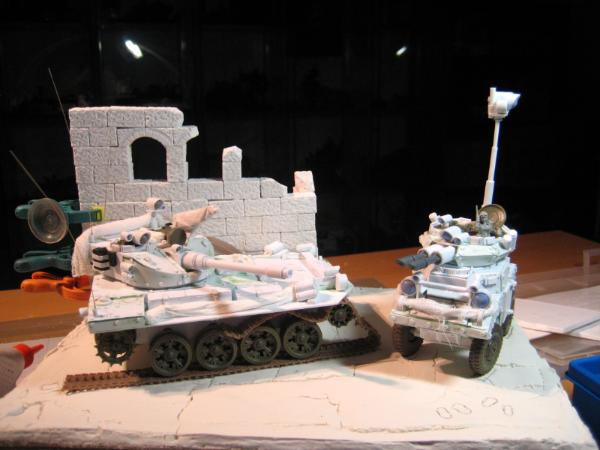
Next I carved the patterns and cobblestone into the base,
and then applied dirt and debris.
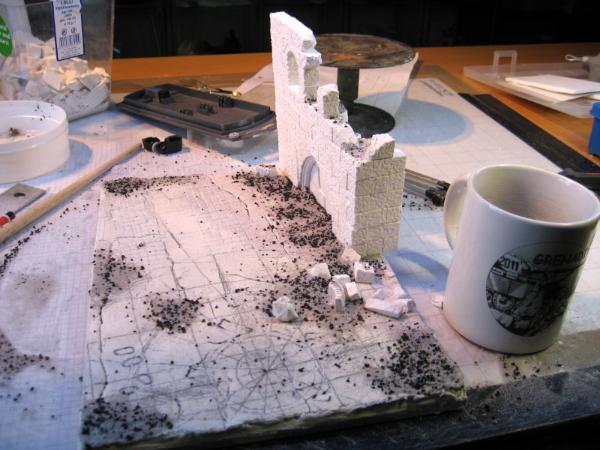
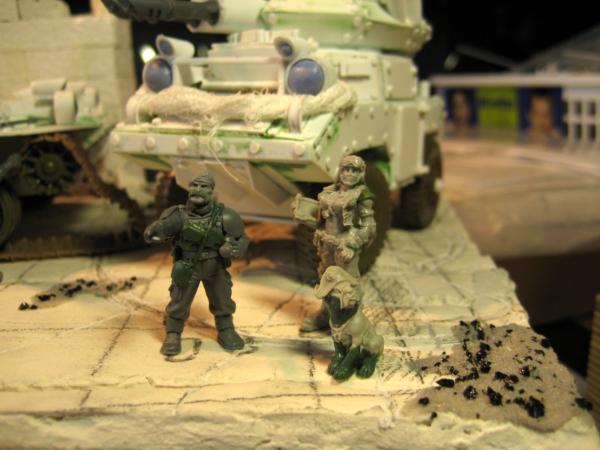
Finally I added some more details, like the straps for the tarps and nets.
I added the cable to pull the track.
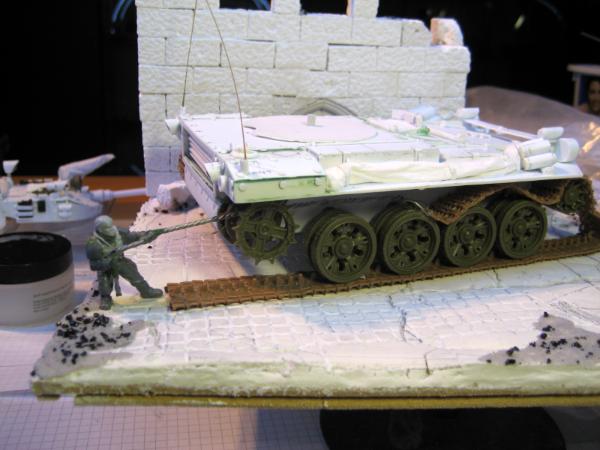
Some more personal equipment for the TC as well as a nice mustache.
Almost there.
After watching another Star Wars trailer I was tempted to add a BB-8 droid, but couldn't come up with a convincing ( WH40K)design.
So I decided to use one of the Raging Heroes mascots and modify it to fit the scene
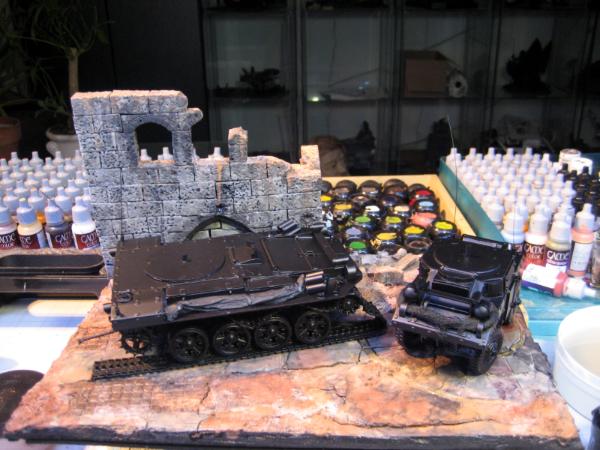
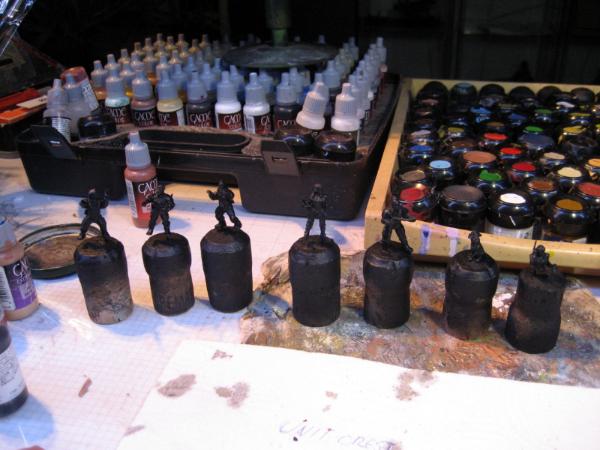
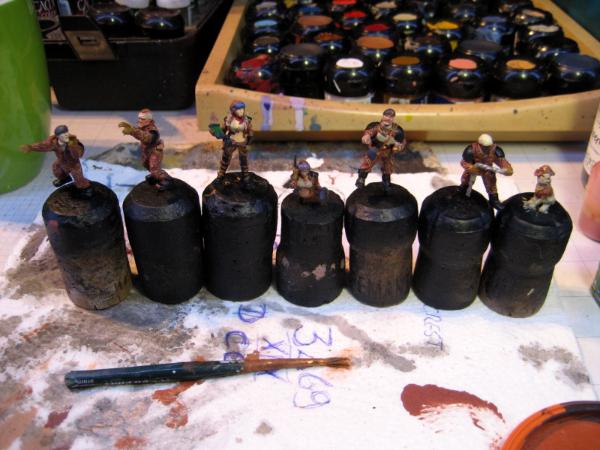
Everybody ready for priming.
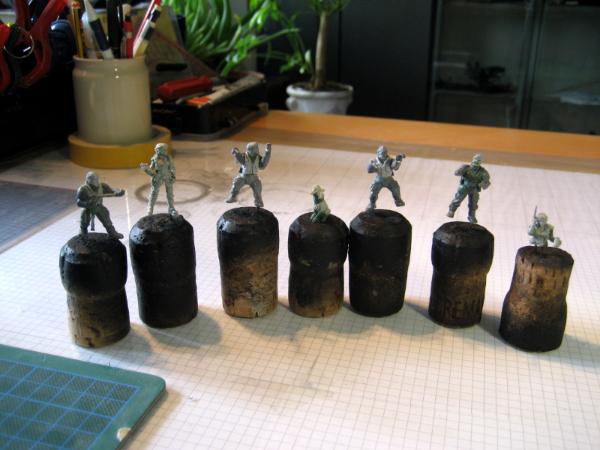
Re-arranged the desk for painting.
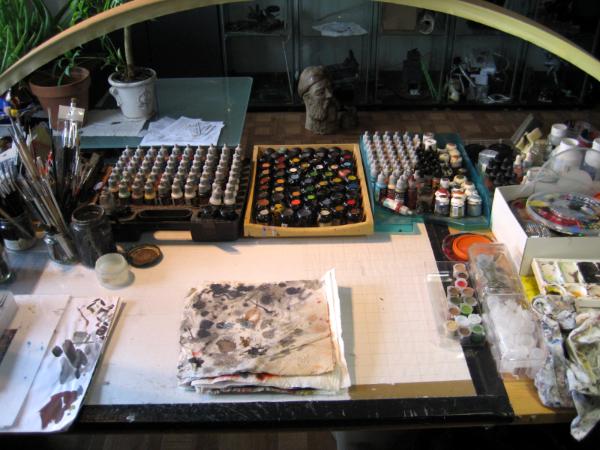
And started with the base.
First were the base colors,
then some hefty washes,
and finally pigments to represent the Martian-style landscape of Dencara V.
Well, this is as far as I got.
What do you think? Anything still missing?
Cheers
Klaus
|
|
|
|
|
|
2016/04/26 19:05:08
Subject: (Not) Santas Workshop of the Strange, Wierd, and Wonderful - 26 Apr - Scouts Meet - pg 61!
|
|
Gargantuan Great Squiggoth
|
Fantastic scene developing, brilliant models, nice mini choices also. Like the colour of the flooring, just amazing as usual.
The only thing throwing me a little is the plain wall. Usual brilliant work, great texture, but it is looking a little off at mo, maybe darken it.
|
|
|
|
|
|
2016/04/29 08:43:30
Subject: Re:(Not) Santas Workshop of the Strange, Wierd, and Wonderful - 29 Apr - Scouts Meet - pg 61!
|
|
Dakka Veteran
|
Thank you Camkierhi - yes the wall still looks a bit plain.
I added some more scorch marks - but I think I will revsisit it again
Well, today just a small paint update.
Here you can see the base with the pigments - before varnish.
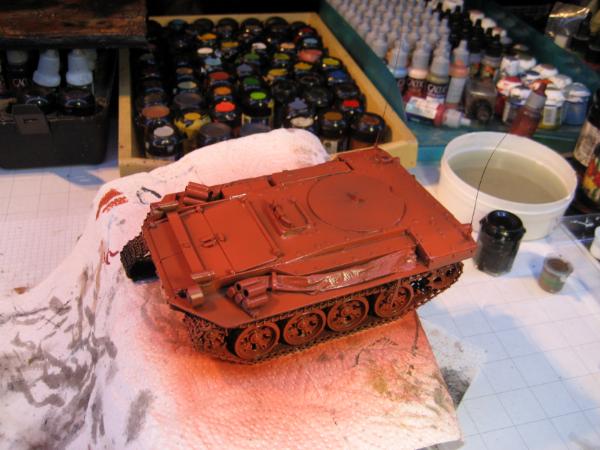
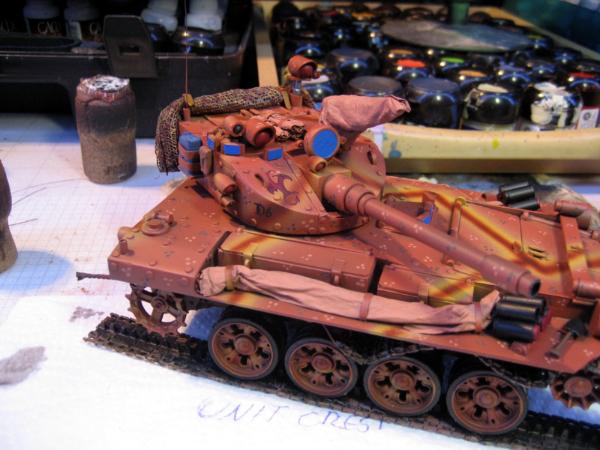
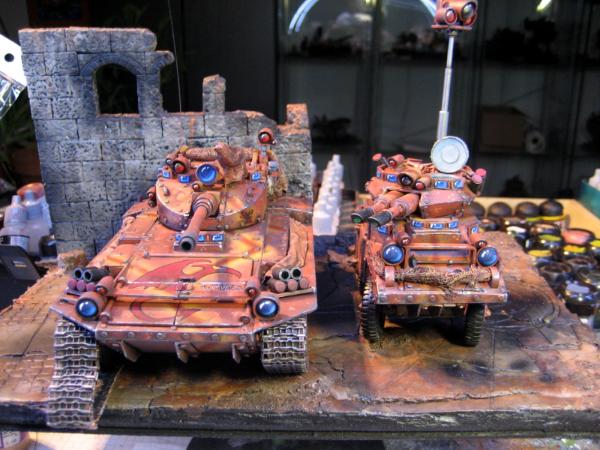
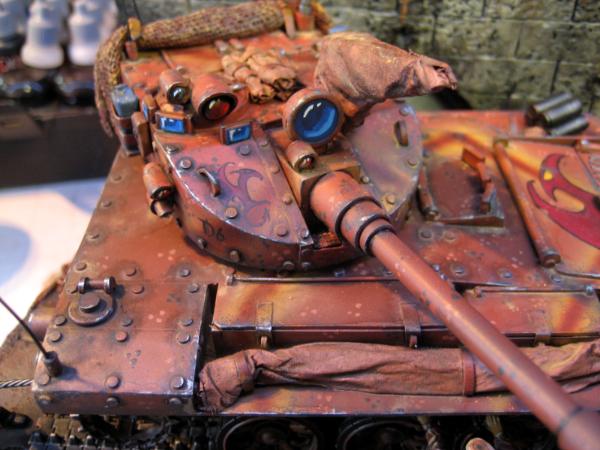
With the base mostly done, I started the vehicles. Since the scouts will operate outside any of the major settlements they will not receive the urban camo I used on the POLEMOS and EPIALES, but rather the standard Tiger Flash used on the HERCULES and PONOS.
For this I started with the "Terracotta" base color.
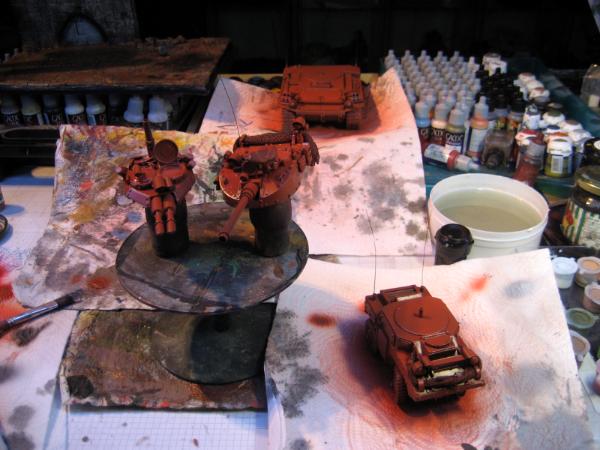
Then I added the "Ocre" flash stripes.
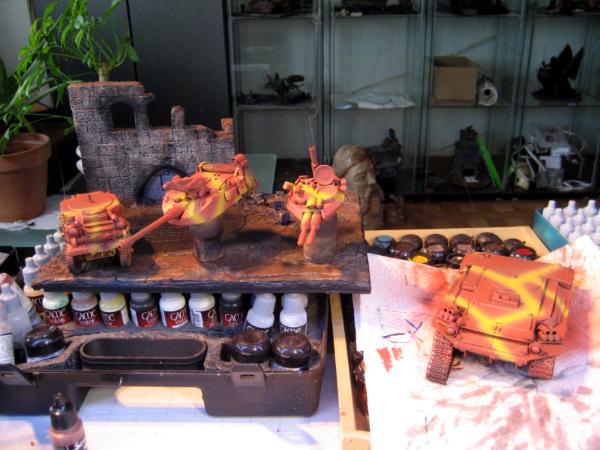
And inlined them with the "Mahagony" stripes.
After the basic camo they received the tripple-dot patterns (light and dark), the canvas tarps were painted in a light brown color, the camo nets got a pattern and I painted the vision ports and some of the lights in blue.

That's as far as I got.
Next are the sights in red, black on the roadwheel rubber, the Smoke Launchers, and the tracks.
So what do you think?
Cheers
Klaus
|
|
|
|
|
|
2016/04/29 09:20:48
Subject: (Not) Santas Workshop of the Strange, Wierd, and Wonderful - 29 Apr - Scouts Meet - pg 61!
|
|
Pious Palatine
|
I think it's a work of art, all the little details are just amazing.
EDC
|
|
|
|
|
2016/04/29 13:20:40
Subject: (Not) Santas Workshop of the Strange, Wierd, and Wonderful - 29 Apr - Scouts Meet - pg 61!
|
|
Dakka Veteran
|
Thank you EDC!
Hey guys,
here's a tidbit I've been toying with for a while. Telling the Dencara story.
I just posted the first little part here:
http://fischers-design-shop.blogspot.de/p/chapter-i.html
Well, English isn't my Mother tongue and admittedly I'm not too verse in the WH40K universe 
So if you have some time and like to help me out, I would surely appreciate some editing, suggestions, improvements and so forth.
THANKS!!!
|
|
|
|
|
|
2016/05/02 11:07:27
Subject: Re:(Not) Santas Workshop of the Strange, Wierd, and Wonderful - 2 May - Scouts Meet - pg 61!
|
|
Dakka Veteran
|
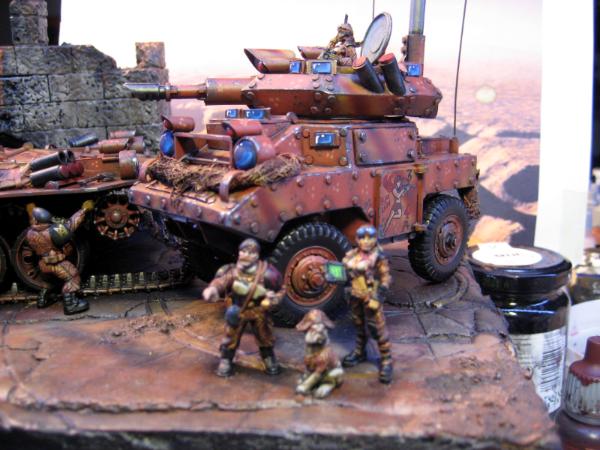
Hi all,
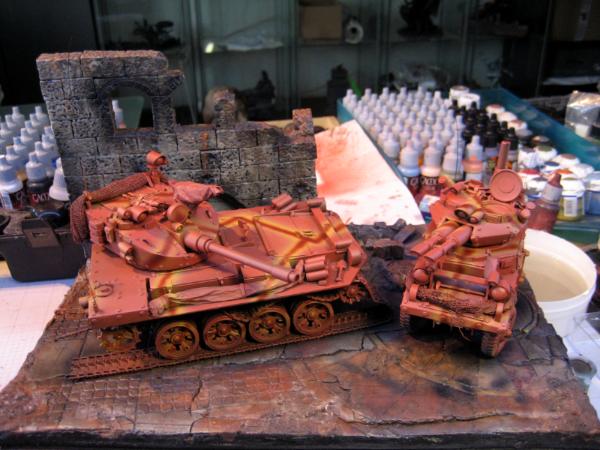
today I only have a very short 5 image update.
Since the last update I added the red and black color for the remaining lenses.
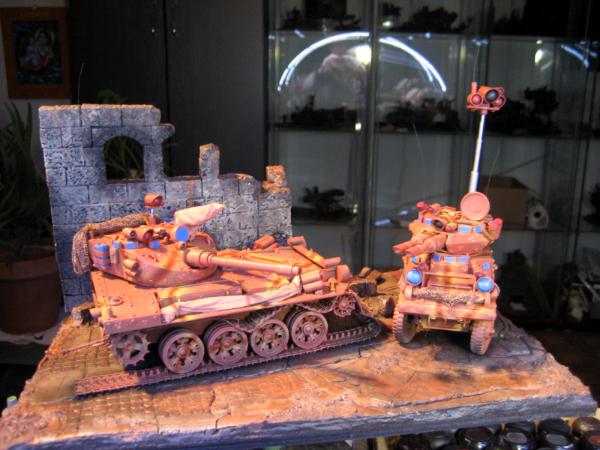
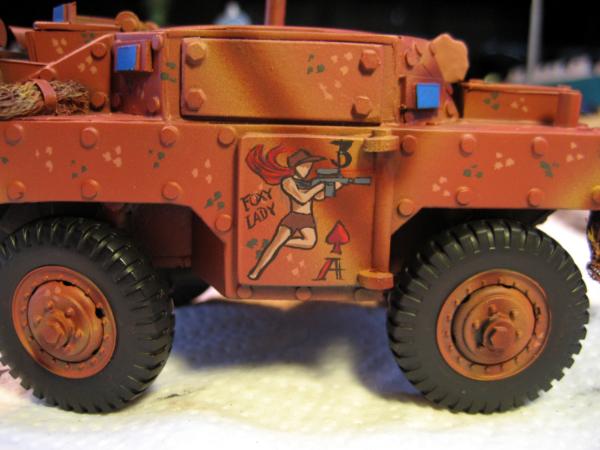
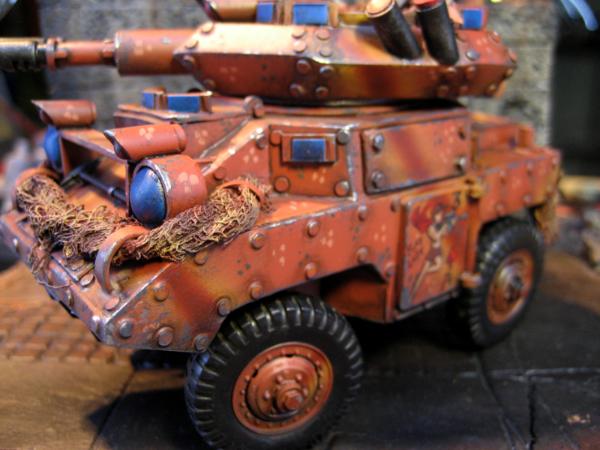
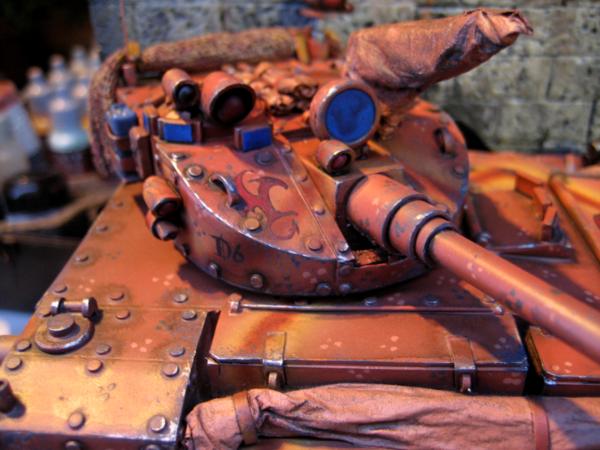
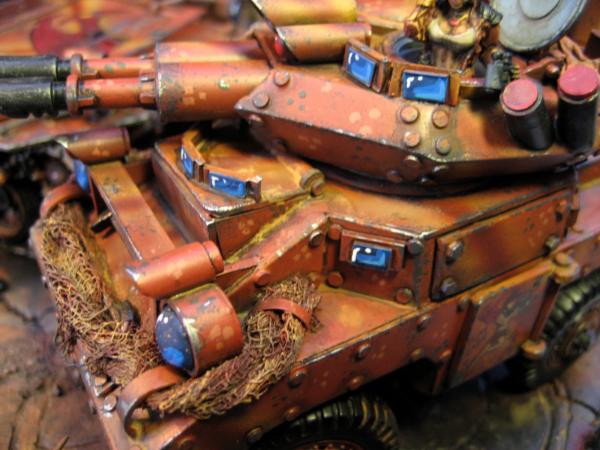
Then I decided to do a small freehand for the KAIROS door.
"Foxy Lady" as a tribute to the FOX Armored Reconnaissance Vehicle and the female crew.
Then some more black for the roadwheels, Track base and Smoke launchers.
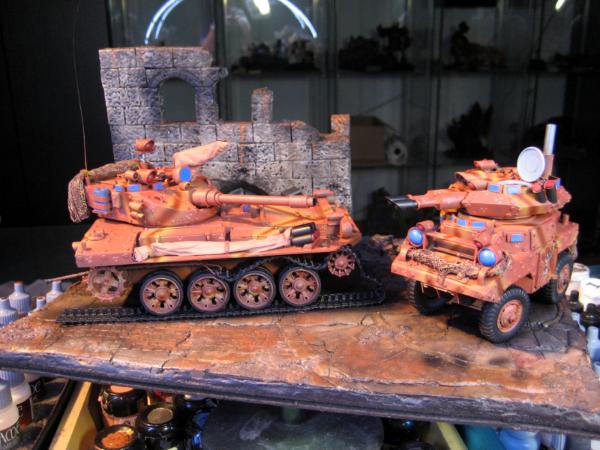
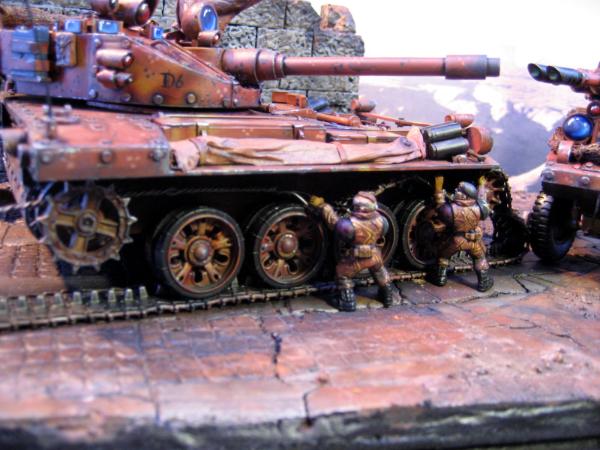
Next I did some small unit markings for the PHRIKE.
Vehicle D6 of 3/69 (Armor) of the XIX Guards.
The "Wyvern"
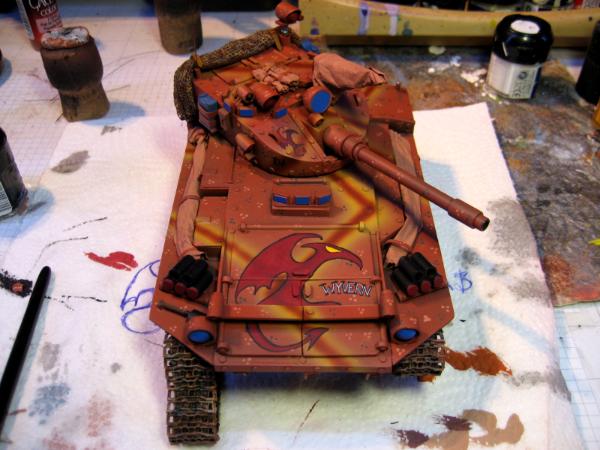
You can also see that I started to work on the tracks, giving them some rust and dust.
That's as far as I got this weekend.
I hope you like it.
Cheers
Klaus
|
|
|
|
|
|
2016/05/03 11:06:32
Subject: Re:(Not) Santas Workshop of the Strange, Wierd, and Wonderful - 2 May - Scouts Meet - pg 61!
|
|
Dakka Veteran
|
Hey guys,
I updated the "Dencara Story" a bit - http://fischers-design-shop.blogspot.de/p/chapter-i.html
But I would like your feedback specifically on this bit:
the NEMESIS weapons platform was finally in position to join the fight.
The enormous weapon was loaded with a projectile as big as some of the smaller ships. Energy banks were charging up, lining up magnetic fields that would accelerate the projectile faster than the speed of sound and hurl it at the enemy.
One after another the relays were charged up and indicator lights on the bridge of the NEMESIS turned green.
“FIRE!”
Despite being in the non-atmospheric voids of space a glowing ball erupted from the rail as the projectile was launched. Its tip glowed as it raced across the distance between the NEMESIS and the most forward Ork ship.
While the projectile was still in flight crews of slaves manned machinery and cranes opening the breech mechanism of the gun and positioning a new projectile into it.
The impact of some hundreds of tons of especially hardened alloys and the tremendous kinetic energy resulted in a gigantic explosion. The resulting fireball was spectacular to say at least.
The enemy ship was torn apart and many secondary explosions ripped through the remaining sections, now floating through space.
Does it make sense? Is it "dramatic" enough? I mean faster than sound...we can do that today, can't we? Or are rail guns different?
Does it sound "huge" enough?
It's 40K after all. The rail gun should be so big it can't be in a cruiser size ship and is instead mounted in a slow and cumbersome "Weapons Platform" that is bound to a solar system (not interstellar).
The slow, but forbidding weapons platform was lumbering behind. But with its enormous range and destructive power it didn’t need to be any faster – all it needed was a clear line of fire.
I would really appreciate your input here
Thanks guys!
|
|
|
|
|
|
2016/05/03 14:53:08
Subject: (Not) Santas Workshop of the Strange, Wierd, and Wonderful - 2 May - Scouts Meet - pg 61!
|
|

Lone Wolf Sentinel Pilot
|
Looking good with more colour on, freehand adds the last touch of awesome.
Inspiring, as always!
Will be back later (need to get to a propper keyboard for that) to better comment on the background story.
|
|
|
|
|
|
2016/05/03 21:57:09
Subject: Re:(Not) Santas Workshop of the Strange, Wierd, and Wonderful - 2 May - Scouts Meet - pg 61!
|
|
Gargantuan Great Squiggoth
|
That is looking great bud, really great colours, with the blue lenses really popping. Free hand is brilliant, but almost too crisp and clean. Brilliant though.
As to the story, I must go and read it all, however that bit seems to do what you are asking, but there are some translation issues I think. "spectacular to say THE least". That's being picky though. The passage certainly conveys a sense of a massive gun, I think the speed of sound has well and truly been broken, and this would realistically need to be way faster if it has a range as vast as it is portraying. But finally, I have enjoyed what I have just read, and will be off to read more, great stuff.
|
|
|
|
|
|
2016/05/04 09:21:58
Subject: (Not) Santas Workshop of the Strange, Wierd, and Wonderful - 2 May - Scouts Meet - pg 61!
|
|
Pious Palatine
|
Spectacular. That freehand really sets it off.
How heavy do you plan on going with the weathering?
EDC
|
|
|
|
|
2016/05/04 11:47:25
Subject: (Not) Santas Workshop of the Strange, Wierd, and Wonderful - 2 May - Scouts Meet - pg 61!
|
|
Dakka Veteran
|
Thank you guys!
@Camkierhi - thank you. Weathering is well under way and most of the colors are now muted, toned down. Started paint chipping via sponge last night. So it ain't crisp and clean any longer.
Changed the "at" to "the"
I hope you don't mind that you (Camkierhi) are now a member of the noble house of Cesca
@EDC - THANKS!
Yes, started weathering last night - it will hopefully bring everything together.
I continued with the story a bit too:
http://fischers-design-shop.blogspot.de/p/chapter-i.html
Cheers
Klaus
|
|
|
|
|
|
2016/05/04 12:26:41
Subject: Re:(Not) Santas Workshop of the Strange, Wierd, and Wonderful - 2 May - Scouts Meet - pg 61!
|
|
Aspirant Tech-Adept
|
Stunning work as always mate .
|
|
|
|
|
2016/05/10 09:14:29
Subject: (Not) Santas Workshop of the Strange, Wierd, and Wonderful - 10 May - Scouts Meet DONE - pg 61!
|
|
Dakka Veteran
|
Hi all,
I hope you are all well
I'm currently a bit down with a cold - you know the one that's a sneeze to women, but life-threatening to men
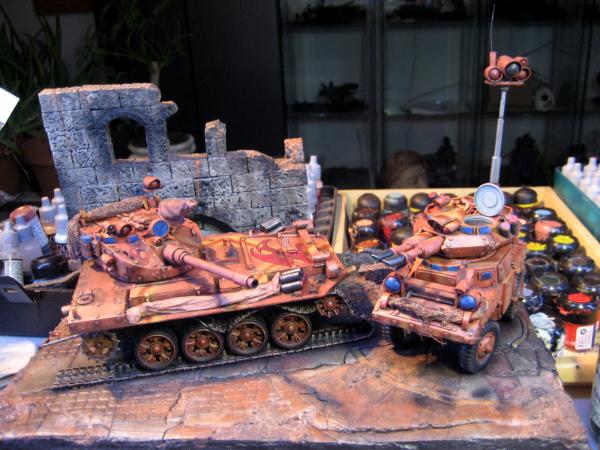
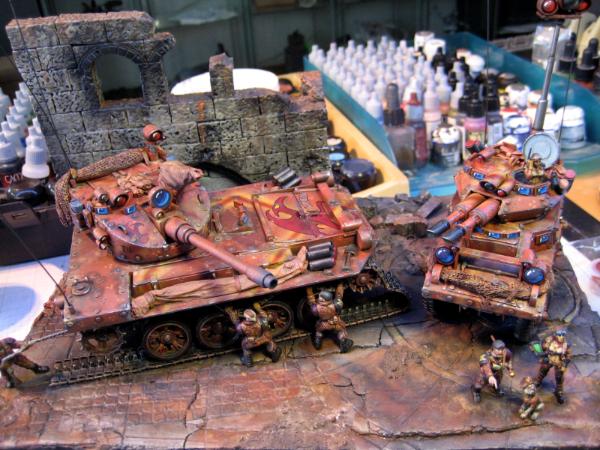
But luckily I was able to complete the diorama.
You will see, the washes have toned down all the colors nicely and the blue of the lenses is now much better aligned with the rest of the colors.
So, here is the last shot of the PHRIKE and KAIROS in a "pristine" state. Already toned down with washes, but no paint chipping yet.
I started the weathering with my "damage mix" a dark blue-grey that I apply with a sponge.

Once I've completed the basic chipping I added some metal effects. The minor ones with a pencil, the larger one with Boltgun Metal - applied with a brush.
I think it works quite convincing.
Also on the PHRIKE.
And finally I painted the lenses and lights.
Done!

Oh wait!
There's the crew :(
They all get the Dencara Tiger Flash pattern.
Lots of details
Last image before the washes and highlights.
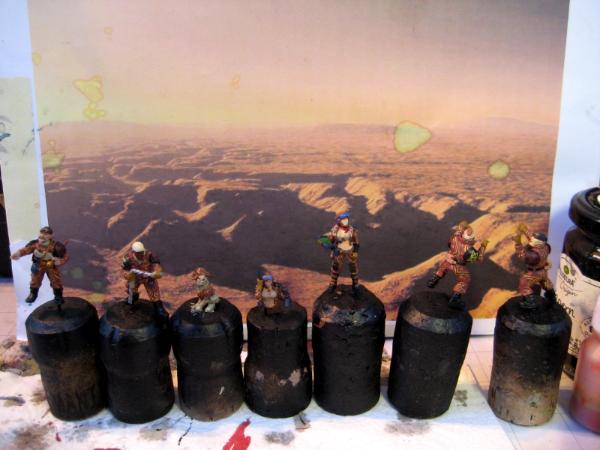
But now!
Too bad the auto-focus didn't agree with me.
But I think you get the idea
Even though I'm not 100% satisfied with the lady's face, I think I can live with it
To bring it all together I applied some more pigments to the vehicles and the scene.
I think this makes it look a bit more realistic.
And the completed scene
I hope you like it.
I want to thank you very much for accompanying me on this little journey and I hope you enjoyed the ride.
Thank you for your feedback, suggestions and comments.
They lifted this project a bit higher and made it better.
THANKS!
Some HQ images to follow
|
|
This message was edited 1 time. Last update was at 2016/05/10 09:15:12
|
|
|
|
|
2016/05/10 22:21:12
Subject: (Not) Santas Workshop of the Strange, Wierd, and Wonderful - 10 May - Scouts Meet DONE - pg 61!
|
|
Gargantuan Great Squiggoth
|
Amazing as always sir, beautifully executed. the weathering and toning down works really well, yet another perfect dio.
|
|
|
|
|
|
2016/05/11 16:54:05
Subject: Re:(Not) Santas Workshop of the Strange, Wierd, and Wonderful - 11 May - ATHENA is back - pg 61!
|
|
Dakka Veteran
|
Thank you Camkierhi
So,
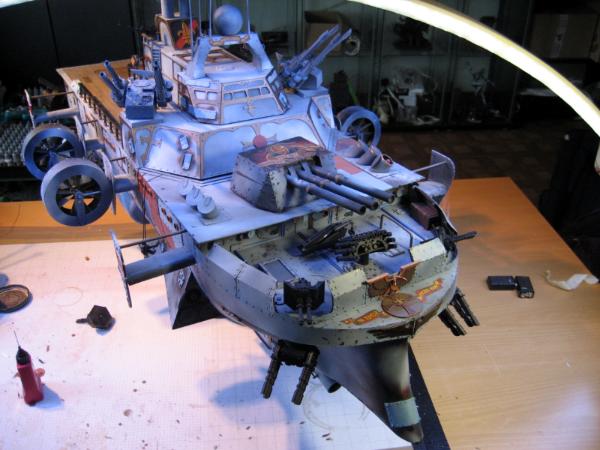
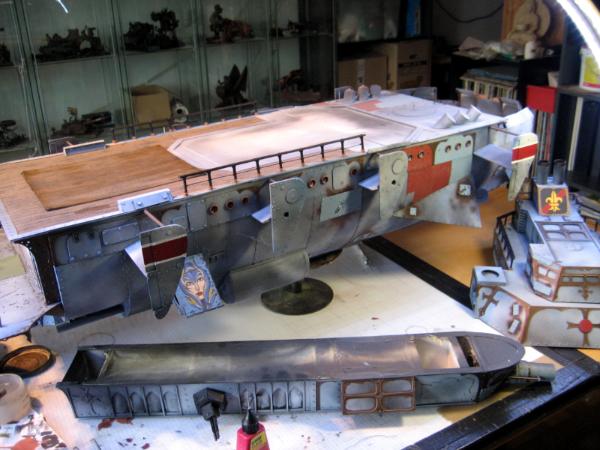
Look what's on my desk
The last time she was seen, was September 2013 ( ATHENASteampunk Airship - 105)
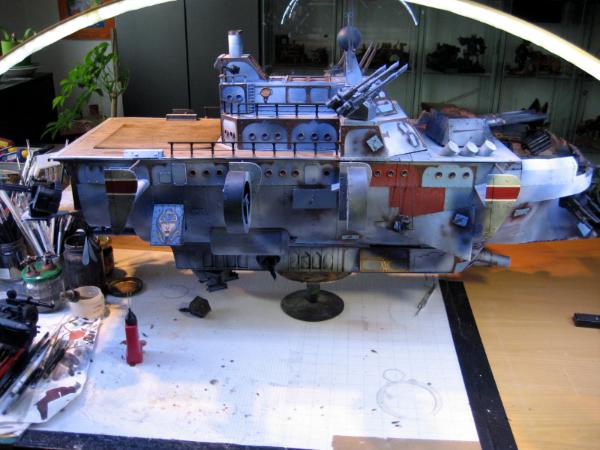
But honestly I'm not sure how far I will get this time.
By now the plastic is very brittle, and many pieces started to warp.
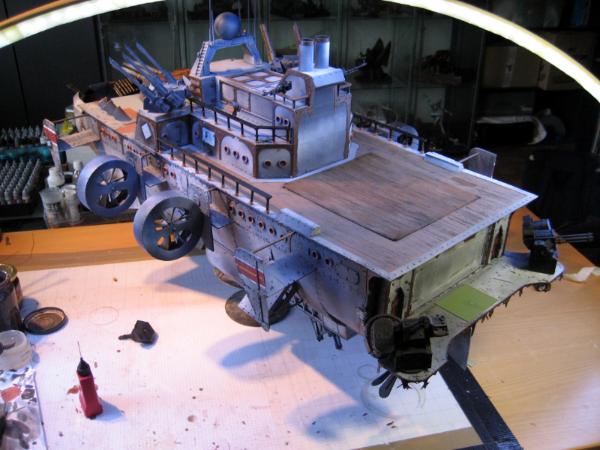
She's still a beauty though.
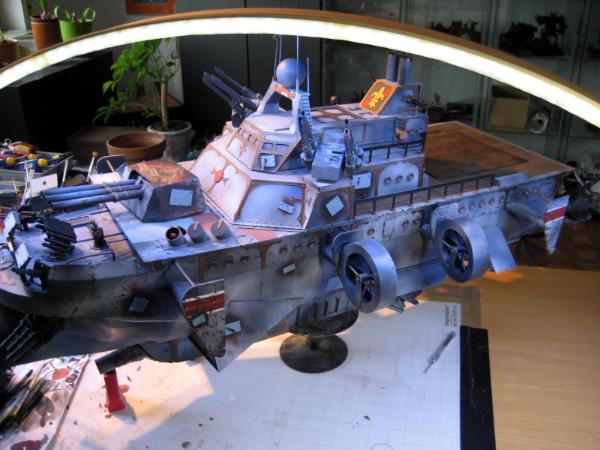
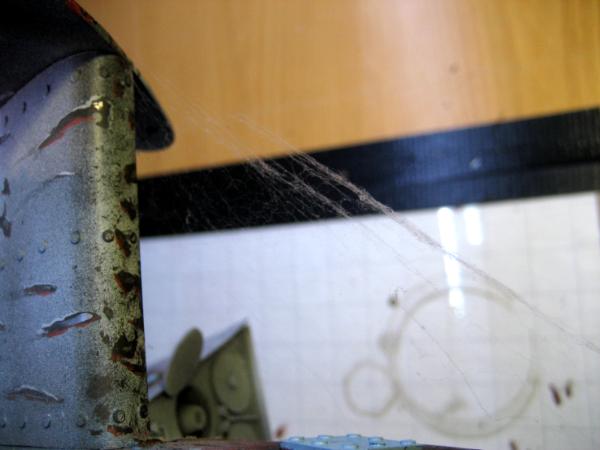
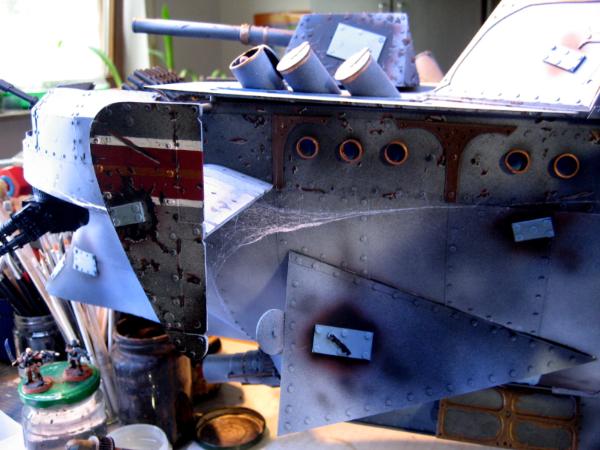
Got some real spider webs
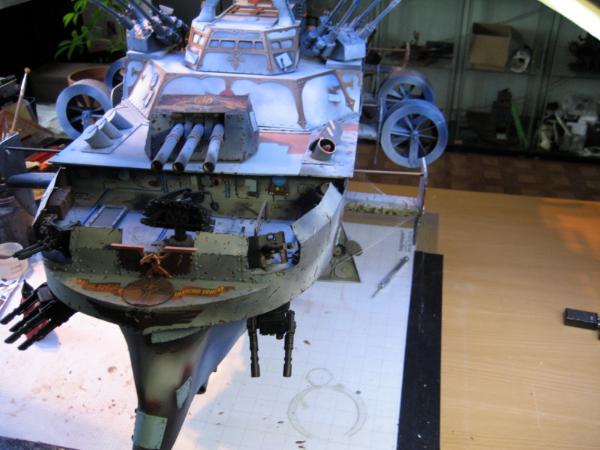
So now I'm taking stock
Some pieces are broken and she needs a good cleaning.
Sheesh, probably a whole spider colony.
So I started to repair some of the broken pieces - a wheel on the STRIX VTOL aircraft and a blade on the propeller.
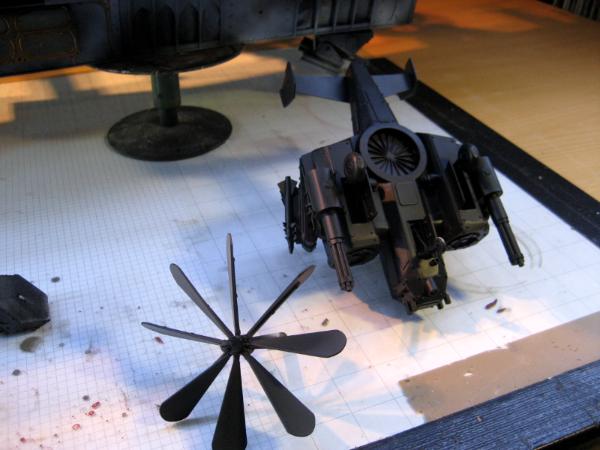
As said, no promises.
I'm trying to enter her at the SMA Big Spring Contest as "Shelf Queen" for which she definately qualifies
But I will be out for two weeks - visiting Scottland - and then I'll see.
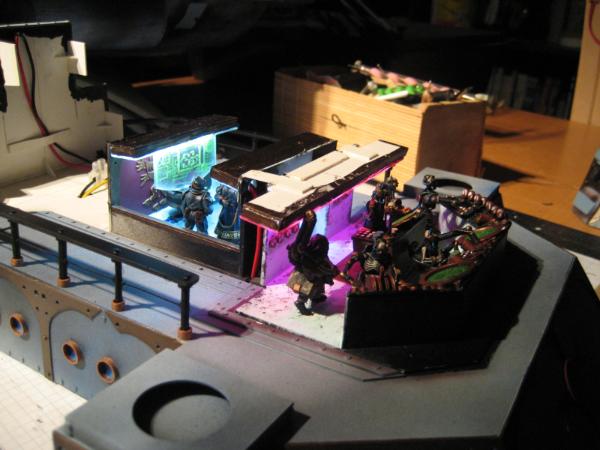
Well, last night I decided to remove all the masking off the windows and stuff - or rather see if it still comes off after 3 years.
It was never intended to remain so long on the windows - and I don't think it was made for it.
But luckily the rubber mask from Vallejo came off pretty well.
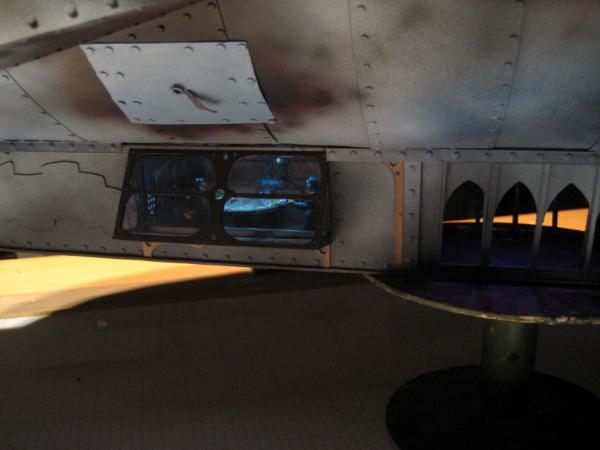
First time in years these 3 guys see the light of day again
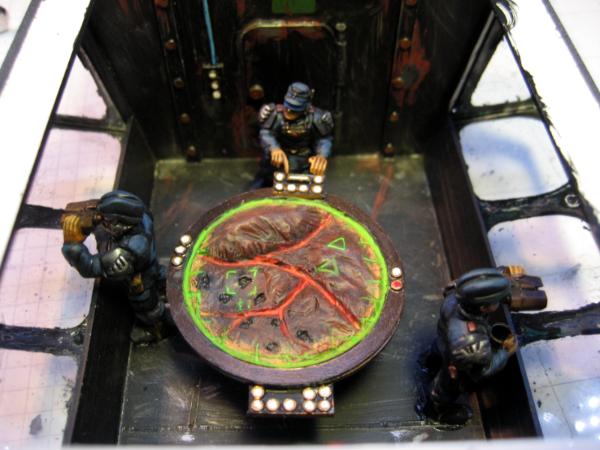
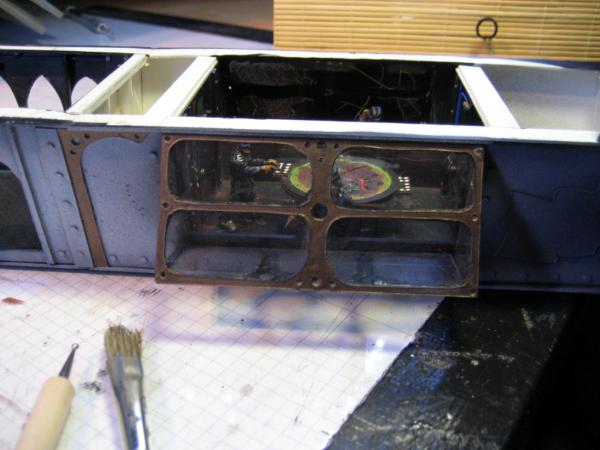
Another important part is the bridge.
After a battery recharge, the lights still work.
How would the Tamija Masking Tape come off?
Great!
No problems at all. No damage to the Goddess.
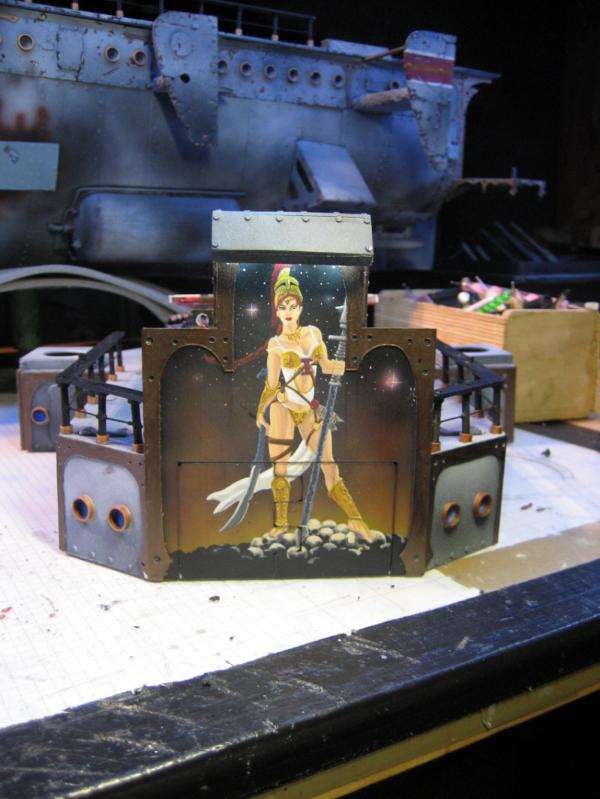
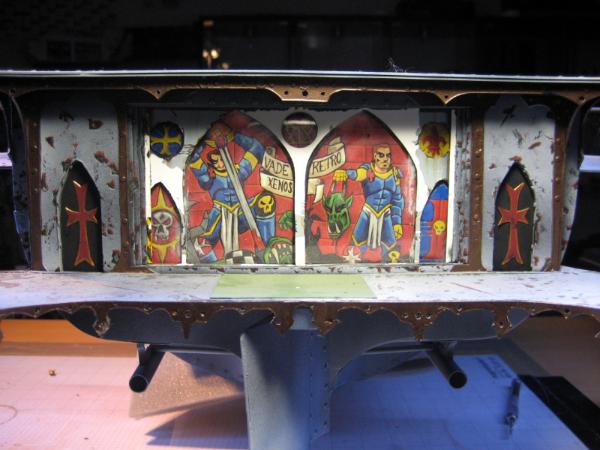
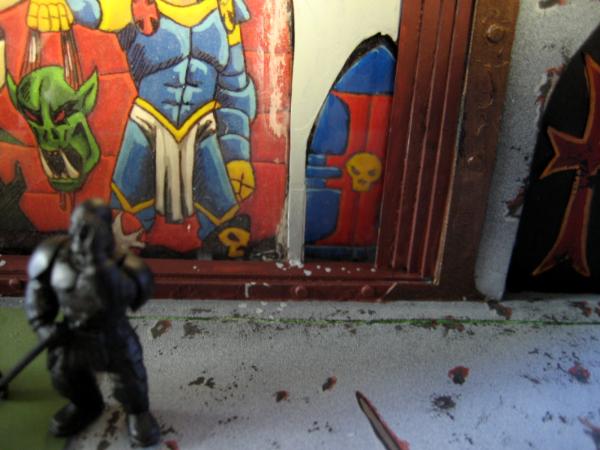
The large rear mural was covered in standard, no-brand masking tape...
Lots of paint ripped off :(
But well. I already have an idea here.
So I checked the wiring and lights for the body area. Still working.
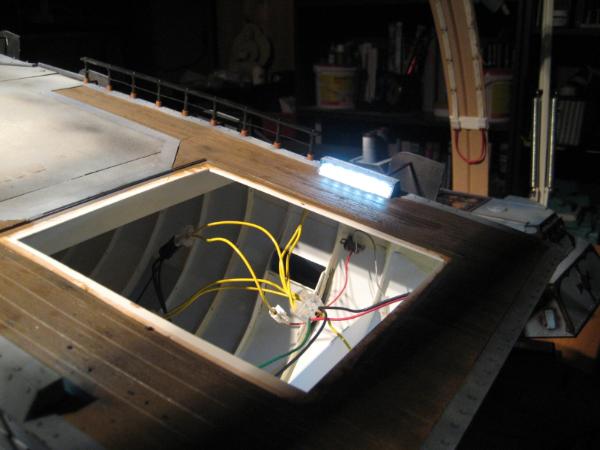
Lower observation room too
And this morning she was still on my desk
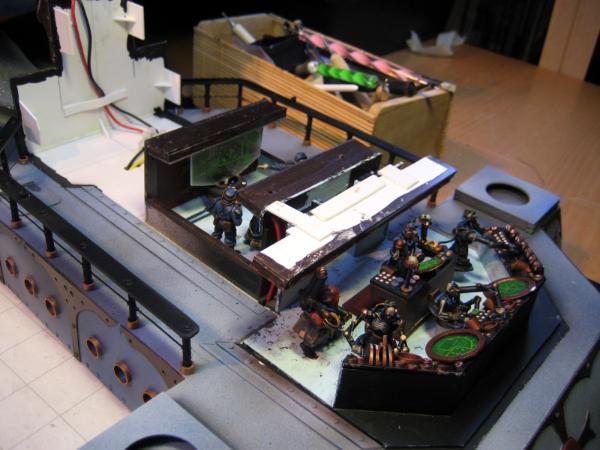
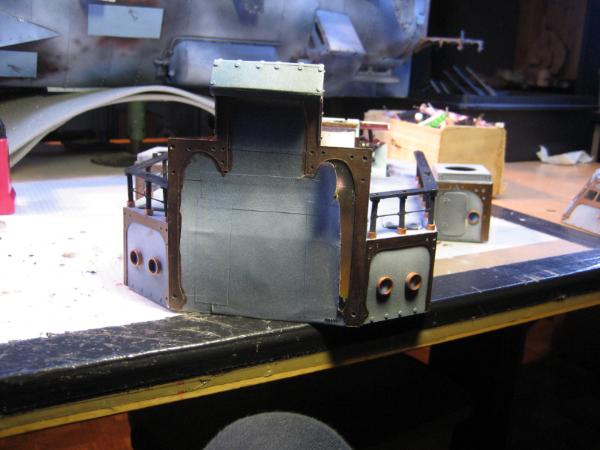
So I decided the first thing to fix was the rear area.
I simply changed the scene here, so that the two guys *should* actually be painting the rear are, but are taking a break and do some golf
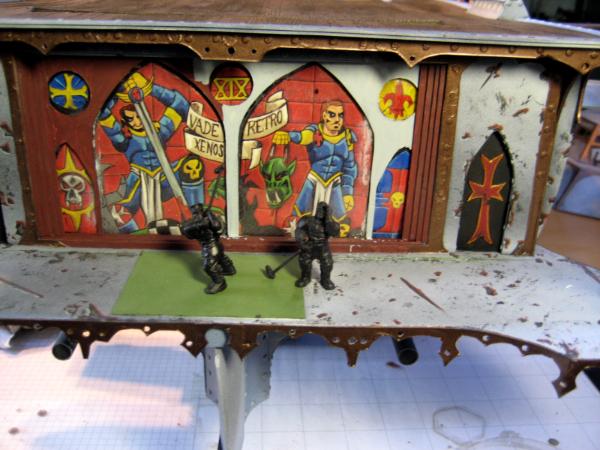
Even added some spilled paint.
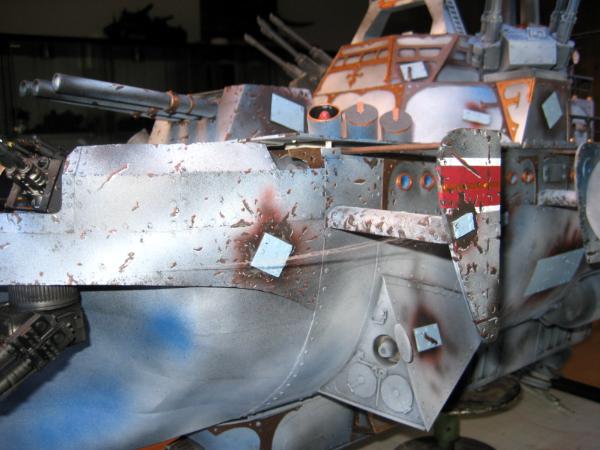
Then it was time for some serious work.
Damages.
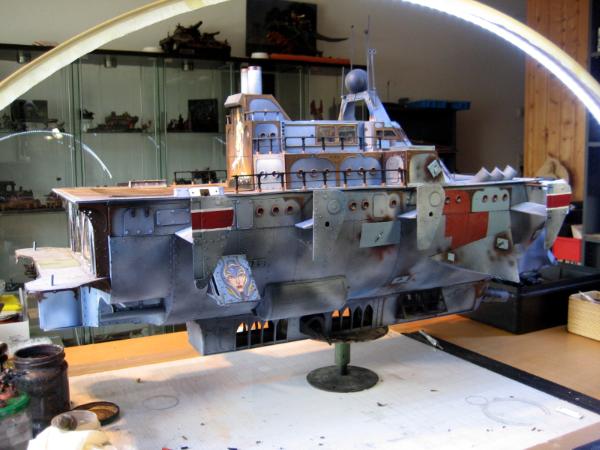
Like last time I started with the dark grey.
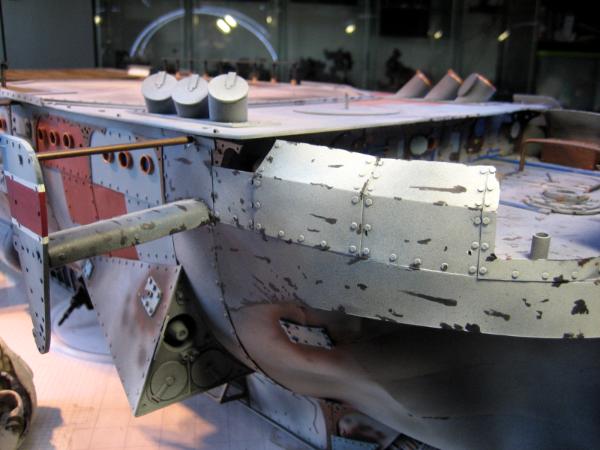
Then Terracotta in the upper parts (simulating the rust resilient paint) and Fortress Grey for the lower highlights.
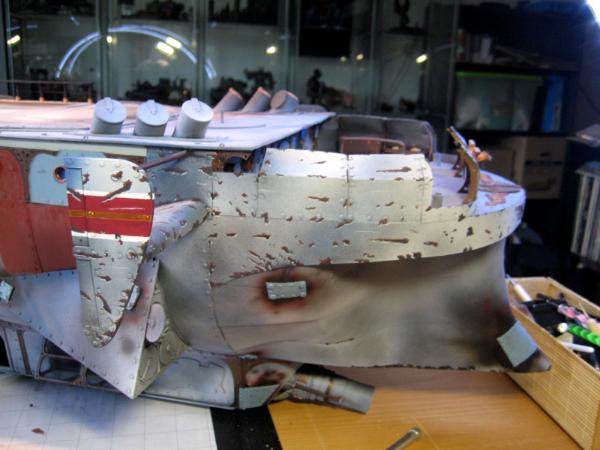
Then the dark grey with a sponge.
And finally Boltgun Metal for the deeper damage areas.
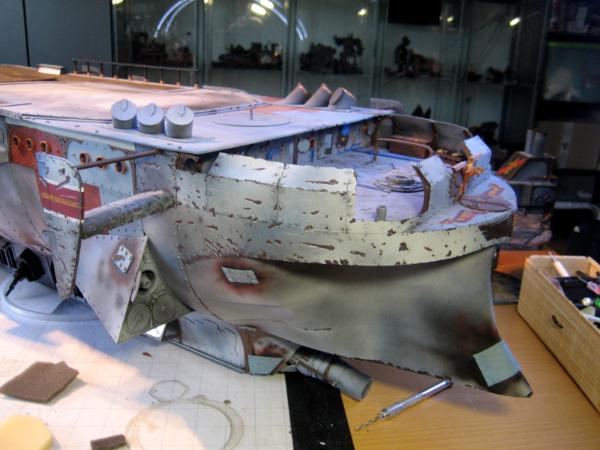
The top of the deck received a new paint coat to support the scene there, where a bunch of guys are in process of painting the deck.
You can also see the simulated color transition of the "cloud pattern" with the two colors.

Well, that's as far as I got.
Feels good to have the old lady back on the desk.
Cheers
Klaus
|
|
|
|
|
|
|
|