Played another game of Nids v Tau yesterday. We were originally going to test out our 1,500pnt tourney lists, but time prevented us so we got stuck into a 750pnt game.
The Swarm
Prime with twin bone swords and deathspitter (leading warriors)
4 x warriors with deathspitters (1 barbed strangler)
18 x hormagaunts with adrenal and toxin
10 gargoyles
10 termagants
2 Hive Guard
2 Zoeys
The Tau
Leader in suit with plasma rifle and missile pod (leading suits) - can fire both weapons
2 x crisis suits with plasma and missile pods - can fire both weapons
10 x fire warriors
6 x fire warriors (using path finder devil fish)
4 x path finders with fish
2 x broadsides
10 x kroot with 4 x hounds
We rolled seize ground (3 objectives - flags) and spearhead deployment.
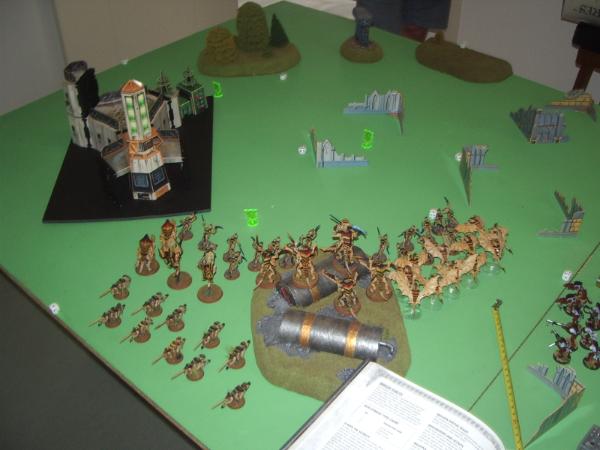
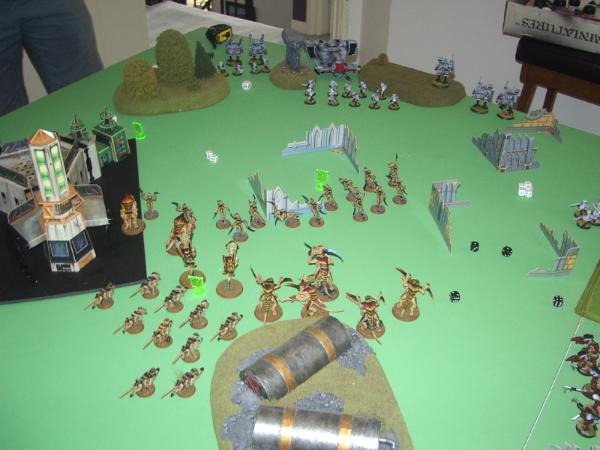
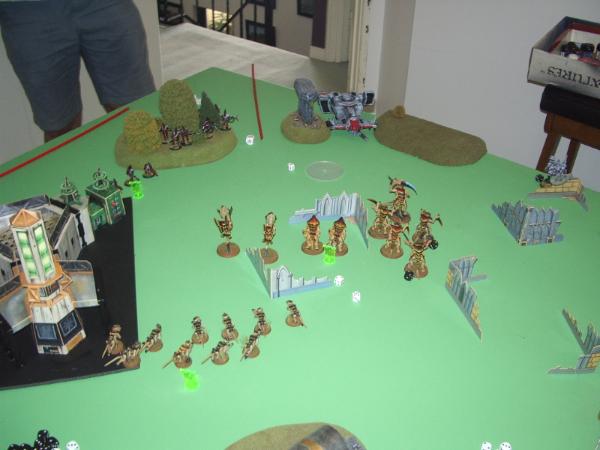
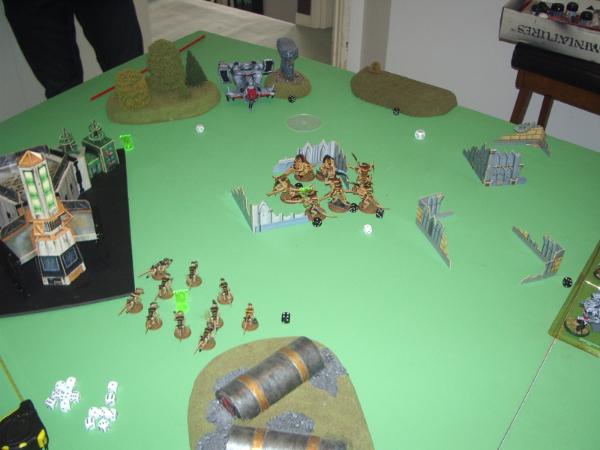
Nid Deployment
I deployed first - pushing my hormies up front, zoeys and hive guard to the left, gargoyles to the right, warriors central behind hormies and termagants behind and to the left. The plan was for the hormies to close the gap as fast as possible, with the gargoyles overtaking/spreading out in front of them to give them saves (no blasts, so didn't have to spread too much). Gants would move up and sit on the objective, whilst the rest of my swarm started spreading the pain.
 Sir! we've identified multiple alien life forms approaching our position. Should we fall back for reinforcements?
No, the minerals we have identified are too valuable. We can't risk them being consumed by the swarm. Prepare to engage!
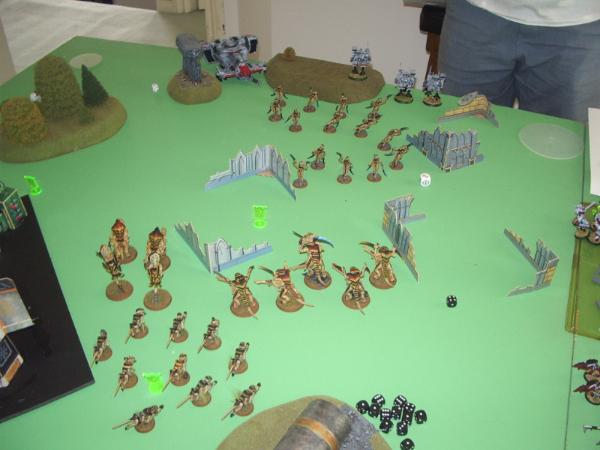
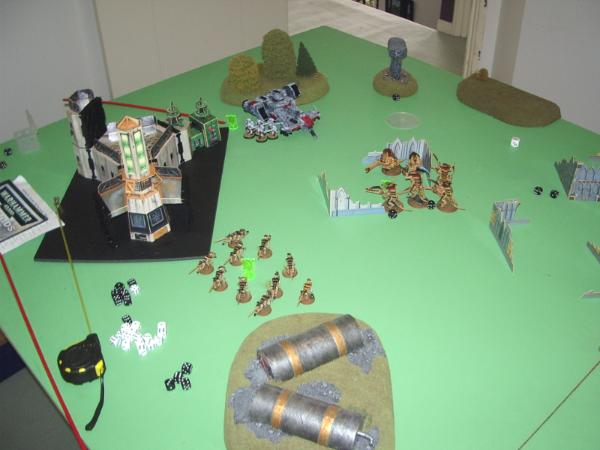
The Tau's view:
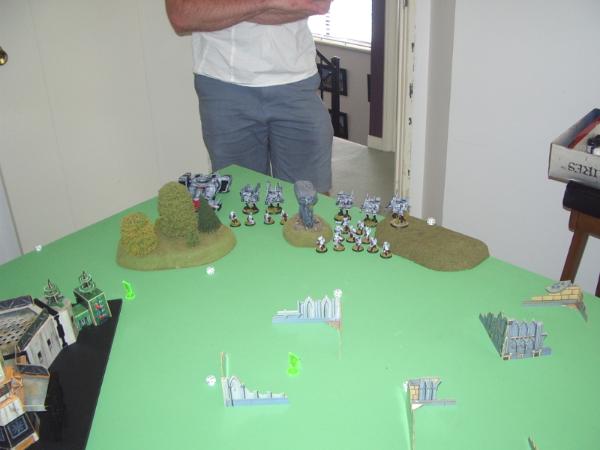
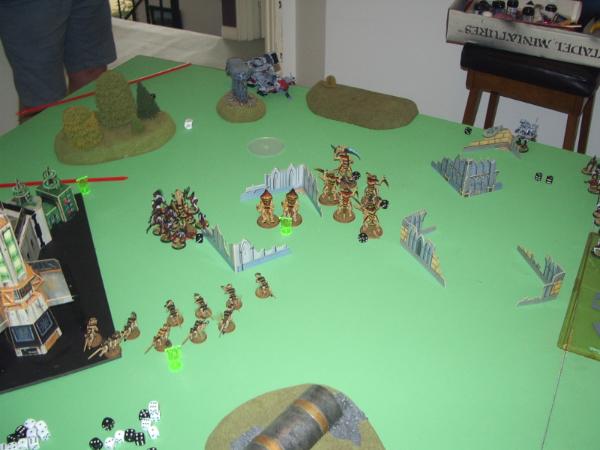
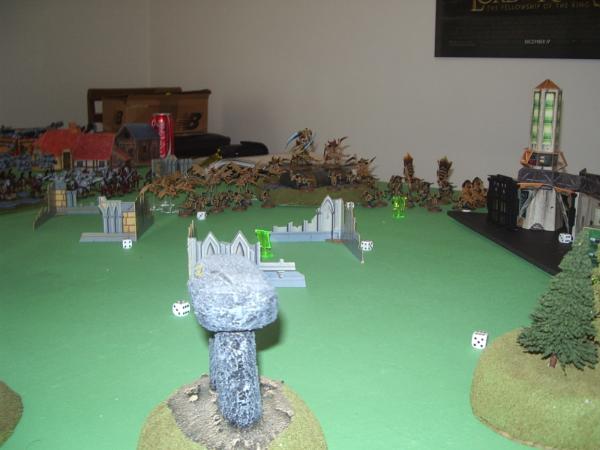 Tau Deployment
The Tau then setup with the crisis suits on my right with the large squad of firewarriors in front (he was concerned they might be a little too close, but hoped they were far enough back). The broadsides setup ion the centre behind the path finders, with the devil fish and the six man warrior squad off to my left behind the trees. Lastly, the kroot outflank.
The Tau try to steal the initiative, and fail.
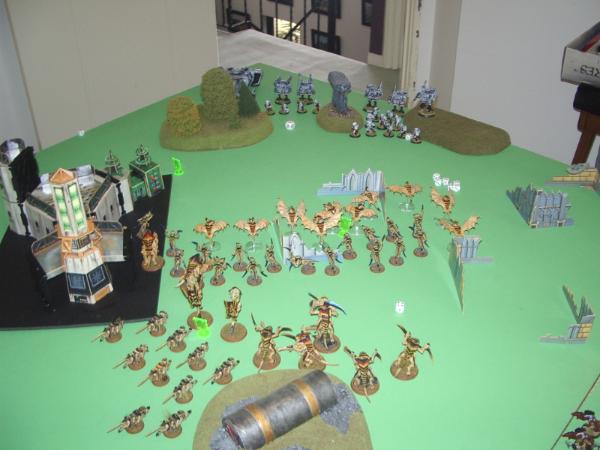
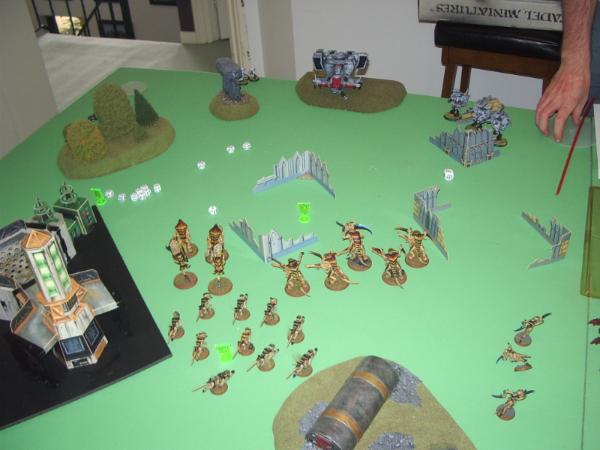
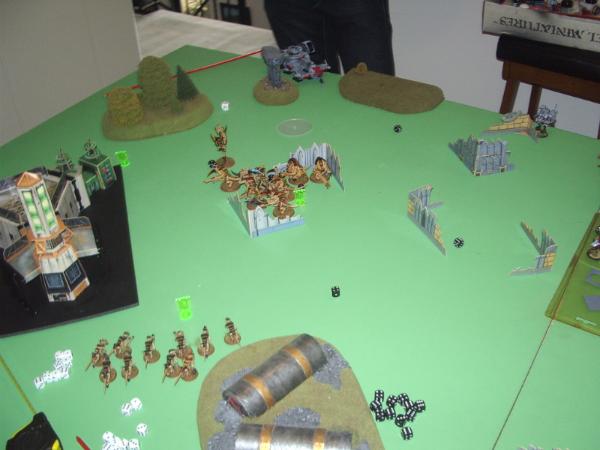
Nids Turn 1
Everything races forwards, with the gargoyles fanning out in front of the hormagaunts. One of the gargoyles clips a wing flying into area terrain and dies (first blood to the Tau). IN the shooting phase, both the gargoyles and hormagaunts run, getting a massive 6" and 5" move each! The gargoyles use the extra move to oput over half the brood into the area terrain, whilst the hormagaunts move up immediately behind them.
Not risking the distance, the Zoeys and Hive Guard also run, but only manage 1" and 2" of movement respectively.
The Gants hop up around the objective in my corner.
The only firing comes from the barbed strangler - who fires at the large squad of firewarriors. The shot scatters off onto the crisis suits, and although I cause a wound he easily saves.
They're closing in too quickly. Squad Destiny - move up and lay down fire on the gargoyles. Take them down so we can start focusing on thinning out the rest of the horde!
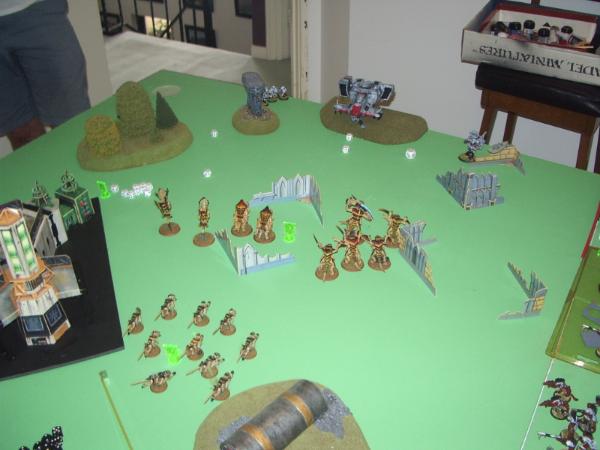
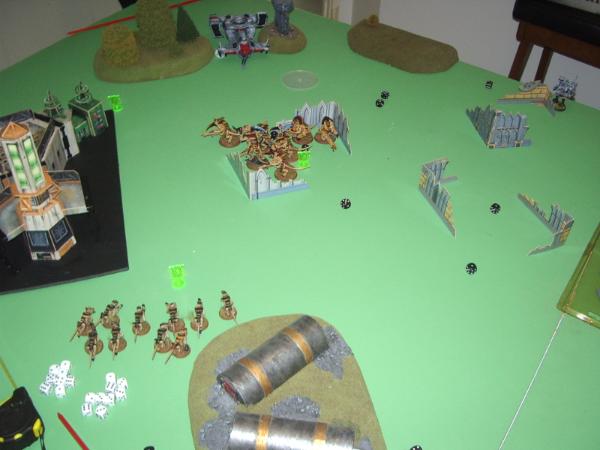
Tau Turn 1
Appalled by the rapid movement of my Nids, the Tau no longer entertained any ideas of avoiding a second turn charge from the gargoyles. To that end, the ten man unit of fire warriors moved slightly forward into rapid fire range, hoping the hormagaunts wouldn't run fast enough in the following turn to engage.
The other firewarrior unit loaded up into the devil fish, who carried them off to my right. The crisis suits also moved off to the right in an effort to split up some of the swarm.
Firing saw the path finders only put one marker light on the gargoyles, which the firewarriors used to reduce my gargoyles cover saves by one. They then rapid fired into the gargoyles, but only managed to down 5 of the winged beasts. The commander and crisis suits then fired in their plasma and missile pods, downing two more. The Devil fish failed to bring any down. Deciding that he couldn't let the last two survive to charge, the broadsides opened fire with their big guns and missile pods, finally managing to down the last two gargoyles. Now he just had to hope the hormagaunts wouldn't make it into his fire warriors.
 Objectives- Nids: 2, Tau: 0 (KP- Nids: 0, Tau: 1)
Nids Turn 2
Objectives- Nids: 2, Tau: 0 (KP- Nids: 0, Tau: 1)
Nids Turn 2
The Nids continued to advance, swinging heavily to my right with the hormagaunts towards the advancing fire warriors.
Firing saw my Zoanthropes send their warp blasts into the pathfinders, killing three of them and wounding a broadside with a scattered shot. The Hive Guard then fired into the broadsides, and managed to land three wounds. They rolled for their armour but came up with 2 1's, skewering them both with
ID. The warriors then fired into the crisis suits, wounding 1 suit with the strangler but failing to pin them. Running saw my hormagaunts go forward another 6", easily getting to within assault range of the large fire warrior unit. Mean while, the last path finder broke and ran 12" off the board.
Assault! - 7 hormagaunts made it into assault with the fire warriors. After a flurry of scything talons, all 10 firewarriors were dispatched in the mayhem. The hormagaunts then consolidated towards the crisis suits, looking for their next kill.
Their too fast! Deploy the remaining fire warriors. All focus fire on those hormagaunts!
Tau T 2
Trying to regroup, the Tau decided the best defence was a good offence. An offence that was not helped by the Kroot failing to arrive.
To that end, the devil fish deployed the 6 fire warriors to help out with taking down the hormagaunts.
Rapid fire from the fire warriors, crisis suits and the devil fish saw the hormagaunt threat erased. Without cover, they really did just drop like flies against the Tau's guns.
 Objectives- Nids: 1, Tau: 0 (KP- Nids: 3, Tau: 2)
Nids T 3
The warriors advanced towards his crisis suits and commander, whilst the Hive Guard and Zoeys advanced towards his Devil Fish. The Gants stayed on the objective.
Firing saw the warriors kill the two crisis suits with their deathspitters, and wounding the commander once. Both the Zoeys and Hive guard fired into the devil fish. The Zoeys were unfortunately out of range, though passed their psychic tests. The Hive Guard managed to score 1 Pen and 1 glance, but both were saved by its disruption pods.
S'Kelth! Where is your Kroot squad? I need them now!
Tau T3
The Tau started off on a positive note, with the Kroot arriving on the objective side of the board and taking up position in the trees nearby. The fire warrior squad re-boarded the devil fish, and the commander moved forward to rapid fire into the warriors.
Firing saw the commander put a wound on two warriors (a deathspitter and a barbed strangler) and the Prim, and the devil fish put another wound on the Prime (who just couln't make his 3+ save)
The commander then jumped back out of range from my warriors.
No pic, sorry
Objectives- Nids: 2, Tau: 1 (KP- Nids: 4, Tau: 2)
Nids T 4
The Warriors and termagants moved a bit closer to the Kroot, in case he decided to charge out into my Zoeys. The Hive Guard moved further into the terrain, and the Zoeys went to move into the cover to avoid being charged but rolled a massive 1" move, leaving them in charge range of his Kroot.
Shooting saw my barbed strangler fail to hit his commander (spitters were just out of range). The Hive Guard shot up the Devil fish, again scoring 1 Pen, 1 Glance and again having him save both of them with his disruption pods. The Zoeys, being out of range for lancing the Devil Fish decided instead to try and warp blast the Kroot, but they made all their cover saves.
 Ok S'Kelth, show me what you and your Kroot can do. I'll try and distract the warriors so you can clean up the rest.
Tau T 4
With an Almighty whoop, the Kroot advanced on the Zoeys whilst the commander advanced on the warriors.
The Commander managed to deal 2 more wounds to the warriors, reducing the Prime and the deathspitter to one wound each, whilst the Devil fish managed to bring the barbed strangler warrior down to 1 wound (and again I can't make my armour...)
The Kroot charge into the Zoeys and manage an impressive 10 wounds on them. I then make 7 of my saves, killing one zoey and leaving the other on 1 wound. I then proceed to make all of my fearless saves, locking them in combat.
 Objectives- Nids: 2, Tau: 0 (KP- Nids: 4, Tau: 2)
Nids T 5
Objectives- Nids: 2, Tau: 0 (KP- Nids: 4, Tau: 2)
Nids T 5
My Warriors advance on the Kroot, whilst my gants go back to the objective in case something goes horribly wrong.
Shooting sees my Hive Guard fail to even glance hi devil fish.
My Warriors charge in. My Prime slices down 4 Kroot, whilst his hounds completely miss. My 4 warriors then proceed to lay down the pain, hitting with 12 attacks (after rerolling 4 ones for talons) and wounding 10 times. The warriors then consolidate onto the mid objective, whist the Zoey consolidates towards the devil fish.
 Those Nids are too tough. Stand back and fire!
Tau T 5
With little left, the Tau decide to stand back and take aim at the Zoey, killing him.
 Objectives- Nids: 2, Tau: 0 (KP- Nids: 5, Tau: 3)
Nids T 6
Objectives- Nids: 2, Tau: 0 (KP- Nids: 5, Tau: 3)
Nids T 6
The commander strayed a bit too close to get my Zoey, so my warriors moved towards him to finish him off. My Gants remained around their objective.
Shooting saw the warriors take down his commander, whilst my Hive Guard put one pen on the devil fish which was again saved.
 The commander is dead! What should we do?
We better at least grab some of the crystals, then lets get out of here and report back.
Tau T 6
With only the Devil fish and fire warriors left, they moved over to the remaining objective, hopped out and fired into my Warrior brood, finally taking down one of the warriors.
 GAME FINISHES
Objectives- Nids: 2, Tau: 1 (KP- Nids: 6, Tau: 3)
End Game Analysis
GAME FINISHES
Objectives- Nids: 2, Tau: 1 (KP- Nids: 6, Tau: 3)
End Game Analysis
Well, everything started off very well for the Nids. The run rolls in my first 2 turns (due to in no small part the 'bounding leap' rule for the hormagaunts) meant I was able to close quickly and engage the Tau in T2. He setup a bit too close in hindsight, but wasn't expecting me to move so fast.
The warriors were outstanding this game. By taking down the broadsides early, they really became an impossible unit to kill with wound allocation tricks.
The Hive Guard started off well (though he was unlucky to fail two armour saves on the broadsides) though he made up for this later on by making all his disruption pod saves on his devil fish.
All in all a fun game!
Please C + C on the report, tactics, army selection (for both sides) paint and anything else you feel like

Hope you enjoyed!


 Imperial Knights: The Avengers Initiative
 Da Dark Angelz
 Arakasi vs Infinity

 I expected Tau to do better, as they are deadly at small games due to their strength 5 rapid fire guns, which should slice apart you 'nids on a 2+


 1250
1250
 1000
1000
 : 1/1/1
 : 6/0/1 (1 overall win)
 :8/0/2 (1 overall win)
 2000pts