@ Desubot, Indeed you are correct sir, his work is truly stunning. Bit too laborious for me even, but I steal ideas.
@Vik, Thanks bud, hopefully the strips are looking a little better though they are still WIP @ Shas, Thanks bud.
@ Yorkright, thanks, neither can I, had a great day, nothing too fancy but a brilliant day, with the family.
@ Graven, Thank you.
@ Dave, Thank you sir, means a lot.
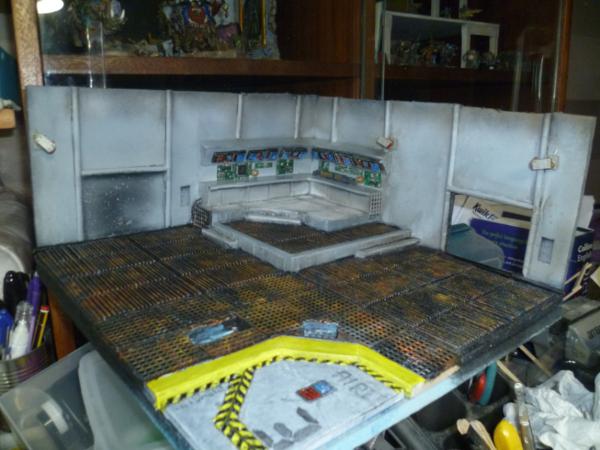
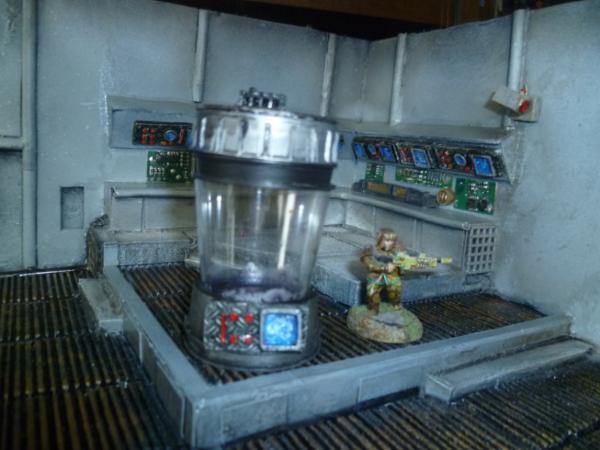
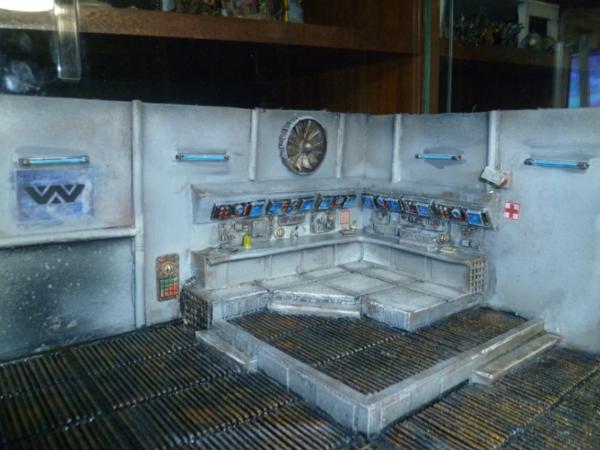
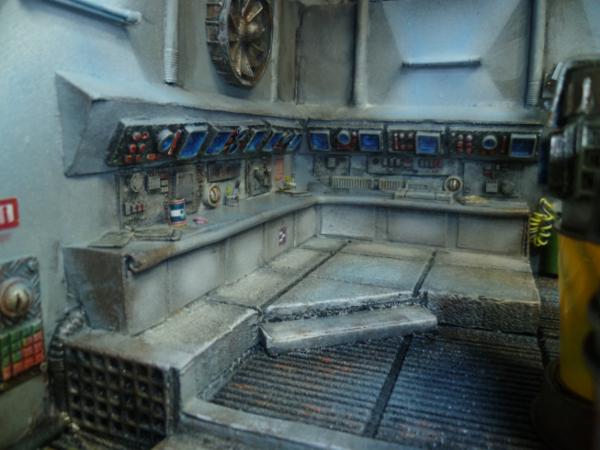
@ DrH, Thanks bud, fun will be expanding it later on to be either a large room with the full airlock or seperate rooms with many airlocks, but for now this one corner will work fine.
@ CK, Thank you bud, trying not to go too alien, but hey can't be a bad thing right? Thanks had a great day.
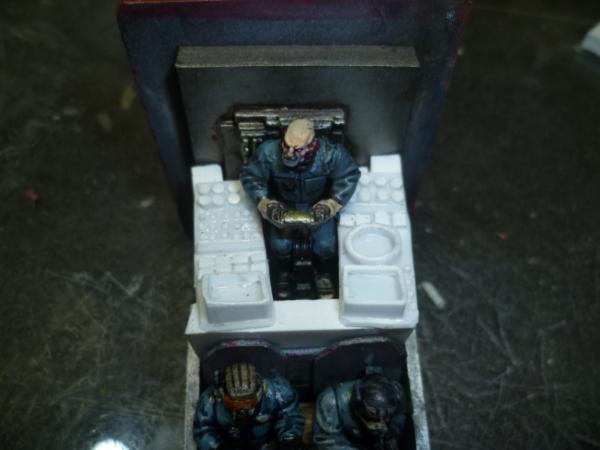
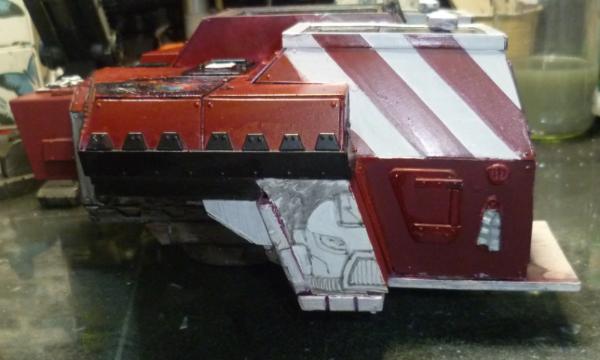
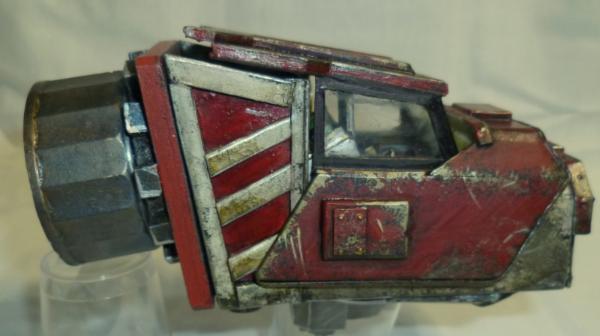
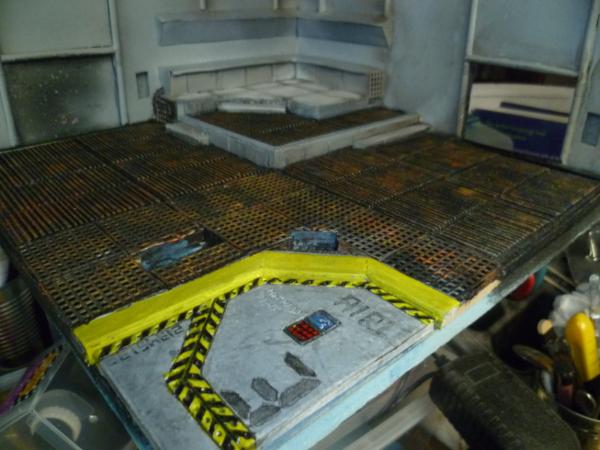
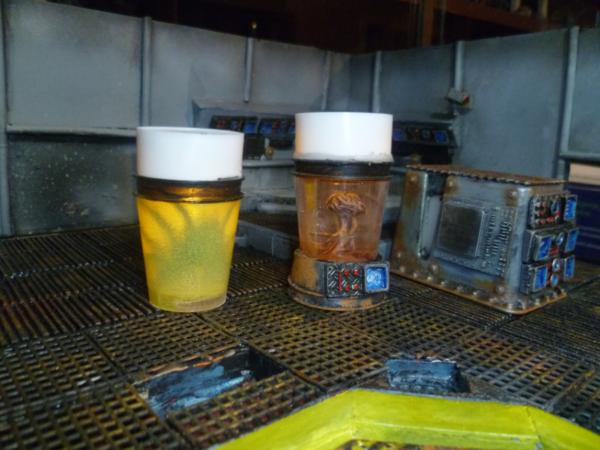
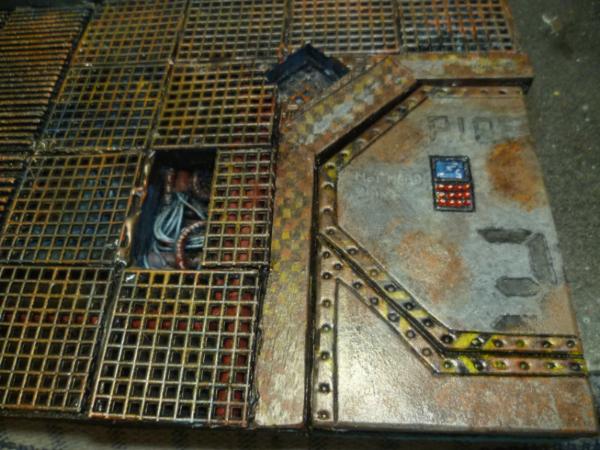
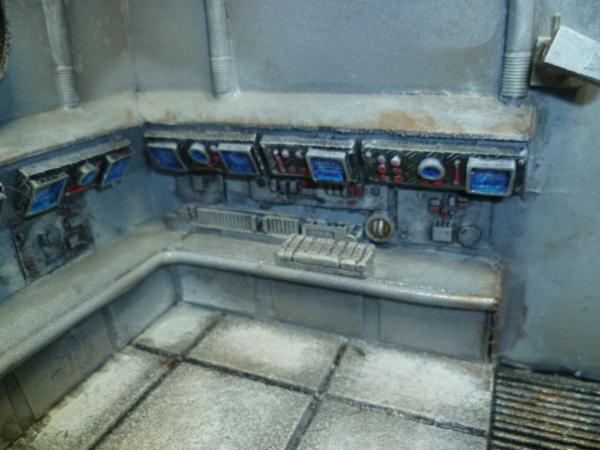
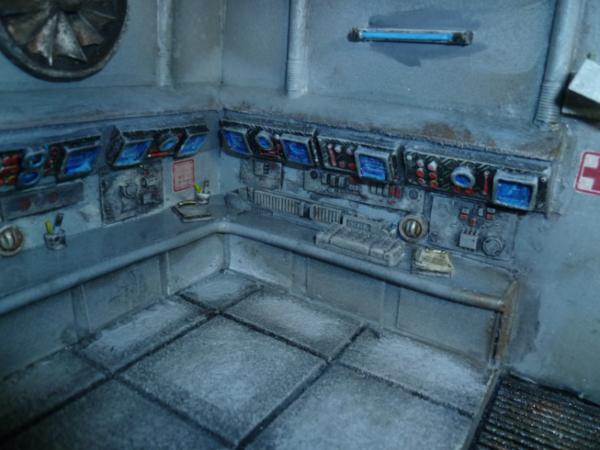
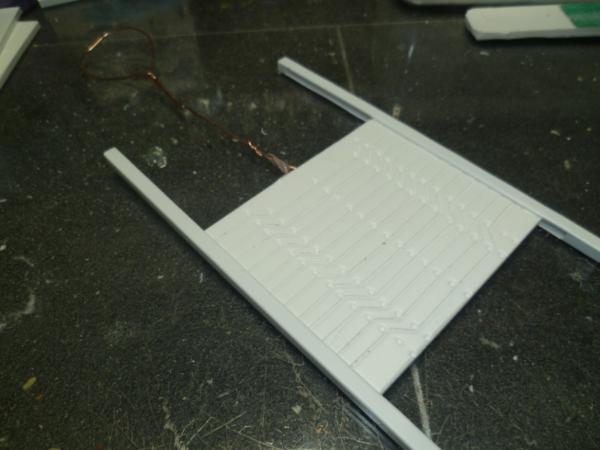
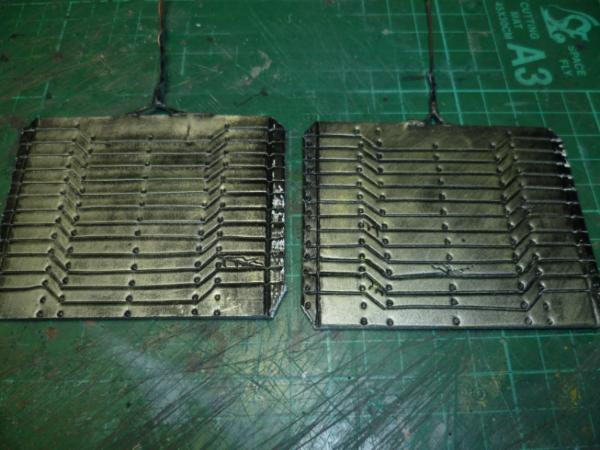
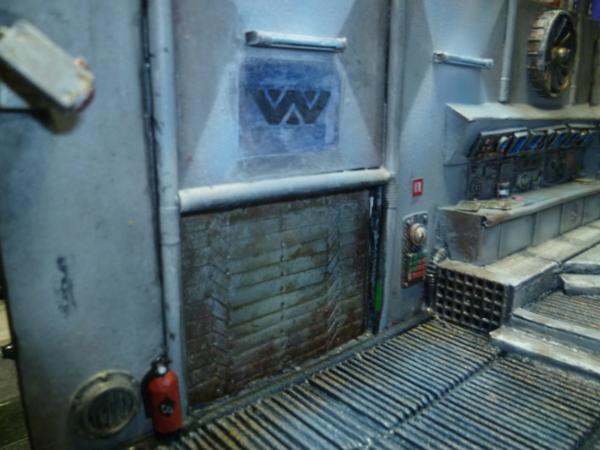
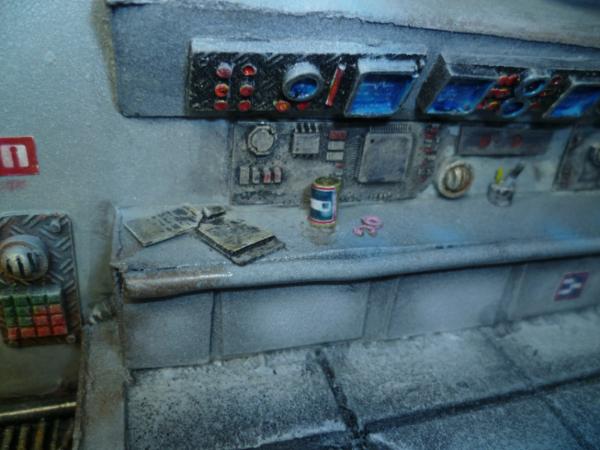
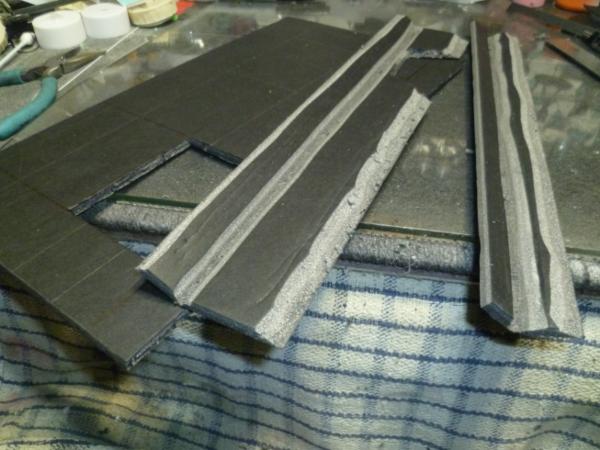
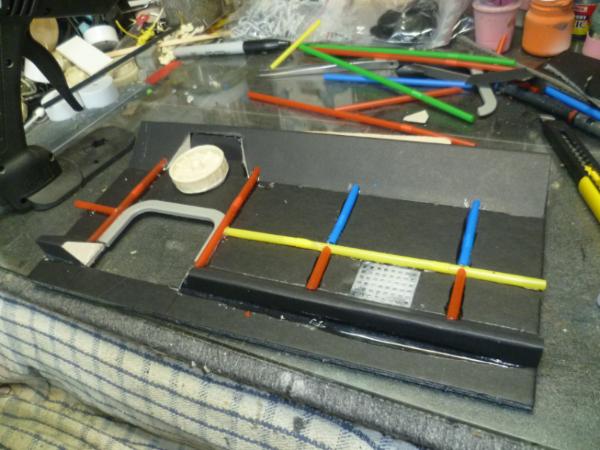
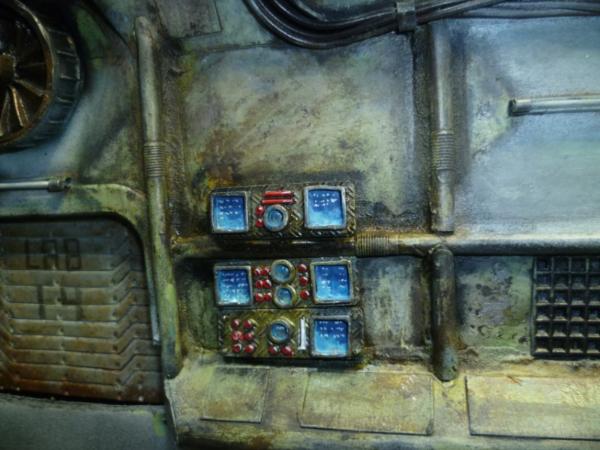
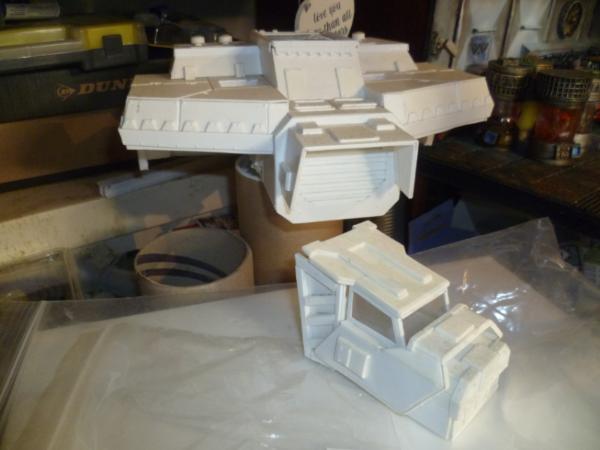
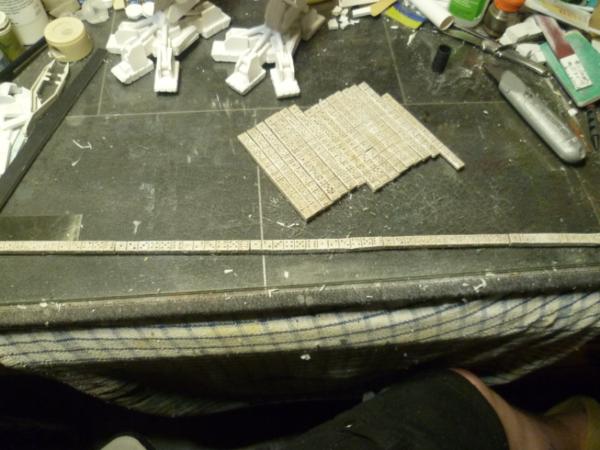
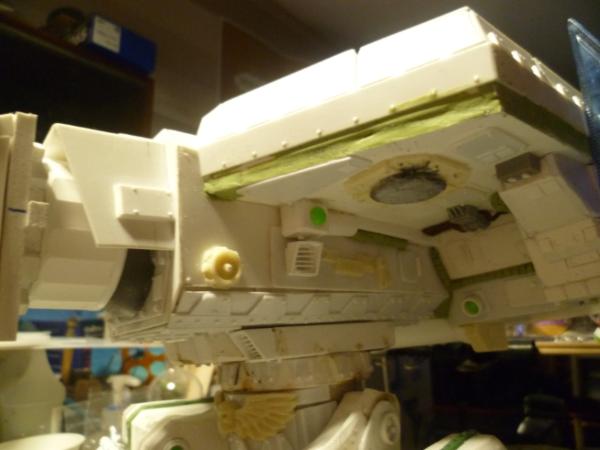
OK so keeping it light here, so none of RL BS. Here is an initial attempt at redoing the hazrd stripes, think I will dirty them up and maybe do checkers on the flooring part.
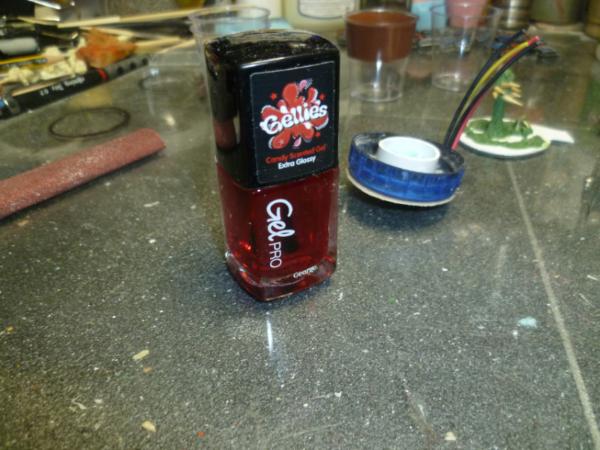
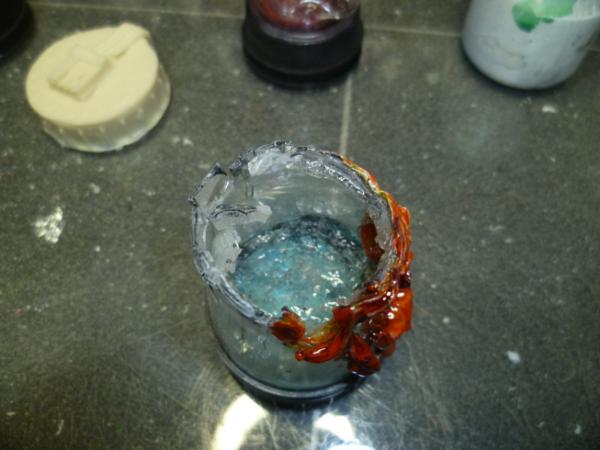
Trialling a new "paint"...
£2 for super glossy fast setting "paint" in red yellow green and purple. Will let you know how I get on.
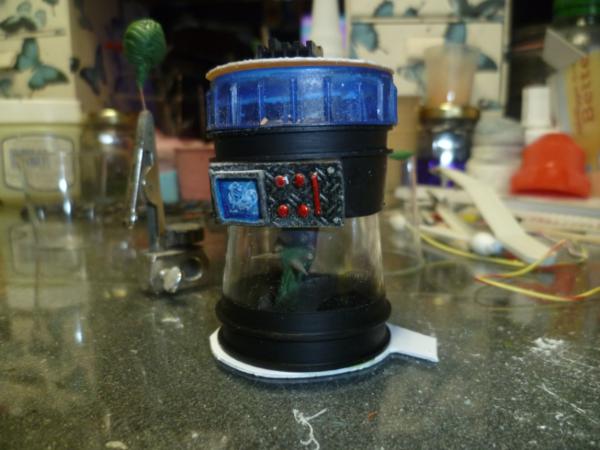
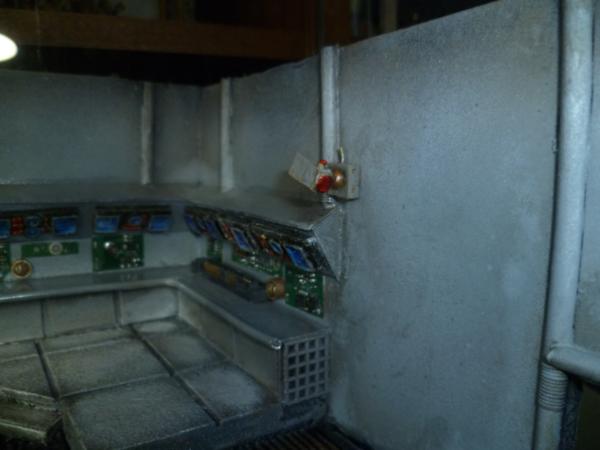
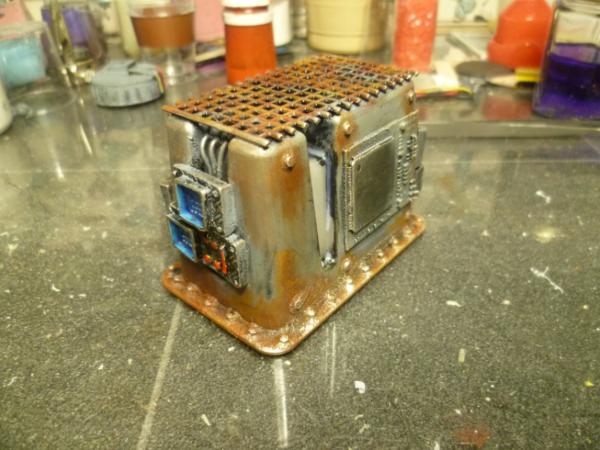
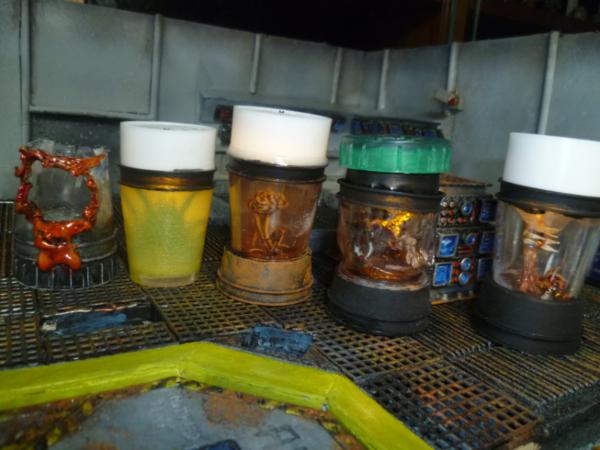
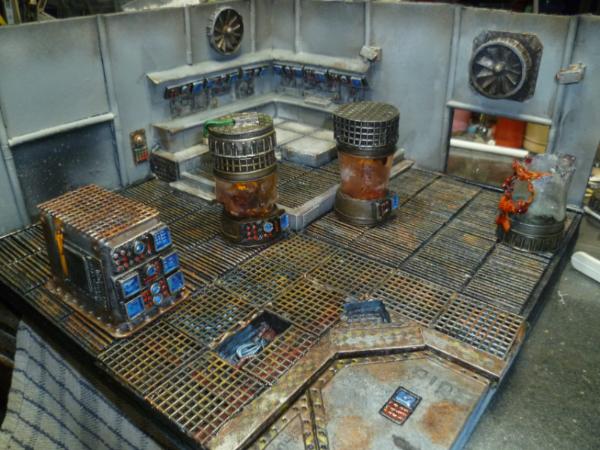
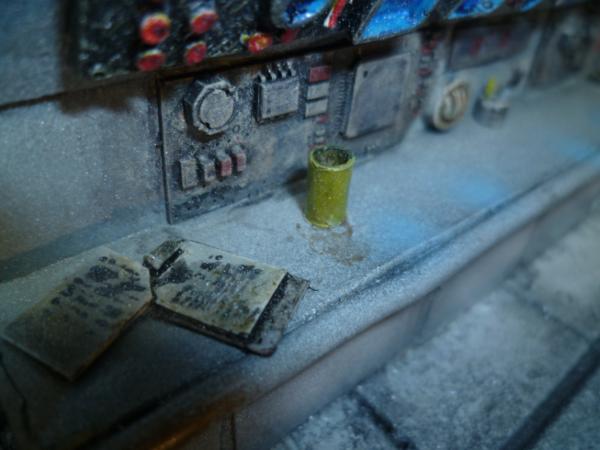
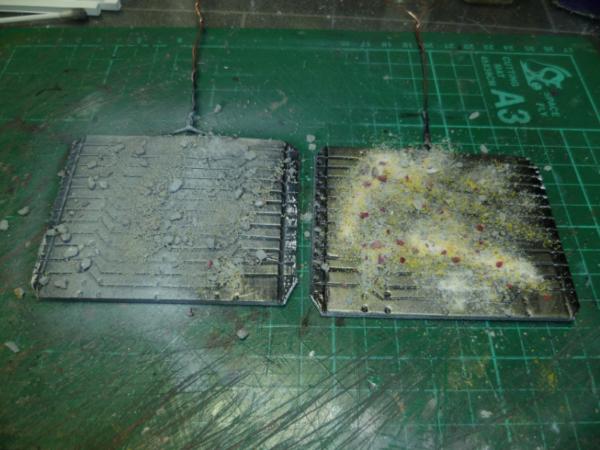
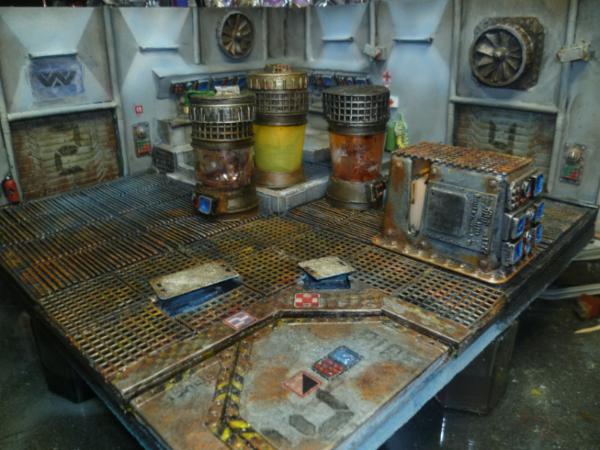
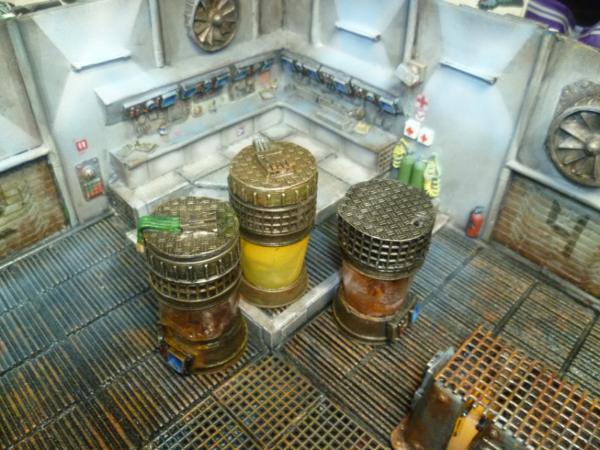
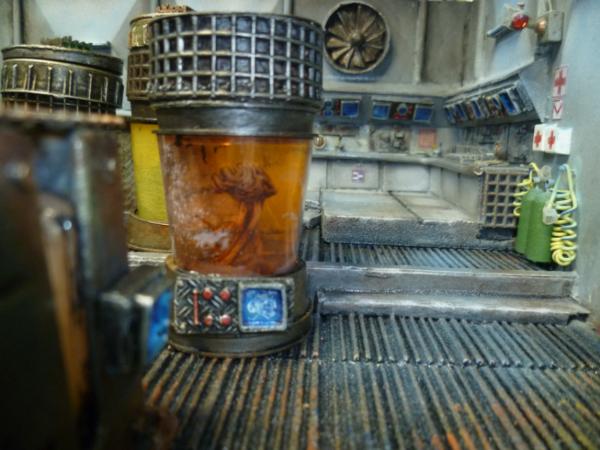
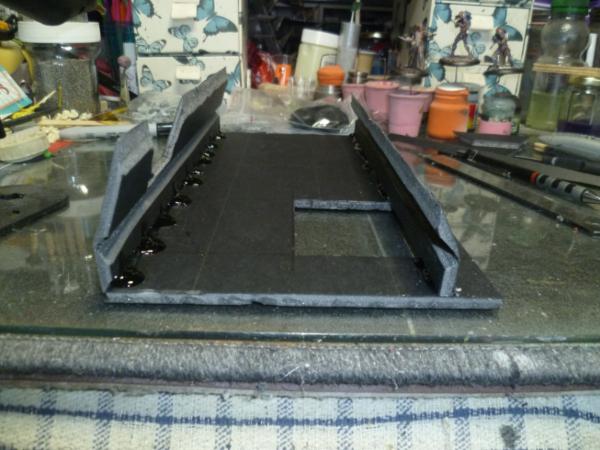
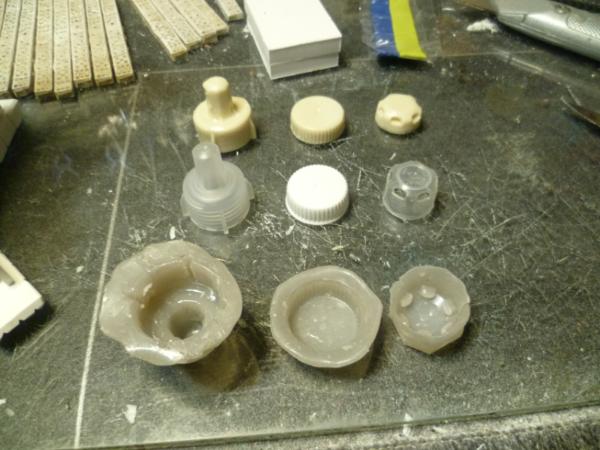
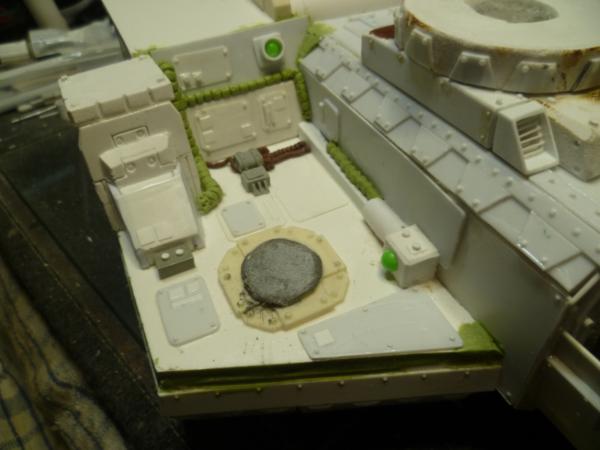
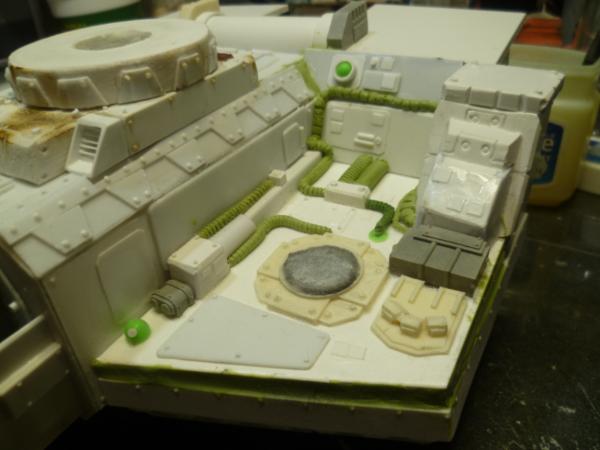
And started to mess about with containment....
Something like this, still very WIP
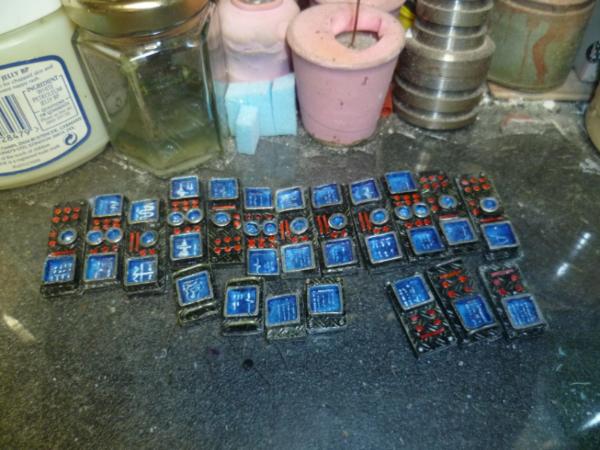
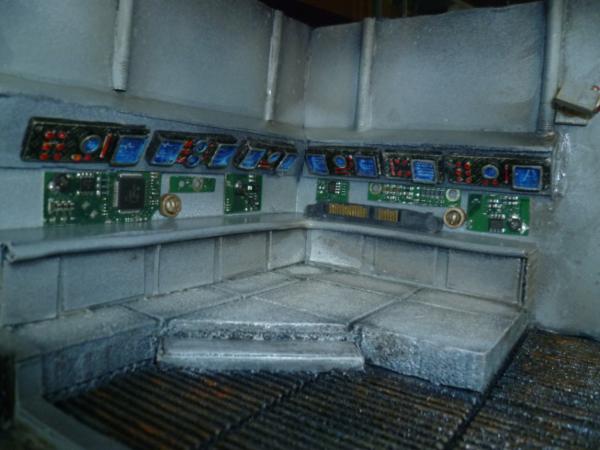
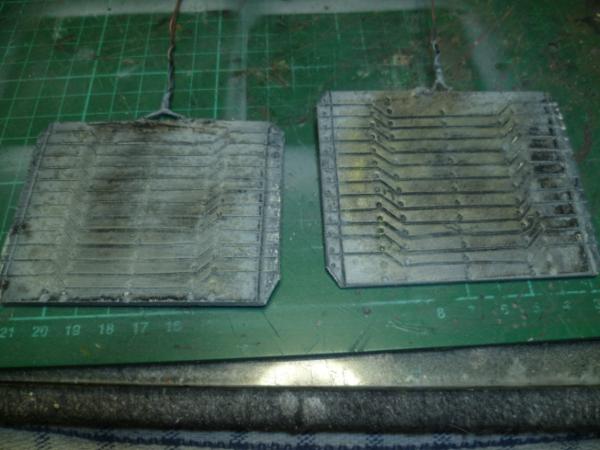
And put final coat on the buttons just little tiny white highlight strip to add on the control panels...
Hopefully get a bit more done this week. Thanks for looking in, really appreciate the feedback everyone.
i´ve used nail polish for sealing decals on lego items...its a really sturdy seal...i bet you can create lots of effects with these then when you already mention the fast curing time of these...
i often mention stuff that is probably WIP and should put my feet into my mouth^^
the numbering and the other lettering looks very cool!
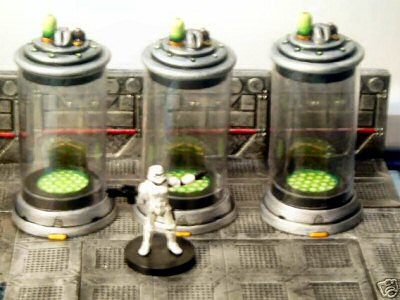
the containment unit...could you do a comparison shot? looks currently a bit short? compared to a standiing figure i think it should be taller than the average person...
Come on, we know we'll see that nail polish tested out somewhere .
Love the added color, the grimdark of the future is less grim and can't be too dark with all the glow from those panels.
Yorkright wrote: Room is coming along nicely, hazard stripes look much better. Specimen containers look very cool, perhaps they should contain some grot specimens.
Most dangerous species know to the IoM? .
A genestealer head with spine attached would be pretty cool IoM - if you plan on filling them, that is.
Would like to have a clear resin, but going to have to see how it goes.
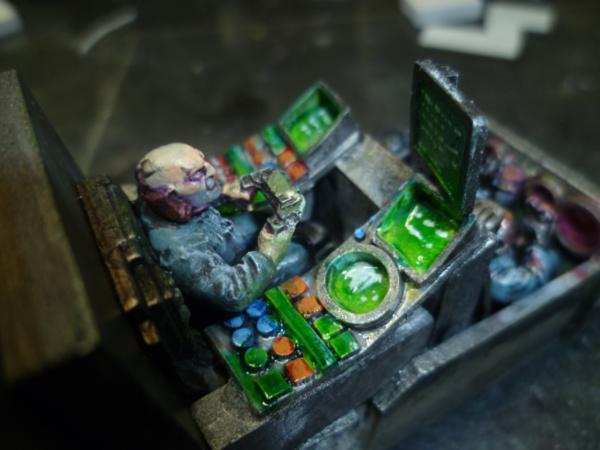
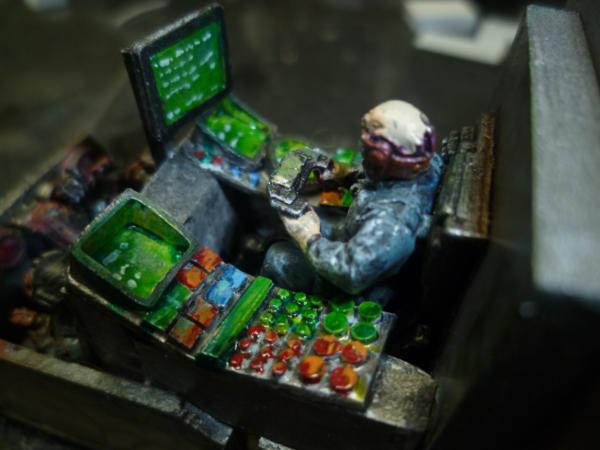
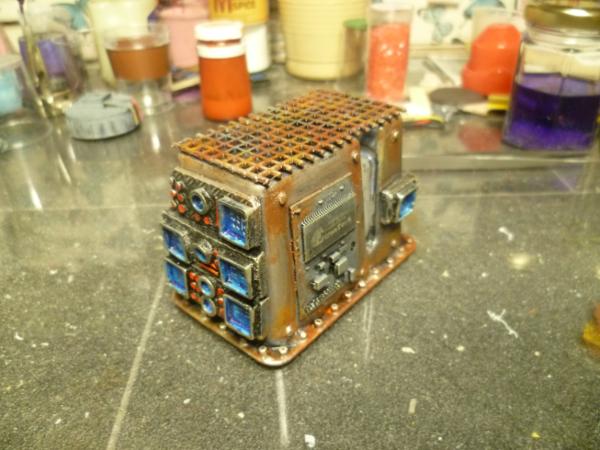
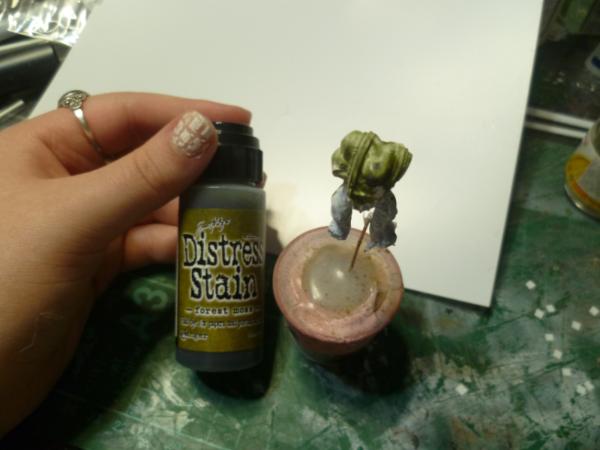
Bit of progress....
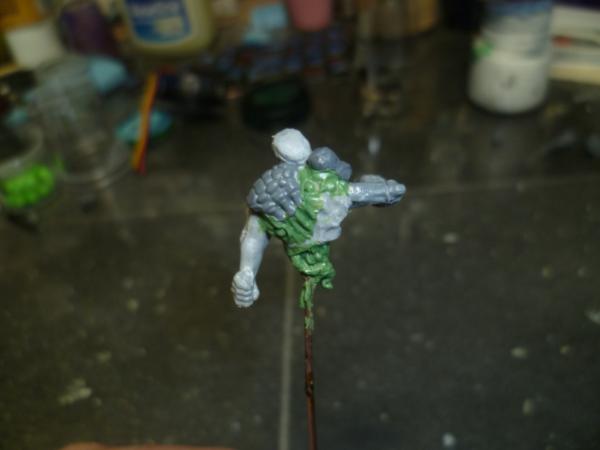
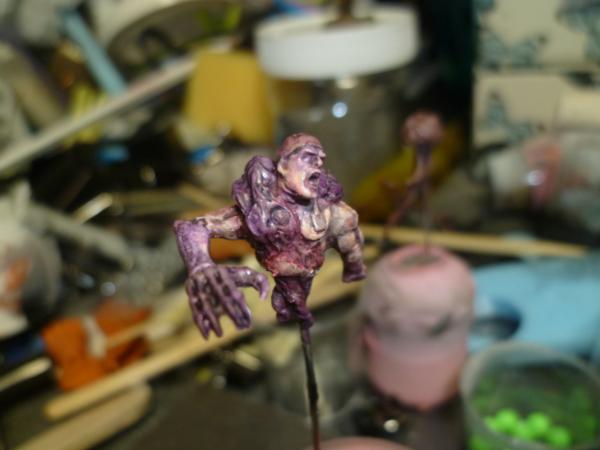
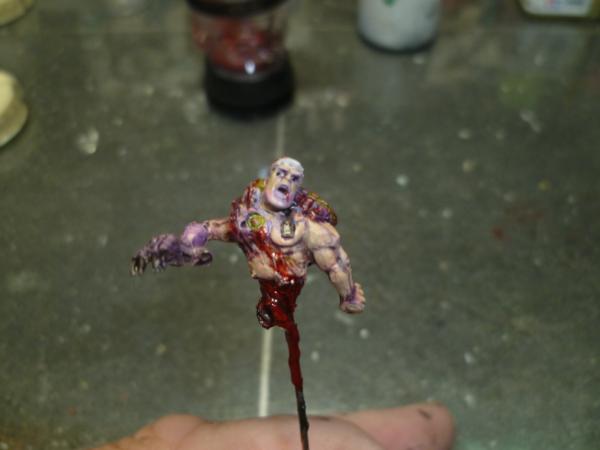
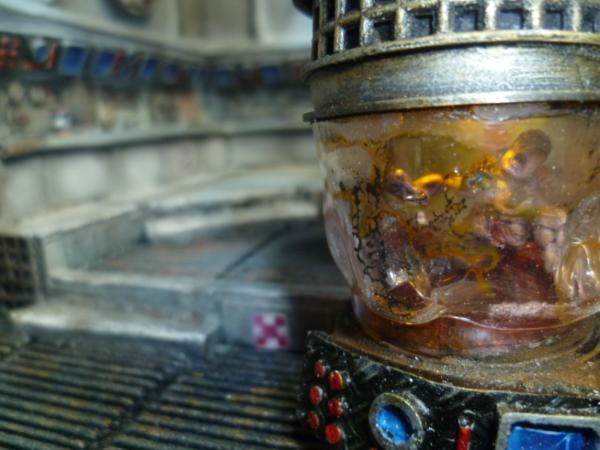
Started the layering on the Victim specimen...
And some layers on the other bits...
This one has layers of that nail polish, blue/green, and then yellow, like the effect at the moment.
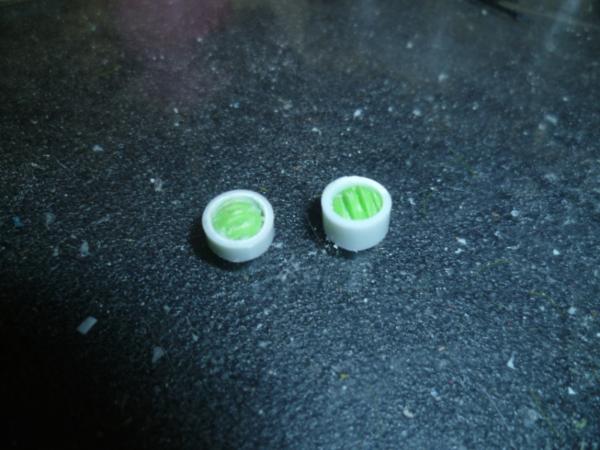
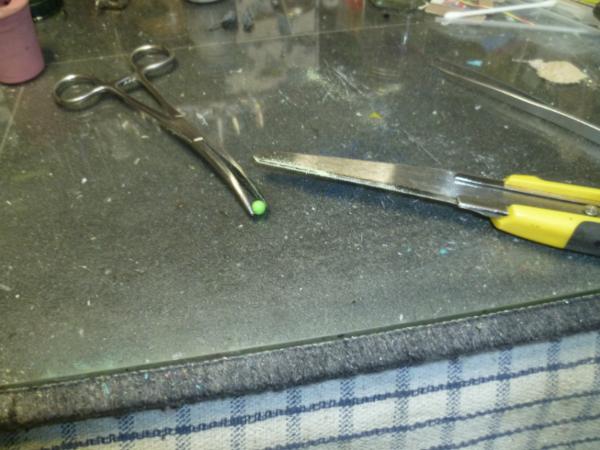
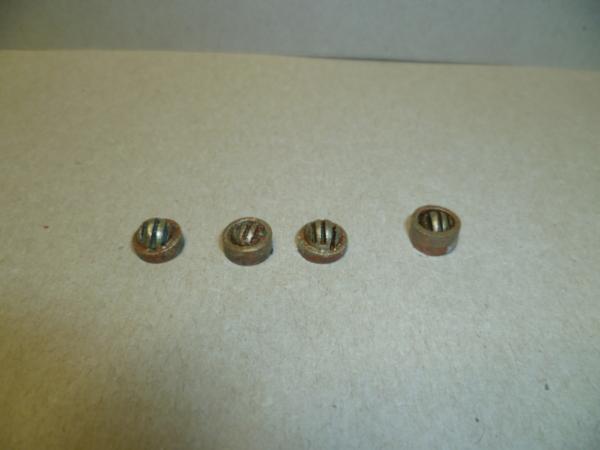
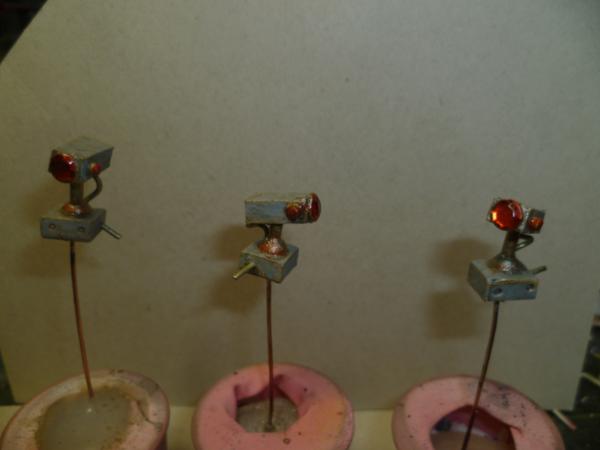
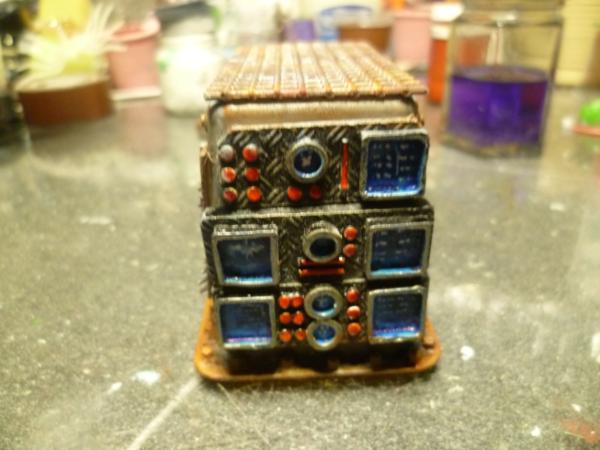
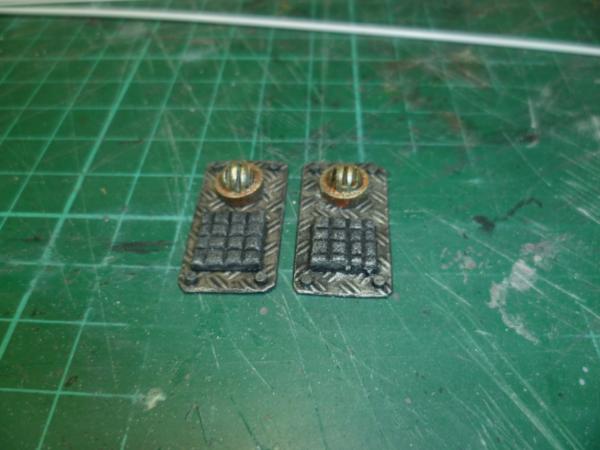
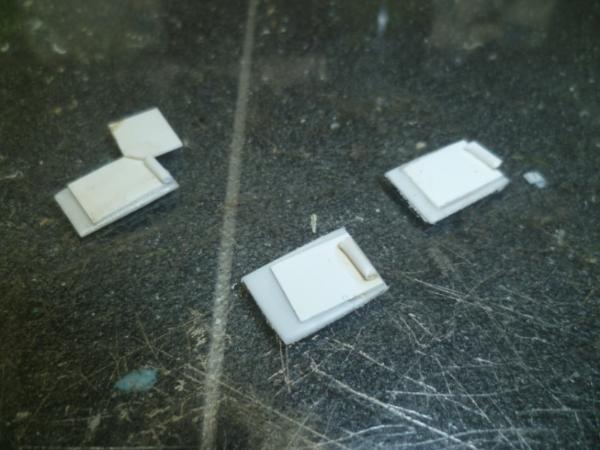
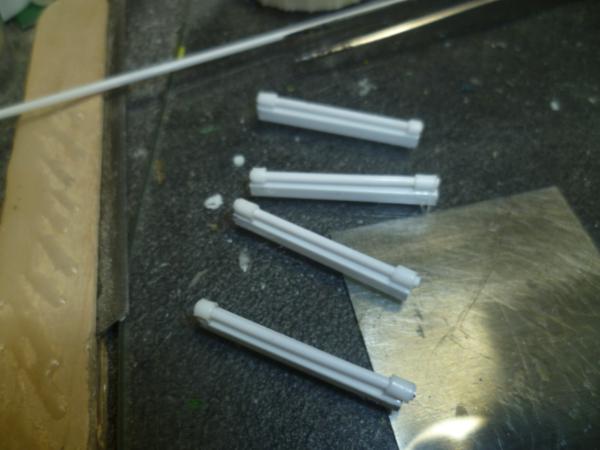
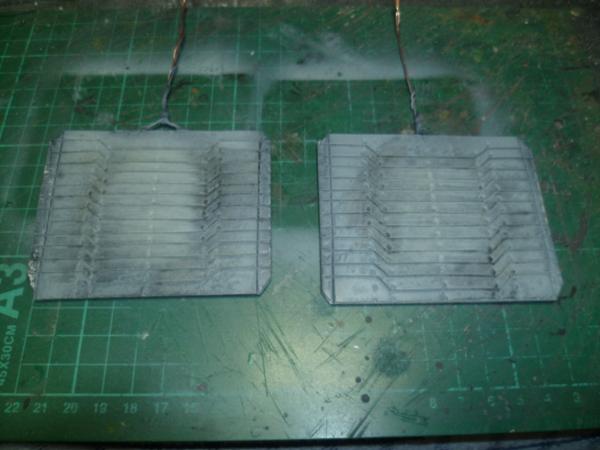
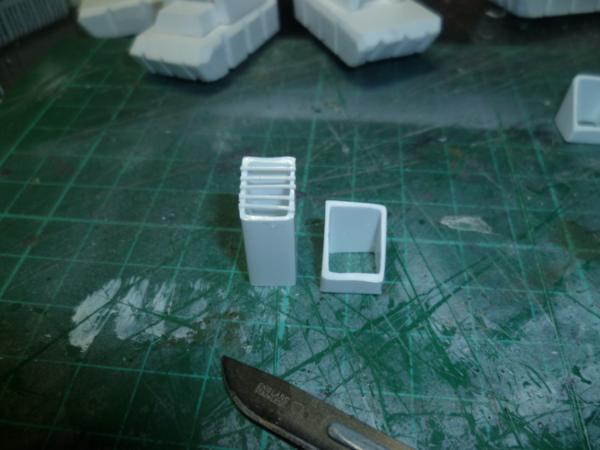
Did some more speakers...
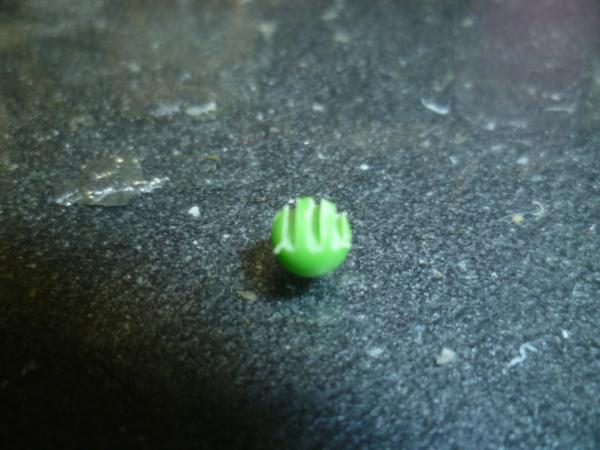
Take a 6mm BB and put some cuts in.
Place in a bit of styrene tube with ID 6mm. and paint.
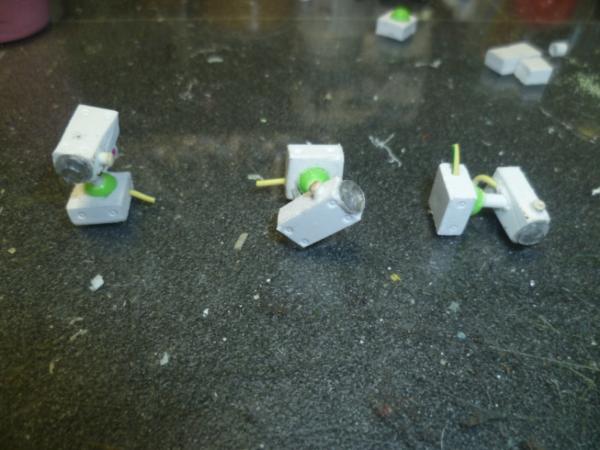
Also did some other bits to add a bit of flavour.
Added a bit of paint...
And some nail polish , got to be a bit tidier with this stuff, using the brush that comes in the pot at mo, going to have to dedicate a brush and wash it properly.
Thanks for looking, all comments and critique welcome.
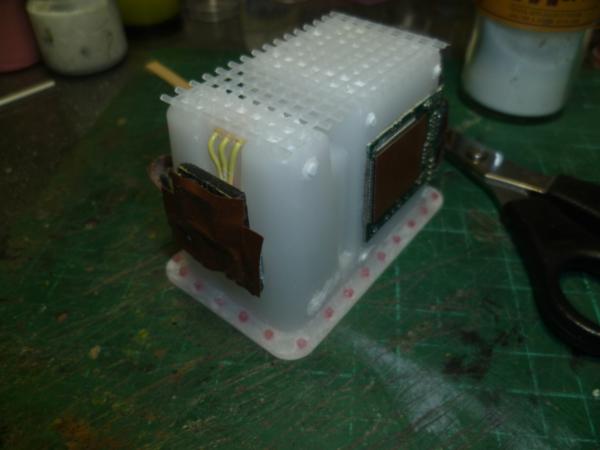
Great work as always, Cam! I love that center console/island you've built- I've been saving those printer cartridge packaging things for years now (I must have ten or so taking up space). You've put them to very good use and given me some ideas.
I'm already ripping off- I mean, creatively adapting- how you put together the computer screens- I need one in the Athena for the weapons console and your are good looking and I can suss out (some) of how you did them.
Thanks everyone, really appreciate the feedback, keeps me going.
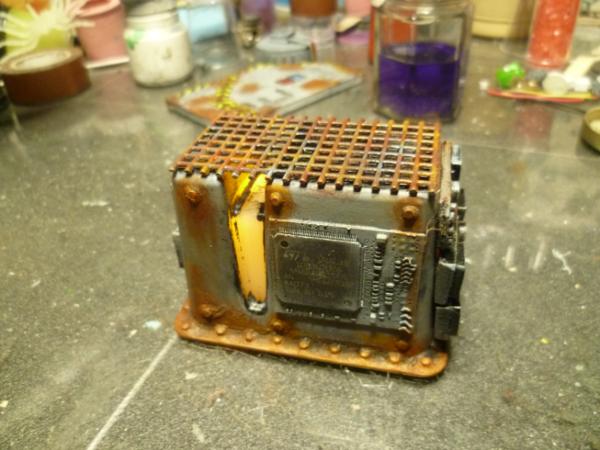
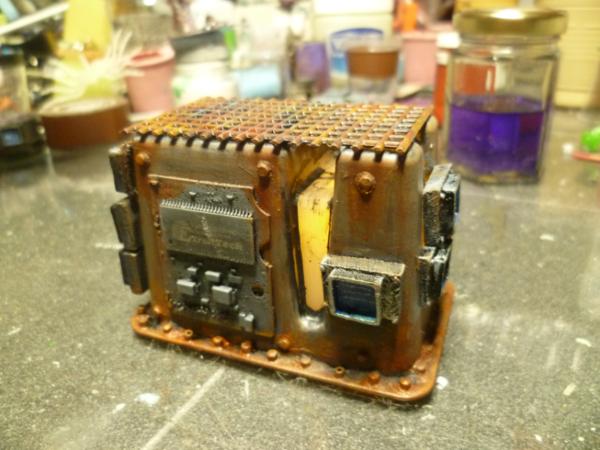
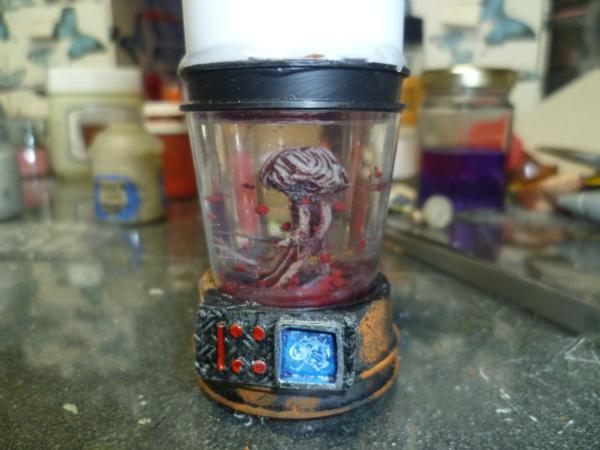
Little update...
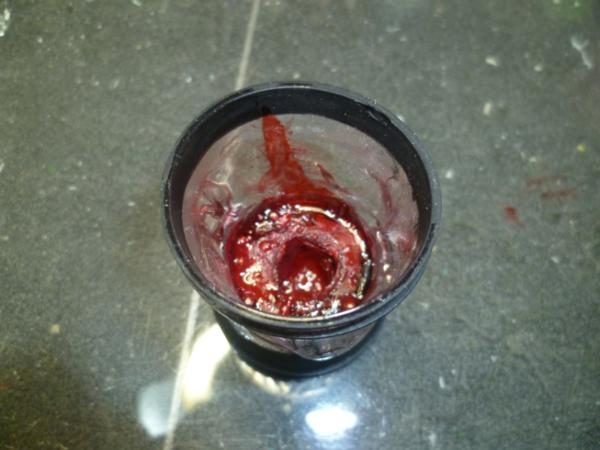
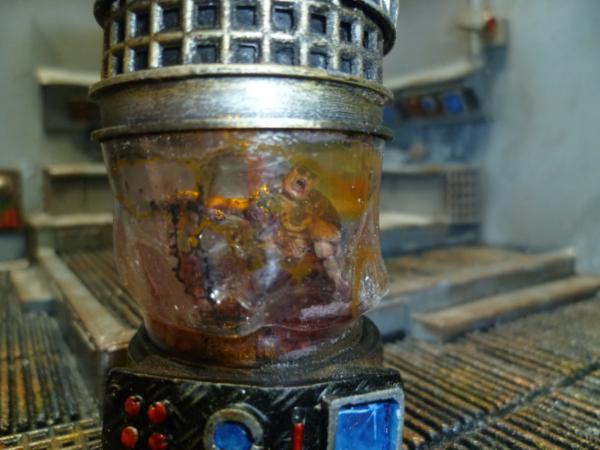
Brain in a jar!
Actually filled with coconut oil and a few drops of red calligraphy ink, pleased with the effect, waiting to see if it will melt through my desk given time.
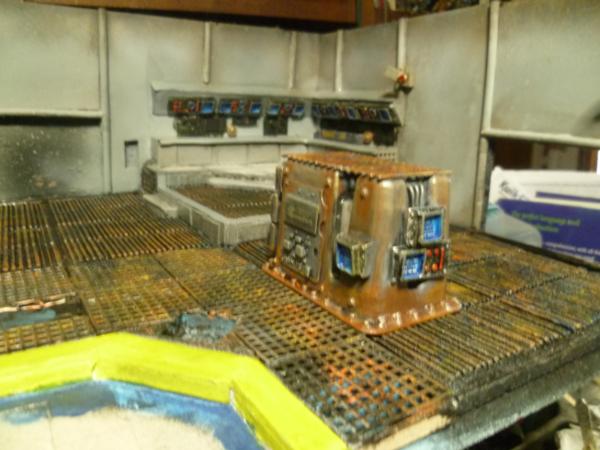
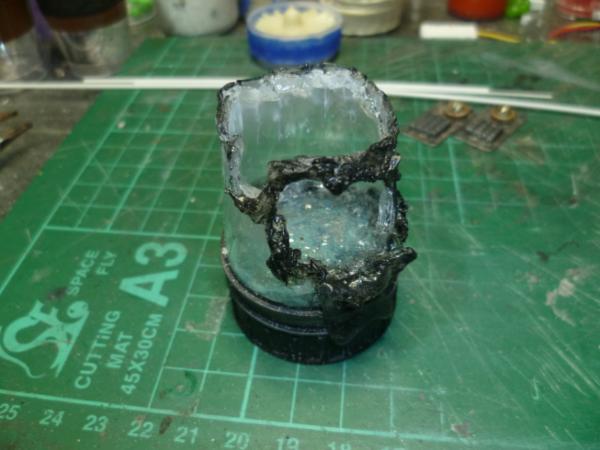
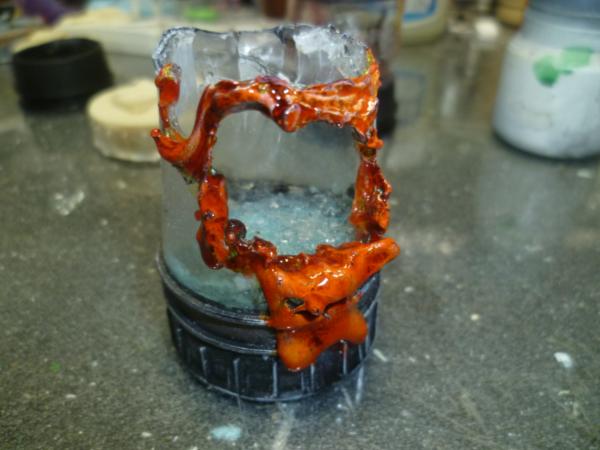
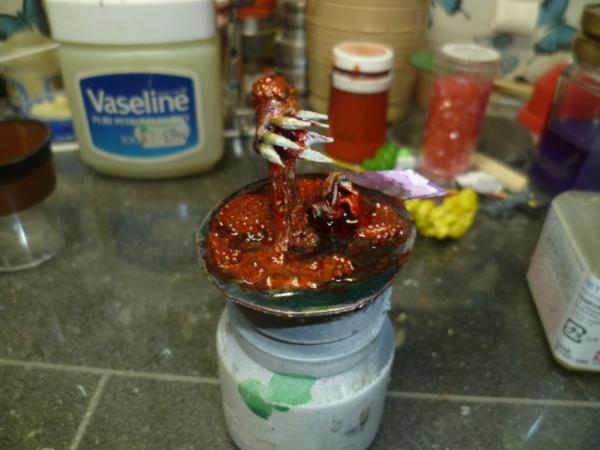
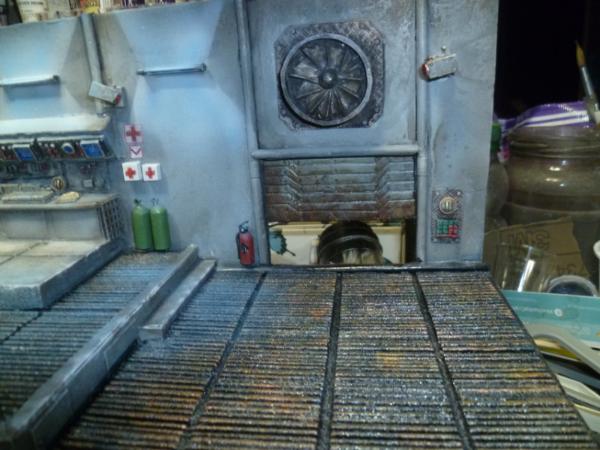
Very WIP broken containment...
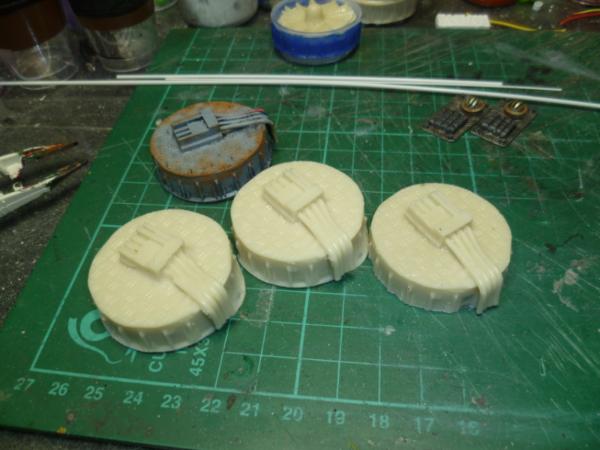
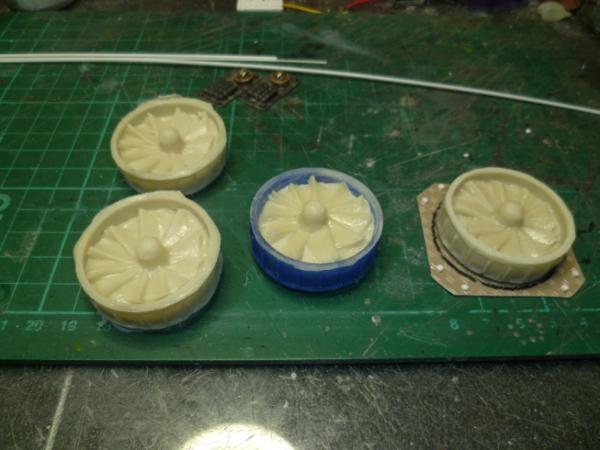
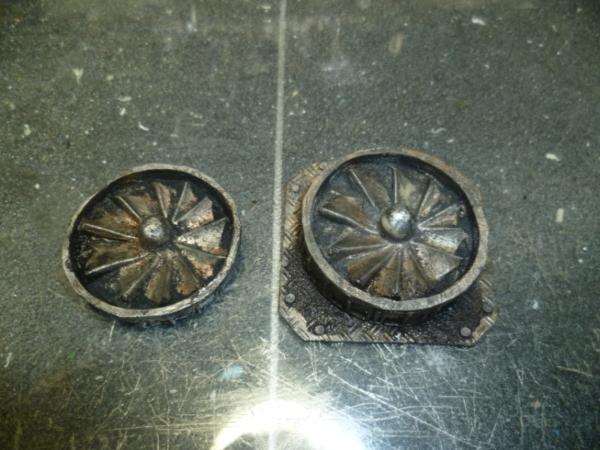
Needed multiple tops...
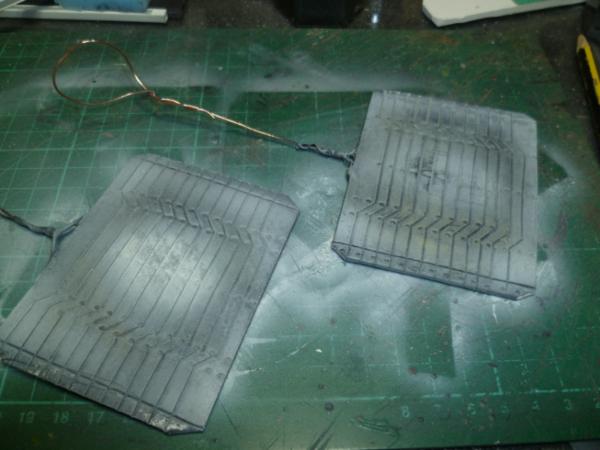
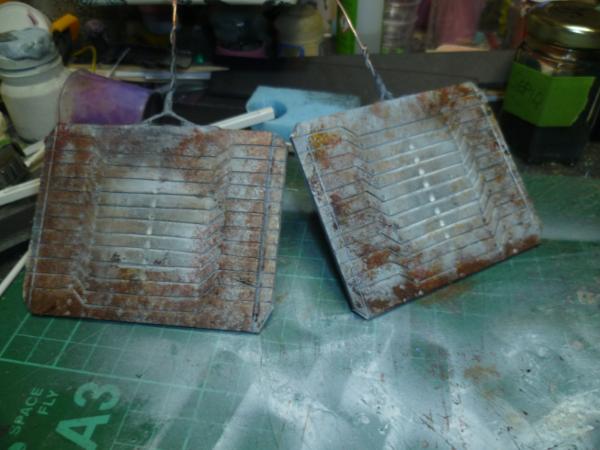
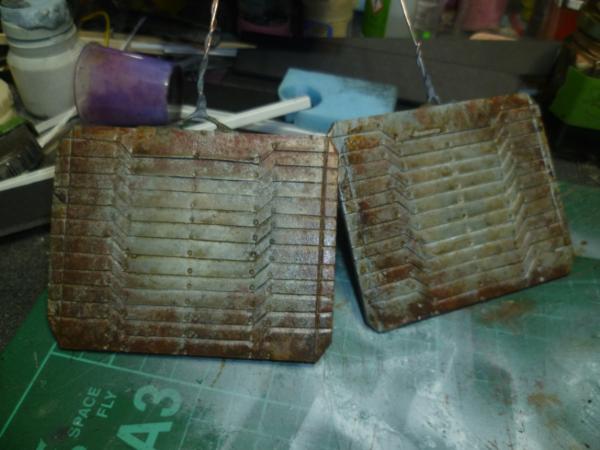
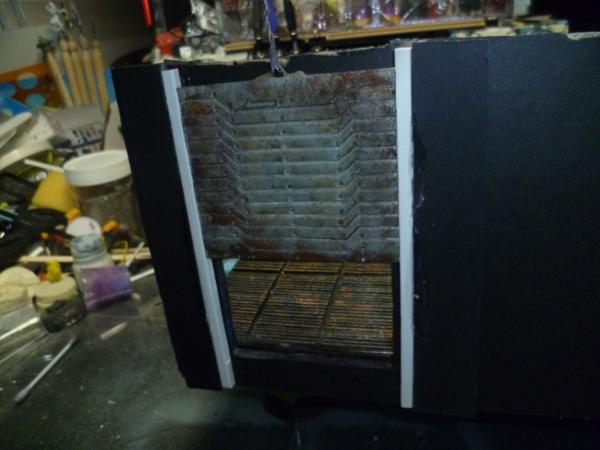
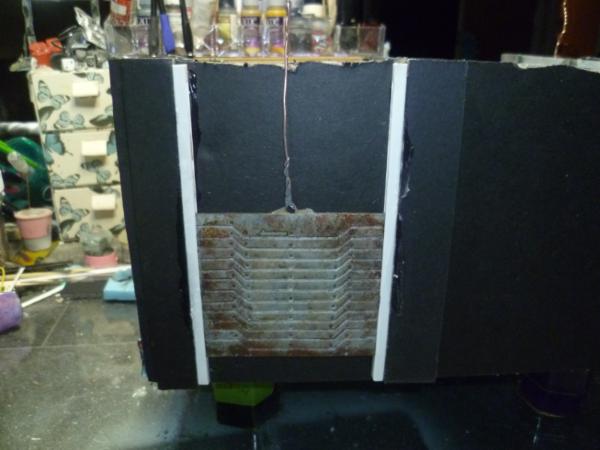
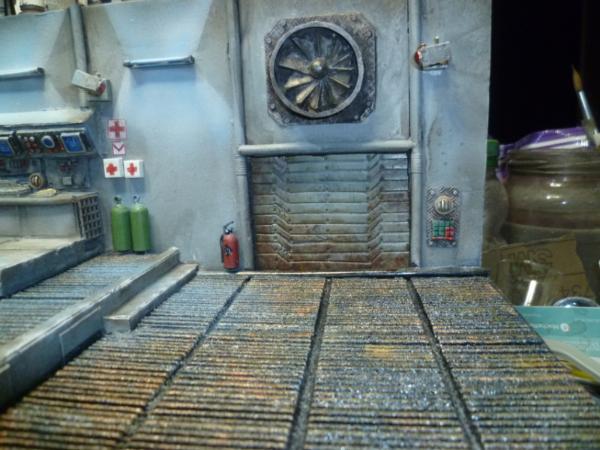
And needed a fan or two for the walls...
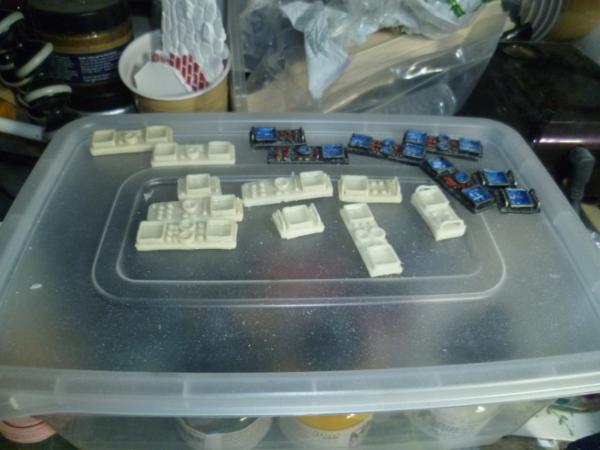
Spare resin made some more control panels...
And needed something to control the door locks etc...
More to come soon, thank you for looking, and your C&C are most welcome, thank you so much for your support.
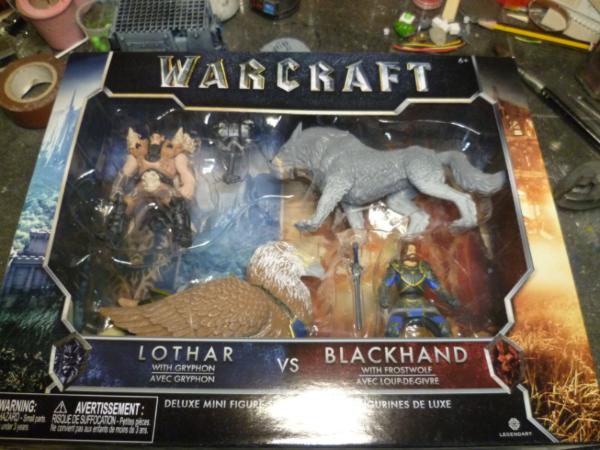
Lothar, but no Hand People? Shame, shame. (And wondering who'll get the reference...)
Use mineral oil instead of coconut oil in the future. It won't go rancid.
Progressing well. Keep at it.
Automatically Appended Next Post: Oh, nail polish... look into water based enamel paints to get a similar effect.... also, simply applying a few coats of glazing compound to regular paints can work too. Save the nail polish, and its terrible odor, for nails. (For the record, not a fan of black nail polish. Red, OTOH... )
Not sure of the reference. I used this oil as an experiment, will see how it lasts. As to the nail polish I get what you are saying, however this is cheap compared to the water based alternatives, and also due to being solvent based is giving me some very interesting effects. Thank you so much for the comments, think I will look into the water based stuff.
As you built this I was thinking "Wow how awesome is this project", but then you had to go and make it better. Fans, containment units, broken containment units with blood and broken glass. You should be designing and building movie sets for a living Cam, really wonderful stuff.
gosh....you´re so damn productive! and you make it look like as if casting is soooo easy....
by the way.... got a heat gun recently for fathers day... with all bits that come with it... (you know why i mention this here...because you showed it first how this tool could be useful for hobby...^^)
the molten containment unit looks very convincing!...
small idea drop....i think when you experiment with casting...you should find a shape/ built where later on you could put a tealight inside...that´d be a killer of a cool thing...
@ WP, Good to hear. @Theo, Thanks bud much appreciated.
@ Yorkright, Thank you, I wish, but quite happy to pootle along as an amateur.
@ Vik, Thanks sir, really appreciate the comment, good idea with the tealight idea, might just do that.
@ Dave, Thanks, cast my own, several items now. The fans were a quick negative sculpt in some plastacine, and pour some resin on it, then slightly refined, still a bit rough, but good enough for my bodge work.
Thank you all so much.
First, I am very proud to ask you to have a look at a new blog, not mine, but my daughters, she will probably be slow in updating, and she will do a variety of stuff, but I think well worth a look, and she can do with all the encouragement she can get.
https://www.dakkadakka.com/dakkaforum/posts/list/727867.page
gotta ask...will you add grid plates for the two open spaces later on as a decoration?
everything looks really cool... tho now a tiny bit crowded...i think it´s inevitable to build the next corner of the room
also...was wondering when you´d advertise for your daughter^^
to all the others...really worth a look
those grates look great. though scratch building them would start grating on my patience.
I saw what you did there Desubot !,,
Lovely work mate, even better for its "scratch" nature, makes me think I should Re start work on my space hulk boards.
I'm a fan of the Tamiya clear acrylics, but you seem happy enough with the nail polish.
Keep going mate, it's only any good if it's finished !
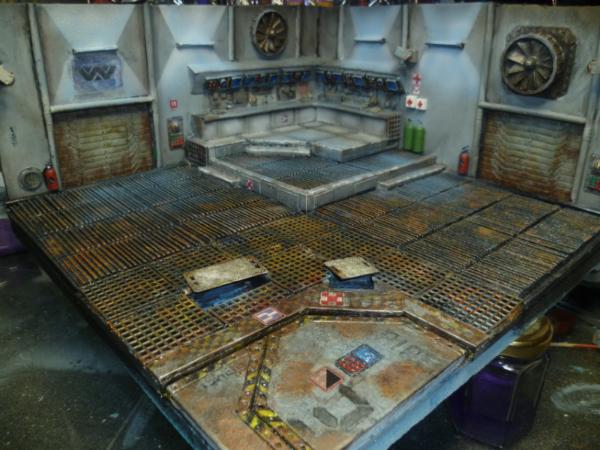
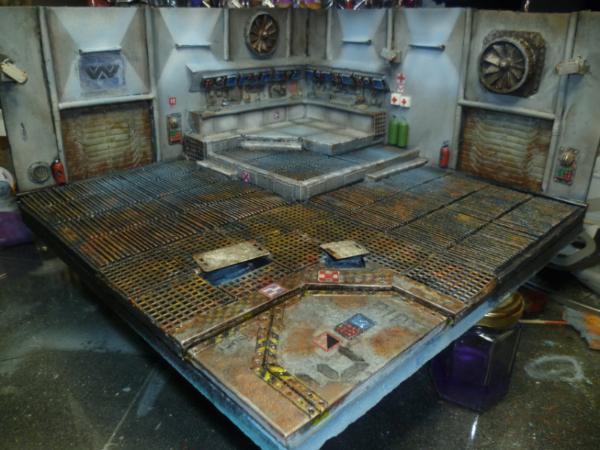
That's really impressive Cam. I like the fact that that in that big expanse of space, there are elements that draw your attention in the fore-, mid- and back-ground. My eyes keep moving around from one area to another... even that little bit in the front is interesting because it's different from the rest. Nicely done.
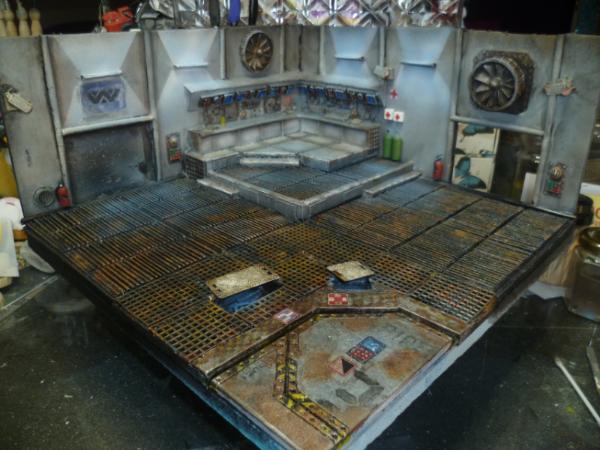
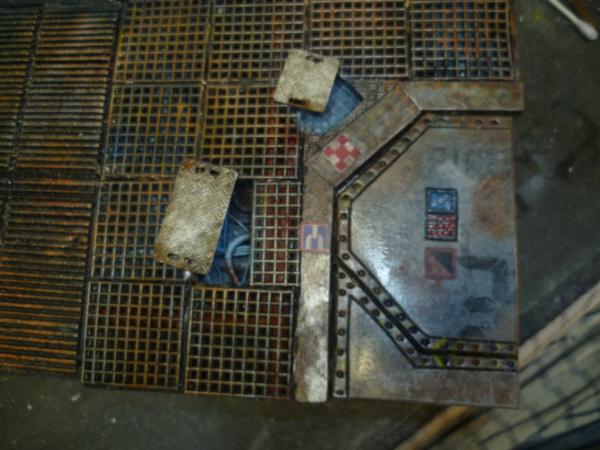
@ Vik, there will eventually be at least 3 more tiles, this one is 12 " sq. There will be loose covers for the 2 pits.
@ Big H, well your work inspires pieces like this. I like the Tamiya clears too, but they are more expensive and I am really only trying some experiments with the np, to see if it is viable. So far has promise.
@ Gits, thank you sir.
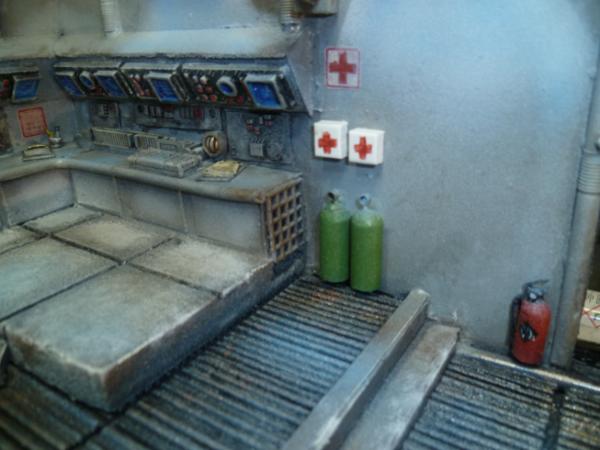
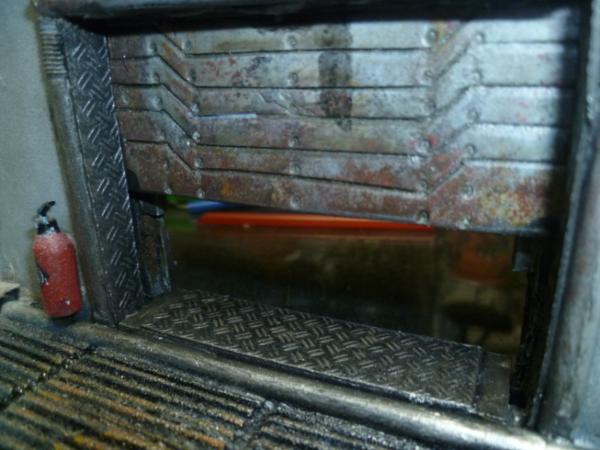
I can't tell if its attention to detail or just making sure your minis are safe that prompted you to make fire extinguishers. But this is 40k, needs more weirdness in their fire suppressant technology. Like a creepy cyber cherub that descends from the ceiling and vomits CO2 while speakers blare the prayer of fire death.
Ah ha, I know where those signs/symbols came from. I lifted a set from some Alien fan website to use on models.
Great work. It's coming alive all the time.
Red Harvest wrote:... (For the record, not a fan of black nail polish. Red, OTOH... )
What's wrong with black nail polish. I loved the confused looks and double-takes I got while wearing it (considering the rest of me was generally "normal" looking). It also reduced the amount of nail biting I did and gave me the longest finger nails I've ever had (could even be used to scratch with).
I even got hold of a white nail polish that had a nozzle in the lid and started painting patterns on my nails, from stripes to checks and all manner of things. They got even better looks.
Notepads, fire extuinguishers... Will the madness ever end? All kidding aside, I love all the detailing you're adding, it's always the little things that keep you looking at a beautiful piece. Still needs a spilled coffee cup somewhere as well IMO!
@ WP, Thanks bud, well yes you could be on to something with the cherubs, LOL @ DrH, Signs are thanks to a link from Red, as to your nail polish activity, possibly tmi, but hey what ever floats your boat bud! (can't say nothing, my daughter regularly catches me.)
@ Shas, That's the point! LOL @ EDC, Thank you sir, much appreciated.
@ CK, well you should now by now this is madness. Got cup stains, see below, and in the process of making some doughnuts.
@ Graven, Thanks matey, going to do more notices.
So bit of progress...
Covers for the open holes.
Coffee stains..
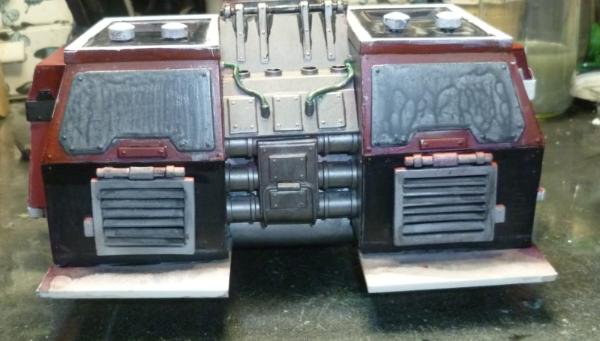
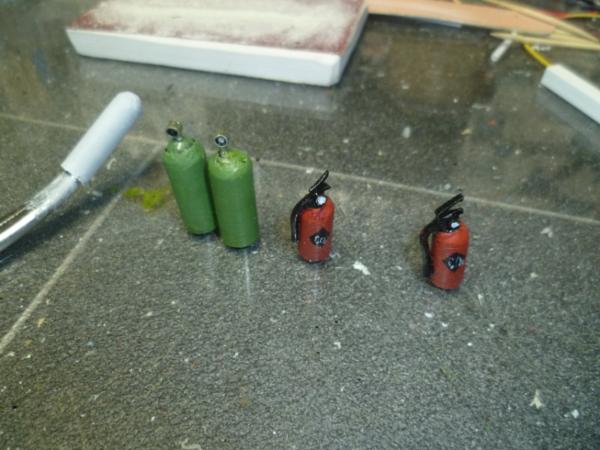
Painted the tanks...
Stuff going in...
Hey cam, do you possibly use Pinterest? I have collected a nice big chunk of the internet there already with everything I feel concerns my hobby interest...and lately some really cool and even some more on the funny side of warning signs...just saying....if you're interested I could send you a link...
Fire extinguisher are amazingly detailed, what are the green canister supposed to contain?
Coffey stains.... what will you think of next, you detail loving manic
You had to up the ante with the stains now, didn't you? Oh, and I agree on the madness part. For me modelling is about taking my insanity so far I come back out on the normal side
A real scientist would cover the coffee stain with his clipboard.....just saying....although their might be an older coffee stain under where you have the clipboard.
Oh mate, that is quality, if you ever decide to cast up fire extinguishers, note pads and all the other details give me a shout, I'll have a pack off you ! ☺
@ Archer Thanks bud, no need for that.
@ Vik, occasionally come across pinterest, but don't use it as such. Thanks for the comments.
@ CK, I just keep it in the zone bud, mad zone.
@ Theo, LOL, thanks bud.
@ Big H, could sort something out maybe, thanks bud.
@ Josh Thanks it is quite robust though.
@ Ruglud, LOL thanks bud.
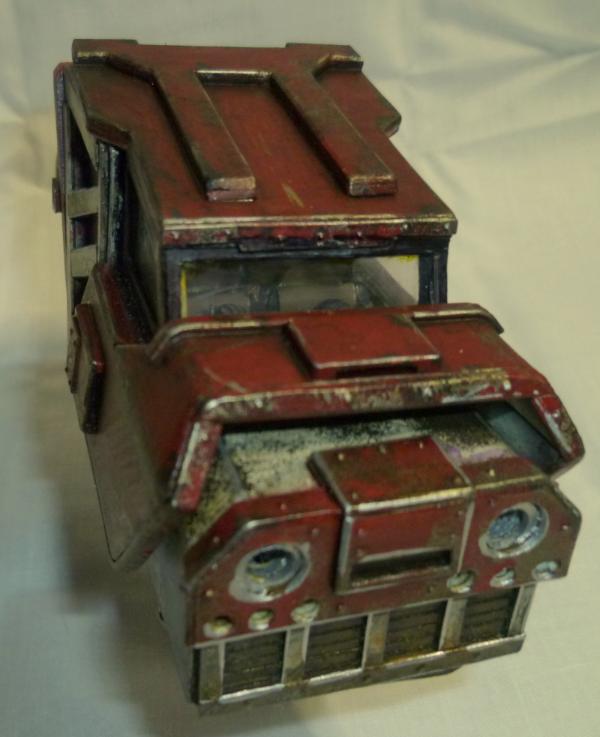
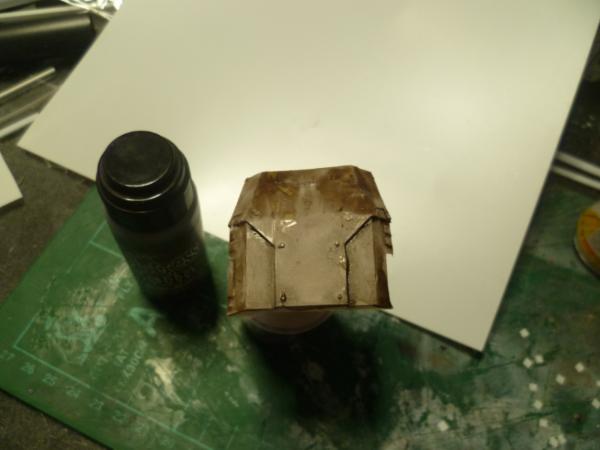
So here we go, still not finished, but....
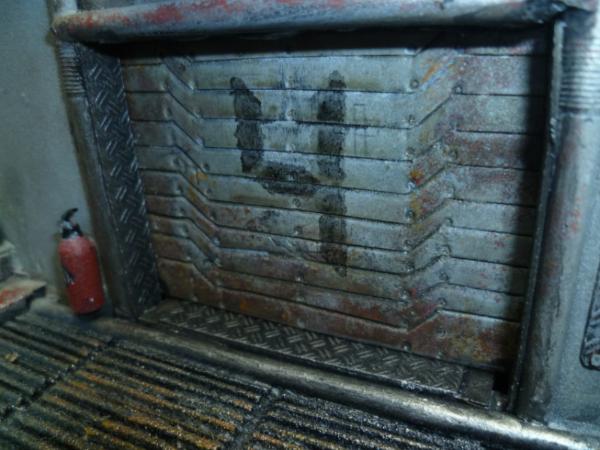
Doors...
Bit of quick "sculpting"... Cut some box section to form runners.
Primer black then couple metallics thrown on.
Bit of salty work, probably a waste of time but hey... put a coat of grey over it...
After salt brushed off.
Grey
White.
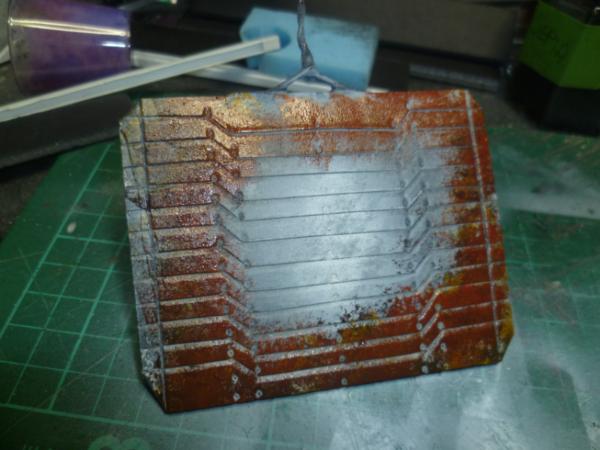
Sponged on rust...deep brown, then red, then orange and back and forward to build up layers.
Ragged over with thinners.
hen a sponge coat of grey...
Then a coat of Sepia wash..
Started to put in place...
And from the room...
So operational sliding doors..
Starting to look like something now...
Oh yeah.....doughnuts...
Thank you so much for looking and your comments really spur me on.
@ Ruglud. Awesome thanks.
@ Gits, probably half of it is a waste of time, but I feel it builds up the layers to give me the result.
@ Yorkright, some are attached honest.
@ CK, Thanks bud.
Progress, getting there.
And @ Vik, you asked what the green tanks are for....
Hope you like, C&C welcome and encouraged, thanks for looking in.
Seconded, except for the Sergeant Pepper part. I'd say it was his "Born to Run". But that's just me. We all have our favorites. Makes life more interesting, the variety.
The signage is good. You're not going to hide a killer rabbit under one of those floor grates, are you?
Those Oxygen(?) tanks and fire extinguishers are very effective details.
@ Dave, Thank you sir, means a great deal coming from guys like you and Red.
@ Red no rabbit's but now you have given me an idea!
@ Grimdork, Thanks bud really appreciate the comment.
@ Alaricuk, Thanks sir.
@ b-tone, Wait til its finished, what do you mean, it is finished......JK Thank you, very much appreciate the comments, still got a few bits but it is getting there.
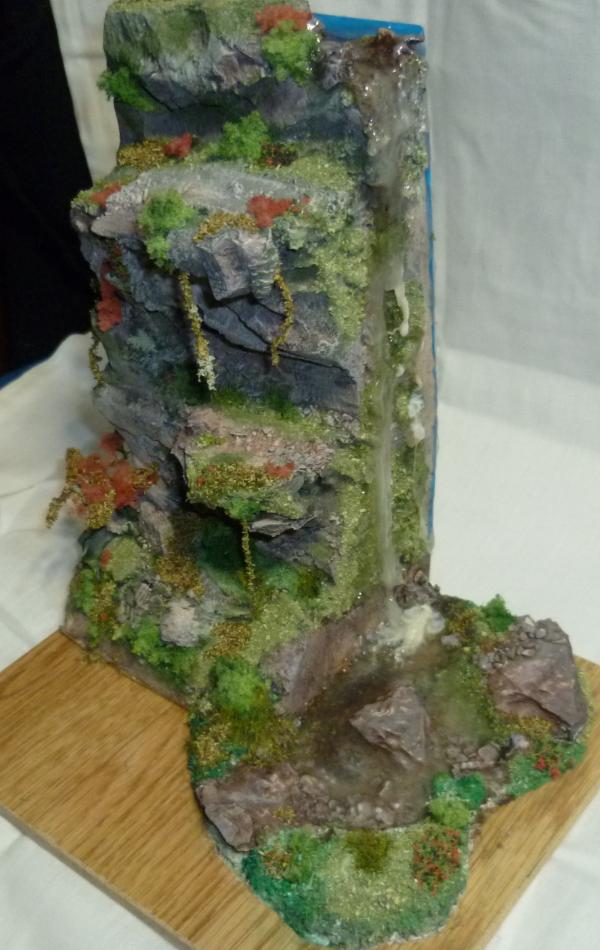
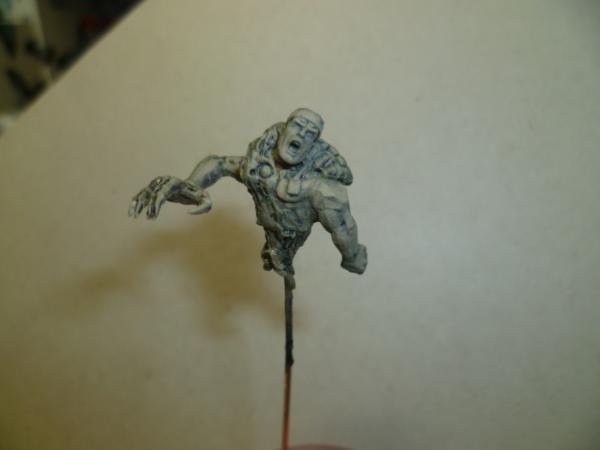
OK took a break for the day to do something a bit different, but I guess not a million miles away...
These are WIP shots, lots to do on them still, but wanted to do something different, going back to finish up the scene.
I think I am 80% certain I will not be entering this as an entry to the LoER comp. Not sure whether to enter the Ork Distillary, can't decide.
Anyways thank you so much for the feedback and thank you for just looking in, really helps me, and boosts me.
hey cam...excellent work there bud...(a fill in that could be used for ANY update you chuck out!) the oxygen canisters are super! especially since you got the tubes in that neat way! those curls have something mighty satisfying... what did you use to make the see through gas masks from? good be superglue crystals...?
working doors...hell yeah!
as for alien and the predators...well...looking forward to more detail work on the hunters...i always had a soft spot for these two sci fi sagas...could you get some neon green to make one bleeding?^^ and don´t forget some laser tracking beams...you know you want to make them^^
@ Gits, EDC and Graven and Cleatus and DrH. Thanks guys really means a lot coming from you all, you are such inspirational peeps boosts me no end to have you coming here.
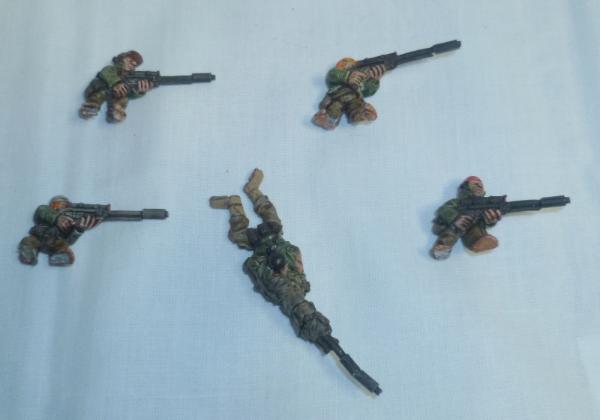
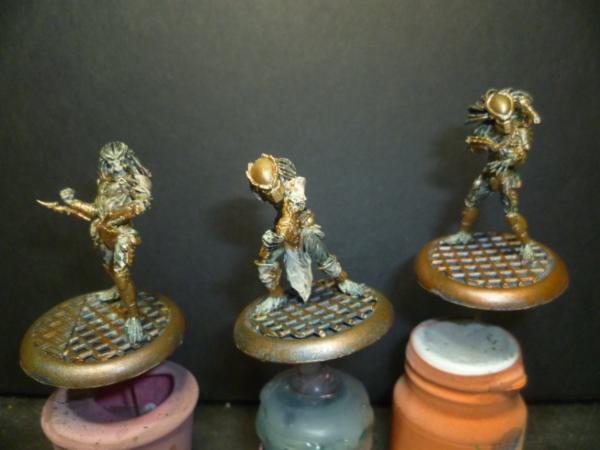
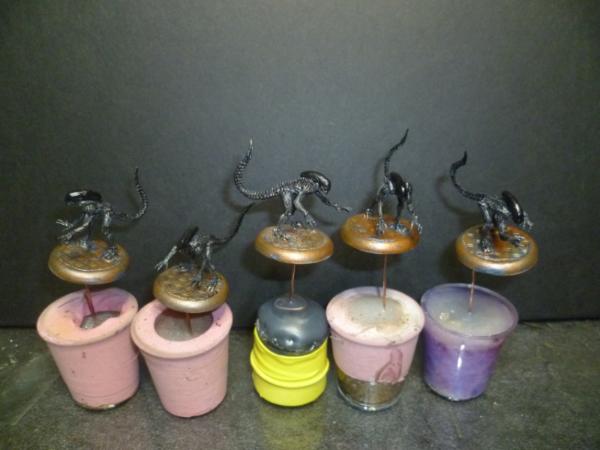
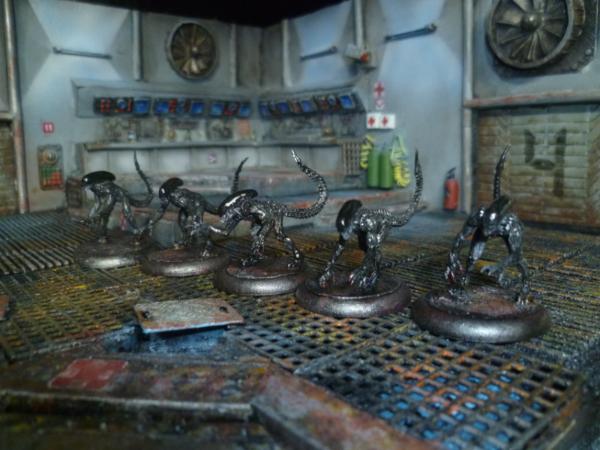
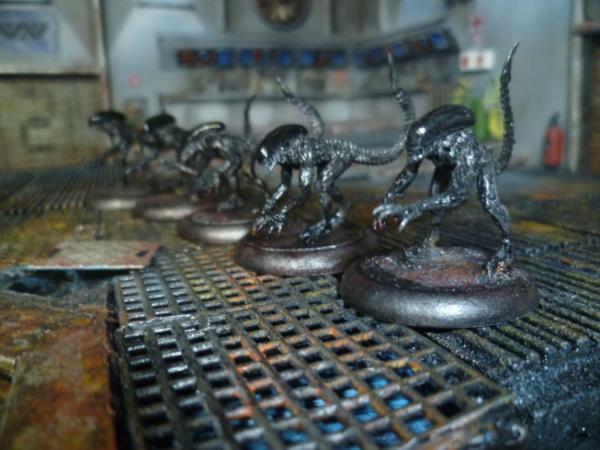
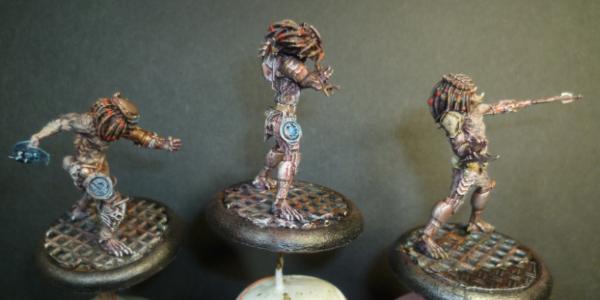
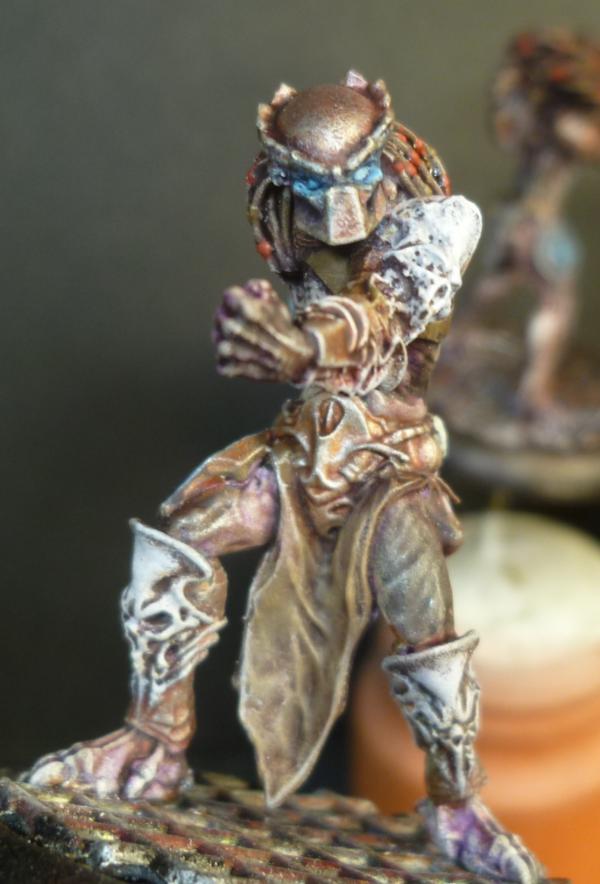
@ Vik, thank you sir, gas mask are from a clear plastic tube heated the end and inserted tweezers to shape in to mask shape. And as to AVP see below, still very WIP but getting there, lot of clean up top do once I see them up close on screen.
These guys are supposed to be stalkers or baby aliens, they arte very close to done, not a lot you can do with them.
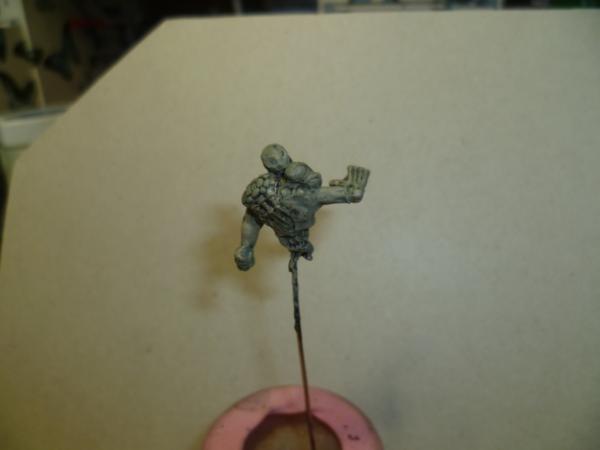
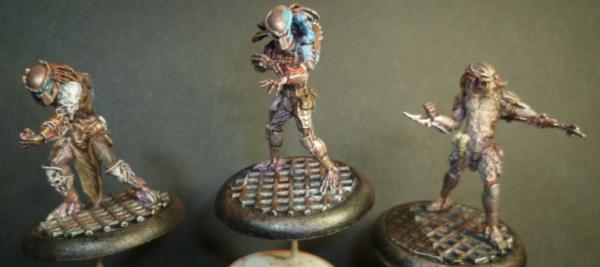
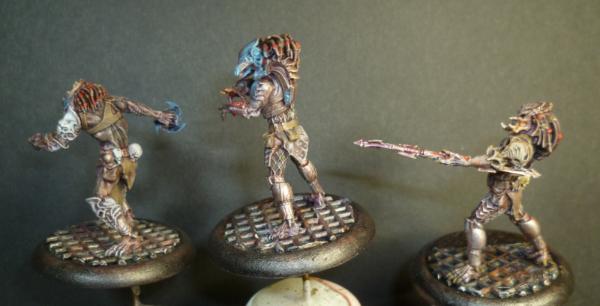
Then there are these guys, still lots to do on these.
Thanks for stopping by, and please feel free to comment etc.
Those alien babies fit right into the lab, but I have to say your predators are great. You really captured the feel of them, and your osl is perfect sometimes I think people go a bit overboard but this looks the way it did in the movie.
Love how this build is going Cam! You've got me convinced to try OSL myself on my current project. Fantastic imagination- and the detail! Right down to the half-eaten donut by the coffee cup- right out of the second movie....
@ Graven, That's what I like to see. Please pick away. And thank you.
@ Vik, Thanks bud, and yes there will be more walls and rooms and corridors. Oh and I know I am a bit old school at times, but tar as an adhesive is no good at all, Unless you are laying down some grit on a battle field. Or doing a lava effect. MMM have to have a think on this!
@ Cleatus, Thanks bud, it's just hotglue, it's actually still hot at this point so its clear.
@ Tom, Thank you sir, and drop me a PM with your address and I will happily send you some.
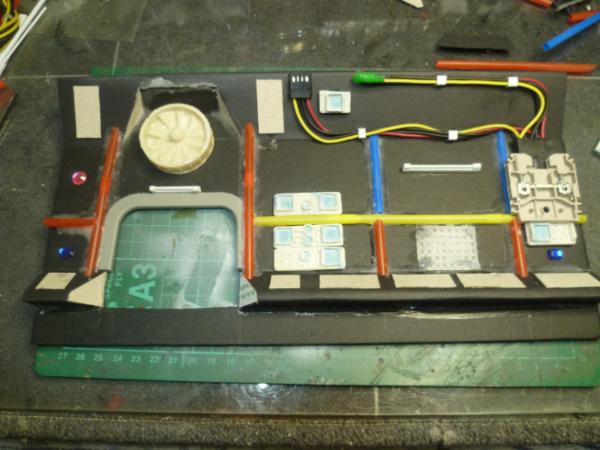
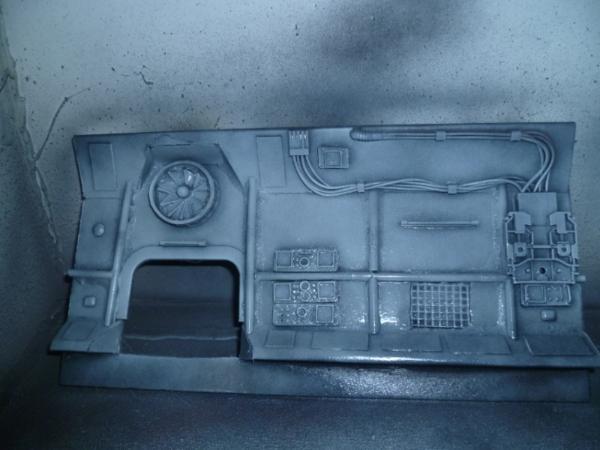
OK added some detail...
And a very fresh coat of primer...
Now going off to look at that OSL edging/ feathering in.
C&C welcome and indeed encouraged, thanks for looking.
eventually you know deep down...you have to cast these walls...right?... with these walls i bet you could raise some money...honestly...FW does stuff like that and i think yours has more character to it...
by the way... nice use of computer parts there... the cables...
Maybe Vik, and this is more of a skin for the outside of the other tile, as you will see below. It will allow another room or a corridor to be added to the battlefield, constant expansion is possible.
OK quick update before my beloved daughter steals my computer to watch Anime, considering she has her own it's a bit much.
Still WIP, got the detailing to start yet.
My control panels are not perfect, but I am happy enough, if you are happy enough with what you see, PM me, I know Tom was interested.
Oh and for you Vik...
Well back laters, got to get some shots put together for the LoER comp.
Sooooooo good! and so inspirational! I love watching you work, the containment tanks are something I've been planning on re visiting since my first attempt years and years ago and seeing yours has made me want to do it now rather than later I bought two plastic containers of '100's and 1000's from the supermarket to use as my clear cylinders but I would love to add some lighting but i'm not sure how, if you'd be kind enough to help teach me? I have no experience with circuits and lights etc so be gentle
now back to gushing over your project! looking amazing! love the containers obviously and the murky yellow is spot on for the images from the movies (which I have watched every one again in the last couple weeks) Weyland Yutani Corp are bastards, I can't condone their experiments and ideas to harvest and evaluate these Xenomorph it's not right! but luckily we have some friendly Yautja (sic) to stem the tide! are they from the game?
Your treatment of the walls,floor and sliding doors (how cool are they!) is excellent, great vibe for a laboratory but it needs a smooth area with a plughole to wash any fluids down....
so when does chapter 2 take hold properly so I can watch you give man-birth to another awesome terrain!
Everything is looking great! I love the touch of the frosted donuts as well sitting near the coffee cup, and the corporate logo over the door to remind them who they worked for.. The predators and aliens also look spot on.
The next piece of wall is great. Do you have any plans to expand to a whole table or just see where it goes? Although I think you do need a "clean room" where everything is that insanely, creepy clean with white crisp walls so you know for a fact that's where the really nasty stuff goes down.
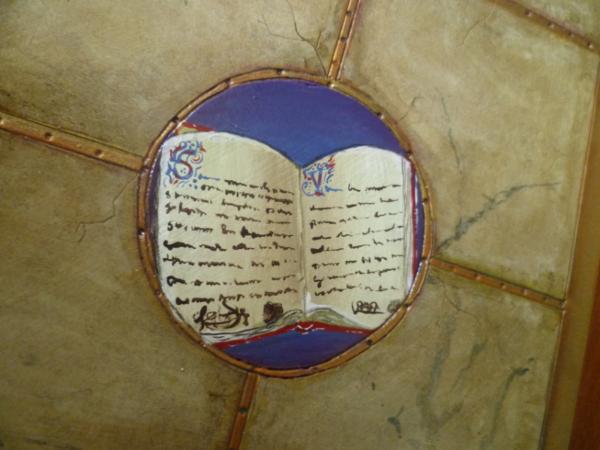
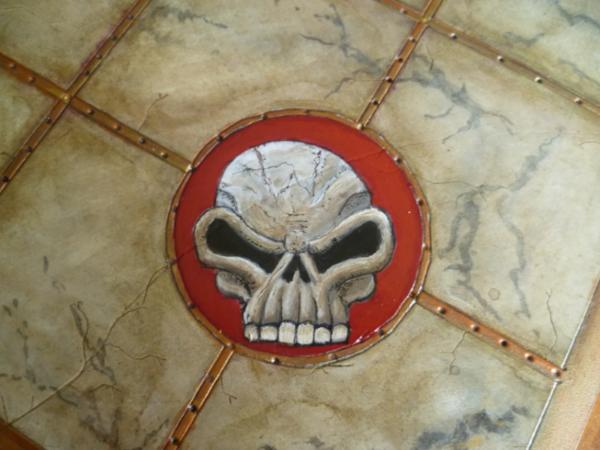
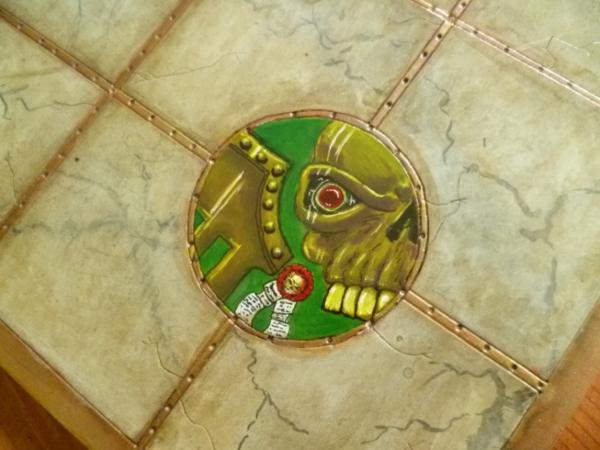
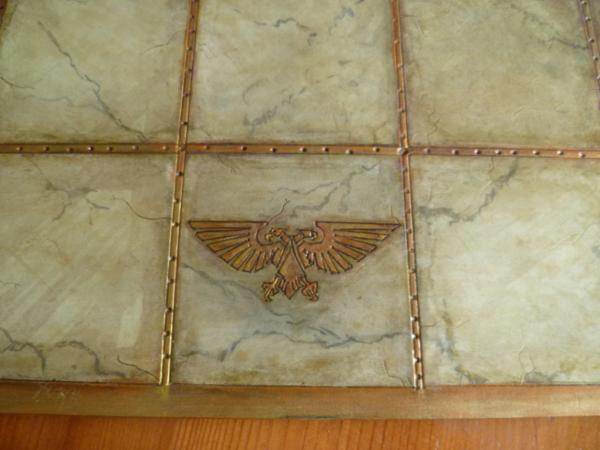
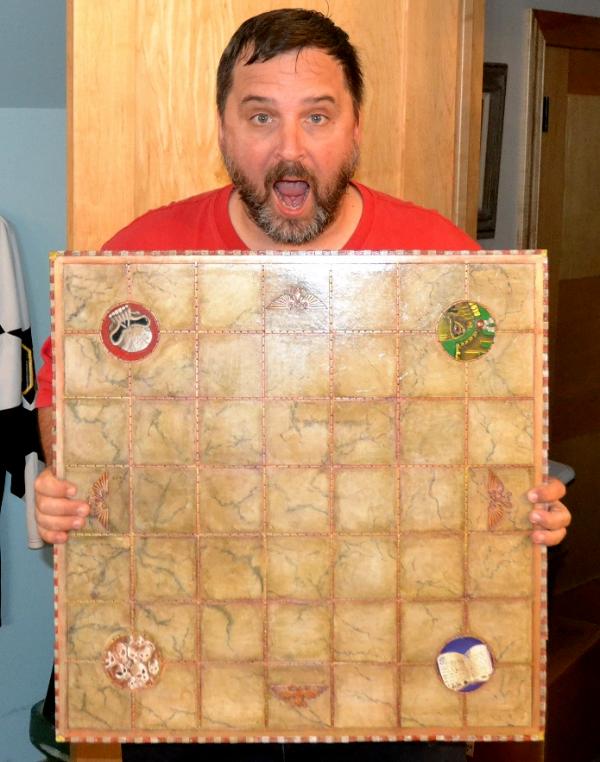
I am doing a display board for Gitsplitta, Unknown to him (shhh) I am going to do a quick and dirty "B" side, for his Imperial forces. Now the thing is I am not to hot on the symbology. So Aquila are generic Imperial, are the half mech half evil skull symbols a generic or an Admech thing. Want a nice symbol to sit in each corner, nothing to ostentatious. But would be nice for Gits (shhh) if itb could be bused bmaybe for his Admech and his Mantis Warriors and he is building a small IG force , so want to keep it generic.
since the admech sign/head/skull thingy stands also for the machine spirit i think you would totally get away with using such a piece for anything IG too...? tho i am not THAT fluent and firm in the fluff... but look at it this way... wings and claws you could use too in the same way...they´re generic but also SM associated...if all else fails... put skulls on skulls...
they love their skulls they do! A common symbol I see a lot for IG and other things under the imperium is a skull with wings. That and the Aquila are the ones I'd say are the top symbols.Or servo skulls, or sometimes skulls in numbers or letters for regimental/chapter symbols.... have you thought of skulls?
Maybe write "the big guns never tire" somewhere on it. That's one of their sayings. I know you could find an easy way of making tank tracks across the board that looked good. Even using the impressions from the tanks themselves as they have the Aquila and Skulls on the tracks. A large shell would be a decent symbol as well.
I'll go take a pic of some old Imperial guard decal shetts if that helps.
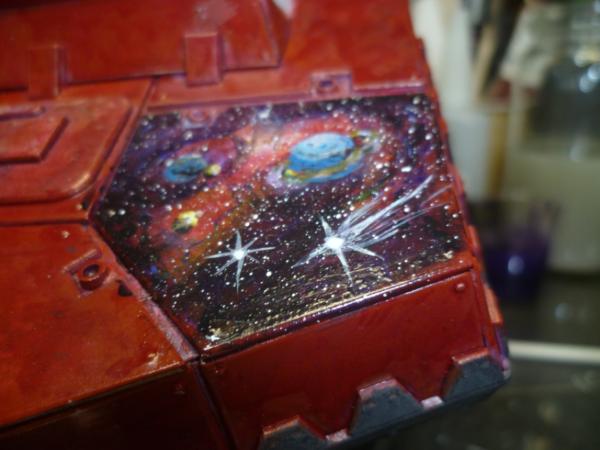
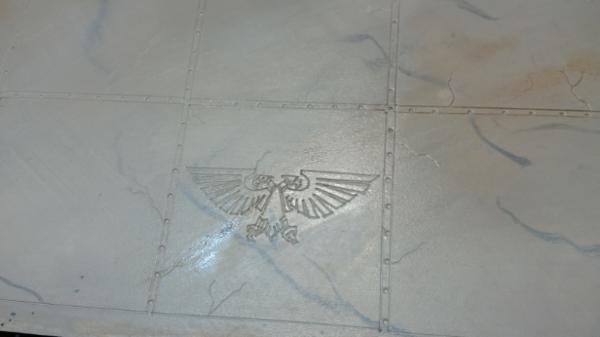
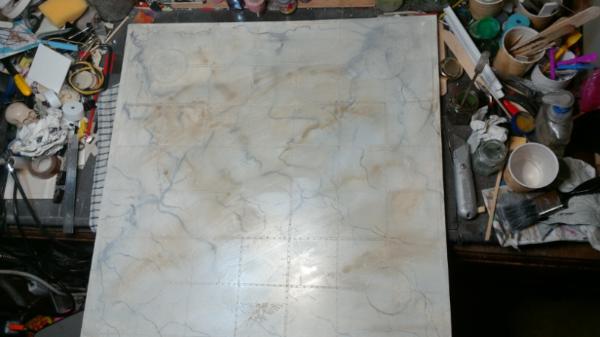
@ Vik, the vast majority of my work is freehand so yes they are freehand scratched into the surface, I did do a rough sketch and used it as a reference, doing similar to a dot to dot, to make sure they come in at roughly the right size.
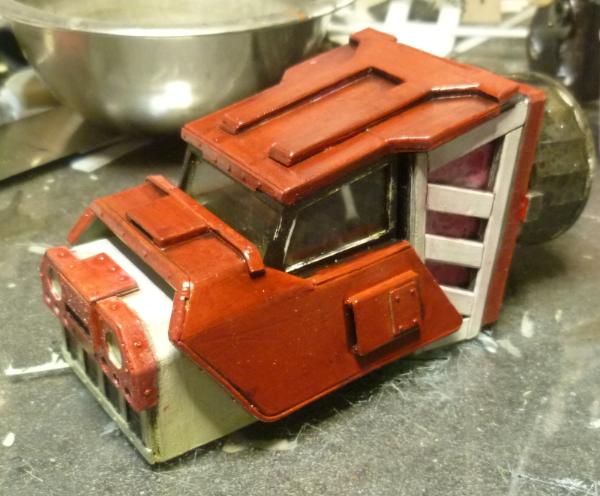
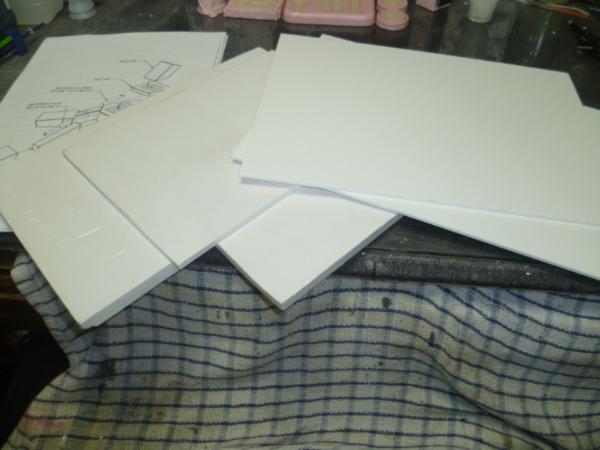
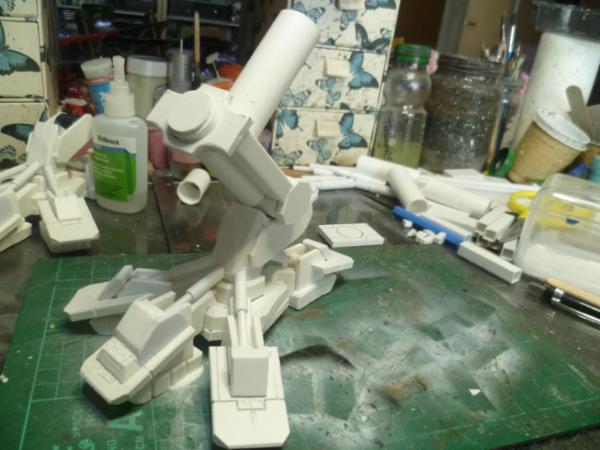
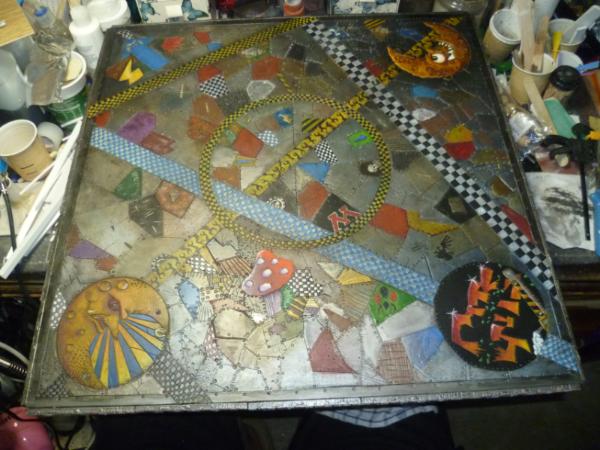
OK, New project....
Going to leave it at that for a sec. I won the biggest part of this many years ago in an LoER comp, and have never dared to use it, but it is about time and I feel confident enough to try.
Oh and anyone who wants the finished article let me know, no way I am letting it sit on a shelf.
Must get that sale blog going, if you fancy my Dakka jet talk to me. Or any of my previous trucks.
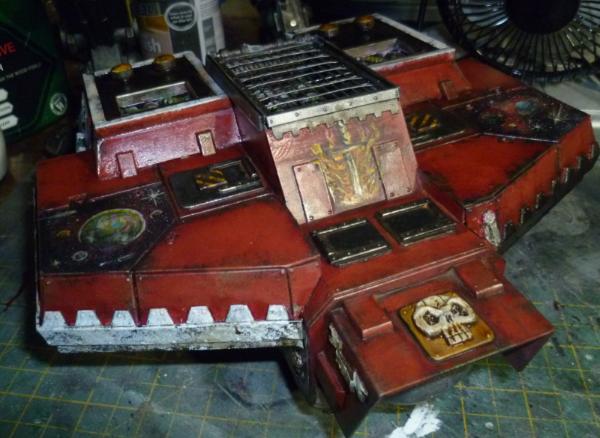
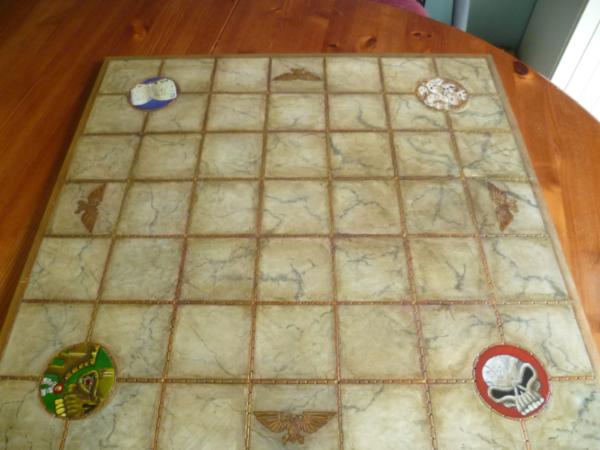
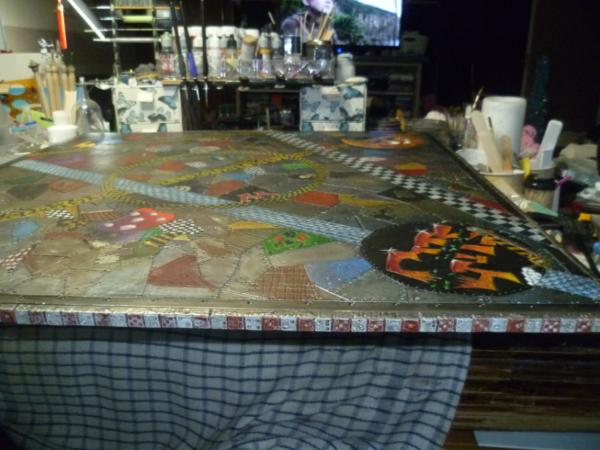
OK, here is the secret bit, that should be enough for Gits to get bored and look away. Not the best pic in the world deliberately.
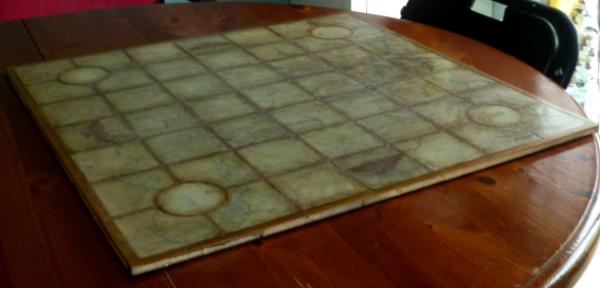
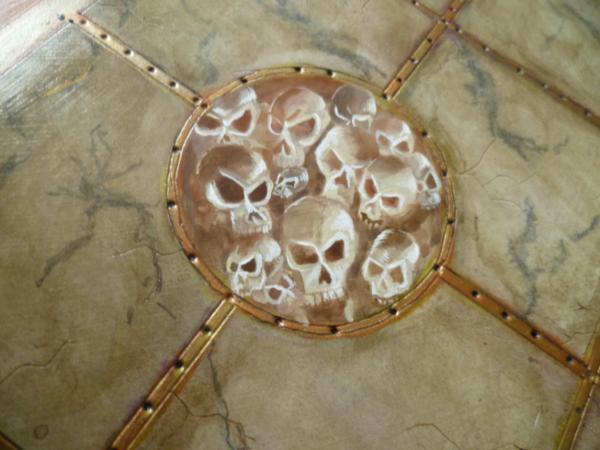
Can't decide on edging, and have decided to do some skulls in each corner, waiting on the last coat of varnish to dry. So far this has had 17 layers of paint on it.
OK thanks for looking, hope to get a bit done today. Laters dudes and dudettes.
Great stuff - I too thought it was floor tile at first. Using wire harnesses for wall cabling is also brilliant. As for symbols, scrollwork is also very imperial. Gryphons, hourglasses, all that gothic stuff.
@ Theo, indeed. Though I think I will just build it for now.
@ Kestral, Thank you bud.
@ Dave, no afraid not, (see below)
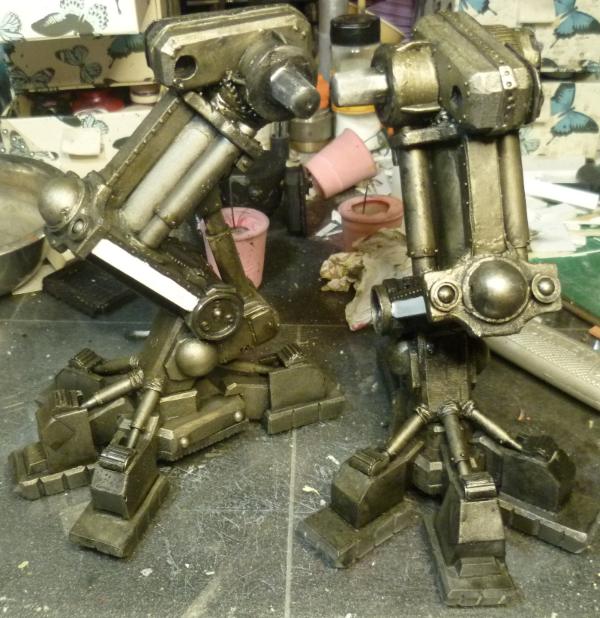
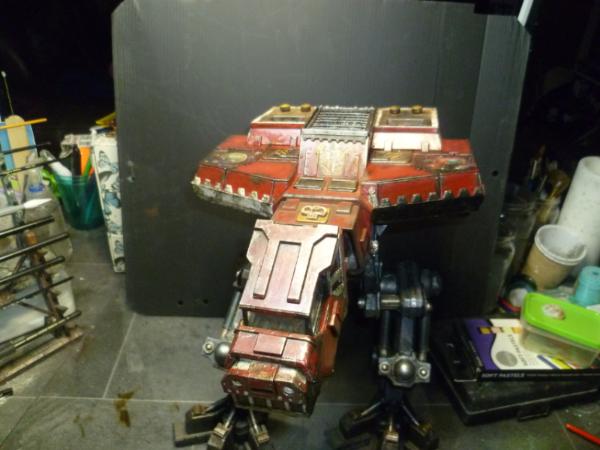
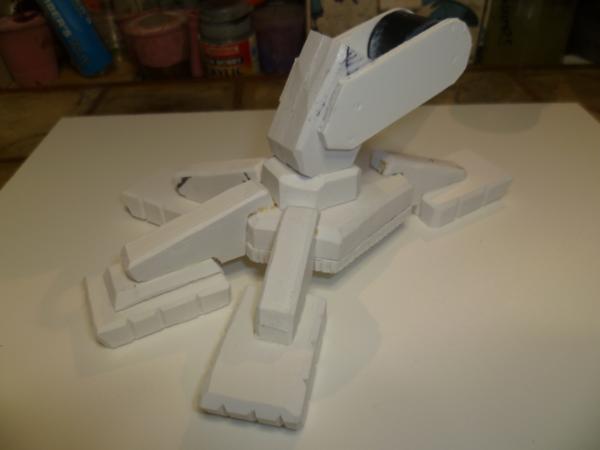
OK did two of these in a quick sit down yesterday, they are only the basic skeleton, going to add lots of detail. Getting lots of inspiration around Dakka, Blackadder's Warmonger is epic.
And Dave this is the bit of kit I have to try and live up to. hk1x1 sent this several years ago. Just hope I can do it justice.
Well thanks for looking, c&c welcome and encouraged.
Please bear in mind the body and head are epic work by hk1x1, a true master, I am nervously trying to emulate.
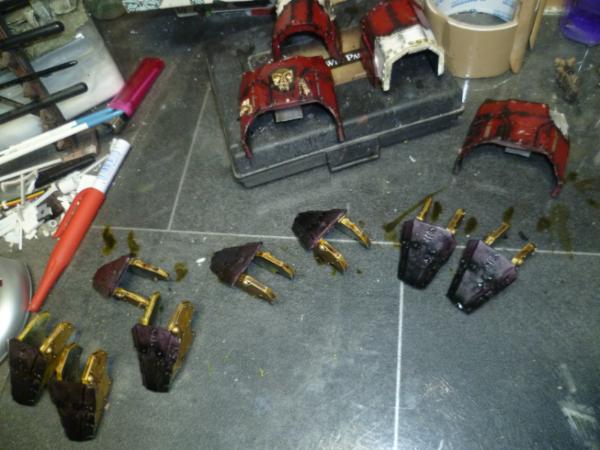
Bit more...
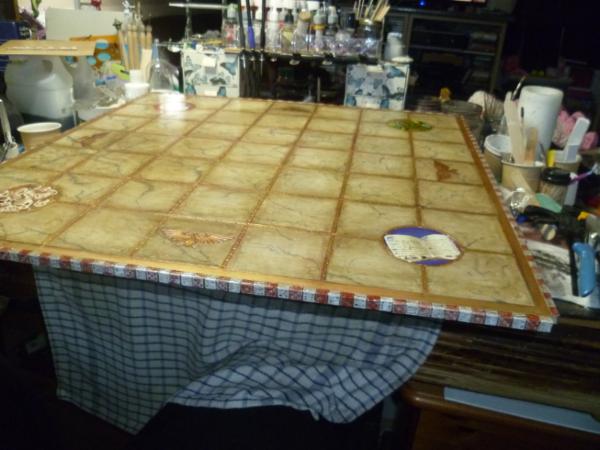
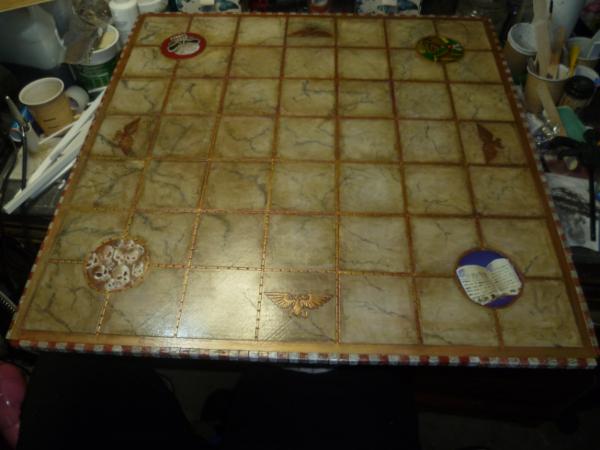
Now working on this for the weekend, been finishing up that display board, got some help from my daughter Shinigami-Ren, took pity on my indecision and started on two of the corners, so I have done the other two this morning.
OK spoilered in case Gits loiters around here.
Spoiler:
And some of the details..
The two corners Shinigami-Ren did first..
Then my lame efforts...
And a pic of the metalwork..
Still need to decide what is going around the outside edge.
Well thanks for looking and the comments are greatly appreciated, really help me out and keep me going.
of course you said us before that your daughter made these two pictures...but with that knowledge one can see you two have different approaches on art...other influences...yours is classic GW influence... and i suppose for Shinigami-Ren is more eastern oriented...manga etc...the way she does skulls... they appear ghost like...i wouldn´t be able to tell which one is better...as i like both artful approaches...and they both exceed my own feeble attempts by a zillion degrees...
and i like theo´s idea about the D6´s ...that might be really cool and classy looking...so... fitting for the whole board then
@ Dave, Thank you sir.
@ Theo, Thanks bud and really great idea, will go with it I think. Watch this space tomorrow.
@ Vik, Thanks bud, don't knock your work, it has been inspirational to me. She is incredibly talented, keep saying and trying to push her to get to grips with models, but to be honest, she is probably way better than that.
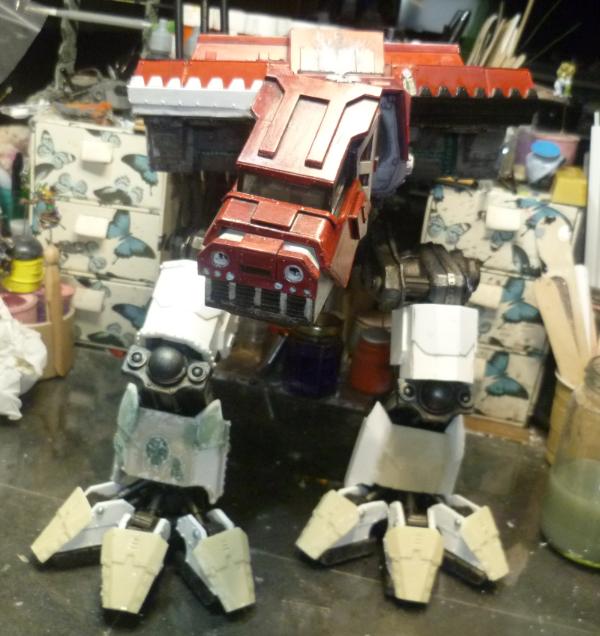
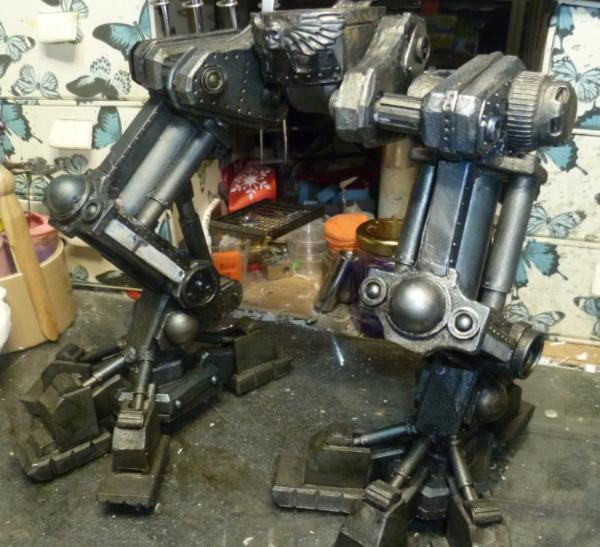
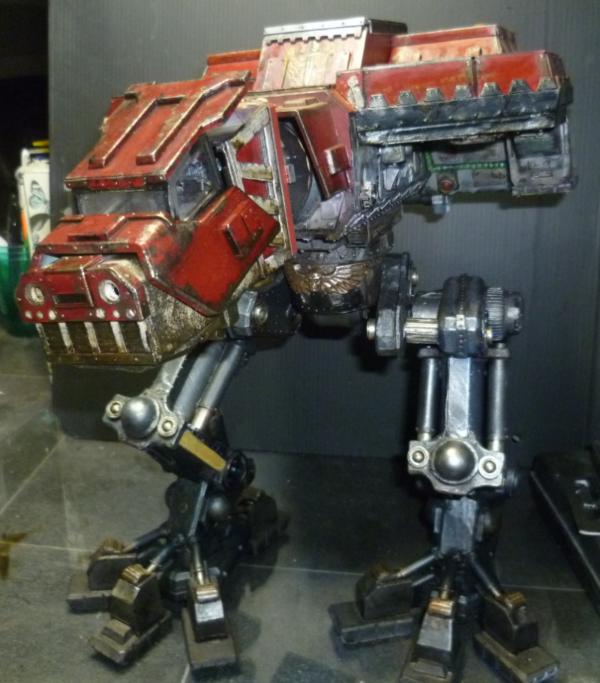
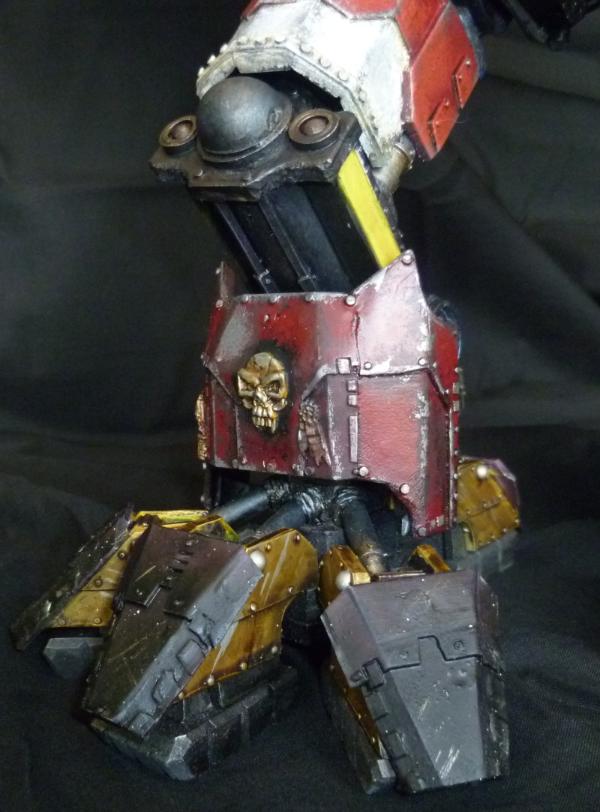
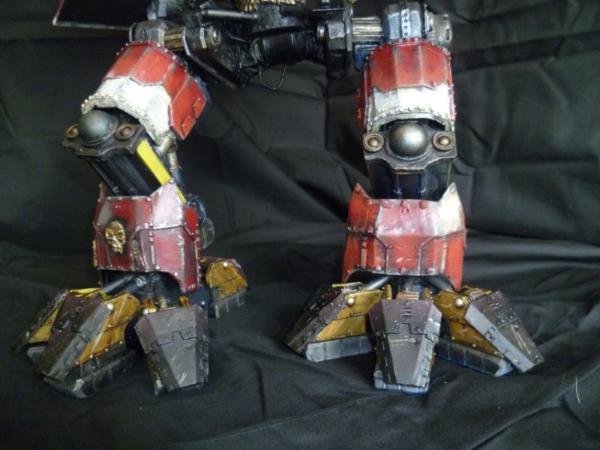
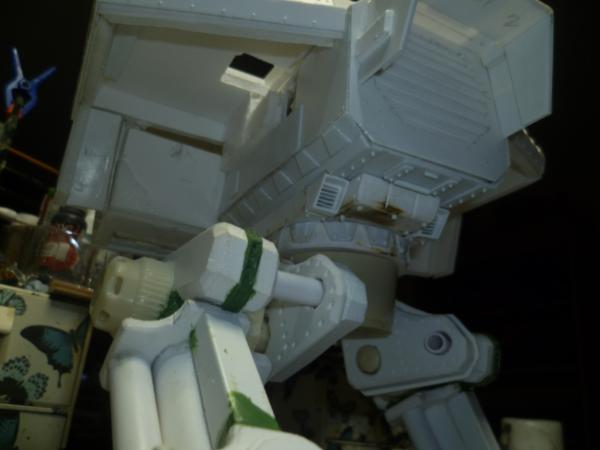
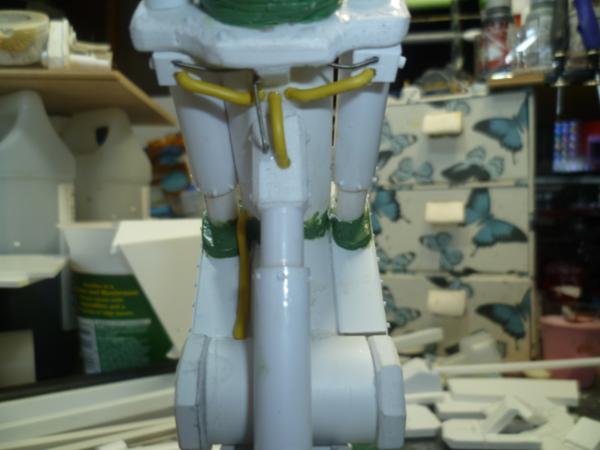
OK added some armoured toe nails, these are not fixed on as I want to add cabling and tubes and stuff under them and paint under them also.
I am afraid I might drift off the true design a little. But trying to keep it close, so somebody will want it when I am finished.
From what I can see it looks a bit sneeker like where the soles are concerned...which is more modern looking and thus a bit fresher, not that strikt gothic...maybe this will leave an old impact on the whole build...
Thanks Vik, and I agree, might have to knock it back a little, though this is the square version, Lucious pattern I think, though I am no buff on that. See a fair few with the rounded carapace and greaves. Not going that route.
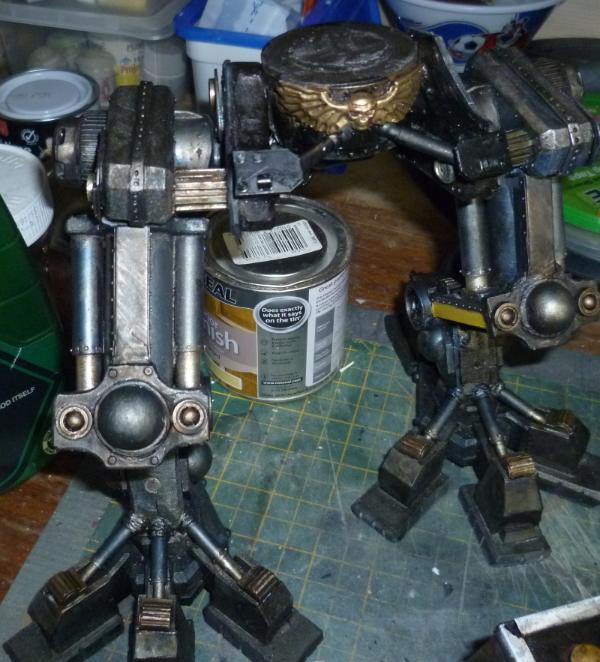
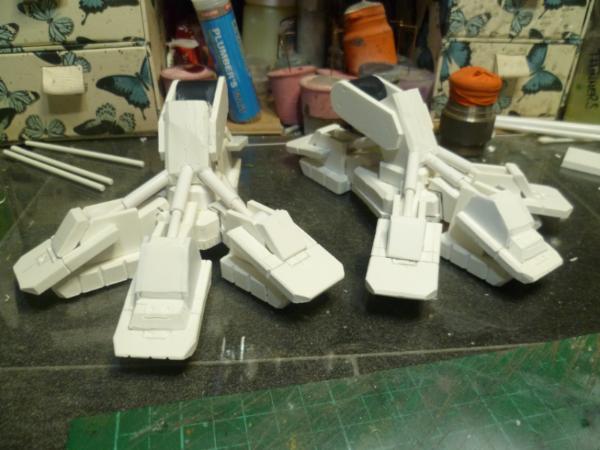
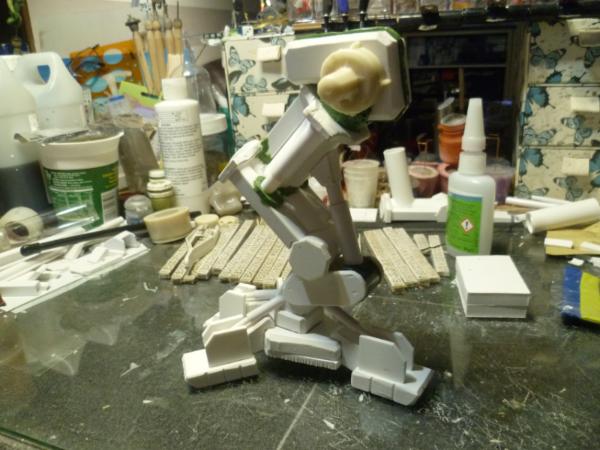
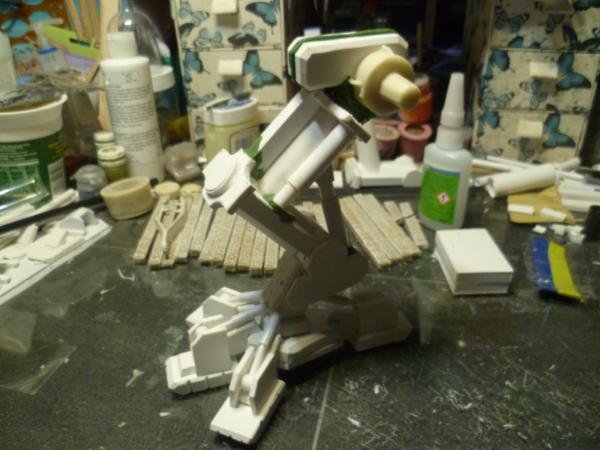
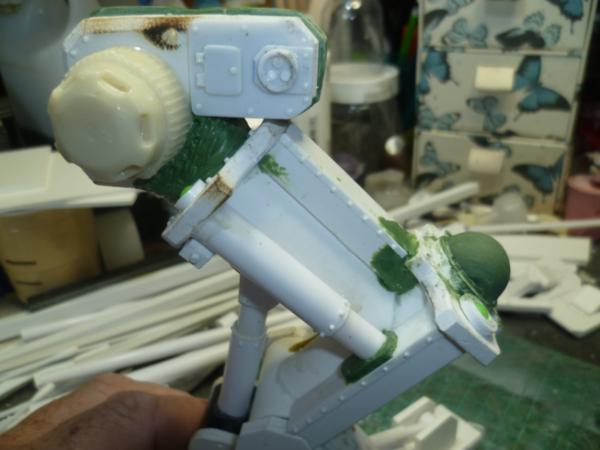
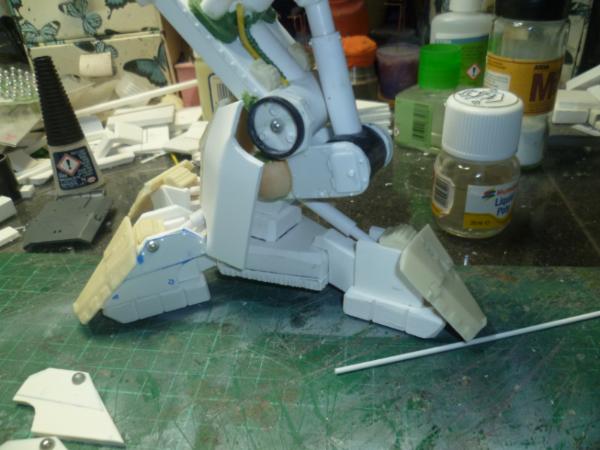
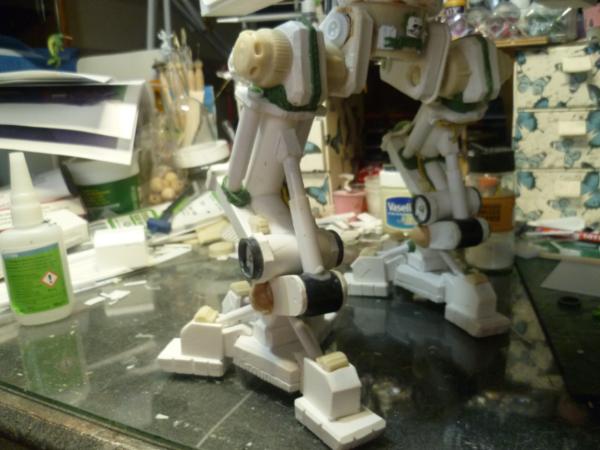
Did a little more, posting this in small increments hoping to get a little feedback on how far off I am. Also should anyone want to know how I do things.
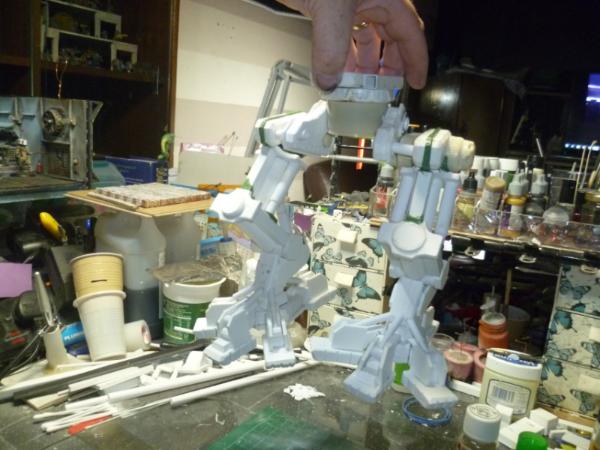
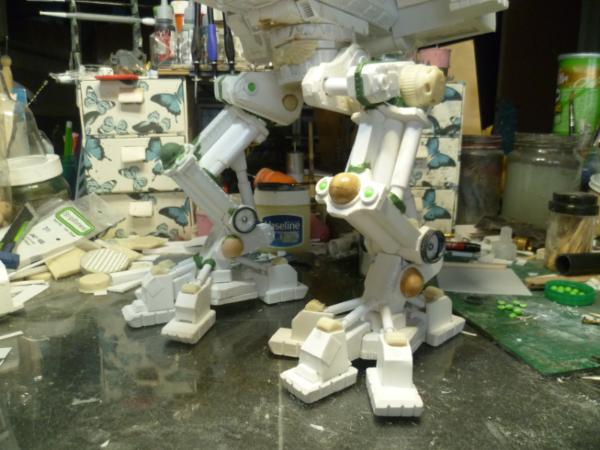
Leg parts.
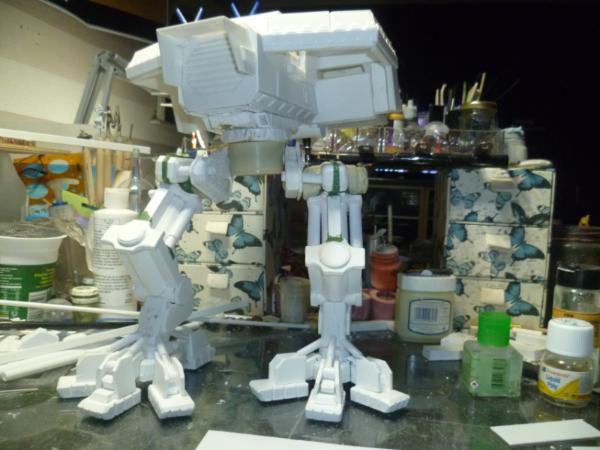
And loosely positioned.
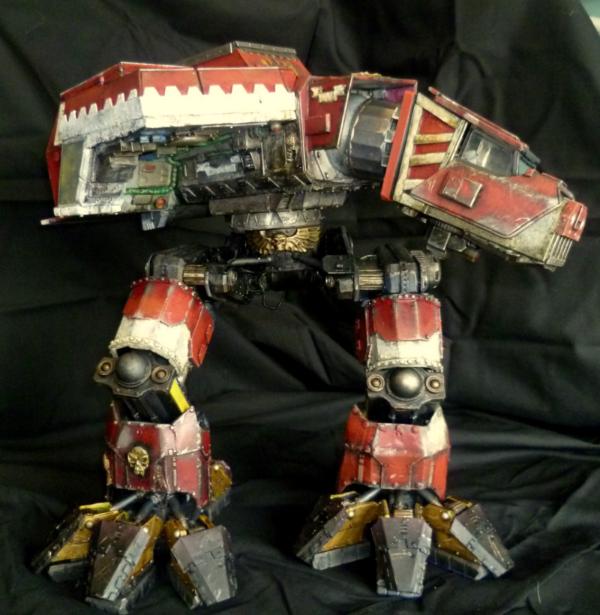
This is putting the hip at a max of 150mm (6") which as far as I can tell is about right.
I dont check in for awhile and BAM! Cool looking board and now a scratch built warhound. I may have to not go on vacation just to watch this build come about.
@ Dave stalled abit this week, but getting there, thank you.
@ Vik LOL @ Einibbus, Thank you sir.
@ Yorkright, Please have a great vacation, (heard of this concept, never had one!) Thank you for the comment though.
@ Graven, Thanks bud.
@ Shas, Well I try and keep it interesting.
@ Josh, Thank you sir.
Well OK not had much time lately, but started to get a little time on tonight and did some work on couple things.
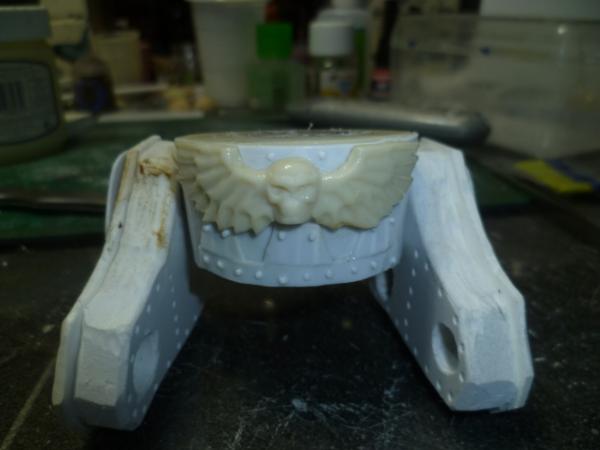
Edging, (thanks Theo for the idea).....
Can't decide what colour to go with, got a bone thing going on at mo, but needs something.
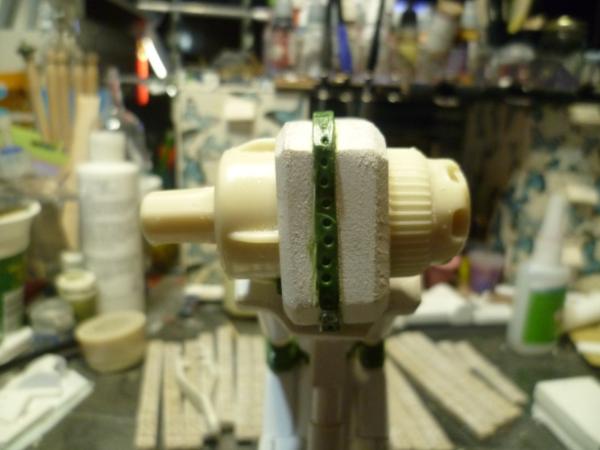
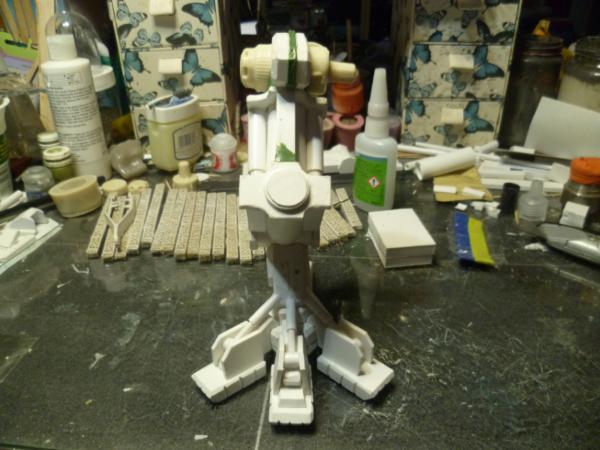
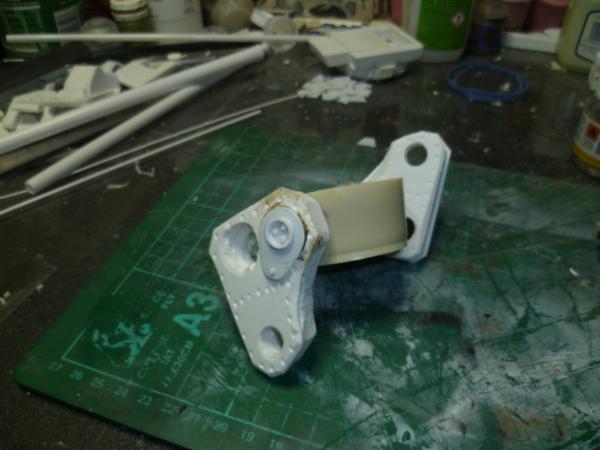
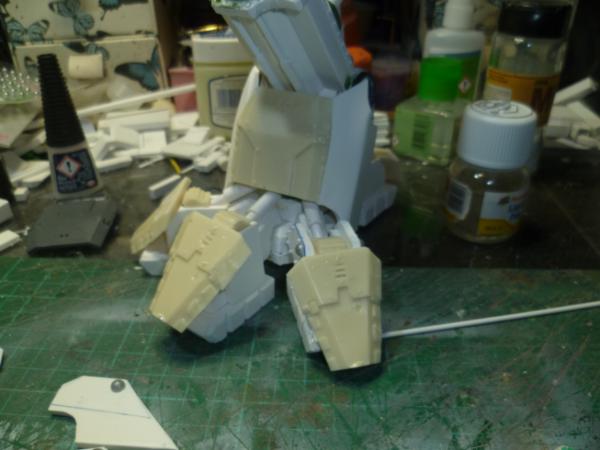
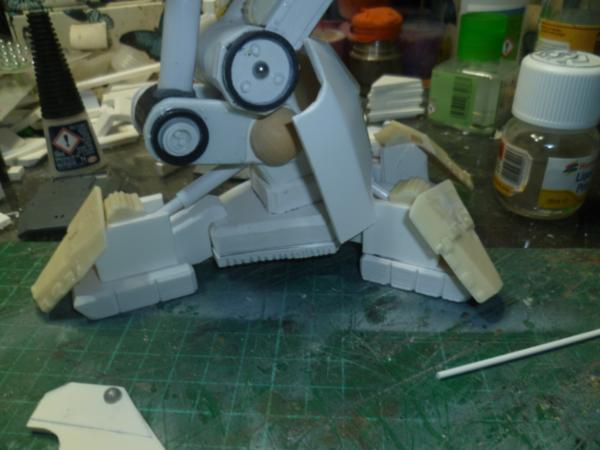
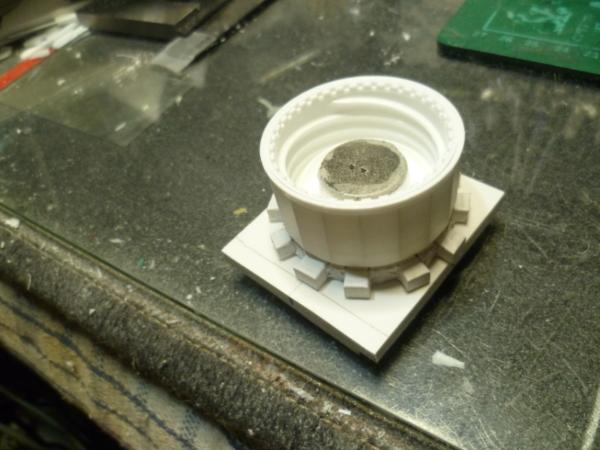
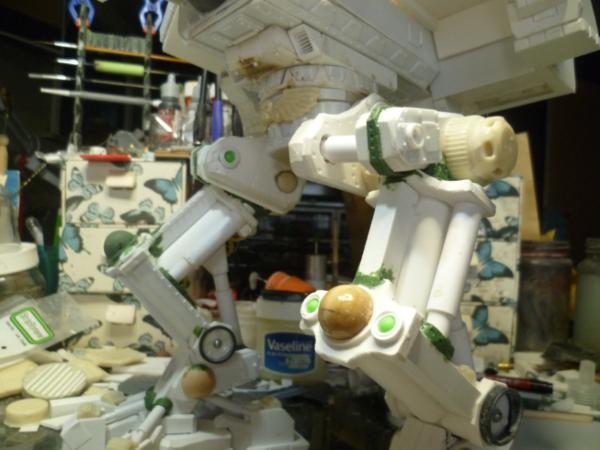
Needed some parts ...so a dig through the bits, and found some lids...
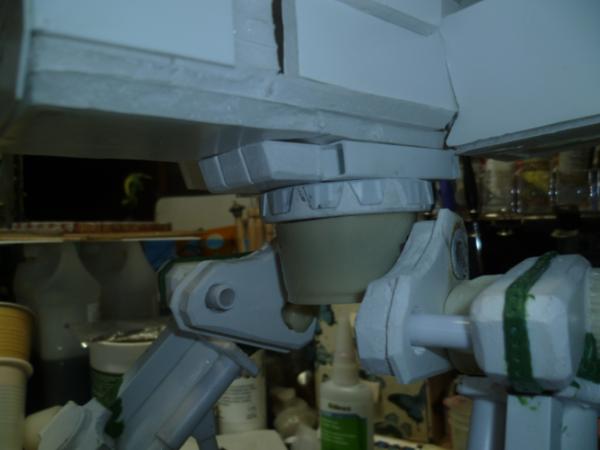
I think they make a nice hip assembly...
And a quick mock up...
Of course there are tons of details to add yet, but thoughts would be appreciated.
Holy cow- I turn my back for a couple days and you go all Sistine Chapel on me- what a terrific build! I'm particularly taken with the articulation and pistons driving the joints- very natural (form follows function type stuff)- looks lie what you expect a machine part to look like.
Are you thinking about using guitar string to fabricate servo hoses? I've heard guys talk about using it- some have posted pictures of models using it- and want to do something myself that requires it (first, need to buy some guitar strings).
I very much look forward to seeing how this project progresses!
really like the dice rim! also...it seems whatever you see fit for scratchbuilding you instantly mold and make in resin it seems...seems currently almost like your modus operandi...^^
@ Theo, So do I. And classic song.
@ Meer_Cat, Thank you. Will be using various "piping", guitar strings, cabling, and GS rolled.
@ Vik, Thank you sir, the thing with the resin, is I find it very easy to duplicate a part, I want 20 control panels all looking similar, then instead of cutting all those parts out of expensive and hard to get supplies, make one original and cast it 20 times, really easy and cheaper. also saves a ton of time. With the hip joint mechanics on this build I had one of each lid, plus glueing the lids together is alwasy a little insecure, but cast up the parts and I can manipulate it around and glue it up easy and it is super strong. My lower pelvis coupling below is just some resin poured into a plastic cup. Lump of resin that I can sculpt after. I think more should try it.
@ Dave Oh well past the privates now....
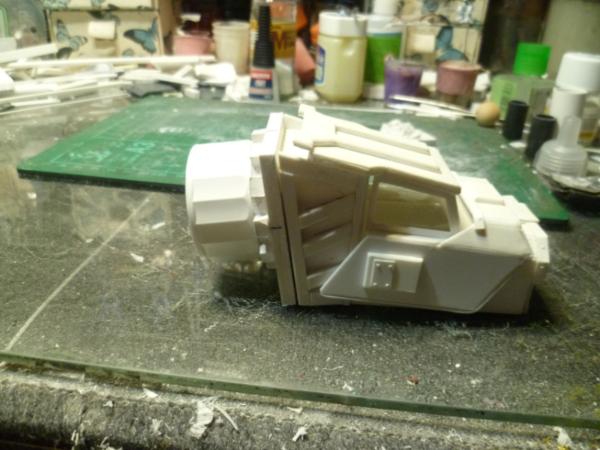
OK so got a little more done....
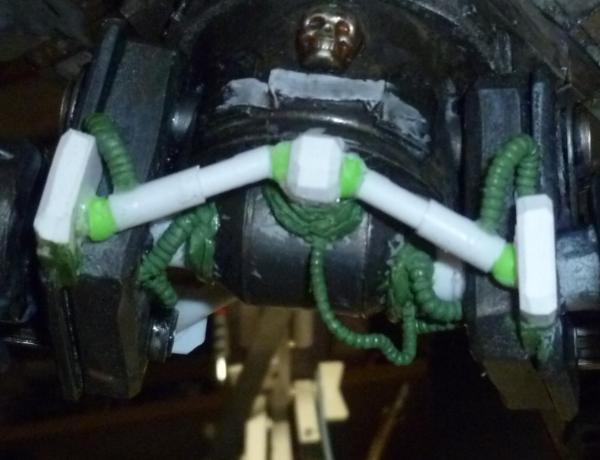
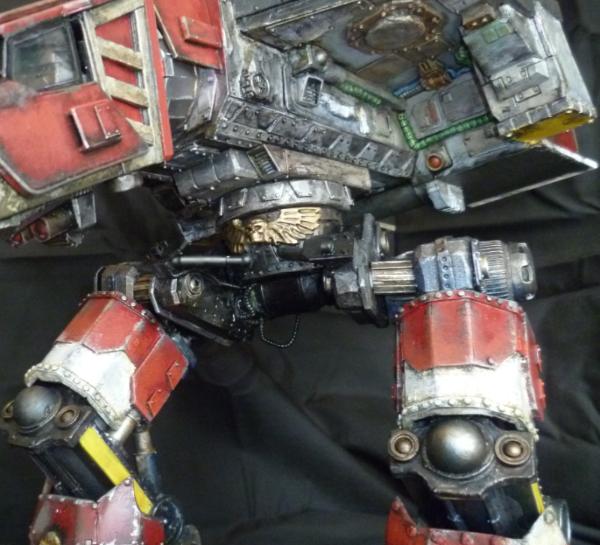
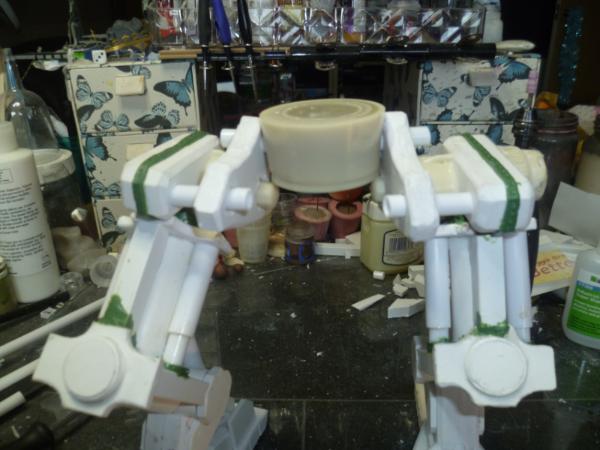
Made what I am refering to as a pelvis....
And a waist coupling, used magnets, very big magnets....
Loose fitment, not bad...
Started on a few smaller details...
Well thank you for looking, please feel free to comment and critique. Would like to know if anyone has any ideas on colouration for this, also if anyone wants it when I am done, could personalise it that way.
Using resin is like the concept of the space elevator, takes huge amounts of resources to built it but once established it earns back everything in no time and practically runs on zero costs...but you have to reach said level in the first hand...that step feels still light years away for me...tho I fully see every tiny benefit of the whole method...
The warhounds development looks very promising... specially the sturdy pelvis region...using there hollow plastic would have caused feeble structural conditions...but your pics show how sturdy everything is! My hat is off to you and your skills...and your courage to tackle such a project!
This is just ridiculous... How, in the name of all that is holy, can you possibly create this beauty in such a short time? I'm flabbergasted and truly in awe (as if I wasn't already...)
@ Theo, could do, was thinking maybe a few rainbows as well. @ Archer, kinda like it actually, was thinking of Cassius Clay, "Float like a butterfly, sting like a SoB!" but probably not. (he was a great man.)
@ Vik, Oh go on, you can do it. And thank you sir.
@ Dave, Thanks bud.
@ Shas, Thanks bud.
@ Ruglud, Life is shity in many ways, but a few small blessings, like a day to myself and the wife watching movies and building models, will she knits. I am fully aware of how precious time is, and I use every minute of it. Oh and thank you, you are too kind.
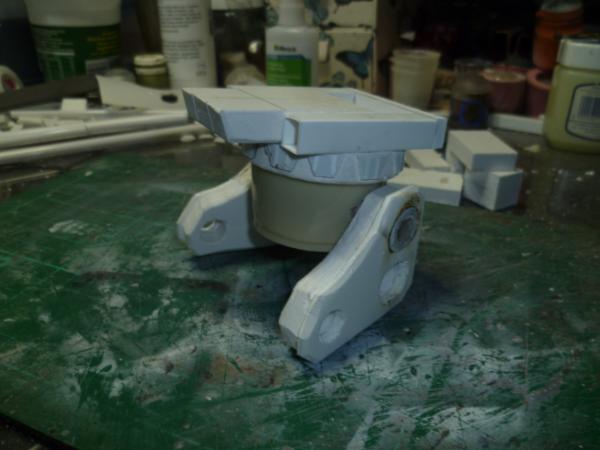
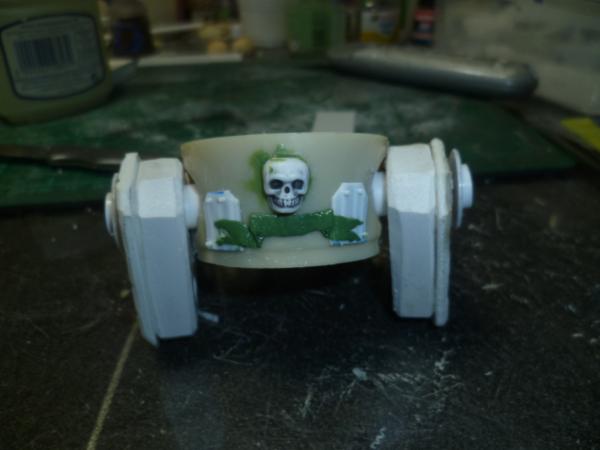
Little progress really, did a few bits to the Lower pelvis, making it a little more, well bling I guess.
And the back...
Also stuck the edging on to the board, need to finish the corners and trying to decide whether to do the dots on the dice gold. (Gits look away.)
Thanks for looking and please keep the comments coming.
Are you fething serious? that marble looks AMAZING! honestly the best i've seen! totally realistic effect and just done superbly! 17 layers to get that effect? totally worth it :-)
and a Warhound!!!! a Lucius pattern Warhound.... from scratch!? you are astoundingly good at this work Cam, like top tier simply one of the best i've seen ever! i've a Lucius to paint so we can compare :-)
@ Ruglud, @ Theo, Thanks bud.
@ Dr H, Thanks and will try.
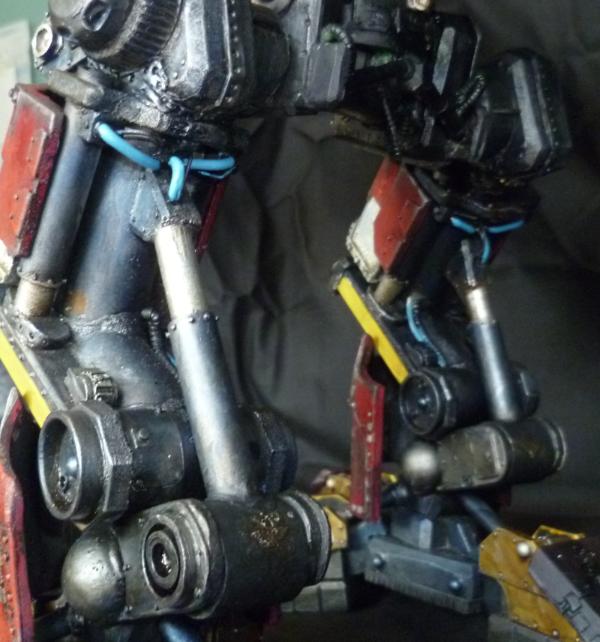
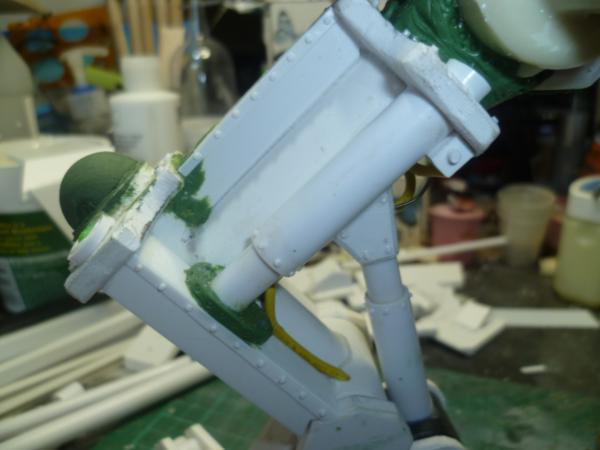
Hitting a bit of a wall at the mo, but trying to plough through..little details on the legs. Can see hoses and control cables starting to appear. Riveting and banding. Trying to make it all logical as opposed to just sticking it on for the sake of adding something. I think most of this will be grimy old metal work, not too rusty but old and dirty, I know these things are a revered artefact, but they are ancient. Need a bit of lube to keep going.
I don't think you've hit a wall- you've just started a really fiddly bit of the build. It's amazing how much more complicated a project becomes when you decide to model something 'true to life' instead of comic-book-cool. When all the gears, cables, conduits and wires have to have a function, and run logically from Point A to Point B, progress requires careful thought and superior modelling skills.
I'm very interested in the pistons you've already built and the servos you're adding to make them 'fully functional'- I may have to add scratch-building a Sentinel in the near future just to give that tech a try!
@ OMN, I get to a stage sometimes where I get frustrated because something is not clicking for me, had a nice burst today so maybe past it a bit.
@ Meer_Cat, Thank you bud, much appreciated.
@ Ruglud, Hehe Thanks bud.
So had a few days of struggling a bit then sat down today and had a rush of blood to the head, so a little progress.
Very realistic- even for real world. The underlying structure that lets any machine perform its function gets designed first- then armor is added. Good engineers consider both in their design and it yields a more integrated/smoother looking machine.
This looks like very good engineers indeed designed it. Believably functional.
The display board is sweet. The titan is madness-- in the British sense, not the American. (crazy, not angry.)
I hope you've thought ahead more than one step... hmmm, given that you are working on the titan's foot that may be an intentional pun.... and figured out where you'll put the beast once it is built.
Do paint a flattened space marine on the bottom of one of those feet. It is a must do.
@ Meer_Cat, Thanks bud.
@ Theo, Thanks bud, much appreciated. And yes drop pod, might see a few other bits pop up soon.
@ EDC, Thanks sir.
@ Ember, Thank you, and yes I do have , will work it out somehow.
@ Red, Thank you sir, now I do have somewhere to put it, but am waiting for someone to take it off my hands, anyonw!!
@ Adam, Thanks.
OK little progress. ...
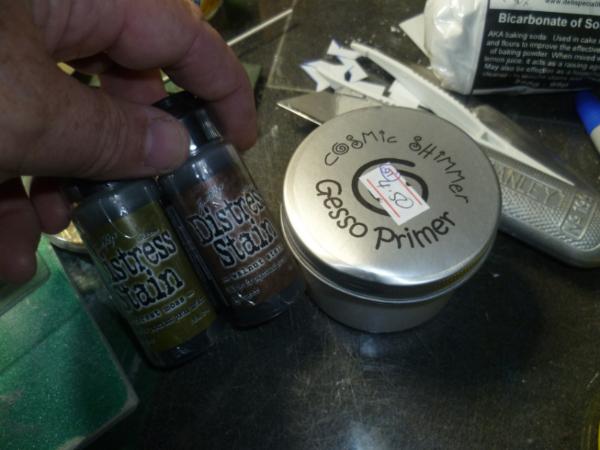
Also got a few bits including this stuff to experiment with...
Brown is really nice.
Green is wonderful...
@ OMN, I get to a stage sometimes where I get frustrated because something is not clicking for me, had a nice burst today so maybe past it a bit.
Yep I know that feeling all too well. My solution is to walk away from it for a bit, sometimes works, usually ends up in me starting a new project so YMMV.
I've seen those stains somewhere before no idea where, that green does look good, nice find!
@ OMN, Thanks, the stain was purchased in a little local craft shop, was amongst the card making gear.Actually has a kinda mesh as a dispenser. Many different colours, was £3.95 for 30ml which is not bad, suspect since it is water soluble I will thin it down most of the time.
@ Graven, Thank you sir.
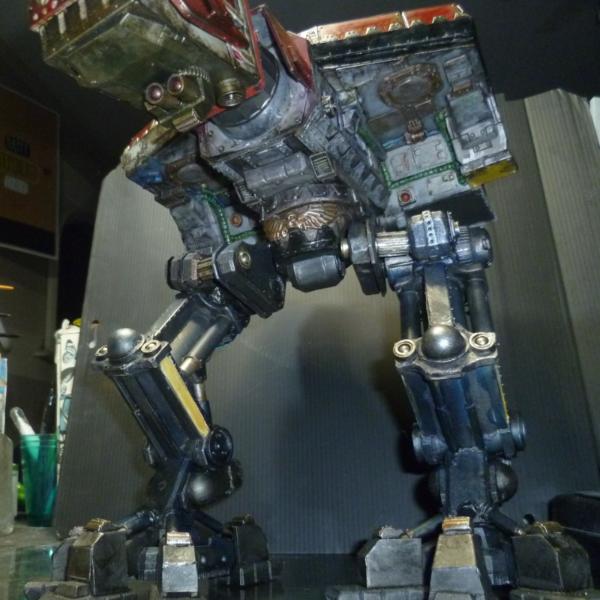
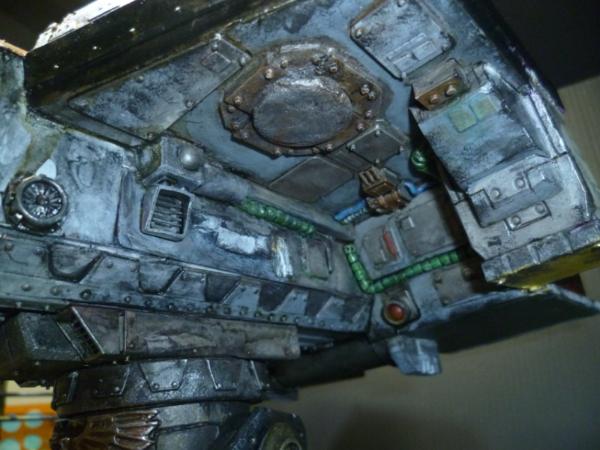
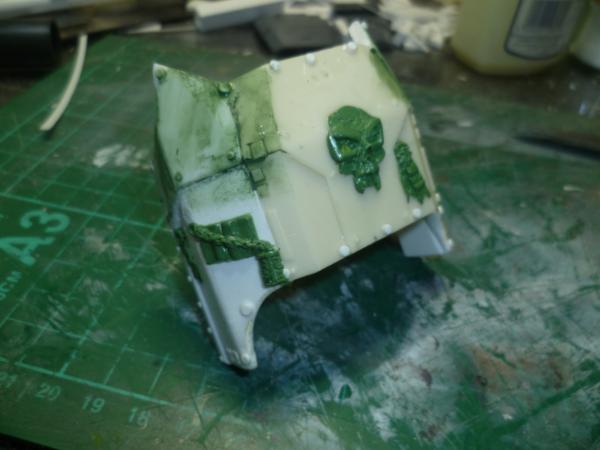
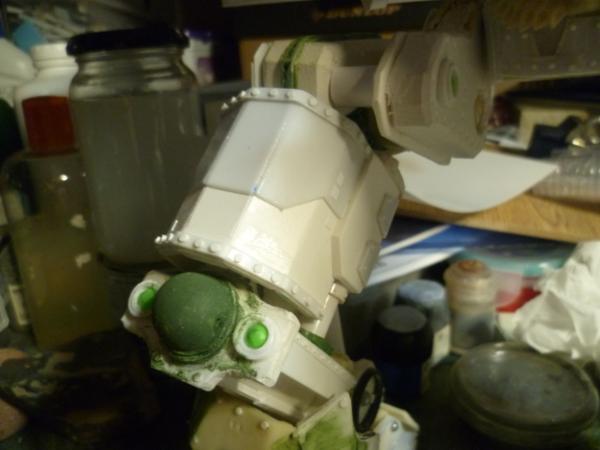
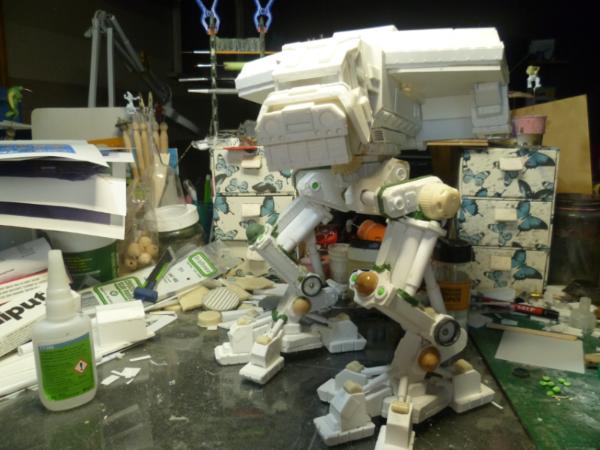
OK here goes, a little bit more done...
Finished the thigh armour plating.
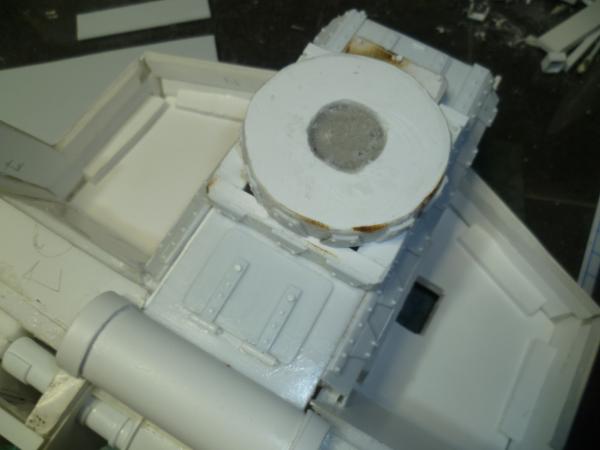
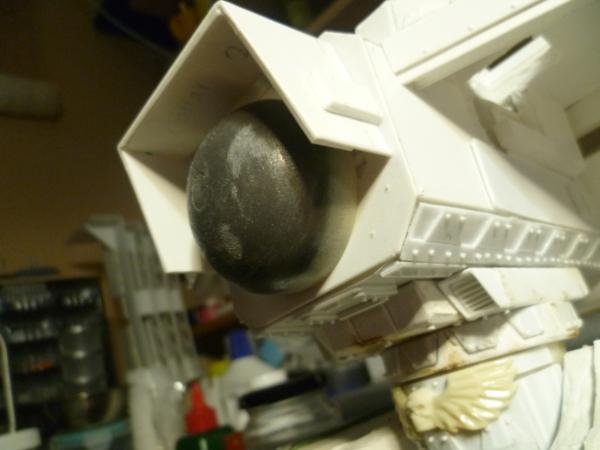
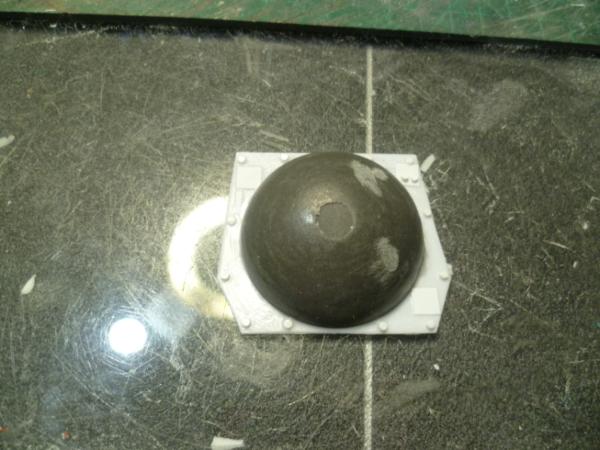
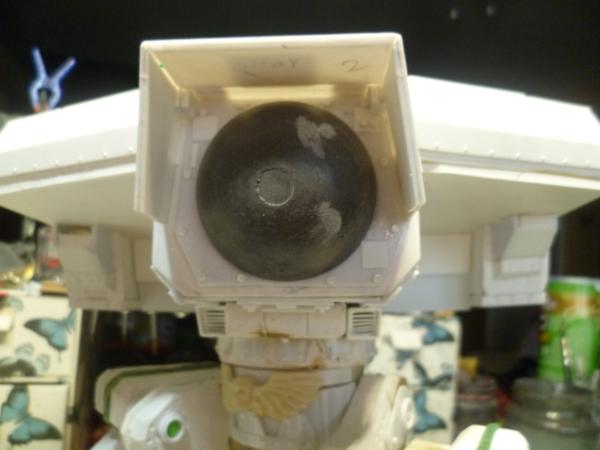
Been puzzling about the neck joint, then had a spark, iron resin and big ass magnets...so...
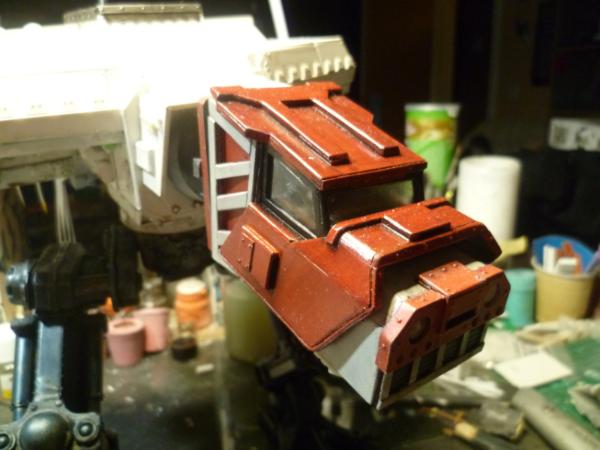
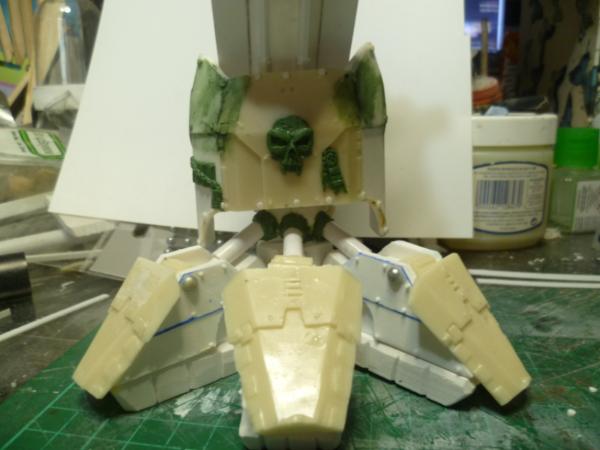
The head, (main parts by hk1x1).
Rear plate for the head, made using a pill bottle lid.
And together..
It does mean the neck is a bit longer than regulation, but the advantages will be clear.
So then a quick mould of a semi-sphere, and some resin with iron powder in it.
This of course means the head is very posable...
Well thoughts appreciated, is the neck too long?
Thanks for looking, and please feel free to comment.
Great detail work, and good use of your metal-infused resin trick.
The resin dome could be a bit more "inserted" (dyslexia preventing a better word) into the head's neck.
The length doesn't worry me as much as seeing too much of the dome. Maybe a wider ring at the back of the head's neck just to hide a little more of it...?
@ Dave, Thanks sir, and nope, did see that somewhere!!
@ Joe, thanks bud.
@ DrH, Agreed and thinking about it, have made some alterations, sorry bit too tired at mo, pics soonest.
@ Red, Thank you sir.
@ Yorkright, Thanks bud.
So no pics again, sorry, what is going on? Have done some work but been slow. Work and life.
However, I do now have a home for this beasty, and it will have a name..The "Iustus Indignatio" , (Righteous Indignation)
Will be painted in Legio Atarus colours, and I think I will give it several different load outs, been requested to make a small-scale sonic weapon (like the ordinatus) and a large scale Irradiation-engine type weapon like on myrmidon destructors? I have a couple pics for reference.
Well thanks for looking, back in a bit with some pics.
Hot damn, I somehow missed this blog (I follow your ork blog). Glad Klaus mentioned the warhound build, now I get to check out some cool imperial stuff.
the new plate you made looks very good...the fact that it is not symmetrical somehow makes it look way more realistic...? dunno why but tat´s my feeling for that piece...
i bet you will feel a rush of progress once you have the thigh guards and the chin guards all in place... that gives a more finished look in a mere moment...
also... have you thought about how you will paint that monster...is the build still able to be taken apart?... otherwise this will be a really pain in the rear to get to all these hidden parts and places......but we have faith^^
It really is super impressive to have gotten this far, I've seen home builds start off well, but fail around the groin area, so seeing him all the way to the head is exceptional!
Thank you all so much for the words, they mean more than I can say.
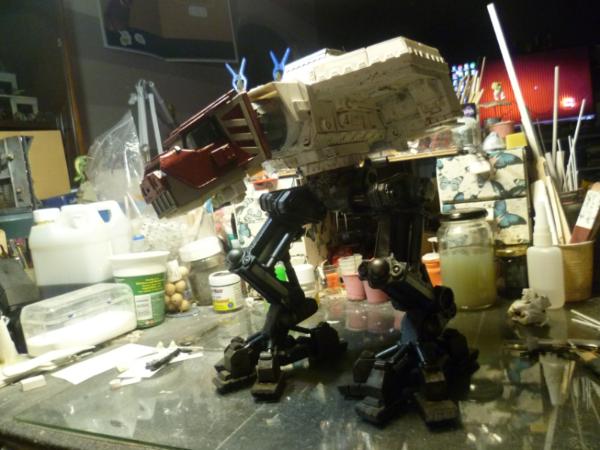
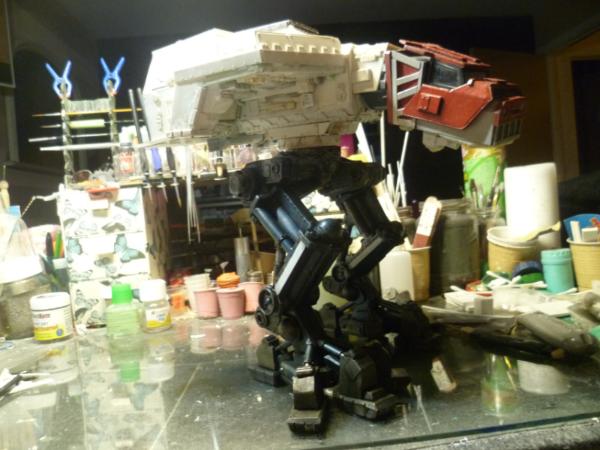
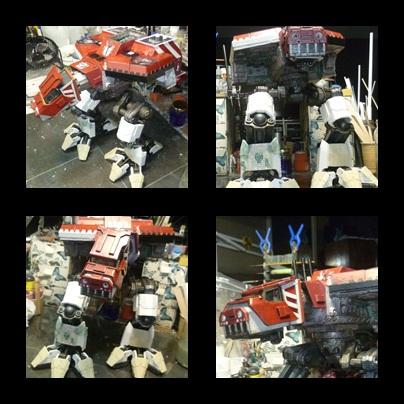
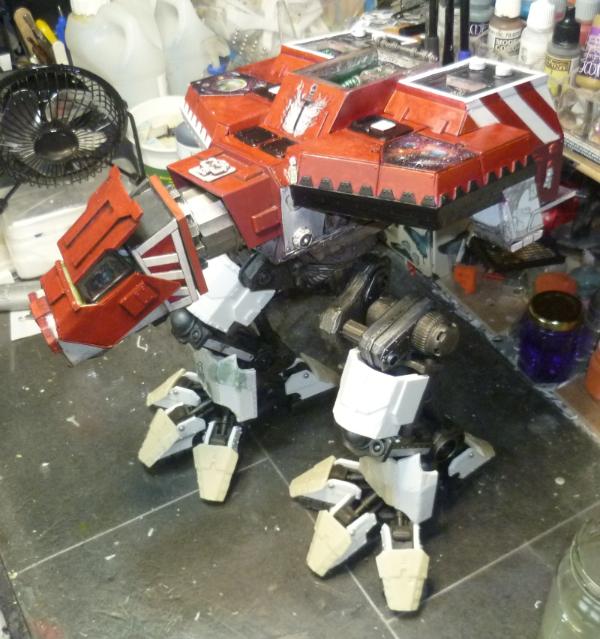
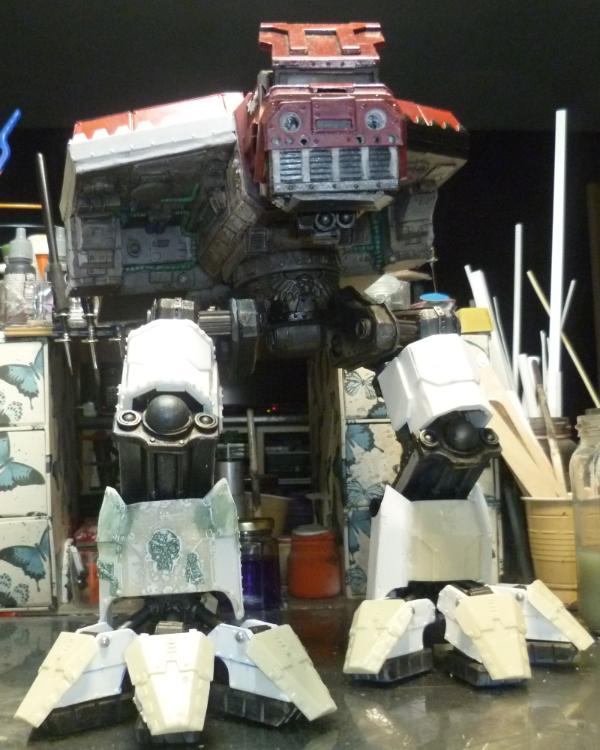
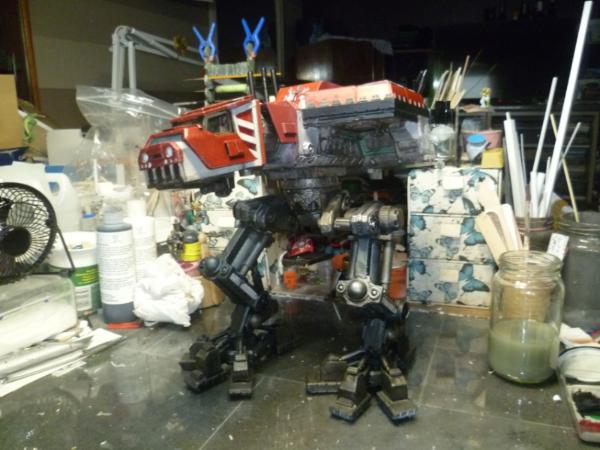
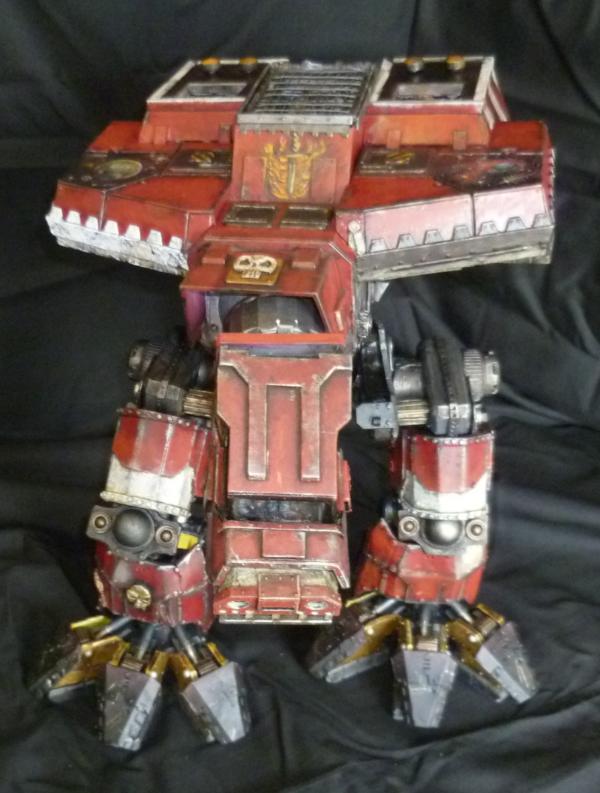
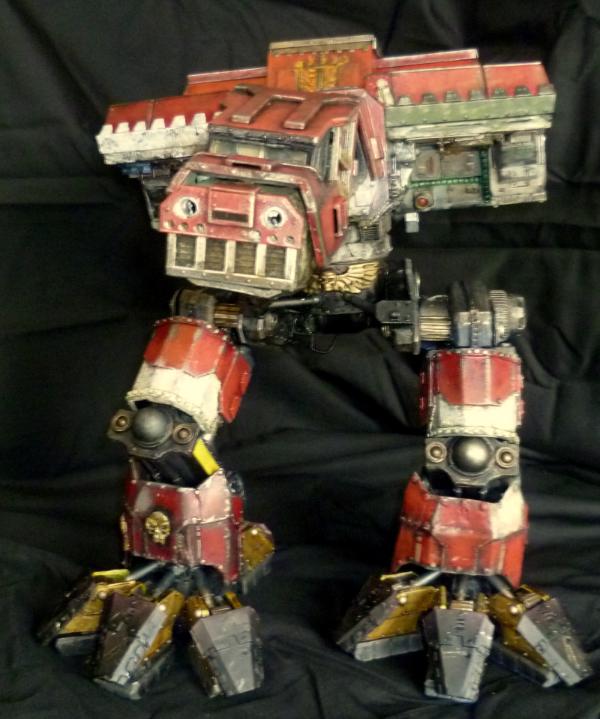
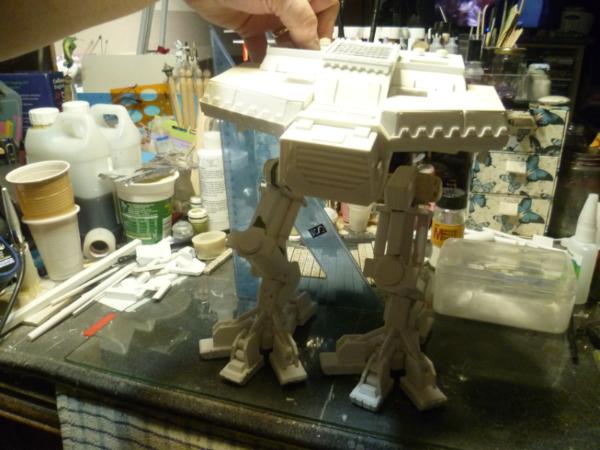
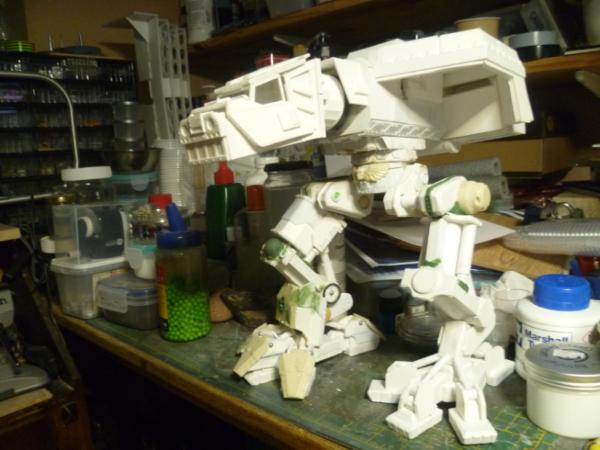
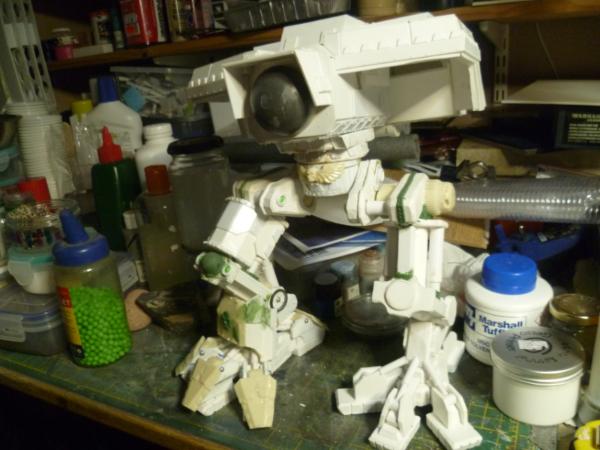
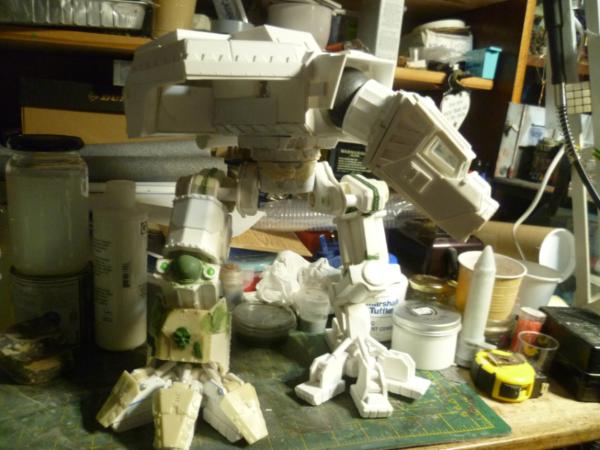
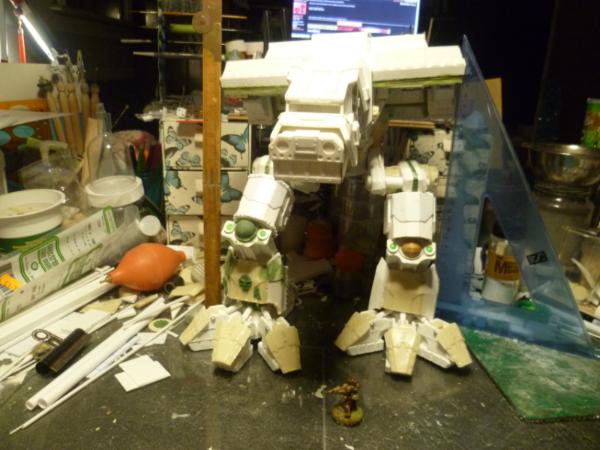
Not feeling up to much in the way of words at mo, so here are some pics, starting with one for you Red, that's 11" at the shoulder.
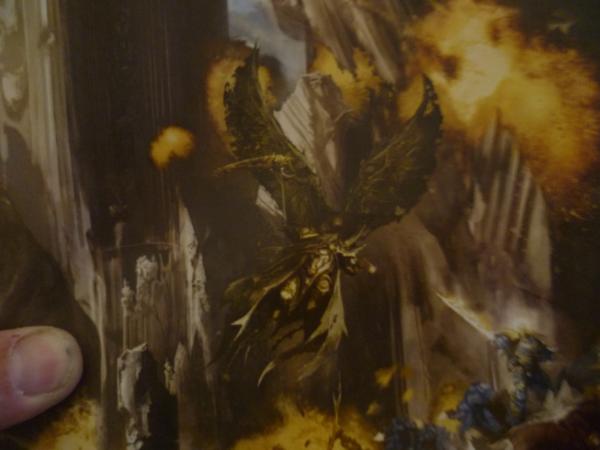
Oh and in a recent White Dwarf, this is part of one of the big battle scene pictures, well it has got my juices flowing, so maybe look into this next, though I have other things I should do. Don't think there is a model out for it currently, but could be wrong.
Well thanks for looking, and as always any words are appreciated.
Cam the board you sent Gitz was amazing. The Warhound is looking sharp, I knew you would not disappoint by putting all the little detail work that makes a model go from cool, to awesome.
she's coming along beautifully cam the level of detail is pretty amazing, I don't even think the original kit had that much detail.
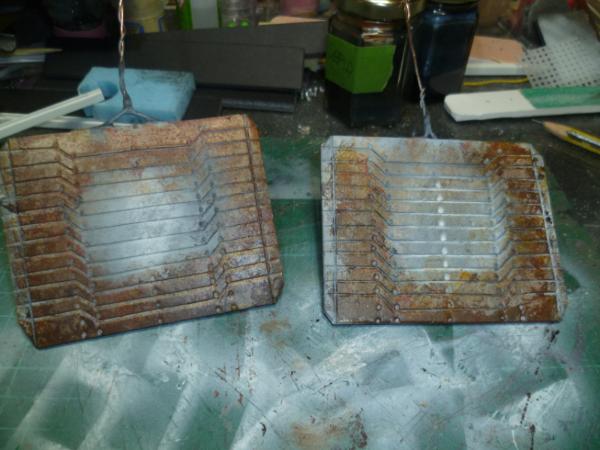
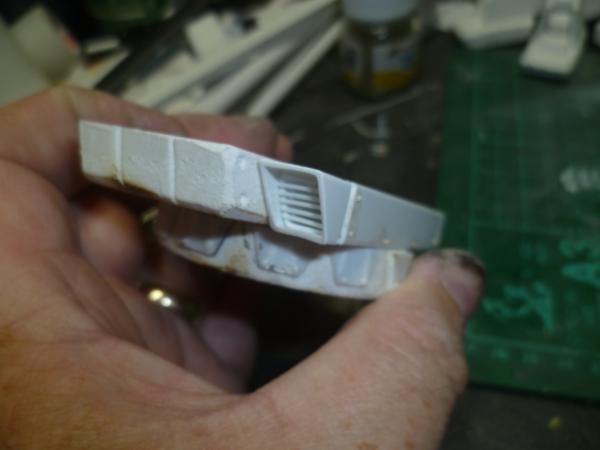
My favourite part so far is the little grills on those vents, they are such a pain in the to make and yours are not half melted un-even mess like the last time I tried them.
Wonderful level of detailing, really complements hk1x1's build. And that display board for Gits - wowzers... I do wonder though... either it's massive or Gits is a Hobbit
@ Gits, You are most welcome sir, glad it arrived OK, now want to see some troops on it.
@ Graven, Thank you.
@ Yorkright, Thank you very much.
@ Theo, Blooming thing is 2 feet square so it is big, Gits aint that small.
@ Whalemusic Thanks bud, thought it might be Morty, not sure now, think I will have a go myself see how I compare.
@ OMN, Thank you sir, coming from you that means a lot. Also see below a pic from Knightly his Warhound is a fantastic piece, I hope I get half as good a result.
@ Ruglud, Honestly Gits is not a hobbit, I have seen pics with him and other people around, mind you it may have been a hobbit convension!! Thanks for the kind words.
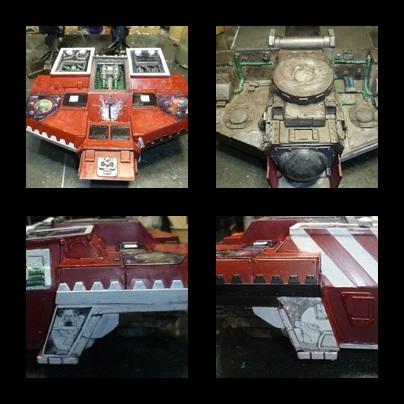
Did get some boring stuff done today priming type stuff, no pics, too boring.
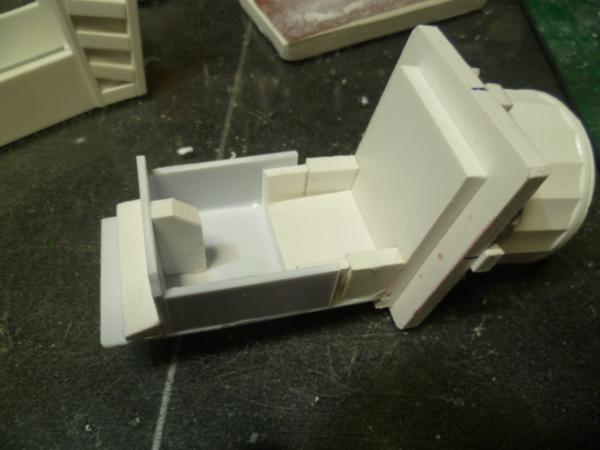
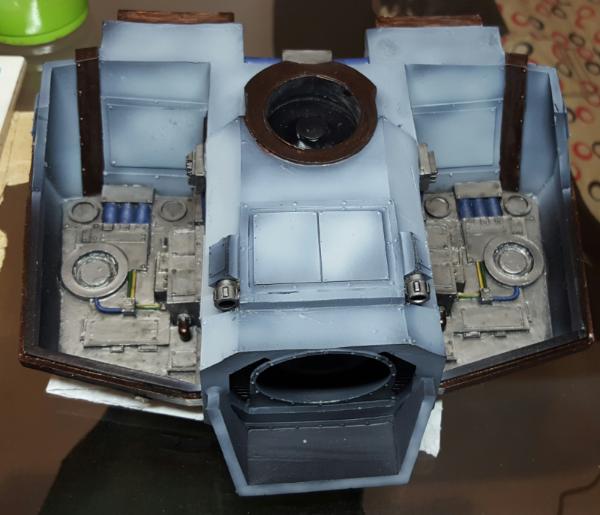
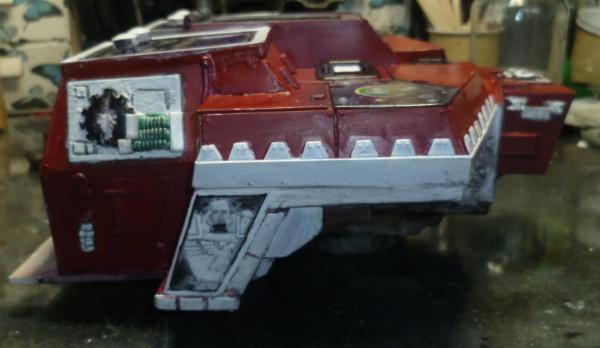
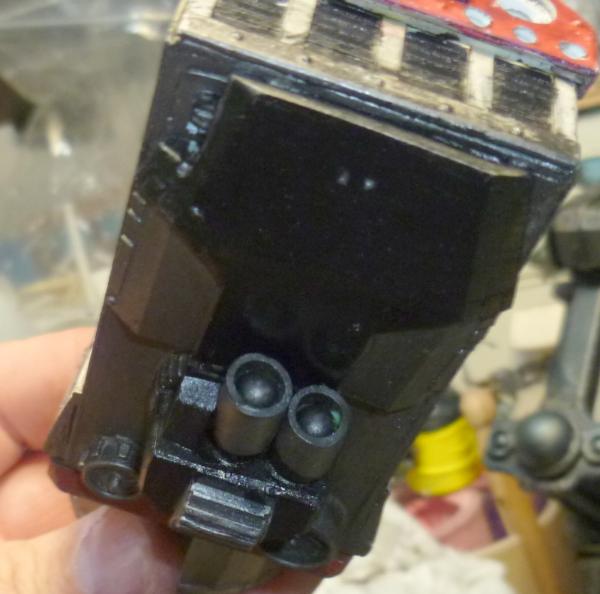
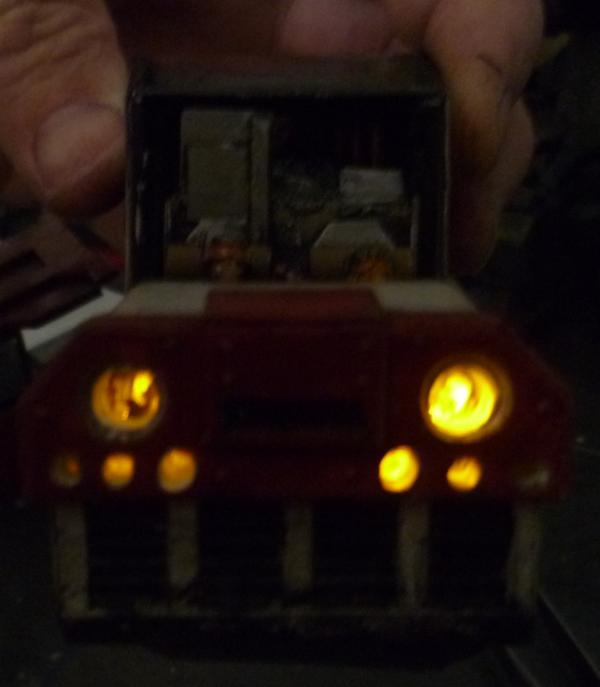
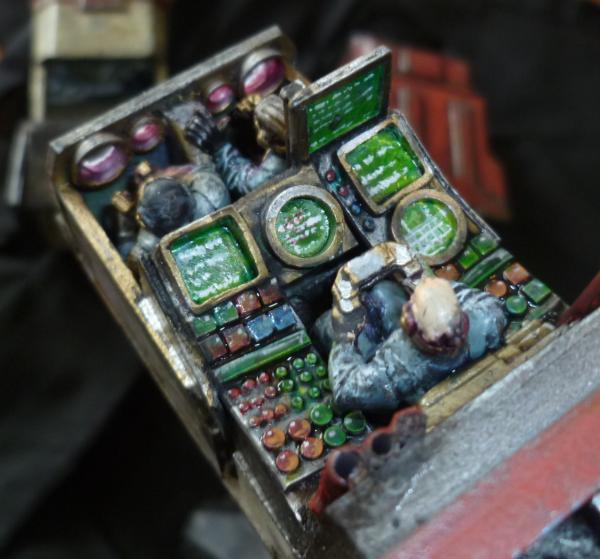
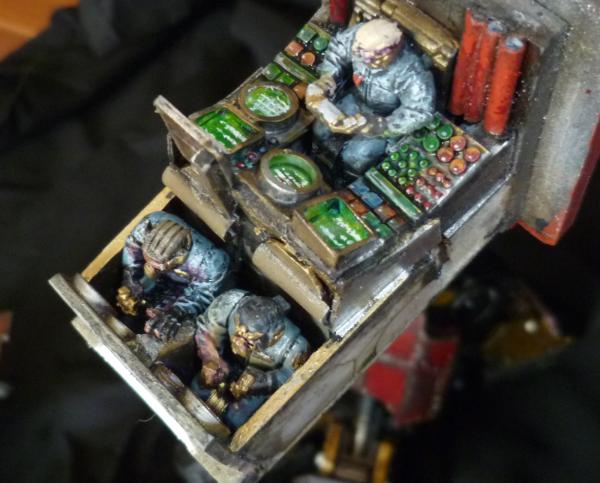
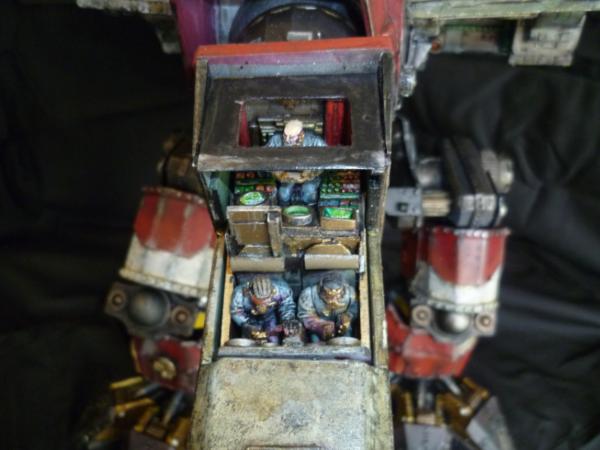
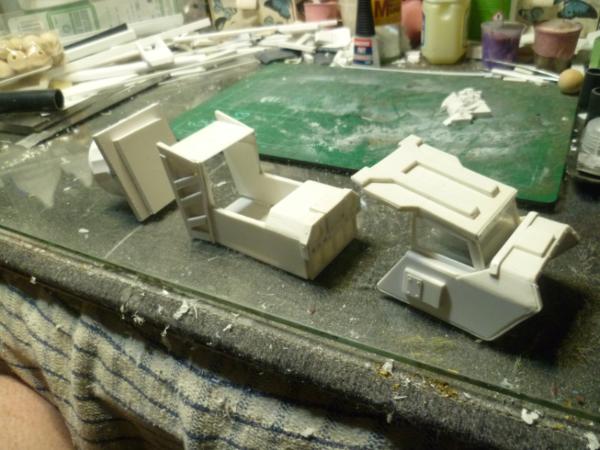
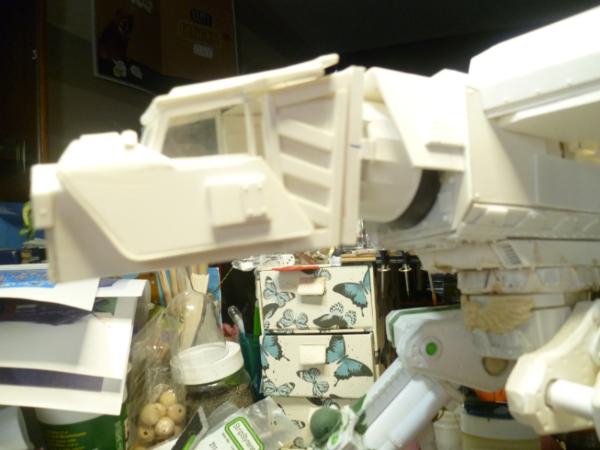
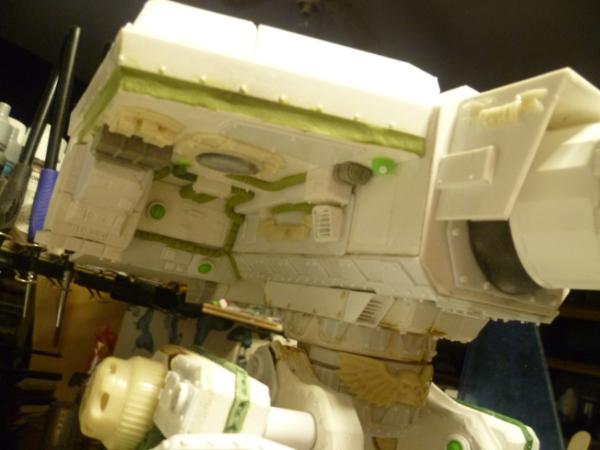
Here are some pics of where I have started in on the cockpit area in the head.
Made a "tray" so I can remove the crew compartment...
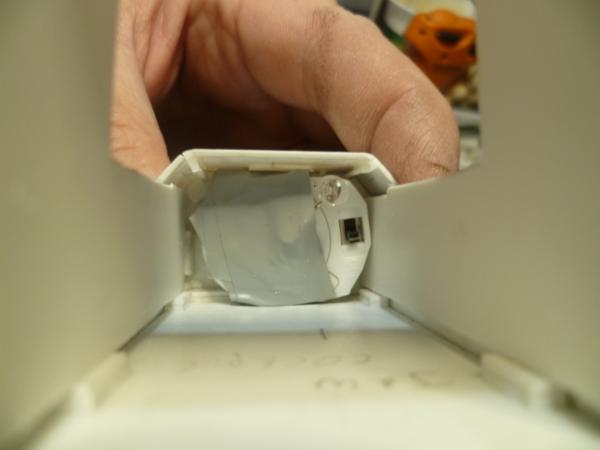
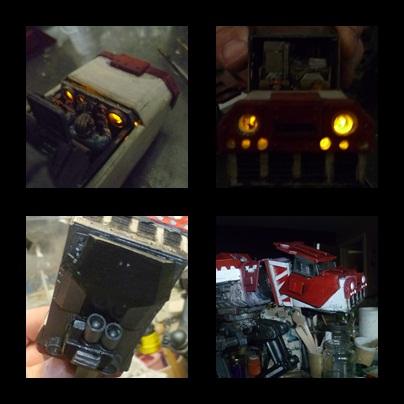
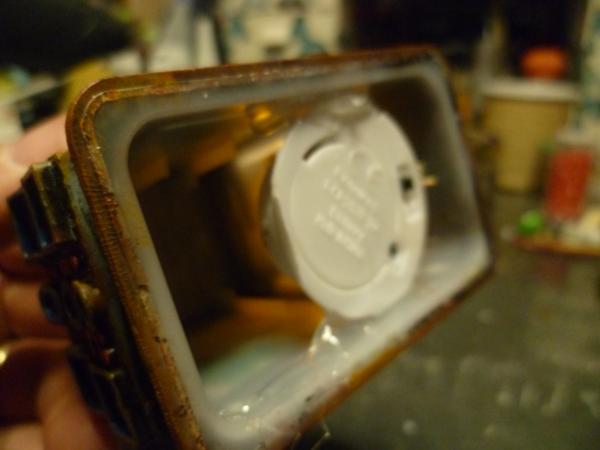
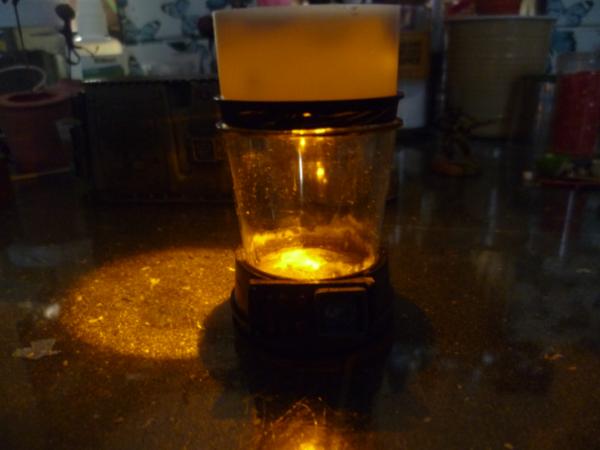
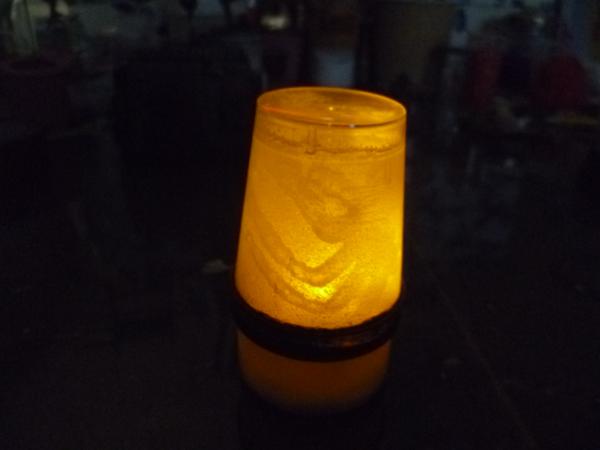
Not sure if Nerdy hangs this low down the food chain, but I remember he asked how I did the lighting on those specimen jars, Same as this, I cut up a electrical LED tea light, 4 for a £1 at the pound shop. got to work a little on the switching mechanism, but stuffed it in the nose...
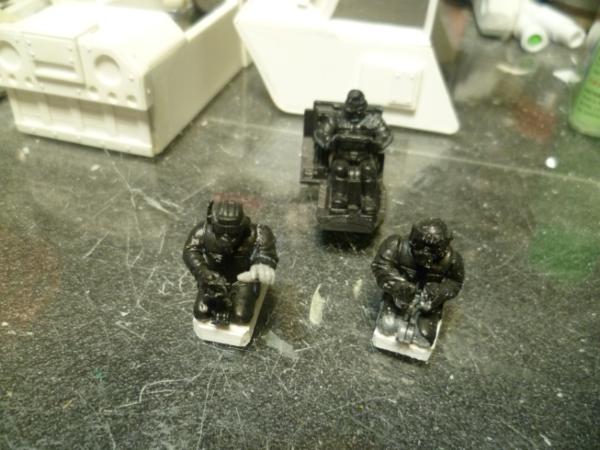
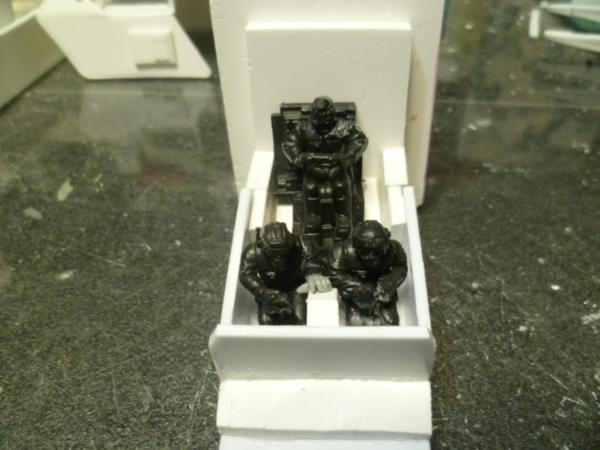
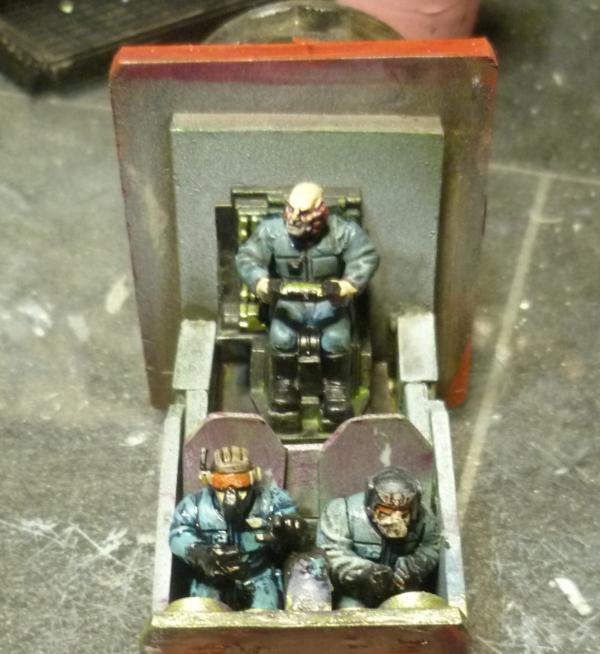
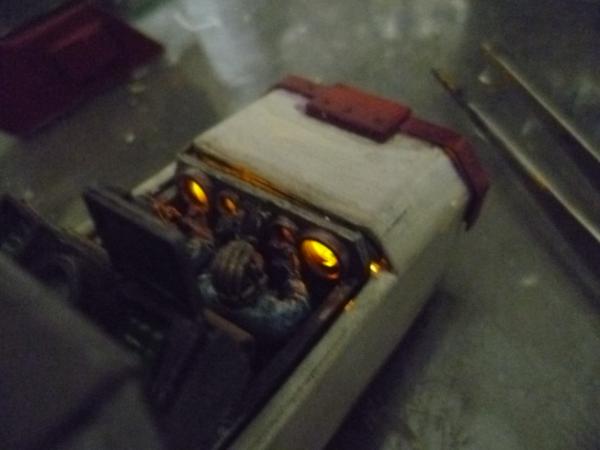
Dug about and found some likely looking crew...
Make sure they fit...
And I have done a little more but not anything worth showing, just yet.
Finish up with a borrowed pic from the amazing Knightley's Warhound build, this is what you get if you go buy a proper model.
Hope he does not mind me borrowing his pic, the end results are such a wonderful build, and paint job. One of the main influences for this project.
This Warhound will be going to SirDonald of Dakka Dakka, apparrently his Warhound needs some protection.
Well thank you guys and dolls, Please keep the comments coming, really help.
Of course he's no hobbit. Everybody knows hobbits went extinct in Wisconsin decades ago. Gnomes however, well, Wisconsin is lousy with 'em. I suspect Gits may have a tall red conical hat somewhere. (And I do hope he has a sense of humor about this. )
So, I open up the thread and saw the underside and thought, oh wow, he primed and base coloured that quickly! and he's doing a mighty grey behemoth as well... hang on a second, that is very similar to mine.... oh, it is, how cool is that!
Of course I have no concerns with the use of the pic, its for a good cause!
The crew look just right - particularly the one that's going to be the princeps, looking up and right like theres a screen up there - loadsa character, love it!
I can't wait to see your take on the weapons; Particularly the Titanic-scale Irrad-Cleanser!
I've been constantly impressed by your resourcefulness looking back at this thread - often open-mouthed too!
I aim to have a special welcome party ready for the 'Iustus Indignatio' - it will be a day recorded and archived permanently by the servo-scribes in every sector.
That is a heck of a Warhound - amazing scratchbuild, and I've seen quite a few over the years. Particularly great hydraulics and armor plating. Nicely done!
Automatically Appended Next Post: Great start with the metal - really looks like stuff from an old school machine shop.
@ Grim, Thank you.
@ Whalemusic360, Thank you, and weapons soon.
@ Tom, Thank you dude.
@ Mad, Thanks, got lucky with the crew.
@ Meph, Thank you sir.
@ Dave, Shocks dude, you guys are my inspiration so give yourselves a pat on the back too.
@ OMN, And that is just the start!
@ Kestral, Thank you.
@ CragHack, Welcome, and it's easy bud, honest.
Done a little bit, work interfering again.
Some control panels.
And started painting, got a fair bit of clean up to do.
You sir show that you've learned so many lessons in building and painting...I currently follow mostly silent your work...but every time I see you've updated its for sure an eye opener!
@ Azazelx, Thank you sir, honoured to see you here.
@ Josh, Thanks bud. Your chariot is brilliant, really inspiring me, I fancy a 40k Champion in a Jet chariot/pod racer type thing, probably been done loads, but I fancy a go, mainly thanks to your work.
@ Graven, Thanks bud.
@ Vik, Great to see you about, feel honoured to have pulled you out for a comment.
@ Theo, Thanks bud.
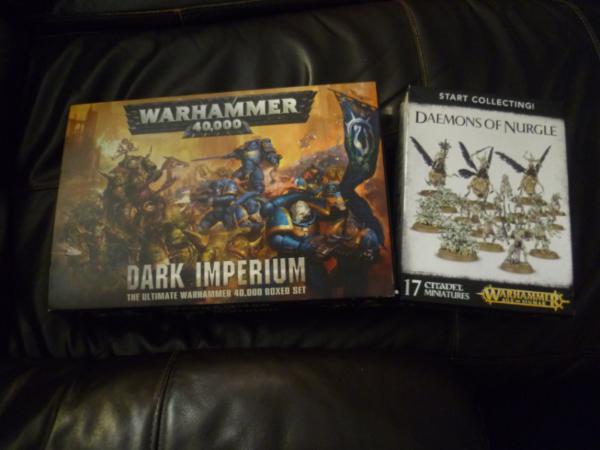
Done a little to the cockpit and head, and a few bits of paint, but this is just an update to say I have jumped on the band wagon, bit late really, but thanks to an overwhelmingly, generous Patron of the Art, I decided to treat myself...
Really fancy the Nurgly side, and the Primary School Kids on the Block might get a makeover too. Said before, love the look of that flying Morty and might have a go.
Well thanks for looking in, and thank you so much for the feedback guys, really appreciated.
Nurgle, eh? Hmmm...maybe your exactly the one to not only make them gross looking but have them with a bit of character and suffering, what I think most peeps tend to forget about...
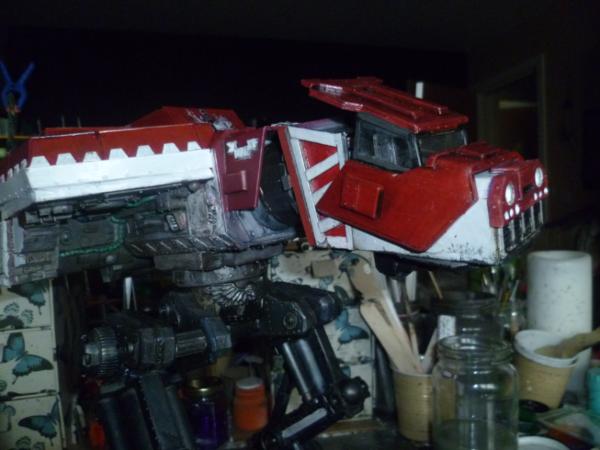
Some how the current look of yon warhound reminds me of optimus prime..
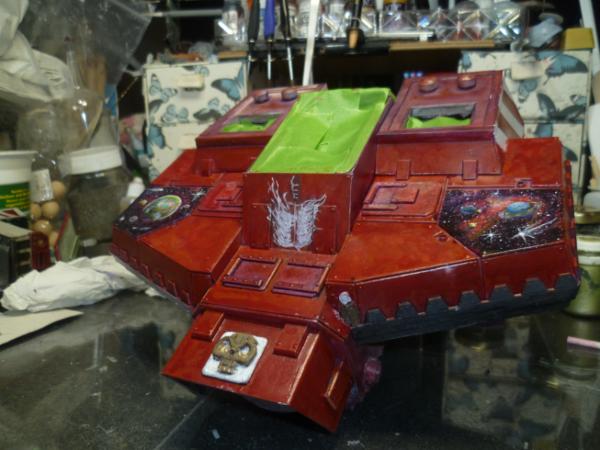
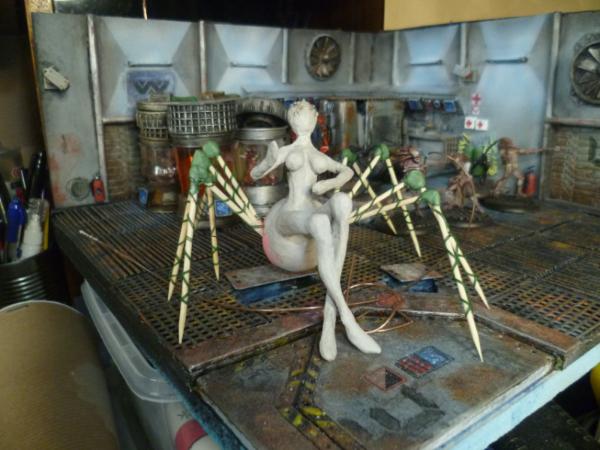
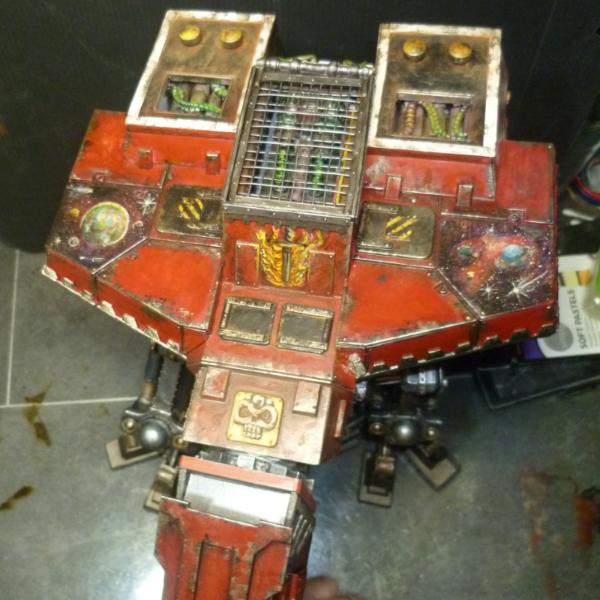
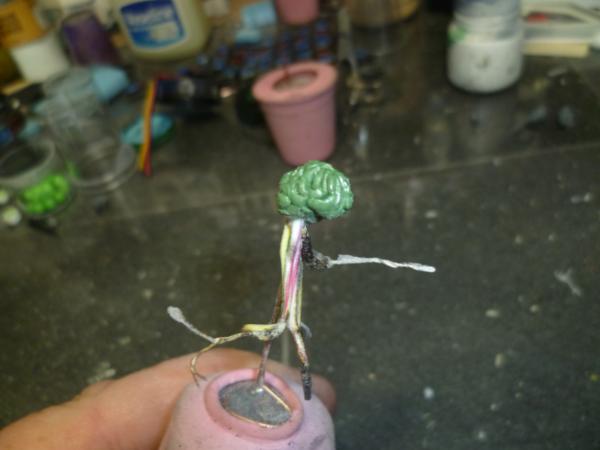
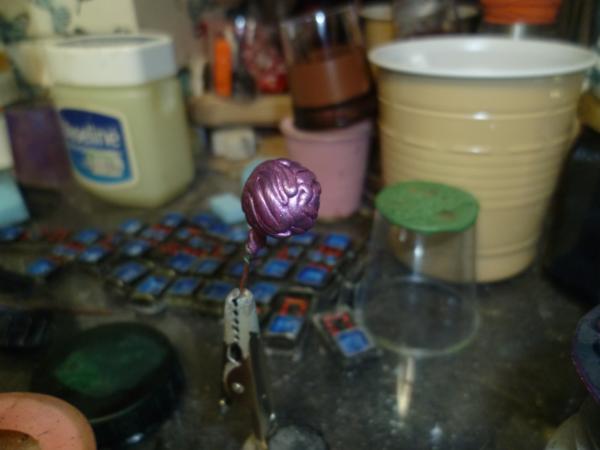
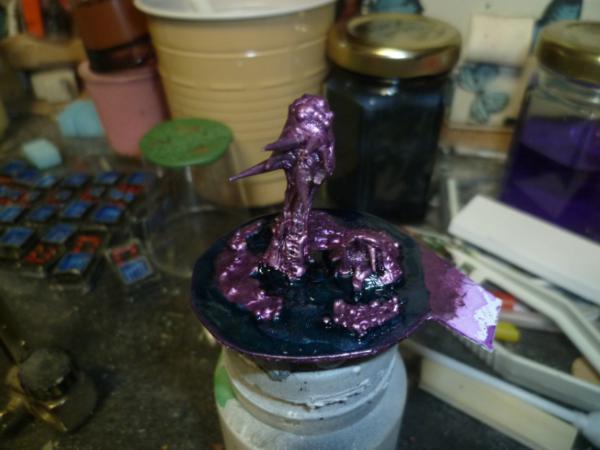
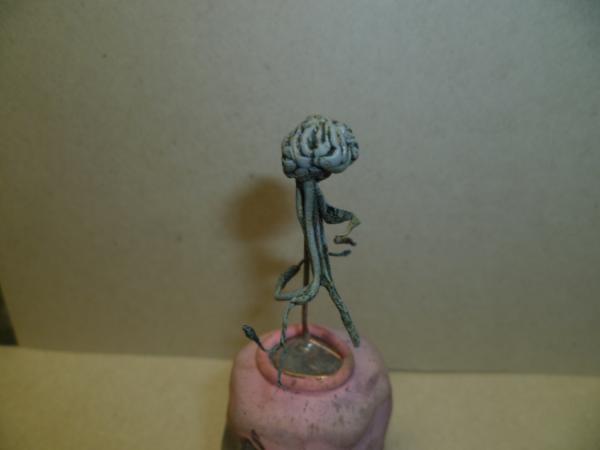
Oh and Shinagami-Ren is working on some bits, going to get her watching some videos I think. She is a bugger for updating her blog, so I will show you a WIP of one of her experiments.
Thanks for looking in and as always C&C welcome and encouraged.
Those starscape panels are excellent . Warhound is really coming along!
That... spider lady? That's come up very creepy! Interesting choice to have the human legs as well as full compliment of spider legs. Differentiates it from a drider/spiderqueen though.
@ Grim, Thanks bud, Going to persuade her to put an update up.
@ Alaricuk, Thank you sir.
@ DrH, Thanks bud, appreciate it, and 'Ren got the message.
@ boundless, Thanks bud.
@Theo, Most welcome input as always, thanks bud. going more for the "Oh look at the pretty.....BANG!" from passing pilots on that really, but up against something like Blackadders monstrosity, I guess they would be looking down on it.
@ Graven, Thank you sir.
@ York, Thanks bud, what painting skills?
@ Ruglud, you got to try this bud, it is a lesson in patience.
@ WP, Afraid this one is now spoken for, but if you want a Chem Dogs one just say the word bud.
OK Update, pic dump, this is all WIP.
Spoilered the individual zoomables as lots.
Spoiler:
Thanks for looking, and your support is amazing, thank you.
Terrific build Cam- scratch-built _and_ uses imaginative found objects! Plus the magnetic resin gimbals. I'm particularly liking the illuminated instrument panel- what a neat innovation. Along with learning about plastic and/or resin casting from you guys one day, I really want to play with illuminations some. I have some experience from my model railroading days (American HO//British OO) but the products available today are fantastic.
I'm very much enjoying following this build and look forward to more.
I know you guys are being too kind with your comments, but just having someone say it is looking OK is great for me, real motivation.
@ Vik, Thank you sir, I am not sure on banners, kinda like the idea, but the gent who will be getting this has stated in his blog that he does not like too much ostentation.
@ Whalemusic360, Thank you.. @ Meer_Cat, Thanks bud, and always new stuff to have a go at.
@ Gits, Thanks sir, she will be The "Iustus Indignatio" Translates to...The "Righteous Indignation" Named by her soon to be new owner SirDonlad.
@ Mad... Thank you bud.
@ EDC, Thanks bud.
@ SirDonlad, Just hope you like her once you have her in hand.
@ Josh, Thanks.
@ Dr H, Thanks bud.
The paint job is great Cam. It really makes it so much more personalized than a standard pattern Titan color scheme. Almost like the pilot cared about his ride than just drove it off the sales floor.
You're spot on about my views on banners etc, but in this case i'm bending to the idea - it would be fitting to have one honouring the creating Archmagos (definetly get your name on it!) , the bonded household Col'Khak protectorate and the pact made with the Ordo Reductor for the 'loan'
Edit: it is looking glorius Cam! Still cant get over the freehand planets - i don't have the skills/stones to try that on my stuff!
Meant to mention before- I've never seen the Gothic Mural panels on a warhound before- just Knights. I think it looks great and is entirely consistent with the whole concept of Titans. These machines are each a significant effort to produce, so naturally each would be personalized and embellished either by its factory or by its crew. It helps that the shoulder panel murals are so well done, of course.
They spend YEARS on massive pit-stop ships in space, so it makes perfect sense for the artificers to lavish the details on, as long as the tech priesthood approved, of course
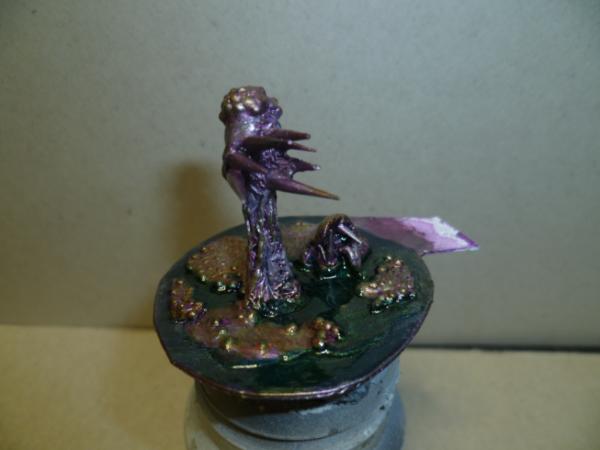
Thanks everyone, will reply soon, but thought I would drop in some pics, I have been doing a little, got a little distracted, but hoping to put in some serious time, and get this Warhound wrapped up.
Fancied doing something with Shinagami-Ren and organic rather than giant robot, so...
The white cog-edging on the right side carapace is great, it really enhances the extra work you did - it effectively 'frames' what it's around, and makes it look even better! Were you planning on doing the other side white too?
I love the way the toe armour paint is burnt black with the radiation, volkite beams and black lightning scoring - no messy smears from crushed infantry units there!
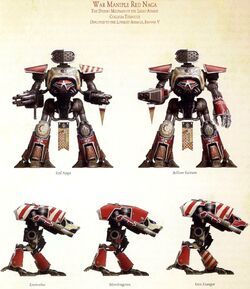
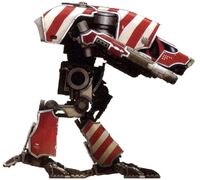
Your choices for colour scheme are perfect! Here is the maniple that was on Isstvan 5..
I'm not keen on the barber pole look of the red and white stripes, so what you have done so far inadvertently takes certain paint scheme cues from the red naga maniple without taking any of the ones i don't like!
@ Elbows, Thank you sir.
@ Red, Thanks.
@ SirDonlad, Thanks, well I am known for being telepathetic, pretty sure I aint no Jeanyass.
@ Joe, Thanks bud.
@ Ruglud, Thanks bud, and see below some progress.
@ Panda, Thank you sir, very much appreciated.
So the big guy outshines the little folk, no worries, I will let them have their day soon.
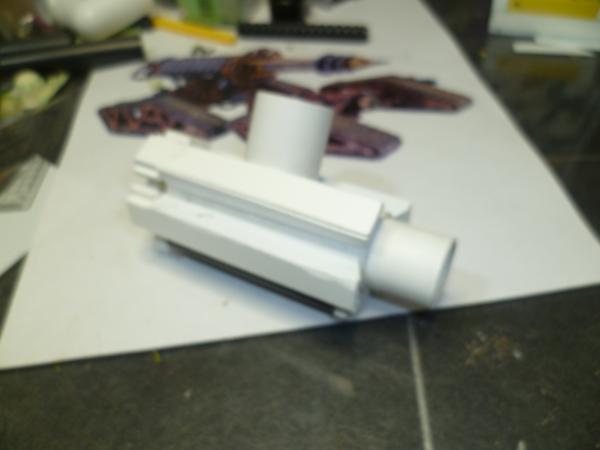
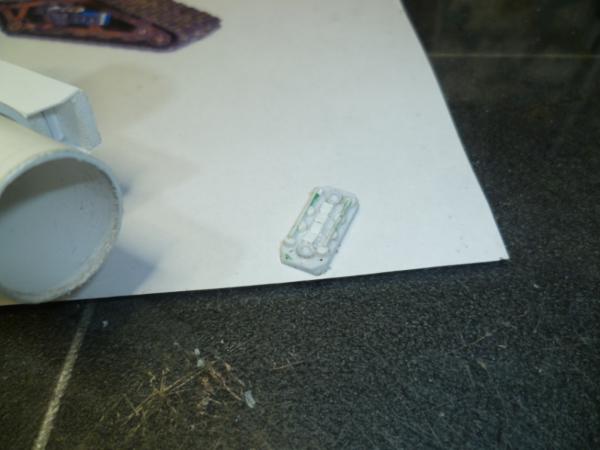
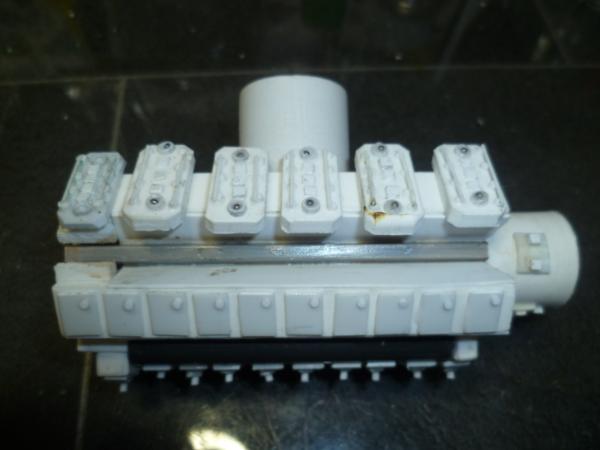
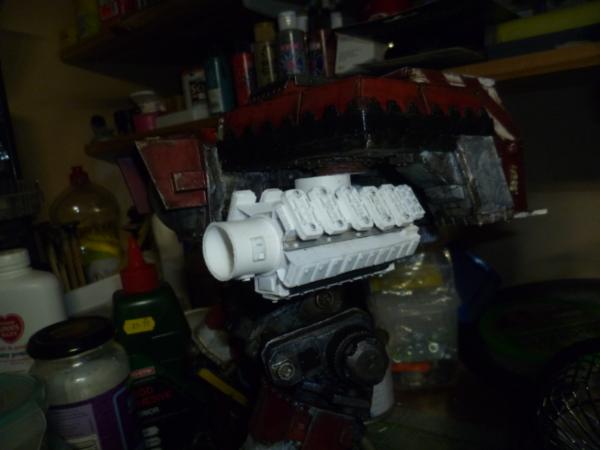
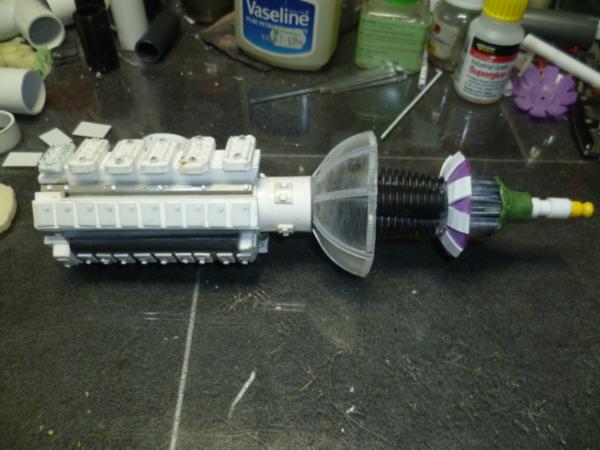
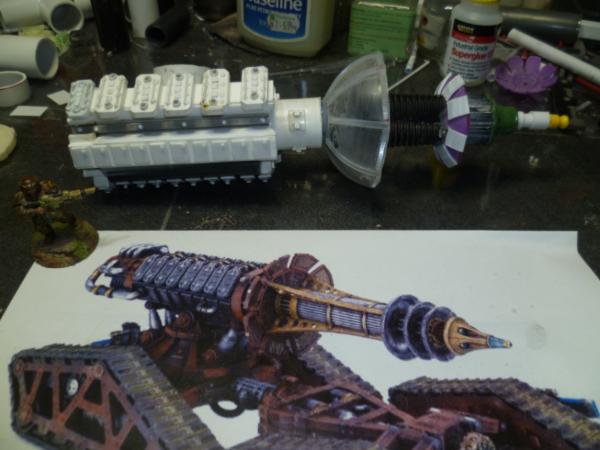
Now the weapons I asked what he wanted and he asked for a titan equivalent of the Ulator class Sonic Destructor. A terrifying weapon whose origins lie in the shadows of the Age of Strife, the Sonic Destructor generates a wave of annihilation that wreaks havoc across the battlefield.
So some 22mm pipe and a tee connector, and a few bits and pieces...
And a pic of what it is supposed to look like, and a mini for scale.
Thank you all for looking and your thoughts, very much appreciated.
Honestly, making a (small) living by hobby modeling should definitely be an option for you...I've been waiting to see you working on the gun arms for what feels like an eternity...and the waiting was totally worth it!!! Amazing skills in scratch building and working after a reference!!!
Painting is amazing, but it feels that goes without needing to be mentioned...but as you're an artist you need to be praised! Applause is mana after all
Sorry, fell has kept me from following everything going on.
But holy . Paint job is fantastic, I think it matches up really well with that Legio. Also the gun you built . Definitely a custom piece that anyone would be proud to own.
Oh the age and weathering on that Titan is awesome Cam, the details for the cockpit are also spot on! just need tasp/cable connecting the princeps to his titan.


 )
)


 , your a machine sir
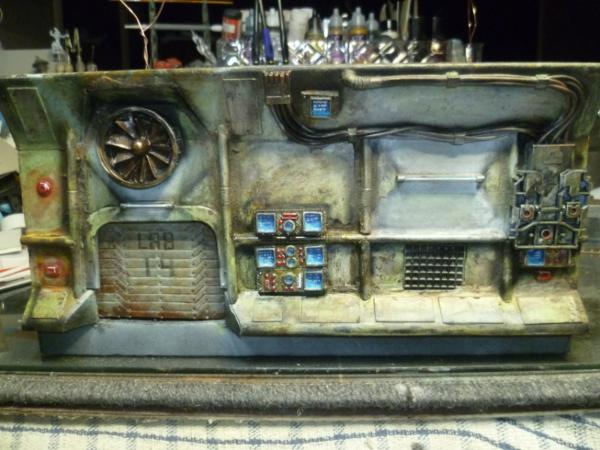

 it's not right! but luckily we have some friendly Yautja (sic) to stem the tide! are they from the game?


 Brilliant, he's using vinyl marble look floor tile for the base. So no worries about not channeling Januine.


 that's so much bigger than I thought it would be...or your smaller....