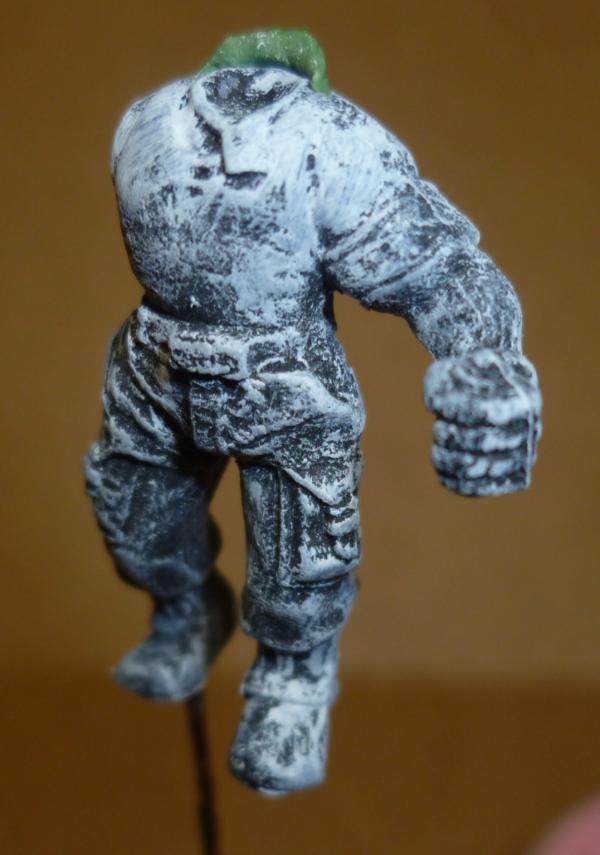
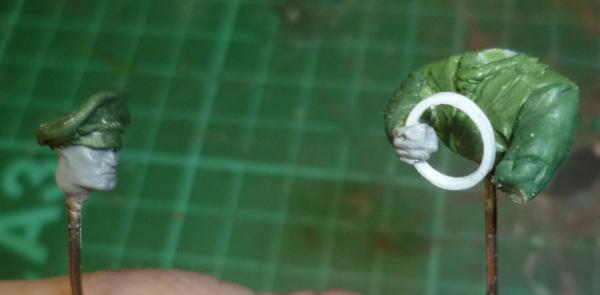
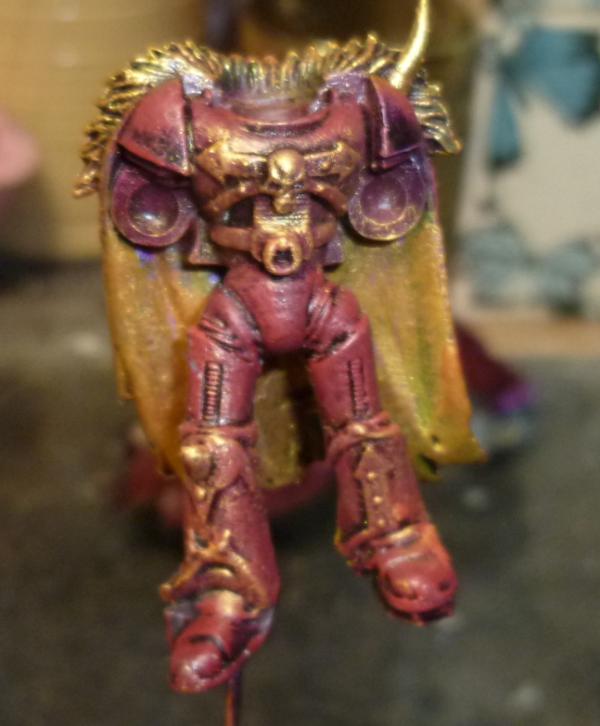
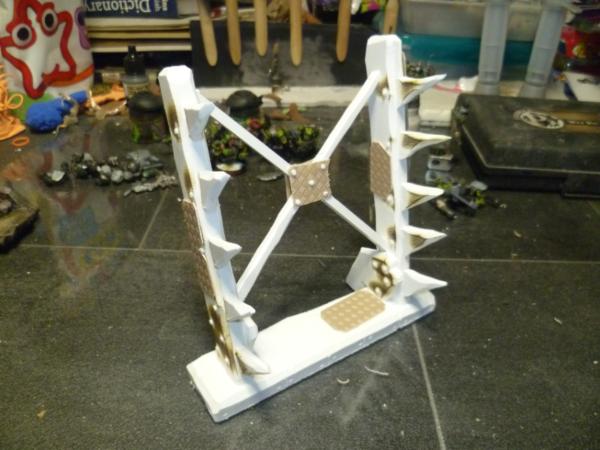
Nice job on the Comm'. Do you have colour shapers (silicone-tipped thingys) for putty work? They may help get a smoother finish at the first attempt, her clothing is a little too worn/tattered for her rank, I feel.
And wow. Great job little Rhi'.
I don't envy your attempts to cast it, with all those teeth going in all directions.
If you could make the right hand with a pistol, that would work to fit, and a sword for the left hand? seems right for a commissar, power sword and pistol of choice.
Thanks guys. Thinking about perfecting it and sending as gifts to you for xmas! hehe.
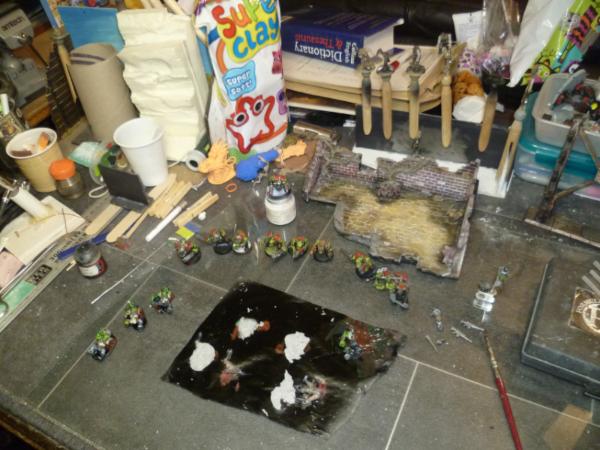
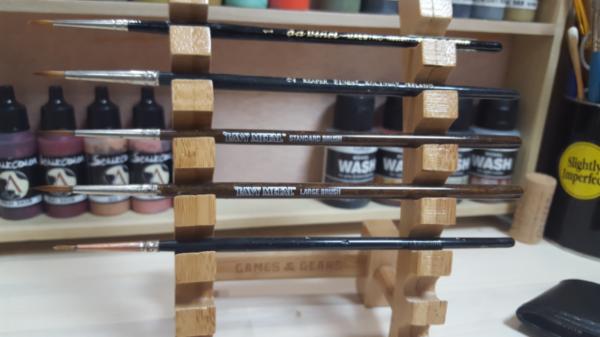
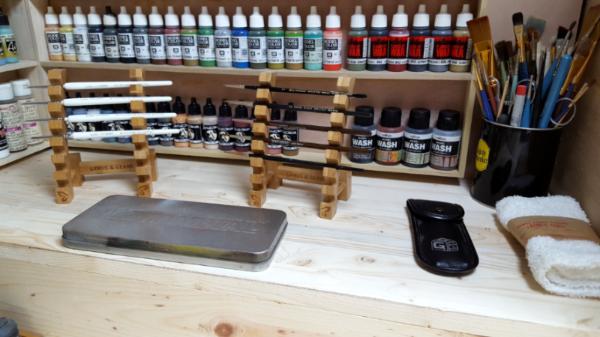
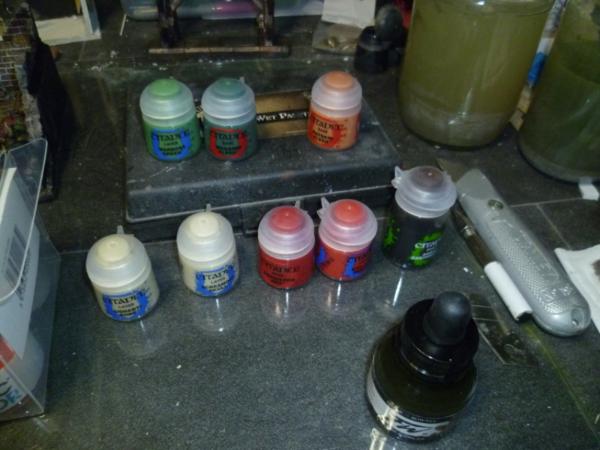
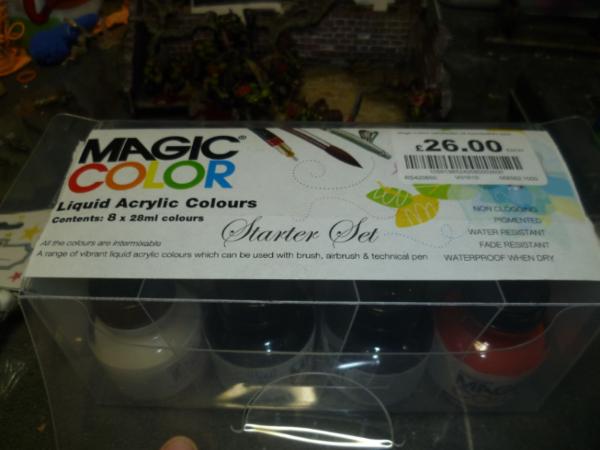
So had a bit of a day, but some good was my beloved went in to local GW and got me some supplies. Also nipped to Hobbycraft and got a couple nice treats, more on that in a mo, first up....
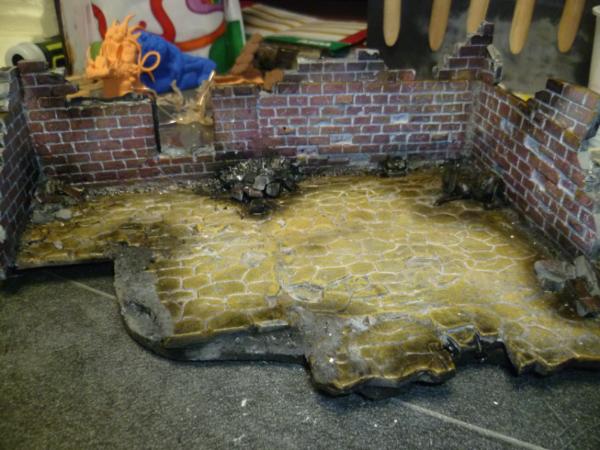
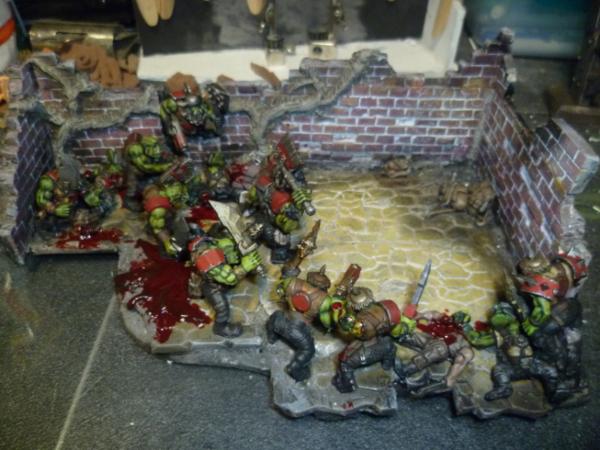
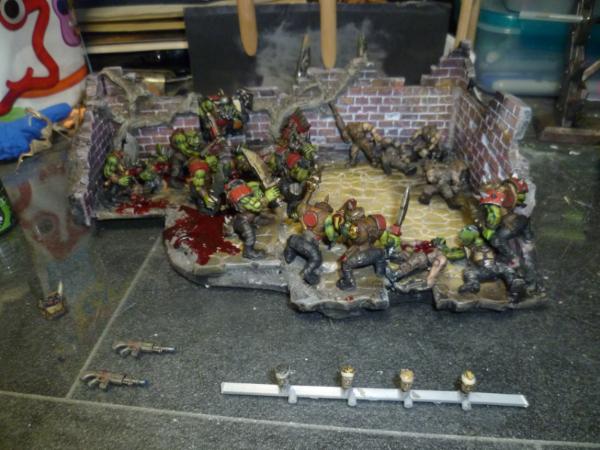
All a bit placed at mo, still lots to do, but going to hammer it over next day or so.
Also good news I won the last round of the LoER comp, with the Waagh! Tower, so up to me for the next round.
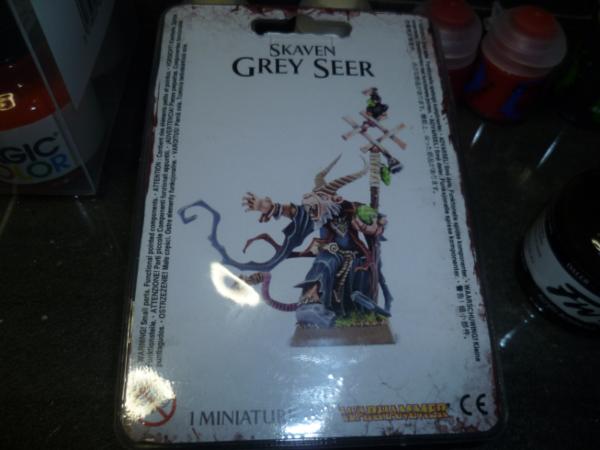
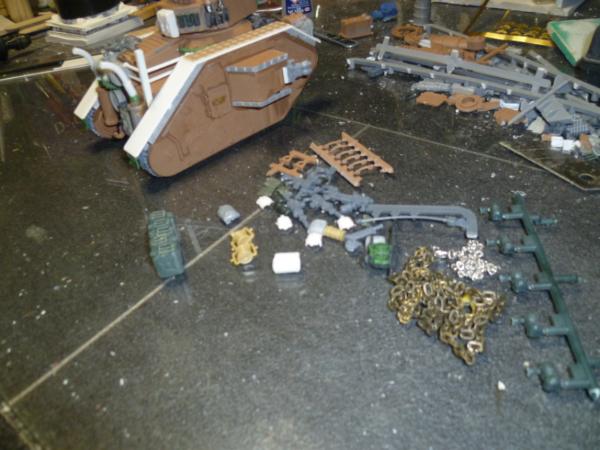
And lastly supply drop...
So happy chap in the end. Trying to get my mojo on, thoughts as always welcome.
first congratz for the very well deserved win matey! you stomped the competition literally! i never invested the amount of time you had put into the waagh tower...in my dice tower...so that alone was a winning argument! (not even daring speaking about the classy paintjob you did an...well all^^)
that scene now...this looks as a soon to be slaughterfest...poor imps...they´ll get cheesed (takes even longer then getting creamed^^)
do i see that right? you got a wet palette?...upping the game once again^^
i recently got me a gravity feed AB pistol...kind of an early Christmas gift^^
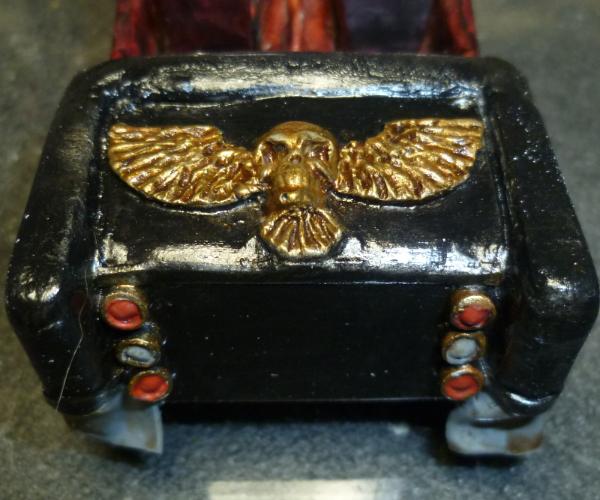
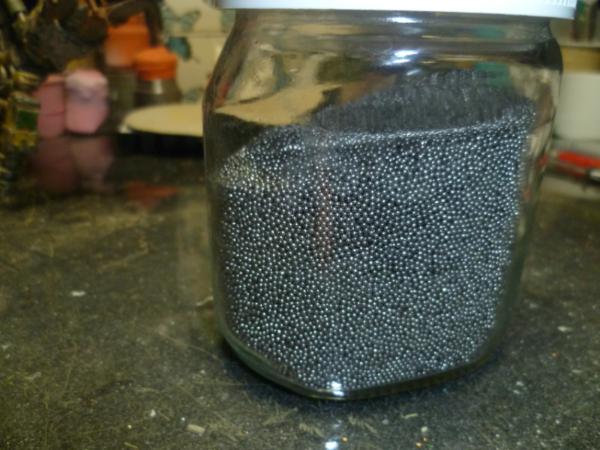
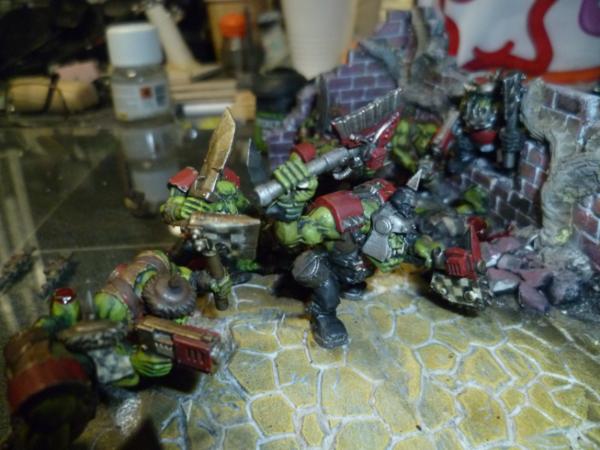
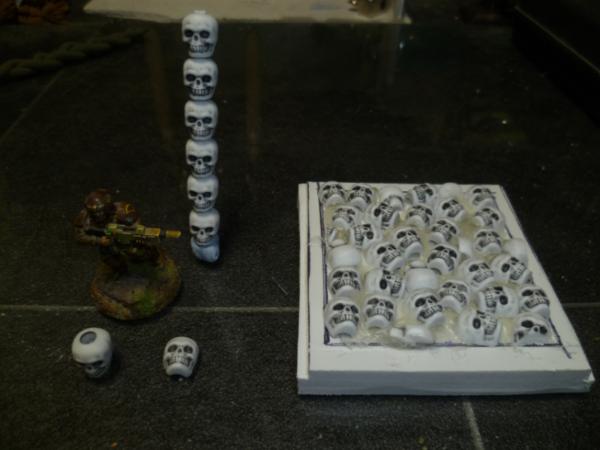
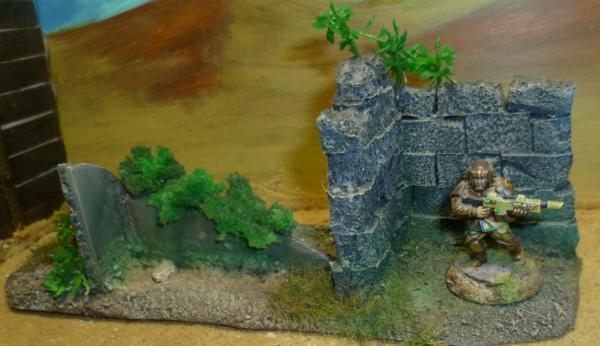
as for the skull beads...these need a scale comparrision shot please as i have been eyeing something llike these for quite some time...never acting on my urges/ideas as i was unsure about scale...
hurry up mate... my mojo is currently very low...i am mostly gaming these days at stupid games...so a new cool theme for a comp will have me sitting at attention in no time^^...
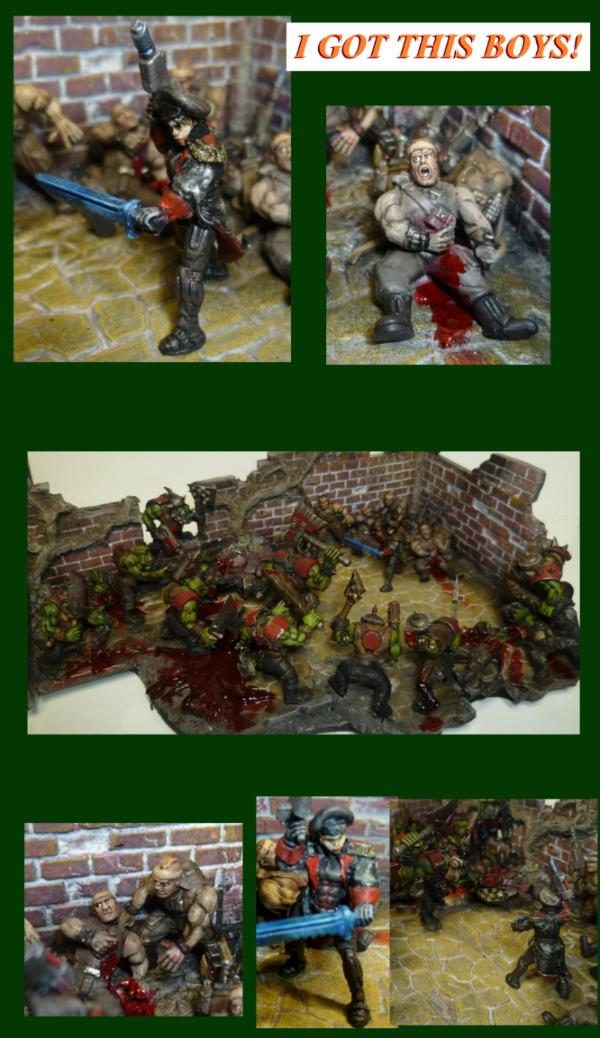
mind blowing action scene! i often wonder if there is no a place for us to work in museum or something like that making awesome dioramas for a living....that would be something i would really love to do...*sighs*(oone small suggestion...i find the idea that the commissar holds the sword like that a bit odd...the edge should face towards the enemy not downwards?...it´s now like...:"back down or you feel the flat of my sword...!")
but i like all the different facial expressions of the catachans... very good choice, and i would love to see a shot where you show what the guardsmen are seeing...to apreciate the front sides of yon orks^^
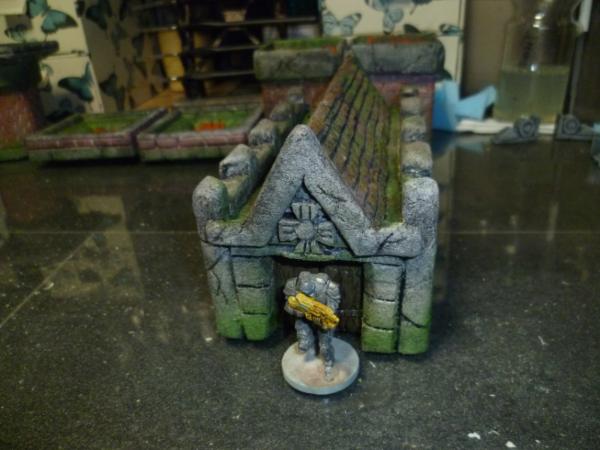
as for the beads... never thought about that use...i was expecting a headswap use...but now these beads ake way more sense and are totally fitting scale!!! just love the winged skull emblem and the skullbase/ wall section is awesome too!!! i think i need to try that too...and honestly... you can get these beads in a zillion bags for rather cheapo money....so that goes to my shopping list^^
have you decided upon a theme yet... i a tingling with anticipation...
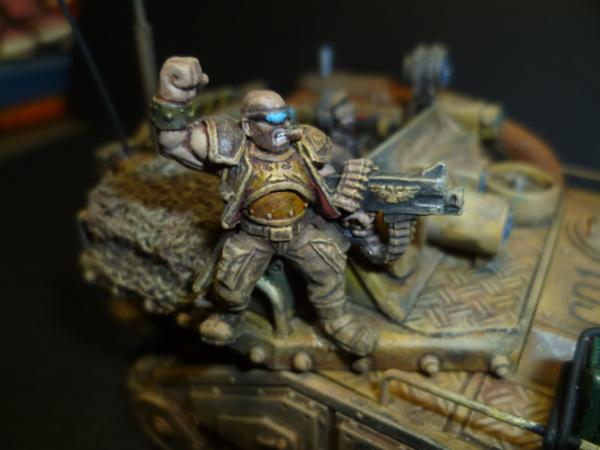
You know Cam, I really like the fact that in your diorama the commissar is stepping up for the dirty work. You don't see that depicted very often & it is refreshing. Beautiful work. Creative, dynamic, expertly executed. Another masterpiece.
Those beads look great, I could see a few Khorne totem poles being made out of them.
I too really like the commissar stepping up , but I see him all of a sudden changing into the C'tan sword wielding assassin and stomping all the orcs........then telling the boys...."I'm sorry you had to see that "
LOL Thank you guys, it was just one of those things in my head to do, got another couple yet, but first, I want to get myself back on track, back to productive and pushing boundaries.
Reasoning (spoilered as personal junk, but for the few wonderful people that follow my thread )
Spoiler:
Brain Fart, simple as that really, this has been a hell of a year for many of us, and I have followed and cared deeply about many of you my friends, if nothing else you have shown me that I am not alone in suffering, and many of you have had way worse years than me. But as I try to explain irl, when you are up to your neck in gak, seeing someone drowning 20 feet away does not help your situation, especially when it is a friend, someone you care about. Most of my problems are work based compounded by family and friends ill or dying. Work wise, I have been doing 3 1/2 peoples jobs for over six months, including taking on a whole area I have little experience of. I have a very responsible job and the additional workload has even more responsibility (millions of pounds at my finger tips) I have had zero training and no support. I work on average a 65 hour week With a 1 hour (50 miles) commute either side, each day. End result I got a bit down. Went to the docs and currently signed off with stress/ depression, basically broke down in doctors, did not realise just how low I was. Now like I say so many people have bad stuff happening that far outweighs my crap, but I am struggling, trying to motivate myself is mega right now, and my wonderful Dakka has even messed me up, I got all upset and frustrated, spat me dummy and everything. Still tried to push on though, and you few have been why I am still here and still willing to push to try. I only have Dakka in my life, sad I know, and OK I have a family (wife and 3 great kids) but the place I have gone too is not a place for them to follow, and they cannot really help, apart from being wonderful, which they manage effortlessly. I don't do anything else, work, eat, sleep and Dakka. It's the first thing I check on my phone in the morning, it's the last thing I check at night, how sad am I!
But the point is, I want to start over, drag myself out of this, and Dakka Dakka is my drug of choice. The zen of riveting, the deep trance of perfecting painting, I need these to give me goals and to give me something to be proud of in this crappy world.
Now please except my apologies for this brain fart, just hope it helps to explain my nonsense over the last few months, please stay with me, I need you.
So, back to basics, I have a million models, but which one to do which will be basic and straight forward and a challenge enough to be proud of in the end.....
Lets try this...
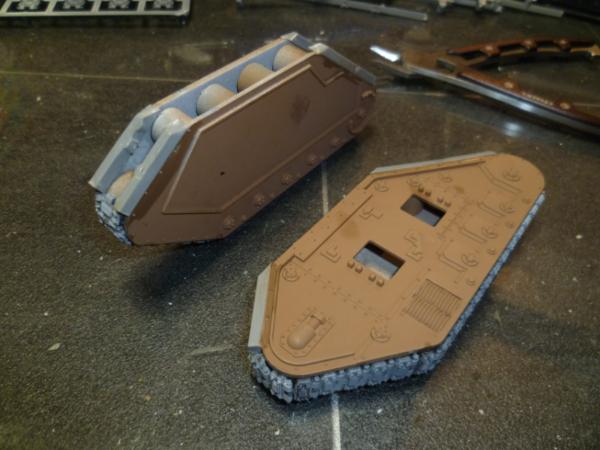
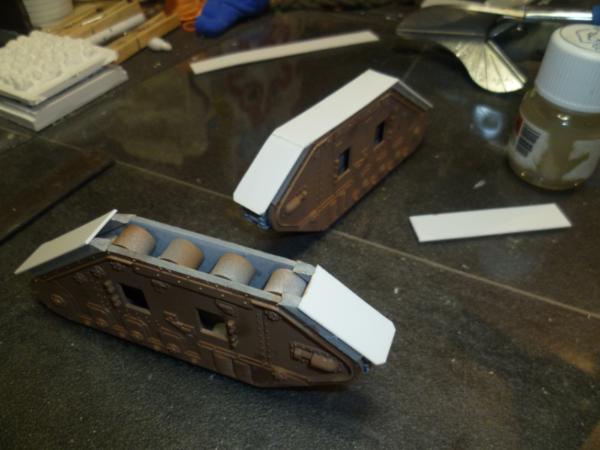
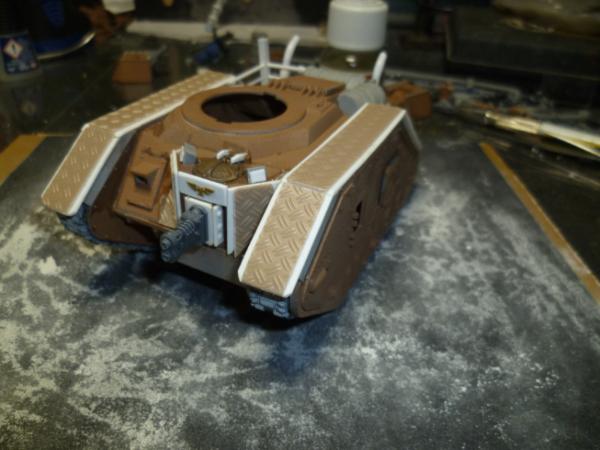
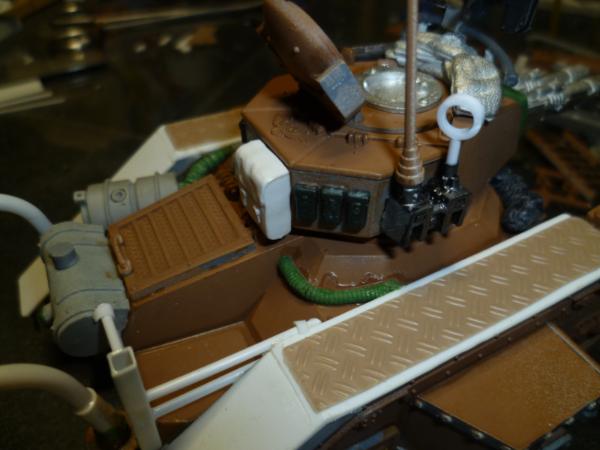
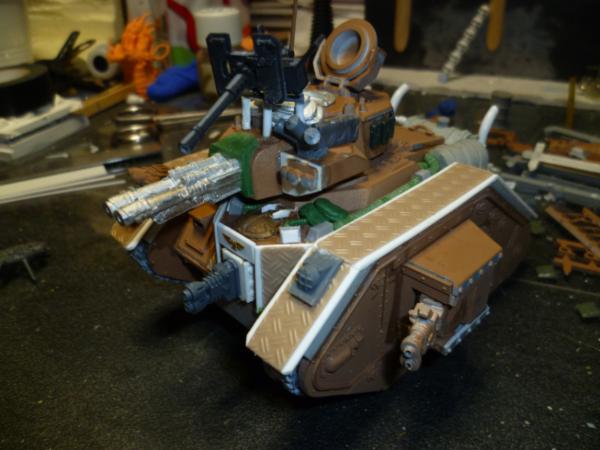
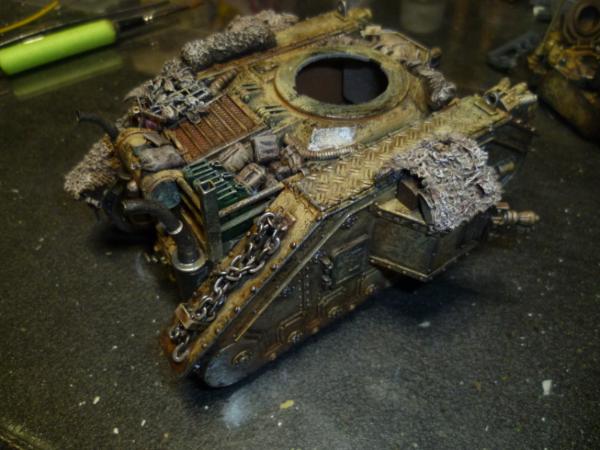
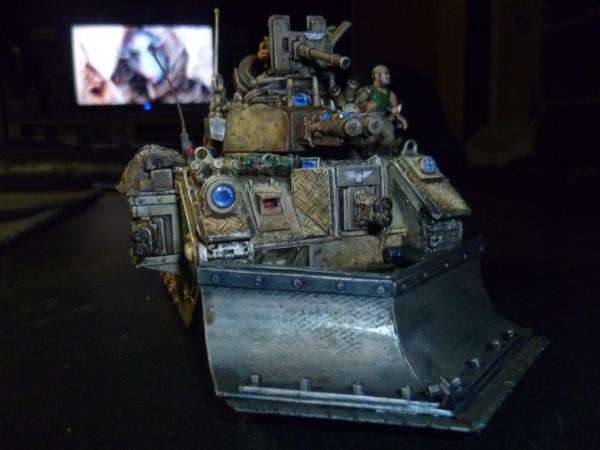
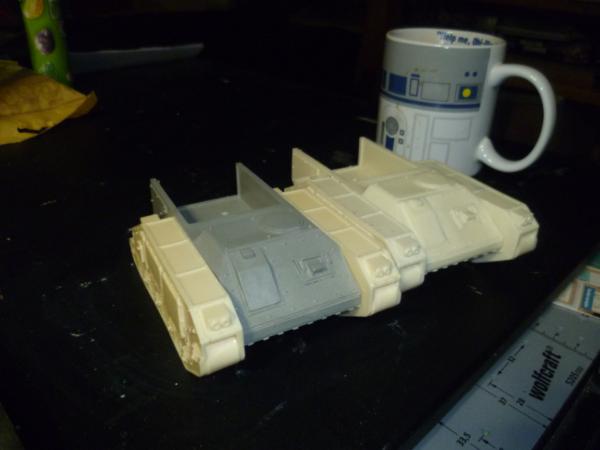
Track sections, with my usual extra armour mods on the top...
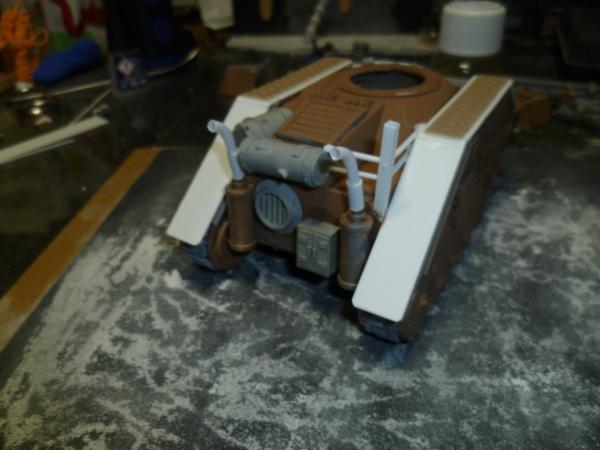
Then stuck the hull together...and added a couple details, still an ongoing process here, more to be added....
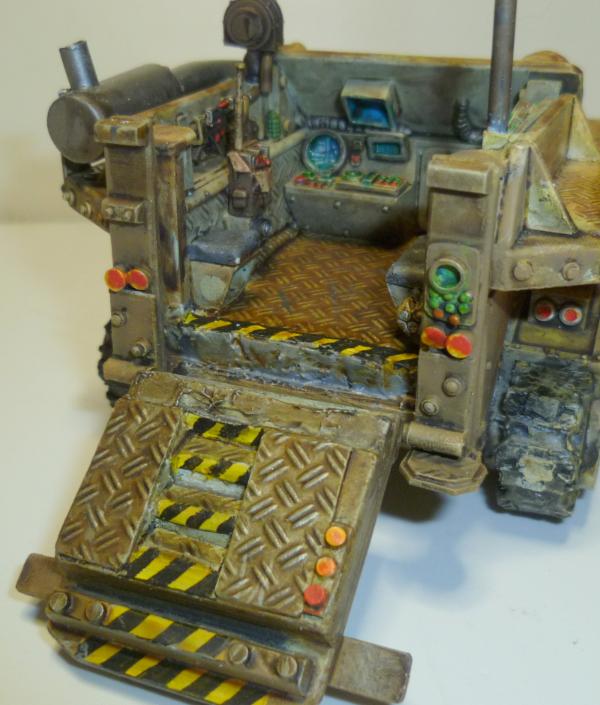
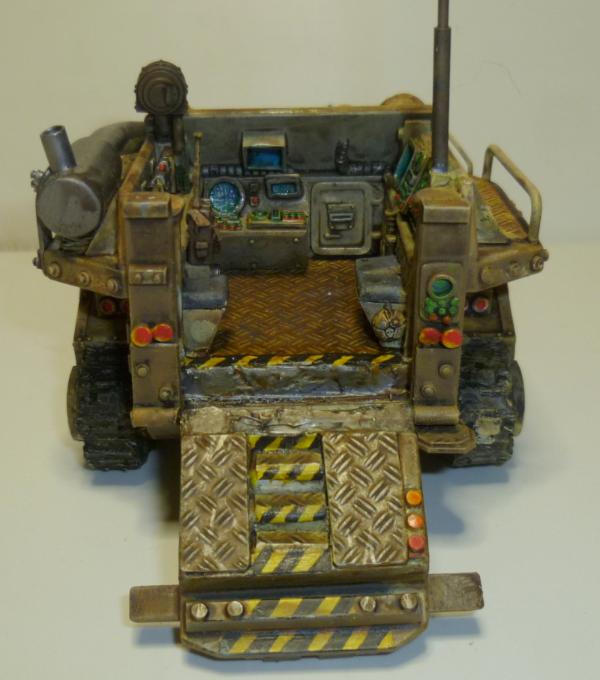
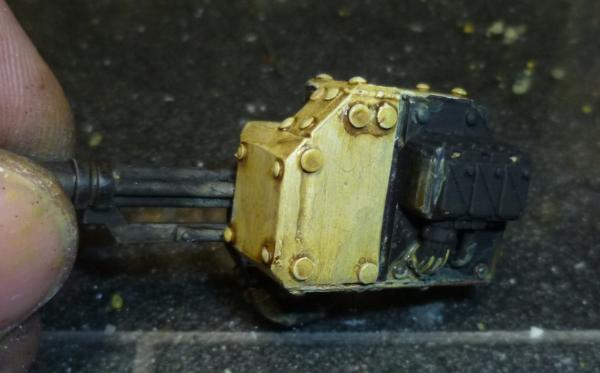
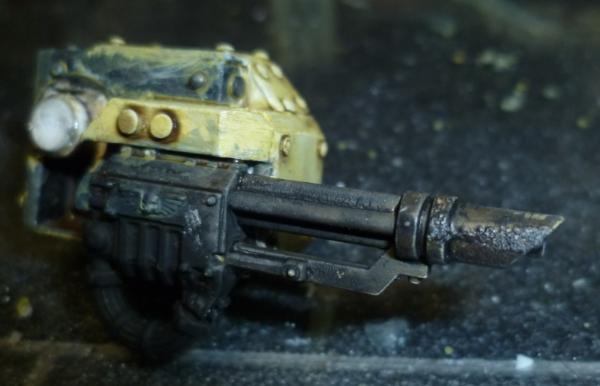
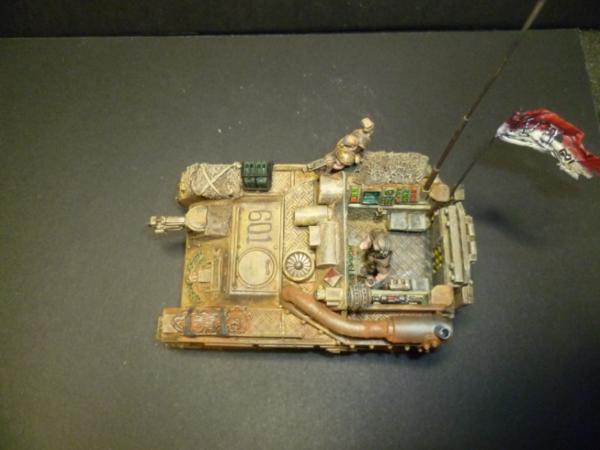
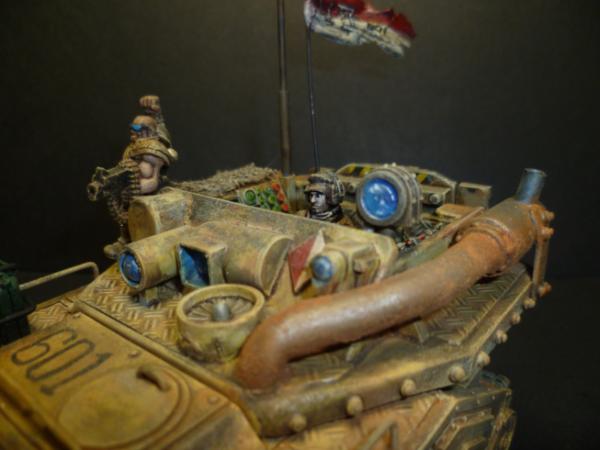
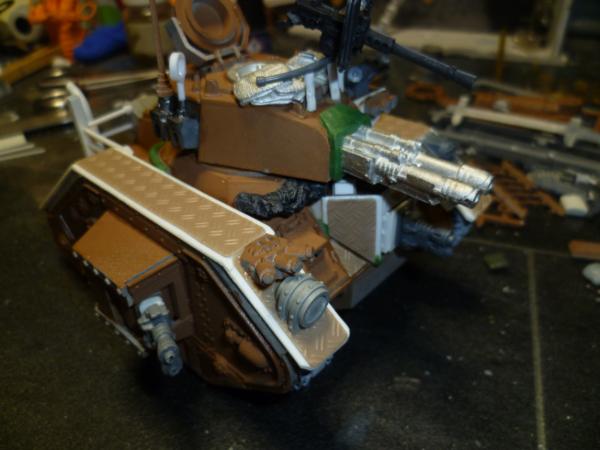
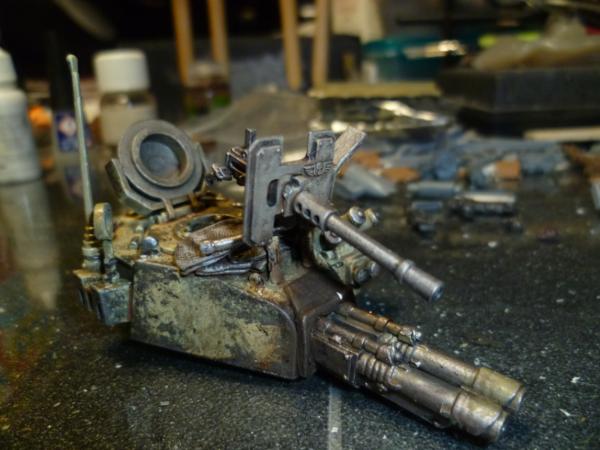
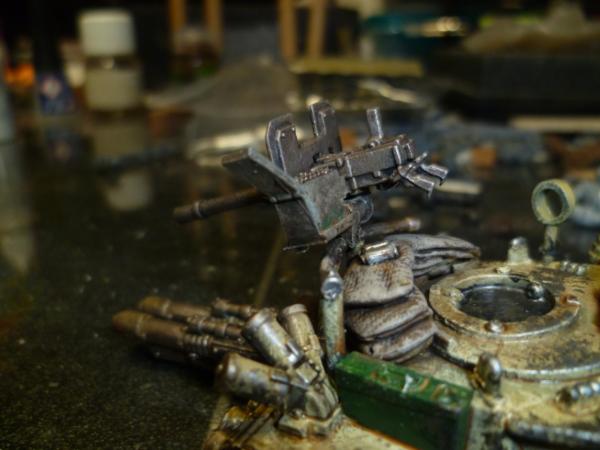
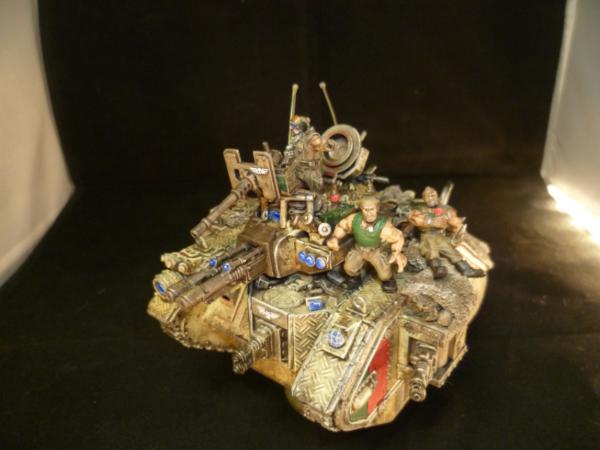
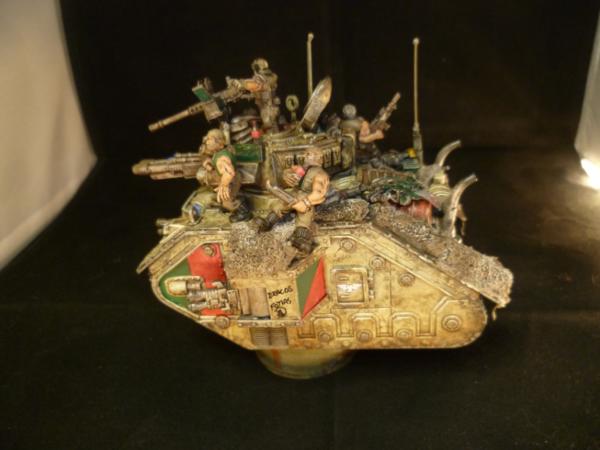
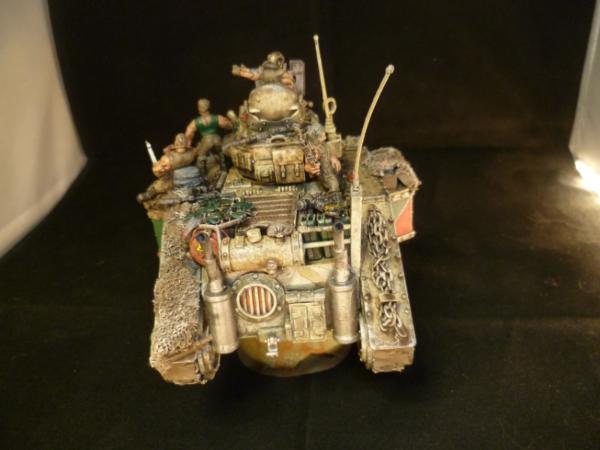
OK bit of fluffy stuff on what I am thinking here, going for a close quarters jungle tank, going to have 3 heavy flamers (1 x hull, 2 x sponson) the Exterminator Autocannon, and a heavy stubber pintle mounted. Not sure this is allowed, or really any good, but the idea is a front line point of contact armoured firestorm, you want to get rid of a bug problem .....flamethrower that nid. Also good against orks. It's the kind of thing I see them using in jungle terrain or built up areas, no real line of sight, close encounters and it needs to be tough as nails to fend off those hordes. Going to do a custom dozer blade as well I think. You know keep it simple to ease myself in here.
Replies...
@ Theo and Gits, thanks yes that was the thinking really, Commisars are badass in my head, not very nice in general, but badass all the same.
@ stonned Thanks bud, much appreciated.
@ Vik, sword is awkward, think I may have to move it arounnd, also got to nail down this whole power effect thing. Beads were a couple pound at Hobby craft, easy enough to cut and use, they are a very hard plastic. And I will have something up, struggling with a theme at moment, soon promise.
@ EDC Thank you and yes, these boys need to pray shee is as badass as she looks.
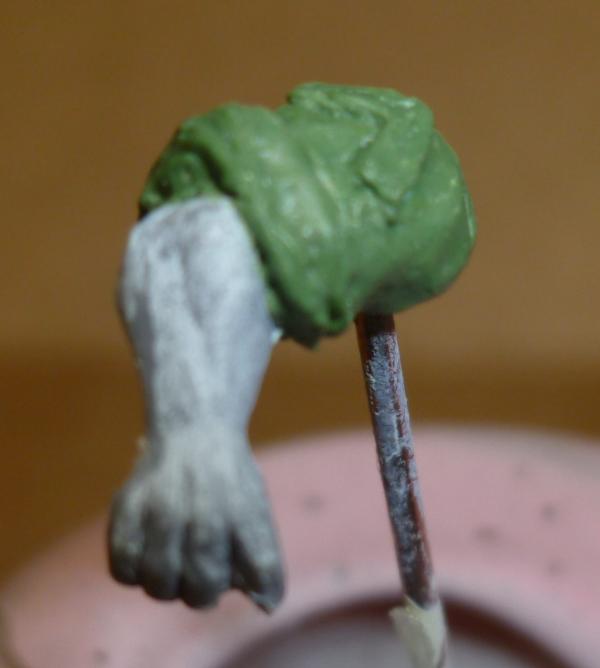
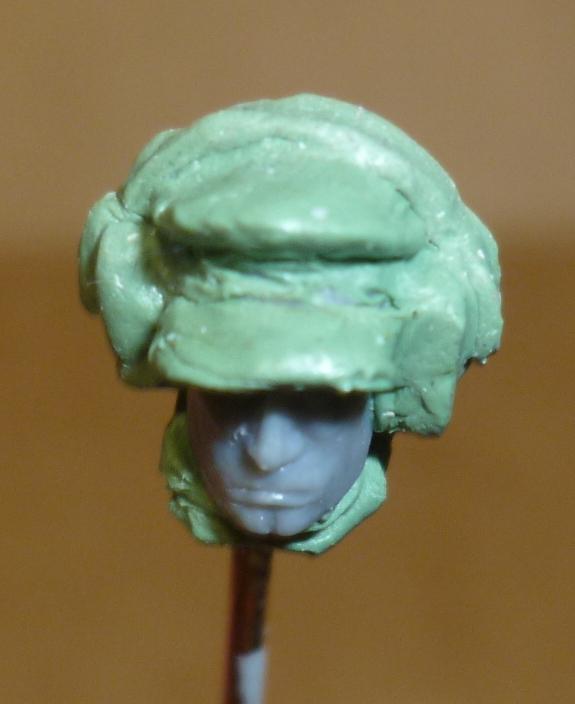
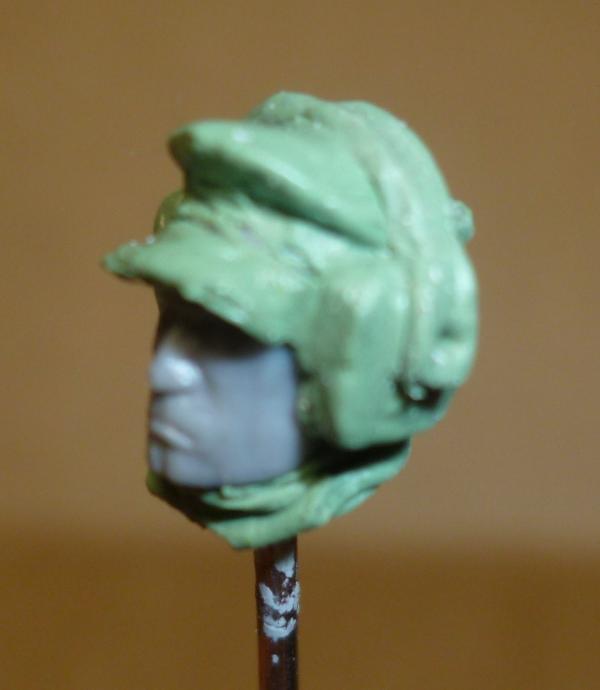
@WP Thanks bud, she is a conversion from a Sedition Wars character model, adde a little GS jacket and cap is all really.
Well thank you for stopping by and I really appreciate your comments, need to get this done and be happy with it, then think I need to do some orks....
Now take a well deserved victory lap, sir. Nice work on the LoER.
As far as projects go, more grim dark , perhaps not so good right now. Pick a project that is bright and shiny. This time of year it's up and at work before the sun has risen and home after it has set. Very dreary. I can imagine it is worse where you are, being at a much higher latitude, and thus having even shorter days.
Ah, full spectrum daylight bulbs, the ones with the high CRI. Alzo is company that makes them around here. No idea about the UK. Great for the hobby--less eyestrain and truer looking colors when painting etc. Makes things a bit cheerier too. Get something with a CRI (Color Render Index) of at least 90. 15 Watts will do for most things. The higher wattage bulbs can have a distracting buzz sometimes.
Go for something modern too, project-wise, after the tank, like that land rover you did a while back. That was really sweet work. No ruins either.
Those brick walls in the diorama. Wow. You really nailed 'em. They are what most impress me.
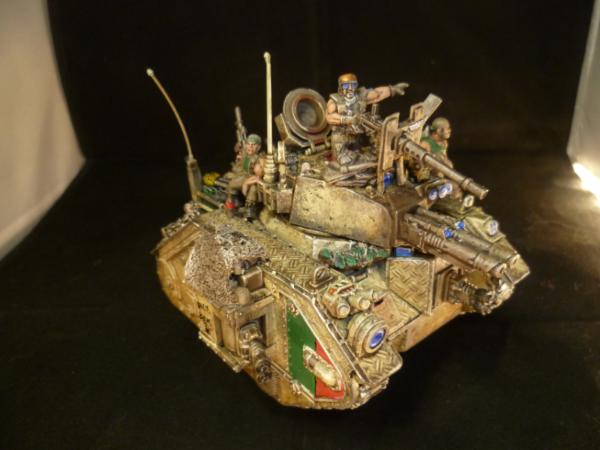
Chin up bud. We are all here for your awesome work. Keep entertaining us and hopefully things come good. Having monkeyed around with the leman russ in the past yours is looking awesome. The auto cannons are spectacularly awesome in game and three heavy flamers is crazy up close. Just watch them getting into close combat.
Okay! Commissar came out pretty good so far, I hear ya about putting the edge of her sword out-facing. Reminds me of a mother bear ready to protect her cubs, kinda vibe, those Orks are in trouble!
Tank is looking great, all the little extras work out wonderfully.
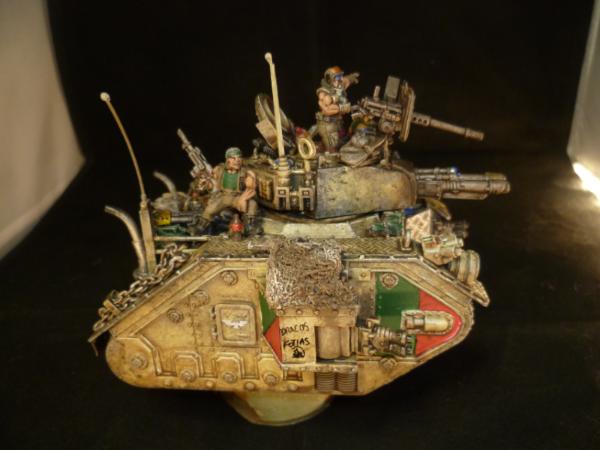
I think that safety shield around the heavy stubbed would be a great spot for some military graffiti, even if it's just a picture. ( I see a colorful parrot on there since it's a jungle world and would draw the eye of the opponent and maybe cause a dear in the headlights situation as the gunner cuts them down ).
Glad you've gotten help from a doctor Sir, it was just proven that you cannot "Fake it till you make it", so carve yourself some "Me" time every day. I know the hours and the workload, I'm there right with you (except drive time), I'm here for you if you need to vent .
Sorry to hear whats happening at the moment, hope we can help , I actually got into the hobby when I was a teenager as an outlet for what I was going through, so I can relate to the hobby being your world thing.
Russ is looking very good, and the ork dio is first rate, nicely executed. Sorry to hear of your struggles, and think your drug of choice is an excellent one. i find it to be my best distraction and therapy wrapped in one.
You need to sleep, friend. Where do you get the time to finish all these projects? How long did this take you? Very cool tank. Do you having any gloss varnish or liquid glazing compound. paint a thin layer over the lenses of the lights. Makes for a nice effect.
@Archer Preformed styrene sheeet, mostly though I did get a roller from Greenstuff World which works brilliantly with GS and Sculpy.
@Red, thank you what is sleep?
@ Everyone else, tha you all very much appreciated.
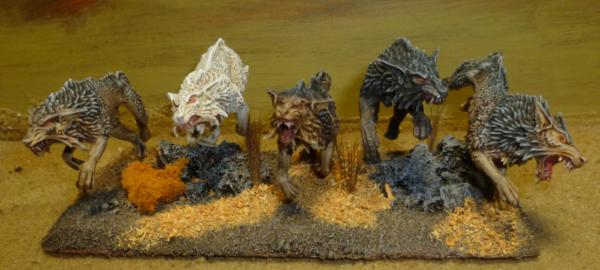
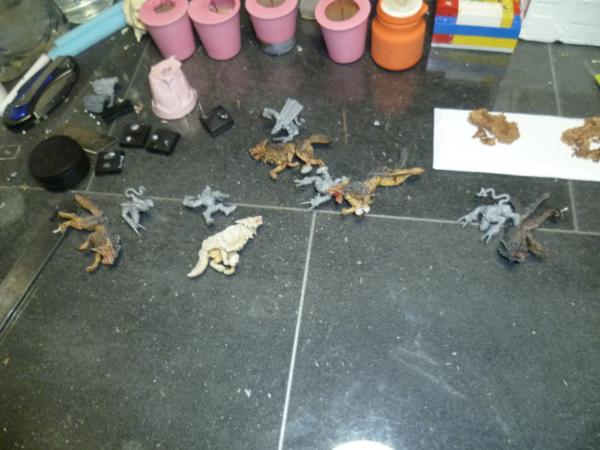
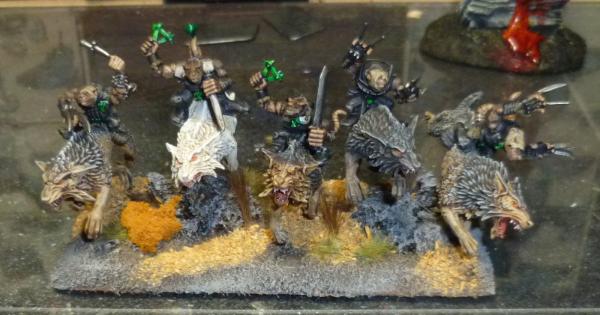
Ok, had these a while and fancied doing them, and since a bit of what you fancy is good for you...
Did not have anything particularly in mind, but then started looking at the KoW rules and at my Skaven, they can have cavalry, so started converting a few skaven to ride them..
Couple more shots of them on there base riderless at mo,...
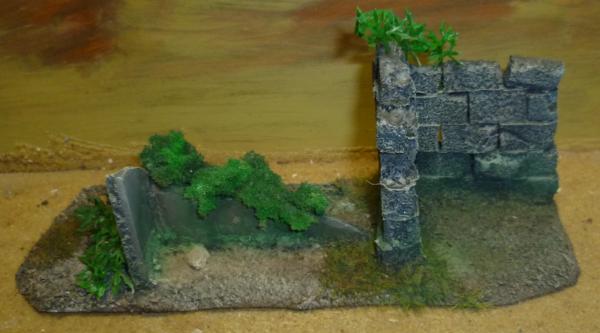
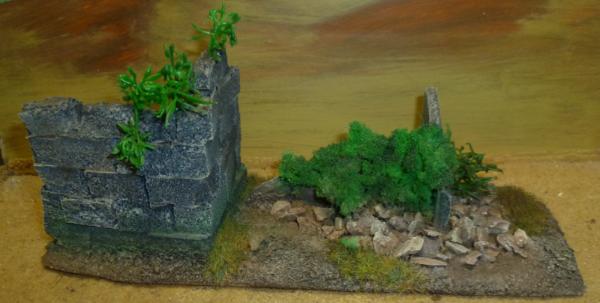
And while that was drying knocked up a scatter bit ...
Thanks for looking, also a little something over on the Orkishness blog, more soon,
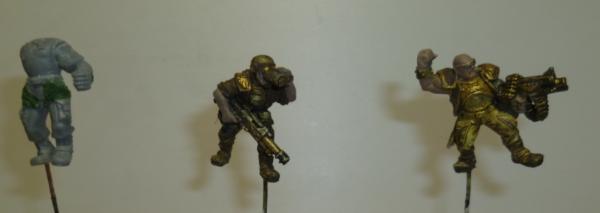
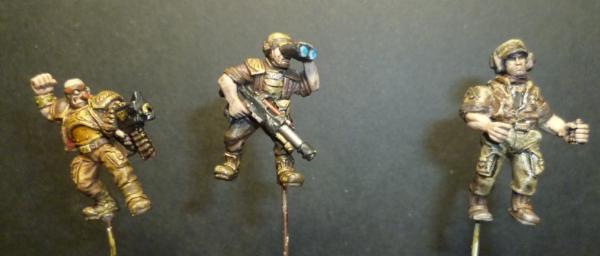
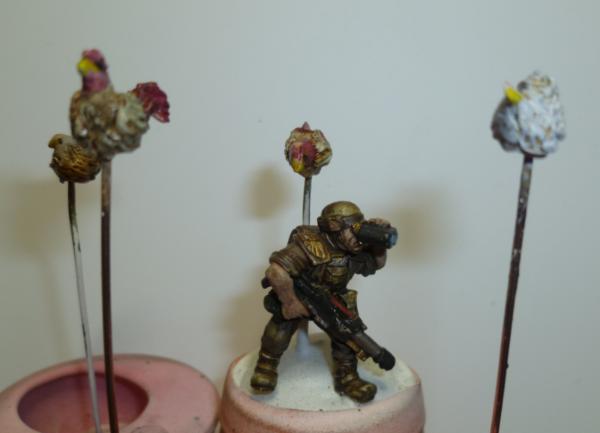
what i like the most, are the very cool and differently looking posed and all out perfect painted soldiers! the facial expressions! you definitely come a long way mate!
and it is good to see you in productivity! skaven wolfriders?.... that´s seriously something new here...kitbash of gobo and skaven, right? clever, mix!
Holy hell I need to add your blog to my feed, it slips down an inch and I miss it for a few days and look at what I . miss out on. Fantastic dio, super sweet tank, excellent wolves and now they're gonna be skaven mounts? Egads! Fantastic. Work you beast of a man.
Really keen to see what you come up with so I can steal it. Have been trying to figure out a table idea that breaks into 1 foot or 2 foot squares for transport and storage purposes. But can be assembled and sit on top of a smaller table and remain rigid. Any ideas?
Sewer board? Cool...what did you use for the "water" effects? Thought abut such a theme quite often too....Will it be open grounded or dungeon like? If the later, then how will you included a wall component?
Thank you all for the great comments, very much appreciated.
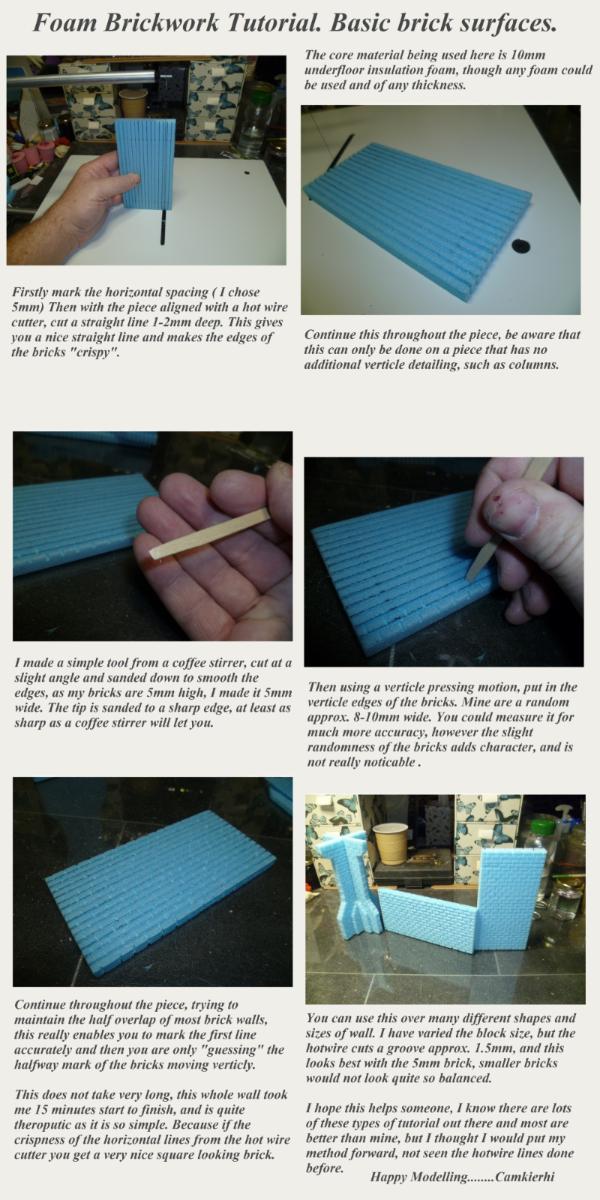
Here we go start of a "how I do!"
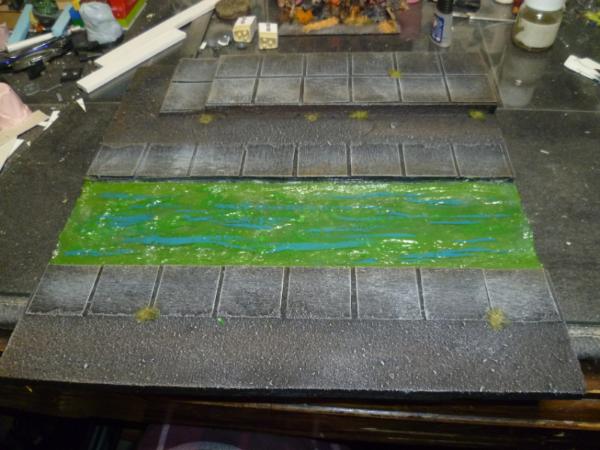
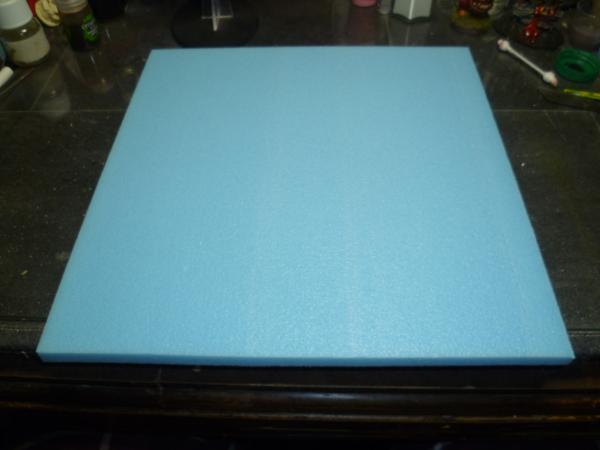
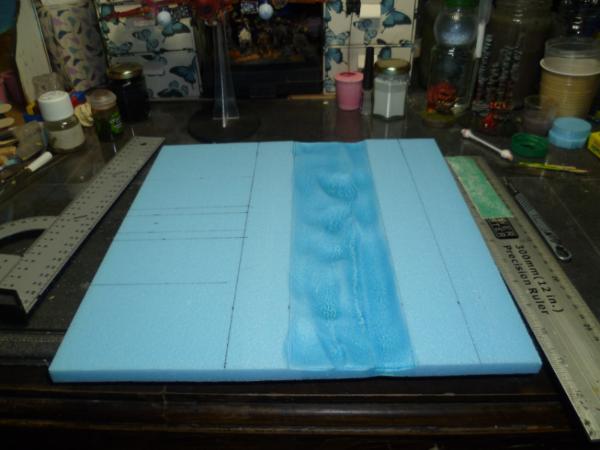
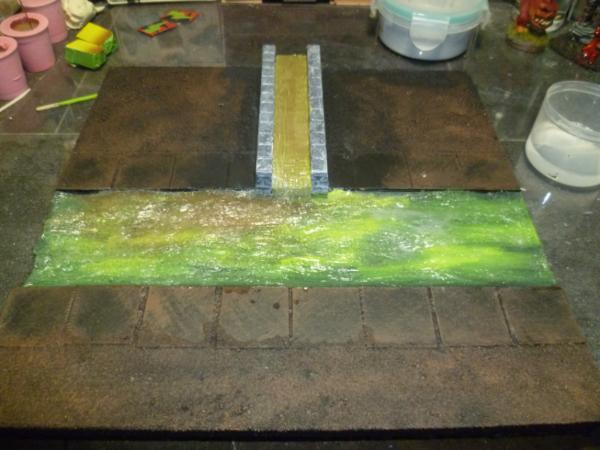
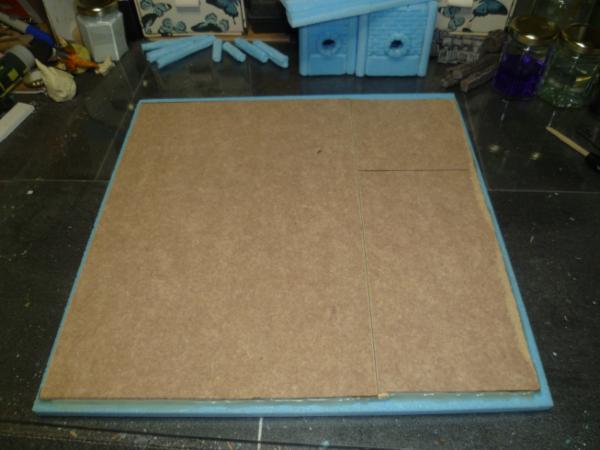
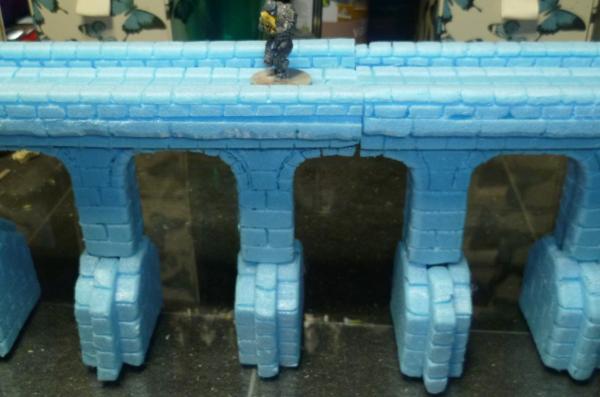
Got hold of some blue insulation foam, came in 4' x 2' sheets and is 10mm thick, used for underfloor heating. I cut it into 12" square bits and mounted the bits on some laminate flooring....
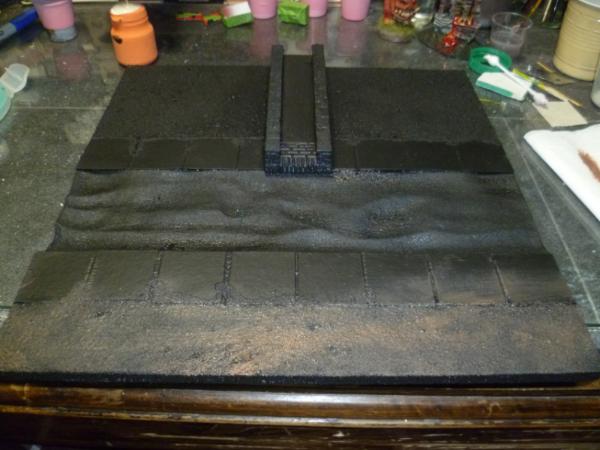
Draw out rough outline of where I want any detailing. In this case to continue the previous main drainage line, 3" from one edge across the board, with a culvert coming in from one side, and again to try and keep things standard this was in the exact centre of that edge.
You will also see where I have "sculpted" the water area, this was done by masking the sides with metal rulers, and from a distance above the board applying heat, in my case from a blowtorch.
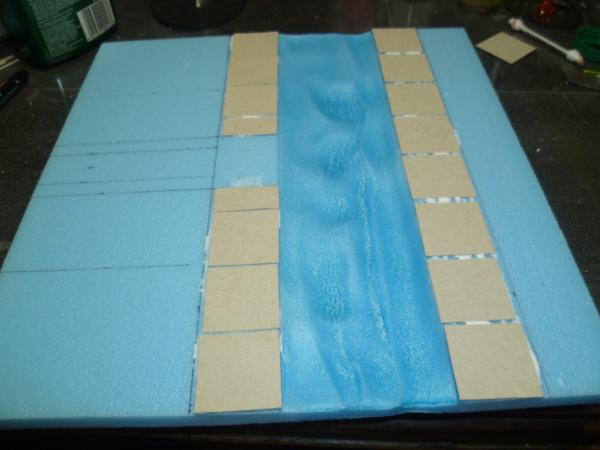
Next I added some cardboard tiles to represent slabs, these were stuck down with PVA.
Next added PVA and sand for texture, also you can see the culvert I have made from foam, this gives me the chance to add water effects to the board. Once this was dry gave the whole thing a coat of 50:50 PVA water left it to dry.
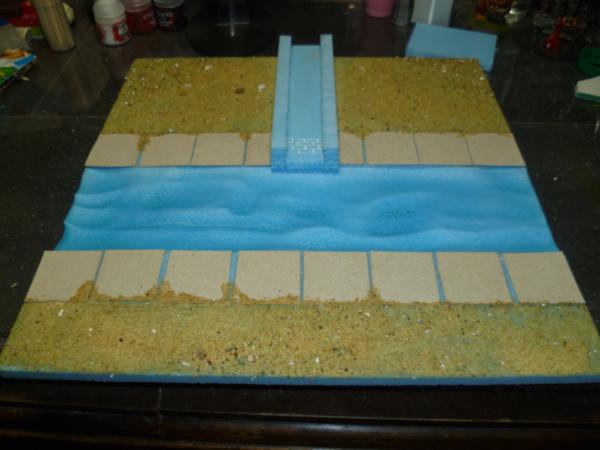
The detailing of the side channel..
Then brushed on black primer and as you can see at the bottom started to dry brush the dirt areas...
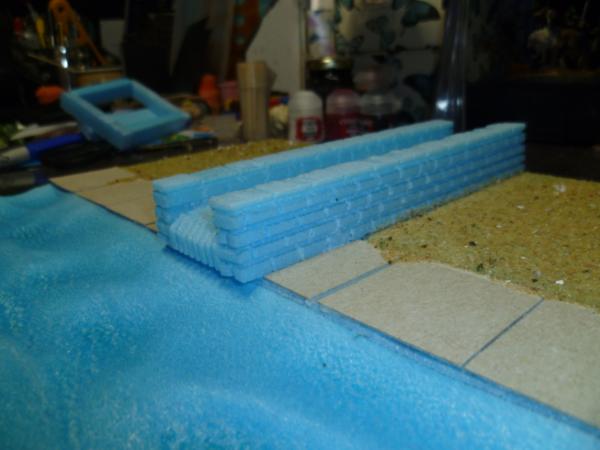
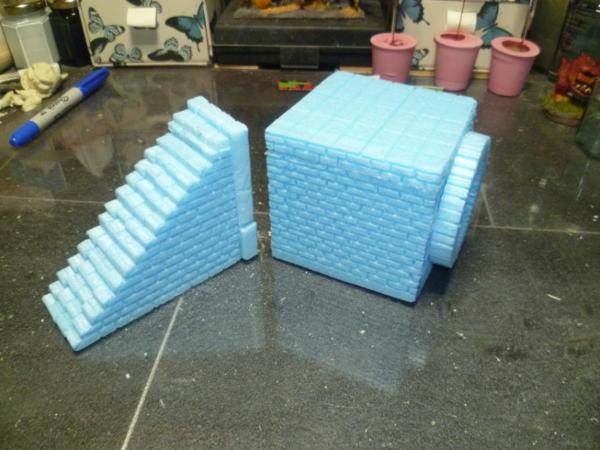
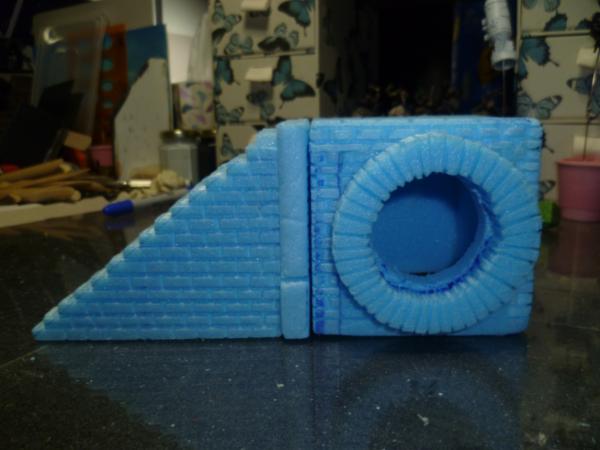
Love it, and been playing a bit for the bits to add to the board...
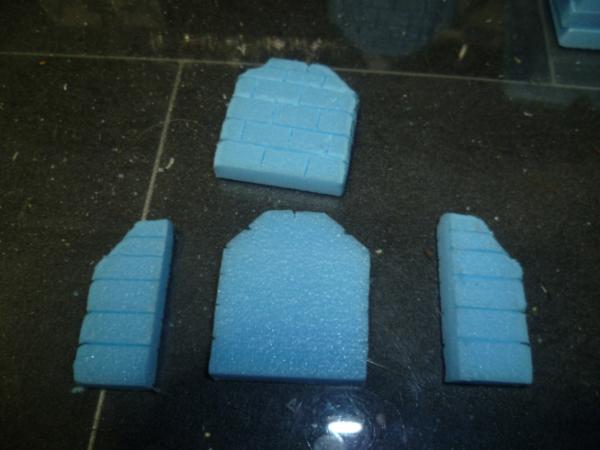
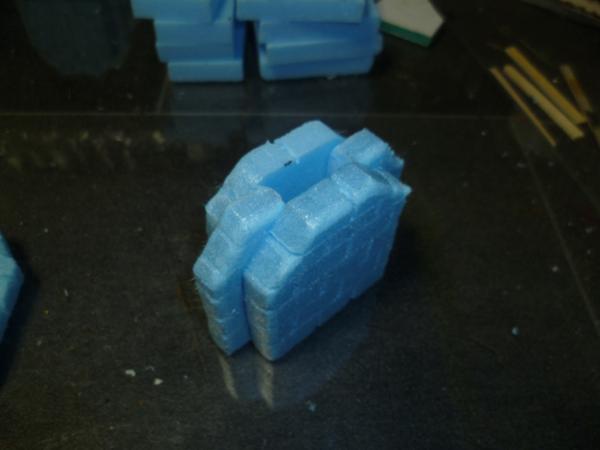
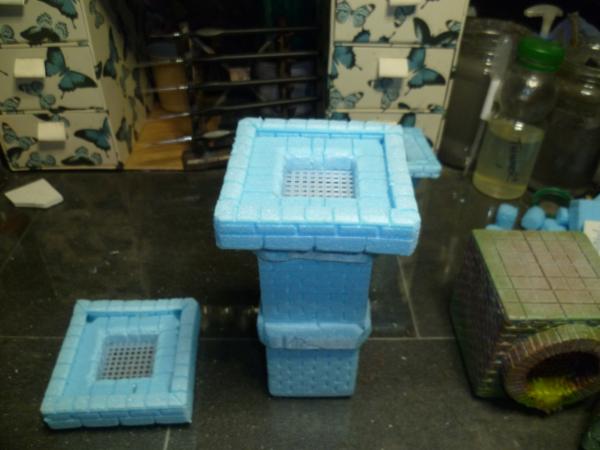
These can be used for various bits, the cube is 3" square, this will mean I could use this for Deadzone, as well as many other bits and pieces. Carved much of the detail with the foam cutter and did all the horizontal mortar lines with it, then made a sculpting tool to simply press the individual brick verticle lines. Is actually quite quick, going to play a little more and might have a go at moulding up some of it, to make reproduction easier.
Thank you for looking, all feedback very much appreciated, back soon with part 2 of the board which will include the water effects I am using.
i recently got me small set of foam cutters...the hand held variety...not being able to play with them yet...but you show how much fun one can have with these! the heat sculpted "waves" look super, but the true icing on the cake is your masonry work! it´s almost a crime () to paint the blue insulation foam...as it looks almost like a toy in blue as it is^^...stunning work mate...and if we don´t read us in the next few days...merry christmas to you and all around you!
@ Vik, it is great fun, and easy enough to do.
@Einibbus, Thank you sir.
@DrH, indeed just carefully lined up and held to the wire, gives a great straight line.
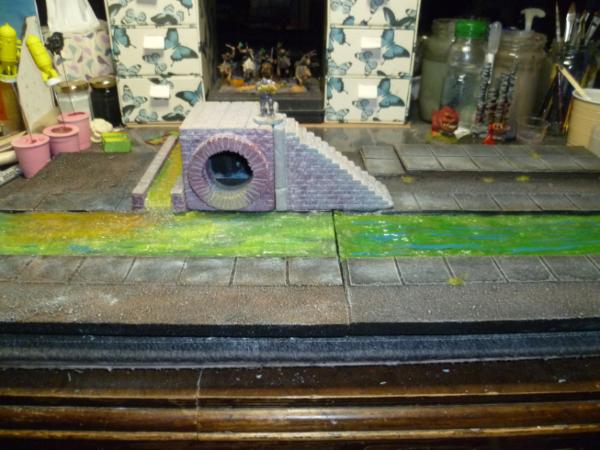
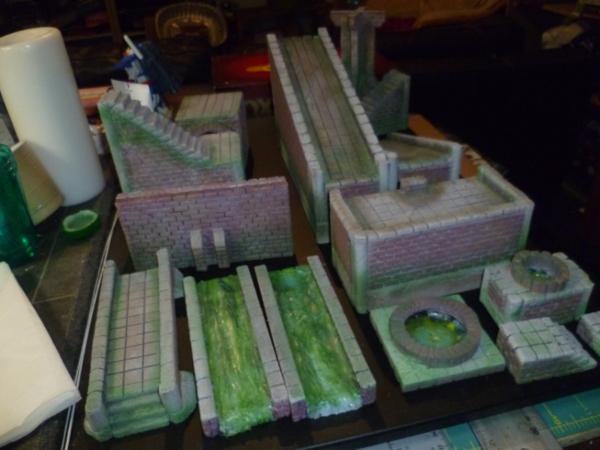
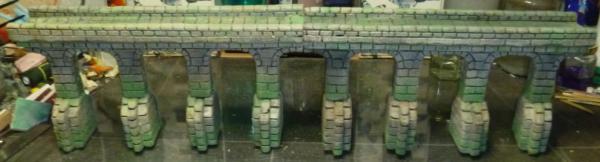
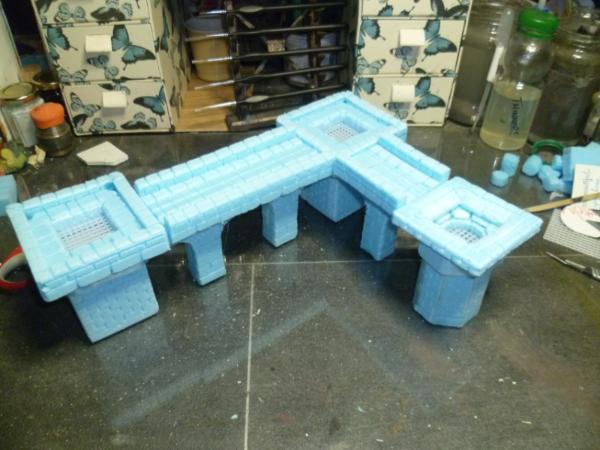
Well here is the next bit...
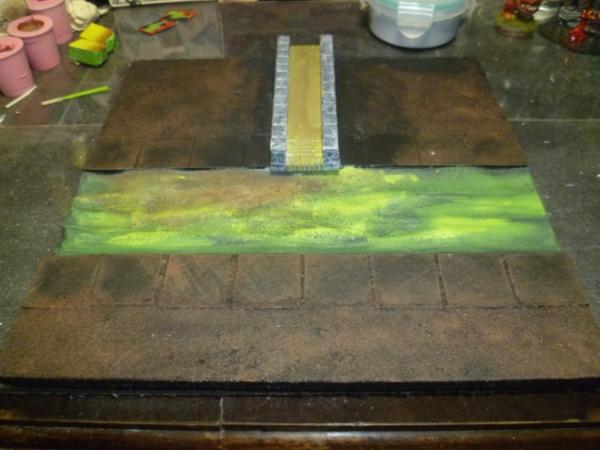
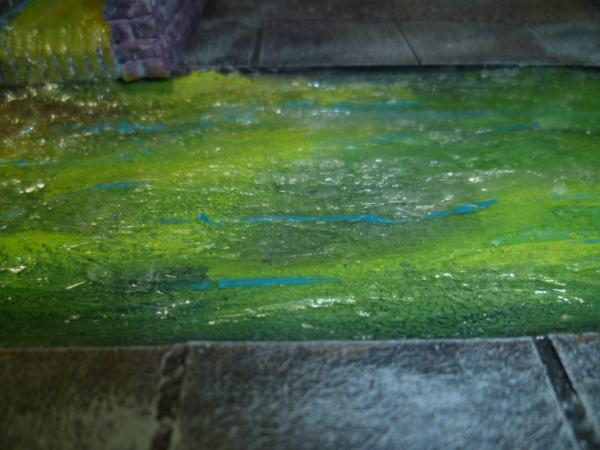
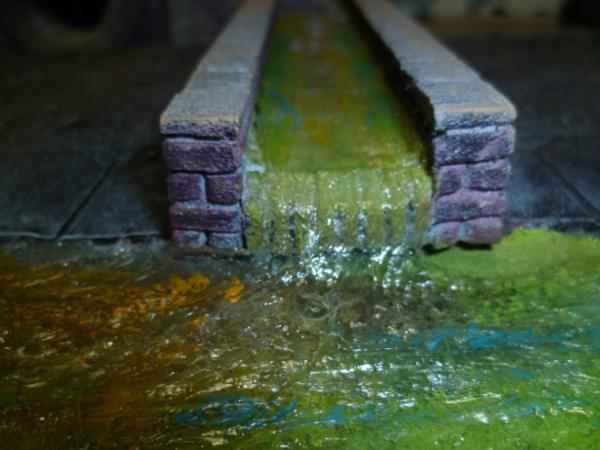
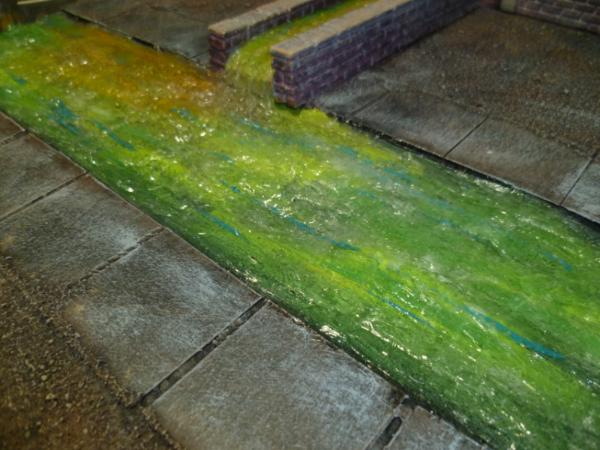
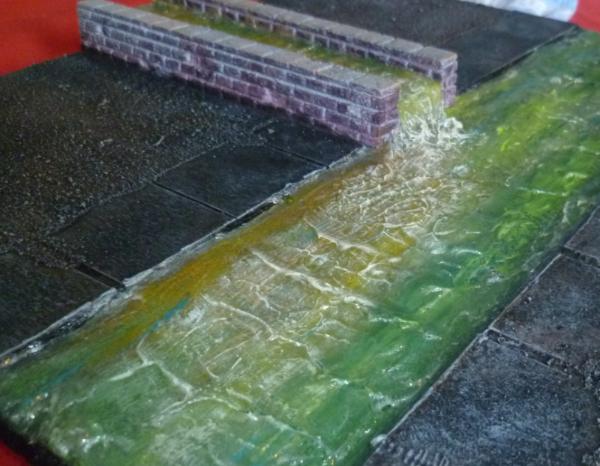
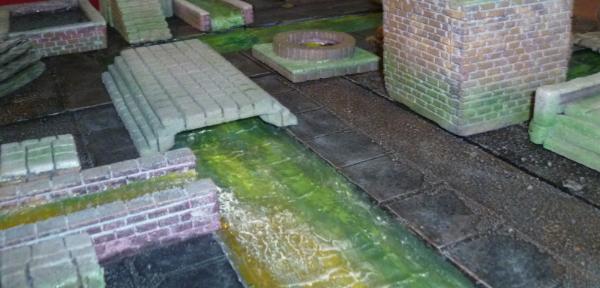
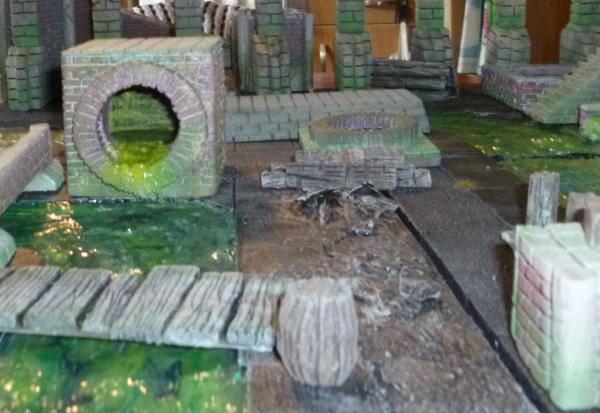
Colour..I have basically done a drybrush job on the ground and put a variable green in for the liquid as a base. Note the discolouration from where the out let comes into the main flow.
Then added a thick layer of Clear Silicone Sealant, Just smoothed it out with a bit of card and my fingers, I am not after a smooth surface, want the impression of movement, but this is only the first layer....
Then put some painted on details on this layer, streaks to look a little like plants or something mving in the flow.
Then another layer of silicone sealant, this is a bit more smoothed out as this will be the sculpt of the surface, there are a couple more layers of varnish to go on yet, but they will not effect the texture much.
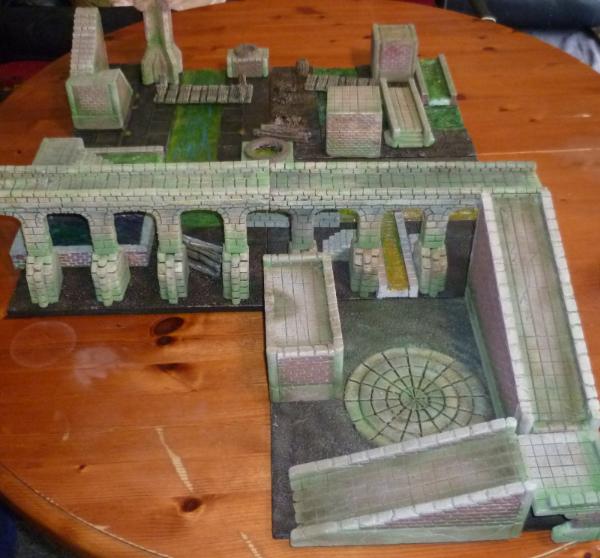
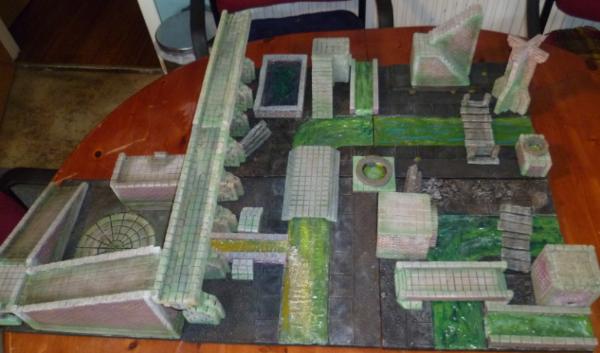
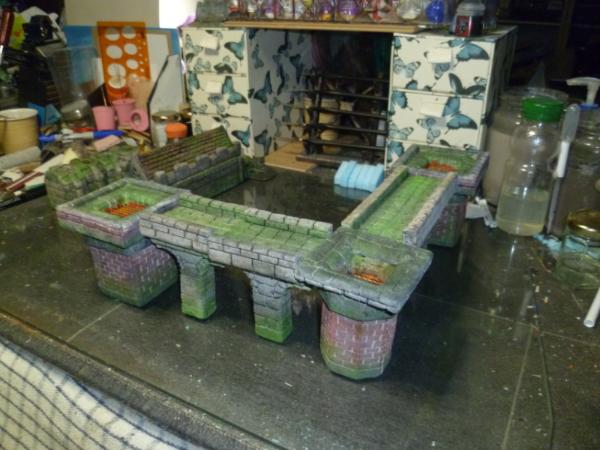
And not finished but put together with other pieces...
I am liking this for a Deadzone board, Necromunda even KoW my Ratkin/Skaven army would be perfectly happy down here.
Thanks for looking and see you soon,
If I don't see you before, Merry Christmas and best wishes to you all.
How are you making the lined for the bricks ? I tend to use a razor and pen, and it looks nothing like that. Your lines look almost squared, and there is no ink.
That river, would that be the Clyde, the Tweed or the Dee you're recreating? Maybe the Thames. Looks like it could be the Thames, right after all the pubs have closed.
It looks pretty good. The silicone is going on thin enough that it isn't getting cloudy?
the fast "water" at the connection looks very good ...but in the front of the pic i think the drybrush on the wave peaks looks a bit rushed...especially since there is a brighter yellowish streak untouched?...or maybe i am misjudging the way the gooey water is supposed to move here...
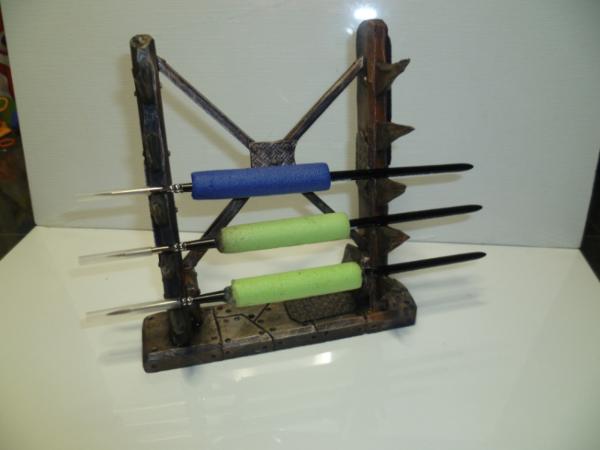
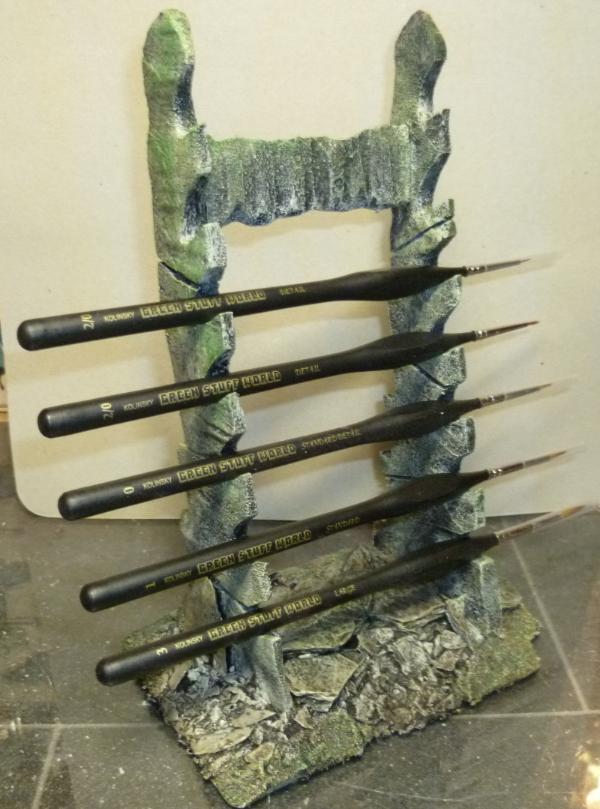
Merry Christmas and Happy New Year to you too Cam. Love the brush stand. I got some new brushes as well... something to keep me going for the next year.
Thank you all, very much appreciate the comments, ideas and questions. Get to the questions in a mo, first...
Got a bit more done...
And some more on the way....
@ CB yes underside of boards are glued to laminate flooring, I left a small gap around the edge to allow for trimming and easy shaping, may live to regret it if the boards get damaged later, but will have to wait and see.
Used laminate flooring as it is thin, strong, can be cut easily enough, and I got a bunch of it from the DIY store at £1 a pack as it was the end of a line, I did not care about the colour etc. just that I got 2m square of board for £1. But even if you bought budget stuff it would not be that expensive. I cut this with a box cutter, but a saw would be recommended.
Does anyone care to know how I am painting these?
Well folks, been a bit on and off, and this lot has had me distracted, back later with some board pics and a few more ideas running around. Thanks for looking.
Stunning tutorial, as usual! I always used a knife for the horizontal lines, but I see why your way has its merits. The already finished pieces create already a lot of atmosphere and I can picture great fun games in the future. Looks to me straight from a computer game, all those shades an textures too bad you aren't gaming otherwise you would see the connections
@ Archer Will get it sorted, and thank you.
@ Vik, Just trying to make it look the part really, I am happy with how it is looking so far.
@ Gits, Thanks sir, I try.
@ Graven, Thank you bud, much appreciated.
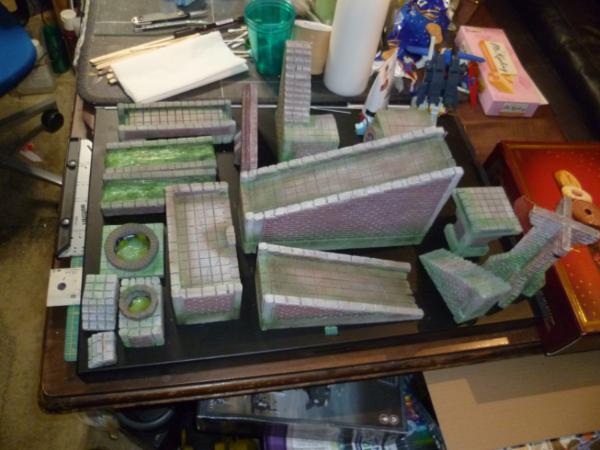
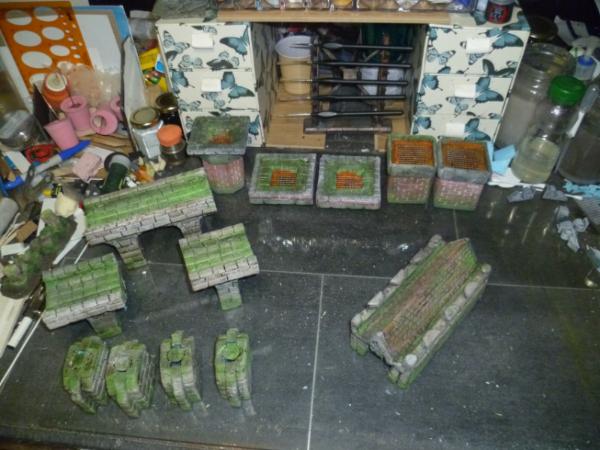
So have finished off a few bits, going to add some details later, but will have a run at it across all the pieces. Going to take a little break from it to make sure I do not burn out, have so many ideas for it though.
Indameentime....
Which is a multipart section, and can be used as smaller sections, but is magnetised for strength.
Scale shot...
And with a little paint..
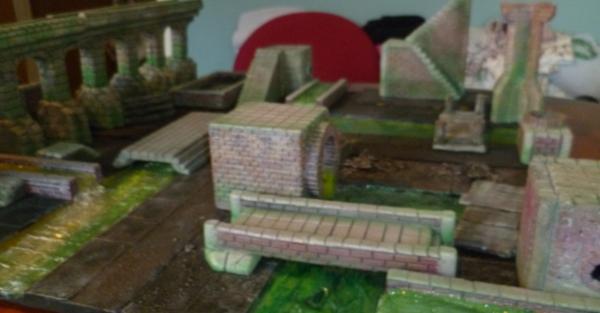
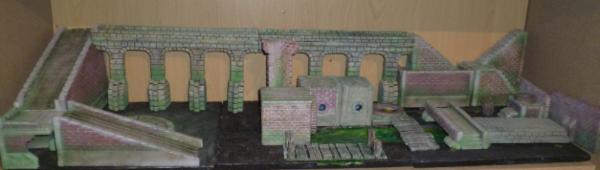
And some shots of what I have done so far laid out...
And on the shelf..
Thanks for looking, any comments gratefully received.
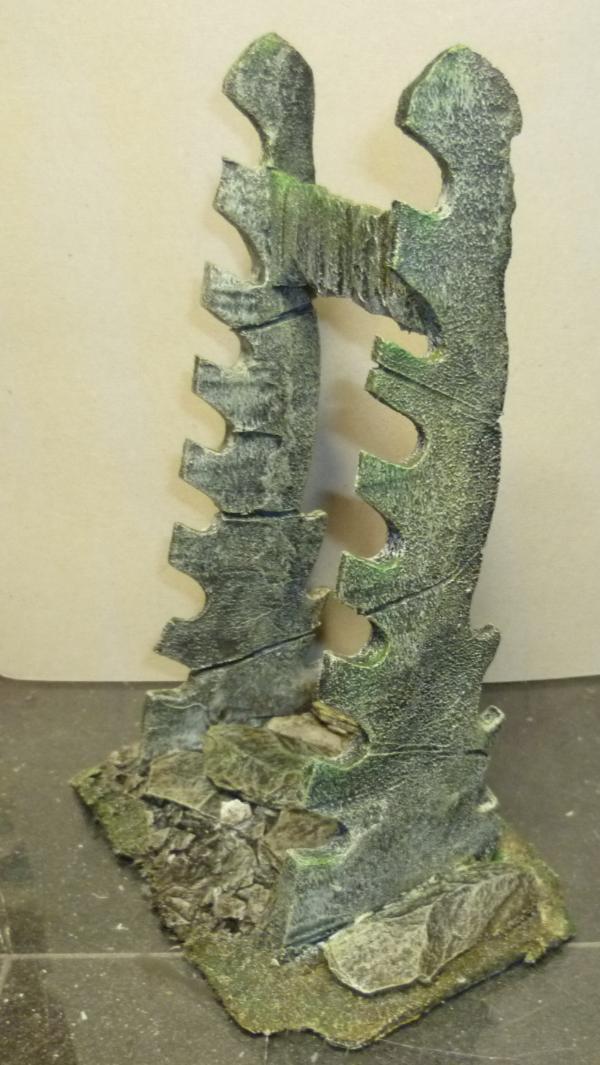
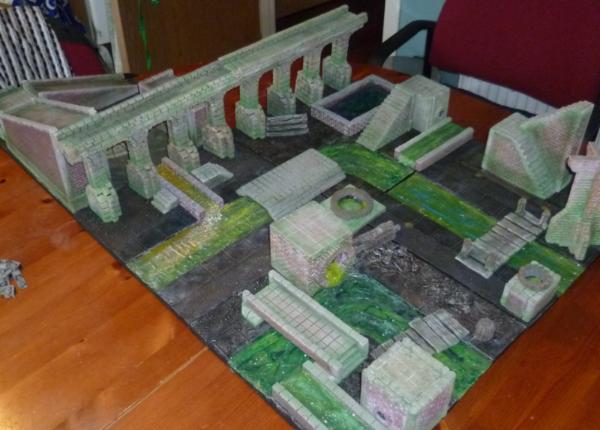
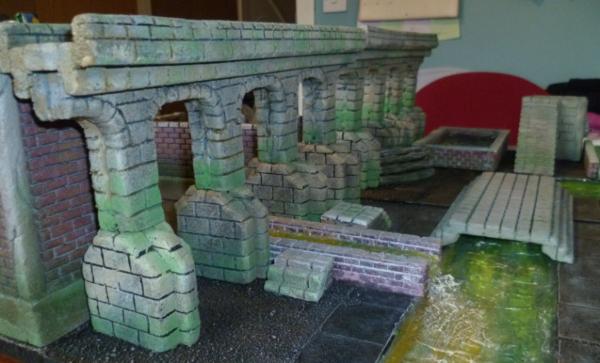
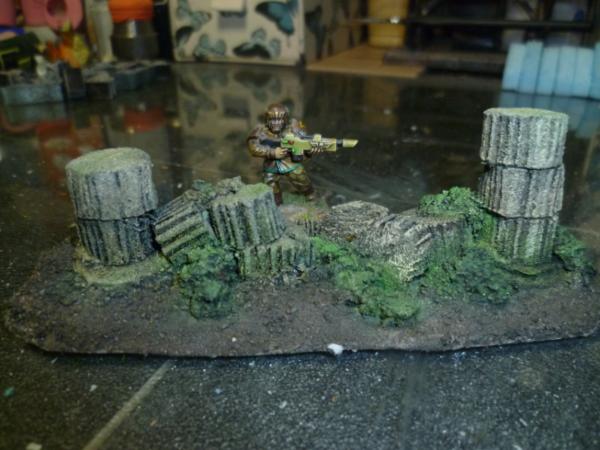
that aqueduct is simply awesome! left me speechless for a moment...true jaw dropping!
i have these project burn out times every time in each project...i need to put up my brush and start working on my pieces too....
one minor suggestion....that round shape of a "place" you did there...that masonry circle...its all (damn loss of words here...speech impediment) all the stones are not staggered ...would be not a sturdy way to build something...made out of foam that way of course easier...but...
Holy crap, Cam! That is some amazing terrain work. I really like how you used the green to add detail to the stone. Looks very realistic, yet so simple.
Calgacus wrote:They plunder, they slaughter, and they steal: this they falsely name Empire, and where they make a wasteland, they call it peace.
History trolling aside, The aqueduct has massive potential. I've seem tables with things like monorails, which may function, in game, in a similar way to the aqueduct.
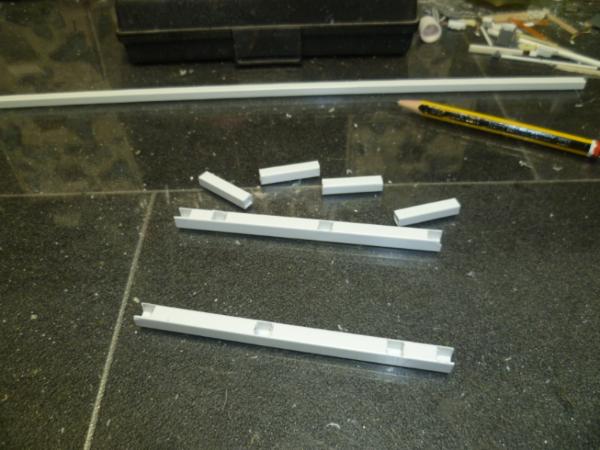
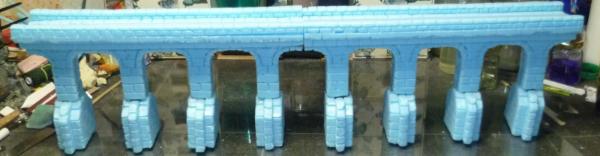
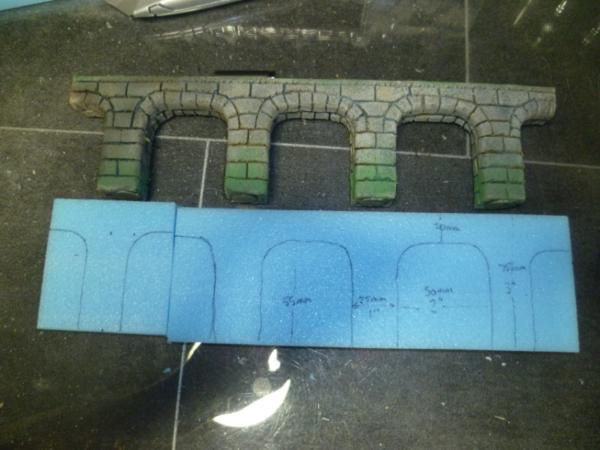
@ Red, sorry for delay, you asked for dimensions. I am kinda working to a 3" cube system similar to Deadzone. It has a nice feel to it but at the same time lends itself to other systems and free open play as well as the grid system. Below is a pic I hope will help.
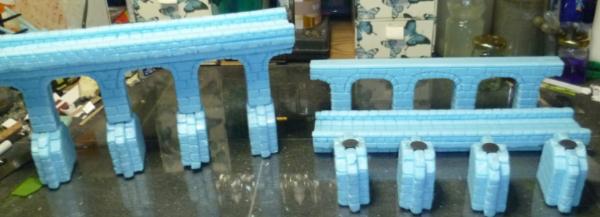
This is the main arch section, as you can see it is 3"(75mm) high, with the arches being 2"(50mm) wide gaps. The over all length os this sections is 12" (300mm), though I have made a smaller group of sections this time around. The idea behind the piece and the gaps, is to restrict movement of large units but maintain sight lines etc. Infantry can move fairly freely through it as well. Later you will see the extensions I put together to extend its height to 6" (150mm) with the channel on top. The parts for the extensions came from the off cuts from the arches. The channel on top is 40mm wide with a 10mm wall either side, it would be possble to have a 60mm base on top, though it would float slightly. Again the idea is to restrict movement of large units.
This is a cross section of the walk way, each piece is 20mm wide.
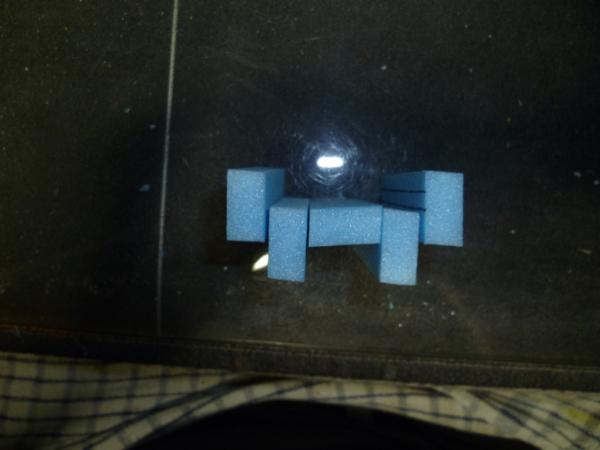
Breakdown of extensions...
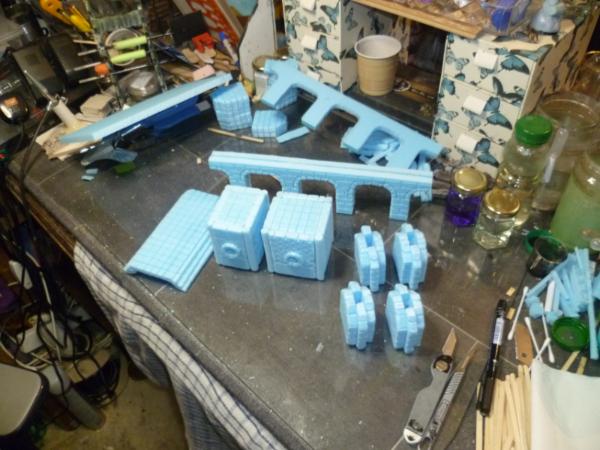
Various new pieces..
Some break down to be able to build bigger structures...
And with a lick of paint...
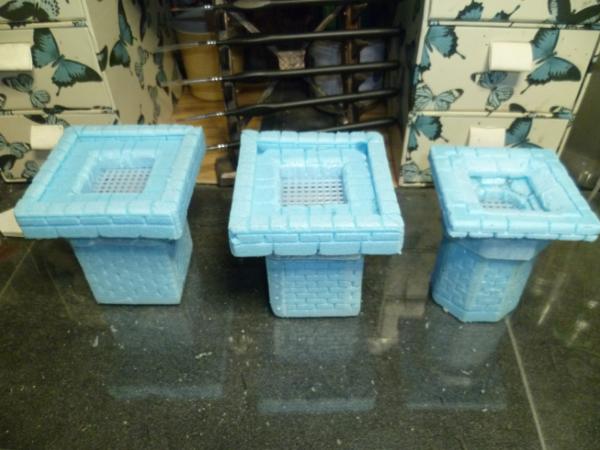
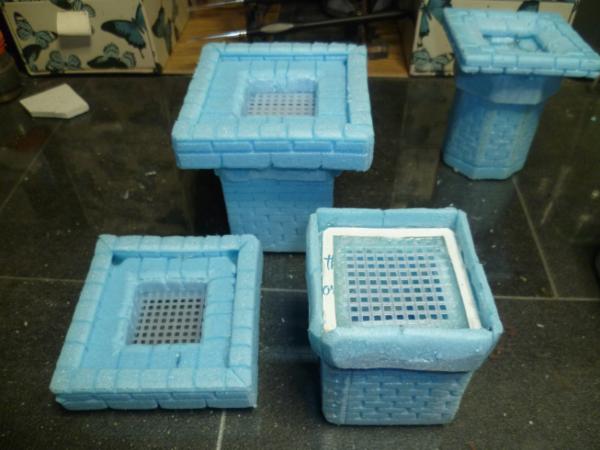
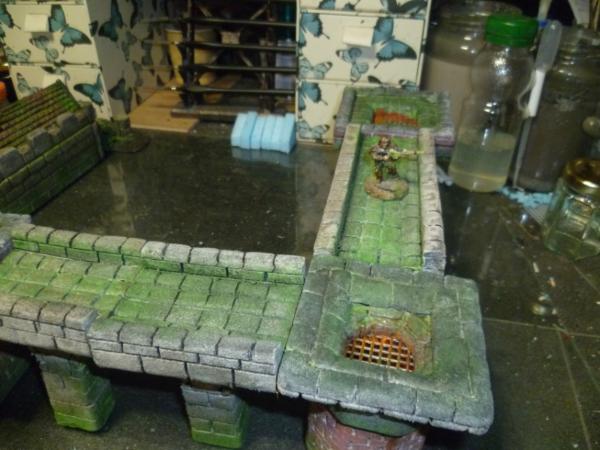
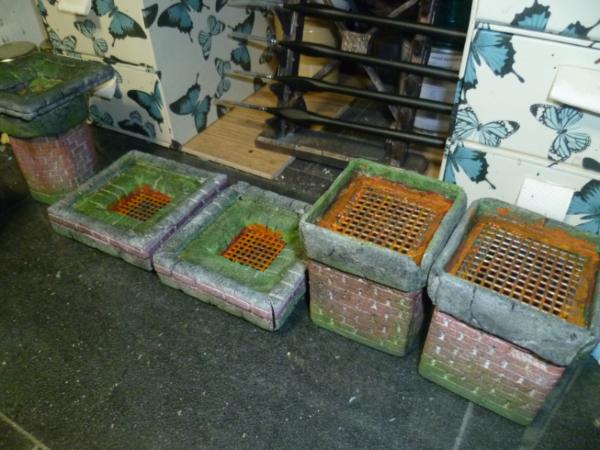
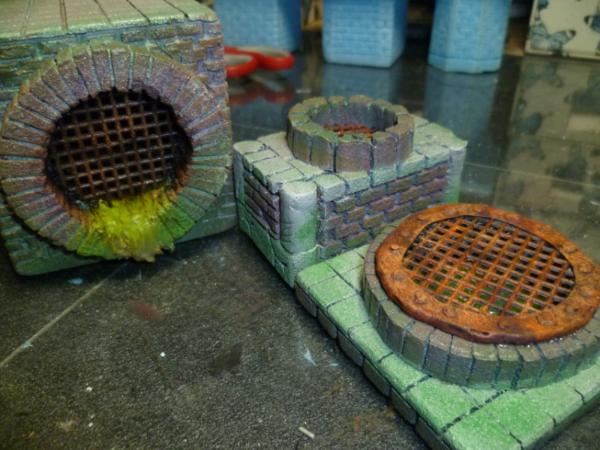
You may have noticed the drain covers/grids..
This was always on the cards, enabling models to stand over some of the water sections, Added a few to the other earlier pieces..
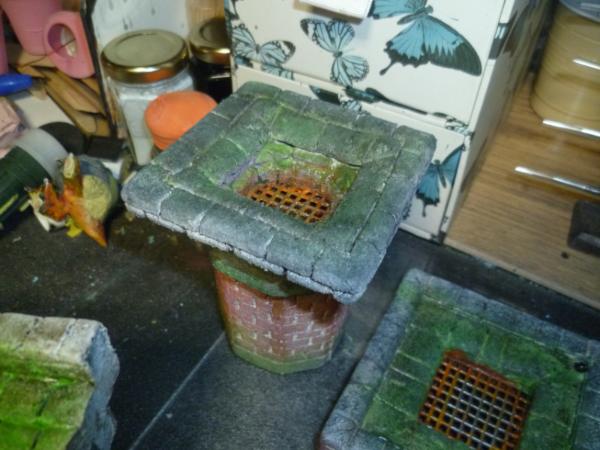
Also messing about with the idea of a catacombs/graveyard, made a little crypt...
In between drying times messed about with some off cuts...
Next up a distraction...
Well ok three distractions..
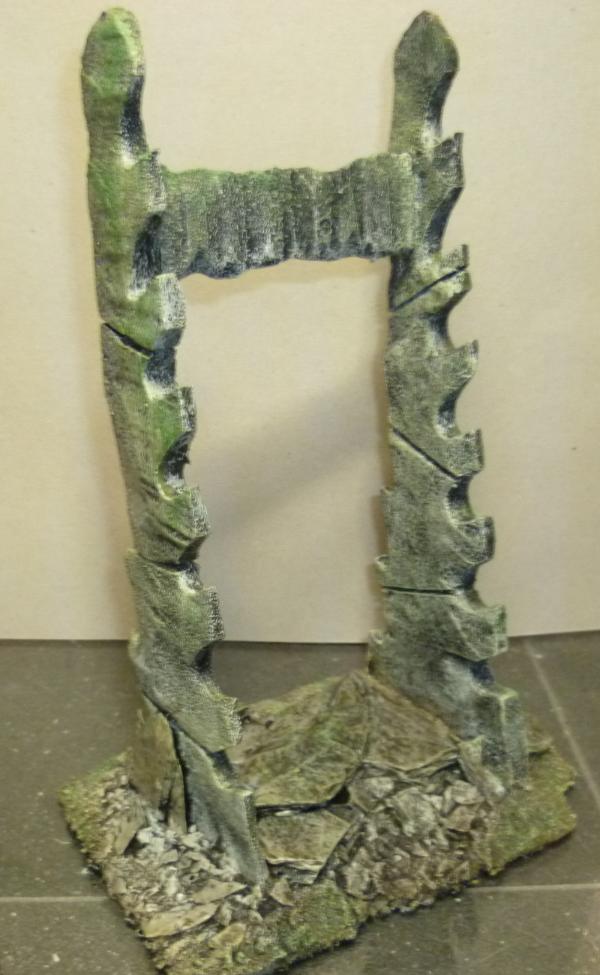
Got these a while ago from OneManNoodles, not seen him about for a while, hope he is well, and doing great. I am going to make some different backs for this, have various ideas in mind. Already started, more pics later....
Wel thank you for looking, please feel free to comment and critique.
Sorry to sound rude here, but you are simply not allowed to use the term "messed around" in combination with your work... it's way beyond mere messing around with...
Also thanks again for that tutorial/step by step...
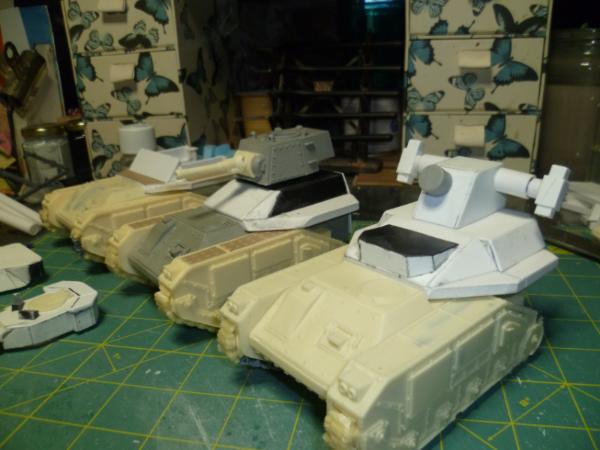
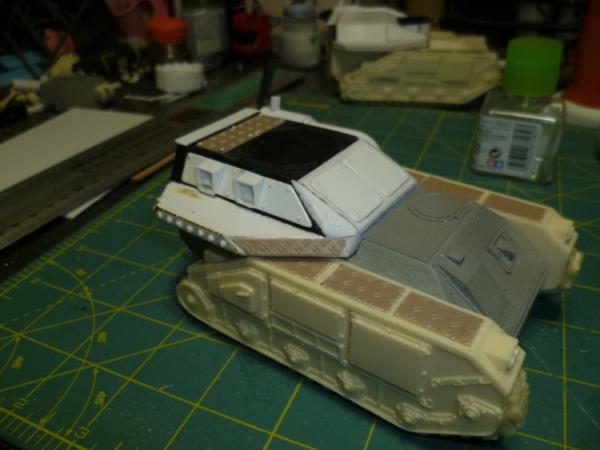
So bit of progress, this is all interchangeable...
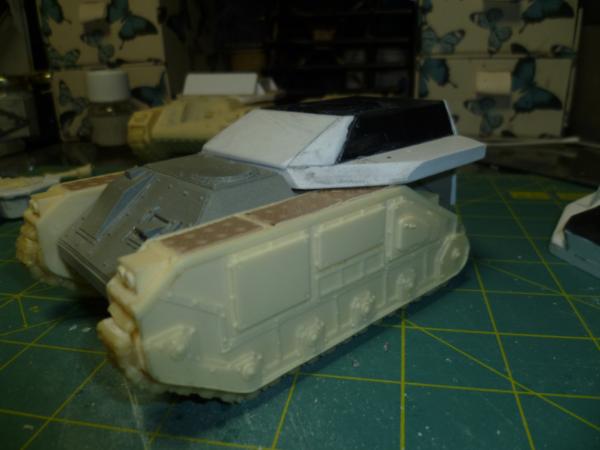
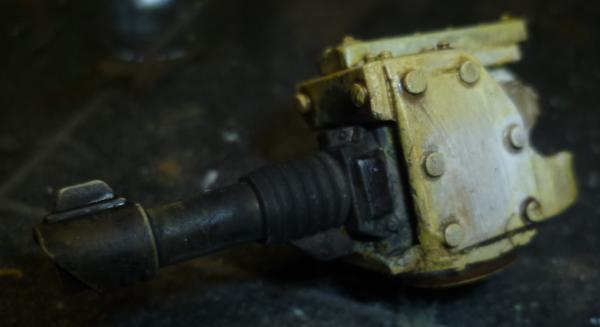
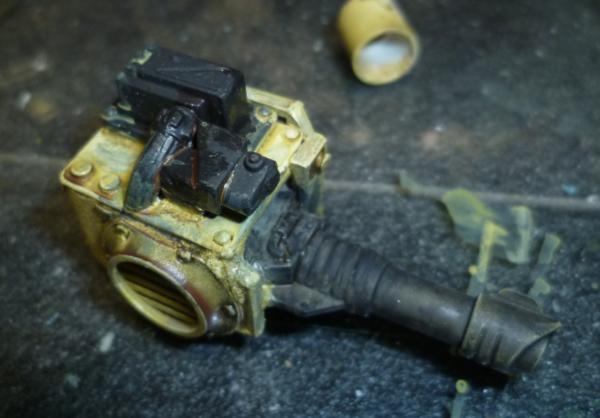
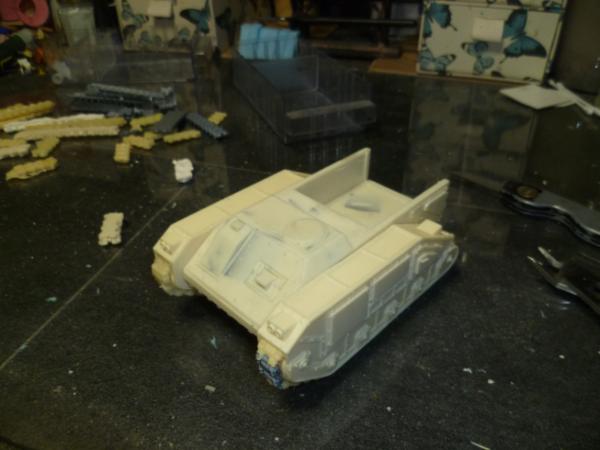
Bit of body work...
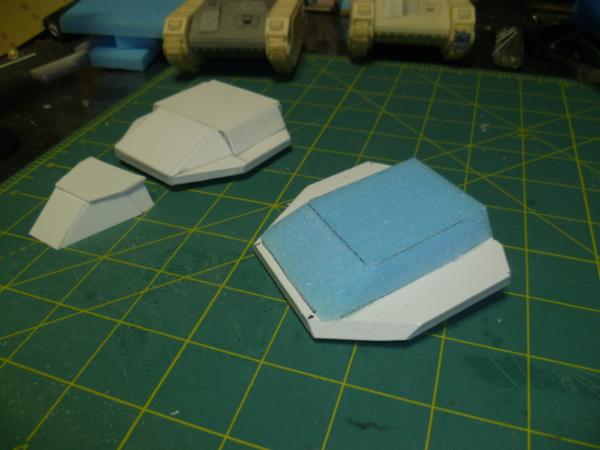
Made these by making a foam former and gluing the PC onto it, and itself to form a shell...
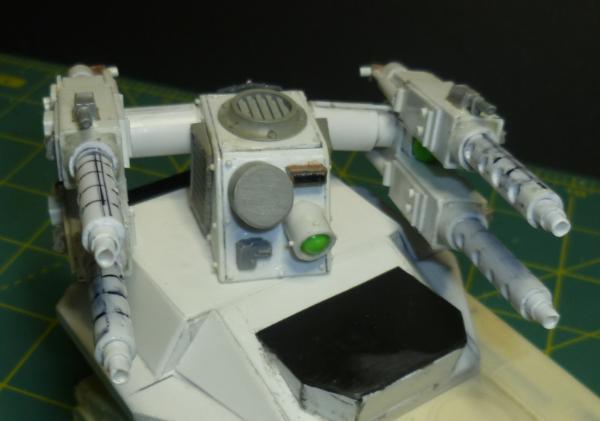
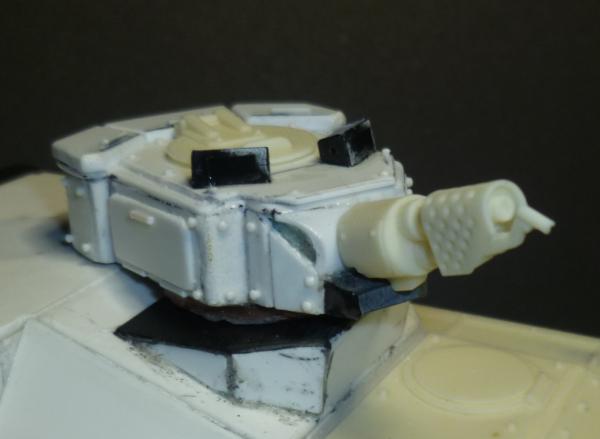
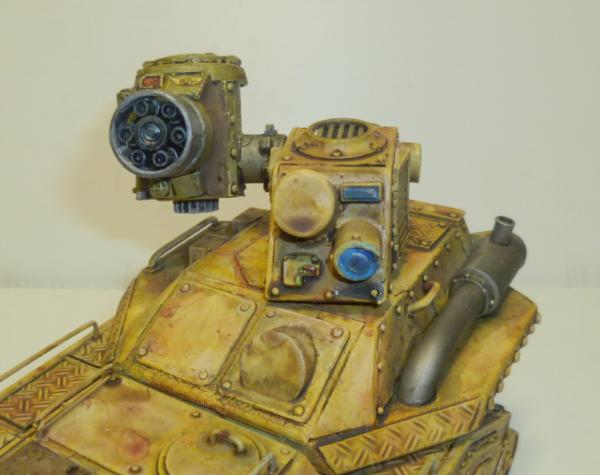
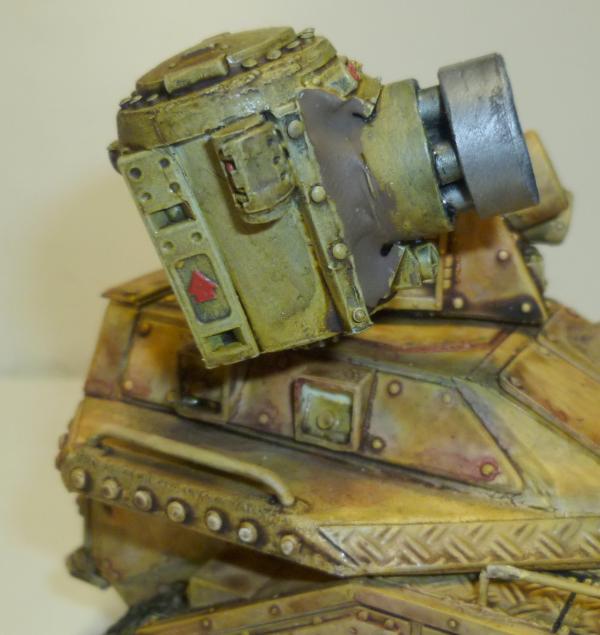
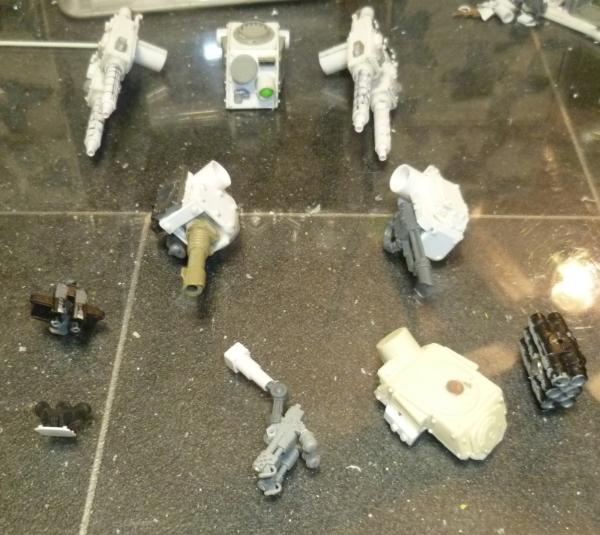
Made some turrets...
The foam enables me to be able to bury a magnet under the PC to give various mounting points for turrets etc. also magnetized the the gun ponts so they are interchangeable...
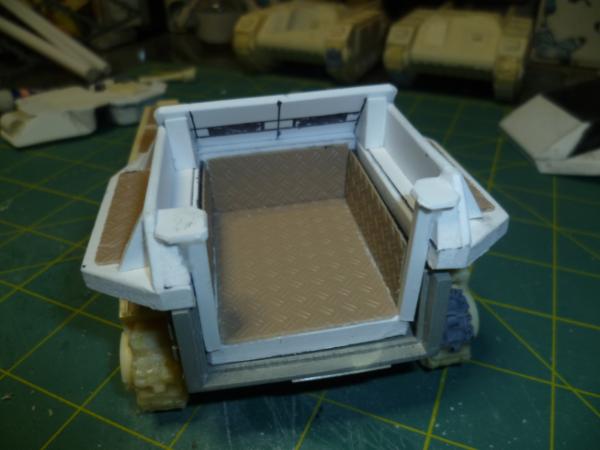
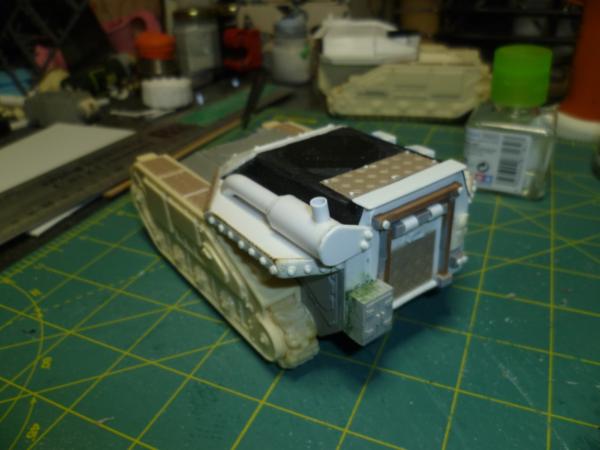
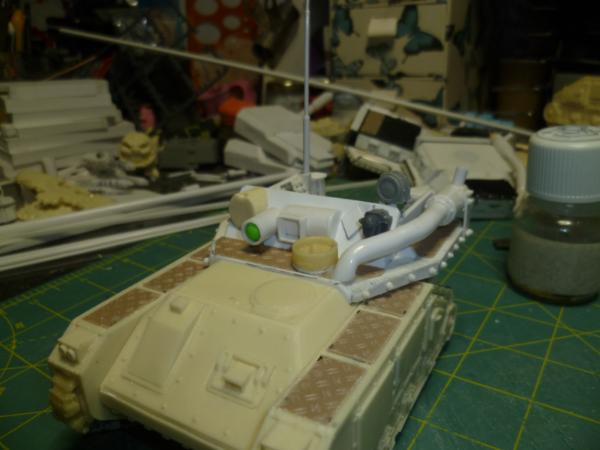
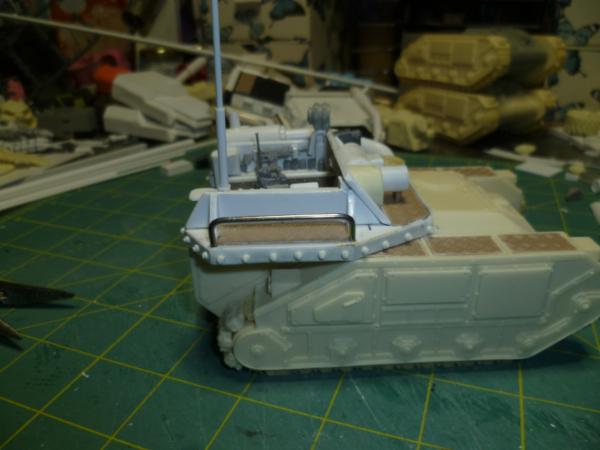
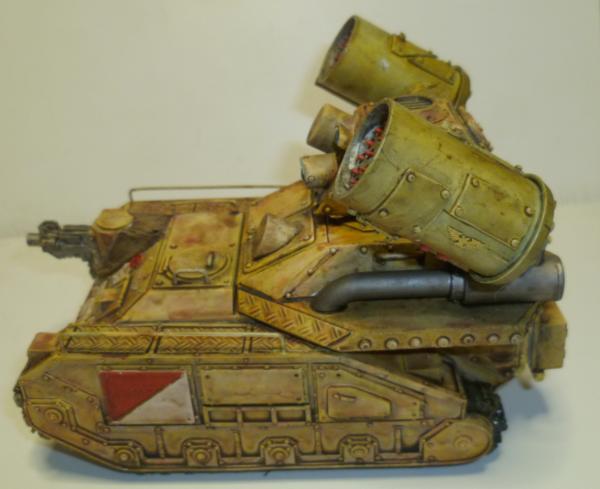
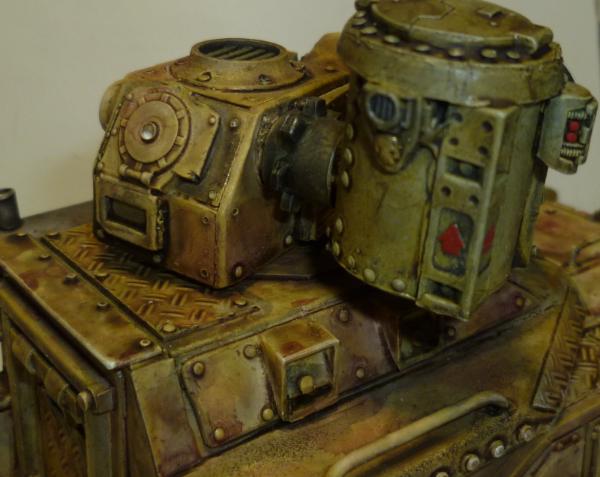
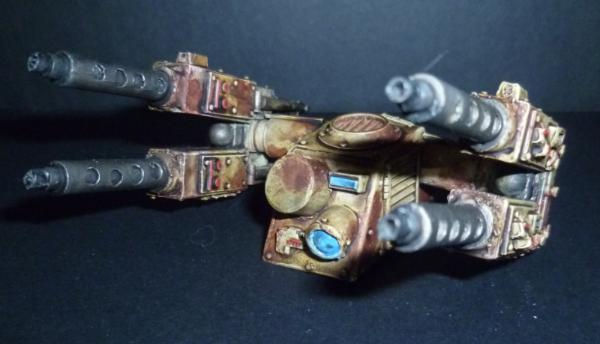
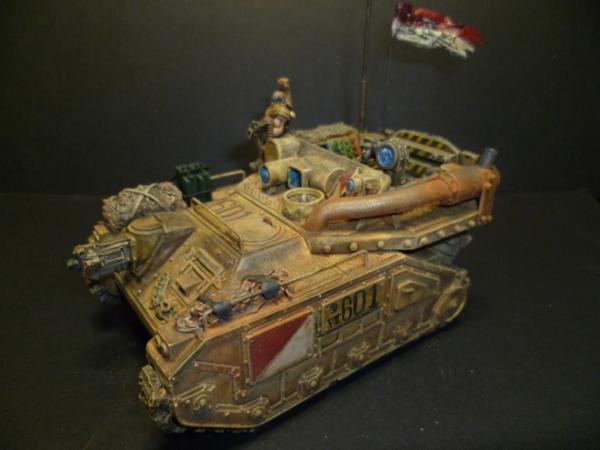
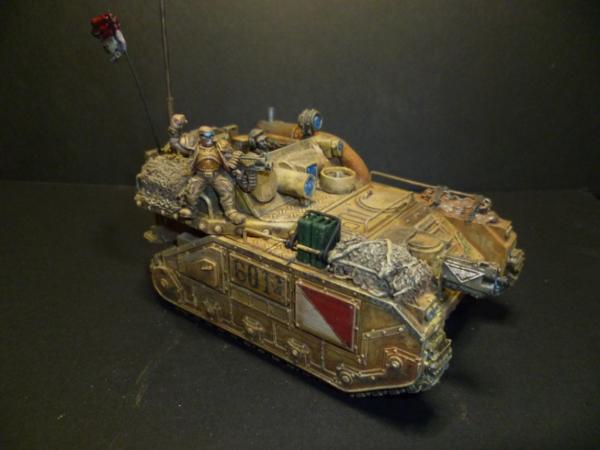
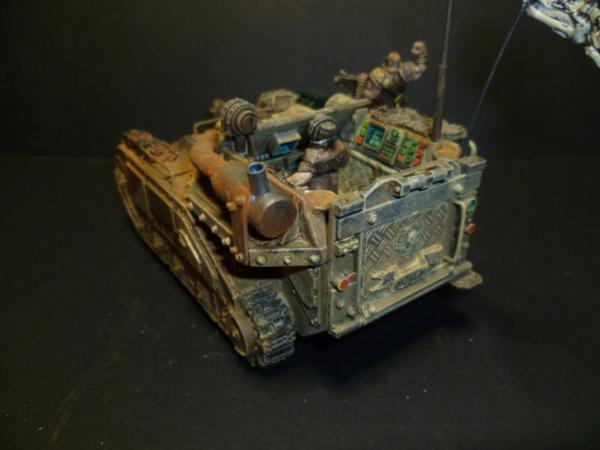
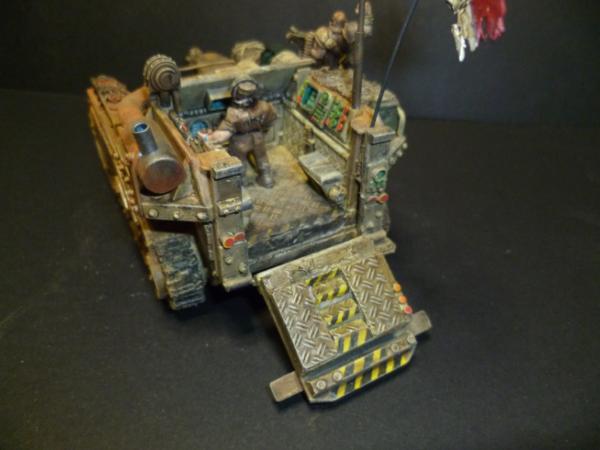
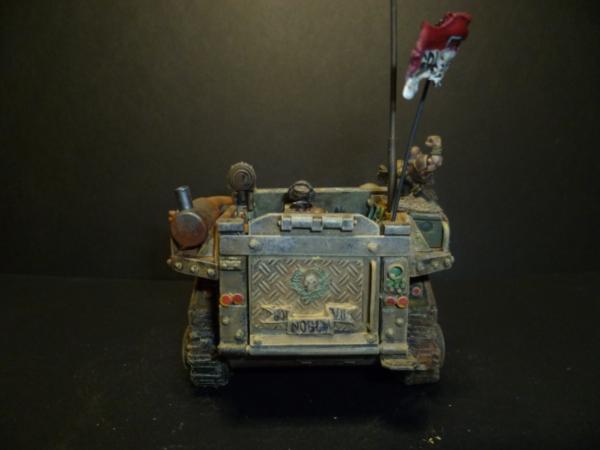
And here is the back of the open topped variant, think it is classed as a Salamander Command Tank.
Well still very WIP and lots of variants, Heavy Flamer, Heavy Bolter, Autogun, Vanquisher cannon, or maybe earthshaker, might reduce the length of that one, and a Hydra variant, also probably make some more standard backs for just troop carrying, and some more bigger guns.
Thoughts and comments welcome, thanks for looking.
Thank you all for the kind words, very much appreciated.
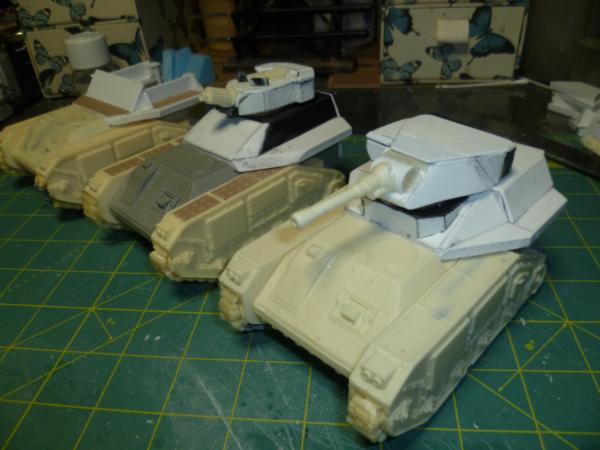
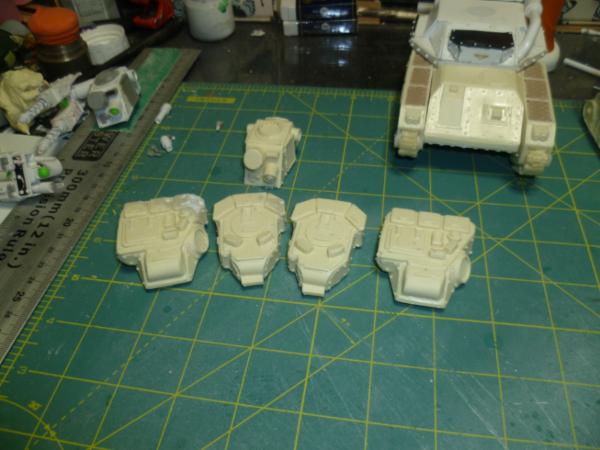
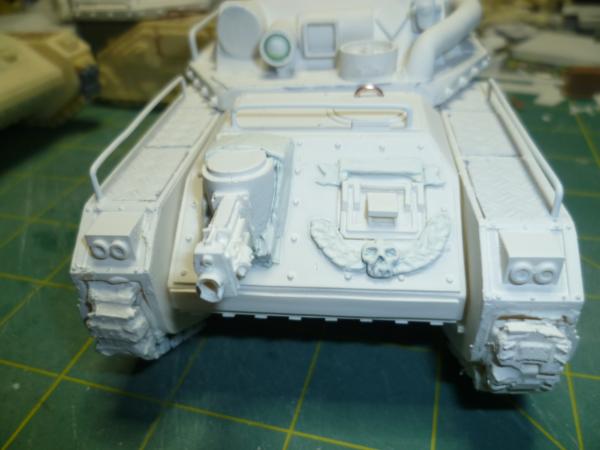
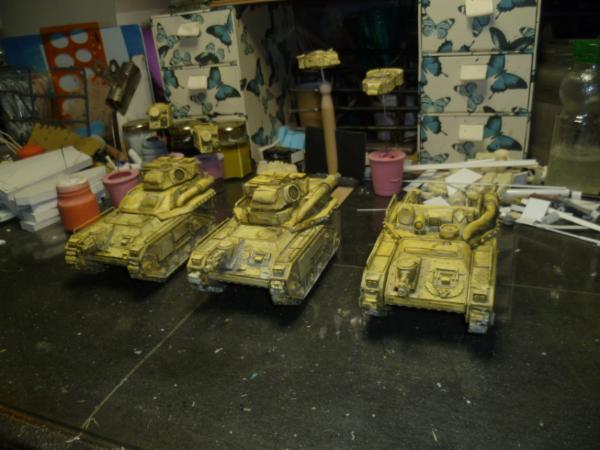
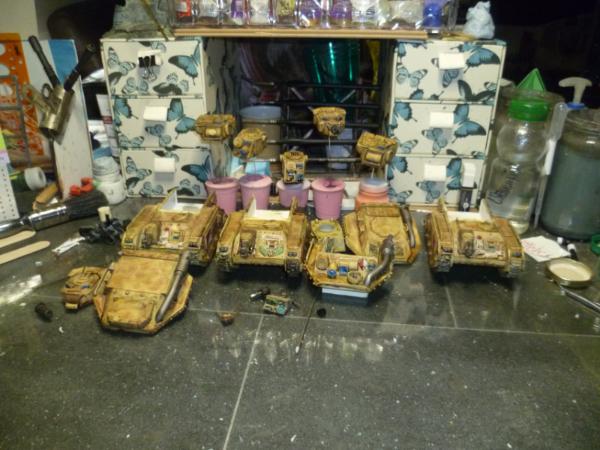
Still going at these tanks.....
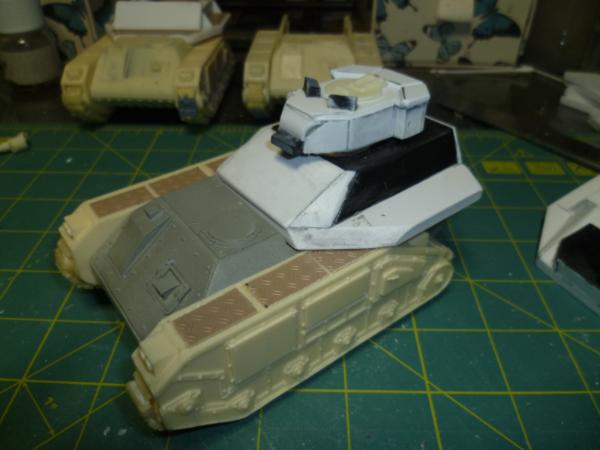
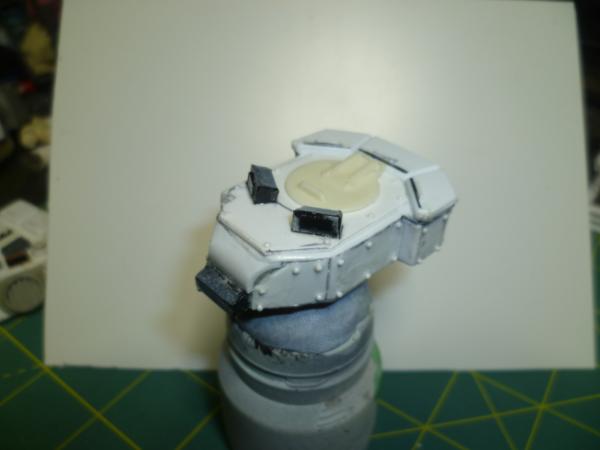
Cast up some turrets...
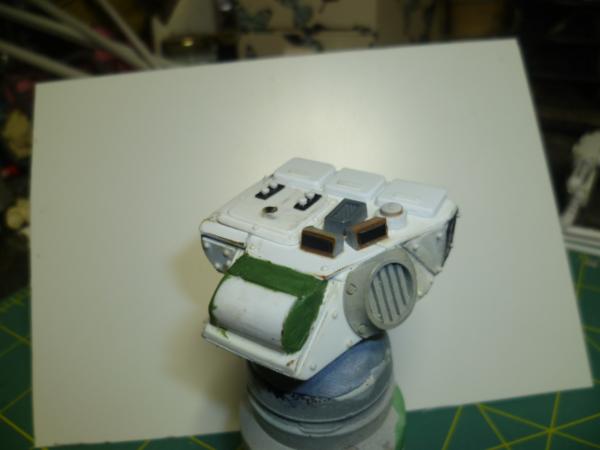
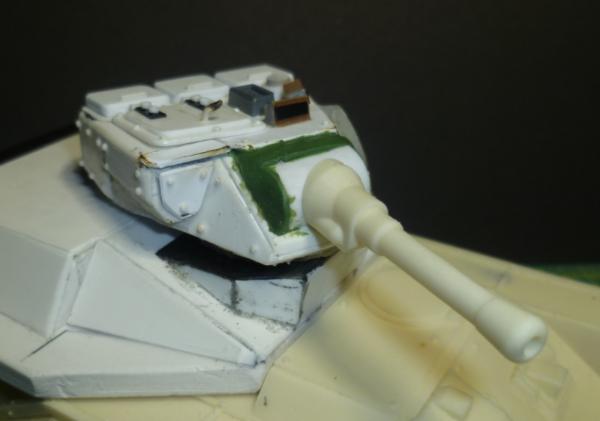
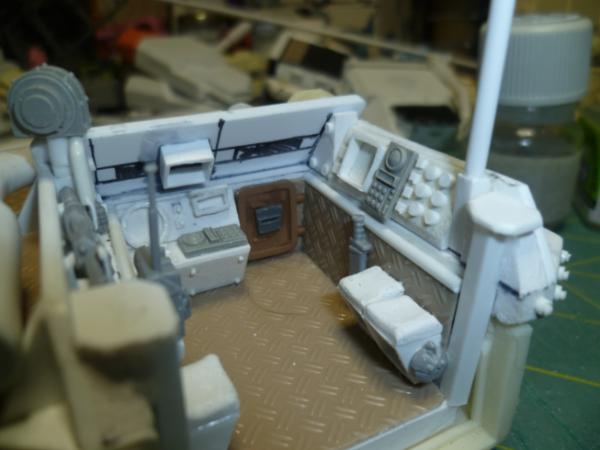
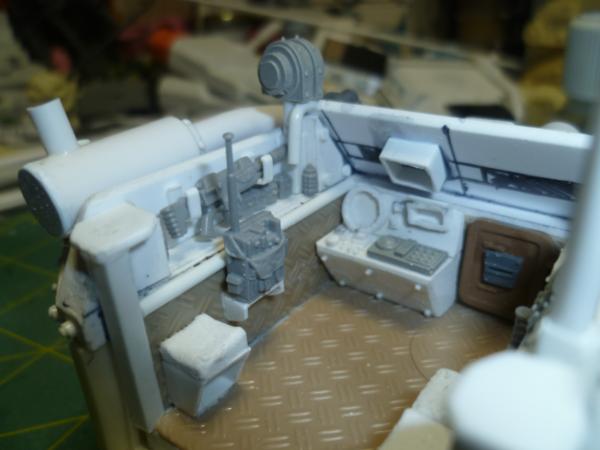
Started in on the command tank detailing....
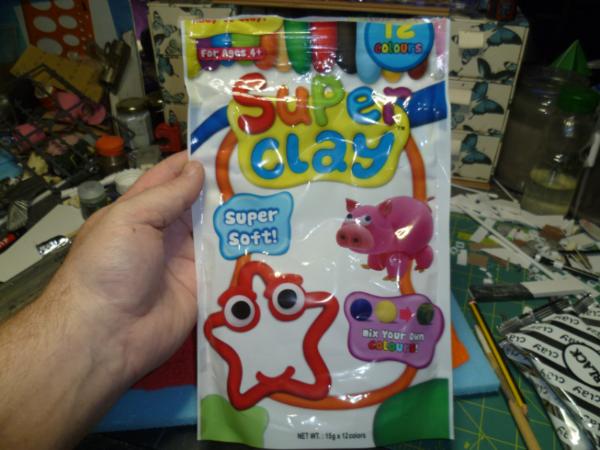
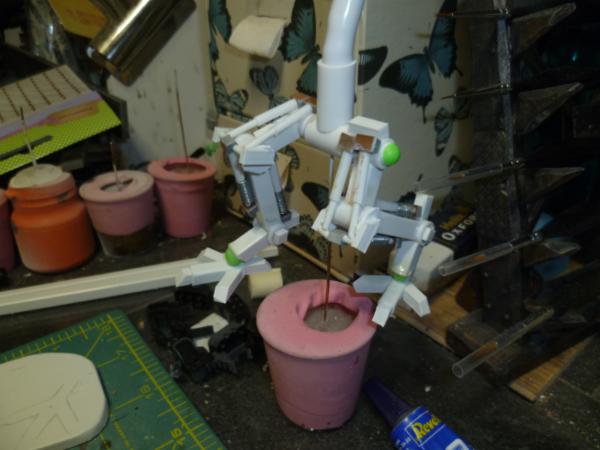
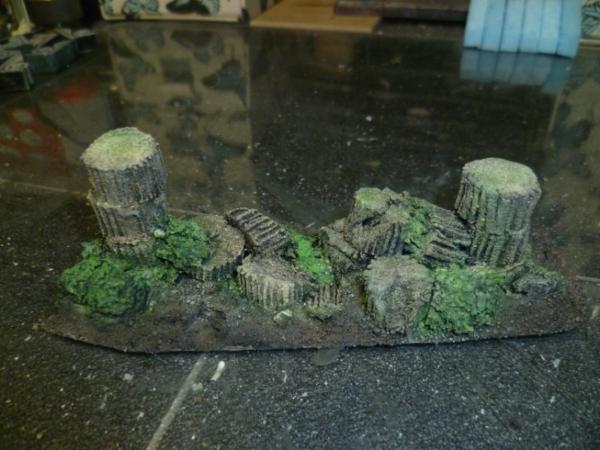
Bought this stuff a while ago at Home Bargains, very cheap, it's the stufff my daughter was messing about with, well I am doing a scenic base for these tanks for between battles (most of their lives) and thought I would give this stuff a go...
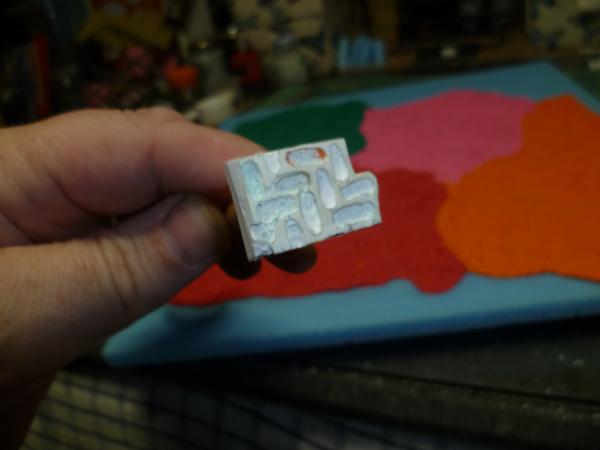
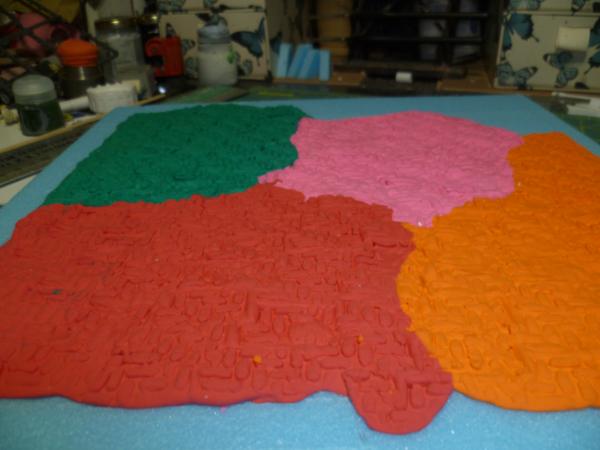
Air drying in about 3-4 hours. spread a layer out on the board and made a stamp to do cobbles with...
Result is waiting on painting yet but I am happy enough....
Thank you for looking and any comments really are appreciated.
How durable is that kid's clay? That stamp to make the cobbles is something I need to try. Also, how did you make the stamp? I know; I know. I ask too many questions.
You're rivalling KlausnotSanta with this work. Amazing. Not sure why I'm amazed though as we come to expect this level of excellence from you...
And follow the yellow brick road, or is it green, pink, err, orange, rr, red... Great idea though and best part is it's cheap (I presume), simple, yet effective... Inspirational stuff for everyone watching
@ Ruglud, the clay turned out great, each one of the colour patches is 1 of the 12 packs you get in the set, think it may have been £4 ish so you get a fair bit, it models easily takes paint well, once cured it is a bit flexible, but used in the right spot it is brilliant. Klaus is an inspiration, I would aspire to be half as good.
@ Red, clay is durable enough, the flexibility helps I think. The stamp was made from a small chunk of 5mm thick Sintra PVC, stuff used by sign people. You could use any hard block. The pattern was made with a Dremel, just plunged in a milling bit, think it is maybe 3mm across. Worked really well.
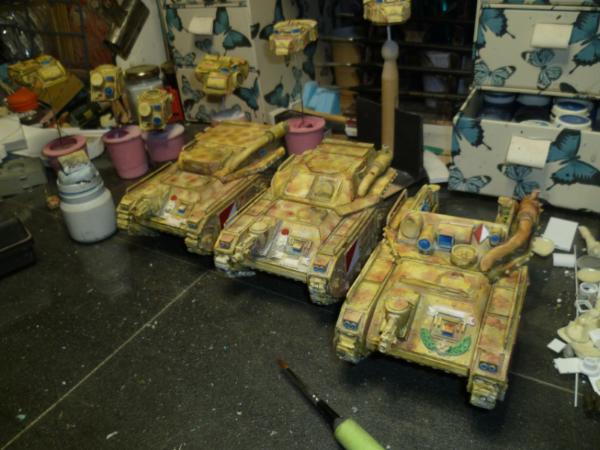
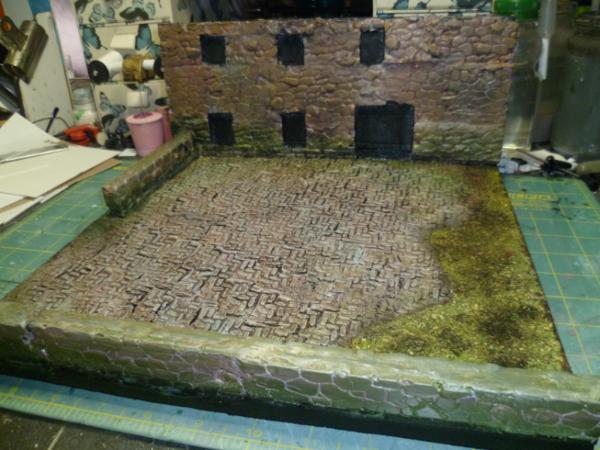
I have been working on some alternative guns, but no picks yet,however I did start some work on the base......
Thank you all for looking in and I really appreciate your comments.
Love your tank work! And that display base looks very good.
My only suggestion to improvement would be to make two to three of these stamps...to eliminate any repetitive pattern making...the stupid eye sees these at the slightest glance...(I know...I don't show up for ages, lest show something done myself and then giving out non humble suggestions...)
I get what Vik is saying, but isn't this meant to be a repeated pattern with he block work - herringbone right? Maybe some damaged / worn areas or weeds growing through would help though? And / or some colour variation?
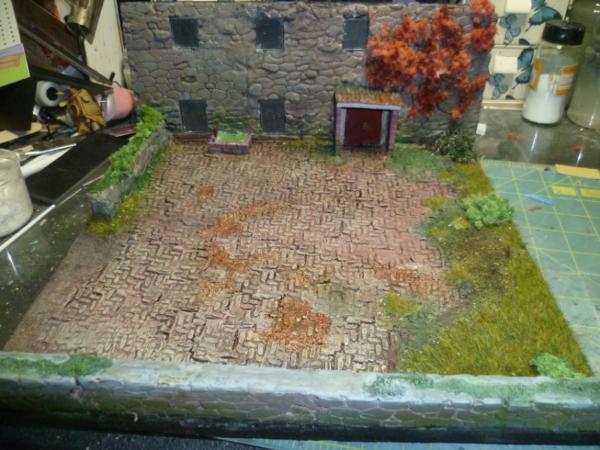
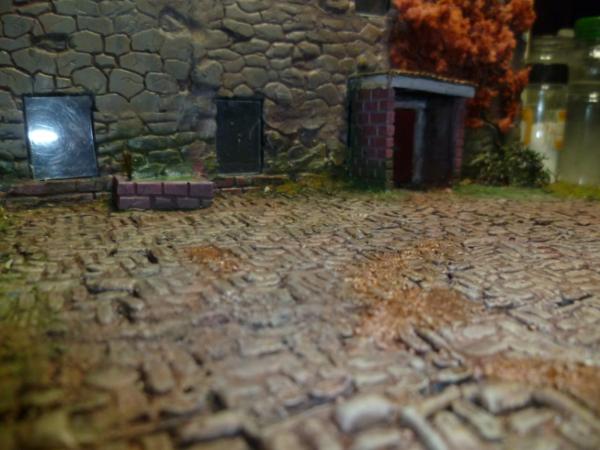
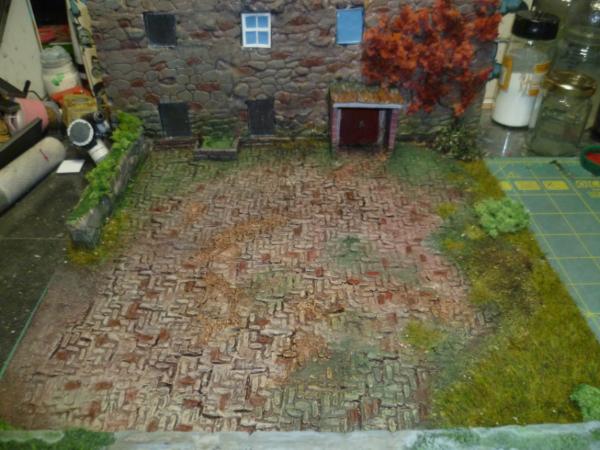
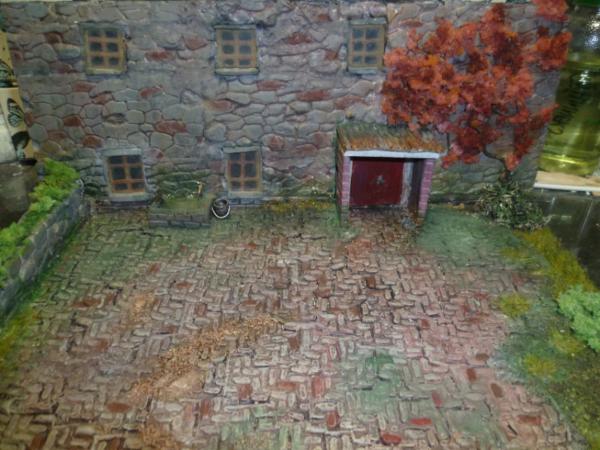
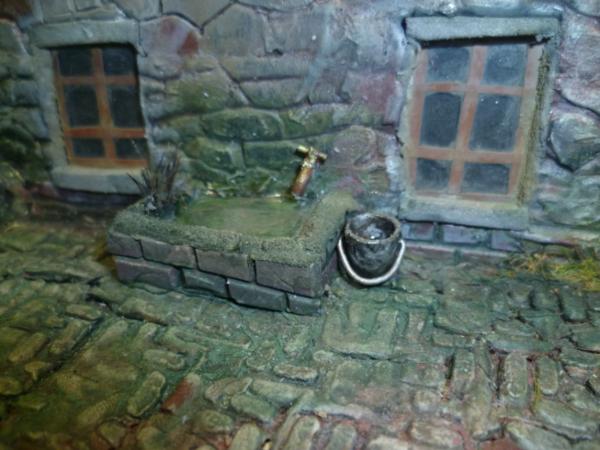
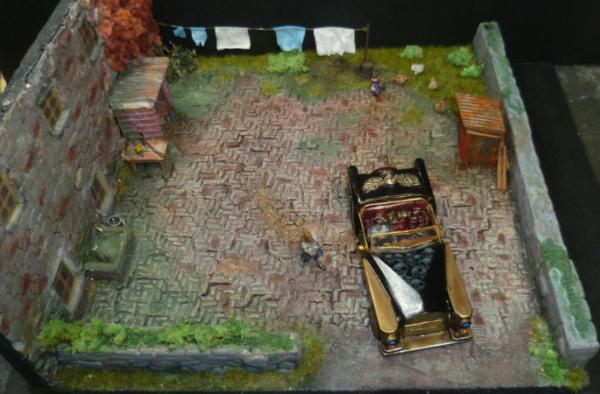
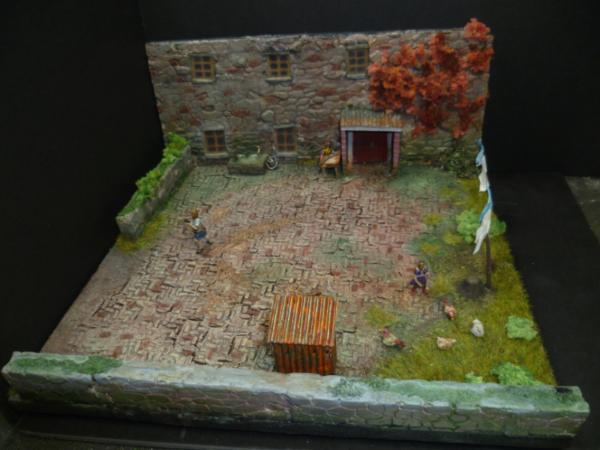
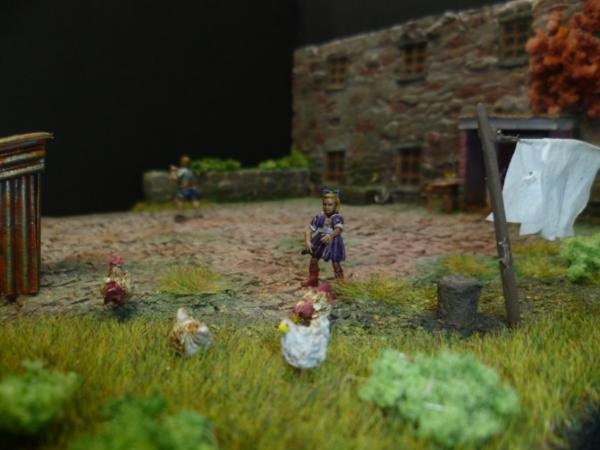
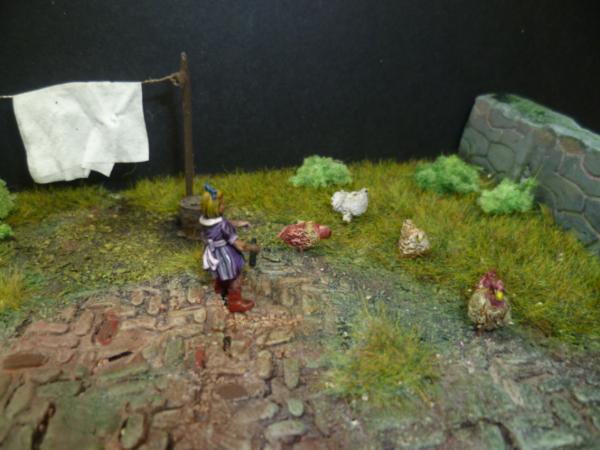
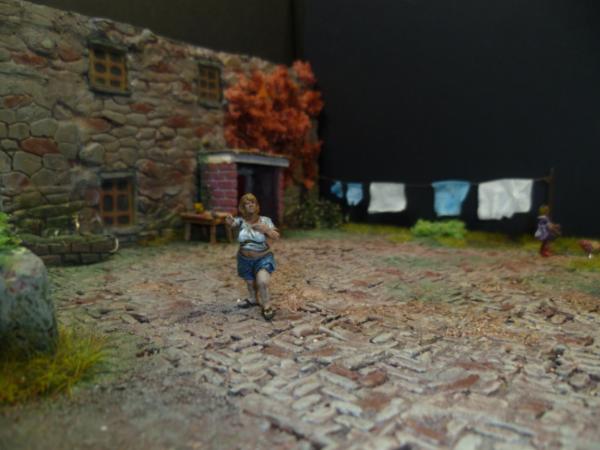
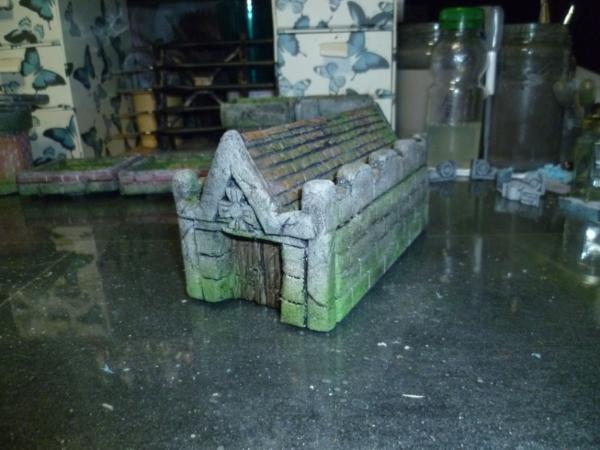
Thanks guys, agree I need to put in a bit more effort, but your right Ruglud, it is meant to be herringbone, so a repeating pattern, and it is meant to be a rough courtyard, not very "perfect". I am going to perfect this for a future build with a more impressive establishment, but this old farm croft will do with this. Done a bit more and obviously great minds and all that gents, started messing about with patches, also started adding some veggies....
Arty shot...
Thanks for looking in, will get some pics up soon of some gun options I have also been working on, got an itch for something Orky coming on so we will see what happens, need to finish these tanks up first.
Thanks guys, and Vik, no foot to worry at your comments were valid and heard, thank you, I always appreciate your comments, did not mean to shout you down bud.
So little more....
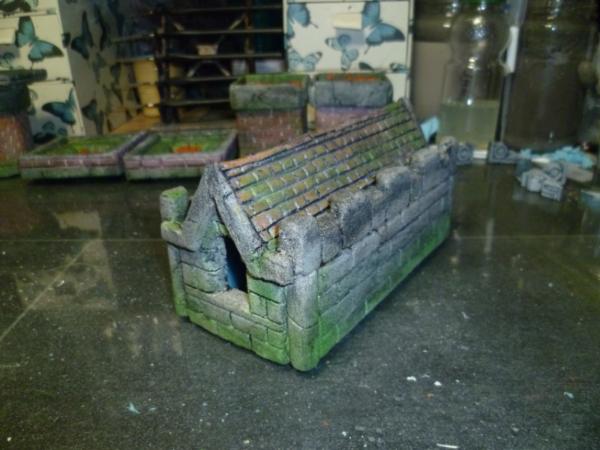
Varied some blocks colouring, few other touches...
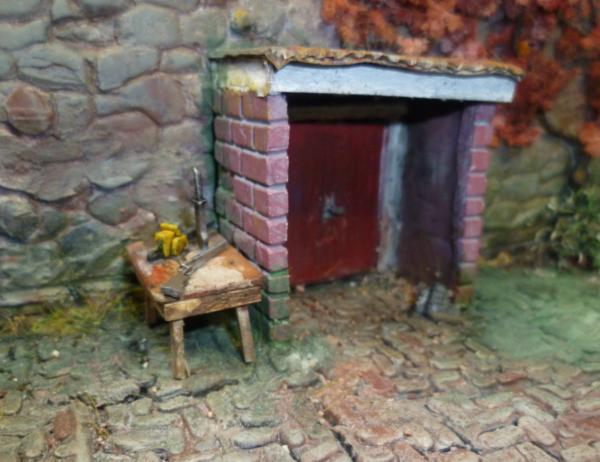
Question, what the heck do I do with the windows can't decide at the moment.
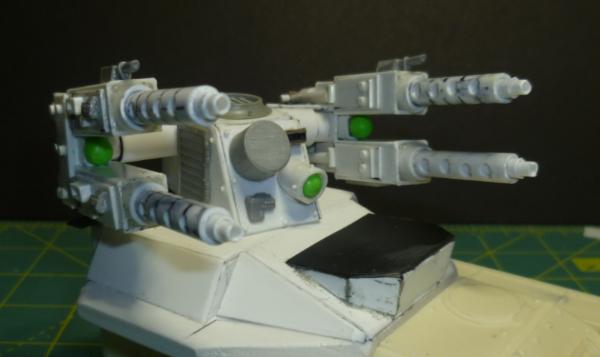
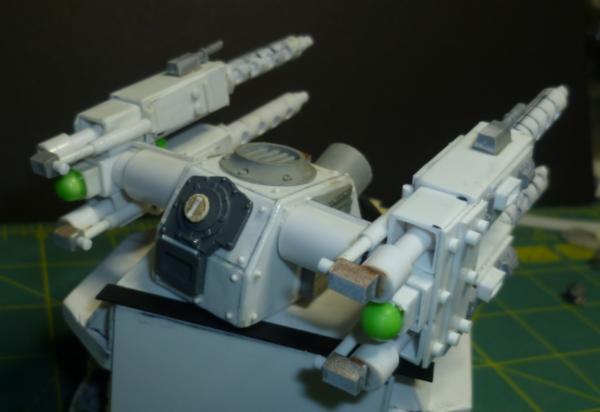
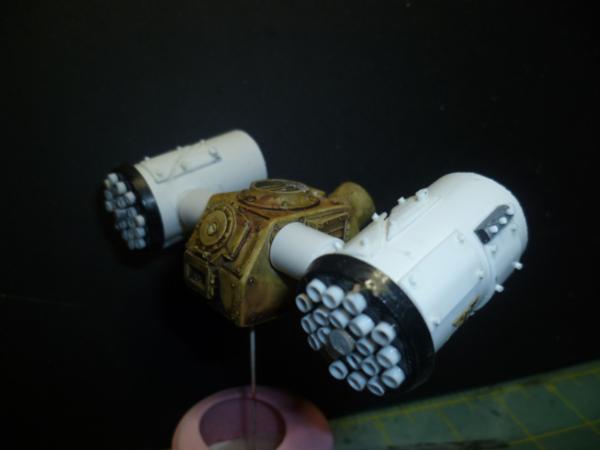
Oh and some guns...
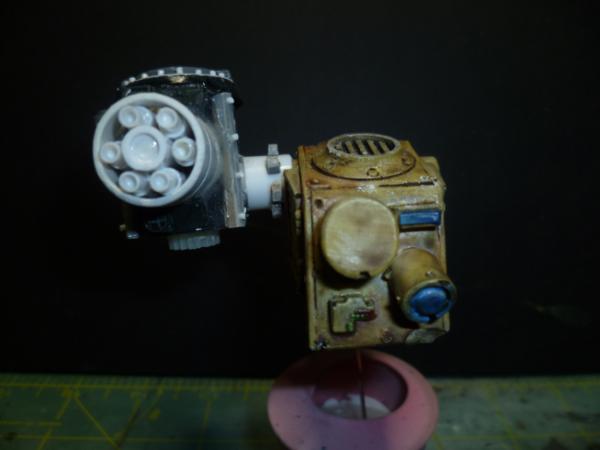
Anti air mini gun...
Kinda aiming for that minigun thingy they have on ships for shooting down missiles.
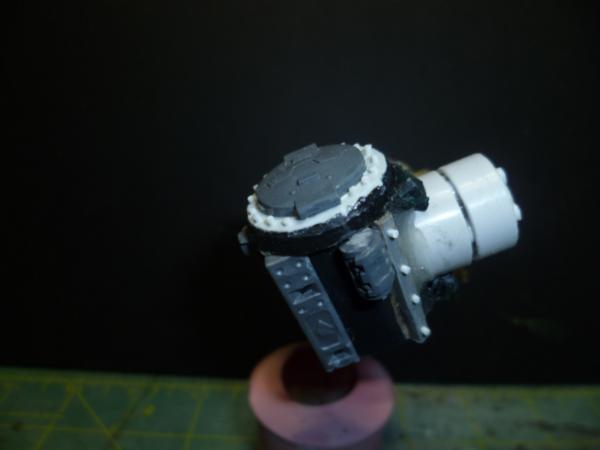
Talking of missiles...
And also some heavy anti-air that I am going to cast up, last lot where a failure.
Oh and some legs, not sure where these are going yet did not start out with this in mind!!..
Thanks for stopping by, thank you for all the comments they are all taken in and used I promise.
Camkierhi wrote: ...Question, what the heck do I do with the windows can't decide at the moment.
Variation in colouration is good. What you do with the windows depends on what the aim of the piece is. It's a nice courtyard, seems more "now" than "future"... getting quite the village cottage feel from it. Maybe look at a google of cottage pictures and see what grabs you.
Oh and some guns...
Look good.
Oh and some legs, not sure where these are going yet did not start out with this in mind!!...
lol The greatest of artworks don't usually end up where they were first intended to go.
Give the windows a simple treatment. clamshell plastic for glass, and 'wooden' frames, 6 over six if you can, otherwise 3 over 3. You can make the frames from electrical tape or some other vinyl tape. Quick and easy, and very effective looking.
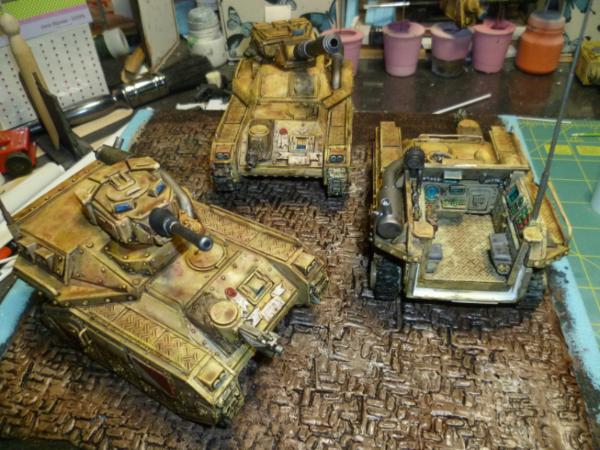
The courtyard got away from me a bit so slipped it to one side for a sec and hada go at the vehicles....
Started painting the guns, still a ways to go and some detailing to add...
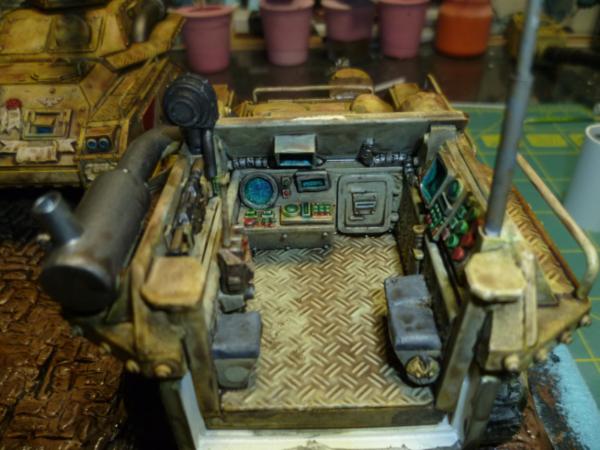
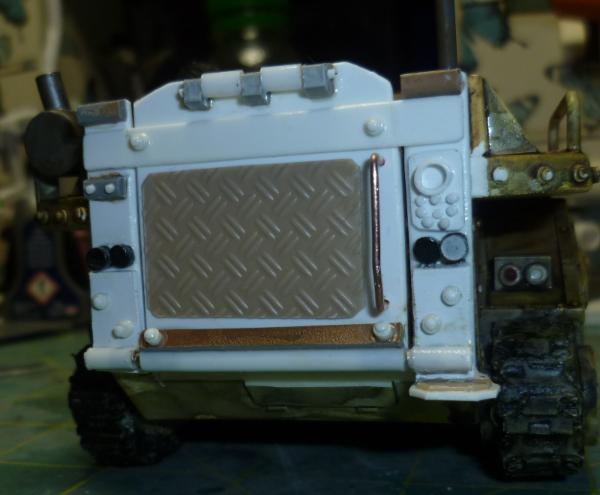
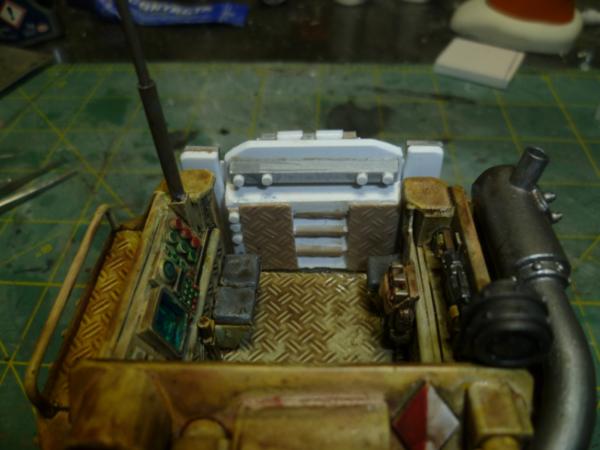
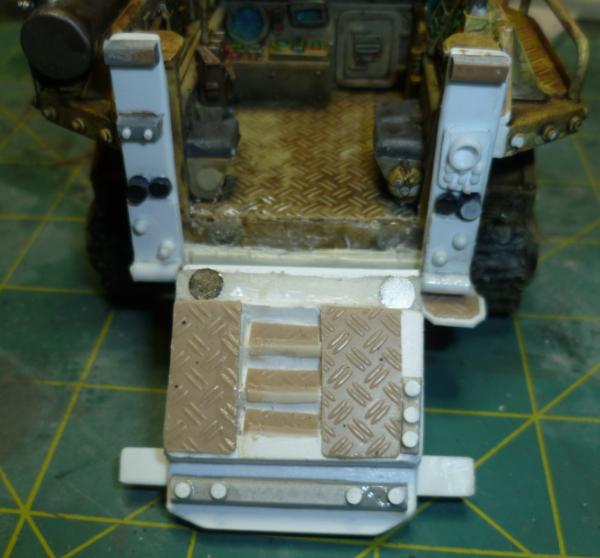
And did the back door for the command vehicle...
And with a start on the paint...
Looked out some crew...
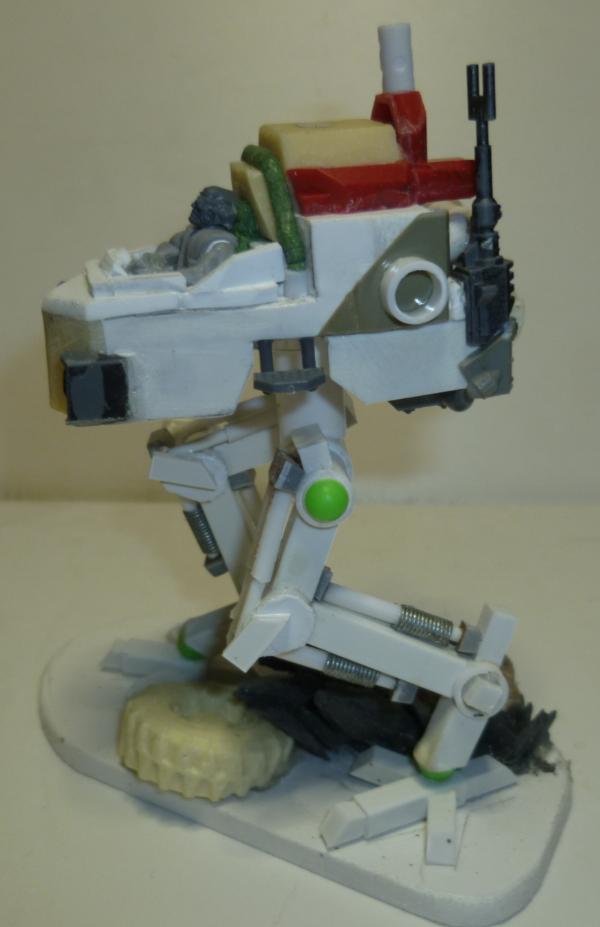
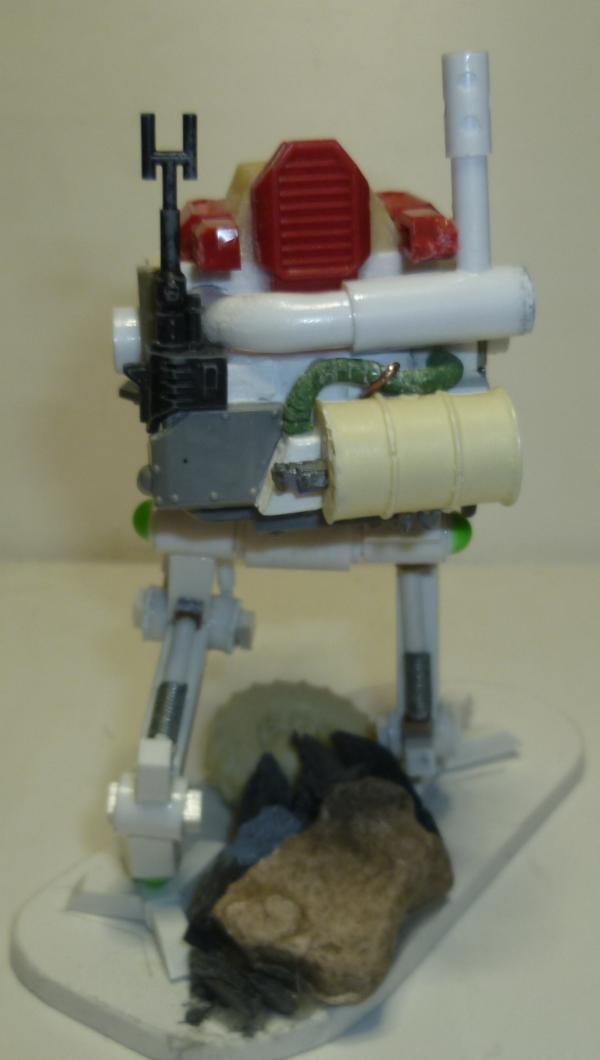
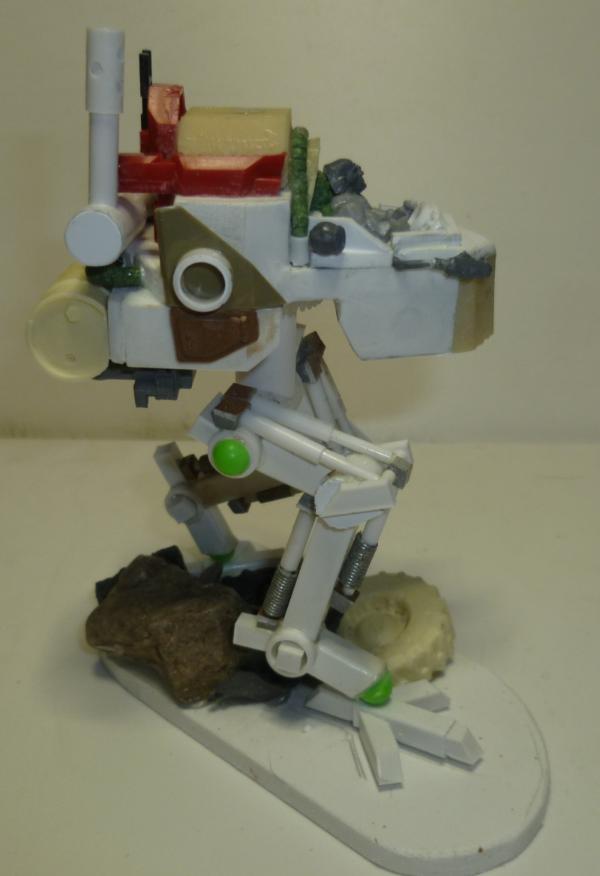
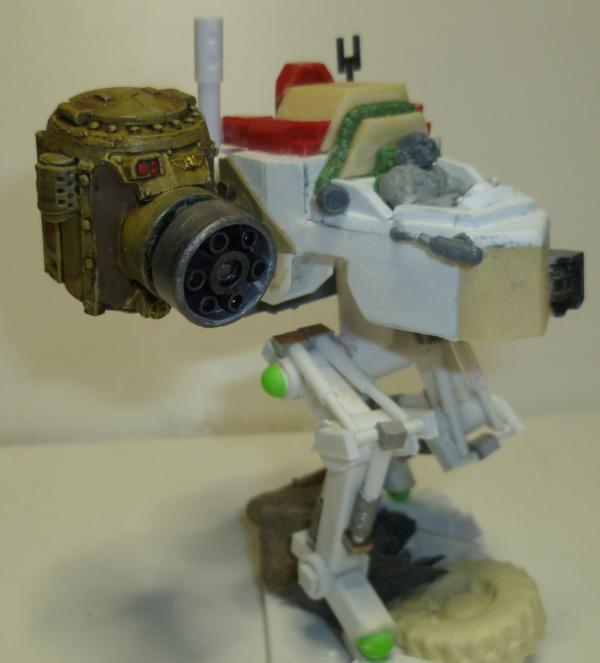
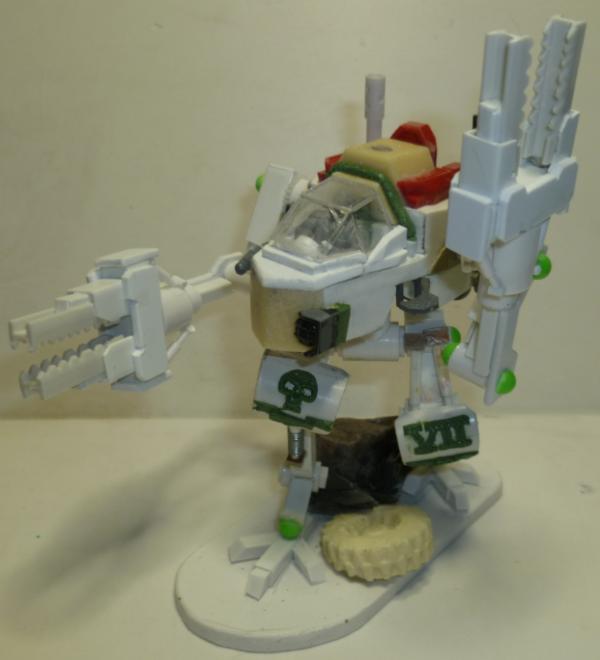
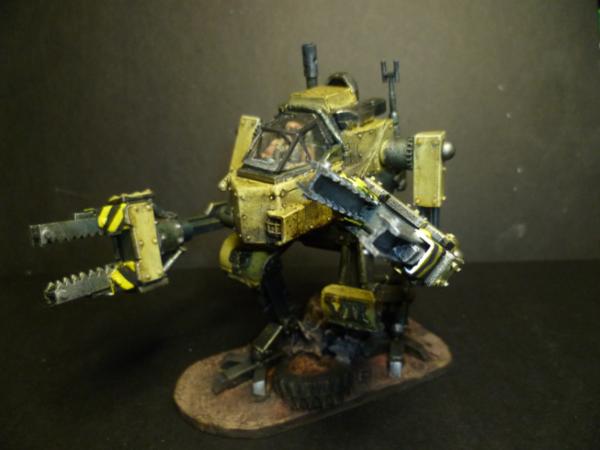
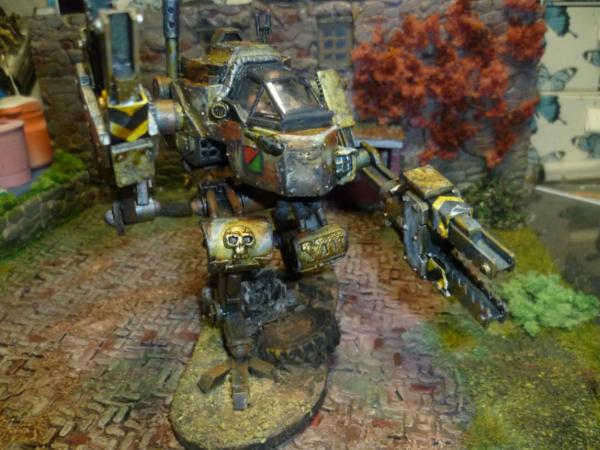
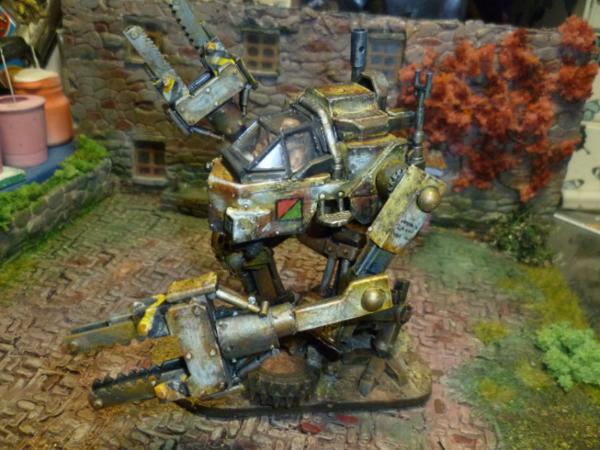
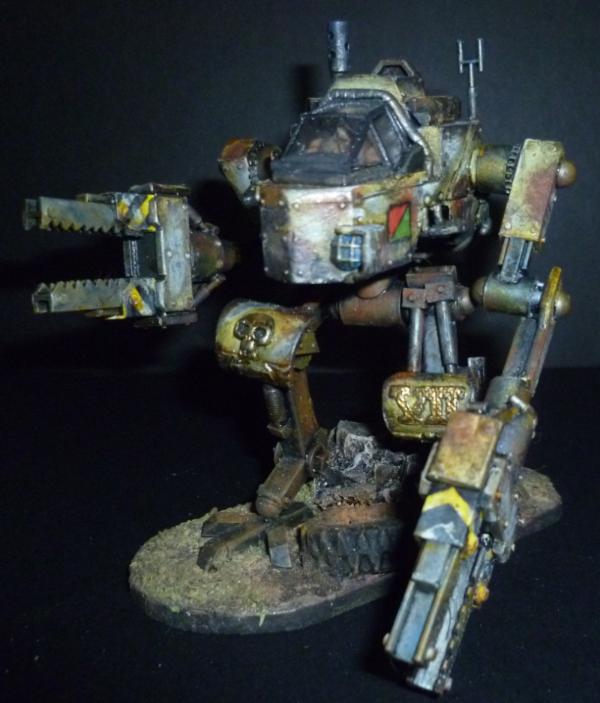
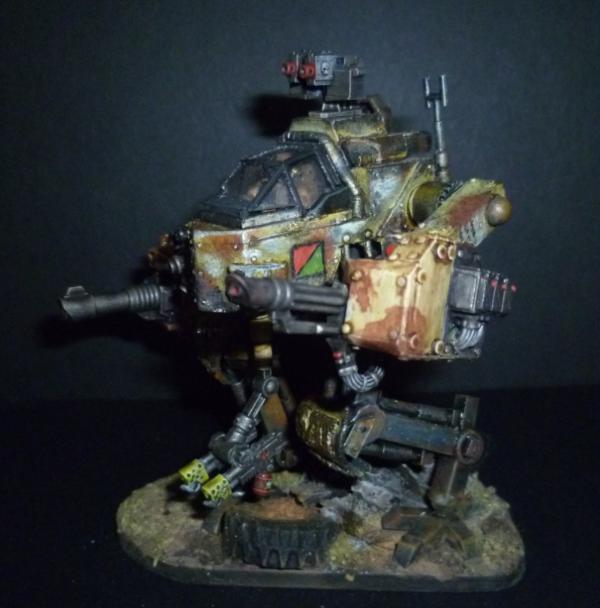
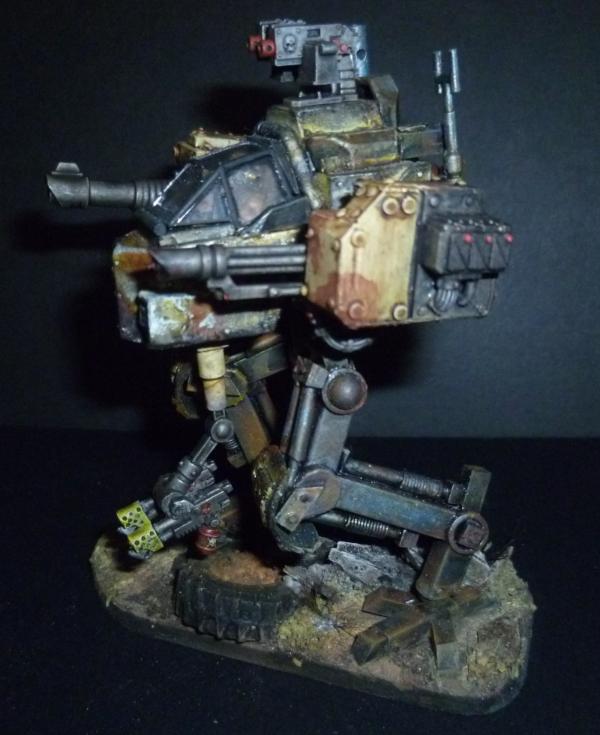
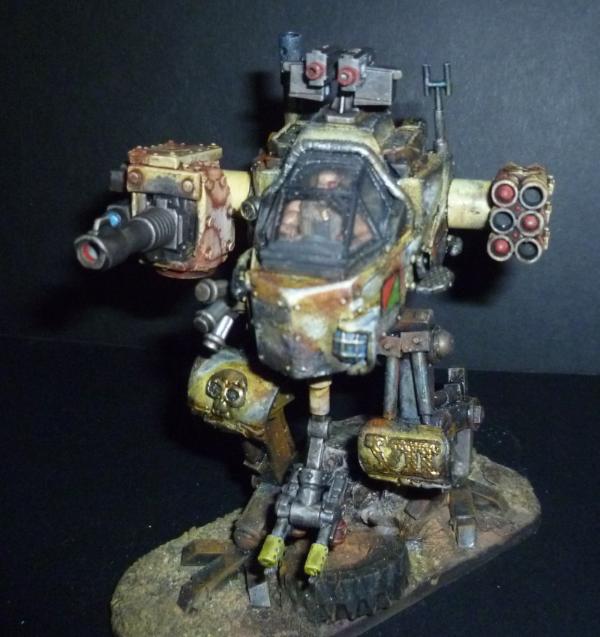
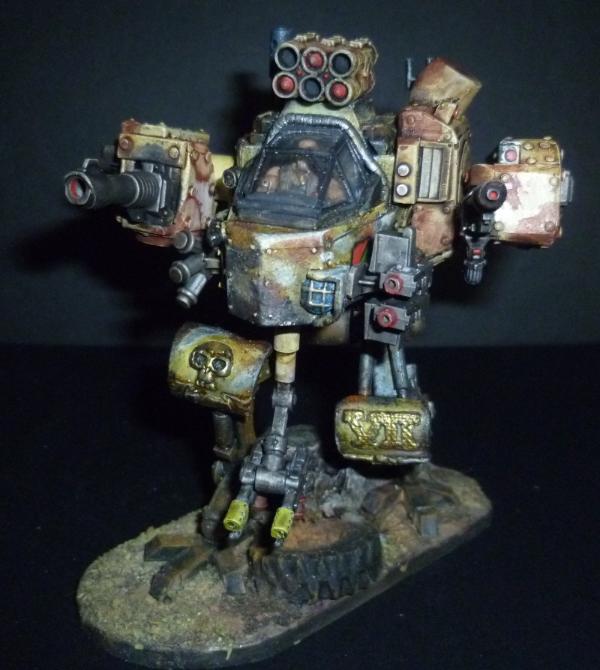
Then I started getting the itch for those legs and began work on the top half...
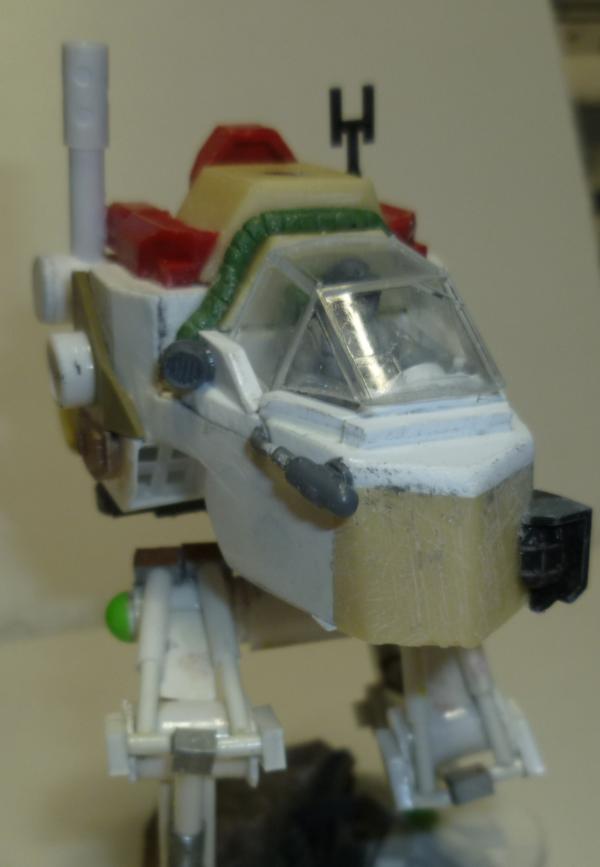
With probable canopy, not set in stone on this yet but most likely...
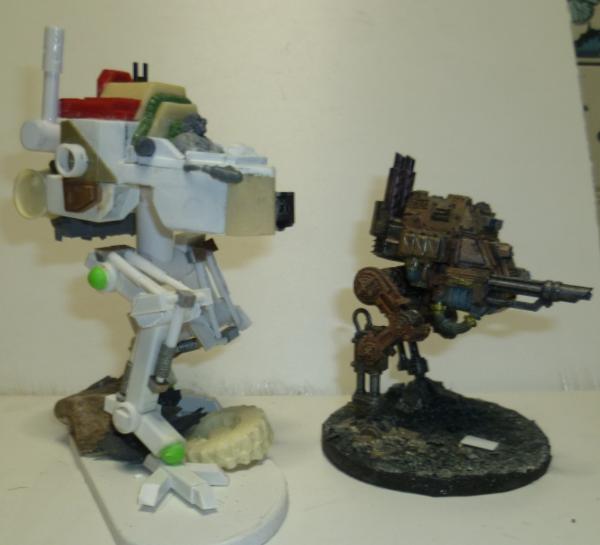
And a scale shot...
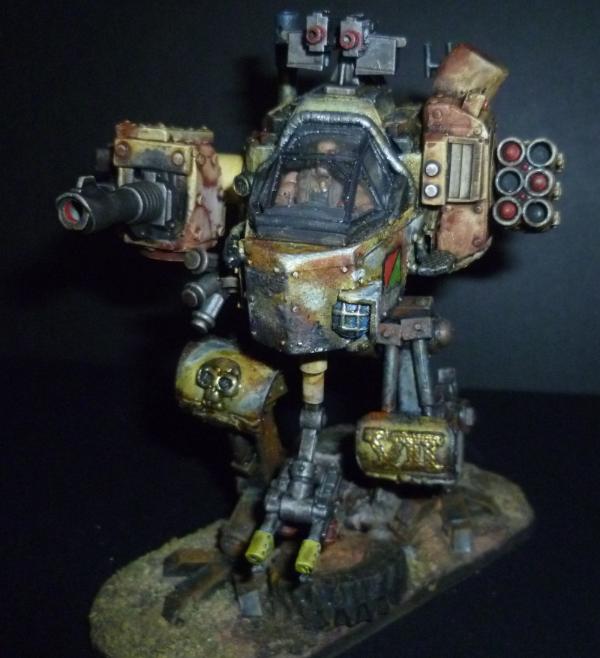
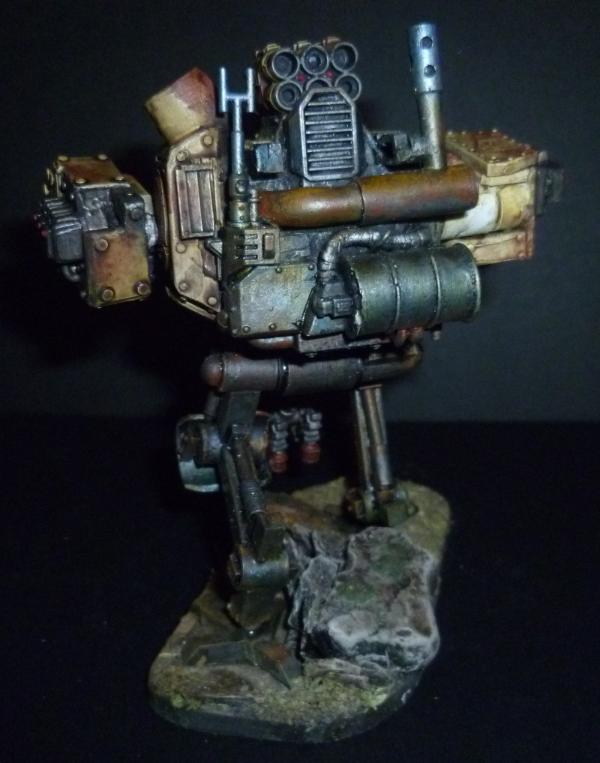
This walker has got me thinking about this bit of the force, This walker would be a heavy weapons platform so maybe rocket launchers twin linked Lascannons or autocannons type of thing. I have given it 6 magnet mounts built in.
Example..
Now I am thinking of making these units a Scout type unit. These tanks are slightly less armoured and more in keeping with scout tanks similar to a Warrior in my mind, and the mobile HQ and the walkers all add to a scouty up front probing roll, so may have to do a couple units of snipers, and some fast moving vehicles...
Any way thank you for looking, and would love to have your thoughts....
Thanks bud. No idea if it would be usable, or if it could proxy, it has been done before, often by better than me, but that does not matter, I am enjoying it.
Thinking of venturing in your direction actually, originally that courtyard was for the tanks, but now thinking of a civilian car, similar to the one you have recently done. I will have to scratch something up.
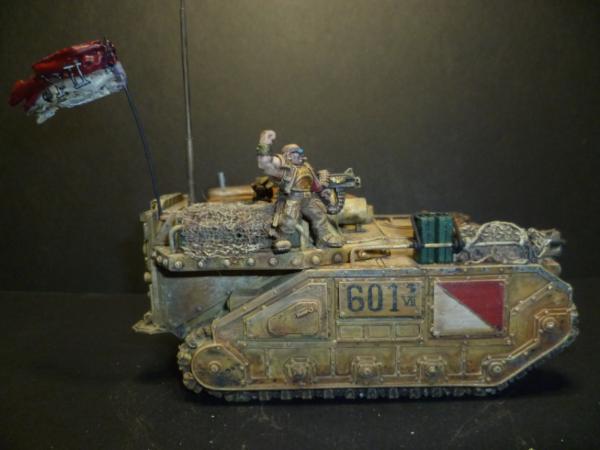
Also need a favor, anyone know the markings I should be putting on my tanks? Had a look about and can't seem to find much. Would like to number them properly, ish. So does the scout element of an IG army have a designation as such?
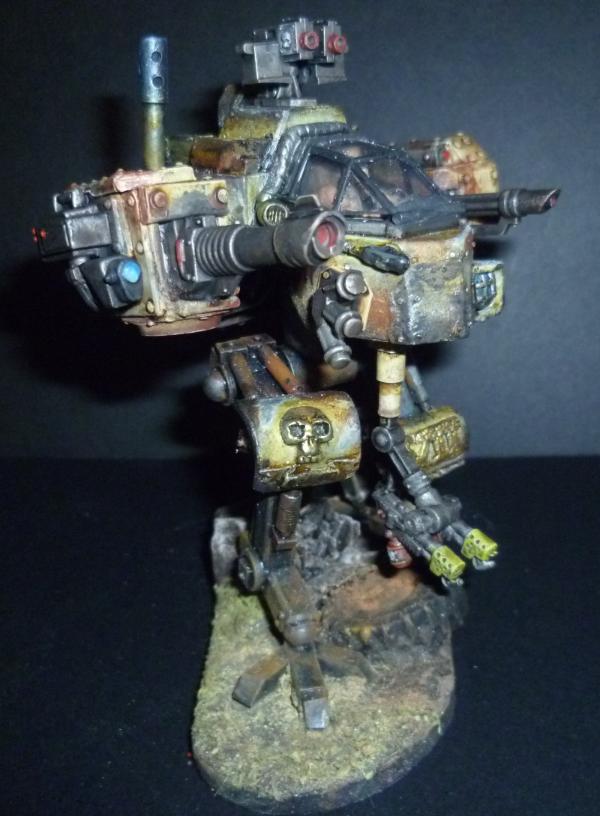
The tanks are looking great, and that scratch-built sentinel is a thing of beauty. I find myself wondering how you achieved that splotchy effect on the tanks. Is that just basecoat and washes, or did you do something out of the ordinary?
You should start sculpting your own human shaped models...then you'd be totally autonomous!
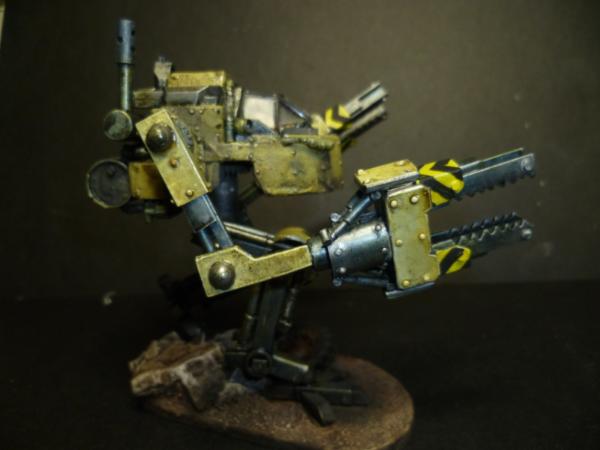
Sentinel looks highly promising, the fitting rocket launcher tho later on should have a more streamlined look to it than the one borrowed from the other tank...or is it that you favor the mechwarrior look more?...than that'd be appropriate...
Sentinel is good. I do like. But, that giant weapon on the side really unbalances it. So, make a smaller weapon/attachment. (Yes, genuine C&C. I know that you can handle it. ) I suspect by the time I post this, you've already painted the sentinel too.
Oooh, a request. Maybe replace it with attachments to make a power lifter sentinel, or something for construction or building or terra-forming etc. I keep meaning to change my sentinels over to something that is more 'civvie' friendly. I could steal draw inspiration from.
Really sweet work as always mate! Need to have a proper go through and catch up with this blog... but the Heavy Sentinal is very cool!
I do kind of agree with red Harvest that the weapon pod does seem to unbalance it slighty.... Not sure if the idea is to have another on the other side... might sort that issue out..... Or..... maybe the large weapon units can actually be completely separate....
I was thinking kind of the weapon pods having their own "legs" and linked via cables back to the main walker..... which itself would have no weapons... but space for other equipment etc..... like a wanderer walking his 2 dogs...... or Michonne in the Walking Dead... with the 2 zombies on chains!
Just a thought... and prob way too late as you have no doubt already finished it! lol....
Thank you for the critique, agreed, and like the idea Magos, got some things in mind for that as well, well sort of.
As requested by Red, and yes I wanted to do this anyway. ..
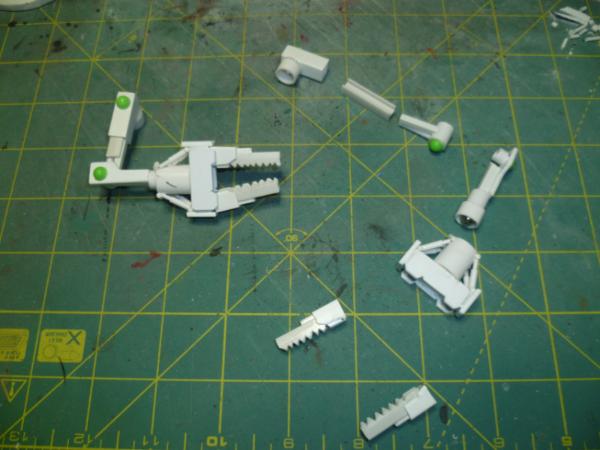
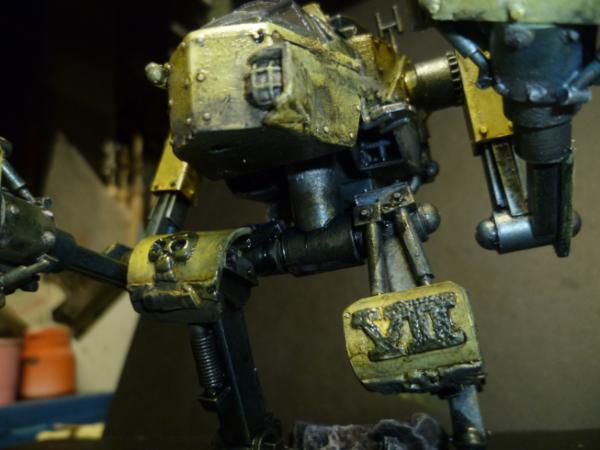
Not that much done over last few days, not really sure why. Anyways the arms are many separate bits so I can make extra attachments, say a big knife (Avatar style) just use the upper arm and mount weapons, etc. There are magnets and friction fit joints all over so it is quite pose-able, al the moment got to do some work on the shoulder got a magnetic ball and socket joint which is great until I fully extend the arm. Here is a pic of the arm in bits...
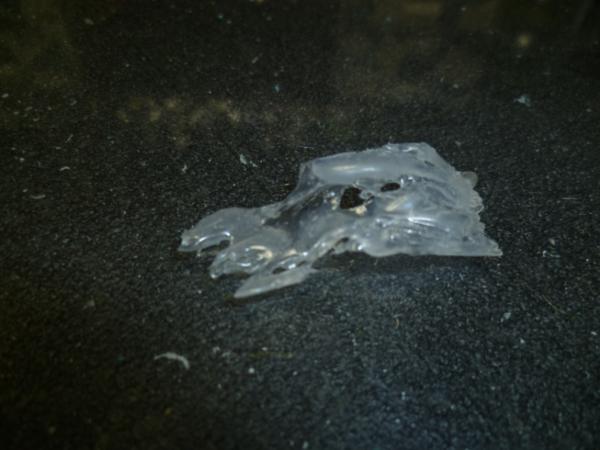
@ Josh, Thanks bud, well I tried to do something, not sure yet if it has worked, I seem to have lost it amongst the washes, but I did try the beige and then a bricky colour red stenciled over it. Totally an experiment, made my own stencils out of hot glue.....
They are flexible, work fairly well provided you are not after hard crisp edges, and dirt cheap and easy...
Thank you all for looking and as always comments and critique welcome, and evcouraged.
Thanks Cam.. That's perfect. Seriously, perfect. I'll be taking copious notes here I'm thinking for mine I'll place the 'shoulders' underneath the cockpit, since I can easily detach it. It's on the To Do list.
Speaking of stencils, wouldn't using paper or cardstock work a little better? I find hotglue tends to do what it wants, no matter how hard I try to guide it.
JJJeeeezzz... how did I miss those tanks on the previous page!?!? lol...... Awesome work!! Really cool.... and the interiors look really convincing! Need to go back and have a read through also...
Wow!! You have been busy!!!! Those tanks are excellent but I'm bowled over by the super sentinal. Love the whole concept especially with the power loader arms. Hats off to you bud
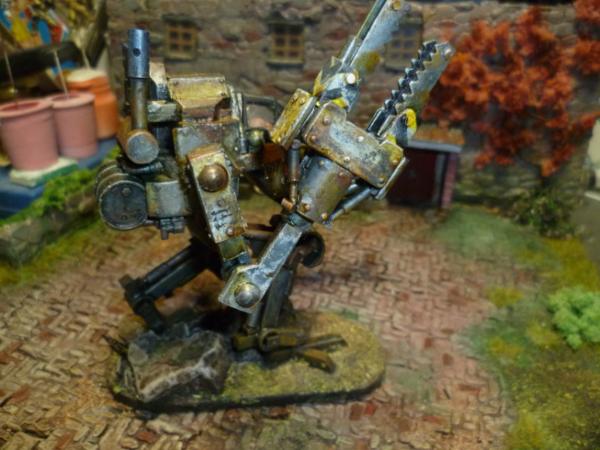
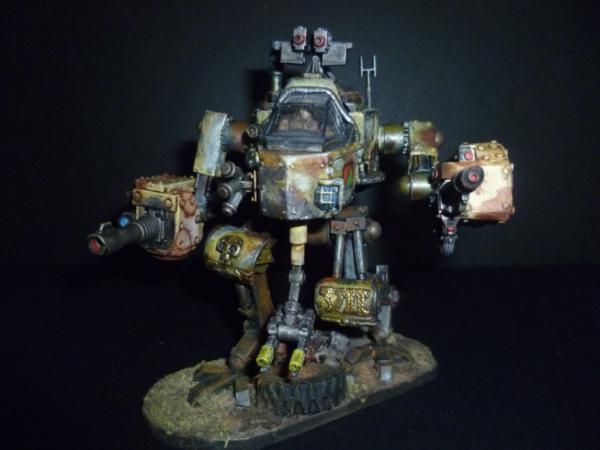
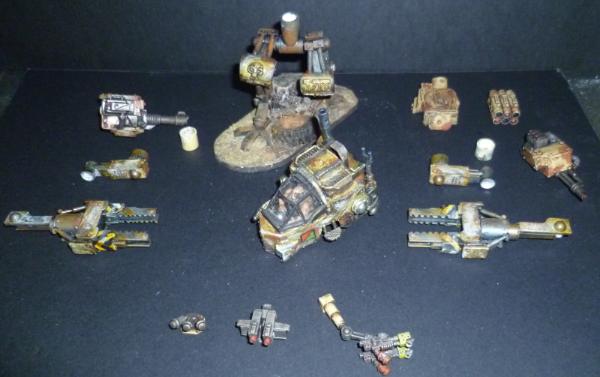
Well I am not finished, but feeling like moving on so will come back to it later, but in the mean time, here is the Hvy Sentinel with all weapon options etc.
Many individual pics to follow....
Cargo duty...
Las/Scatter..
With no arm extension..
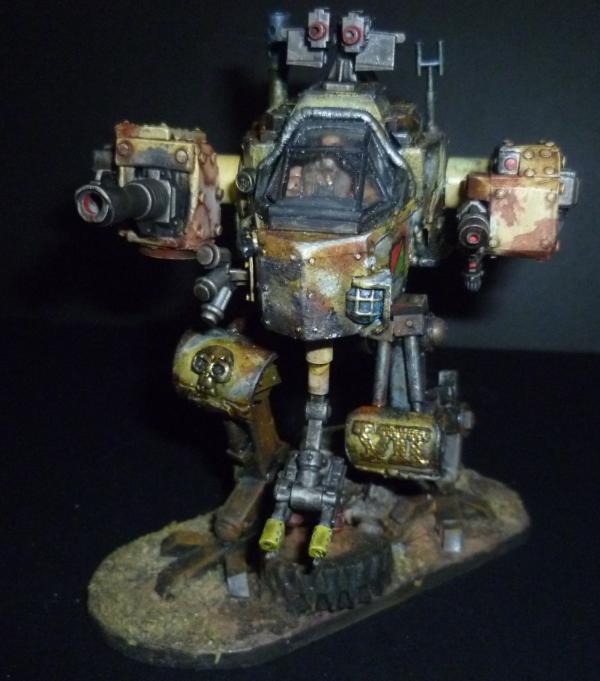
With Las/ML, did not think the ML looked very good...
So I built up a Guidance shoulder unit for it...
Then of course we can be silly...
And it all comes to bits and is swappable...
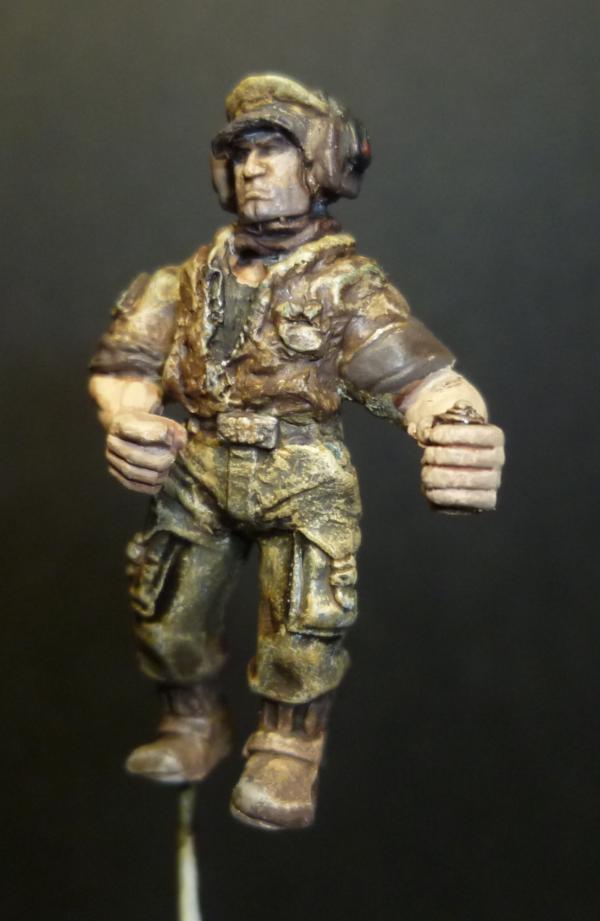
Oh and did a bit of messing with the tank crew..
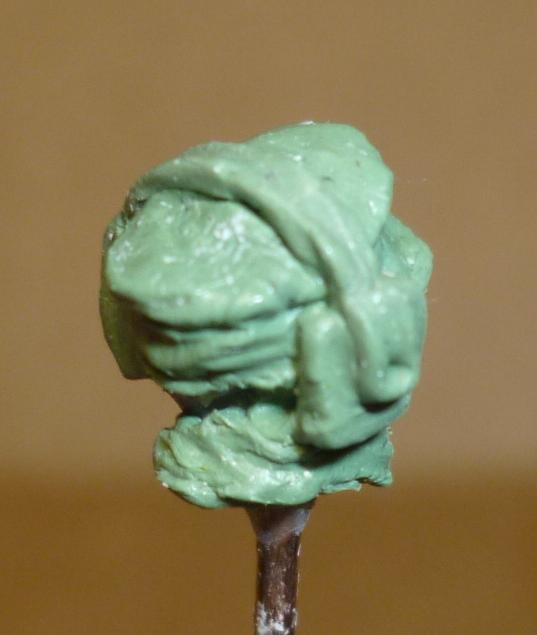
And the bit of sculpting is coming out ok.
And I guess there is also this bit of kit for the other tanks...
As always your thoughts and comments are most welcome, and required....Thanks for stopping by...
I was so blown away by you not setting something on fire that I forgot to comment on your sculpting:
The chap came out well and the sculpting looks a step up for you, much smoother/cleaner. Good effort.
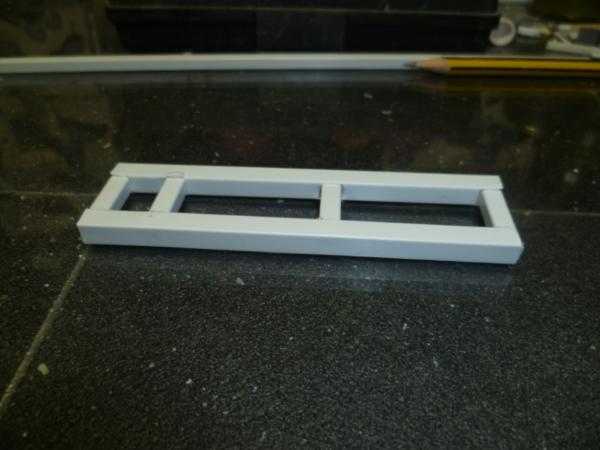
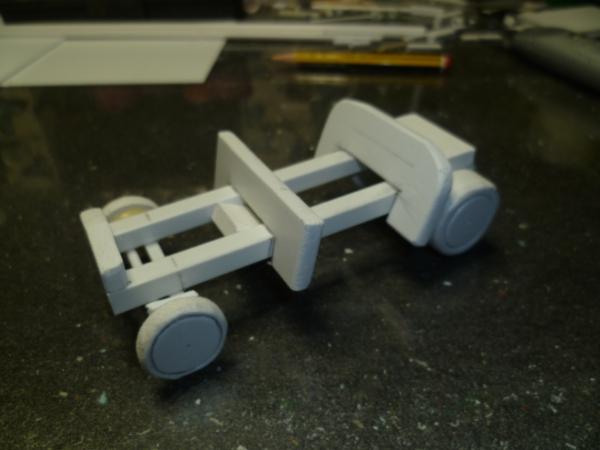
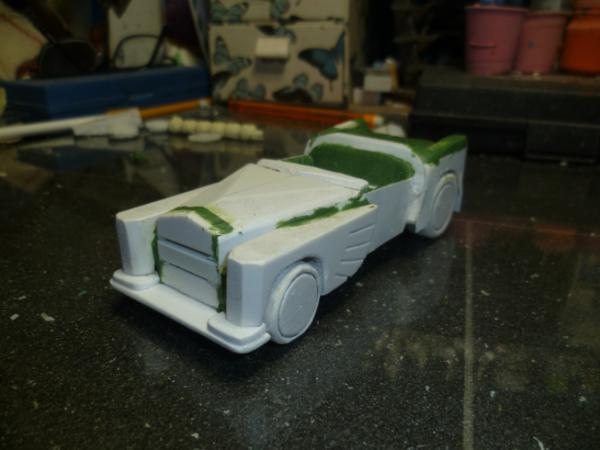
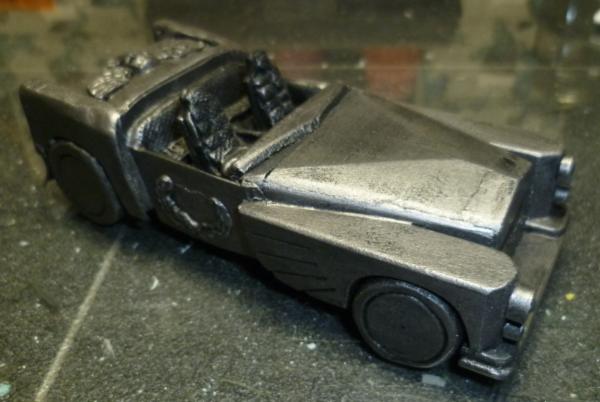
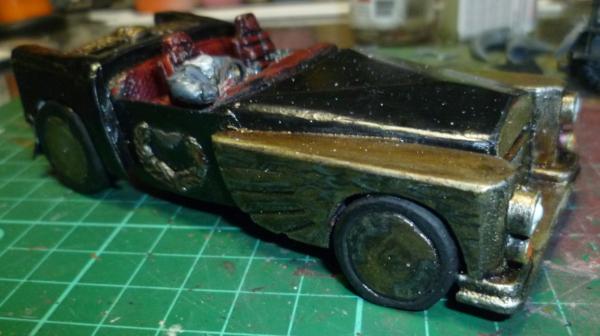
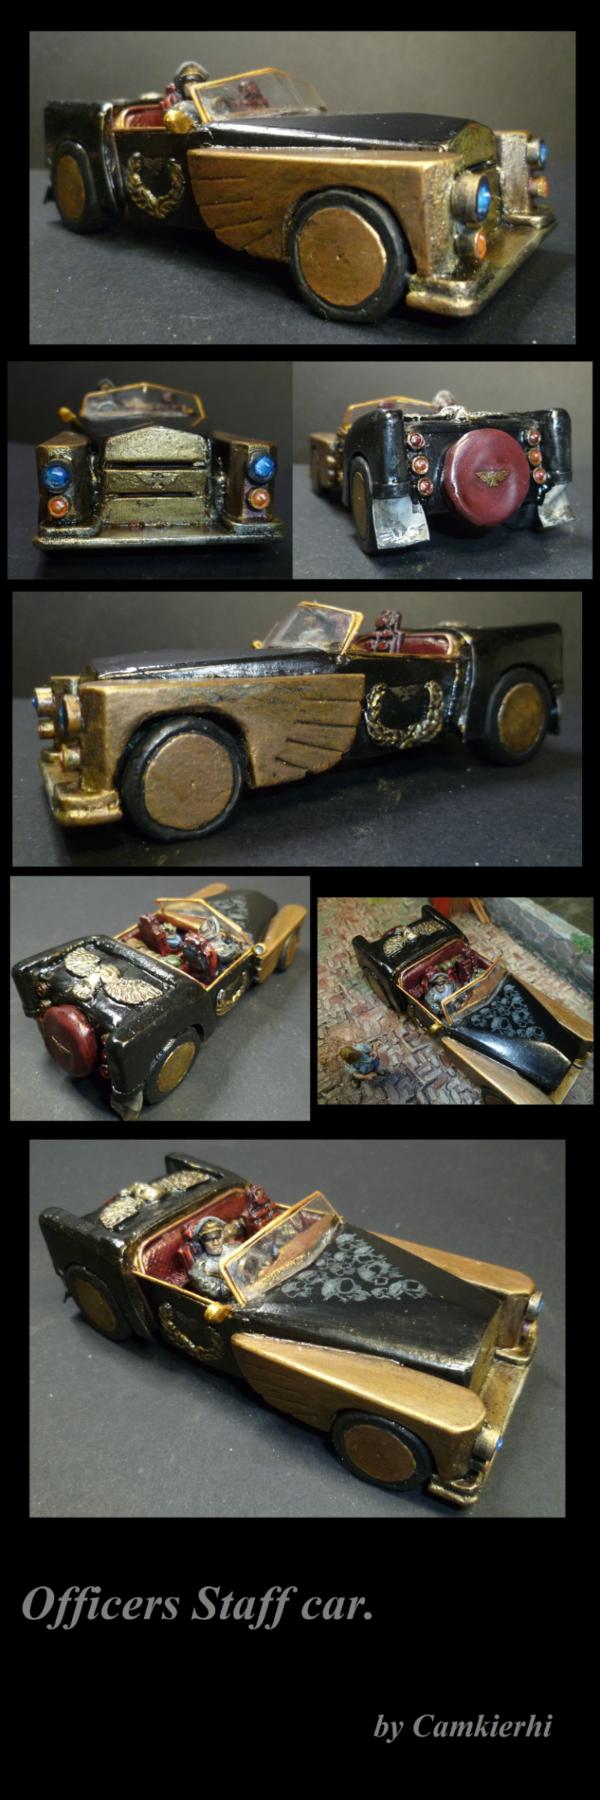
Nice shape on the car. What did you use for wheels?
That's really awesome. I second the praise for the wing fenders. Even thus early on in the build it already looks great. Will you be detailing a driver inside the vehicle, too?
@ Doc, Cut out of Sintra board. sanded round, could have done with a little more effort on my part.
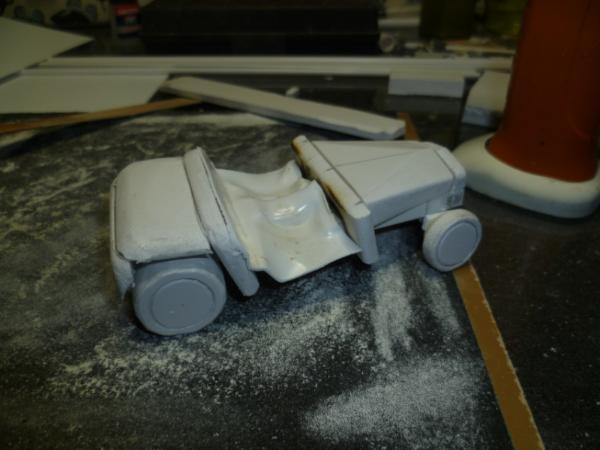
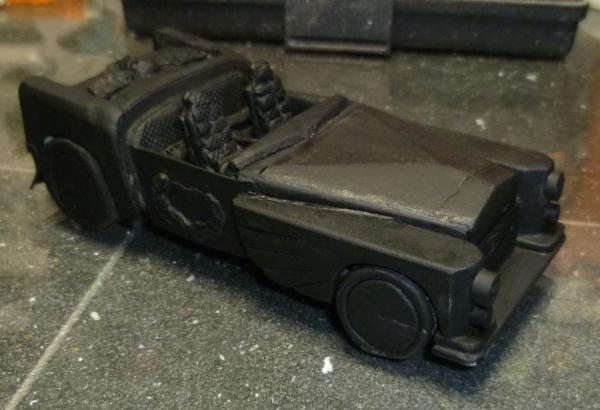
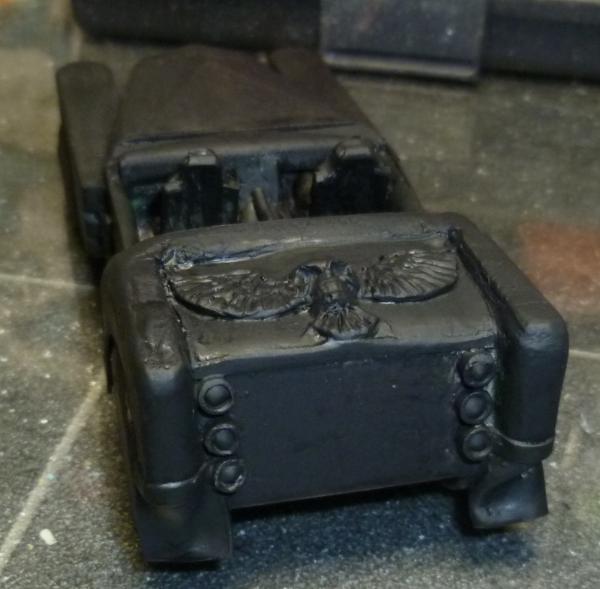
So added a few of the details then black bombed it, and finally a heavy dry brush of metallic to smooth out the paint, and show areas I need to work on like the bonnet...
Thank you for looking and any and all comments are welcome.
that is a cool car there mate! Really like the look of it! Reminds me of a coupe version of Nemo's car in "The League of Extraordinary Gentlemen" ... which IMHO is a good thing!
Looking forward to seeing some paint on it and some shiny bits!!
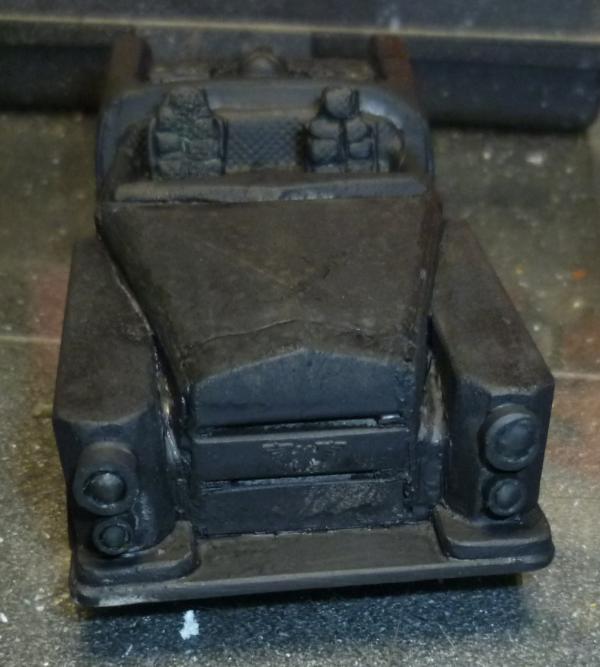
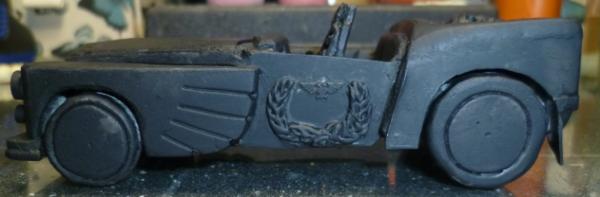
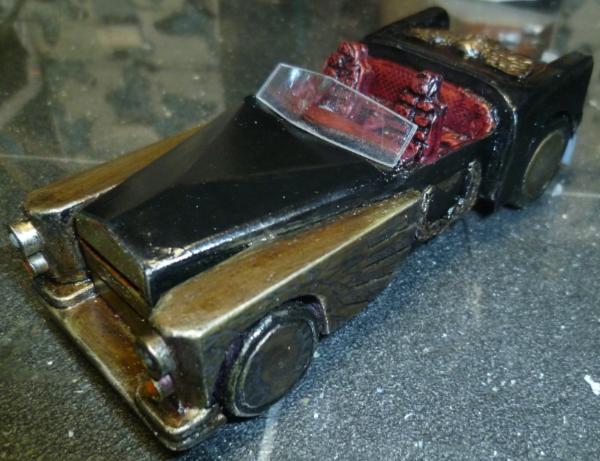
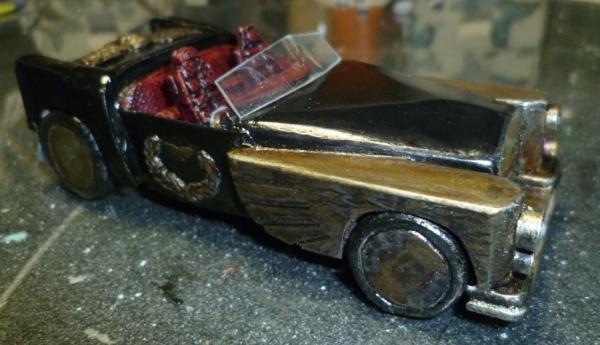
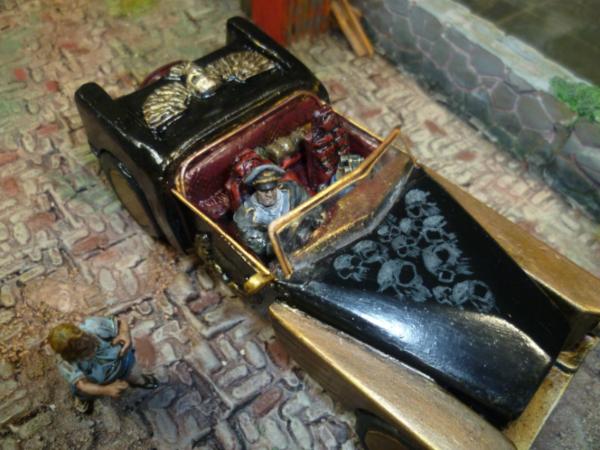
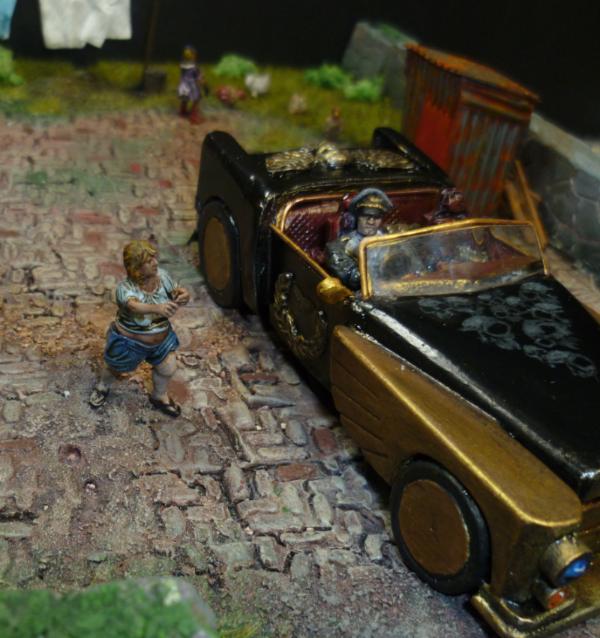
@ Stonned, it's more of his own car kinda thing, aiming somewhere like a limo/roller coupe. Anyways see what you think below.
@ Casey great to see you sir, Thanks.
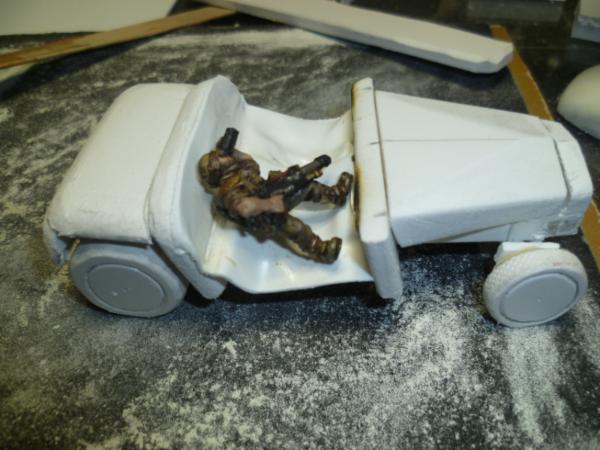
Well few bits done....
Few internal details starting to be added..
This was the driver...
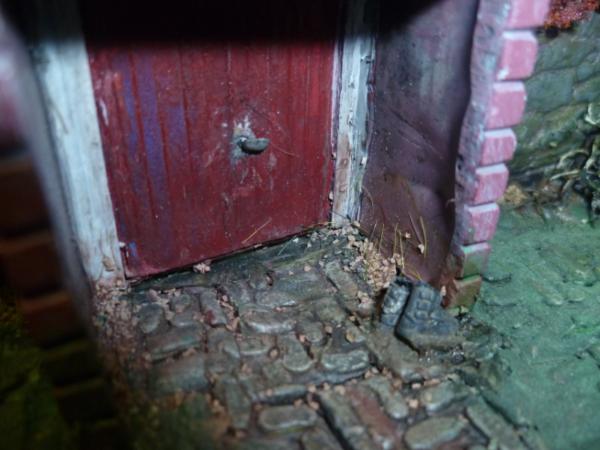
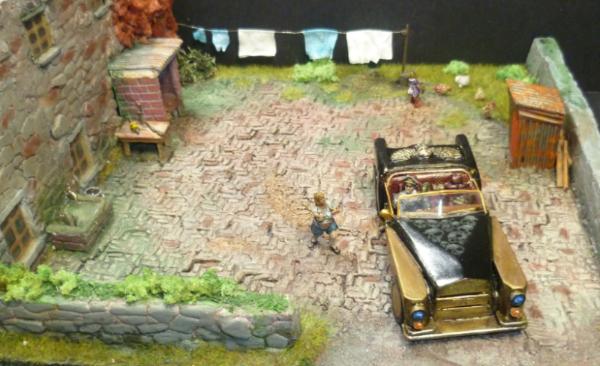
Made some chucks for yard scene...
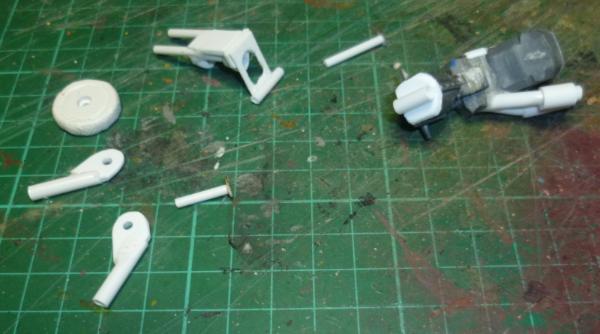
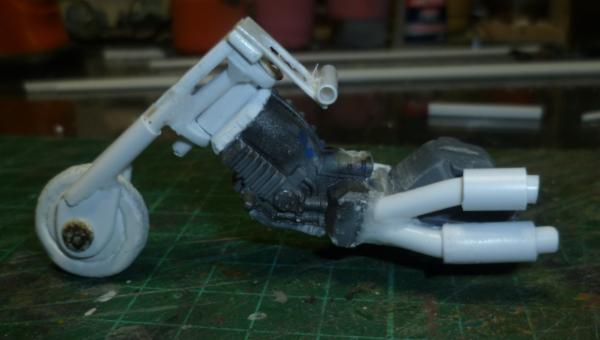
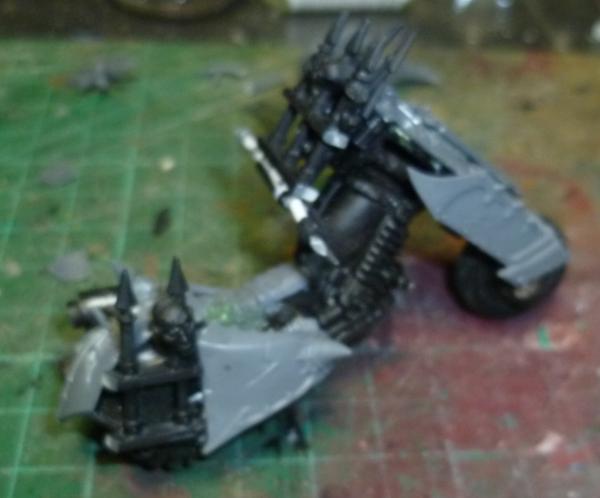
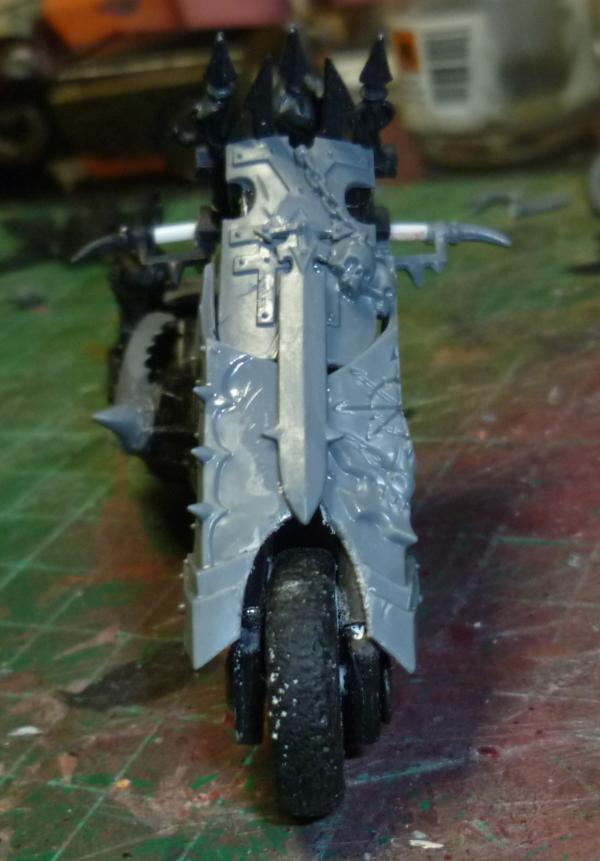
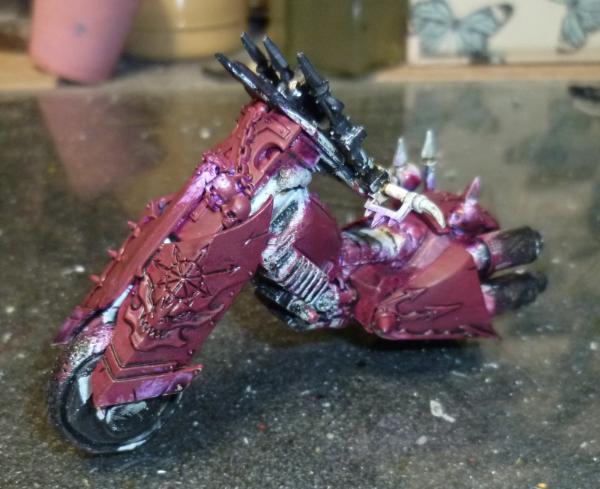
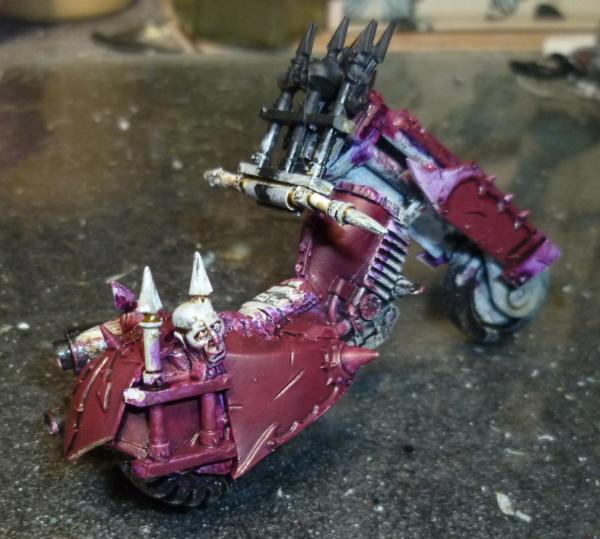
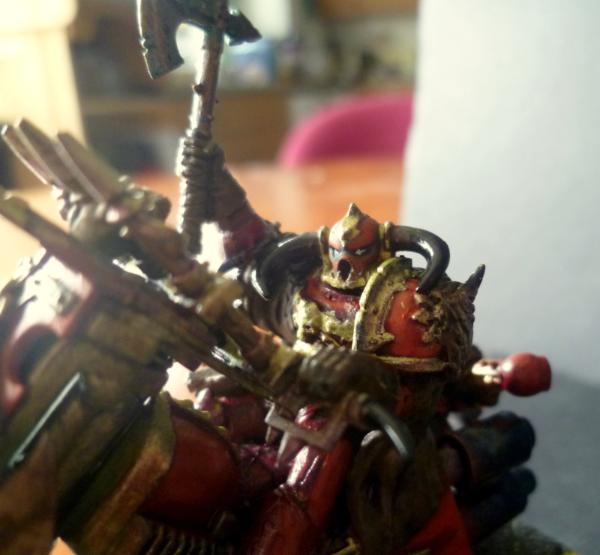
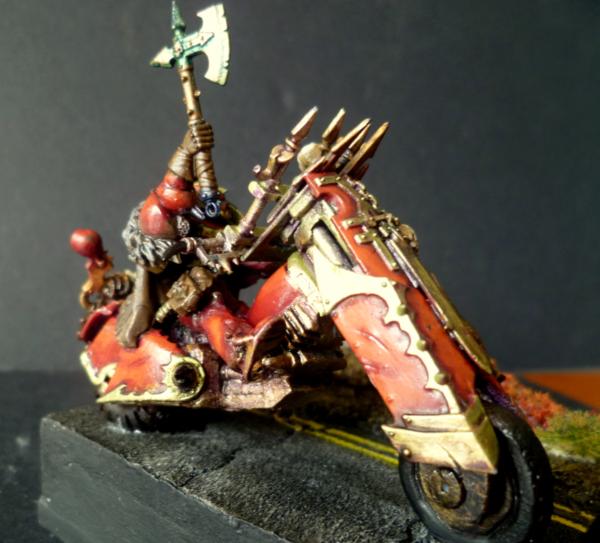
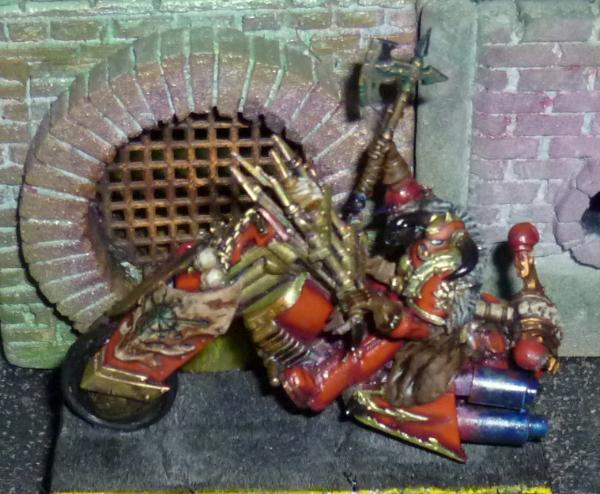
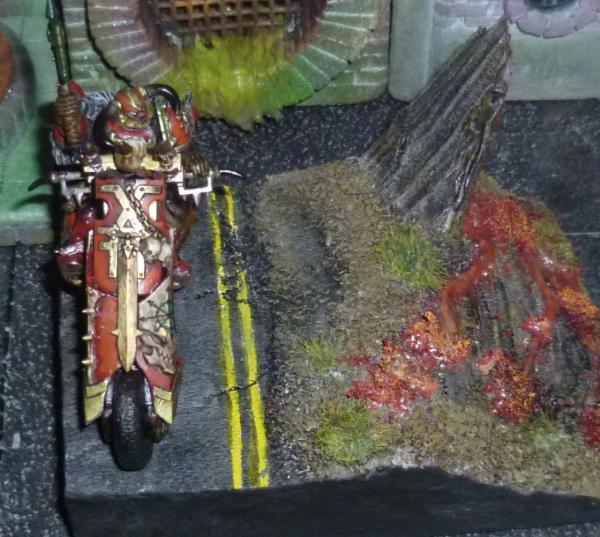
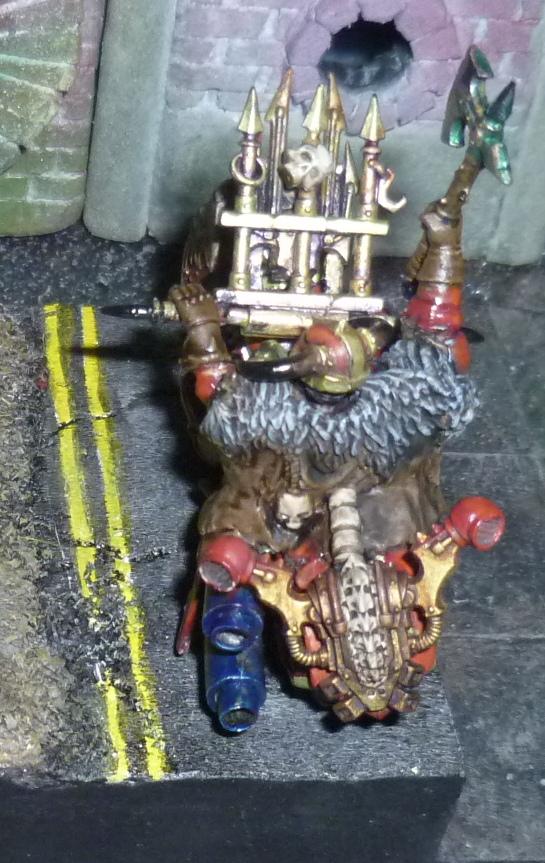
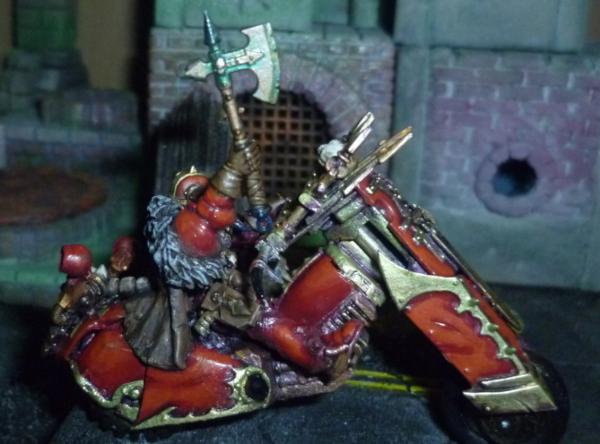
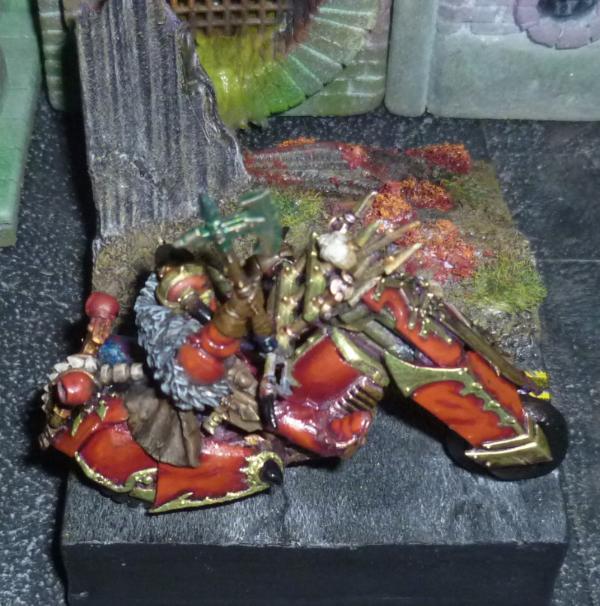
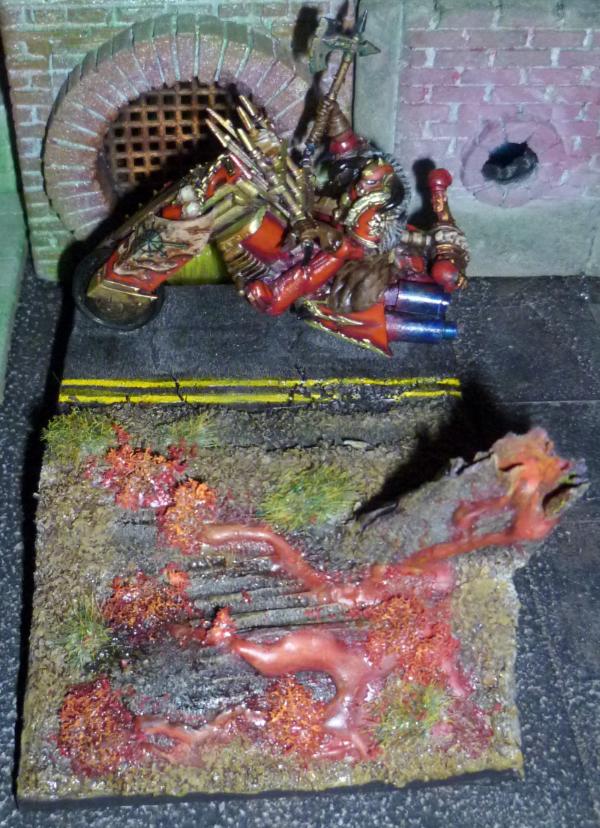
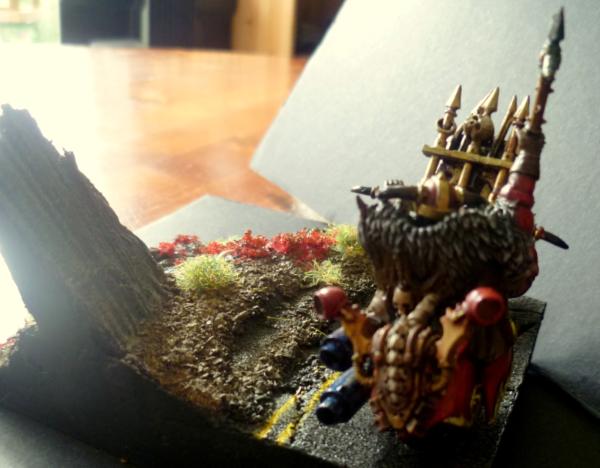
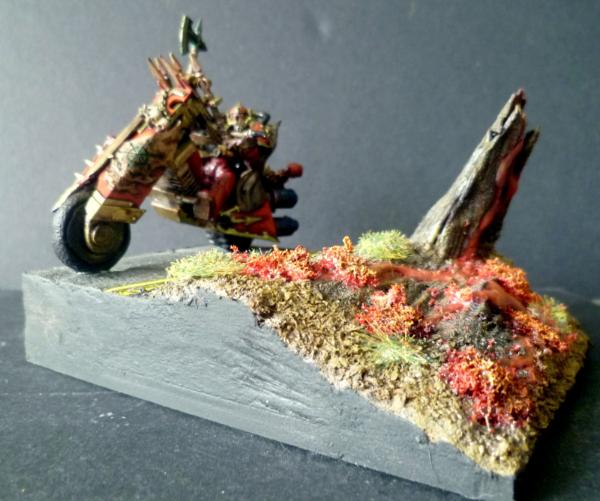
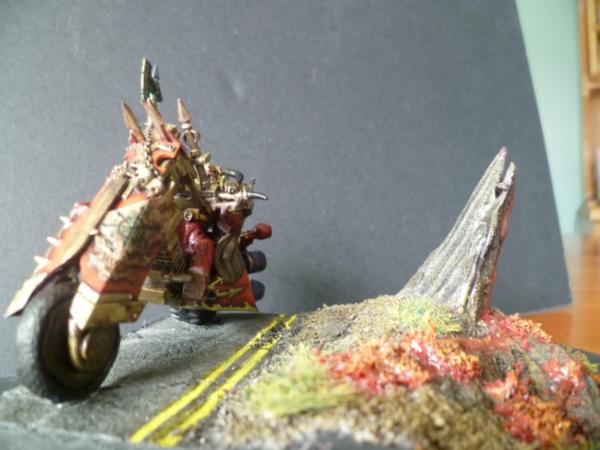
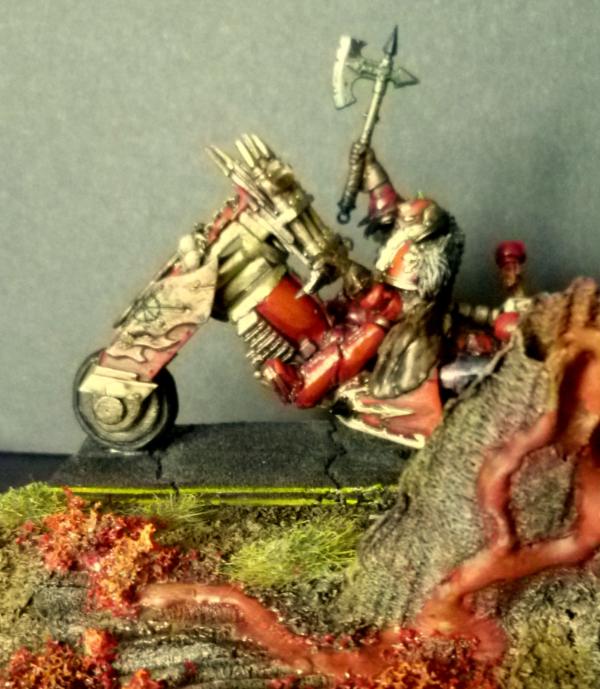
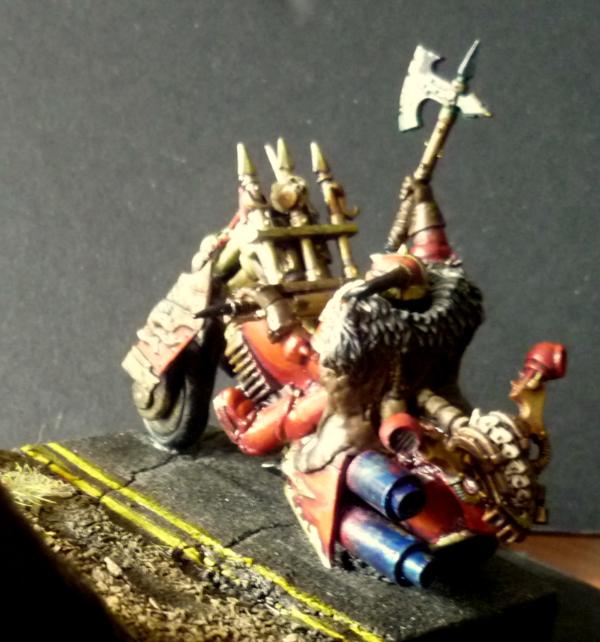
Oh and started messing about with a chaos bike.....
@ Stonned, it's more of his own car kinda thing, aiming somewhere like a limo/roller coupe. Anyways see what you think below.
@ Casey great to see you sir, Thanks.
Well few bits done....
Few internal details starting to be added..
This was the driver...
Made some chucks for yard scene...
Oh and started messing about with a chaos bike.....
Yeah no, wow ok. I see were you were going with that now, he wouldn't need protection driving around on his home world settled snugly in the firm grip of the imperium as no good emperor fearing folk would ever dare to attack him. Nice work.
Like the bike too, that tail pipe.
Love the yard. Seeing the little girl mini though, perhaps add a white rabbit mini somewhere? Is that a chainsaw on the table? Cool. I retired my gas powered chainsaw in favor of a nice 40v battery powered one.
Did you flip the images of the staff car, or did you have an *oops* moment and put the steering wheel on the wrong side?
(Yes, I B trollin' U. )
For serious C&C: Did you consider running boards for the car?
Well thank you everyone, really appreciate the feedback.
@ Casey, Thanks bud, must be doing something right then.
@ Gits, thank you sir. @ Stonned, Thanks bud, yes you get it.
@ Graven, thanks bud, much appreciated.
@ Dr.H Cheers bud.
@ Red, I think that would be because you are a mirror of us and have everything the wrong side! Agree about the rabbit. And Might have to add some running boards, Maybe a gold rope bar!
OK I got distracted over on my Ork blog (selfish plug there) And been busy with the end of the LoER comp.
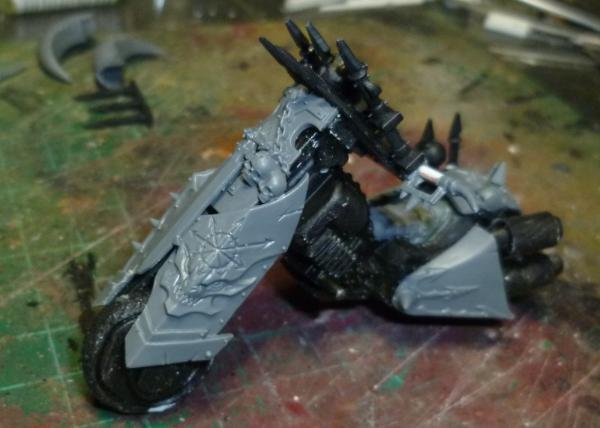
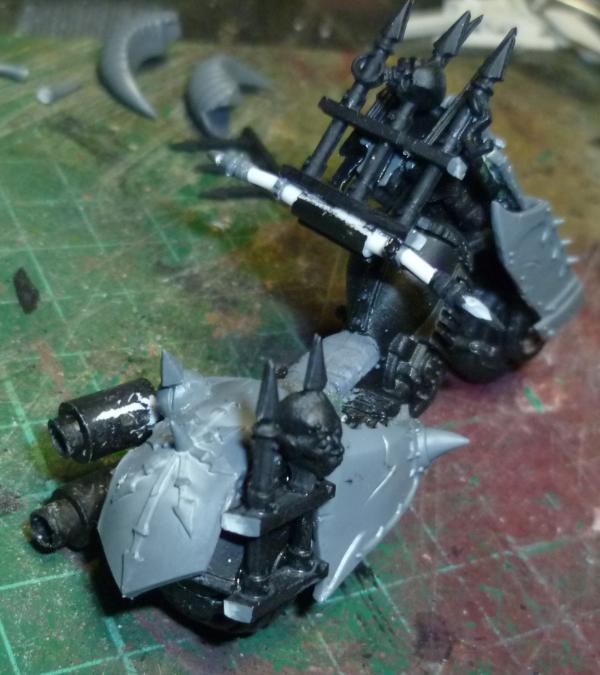
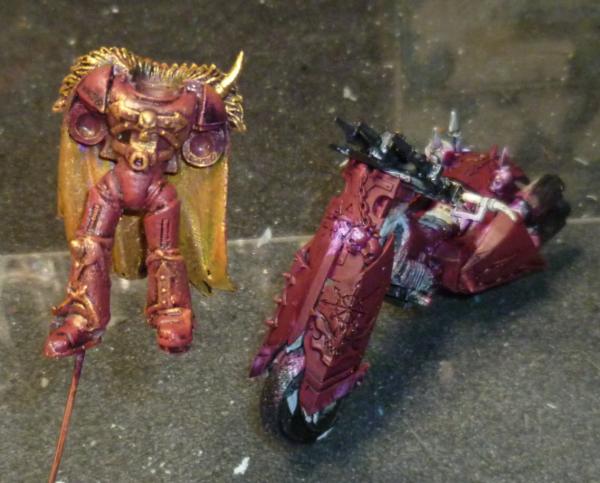
But did start laying some paint down on these...
Actuallly ripped the guy to bits and have seated him on the bike, pics later.
Terrific blog, Cam- lots of ideas here to emulate, and a high bar to reach to try to come close to doing as well. The imagination that goes into the concepts is original and inspired.
Thank you all for the praise, sorry it took so long been distracted in Orkyness.
Just going to drop a few things ere... supply drop time, yes I got paid and (blushes) will get the prizes off to the LoER winers now.
OK supplies....
1kg of 1mm steel ball bearings £20 online, I recon it is going to give styrene a run for its money on the value front, but will have to see how we go..
Thousands I recon.
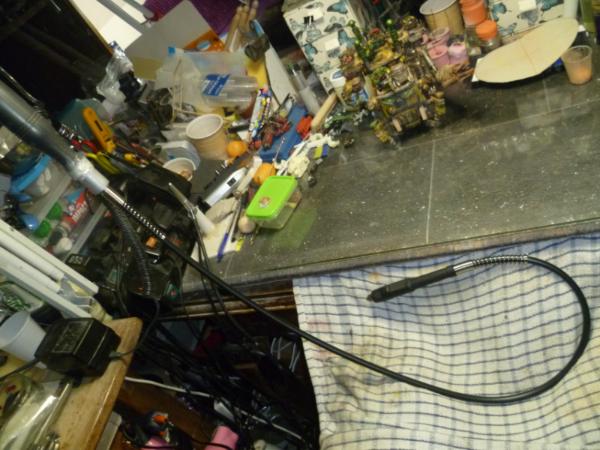
I have a cordless Dremel (which runs out too quickly for my taste.) and a cheap DIY store special which unfortunately will not take Dremel bits as the doda is too small. So I had a look on line and found this....
Now I had to modify it a little but it works a dream, is actually quieter than the original tool, and takes many different sized bits including Dremel ones.
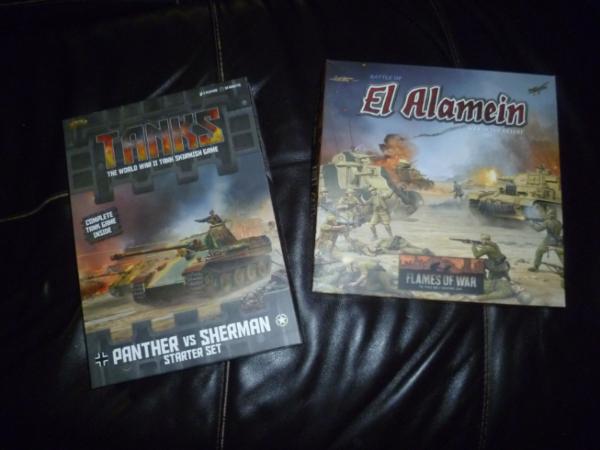
Oh and a couple future projects, the main aim is actually to get the kids interested, so I might not get to paint much...
Thanks for looking back soon with some more modelling...
That is one impressive sized road hog bike! Khornate bikes because berserker types want to get their weapons to you faster and take your skull for their God.
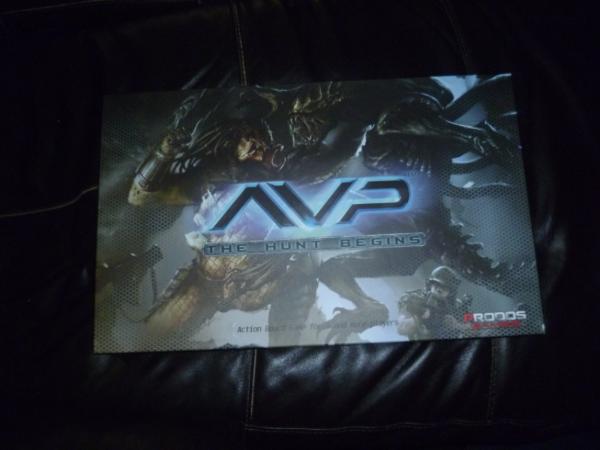
I see you picked up AvP - I was stupid enough to back the Kickstarter and still waiting for some of my pledge although I do have the base game - just haven't touched it... The models though are seriously gorgeous sculpts, same can't be said though about Prodos themselves - seriously poor business ethics it would appear... BTW, you got the 1st edition as well from the looks of it (like mine) - guess you got that on sale as there's a v2.0 out now with updated rules and one piece minis...
@ Shas, Thanks and yup sounds about right.
@ CommissarKhaine, Thank you, things do come together once you have primer on them, never sure myself until I get the brushes out.
@ Graven, Thanks bud.
@ Gits, Thanks. @ Yorkright, Thanks. @ Ruglud, Thanks, and believe it is 1.0, and was a little cheaper, might get 2.0 soon as well, just for laughs, still not managed to do anything with it yet, but soon.
@ DrH, Thanks bud, much appreciated.
OK well LoER comp is on and I have done an Orky piece, nice and quick and dirty, still a WIP, but seriously getting there. But I had several ideas for the comp, and one other I cannot get out of my head, as usual I will try and keep you all guessing, but this is quite ambitious in the time scale so may just go with the Orky one for the comp, but will still do this.
Right so, complete tangent....thinking along the lines of AVP and Space Hulk I would like to do a board, modular using the 1foot square idea I have been kicking about with and atmospheric, maybe tie in with the smaller tiles aI made some time ago, well here is the start of this one...
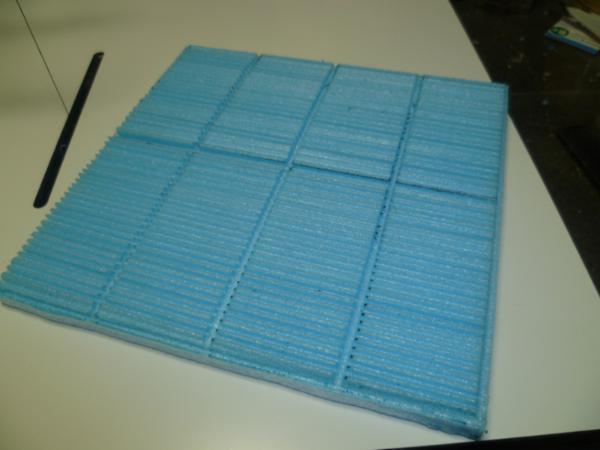
First up a floor panel 6" square..
Made of blue foam and "scored" with the hot wire cutter.
Add a couple more bits....
Yes tubes, already, well straws but they are tubular. In my head there is a scene playing out here, but I want to leave it open for game play so they will all be dead!
Thanks for looking in, really appreciate the feedback.
These control panels were what I was going for in my current conversion- but couldn't make it come out right. These already look great- I'll be interested to see the next steps!
I intend for it to be a generic human space hulk/ship tile/room, but will have to see where it goes.
Not a lot done, but did some experimenting I want to share.
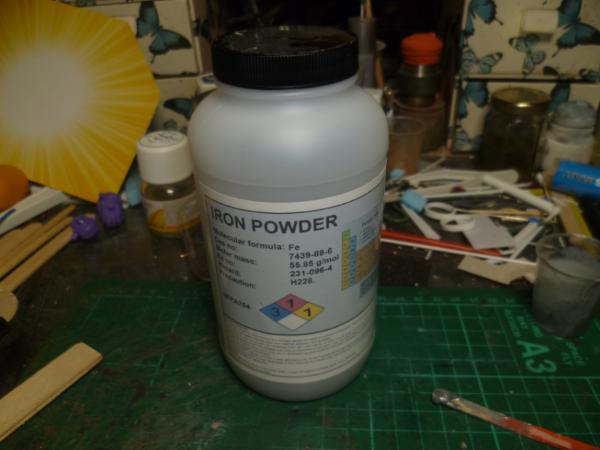
So I watched this video on Youtube about a guy mixing iron into clear resin and treating it with some rust stuff, and it looked amazing
However I had a thought. What if a cast with iron in my resin, magnets will stick to the resin! OOOOOOOooooooooo!!
So, got some of this...(£6 for 500g)
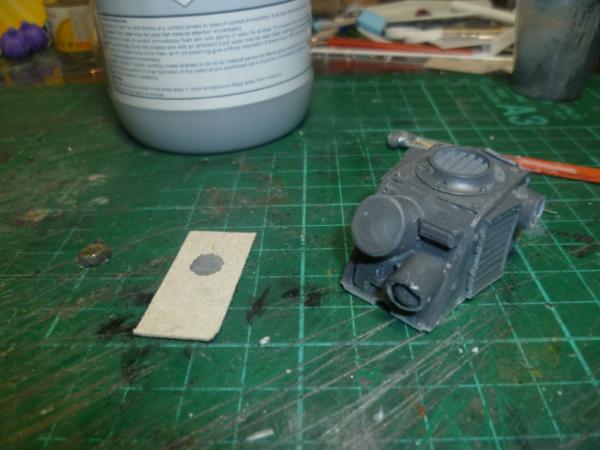
Did a mix of 1 part iron, 1 part Part A, 1 part Part B, nothing blew up burned through the table or generally happened...so poured a quick cast....
And it works....
This alone has so much potential, got to do some maths on the cost, but casting up guns in iron resin and only setting magnets in the body of things would be pretty cool all by itself.
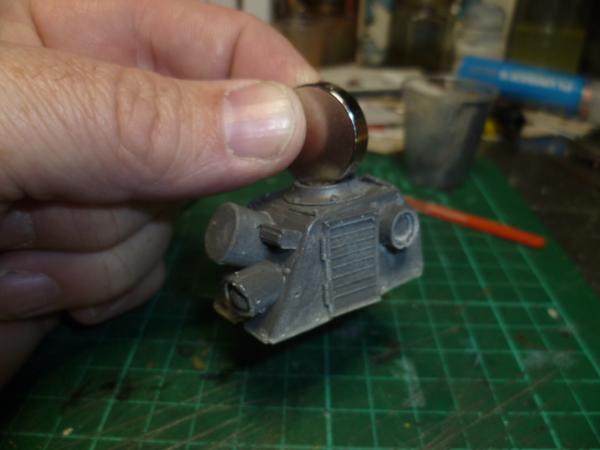
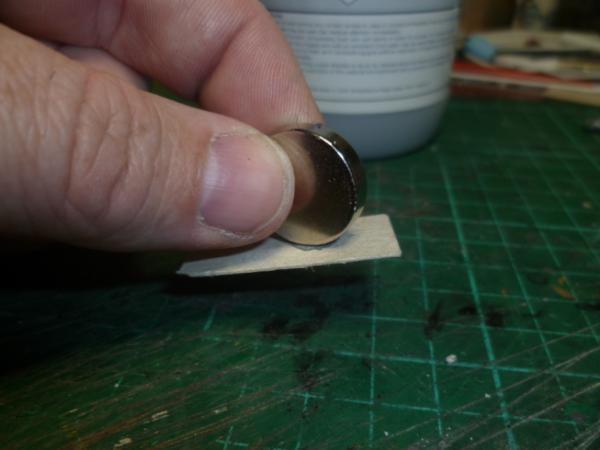
You may have noticed the bit of card with some stuff on it. Well that is a blob of superglue with the iron powder sprinkled over, once set, filed it down, which is cool, and here we are a thin metalic coating which magnets stick to...
Again such potential, going to play with this a bit more, bases with it mixed through the PVA , thin coats on models to enable magnets for hard points on vehicles, could have a go at a fully pose-able 28mm figure.
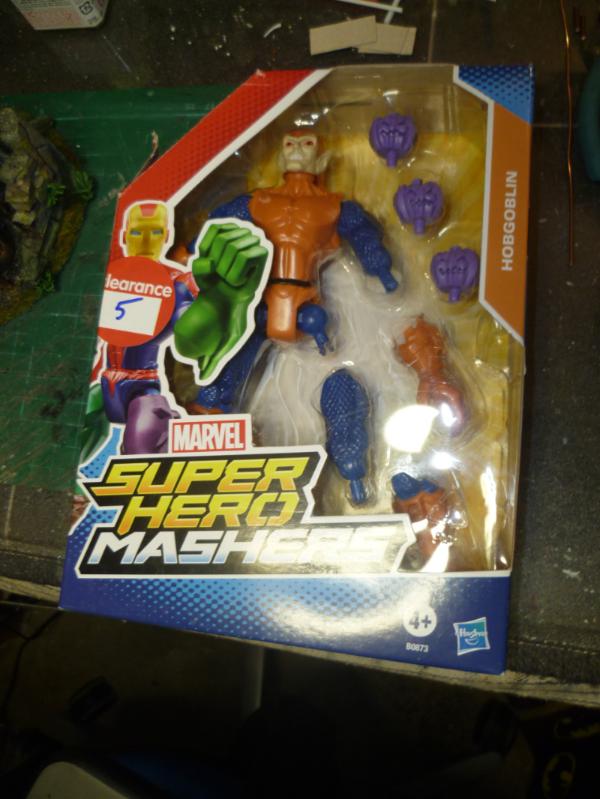
Oh and also picked up this in the supermarket on sale, could not resist the pumpkin heads, going to have to come up with something for Gits Halloween army with them. But the figure has potential as a Daemon Prince as well, so win win for £5.
Thank you for looking and your comments are most welcome.
In my trade (pattern making) we use a LOT of different resin and filler materials depending on what we are attempting to achieve (increased strength, formability, heat conducting properties etc.) but I have to admit you may have stumbled upon a very ingenious use for iron filler in casting for the tabletop.
You need to see if you can get the various sizes of iron shot and see if that makes a difference compared to granules or powder.
Great idea! However, if you use iron in the resin, ho do you get the weapon to stay where you want it to? The magnet would attract the iron in every part of the weapon.
dsteingass wrote: Great idea! However, if you use iron in the resin, ho do you get the weapon to stay where you want it to? The magnet would attract the iron in every part of the weapon.
Probably set up some lips or retaining rings to keep it in check.
Great idea with the metal powder . So much potential, especially with vehicles as you could make some smoke plumes and attach them to a small magnet to put on the weapons or tracks in game to show what is damaged.
@ Archer, Thanks bud, I have some 1mm steel ballbearings kicking about, I think I might try them.
@DaemonJellybaby, Thank you sir.
@ Dave, I hear you, but as has already been said by Desubot, recesses to accommodate the magnets help though you do not get much slippage to be honest.
@ Gits, Thanks Bud.
@ Yorkright, Thank you, and glad to hear it. @ Desubot, Thank you and yep, spot on.
@ shas, exactly, well if you have a handy 3d printer that is, myself I still scratch a master together and use that.
@ Theo, Thanks and I agree, so much potential.
@ EDC Thanks bud.
@ DrH, Thanks bud.
@ Graven, And you only just noticed? @ ckig, Thanks sir, and yep even just sprinkling has lots of potential.
So something different again I am afraid, will be back to the iron works tomorrow, but for today...
Bit done on this...
Few details added, still an aweful lot to do.
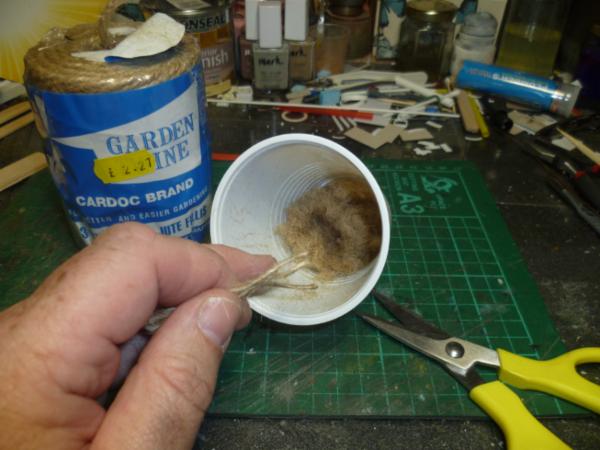
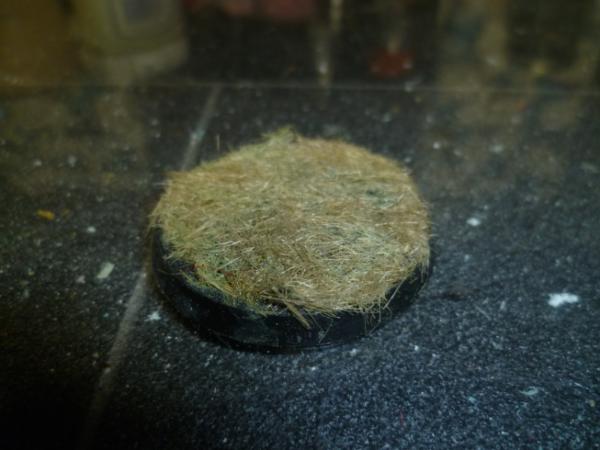
Also saw this on youtube, and did my usual of messing it about...Sat for 5 minutes and cut up the string at variable lengths, really most likely a waste of time as static grass is just not that expensive, but in a pinch one to remember...
I am happy with the late summer/Autumn feel it gives....
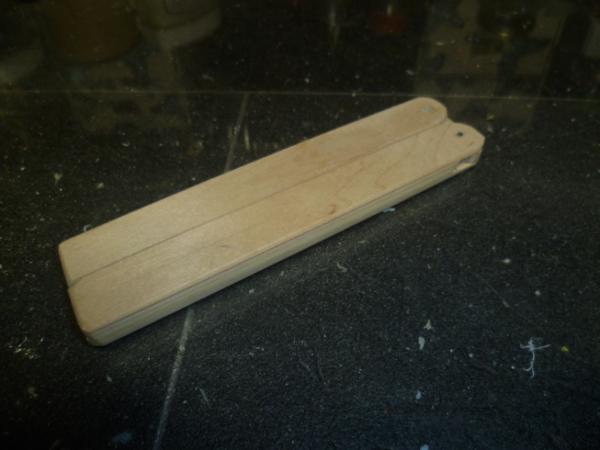
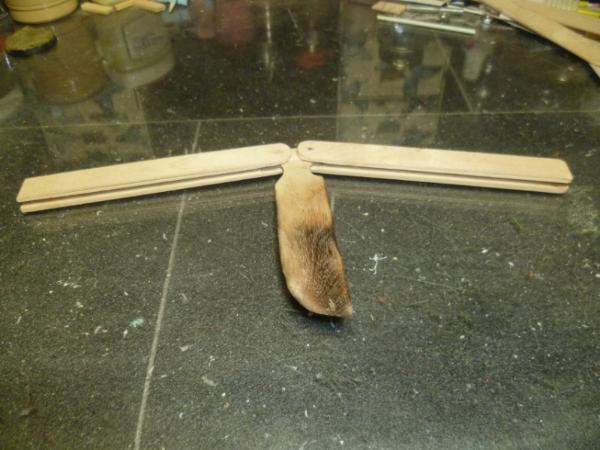
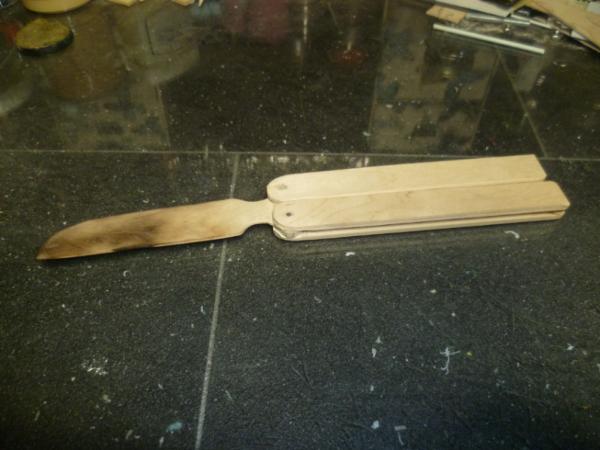
And another silly little side project.... Popsicle sticks......
This is the prototype, or at least my first go at it, it is all over youtube., Going to start again and be a bit more precise.
Thanks for looking in, thank you so much for the comments, really wonderful.
A popsicle stick balisong? (A.K.A. butterfly knife) Hmmm.... I wonder if I am the only one posting in this blog who owns one (and knows how to work it. Yes, a misspent youth.) Is it even legal to own one in the UK? I know you guys have some funky laws about that sort of thing... or is it the Aussies
@ DrH, Thanks bud, not a flick knife a butterfly thingy.
@ Josh, Thanks, got a cheap foam cutter set up off ebay, really great, not that big a deal to do this lot.
@ Theo, OOps well luckily my blog is just not that popular.
@ Dave, Thanks sir, much appreciated, and look forward to seeing your efforts.
@ Red, I should have guessed you would be the mispent youth...Thanks bud.
@ CK, Thank you sir.
So little progress....
Laid out some supports for a floating floor....
Dry fit the covering....
Black bomb...
And start laying down some base colouring, probably not the end colouring...
Thanks for looking, happy enough with progress, but wish I had a bit more time at it. Questions, comments and critique as always welcome.
Nice work. I'm thinking of casting up some spaceship panel floors and I like the work you've done here with the "drop floors" beneath the grating. Cool inspiration.
Iron powder in resin, who'd a thunk it ? Genius.....until it all oxidises into a lump of nurgle rot I'm sure the resin, paint and varnish will stop that.
Nice flooring, are you makeing a Space Mortalis ? Or a Hulk Zone ?
Would answer you individually but think a quick note will help more.
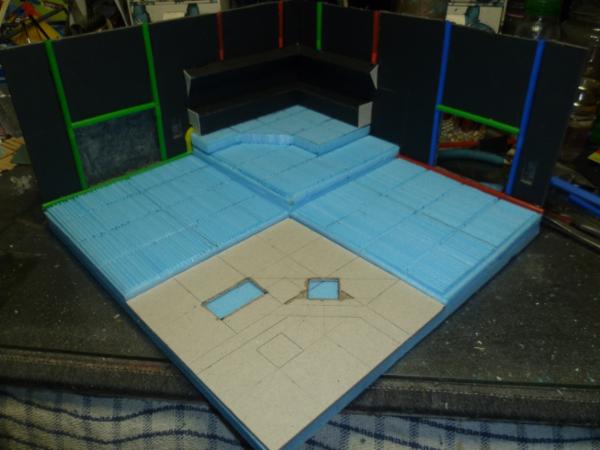
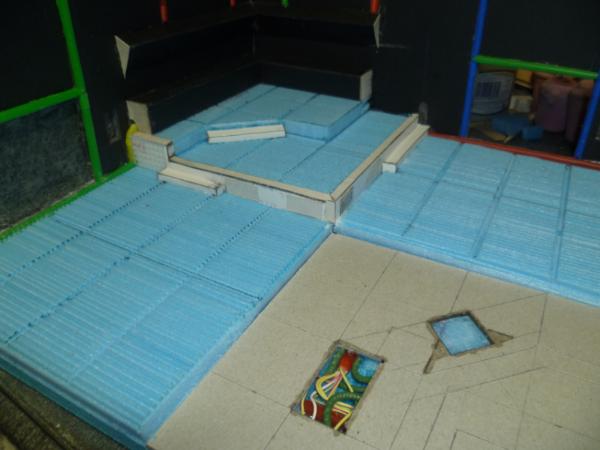
This is actually my second go at the LoER comp, theme "Tubes". I am developing a large space ship or base interior, with a mind to space hulk style play, this is a little more towards the AVP game so less 40K iconography, though will still be able to be used as a board section. This is obviously only a corner of the room, another few boards could either add the rest of the room or be other rooms, the aim would be for an eventual 4 x 4, but modular enough. Though in my head it will be a bit more free flow, in so far as you would lay it out like a dungeon, with corridors and some rooms off that are accessible.To that aim this will have movable doors and the "other side " of the walls will be done., this section will be something like a lab, with trailing tubes and wires and some containers with stuff in. not too much to block play, but enough to give you the creeps. The hard bit is balancing it right for generic use, to AVP and it will not work for 40k etc.
Anyways heres some pics.....
Overall, this was actually yesterday, done some since...
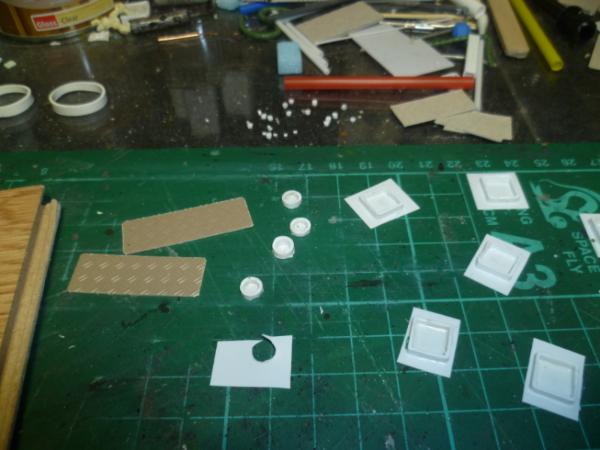
And decided I need a few more control panels...
Black bomb and drybrush metallic...
And started colouring in...
Thanks for all the wonderful comments and thanks for just looking in, really appreciate it everyone.
Oh and @ Graven, yes you are correct. My youngest has Aspbergers and fidget things are good, he has an unhealthy love of knives and guns, but what little boy doesn't, so I am making hime a harmless enough Butterfly knife to play with. A few years and he will be old enough to join Red and buy his own real deal, but until then I will wrap him in cotton wool and popsickle sticks.
This is actually my second go at the LoER comp, theme "Tubes".
how productive and somehow slightly decadent...^^ i haven´t even reached any kind of finishing line with mine...and you start a new one
the idea is brilliant and your execution is emanating so many good memories of movies and computer games....keeping it generic is in my opinion always the better move here...
some years ago i saw someone making a whole airship "dungeon/board" ...looked spectacular...and that is a dream of mine ever since...to make a playable bard that lets you dream yourself into this very rooms then....(mind you, with enough money i would be drowning in hirts arts molds and build it^^...)
by the way, how come you can use up so much granny grating? i still try to find some here...seems i either lack the correct german name ...but i know where it is used... that material seems to be more accessible in UK and the states?
speaking of the lab idea...what will be the furnishings of these rooms be? big vats with specimen? have you seen that vivisection table of the new 40k releases?...
Just want to put out a message to any affected by the Manchester incident last night. We are so sorry and filled with anger at the events and please accept my family and I's, prays and love and deepest sympathy. Nothing can say how we feel.
Really appreciate your efforts to bubble wrap your young'un. As I dad I can empathize with that. It's probably a losing battle... but we've got to fight it, right?
Very sad to hear the news about the bombing in Manchester. My thoughts & prayers are with you folks in the UK.
Just want to put out a message to any affected by the Manchester incident last night. We are so sorry and filled with anger at the events and please accept my family and I's, prays and love and deepest sympathy. Nothing can say how we feel.
+1
And two entries? Wow, I din't even get my head around one . I like the more generic feel, it makes it useful in all kinds of scenarios. If your boy likes guns, I can suggest nerf guns . They're (relatively) harmless, and can be modded to his (and your) heart's content
Cam, there is a toy-- or tool-- that is quite popular over here at the moment called a fidget spinner. It seems that you have created you own version of one with the woodn balisong. It is meant to help alleviate stress for those with things like aspergers, autism, PTSD ADHD, etc...
...and they can be a bit addictive, the balisong knives, but one needs to be very, very careful about where one 'flicks' them. For some odd reason they are very scary to people who know nothing about them. I've had mine for over 30 years. A good knife should last a lifetime.
Also saw this on youtube, and did my usual of messing it about...Sat for 5 minutes and cut up the string at variable lengths, really most likely a waste of time as static grass is just not that expensive, but in a pinch one to remember...
Boulder creek railroad channel?
i saw that guy do the same thing to make hay bales.
the room looks stunning and i love the controls...but the hazard stripes are a bit...meh...i recently discovered acrylic pens...instant coverage even on dark surfaces... for my leagues entry this will be the method for my hazard stripes...


 never thought about that use...i was expecting a headswap use...but now these beads ake way more sense and are totally fitting scale!!! just love the winged skull emblem and the skullbase/ wall section is awesome too!!! i think i need to try that too...and honestly... you can get these beads in a zillion bags for rather cheapo money....so that goes to my shopping list^^


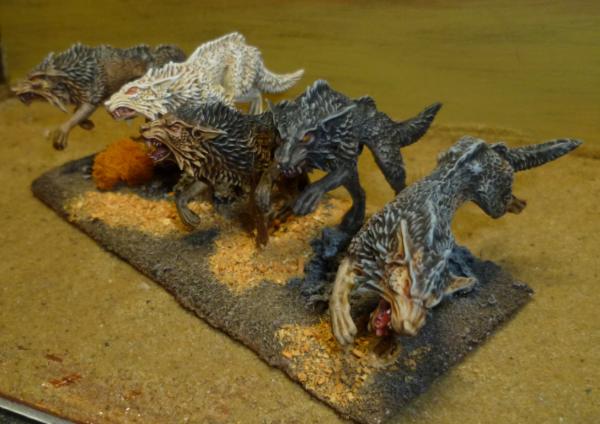
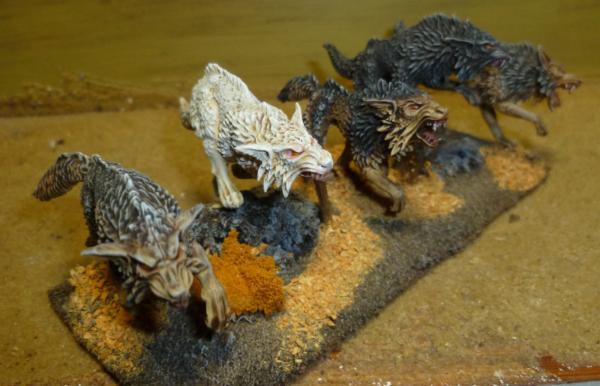

 , well I guess if mushrooms can ride dogs that's fine too. Great work on their coats.


 it's way beyond mere messing around with...