There are a number of techniques I use for eyes, as faces are by far my favourite part of painting. From the simplest to the most complex:
Washed eyes
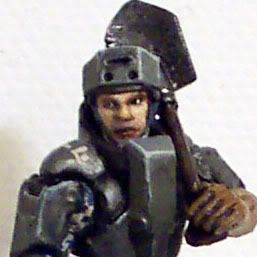
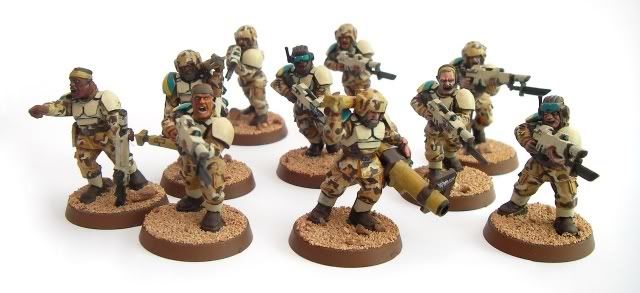
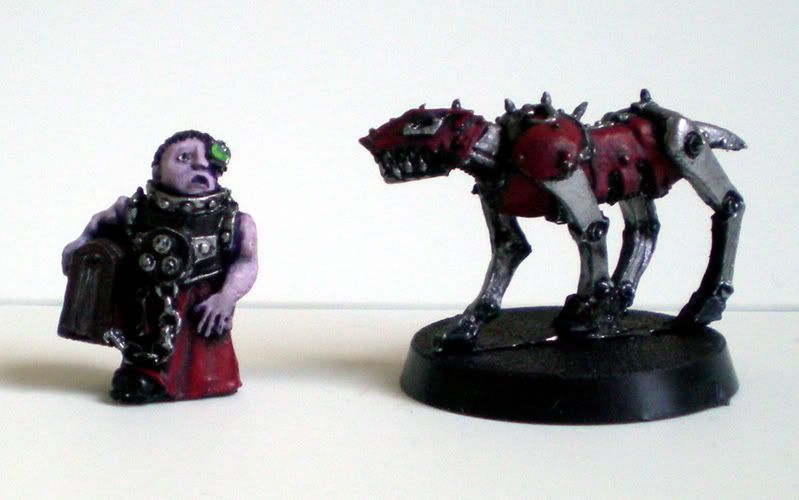
For models that are squinting, cowled or otherwise have hooded eyes, you can simply use washes to suggest a dark area. This is the quickest and simplest method I use for eyes, and if the eyelids are highlighted sympathetically, it can still give a convincing effect. Cadians' squinty eyes work particularly well with this technique – and it's useful for eyes in hard-to-reach areas, such as the Sentinel driver example (I really must remember to paint bits like that
before assembly!).
1) Paint the face as normal.
2) Apply a dark wash to the eye sockets.
3) Allow to dry and repeat until you've got a sufficiently dark area.
+++
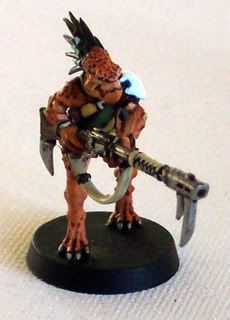
Inked eyes
Useful for alien/glowing/magical effects etc. It's a little time-consuming, but extremely easy.
1) Paint the eye socket white.
2) Once dry, add a touch of watered down brown or black paint/ink. Quickly clean and dry your brush and touch it to the centre of the eye. This will lift out excess paint, and keep the centre bright. Allow to dry.
3) Repeat this by washing in and lifting out successive tiny amounts of black or brown until the recesses at the edge of the eye are black/brown.
If you wish, add a pupil, following the instructions in
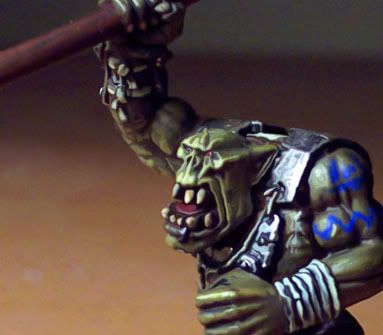
Expressive eyes later. This technique works well for bloodshot pupil-less eyes, like orks. Simply use red ink instead of brown.
+++
Initial eyes
Essentially, this techique means you paint the eyes before the rest of the face. The eyes can be as big and blobby as you like, as you 'cut in' to the overspill with the flesh tone and shading. Downside is that you can't use flesh washes to finish the face, as it'll run into the eye.
1) Paint a white spot onto the eye area, covering it completely.
2) Once dry, draw a fairly broad vertical line through the eye where you want the pupil (generally in the centre). This'll give you a weird 'cat's eye' effect, but don't worry; we'll fix that now.
3) Draw a horizontal line of your darkest flesh shade (Calthan brown works nicely for Caucasian flesh) over the lower eyelid, then over the upper eyelid. Don't worry about the area outside the eye; concentrate on squaring off the vertical stripe, edged by two white dots on either side.
4) Carefully paint the rest of the face.
+++
Side-approach eyes
A simpler version of Expressive eyes. Because white paint is easier to see, it's fairly easy to place. These instructions will get you eyes looking to the left, so swap the sides if you want your model looking right. Obviously, not very effective on models looking straight ahead!
1) With the rest of the face completed, paint the eye area with diluted black paint.
2) Quickly clean and dry your brush, and use it to lift out/adjust any areas that have gone over the edge of the eye.
3) Once dry, dip the tip of a dry detail brush (I use a 1 with a good point, but feel free to use a smaller brush if you feel more comfortable) in white, straight from the pot. Aim to pick up a drop of paint so small that it forms a near-sphere on the end of your dry brush. If it soaks into the bristles, this won't work. N.B. Synthetic brushes are your friend for this approach!
4) Touch the sphere to the right side of the eye, leaving an outline of black all round it. If it is too large, covers too much of the eye, or overlaps the eyelid, quickly rinse your brush, wet it, and gently scrub the wet paint away. Dry the area with a tissue before trying again.
5) Repeat on the right side of the other eye to finish. It's important to keep the dot of white an identical size and in the same position on one eye as the other, or your model will look cross-eyed.
+++
Expressive eyes
These are the 'proper' eyes that people struggle with. Essentially, it's a development of the side-approach eyes, allowing you to place the pupil and create an expression.
1) Paint the eye in the same way as side-approach eyes up to step 3, but instead of dotting on the white, draw a fine line across the entire eye.
2) Once dry, dip the tip of your brush into black, straight from the pot. Create a bead as in the side-approach eye, but draw the brush over the side of the pot to spread the bead over your brush.
3) Place the tip of your brush on to one eye, and carefully draw the brush down slightly to transfer a short stroke to the eye, creating a pupil. Make sure that the stroke entirely covers the white stripe to avoid a staring expression.
Allow the pupil to dry completely.
4) Draw a horizontal line of your flesh shade across the eyelid if the pupil stripe touched it.
5) Repeat the process on the other eye, being careful to place the pupil in the correct place. If it's wrong, simply wet the head, gently the pupil away and start again.
Try varying the placement of the pupils – leaving a little white above the pupil stripe will result in a furious, startled or frightened appearance. White below will look wistful, thoughtful or injured; while having the pupils on one side can look sneaky, shifty or aiming in a particular direction.
 Eep!
Eep!
+++
Light-correct eyes
These are the most complex eyes I paint currently, simulating the natural shading of the sclera from a light source..
1) Paint the eye in the same way as expressive eyes. Allow to dry.
2) Hold the model upside-down and add an extremely dilute wash of black or brown to the eye areas.
3) Use the tip of a clean, dry brush to lift out excess wash in the middle of the eye to create a highlight, and allow to dry.
Painting eyes is more a case of patience and practise than anything else. Good luck, and hope this stuff's useful to you.


 Orks is never beaten.


 Legio Suturvora 2000 points (painted)
 Daemonhunters 1000 points (painted)
 Flesh Tearers 2000+ points (painted) - Balt GT '02 52nd; Balt GT '05 16th
 Greenwing 1000 points (painted) - Adepticon Team Tourny 2013


 1100points