Forum adverts like this one are shown to any user who is not logged in. Join us by filling out a tiny 3 field form and you will get your own, free, dakka user account which gives a good range of benefits to you:
No adverts like this in the forums anymore.
Times and dates in your local timezone.
Full tracking of what you have read so you can skip to your first unread post, easily see what has changed since you last logged in, and easily see what is new at a glance.
Email notifications for threads you want to watch closely.
Being a part of the oldest wargaming community on the net.
If you are already a member then feel free to login now.
2012/08/03 07:03:55
Subject: Custom Imperial Guard special weapons. Now with Shotguns
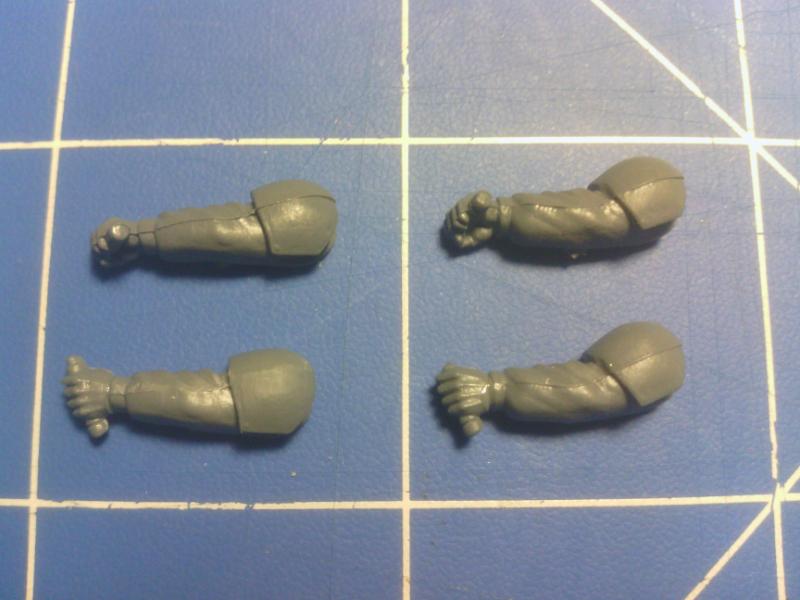
Ok so who here likes kitting out their mechvets with an ungodly amount of special weapons? Everyone! Who ever has enough of any of them to go around though? Not as many i'd wager.
I've tried to keep these tutorials as basic as possible. Knowing that A) not everyone is good at using greenstuff. (myself very much included here) and B) not everyone is experienced in converting and modelling or may not feel comfortable chopping up their expensive plastic toys willy nilly. All of these conversions were acheived using only componants found in the standard Imperial Guard Cadian Shock Troops box and the most basic of greenstuffing ability. *Please note that with the addition of the Mk2 plasma gun parts from the Imperial Guard Cadian Heavy Weapons Squad have also been used.*
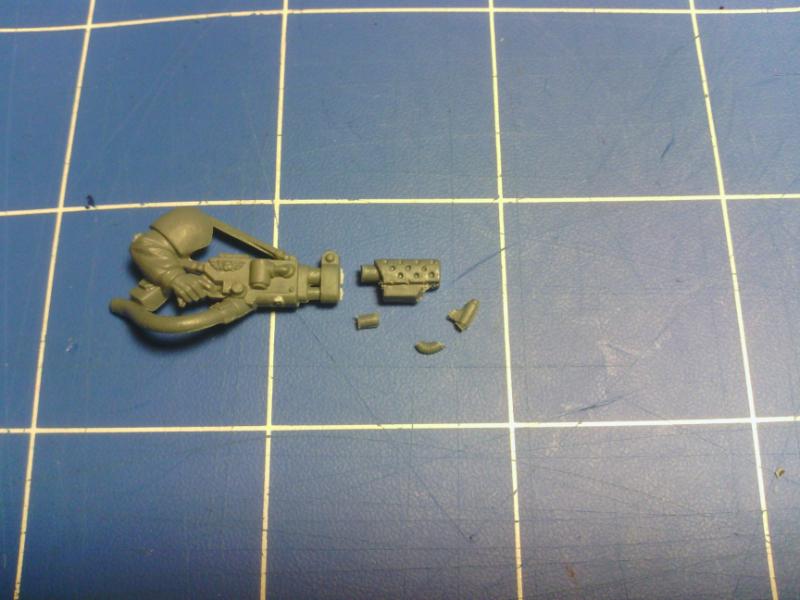
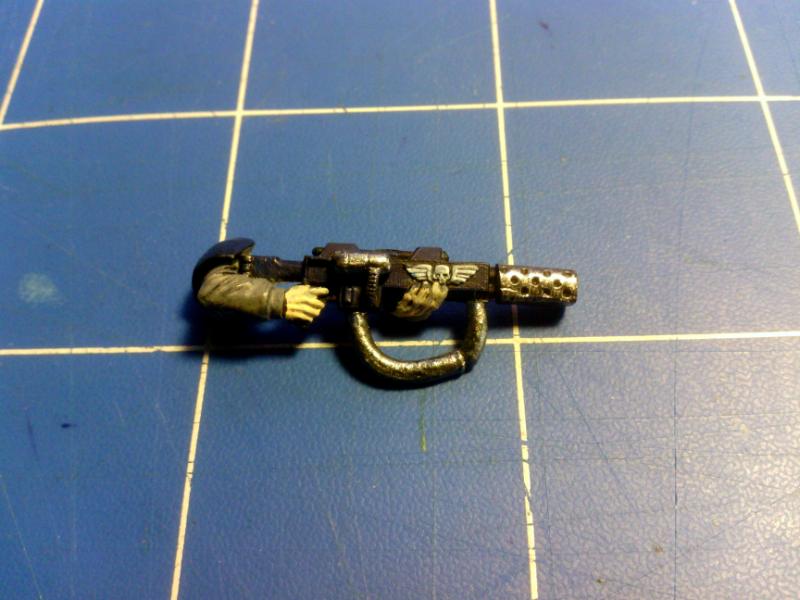
So Meltaguns. Parts needed - 1x lasgun, 1x flamer, wee bit of greenstuff.
Spoiler:
1. Start by taking a flamer and disassemble as shown. Keep all the little bits you cut off, you'll need them later.
2.Trim down the flamer nozzle so it looks like this.
3. Take a lasgun and cut off the barrel. You should also now trim off the pipe and angular side of the flamer nozzle. It should look like a cylinder with a flat side now.
4. Line up the 2 parts and glue them together. It should look something like this. Oh at this point you should also snip of the lasgun power pack and bayonet lug. Smooth out the surfaces with a file as well.
5. Alrighty then. Hardest part of the conversion coming up. Please excuse the large, ugly mass of blutack. glue hadn't finished drying yet.
Get your greenstuff and roll out a sausage, as fat or as thin as you like. Cut off a small segment about 3 or 4mm in length and glue it on above where the power pack used to be. Flatten the ends with a GS tool or the tip of your knife/scalpel/xactoblade/etc. This is now the fuel canister.
Now take the rest of you sausage and glue one end to where the power pack was. Glue the other end to the spot the bayonet lug used to be. This gives you your feeder hose thingy... As you can no doubt see my gs sausage is poorly glued on.
Remember those little bits you cut of the flamer? take the teeny tiny hose bit and glue it the underside of the fuel canister. This step is optional and is purely to buff its appearance.
EDIT - Towards the end of the 2nd page Blaggard posted an excellent picture of a meltagun he converted. IMO its a superior design to mine due to the fact that it uses no greenstuff. It also looks cool. Go check it out.
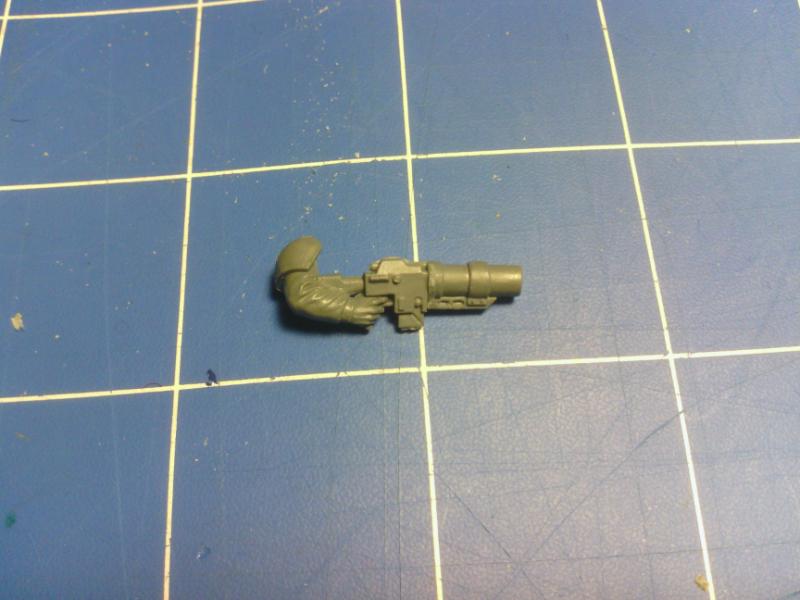
And there you have it. Finished meltagun. Onto the Plasma gun. Huzzah!
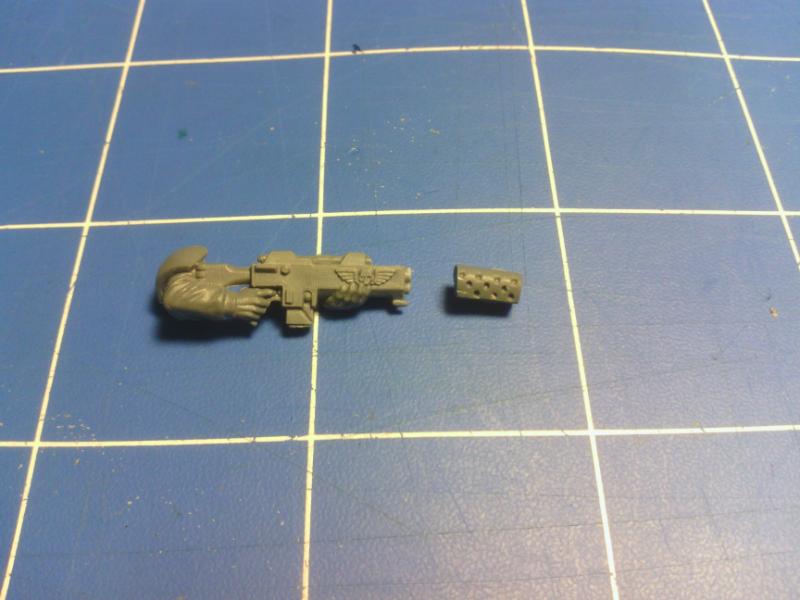
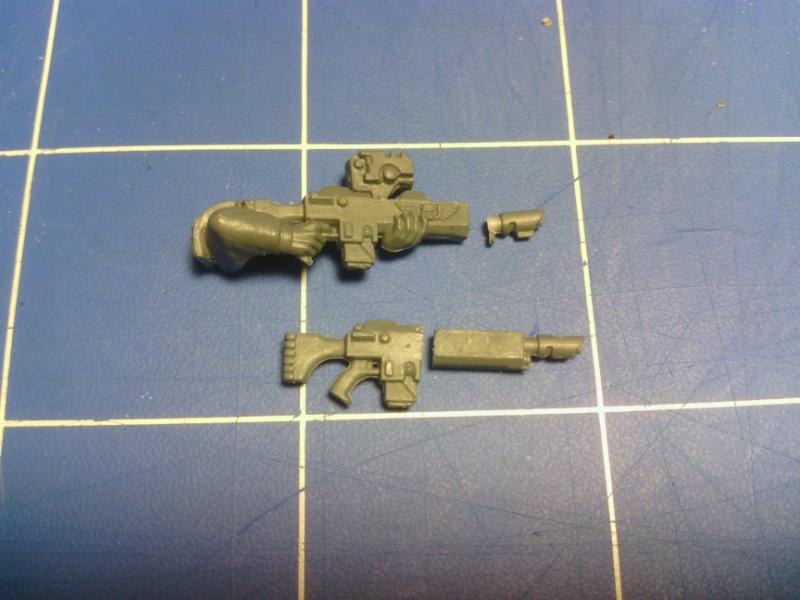
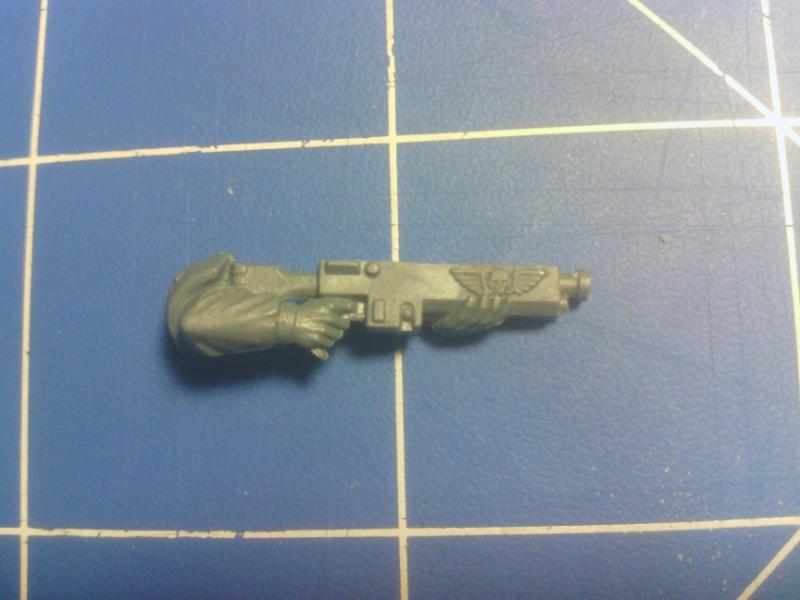
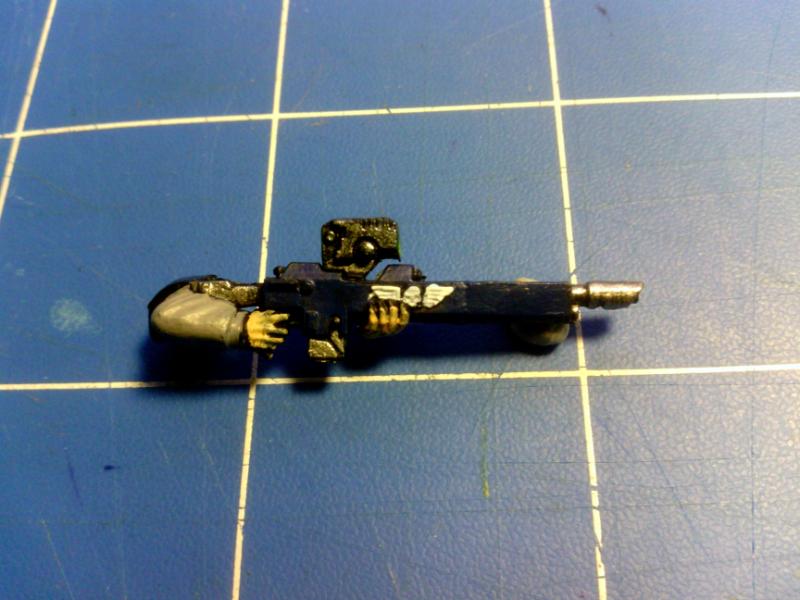
Plasma guns. Parts needed - 1x lasgun (i highly suggest you use the (H) lasgun.), 1x Grenade launcher.
Spoiler:
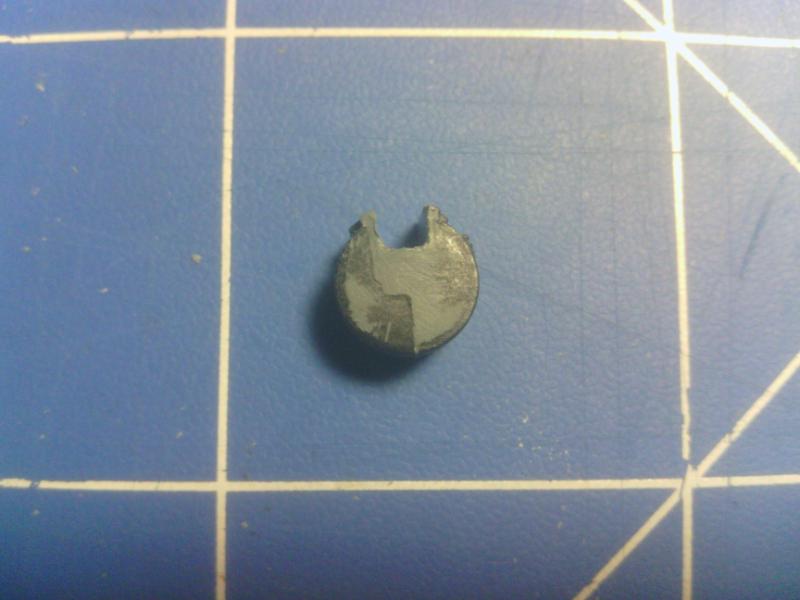
1. Cut the Grenade launcher barrel off at the ammo drum. The barrel should look like its got a bit of a backing plate, carefully trim this down so it matches the barrel.
2. Now there is a step in here which i forgot to take a picture for. But its a simple enough process and doesn't really need a pic. Take your lasgun and cut it half. Flush to the powerpack is what you want.
Take both the butt of the lasgun and the barrel of the Grenade launcher and glue them together. It should look like this.
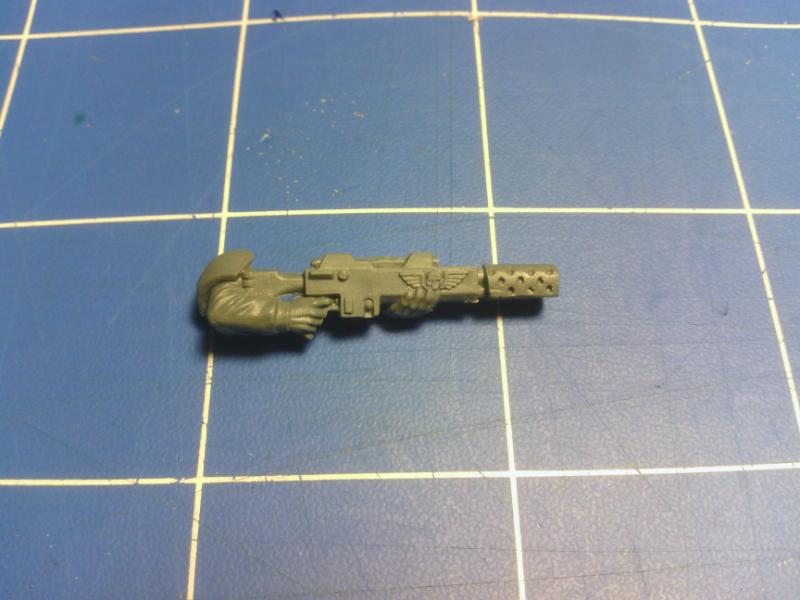
Now at this point you might be thinking that this thing still looks more like a nade launcher then a plasma gun. And you would be right. You see the plasma weapons most iconic feature is their coils that everyone paints bright colours. Theres nothing even remotely like that in the standard Shock troops kit. So lets just pretend this a new varient of plasma gun that uses a tube filled with plasma instead of those funny coils. (It will make more sense when painted. Trust me.)
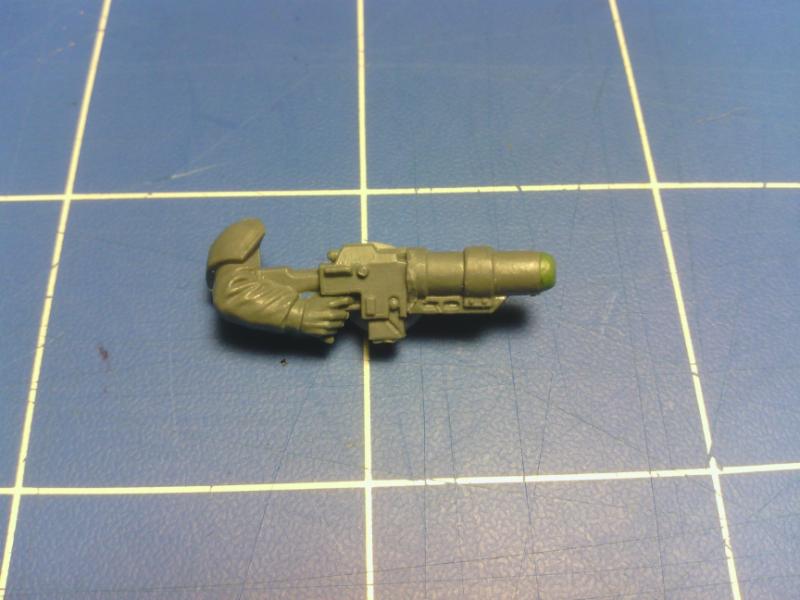
3. Ok last step. Take a small dab of GS and tak it on the end of the barrel. Make it dome shaped. Push a small indent into the centre of the dome so it looks kind of like a hollow point bullet.
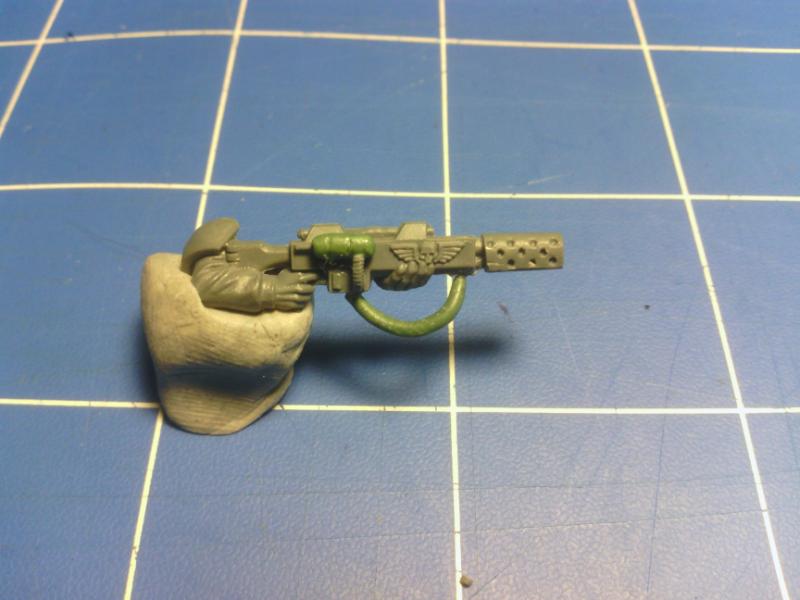
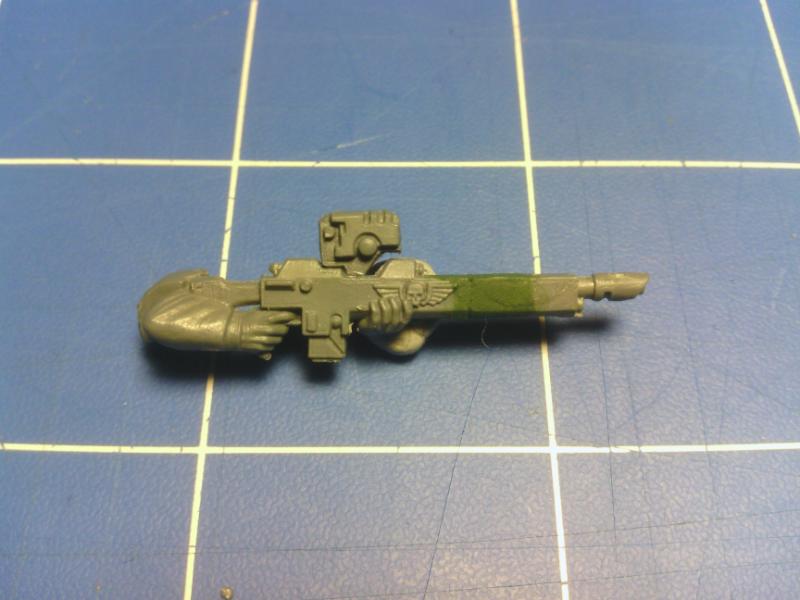
Not a fan of this style of plasma gun? Look below.
Presenting.......
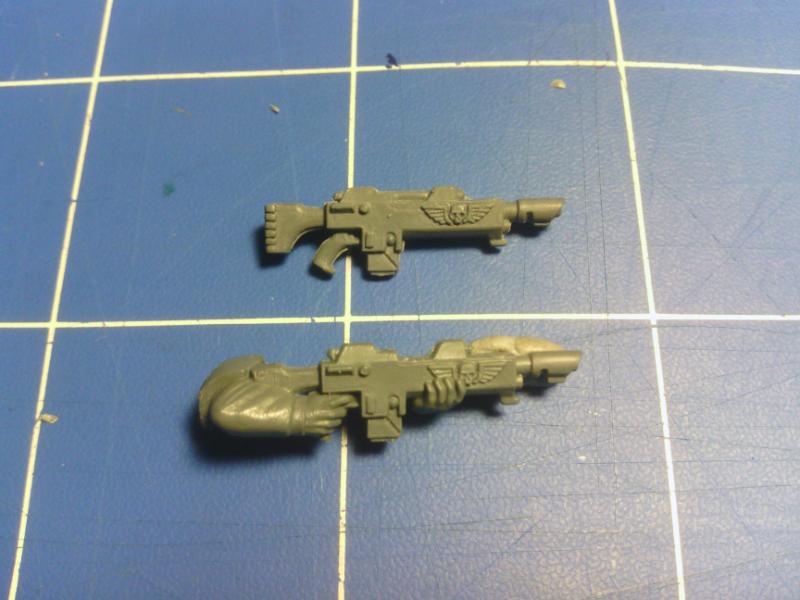
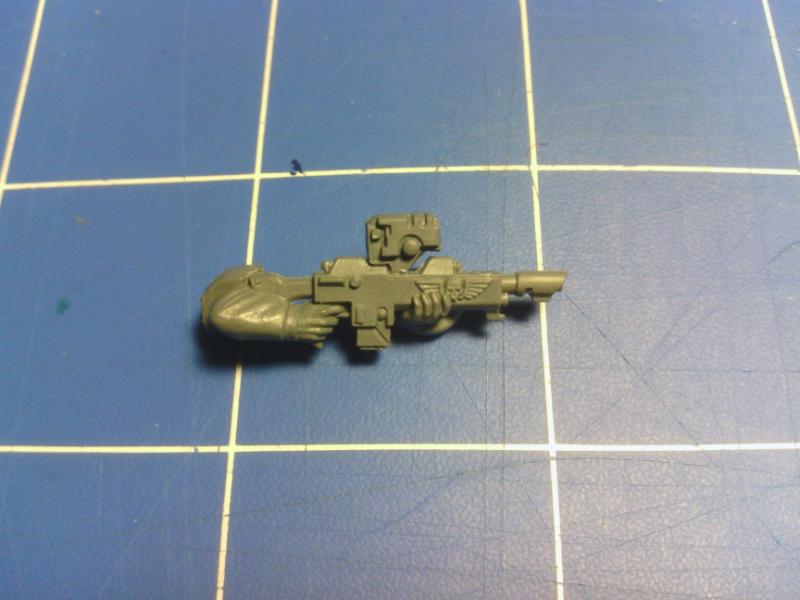
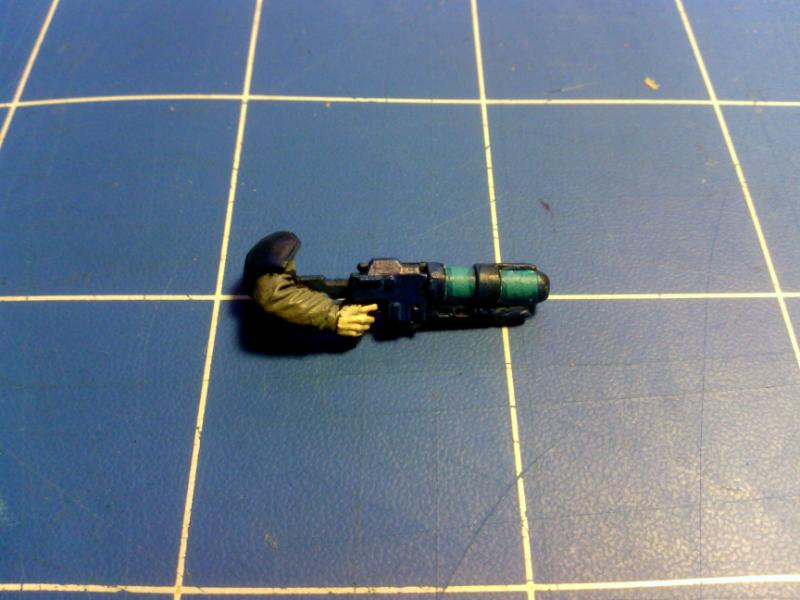
The Plasma Gun Mk2. Parts needed - x1 Lasgun with arm, x2 Arm free lasguns.
~ Before starting i would like to apologise. I normally use a lasgun with an arm attached. I didn't this time for some reason. Also, the arm free lasguns can be found in the Cadian Heavy Weapons sprue. From memory there may also be one or two in the Cadian command kit. Im unsure as to whether you will find any in the Catachan kits. If not, well that the price you pay for collecting an army full of ugly models. ~
Spoiler:
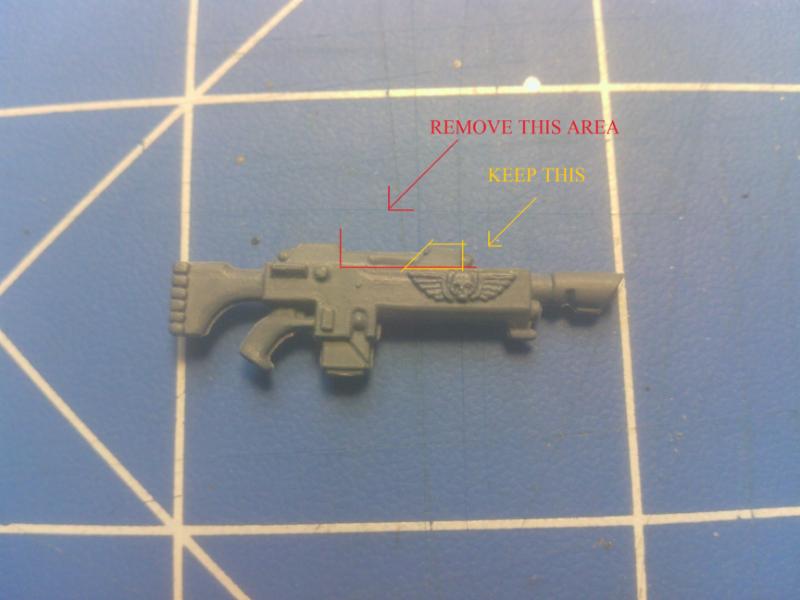
1. Remove the indicated areas. It should now look like....
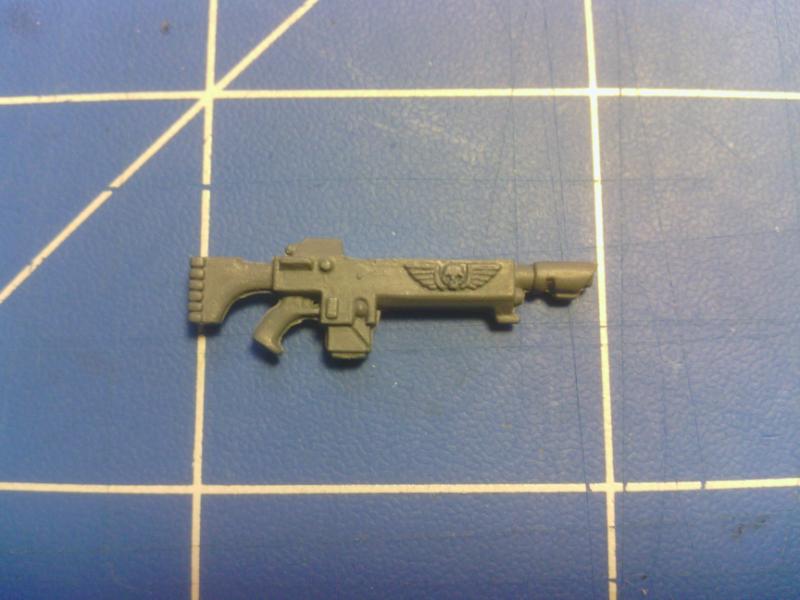
2. This. Remember to keep the bit marked in the orange box.
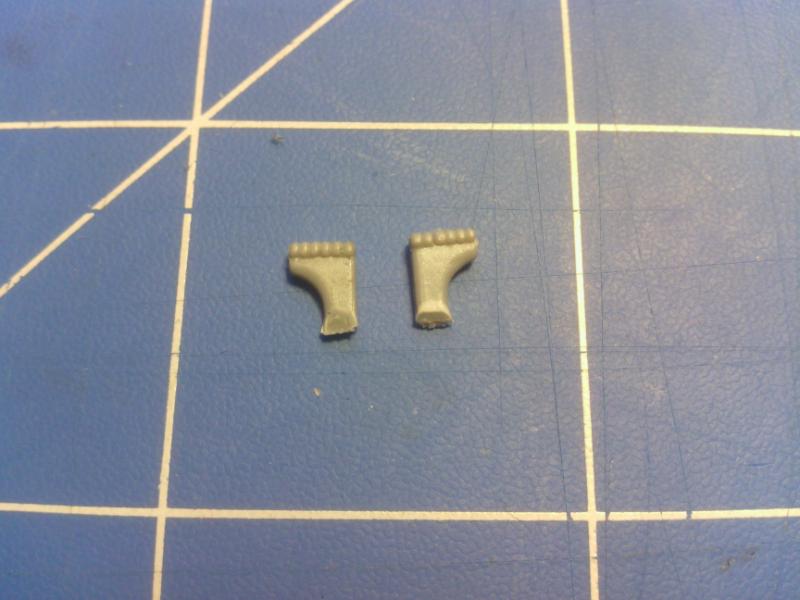
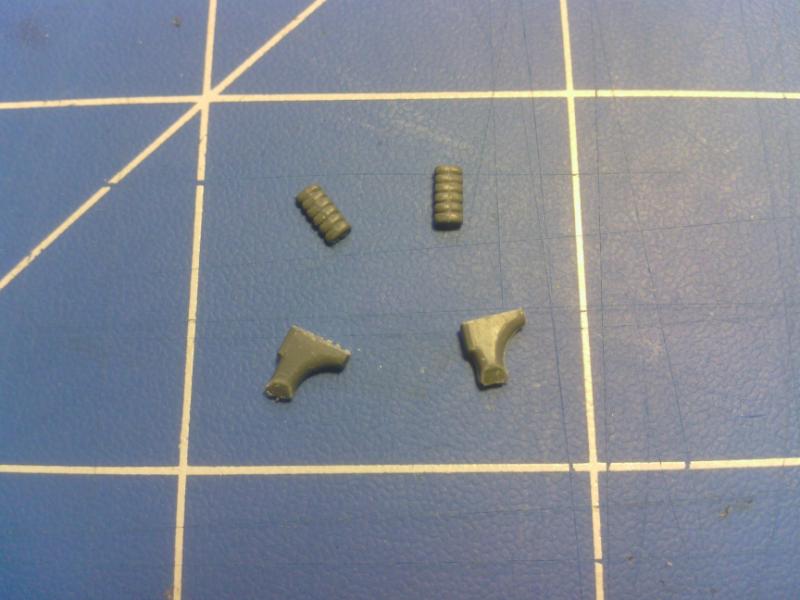
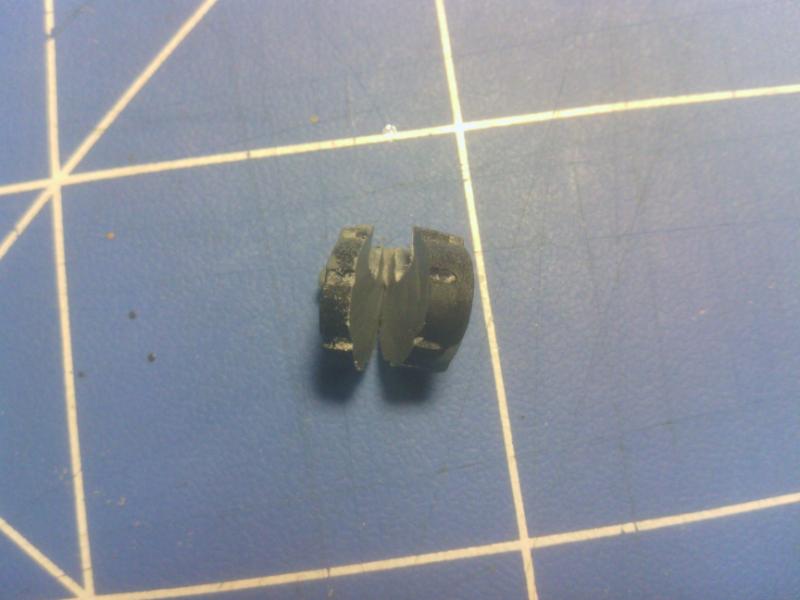
3. Take the 2 arm free lasguns and remove the stocks.
4. Very carefully remove the bumpy end of the stock. I used a blade for this as the razor saw was impractical and the snippers would have just mangled everything. These parts will be used as the magnetic coils that makes the Imperial plasma weaponry so indentifiable.
5. When gluing the coils onto the back of the lasgun you will notice that they aren't quite as wide as the body of the lasgun so some precise placing may be needed.
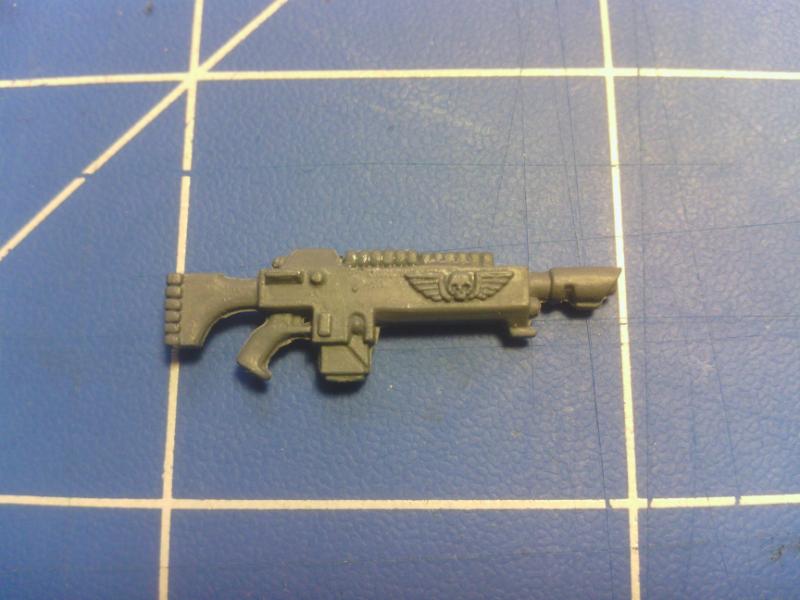
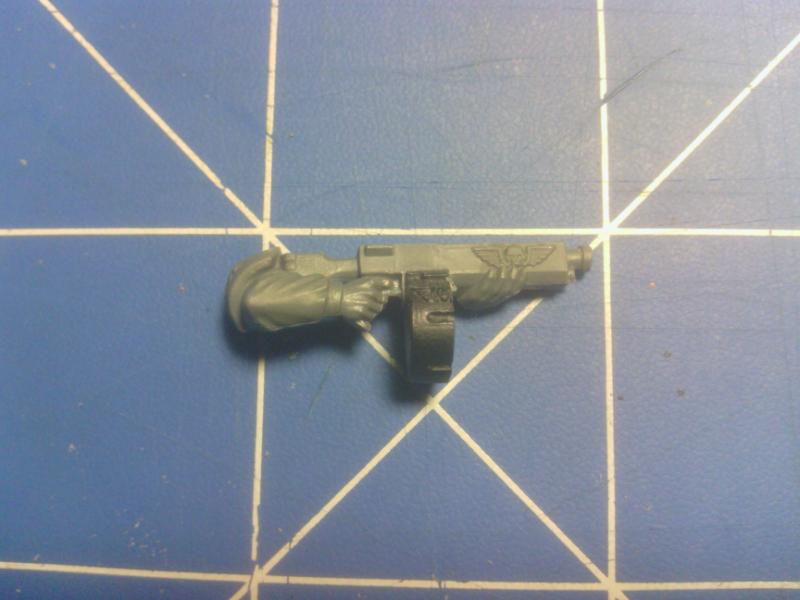
6. Right we're on the home stretch here. Cut off the Lasguns powerpack. (I think all my conversions involve cutting off those blasted powerpacks.) You also want to cut of the barrel so it sits at the same length as the little bit underneath it (not sure what that is or what its called). You can
remove the bayonet lug if you like. I personaly left it there because i thought it looked wrong without it. -For this step refer to the below picture-
7. To finish off take the part kept from step 1. Trim it down so its just an oddly shaped little bit of plastic. Turn it so the sloped end faces out towards the barrel and the flat end sits flush up against what are now the magnetic coils. It may need some additional triming and neatning but it should fit pretty well.
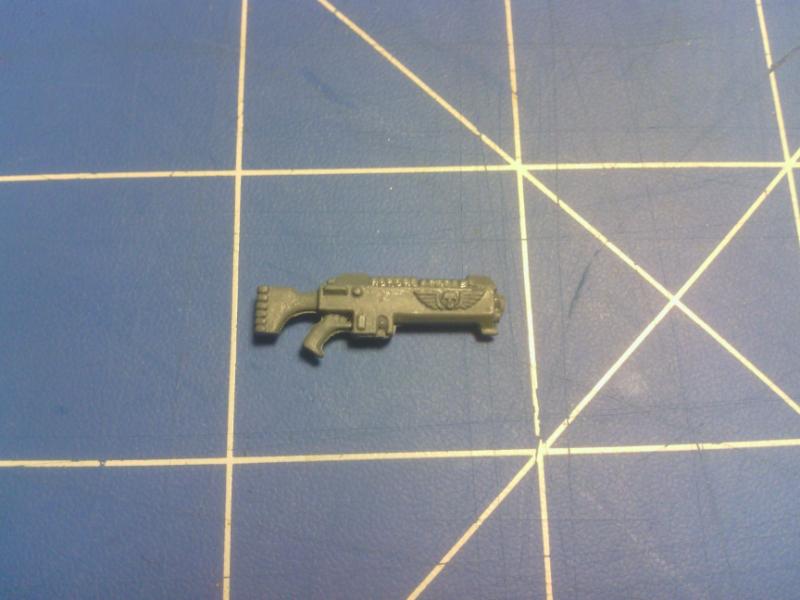
8. Not really another step, just a comparison picture of the Mk2 plasma gun and a standard issue lasgun.
This is a much better Plasma gun in my opinion. It looks almost bang on for a standard Imperial Plasma gun except its slightly smaller.
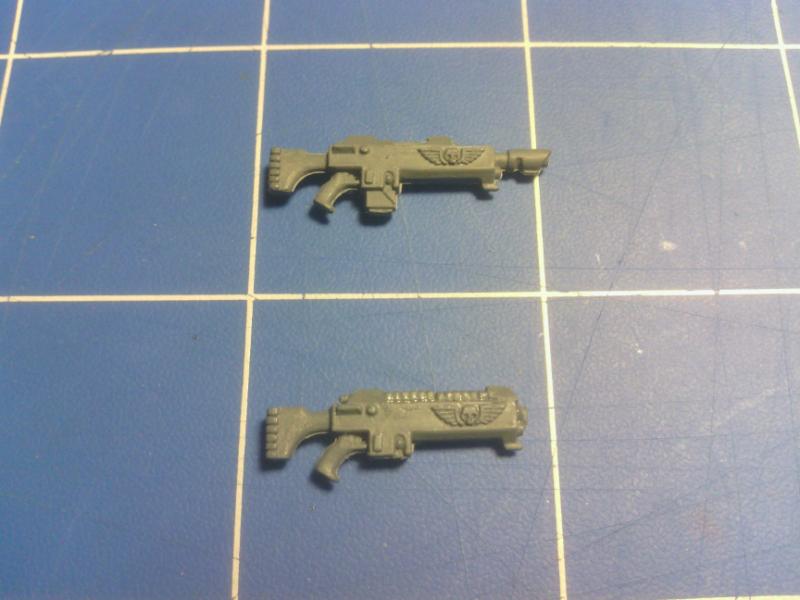
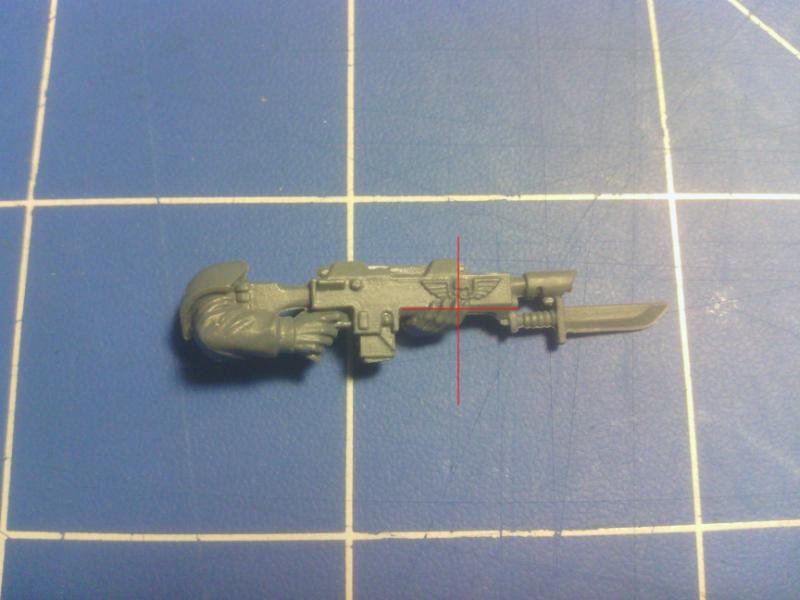
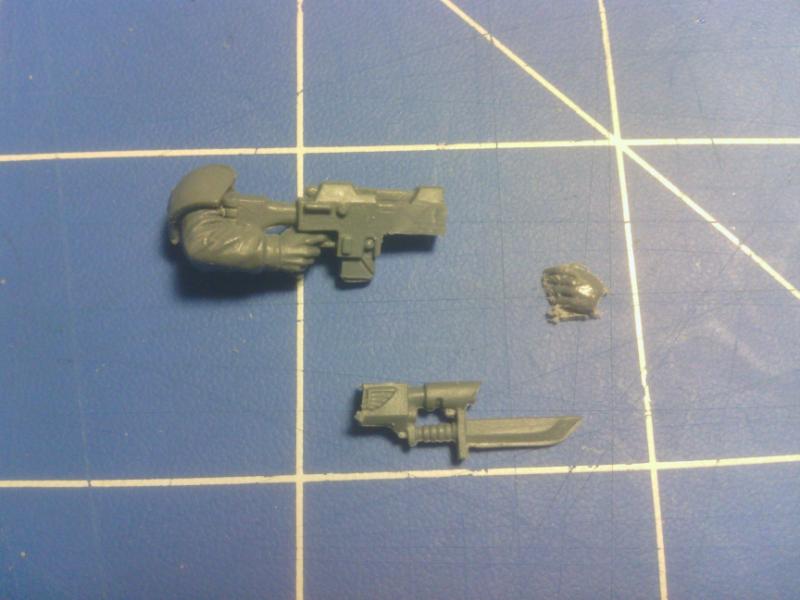
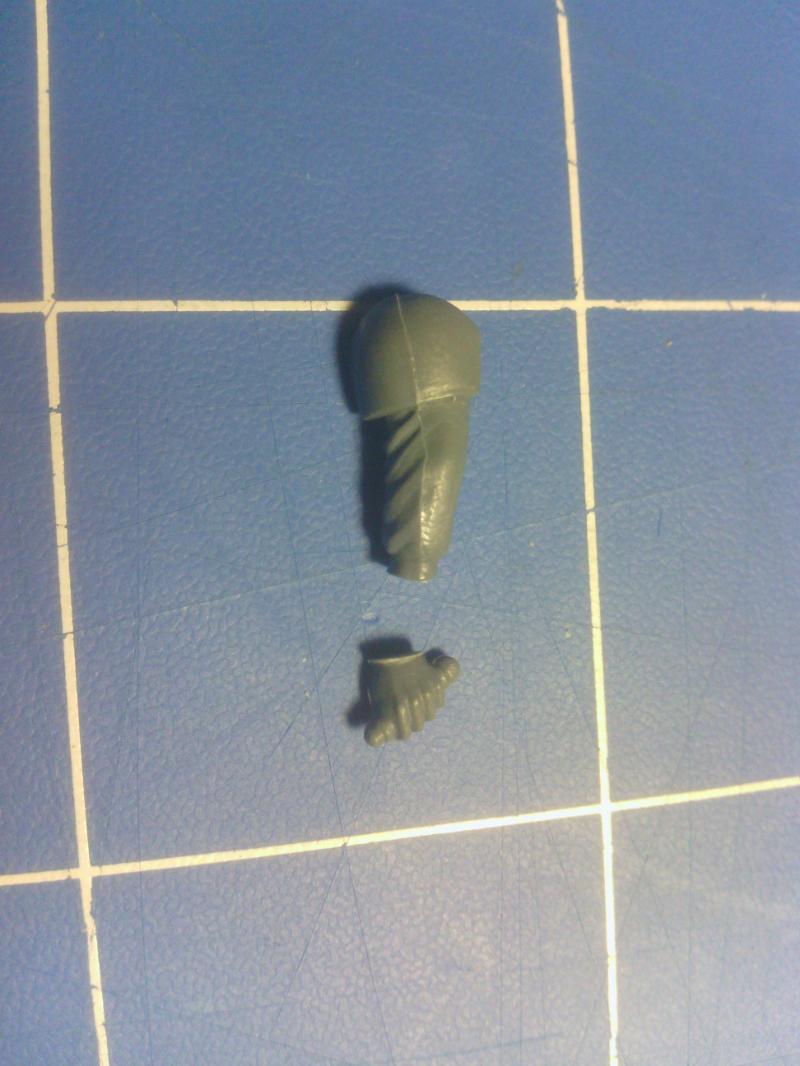
Lastly we have the Sniper rifle. Parts needed - 2x lasgun, 1x chainsword ( ).
Spoiler:
1. Righto then. Get your chainsword and carve it up like this.
2. Get a lasgun and carve out the little round bar thing on top. Heres a comparison so you can see what im talking about.
3. Glue the Chainsword motor on the top of the lasgun where that bar was.
4. Get the second lasgun and cut it in half like so. At this point cut the whole barrel assembly off your first gun like shown.
5. Glue the front part of the 2nd gun to the the body of the 1st gun like in the picture. I also shaved one of the imperial eagles off. It looked sill with two. I also filled in the join with LGS. It looks like im going to need another coat or two.
Pretty simple sniper rifle conversion there.
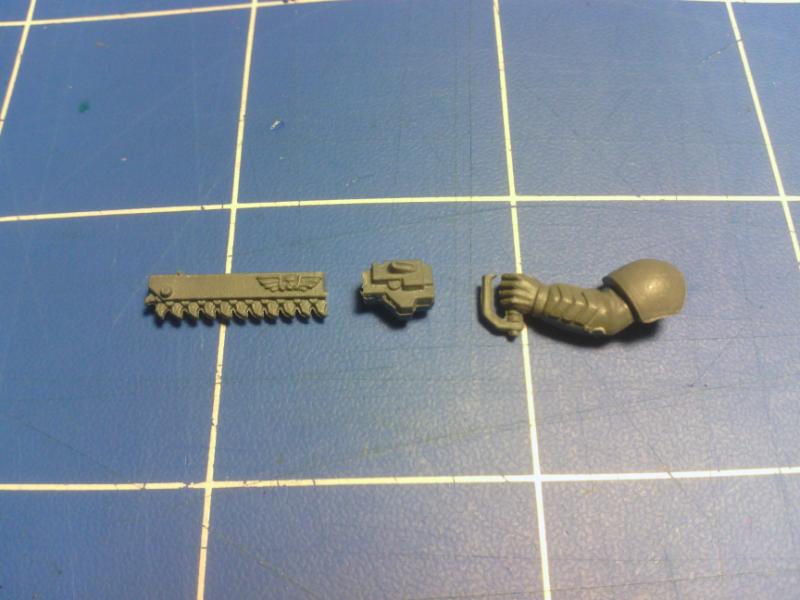
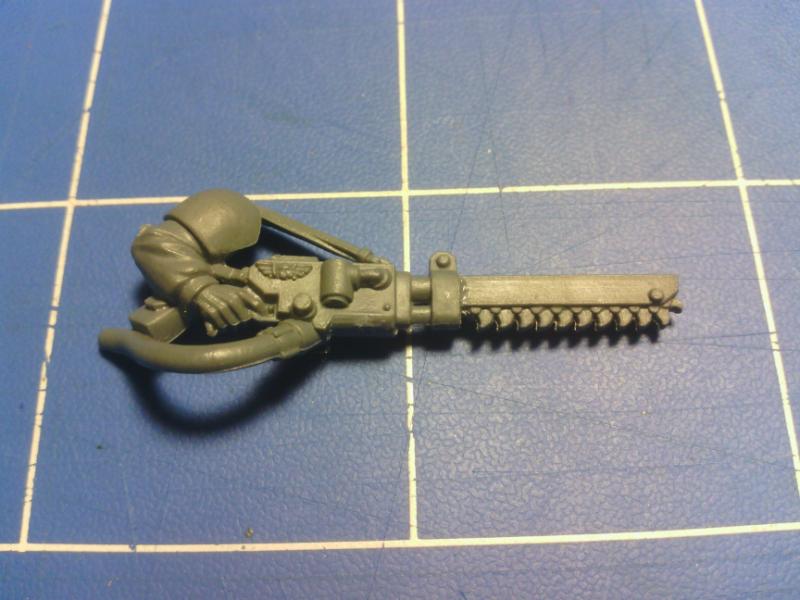
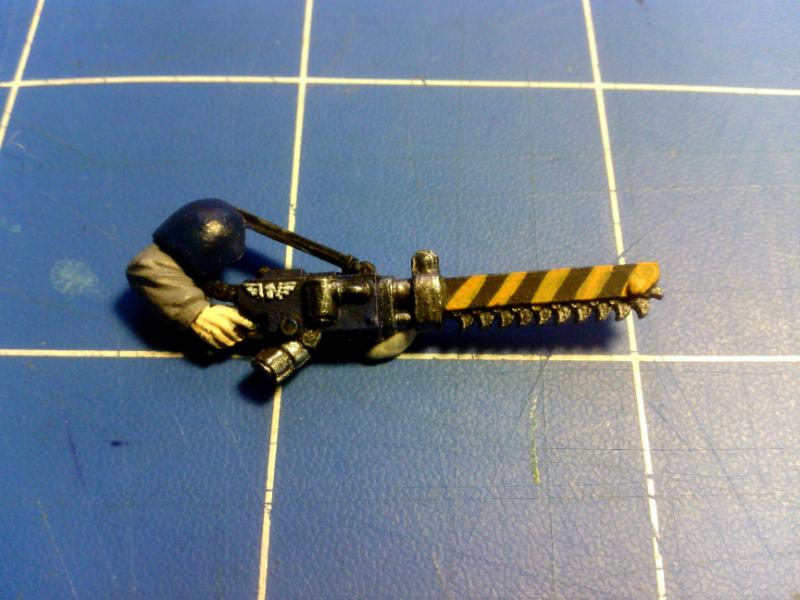
Oooh almost forgot. Heres what you can do with a flamer body and the blade of a chainsword. Enter the Eviscerator
Spoiler:
My latest addition to the special weapons list, Shotguns. Yes plural. I went from no shotguns to 2 in one evening.
The first is a Pump action shotgun with a pistol grip pump. A forewarning, this conversion looks strange at first when you see the pics. When you are holding the actual thing though you really start to see that it looks quite realistic.
All right folks, this one is fiddly. Lots of small parts that can get lost easy.
Spoiler:
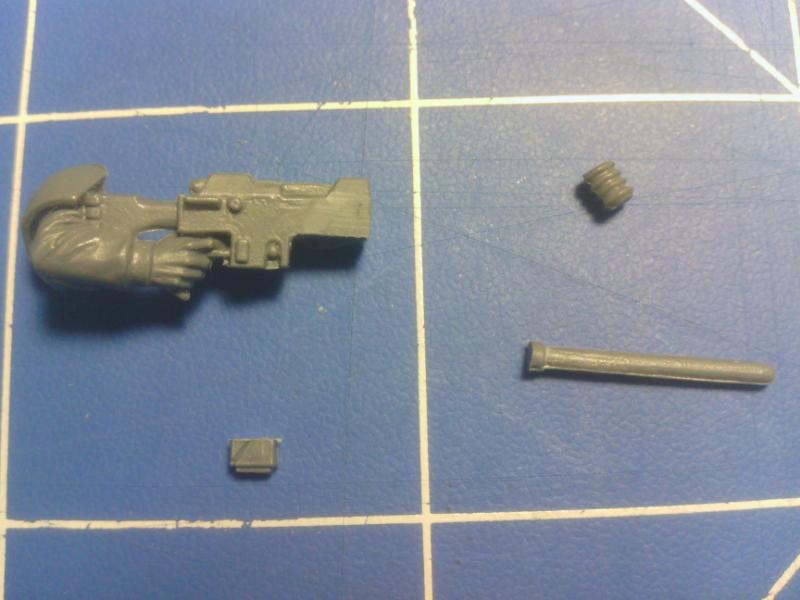
1. Take a standard lasgun and disassemble along the indicated lines.
2. You should now have 3 pieces that look like this.
3. Next get the Vox pack and cut it up like shown. Keep all the parts.
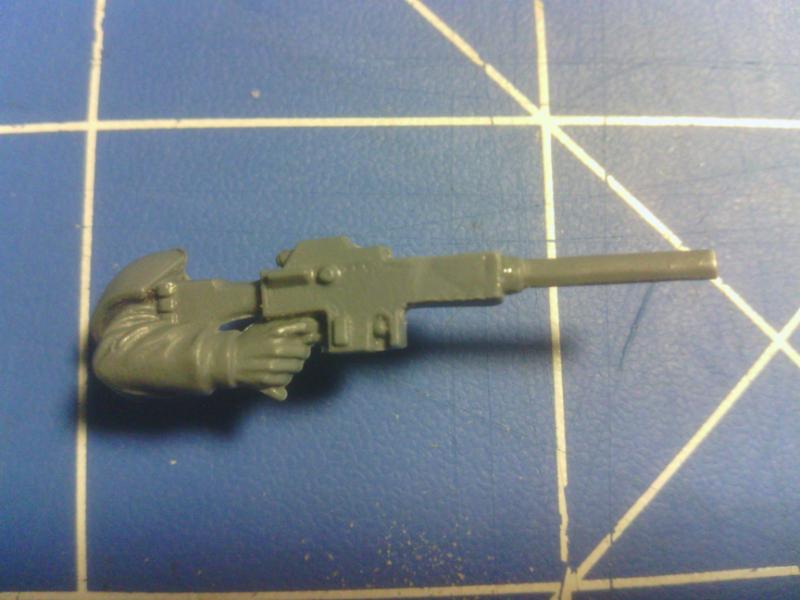
4. Take the main arial and cut the little bumpy bit at the bottom off. Keep both bits for later. As always snip the lasgun ammo pack off.
5. Glue the arial to the lasgun. This is now the shotguns barrel.
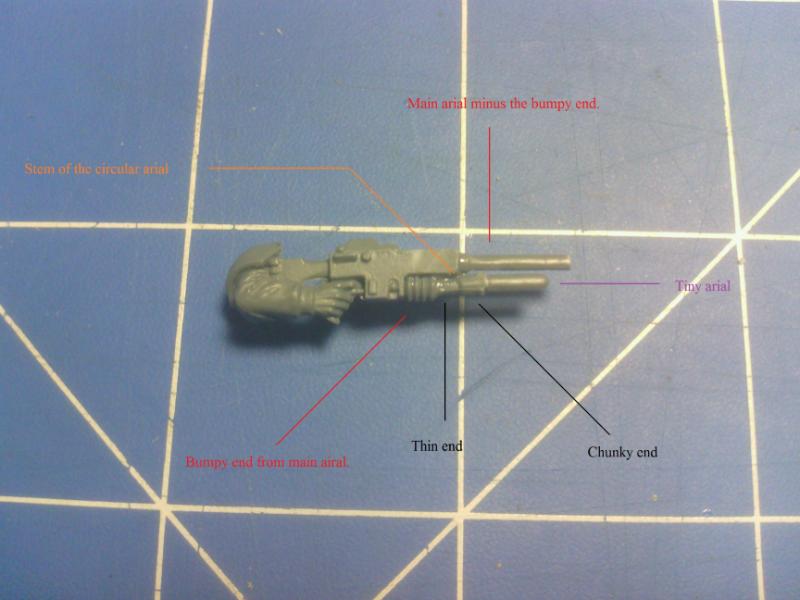
6. Take the circular arial from the vox pack and cut the circle off. Don't worry about the bayonet handle you can see in that pic. Was gonna use that for something but didn't end up needing it.
7. This step is probably the most fiddly out of all.
The little bumpy bit you cut of the main arial? Glue that on so it sits flush with the body of the gun. You will need to file or shave down one side of the bumpy bits so that it glues properly to the gun. Take the stem from the circular airal of step 6. This stem should have a chunky end. Glue the slim end to the buppy bit you previously glued on. The chunky end is going to serve as the pump. There should have been a tiny arial on the vox pack (not pictured in picture 3 becuase as i cut it off it flew away never to be seen again.) glue this little arial to the chunky end of the other arial stem. Now like i said before this step is very fiddly and convoluted. I advise reading it a few times and looking at the finished product before attempting it. Hopefully i've indicated all the bits properly with my colourful lines.
8. Take the support arm for a grenade launcher cut the hand off and reposition it 90* so that its facing up. The grenade launcher support arm should more or less line up with with the pump. Some creative positioning may be needed or it might be easier to glue the severed hand to the pump and the glue the arm to the hand. What ever works.
I can see this design being a bit hit and miss with people. But at the end of the day its still a shotgun and I don't think i'd take much to convince your opponent that it is a shotty.
Still, if the pump action shotgun ain't your bit then you might prefer a full auto shotgun. Something akin to the AA-12. If so then read on!
Auto Shotgun. Parts Needed - 1x lasgun, 1x Grenade Launcher.
Spoiler:
1. Start with a standard lasgun and cut off part of the barrel, the ammo clip (surprise) and all the bumpy gubbinz up the top. Its also worth scraping off all the rectangles and circles on both sides of the lasgun. It should end up so it goes from this.....
To this...
2. Take your Grenade launcher and cut the both ends off so you end up with only the grenade drum. It may take some extra cutting and filing so that its smooth on both sides. (I didn't think a photo was necessairy for this step.)
3. Either using a saw or knife cut a square chunck out of the top of the drum. This bit can be tricky as you need to get it the same width as a lasgun. The easiest way to get it the right width is using a file to gradually wear down the insides.
4. Flip the drum on its side and cut about a 1/3 of the way through it as shown. Which incidentaly is about how wide the lasgun clip is.
5. Attach the larger side of the bisected drum to your lasgun.
Hey presto, an automatic shotgun. Very little reloading required.
I hope this is helpful to someone and was easy enough to understand. Any comments and/or criticisms are welcome. If anyone has any difficulty understanding my instructions or the pictures you need but ask. I'm more then happy to rewrite bits or post clearer pics if need be.
This message was edited 6 times. Last update was at 2013/01/06 22:54:26
Will definitely be using the Meltagun conversion at some point. Not too sure what to do about the Plasmagun, in particular the lack of magnetic coils. If you can find something aside from greenstuffing it on that that would be awesome. Aside from that, very nice work, I can see this being very useful to a lot of people.
And that Eviscerator is badass.
Pretre: OOOOHHHHH snap. That's like driving away from hitting a pedestrian.
Pacific:First person to Photoshop a GW store into the streets of Kabul wins the thread.
Selym: "Be true to thyself, play Chaos" - Jesus, Daemon Prince of Cegorach.
H.B.M.C: You can't lobotomise someone twice.
2012/08/18 20:47:26
Subject: Custom Imperial Guard special weapons. Straight from the box.
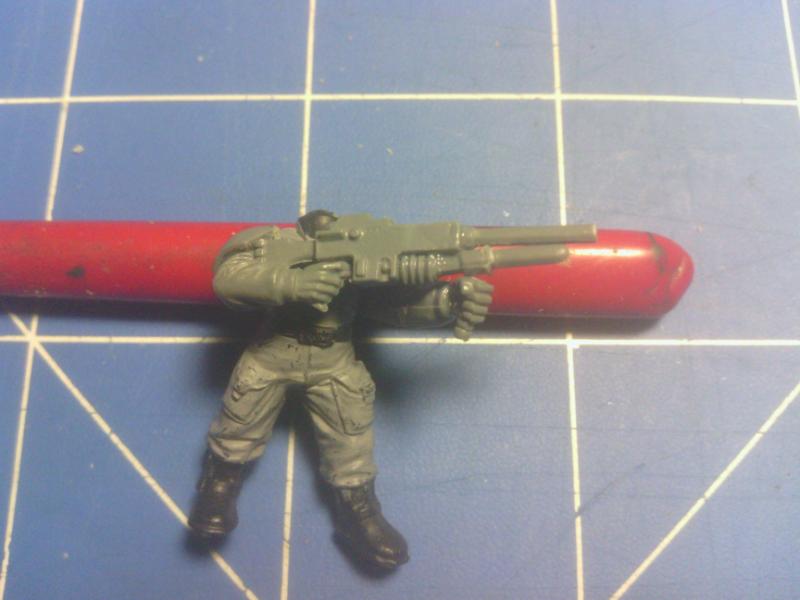
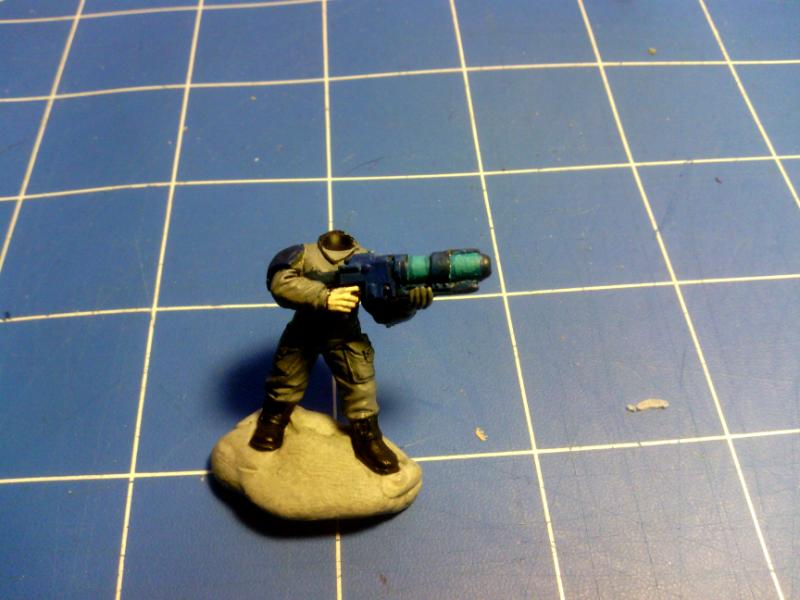
Yes i did mange to make a few adjustments to the plasma gun which i'm slightly more happy with. The paintjob makes a huge difference though i think. You can actually tell its a plasma weapon as opposed to a lasgun body with a grenade launcher barrel glued to it when its painted up.
Hang on il throw up some finished, painted pics. I've been meaning to post them for like a week now but i've been lazy.
Well, the Plasmagun still looks a bit weird, but I really shouldn't comment, especially if people are doing this on a budget. The Melta and sniper look fantastic, though. Those are my favorites.
Lord Judicator Valdrakh of the Atun Dynasty (6th Ed: W:3, L:4, D:0)
H.B.M.C. wrote: Well GW were mostly responsible for the Berlin Wall, so it's natural for some people to harbour resentment towards them.
2012/08/20 09:13:30
Subject: Custom Imperial Guard special weapons. Straight from the box.
Hey mate I'm right there with ya. Its odd looking i know but i couldn't find anything that even remotely resembled the magnetic coils of a plasma gun. So instead i went for a tube of plasma with a magnetic rail underneath that propels the plasma blast much like a railgun propels it projectile.
Also that picture is very dark and the blue on blue doesn't help none.
I still feel like the plasma gun looks too much still like a grenade launcher. Unfortunately, I can't really think of a better way from the stock boxes to correct it.
I think they all look pretty good. The plasma gun is definitely a different flavor of plasma gun manufacture, but I wouldn't confuse it with another special weapon type.
Wish I'd seen this when I was first putting my army together.
"Because 6th edition is the ruleset that 40k fans deserve, but not the one they need right now... and so we'll argue over minutia... because GW can take it... because faqs and erratas require effort and money... they remain a silent rule maker, a neglectful protector... a Space Marine fanboy..."
-Commissioner Gordons view of 40k 6th ed.
2012/08/22 07:17:54
Subject: Custom Imperial Guard special weapons. Straight from the box.
I really like the melta gun myself! I tried something like that and didn't turn out nearly aswell. I'm going to have to try your version next! Love it!
"A good soldier obeys without question.
A good officer commands without doubt."
-Sergeant Lukas Bastonne
2012/08/23 01:06:23
Subject: Custom Imperial Guard special weapons. Straight from the box.
I agree with adamsouza. You can say it's just a rare pattern of plasma gun. I think it works and I'll us this conversion over buying the plamsa/melta $15 blisters.
This message was edited 1 time. Last update was at 2012/08/24 14:57:21
WAAAGH Squigeye: 3500 and counting
2012/08/24 18:00:51
Subject: Custom Imperial Guard special weapons. Straight from the box.
Dark Apostle 666 wrote: The plasma gun looks like it was reverse engineered from tau tech...
I'm sure you could tie that into fluff somehow - maybe they got supplied from a R&D forgeworld or something?
Oh hey i hadn't noticed that. It does look a lot like the Tau plasma rifle. At least we know it would look good if you were running a tau w/human allies army.
One idea would be to score the tube with an x-acto knife. That might create the coils some people are looking for, but I like the unique look it currently has.
Rennoc215 wrote: One idea would be to score the tube with an x-acto knife. That might create the coils some people are looking for, but I like the unique look it currently has.
Not a bad idea and should be easy to do.
WAAAGH Squigeye: 3500 and counting
2012/08/29 20:29:20
Subject: Re:Custom Imperial Guard special weapons. Straight from the box.
That plasma gun looks the business once painted! Wouldn't it be simpler to just use two pieces of plasticard though? Similarly, some tube and wire for the meltagun?
2012/09/01 11:01:41
Subject: Custom Imperial Guard special weapons. Straight from the box.
Construct wrote: That plasma gun looks the business once painted! Wouldn't it be simpler to just use two pieces of plasticard though? Similarly, some tube and wire for the meltagun?
Maybe, but not everyone might be aware that plasticard exsits. Or maybe they don't know where to get it from. I was following the KISS ("Keep It Simple Stupid" for those who don't know what it is.) principle as much as i could. Plasticard and wire and stuff just adds more to deal with. The fact that i had to resort to using greenstuff annoys me a little.


 ~
~
 ).
).


 WAAAGH Squigeye: 3500 and counting

 _--_--_--_~1750pts
  _--_--_--_~1000pts
  _--_--_--_~1300pts
  _--_--_--_~750pts
  _--_--_--_~2000pts


