| Author |
Message |
 |
|
|
|
|
Advert
|
Forum adverts like this one are shown to any user who is not logged in. Join us by filling out a tiny 3 field form and you will get your own, free, dakka user account which gives a good range of benefits to you:
- No adverts like this in the forums anymore.
- Times and dates in your local timezone.
- Full tracking of what you have read so you can skip to your first unread post, easily see what has changed since you last logged in, and easily see what is new at a glance.
- Email notifications for threads you want to watch closely.
- Being a part of the oldest wargaming community on the net.
If you are already a member then feel free to login now. |
|
 |
2017/05/16 21:16:56
Subject: Re: Multi-level city terrain, marine v nid bases (5/16: steel plates done, garage cleanup)
|
|

Dakka Veteran
|
|
|
|
|
 |
|
2017/05/17 21:06:42
Subject: Re: Multi-level city terrain, marine v nid bases (5/17: garage re-wiring I)
|
|
Dakka Veteran
|
So I started slowly figuring out painting the bits i green stuffed. It's odd because its such a different material than the hydrostone that even painted it still looks smoother and off, so it'll take a while to get right.
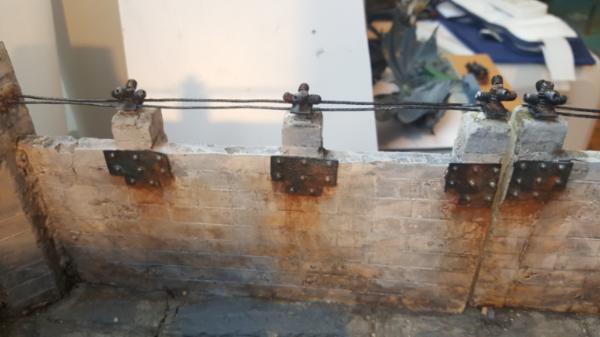
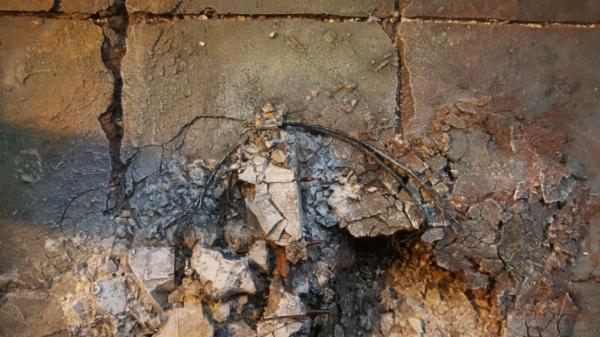
Meanwhile I also added some cabling to my downed wall section. This is an instance where using the braided stuff I'm using (100lb braided wire for holding up frames) is both good and bad. Good in that it looks perfect and is tough, bad that it's stiff enough to not drape naturally. So you have to shape it into place, which can take longer than expected.
Finally we have a lesson I hope you've all learned by now. Its okay to get things wrong! Its okay to do something just to get it done, then come back later and re-do it better. I hope I've highlighted that throughout this blog. As happy as I am with my projects and how they've been turning out, they certainly didnt start that way and more often than not I've iterated my way into a look im happy with (dark metal, marine blue, these walls, blood and guts, nids ATTACKING on bases) and then gone back and realized I need to re-do some old things to line up (orange marines).
So the latest case is the wiring for the garage. At the time well I was burned out and just wanted done, so I cant even be mad at my old self. But during LVO it was definitely difficult to turn the garage on the fly since I didnt have a switch. Furthermore detatching/re-attaching the walkway from everything is a major pain. Further-furthermore the battery pack magnet idea didnt really work out, its time to just glue that sucker down. Further-further-furthermore I need some more LEDs in there, raw and untinted just to get some basic white light in there.
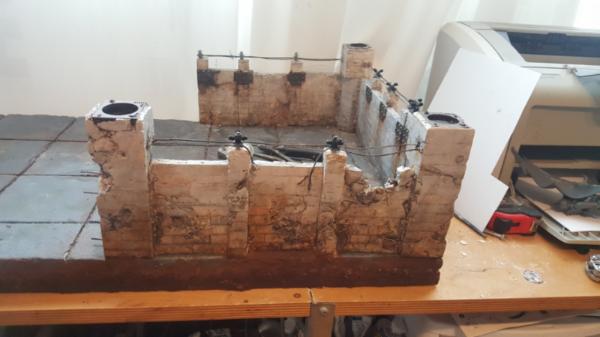
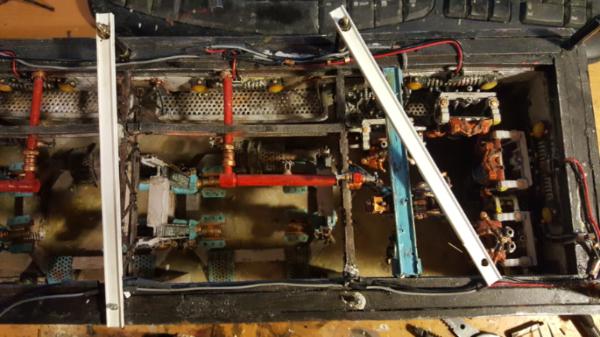
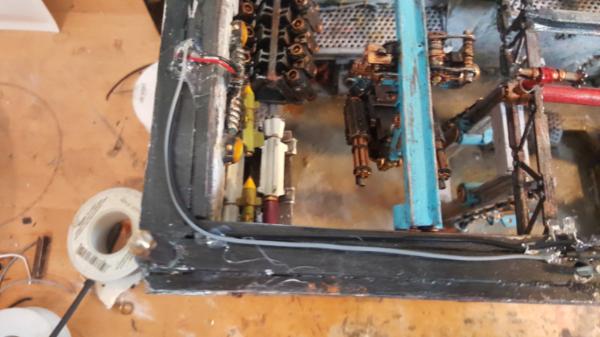
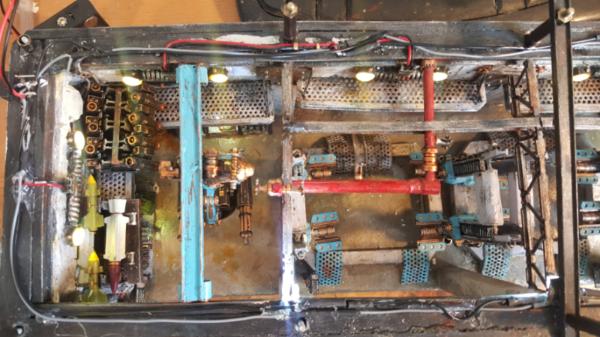
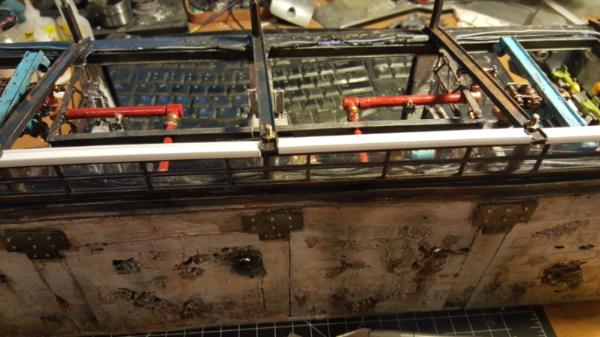
So, first up is the re-wiring. This is where I left things last time:
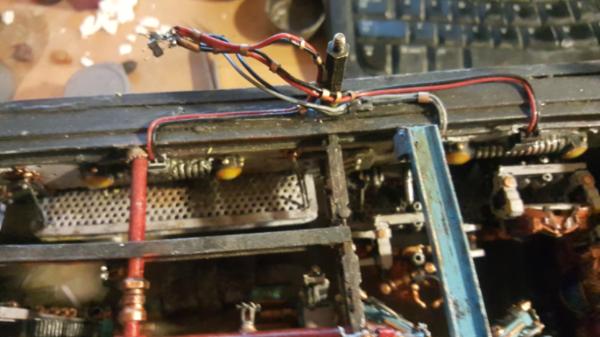
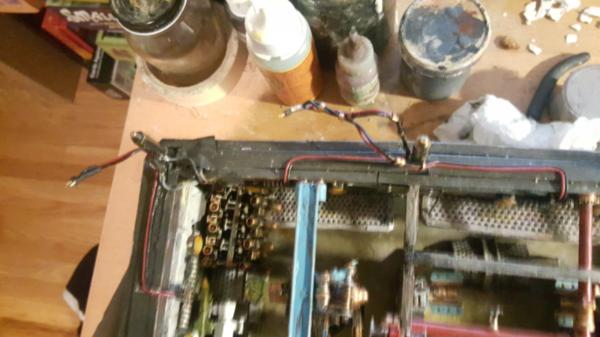
Lots of connections, lots of things to hook up, pretty messy. So lets fix that. The goal is to re-wire it to just all feed into a single connection with a switch attached.
|
|
This message was edited 1 time. Last update was at 2017/05/17 21:07:35
|
|
|
|
|
2017/05/18 22:38:28
Subject: Re: Multi-level city terrain, marine v nid bases (5/17: garage re-wiring II)
|
|
Dakka Veteran
|
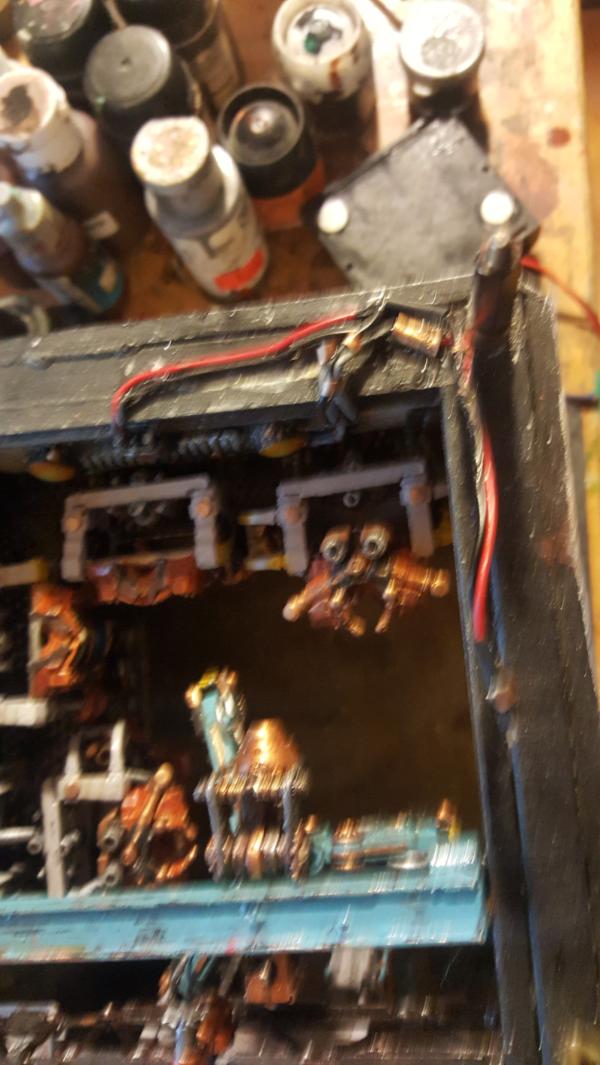
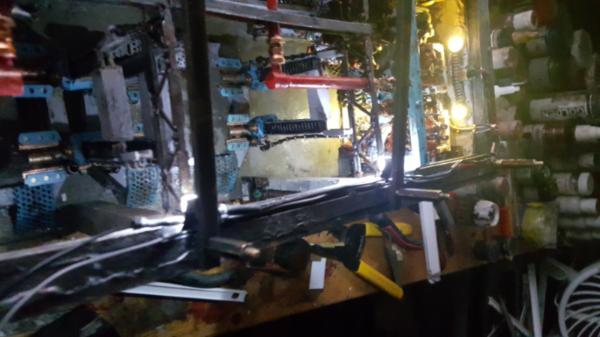
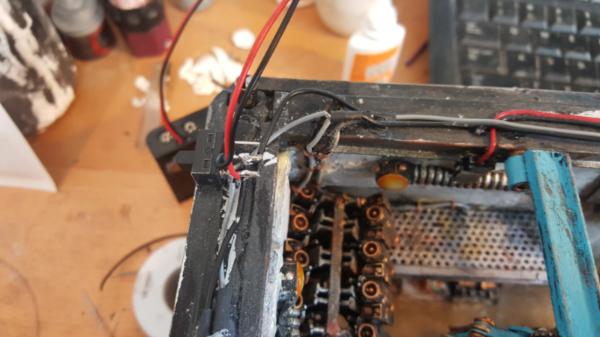
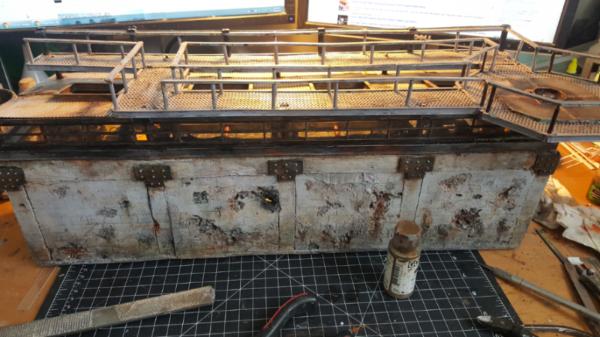
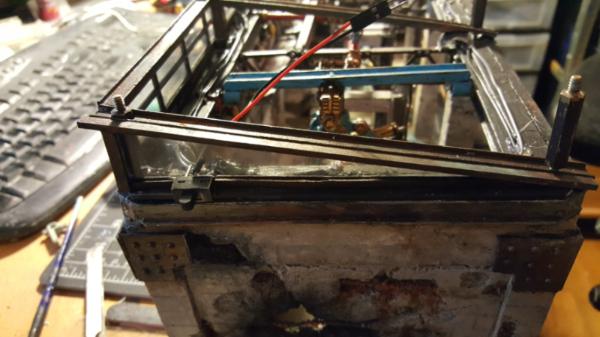
So the first part of the re-wiring went okay. It's time consuming, as you have to basically make a tri-wire connection each time you want to reduce a pair of wires which can be tricky to make sure its secure but also test it before you put the solder down. My abilities at de-soldering are.. uh.. lacking? It never seems to work well, even the copper mesh stuff, so its best to test first otherwise you have to cut and the whole point of this is to not have much excess wire.
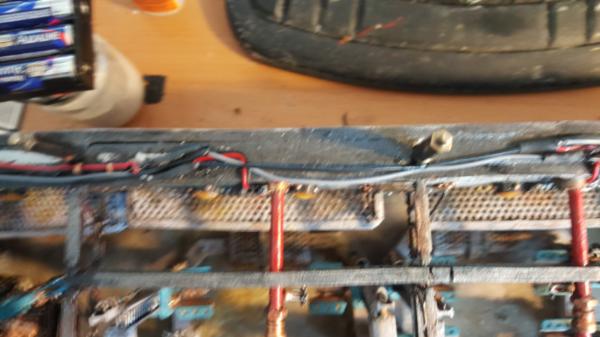
I also decided it would be nice to add cross-beams to help ensure my slant is in place and support the roof a bit more. I've noticed it can sag ever so slightly when on its own and when I add the walkway on top of it it's easy for the roof to start sliding down the pins instead of staying at a nice angle.
|
|
|
|
|
|
2017/05/20 16:12:49
Subject: Re: Multi-level city terrain, marine v nid bases (5/20: garage re-wiring III, new lights!)
|
|
Dakka Veteran
|
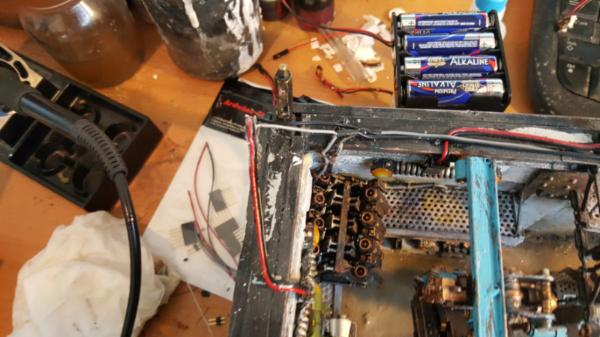
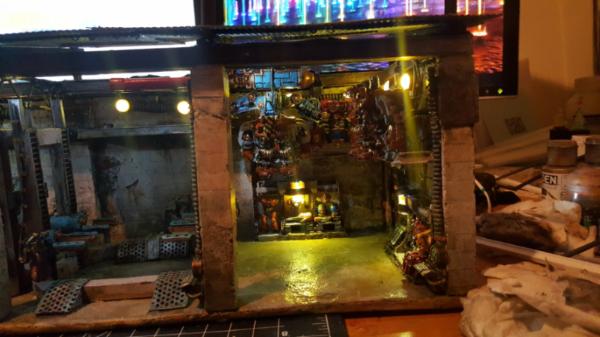
So the re-wiring continues and I added in some new LEDs. I wanted some more in the middle, raw and hidden to help flood it with light. The result is cooler then possibly it should be but I might add even MORE that are yellow to balance it out. I wanted the white to be as raw as possible so I get the most light. If not Ill just color the led bulb directly a bit but im hoping to avoid that.
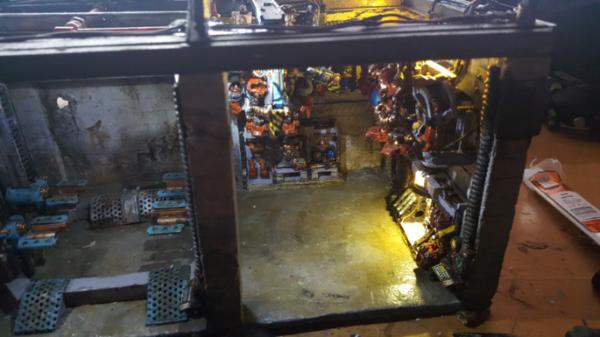
We also have the first few crossbeams painted up!
|
|
|
|
|
|
2017/05/22 23:37:48
Subject: Re: Multi-level city terrain, marine v nid bases (5/22: garage, new lights tut)
|
|
Dakka Veteran
|
So! quick tut of the lights I made. Whats unqiue about these is that I needed them to be minimally impactful on the LED brightness BUT also block the LED from being super bright right in the eye. Unfortunately because of the gap in the back my "hidden" extra fill LEDs are anything but, which is why I needed these shades.
I settled on using plastic tubing cut in half and along the angles to make a trapezoid, letting light escape at the angles. To maximize the light I then covered the interior with tin foil to reflect as much as possible. Seems to work okay as a result?
Sadly this is the best picture i have of the shape of the lights.
All the pieces seperately:
Surprisingly supergluing tin foil to plastic worked pretty well. Seemed to hold well enough, just dont tear the tinfoil. I wrapped it around the plastic too just to really try and.. secure it as best I could.
The light in place. Look in the upper right corner.
|
|
|
|
|
|
2017/05/23 20:40:57
Subject: Re: Multi-level city terrain, marine v nid bases (5/22: garage, extra LEDs done, switch installed)
|
|
Dakka Veteran
|
So back to working on LEDs! I figured out my light covers, build them and primered the exterior black and installed. With that and some more cleanup we're good to go! One thing that Im sorta glossing over is.. this still took a while to wire up. Worse yet was the fact that 2 of my LEDs were duds, so I wired the middle light with only 1 led because I didnt want to make the lengthy drive to get more LEDs... only to find out I was still short an LED because of the second dud. So the middle light could be brighter but.. oh well. At this point I was tired of wiring and re-wiring things (took pretty much an entire weekend to get all this soldered up and cleanish). Of course I then found more (weaker) LEDs later after I went through my bits... sigh. Oh well, 5 instead of 6 is okay for brightness.
Then I added in a switch and.. did it terrible wrong! I have no idea why, sleepiness I guess, but I just wired up both leads to it and both of the battery leads as well. So when its in the open position it lights up! but when its closed.. well.. the battery shorted out.
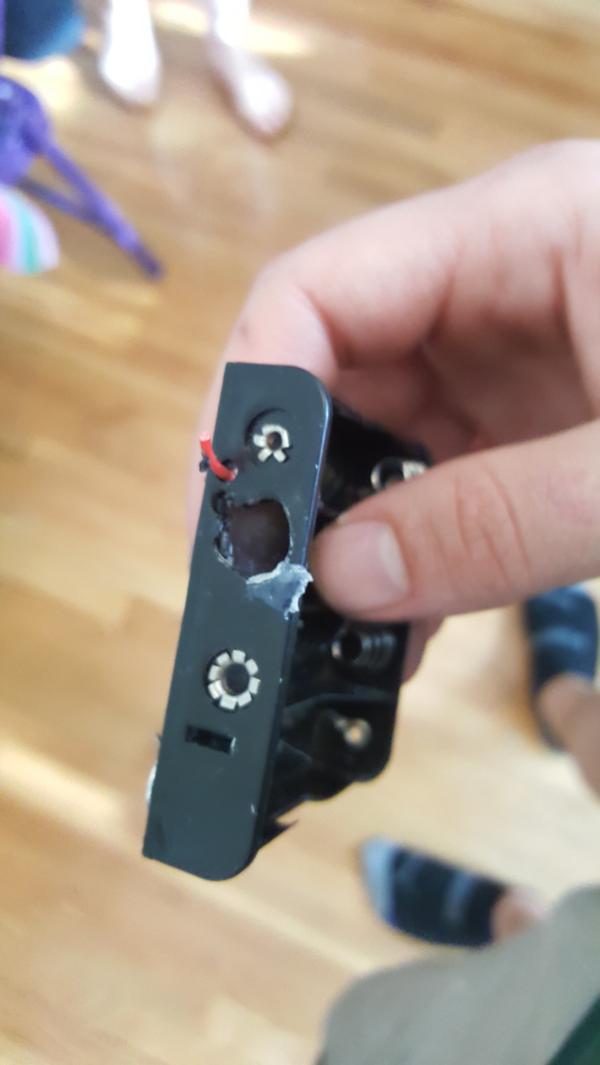
This was not how I wanted to end my weekend but.. the lights still worked, I just needed a new battery pack (guess where those are... the super far away store! ARGH BLARGH) and to re-do the switch wiring. With that done we're back to working again:
Much better on the brightness levels I just want a couple more LEDs to yellow it up.

|
|
|
|
|
|
2017/05/23 21:42:25
Subject: Multi-level city terrain, marine v nid bases (5/22: garage, extra LEDs done, switch installed)
|
|
Ragin' Ork Dreadnought
Deep in the Outer Boroughs of NYC
|
Wow, that looks great!
|
|
|
|
|
|
2017/05/24 21:41:04
Subject: Re: Multi-level city terrain, marine v nid bases (5/24: garage, back window done)
|
|
Dakka Veteran
|
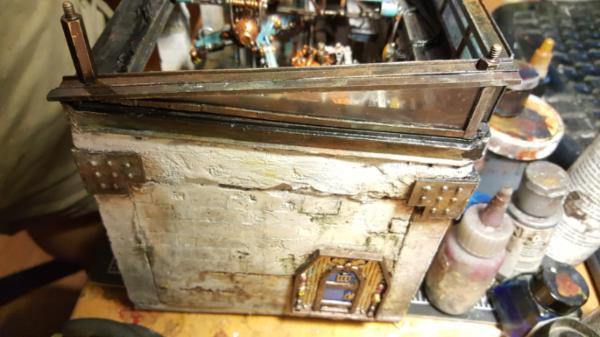
Danke! now for some windows! Or well, the back ones at least. The side ones i havent figured out yet since htey are triangular and tthose kind of windows are always wierd when it comes to adding trims and such.
First up was finishing off all my roof central beams:

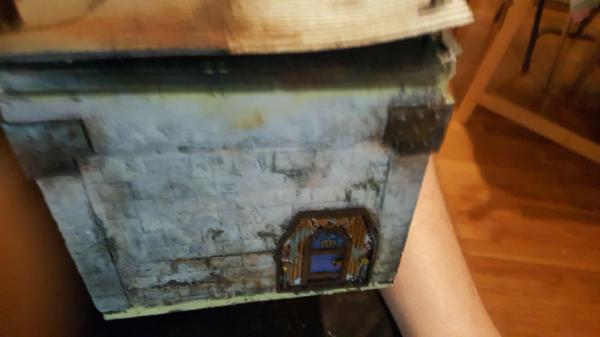
The window itself was fairly straightforward. I had already gotten some convienent plastic garage-style mass window panes that were the perfect height. So I just painted them up and sandwiched some plastic between them. It's not as clear a plastic as it could be but.. ehh.. its "realistic!" lol.

Added some caps on the top of the frame:
The final result! looks good, much more official garagey now. Of course having such a thick cool looking dark metal chunk is really making me wonder if i should just strip my walkways and go dark metal with them... The other walkways turned out so well that it is awfully tempting. Downside is that i'd have to (very very carefully) somehow strip my existing bases I've already made. Maybe something to save for later. The blue also really wouldnt work, as i'm deliberately trying to keep all the color for the details on the interior. Dunno.
|
|
|
|
|
|
2017/05/26 21:31:40
Subject: Re: Multi-level city terrain, marine v nid bases (5/24: garage tile, gate WIP I)
|
|
Dakka Veteran
|
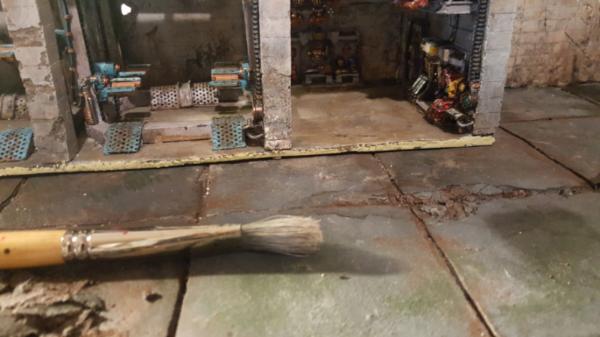
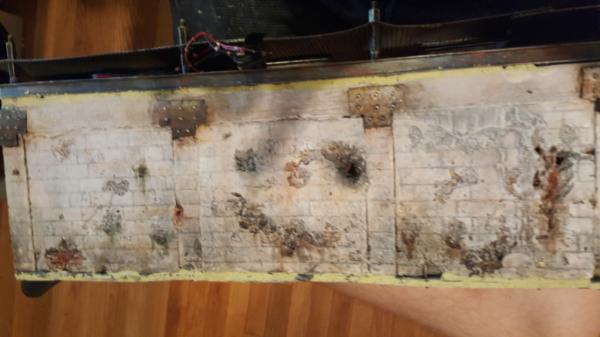
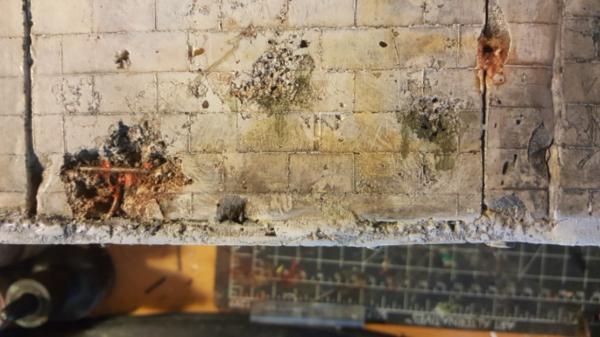
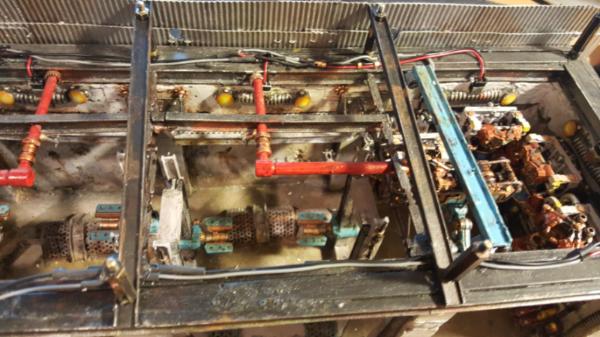
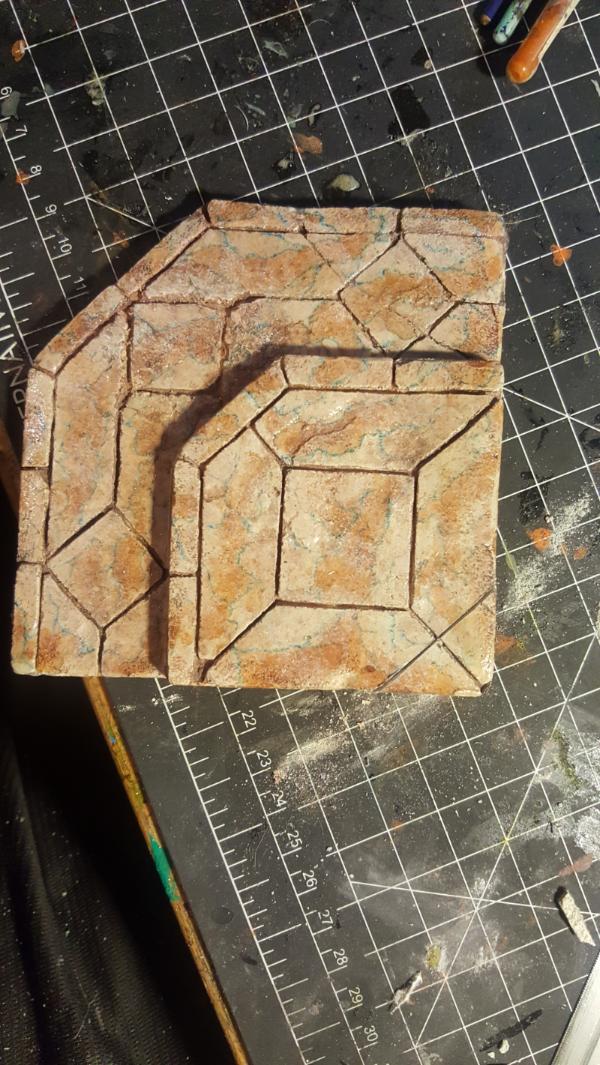
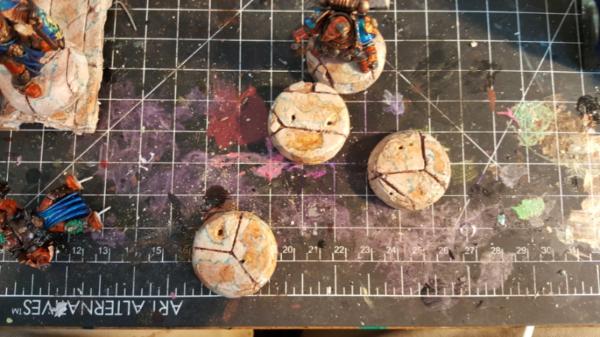
So here is where we're at with the garage tile
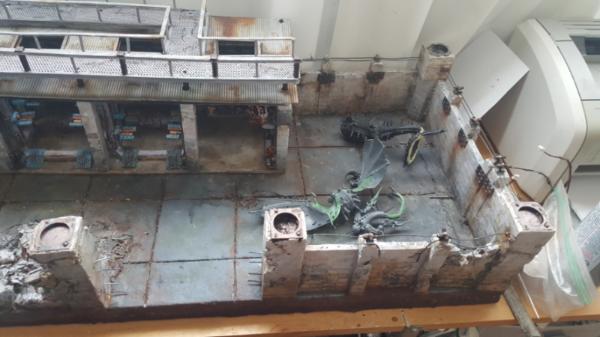
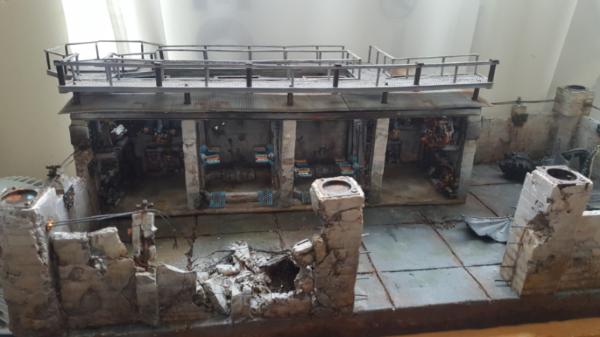
Pretty good shape! So the list of remaining things to do:
1. Paint up the flyrant
2. Paint up the mawloc
3. Make a gate
4. Turrets, make sure they are up to snuff paint wise and destroy a few
5. A few extra lights in the garage.
6. Still try to think about where to put my marble base marines, if anywhere.
Thats about it! Not worrying about barracks/giant cranes/etc until we know whats good in 8th. So given that lets.. start on the gate! I really didnt want to paint the nids yet.
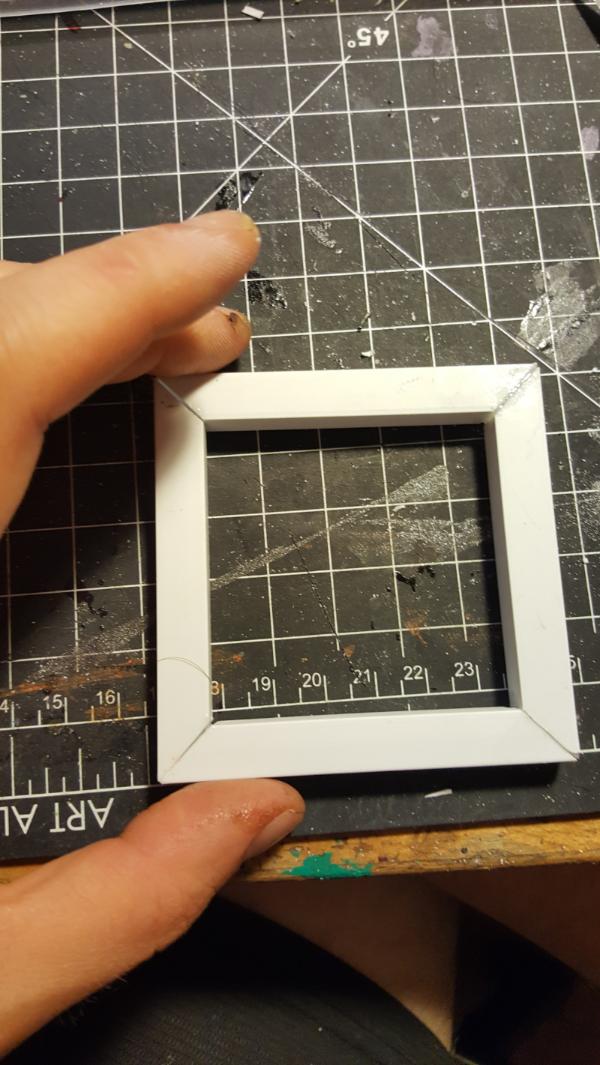
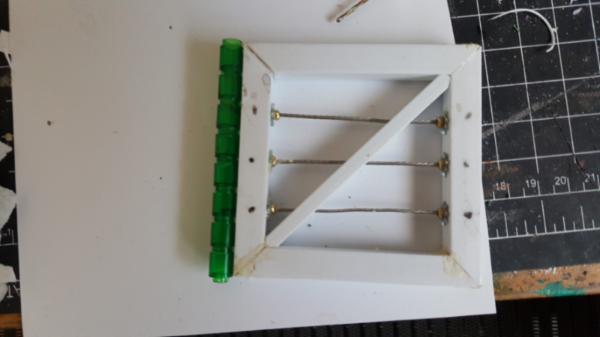
First up, my third favorite plastic shape: square tubing.
|
|
|
|
|
|
2017/05/27 18:58:43
Subject: Re: Multi-level city terrain, marine v nid bases (5/27: garage tile, gate WIP II)
|
|
Dakka Veteran
|
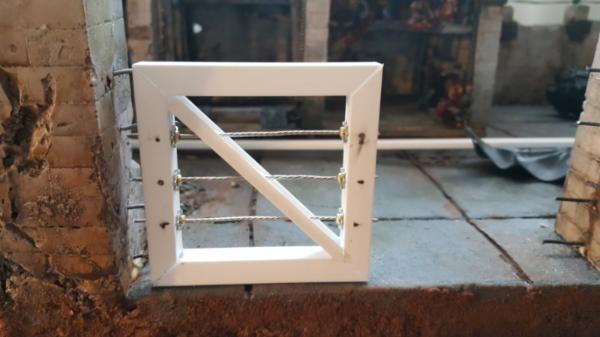
Just continuing work on the gate. As with the cardboard, I wanted it to look sturdy but not be solid, after all "windows" through the wall to the garage/stuff beyond are relatively few so this has to be one of them. Given that this will be the "second" tile the ability for people to get in close from the front will be more limited.
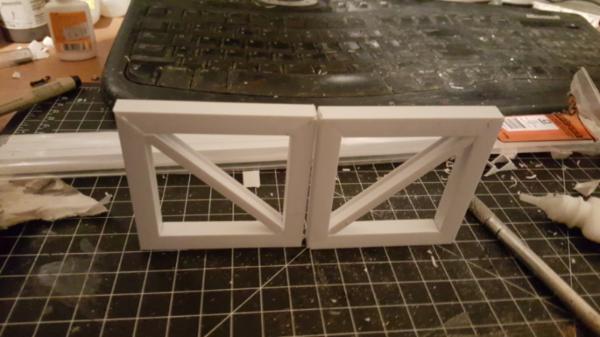
Of course that means I need more charged electrical fencing to fill in those gaps!
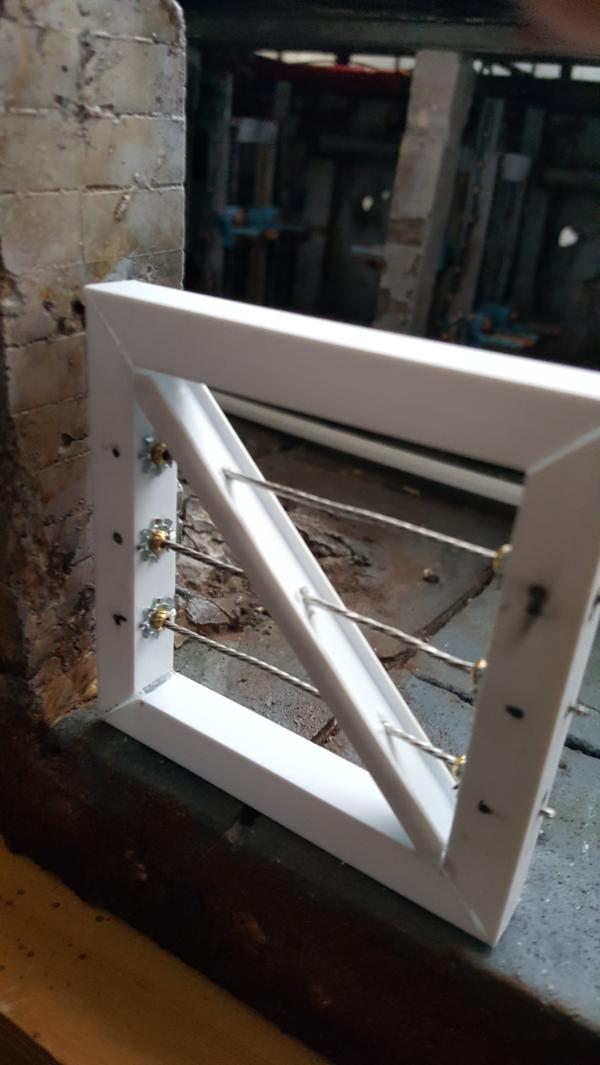
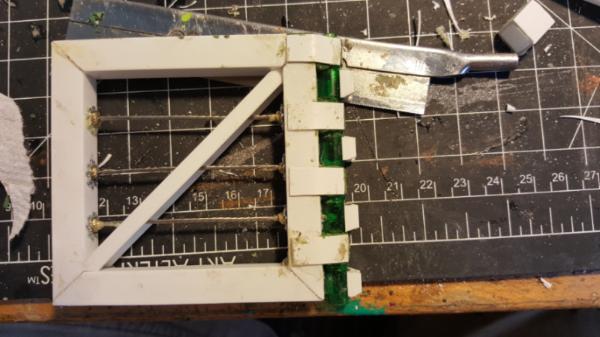
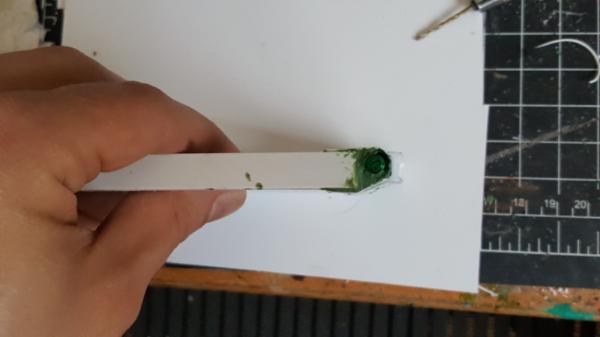
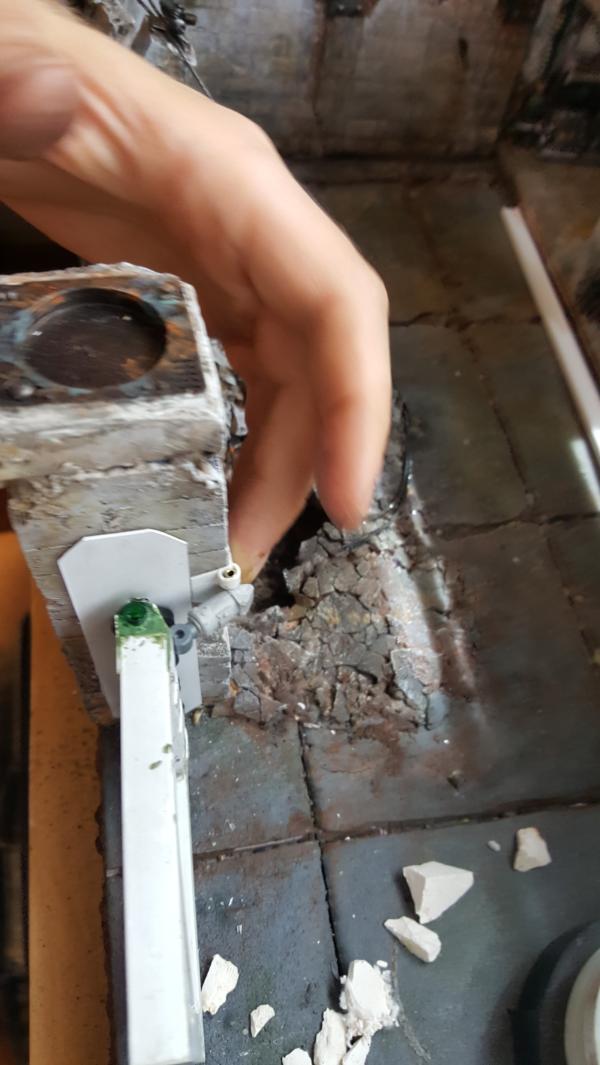
Now one thing you wont see that I did is poke some holes in the bottom of each vertical side of the gates, where the braided wire attaches. The reason for this is.. well square tubing in plastic form is pretty flimsy. The joints holding the squares together are pretty easy to break and its not like there is much holding the wire in place.
So to help with that I poked a nice big hole in the bottom and just FILLED the vertical sides with gorilla glue. I put so much in that i could actually feel a weight difference. An hour later and a lot of patience clearing off the expanding out of various holes and pores you get a much more solid structure all around for holding everything in place.
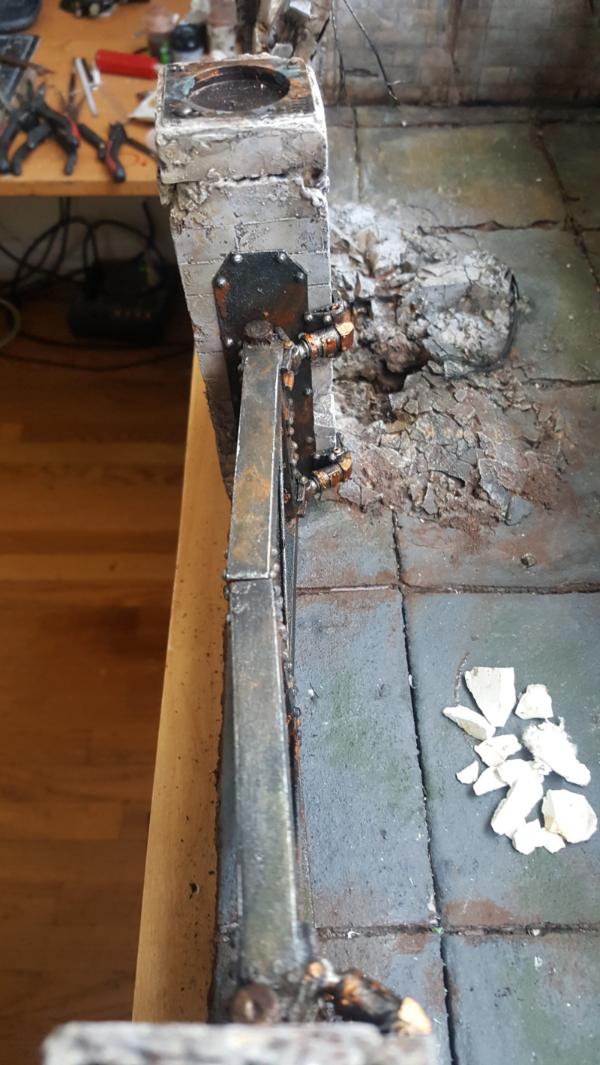
Next up is figuring out how this thing will attach to the wall. Doing a little research on blast doors revealed that the hinges are typically on the outside of the door attaching to the outer part of wahtever wall. This is to ensure the door can only outwards buttt... that would mean I have to have the gate flush up against the pillars.
http://www.pogo.org/assets/images/blog/2013/blast-doors-575.jpg
http://www.strangemilitary.com/images/content/199911.jpg
Not something I really want since Im attempting to limit how much stuff sticks out over the tile.
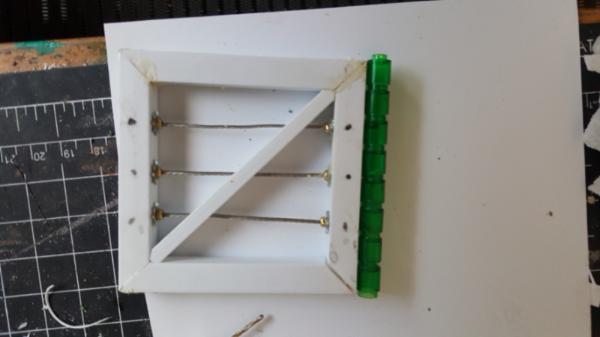
Thus I'm thinking more a giant piano hinge. It'll feel nice and study and I already have the legos for it in the perfect size!
|
|
This message was edited 1 time. Last update was at 2017/05/27 19:01:53
|
|
|
|
|
2017/05/30 23:31:26
Subject: Re: Multi-level city terrain, marine v nid bases (5/30: garage tile, gate WIP III)
|
|
Dakka Veteran
|
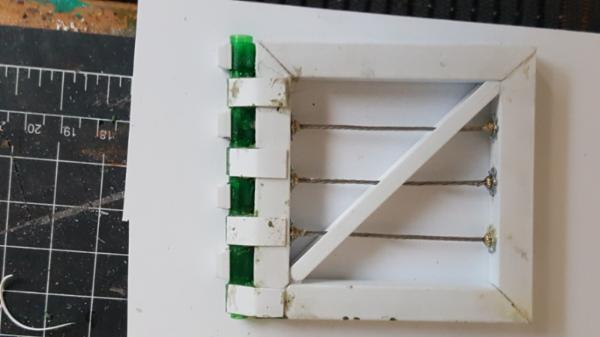
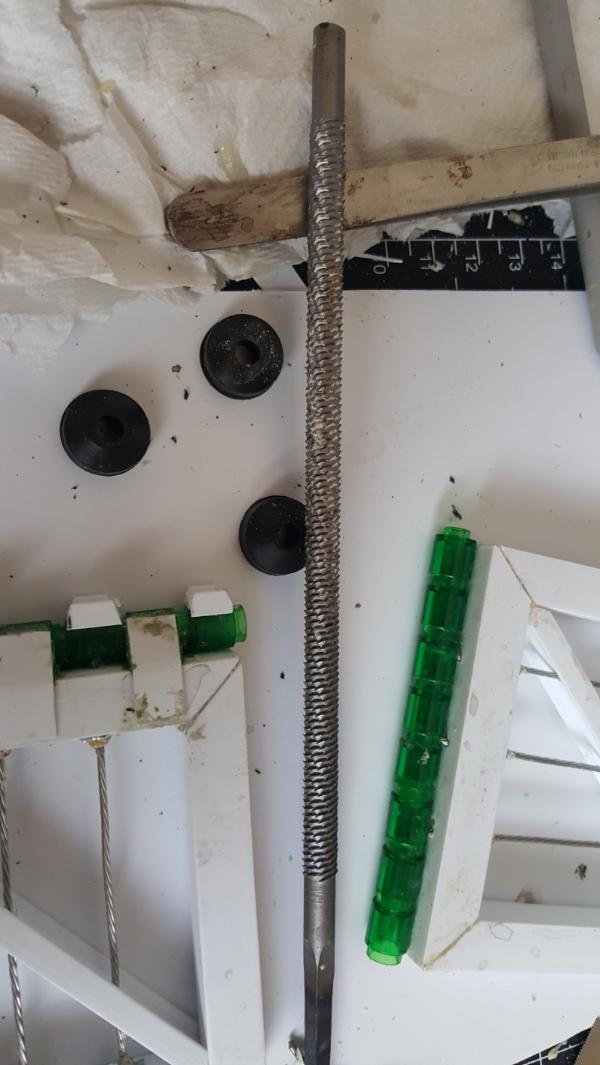
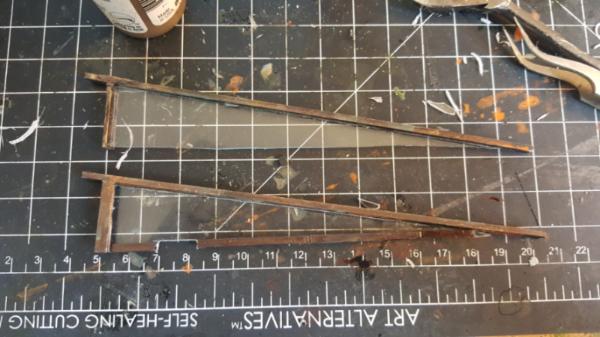
More work on the gate:
First up hte other side
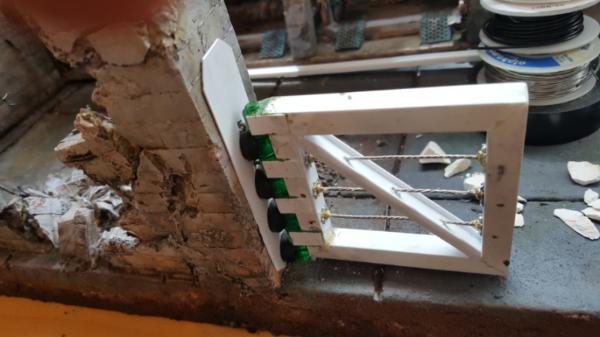
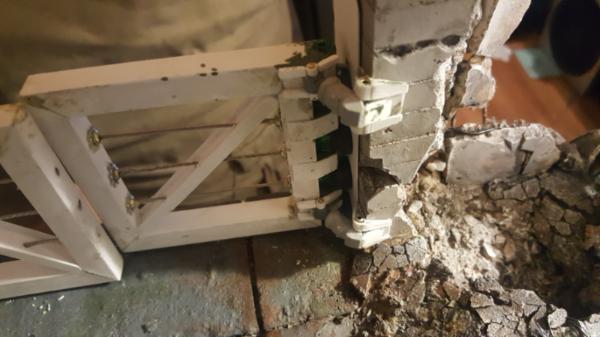
Then it was about how to actually bind the hinge to the gate itself, normally it would be metal plates on half of the piano hinge hooking up to the gate and the other half hooking up to the wall, so thats what I went with here. In order to make it more realistic/able to actually poen I moved the hinge forward so more of it was sticking out in front of the gate, letting it open further.
You can also see what I started with for my side attachment method. At first I started with I-beams but they looked.. flimsy. I really wanted something that tapered in like a cone or pyramid which ended at the hinge. Fortunately I had these rubber cone things I had found at a hardware store a long time a go that were perfect with a bit of sanding!
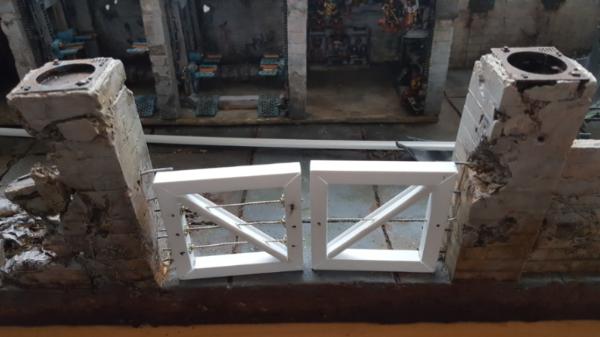
Which led to my first test install, looks good!
|
|
|
|
|
|
2017/05/31 18:34:09
Subject: Re: Multi-level city terrain, marine v nid bases (5/31: garage tile, gate WIP IV, pistons)
|
|
Dakka Veteran
|
So the gate's looking good but a little bare. I want a way to illustrate how it opens and closes, so I figured I'd make some pistons to attach.
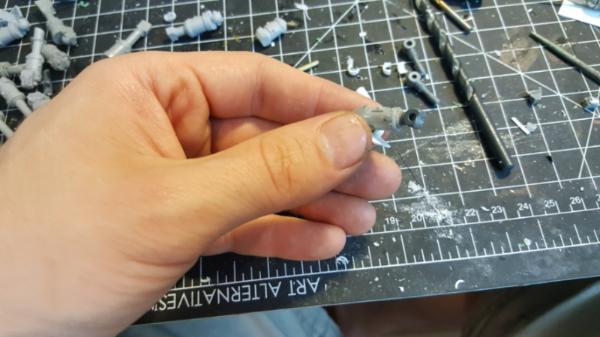
I figure I have it wrap around back corner of the pillars which should look nice and make sense to actually open it up:
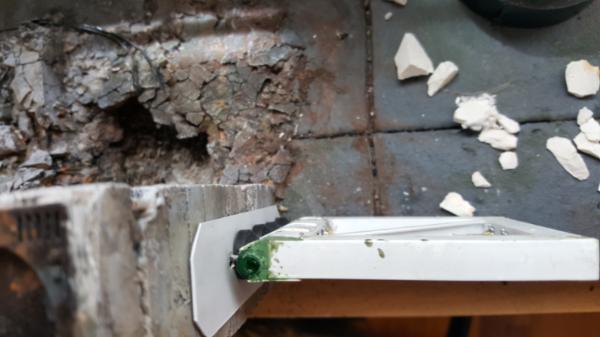
Looking promising! I think it'll work, now I just need to acutally make it work like a piston hinge would, freely available to rotate along the Y axis along both ends as it pushes;
And there you have it!
|
|
|
|
|
|
2017/06/01 18:41:35
Subject: Re: Multi-level city terrain, marine v nid bases (5/31: garage tile, gate done)
|
|
Dakka Veteran
|
Bit of a time jump buttt.. you've seen this all before so you aint missing too much.
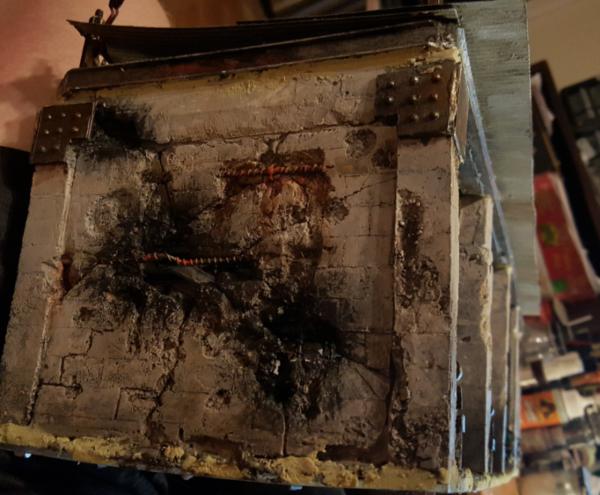
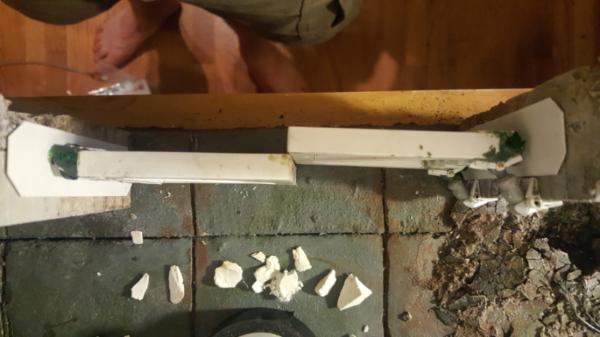
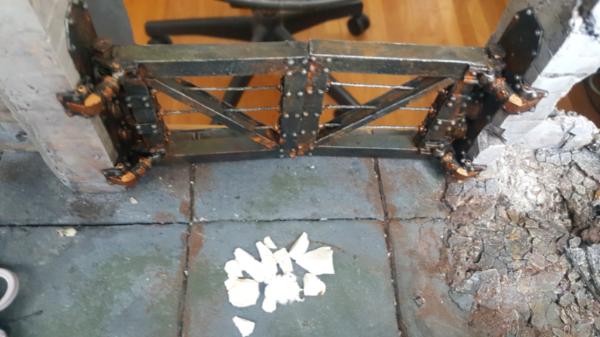
ANyways I added bolts and painted up and voila gate done! The big trick was getting it to fit in my gate gap. I was off about 1/8th of an inch in the end so lot of sanding of my cylinders to get each gate side down to sie so they just squeeeeze together. Aside from that it worked out and looks good. I kept it raw because.. well.. yeah its a better look *shrug*. I might tone down some of the rust spots in the back but otherwise im happy with the result.

|
|
This message was edited 1 time. Last update was at 2017/06/01 18:44:30
|
|
|
|
|
2017/06/02 20:58:13
Subject: Re: Multi-level city terrain, marine v nid bases (5/31: garage side windows, marble shrine placement)
|
|
Dakka Veteran
|
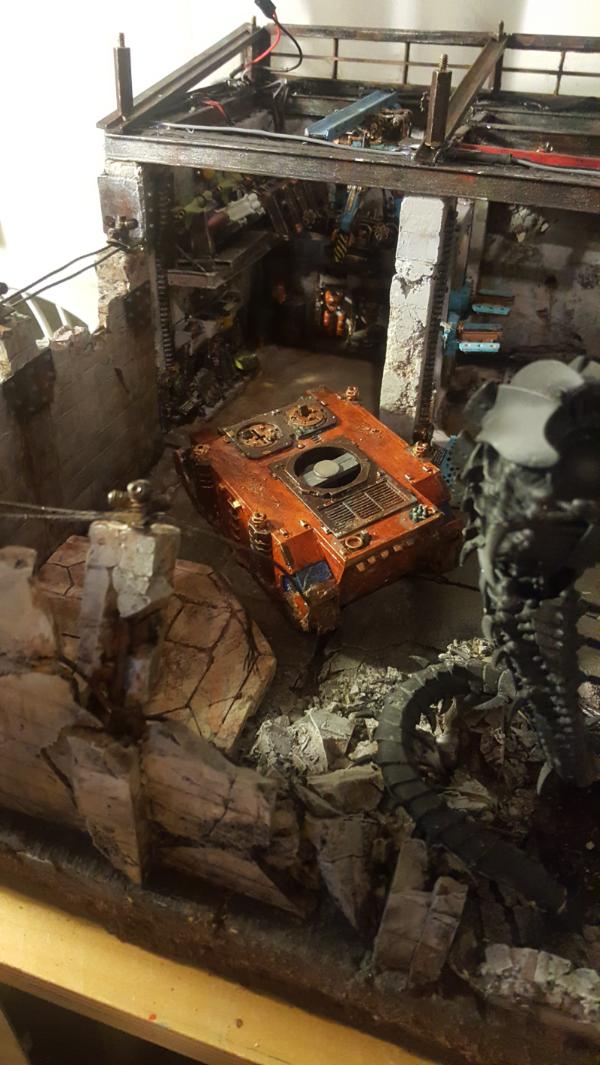
So the gate is completed! Back to the garage for a bit. Just a few major things left: a few extra yellow lights, dirtying up and cleaning up my walkway painting (i still dont yet want to strip it and go raw) and some side windows.
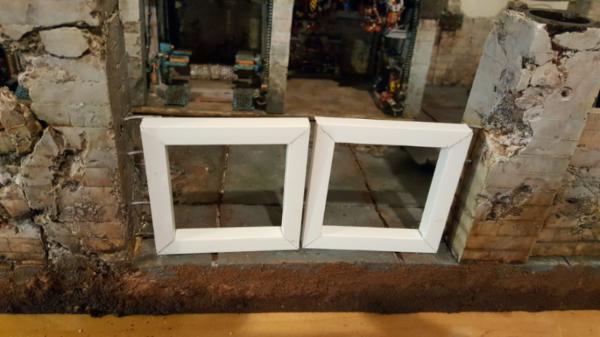
First up is the side windows. I was planning on adding detail in there but.. didnt have the plastic for it and didnt care THAT much. We're already in the nitty gritty I didnt need to double down.
Took a bit but the results are nice and give a good "finished" look to the top now of the garage in terms of detailing.
Next I started re-thinking my marble shrine a bit. With all the new 8th edition madness.. a lot has changed. The meta now is pretty uh.. all over the place? I just dont know what I'm going to want. A pory might be key.. or not maybe my sicaran! or.. a flyer! Either way it feels like something like an exposed garage with heavy lift crane capable of handing a big tank or big knight feels like a more "future proof" method of finishing off this tile. It leaves me room for whatever and also takes advantage of all the new crane/mechanical goodies GW has come out with. The new walkway design for everything, for example, would make for a great landing pad hanging off a corner I could put scouts on.
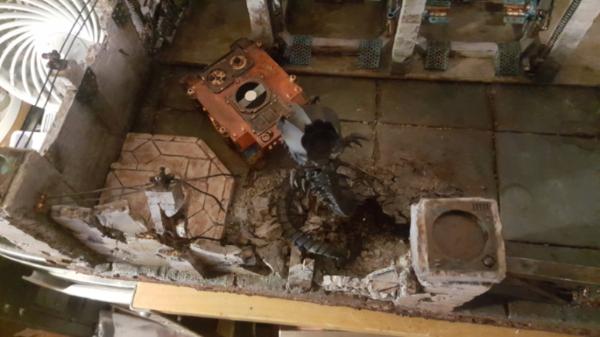
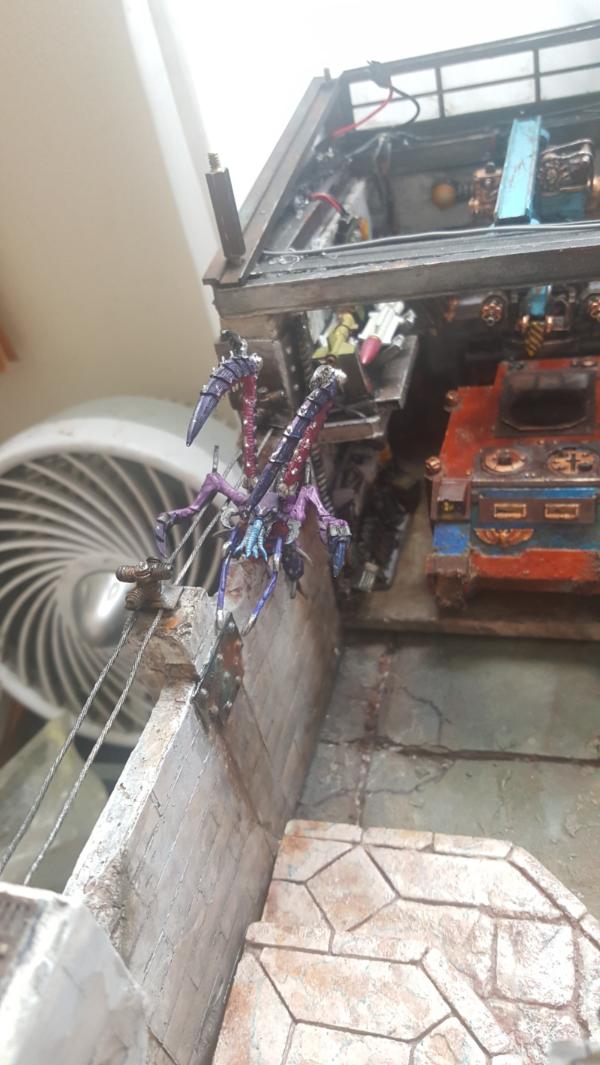
So while I'm not planning on making any of that for a while it seems to be the frontrunner for how this tile will finish off. Thus I need room which means squeeing some marble shring in the corner seems like a bad idea. Furthermore I have this problem:
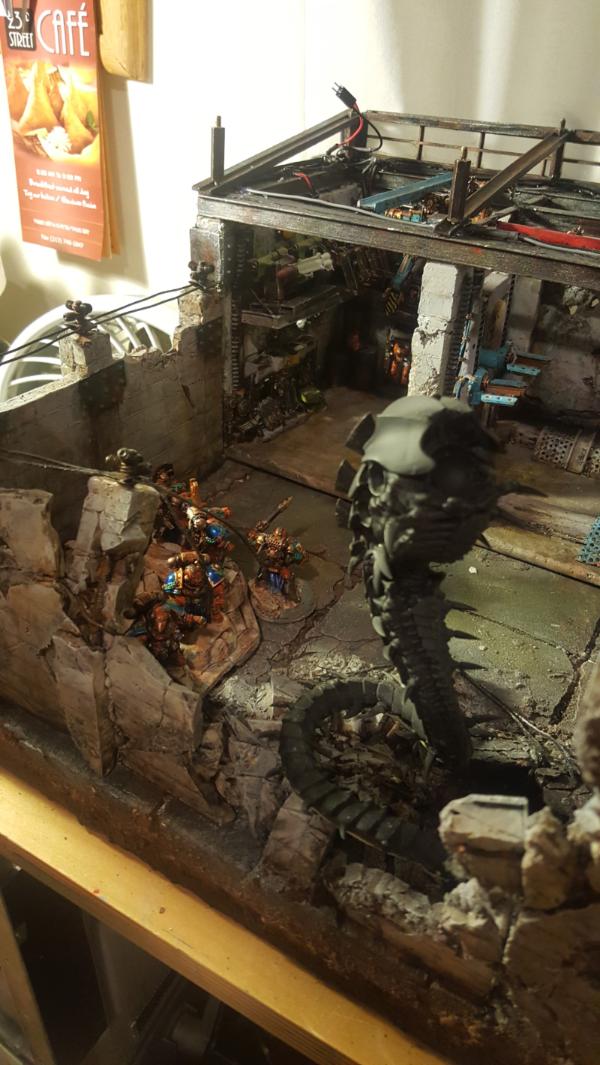
With the flyrant there you just arnt gonna see it. So I had the brainwave of seeing how well it would fit in the left corner instead:
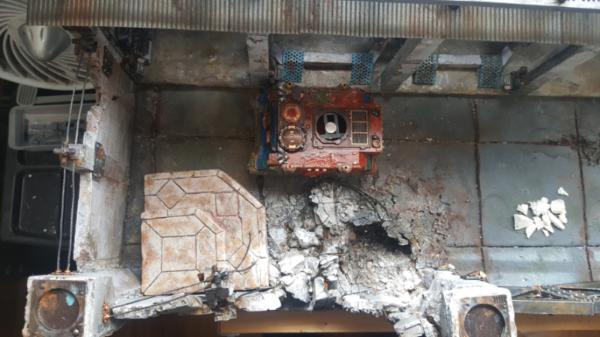
Since there is a giant hole in the wall visibility should be better, and my marins already look like they are fighting something, so they could be shooting at the mawloc. I just gota make sure a tank could still roll past into it's garage but aside from that... could work.
|
|
|
|
|
|
2017/06/02 21:32:56
Subject: Multi-level city terrain, marine v nid bases (5/31: garage side windows, marble shrine placement)
|
|

Crushing Black Templar Crusader Pilot
|
I just love the attention to detail here, it is inspiring!
|
  
Relapse wrote:
Baron, don't forget to talk about the SEALs and Marines you habitually beat up on 2 and 3 at a time, as you PM'd me about.
|
|
|
|
|
2017/06/02 21:54:14
Subject: Multi-level city terrain, marine v nid bases (5/31: garage side windows, marble shrine placement)
|
|
Omnious Orc Shaman
A long time ago in a galaxy far, far, away...
|
Haven't checked in for a while but this is out-friggin-standing work - and agreed that the attention to detail is inspiring 
|
|
|
|
|
|
2017/06/03 23:56:16
Subject: Multi-level city terrain, marine v nid bases (5/31: garage side windows, marble shrine placement)
|
|
Agile Revenant Titan
|
 Ruglud wrote: Ruglud wrote:Haven't checked in for a while but this is out-friggin-standing work - and agreed that the attention to detail is inspiring
Could not agree more 
|
|
|
|
|
|
2017/06/04 00:26:05
Subject: Multi-level city terrain, marine v nid bases (5/31: garage side windows, marble shrine placement)
|
|
Ragin' Ork Dreadnought
Deep in the Outer Boroughs of NYC
|
Additional agreement comment. All of this plus WOW.
|
|
|
|
|
|
2017/06/04 00:33:29
Subject: Multi-level city terrain, marine v nid bases (5/31: garage side windows, marble shrine placement)
|
|
Gargantuan Great Squiggoth
|
Such brilliance, fantastic work sir.
|
|
|
|
|
|
2017/06/04 17:01:18
Subject: Re: Multi-level city terrain, marine v nid bases (5/31: marble shrine placement p2)
|
|
Dakka Veteran
|
Thanks all! I just wanna be done with this tile! Or, well, done for now at least. Not gonna lie.. I need a break.
Anyhoo, lets finish off planning my small marble shrine placement!
I basically convinced myself this was gonna work and be a good idea so I went ahead and chopped off the end to make it fit. Yikes!
With a little squeezing and crumpling in certain places to match where the wall is falling you get this, hooray, the rhino will fit fine.
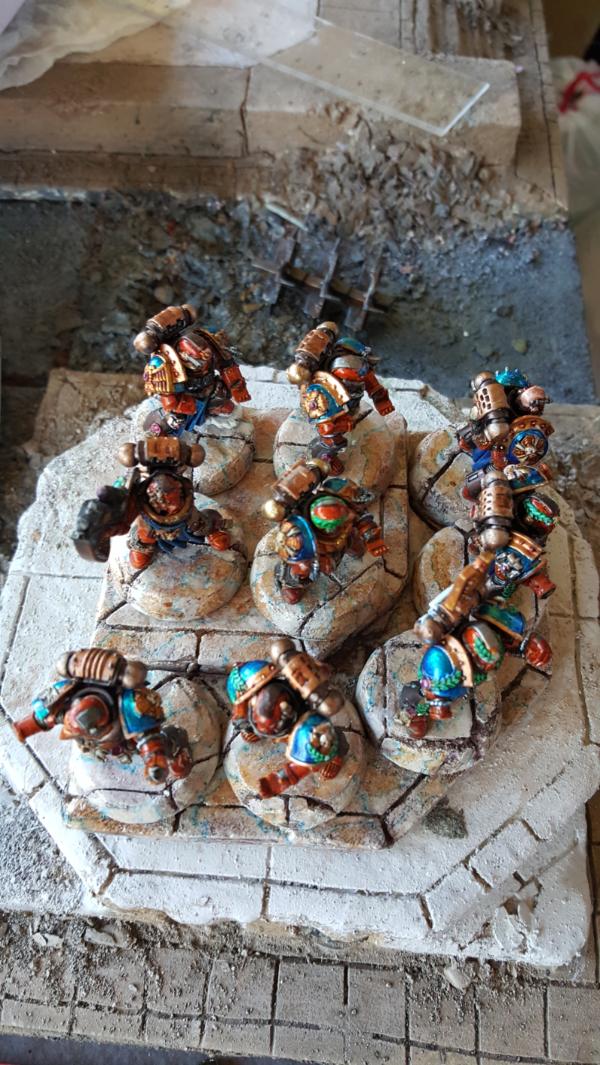
SO thats good, this may actually work. Then I realized I should actually test this WITH the marines .
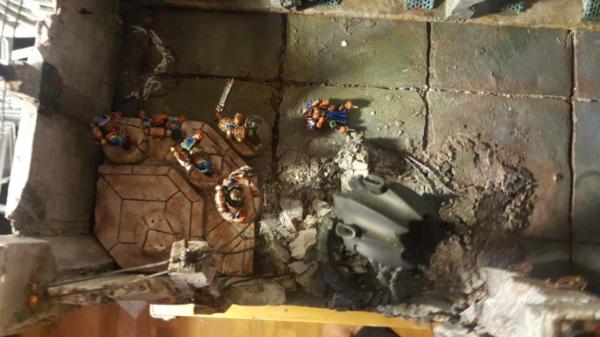
On the one hand, they'll look good! On the other, they arnt.. uh.. all facing the right way. I don't mind pulling some off the bases but the leader on the step in front is not an easy one to either rip off or turn around. So what on earth is he fighting?
At first I thought maybe I have my rippers coming out of the ground there but... that would kinda look wierd near the wall. Then I thought of a lictor!
Okay, thats promising, havnet had one of those yet and they are classic! The metal body sucks but I can use one of my spare warrior bodies to make him a plastic body and keep the metal arms. Downside though is that he's big enough to block physically putting a rhino in that bay (at least, easily) which I intended to do when actually displaying my army. So I need the lictor out of the way but still at that threatening angle. Oh!
BAM. Now thats fun. One lictor a leapin.
This is a good example of where digging yourself in a corner isnt really a bad thing if you can keep your mind flexible enough for new ideas to filter in. Originally I started with a barracks and church on the right side, like so:
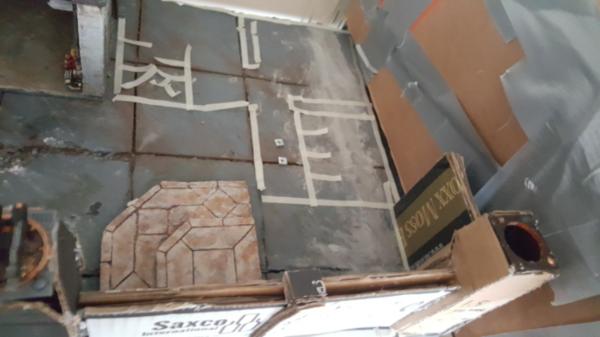
But with all the uncertainty around 8th edition and whats good, I need to keep that space open so once the meta settles I can see whats good (heck, i might be able to pull out my sicaran again. Wouldnt that be fun to be able to have on the display tile?
So now its maybe I dont have marble at all.. but where else would have it if not here.. so I came up with 2 requirements:
1.Must have marble.
2. Marble must make sense.
This led to further requirements as I thought about things
2a. Marble must be visible, cant be blocked by flyrant.
3. Must leave room on the right side for a potential Poryphrion (THEY ARE HUGE) which probably takes up the space of the barracks AND right side shrine combined
4. If not pory, then potential sicaran/other big *thing* of some kind
5. All tanks must be able to enter their bay.
This led to a small shrine on the left side, great! I havent even figured out the shrine part yet but I know it'll work. Ill maybe have some marble "wall of the fallen" on each wall and a small statue where the 10th marine used to be. Maybe I paint up a stone celestine? who knows, it'll look good
But now we have a new wrinkle:
6. marines cant all face the trygon
okay, well, uh,, have something else attack! and on it goes. Not gonna lie, these "brainwaves" take time, most of this thinking and planning has occured over days where I fiddle with something, think about it, then move onto something else while the brain stews over whether thats a good solution. So you guys are getting the compressed version, but by having this time and keeping the plan flexible (the dream is still there of a marble shrine of SOME kind but the precise look is flexible) its all coming together in ways probably better than It could ahve been otherwise. After all, i can STILL make a barracks if I wanted too, thats still around.
The gate, for example, was a similar process.
1. Fill in the space
2. Gate must be see through for maximal viewing angles.
3. The main gate square tubing structure needs to be square, looks better that way.
4. Gate needs to be able to hinge well
okay cool now the hinge looks good but wait, what are the marines just gonna push this thing open? no.. so now..
5. Gate needs to open
and so on.
|
|
This message was edited 2 times. Last update was at 2017/06/04 17:03:33
|
|
|
|
|
2017/06/04 17:13:14
Subject: Multi-level city terrain, marine v nid bases (5/31: marble shrine placement p2)
|
|
Krazed Killa Kan
|
UHHHH.... WOW...
|
|
|
|
|
2017/06/04 17:16:18
Subject: Multi-level city terrain, marine v nid bases (5/31: marble shrine placement p2)
|
|
Dakka Veteran
|
Love this thread, the buildings and there interiors are truly excellent  might steal the idea of Lego casting for walls, turns out a really nice effect.
|
|
|
|
|
2017/06/05 21:30:21
Subject: Re: Multi-level city terrain, marine v nid bases (5/31: marble shrine marines corrected)
|
|
Dakka Veteran
|
Thanks! It looks.. awesomely realistic especially when its all cracked and aged. Heavy tho buuttt the weight is worth it.
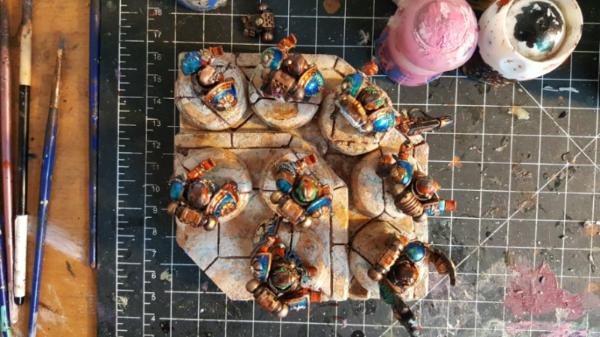
So now that I'm set on a placement for my marble shrine:
(gonna be so fun!)
its time to actually repose the marines to fight their lictor/tyrgon enemies.
The original posing was more open, with them facing a broader specgrum of directions:
Which doesnt really work here, so i had to.. very carefully try to pull them off their bases and figure out how to get them to face the right way.

it took a bit, and I had to greenstuff in some holes and patch my marble but that didnt turn out to take TOO much effort. I was afraid I'd never get the marble to match right.
Oh hey, look at that, the trygon is painted. Hmm... wonder what you're gonna see tomorrow?
|
|
|
|
|
|
2017/06/07 18:42:48
Subject: Re: Multi-level city terrain, marine v nid bases (6/7: garage tile, trygon attacks complete!)
|
|
Dakka Veteran
|
|
|
This message was edited 2 times. Last update was at 2017/06/07 18:43:22
|
|
|
|
|
2017/06/08 18:13:52
Subject: Re: Multi-level city terrain, marine v nid bases (6/8: garage tile, flyrant attacks legs done)
|
|
Dakka Veteran
|
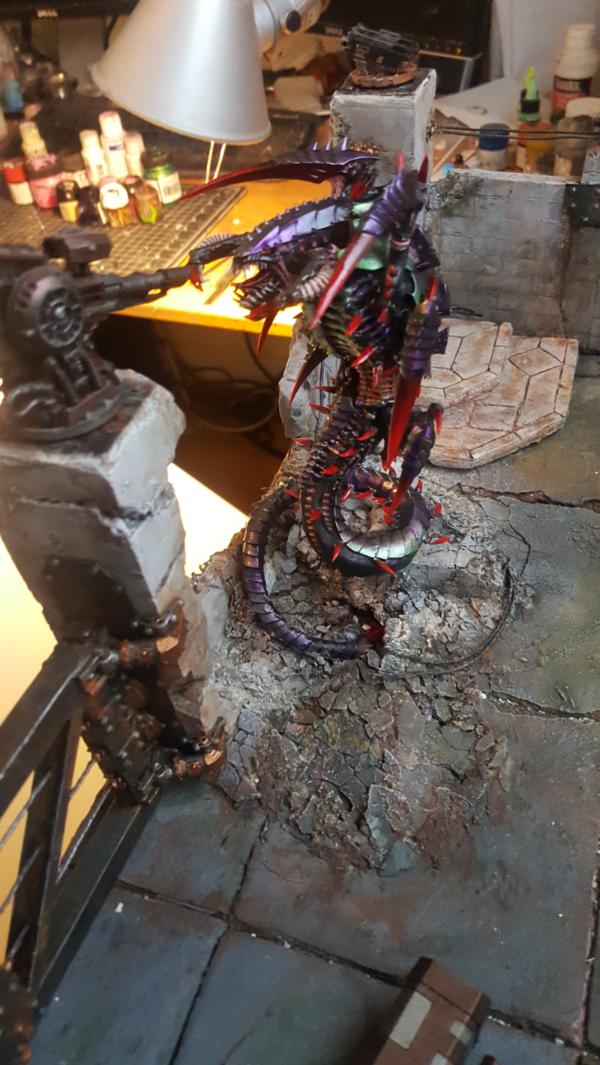
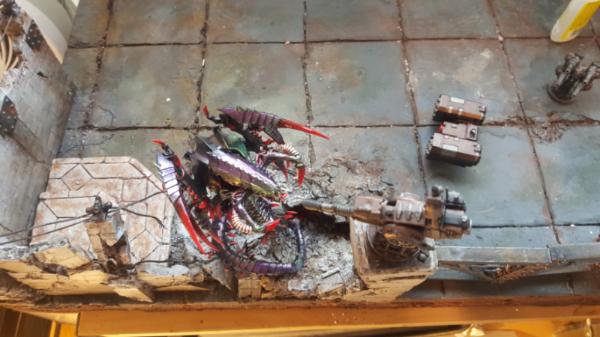
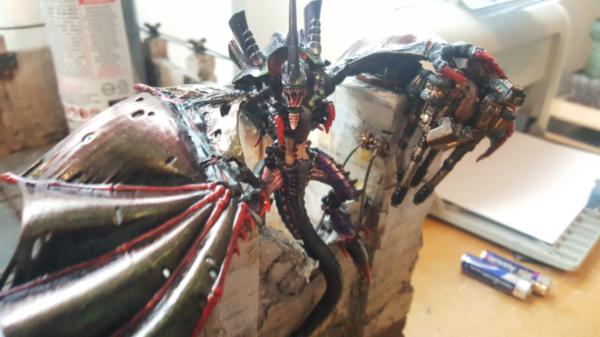
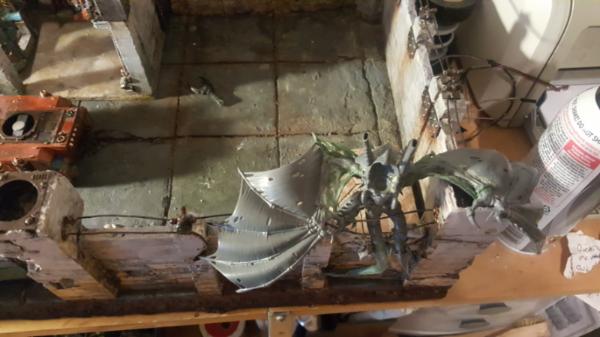
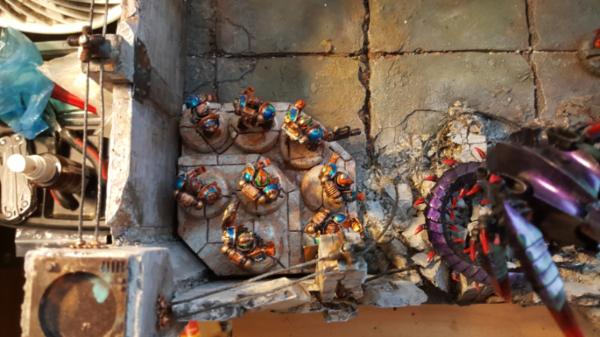
Small update today. The uh, trygon took a weekend to finish off so you guys are rapidly catching up to the present
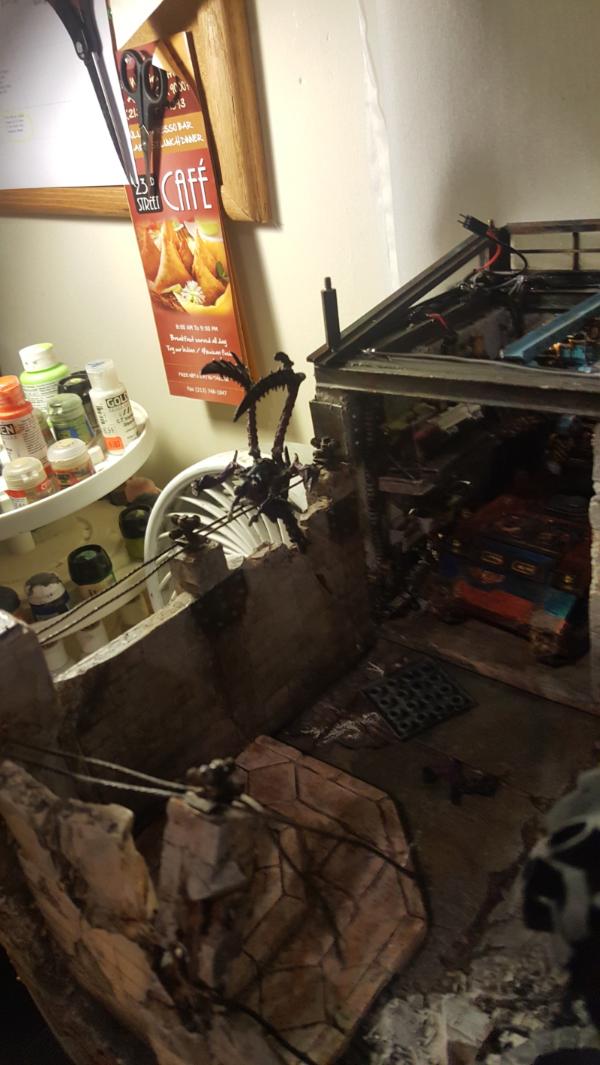
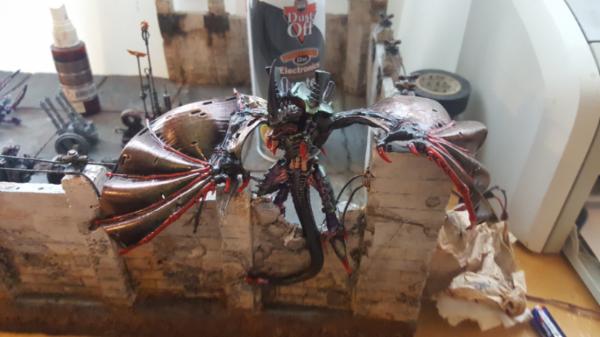
Anyhoo next up is the flyrant. Since the wings do hang over the edge for now I'm just going to keep his body and legs seperate, for potential ease of transport. So legs first!

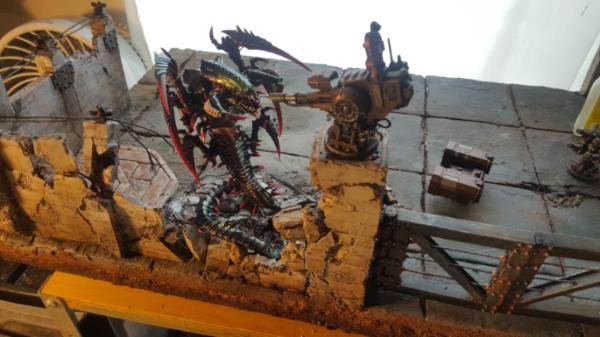
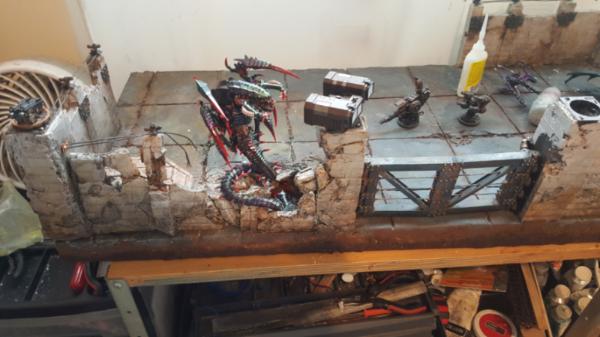
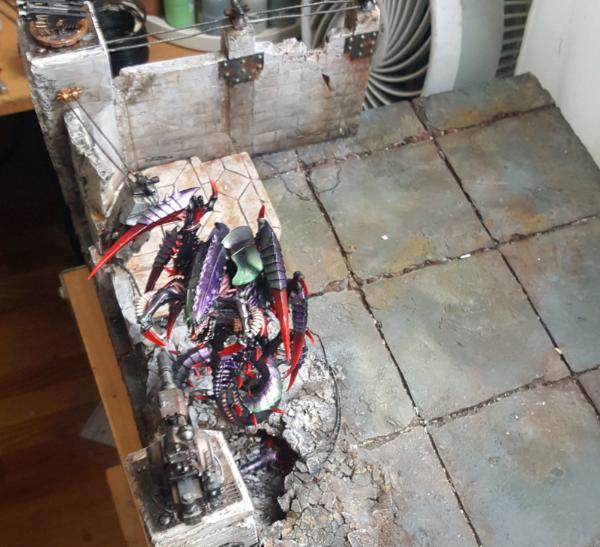
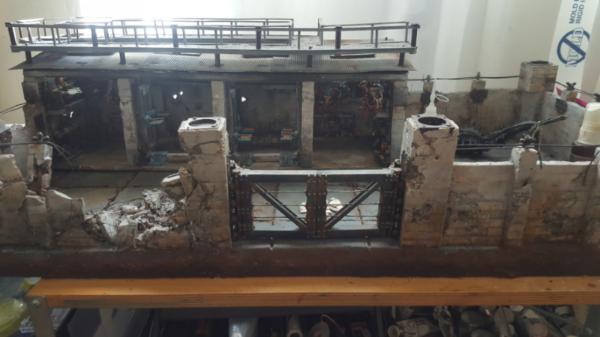
You also get an updated "overview" with my theoretical turrets in place as well and facing their targets:
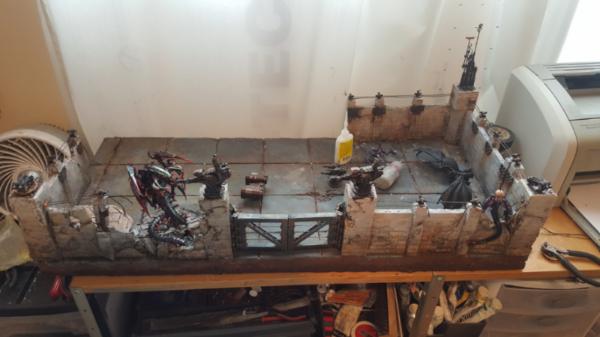
Right now my one concern is that the bolter turrets are kinda... meh. Compared to the Icarus lascannon turrets which look AWESOME its just kinda lame. I have one quad cannon but I'd need 2 and they dont seem to be up on ebay much anymore. Hm.
|
|
|
|
|
|
2017/06/12 21:00:23
Subject: Re: Multi-level city terrain, marine v nid bases (6/12: garage tile, flyrant attacks done)
|
|
Dakka Veteran
|
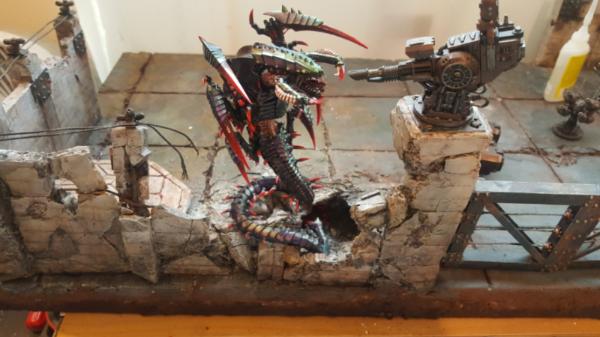
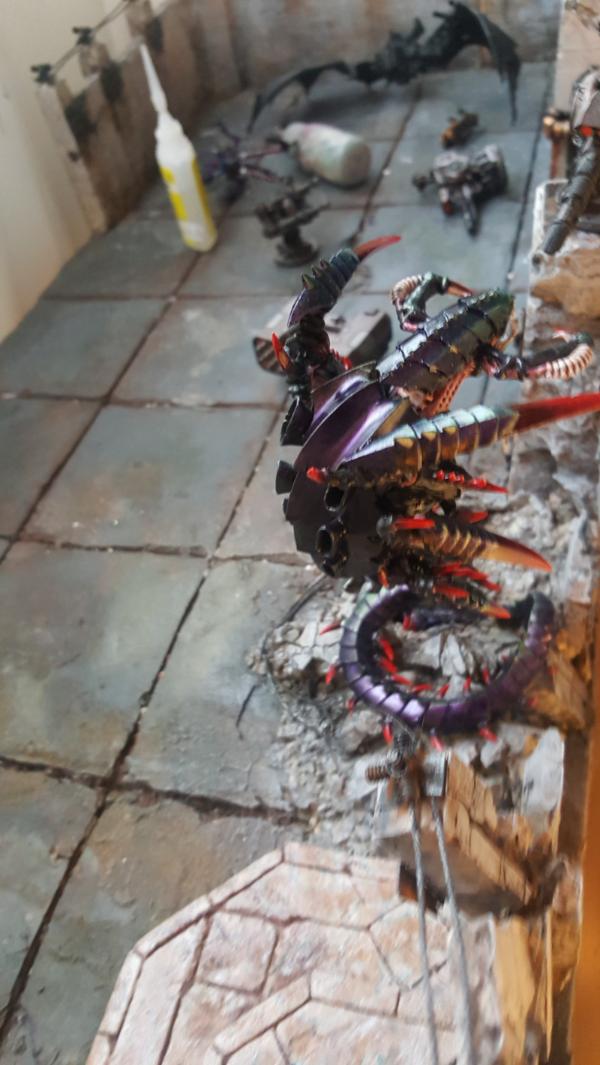
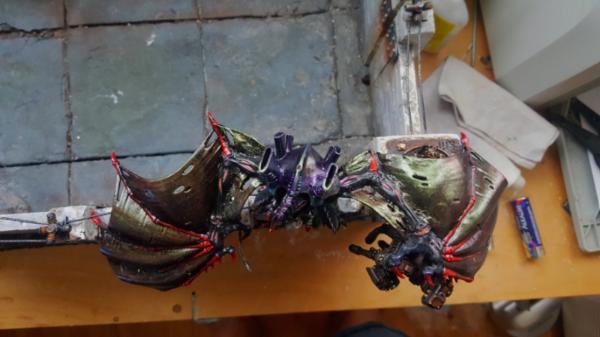
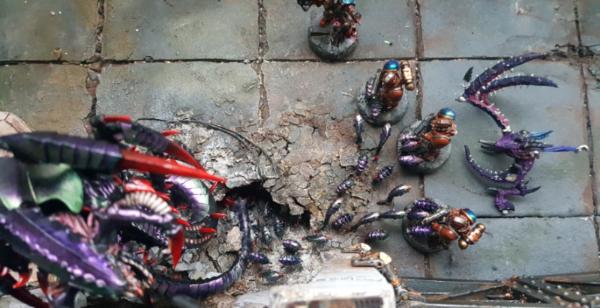
Flyrant is done! Sorry for the delay, I get so caught up working on weekends I forget to actually post things. Anyhoo with the flyrant done we have 3 main things left for this round of progress:
1. Ripper attacks out of the hole.
2. Turrets, repainting all of them with copper instead of leadbelcher and destroying 2 of them
3. Adding a few extra lights to the garage and bolting it down to the tile.
Then over the summer more slowly my next "big" projects will be:
1. Clear Acrylic anti-dust/anti-earthquake housing for both tiles
2. Display/Transport cart to hold 100 pounds of tile
3. Khan bike
4. a pair of twin linked devourers for the flyrant
Finally the progress foal in the fall pre- LVO:
4. 8th edition army editions
5. Some kind of industrial super crane construct adjacent to the garage, capable of handling a variety of "big" toys as armies evolve.
Getting down to the nuts and bolts now for stage 1! Its exciting.
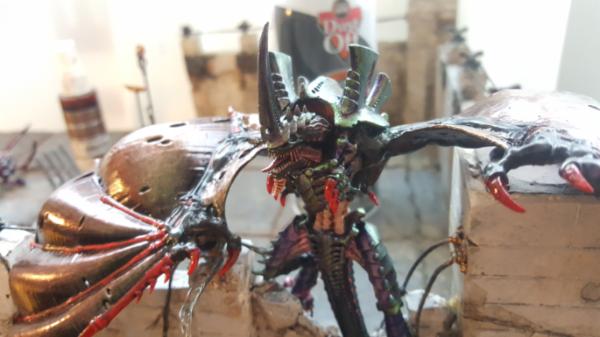
Man the green brown shift is a fun look. Looks really organic in person.

|
|
|
|
|
|
2017/06/13 18:45:44
Subject: Re: Multi-level city terrain, marine v nid bases (6/13: garage tile,attack of the rippers )
|
|
Dakka Veteran
|
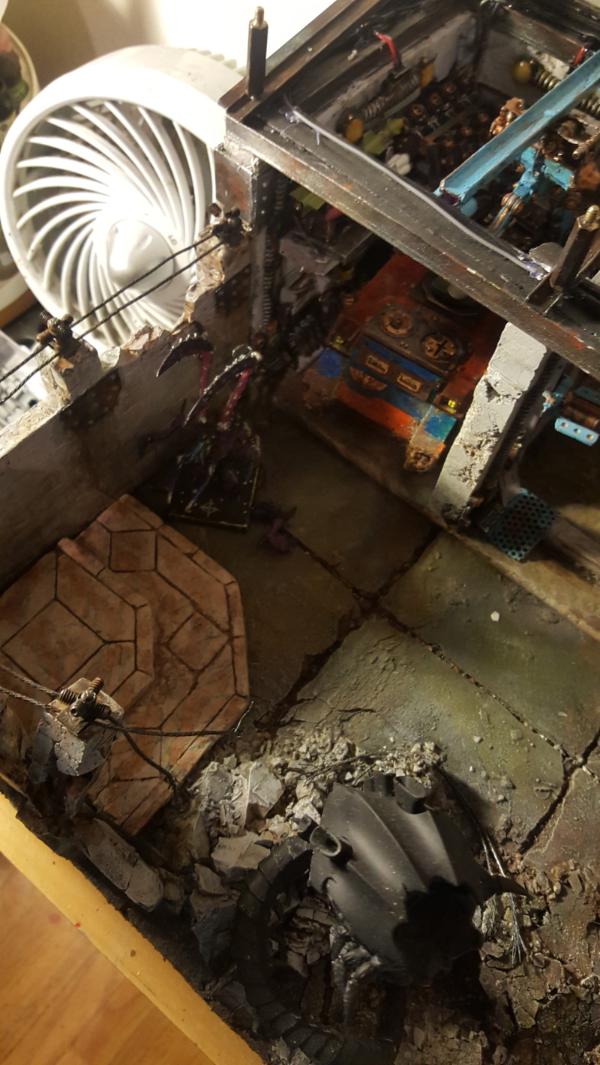
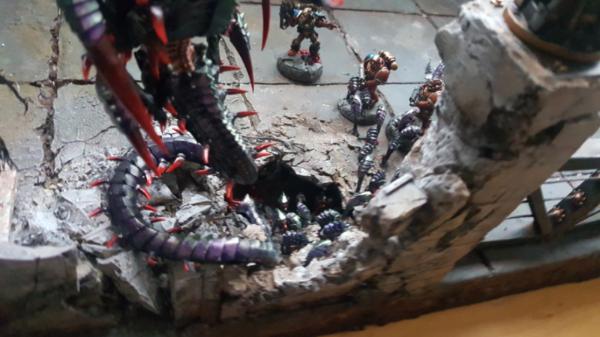
Time to plant me some rippers! Turns out this was pretty tough to do because of the trygon bits getting in the way. the backmost set were the hardest since the ground is... no longer cork but very very solid. So I had to cut off the pinning wires and very slowly glue them in place. Gorilla glue was once again my friend here because the rougher terrain meant that as the glue expanded I had more opportunities for it to stick to the ripper base. It meant I had a bit of paint up cleaning to do but its so dark back there it wasnt a big deal to make formerly black rocks black again.
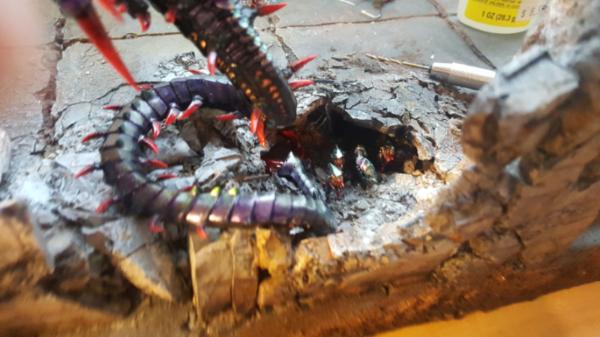
Once I got past that initial batch it got a lot easier because I could just drill a hole for the pin. I cut up their bases to be more rocky and less obvious and it worked pretty well.
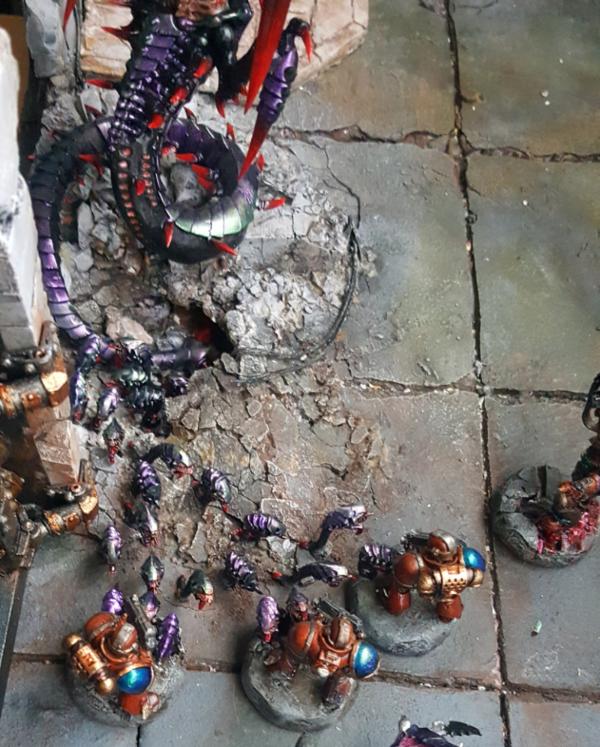
Now conveniently I can finally use another set of marine bases! Its alll coming together!
Some areas might need a bit more touchup green, especially on the ripper bases. Just so the purple-green angle is more consistent across the board.
|
|
This message was edited 1 time. Last update was at 2017/06/13 18:46:03
|
|
|
|
|
2017/06/14 21:57:15
Subject: Re: Multi-level city terrain, marine v nid bases (6/13: garage tile, wrecking turrets )
|
|
Dakka Veteran
|
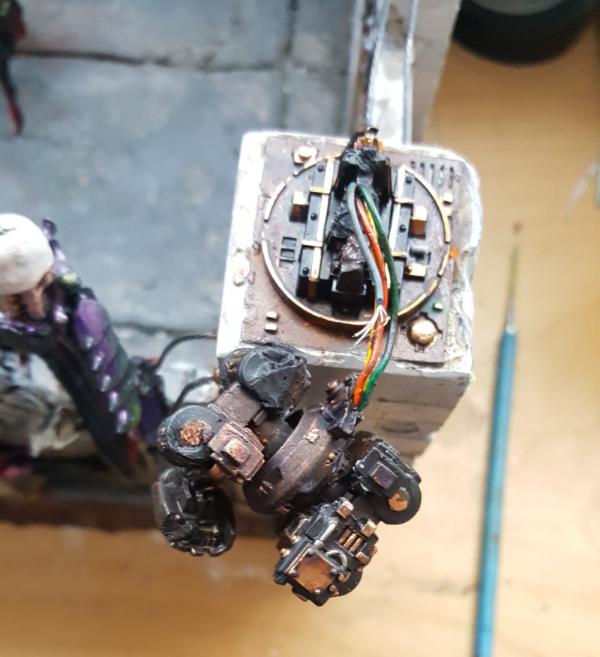
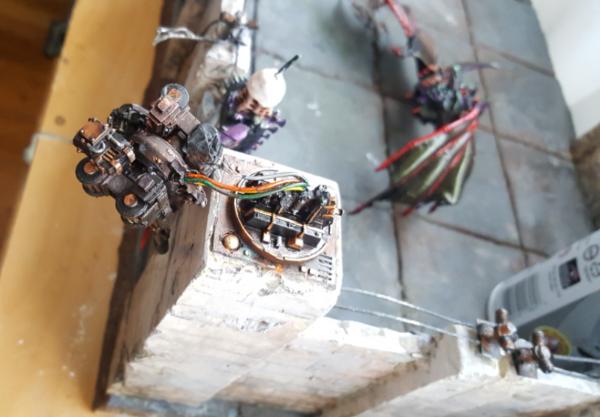
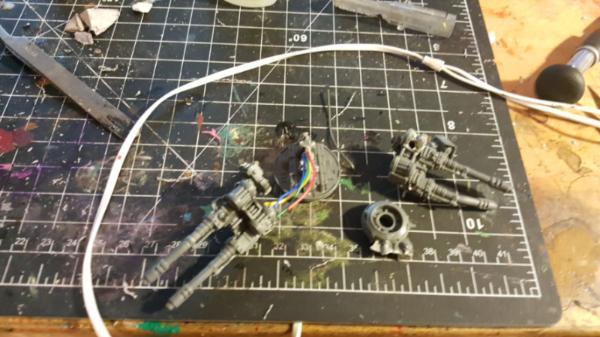
Just munching down the list at thsi point, now its time to wreck me some turrets.
First up is repainting them, gotta make that leadbelcher into copper!
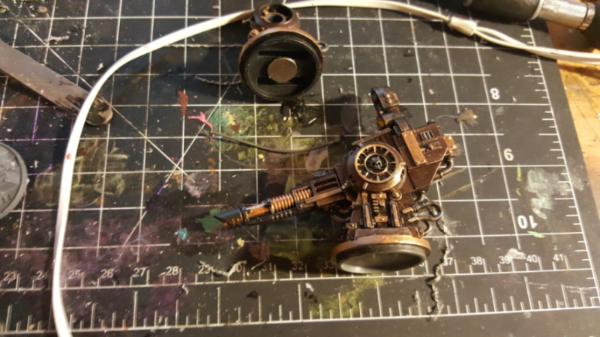
Next is the flyrant wreck. Now since some of the left wing is curled around and pushing past the tower I thoguht it would look best for it to be mid-ripping off the turret. So when the flyurant wasnt there it would be dangling by just a few wires kinda deal.
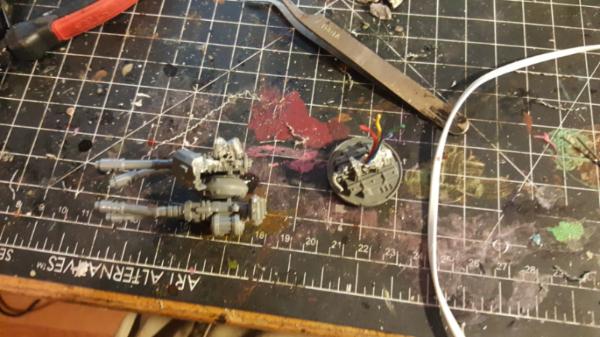
Of course, gotta bend up some barrels too! Good ole soldering iron to the rescue again.
|
|
|
|
|
|
2017/06/16 20:48:42
Subject: Re: Multi-level city terrain, marine v nid bases (6/16: garage tile, wrecked turrets done )
|
|
Dakka Veteran
|
|
|
|
|
|
|
2017/06/17 08:16:38
Subject: Re: Multi-level city terrain, marine v nid bases (6/16: garage tile, wrecked turrets done )
|
|

Regular Dakkanaut
|
WWOOWW 
|
|
|
|
|
|
|
|