I've teased you for long enough... proper update this time!
“Mars tugs at the human imagination like no other planet." - John Noble Wilford Hello again,
It may not come as a shock to any of you, but I have a big fondness for terrain. I once began making cities out of the boxes the games came in piling little
unit boxes, on top of
tank boxes on top of
game boxes to make towering sky multi-coloured sky-scrapers. Later came the much-vaunted
Necromunda card terrain*, and then later the
40K expansion of that, including the
Firebase, the
Bastion, the
Bunker and, sadly, the one I never managed to get, the
Command Tower. These were all excellent replacements for my tank box towers, but even they could be considered limited, especially the Necromunda terrain which, whilst impressive, didn't really look like buildings. After all, they were all mostly flat open platforms stacked on top of one another.
[*That appears to be 3 sets of Necromunda terrain, and it already looks like too much. I have 5 sets. Imagine what that looks like all at once...  ]
] Then
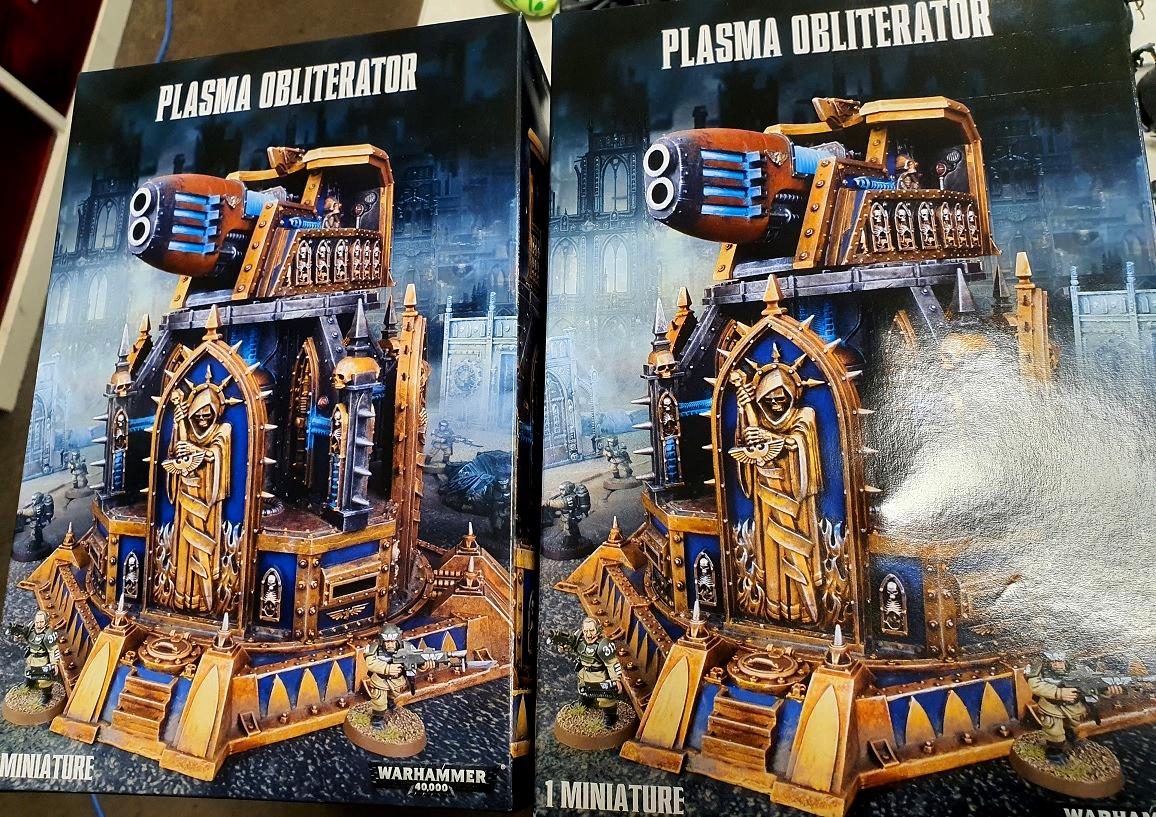
GW went and released Cities of Death, an expansion for Warhammer
40k that built upon the Cityfight rules from ages ago. With this book came the release of plastic modular multi-part buildings -
GW's first real foray into this sort of thing. Part of that release was the massive
Imperial City box, which was more than twice the size of the later Imperial Sector box.
I bought two.

These kits were, by today's comparisons, quite crude (and we'll see an example of this a bit later). The sprues were heavy as hell, especially the sprue with all the ultra-thick floor pieces. Everything had mould-lines up the wazoo and you spend as much time cleaning them as you did building them. They were difficult to work with, requiring a lot of shaving and cutting to make things fit correctly, and you always had too many ruined bits when all I wanted to make was intact buildings.
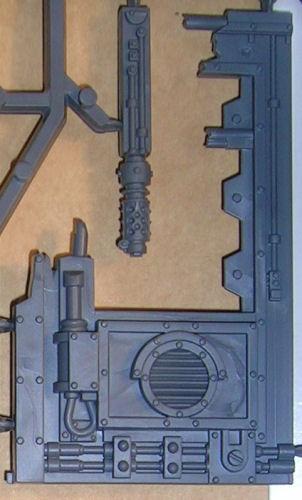
Cities of Death kits were all based around 3" high panels like
this one. More specifically, the entire
CoD system was actually built around this
singular strut, and it didn't matter which
wall panel you chose, they
all had one of those struts as part of their make-up. Even the
ruined pieces had partial struts as part of their design. It helped to space everything out, and if you look at the various wall panels you'll see that they had two little nubs, one about a 3rd of the way down, and another right at the bottom. These were the only guides when it came to sticking walls together. You lathered them with glue, held them together and hoped for the best.
Most of the time what it meant is that you had to start with all the
corners, as it made for a more solid starting point. From there you could
add things on. Inside corners were very difficult, as you'd have to shave off the rivets that were on the struts to get a flush connection, and it never lined up perfectly as it wasn't designed in the same way as the modern stuff.
Then there were the floors. The floors were a whole other story. Making larger floors was tough, but thankfully those single strut pieces slotted between two sets of floors perfectly, allowing you to create
larger floors that were
braced quite well.
I can point out a lot of the flaws this building system had, but the truth is they were fantastic, however frustrating and time-consuming they were to put together. You could do all sorts of wonderful things, and the creative freedom they allowed made for a far more varied table than what we were used to. Plus actual walls! That was a nice change.
So many'a moon ago, before the first version of Apocalypse came out, our group wanted to do a big battle. I spent about a week making a city out of cardboard. It was glorious. The game was enormous, unwieldy and played on a giant 6x8 table that my friend built, textured and painted. When we decided to do it again, this time we had the Cities of Death buildings, so I went
wild.
One of the pieces I did was designed as a manufactorum that had been hit by shelling, or blown up from the inside. It was an enormous building that was split into several pieces, and when properly laid out it takes up a fair amount of space (as you'll see once my Mars board is complete). I am painting it now because we have just gotten back into
40K and each time my group has come over so far I have presented them with a completely
new and
finished board. Sure, the armies might not be painted, but the terrain is either professionally made or completed by me, so that it looks good and complete.
My next board is a Martian board, and this requires the painting of my largest
CoD building, the aforementioned exploded multi-piece manufactorum. So with that preamble out of the way, let's get into it!
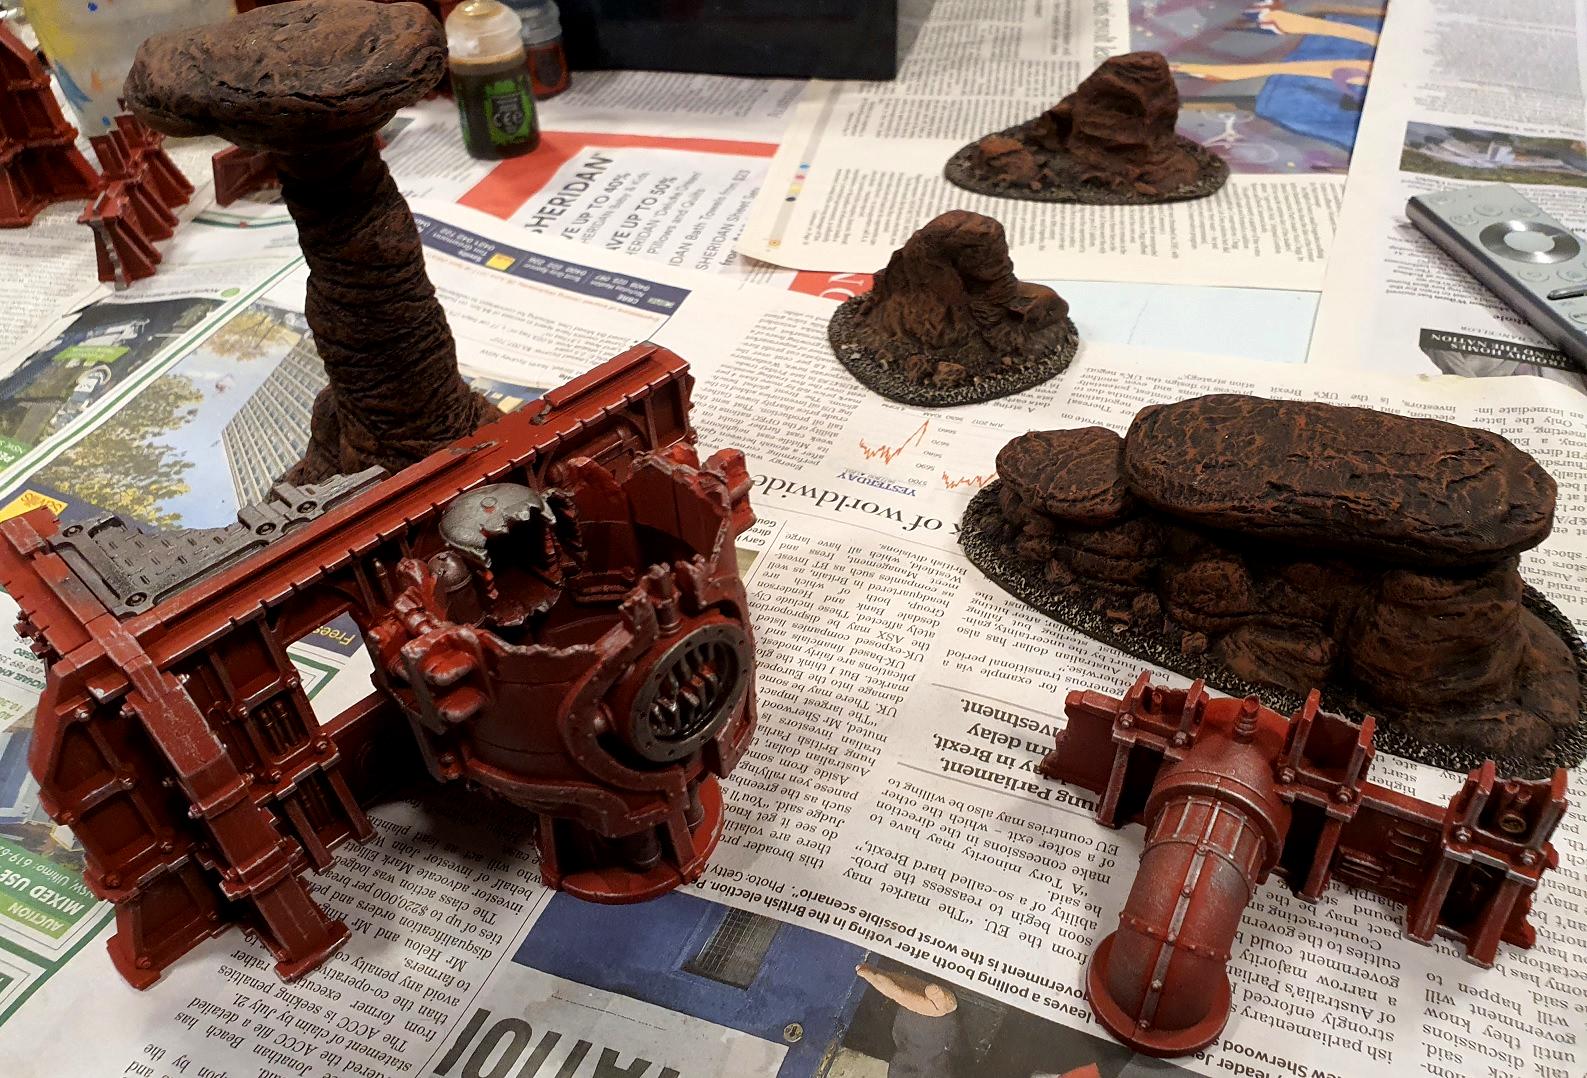
Small Ruin This is just a basic piece that isn't part of the larger building. Put a couple of the manafactorum's pipes onto this. How the piles stayed there when the wall collapsed I guess we'll never know.

Sorry for the blurry photo on that one...
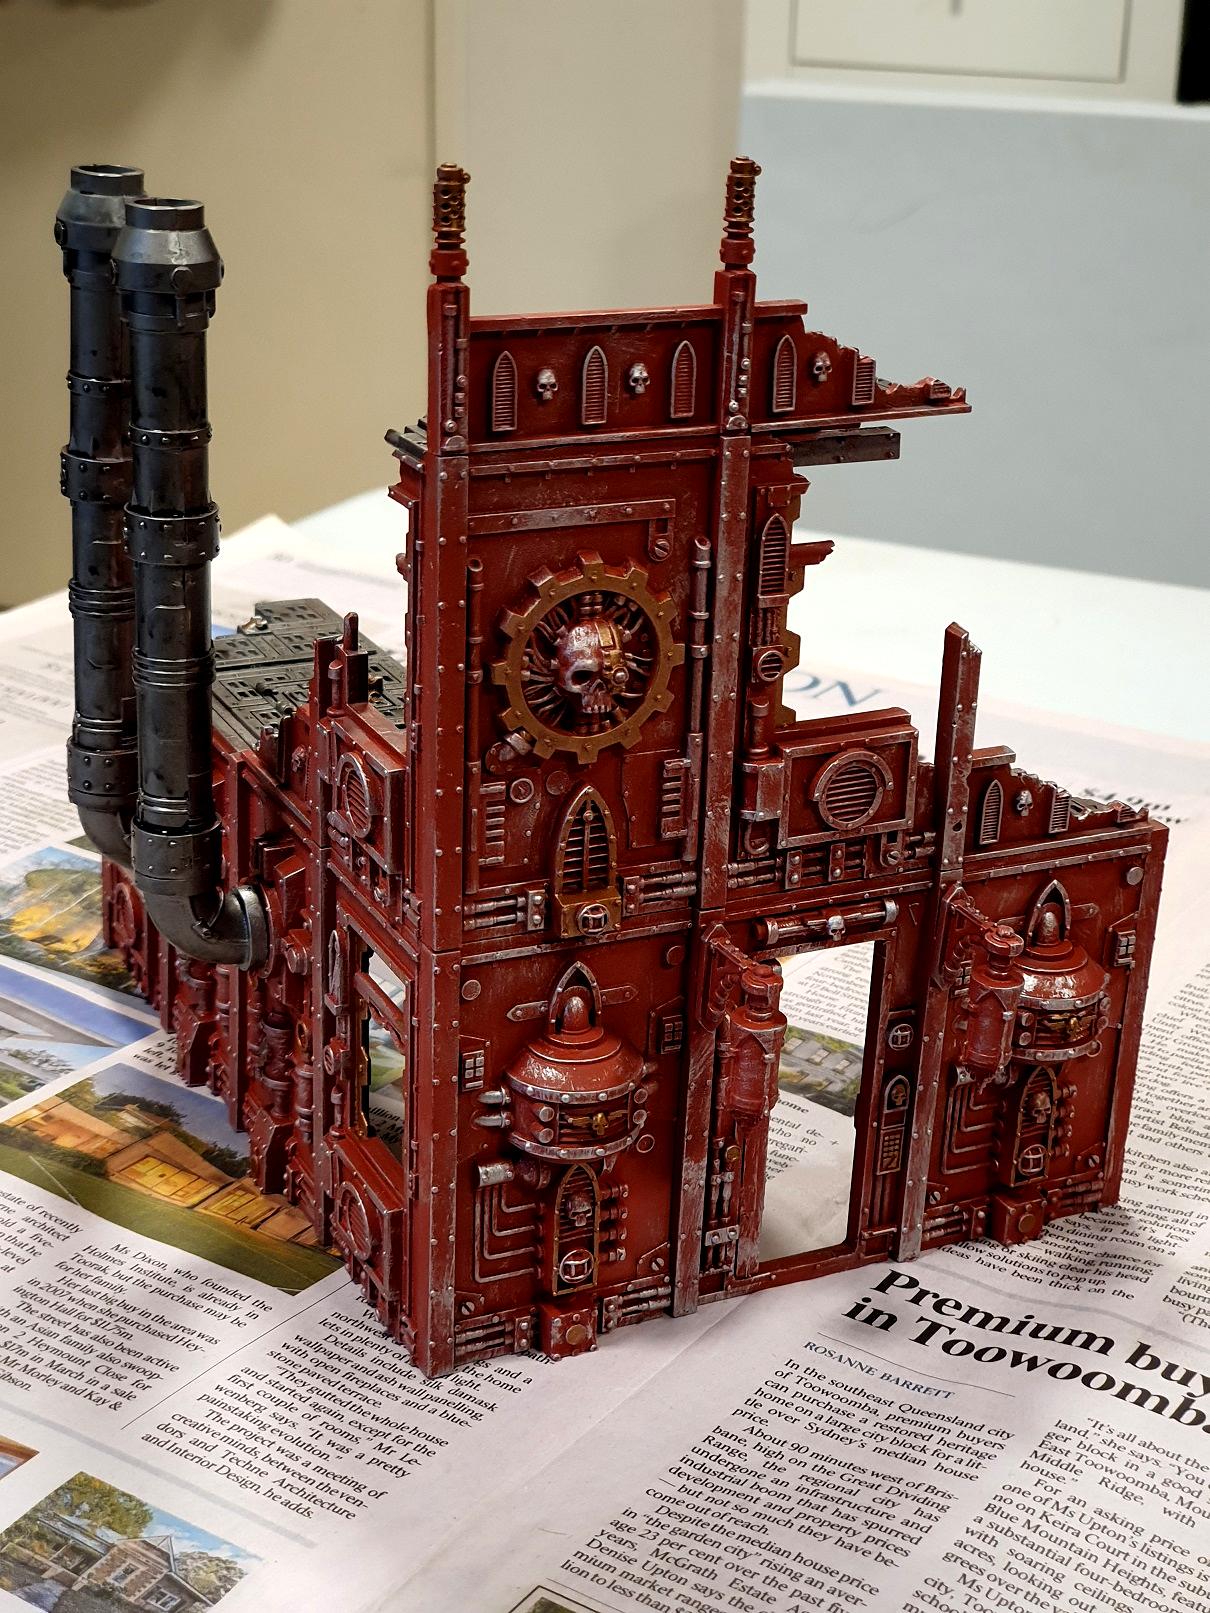
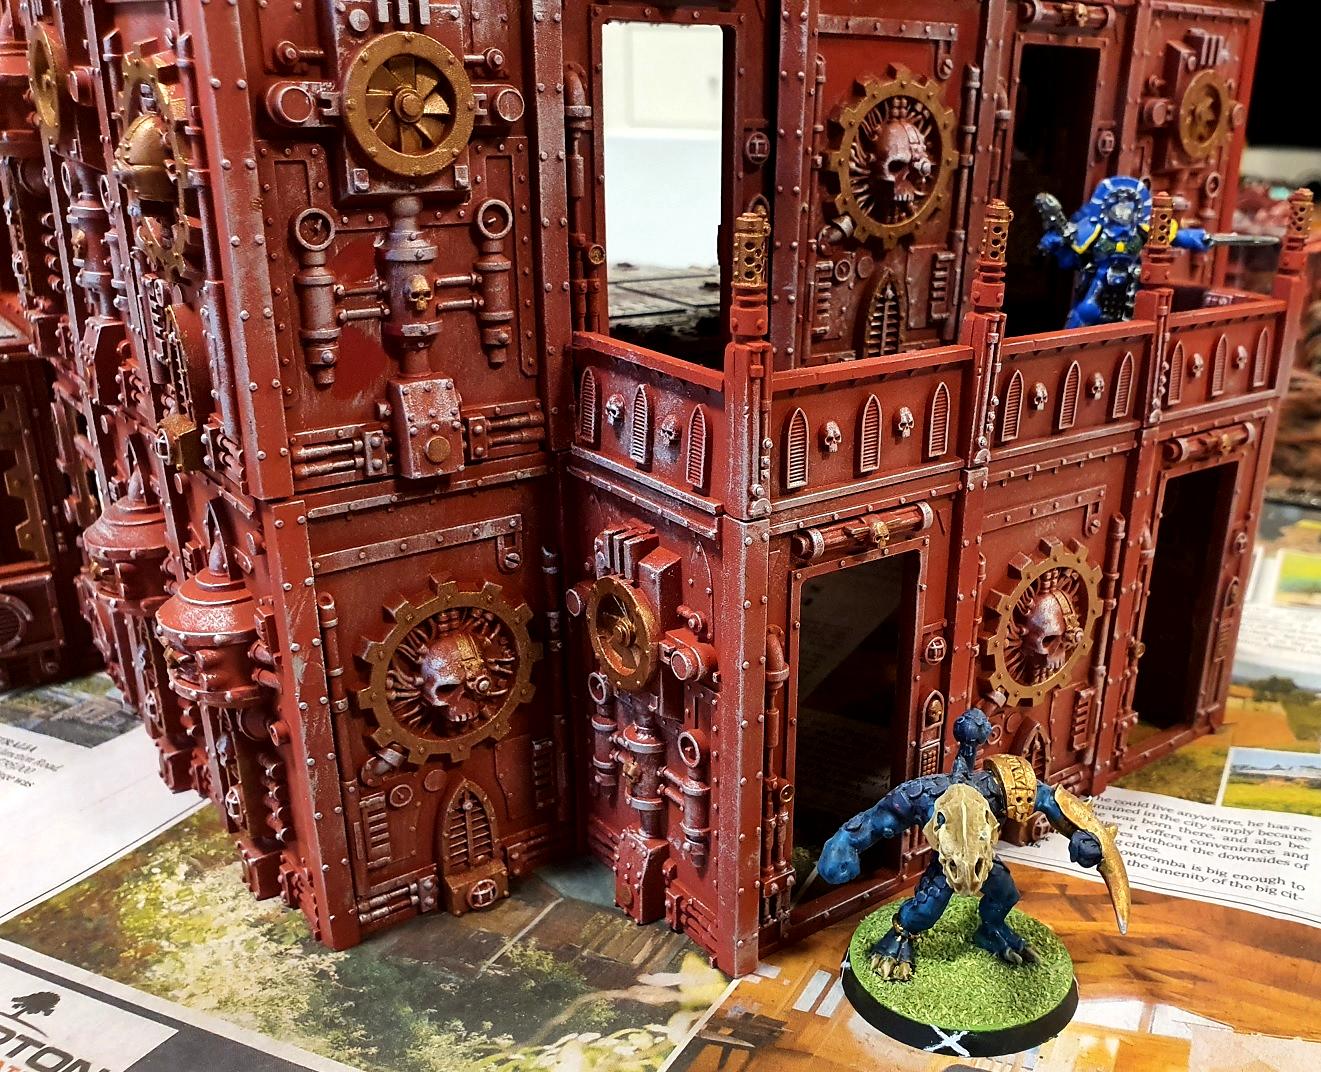
 The Red Wall
 Wanted this one to be a big flat ruin that blocked a lot of
LOS.
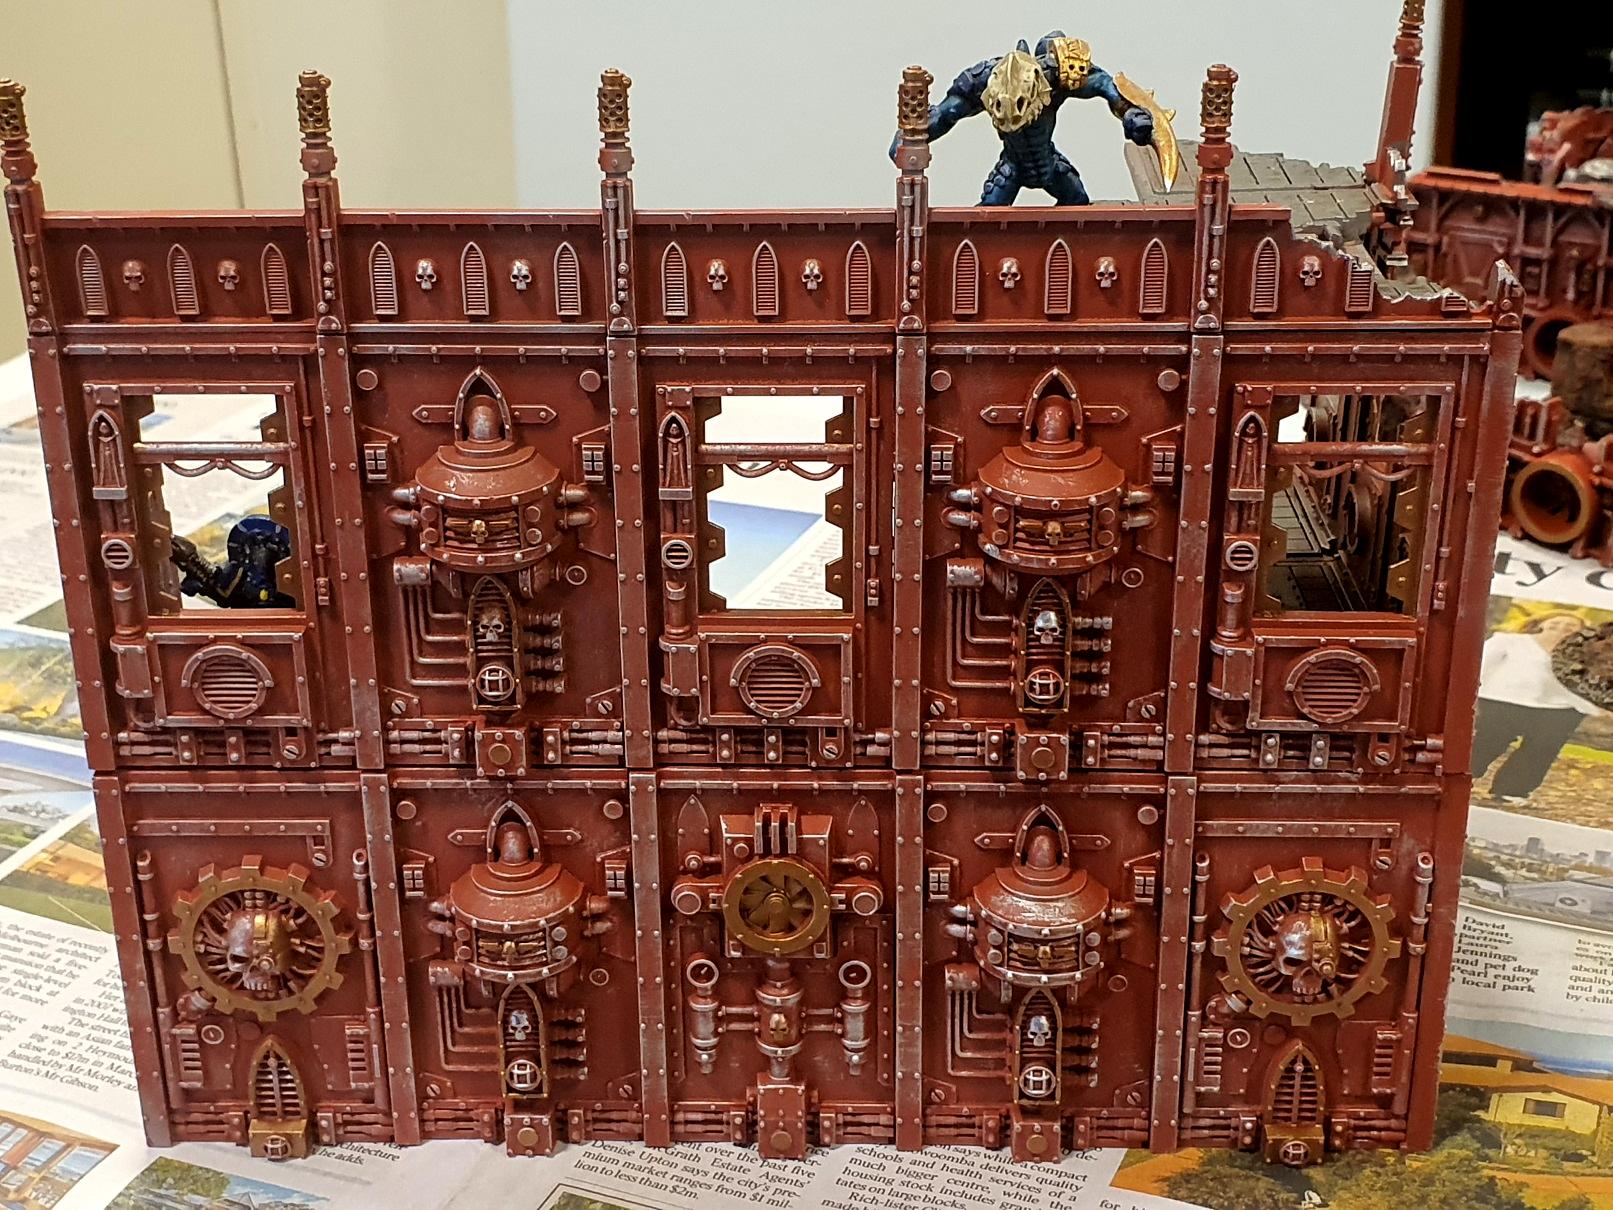
And who is that hiding in the window? And he brought a big lizardy friend with him.
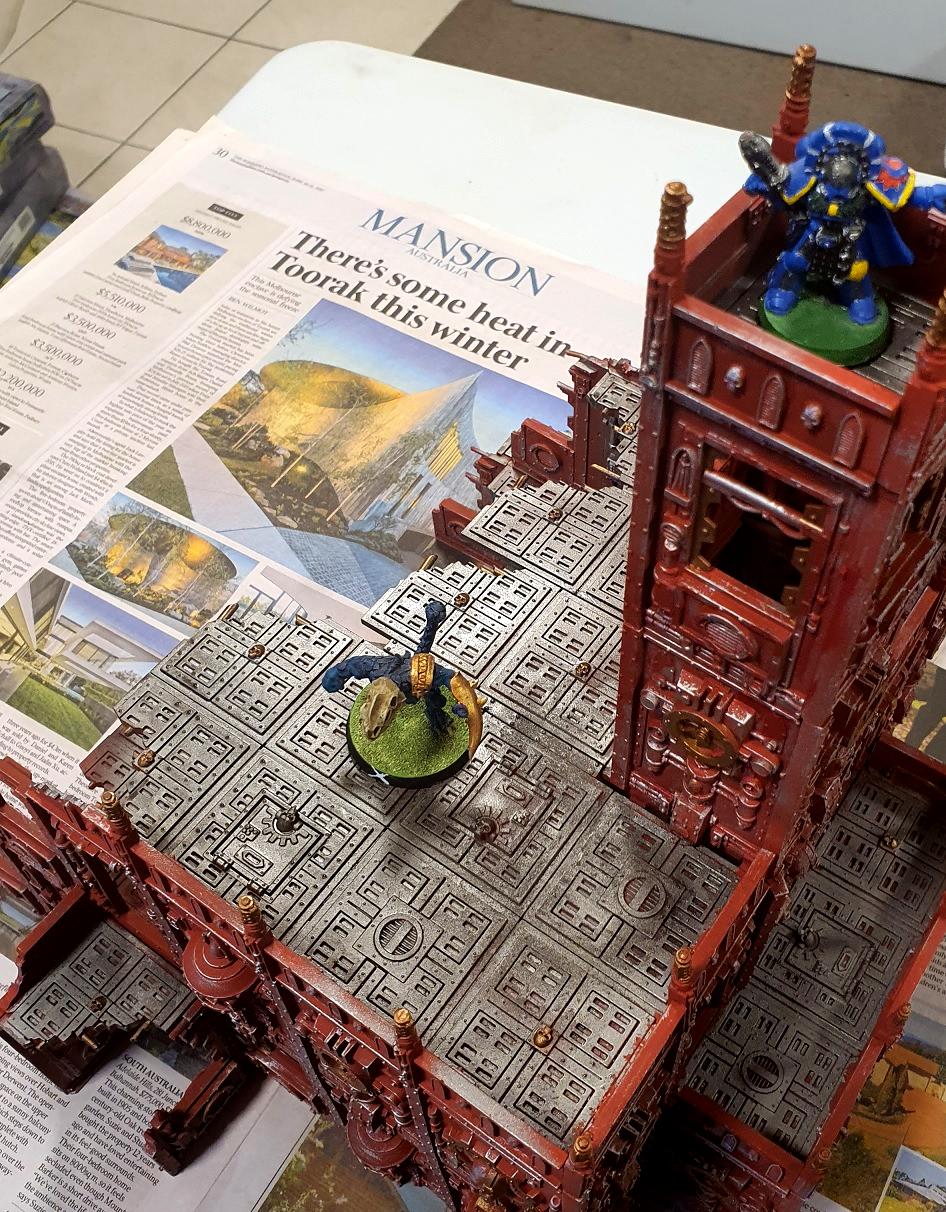
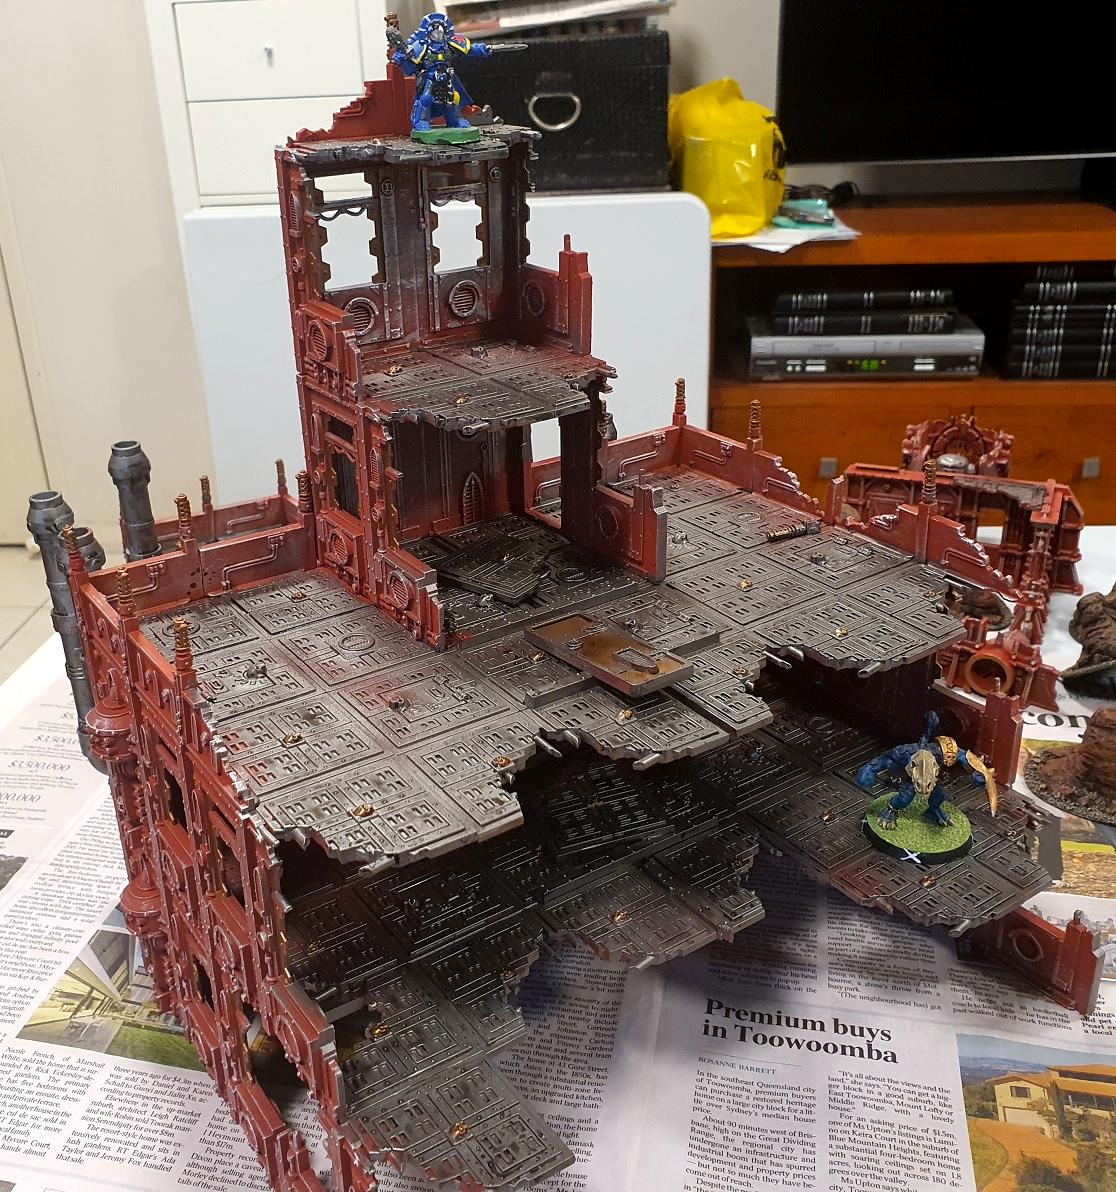
Preacher's Tower Now you already saw the smaller more ruined version of this piece in my
sneak peek. This one goes on the other side of the big building, and I imagined it as a place where a Tech-Priest would recite messages who his adoring non-Servitor workforce. Or even his Servitor workforce. Or whomever. Tech-Priests are weird and do what they want.

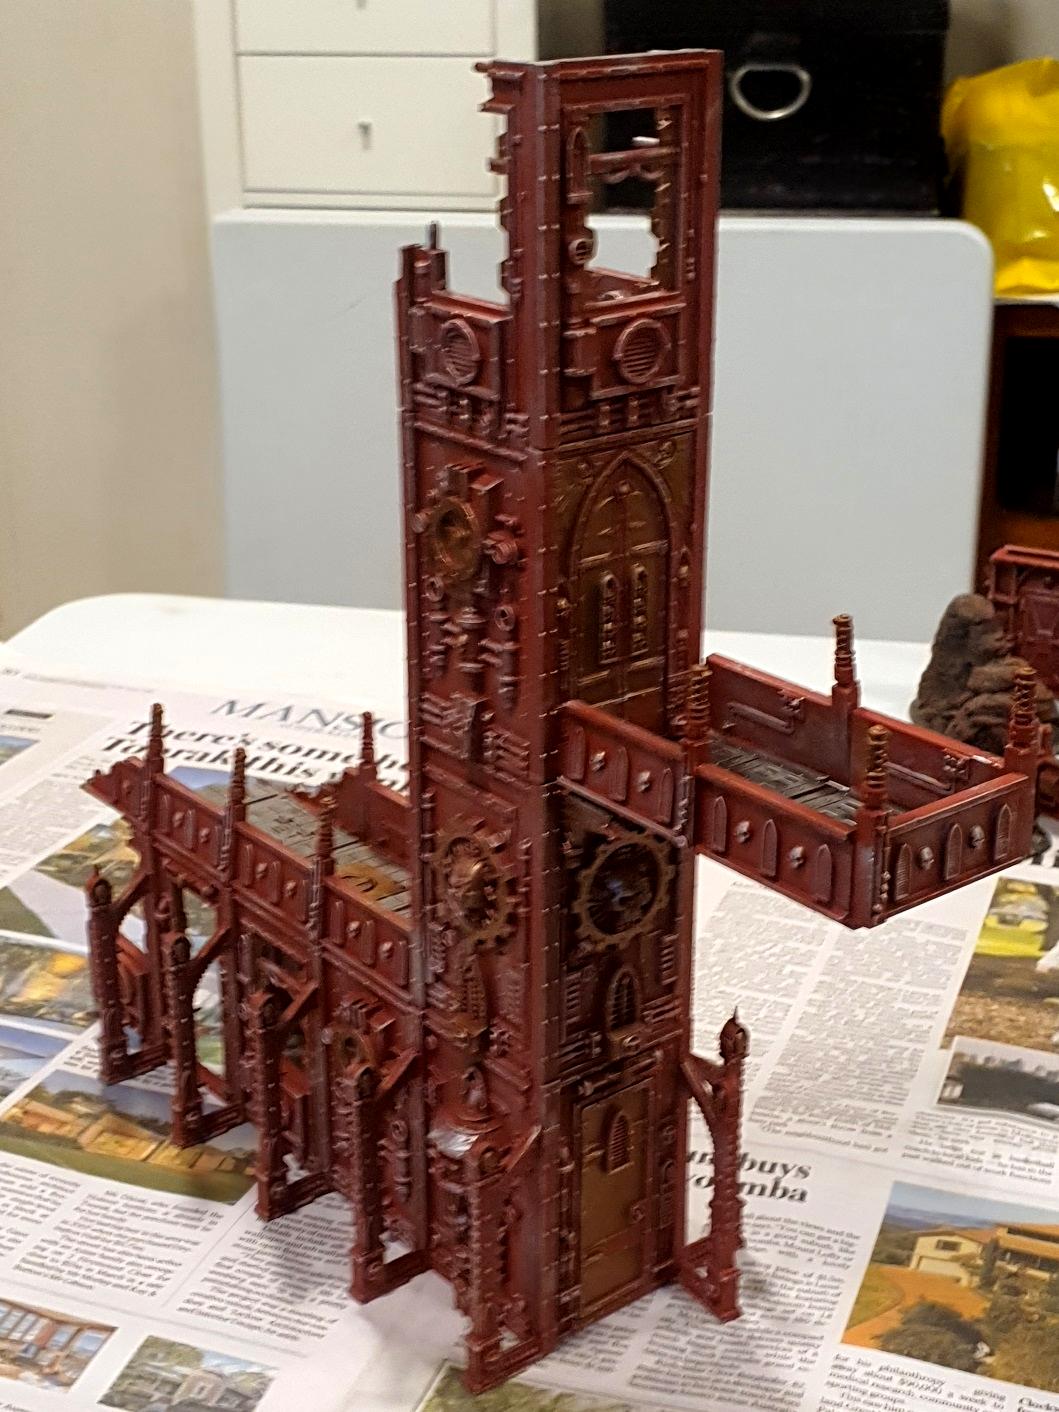
Again, sorry for the blur...
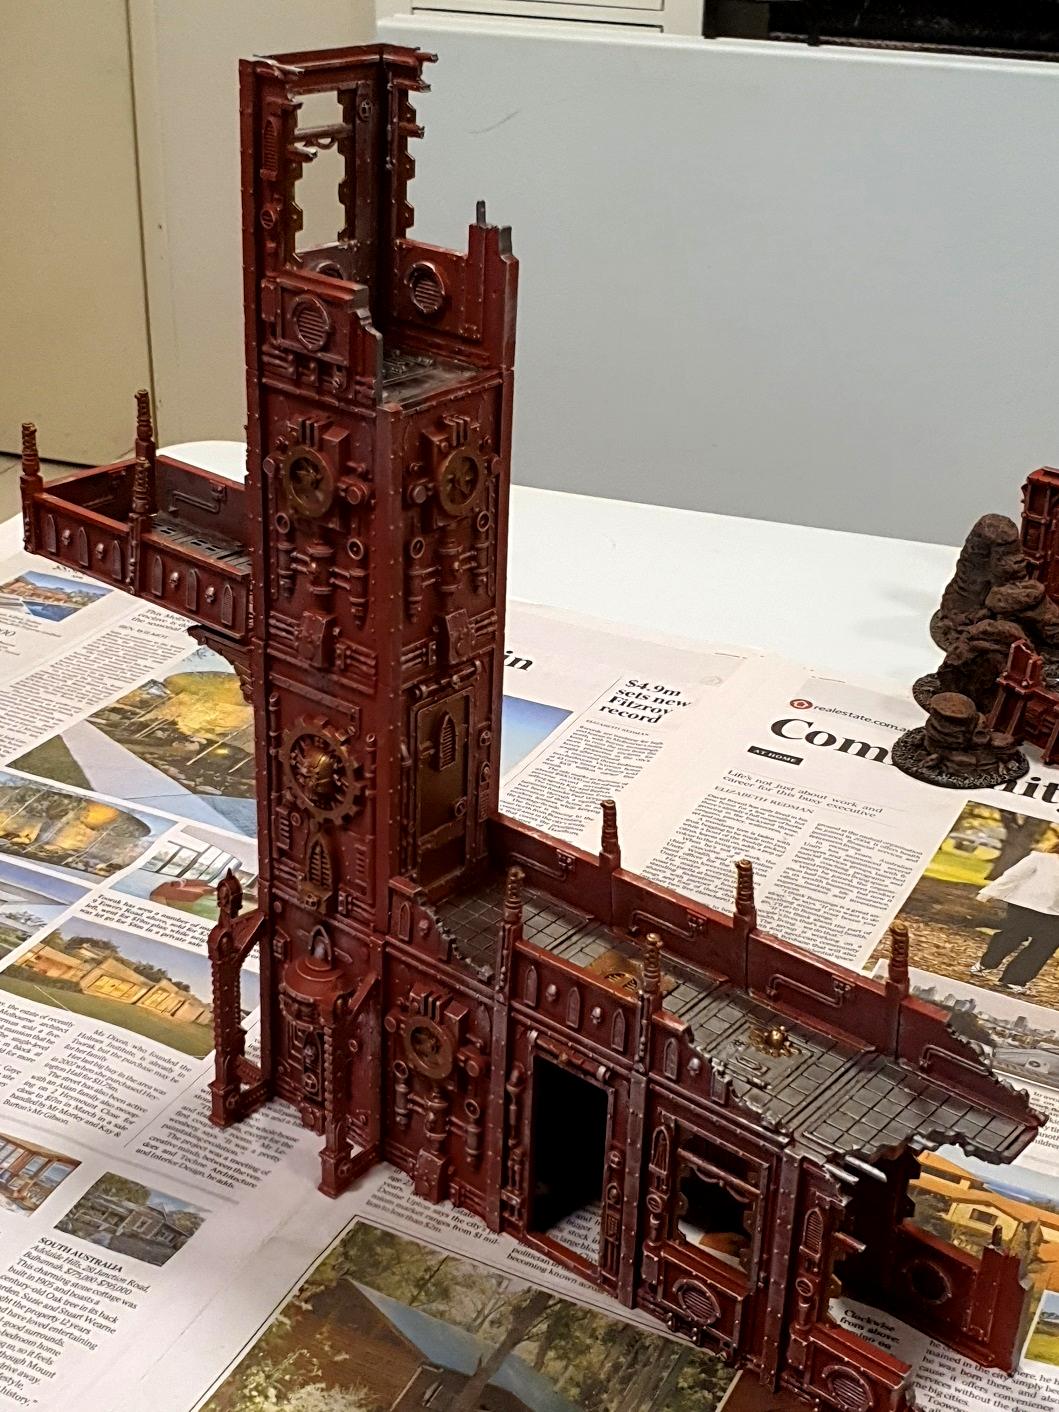

Captain Shortsword is seeing if public speaking is something he's good at.
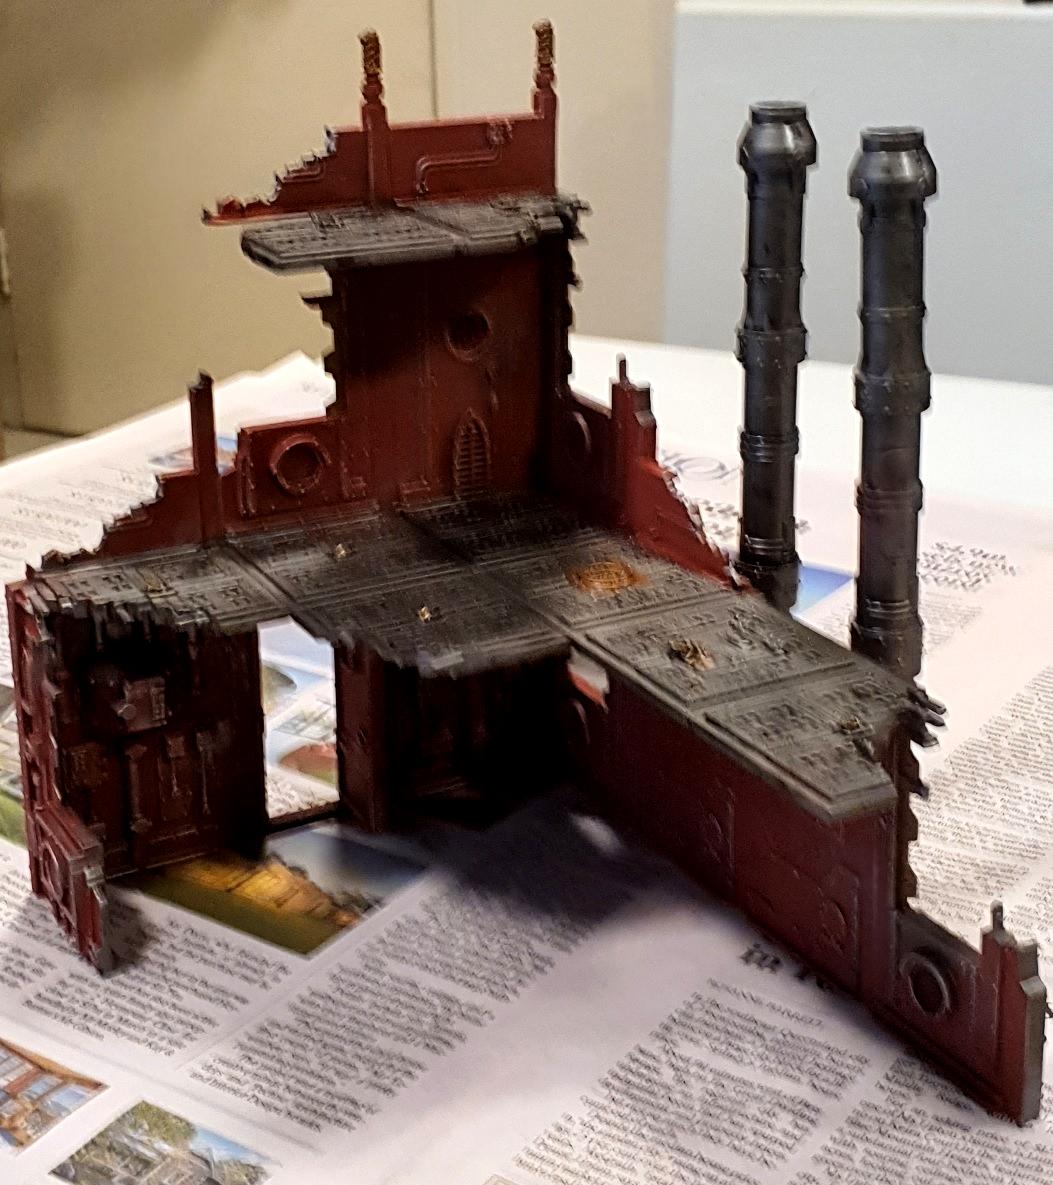
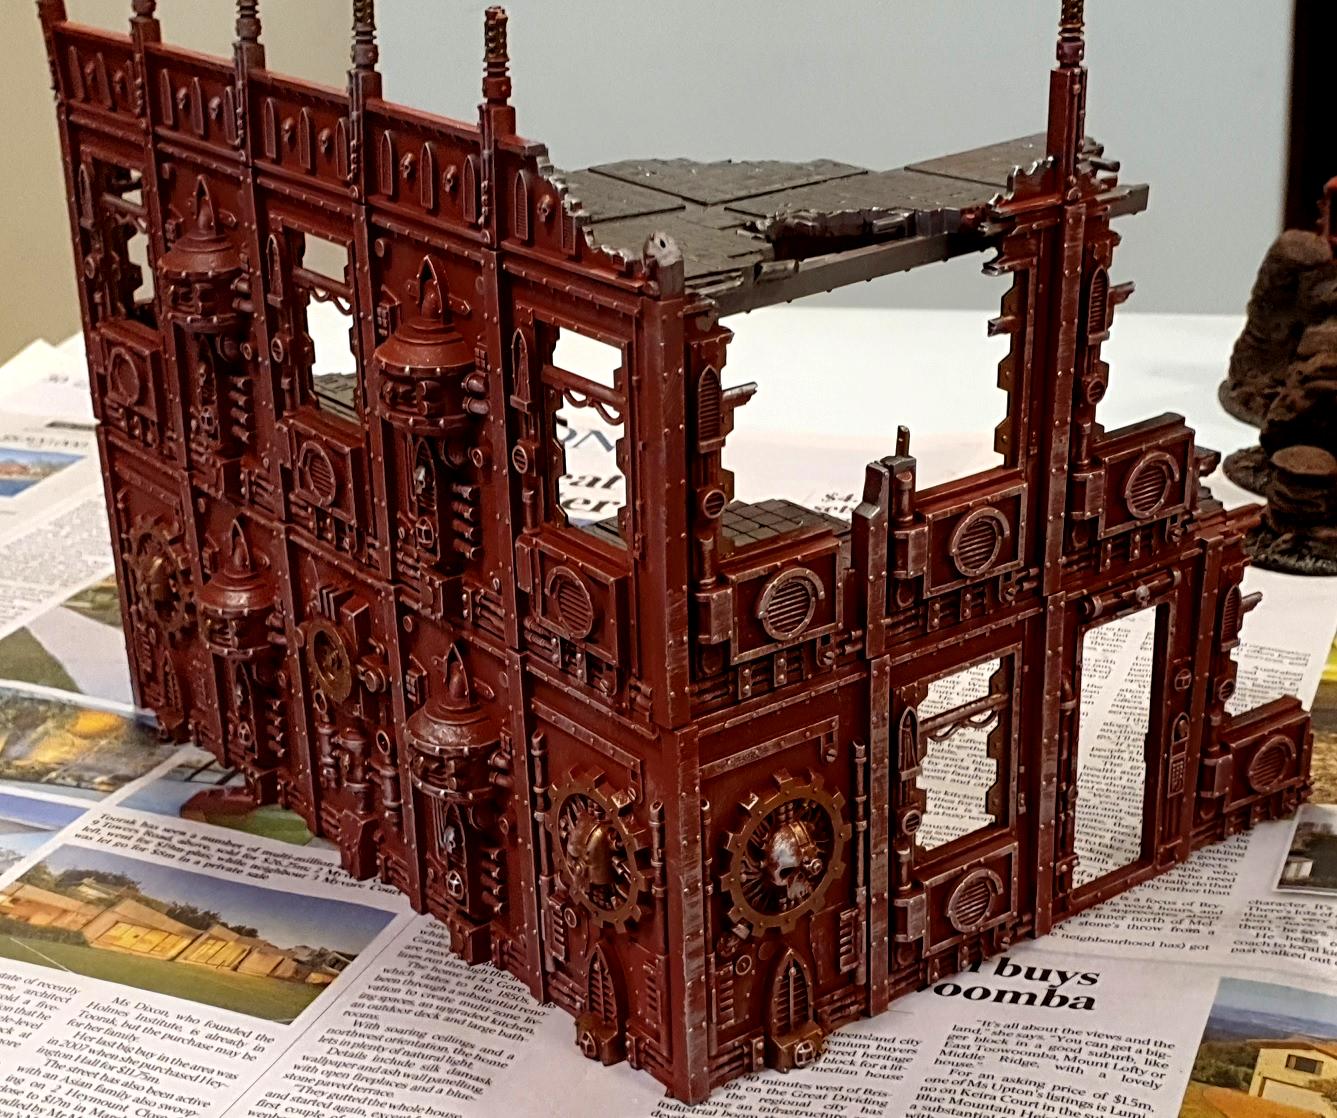
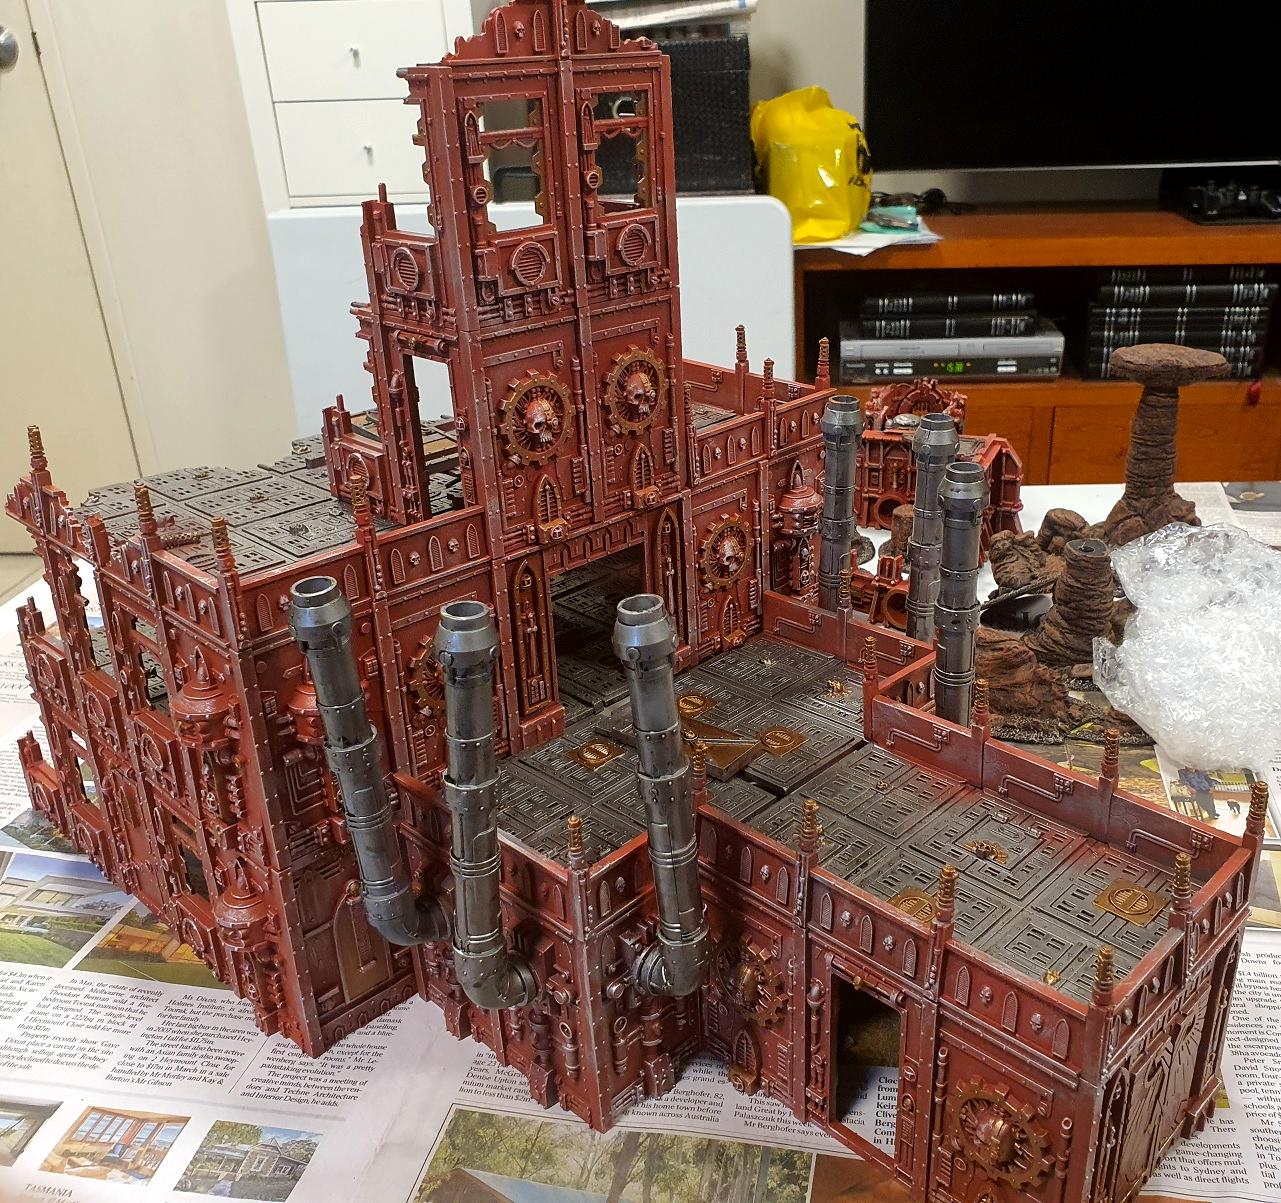
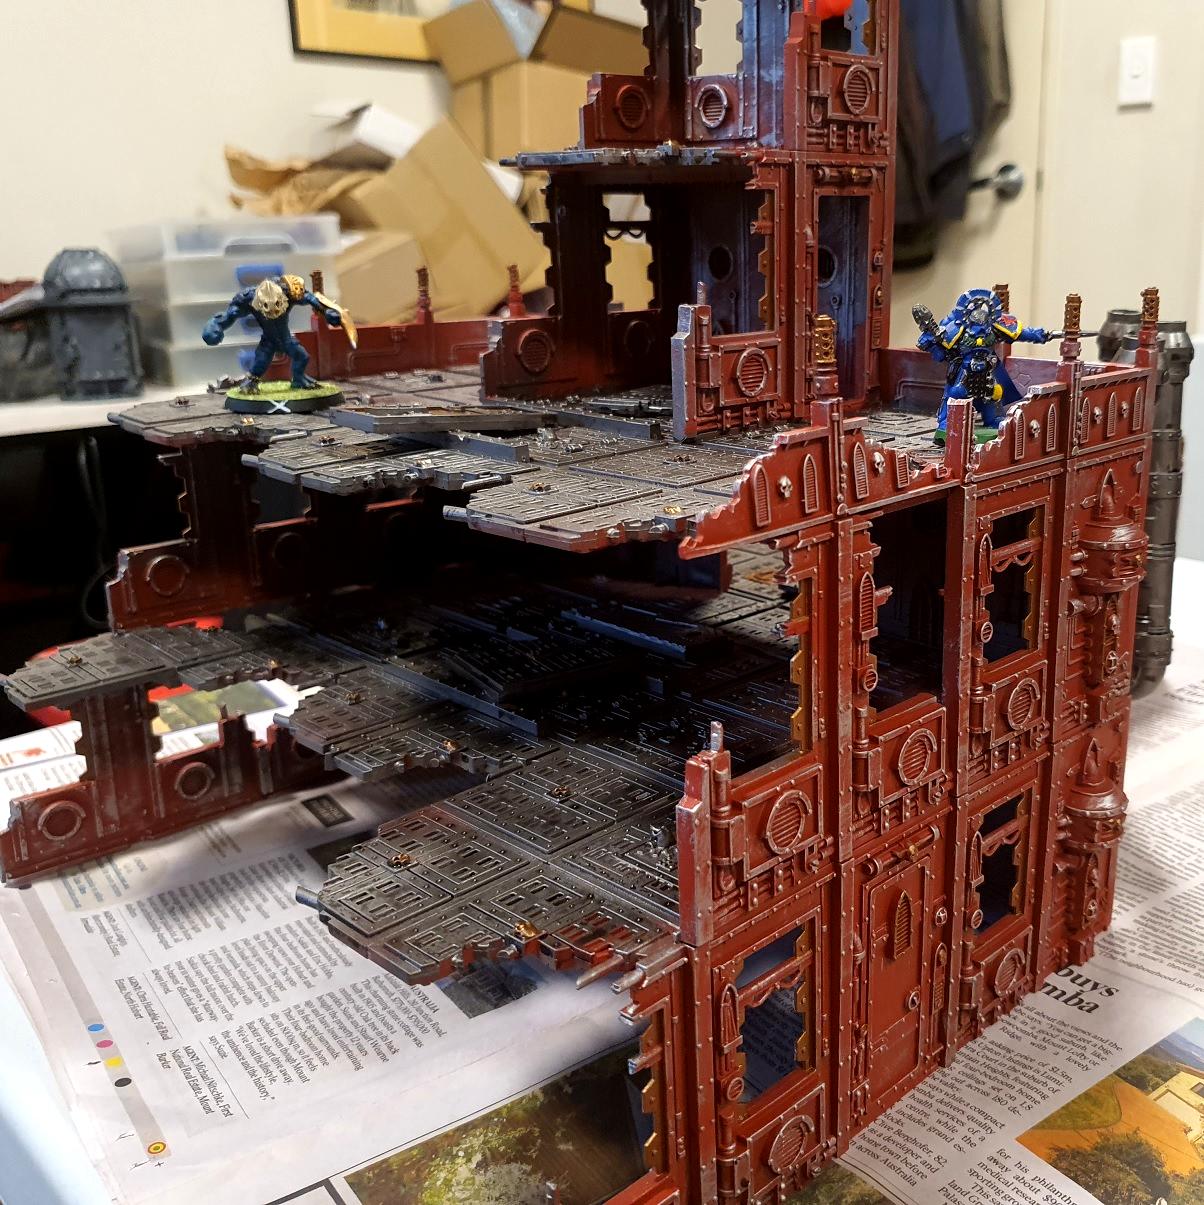
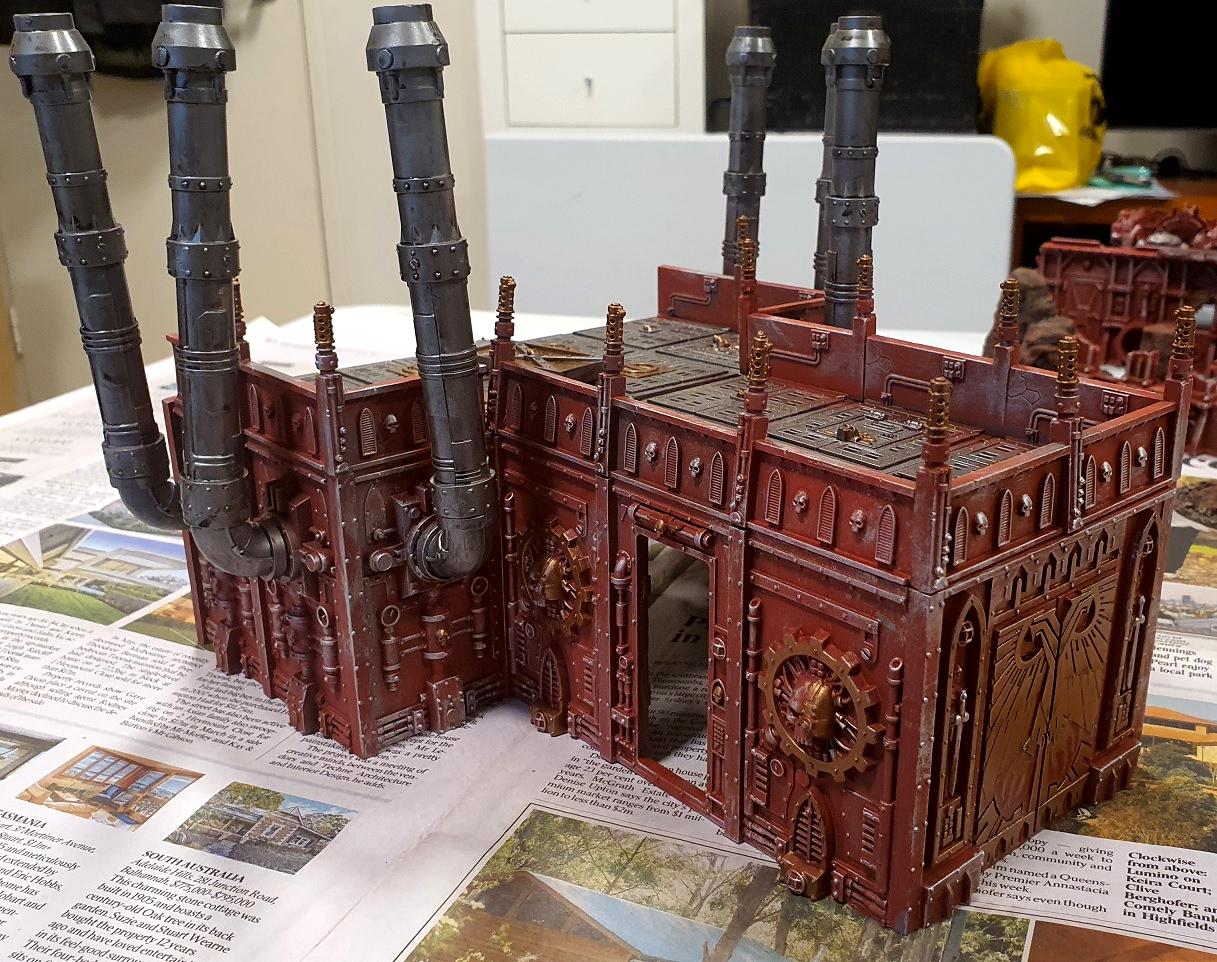
Manufactorum Rear Entrance Alright enough teasing. Here is one of the two big ones, the rear end of this massive building.
The small off-shoot towards the bottom left is the ruined corridor that would have led to the Preacher's Tower. There is another similar off-shoot on the other side that leads to the other more-ruined Preacher's Tower.
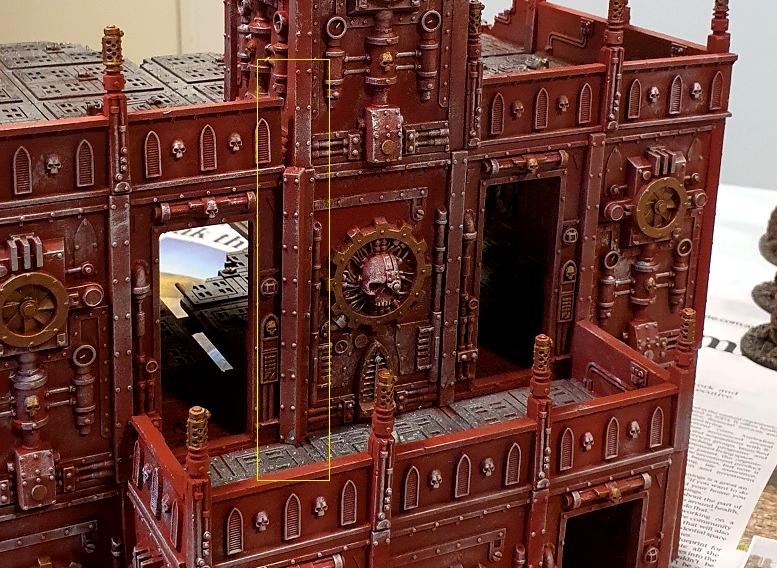
Unlike the new Sector Imperialis and Sector Mechanicus stuff, the old Cities of Death stuff wasn't engineered to be basically perfect. This means that once you go beyond a certain size the floors don't quite match up with the walls, and you can end up with odd gaps. I have filled these gaps as best as possible, but it's not always perfect, hence this odd-angled beam that is filling a gap between two panels.
You have no idea how long it took to make floors for a piece this size. You can see the strut I've placed on the top floor to fill a gap. Those floors are not the same size as the walls are wide. This would never happen with the newer kits.
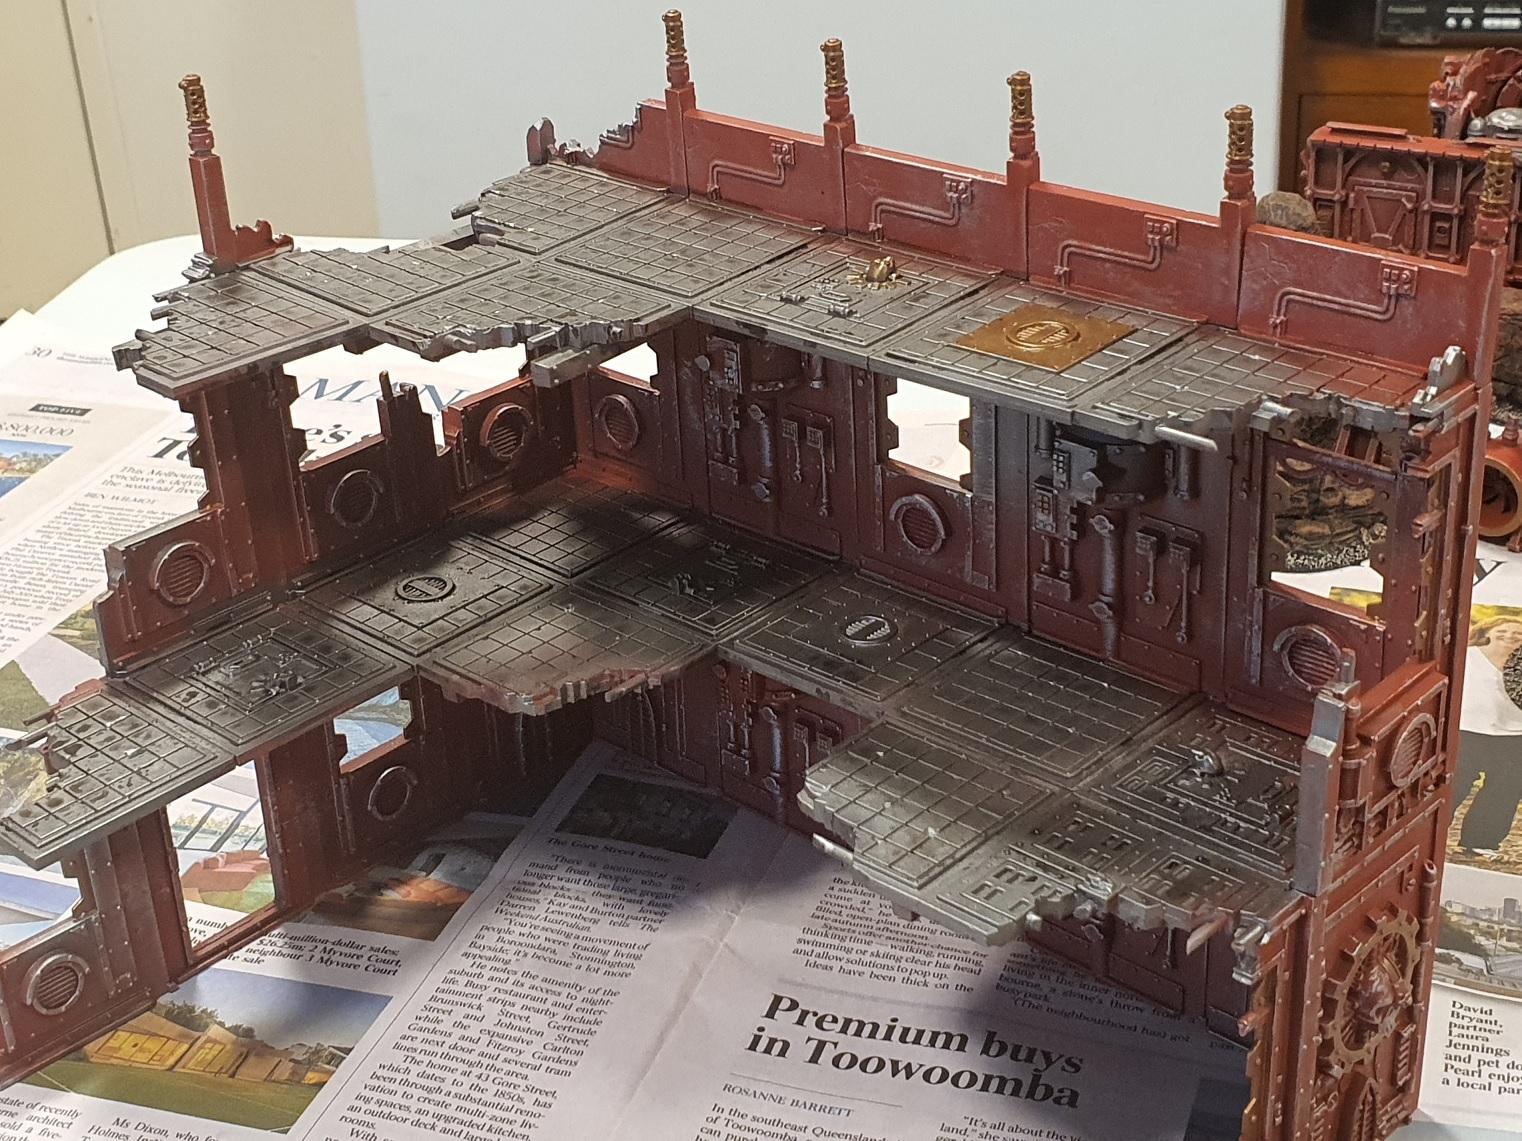
And from above.
Close up from the front.
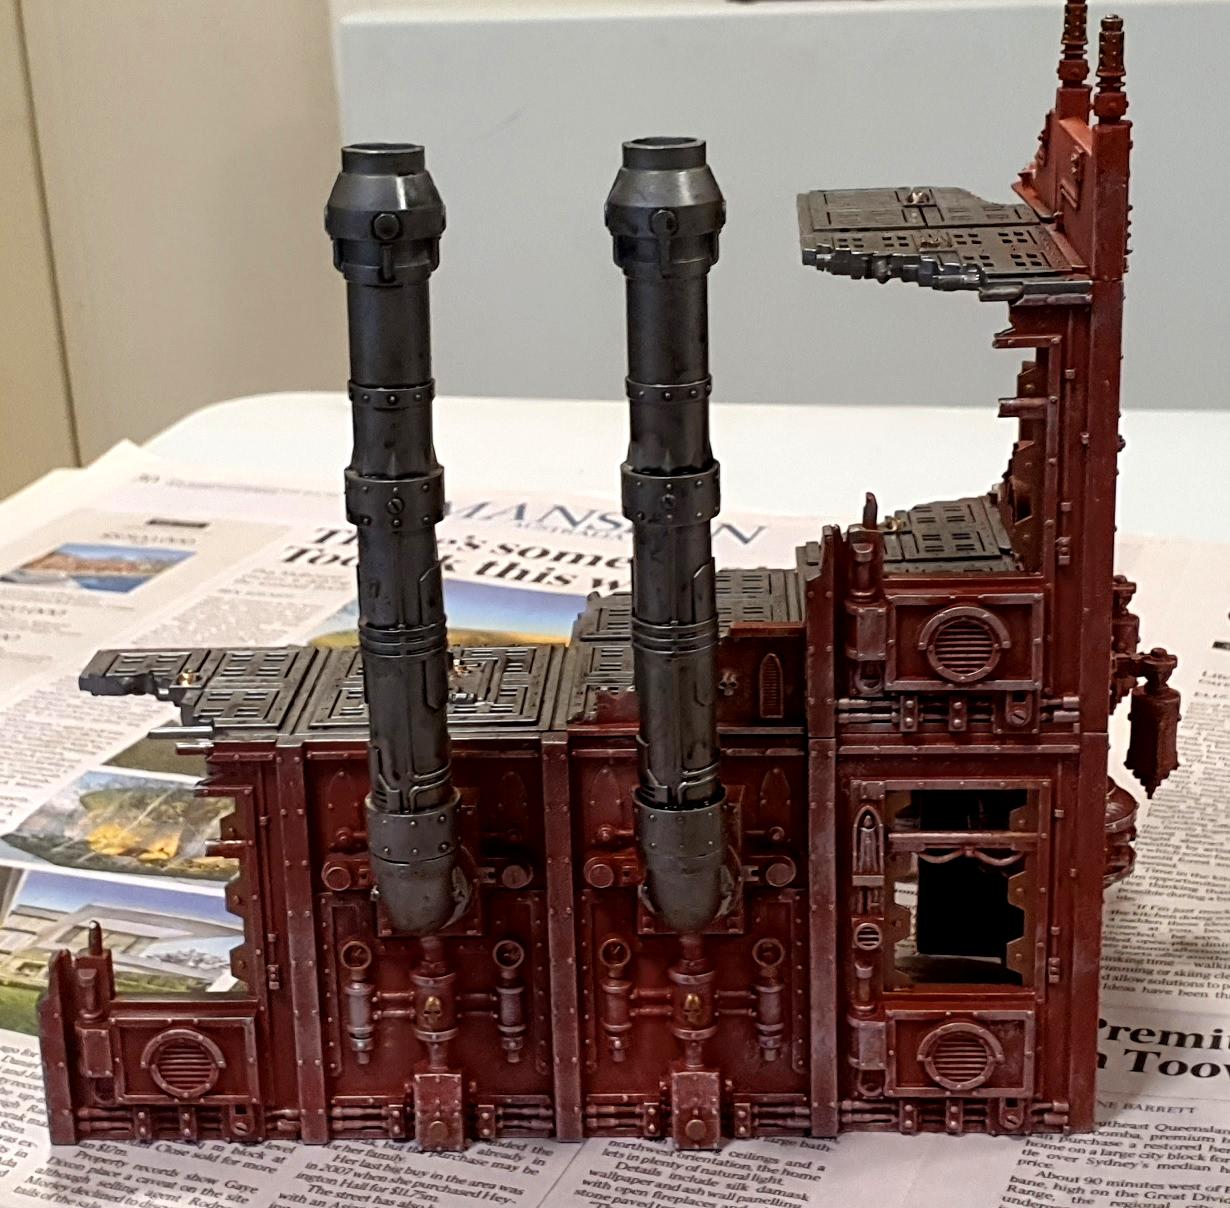
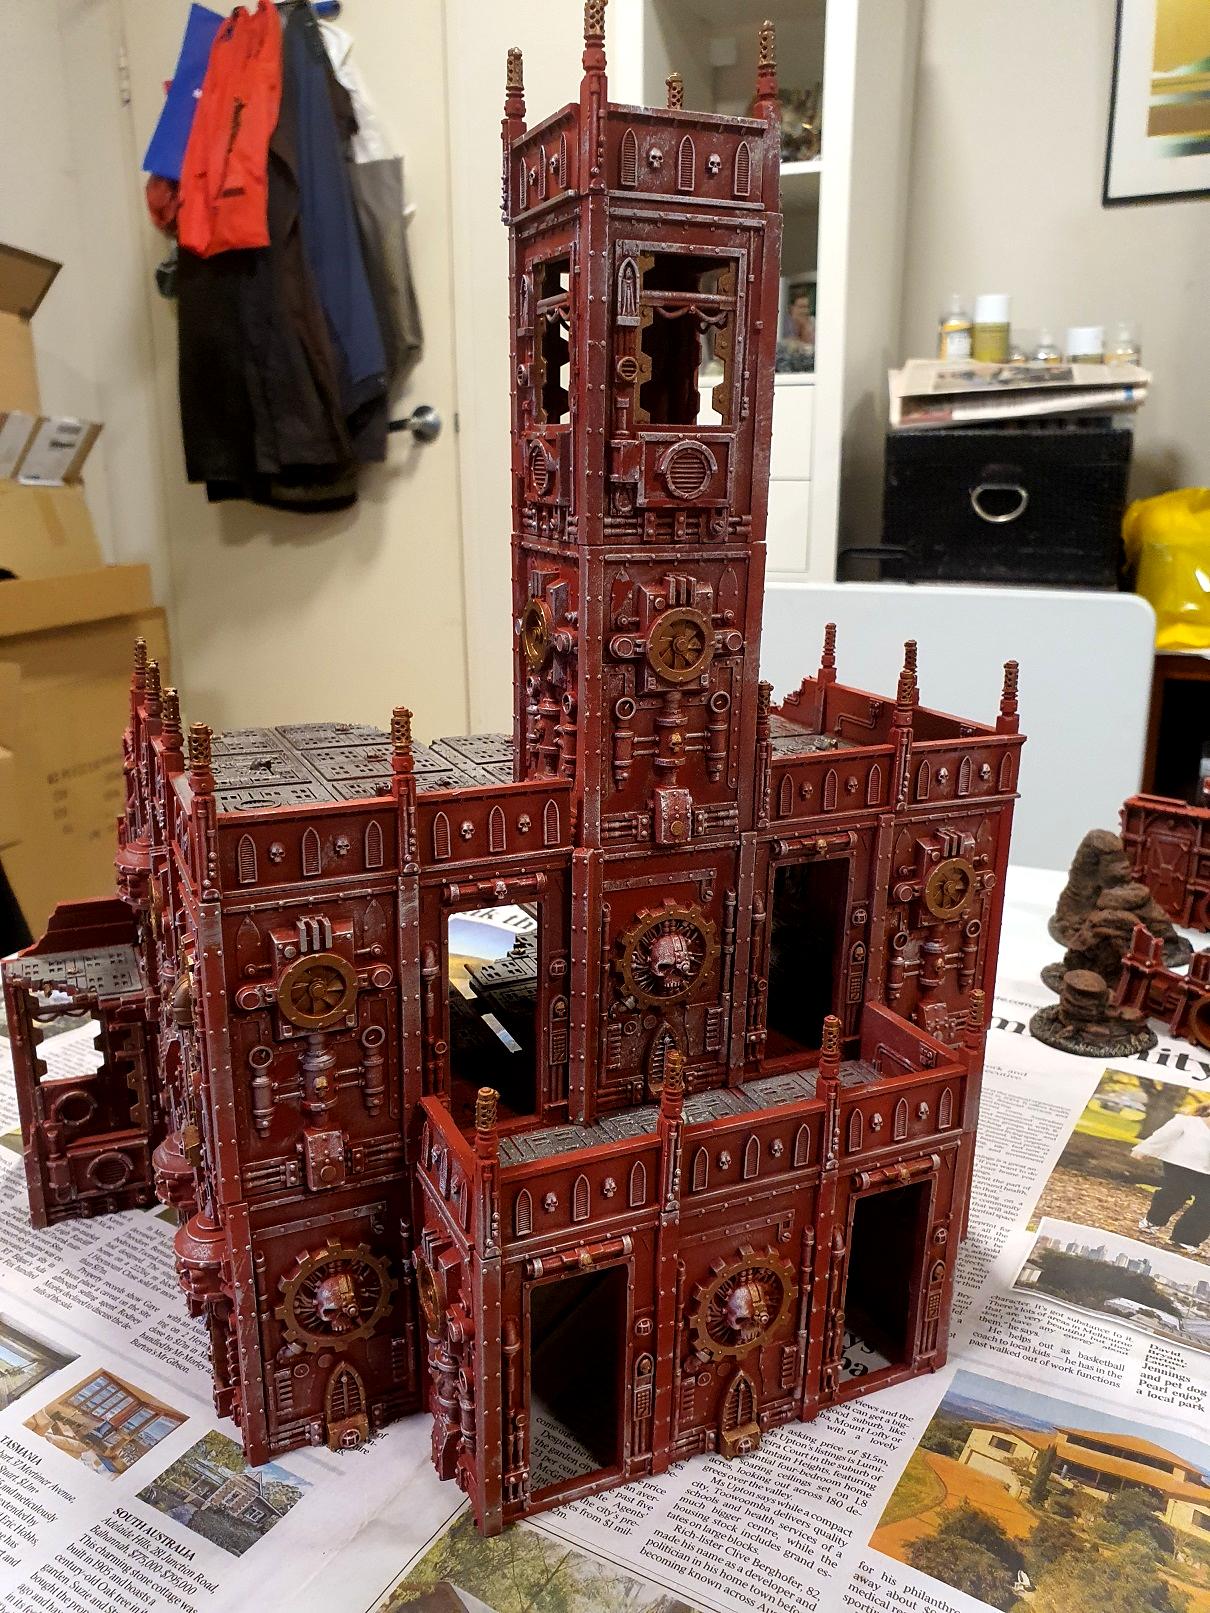
Manufactorum Grand Entrance And now the Big One™. This might still be one of the biggest pieces of terrain I've ever built. And to think it's all from those little 3" panels.
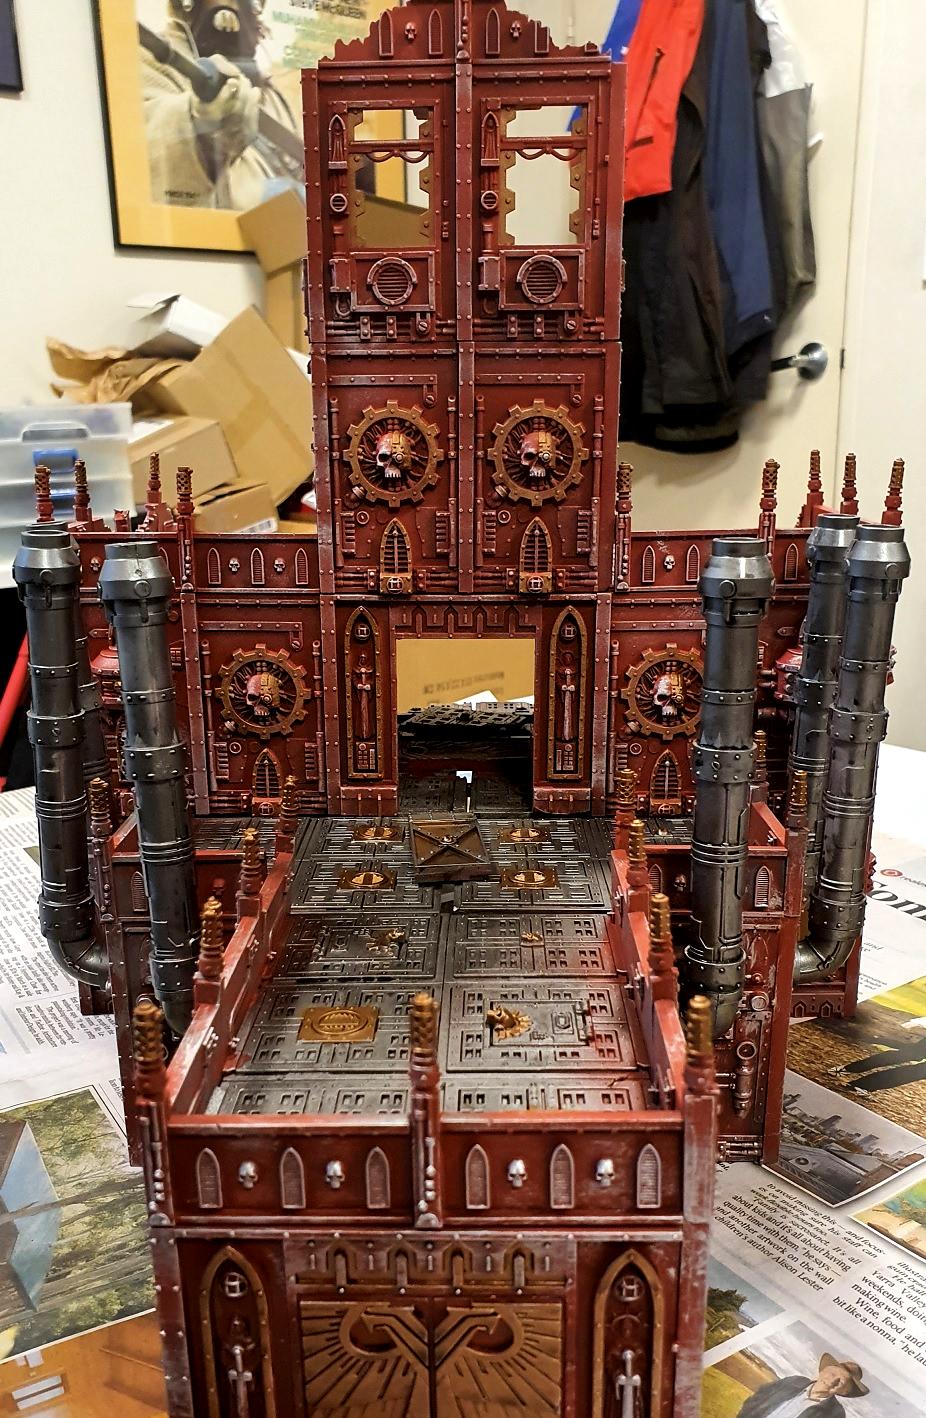
I've used busted doors and floor pieces to break up the gap that runs through the floors on the wider section.
Told you it was big.
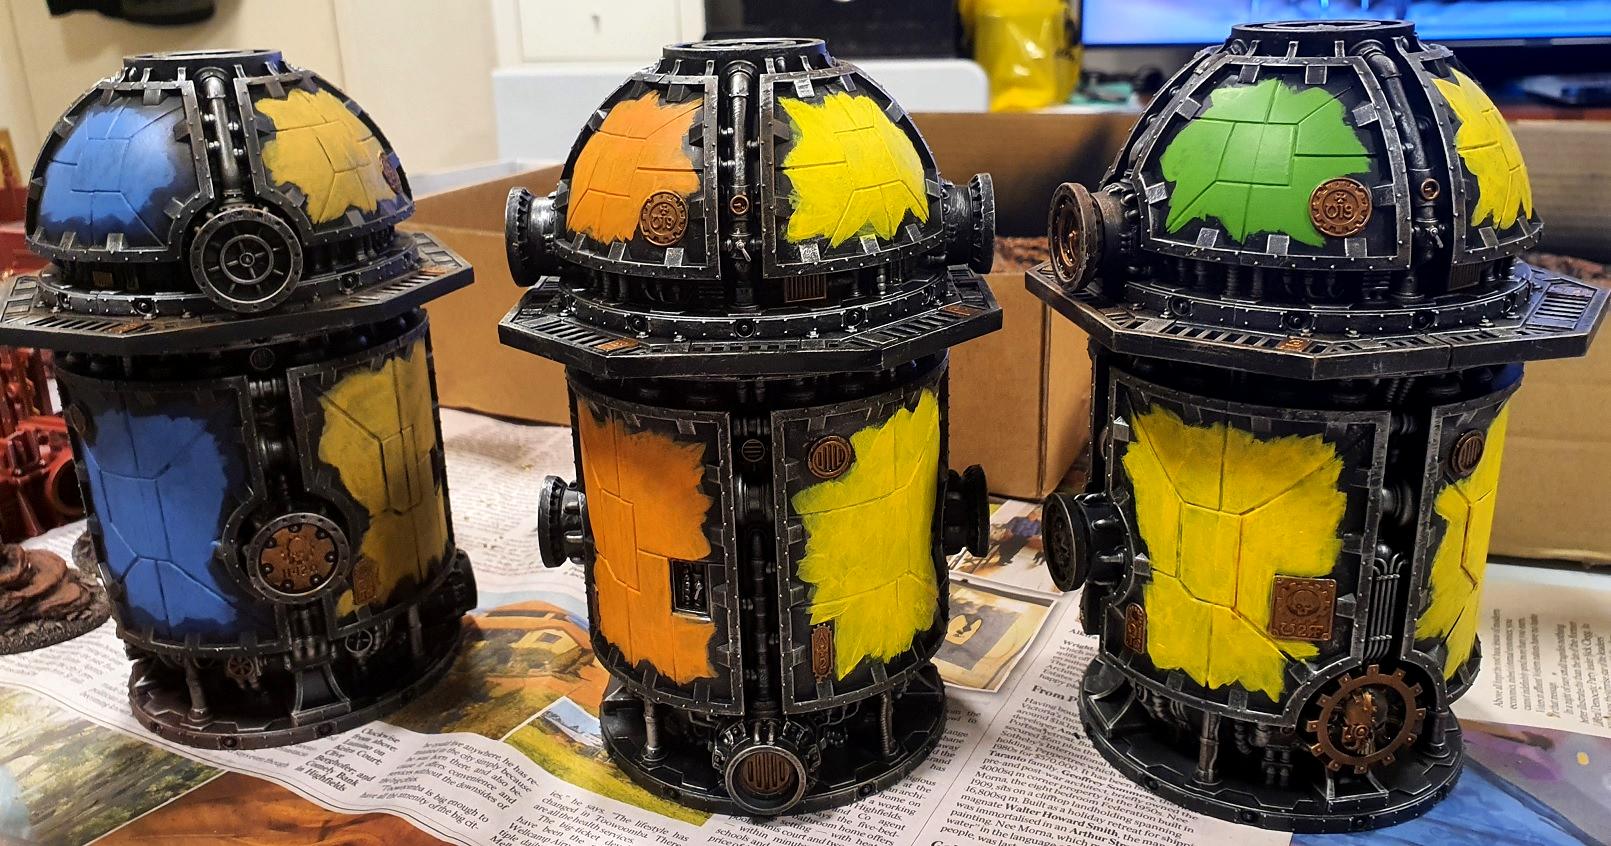
The gold details took forever to do on these pieces. I have remained consistent with each one, so the one with the Mechanicus symbol has the rim done gold, the bionic side of the head is gold, as is the rim of the venting down the bottom. The windows have the "teeth" painted gold - inside and out on most pieces - and the exposed fanblade piece has the fans painted gold, and so on. About half the doors are painted gold. The skulls on the flooring are painted gold. I almost painted all the divots in the flooring gold but that would have taken me a month and drive me crazy.
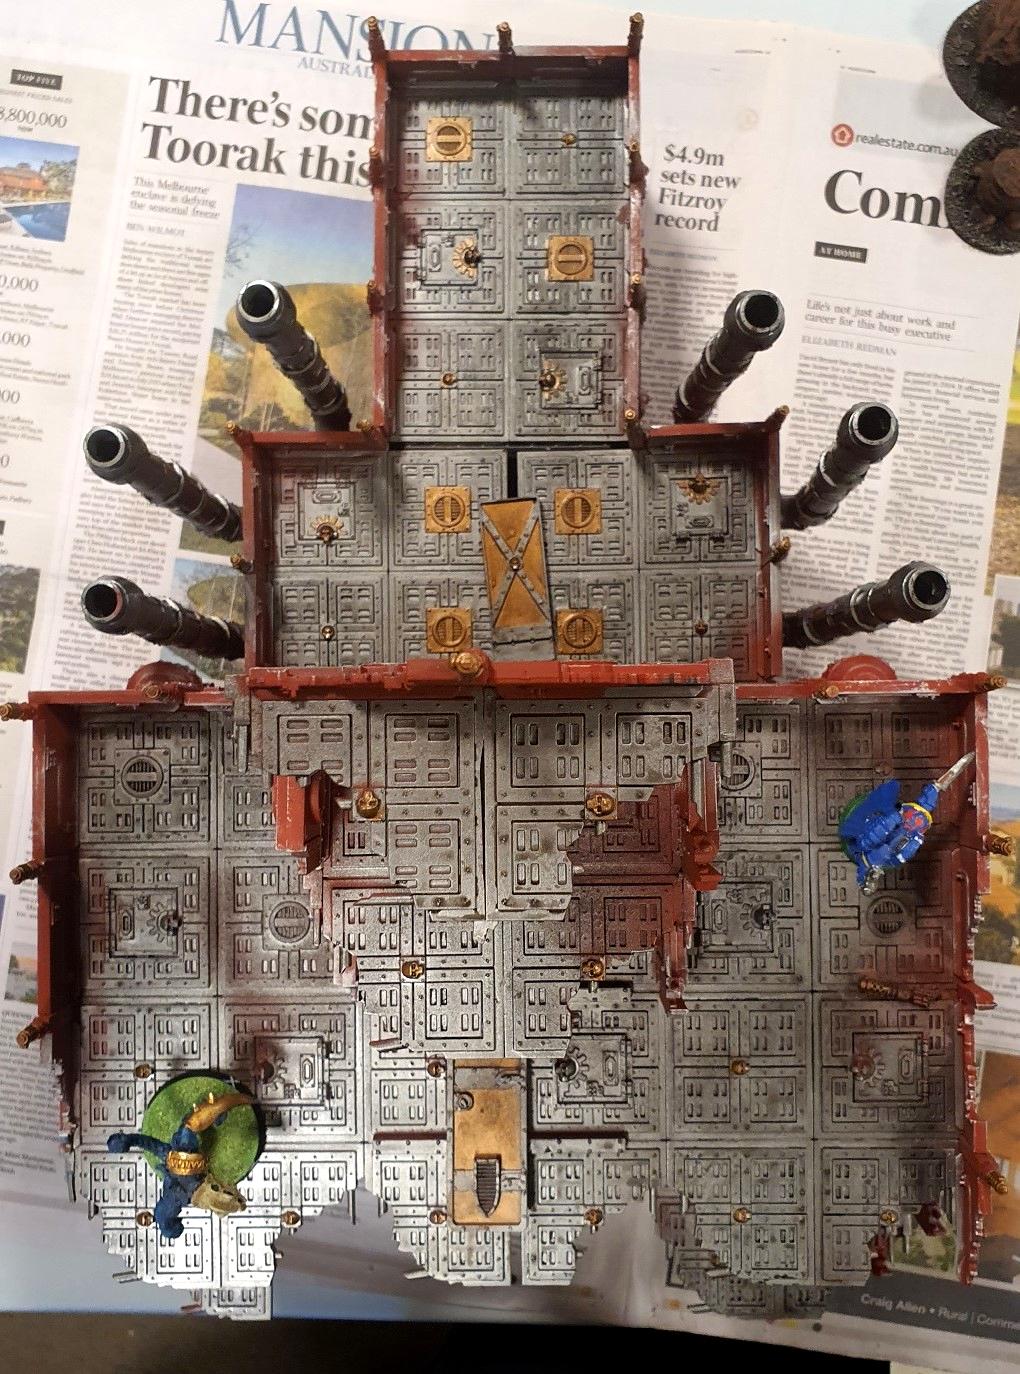
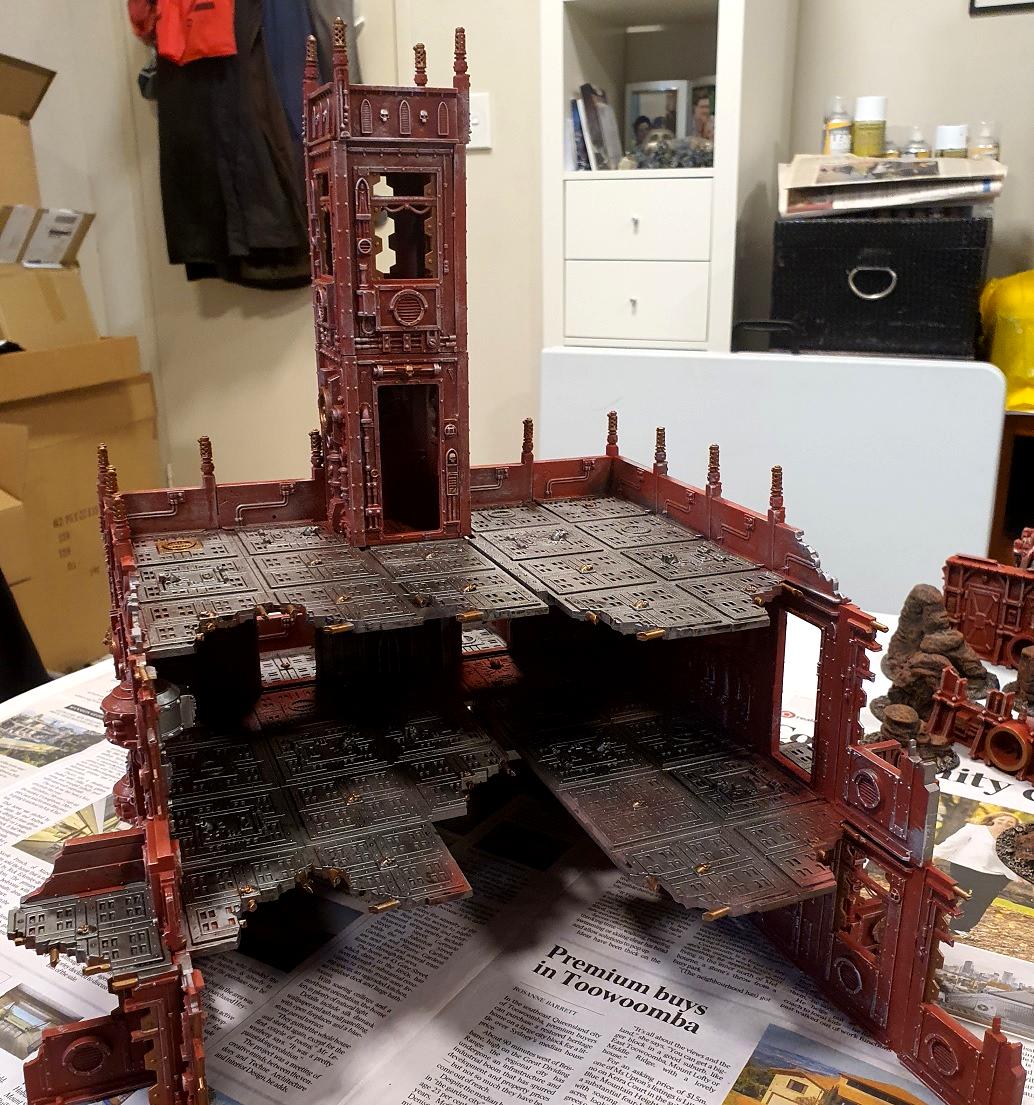
And a shot from above.
The Grande Entrance is actually too big, so much so that when I designed it I had to make sure that the lower entryway with the pipes was a separate piece. Here are some pics of it separated from the rest of the main structure.
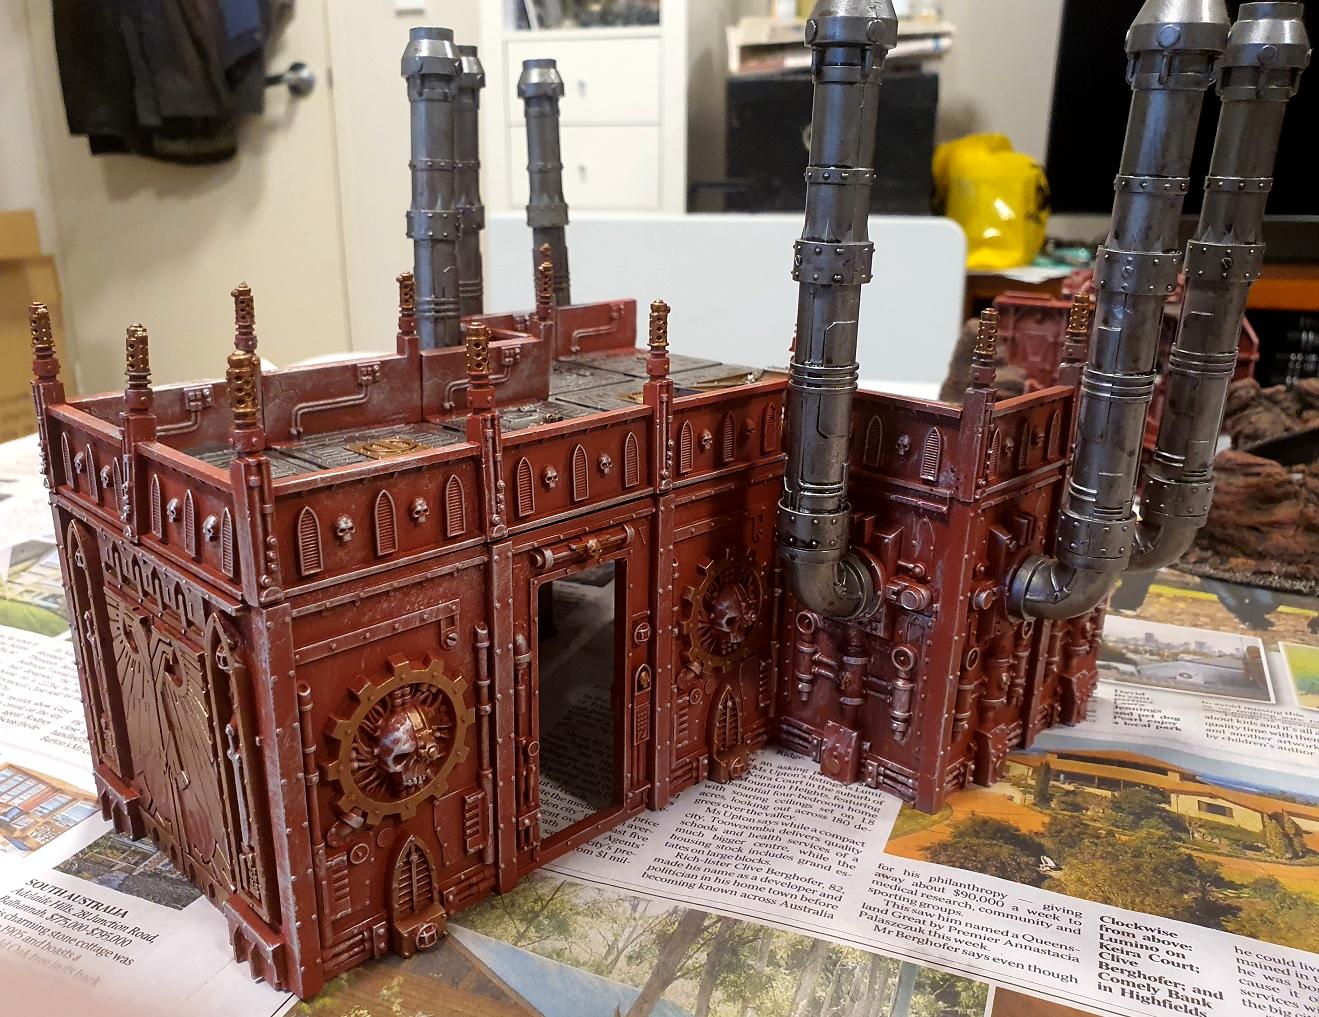
Pipes with the newer Sector Mechanicus kits fit perfectly first try. They're wonderful. These... are kind of an afterthought from a design perspective. Getting them to line up was never going to happen given the very shall slot they fit into.
Inside corners are such a pain in the neck.
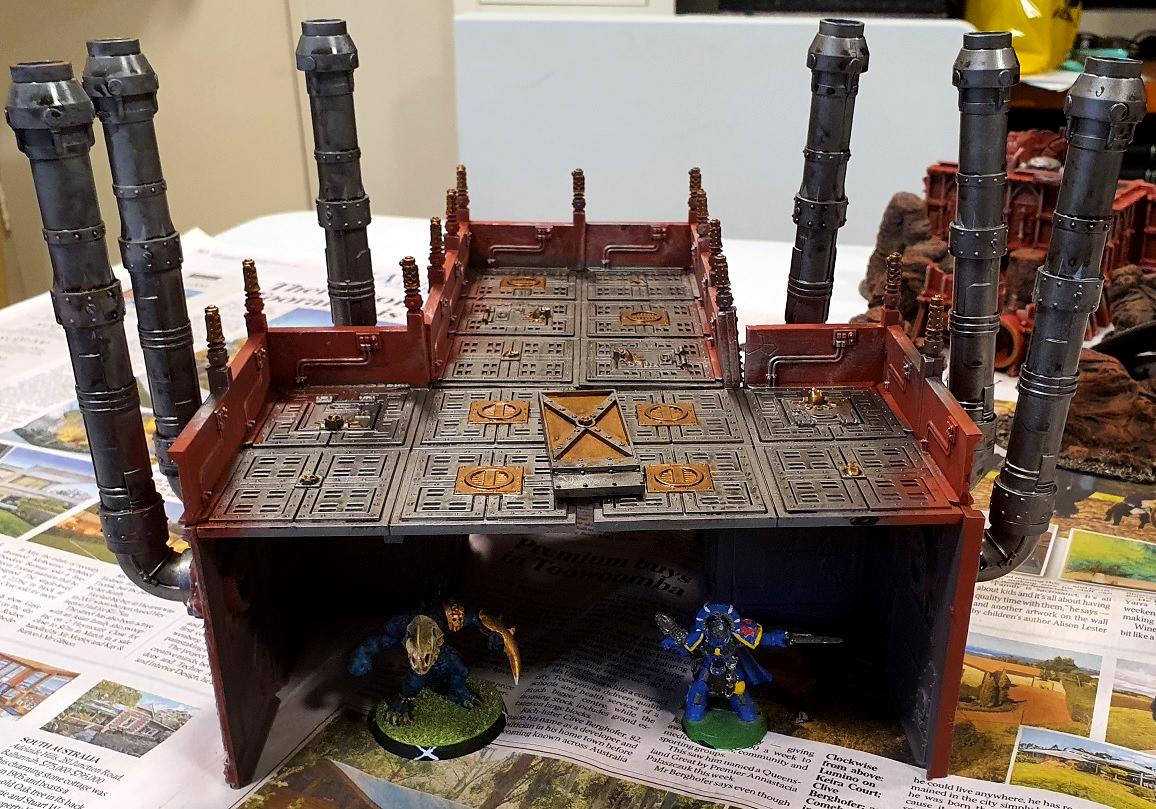
Apparently there's enough room to swing a Squig in there.
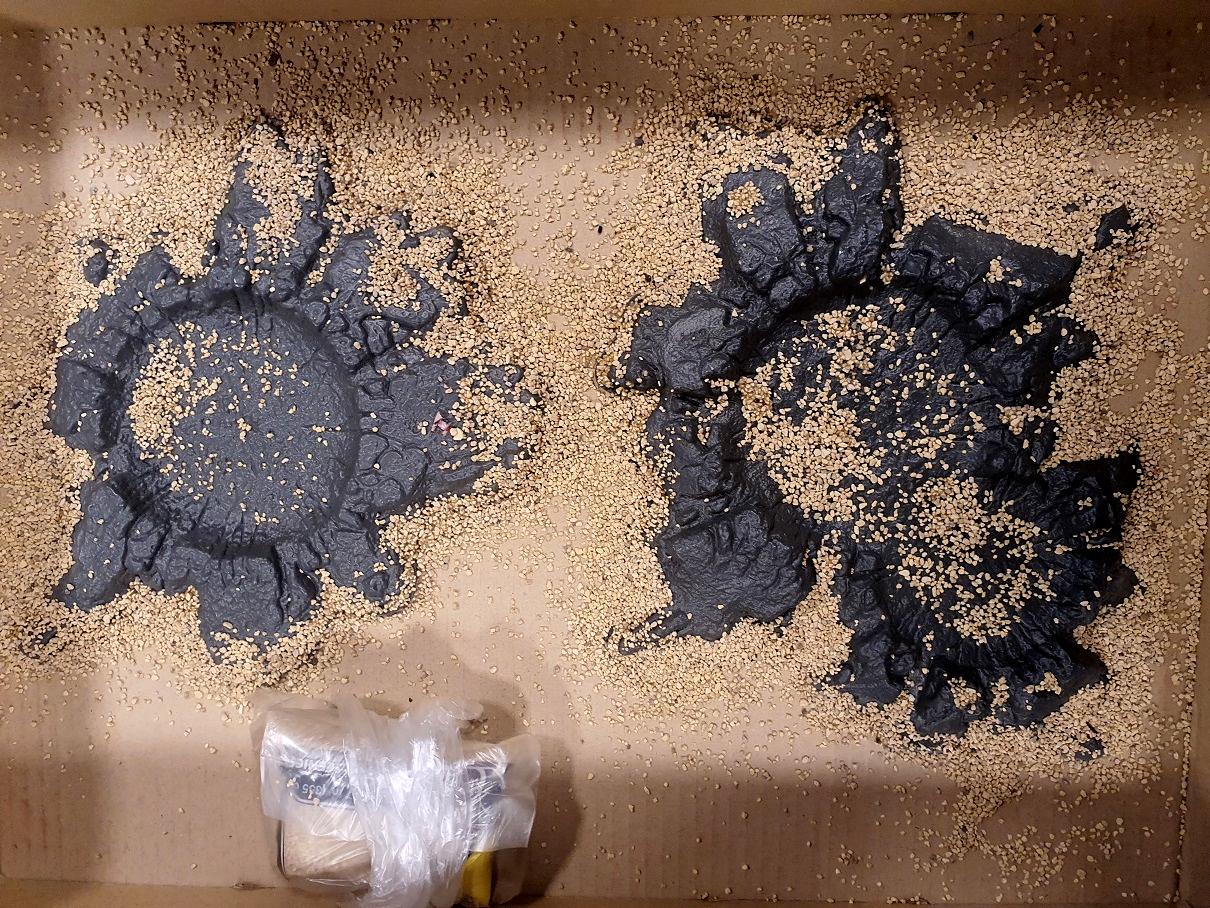
So this board is coming together nicely, but it is not yet finished.
I have to paint up some martian craters, a prospect made harder because my PVA glue has gone bad. More has been ordered, so next week will be all about getting those done (and hoping my replacement Battlefield-In-A-Box stuff arrives). I will post pictures of the completed table once I have everything down on the martian mat. Then Hive Fleet Greysprue will take to the table and probably get stomped as I am purposely bringing an army that just has a bunch of big bugs that I've never used before.
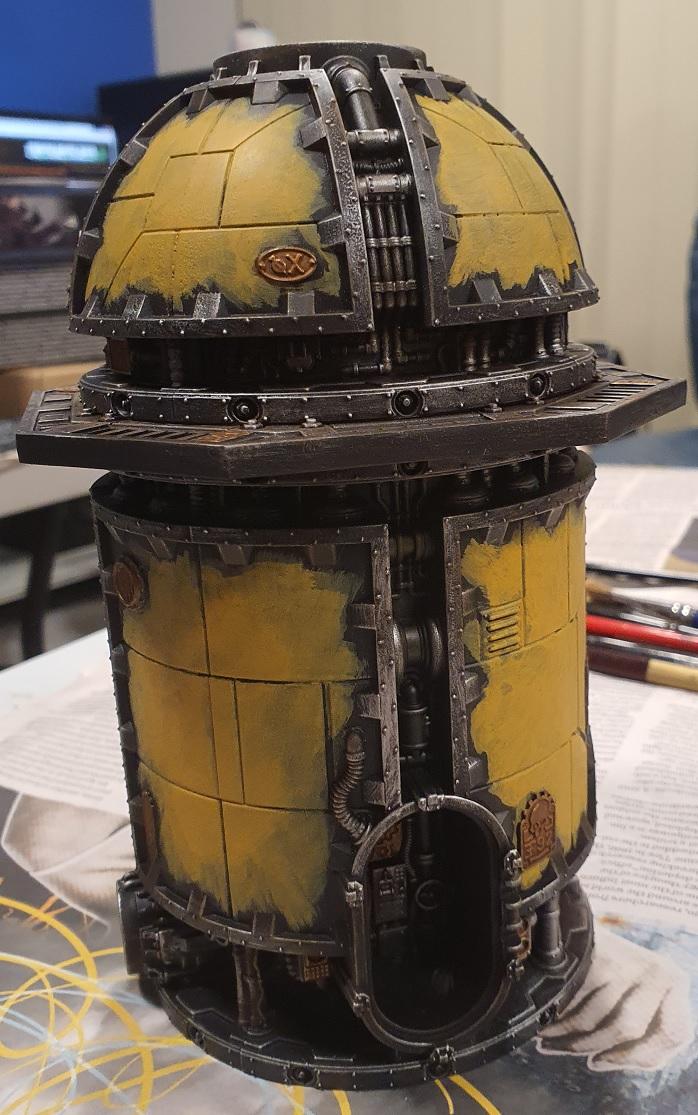
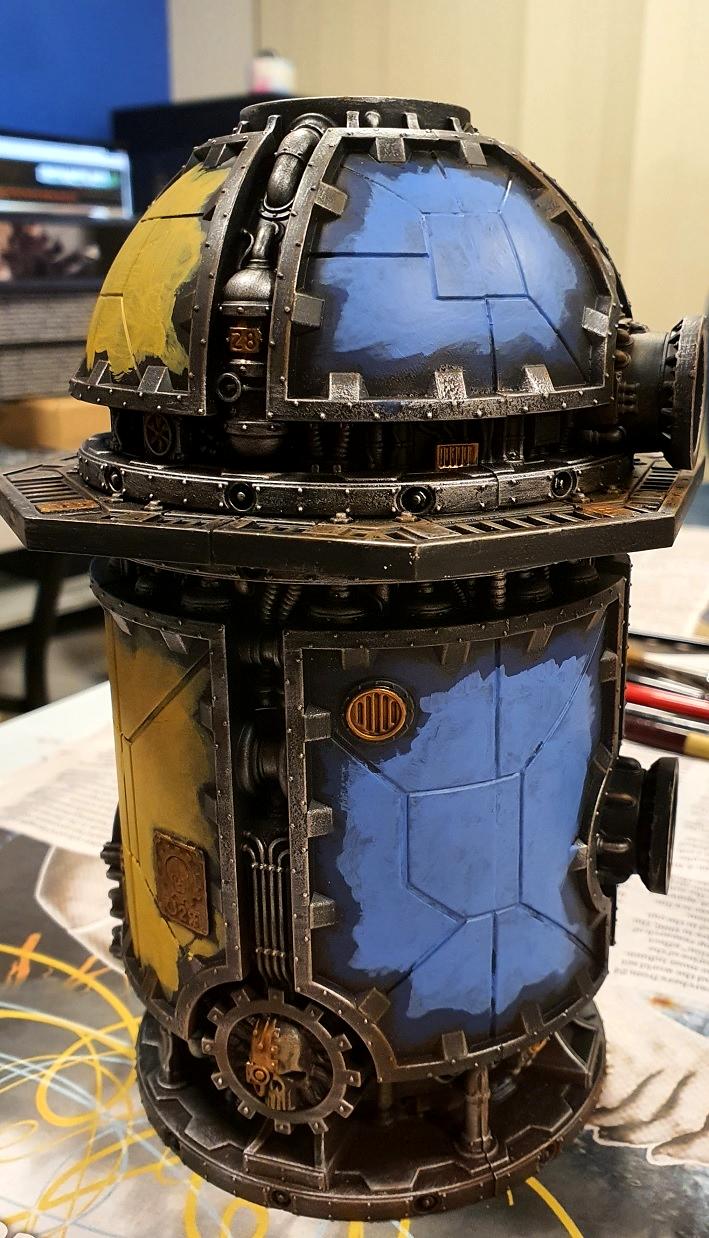
Hope you all enjoyed this, and for anyone wondering the method is super simple:
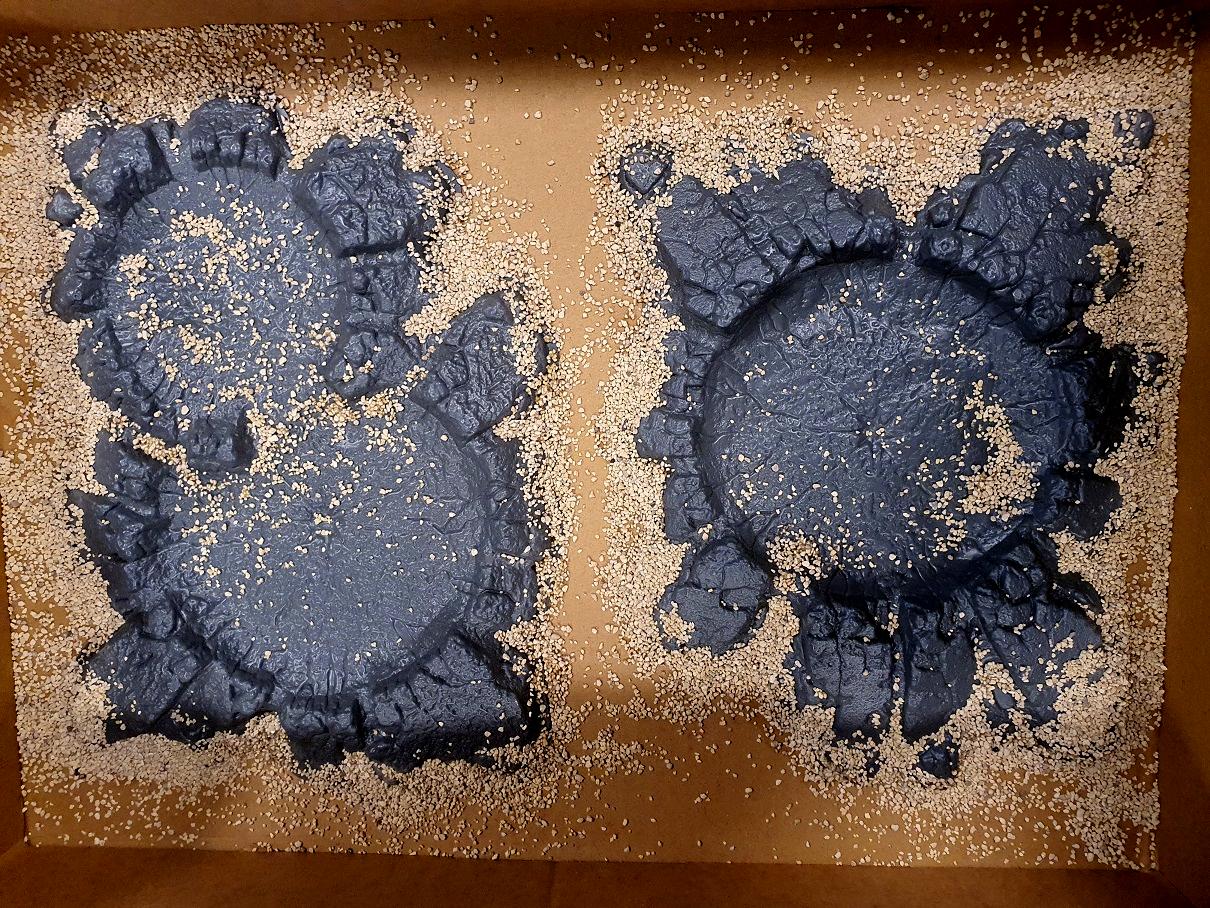
1. Spray red (lots and lots and lots of red).
2. Tape off the red edges and spray silver onto the floors. Paint some of them, plus the pipes.
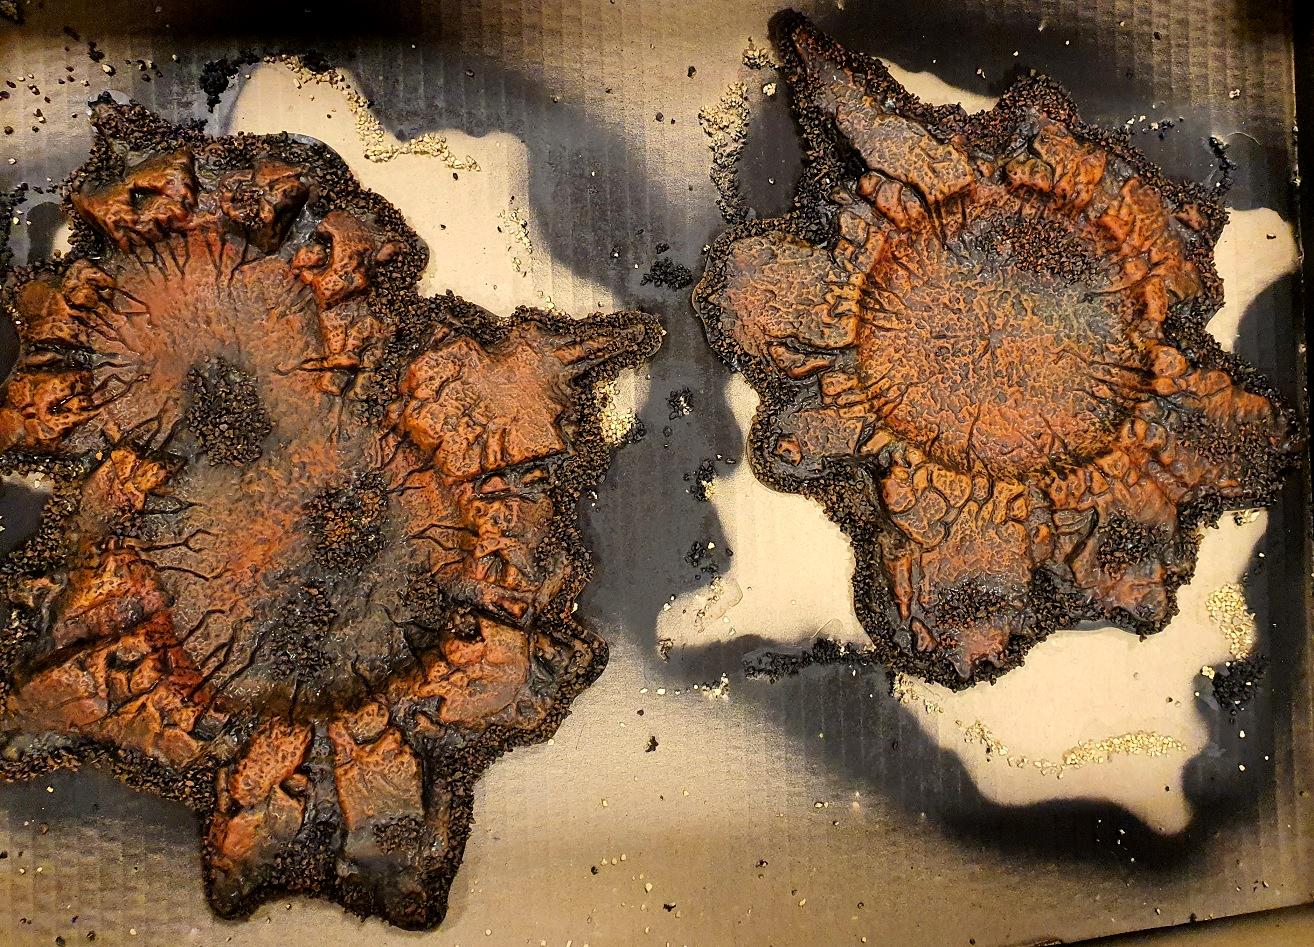
3. Remove tape!
4. Paint details gold.
5. Stick the same piece that has broken off 3 times on for the 4th time.
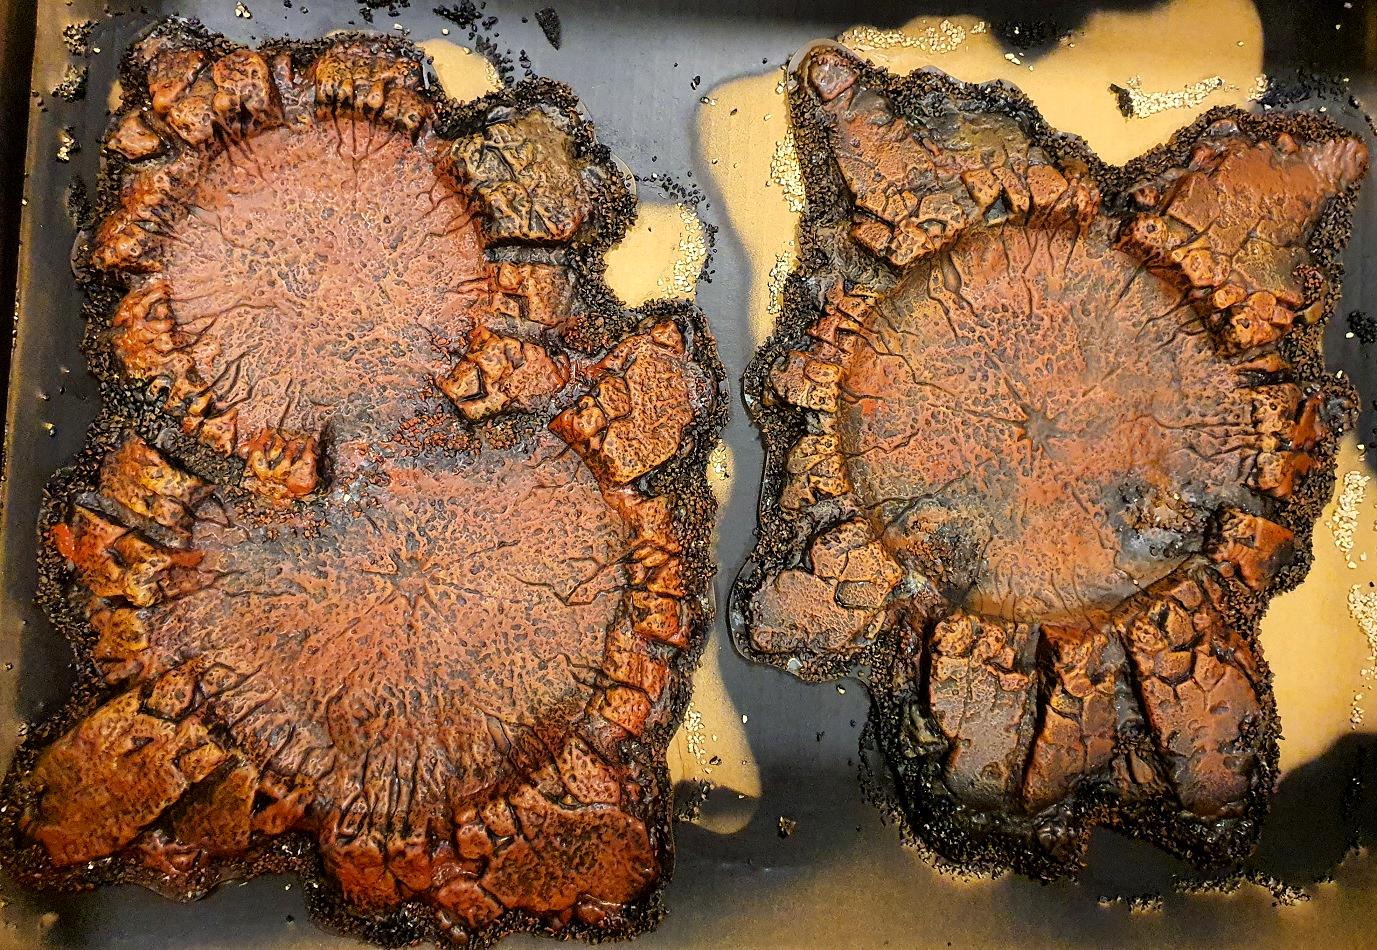
6. Nuln-Oil gloss all the floors to make them less flat, give them some definition, and a distinct wet/oily sheen.
Until next time!
BYE


 Finished Forge World Elysian Army
  Finished Tau Sept Cadre
  Alaitoc Eldar Warhost
  Finished Order of Our Martyred Lady - Sisters of Battle
  Finished Necromundian Imperial Guard Regiment


 ) but I'll make do with what I have (I mean, it's not like they can get any more broken... right). I did also do up a couple of extra Manufactorum buildings for exactly this reason; was never sure if Noble Knight would get me the stuff in time.