Hello there!

Man, it’s been ages since I last posted in here. Well, I got some good news: I’m back with some more terrain to show you! Some of it is finished, some still
WIP, but I‘m hoping you’ll want to check it out regardless. I’ve recently been hit with a massive surge of inspiration and creativity for new terrain, and while I SHOULD be working on getting
my classic 4th edition Battle for Macragge Starter set painted, I am instead building and painting terrain like a madman. Oh well, I guess you gotta make the most of inspiration when it strikes.

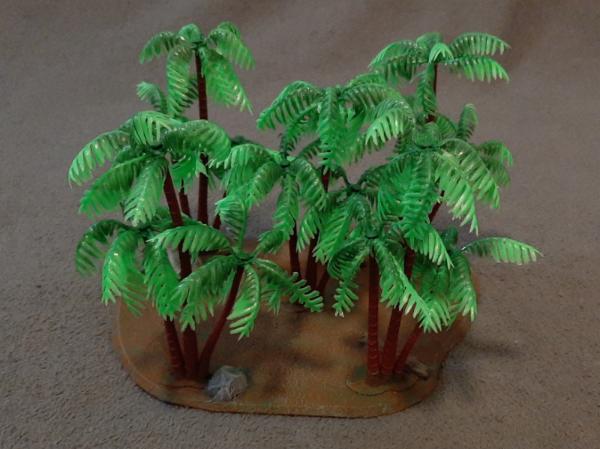
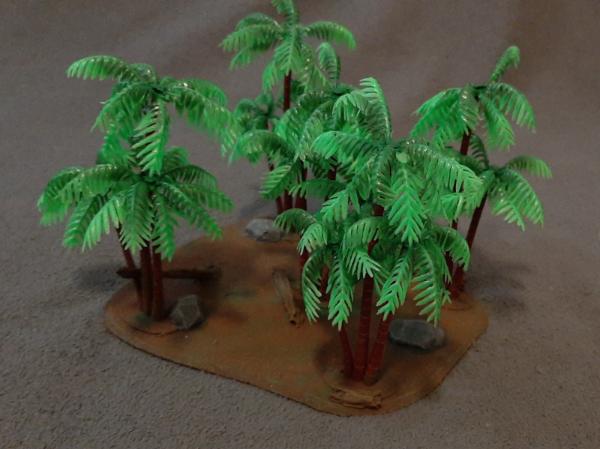
Let’s start off with the first project I have been working on: a new set of forest terrain for my Jungle table. I recently discovered some decent plastic palm trees for cheap on Amazon, and I decided that, while they did look a bit gaudy, they were still a way better deal than anything I could get from
GW. I ordered three packets which means I had 30 trees to work with. I decided to use 5 per base, giving me 6 forest bases in total, an acceptable number to help me fill out my table.
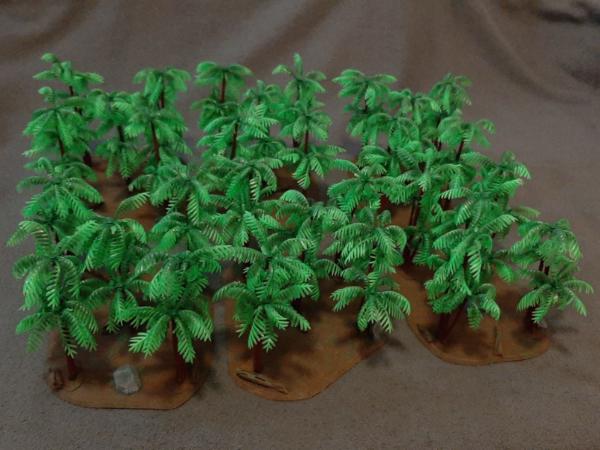
Above, you can see all the terrain bases I have made so far. Keep in mind that these aren’t completely finished yet. The basic build and paintjob are complete, but I still need to flock them with static grass and add some shrubbery to them. This will then hopefully help tie them in with my older, more involved jungle bases and allow me to combine them freely on the tabletop. Let’s get a little closer to model’s eye view now:
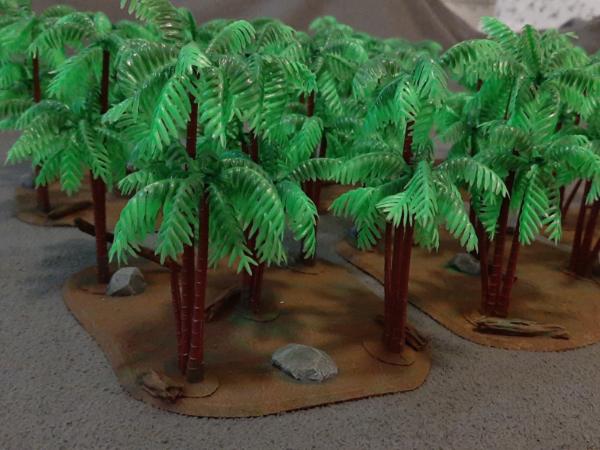
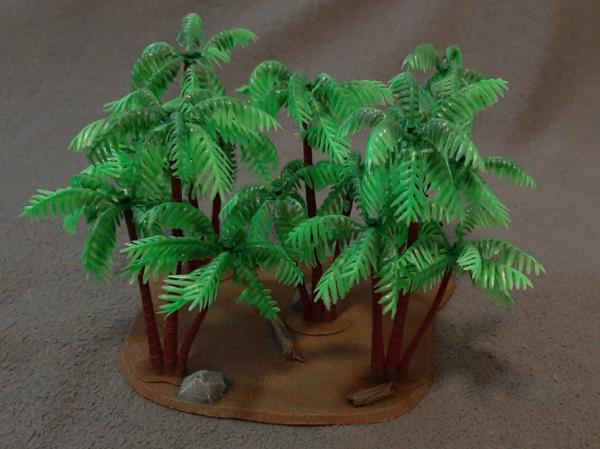
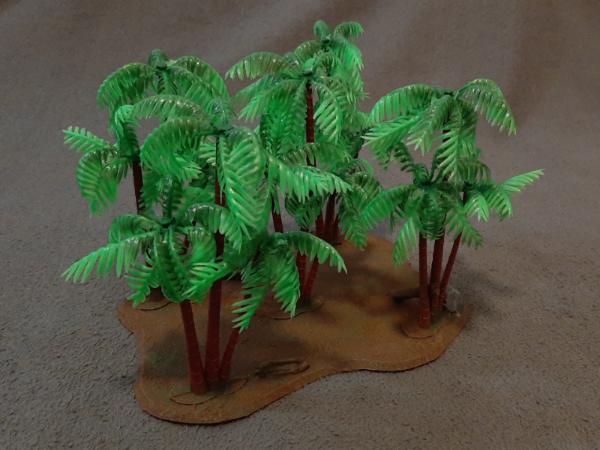
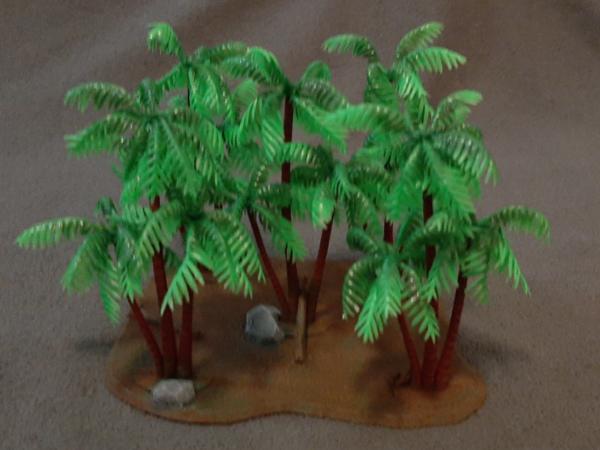
The ground was stippled with spackle to add some texture, as this was slightly quicker and less messy than using glue and sand. It won’t really matter in the end, since I will be flocking grass over it anyway and only need a good base layer that looks believable but is still flat enough to not inhibit playability. You can also see I added some more stuff for visual interest, like the small, mossy rocks and the broken branches on the ground. Once the static grass goes on, these should blend in better with the ground. I also hope that the shrubs will help to “bulk out” the forests and better represent the cover save this thicket conveys in game. I’ve put shots of each individual piece in spoiler tags for those of you who are interested:
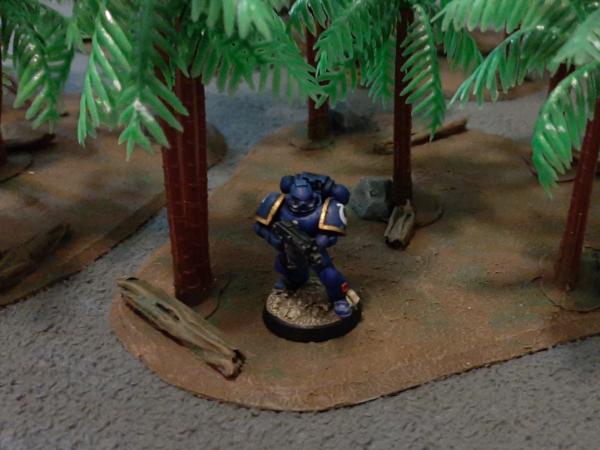
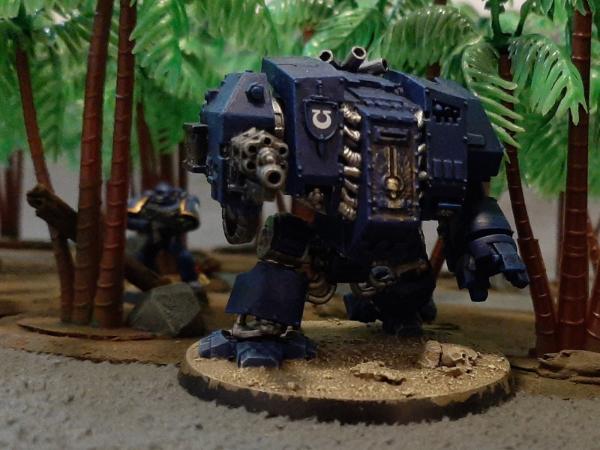
Once again, let me stress that these trees were pretty cheap, around 8 bucks for 10, and so they do look a little bit plasticky, as you would expect for that price. However, I think that the illusion still works pretty well if you get down to model’s eye view.
Pretty happy with where they are going
atm, and I’m looking forward to finishing them up soon. I’ll just have to take them home to my parent’s house where I have stored the other materials, but I’ll update you when they’re done. Now, on to the next project.
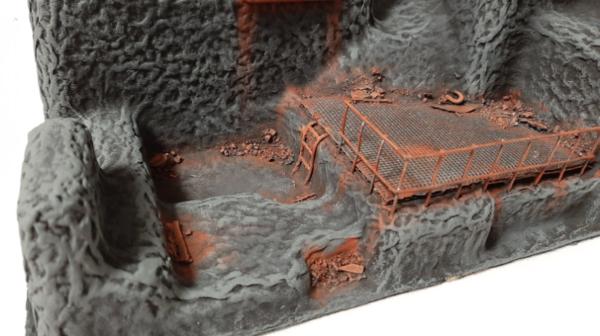
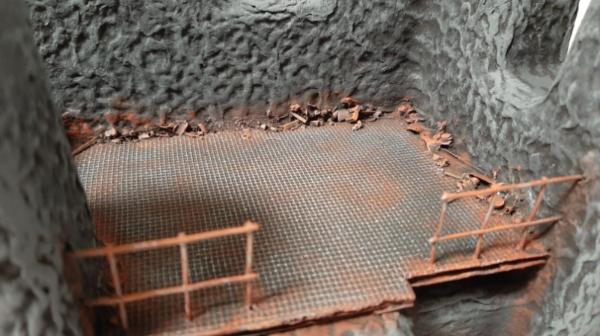
When watching some battle reports on youtube, I got the idea to make some sort earthen trench/barrier with spikes, and I couldn’t help but start right away. I dug out my styrofoam, cardstock and hot glue gun and got to work. Here’s what I ended up with when I was done building them:
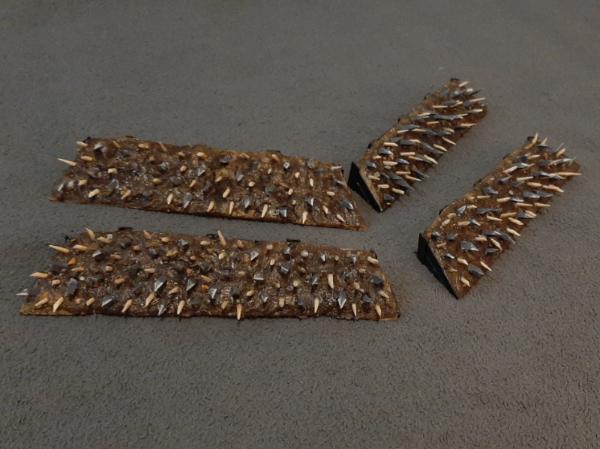
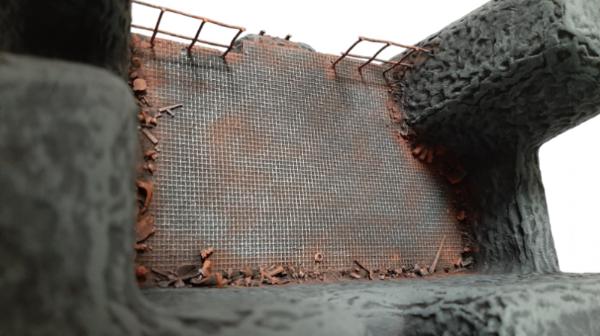
These turned out pretty much exactly how I wanted them to look, so I am pretty stoked. To make them, I cut out the basic shapes from insulation foam, then roughed up the earth side with a knife. To create the illusion of a reinforcing structure, I added planks to the other side which I had cut from cardstock. Then, I glued sand to the dirty side to make the surface more realistic.
Now came the hard part: while the glue was drying, I cut out countless pieces of sprue and toothpicks which would become my spikes. When the first layer of glue had dried, I had to sharpen each individual one of these spikes and push them into the styrofoam base with a dab of glue. Let me tell you, my fingers were KILLING me by the time I was done. Not only from the repeated stabbings I incurred, but also because it was actually super difficult to push them in. If I had known how gruelling this work was going be, I would probably have opted for waaaaay fewer spikes, but alas, I had to keep pushing through. That work alone took me about two evenings.
When all the spikes had finally been inserted, I sealed the whole thing with a layer of PVA to keep both the sand and the spikes in place.
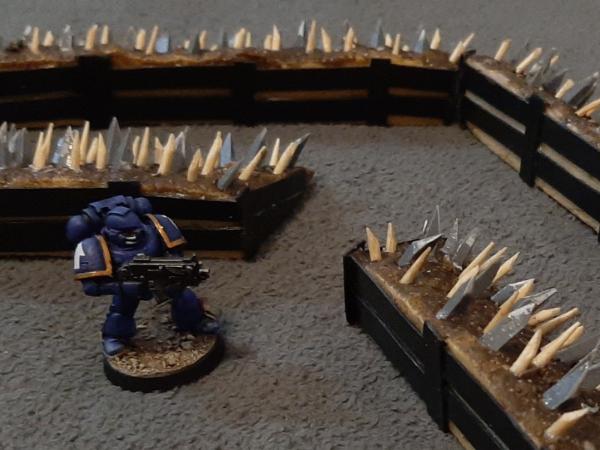
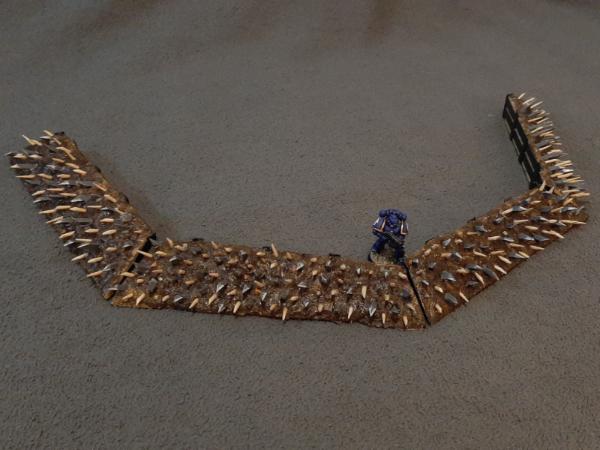
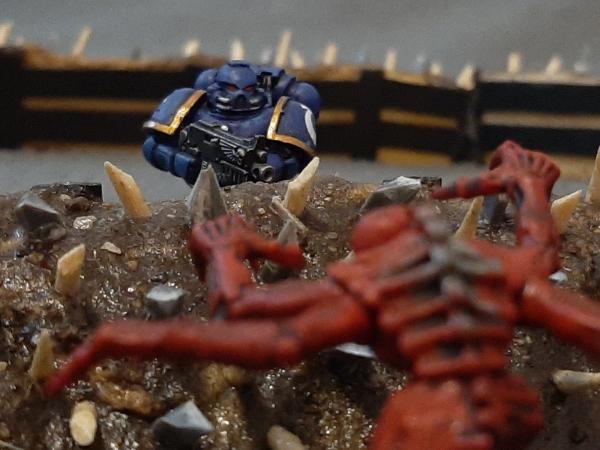
The barriers (please let me know if that is the correct nomenclature, I’m not quite sure) are now in the process of being painted, and I’ll show them off once they are done. The angular design of the edges means I can array them in sort of an arch or semi-circle, which should be helpful to create defensive posts around bases on my tabletop. Here they are with a classic Ultramarine for scale:
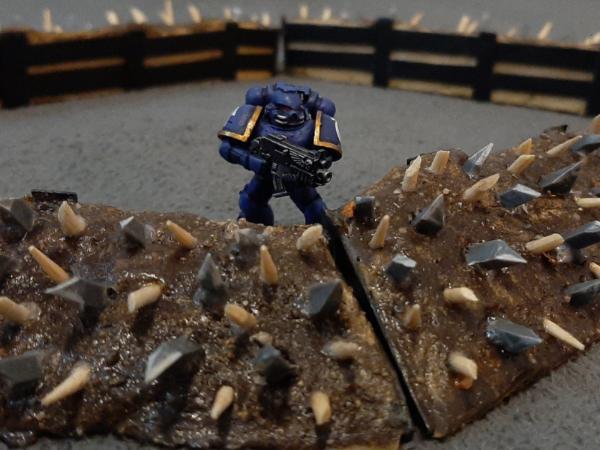
… and here’s a little action shot:
Alright, now time for something BIG:
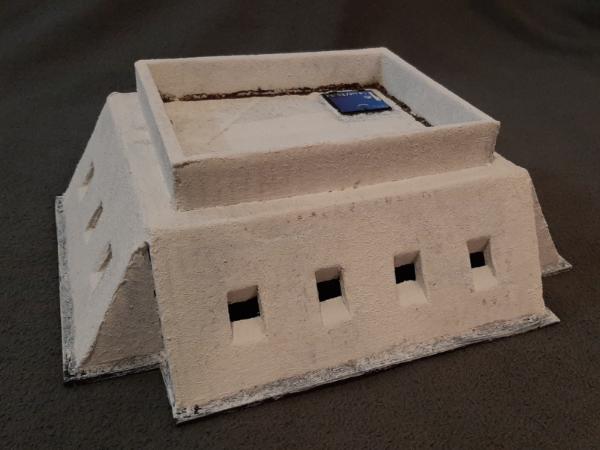
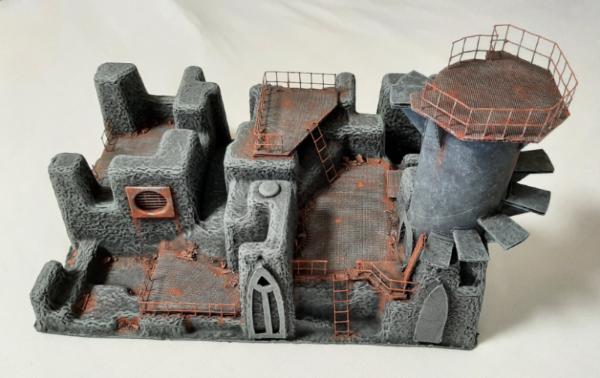
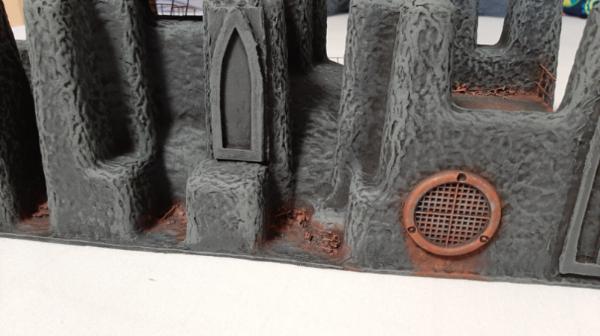
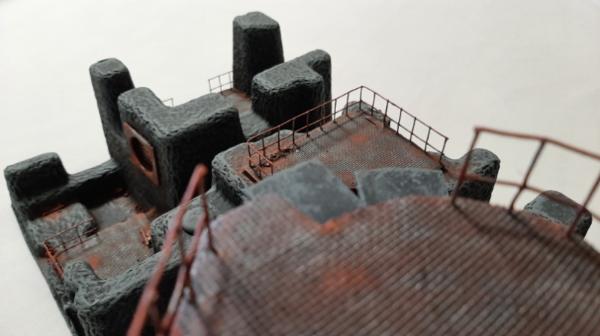
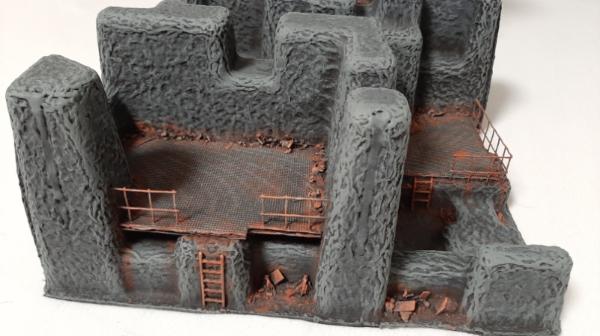
I always loved the classic 3rd edition “Imperial Battle Bunker” terrain set. I even owned one as a kid, but unfortunately, I mistreated it pretty badly and eventually, I had to throw out the cardstock portion of the kit, regrettably. I still kept the bulkheads, but these alone won’t help me much. Down one Battle bunker, and unwilling to shill out hundreds of bucks for an old original, I instead decided to build my own from scratch. This terrain piece was made completely from cardboard and cardstock (and copious amaount of hot glue). I tried to replicate the original bunker pretty closely, but I didn’t take exact measurements or anything, instead eyeballing most of it. Here’s a side view:
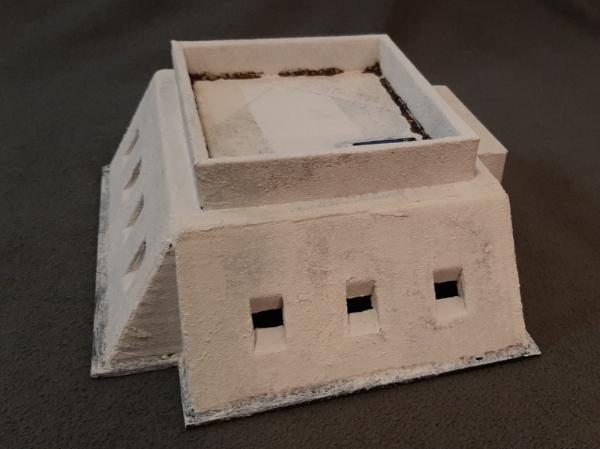
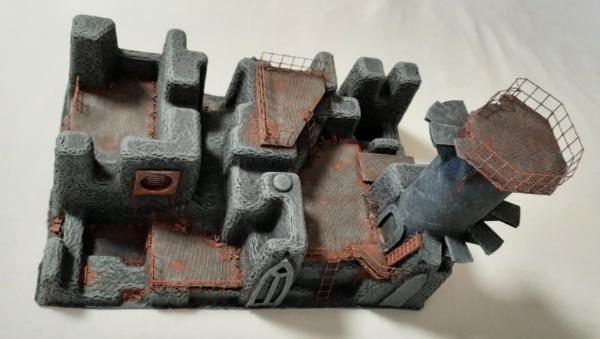
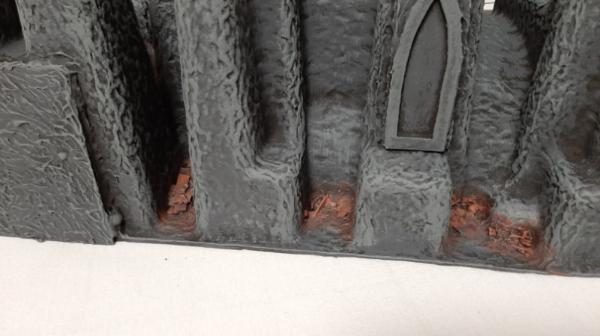
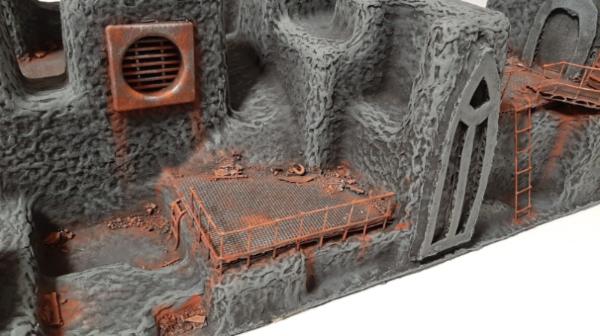
I tried to recreate the classic window shapes as best I could. In the original, these were printed on, but I had to cut and angle the cardboard to replicate that look. To finalize the surface, everything was stippled with spackle which creates a pretty believable concrete texture and also helps make the terrain piece pretty sturdy. Here’s the side with the entrance:
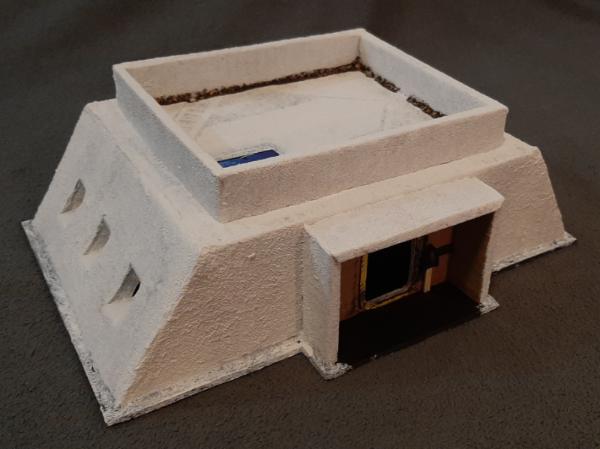
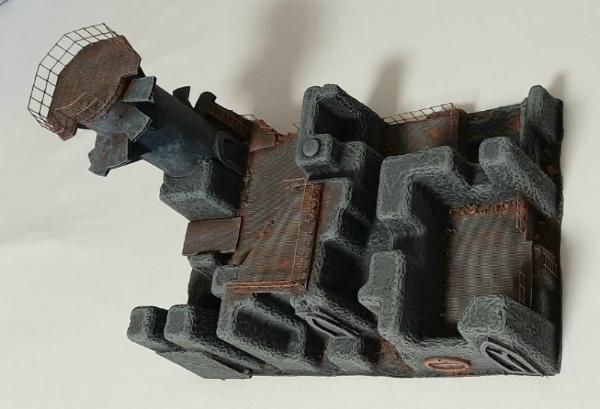
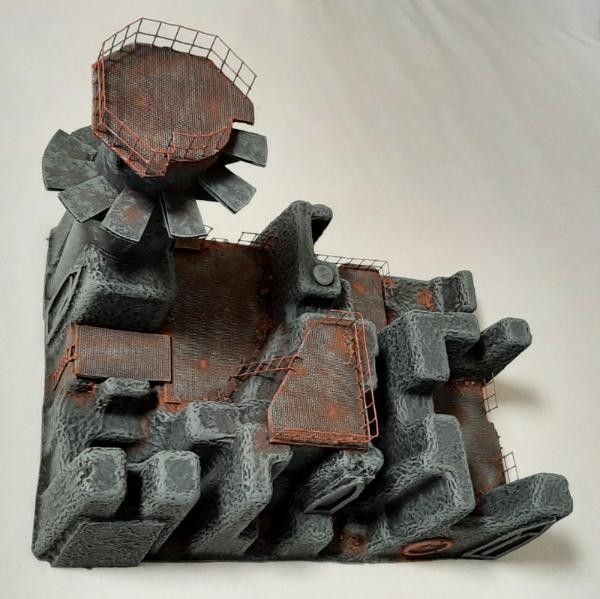
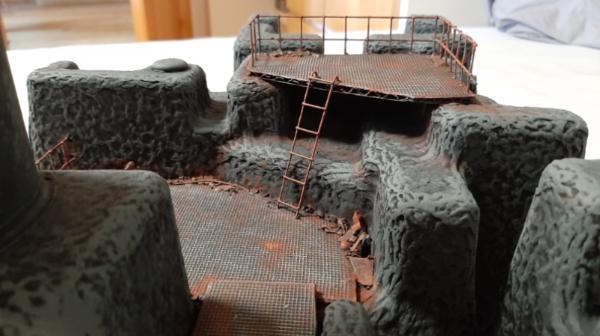
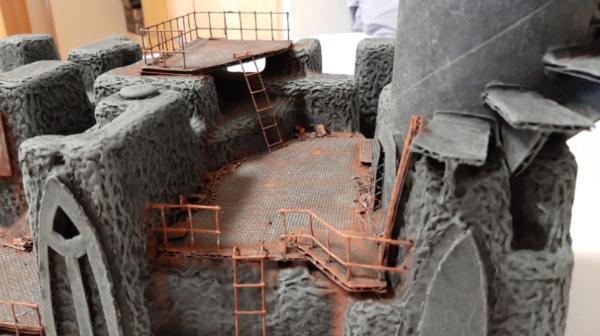
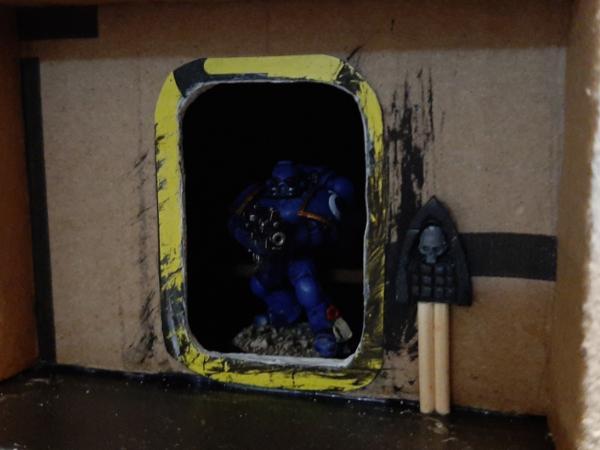
You may notice that, when compared to the original, this Battle Bunker is missing some structures like the watchtower and the connecting hallway. That’s because my idea with this build was to create a modular building. For this purpose, the entrance features a large cowling that will accept the other parts of the modular structure. That’s also why I left out the spackle in this area to help the different modules slide together more easily. When I make the other parts, I might add some magnets to hold the pieces in place more securely. Here’s a detail shot of the entrance:
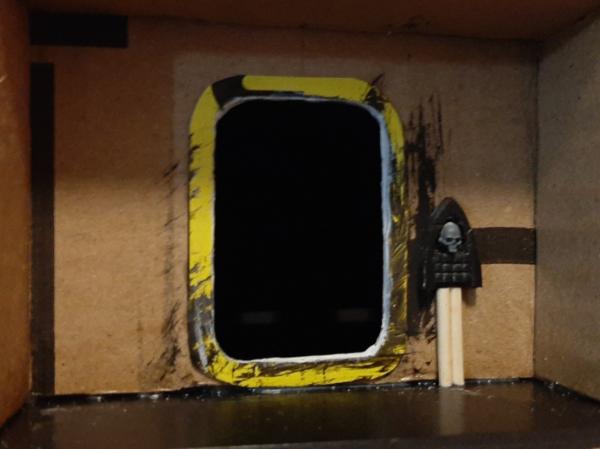
I added a small, scratch-built control panel for the bulkhead entrance. I didn’t bother building the door itself, as I can just claim it was swung open to the inside. I thinks it looks cooler with just the opening, and it also allows models access for some cool
RP.
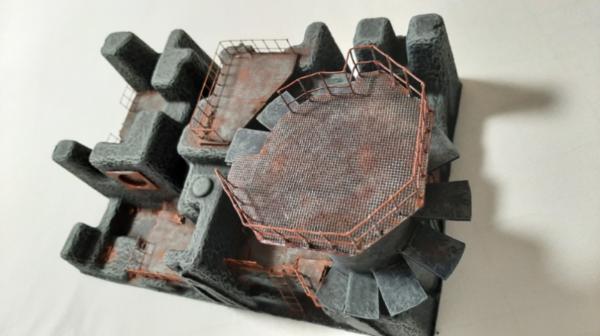
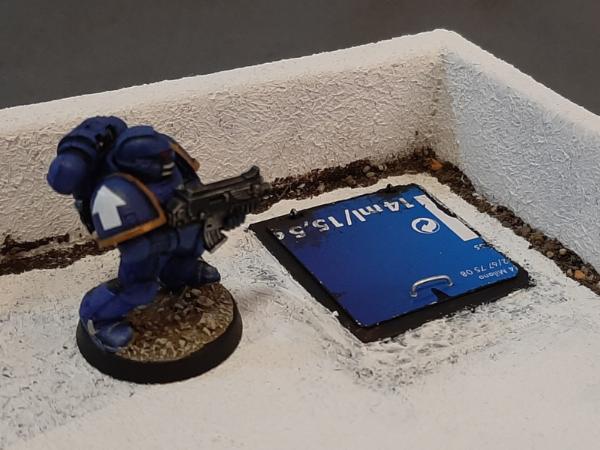
What I did bother with, however, was making an actual, functional top hatch. This was my first attempt ever at doing something like this, and for that, I’m massively chuffed with how it turned out. The hinges were made from thin wire which I use for modelling and pinning, attached to the cardstock hatch with super glue.
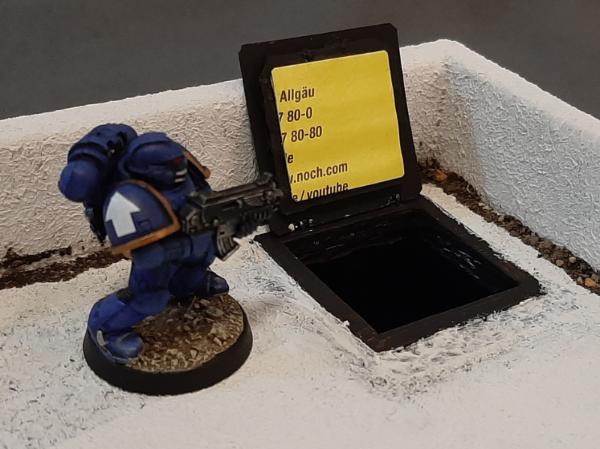
Now I’ll have to be super careful when painting it to make sure I don’t gunk up the parts too much, or else the hatch might get stuck in one position.
Another cool thing about making my Battle Bunker modular is that I will be able to create new and interesting addons which the original never had. Apart from the regular watchtower addon, I’m already toying with the idea of building a satellite dish and a battle cannon turret, or something with missiles maybe… We’ll see when I get around to it. For now, I’m a bit undecided on how to proceed. Ideally, I should be building everything before starting to paint, as that will allow me to get the paintjob consistent across all the separate pieces. But that will mean that the terrain won’t be done for a long time to come still…. I guess I could also premix paints and store them to keep the same look, but I’m not so sure about that. Maybe you can help me out what I should do. Anyway, enough about the Bunker for now. Let’s move on to the final terrain piece of today, one that is actually completed:
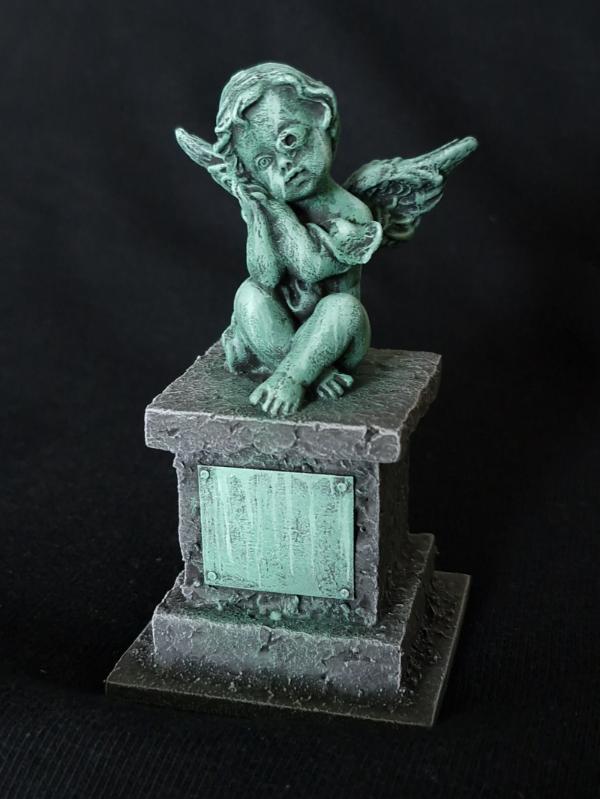
I finished this piece a while ago but never actually posted it here. It is a simple little Cherub Statue which I made from a lucky charm that my girlfriend’s mom gave to me for some holiday. Now, I’m neither very religious nor superstitious, but I’m also not one to throw out a gift just like that. Instead, I figured I’d turn this little angel into something far more useful and lasting.
I built a plinth for the putto with styrofoam and cardstock, put it on a weighted base and securely attached it on there with a pin. Where the pin would go inside the angel, I won’t mention here, but I’m sure you can imagine. I also gave the little guy a bionic eye to make him look a bit more menacing and firmly place him in the 41st millenium. I imagine this bionic, while appearing decorative, might well contain an actual pict-lens. This would allow the imperial elite to keep an eye on the goings-on in the city below them, which makes this statue just that little more grimdark
IMO.
The paintjob is where this terrain piece really came to life. I wanted to recreate a clearly recognizable bronze statue that was heavily oxidized, something you frequently see in old town districts and on main plazas here in Europe. I used
GW’s “Sybarite Green” to achieve the patina look, as it is the
perfect paint for this job, no lie. After a simple black basecoat, I heavily drybrushed the green over it. Then, I followed with a light drybrush of about a 50/50 mix of said green and white. Finally, I watered down this lighter paint and added streaks going down the model, mimicking the flow of water. The end result is pretty convincing
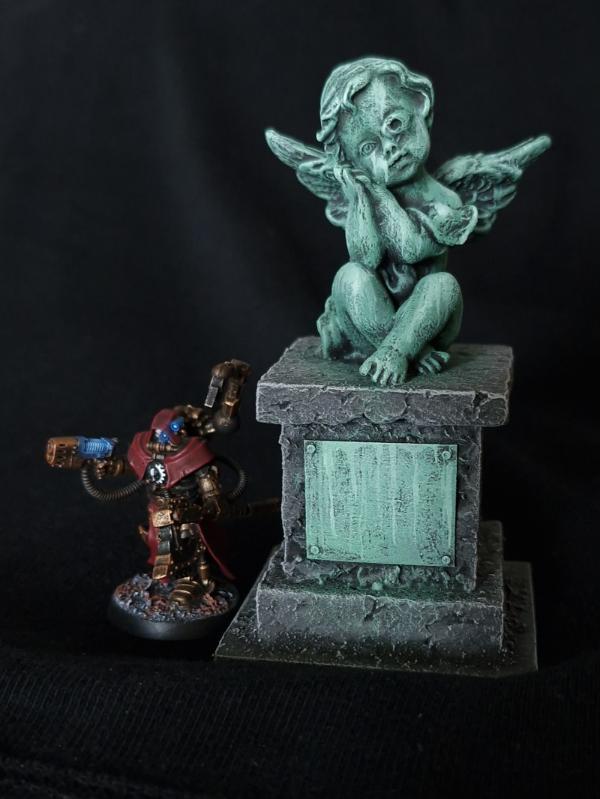
IMO, and I’m looking forward to finding an opportunity to use this piece on my table at some point. Here it is again with a Mechanicus model for scale:
Alright, that’s all I have to show you for today. I hope you enjoyed this update and leave me some feedback, some ideas and/or criticism! I’m always looking forward to reading your input. If you liked what you saw, please stay tuned, there will be more. Anyway, thanks for looking and see you later!


 Finished Tau Sept Cadre
  Alaitoc Eldar Warhost
  Finished Order of Our Martyred Lady - Sisters of Battle