Hello everyone! This is my battle report of the Platinum Devil 3 tournament hosted by Ketara at the University of Kent!
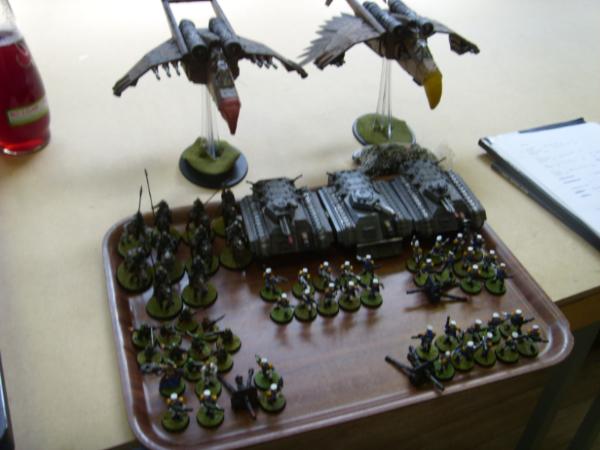
Firstly, introducing my lovely army:

The list I was using:
1000 points
HQ:
Scanning Team
Troops:
Veterans w/Meltaguns x2 + Flamer x1, Demolitions
Veterans w/Meltaguns x3, Demolitions, Vox
Veterans w/Plasmaguns x3, Vox
Dedicated Transport:
Valkrie, Multiple Rocket Pods, Heavy Bolters
Valkrie, Multiple Rocket Pods, Heavy Bolters
Fast Attack:
Vendetta
Vendetta
1250 points
HQ:
Scanning Team
Troops:
Veterans w/Meltaguns x2 + Flamer x1, Demolitions, Vox
Veterans w/Meltaguns x3, Demolitions, Vox
Veterans w/Plasmaguns x3, Demolitions, Vox
Dedicated Transport:
Valkrie, Multiple Rocket Pods, Heavy Bolters
Valkrie, Multiple Rocket Pods, Heavy Bolters
Fast Attack:
Vendetta
Vendetta
Tauros Venator,
TL Lascannon, HKM
Heavy Support:
Vulture Gunship,
TL punisher cannons
Game 1: VS Panic's Grot Wall [VICTORY POINTS]
The first game was versus Panic's Grot/Kan horde, the champions of Platinum Devil season 1. After rolling for deployment, I manage to get first turn.
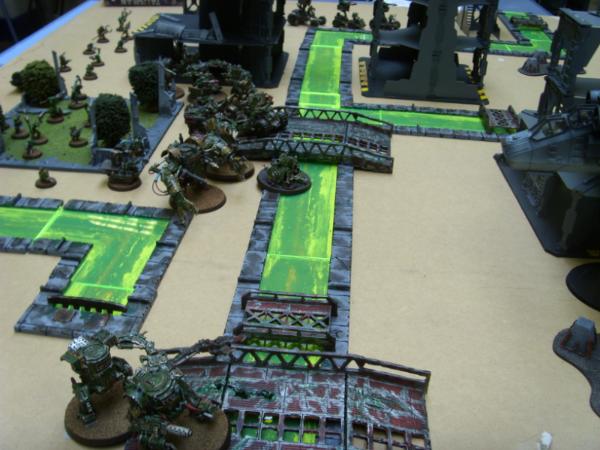
Elysians deploy against the Ork horde

The first turn sees me killing a squad of Kanz using my Vendetta gunships, my Valkyries manage to damage a group of warbuggies.
Panic moves his army up across the deadly acid canals. Trying to take a shortcut across the river of acid, he manages to lose a few kanz, ouch!
The Kanz fall into the acid canals
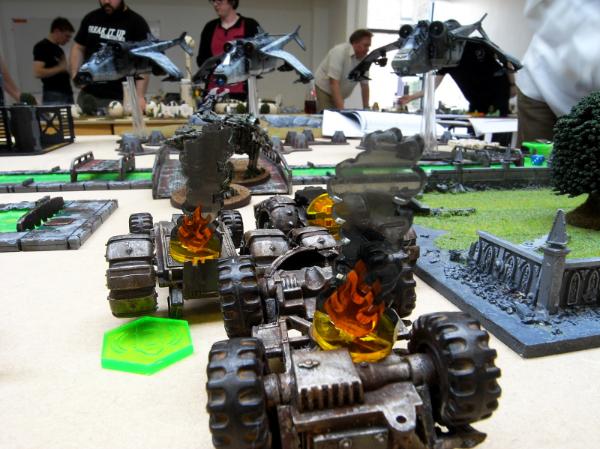
My second turn is uneventful, I manage to take down another few Kanz and warbuggies with my gunships, trying to play safe and avoiding the acid, I don't move any of my Valkyries or Vendettas.
The buggies burn from the firepower of the Vendetta gunships
Panic continues to move through the acid, eating up more of his army, I've never seen so many ones rolled for dangerous terrain. The immoblized Kanz and warbuggies sink into the acid, destroyed!
Marching through the river of acid

However, due to me not moving, one of his damaged kanz make it to a vendetta, exploding it!
Only three survivors pop out of the smoking crator

On turn three, I move my gunships and Valkyries back away from the impending Kan wall. My veterans attempt to destroy the Kan who blew up their vendetta...
 Only to run away in fear!, the Kan assaults the fleeing cowards, they fail to regroup and are destroyed!

Panic's kan wall trundle along, a few buggies fire pot shots with their rokkits doing negligible damage.
I fly to the other side of the acid canal to avoid the Kanz on turn 4.

My last remaining Vendetta cleans up a Deff Dread!

Panic's Kanz are forced to traverse the acid canal again.. causing another casualty.

I fire at what I can on turn 5, with Panic outside of assault range and only rokkits able to take down my Valkyries, the game ends quite uneventfully.

RESULT:
Panic - 260
VPs scored
Me - 305
VPs scored
DRAW, to win you must score over 150VPs, Panic's stuff was so darn cheap that I couldn't kill enough, yet that one Vendetta + Squad kill was a sizeable amount of points. Also, I think that the acid canals managed to cause more casualties than from my actual shooting.
A frustrated Kan shakes his chainsaw fist at the acid canals.
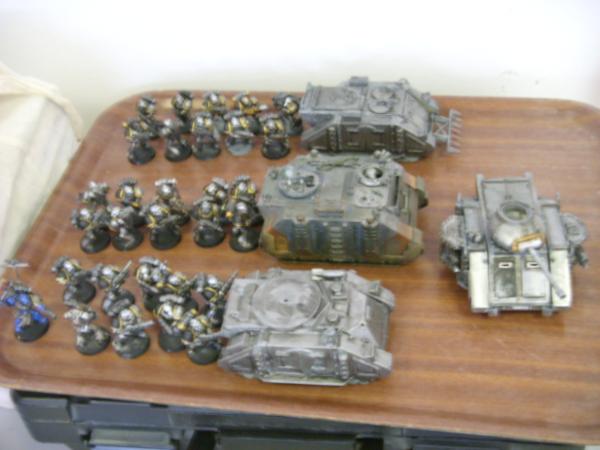
 Game 2: VS Evilmop's Chaos Space Marines [OBJECTIVES]
The second game was a bombardment mission, a variant of the battlemission one I believe. Setup was Dawn of War.
Evilmop's army

The table.

Evilmop get's first turn, everything walks on the table as he secures his objectives.
My gunships move onto the table on my turn.

I manage to destroy his Rhino containing Plague Marines with my Vendetta, but do little other damage.
Evilmop's second turn, he shoots at my rear vendetta with a Bombardment shot (If you hold more objectives than your opponent, you can call down a bombardment
STR 8 AP3 large blast) which wrecks it. His daemon prince then manages to wreck my forward Valkyrie.

I shoot at his Daemon prince with my Veterans who popped out of the Valkyrie, they do three wounds to him but fail to kill him. I disembark a squad next to one of my objectives and then move my othe Valkyrie and Vendetta up towards Evilmop's objectives. I destroy his Defiler with a vendetta.
Evilmop attacks my squad in cover with his Daemon Prince, I fail to wound him and he wipes the squad!

My Valkyrie arrives near the centre unclaimed objective, evilmop decides to unload his berzerkers from his land raider to destroy my Valkyire, managing to shake it and take off two weapons. I unload my meltavets onto the objective and kill his Land Raider. Now controlling more objectives, I land a bombardment on his clumped up Khorne Berzerkers who assaulted my Valkyrie, managing to kill all of them!

With three plague marines left, evilmop concedes the game.
RESULT: Win!
Game 3: VS Lovepug13's Chaos Marines [Kill Points]
I forgot to take photos for this game so I can't really remember what happened. SPOILER ALERT: I lose pretty horribly, I remember though! Bonus Kill points for killing
HQ, Elites and Heavy Support.
The Table:

Lovepug13 wins deployment, I decide to deepstrike everything as he had a very shooty army containing 5 obliterators.
I roll for reserves, half my army comes on, my vulture manages to kill one obliterator, and my valkyrie puts a few wounds on a daemon prince.
Lovepug blasts away my Vulture with 4 lascannons, wrecking it.

The rest of my army arrives, I manage to kill his Daemon Prince with my reinforcements, however, his obliterators manage to wreck a vendetta and immobilize my other vendetta.

I get revenge on the obliterator who killed my vendetta with lascannons to the face, however, as Lovepug13 was ahead by two kill points, I couldn't actually reach the rest of his army and do enough damage to gain any more kill points.
Result: Loss!
Lovepug13: 8 Kill Points
Me : 6 Kill Points
Game 4: VS ArbitorIan's Yellow Tau [OBJECTIVES]
Standard objective game using pitched battle deployment. Five objectives were rolled.
ArbitorIan wins deployment, and deploys as follows.

I decide to reserve my aerial forces to avoid the worst of the Tau firepower. I deploy my Tauros behind a rock hoping to avoid being seen, but the Tau hammerhead manages to maneuver into position firing an ion shell into my rear armour! Luckily, I passed my cover save. The Tauros peeks out on my turn to take a pot shot at the the Devilfish, but does nothing.
My vulture also arrives, killing both shield drones and one broadside!
Sneaky sneaky Tauros


My Valkyrie also arrives from the side, doing some minor damage to the Tau Firewarriors inside the trench.
Dakka Dakka, 20 twin linked Str5 shots

ArbitorIan responds by knocking the punisher cannons off my Vulture. Luckily, his broadsides roll ones to penetrate my Vulture, allowing it to live another day! The missile pods manage to do the damage though. My Valkyrie at the side is immobilized by missile pod action. On my turn, I disembark my Meltavets to engage the Tau commander.

I miss horribly with my Democharge, but my meltaguns manage to take down two gun drones.
With my Vulture without it's guns, I decide to ram it into the devilfish.

An exciting moment passed as both me an ArbitorIan manage to penetrate each other's respective vehicle, but we both rolled low (2 and 1) as the two vehicles bounce off each other.
ArbitorIan cleans up my Vulture with his broadsides, while managing to take down my veteran squad. I go to ground, leaving 4 guys standing! Who said 6+ saves were bad?!

My Valkyrie that was immobilized was quickly mopped up by the Tau commander.
My Vendetta gunship arrives on my turn. Seeing that ArbitorIan only had two troops choices in an objective game, I decided to unload my Vendetta's payload into the Tau squads, I manage to kill three firewarriors out of 6.
The next turn rolls around, and ArbitorIan shakes my Vendetta with deepstriking Fusion Blaster suits. The Broadsides kill my last Valkyrie with the Veteran squad inside.
Survivors of the crash

I gave up my plan to kill the firewarriors, and rammed the Hammerhead in the centre of the table with my Vendetta, I manage to penetrate and immobilize it with my kamikaze attack, meanwhile, my plasma veterans manage to kill the deepstriking fusion blaster suits.

ArbitorIan manages to finish off my ramming Vendetta and kills the plasmavet squad with his pathfinders and battlesuits. Even my amazing 6+ cover save from going to ground couldn't save them from the firepower of 6 battlesuits. My veterans that were contesting the centre objective decided to run away after losing one man to the firewarrior shooting.
At turn 5, all I had was my scanning team and Tauros who was shaken that entire game, however, I could force a draw if I managed to zoom my Tauros on one of the objectives and force a fall back on the other Tau squad (as they were both below half strength!), I manage to hit and wound with my lasgun, however, Ian makes his armour save. I then proceed to roll double ones with my Tauros.

RESULT: LOSS!
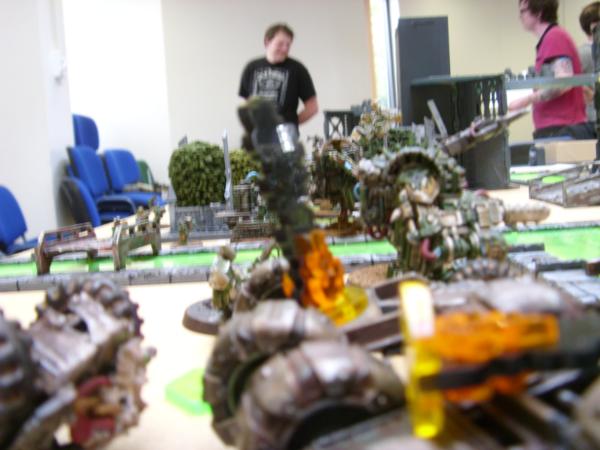
Running over by nearly an hour and a half, I found myself unable to play the second day due to university related work. However, I have a plethora of bonus pics of the day as a sorry. Enjoy!


 8000
8000
 3000
3000
 1000
1000
 1500
1500


 Imperial Knights: The Avengers Initiative
 Da Dark Angelz
 Arakasi vs Infinity