My friend and I started getting back into
40k after a long absence about 6 months ago, and have been refining our armies. I have been focusing on a new Tyranid army (Hive Fleet Inferno), whilst he has been focusing on Space Wolves and Tau.
Nids
I created a fresh Nid list to form the core of my army, and have been playing with pretty much the same list for many games now. I have taken the same army in all three of these games to try and help me focus on strategy, what works, what doesn't work etc.
Tau
The focus for my friend over these three games was to find a list of Tau that worked for him. You will see a very clear progression from his first army to his third, and how effective each was.
Each game can be found here:
Nids vs Tau (Part One - Currently reading)
Nids vs Tau (Part Two)
http://www.dakkadakka.com/dakkaforum/posts/list/372694.page
Nids vs Tau (Part Three)
http://www.dakkadakka.com/dakkaforum/posts/list/0/372926.page#2878089
Hive Fleet Inferno
Tyranid Prime –
LW/
BS & Death Spitter
5 Warriors (4 deathspitters, 1 Barbed Strangler)
2 x 10 Hormagaunts
2 x 15 Gargoyles
2 x 1 Zoey
2 Hive Guard
Trygon
Tau
Leader in suit (plasma/missile pod?) and marker light drone
3 Broadsides
Hammerhead
2 x 6 Firewarriors
1 x 8 Firewarriors
2 x 4 gun drones
1 x 3 sniper drones and marker light
Mission – Annihilation, pitched battle
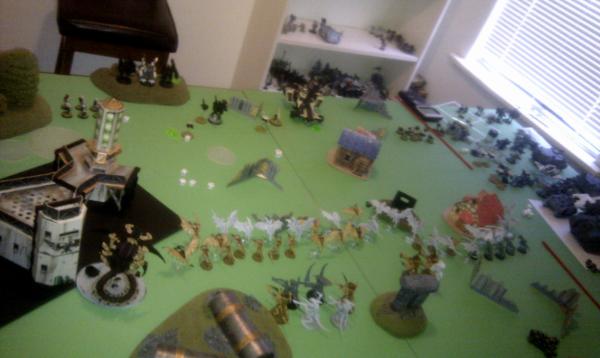
Tau get first turn and deploy:
The three broadsides take up firing positions on the hill on the Tau right flank with two squads of six Fire Warriors setup in front. The leader (with a marker light drone) sets up right of centre with a squad of four gun drones in front. A squad of 3 sniper drones take up position in the centre. The Hammerhead deploys behind a building on the Tau left flank, along with a squad of 8 Fire Warriors and another squad of 4 gun drones.
 Tyranids deploy:
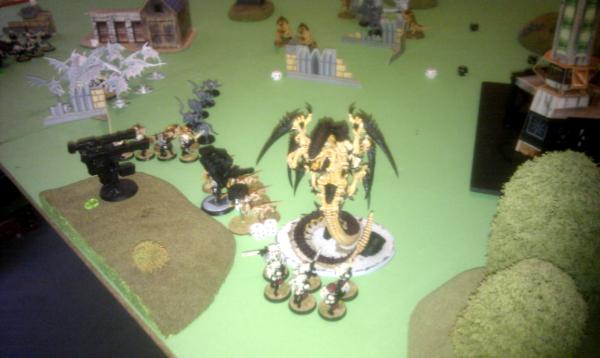
My Nids largely deploy across the entire board. The only particular items of note, is that my hormagaunts are in front of my gargoyles (for both first turn cover saves, and for timing purposes later in the game) and the Trygon sets up with the power plant between him and the broadsides so that at worse, he will at least get a cover save if they shoot him.
After I have setup, the two gun drone squads make a scout move forwards (intending to bring my gargoyles within rapid fire range, and separate the ‘waves’ of my army).
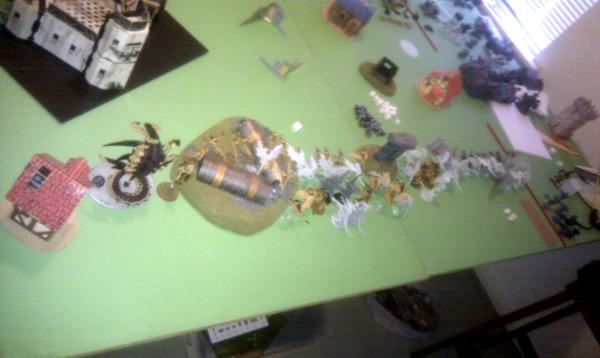
Tyranids fail to seize.
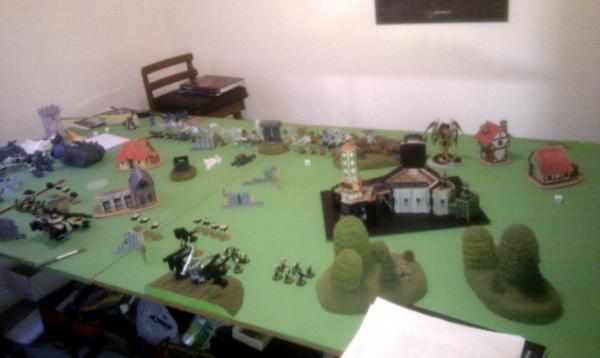 Tau Turn 1
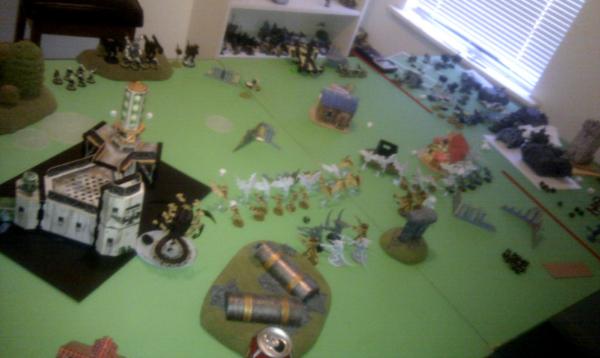
Whilst the gun drones move forwards again, the rest of the Tau army remains relatively stationary, and starts to pick long range targets where they can. Firing however does not start well, with the hammerhead managing to kill 1-2 hormagaunts and gargoyles and the Broadsides Insta killing one of my Zoeys.
 Nids Turn 1
The Nids lines surge forwards, with the gargoyles quickly overtaking the slightly slower moving hormagaunts. The left hand brood of gargoyles fired upon the gun drones, taking 3 of the four down with the remaining one fleeing. On the right, the Hive Guard managed to Shake the Hammerhead (just in range), whilst the gargoyles managed to down one of the gun drones. The Warrior with the barbed strangler shot at the firewarriors in front of the broadsides, killing two firewarrios (and making them flee) and wounding a broadside and pinning them! Great shooting. The gargoyles on the right then charged the remaining three gun drones, wiping them out and then getting a 6” consolidation move enabling me to bring them back behind the building and out of rapid fire range.
 Killpoints – Tau: 1 , Nids: 3
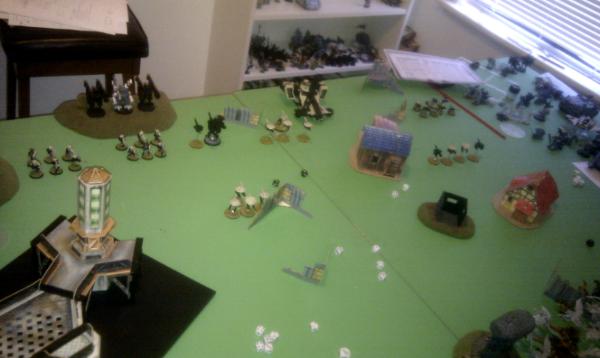
Tau Turn 2
Killpoints – Tau: 1 , Nids: 3
Tau Turn 2
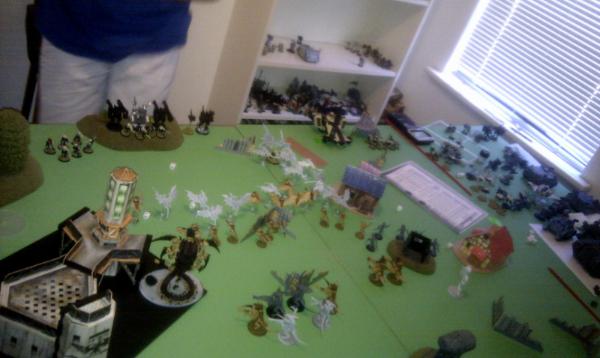
With their Hammerhead shaken and the broadsides pinned, their wasn’t much happening in the Tau turn. The Fire Warriors rallied and reformed in front of the broadsides, the 8 man Fire Warrior squad backed off into the terrain to prevent being charged by the gargoyles and the rest shot into my horder doing minimal damage
 Nids Turn 2
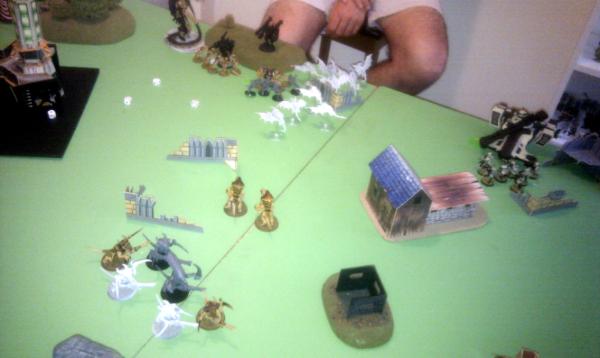
The horde again swarmed forwards. The Gargoyles and homrgaunts on the right switched direction towards the centre of the board, putting some buildings between themselves and the 8 man Fire Warrior squad and keeping out of rapid fire range. The only firing of note was the Hive Guard wrecking the Hammer head. In the assault, the gargoyles charged into the sniper drone team, but failed to kill them all.
 Killpoints – Tau: 1 , Nids: 4
Tau Turn 3
Killpoints – Tau: 1 , Nids: 4
Tau Turn 3
The Tau then brought all of their fire to bear (except for the 8 man FireWarrior squad) on my horde, but only succeeded in killing off one of the gargoyle broods, and doing minor damage to the hormagaunt brood behind. Somehow, the sniper drone squad continued to hold up the other gargoyle brood...
 Nids Turn 3
The horde was now in striking range, and it was time to land the killer blow. As the gribbly bugs scittered forwards eager for combat, the Hive Guard again got lucky and managed to skewer two of the broadsides with their deadly weapons (3 wounds and two ones on the save – ouch!). My horde then crashed into his remaining army, 1 hormagaunt brood into one fire warrior squad, another into his leader and the Trygon into his other firewarrior squad. The Trygon wiped out all 6 warriors in one go, whilst the hormagaunts managed to kill 3 of the four fire warriors, and kill the marker light drone with his commander for minimal loss. The gargoyles also finished off the last sniper drone and advanced towards the broadsides.
With only a handful of Tau left, and most of the Nid horde intact, the Tau decided to concede at this time.
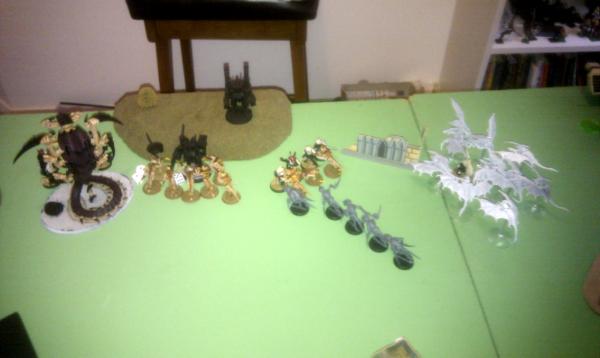
 Killpoints – Tau: 2 , Nids: 6 – Victory Nids!
Please feel free to comment, make suggestions/criticisms of both battle report, gameplay, army selection and tactics.
I will update this with my own review of the battle sometime over the next week, and appreciate your thoughts/comments.
Thanks!


 Imperial Knights: The Avengers Initiative
 Da Dark Angelz
 Arakasi vs Infinity


 And if you're drinkin' well, you know that you're my friend and I say "I think I'll have myself a beer"