| Author |
Message |
 |
|
|
|
|
Advert
|
Forum adverts like this one are shown to any user who is not logged in. Join us by filling out a tiny 3 field form and you will get your own, free, dakka user account which gives a good range of benefits to you:
- No adverts like this in the forums anymore.
- Times and dates in your local timezone.
- Full tracking of what you have read so you can skip to your first unread post, easily see what has changed since you last logged in, and easily see what is new at a glance.
- Email notifications for threads you want to watch closely.
- Being a part of the oldest wargaming community on the net.
If you are already a member then feel free to login now. |
|
 |
2012/01/31 07:54:09
Subject: Re:The 1st Merican Lancers an Superdetailed Imperial Guard Tank Army.
|
|

Pyromaniac Hellhound Pilot
|
More great work from Inq. Eisenhorn 
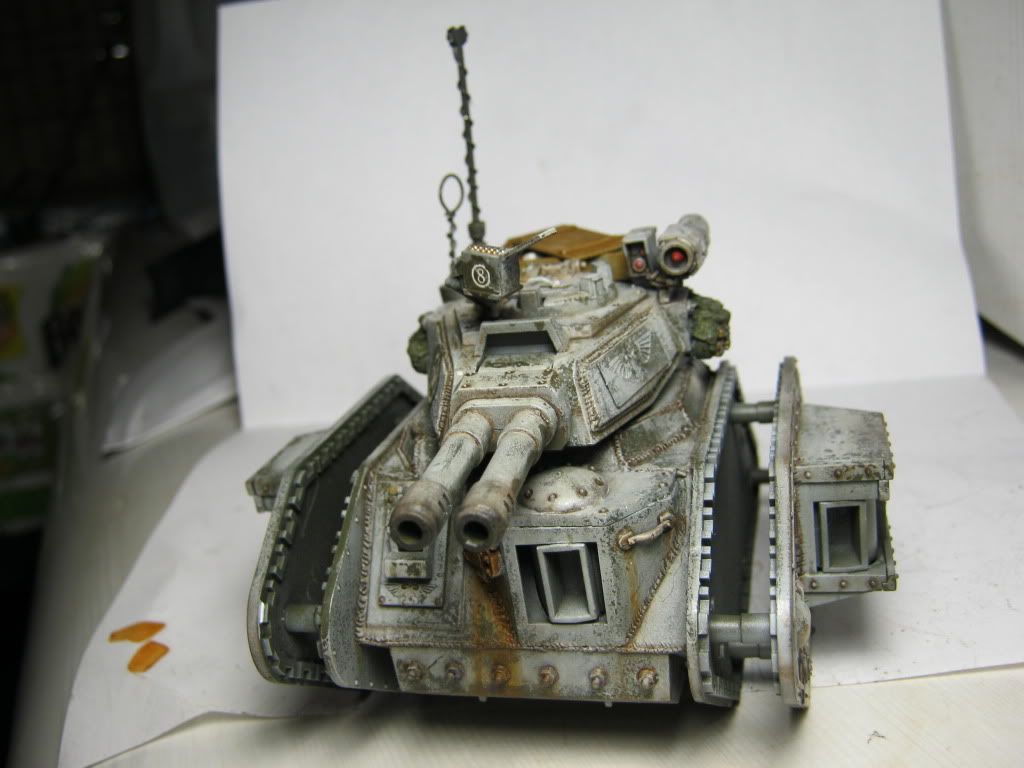
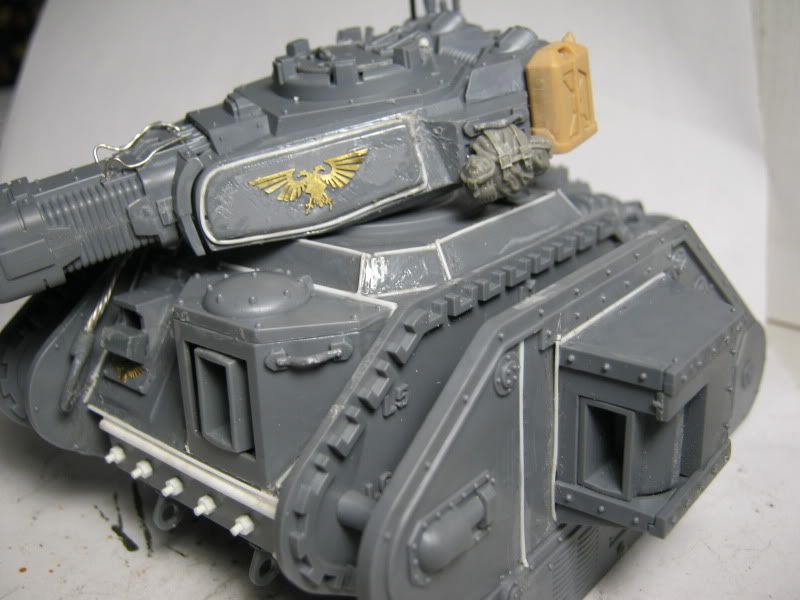
I love the ammount of effort that you put into customizing your tanks. It really goes a long way. Keep it up! I really like the super charger on this one! Great fluff!
I don't think the stowage on the back of the turret lends itself to the stripped down look. I know Johnny 5 has less than the other tanks, but I'm still not a big fan. Other than that, great work! 
Rawson
|
 The 104th Vostroyan Mechanized The 104th Vostroyan Mechanized
 Rawson's Reboot Rawson's Reboot

Viktor von Domm: nope... can´t do that for the sake of all lving creatures that dwell on earth....
dsteingass: That's like saying "I forgot to tell you who your real father is"
nerdfest09: Rawson speaks the truth! |
|
|
 |
|
2012/01/31 12:02:47
Subject: The 1st Merican Lancers an Superdetailed Imperial Guard Tank Army.
|
|

Dakka Veteran
|
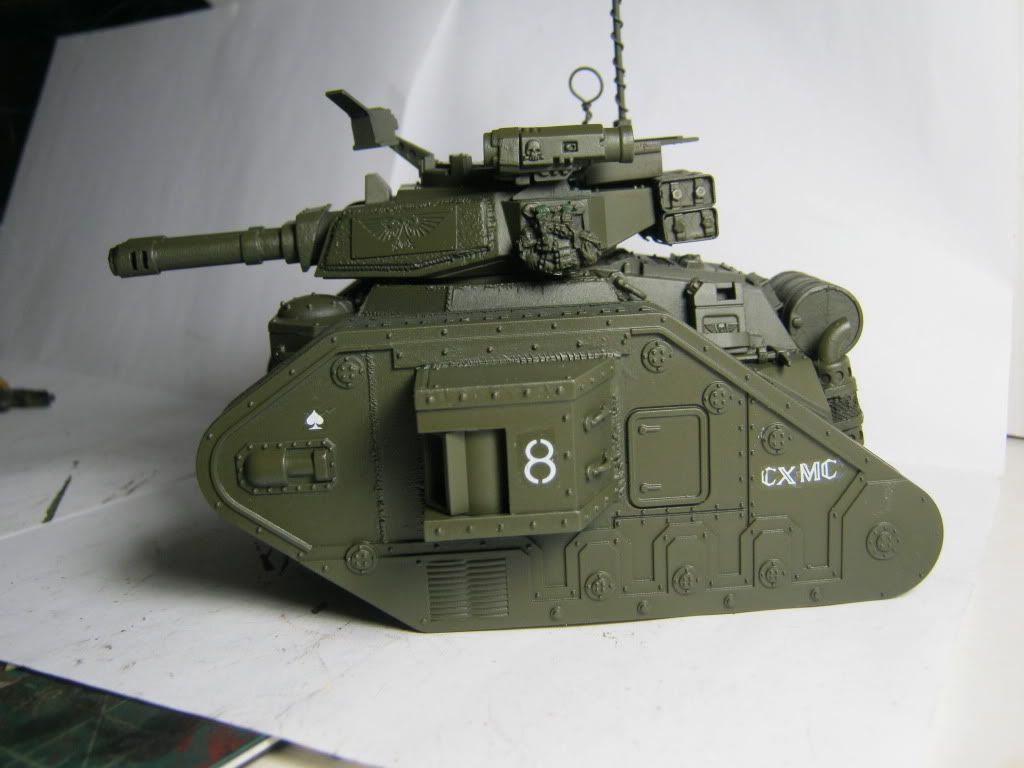
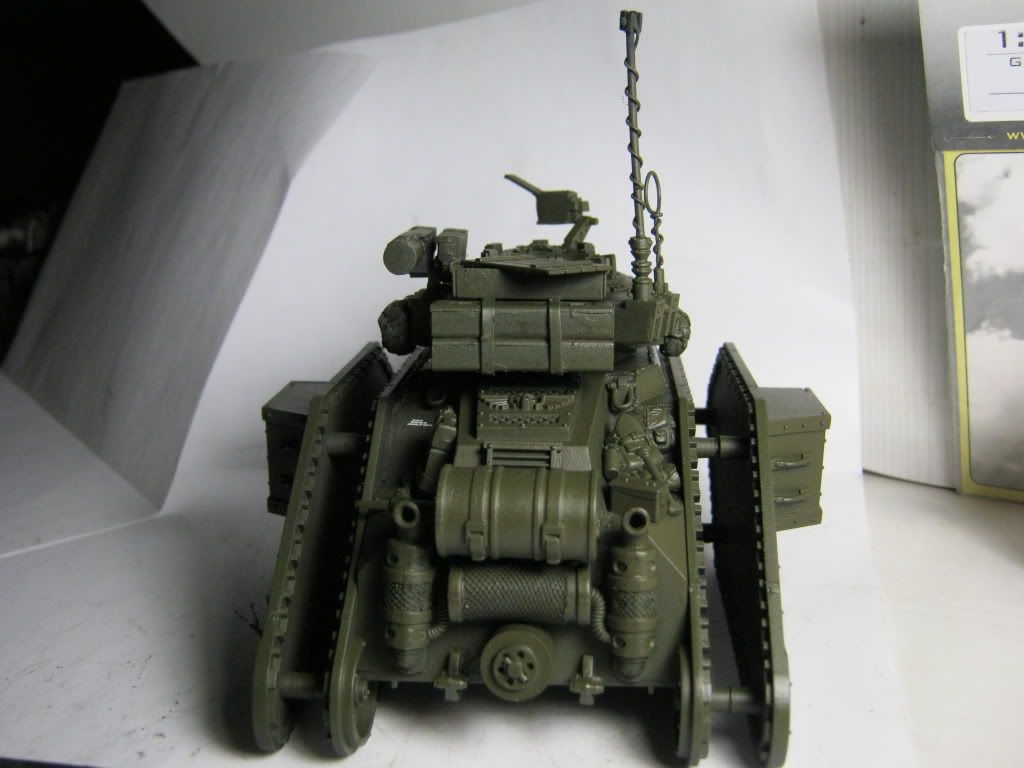
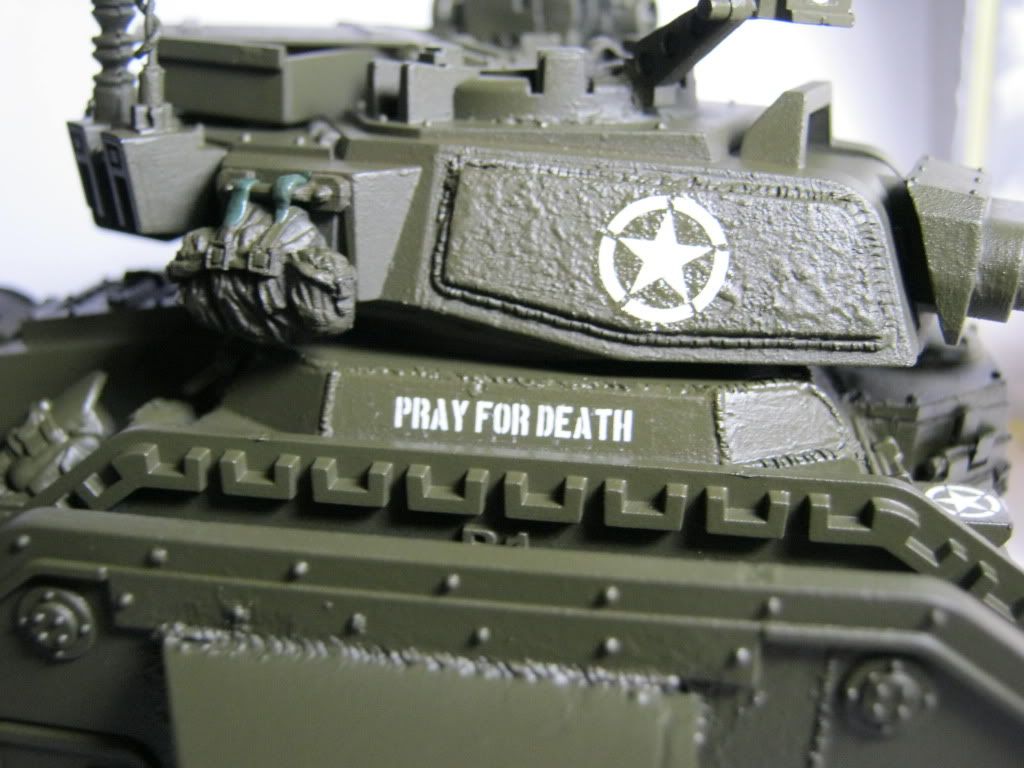
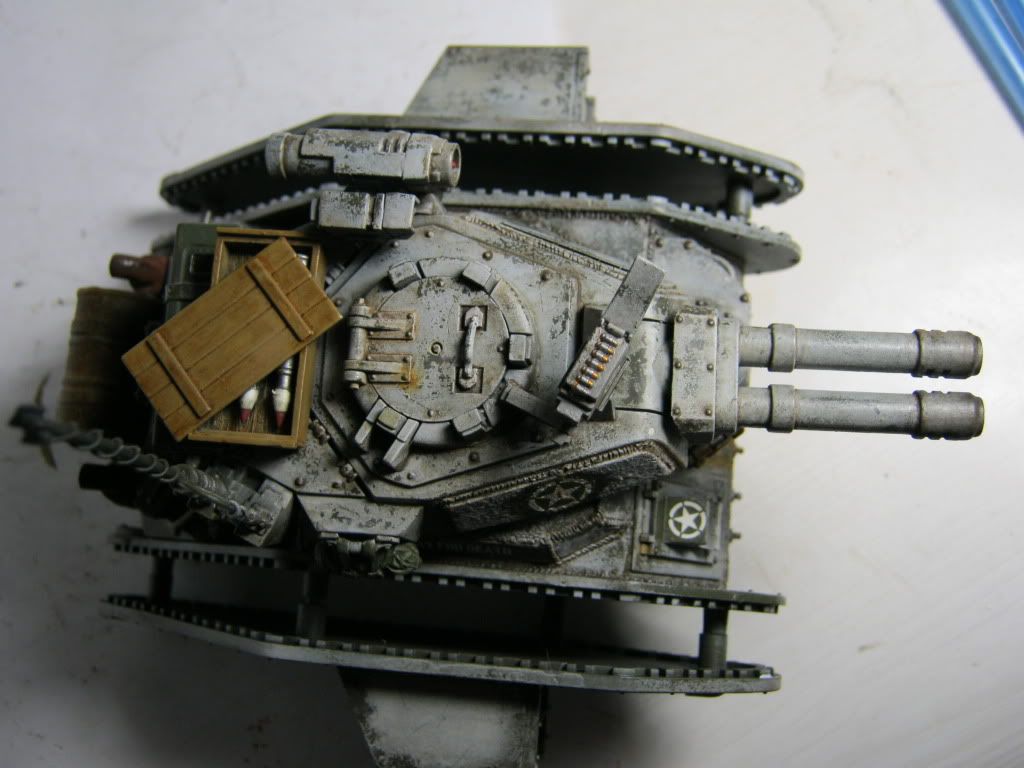
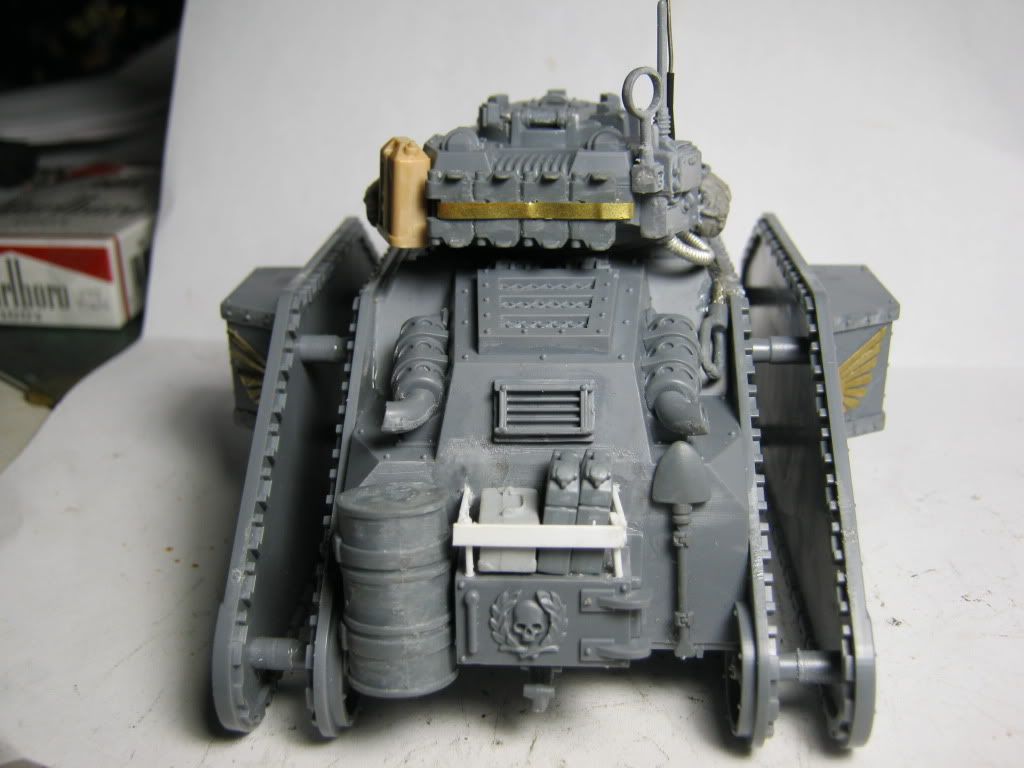
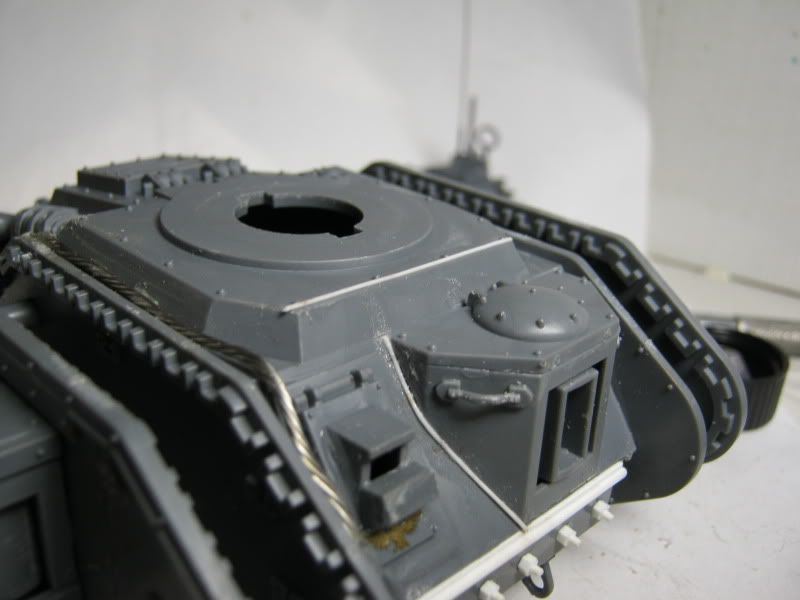
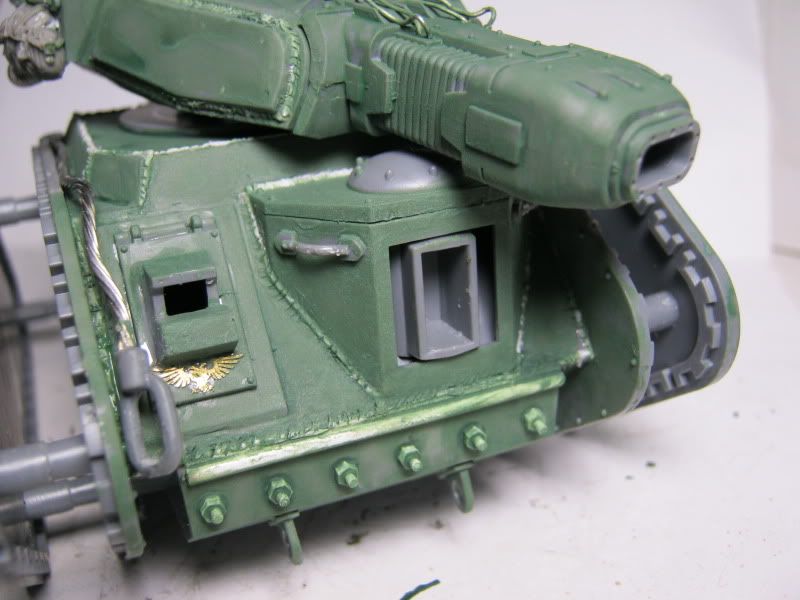
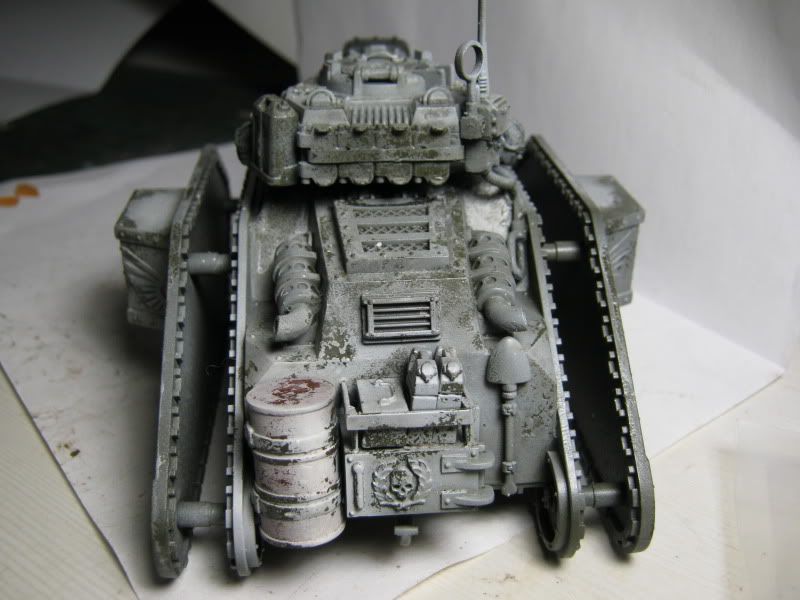
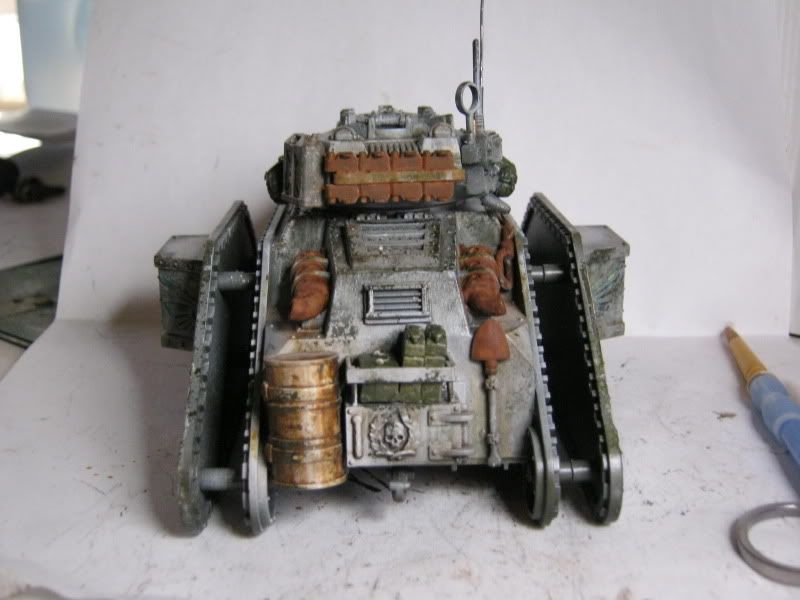
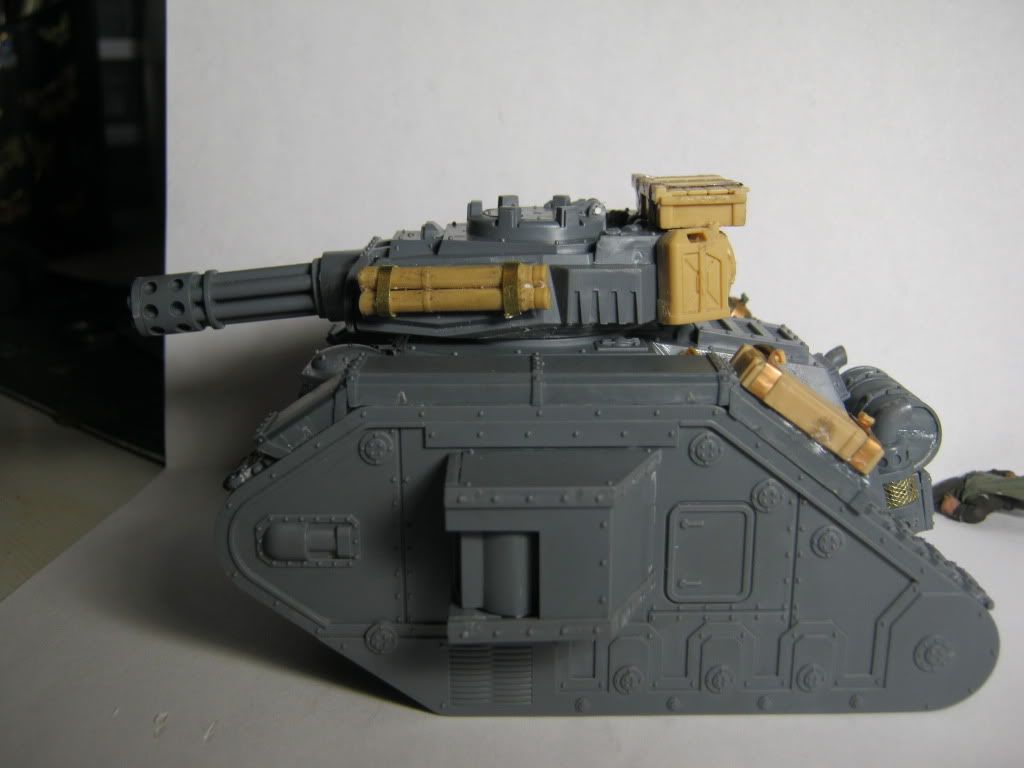
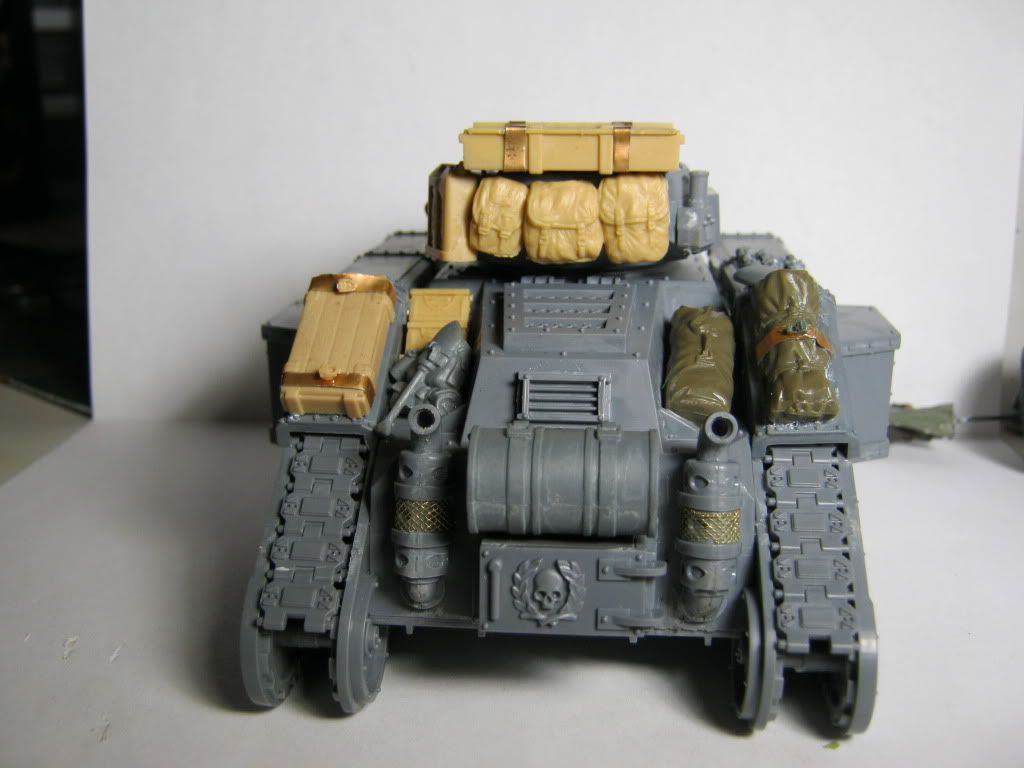
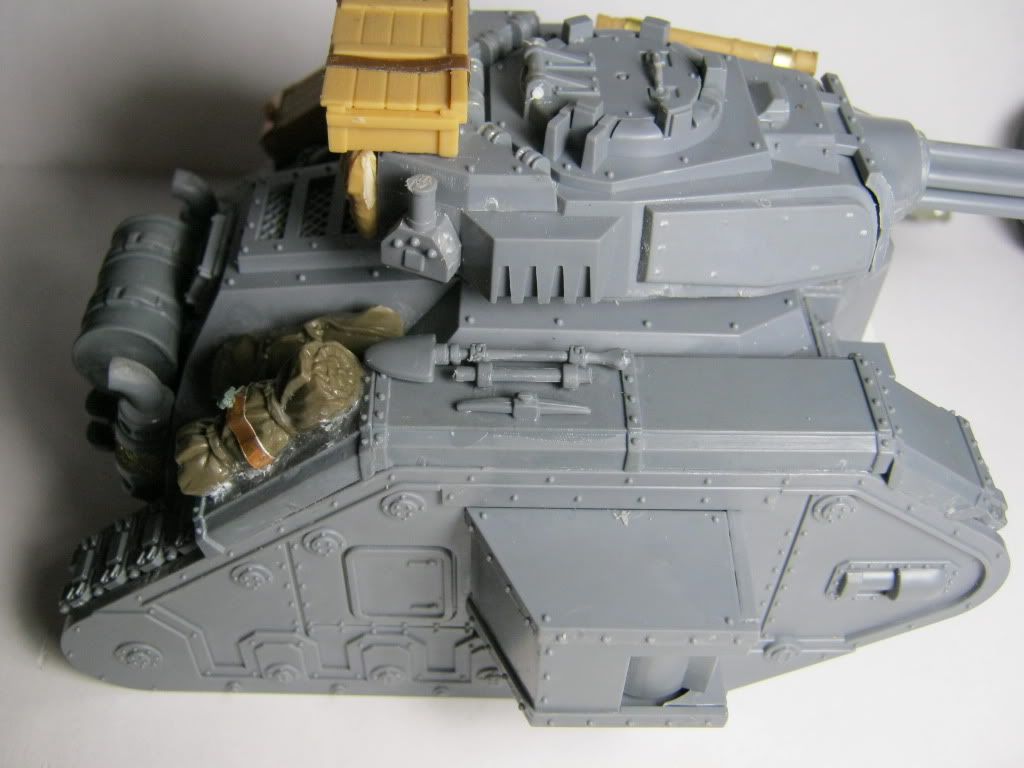
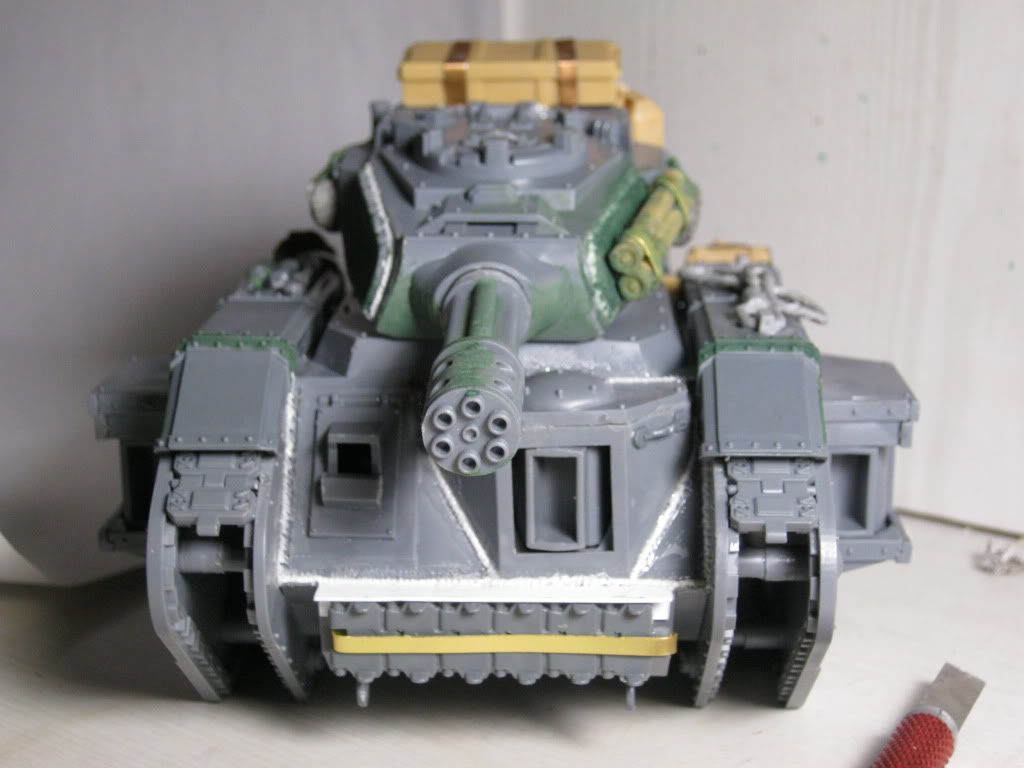
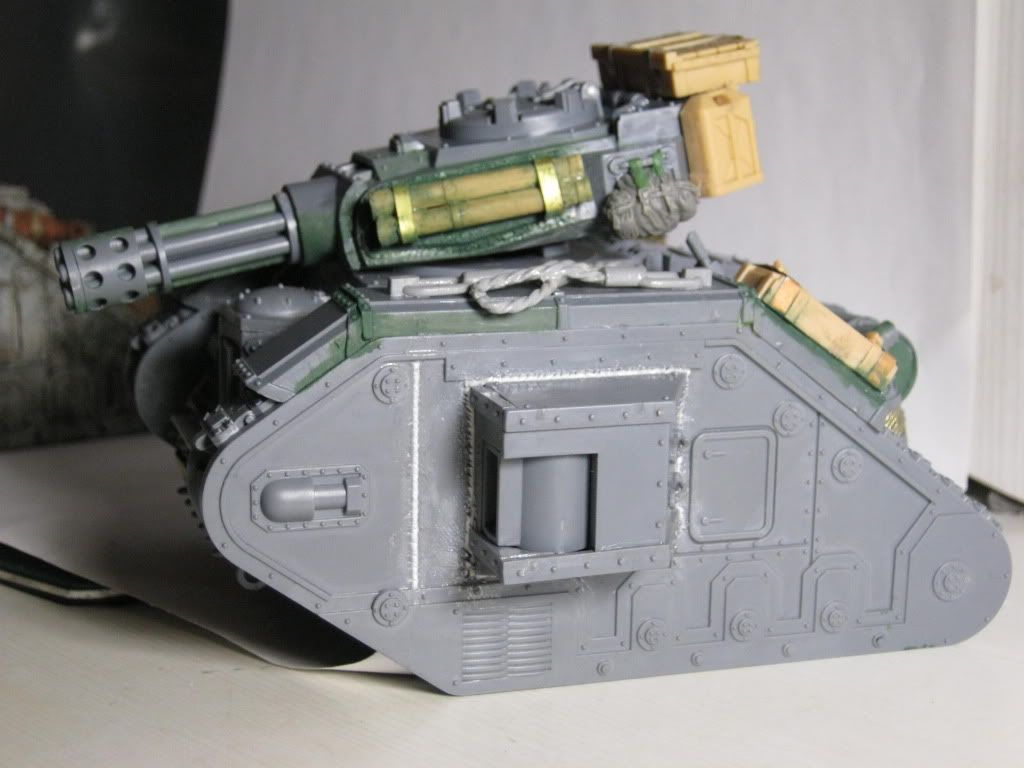
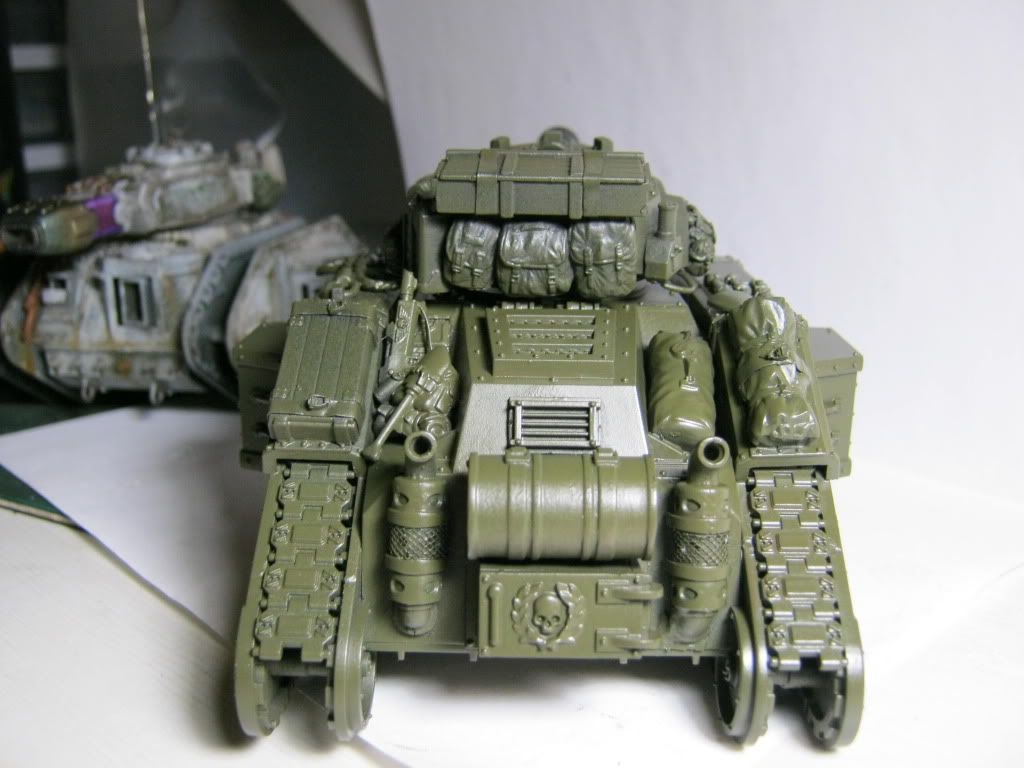
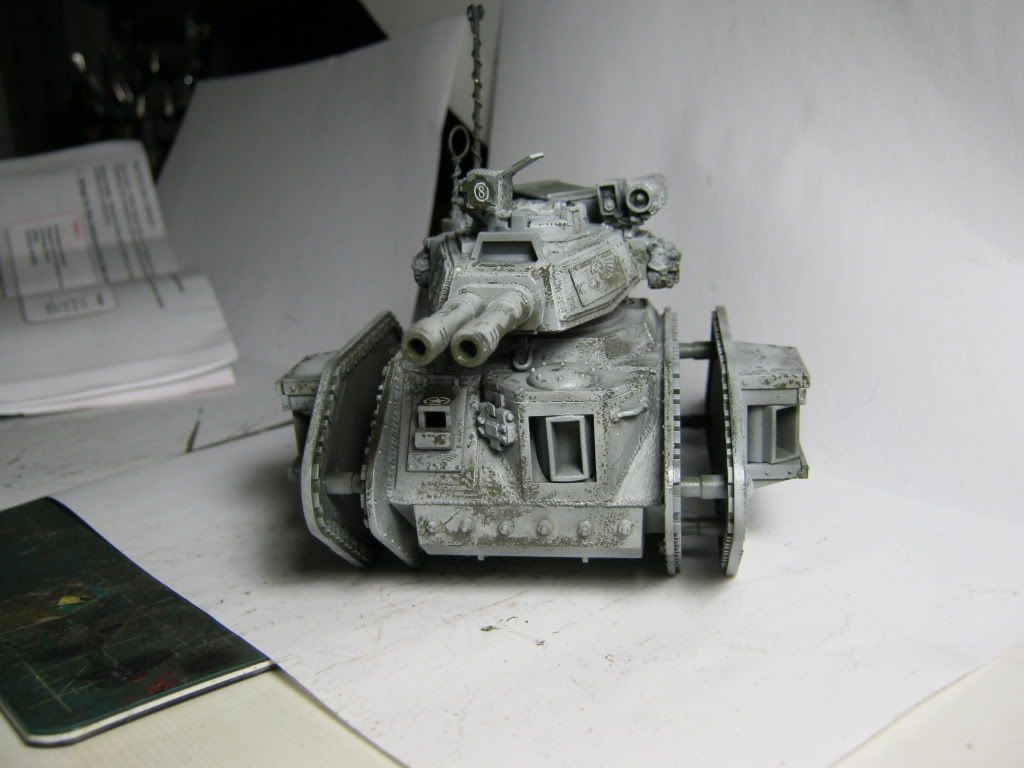
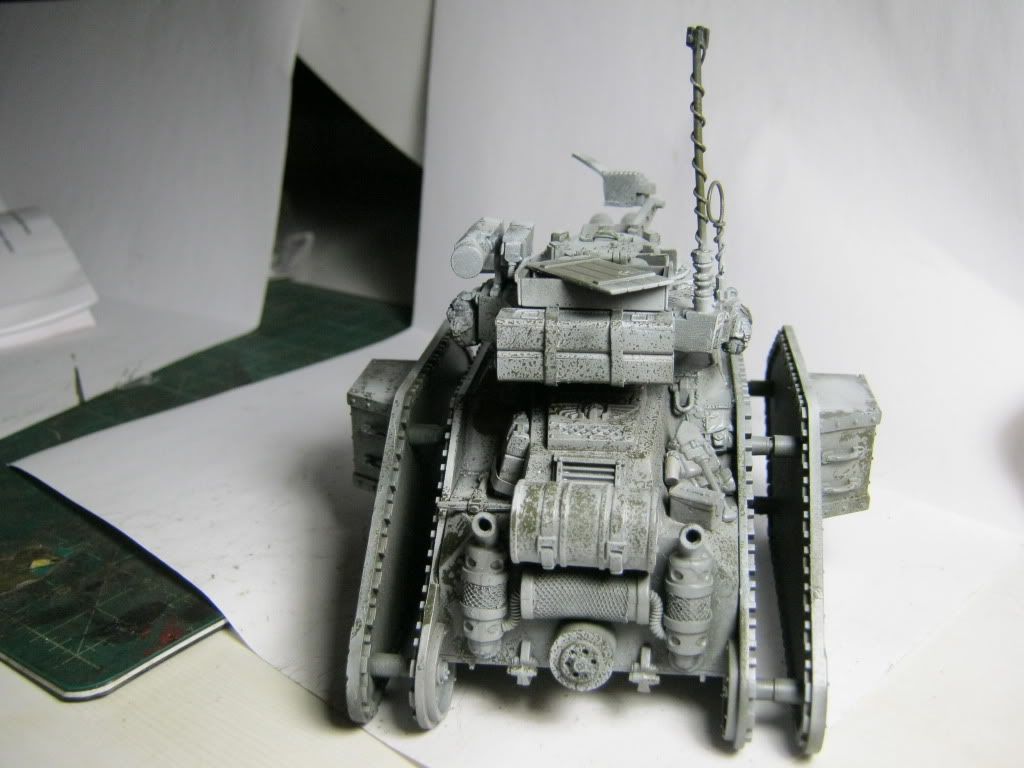
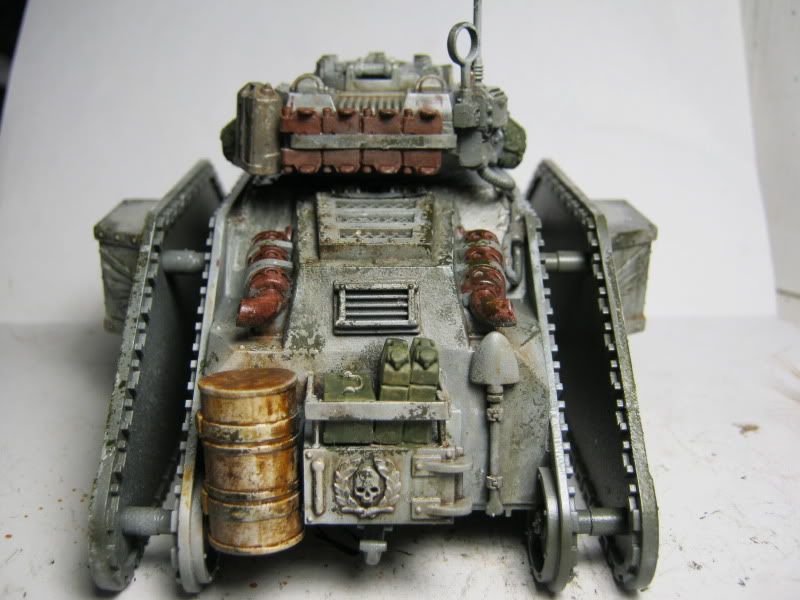
Instead of stripped down,I went the other way.
Enough supplies for him to go on his own for a few days.
If you look closely there are also 3 anchor points for him to be airlifted
|
|
|
|
|
|
2012/01/31 13:28:41
Subject: The 1st Merican Lancers an Superdetailed Imperial Guard Tank Army.
|
|
Pyromaniac Hellhound Pilot
|
Eisenhorn wrote:If you look closely there are also 3 anchor points for him to be airlifted
I hadn't noticed that, but I love the concept! How about a little fluff to fill out the story of this guy?
|
The 104th Vostroyan Mechanized
Rawson's Reboot
Viktor von Domm: nope... can´t do that for the sake of all lving creatures that dwell on earth....
dsteingass: That's like saying "I forgot to tell you who your real father is"
nerdfest09: Rawson speaks the truth! |
|
|
|
|
2012/01/31 15:00:39
Subject: The 1st Merican Lancers an Superdetailed Imperial Guard Tank Army.
|
|

Unhealthy Competition With Other Legions
Filipstad, Sweden.
|
Aweomse stuff! cant wait for more. I do love me some tanks!
|
"You have ruled this galaxy for ten thousand years, yet have little of account to show for you efforts. Order. Unity. Obedience. We taught the galaxy these things, and we shall do so again."
 |
|
|
|
|
2012/01/31 16:27:31
Subject: The 1st Merican Lancers an Superdetailed Imperial Guard Tank Army.
|
|
Dakka Veteran
|
Rawson wrote:Eisenhorn wrote:If you look closely there are also 3 anchor points for him to be airlifted
I hadn't noticed that, but I love the concept! How about a little fluff to fill out the story of this guy?
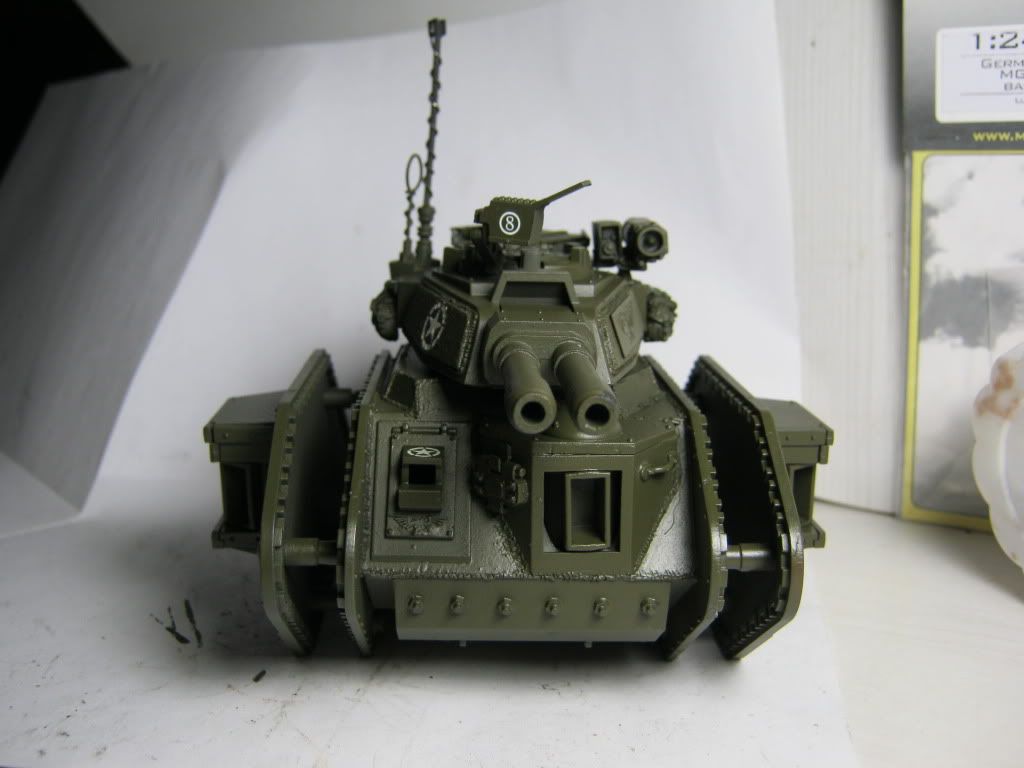
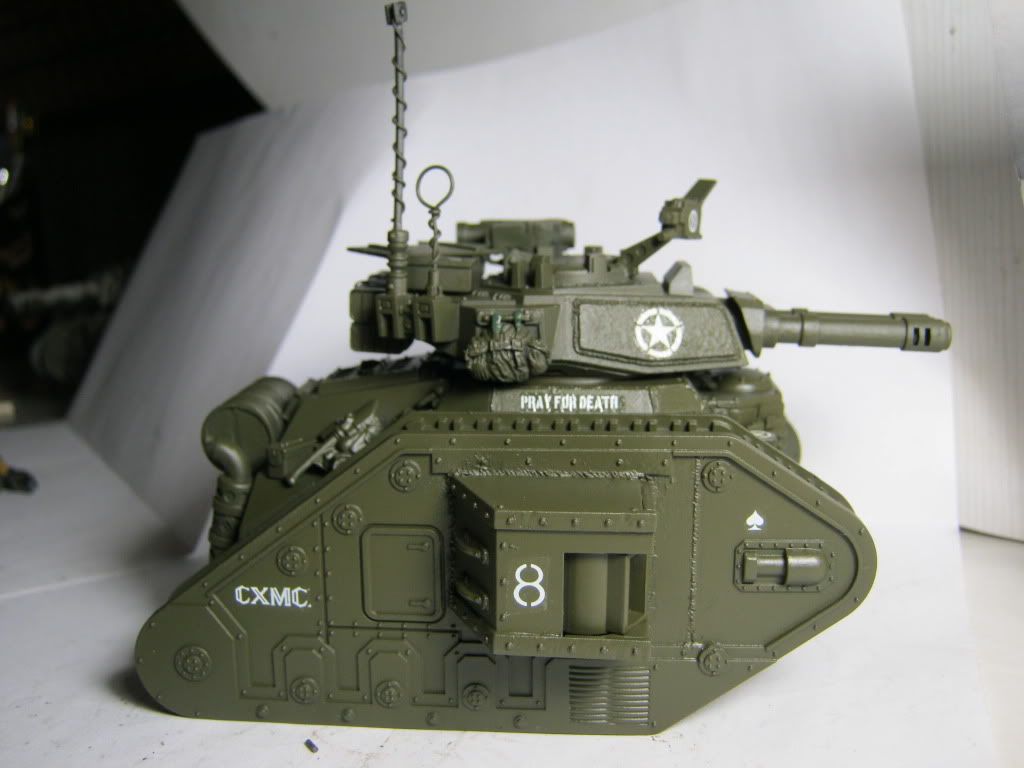
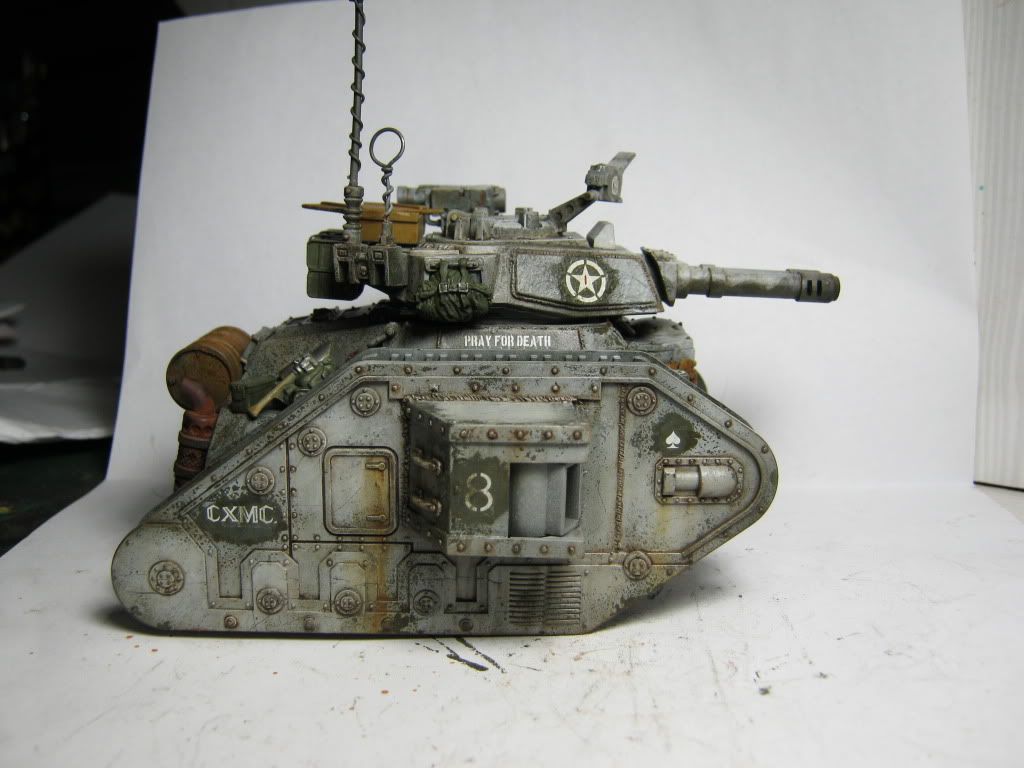
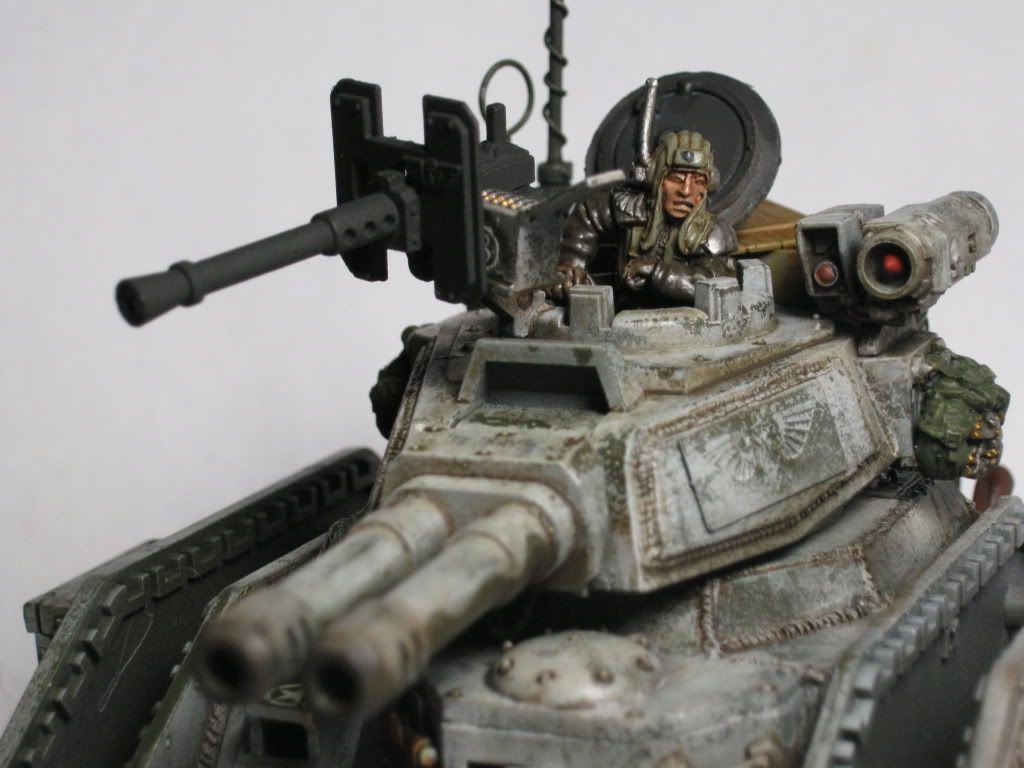
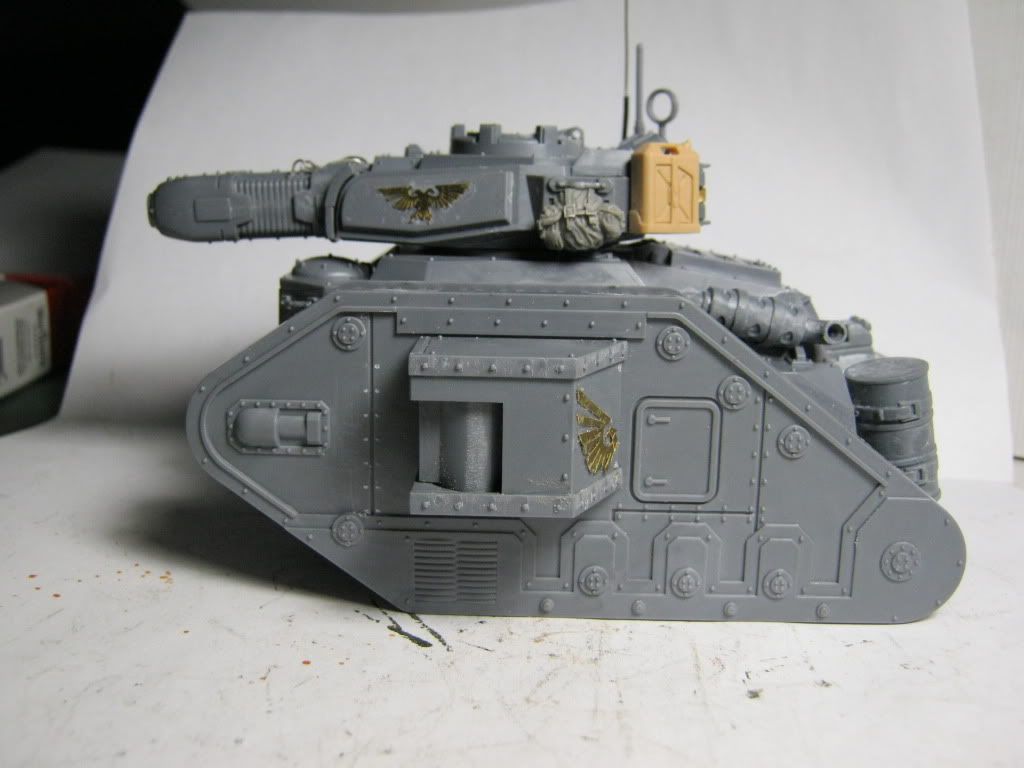
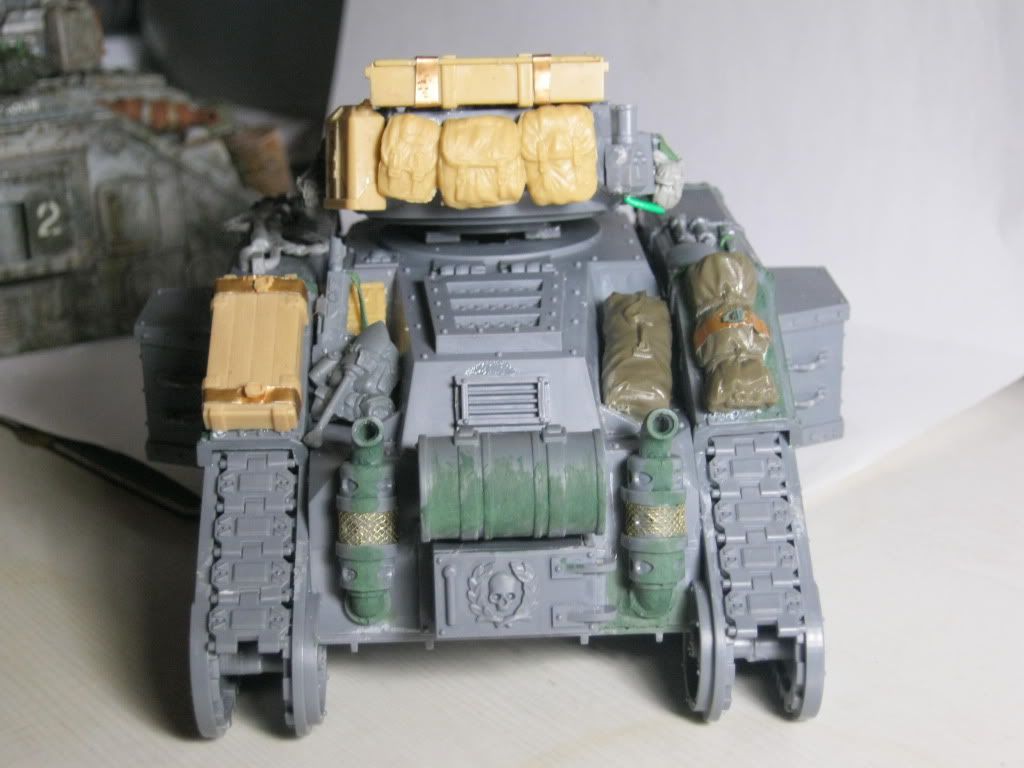
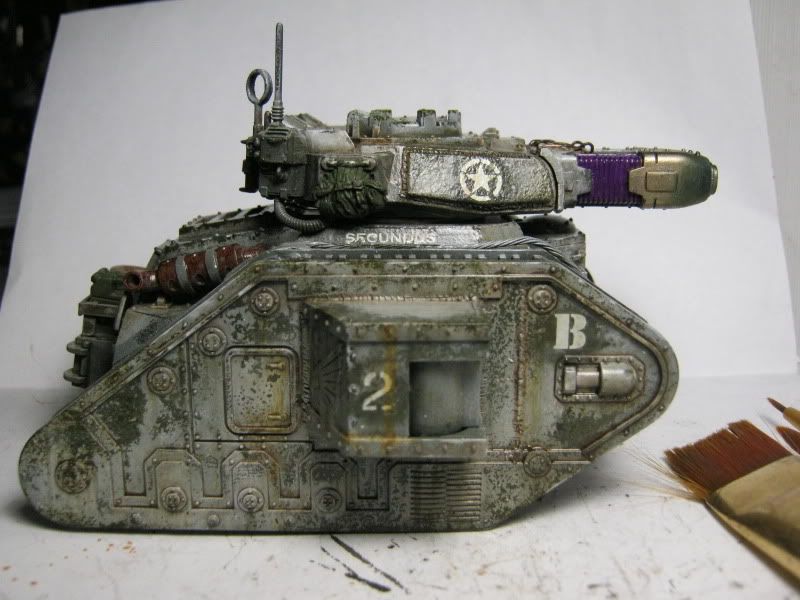
I was thinking on numbering this tank 8 instead of 5,that way his crew can be called the Crazy 8's
I see this tank commander as the type who too Gung Ho,is every bit as likely to press the attack even though told to fall back.
He can drive his tank over terrain that would be immpossible for other drivers,letting him get to places you would not expect to find a 60 ton machine.
This tank has an autocannon to keep the weight lower,as Battle Cannon and its ammo weigh a whole lot more.
No one can spot an ambush like him not even Pask and while he might not be as accurate as Pask,his crew will always get off the first shot.
|
|
This message was edited 1 time. Last update was at 2012/01/31 16:31:05
|
|
|
|
|
2012/01/31 16:54:31
Subject: The 1st Merican Lancers an Superdetailed Imperial Guard Tank Army.
|
|
Lone Wolf Sentinel Pilot
|
On the next tank can you show us the process you use to create the weld lines?
|
Life isn't fair. But wouldn't it be worse if Life were fair, and all of the really terrible things that happen to us were because we deserved them?
M. Cole.
    |
|
|
|
|
2012/01/31 17:39:41
Subject: The 1st Merican Lancers an Superdetailed Imperial Guard Tank Army.
|
|
Dakka Veteran
|
Another tutorial grrrrrrrrrrrr.
J/K I,d be more than happy to.
In short I use super thin styrene rod (0.20) and glue the rods where the welds go.
Then I coat the rod with Tenax Liquid cement.
Then I press in the weilds with a brass rod cut to a 45 degree angle.
Once the weld is done,I use Liquid Green Stuff to clean up the area.
I'll take pics next tank however
|
|
|
|
|
|
2012/02/01 06:00:26
Subject: Re:The 1st Merican Lancers an Superdetailed Imperial Guard Tank Army.
|
|
Dakka Veteran
|
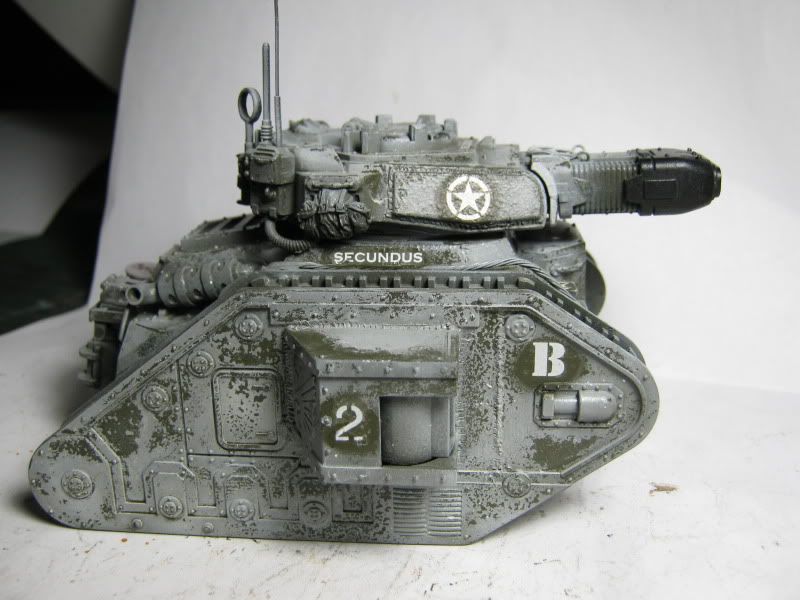
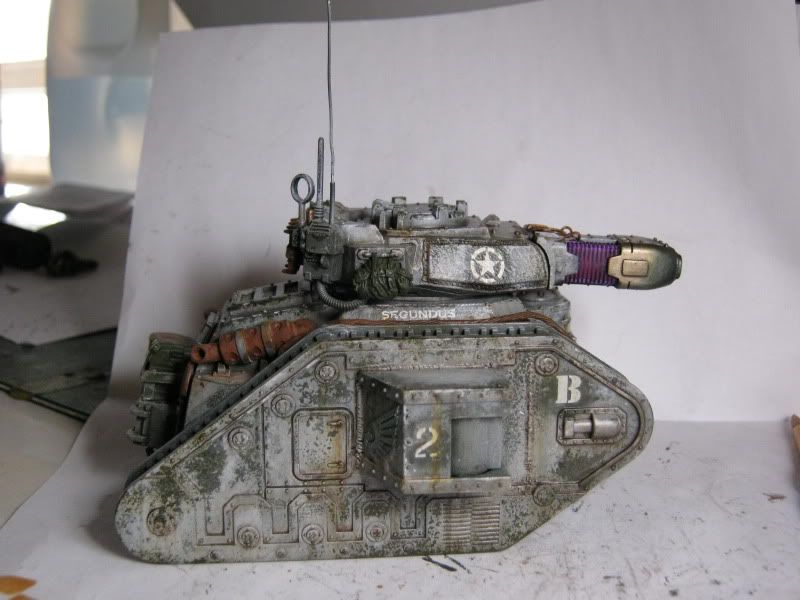
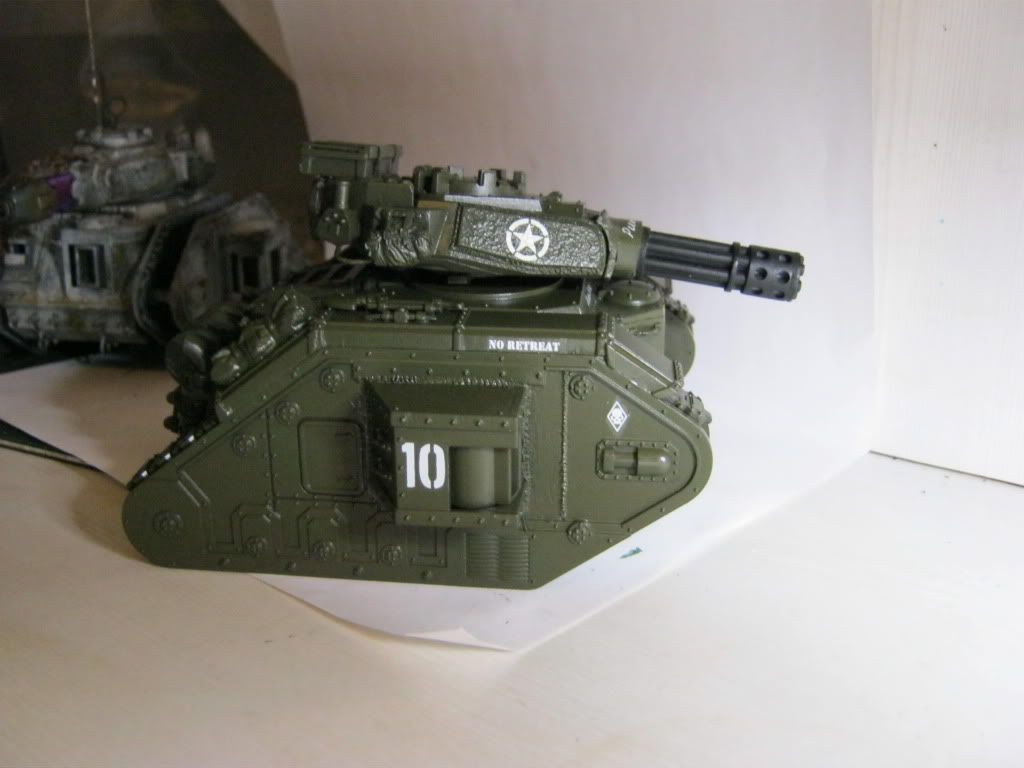
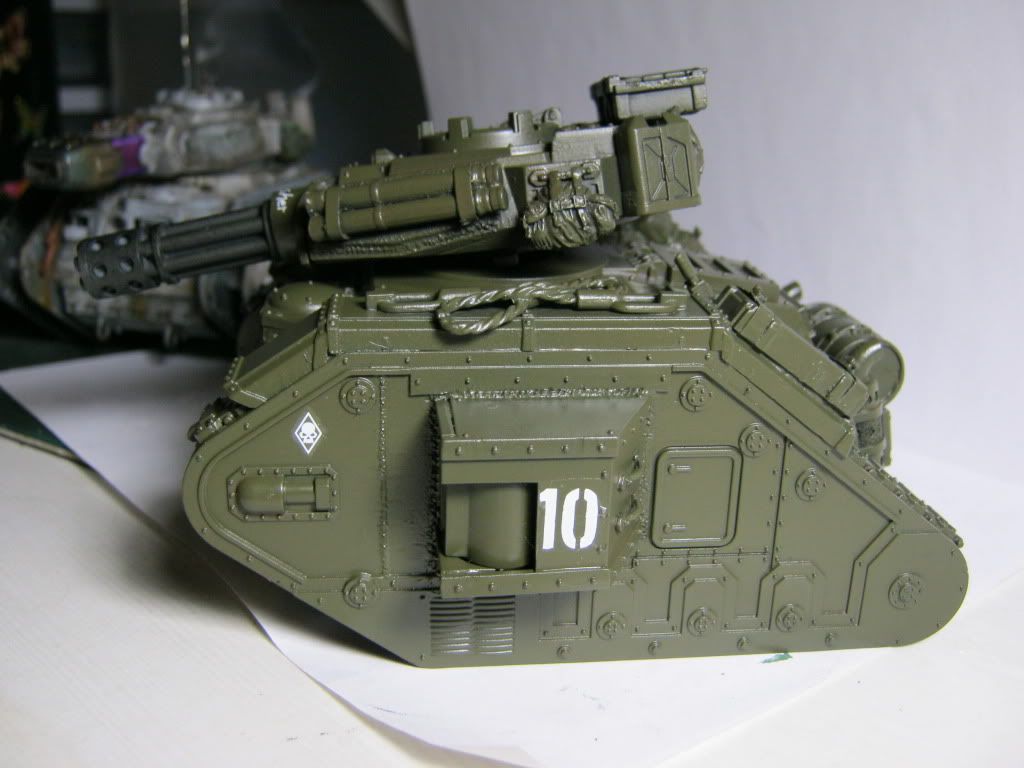
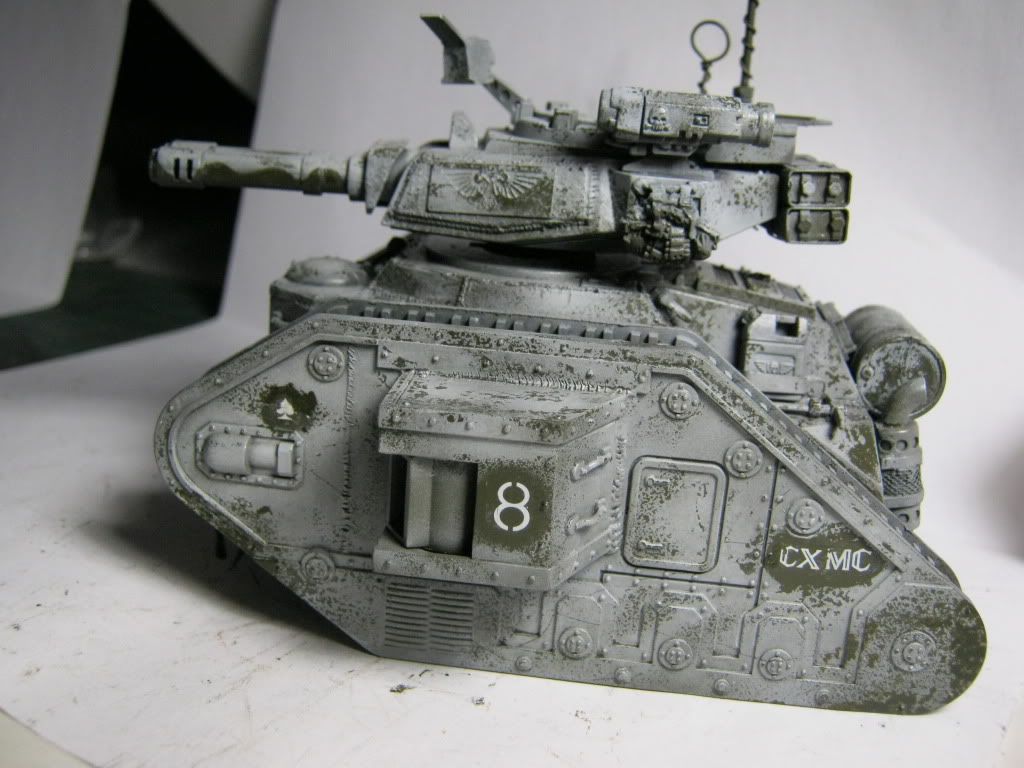
I did indeed number this tank #8 the Crazy Eights
Nice Slogan from the FW guard sheet
Found Tamiya Olive Drab Spray can today and the color is spot on.
Thank God O.D. is a bitch to clean from the airbrush.
Time for some winter magic
|
|
|
|
|
|
2012/02/01 06:14:27
Subject: The 1st Merican Lancers an Superdetailed Imperial Guard Tank Army.
|
|
Lord of the Fleet
|
Those looks pretty cool. Very reminiscent of old ww2 schemes but still it fits on 40k stuff pretty well
Although every time I look at them, I'm reminded of dust tactics
|
|
|
|
|
|
2012/02/01 10:24:22
Subject: The 1st Merican Lancers an Superdetailed Imperial Guard Tank Army.
|
|

Bonkers Buggy Driver with Rockets
|
Merica! Feth yeah!
Absolutely stunning. I don't know why, but for me, the weld lines make it. Incredible.
|
Codex: Grey Knights touched me in the bad place... |
|
|
|
|
2012/02/01 10:39:12
Subject: The 1st Merican Lancers an Superdetailed Imperial Guard Tank Army.
|
|
Fighter Pilot
Townsville, Queensland
|
These tanks are just epic! Hope to see this project finished!
|
 2000pts 2000pts
 5000 pts 5000 pts
 1 squad 1 squad
Leigen_Zero
"Armour? orks have armour? 6+ you say?
I don't think I've ever had to roll an armour save for my boyz outside of CC  " "
(\__/)
(='.'=) This is Bunny. Copy and paste bunny
(")_(") to help him gain world domination.
|
|
|
|
|
2012/02/01 14:22:41
Subject: The 1st Merican Lancers an Superdetailed Imperial Guard Tank Army.
|
|
Dakka Veteran
|
kenshin620 wrote:Those looks pretty cool. Very reminiscent of old ww2 schemes but still it fits on 40k stuff pretty well
Although every time I look at them, I'm reminded of dust tactics
Funny you say that,Dust was one of the big inspirations for this paint sceme
|
|
|
|
|
|
2012/02/01 14:29:49
Subject: The 1st Merican Lancers an Superdetailed Imperial Guard Tank Army.
|
|
Thinking of Joining a Davinite Loge
|
As a treadhead and a fan of realistic paintwork I am in sexytimeheaven with this thread!
|
Armies:
(CSM/HH) - Iron Warriors; Death Guard; World Eaters; Night Lords
IG - Vestfalian Expeditionary
Force (Solar Auxilia - HH)
SM - Blades of Inaros (Homebrew)
DE - Kabal of Ouroboros
|
|
|
|
|
2012/02/02 02:46:06
Subject: Re:The 1st Merican Lancers an Superdetailed Imperial Guard Tank Army.
|
|
Dakka Veteran
|
|
|
|
|
|
|
2012/02/03 03:06:59
Subject: Re:The 1st Merican Lancers an Superdetailed Imperial Guard Tank Army.
|
|
Dakka Veteran
|
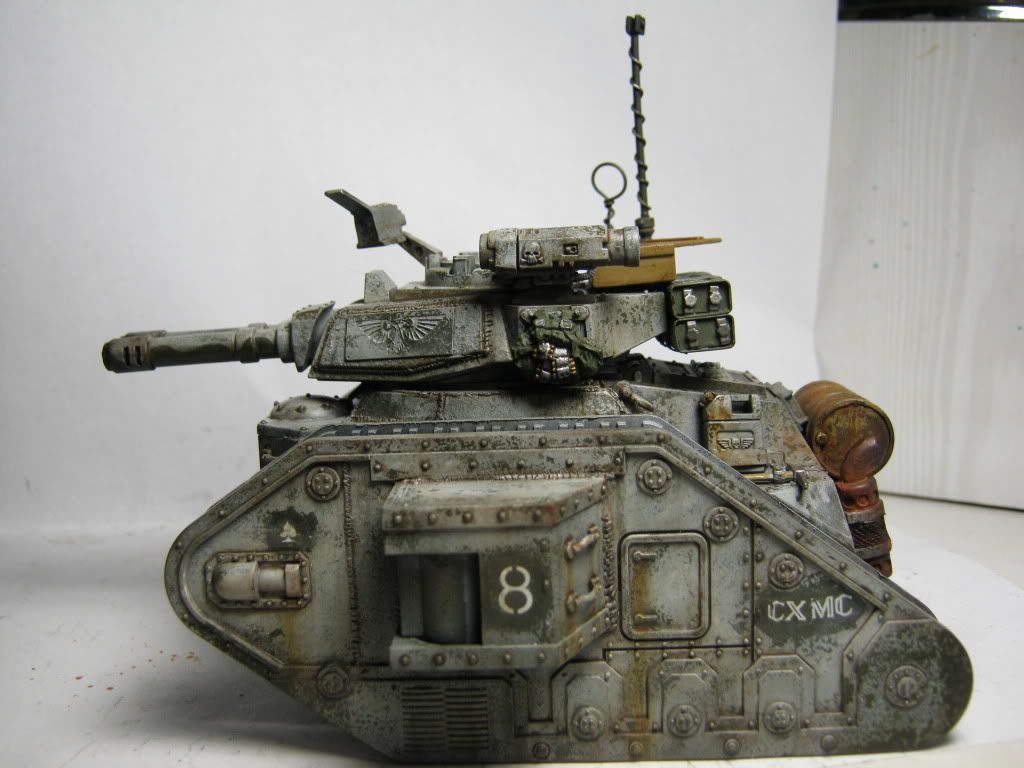
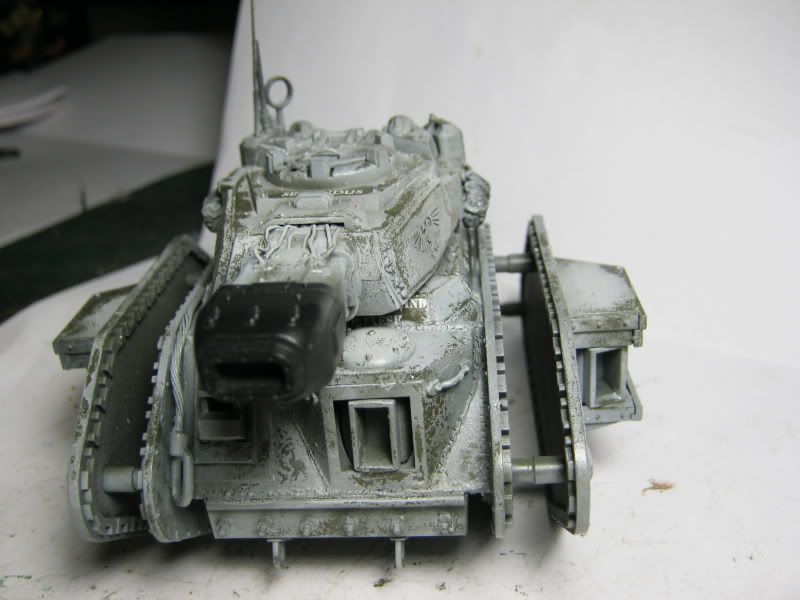
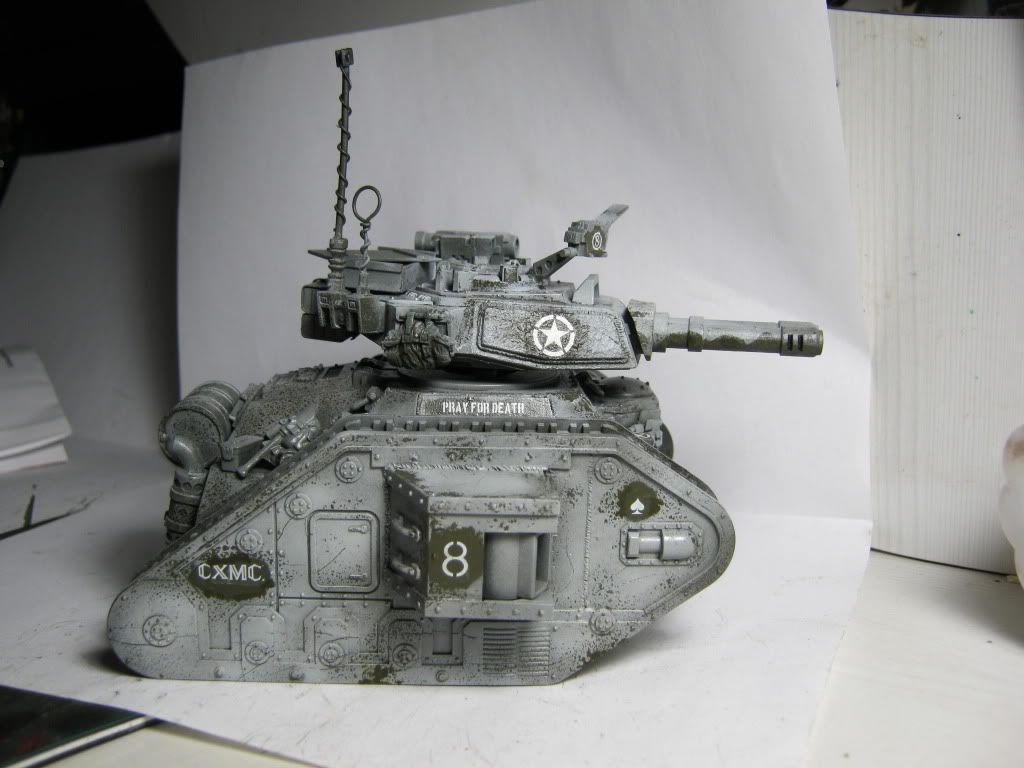
I just finished the chassis for tank number 8
I have to get in gear and crank out some tracks for this and the other two tanks.
I have 1/35 scale paint stencils coming in the mail,when I get it I am going to stencil H/K on the top of the crate.
 Automatically Appended Next Post: Automatically Appended Next Post: Here is the commander for the Crazy Eights,Eightball himself
The models eyes are not the best,if I painted the white they would be cockeyed.
But it looks good squinting like he is looking for traps and ambushes

|
|
This message was edited 2 times. Last update was at 2012/02/03 05:53:37
|
|
|
|
|
2012/02/04 06:12:55
Subject: Re:The 1st Merican Lancers an Superdetailed Winter Themed Imperial Guard Tank Army.
|
|
Dakka Veteran
|
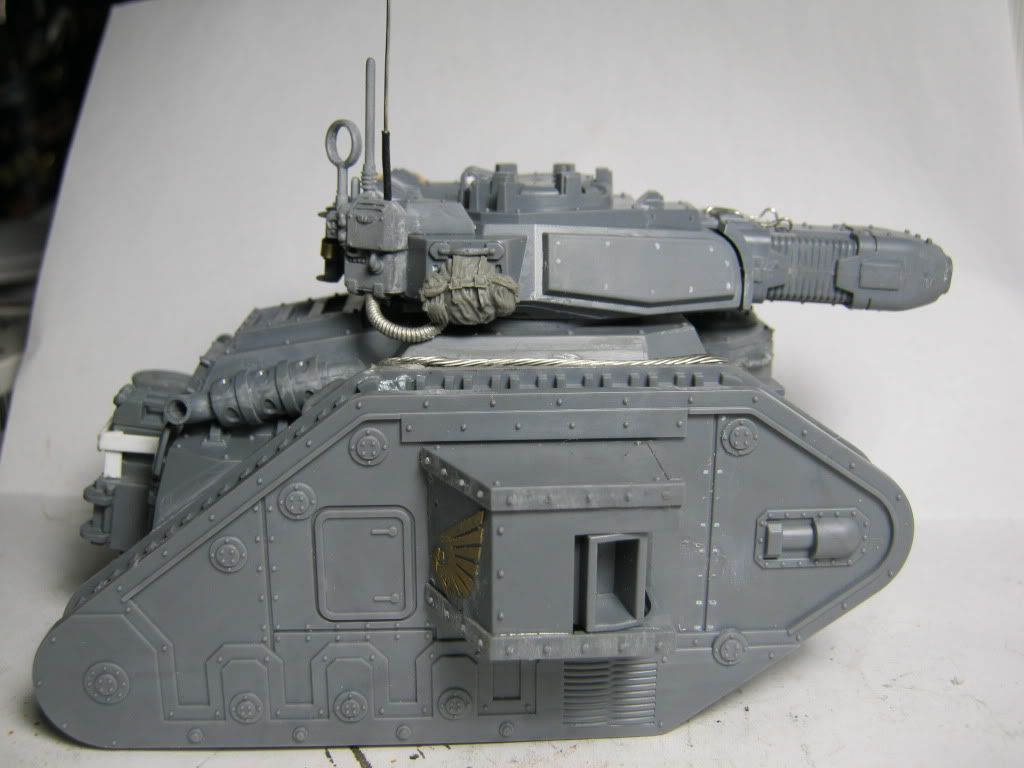
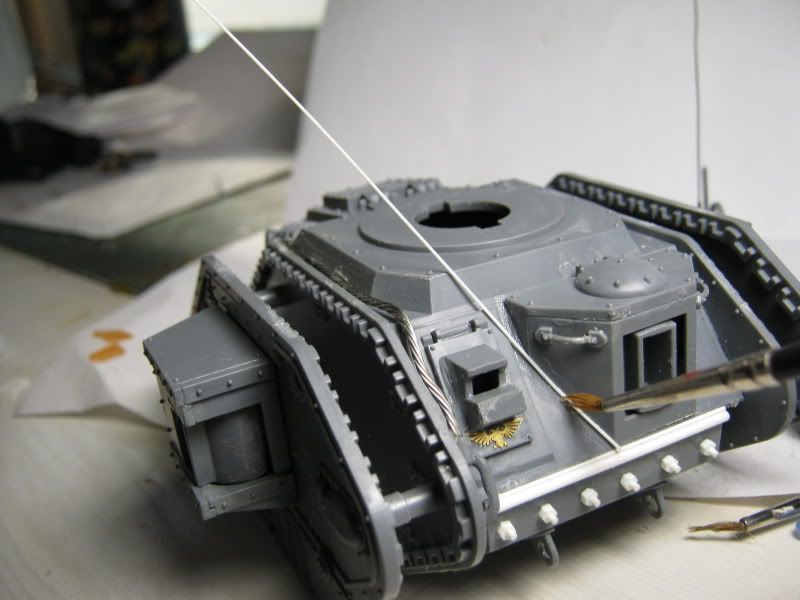
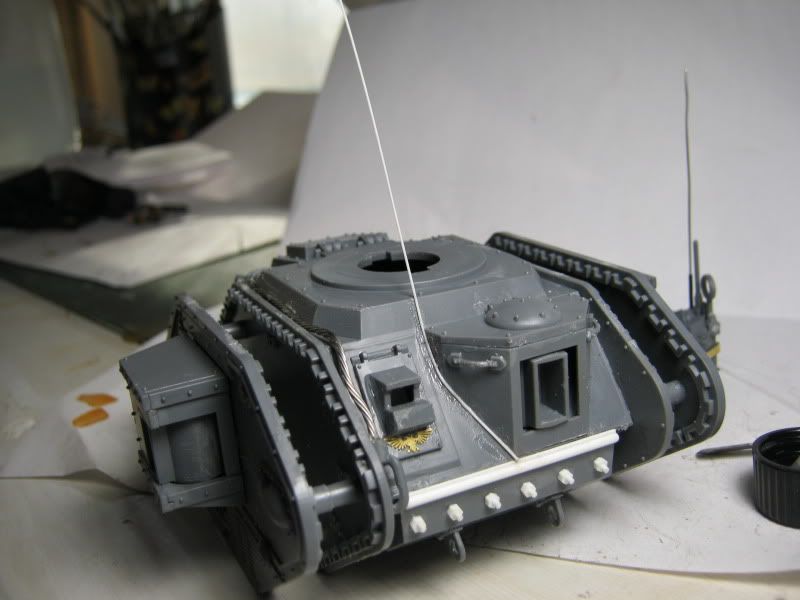
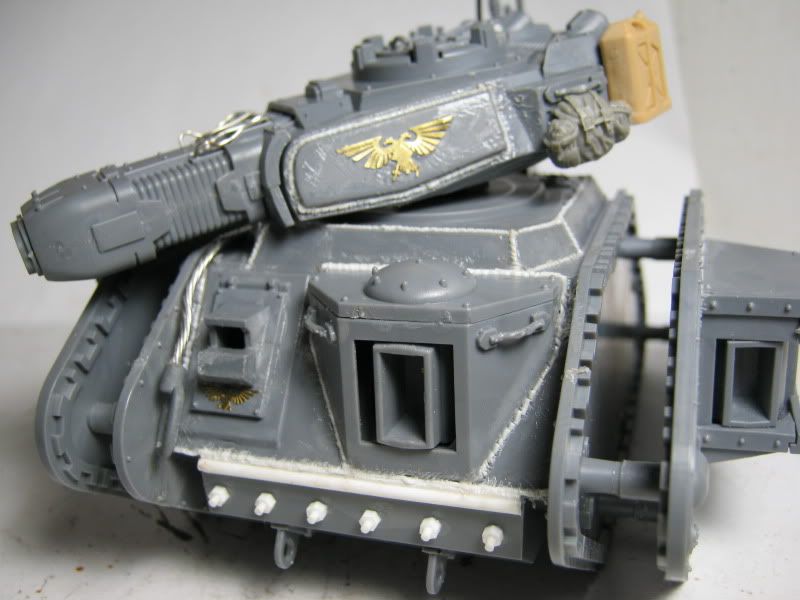
I have pretty much finished the build for the next tank.
Gonna start getting on track this will be the XO's tank Tank number 2
They say the Plasma tanks are rare so I figure the XO would get that.
The CO is going to be on a Mars Pattern Vanquisher,have the turret just need the chassis.
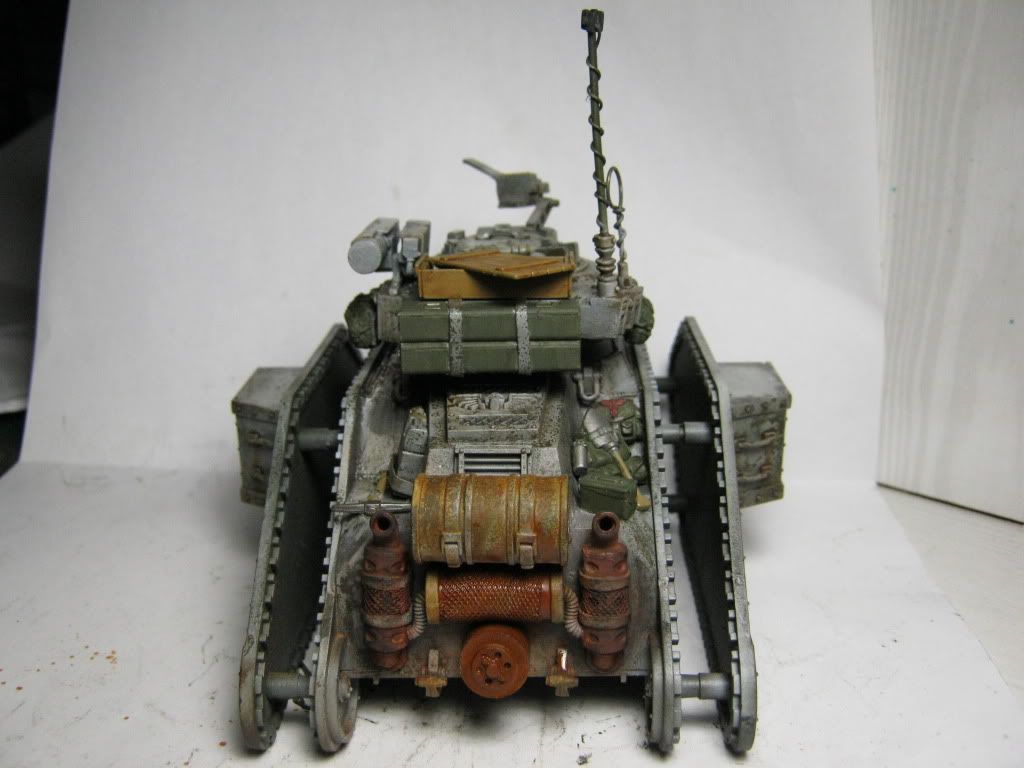
Copying last tank this too has bolts along the bottom Mars style as well as the exhausts,extra wire detailing on the cannon and spare tracks strapped to the back of the turret.
I added a Stowage rack to the back and filled it will gas cans and a ammo box.
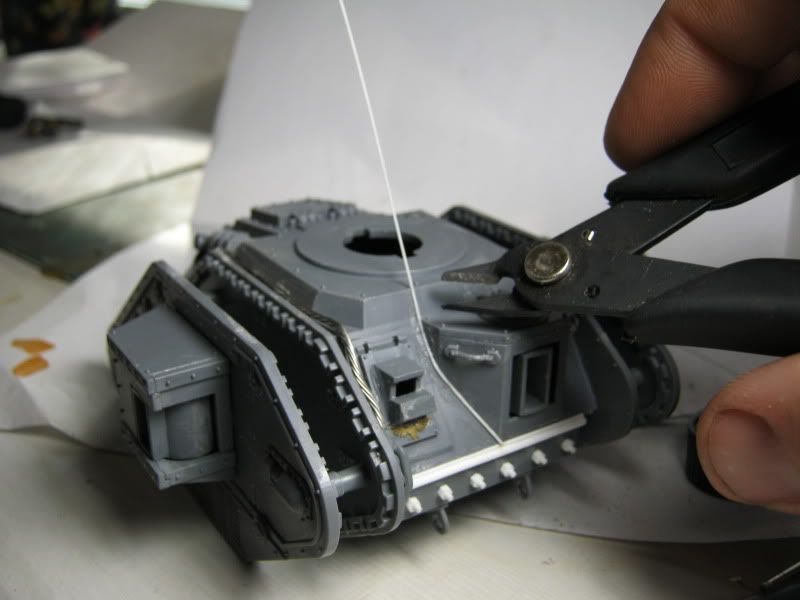
This time I used a guardsman Comm unit for the Comms added 24 guage wire antenne.
I also used picture hanging wire to replace the tow cable
Next post will be the welding tutorial Welding 101.
 Automatically Appended Next Post:
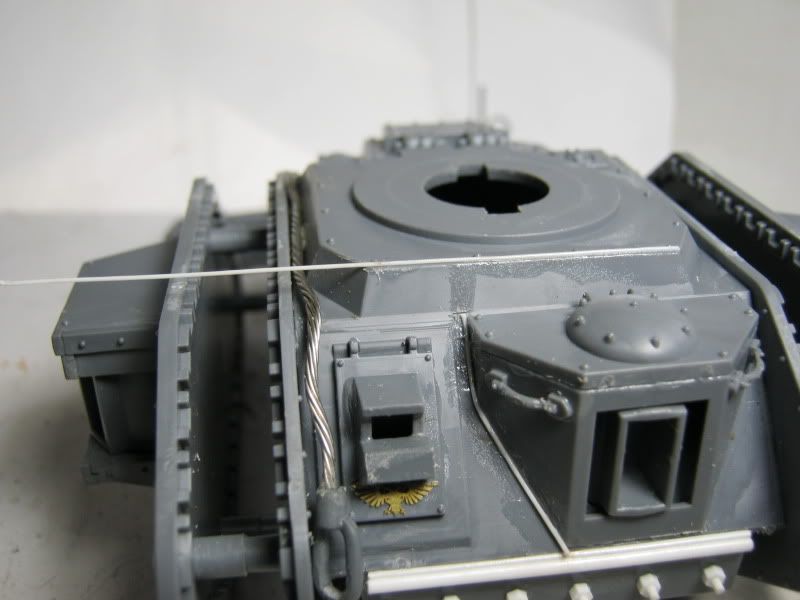
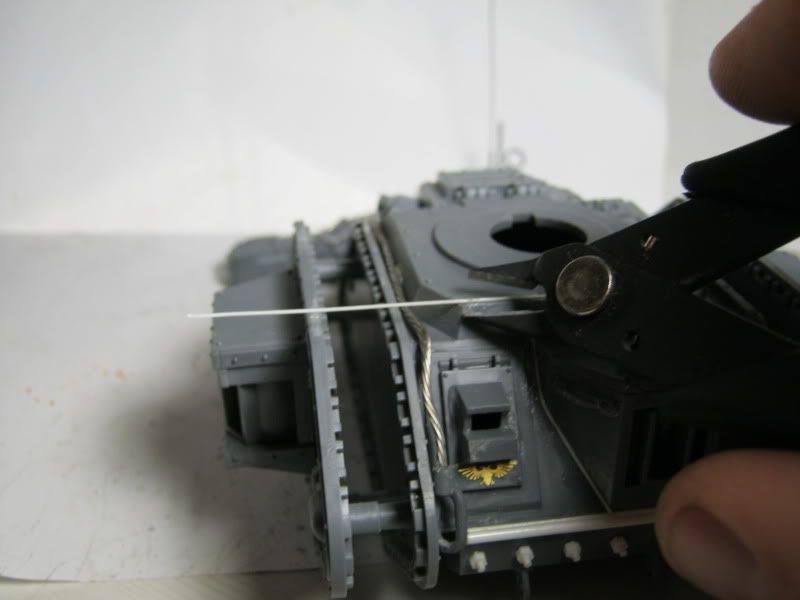
As promised Welding 101
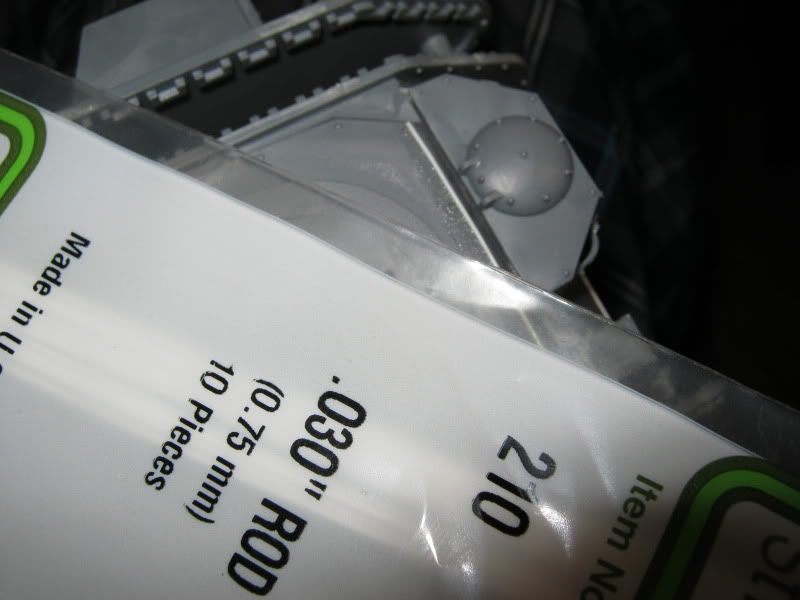
First you need Tenax liquid cement and .020 plastic rod,you will need .030 if there are any gaps in the construction.
Tenax is a super thin waterlike plastic glue that is super strong.
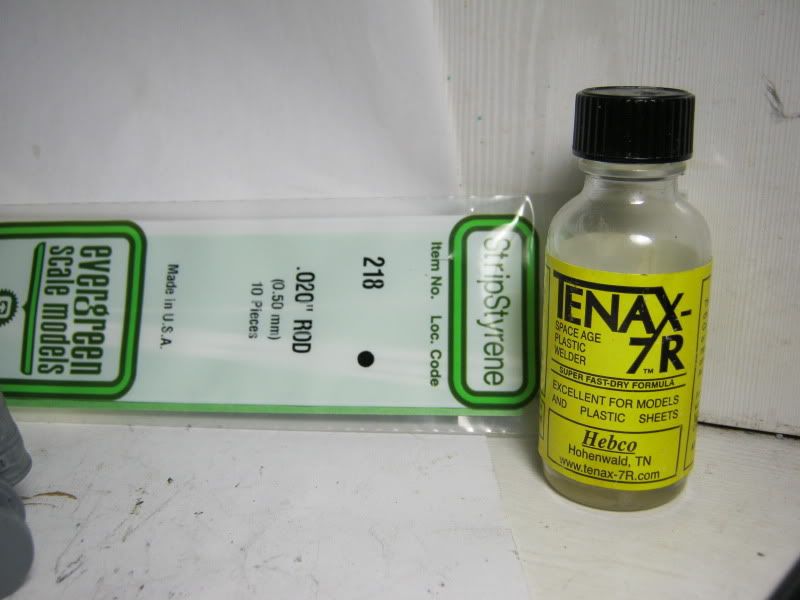
Get an old brush and paint on the Tenax where you want the weld.
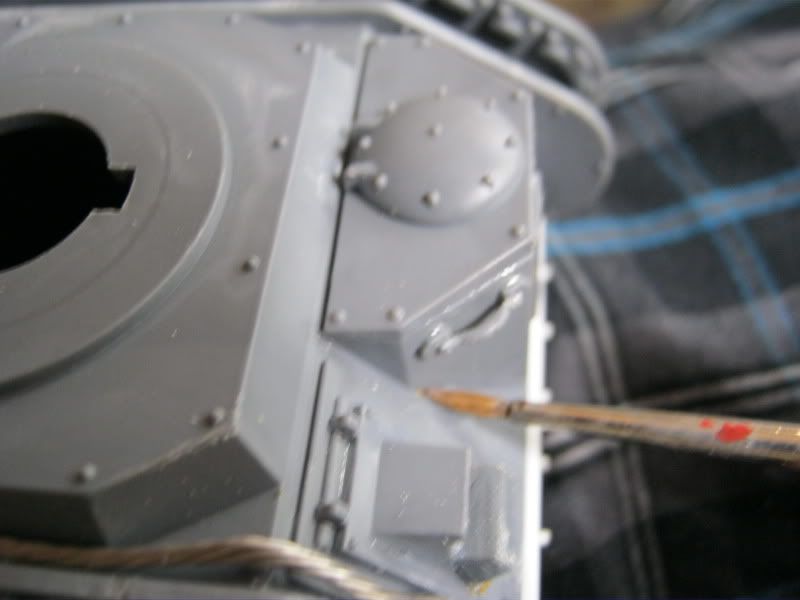
Then cut off a workable size of rod an attach to where you want the weld,the rod is thin enough to wrap around,details,then paint over this with another layer of glue.
Cut off flush using cutters or a number 17 flat Exacto blade the blade give you the most control.
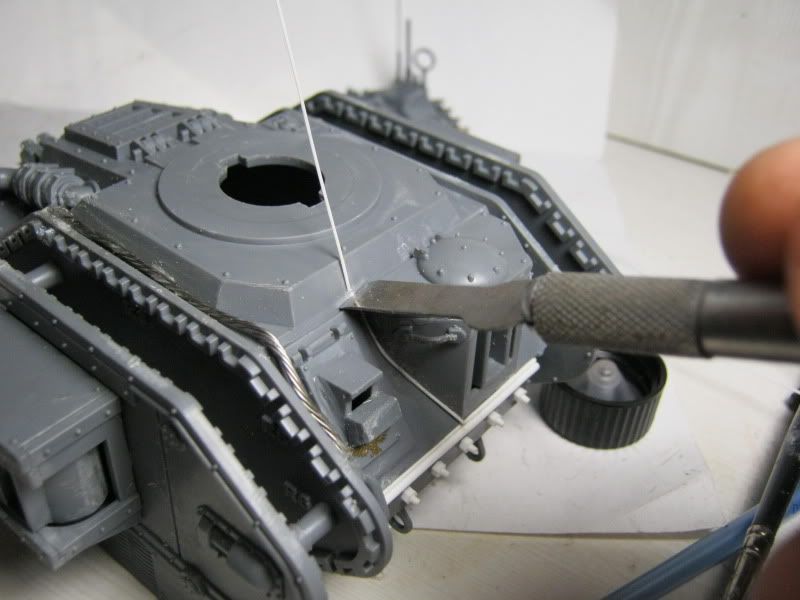
Like I said there was a gap where the sponson meets the hull that the .020 fell right into,this is when we use the .030.
Now continue this process anywhere you want welds on the tank
Now you will need a brass rod cut off at a 45 degree angle,metal coat hanger works good for this.
I added some g/s for comfort,using just the rod is hard on the fingers.
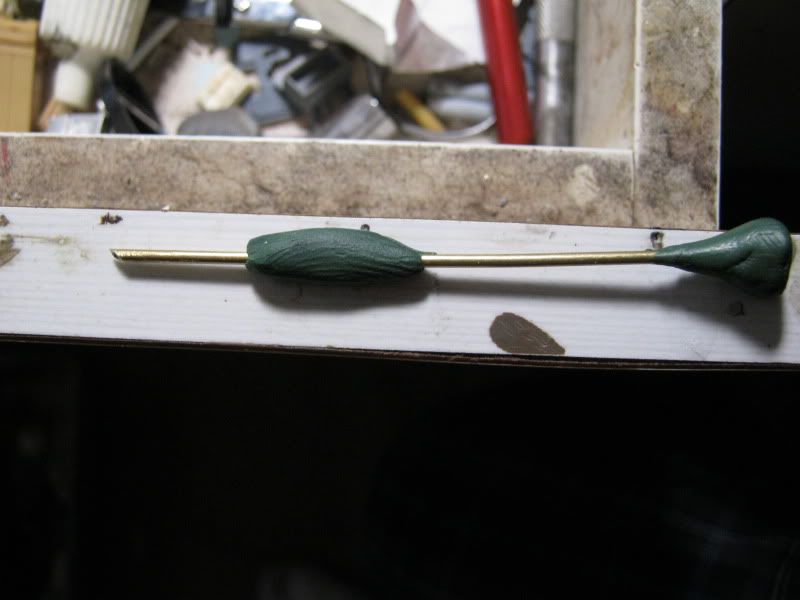
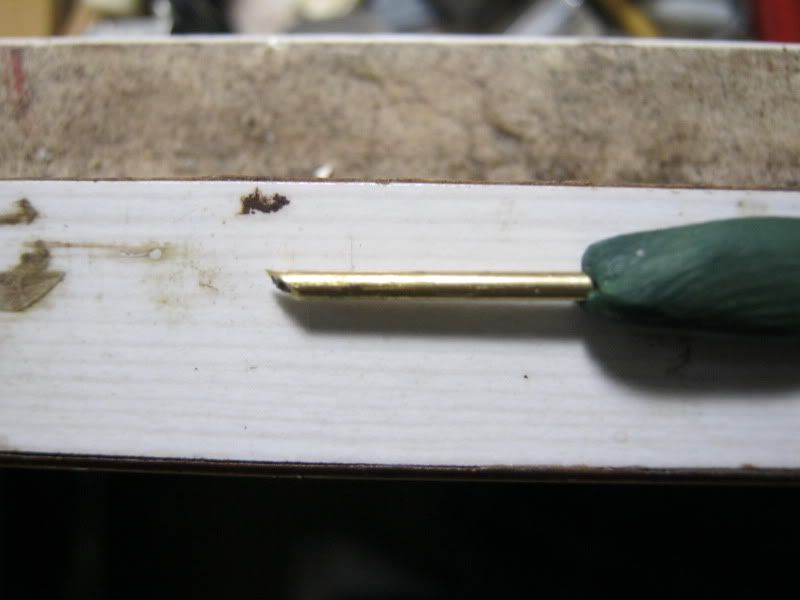
Now coat the weld in a layer of Tenax wait 20-30 seconds then start pushing in your weld ridges
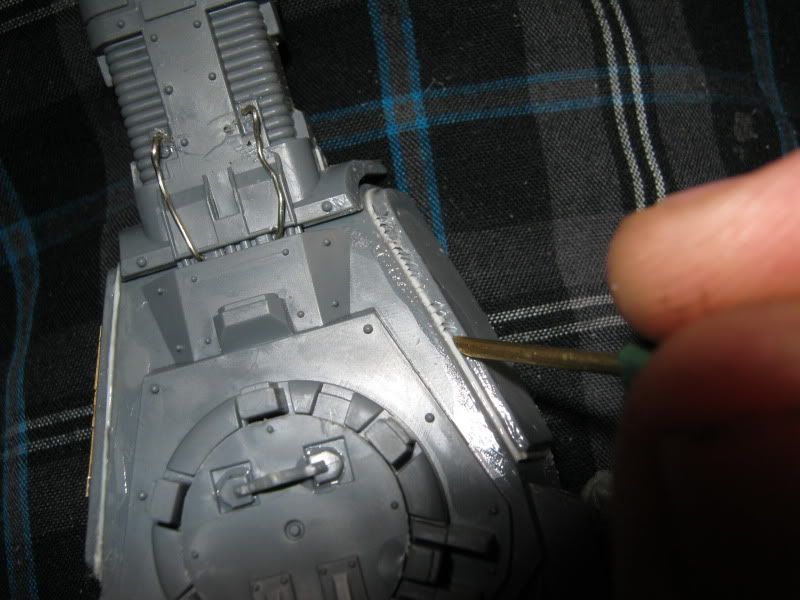
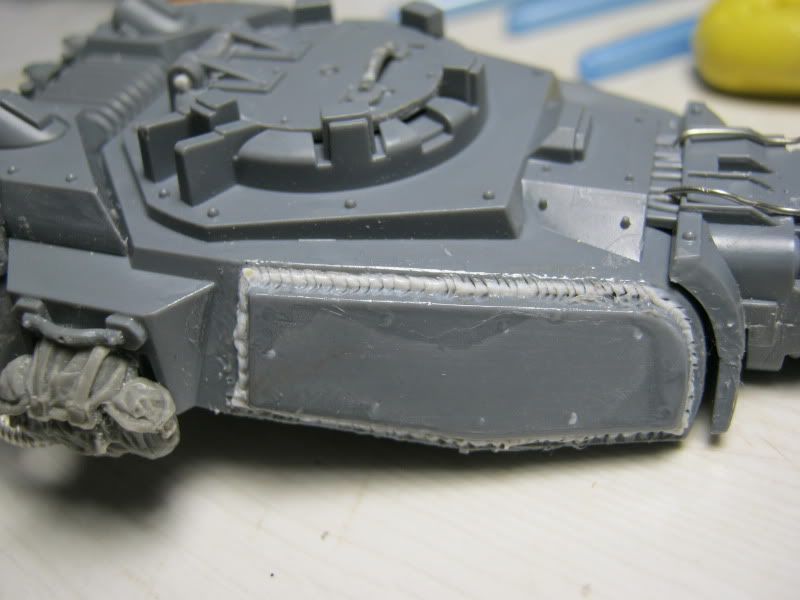
Continue until all the welds are welded
Now the final important clean-up step
Using Liquid G/S make a miketure that is paintlike in consistancy and paint over and glue residue.
I cover the whole section to keep it uniform
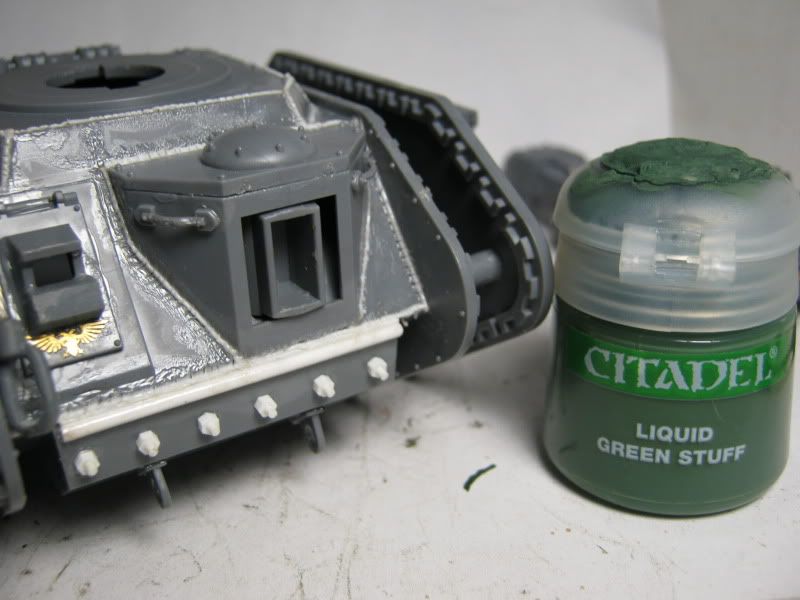
Once dry Prime and Paint
|
|
This message was edited 2 times. Last update was at 2012/02/05 05:47:28
|
|
|
|
|
2012/02/05 04:41:35
Subject: The 1st Merican Lancers an Superdetailed Winter Themed Imperial Guard Tank Army.
|
|
Dakka Veteran
|
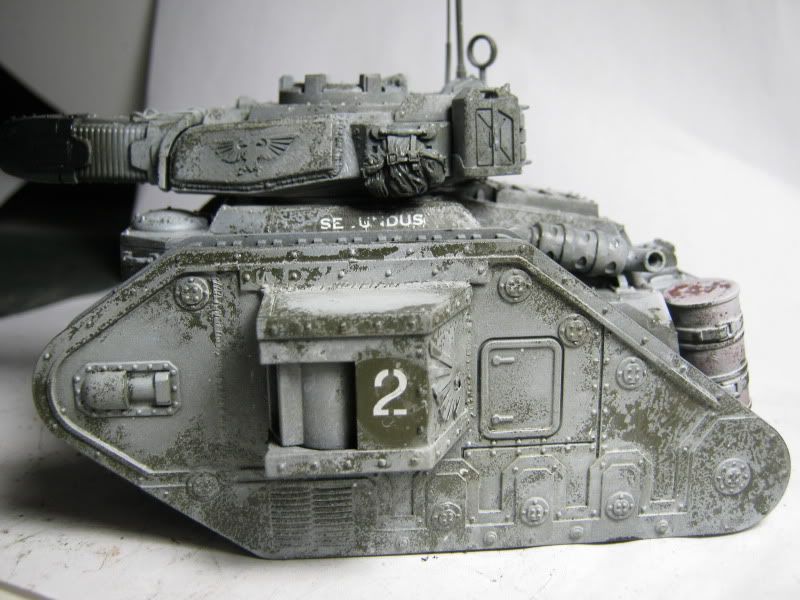
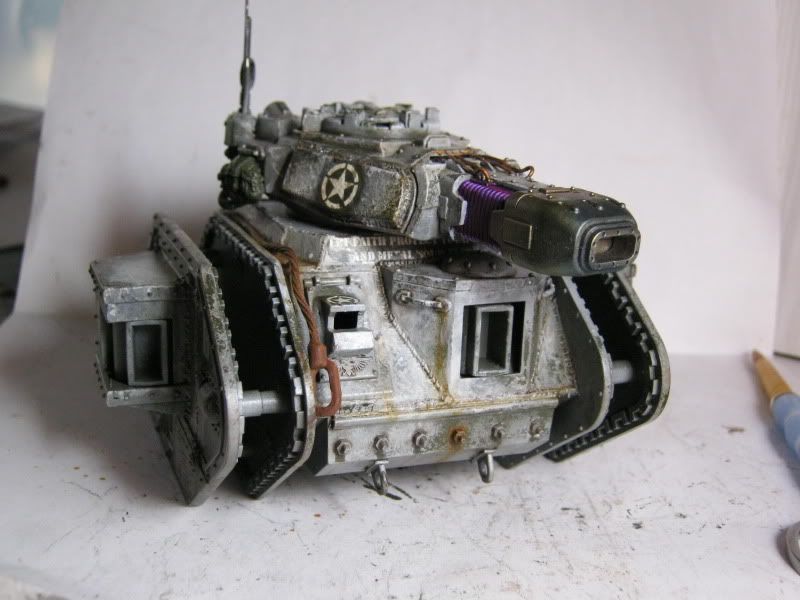
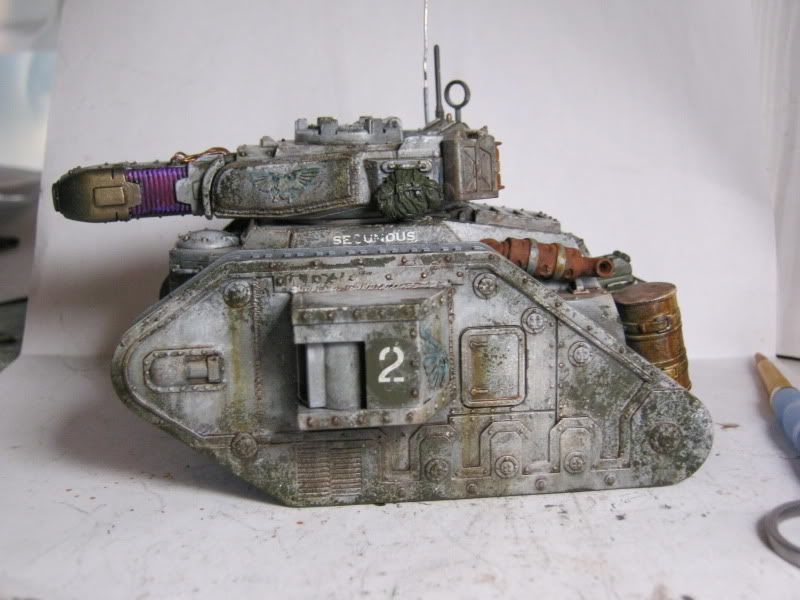
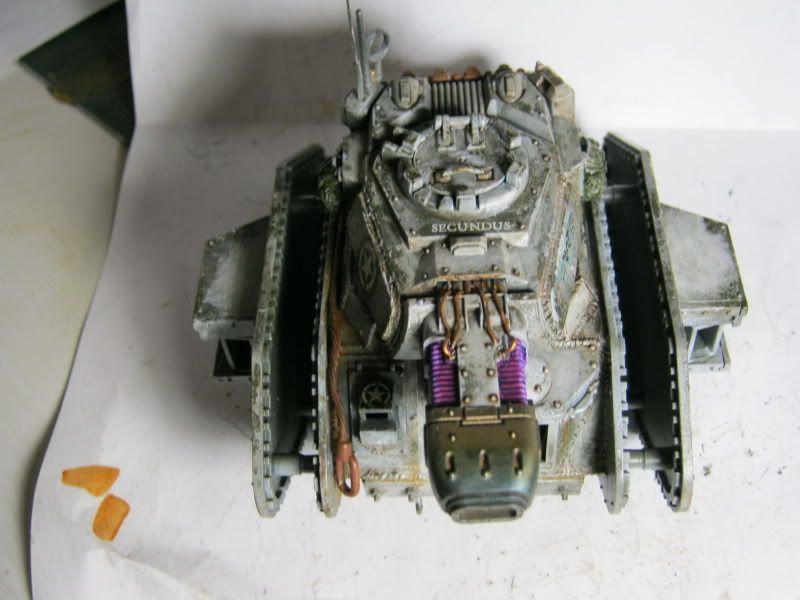
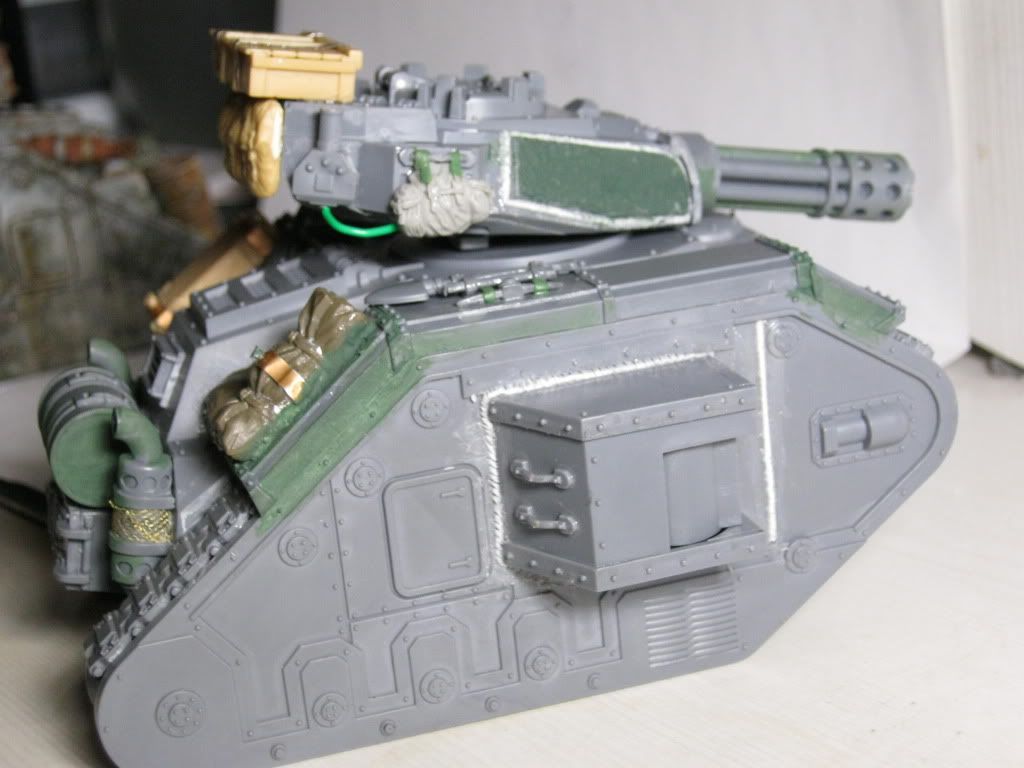
Number 2 is camoed up.
This is the Secundus the XO's tank.
A bit of the decal lifted but that will just be wear and tear.
Need to do a few touch ups then weather.
Just ordered the Mars Chassis for Primarus.
|
|
|
|
|
|
2012/02/05 05:41:57
Subject: Re:The 1st Merican Lancers an Superdetailed Winter Themed Imperial Guard Tank Army.
|
|

Steadfast Grey Hunter
|
Great looking tanks here.
Thanks also for the tutorials, it's always nice to see the process behind great models.
|
|
|
|
|
|
2012/02/05 10:23:33
Subject: Re:The 1st Merican Lancers an Superdetailed Winter Themed Imperial Guard Tank Army.
|
|
Dakka Veteran
|
|
|
|
|
|
|
2012/02/05 13:51:05
Subject: Re:The 1st Merican Lancers an Superdetailed Winter Themed Imperial Guard Tank Army.
|
|
Hulking Hunter-class Warmech
|
Wow, these tanks are great! Love the weathering...
Consider me subbed
|
|
|
|
|
|
2012/02/05 14:07:17
Subject: The 1st Merican Lancers an Superdetailed Imperial Guard Tank Army.
|
|

[MOD]
Otiose in a Niche
|
Eisenhorn wrote:Rawson wrote:Eisenhorn wrote:If you look closely there are also 3 anchor points for him to be airlifted
I hadn't noticed that, but I love the concept! How about a little fluff to fill out the story of this guy?
I was thinking on numbering this tank 8 instead of 5,that way his crew can be called the Crazy 8's
I see this tank commander as the type who too Gung Ho,is every bit as likely to press the attack even though told to fall back.
He can drive his tank over terrain that would be immpossible for other drivers,letting him get to places you would not expect to find a 60 ton machine.
This tank has an autocannon to keep the weight lower,as Battle Cannon and its ammo weigh a whole lot more.
No one can spot an ambush like him not even Pask and while he might not be as accurate as Pask,his crew will always get off the first shot.
Rules wise taking Creed as you HQ would allow you to give him out flank and pop up from nowhere.
Great stuff and as others said America feth yeah!
|
|
|
|
|
|
2012/02/05 14:20:23
Subject: The 1st Merican Lancers an Superdetailed Winter Themed Imperial Guard Tank Army.
|
|
Lone Wolf Sentinel Pilot
where am I? *looks around* Well i'm...errr...I...I...don't know!
|
Amazing looking tanks, truly inspirational for any guard tread-head (what other reason is there to take guard?)
|

MAY YER BOLTER NAE FALTER!!!! |
|
|
|
|
2012/02/05 15:08:08
Subject: The 1st Merican Lancers an Superdetailed Winter Themed Imperial Guard Tank Army.
|
|
Battleship Captain
|
That is amazing. I wish you were working on chaos though
|
|
|
|
|
|
2012/02/05 20:41:35
Subject: Re:The 1st Merican Lancers an Superdetailed Winter Themed Imperial Guard Tank Army.
|
|
Dakka Veteran
|
Tank 2 fresh off of the assemby line,well so to speak.
Really pleased with the plasma burned barrel,used Tamiys Burnt Blue and Burnt Orange powder for that effect
I made this tank a little more old looking,keeping with the fact Plasma tanks are now artifacts.
I am not 100%thrilled with the comms however I think that I will need to come up with something scrachbuilt along the lines of the Forgeworld one.
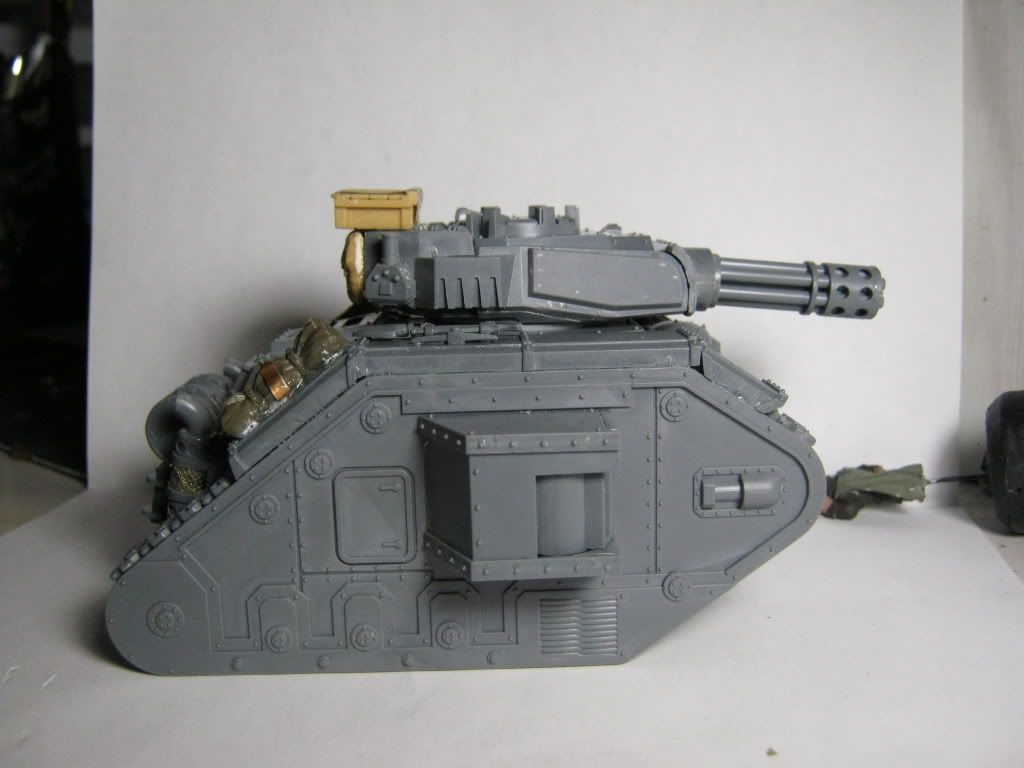
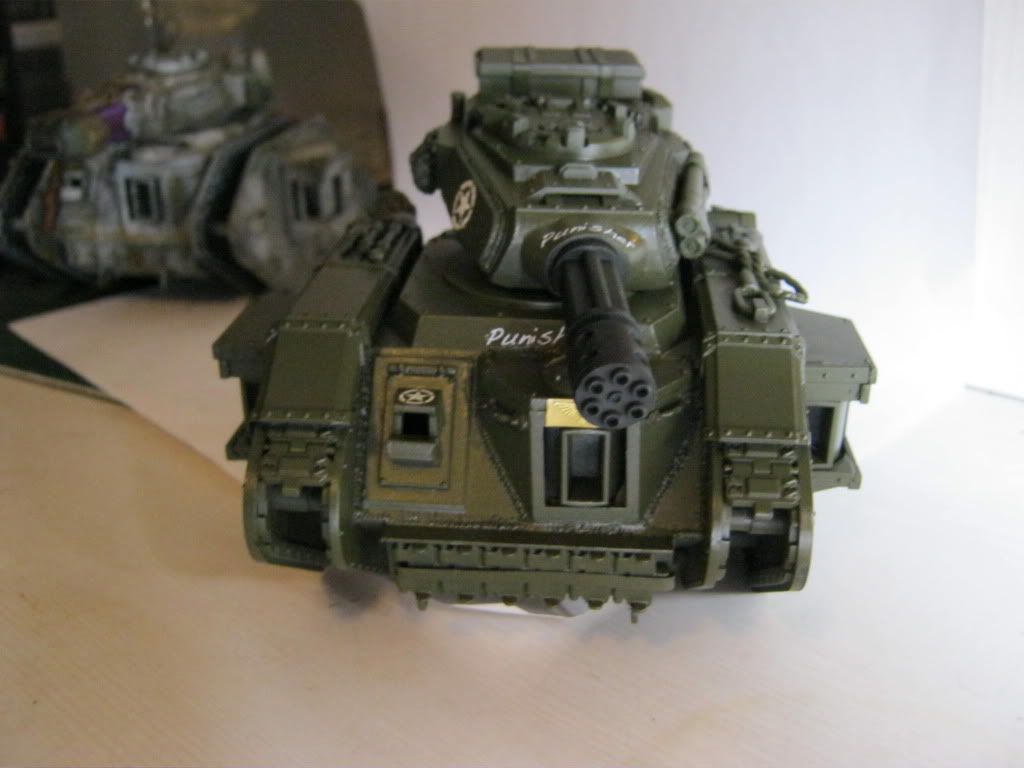
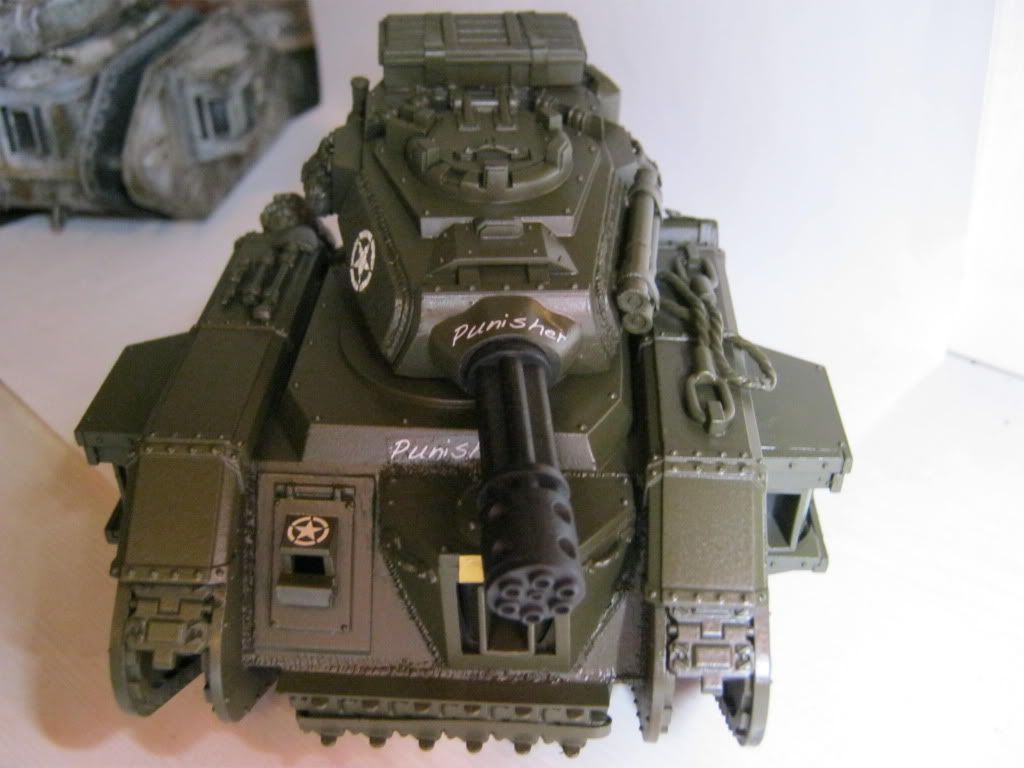
 Automatically Appended Next Post: Automatically Appended Next Post: I have started the build for tank number 10 the Punisher.
I figure this tanks supports the footsloggers a bit more so I added fenders for the guys to hitch a ride on.
I added the spare track to the front this time with a bracket made out of an L piece of pasticard
Sowage is a mix of Academy 1:35 tank stowage and pioneer tools from the equipment sprue
|
|
This message was edited 2 times. Last update was at 2012/02/06 06:25:38
|
|
|
|
|
2012/02/07 07:39:38
Subject: Re:The 1st Merican Lancers an Superdetailed Winter Themed Imperial Guard Tank Army.
|
|
Dakka Veteran
|
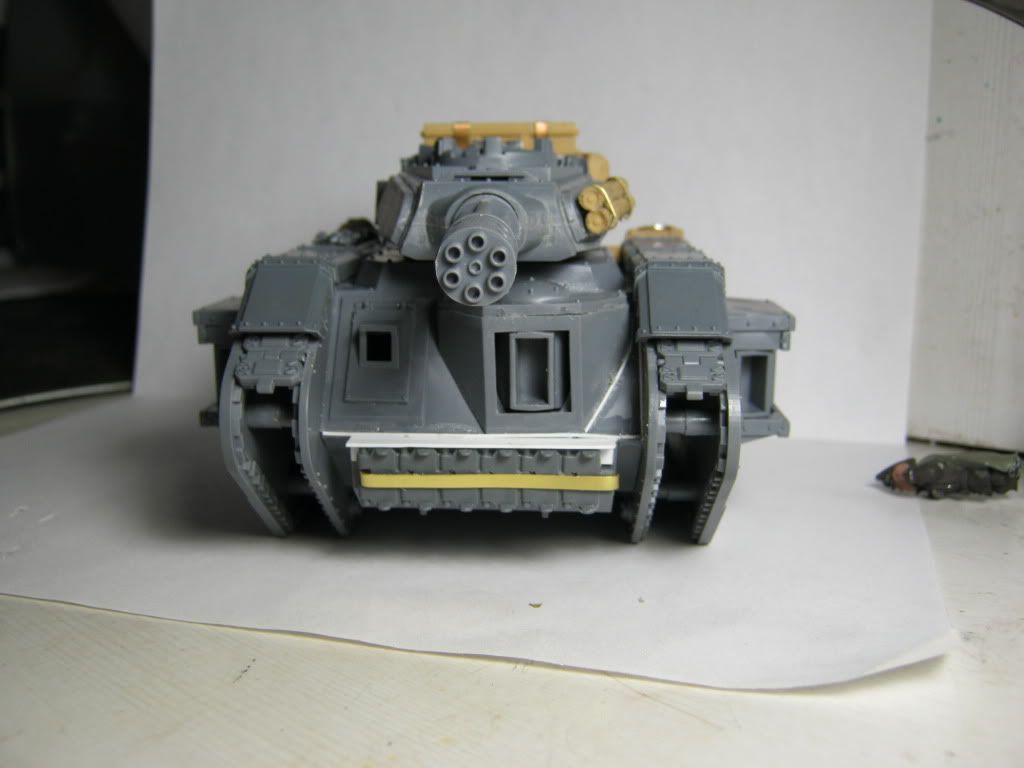
The build is finished,funny how I picked this model up at 11:00 thinking I was just going to weld the front plate.
Three hours later the whole tank is ready for primer now.
I Added Tow cable from the old vindi kit on the left fender,now they do not look so bare.
It is surprising hard placeing stowage in a realistic manner.
|
|
|
|
|
|
2012/02/07 08:14:24
Subject: The 1st Merican Lancers an Superdetailed Winter Themed Imperial Guard Tank Army.
|
|
Warning From Magnus? Not Listening!
|
The weld-lines look awesome. (is that how you spell it?)
|
Notice: If you notice this notice you will notice that this notice is not worth noticing
|
|
|
|
|
2012/02/07 12:08:50
Subject: The 1st Merican Lancers an Superdetailed Winter Themed Imperial Guard Tank Army.
|
|
Dakka Veteran
|
Thanks a bunch,I thought this was ready to paint until I remembered I have to clean up the glue residue with a liquid g/s skimcoat
and yes you spelled it correctly you get to advance to the next round of the Spelling Bee Automatically Appended Next Post: So for my tank company I bought a box set off e-bay.
They came as a 1 box full of sprues for the russes.
My question is when you buy 1 new style leman russ box does that tank come with the accessory sprue with the dozer blade and most importantly comms?
I am starting to think this seller took out all the accessory sprues to resell then sold me just the tanks.
Or does the Apocalyspe package not come with them?
Any info is appreciated,thanks.
|
|
This message was edited 2 times. Last update was at 2012/02/07 22:06:36
|
|
|
|
|
2012/02/08 04:10:17
Subject: The 1st Merican Lancers an Superdetailed Winter Themed Imperial Guard Tank Army.
|
|
Dakka Veteran
|
Thank God for the FW guard decal sheet,if not for that I would of had to line up the 1 and 0 myself.
I found the perfect decal however on the Dust allies decal sheet,the Punisher.
The basecoat for the camo is finished this time I am going to prepaint the barrel a rust color for a really cool effect once I use the chipping fluid.
|
|
This message was edited 1 time. Last update was at 2012/02/08 04:20:43
|
|
|
|
|
2012/02/08 08:49:38
Subject: The 1st Merican Lancers an Superdetailed Winter Themed Imperial Guard Tank Army.
|
|
Chaplain with Hate to Spare
|
Amazing work mate! you have shown me an absolute Aladdin's cave of fantastic ideas and techniques! I will definitely try your welding method as well as subscribe to keep watching your tanks come to life!
great stuff, well done! can't wait to see more!
Nerdfest09
|
 Flesh Eaters 4,500 points Flesh Eaters 4,500 points

" I will constantly have those in my head telling me how lazy and ugly and whorish I am. You sir, are a true friend " - KingCracker
"Nah, I'm just way too lazy to stand up so I keep sitting and paint" - Sigur
"I think the NMM technique with metals is just MNMM. Same sound I make while eating a good pizza" - Whalemusic360 |
|
|
|
|
2012/02/08 11:33:30
Subject: The 1st Merican Lancers an Superdetailed Winter Themed Imperial Guard Tank Army.
|
|
Ragin' Ork Dreadnought
|
Awesome work here. One thing - I can see frosting around the decals. Now, it may be exaggerated by the photographs, but there are a couple of things you can do to make it even better:
1) Trim the decals as close to the design as you are comfortable.
2) Coat the panel in gloss varnish, let dry, then apply the decal. The frosting comes from small pockets of air trapped under the decal due to the matt finish. You can reduce the "edge" effect further (and protect the decal) by gloss varnishing over the top once dry. You can then matt varnish to bring it back in line with everything else.
When your work is as good as yours, its the little things that stick out!
Keep up the good work!
|
|
|
|
|
|
|
|


 Arakasi vs Infinity