Forum adverts like this one are shown to any user who is not logged in. Join us by filling out a tiny 3 field form and you will get your own, free, dakka user account which gives a good range of benefits to you:
No adverts like this in the forums anymore.
Times and dates in your local timezone.
Full tracking of what you have read so you can skip to your first unread post, easily see what has changed since you last logged in, and easily see what is new at a glance.
Email notifications for threads you want to watch closely.
Being a part of the oldest wargaming community on the net.
If you are already a member then feel free to login now.
2012/05/02 19:44:47
Subject: ++ Zone Mortalis Board - First work on scratch built tiles++
yeah,
My summer project is a Zone Mortalise board.
I have bought 8 official tiles. I plan to make 8 home made tiles.
Discussing Zone Mortalis boards with ArbitorIan we concluded that the FW board is probabily too enclosed.
So I plan to make tiles that will open the board up somewhat.
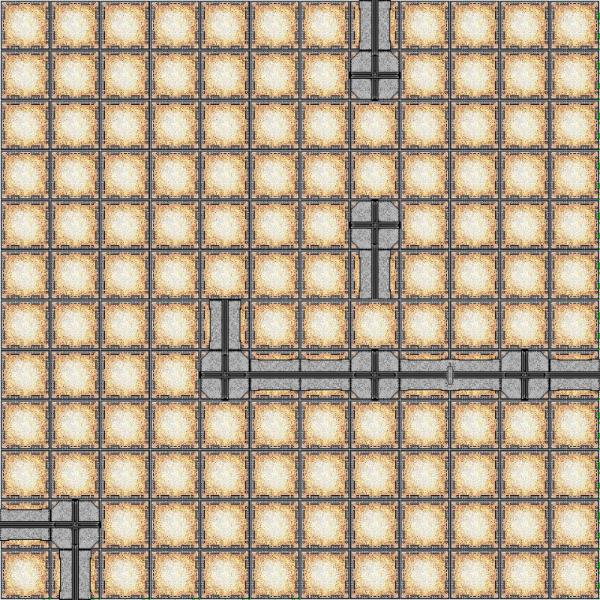
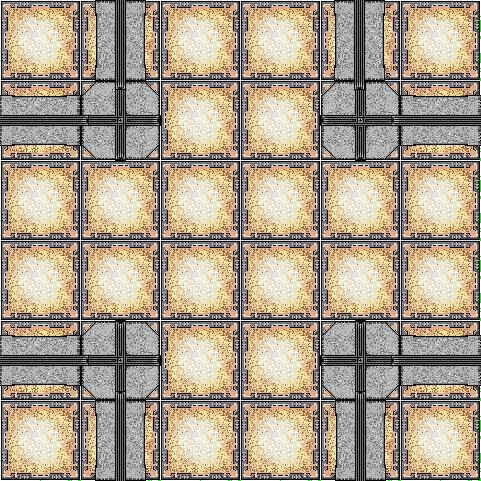
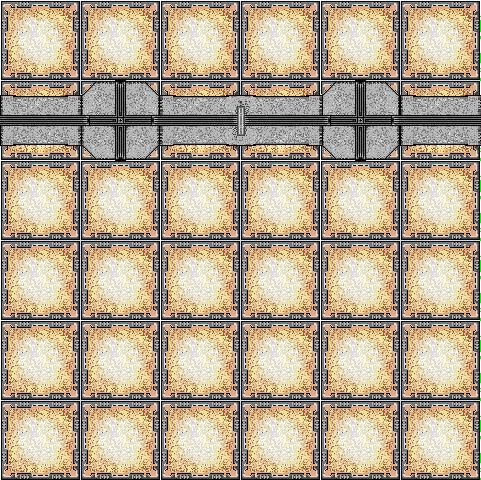
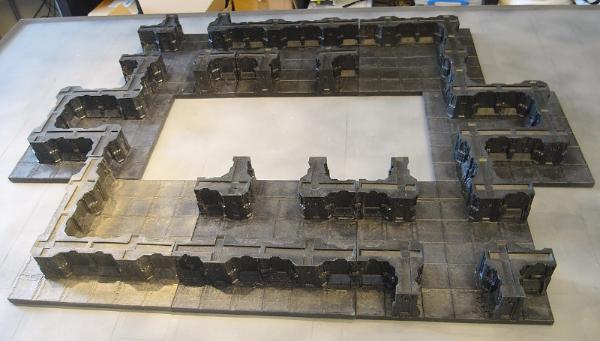
This is the four original FW tiles set out in a 2x2 grid.
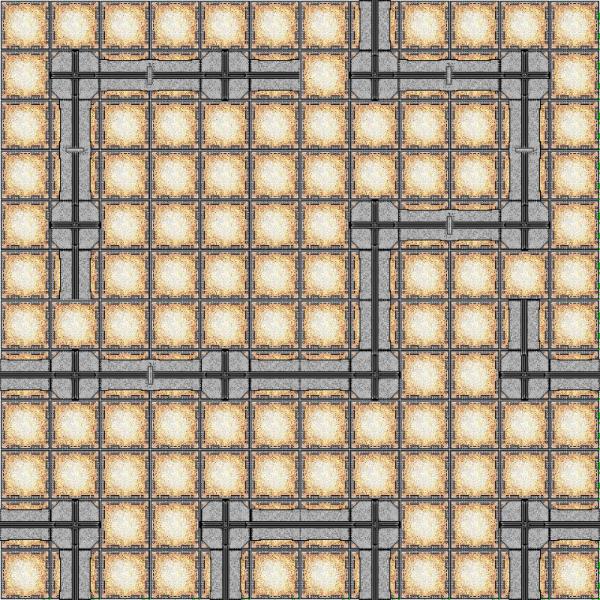
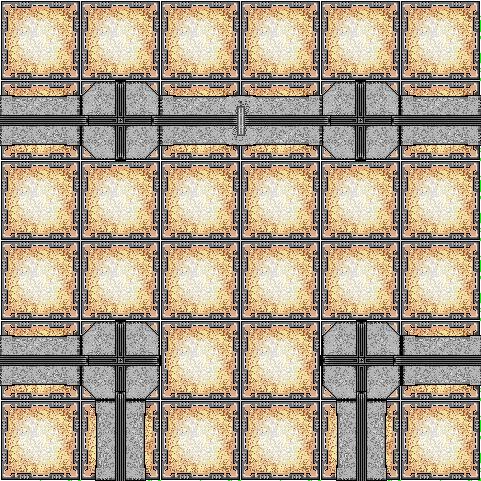
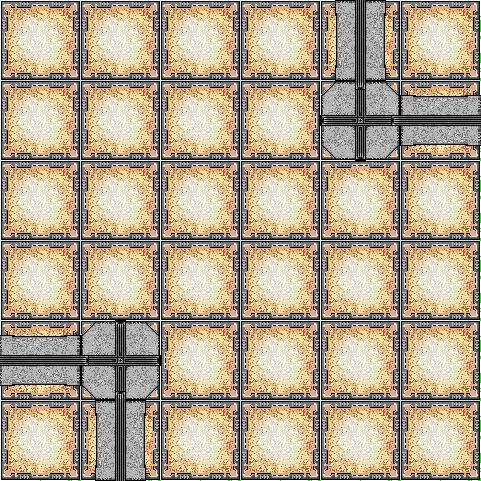
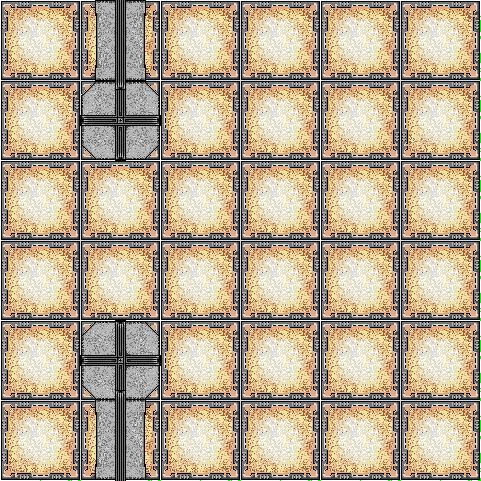
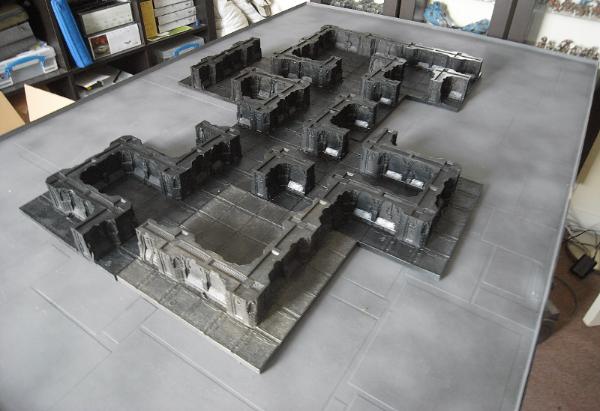
These are my four new tile designs in a 2x2 grid.
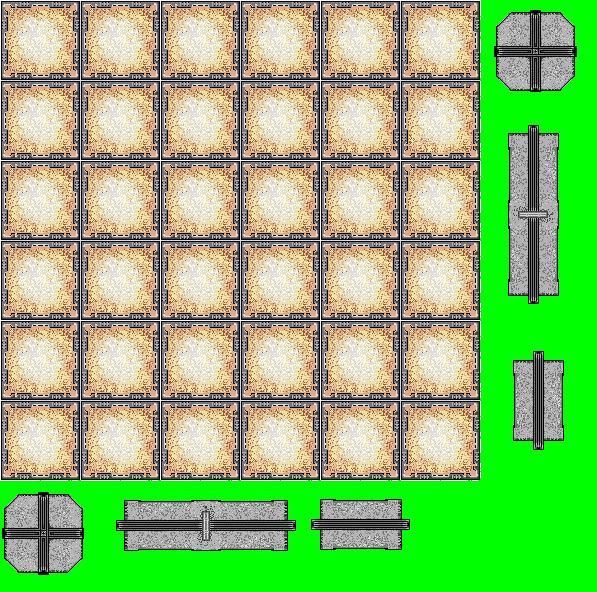
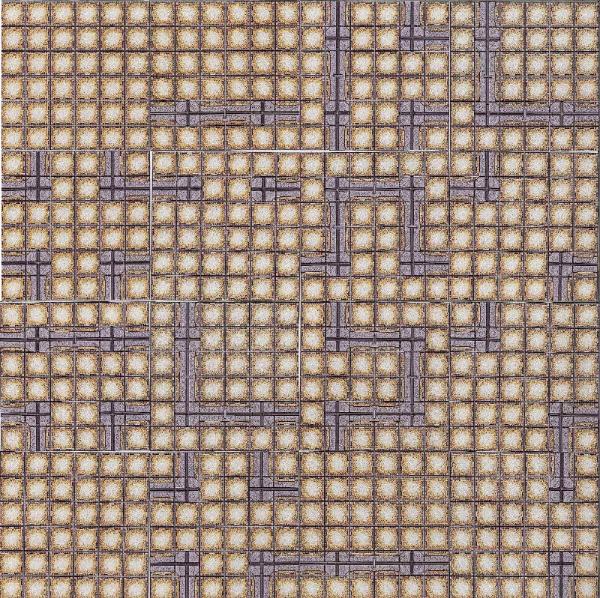
This is the tile template generator image thingy I created;
Spoiler:
Forgeworld Tiles replicated in MS paint
Spoiler:
L style Tile
Spoiler:
X style Tile
Spoiler:
T style Tile
Spoiler:
C style Tile
My tile Designs.
Spoiler:
Blank style Tile
Spoiler:
wall style Tile
Spoiler:
corners style Tile
Spoiler:
gap (for door?) style Tile
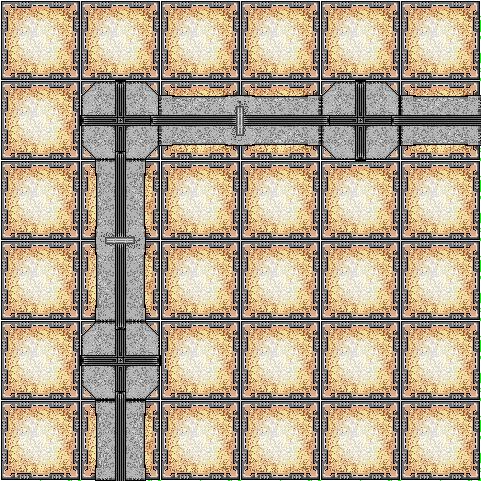
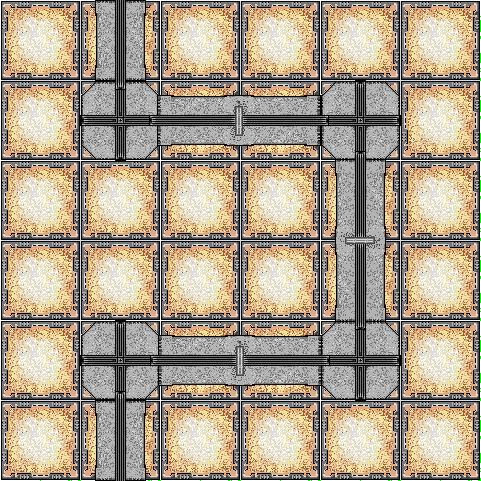
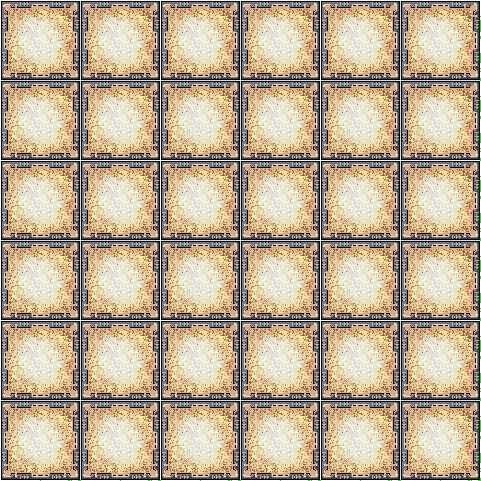
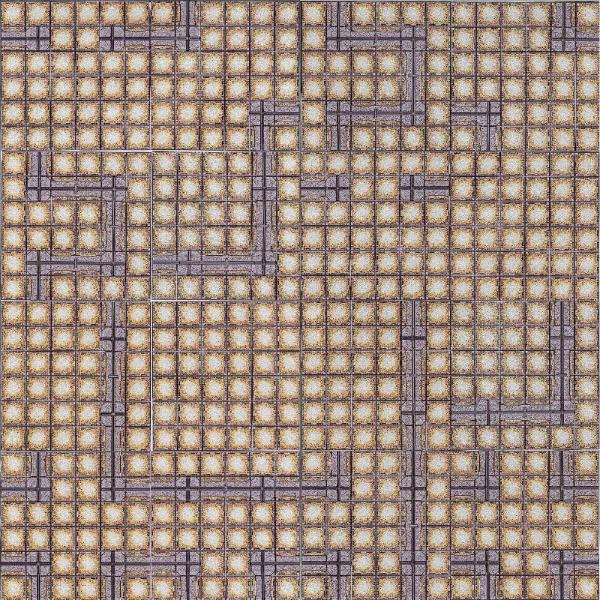
These are two 4x4 mock ups with printed out mini tiles.
The layouts are random as i couldn't see which way i was placing the tiles on the scanner, but I think that the amount of free space looks good.
Spoiler:
Random layout 1
Random layout 2
And playing around with the FW tiles...
There are quite a number of bubbles in each tile but I think that they are unavoidable.
I'll photograph these and show how much work is required in patching them up as the blog continues.
I have one FW tile with a warped wall I plan on complaining to FW customer care about and asking for a replacement tile.
Again I'll update the blog with photos and details of the warped piece and my correspondance with FW.
To make my own tiles I plan to get squares of wood, cover them in a putty and push a custom tile negitive mould into the putty to get the floor detail. Wall sections will be mostly GW city of death tiles combined with bitz box goodies and plastic card.
I'm not sure which putty I'll use. Ideas?
Panic...
This message was edited 3 times. Last update was at 2012/05/14 19:36:36
Interesting, looking forward to seeing how the floor mould works especially. There's lots of potential for expanding the FW parts, cool as they are they could use a bit of variety.
2012/05/03 12:47:30
Subject: ++ Zone Mortalis Board - Planning Stage ++
SilverMK2 wrote:Can't wait to see where you go with this (and good work on and use of the tepmlates there!).
thanks It'll be a slow burner like the s6 canals blog but it'll get there.
Bruticus wrote:Interesting, looking forward to seeing how the floor mould works especially. There's lots of potential for expanding the FW parts, cool as they are they could use a bit of variety.
I'm also looking forward to seeing how the floor mould works ... I spent yesterday evening looking on the Sylmasta website. I opted for 500g of black - sylmasta A+B putty
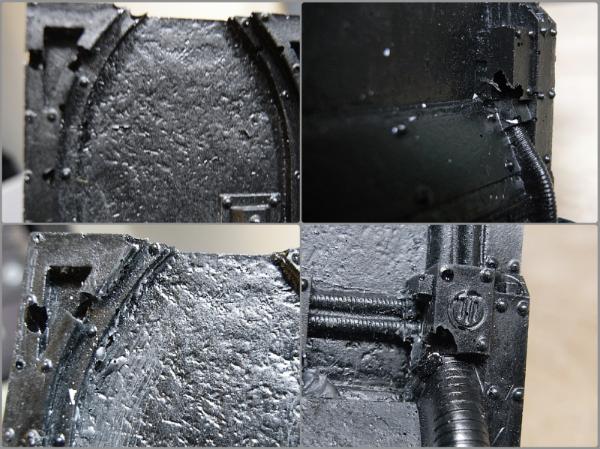
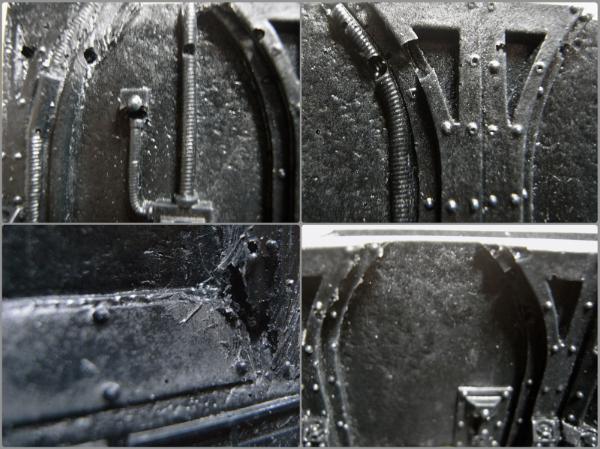
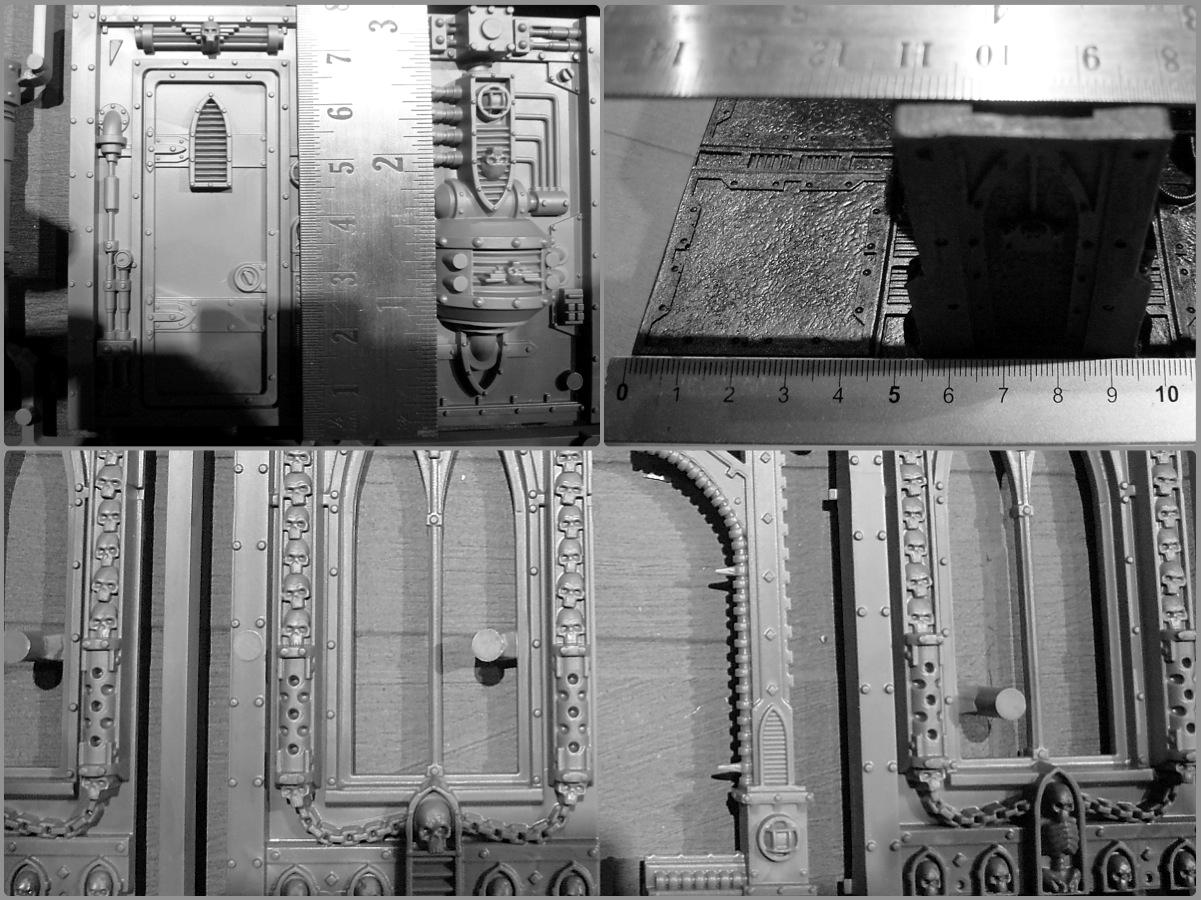
++ Today I photo documented the warped T section end Piece and the bubbles across the 8 tiles. (obviously I didn't photo every bubble!)
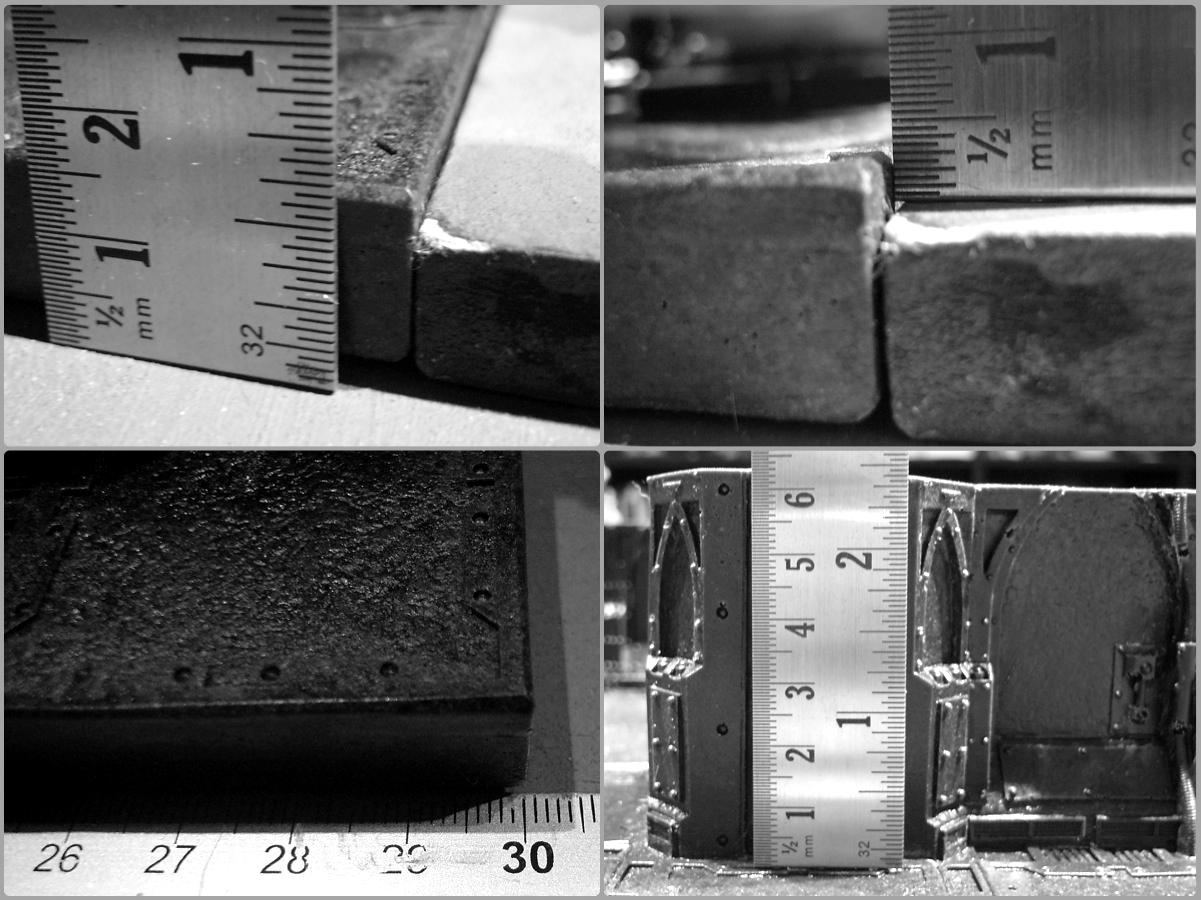
The Warped T piece problem leaves a 5mm gap at the top... the last image shows how it should be.
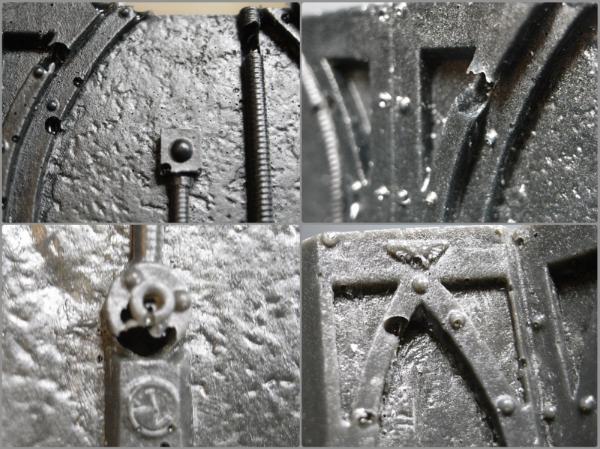
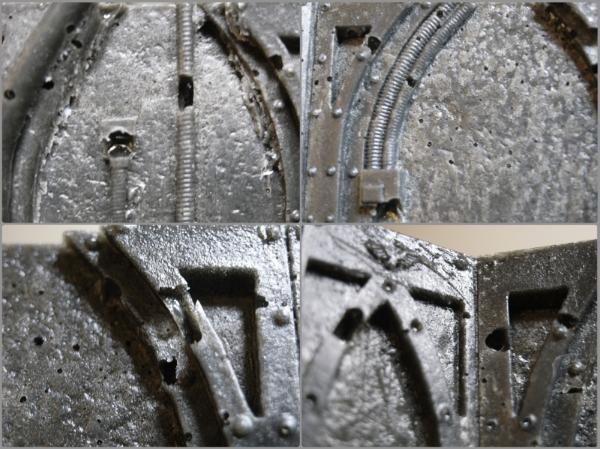
The bubbles ... the bubbles... These photos are quite the horror show... If you have problems with finecast look away now!
Spoiler:
As I took the photos I started thinking the bubbles are kinda pretty bad... here is a copy of my email to forgeworld -
Spoiler:
Hi, I recently bought 8 Zone Mortalis tiles from the Forge world stand at Salute 2012.
The first issue I have is one of the tiles has a warped end and does not line up correctly. There is a unsightly gap at the top when the tiles should match up. Please see the image 'warped T section' it has 4 photos of the wared piece and the gap it causes, the last photo is how they should match up... I don't believe this is correctable and think it requires replacing.
Second issue is the large amount of bubbles in every tile. Please see images 'bubbles' 1 to 8... Is this the amount of bubbles I should expect or have I received a bad batch of tiles?
Sincerely, Xxxx Xxxxxx
Panic...
This message was edited 2 times. Last update was at 2012/05/03 14:28:57
Green stuff hero! *green stuff hero makes dramatic entrance*
Here I am Panic don't worry I will fix that for you! *green stuff hero is waiting for Panic to use him*
;P sorry that popped into my head when I saw this blog. When do you think you start spraying them and so on? I suppose that will fill in some gaps as well?!
Looking forward to your colour scheme and such.
Falling down is the same as being hit by a planet — "I paint to the 20 foot rule, it saves a lot of time." -- Me
ddogwood wrote:People who feel the need to cheat at Warhammer deserve pity, not anger. I mean, how pathetic does your life have to be to make you feel like you need to cheat at your toy army soldiers game?
2012/05/03 14:53:28
Subject: ++ Zone Mortalis Board - Planning Stage ++
Yeah, I don't know - the warped section is definitely a replace (hopefully without a return!) but I'd expect a fair few bubbles on a piece of resin this size.
I guess you should just get what you can!
Looking at that board, I think you should think about making a large batch of 'blank' tiles with just the floor pattern to make the large open spaces become completely configurable.
You could make a small terrain set of moveable columns and industrial/generator scenery which take up 4/6 floor 'spaces'...
Sharazad wrote:*green stuff hero is waiting for Panic to use him*...
At first I though the tiles were expensive enough and should come with the doors included... now I'm thinking they should come with Greenstuff
++
ArbitorIan wrote:Yeah, I don't know - the warped section is definitely a replace (hopefully without a return!) but I'd expect a fair few bubbles on a piece of resin this size. I guess you should just get what you can!...
On the whole the tiles still look great even without any GS attention I think they will look good sprayed and inked as is. If the choice is tiles with bubbles or no tiles at all... I'll take the tiles as is.
FW say this in their FAQ
Surface Air Bubbles in Hollow Resin The casting process for our new range of hollow resin scenery pieces means that occasionally small surface air bubbles form. These can easily be filled with a tiny drip of superglue – we recommend that you carefully pour a small amount onto a palette, then use an unfolded paperclip to drip a small quantity into the hole. Citadel Liquid Green Stuff is also a great way to fill these holes; especially as it can be mixed with water to reduce its viscosity.
I think my bubbles will take more than a little bit of super glue to fill! I've asked FW if mine are more bubbly than normal. It will be interesting to see if this is the standard. If so I think they should have unpainted examples on the website so people can see exactly what they are getting.
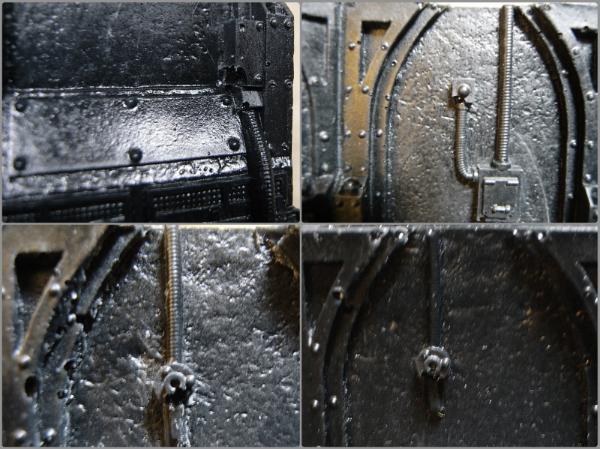
It's also worth noting that in their painted examples there are some air bubble defects. I just think mine has alot more.
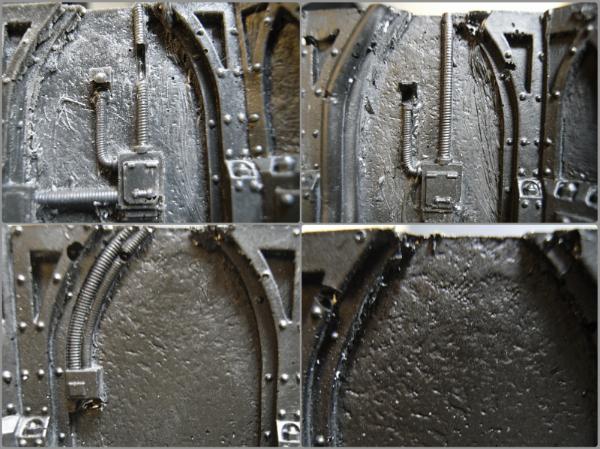
Spoiler:
top of the arch has a bubble gap...
all the arch tips have bubble pips and the arch again has a gap.
Again arch pips and gap... again painted in not filled.
Panic...
This message was edited 1 time. Last update was at 2012/05/03 15:55:22
Hi, I recieved my 9 tiles for a 3x3 table about two weeks ago. There were small air bubbles and pitting which I expected from the reviews I read. However, mine are minor and make the terrain look worn. I have the occassional larger one on a few of the tiles. But they're infrequent and nothing a little putty can't handle (though I intend to leave them as is for battle damage.) If you have more major bubbles than what you've shown, I suspect you got a bad batch.
Also I have some minor warping in the tiles (no more than what you can see on the promo videos) but nothing as bad as what you showed on your T tile.
2012/05/03 18:28:52
Subject: ++ Zone Mortalis Board - Planning Stage ++
Sharazad wrote:Instead of sending it back can't they just send you green stuff as compensation?...
well I do think they should contribute! Also I can't start patching these up until FW get back to me on the quality questions. Since they may ask me to send these back. :sadface:
witchdoctor wrote:Hi, I recieved my 9 tiles for a 3x3 table about two weeks ago. There were small air bubbles and pitting which I expected from the reviews I read. However, mine are minor and make the terrain look worn. I have the occassional larger one on a few of the tiles. But they're infrequent and nothing a little putty can't handle (though I intend to leave them as is for battle damage.) If you have more major bubbles than what you've shown, I suspect you got a bad batch.
Also I have some minor warping in the tiles (no more than what you can see on the promo videos) but nothing as bad as what you showed on your T tile.
thanks for the information. On your tiles are any of the electrical boxes and cables details destroyed by bubbles? I seem to have quite a few completely missing!
warrior lord wrote:also you will need to do some battle reports
We will!
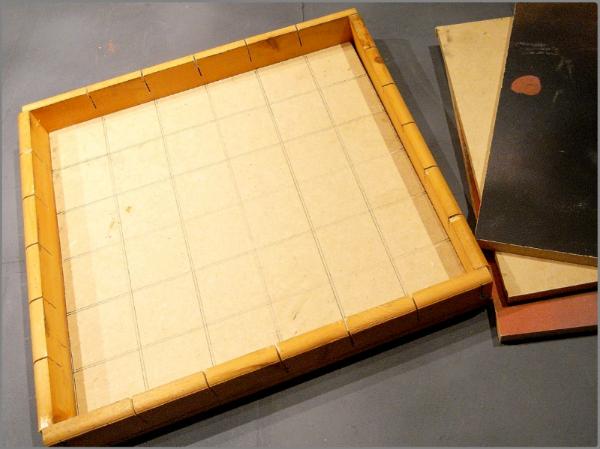
++ Ok so today I started to measure up the FW tiles
As you can see the tiles are 2 - 3 mm higher than a 1/2 thick board. this is super convenient for the plan to put putty ontop of squares of wood. I think a 1.5 - 2 mm layer of putty will squish down and pop up to 3mm for the raised details of a tile mould.
The FW tiles are exactly 300mm square - (just short of being 12" square) also great as I have two 2'x2'x.5" mdf boards spare!
As for detailing the floors If I simplify it to 6 squares and forget about the grates next to some squares... each mini Floor tile on the section will be 50mm square.
The walls are 63mm tall, compared to the 80mm for GWCOD walls. So the GW plastic will need cutting down with a razor saw and/or belt sander. the regular walls are 40mm wide at the bottom and 32mm at the top... the pillars are wider. Inter tile Connecting Walls are always positioned 55mm in from the corner - bang in the middle of the second tile.
I'll be using lots of GW plastic terrain mixed in with plastic card to create my zone tiles. I also plan to add details like statues and consoles.. I have... x4 x4 x4 x6
I also have 2 sky pads sitting here doing nothing that could make nice big imerial eagle wall logo? x8
Not going to start chopping these up until after the bank holiday thou... So for now I'm just eyeing stuff up and getting ideas together. Ideas???
Panic...
Automatically Appended Next Post: yeah,
++
Update
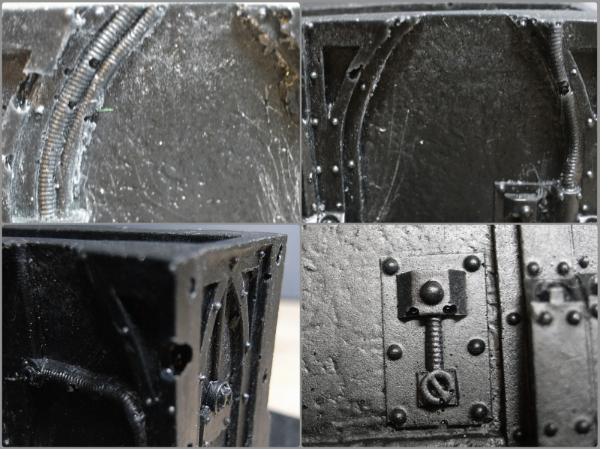
the project grows... I've ordered some bits from Zinge industries... run by dakkanaut Zinge.
Product Model Quantity Price Total
Black Tack Posing Putty 10cm BTA01 1 £1.00 £1.00
Flexible Rivet Strips Sample pack - Sprue of 5 - Various RVSS01 4 £2.50 £10.00
Set of 8 Grills and Vents on a sprue GVES01 2 £4.50 £9.00
Fans - Sprue of 8 - Various FANS01 3 £4.80 £14.40
Sub-Total: £34.40
UK Shipping (Weight: 0.00g): £2.50
Total: £36.90
the rivits do this
Spoiler:
Panic...
This message was edited 4 times. Last update was at 2012/05/04 17:52:10
Yeah,
AndI just got off the phone with Forge World, They agreed that the details shouldn't be missing and asked which tiles had the defects.
I went and had a look and can honestly say that 4 tiles have fairly minor defects which are easy to fix and 4 tiles with major details missing/obscured.
"2xAlphas 1xBeta and 1xGamma, we'll get you those replacements out to you right away" - FW customer care again reigns triumphant.
Plus with a bit of love the details will be fixed on the defects tiles.
Huzzah!
Also, my Zinge order came in the post today. these parts looks amazing in hand very sharp details.
Good to hear, and nice bonus for your troubles. I can't help but think Forgeworld really needs to look into some sort of six sigma/lean methodology. The current rate of defects (still tremendously improved over their early days) must surely be problematic for their bottom line.
Any idea how you're going to paint your tiles? I'm struggling with a good palette for mine, mostly because I want it to look more like a grimdark spaceship than an underground cathedral. I know the distinction between the two is minimal at best.
2012/05/10 15:50:38
Subject: ++ Zone Mortalis Board - Planning Stage ++
witchdoctor wrote:...Any idea how you're going to paint your tiles? I'm struggling with a good palette for mine, mostly because I want it to look more like a grimdark spaceship than an underground cathedral. I know the distinction between the two is minimal at best.
Not sure yet, but It'll involve lots of sprays!
OK progress.
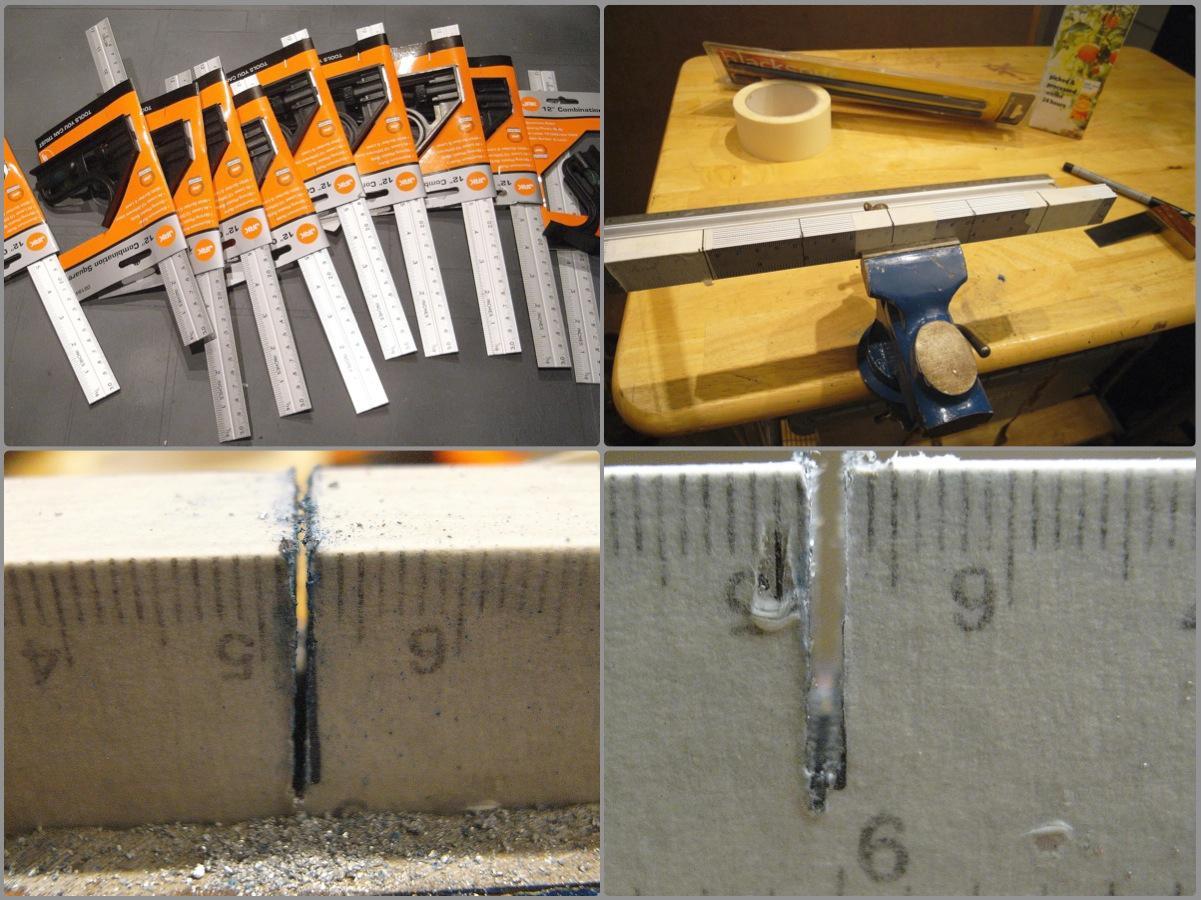
I've started to build my tile making tool.
First I made the Wooden frame.
Bought 10 cheap metal rulers in poundland - £10
Strapped them together in a vice.
First cut with a hacksaw, then second cut to widen with a jigsaw.
Behold! Tile maker MK1
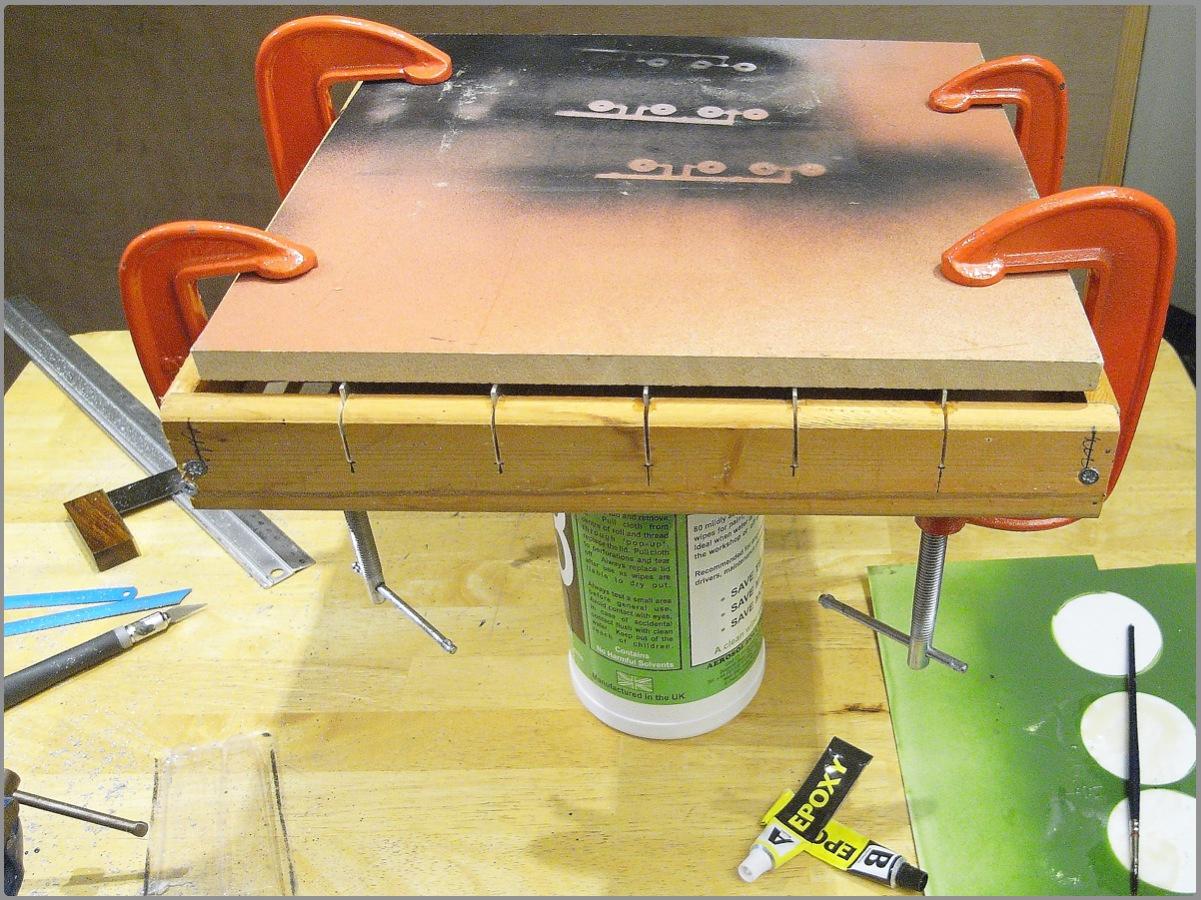
I'm going to put some epoxy glue into the corners and sandwich clamp the frame over-night to straighten it out...
but it looks good to me.
So the plan is layer of putty on 300mm square tile.
Squish down with the Tile maker MK1.
Then stamp into each partition with a floor panel mould.
Vitruvian XVII wrote:Nice idea! Should work great.
Fingers crossed, lots of wasted time other wise!
SilverMK2 wrote:You weren't MacGyver in a previous life were you?
Ha Ha I wish!
Ok today I brushed the two part epoxy glue onto all the metal intersections and where metal joins wood at the edges. I then sandwich clamped the metal rulers between two tiles to flatten them out.
update again with success/fail tomorrow!
Panic...
This message was edited 3 times. Last update was at 2012/05/12 19:39:28


 ... I spent yesterday evening looking on the
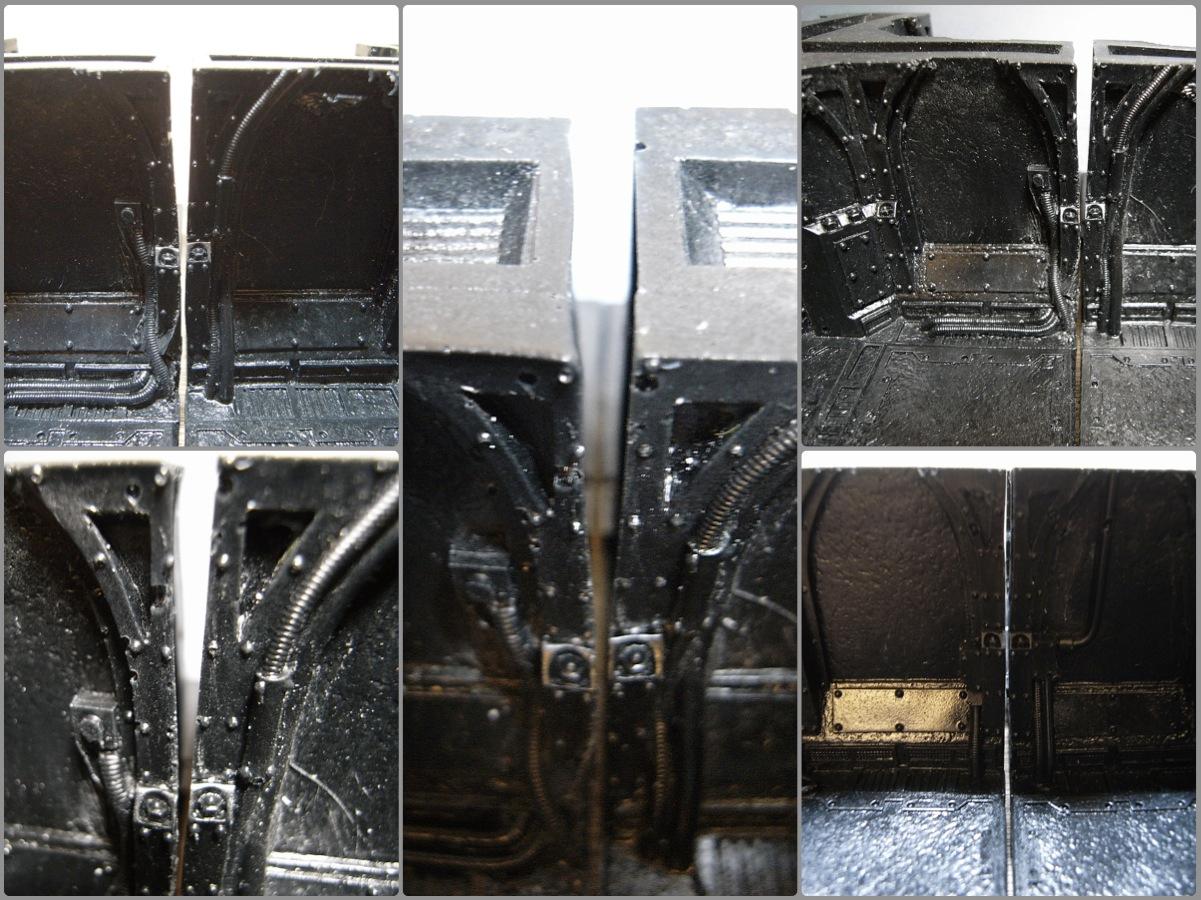

 !!Blogs!!


 Oh my...... I feel a need to do unmentionabel things with you now Scottie