@ Gits Thank you sir, my pace is thanks to your massive effort on your Halloween special. (If gits can paint that fast come on boys!)
@ Archer Thank you, much appreciated. Listed and pics below.
This project is an effort to make tham closer to what I want, but not spend too much time doing it. With moving I have realised I have an awful lot of models and I really should paint them. I also have enough room to have a battle or too with the kids (who like the idea) I do not hold with the whole "it must be painted!" thing, but I would like to have completed armies. (No army is ever complete!) Just want to get to grips with this collection and do something with it.
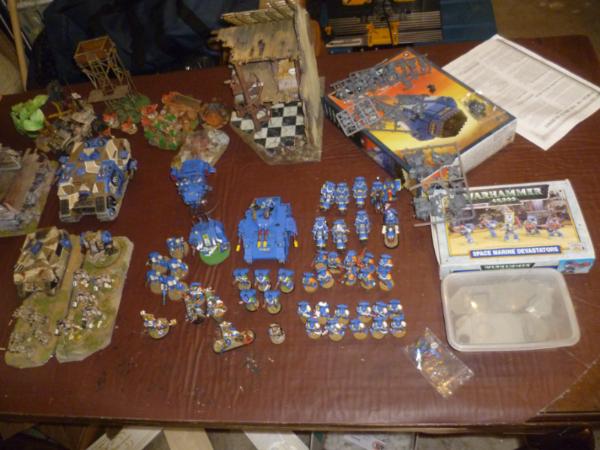
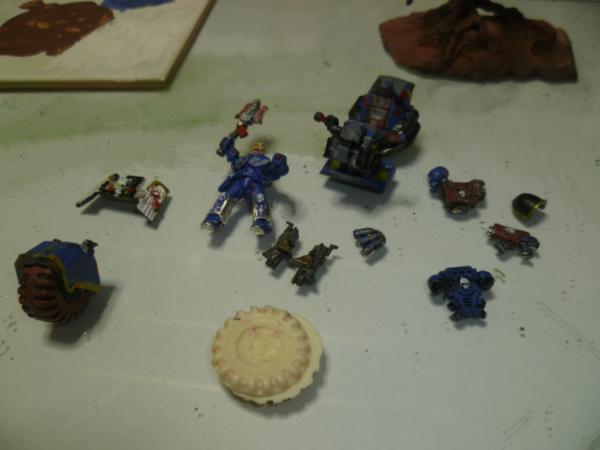
So the Space Marines...Current list...
3 x Commanders (to paint)
1 x Librarian (to paint, maybe)
15 x Terminators (10 to paint)
10 x Hvy weapons (to paint)
19 x Tactical (18 to paint)
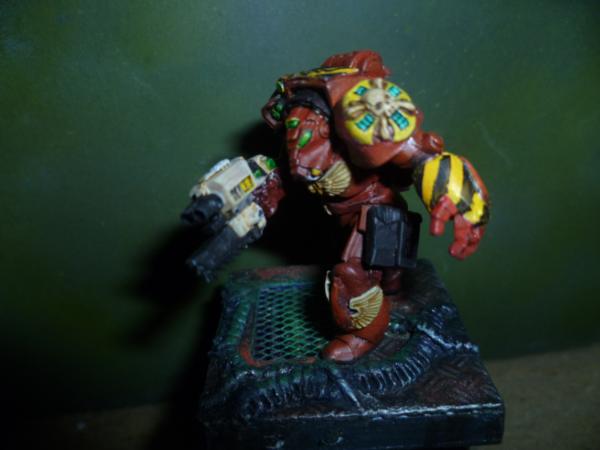
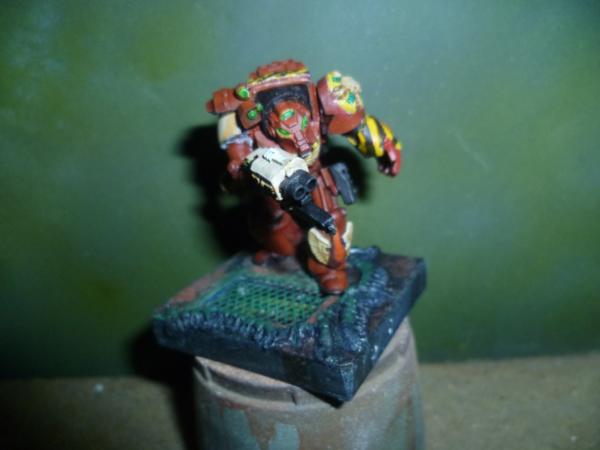
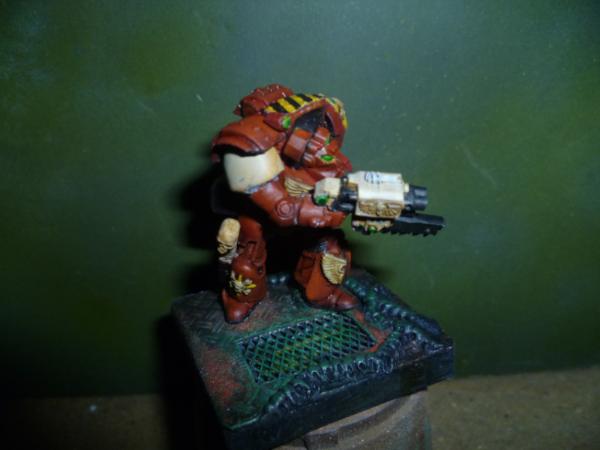
5 x Assault (to paint)
6 x Bikes (to paint)
1 x Attack bike (to paint)
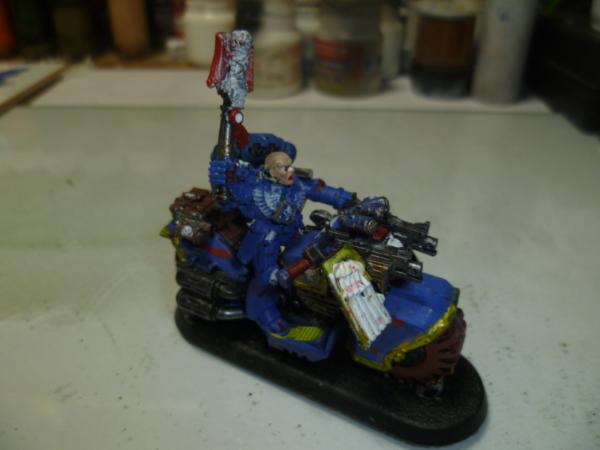
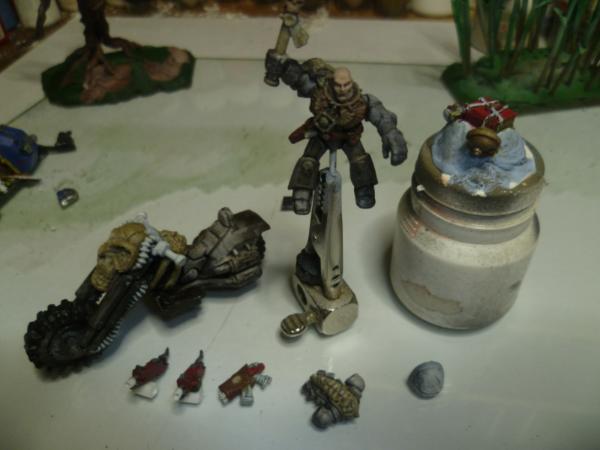
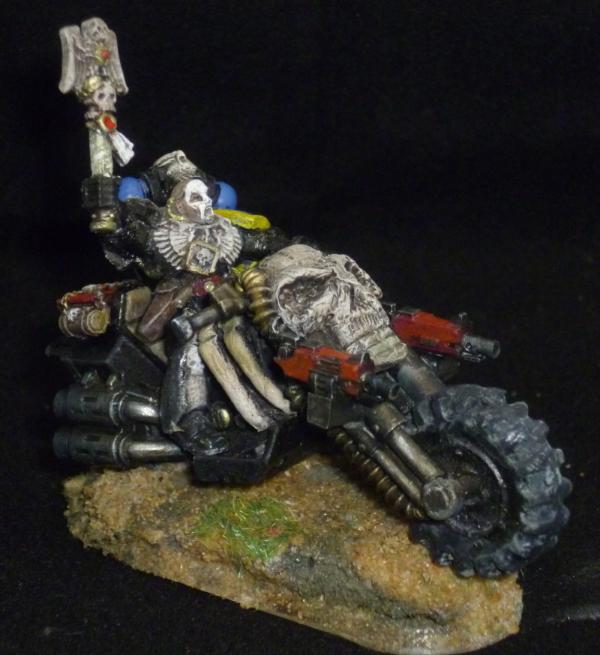
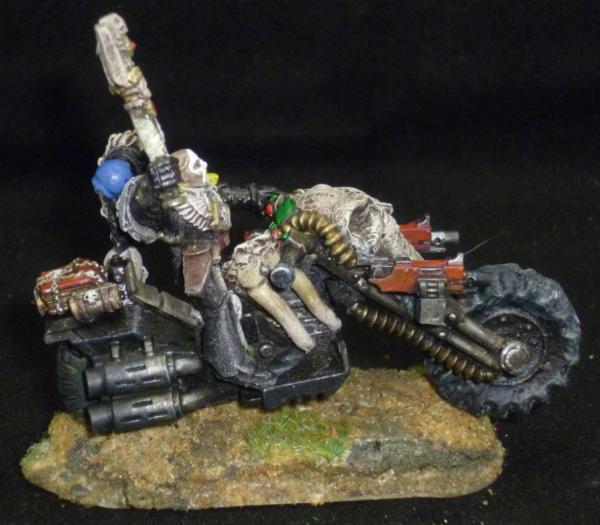
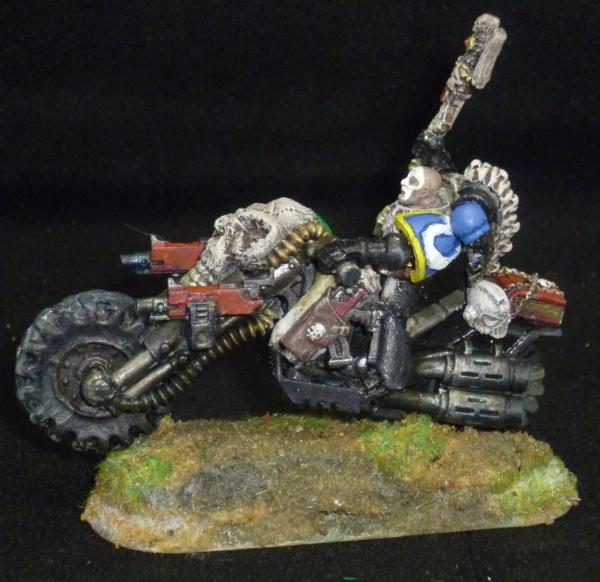
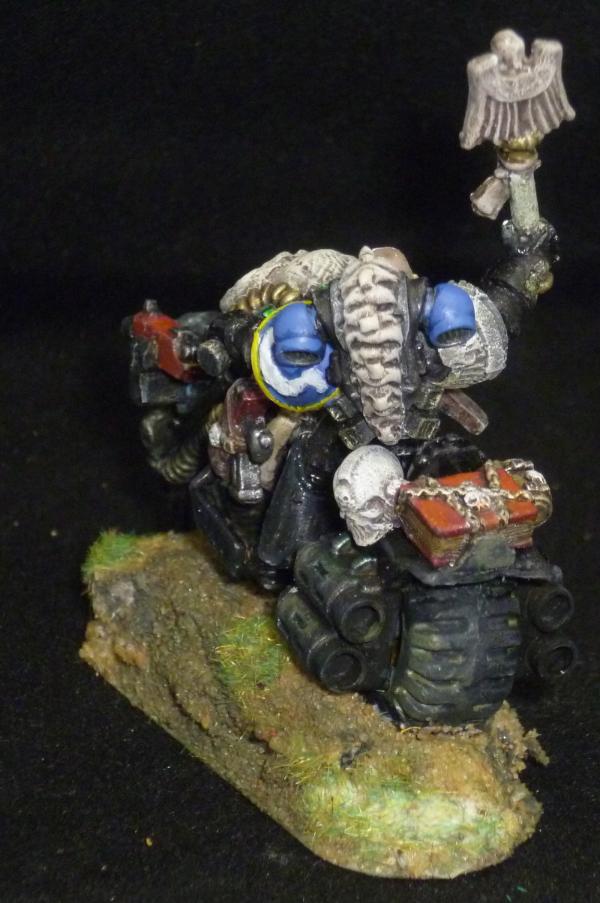
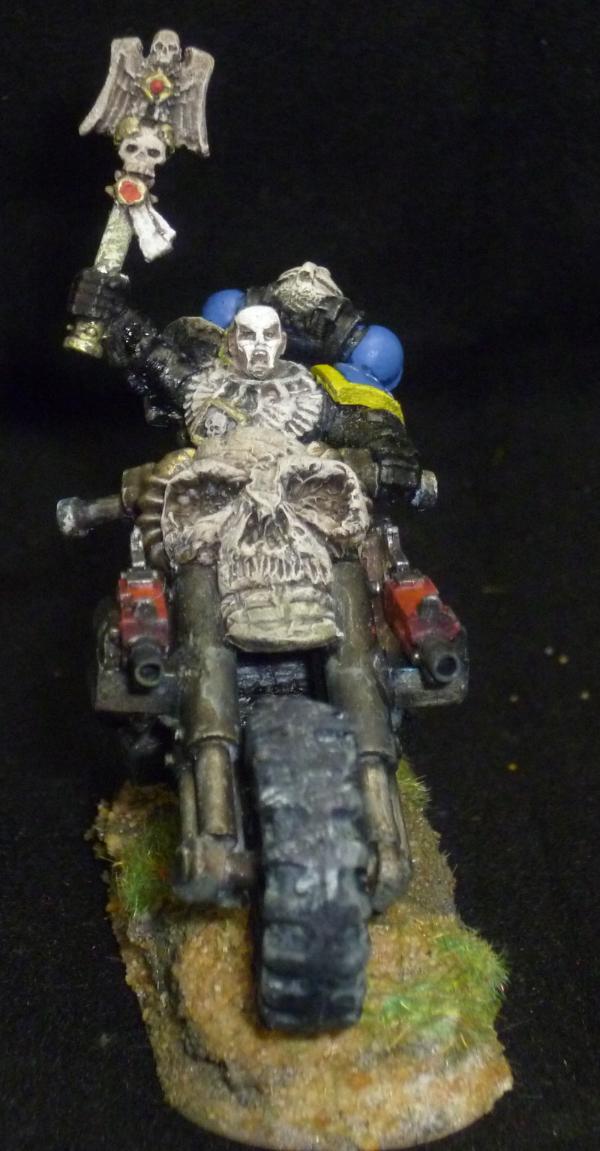
1 x Chaplain on bike (to paint)
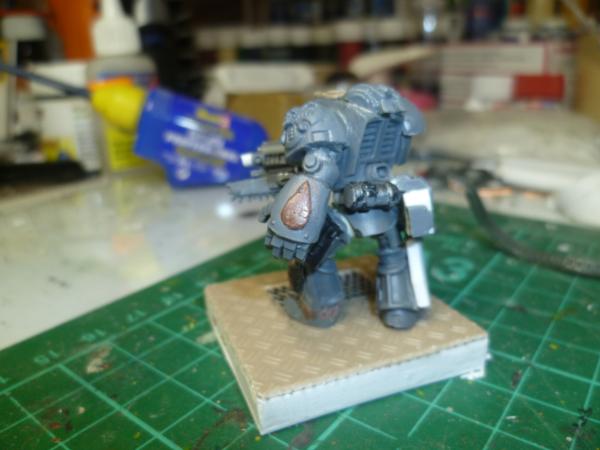
3 x Dreadnaughts (2 to paint)
1 x Speeder (to paint)
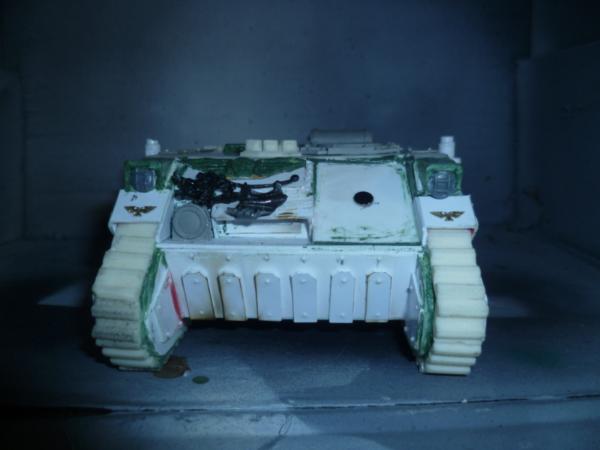
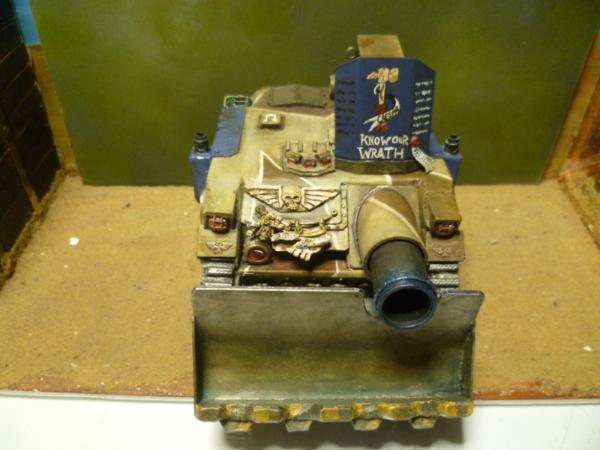
1 x Predator (to paint)
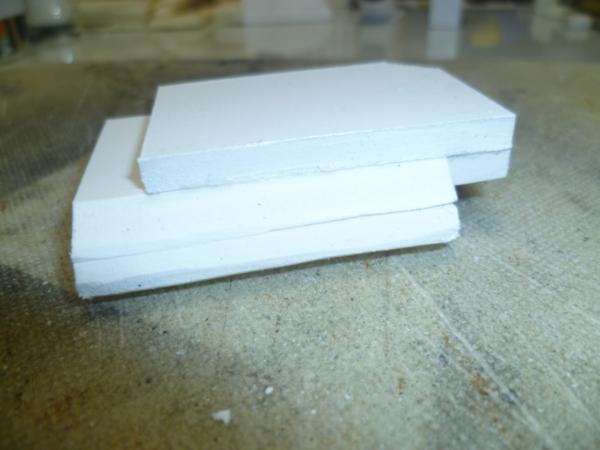
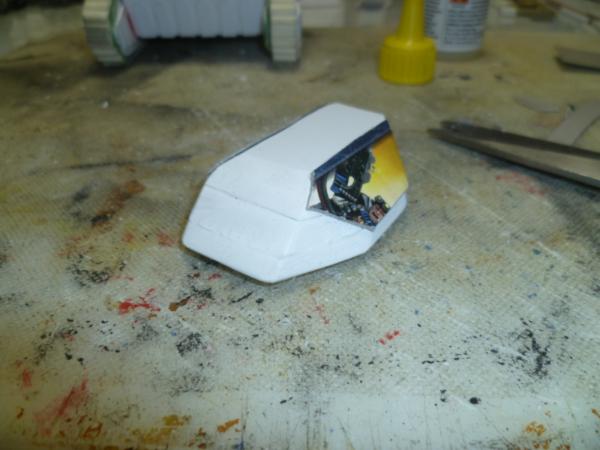
2 x Scout Razorback (1 to make and paint)
1 x Drop pod (to make and paint)
1 x Landraider
Want to add 3 true scale rhinos scratch built and going to build a fortress for them. Thinking of using the drop pod as the basis for the fortress. And thinking of making up a superheavy command transport type thing, don't think they have anything like it at present, but I have an idea in my head.
Going to be doing this week days, weekends will be for other things (ie RL, but hopefully modelling)
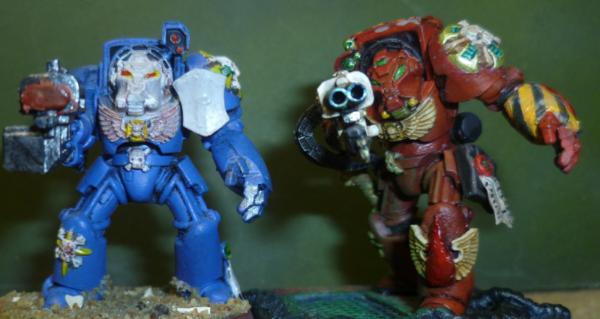
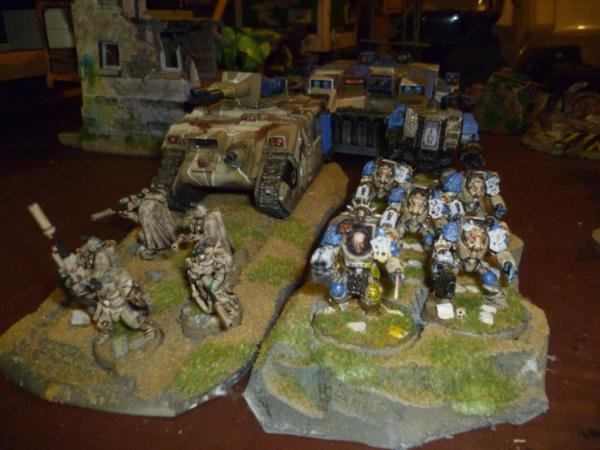
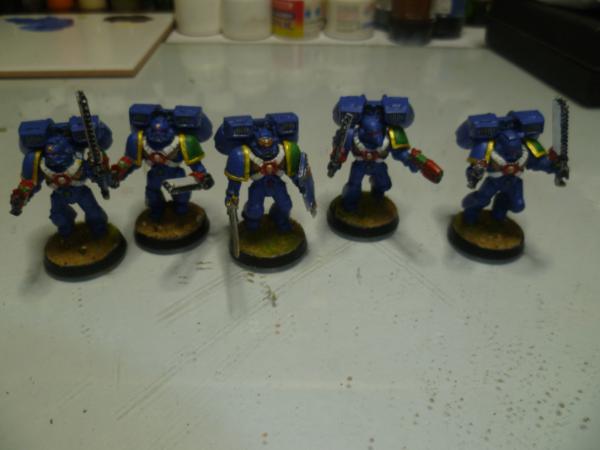
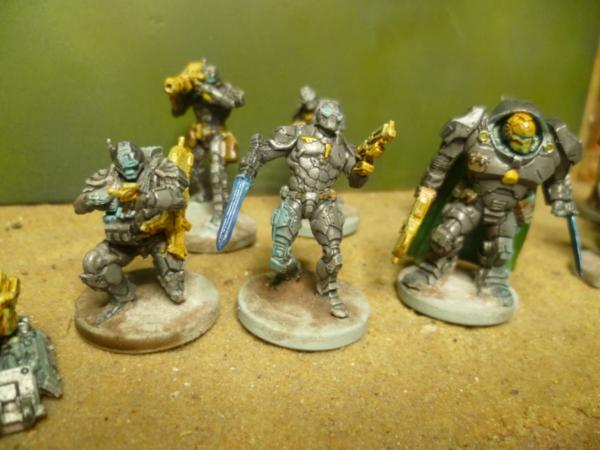
Leave you with the lads so far on display bases.
Thoughts appreciated, especially about the army, what am I missing etc.Not that I will be entering any tournies or anything like that so not really bothered about legalities.
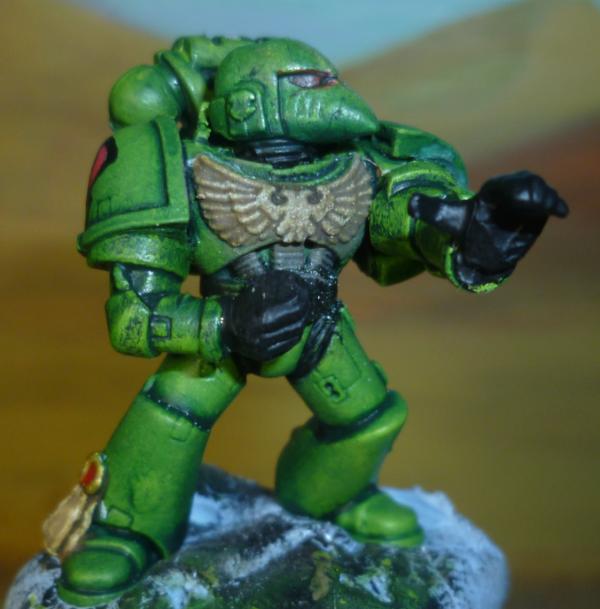
They look so good dude! love the single solid Ultra blue spot it works well with the camo colours you used, the camo design is done beautifully as well.
I absolutely love the individual squad scenic bases. What a great idea.
In regards to the models it's a very ultramarine collection. Good representation from all the types. You may want to add some centurions. I hear they are pretty good. But I still find them funny looking. But with your modelling skills......have I planted an idea yet?
I think a big command vehicle or fortress would be very cool.
Looking fantastic! Really enjoying seeing the before pics for each unit, I've repainted armies myself and it's a great feeling to bring a unit back looking swanky.
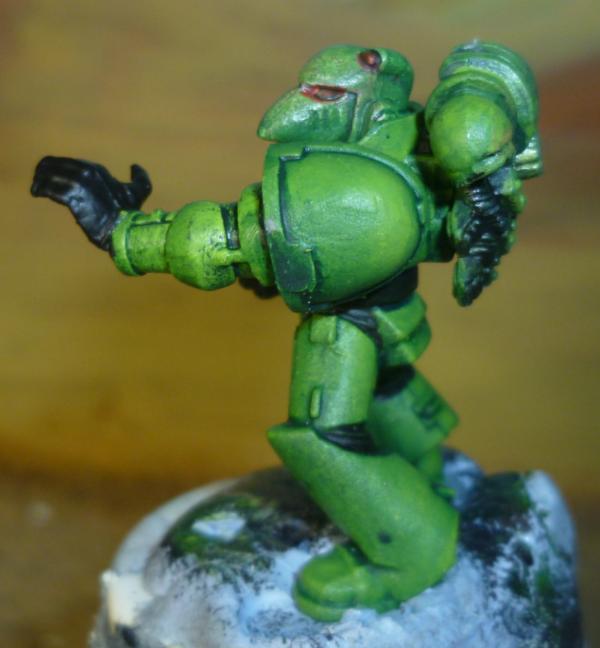
Your marines look definitely better with their new color scheme.
It's a good point that you decided to repaint them, it's worth the effort.
And chosing a camo scheme for marines is quite original, I like the idea.
@Januine Thank you sir, aiming to get them done quick, just don't look too close.
@Nerdy Thanks bud, I figure its enough to distinguish them as Ultra's without being Smurfs.
@ Archer, Thanks, I thought the bases would make it easier and better to display them. I will take on board what you have said, think I have an idea or two.
@ EDC Thanks, yeah it feels good, been meaning to for a while, they have always been a job I rushed, unfortunately looks like it again, but I have made some improvement on the previous flat coat.
@ Minus, Thank you.
So whats to report....lots. Started a new Ork Project (see other blog) Tried some experiments this weekend some failed (not going there!) Others not bad. Started on my entry for the LoER comp, a must see as there is some truly amazing work going on there. I do not stand a chance, only got a couple weeks, but that's tons for me.
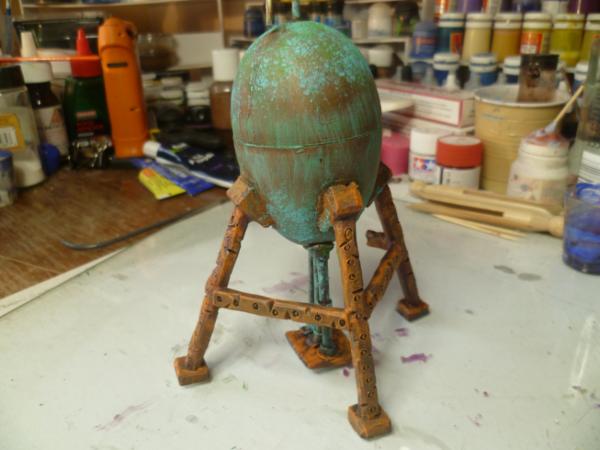
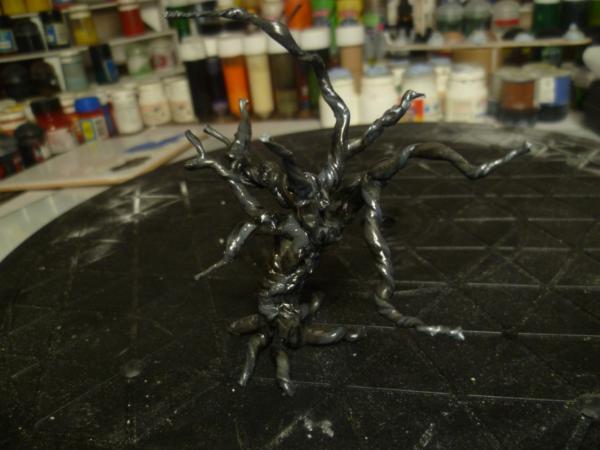
Well heres me setting the world on fire again....
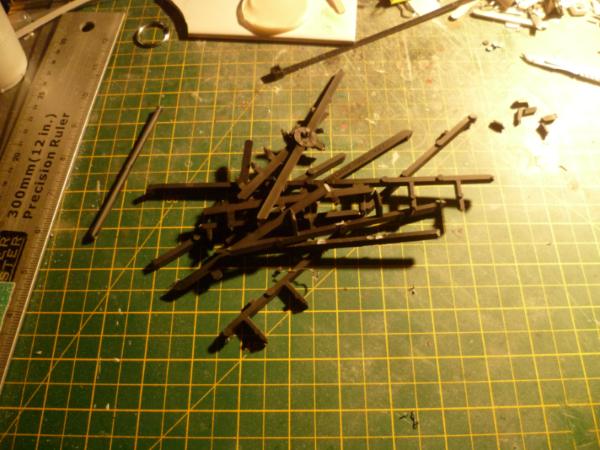
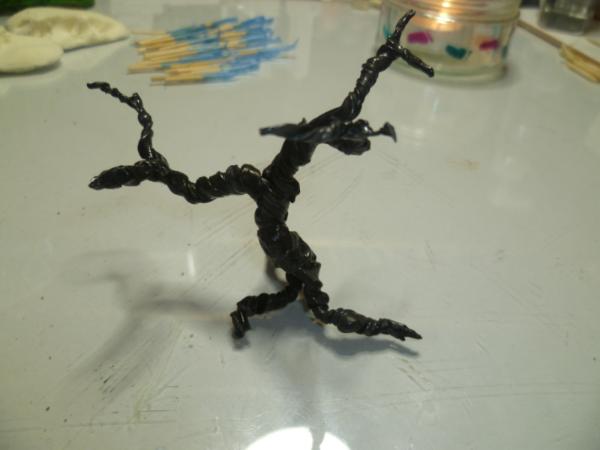
Took some sprue (Hi DrH)(he will twitch and the word) ..
Cleaned it up...
Attacked it with a blow torch...
And got this...
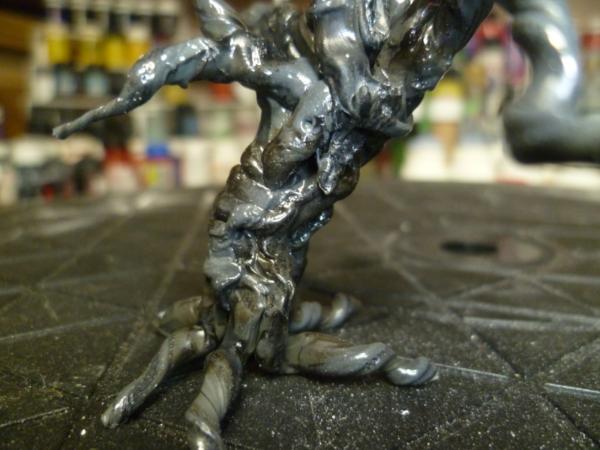
Kinda goes dark about there, as I cut it up and am trying to mould it, think I have failed badly, but I have the bits and will glue them together so I have at least one tree out of it. (think I have blown £10 woth of silicone and resin on it though.)
I will get it together and post some nice pics.
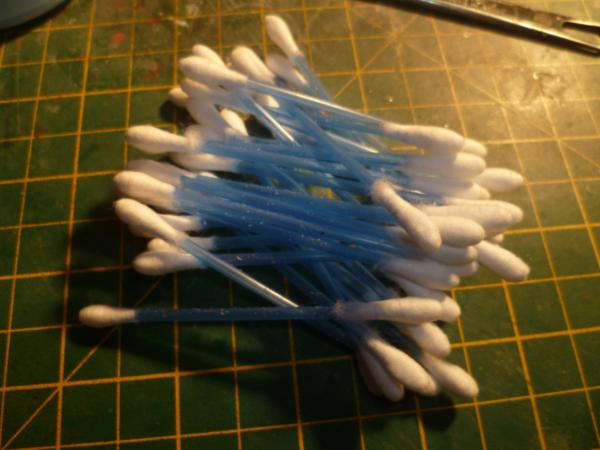
I was kinda thinking this for the LoER comp, but then I saw Rugluds entry, and it is a bit too similar, so that is out, sooooo plan B
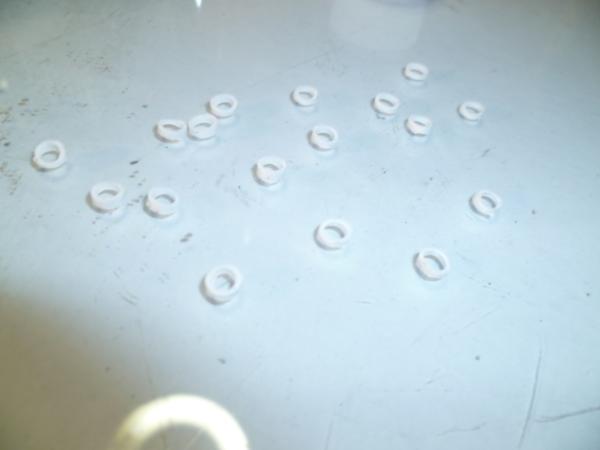
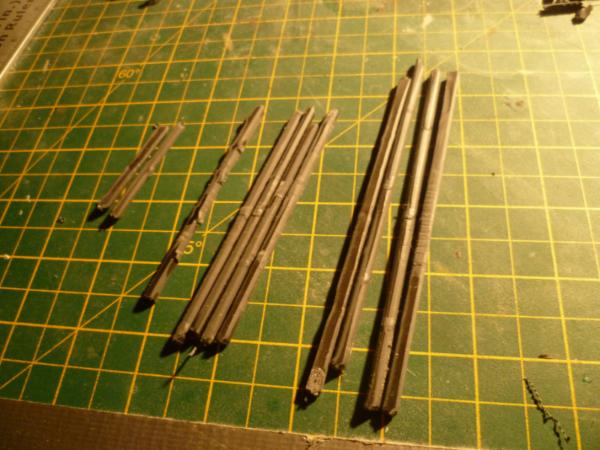
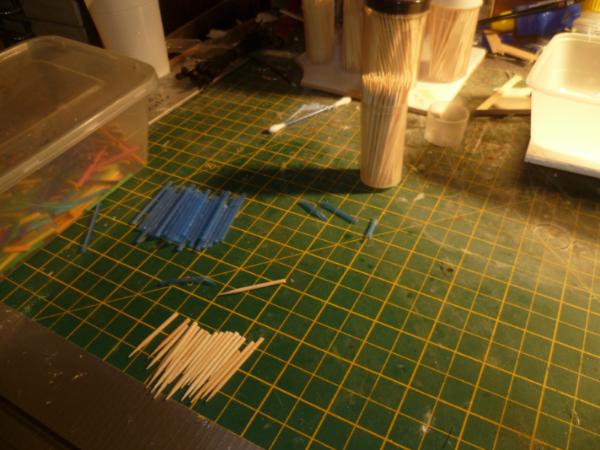
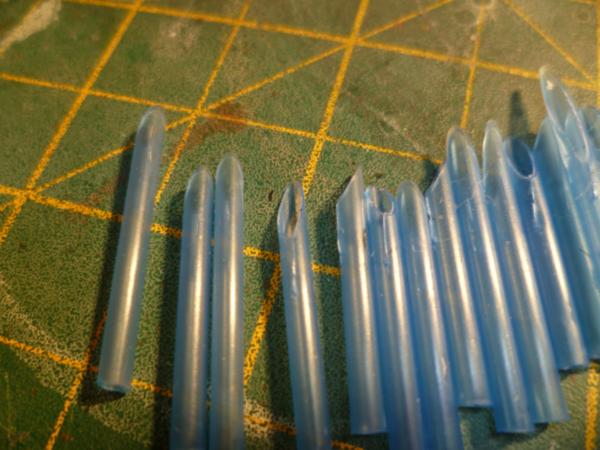
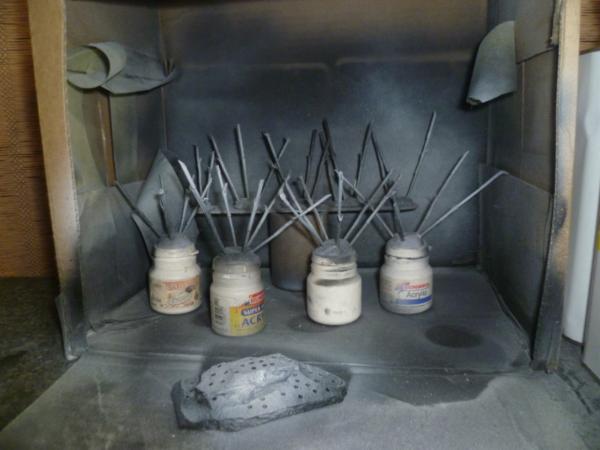
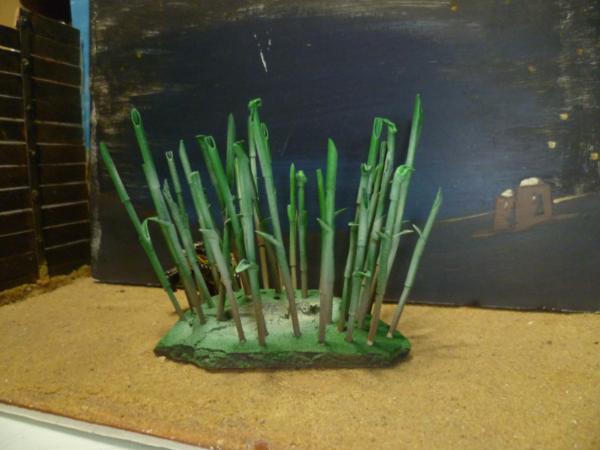
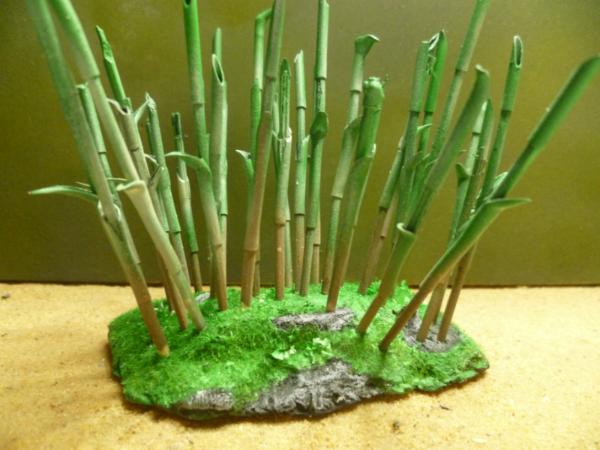
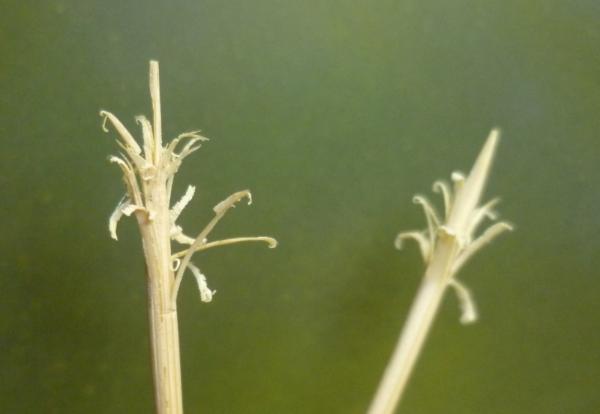
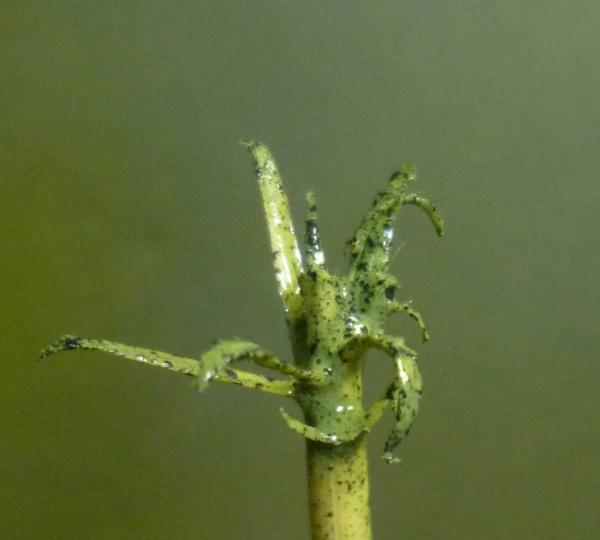
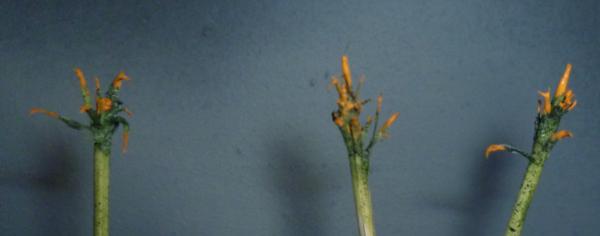
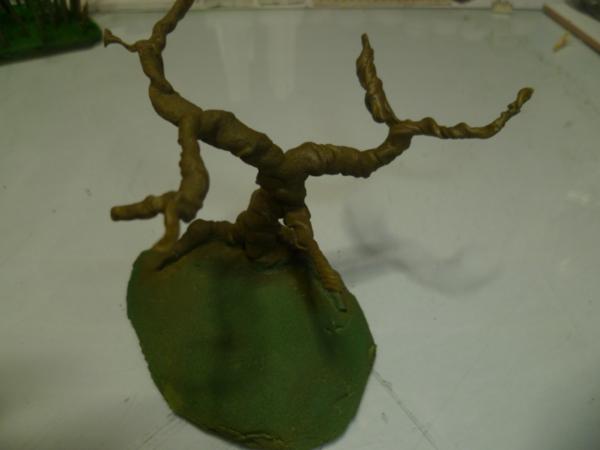
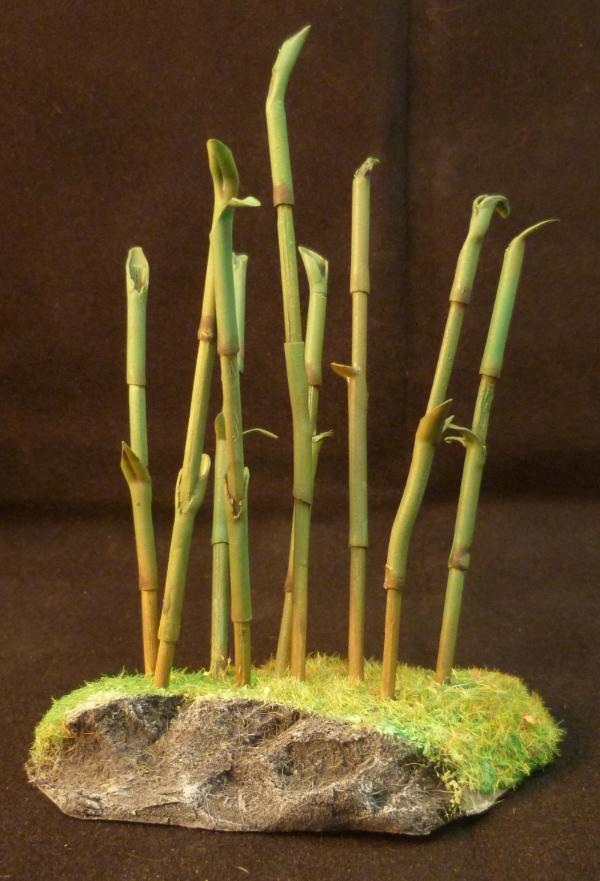
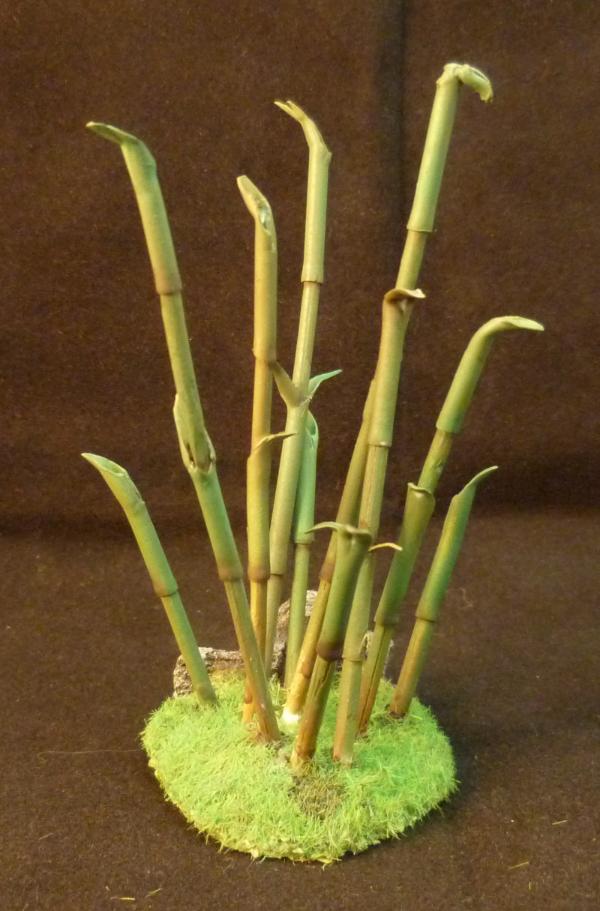
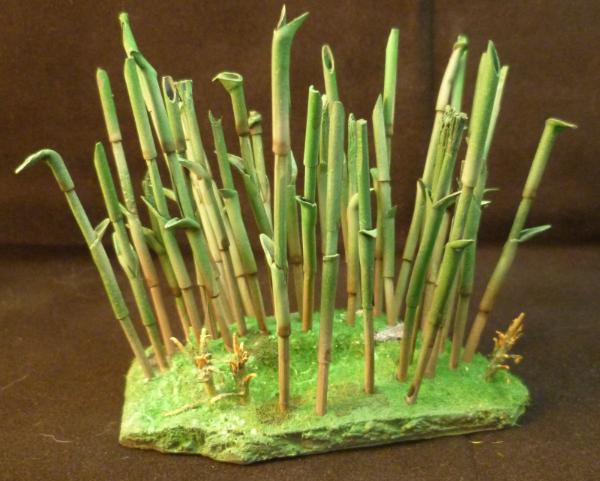
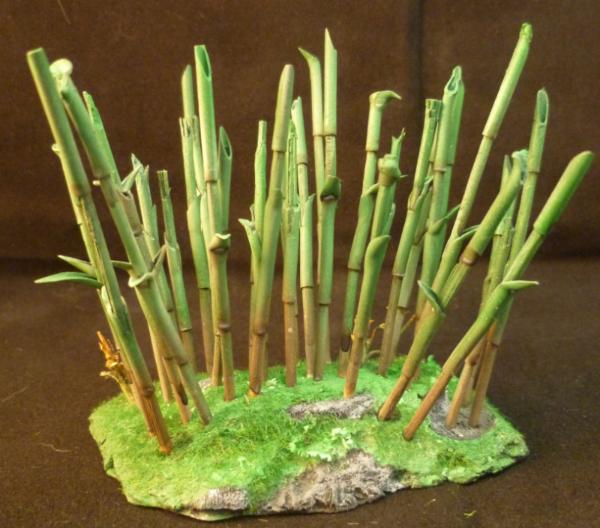
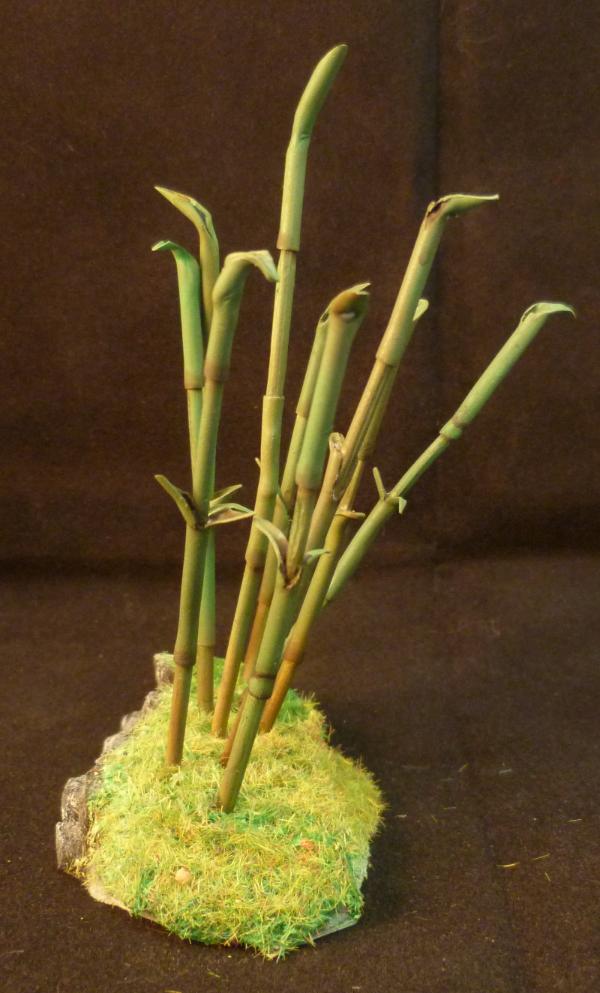
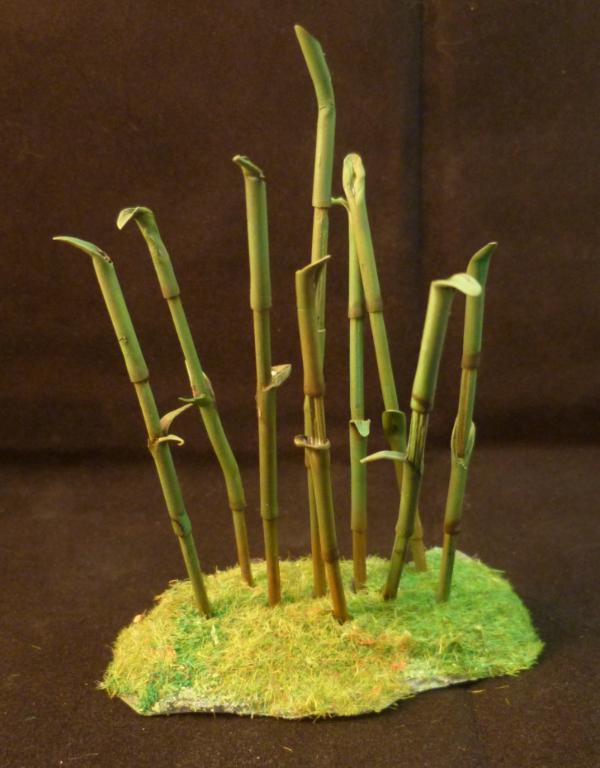
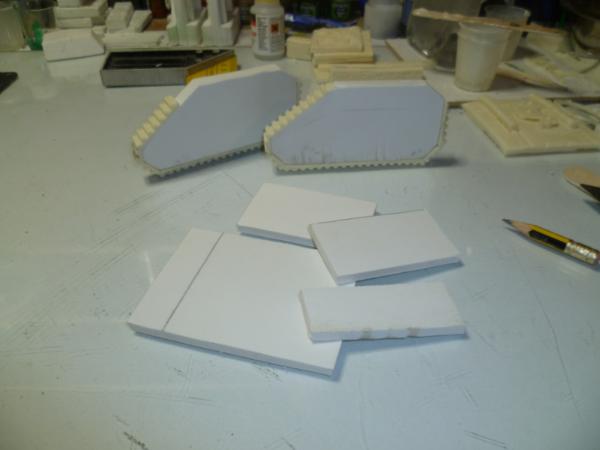
Take some silly rubbish....(cotton buds)
Cut them up a bit, and cut up some cocktail sticks....
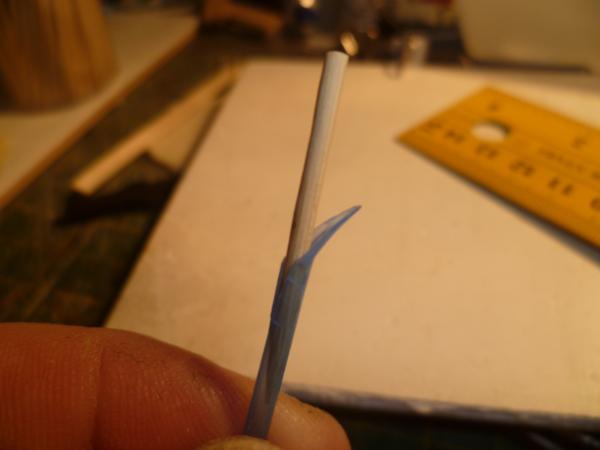
Then cut the tubey bits up at an angle...
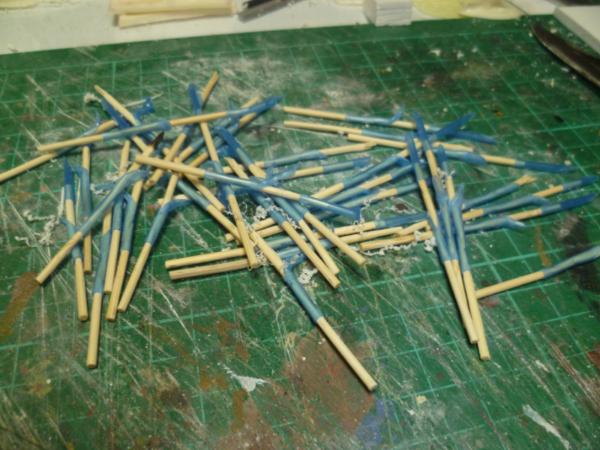
Stick them together...
Repeat.....lots....
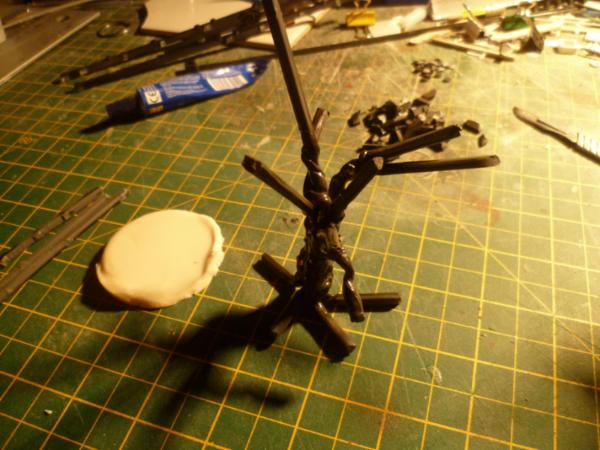
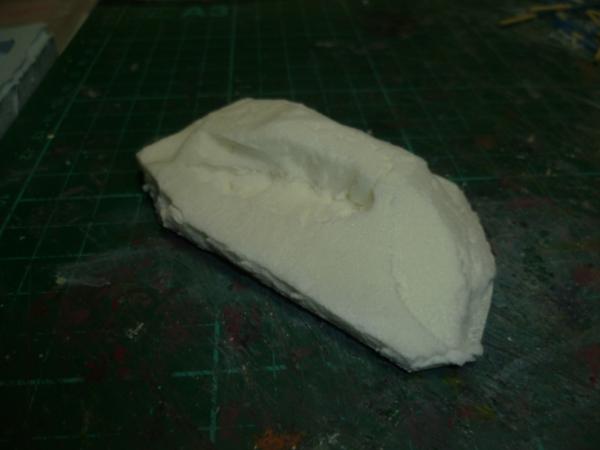
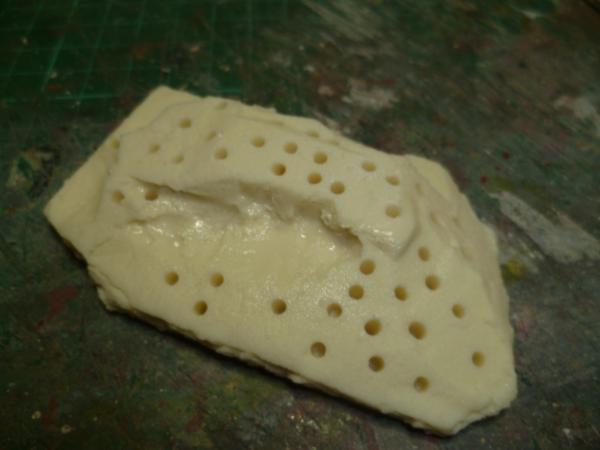
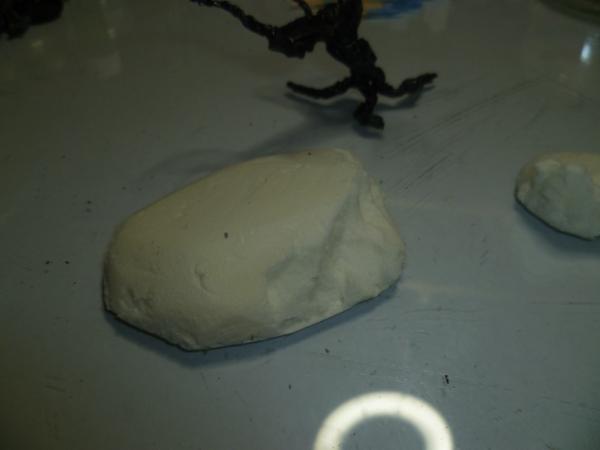
Carve a base in some insulation foam....
MMMM but there no weight in it....I know I will mould up and cast a couple...
Drilled holes in it for the sticks to go in.
Current state is primer....
Oh also half way through repainting these, but have realised the state of the mould lines on them and am too embarised to show you so far...
Well thanks guys for looking, your thoughts are appreciated.
Curious about your tree concepts. The blowtorched tree is incredible.
Oh how I hate painting assault marines. They just seem like twice the effort. Once upon a time I painted about 50 of them for a mate in about four weeks.
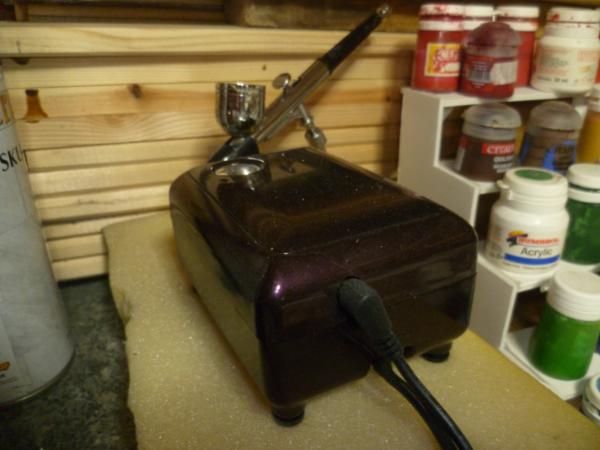
Yes it is an airbrush, since I have nothing like the budget or the patience to learn how to properly I thought I would try a cheapy off ebay, after all, all I am going to do is base coat stuff, will help a bunch with terrain. I have to say it was worth every penny of the £20 I spent. Plug and play, had no issues so far, been using it a lot with the repaint on the marines (yes I been cheating), ok its only base coating stuff, no detail work, but I am a brush man, and to be honest just not good enough to worry at it. This thing is sold for nail art and temporary tattoo work, even if you have a real one I would say this is worth a go as a back up, little chap plugs away just great for me.
Oooh, that sprue true is truly gnarly looking. Great minds think alike right Like the direction you're going with the bamboo though and intrigued to see further progress.
Bamboo is grass, not wood. Just to be TFG. Also, never, ever plant bamboo or mint. Weeds, they are, and darn near impossible to eradicate once they get started. Excellent idea for bamboo though. Definitely gonna borrow it.
The airbrush looks quite useful. Doc is right. A gateway drug. There is something almost mesmerizing about using one...once you've figured out how to keep the paint flowing.
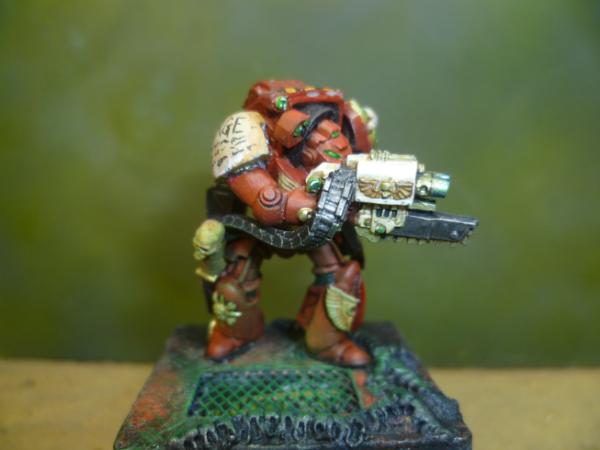
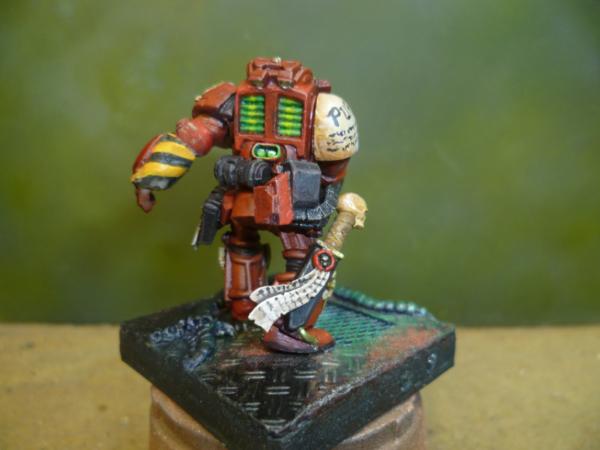
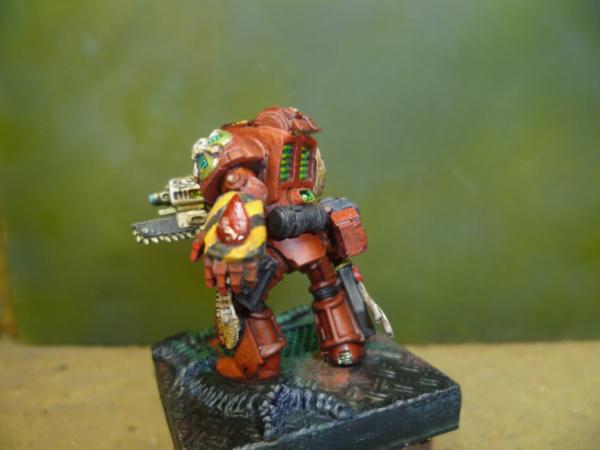
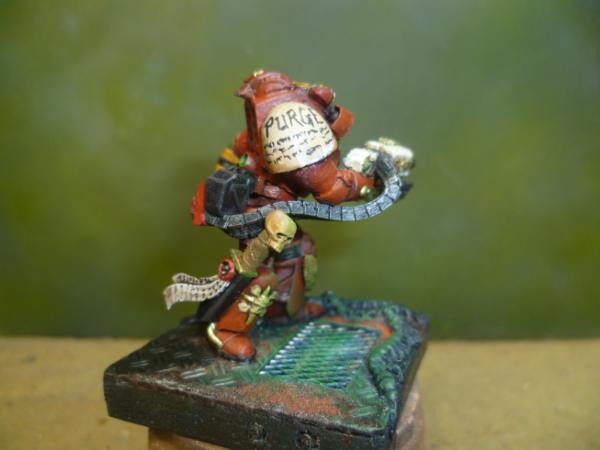
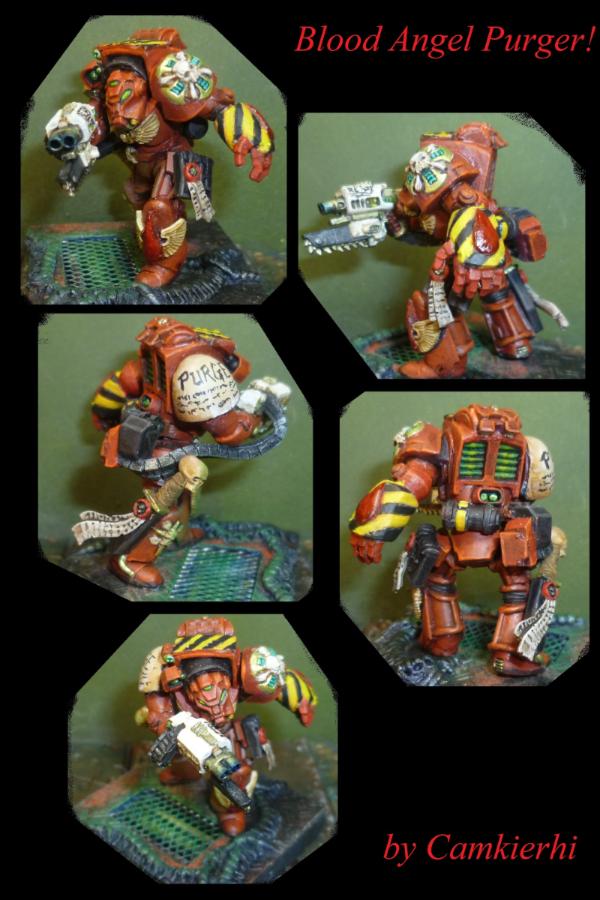
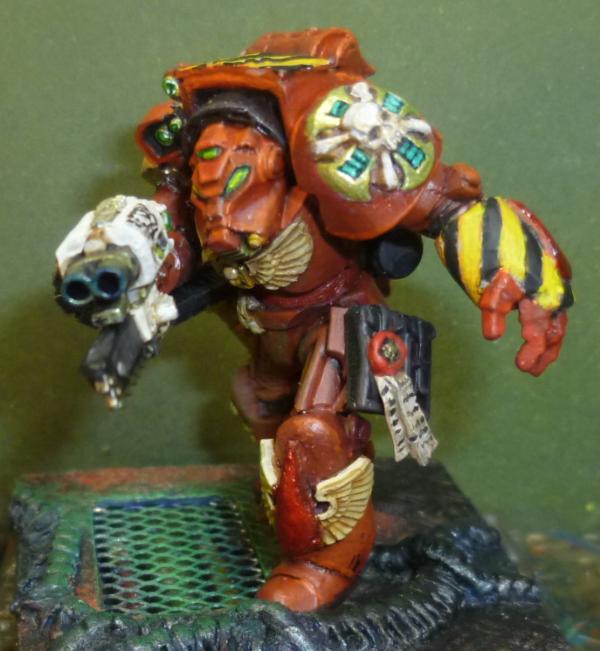
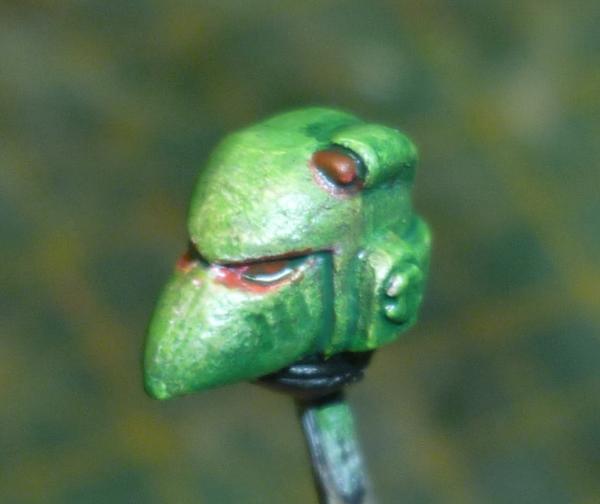
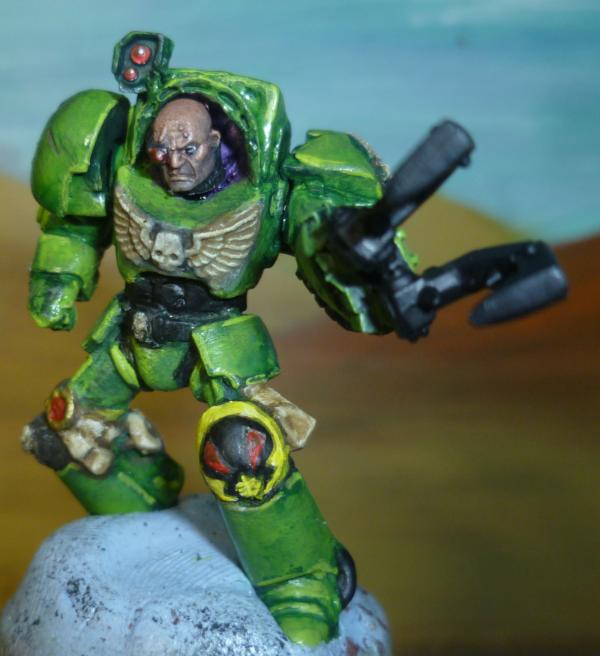
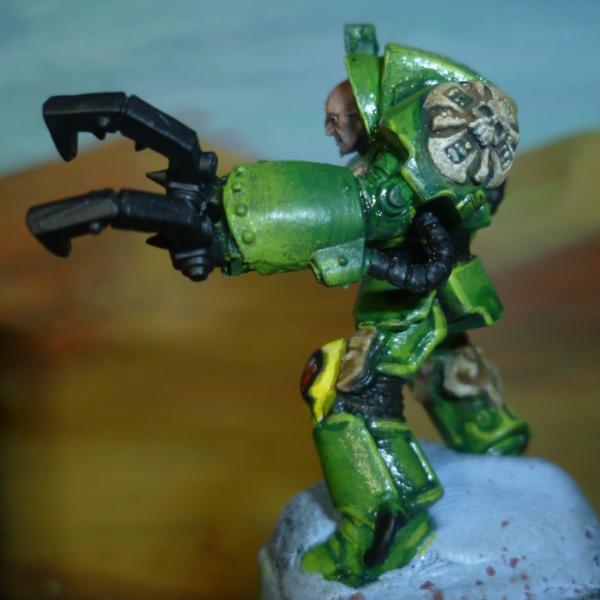
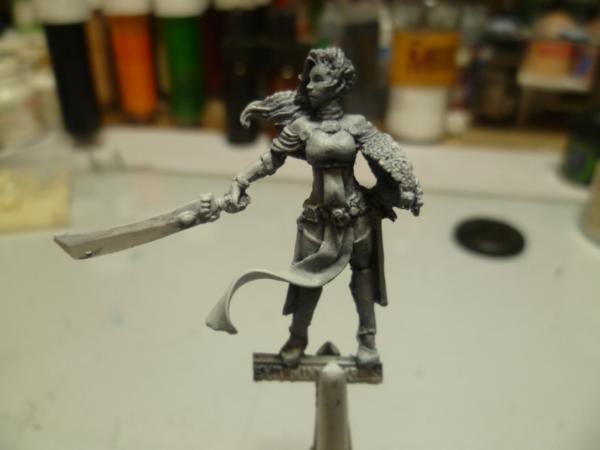
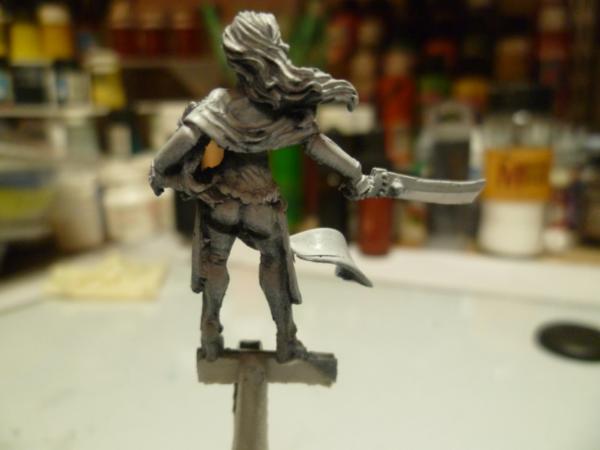
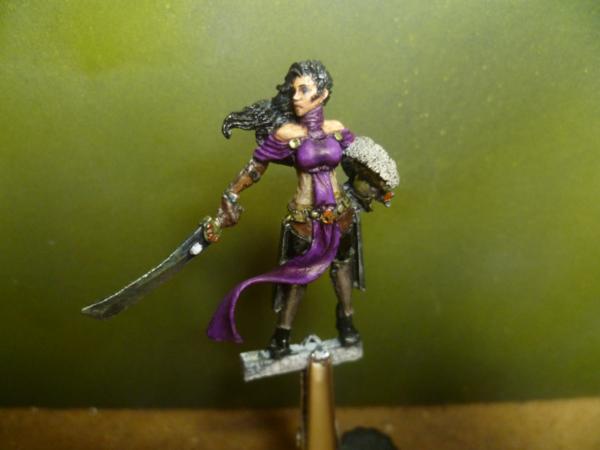
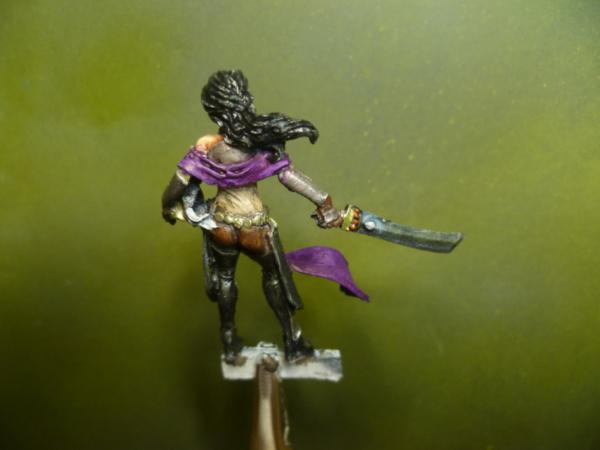
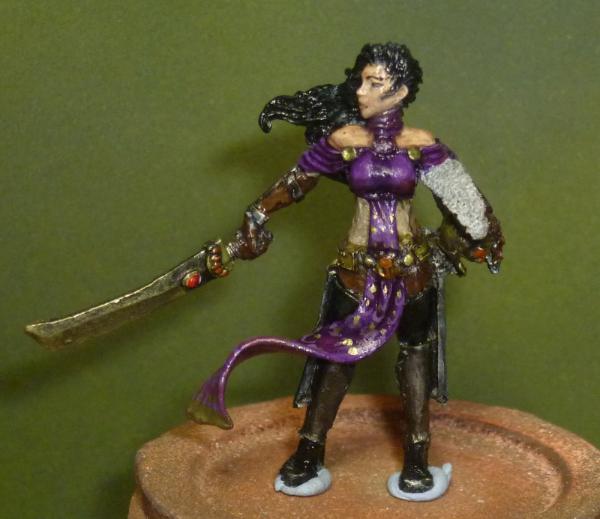
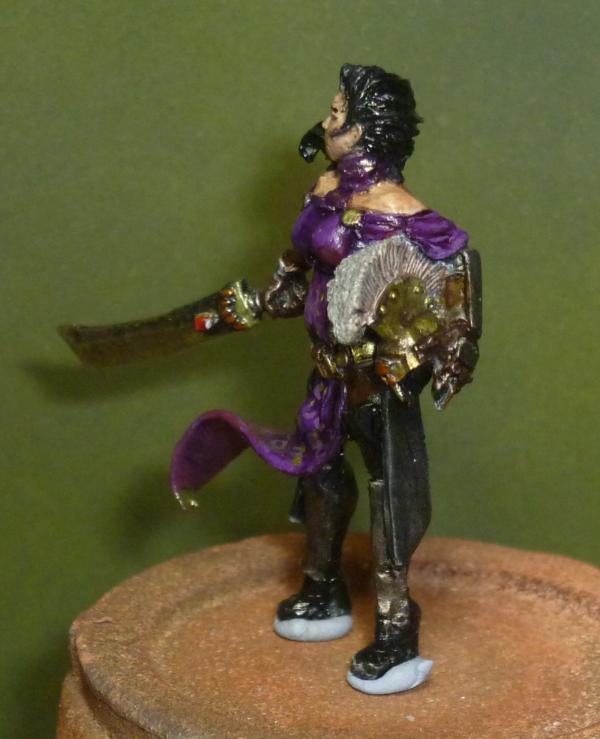
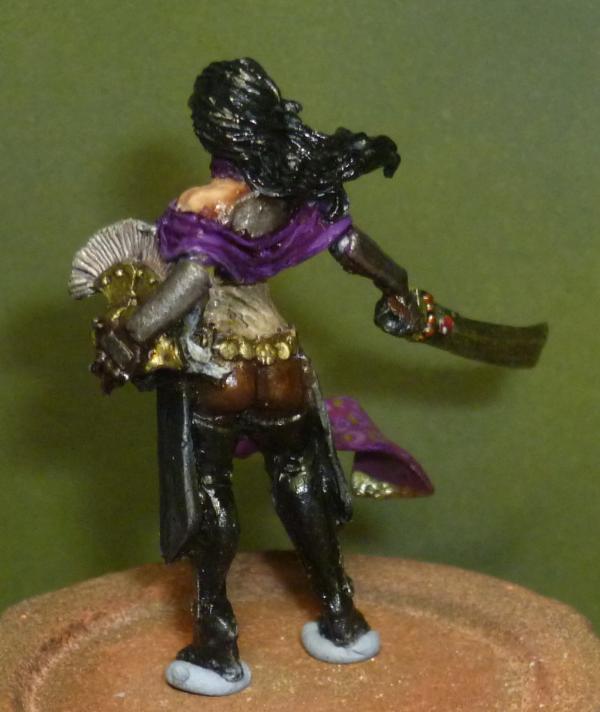
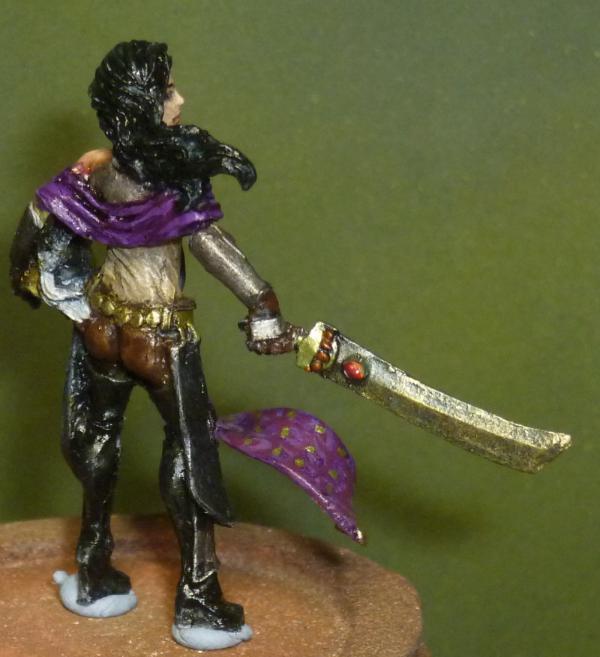
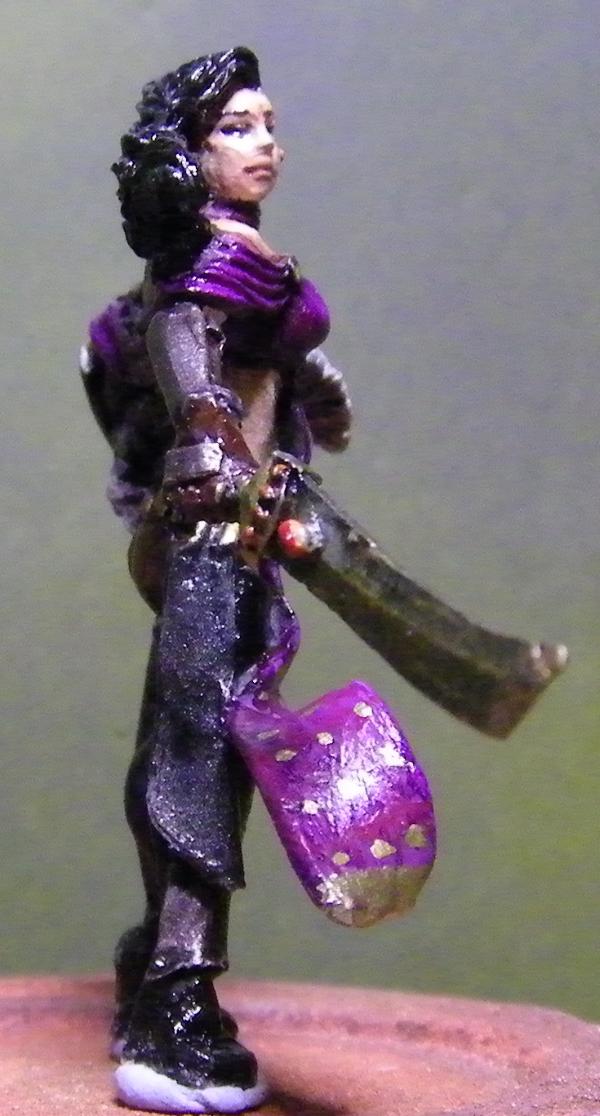
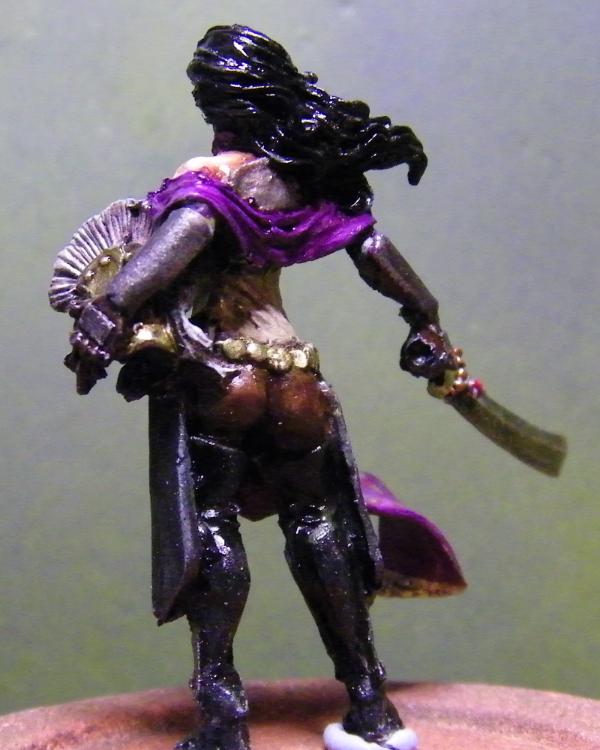
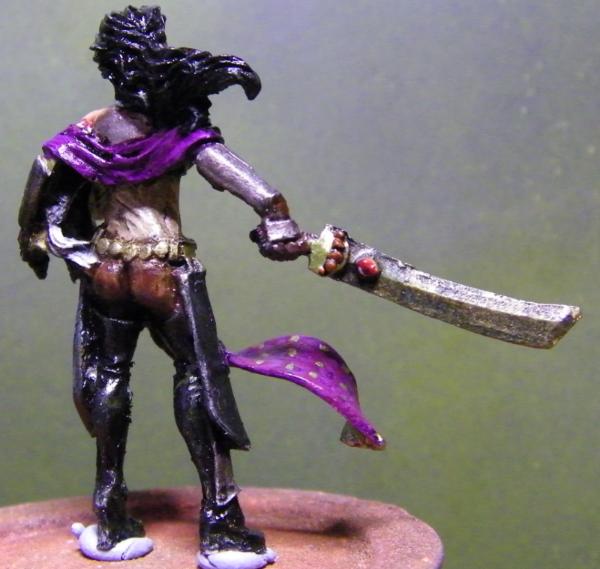
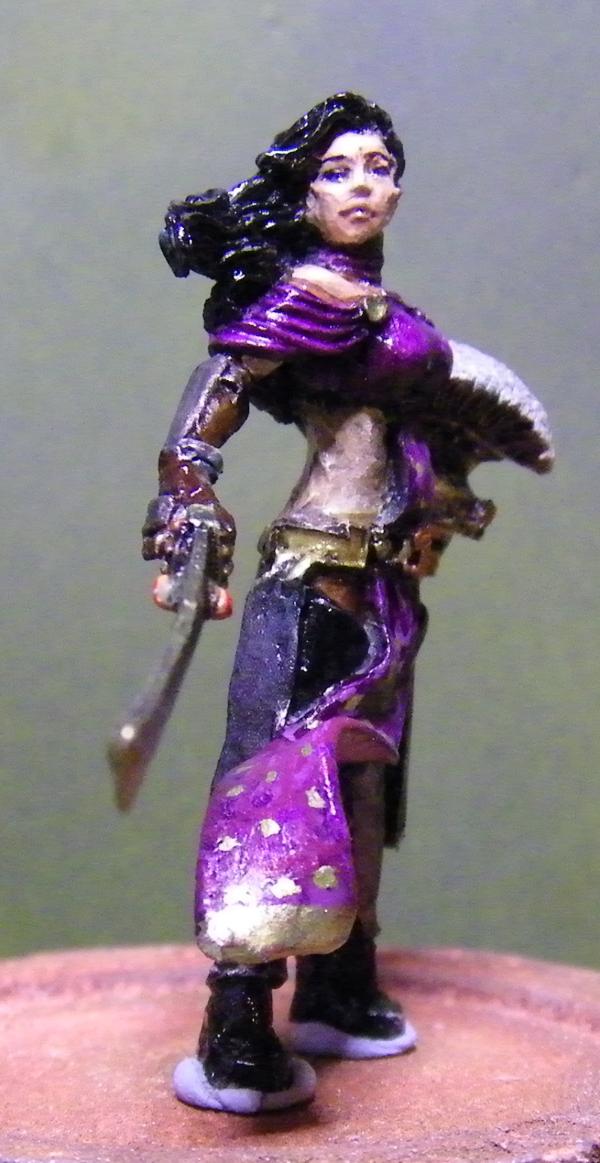
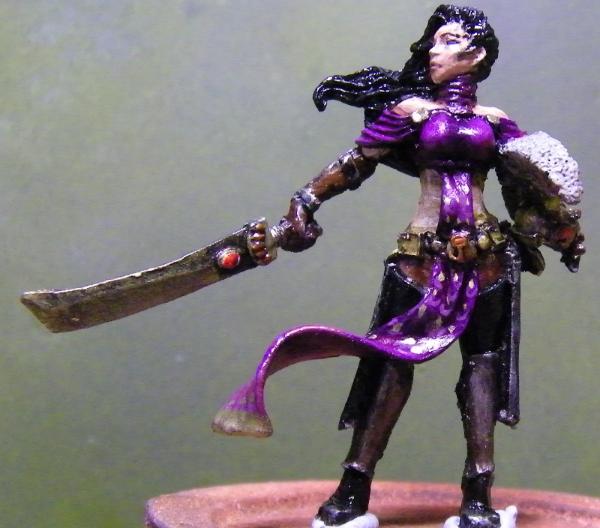
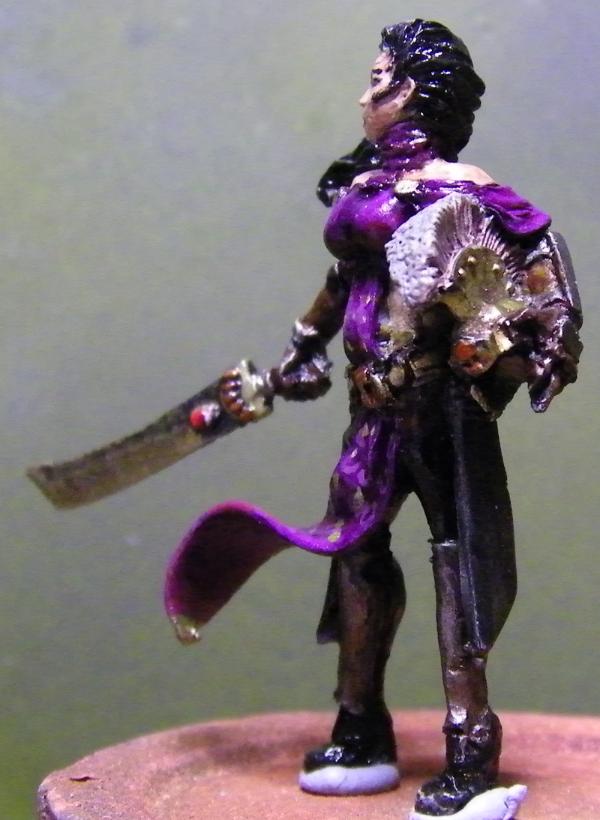
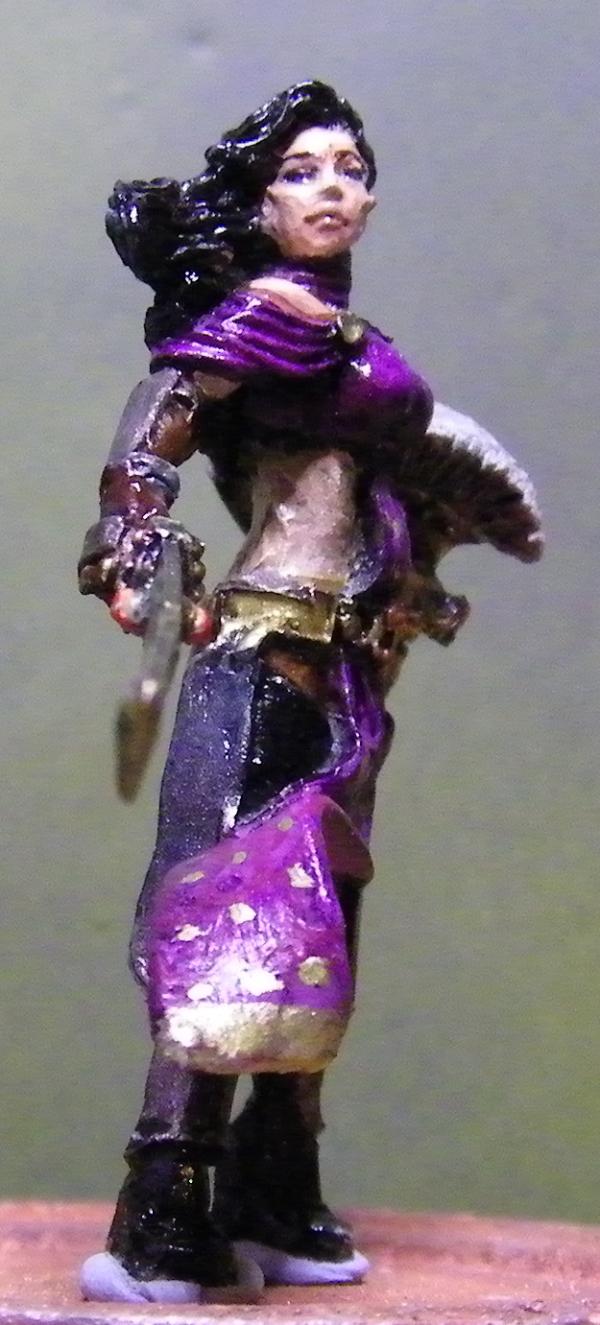
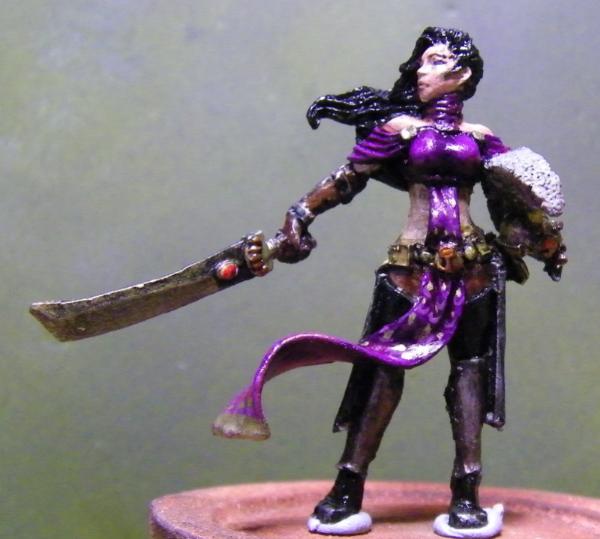
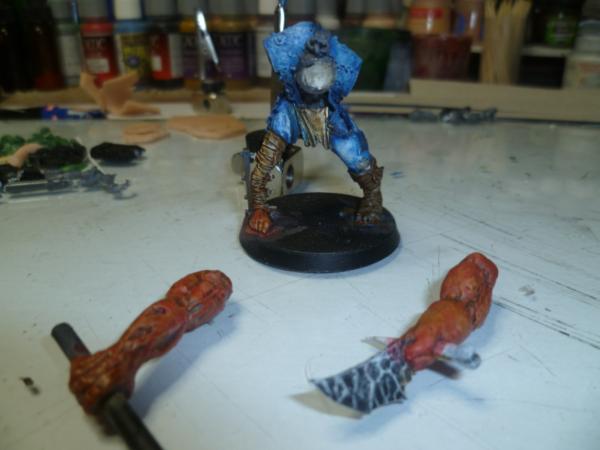
The conversion has come up a treat. Really dig the spinal column and the face paint works really well. Guess this badass doesn't need a helmet after all.
That Tree is 'Tree-mendous!' it looks 'Vine' to me! good to see you 'Branch' out with your sprue stuff with work this good we wont be able to 'Leaf' you alone!
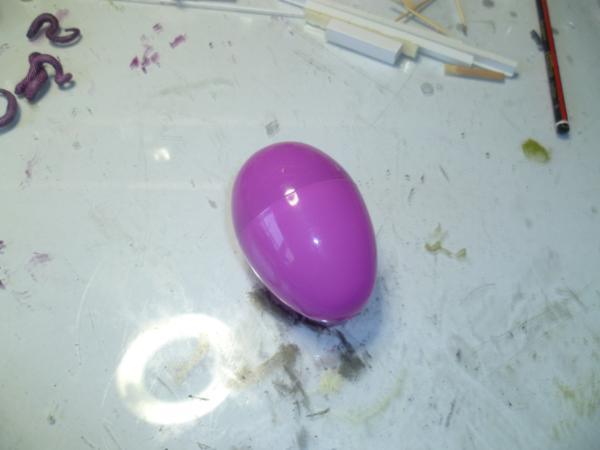
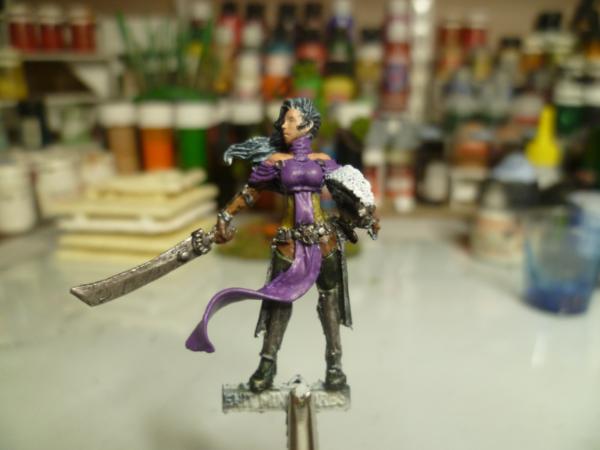
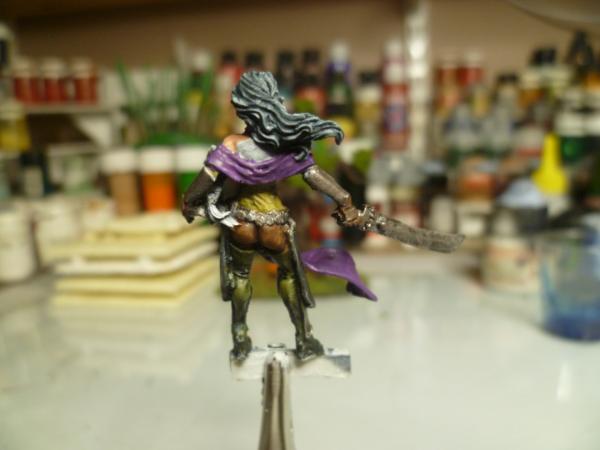
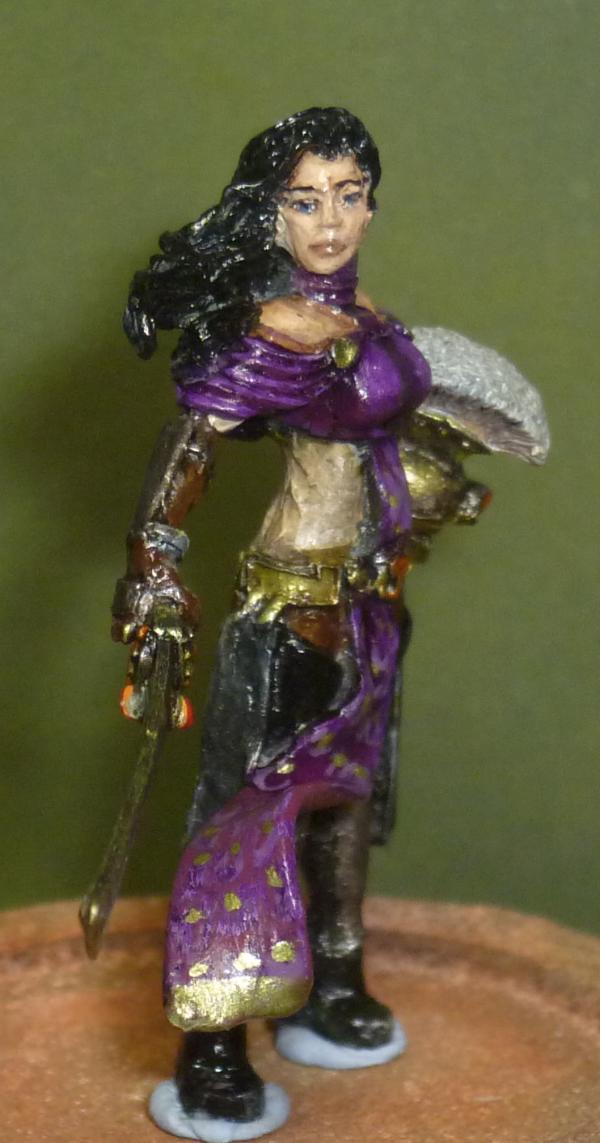
The purple has come up really well. Like it a lot. Amazing difference between the cameras isn't it? Never trust anything you see.
What sort of paints have you used? I really like the glossier result on the clothes. Her lips have also come up really well which may sound odd. But often you see bright red lipstick on a model such as this so the more natural effect is appreciated.
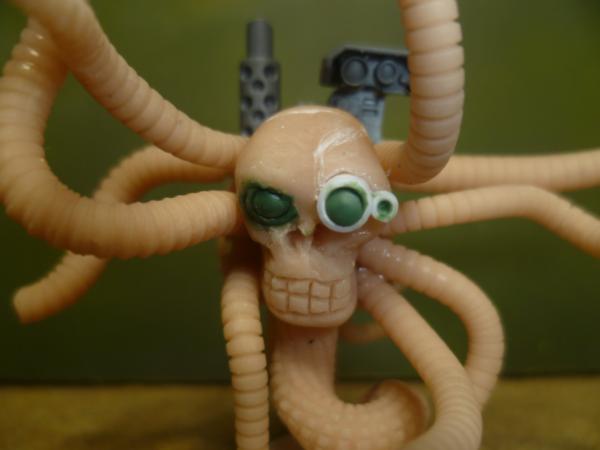
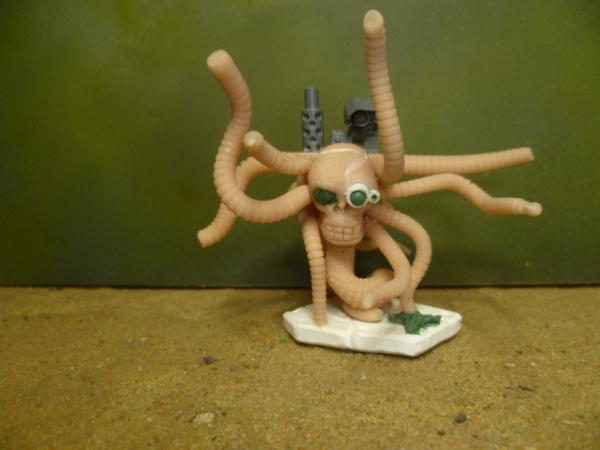
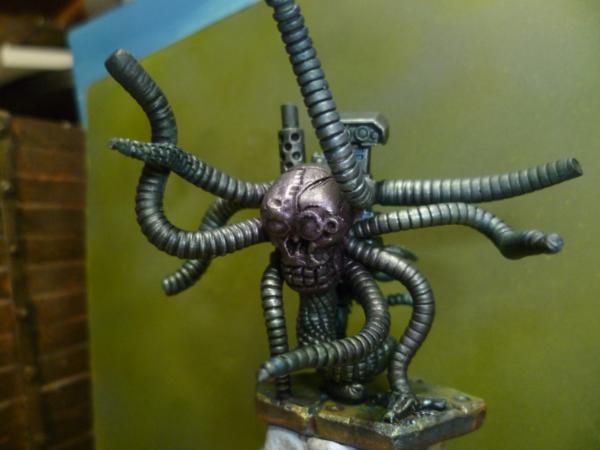
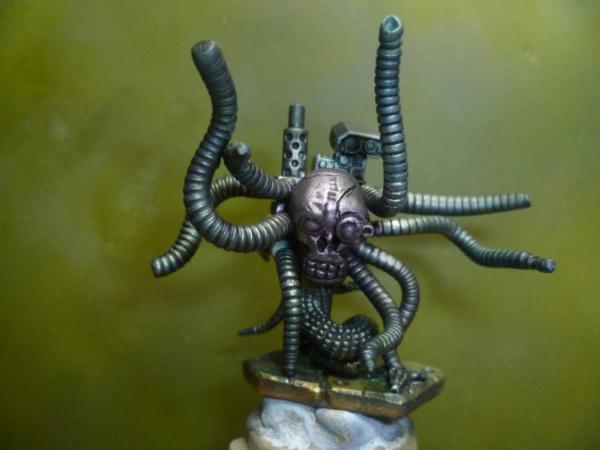
Jokero are orange orangutans that improve and micronize technology. They are exploited by the Imperium. Your skull thing needs pincer claws at the ends of its arms. Something that looks like it has really fine motor skills. That's my opinion anyway.
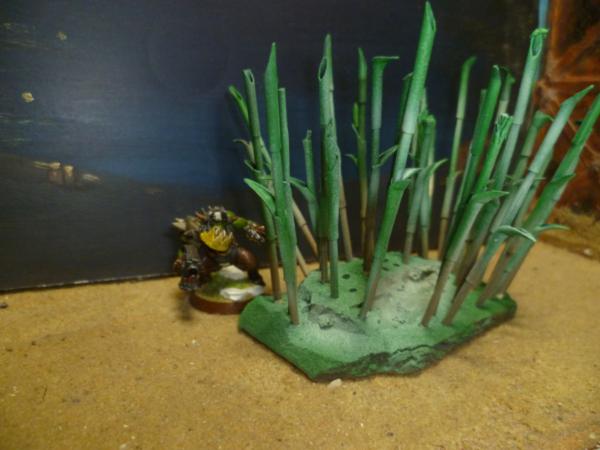
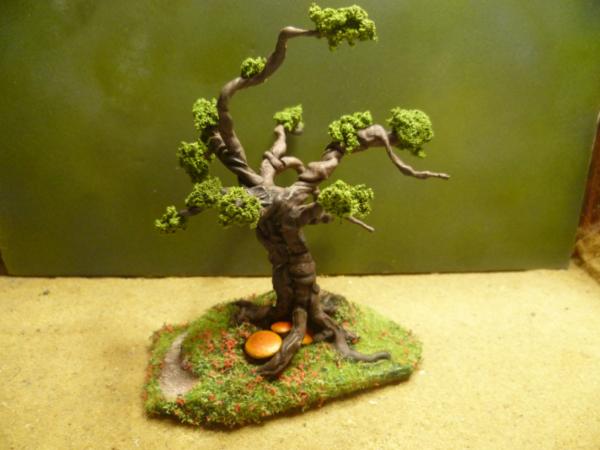
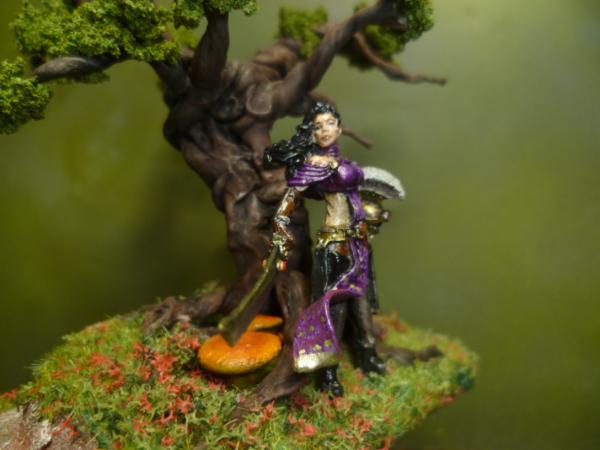
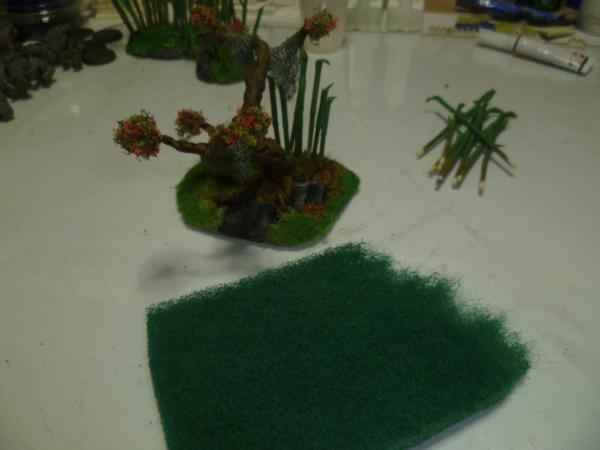
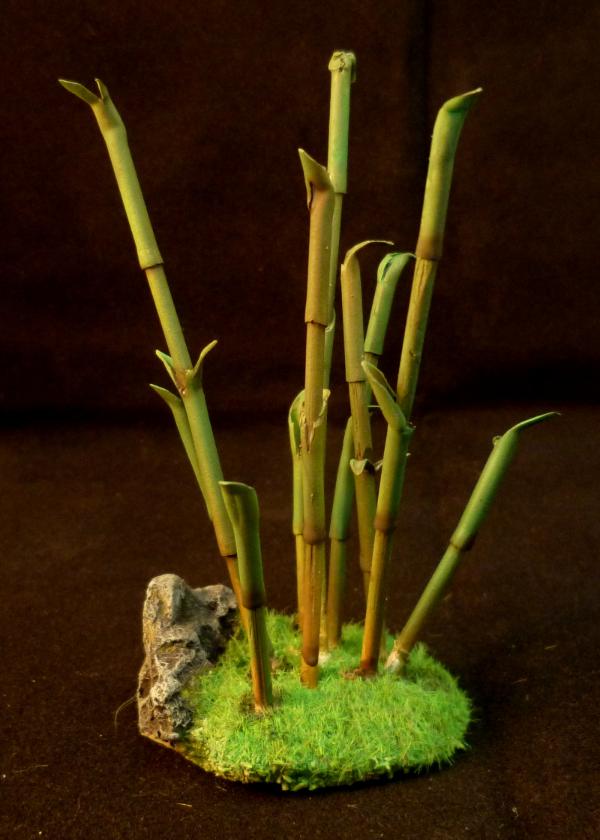
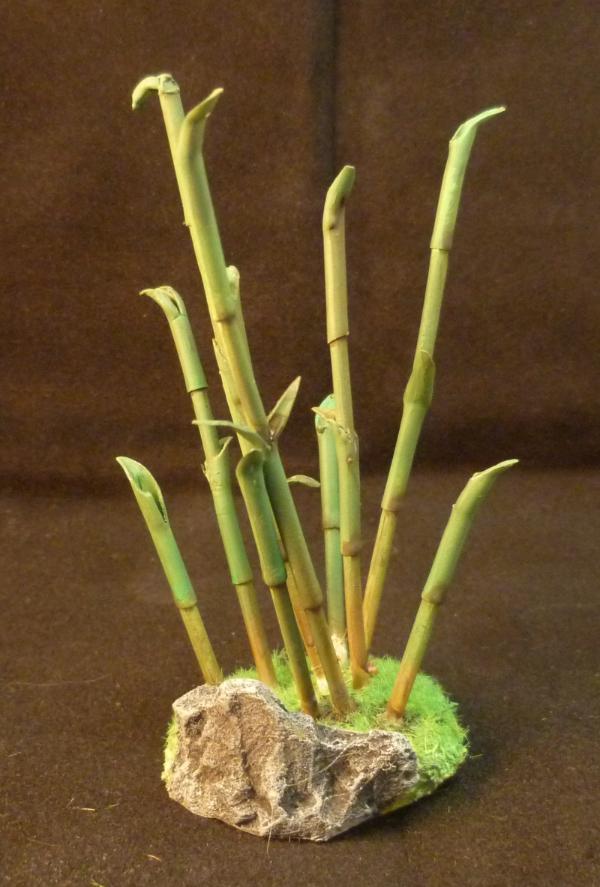
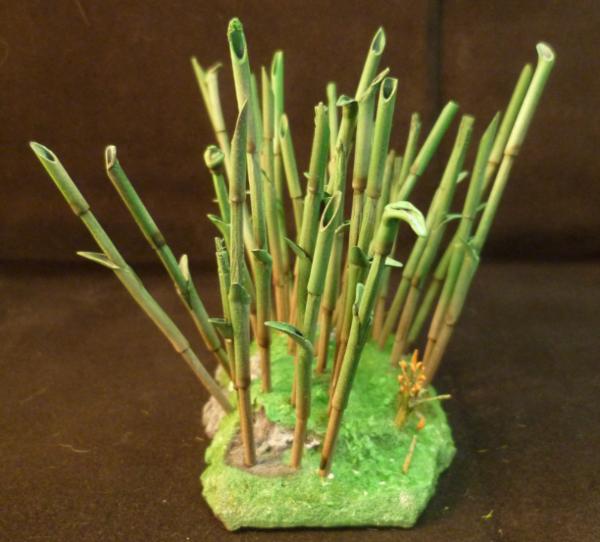
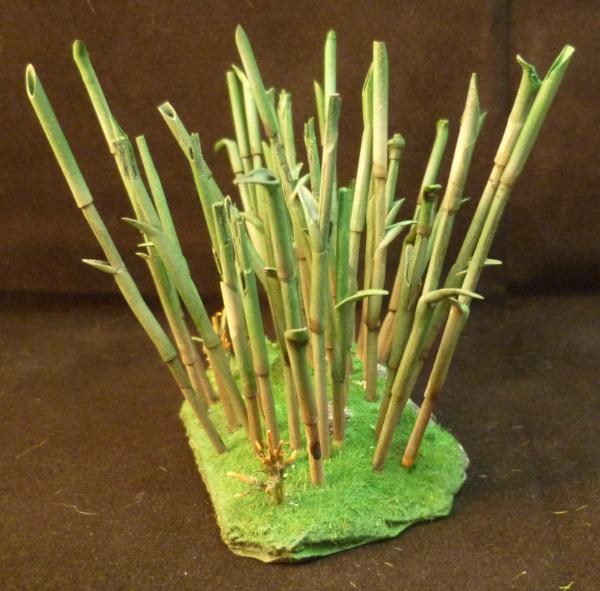
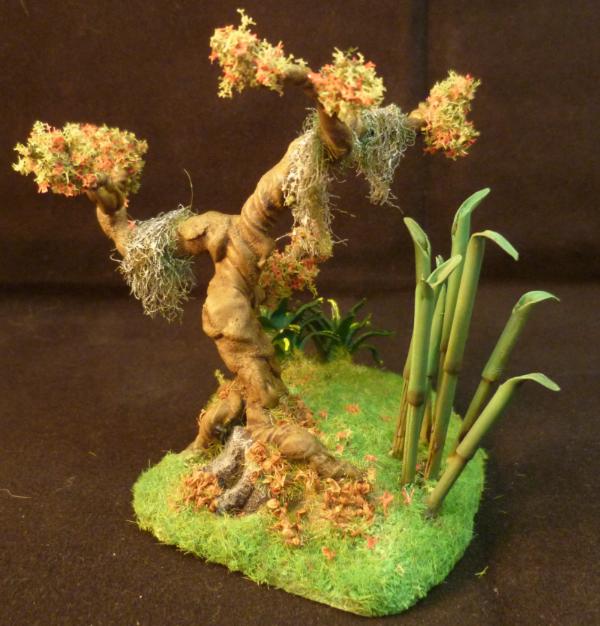
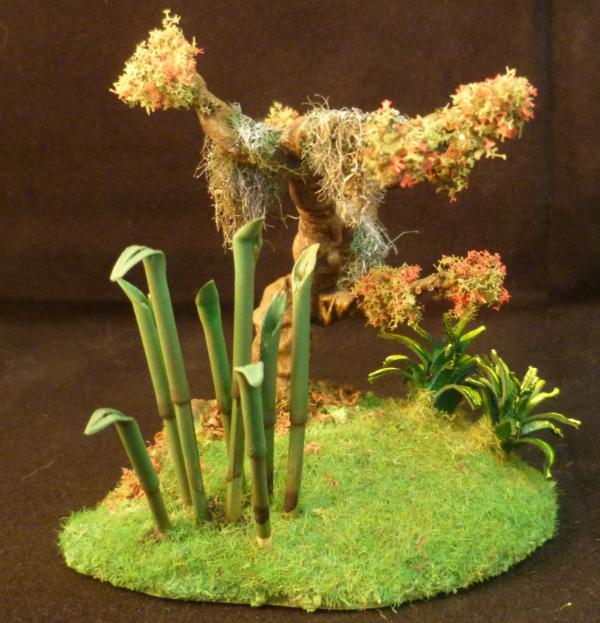
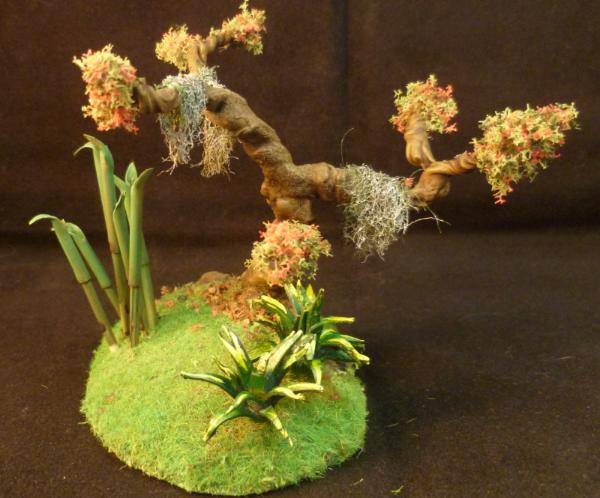
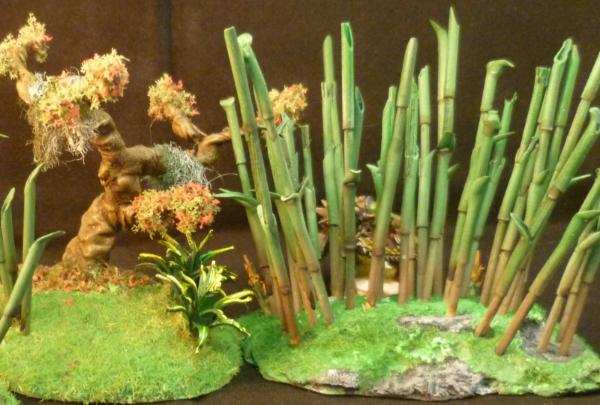
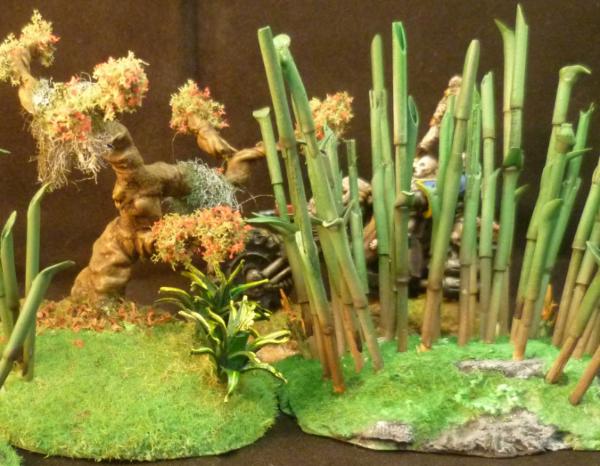
Tonight midnight is deadline for latest LoER comp. so decided I better do some work on it. Was thinking that mine was a bit lacking so decided to add some bits.
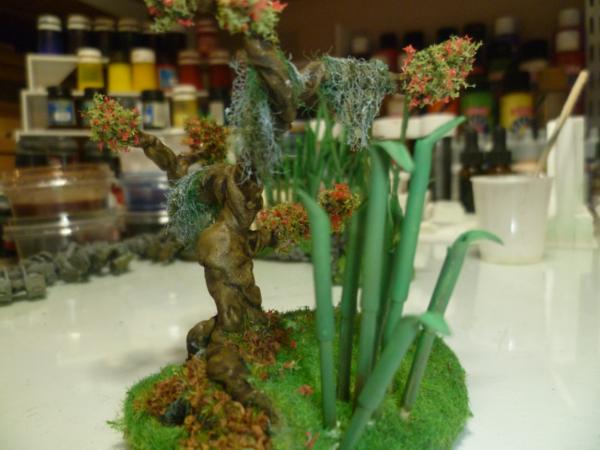
Some little plants made of cocktail sticks...
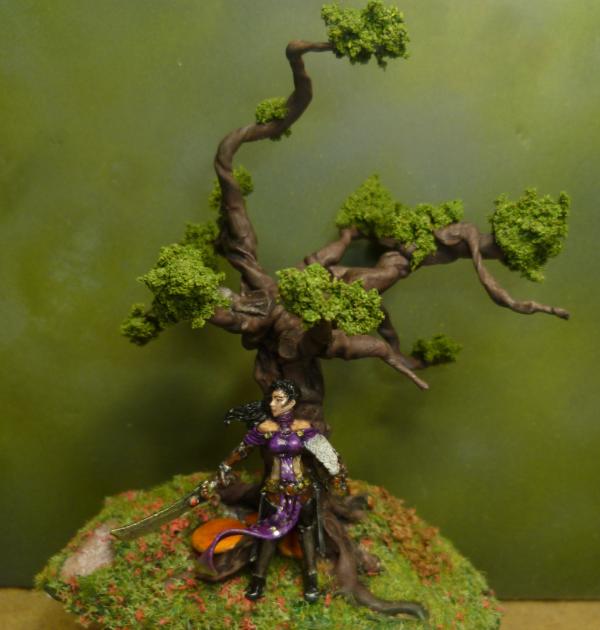
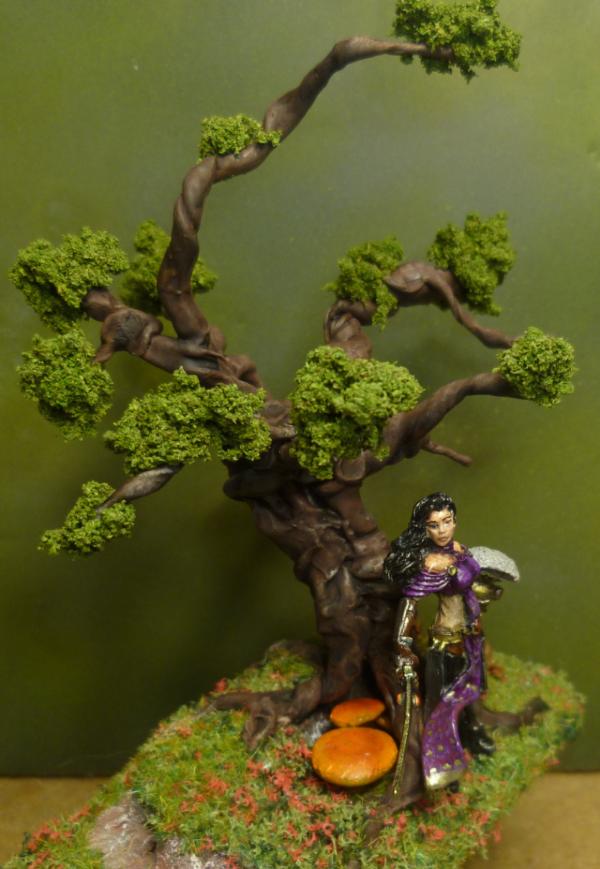
And a tree from sprue....
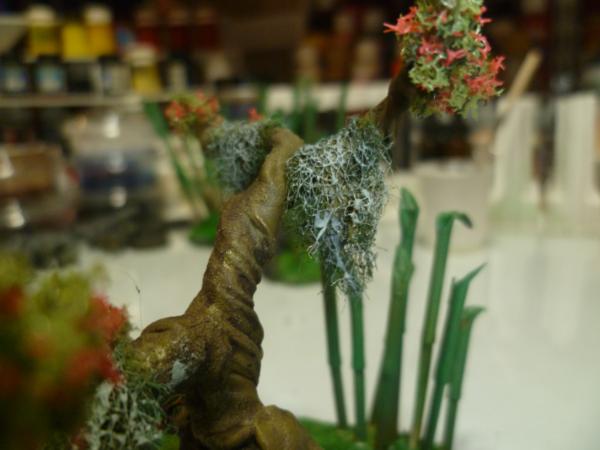
With details like hanging mosey stuff made from green scrubby...
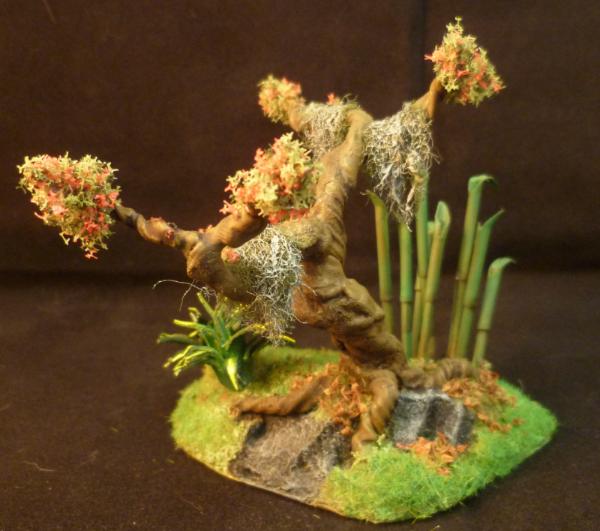
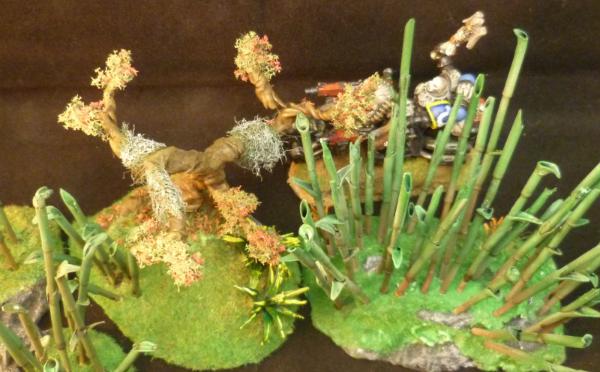
So heres the finished results....
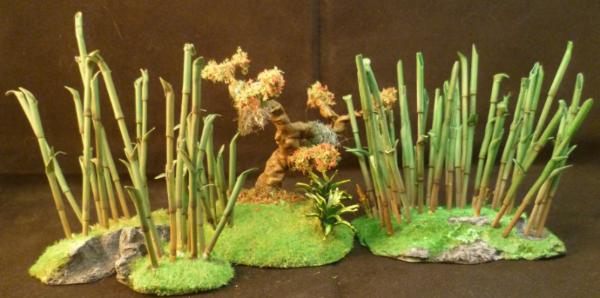
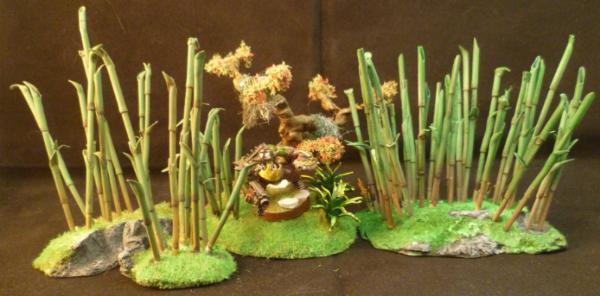
And some shots for scale showing also the cover provided by the scenery....
Hope you like, I do not expect to do well the level of competition has increased big time and the work the lads have put in is amazing. I have not really pushed myself here, and in reality this is 4 days work, nothing compared to some peoples efforts.
Got a couple itches to scratch so back soon...any feedback is gratefully received.
I think it's delightful Cam. Any gamer would be very pleased to have terrain elements of that complexity, creativity and quality on their table. Excellent, excellent work!
Thank you all tons, really appreciate it. Means a lot to me coming from you guys.
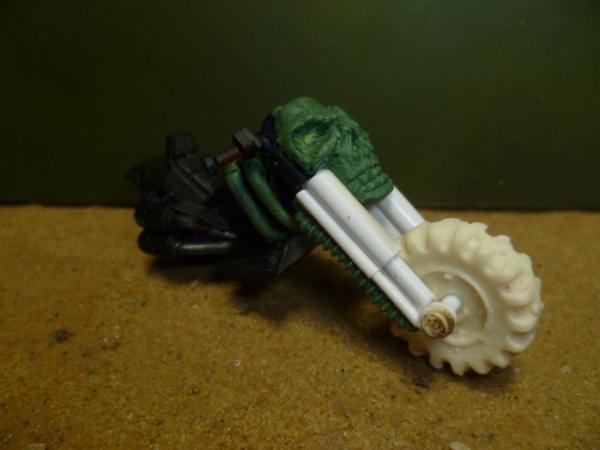
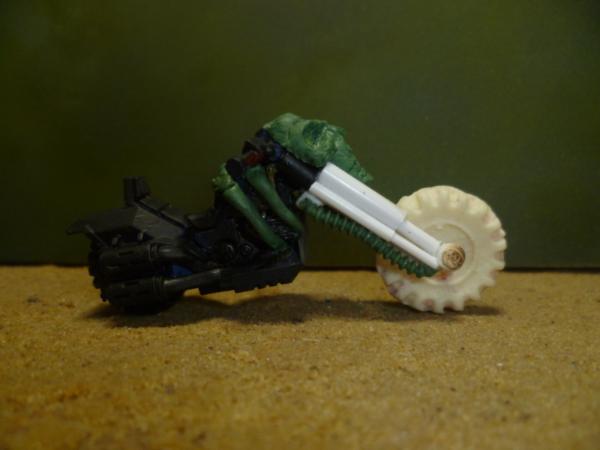
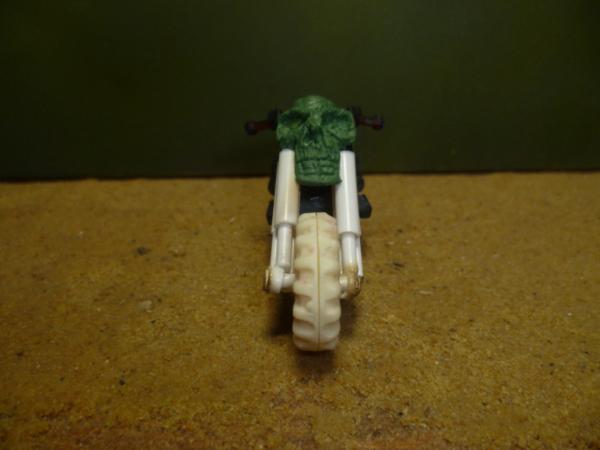
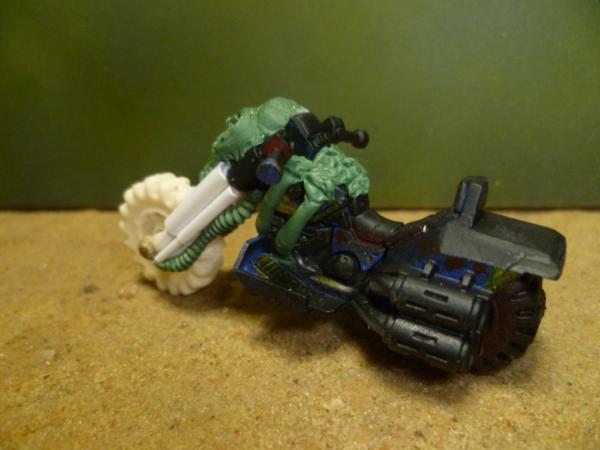
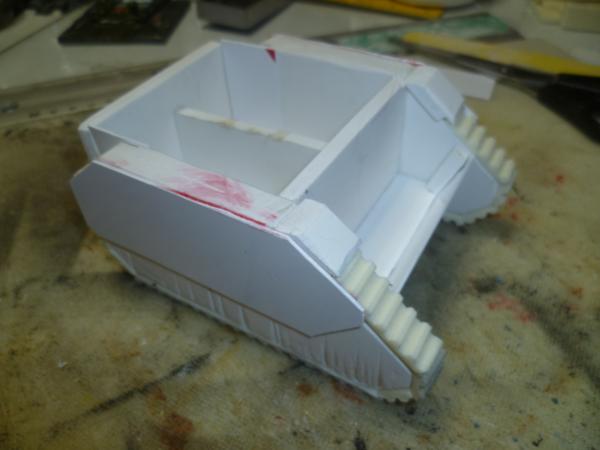
So itching a scratch....
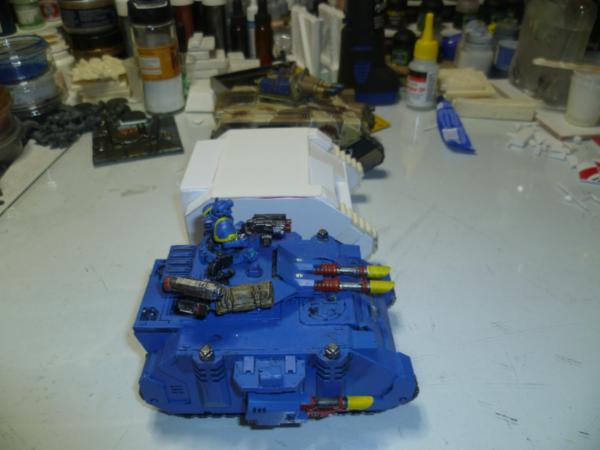
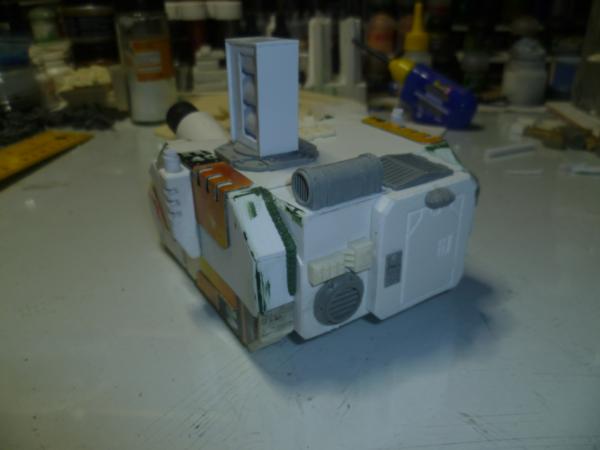
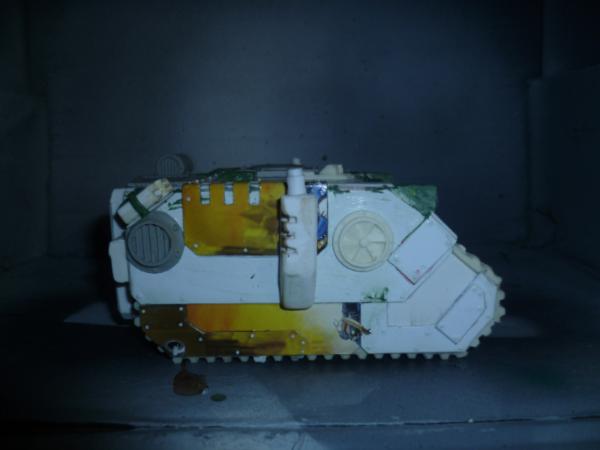
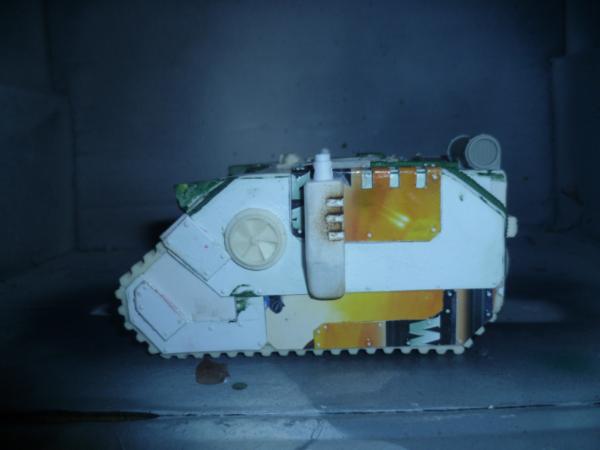
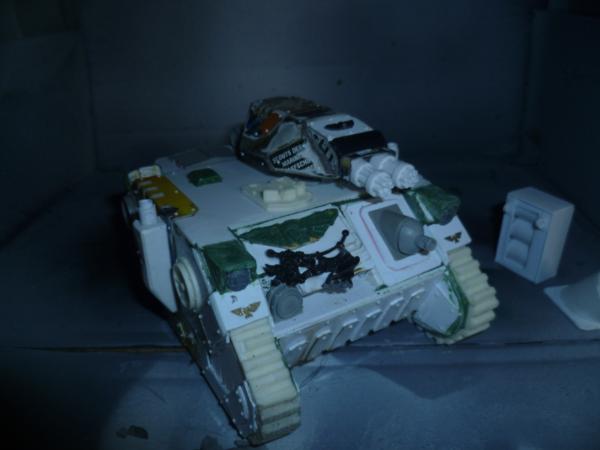
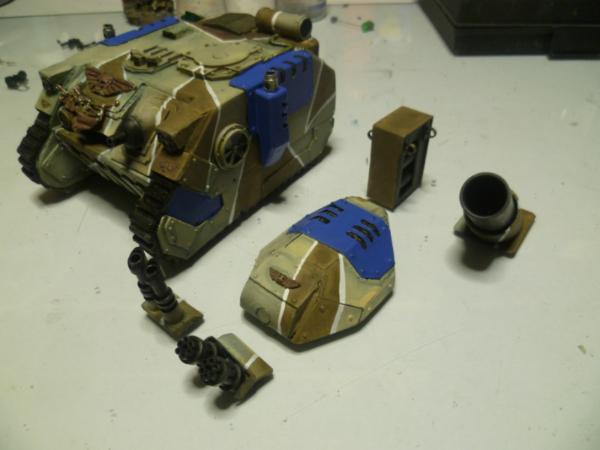
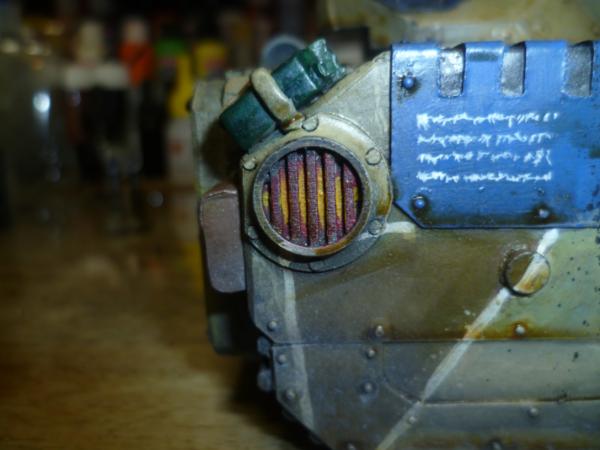
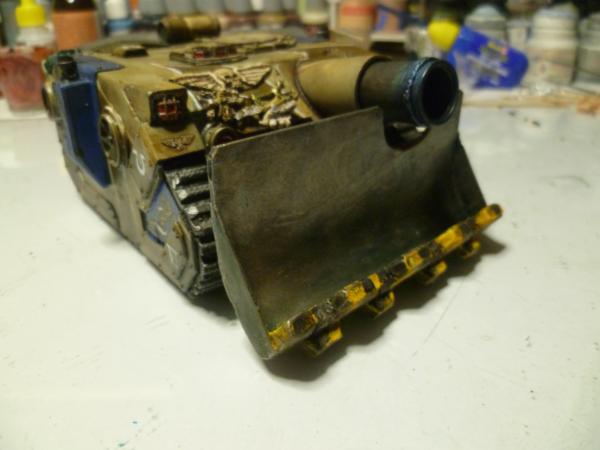
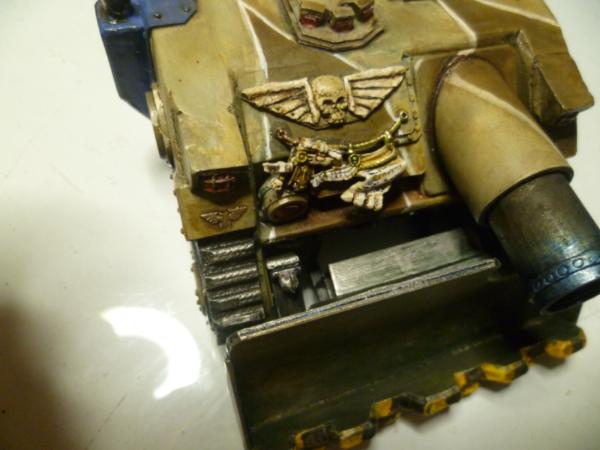
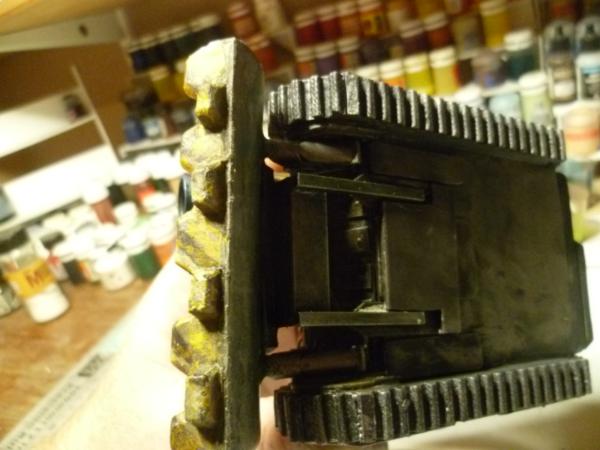
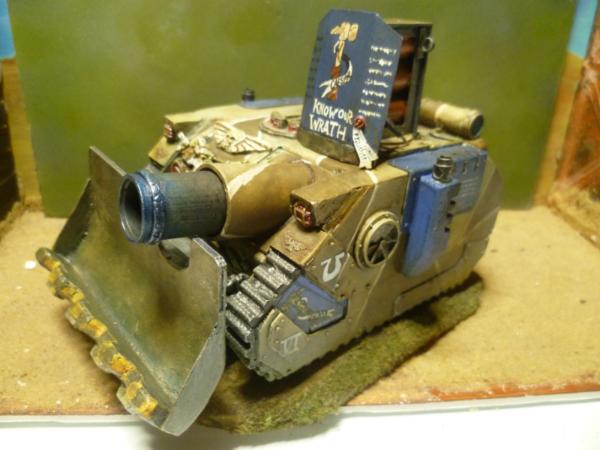
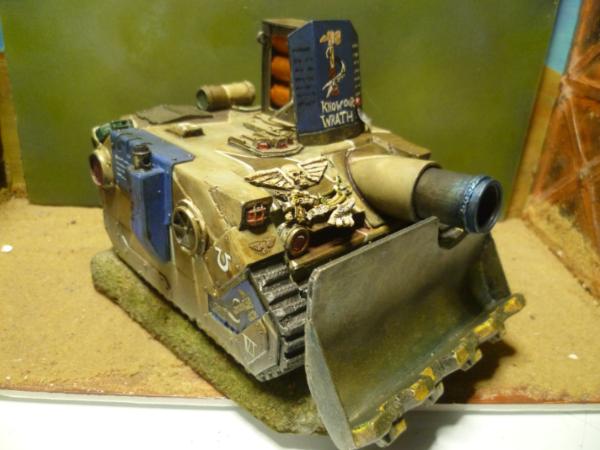
I acquired an old broken drive belt in work. And giving credit where due I had seen this done by others including Magosbiff90, thought of tracks. So I moulded and cast up some sections, and started mucking about with some plasticard.
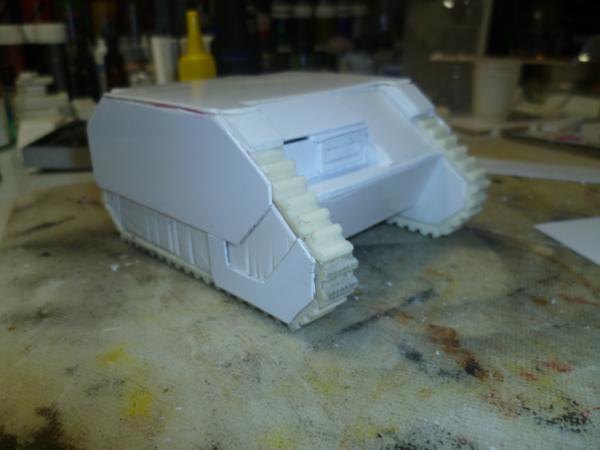
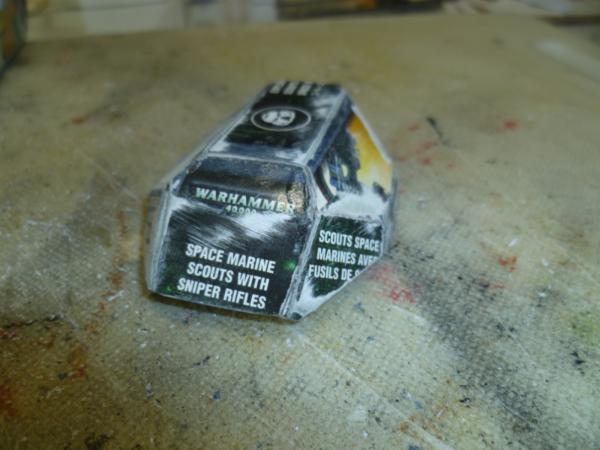
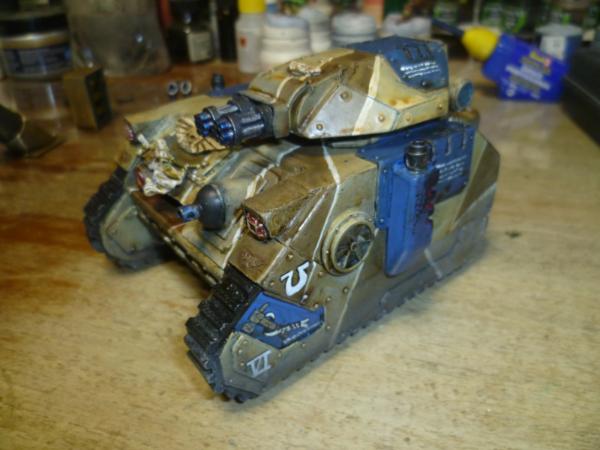
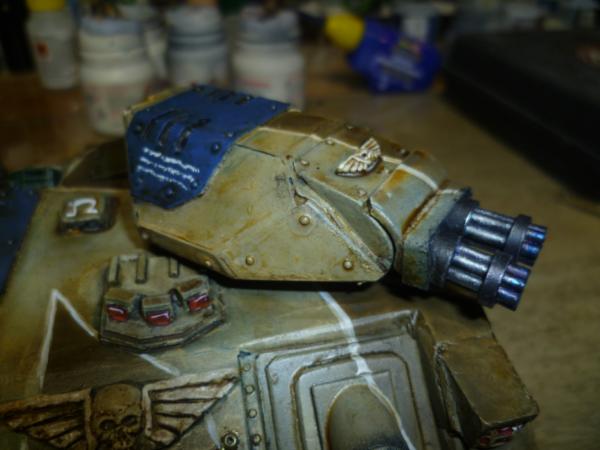
Starting to feel like a predator variant, no idea where I am going, but will get a slick turret and sponsons.
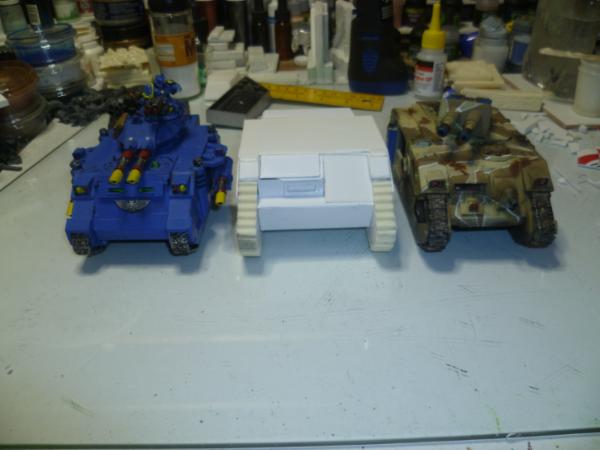
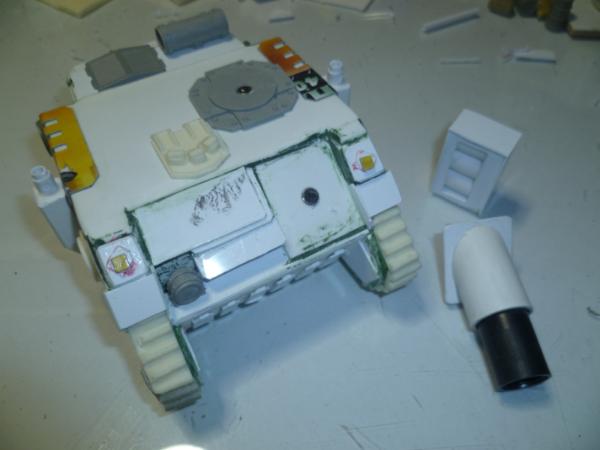
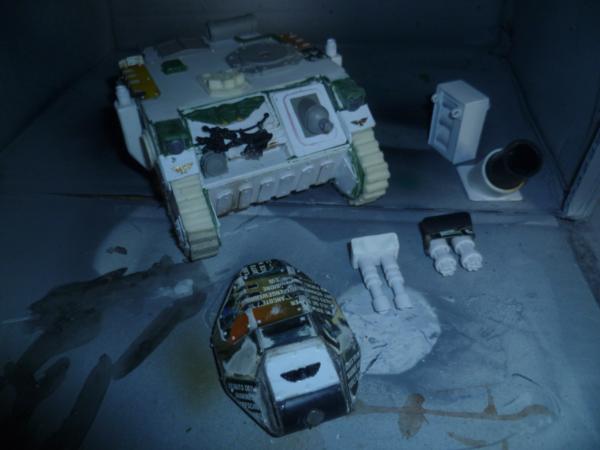
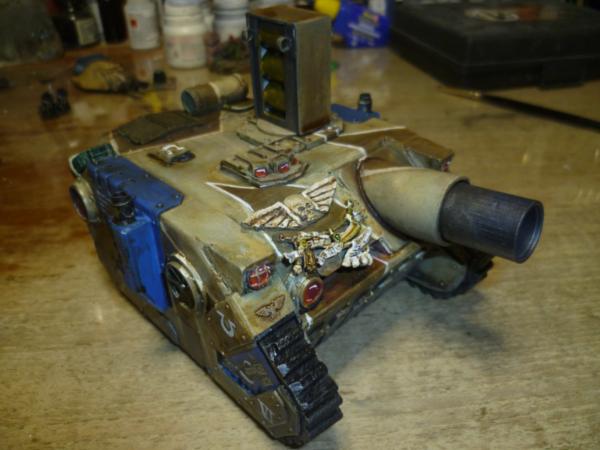
Heres some scale shots..
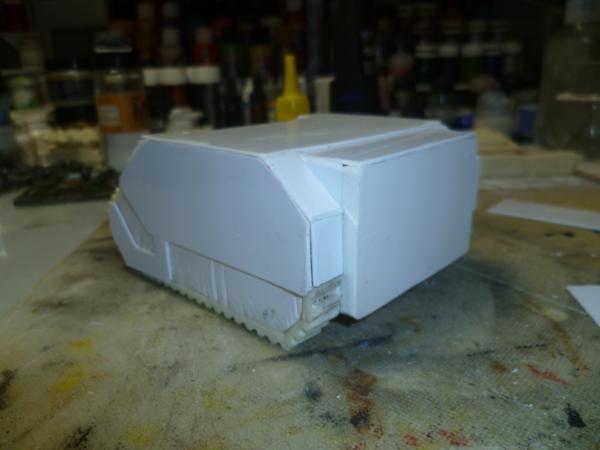
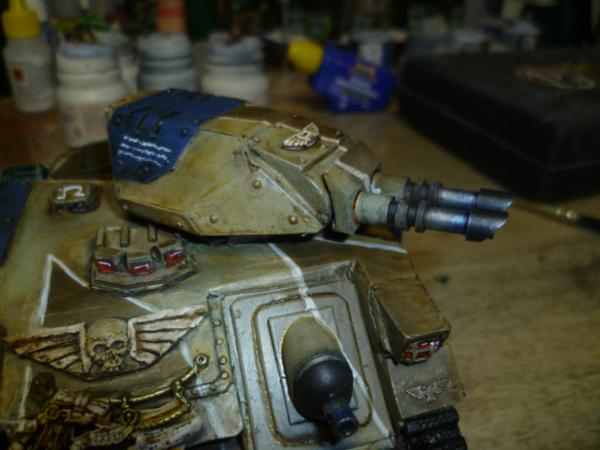
I like that it is a bit wide and stubbier, thinking about an offset turret.
Thoughts, should I forget it and donate to Orkdom?
The off set turret looks really good. Makes for a really unique tank. Love that the weapons are all interchangeable. Are you considering side sponsons?
@ WP Thank you.
@ Archer Yup sponsons will be coming.
@ EDC Thank you. And I guess Baal but aren't they BA gear, can Ultras have them. Not that I am bothered about such rules. Don't want to upset anyones sensibilities is all.
Da blood grows cold on da choppa tonight
Not a humie...to be seen
A orkdom of oksolation and it looks like im da BOSS!
Da WAAAAAGH!is howlin'
Like da screaming squig inside
Couldnt kill dem all mork knows I tried
Dont let dem in dont let dem see be da good boss you always have to be
Krump dont deal dont let dem go
Well now dey go
Ere we go!Ere we go!cant hold dem back any more
Ere we go!Ere we go!
Charge and krump da door!
I dont care,who were going to krump
Let da Waaaaagh!rage on
Da dakka never bothered me anyway
Its orky how some dakka can make every thing seem WAAAAAGH!
da gits dat once kontrolled me
Are krumped by da WAAAAAGH!
Its time to see what I can kill
To test da stompas and break new
Lots of fight lots of WAAAAGH!
And dakka for meeeeee....
Ere we go!Ere we go!
I am one with da gods and WAAAAGH!
Ere we go! Ere we go!
Youll neva see me die
Here I stand,and here I'll stay
Let da WAAAAAGH! Rage on
My dakka flurries through the air into da gitz
My shoota is shooting spiky bitz all around!
And one WAAAAAGH! kill fings like an orky Blast.
Were goin back armeggedon isnt in da past
ERE WE Go!ERE WE GO!
And Ill krump like an entire WAAAAAGH!
ERE WE GO!ERE WE GO!
Dat perfect world is gone
Ere I stand in da sight of gork...
Let da WAAAAAAAAAAAAAAAAGH!!!!!!!! Rage on!
Der dakka never bothered me anyway.
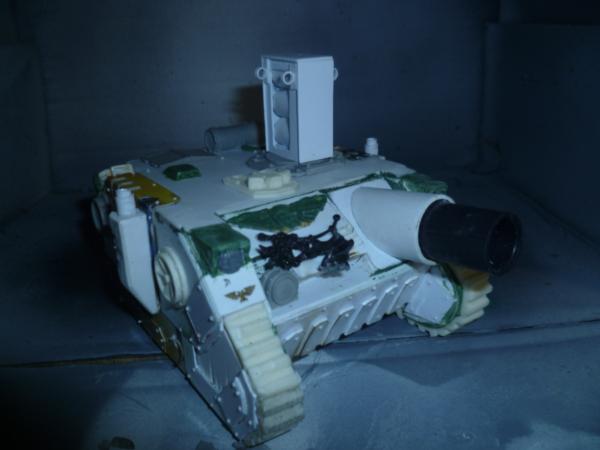
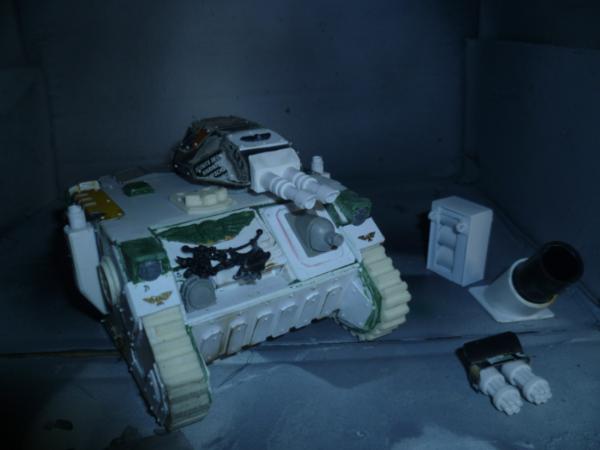
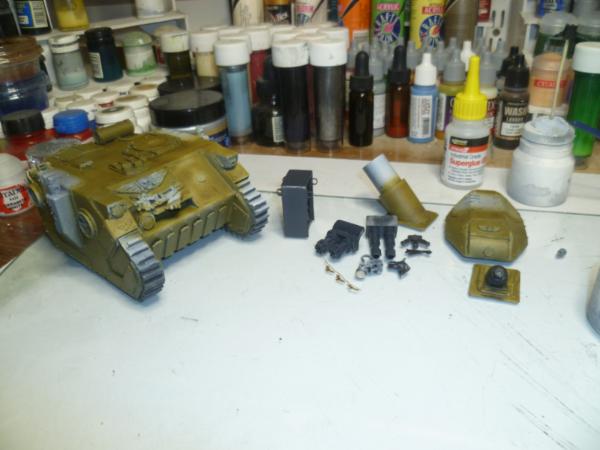
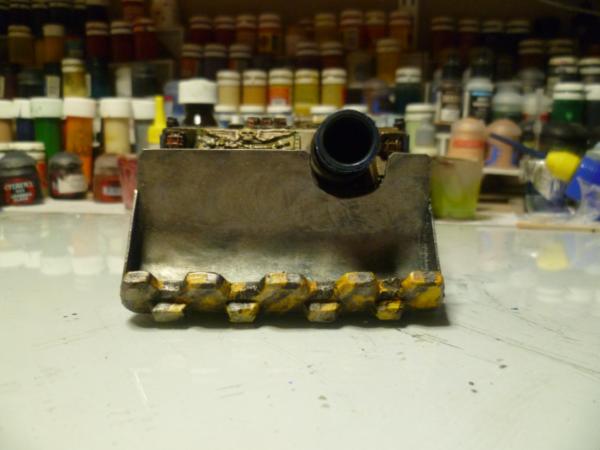
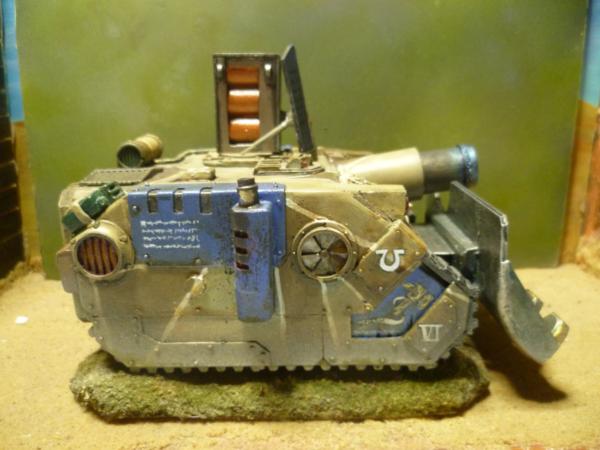
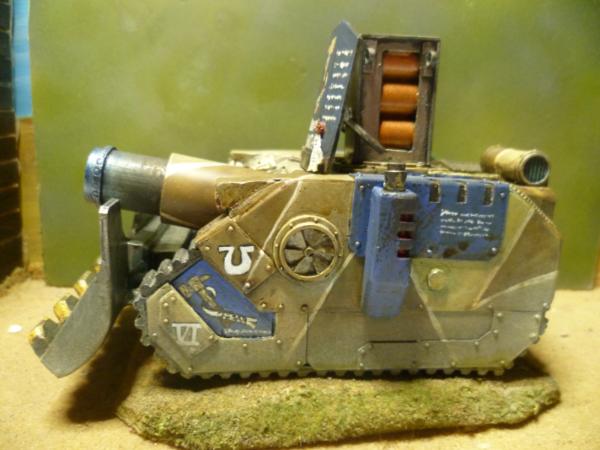
OK guys working on the mag and the barrel, thinking of the ridiculous dozer blade as well maybe. Have to be magnetized for when not a Vindi.
Been playing around, too many ideas, not enough time and just too much to play with....
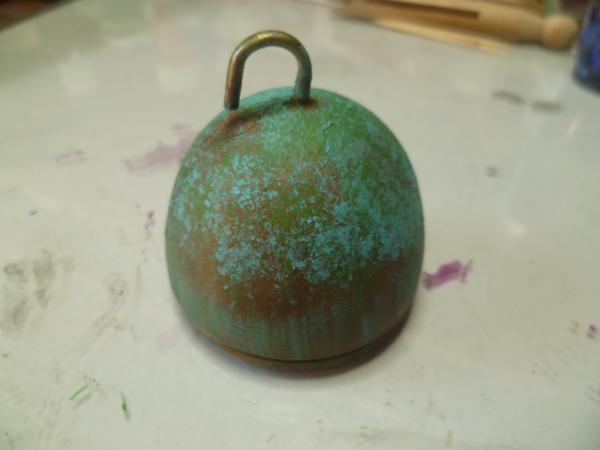
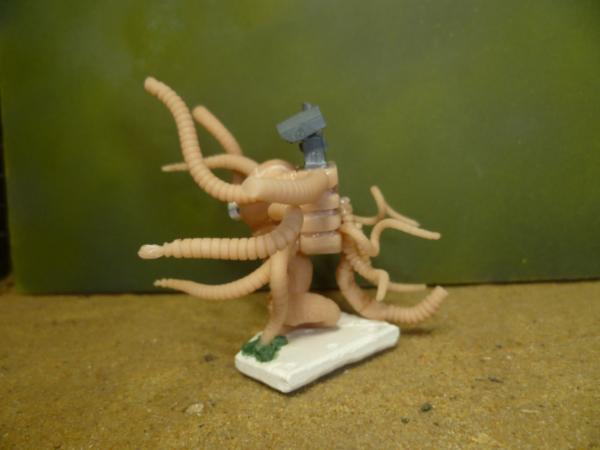
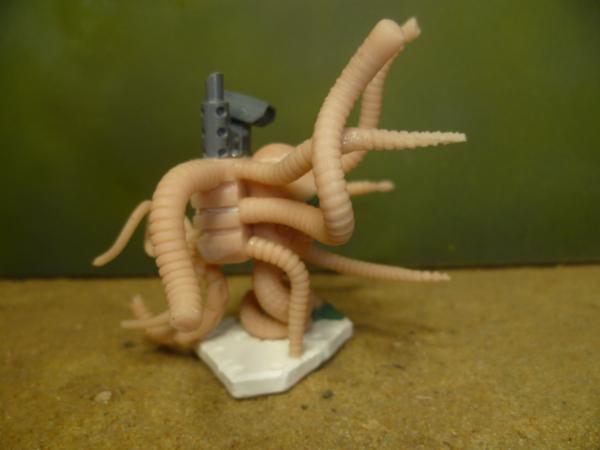
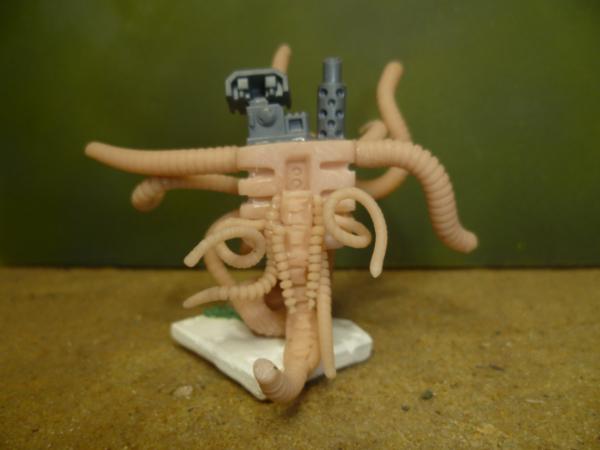
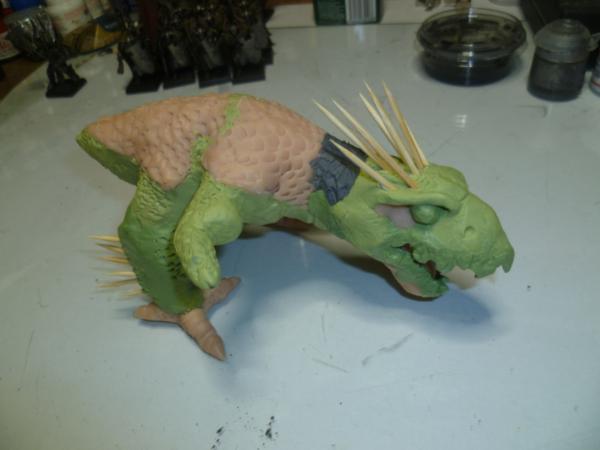
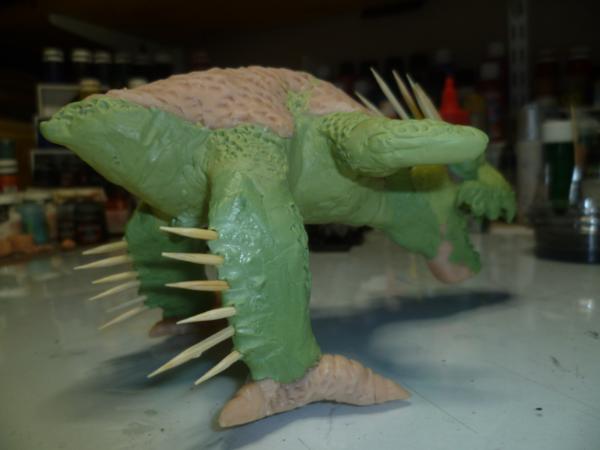
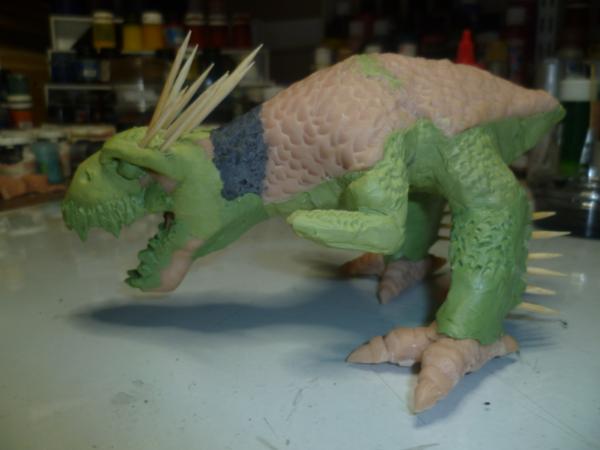
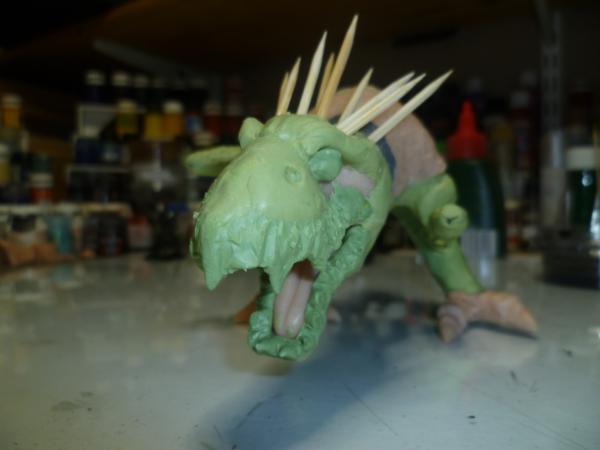
So no idea where this came from but.....
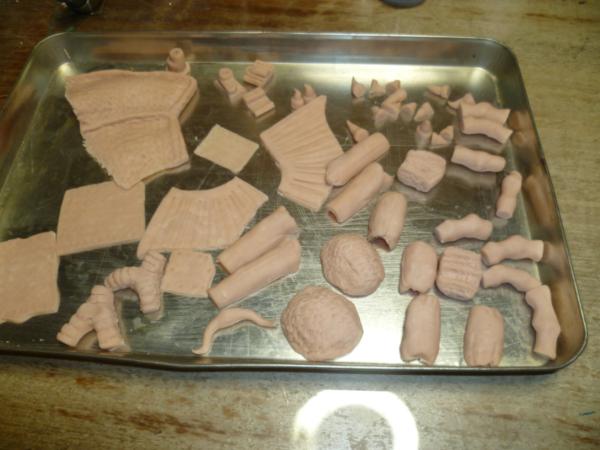
Started out messing about with some Super Sculpy....
Started sticking bits together..sorry terrible pic....
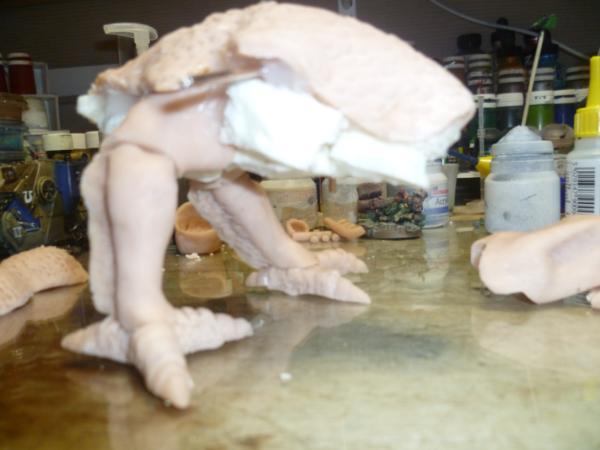
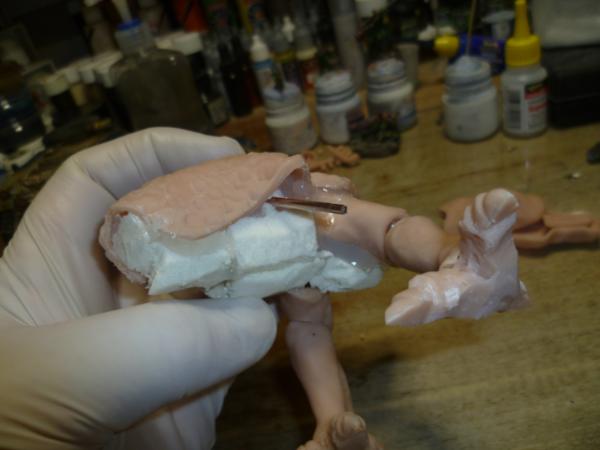
Bulking out with foam and hotglue...
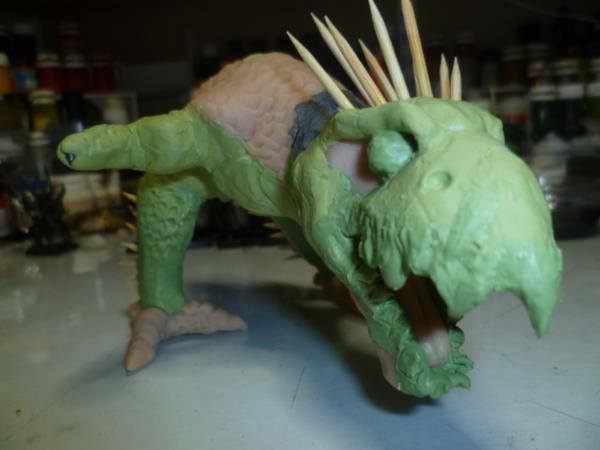
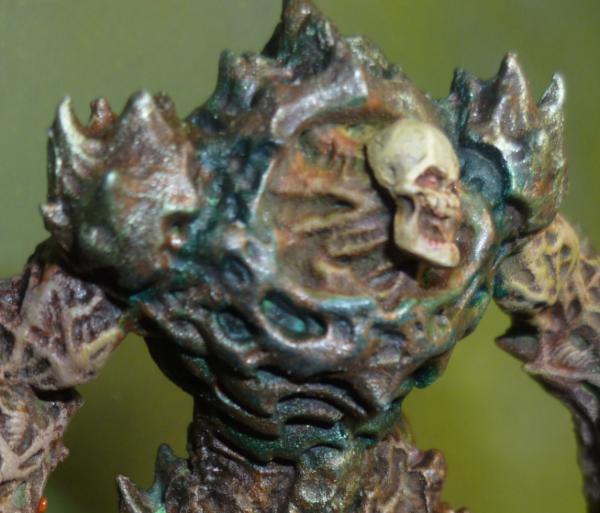
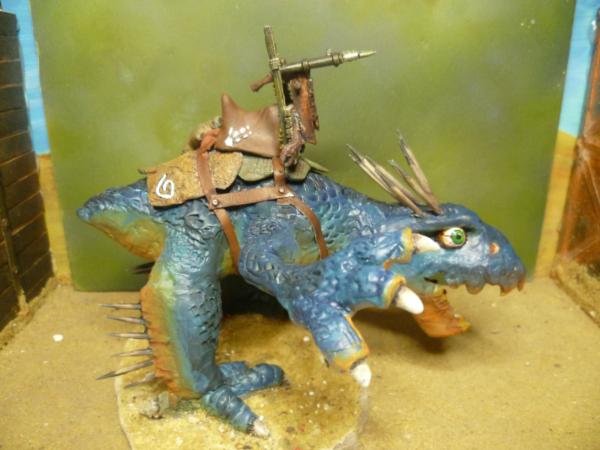
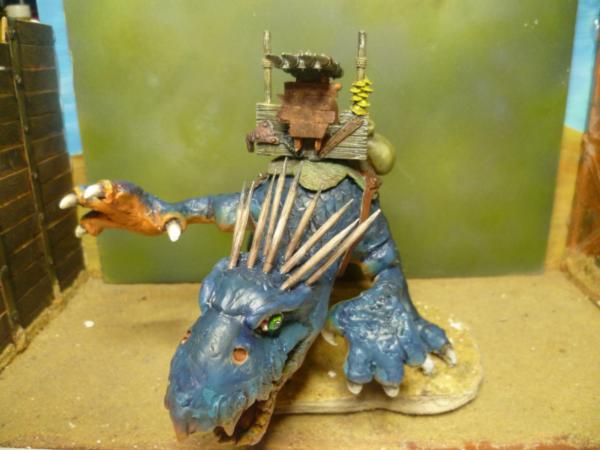
Then a bit of GS and Milliput mixing and some messing about...
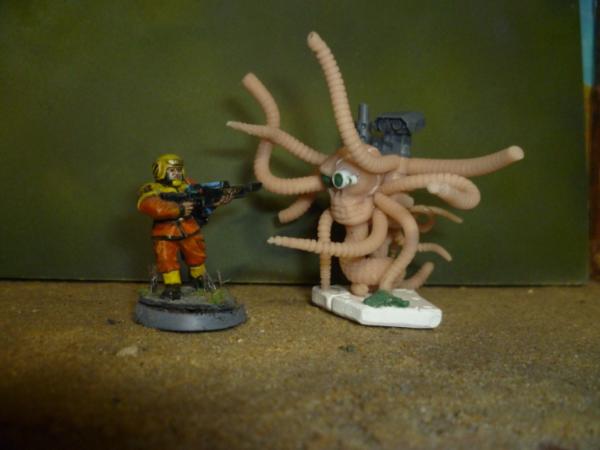
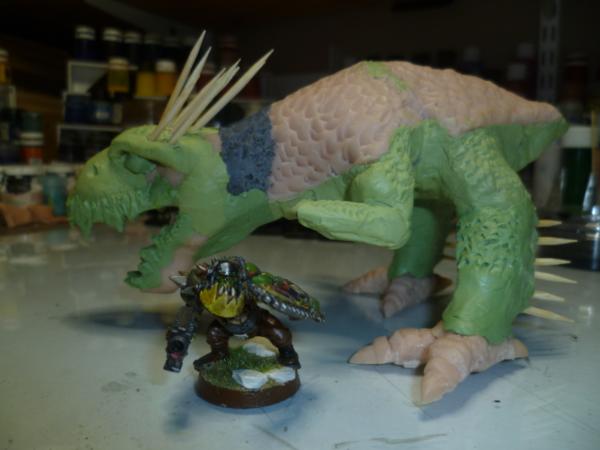
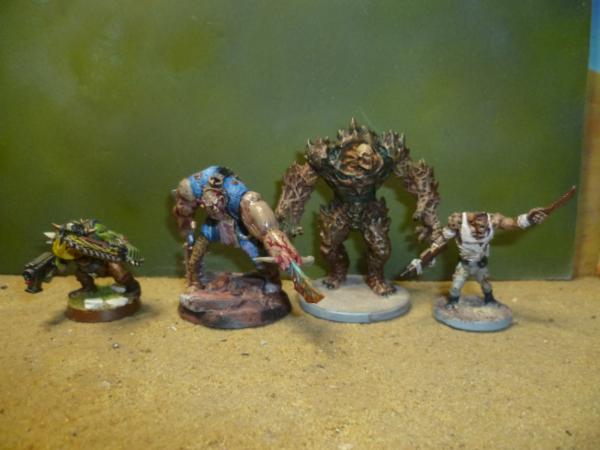
And scale shot...
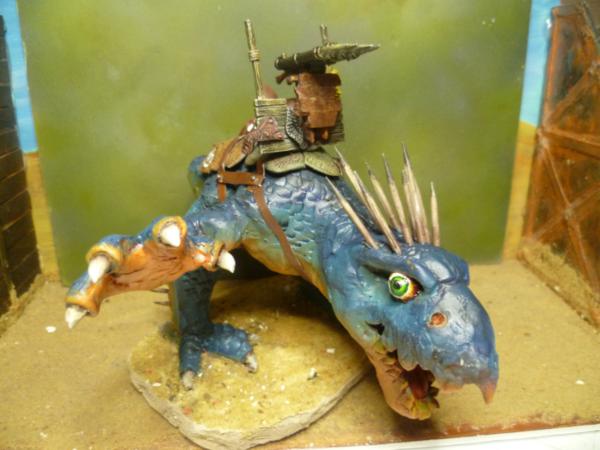
Guessing a Knarloc for me boys Tau/Kroot army. Kids think it is a chicken from hell, don't blame them. I do notice that it is not even for sale on FW anymore, they used to do a model, always fancied one.
totally, tho my expierience/knowledge with the fish faces is limited... but i think you are heading in a good direction...from my shady memory it looks spot on!
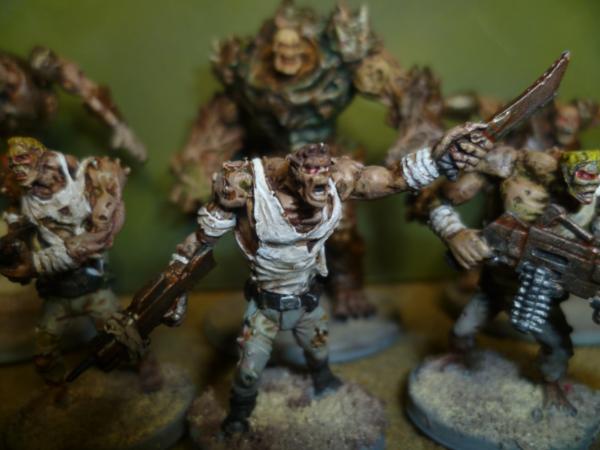
i like the "white" faced plague fella...that look, while still WIP could look really frightening later on...
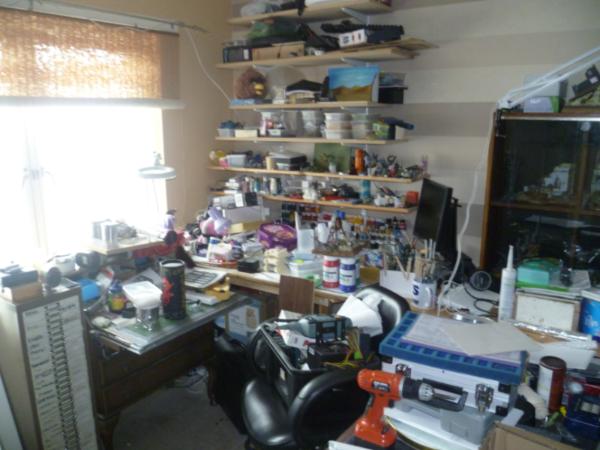
since you moved, you really enjoy the benefits of living in a bigger house it seems the stuff you are working on is rather all space consuming, i know what i am talking about here... projects tend to be giant sized for me every time too^^
also... have a nice start into 2016 later on! i still haven´t even cleaned up my workspace yet... the days went by and nothing hobby worthy happened... and monday i will have to start working again...facepalmfacepalm
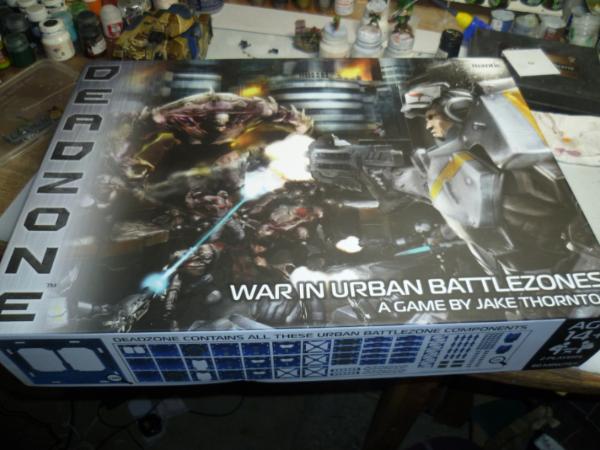
Glad you picked up Deadzone, easier, faster and shorter games than 40K make, at least for me, for a great gaming "solution", specially for playing with the kids!
If you have any, I'm considering clear bases for DZ, think those'd go well with the board/matt in general, and more when having the minis standing on top of the buildings and walkways (which happens a lot in DZ).
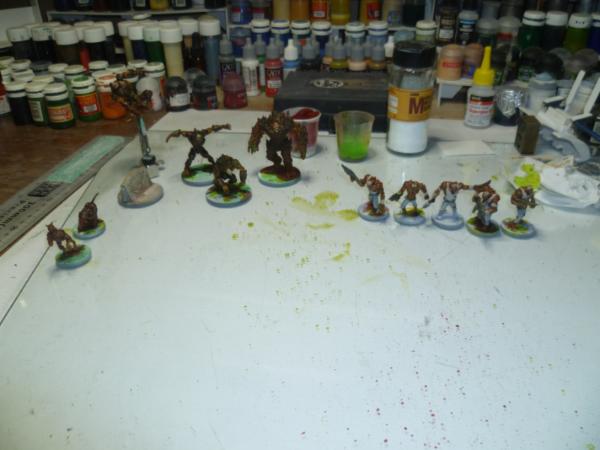
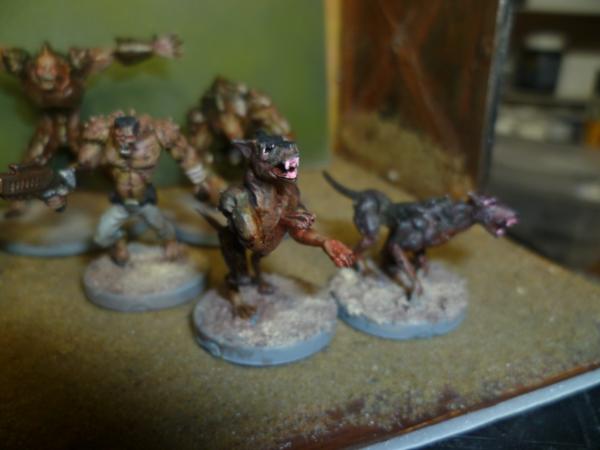
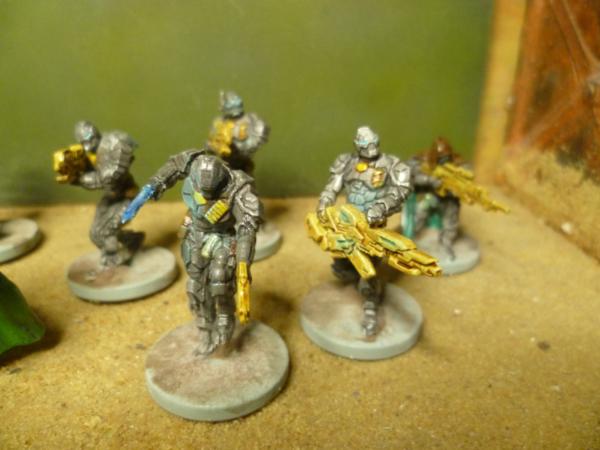
Well here you go, not sure I will bother doing much more to them.
Pointy stick guy...
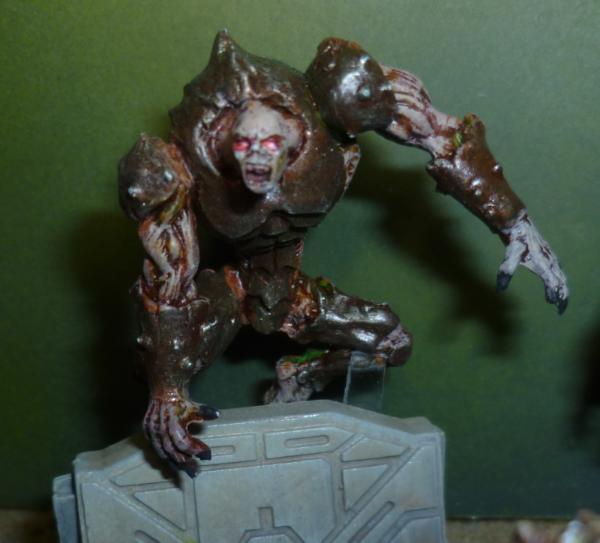
Hoppy guy... I have him in mid air, will have to see how durable this works out..
Doggy..
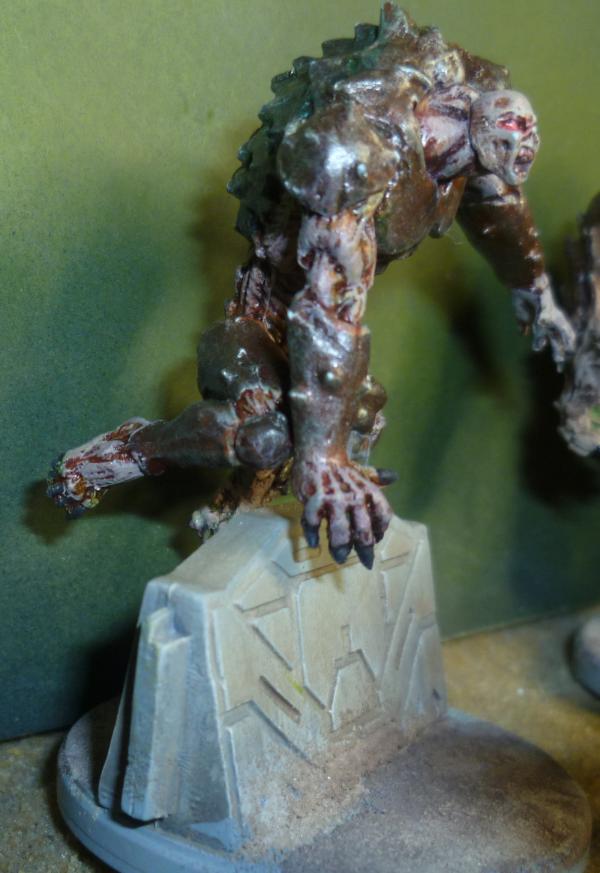
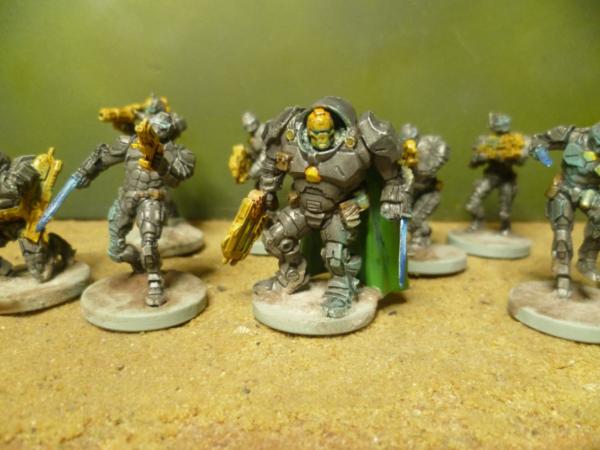
And of course himself...
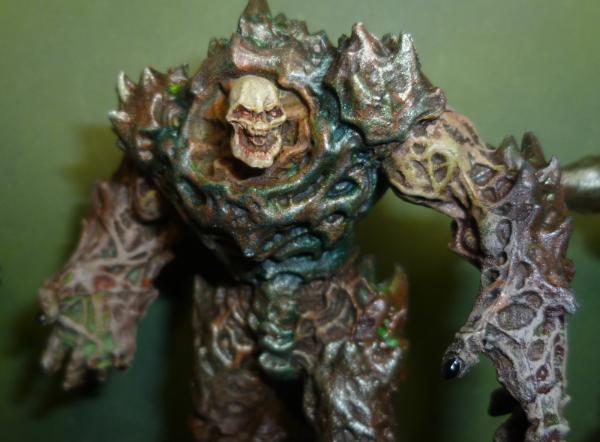
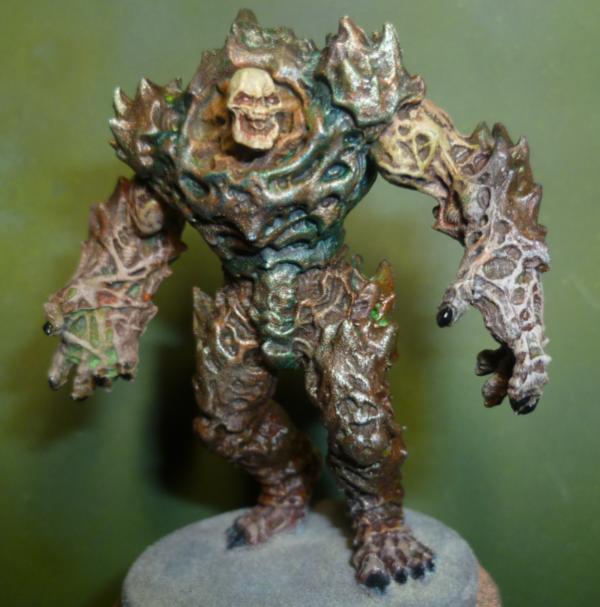
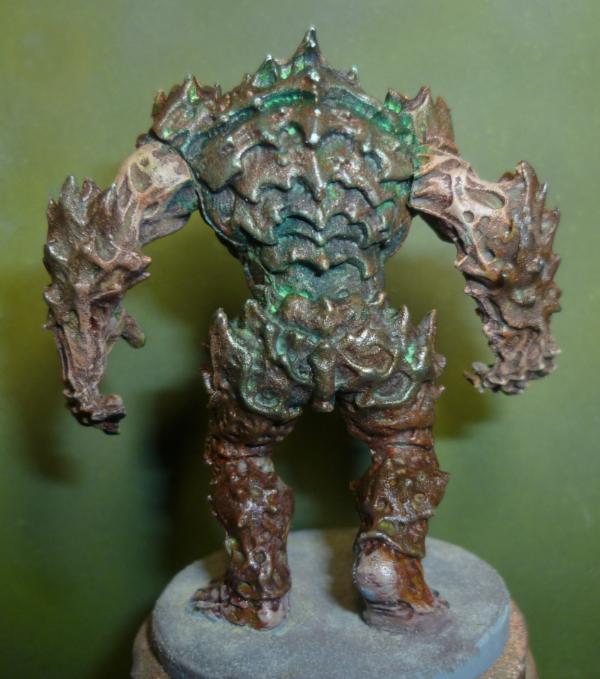
Though I like the models and intend getting another set to convert a bit, there are some bothersome bits for me. Mould lines, Can't bloody see them til its too late, the big guy is a prime example, the shot of his back, did not even notice it until I took the picture, bugger patching that in! And secondly confused by the business with the bases! Why a base within a base, makes it blooming awkward can just about live with the bigger perfectly flat disc!
Anyways thanks for looking, thoughts are welcome.
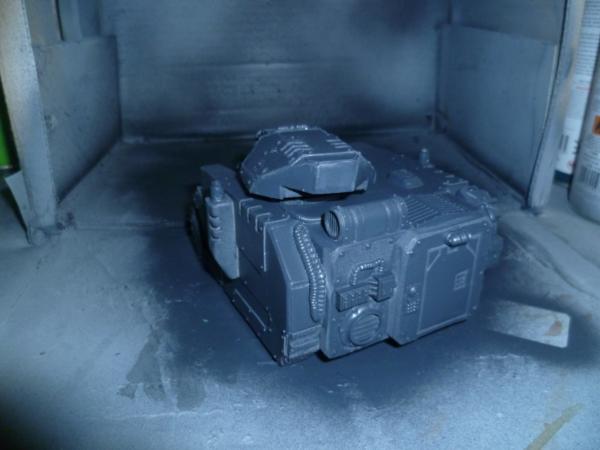
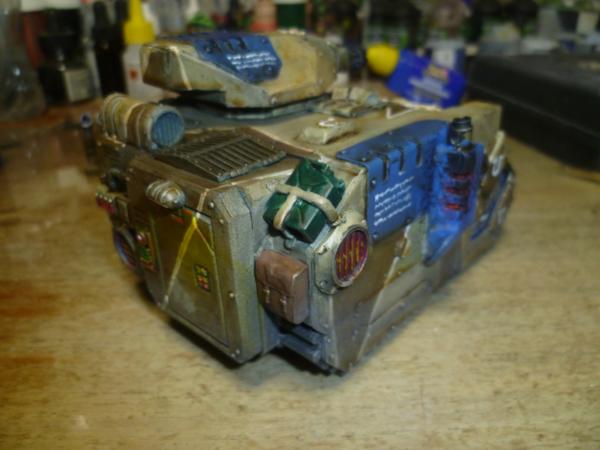
Next bit more camo predator action.
Happy new year to you all, hope its a good 'un for us all.
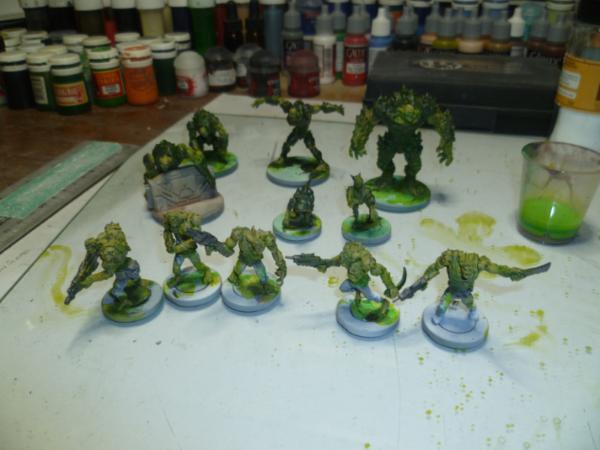
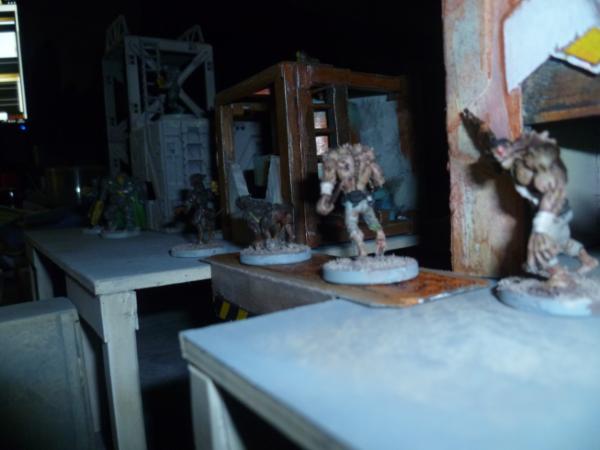
Damn for a minute I thought I was in Theo's thread, great skin tones great repsentation of rotten flesh.
I have to say I was not overly a fan of Mantics range but this has almost changed my mind, they seem to have potential from what I have seen of yours and Theo's threads.
Happy New year to you too may it be a great one for all
Thanks guys, much appreciated, so far I am happy enough, not played yet, and still the enforcers to go, but we will see.
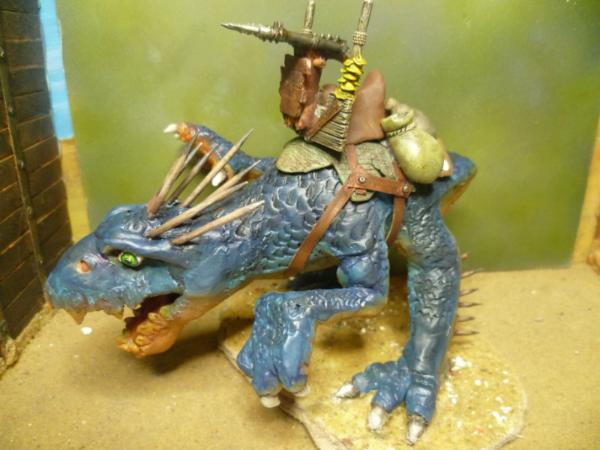
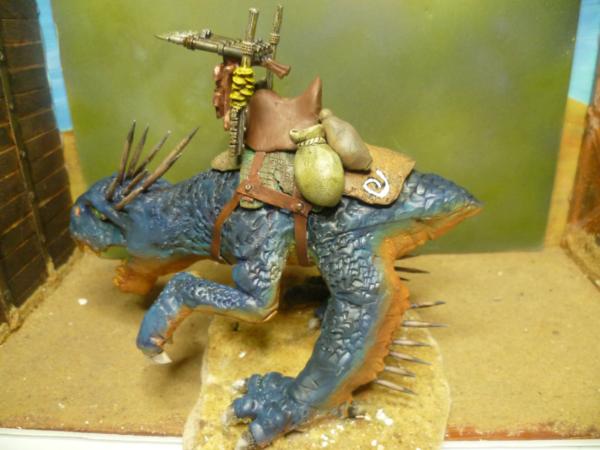
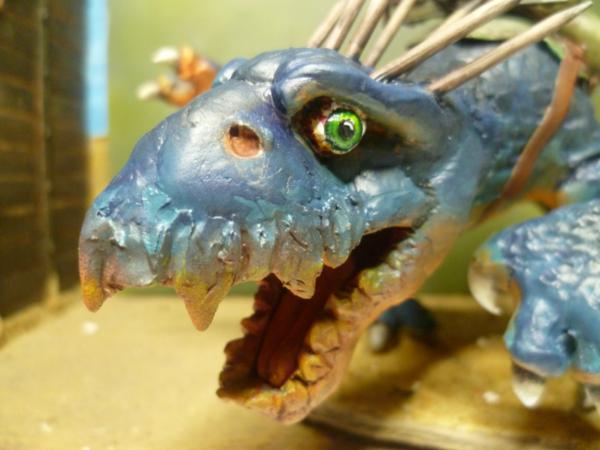
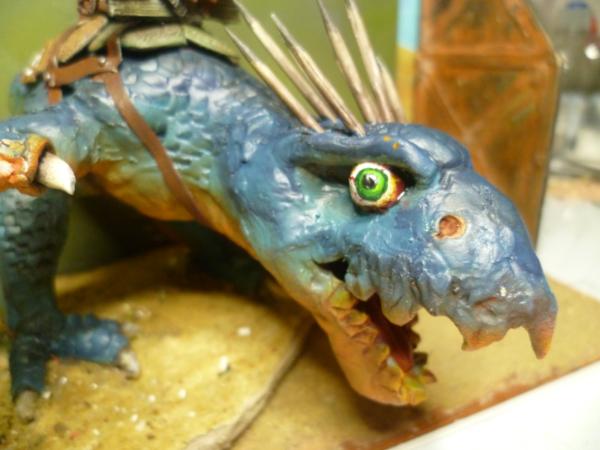
Sorry I lied, silly birdy thingy caught my eye today, heres the result, couple little bits to finish up but it's very late so leave this lot here for you...
I absolutely love the chicken thing. Especially the green eyes. I was also reminded by it of a stupid chicken fact, off topic chicken video attached at risk of MOD attention
I use standard cyano...super glue, normal dollar store super glue on well.. everything I've done for the last few years. It always works. On everything. No idea about plastic glue if that's what you meant though.
I like the enforcer scheme, it's simple but effective.
Well I used superglue as well and it seems to have worked ok. Tried Revell Contacta Professional Liquid Plastic Glue, usually melts surfaces together was a bit worried, but it had little or no effect so gave up on it. The buildings took it though and it worked brilliantly on them. The figures are a little different though.
I would say couple points now I have just about done the set. Bloody mold lines on these are a pain. Gave up on the enforcers as can be seen. But these are strictly game pieces and to be expected I guess. I do like the sculpts and the variety. The buildings are brilliant. Just wish they where in a different material, then I would happily convert away with these guys, but as is, I am very happy with what I have and hope to be playing soon.
Next, no idea.....if you like you could pop over to orkishness and look at my finished entry for Nerdies Competition. Guess I could open Sedition Wars up and have a look.....
Just had 2 games of Deadzone, first time I have played anything in about 5 years at least.
Fantastic fun, played my daughter, she wanted to be Plague. She ran away with the first game as I totally did not get my head straight, I got her (just) the second game.
We got a few bits wrong but it played out well. This is such a graphic game, it puts wonderful images in your head. For instance in the first game she had to infiltrate. So she basically out flanked me and ran off the table but left the big guy all alone strolling up the centre of the board, with shots raining off him, rips the head of the captain and off the board, just magical.
I definitely do more painting than gaming. But when I do I remember how much fun it can be too. Can help a lot when you have opponents seeking the same thing as you too. Glad you enjoyed the game. Any in action shots?
hey Cam, plastic Enforcers are a little taller than the restic ones, but standard plastic cement will do the trick for the all plastic enforcers and peacekeepers, cyano for the restic parts that are options to be added to the plastic bodies, like the shotty and shield.
@ Shas thanks bud, will be trying to source some more Enforcer models soon, so advice gratefully received.
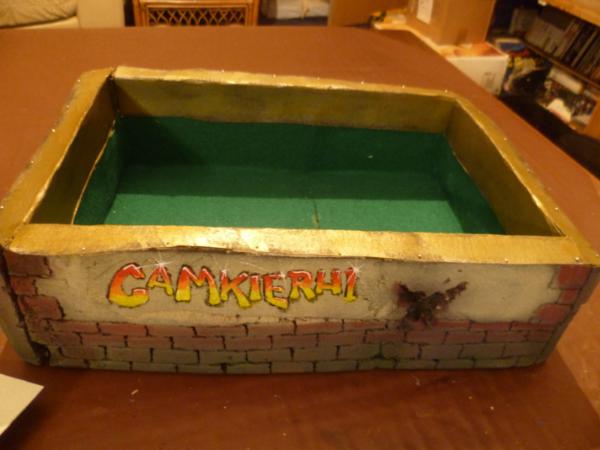
Not really an update or anything, just, well as the kids are playing this and I am knocking around the edges thought I would knock out a dice box. (the wifes biggest complaint about the hobby is the noise of dice being rolled.
Nice work on the tanks. Good job on the swappable parts.
Good job on the giant bird thing. Nice to see you pushing yourself on the sculpting. One critique (as I know you like to hear it) is the legs are "missing" the thighs; the "backwards-knee" that you see in birds and other animals is actually the ankle. The upper leg as you have it, is the shin.
The head is a great piece of work though.
And the swimming pool / dice rolling area is great. Nice idea.
Nice work on the dice box. If it were me I'd put some Grot's around the edge of it, arguing over some dice, or maybe carrying them away.
Or something along those lines, just an idea .
You're really good at doing sceneries. Great job, nice details.
It's something I'm really impressed by, because I would be unable to do anything that good without spending ages on it.
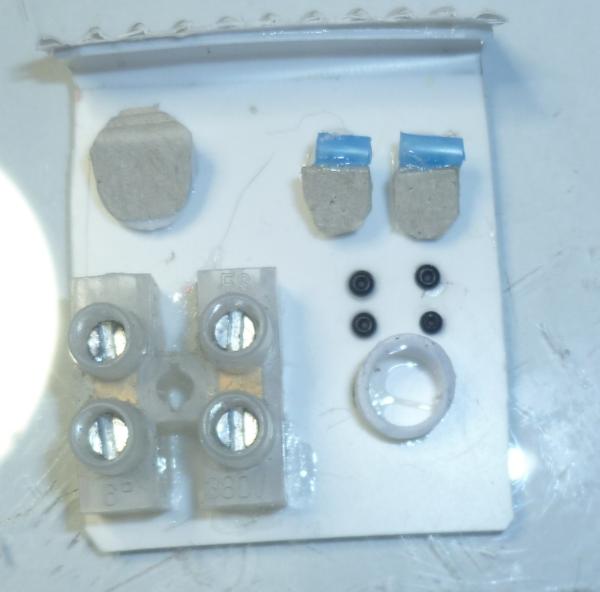
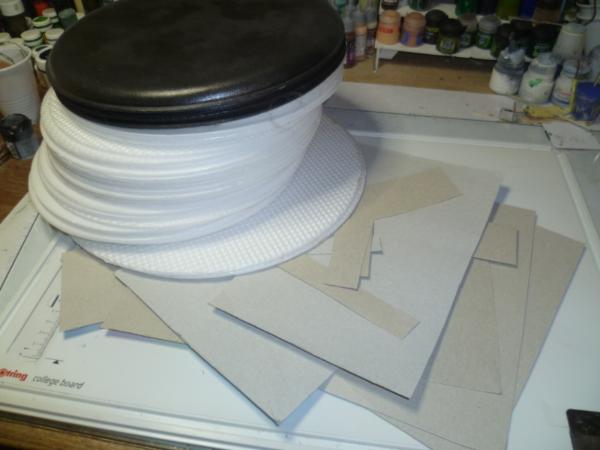
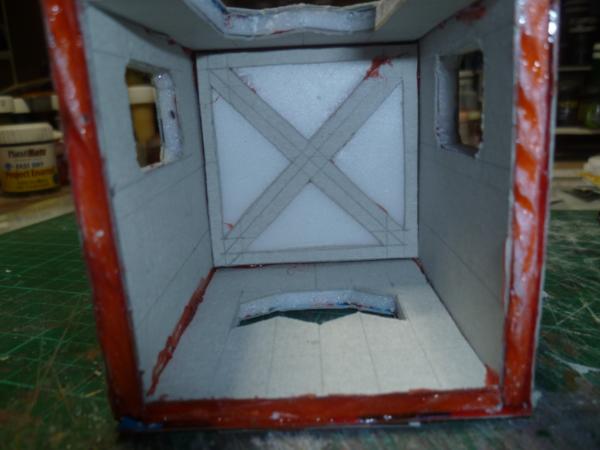
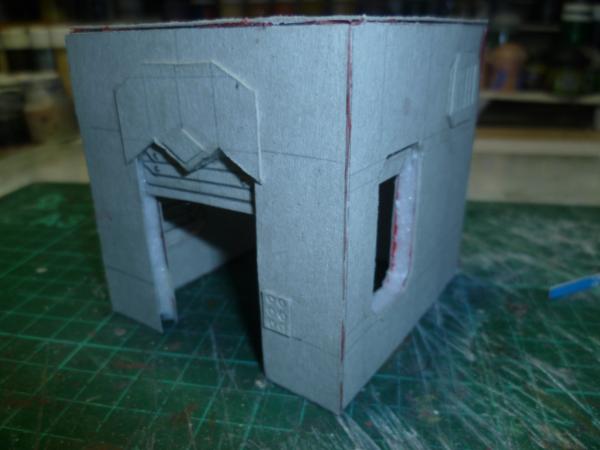
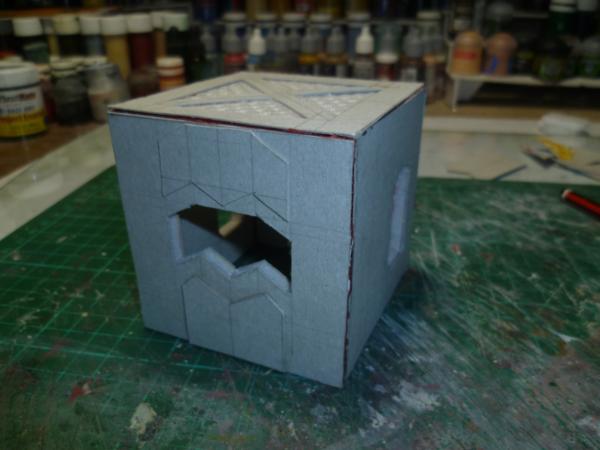
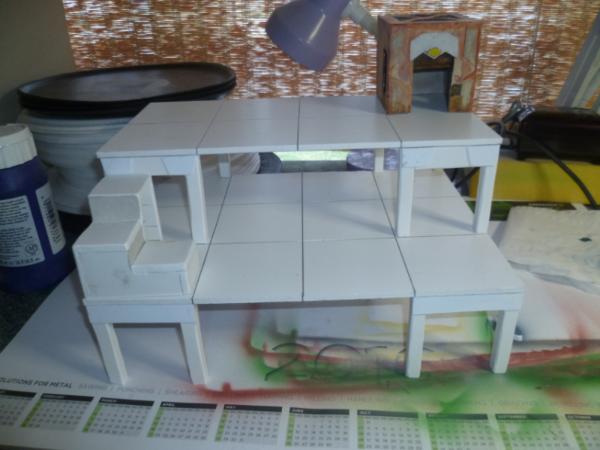
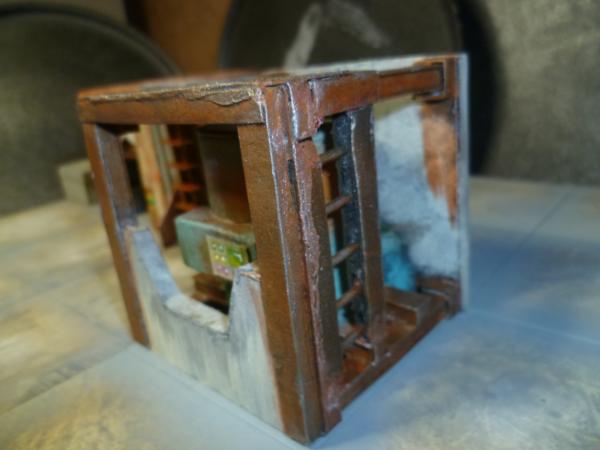
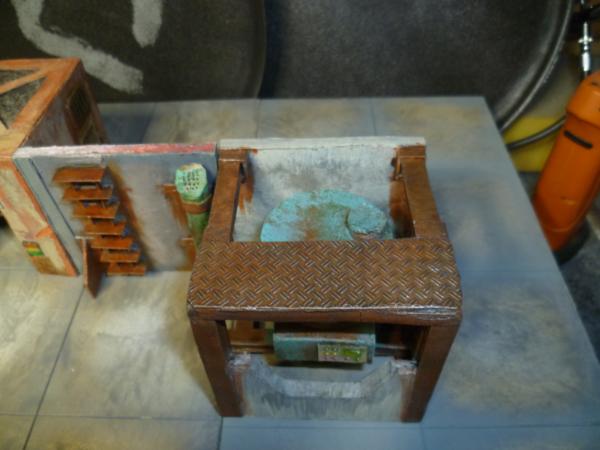
Well silly amount of pictures here so getting straight at it....
Nearly there on the little cube....
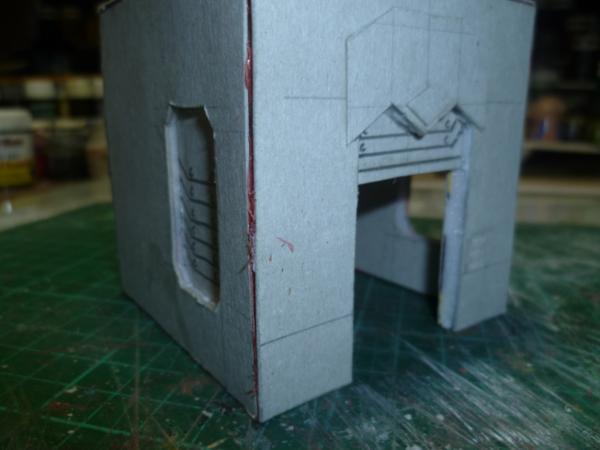
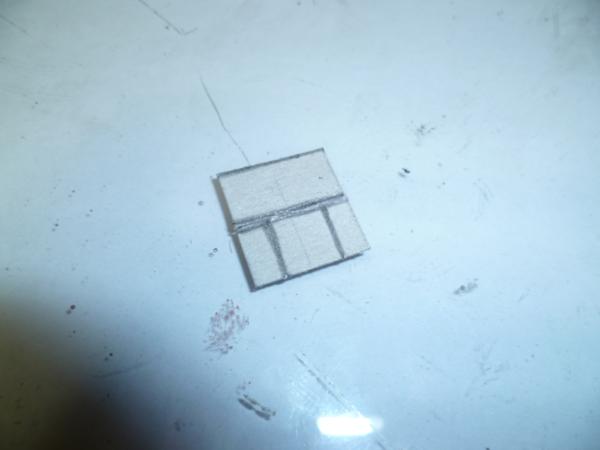
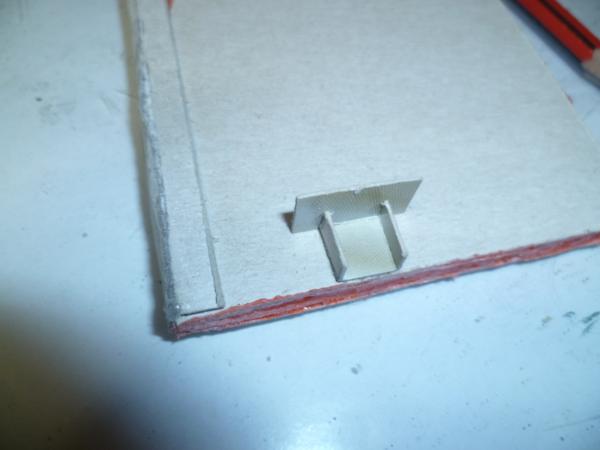
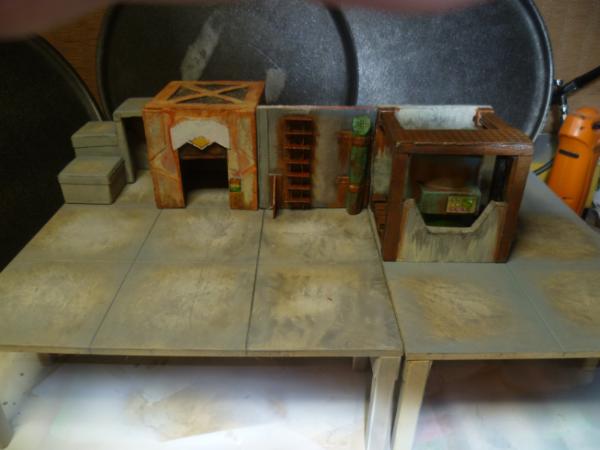
Started in on a Panel, the idea being it can fit various occasions....
Panel was again my homebrew FC, just a straight forward 3" square...Then I wanted to add a ladder....
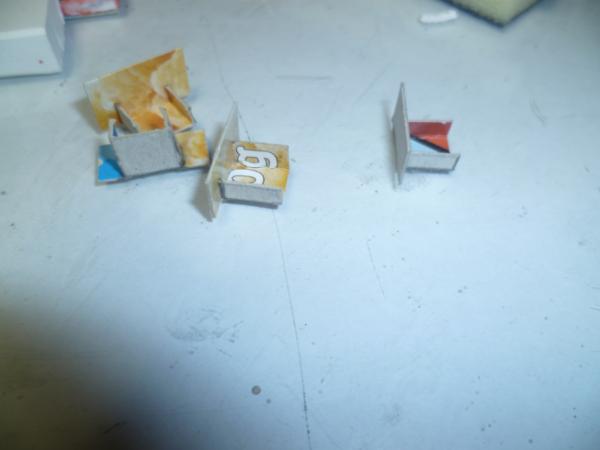
So Steps...
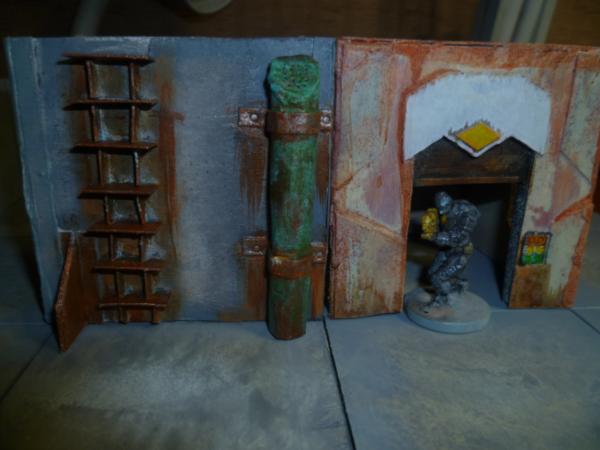
then a quick lick of paint...
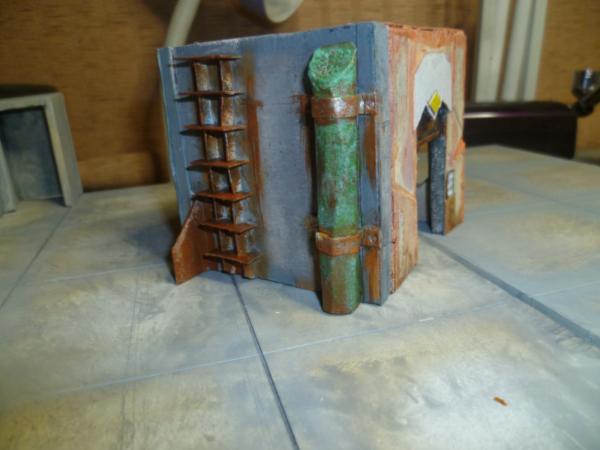
Folded to the building...
As a wall...
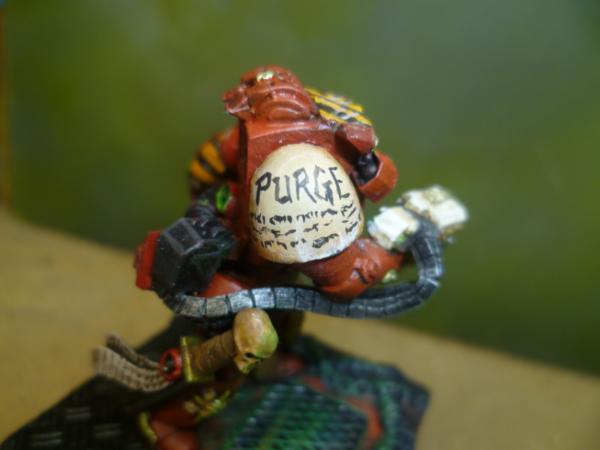
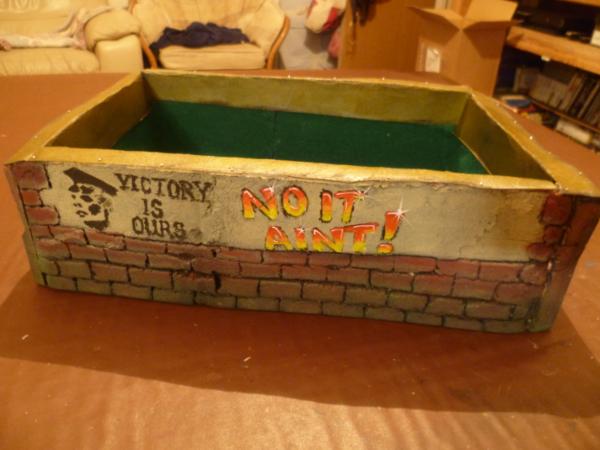
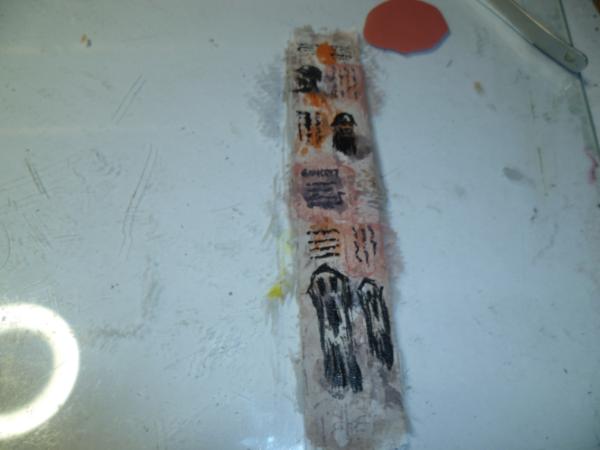
Oh and a little free hand graffittiiiii on the other side..
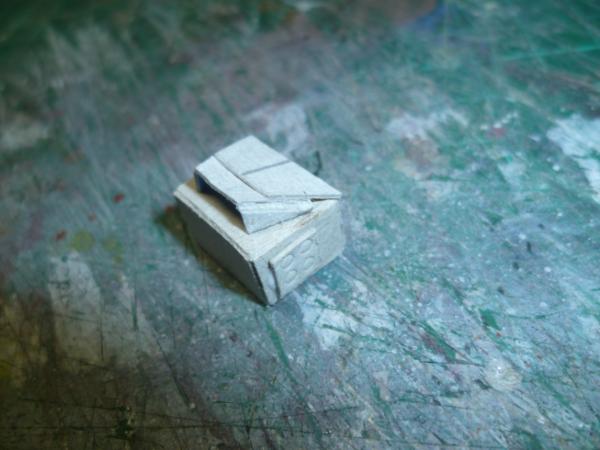
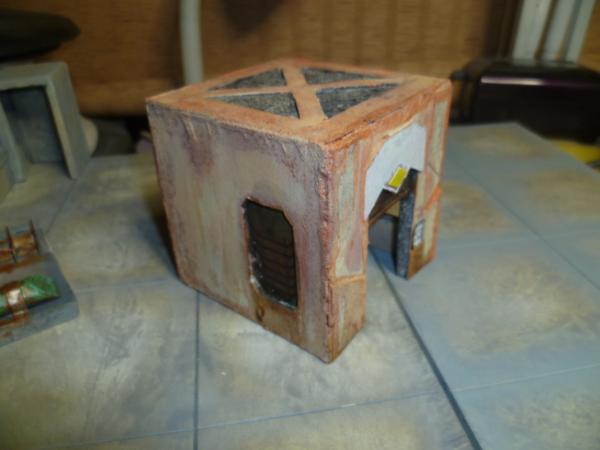
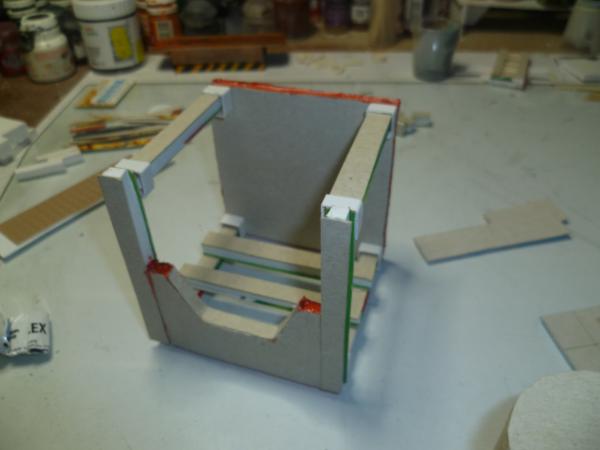
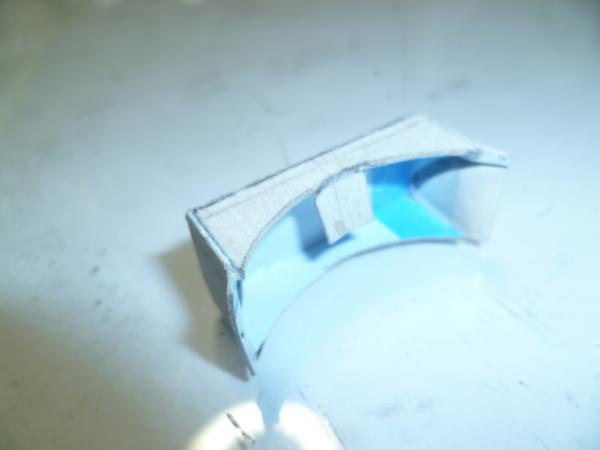
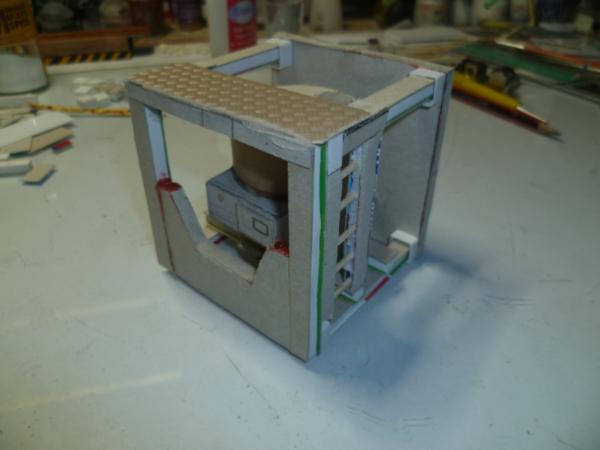
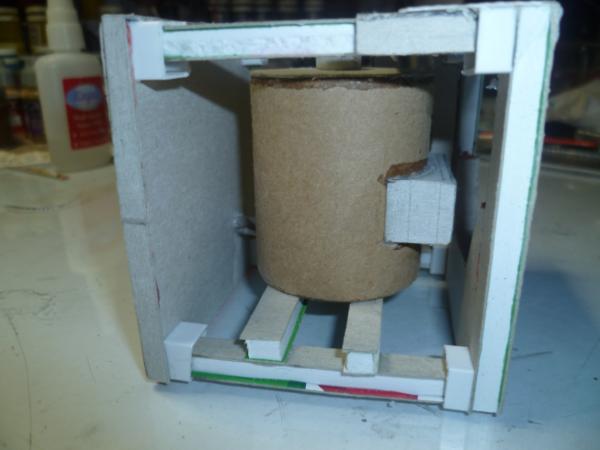
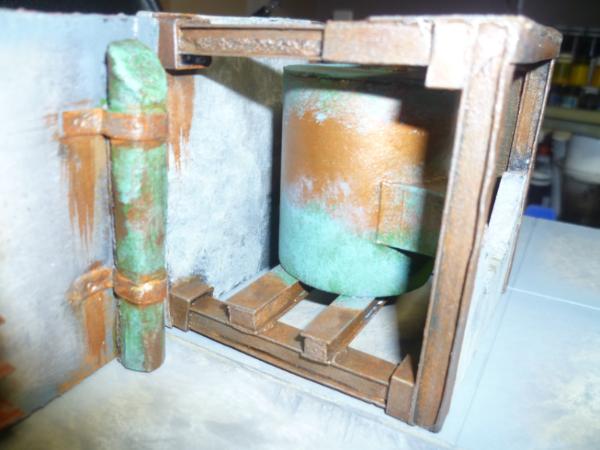
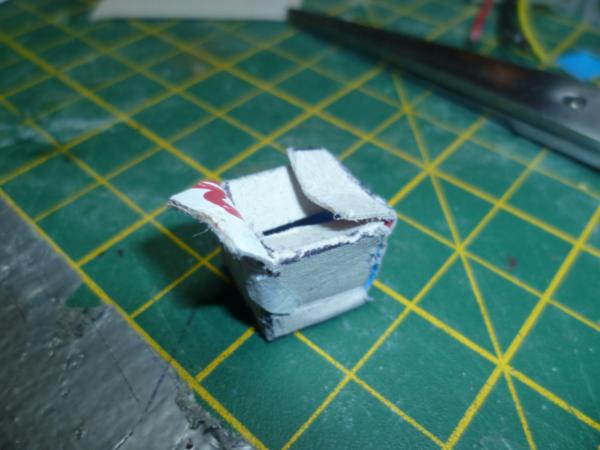
Then I started a new little cube...
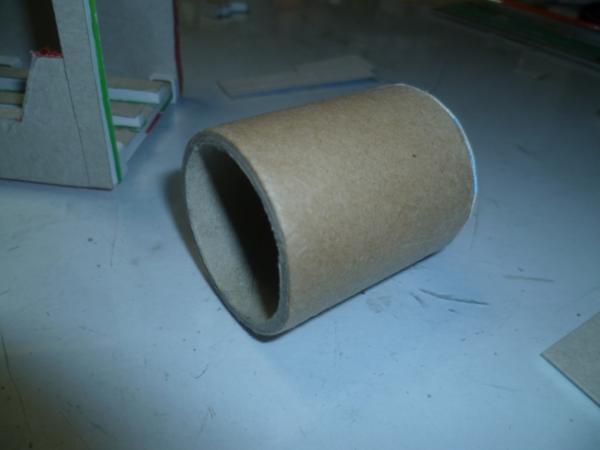
Cardboard tube....
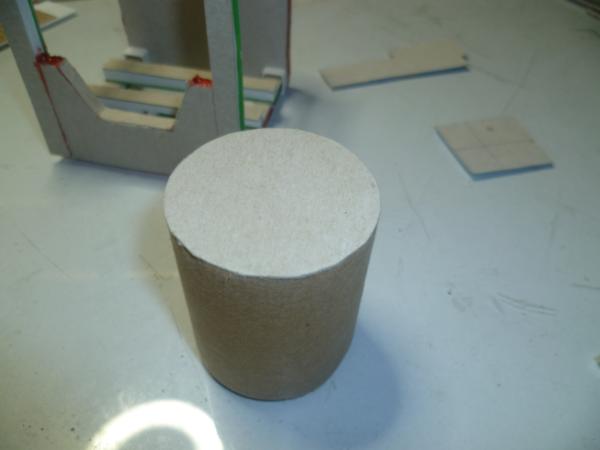
Bit of boxing...
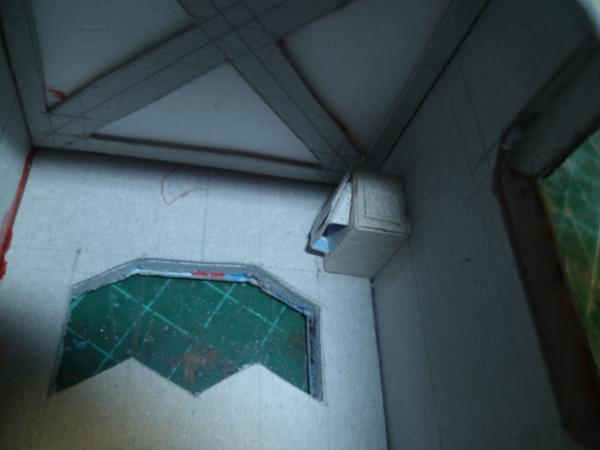
And we are getting there...
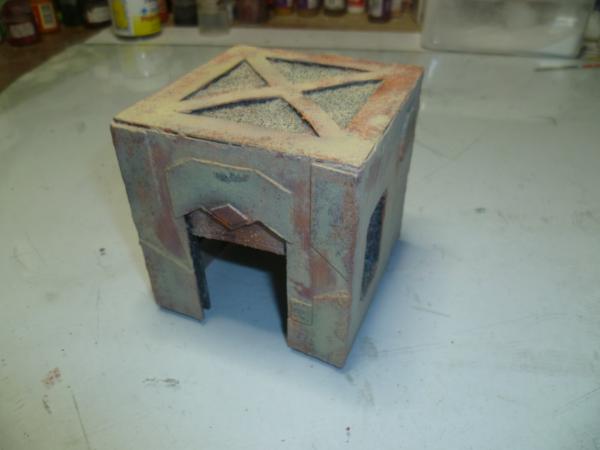
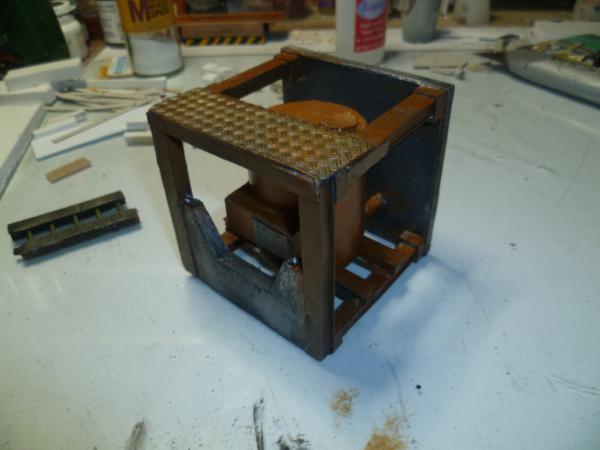
Some base coat...
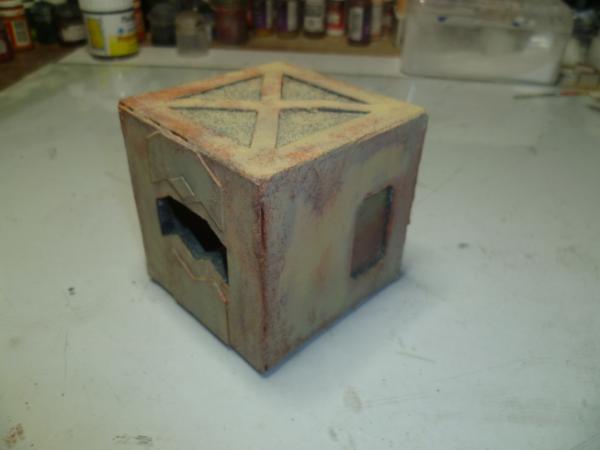
And a little more paint...
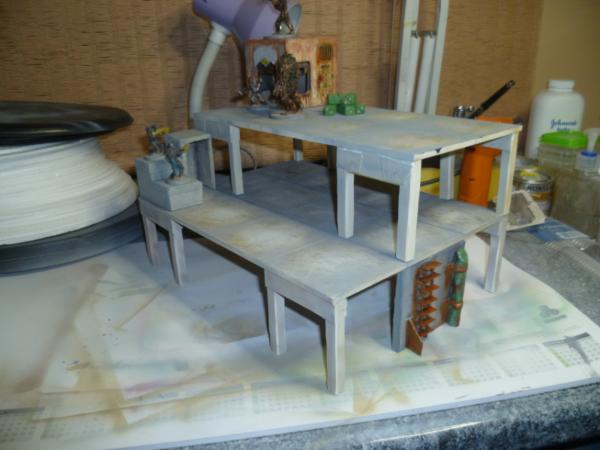
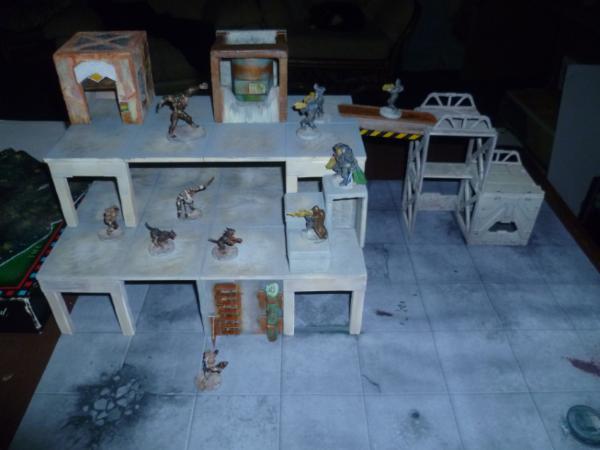
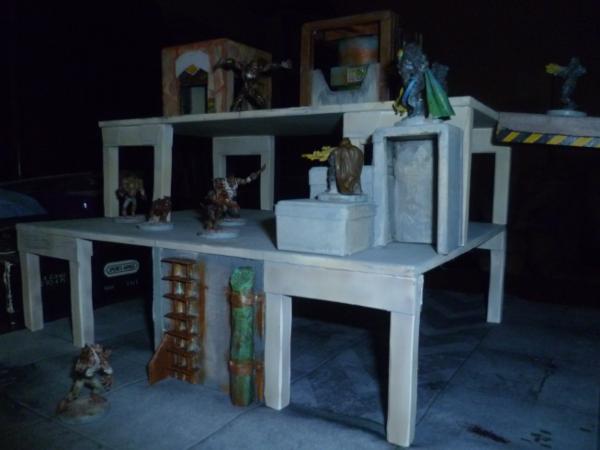
And just some fun shots of it all at the moment...
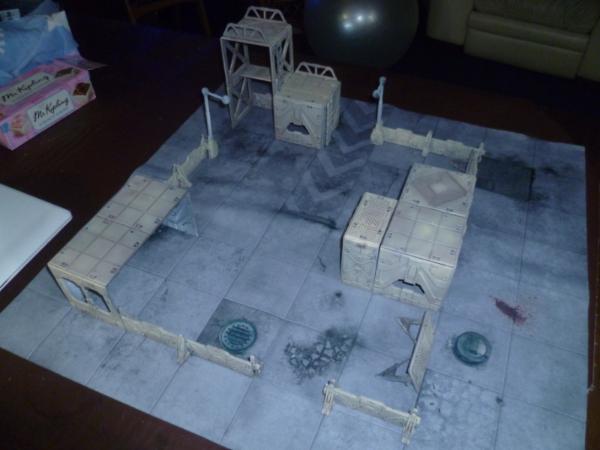
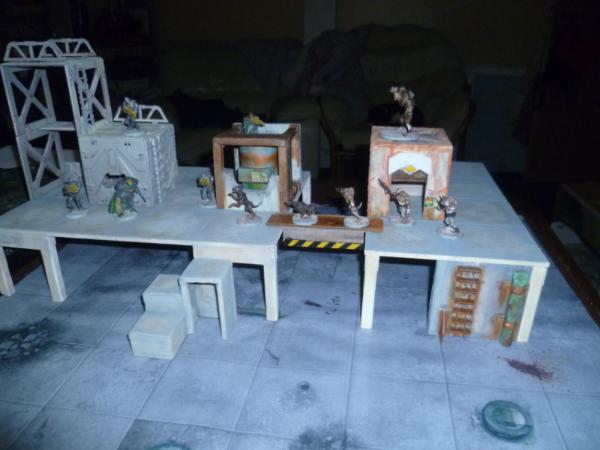
So that's as it is, going to finish adding detail to these, and build some more, just keep adding to it. I think this will be my entry in the comp. (link in sig) Though I feel like I am cheating a little because my bits collection is huge, the platforms are made from reclaimed signs (sintra board) That's not something anyone can get hold of easy. Most of the buildings will be cardboard and pizza bases. Pretty basic stuff.
I think as terrain goes, it's for Deadzone, but will do very nicely if I can get my head around Necromunda again, and is easily usable for 40k etc. Just about any sci-fi game, might just about get away with it for Infinity if I can ever get into it.
So thoughts welcome, thanks for looking, back soon.
No update. Been working on orks. Just popping on quick to answer Graven.
Most often i have purchased sheet styrene. I will let you know where i got my last batch once i look it up. Got 5 sheets cheap. Was on ebay.
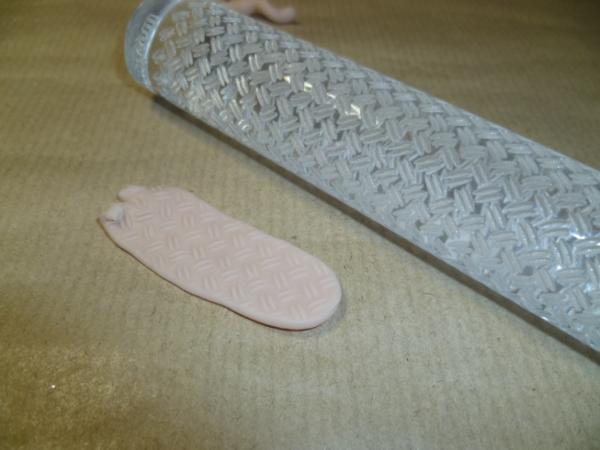
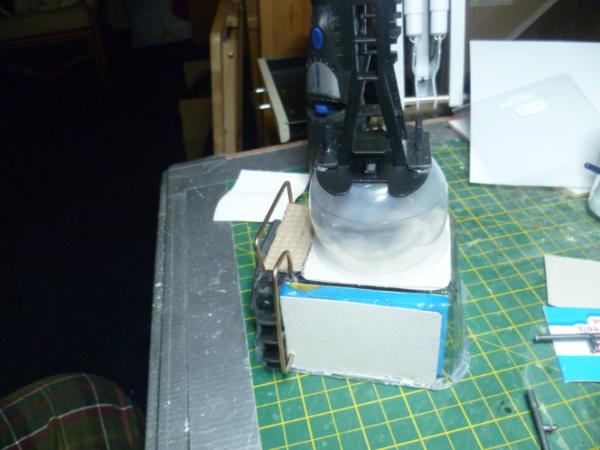
Recently i purchased a roller from Green stuff world which is brilliant. Have made some great panels with it already. I will knock up a little review tomorrow night and show you. Tonight is a bit of a bust. I am just plain knackered so had the yearly bath and off to bed.
I find this excellent and produces really great panels that I can make the thickness I want. If I manage to think about it, I could mould in the rivets etc as well.
I think I prefer this to the sheet material which I find to be brilliant but at times fragile and has no thickness to it.
The sheet is probably cheaper, but not by much to be honest, at least with the sculpey version you use 100% of what you need, with the sheet material especially for Orks who can't cut straight if their life depended on it apparently, you end up with little piles of scrap off cuts that are honestly good for nothing.
Hope that helps a little, back soon with more buildings I think, for now bit busy with a Boaring project on my Ork blog...
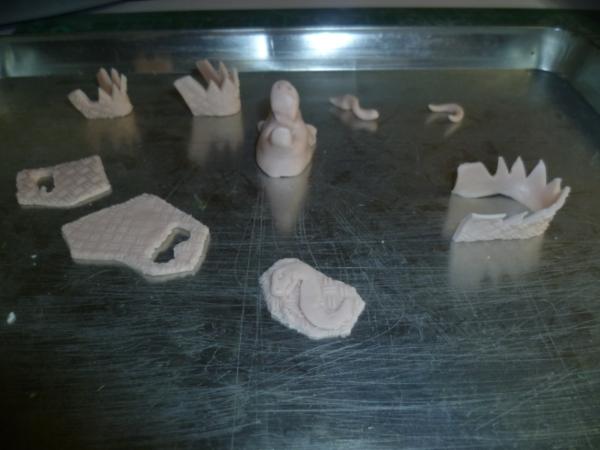
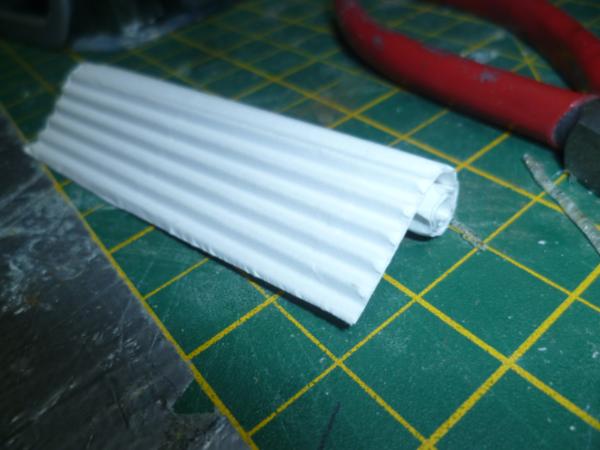
I have oggled over these rolls for quite some time now...Looks super and iis especially interesting to see you bend and cut it fir making metal teef...now that is a selling argument...
@ Ruglud, yup you got it, sorry should have linked it, thank you. And do it bud, I bought there cable/tentacle roller thingy and this roller and has been absolutely worth every penny.
@ Vik indeed, even more when I say that even after baking, if I warm the Sculpey up I can still bend it a bit to mold it to where I want it. They are available in different designs too.
@ EDC Thank you @ Gits, That's easy Gits, consider that sorted...
Sorry no update at the mo, but tonight Pinky we take over the world!! Um well no actually bit busy.
Thanks guys, really need the support, really helps.
@hk1x1, they are great, helps if you wet them or talc them, really solid bit of kit. Honestly for master builders like you these are a must I think. get one and try it.
@Red. Been trying different glues, Evo-stik wood adhesive seems to be working the best, just has to be left to dry. also tried hot glue gunning which works well and is a lot quicker, but is a bit hit and miss at times. And please borrow away, I like the idea myself, looking to fully expand the 3d element of the games, plenty of height, but still very much playable.
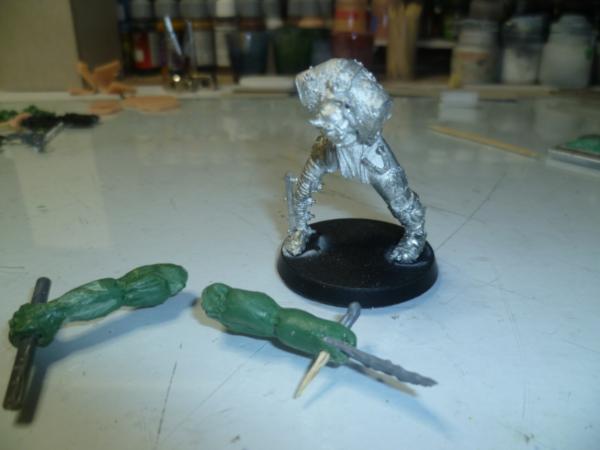
@ Gits, sculpted bud, too big for anything I have in stock.
That looks like the most painful way to carry a knife. Cool sculpt, Cam. Excellent stuff as always. Really dig the textured sculpy tutorial from about a dozen posts back.
Sorry been a bit quiet, been sidetracked by a little project for a friend, don't want to say anything at mo.
Also got rumblings in my head of a idea for the LoER comp, not much time left, but then once I get going on it I will smash it out. Think Graven or Grimdork have got this one, but there are some brilliant works in the wings as always. I will make an entry still, just to be silly.
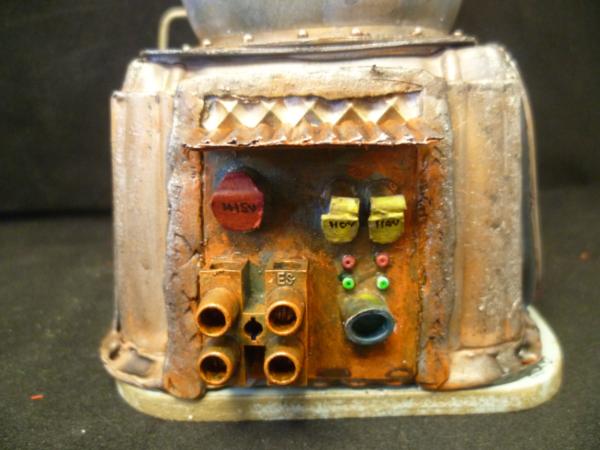
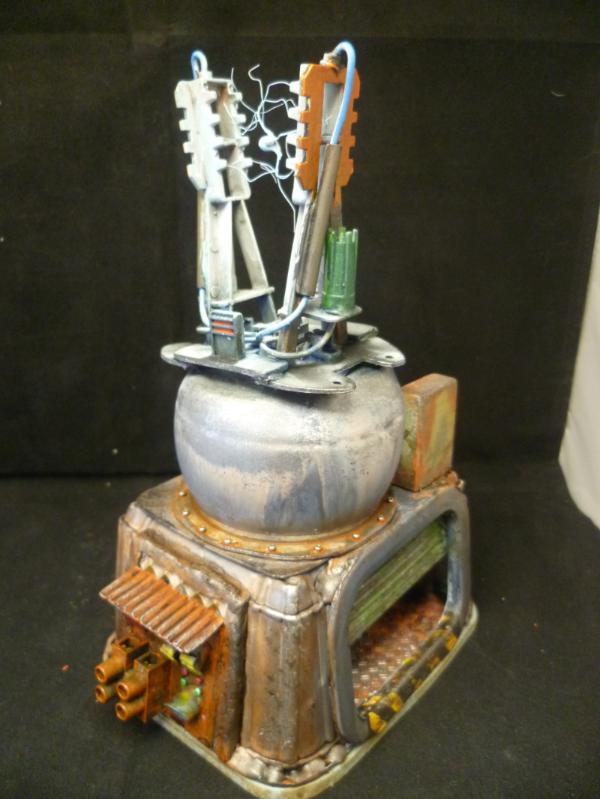
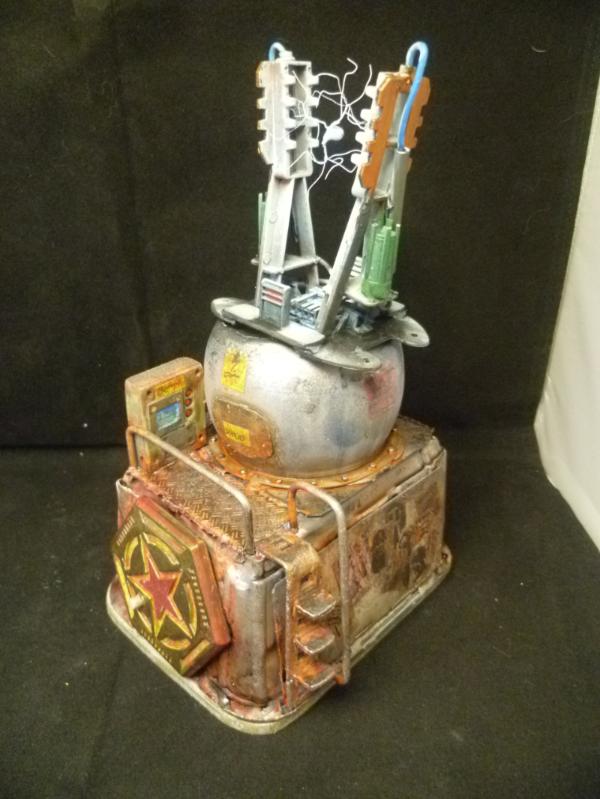
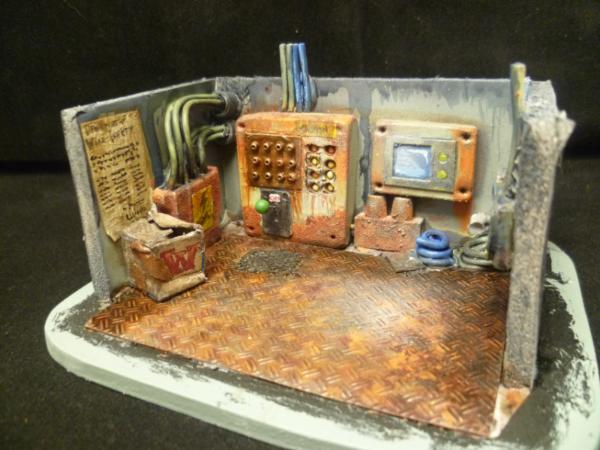
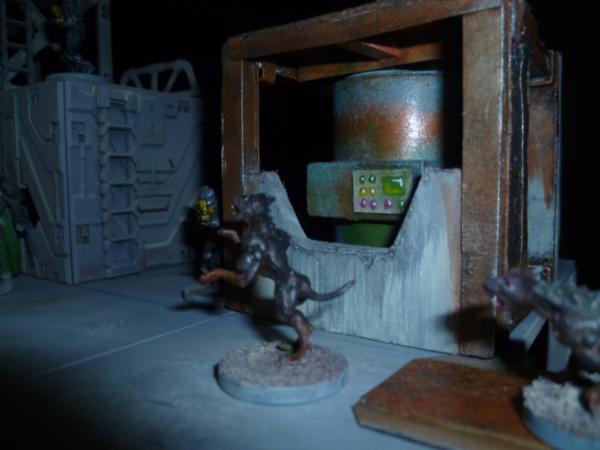
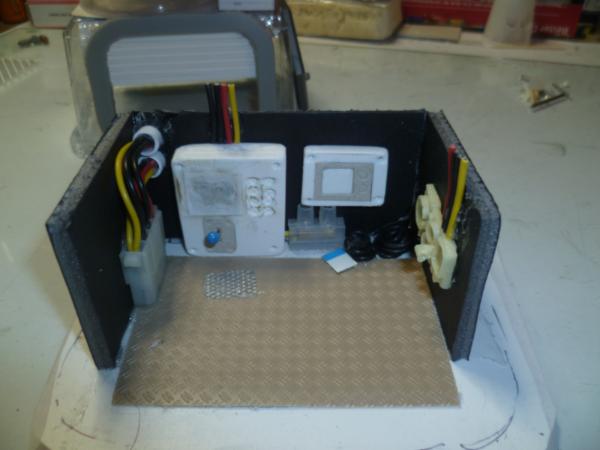
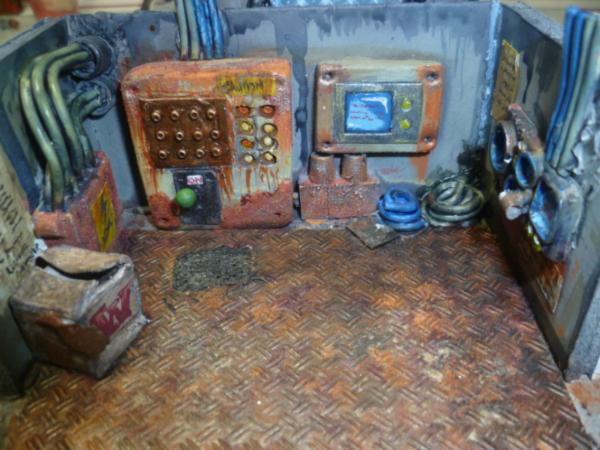
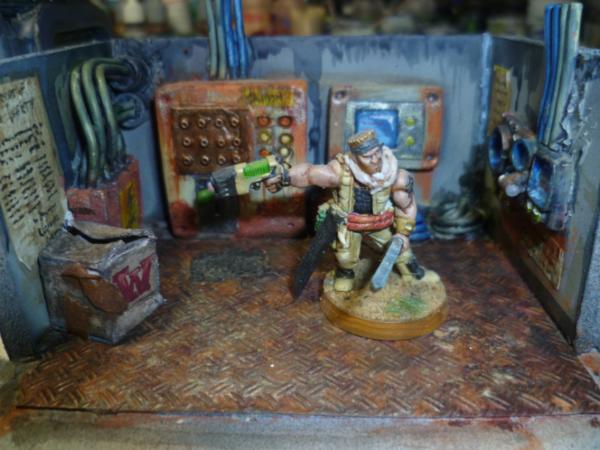
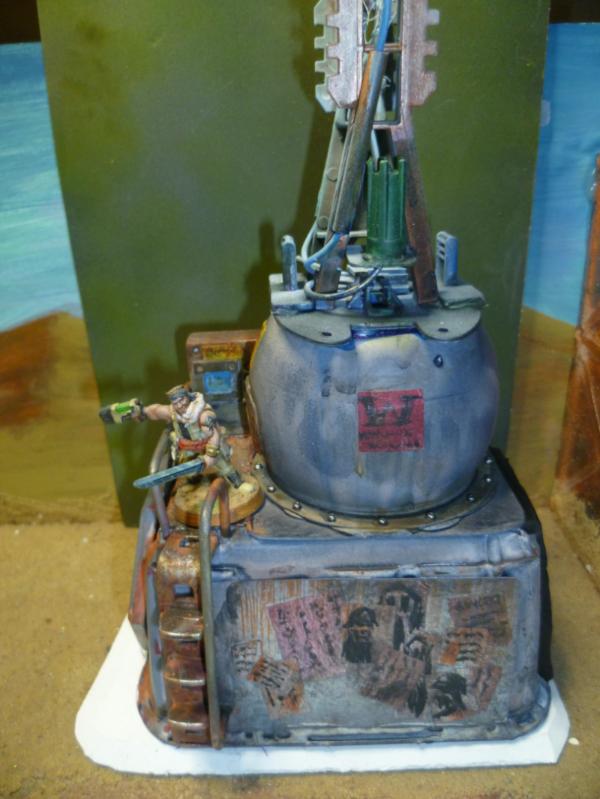
It looks very used/lived in, between the graffiti and the rolled up hoses/wires and the box.. awesome. The screens work well and the arcing electrical bits up top are a neat accent. It's nice cozy little piece, something you'd just roll around in a wargame but in a skirmish game you could see a scuffle inside, or a sniper nesting on the roof.
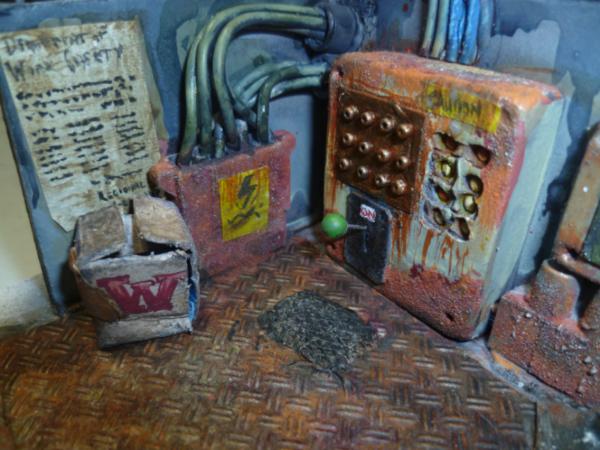
That's excellent progress Cam. Great to see the sergeant swing by to make sure all is on the up-and-up. Box was a brilliant idea and I really like the way you do your monitor screens.
I really like the cardboard box. Overall this thing looks great. I can almost hear the buzzing of the electricity when I look at that detail. The posters are really great, too. Nice job.
Thank you all so much, still working on it, will be finished soon.
@ Red, Luck is the answer, I know that it does not glue easy, hot melt gun nearly melts clean through it, but with care that works, and superglue and Bi-carb is a good combo. Its holding at the moment so happy.
So I have been doing some bits this week just not that much, had a hell of a week IRL and it has been hard going, but....
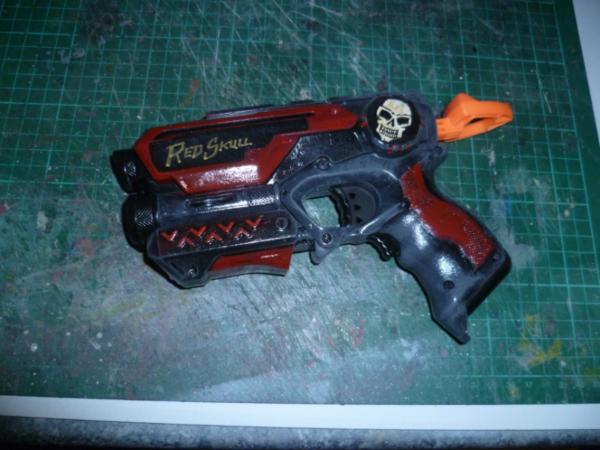
Modified my sons Nerf gun, did a job on the internals, then gave it a lick of paint...
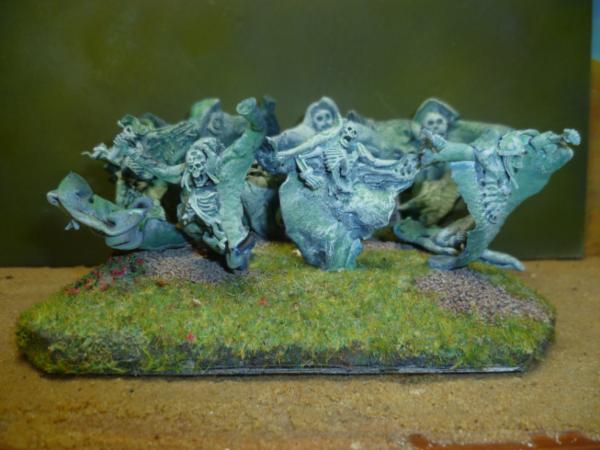
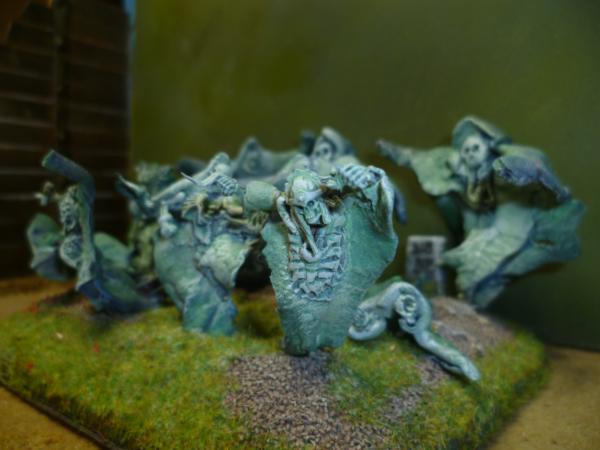
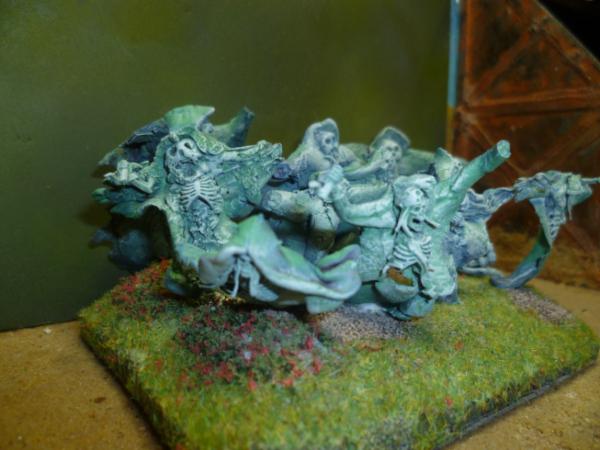
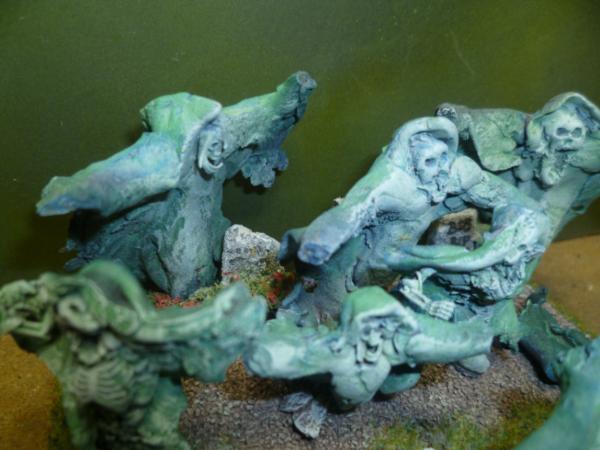
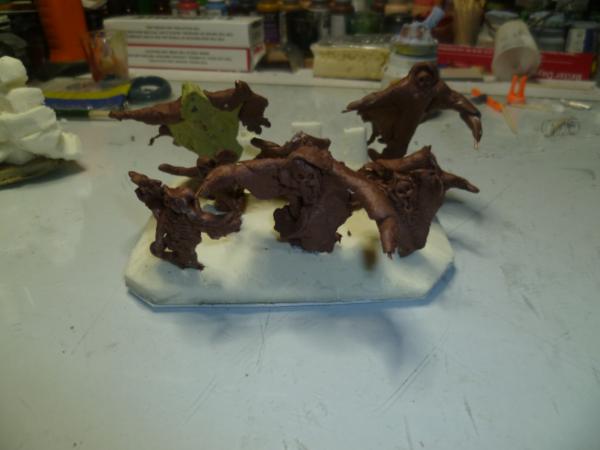
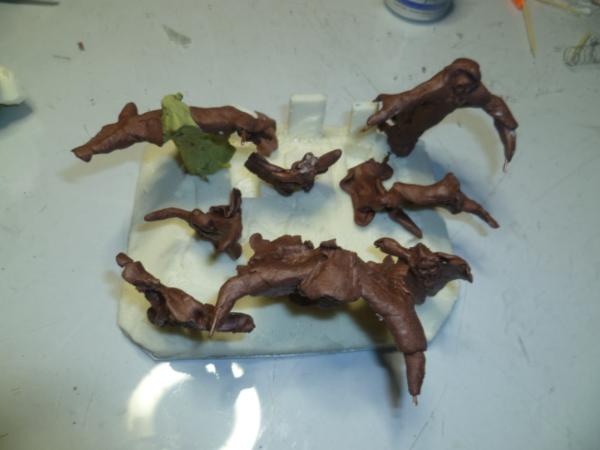
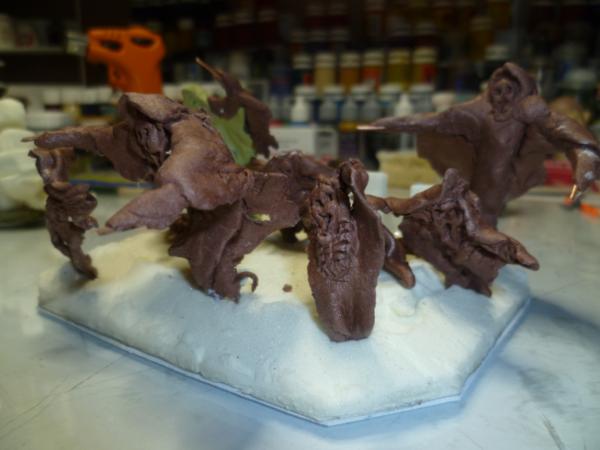
Next is a question, this is a very early wip, I am messing around with some ideas for a Nightstalker army for KoW, not really looked at it fully and properly, but from what i have seen I can make bases up of models and as long as the base is the right sort of size, it is ok. Obviously the models have to represent a large enough group, ..........well enough woffle, please can you tell me if this could represent a Regiment of Spectres....(very early sculpts...)
Thinking about it now, how cool would it be to make the bases have a little recessed bowl or something in them to put a tiny piece of dry ice in and then add a spot of water to it at game time. You'd get your Erie fog of war on the battlefield . Think I'll have to try that on some terrain at some point, maybe just a smokestack or a blown up vehicle.
Hah what a sweet nerf gun. Ehat did you do to the internals? Replace the springS with deadly no longer street legal after market super springs?
Specters looks like a grand start. In KoW base size is of chief import. Technically there's a minimum number or models per base meant to prevent confusion (the max size of the next size down +1, so 11 for a regiment, 21 for a horde, its in the book and online, as are dimensions for all unit types) but that's maybe a tournament concern at best. As long as your opponent knows what's what.
These are really awesome, and the fusion of skeleton and flowey ghost parts makes them somewhat unique. Often you have robed skeletons, robes by themselves, or totally ethereal things, but here we have semisolid skeleton parts within the ghost cloaks. Neat.
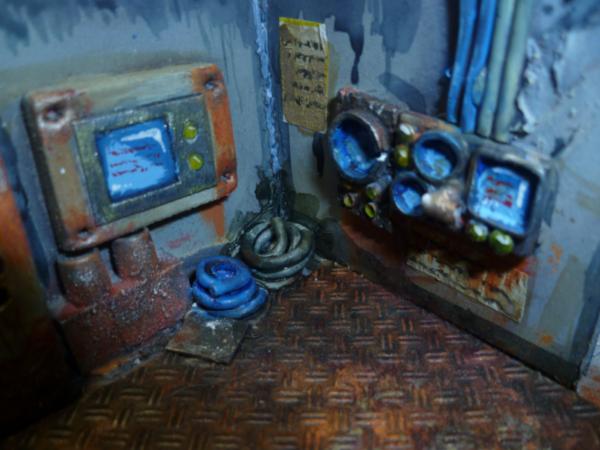
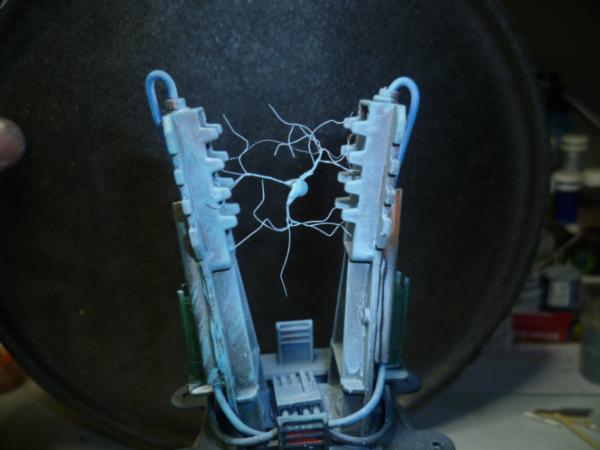
@ Josh Bit of wire from an old molex cable from inside a computer, Stripped bare twisted around and positioned, then a tiny blob of hot glue in the centre. Painted white then some blues then highlighted white. Hope that helps.
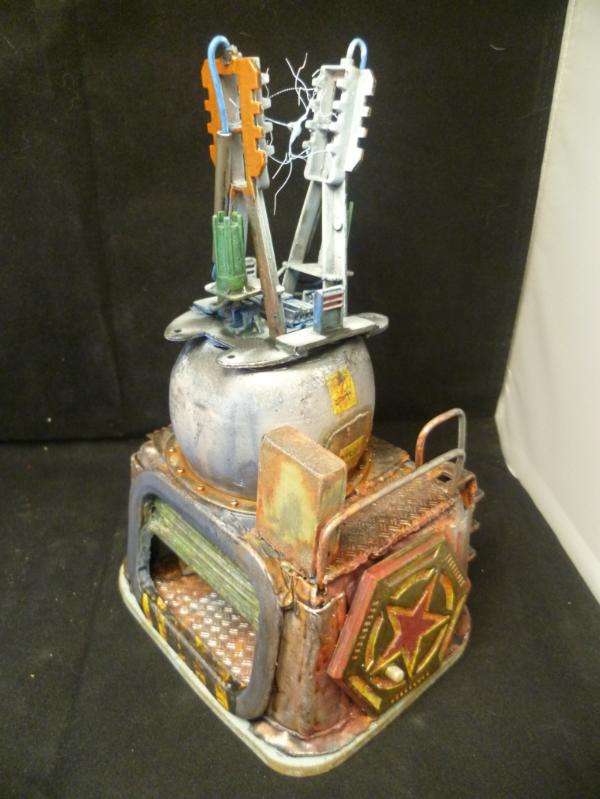
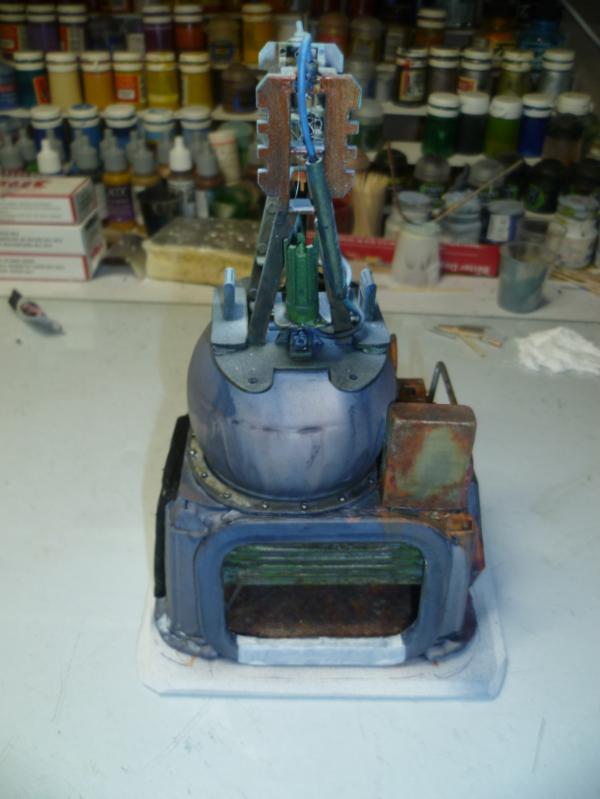
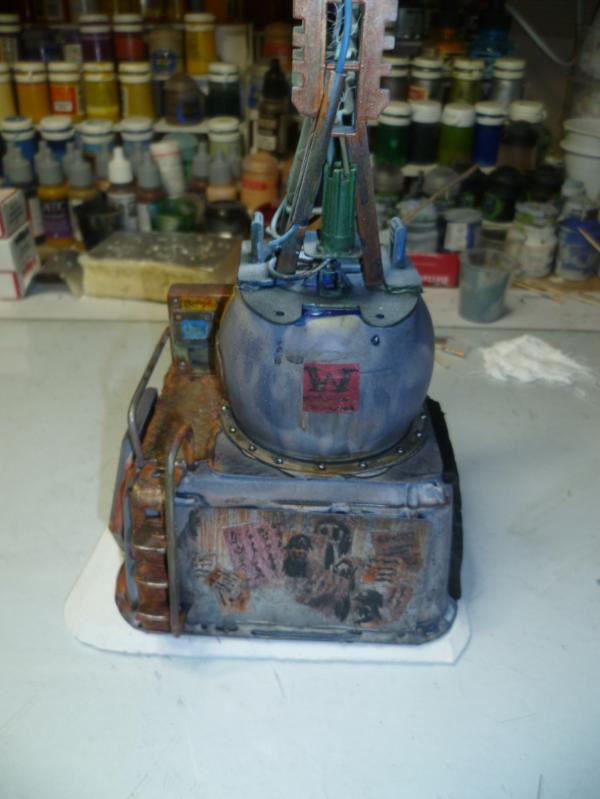
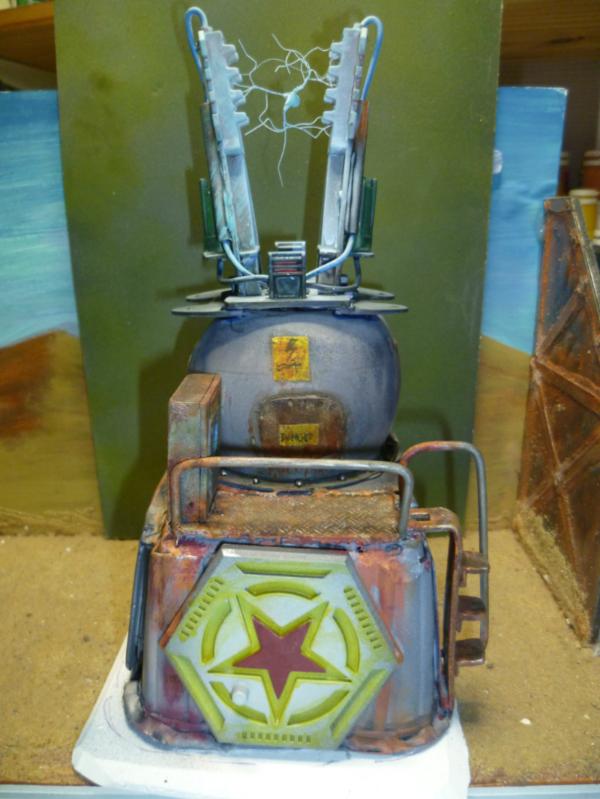
So had to get the comp entry finished, last wall was giving me a bit of an issue til inspiration struck, how about if I put outlets so you can draw power off?
And painted...
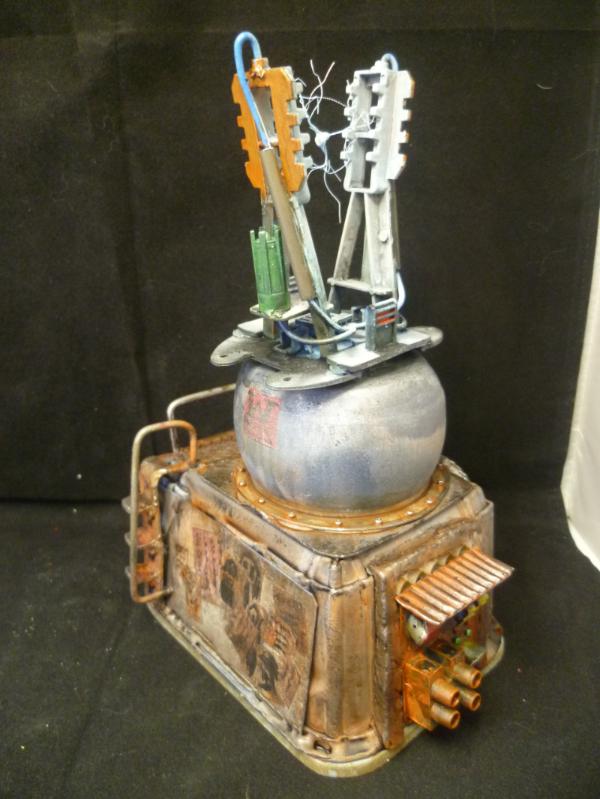
And the final thing, done as much as it ever will....
Interior...
More pics in Gallery.
Thank you for looking and your amazing support.
More Night stalkers coming soon...(first nipping over to my Orkishness blog to touch base with my roots....)
Technical term Chocblock! Least ways that's what I call it.
And the Nerf gun.
Well I dismantled it completely, sanded down any markings, primed with HYCOTE Plastic Primer, then used my acrylics, then it's shiney because I gave it 2 coats of Acrylic Clear Lacquer from Halford (automotive parts shop).
Mods are, removed the air restrictor, and the rod bit at the front that goes up the darts. Also put a stronger spring from another broken Nerf gun in, It's just stronger, no idea by how much. Made some heavy darts for it, and now the blooming thing bruises me when he shoots me. ( which the little bugger does regularly)
No signs of ware yet, after several days of heavy wear and tear.
Next in progress Nerf is a Longshot, going to go a bit crazy and make it look full sniper mode, upgrades to the mechanics and barrel and going to have a go at making it bolt action.
Don't worry though thats a side distraction, models comes firstist...
O.O a longshot sniper conversion...damn...that will be spectacular!
and yep...car spray is probably the way to go for making things last!...
if i was the mek ...which i am not... this would be a cool thing to be able to mod nerfs...i know we have a nerf modding shop here in berlin even... but i am too noobish for this^^
chockblock...hmmm...saved in long term memory...hopefully^^...we call it Lüsterklemme...as it is often used with lights...room ceiling lights...which an old term is called Lüster
I'm always impressed when I see people building really cool terrains/vehicles with a sheet of paper, two screws and a box of toothpicks.
I can't.
I'm jealous.
Thanks all, really appreciate the feedback. Keeps me going.
So couple things going to be happening here soon, first ....well will come to that in a sec, the other is I have an idea for LoER comp, and it will be happening here, just shortly.
Right back to first.....Spurred on by my baffling 2nd place in Nerdy's comp, I have decided to join in this Dakka painting challenge thingy. The competition is really tough, scary stuff. But hey got to have a go so....
This month is Space Marines.
Well I fancy the idea of messing about with Space Hulk. and I have been making a board in the background, I know there are some great models out there, but I have my own ideas of what should be going on so here we go...
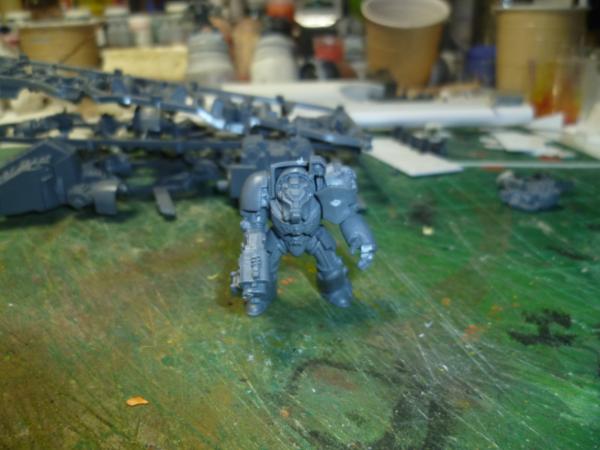
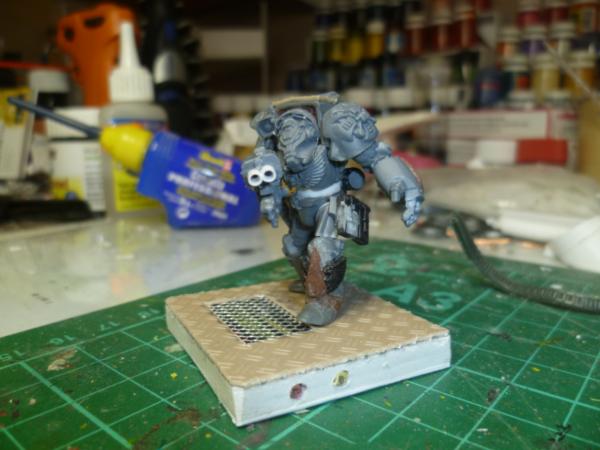
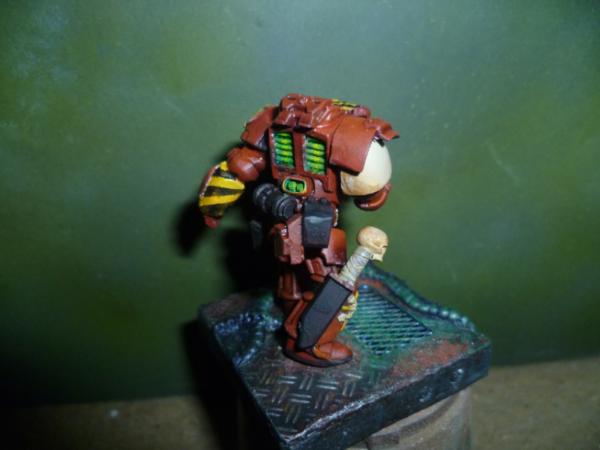
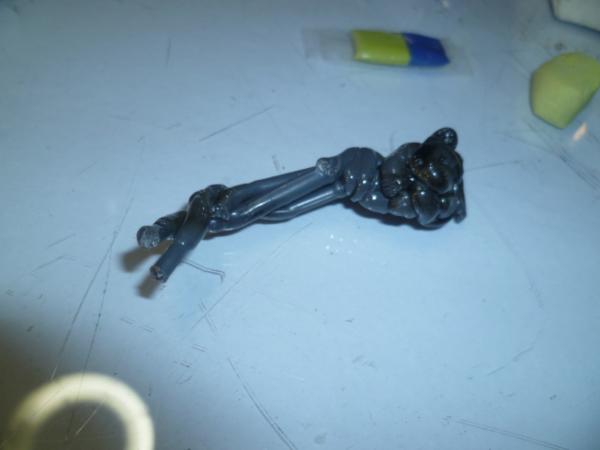
A terminator properly scaled and kitted out for close quarter fighting in dark and dingy corridors of hell. But all I got is some AOB models....
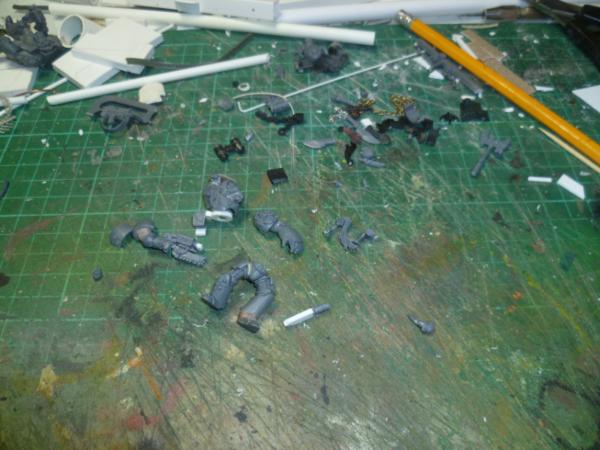
Thats not what I want.....lets sort that out right now.....
My gods its a masacre!
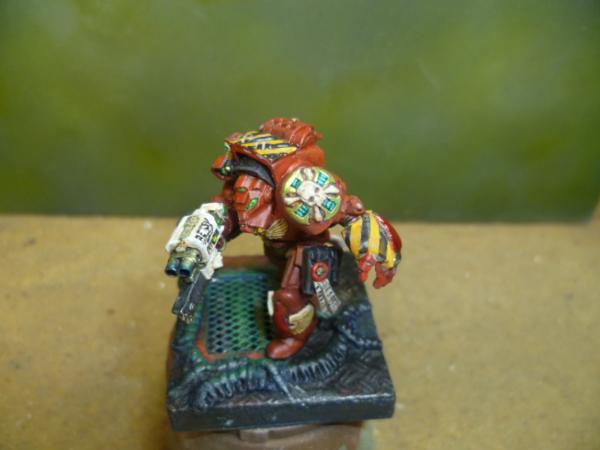
Well here we go, trying to make it short and sweet, the aim is eventually to have a squad, but it will be different, more like the best of the best sent in to clear out the xeno scum, so will not be the traditional squad of termies, but instead a mix match of guys. Probably upsetting a bunch of people with the very idea of it, but hope you stick around. For now, I will be doing one Termie for the comp, depends on how I get on I might do more.
Automatically Appended Next Post: Update already, probably auto do da but hey....
Basic structure glued up, Arms still move about and magnetized the waist...
And just to see how he compares...
Lots of details to add.
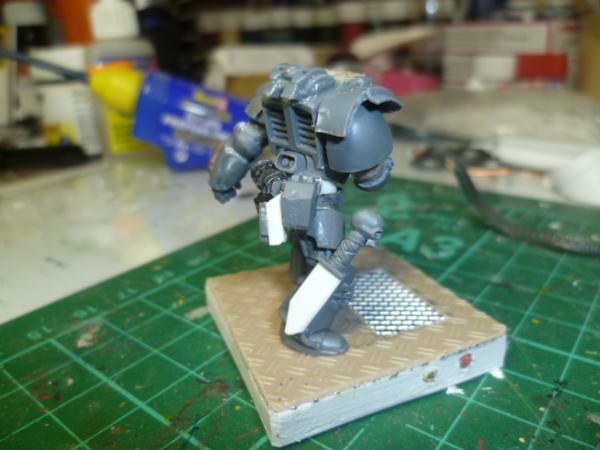
I like the repose, definatly an improvement imho, the left leg might benefit from some green stuff to extend the armour back over the ankle as it looks a little exposed compared to the other leg but that's just my opinion.
There's an art into upcycling AOBR kits...
Definitely watching this with more than moderate interest The thing is, I haven't traveled that road yet out of fear to not be able to put everything together later on...the list of chopped up parts gives me the willies...
Yeah, the Space Hulk idea is just cool - we all remember our feelings when we watched Alien for the first time - dark and dank corridors, narrow, no way to turn around...and never knowing where the beast lurks...
Ah, the chills
Well your reposing of the Termie is excellent. Very dynamic!
I agree with Alaricuk about the left legs lower armor.
I thought of that skit from SNL with Hans and Frans. "We're going to pump *clap* YOU up!
(for those who have no idea what I'm talking about: https://www.youtube.com/watch?v=S-GLO_PydqU)
WOW thank you guys, LOL I plan on doing a bit of OSL but now thinking disco lights!
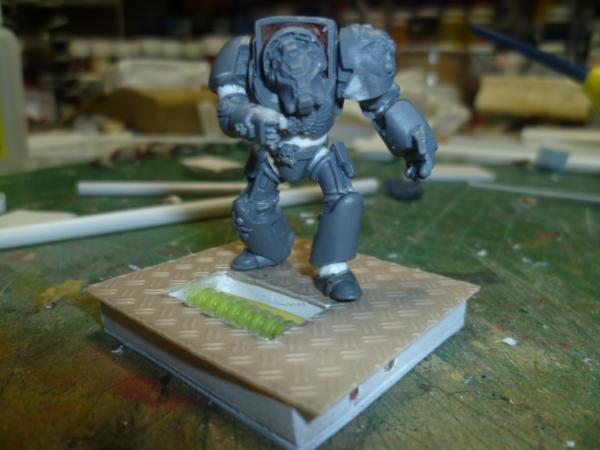
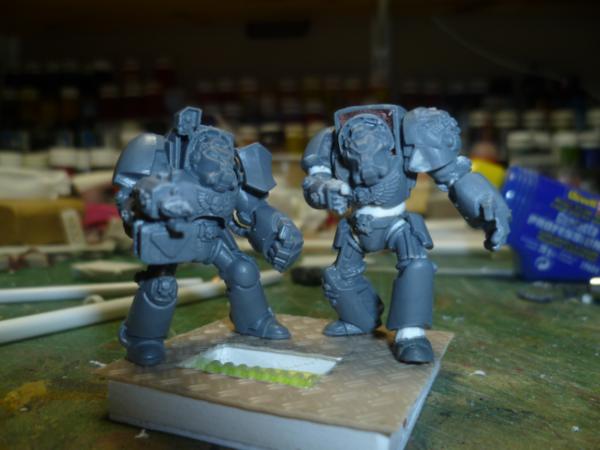
We can rebuild him.....
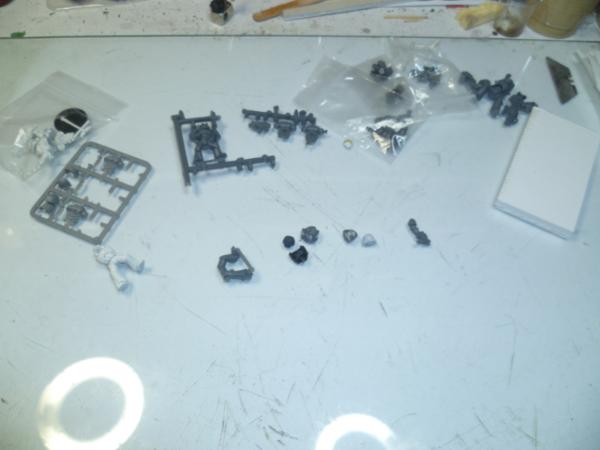
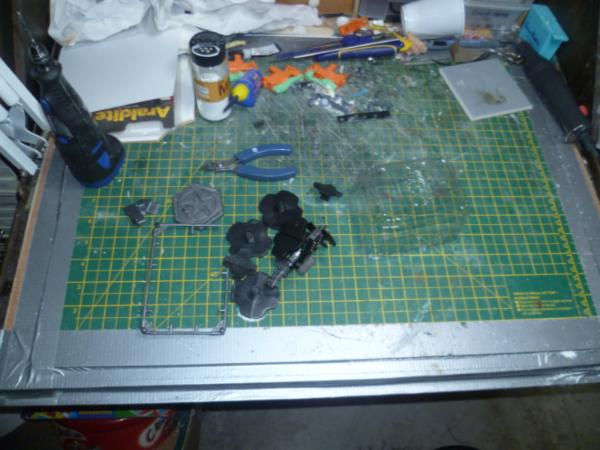
Bits, lots of bits...
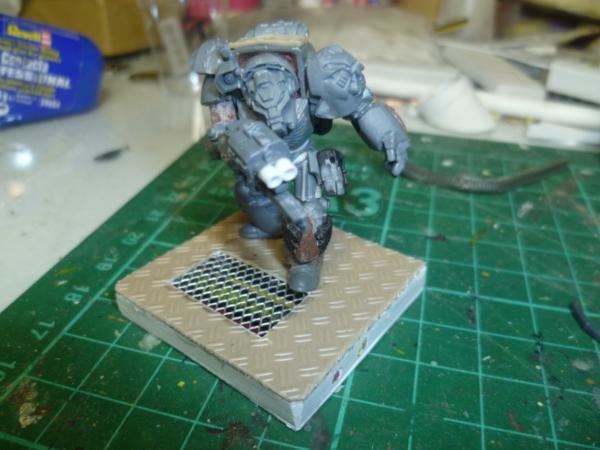
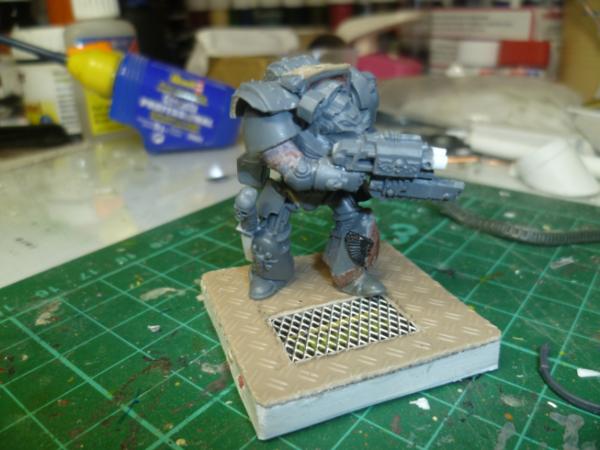
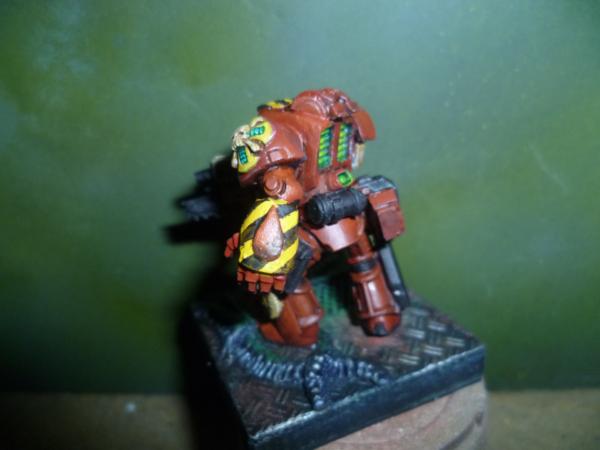
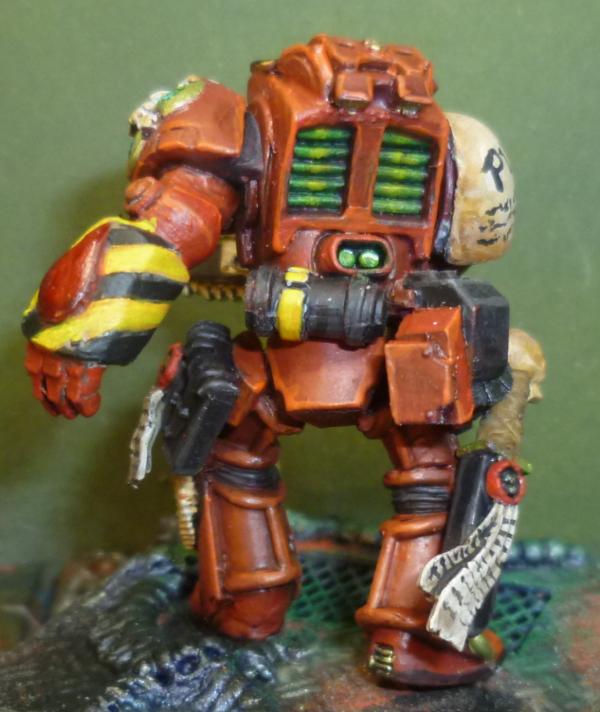
So bunch of shots, before I break him down to paint.....So you can see parts etc...
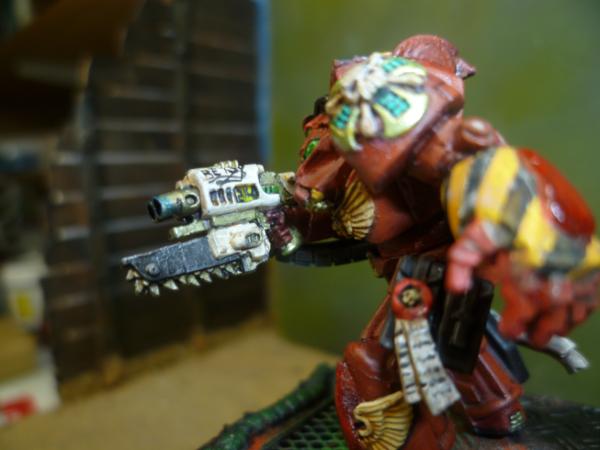
This is definately not the final cut, but a fiddle in that general direction, couple bits I am not sure on, and I have to add a ammo belt feed from his hip mounted ammo pack to the storm bolter. Was going for a bulkier upper look whilst maintaining the idea of nothing sticking up too high to catch on overhead cables and pipes in those tight quarters.
@ Gits Thank you sir.
@ Alaricuk Thank you seems like a long time ago now. I ought to revisit that concept.
@ Vik Thanks bud, and yeah swinging round was what I was going for.
@ Josh, well normal ones look so puny on a termie.
@ Joe Thank you sir.
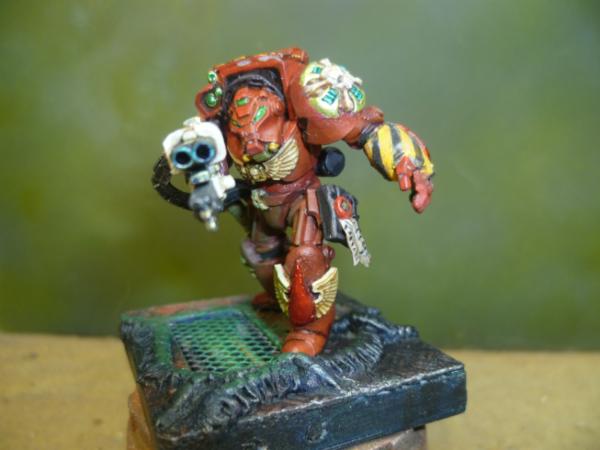
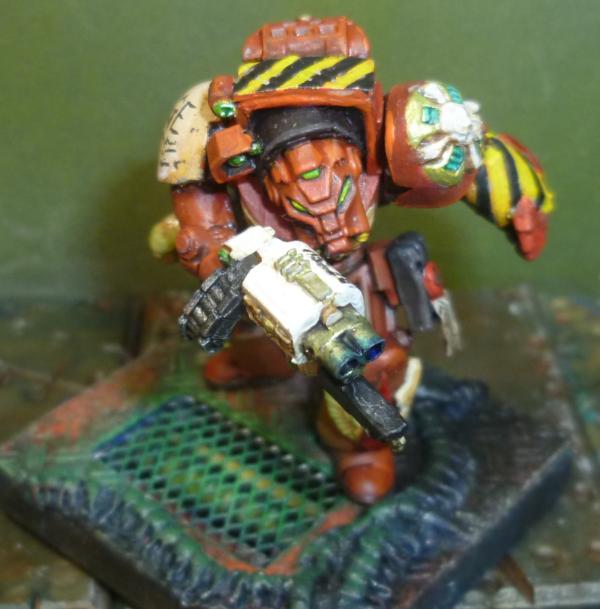
So splashed a little paint around, this is still very early wip, but please feel free to comment.
Bit of a homage to the old 1st edition box cover of Space Hulk, Not truly accurate, but Cam'd.
As always please feel free to comment, all good, even if it is bad.
As always please feel free to comment, all good, even if it is bad.
O.K. Stop painting so fast. Kidding aside, something I've recently learned about my own camera may be helpful to you. Adjusting the exposure value seems to be doing wonders for me. Oddly, enough I increase it for white backgrounds, even though one would think that the opposite. You could try playing around with the values, since some of your photos look underlit/under-exposed. Another thing that seems to be helping me is to put the backdrop farther away from the mini.
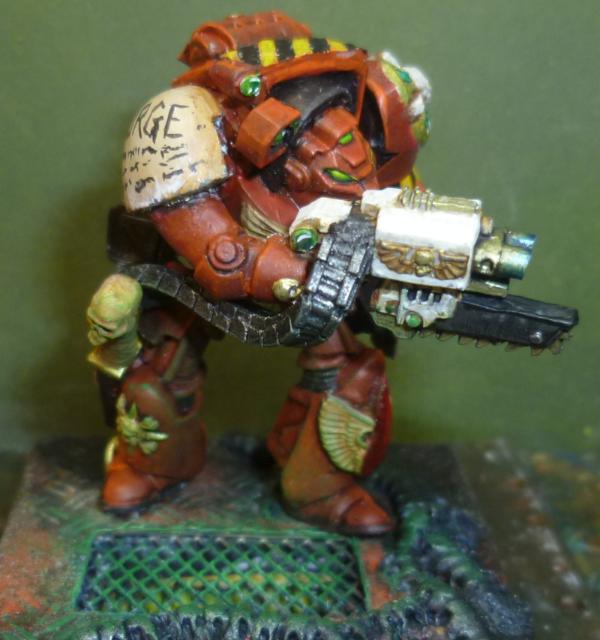
Really need you to scrutinise this for me now, so here you go pic dump....
Thank you for looking, much appreciate your thoughts, I think I see a couple bits, but would be grateful if you see anything, before I enter it. Dead line is the weekend really.
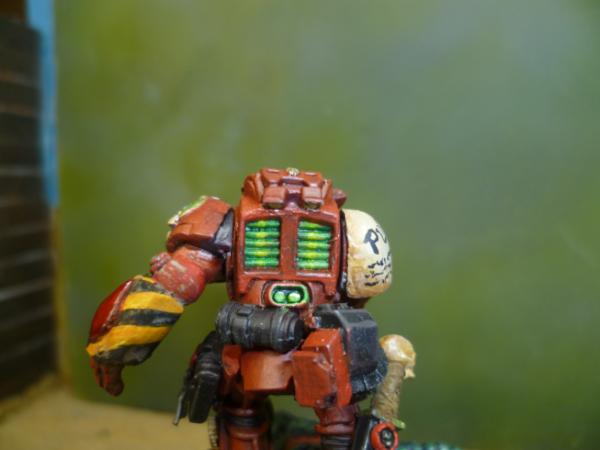
I'm not a huge fan of the green in the vents on his back. I usually go for a metallic, like lead bleacher with black wash or tin bits. Otherwise looking cool, I like the use of the HB ammo feed.
@ EDC I kinda do them that way now, but I am not sure really. I like the idea they have a nuclear reactor strapped to there backs, but then really its just an Air Con unit so probably over doing it.
Just setting up for a photo shoot.
Thank you all for the comments, really appreciate it.
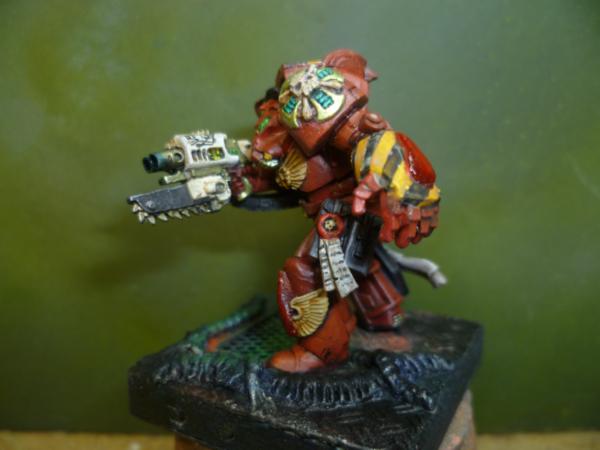
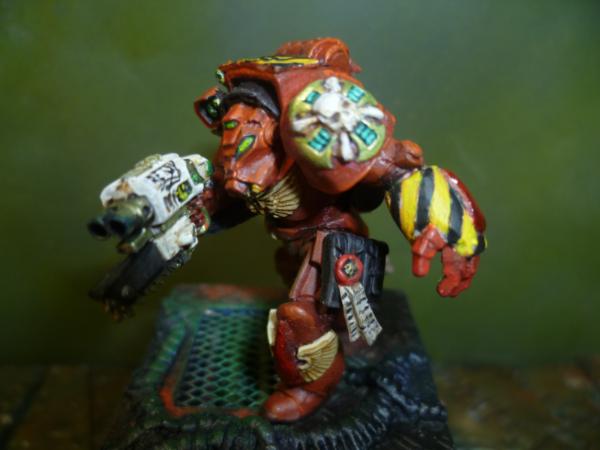
Well after some photos and looking at some of the entries in the competition and seeing Red Harvest's latest work, thought I better push a little harder. See what you think.....
And some individual shots....
And just for laughs, I found one of the old AoBR Termies I had speed painted a few years back and did a side by side, I was looking to show the difference in size and pose, but boy oh boy does it show what you can do if you care about the paint job....
I have enjoyed this, but it was a bit more of a distraction than I really wanted.
Thoughts on my final entry appreciated. Could always have a glance at the gallery and maybe vote! ...cheeky bugger!
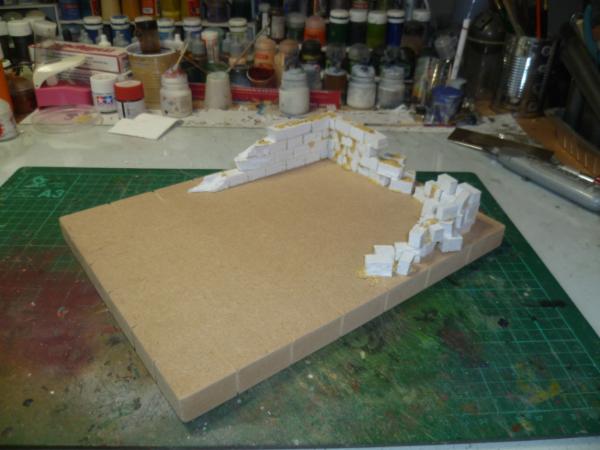
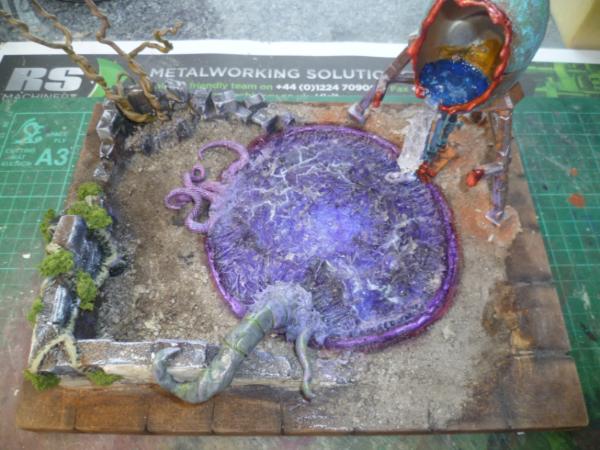
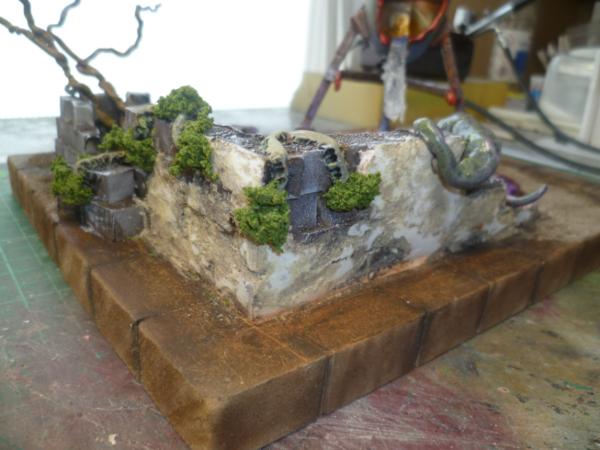
Base...
Bit of stuff and some paint....
Bit more stuff and some paint....
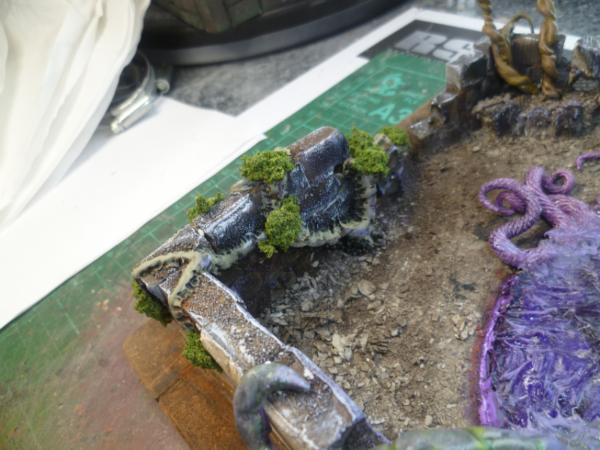
A quick word on stuff!
This may be old news and I have just missed it before.
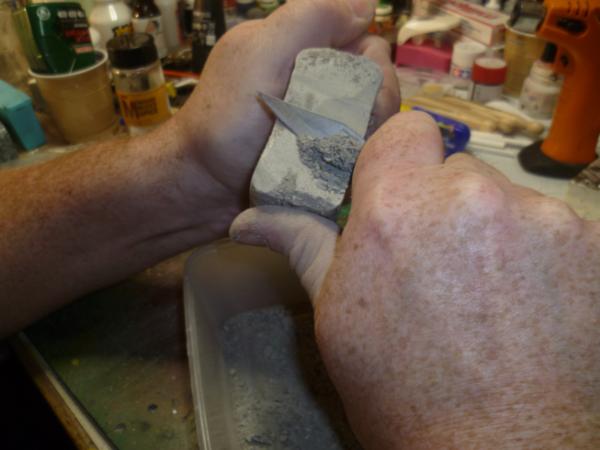
One of the stuff I am using this time was an accidental wonderment. I was going through some boxes and found a container I had some Air Drying Clay in, thought I would do a little sculpting, however the clay was rock solid. I thought well I will do it like and old master and carve it out of the block, but when I started carving this happened....
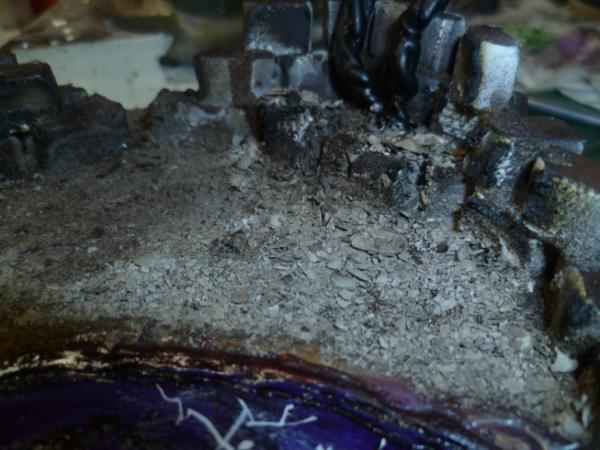
And in place with abit of PVA...
I think it looks spot on for rubble dust and rough stuff. Now I would not say necessarily let some go hard, but to be honest you could. But if you have a lump that has gone hard, this works fantastically. Nice mixed grade.
Anyways hope that helps someone.
Thoughts appreciated as always.
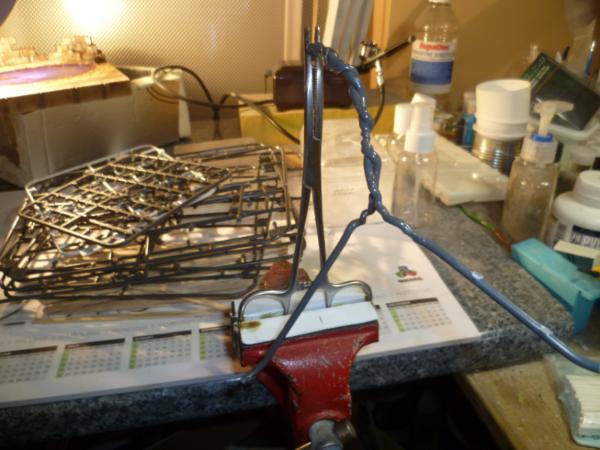
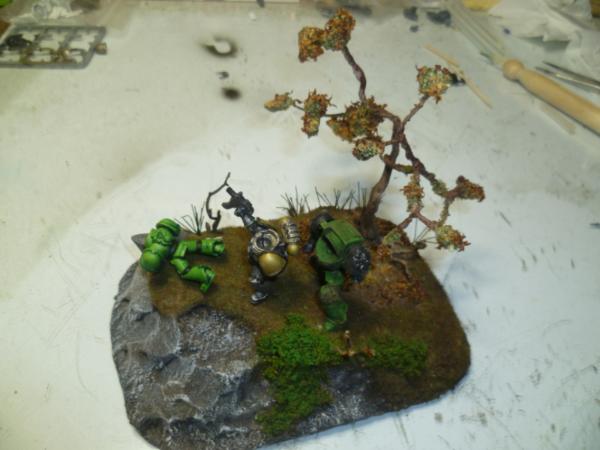
Automatically Appended Next Post: Bit more....
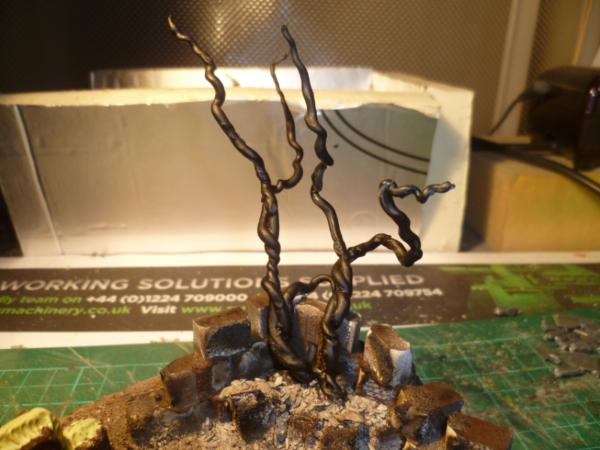
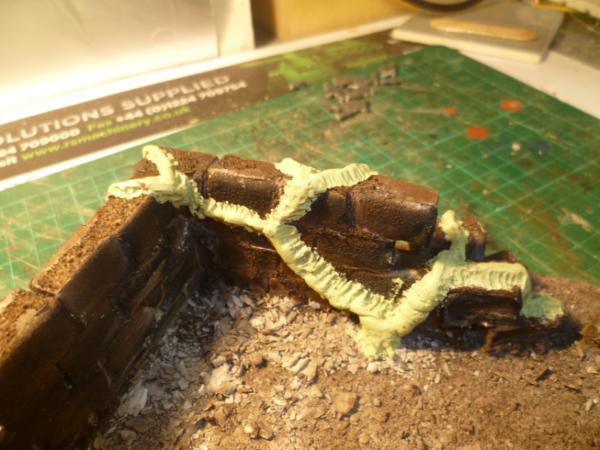
Bent some sprue around....
And made some trees...
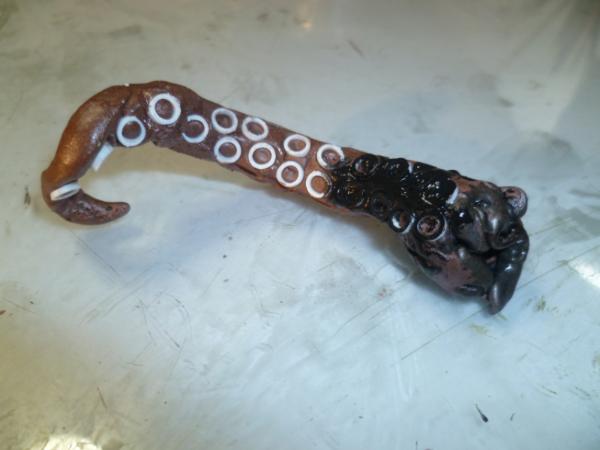
Mixed up some GS and some Milliput and made a vine....
Bent some more sprue....
And cut some bits...
Added a bit of Putty....
And did a few more out of that GS Milliput mix...
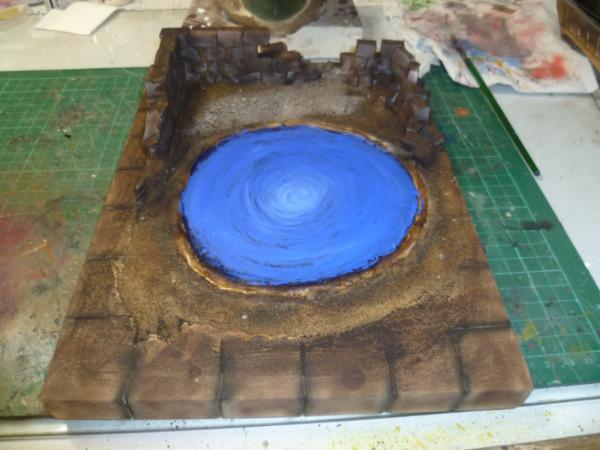
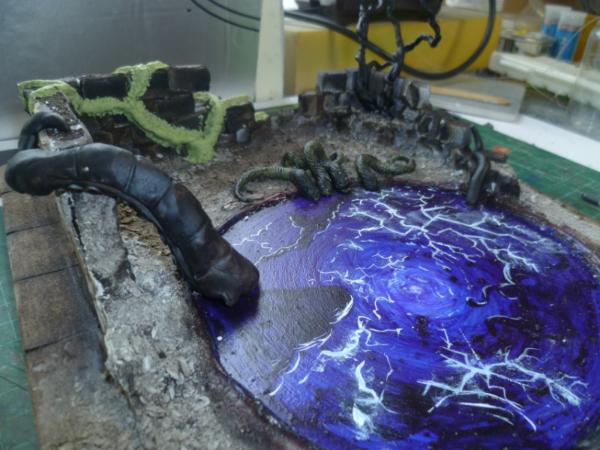
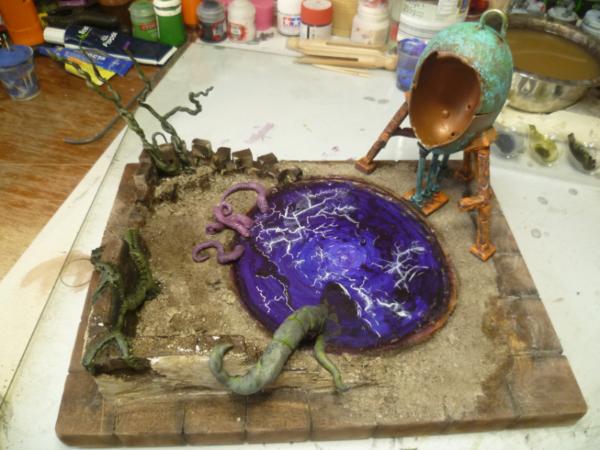
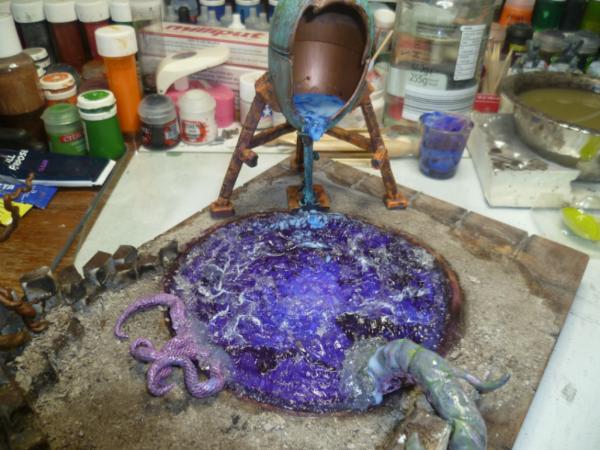
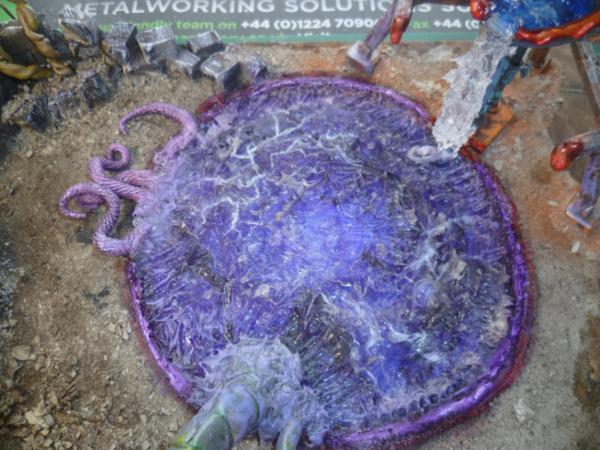
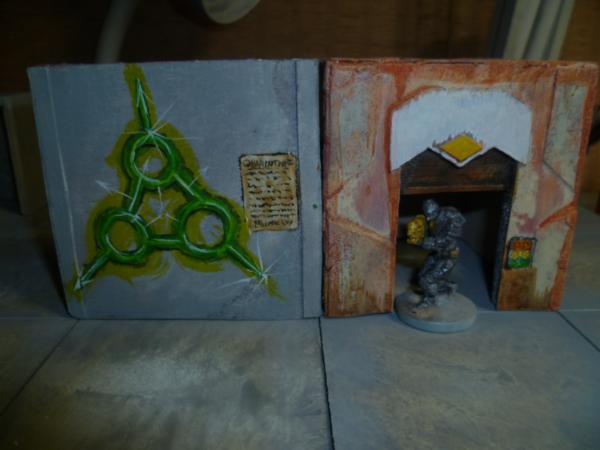
Once I have most of the painting done going to try a water effect on the portal bit to give it depth.
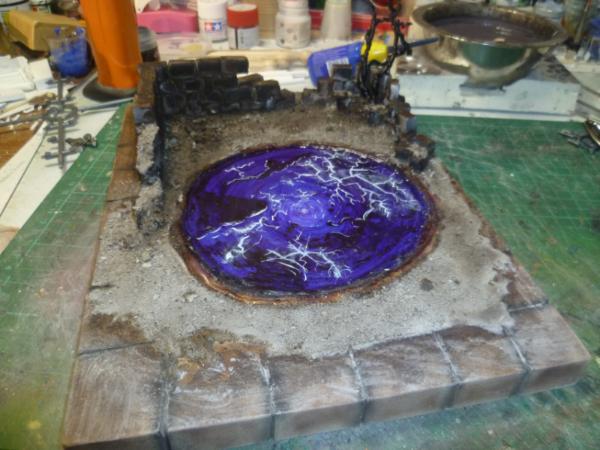
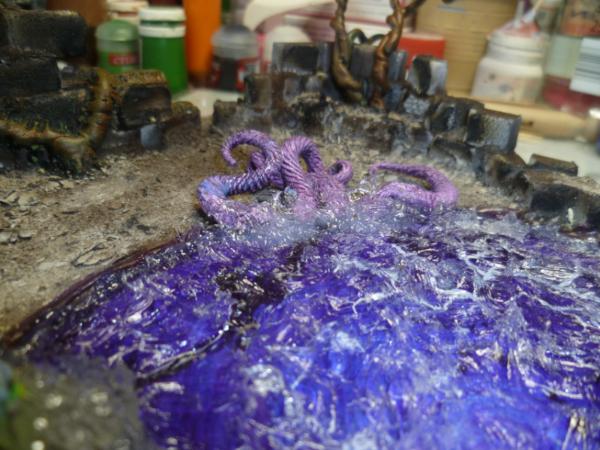
Damn that is coming along nicely. Would it be worth texturing the vortex where the tentacle is coming out of to give it that effect of interacting with the vortex? Or are you already planning that and I am jumping the gun?
I love you for continuously trying out new stuff...this is so ridiculously cool...
My only concern is for your safety though...all these fumes from heating plastics and so on...take care of yourself, wouldn't want a genius like you ruining himself...
Automatically Appended Next Post: Oh and archer...I think he planned just that exactly ahead already, as there is a triangle still all dark on the vortex where the tentacle is coming out...
shasolenzabi wrote: Well, the power armor is powered by a small fusion bottle. Blue is usually electrical, but actual cherenkov radiation shows up as blue. Funny that.
Cherenkov radiation is surprisingly beautiful too. When viewed from a safe vantage.
Nothing to add, except to echo Vik about safety concerns. And that vise, attached to a granite top? Oh, please don't do that again. But the twisted trees did turn out well... Nice idea for the tentacle suction cups too.
Note on safety, you may see me doing stupid things on here, I by no means advocate such behaviour. ALWAYS cut safely, ALWAYS use a well ventilated space to do any activity where you might generate fumes, do not spray paint in doors and above all preparation is the key, don't use a blow torch in a messy area.
Having said that we are mostly adults here, and what you do in you corner of the world is up to you, I hope you are responsible enough to know your limits and to be careful, this is a hobby, not worth burning the house down for.
Next:
@ Archer Indeed texture is coming, just done it in fact (no pics just yet) scary moment.
@ Theo Thanks bud much appreciated.
@ Vik Indeed I enjoy thinking outside the box, trying new things, hoping to inspire. I honestly do take some care, though please see above, I would say to people to always be safe, I have abused my body for so many years I am probably beyond the point of worrying. And thank you for your kind words, always a pleasure to have some response. And thank you for your concern, I do take the message on board.
@ Graven Glad you like it.
@ Red Again thanks for the concern, I do appreciate it. The Vice is semi attached to a chipboard counter top with a laminate on it, it is not actually a granite top. Thank you I do like the way the trees go, I know they are not everyones cup of tea, but by the time I am finished they are quick and easy and look good enough.
@ EDC Thank you sir, 10 seconds under the blow torch then twist together like you would wire. Recommend gloves and pliers. Do not over heat it.
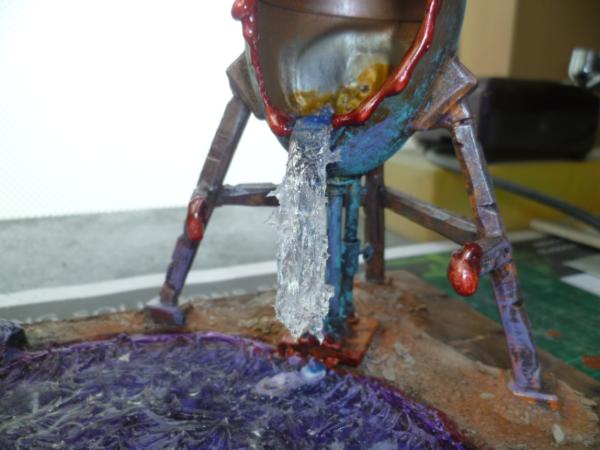
And finally a little update...
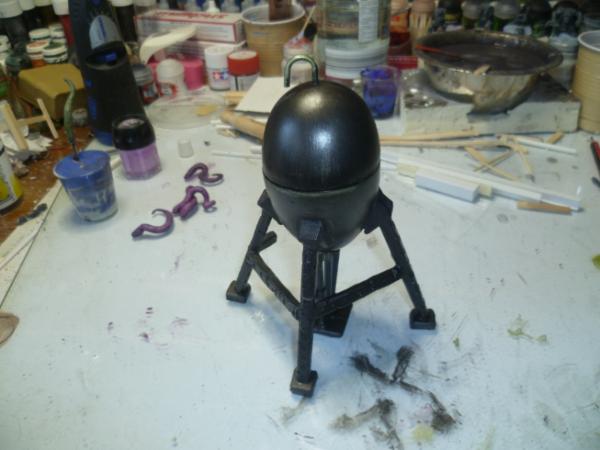
Got a huge bag full of these...
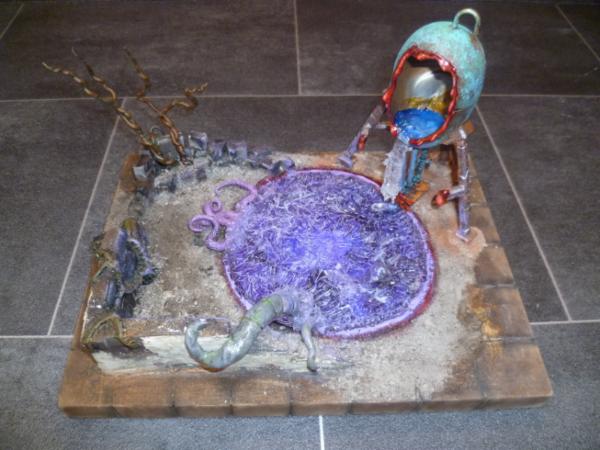
Added a few details and got a water tower...
Added a little paint....
And in position...
Will put up some more pics soon so would appreciate a bump.
Thoughts as always welcome, on all subjects including safety, I do not mind, and it makes us all a bit better. Take care, and see you soon.
That cut, though you showed it a pic or two earlier made me nevertheless flinch seeing the last pic... now there is a story forming in that scene you're creating here...I am curious about how great you will work for that vortex effect that's building up here...
Thinking I might have a hand and arm coming out the other side grabbing for the water tower. Also I will be making the front metal part look like it has been melted off, still glowing red hot.
Well we will see if I am nuts or not. (OK more nuts than normal!)
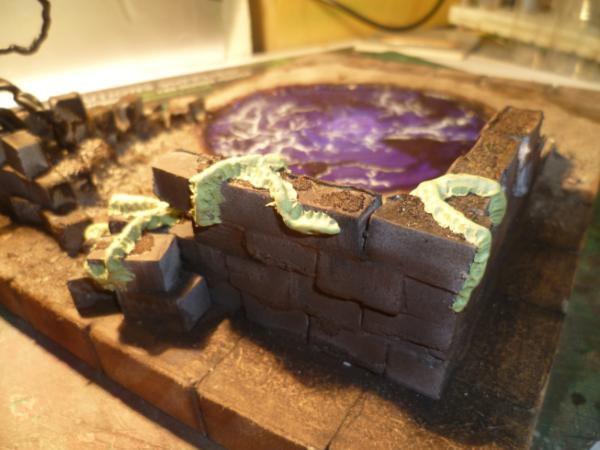
Using a clear silicone sealant to try an effect......scary.....
Thanks buds,
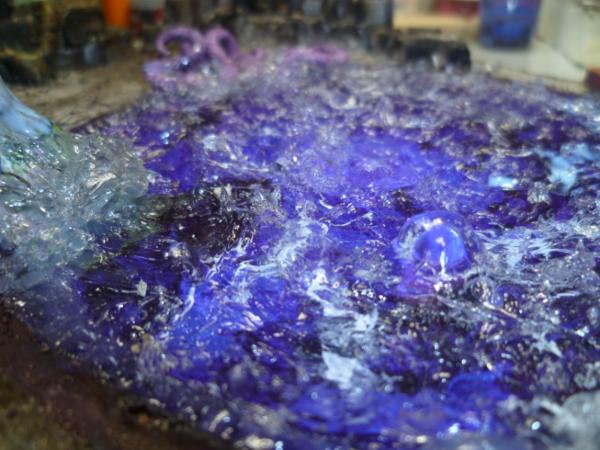
@ hk1x1 Thank you @ Vik Truth is I had dry brushed some very light purple onto the tips of the silicone waves hoping to highlight them a little, with the flash it cancelled out the scene underneath completely.
So a note on the silicone. I went on the net and watched a couple videos about water effects, would love to give credit but I can't remember, but there are some amazing modellers out there. Anyways noticed some using silcone sealant. I saw this product in a store the other day and thought it is worth a go. EVO-STIK 007 CRYSTAL Multi-Purpose adhesive and sealant. Cost me £9.
It is a bit strange coming out the tube, almost thick and rubbery to start with. You can smooth it off, or sculpt it a bit like I did with a stick. Took about 4 hours to set to a point of touch dry. You can paint it once on, it is very crystal clear. I had put a dry brush on it and it took it beautifully. However I did not like what I had done, so this morning I took a tooth brush and some water to it and scrubbed most of the drybrushing off. Took a good scrub, but it worked. I wish now I had not made the surface quite so rough, but that it my fault not the product.
I would recommend this product, it was easy to use, completely safe, apart from to say, once it is on, that's it, it ain't coming off.
Some pics after a clean up....
Oh and started to add some foliage...
Thanks for dropping in, hope the quick review is helpful, thoughts as always appreciated.
The silicone really stays clear? I thought it would cloud up a bit. Hmmm, I do have some lying around. I foresee some experimentation in my future Excellent tip, Cam.
One quick thought. Could you use it to make something, say, like a tentacle, look slimy?
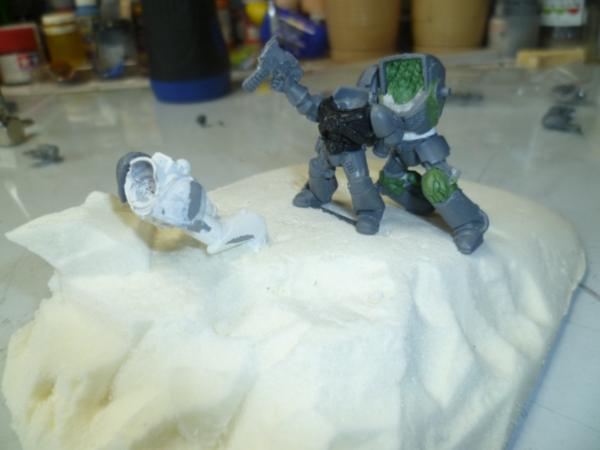
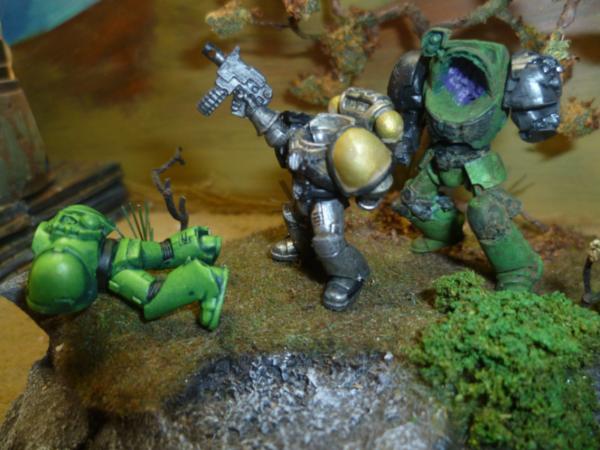
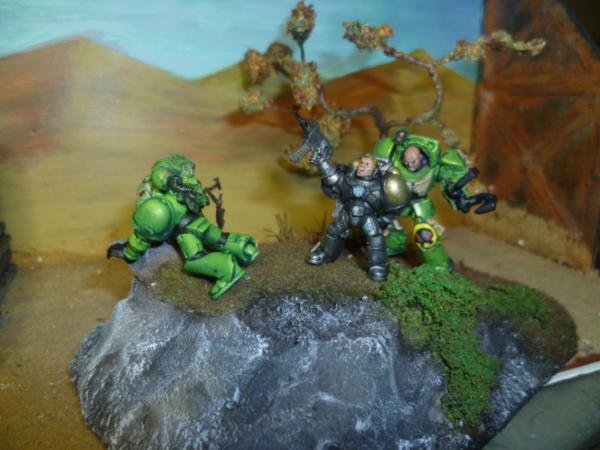
So theme is:
"Old age and treachery will always beat youth and exuberance."
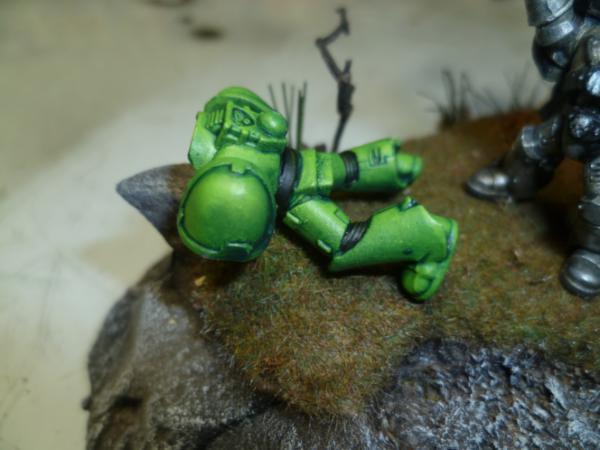
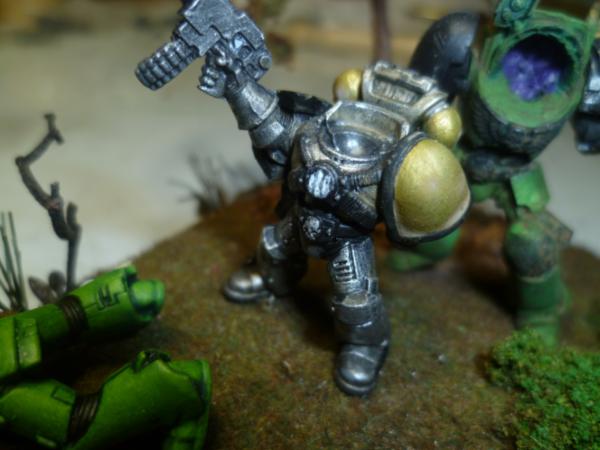
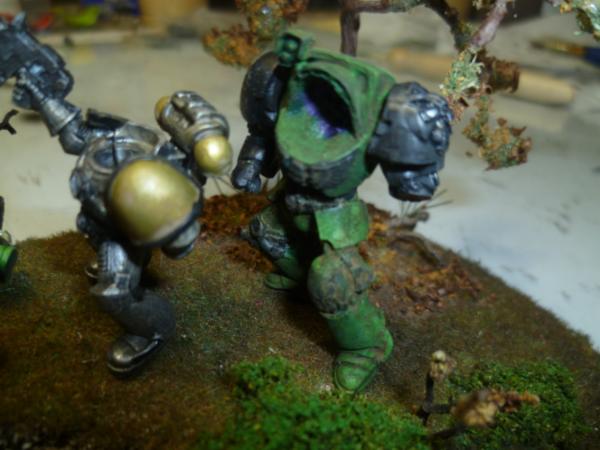
So I have a young Astral Claw celebrating victory over a Mantis Warrior with a Mantis Warrior Terminator stabbing him in the back. Hope that about covers it. Might have some more bodies lying around to depict the battle.
Thank you all guys, much appreciated, really helps.
Little progress, everything is still being worked on here....
Looking at the termy being dirty and old, weathered. other too representing youth, clean and crisp. A little upset because the pics have shown up under the flash and close inspection that a sepia wash has dried a bit white, will sort that.
Beautiful blending on the downed MW. Don't think I've seen you take that kind of care with your blending before... kudos for trying something new and doing such a good job on it!
It would Appear so...id like to enter it perhaps myself simply because I've never painted any mantis warriors before. Cam, I'm loving what you're working on here! Sorry it's been a while since my last comment! The green to yellow looks great man and as usual you're pulling out all the stops on construction and set building. Great stuff from a a creative mind! Love it!
@WP & beebop: Yes, there is a mantis warrior competition again. Check out the first link in my sig which will take you to the rules. You'd be welcome to jump in beebop!
Looking great Cam. That terminator reminds me a bit of the one you did last year. Very excited to see your entry come together, stick with it!

 Like the direction you're going with the bamboo though and intrigued to see further progress.


 Also, never, ever plant bamboo or mint. Weeds, they are, and darn near impossible to eradicate once they get started. Excellent idea for bamboo though. Definitely gonna borrow it.


 And I guess Baal but aren't they
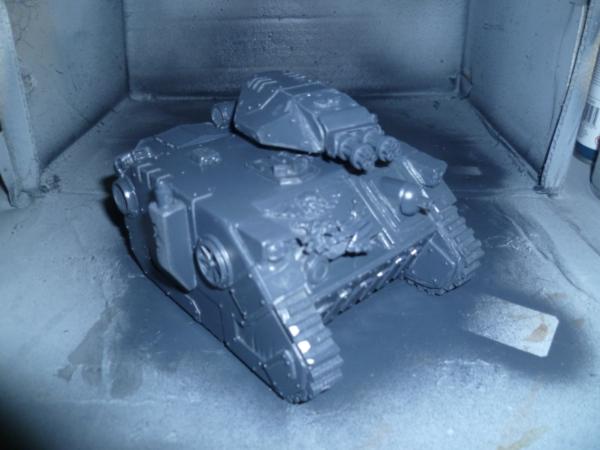

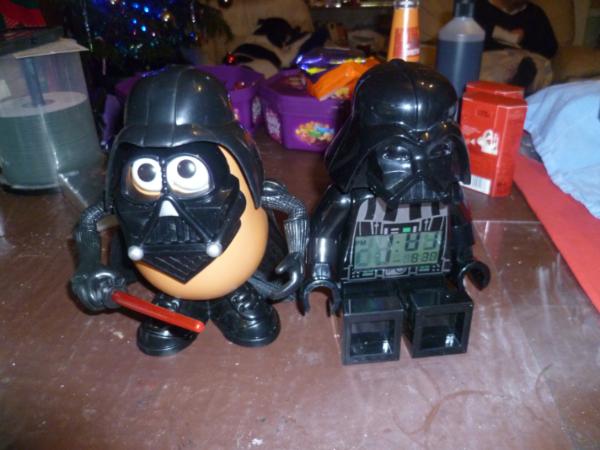
 potatoe head Vader can't beat it

 and monday i will have to start working again...
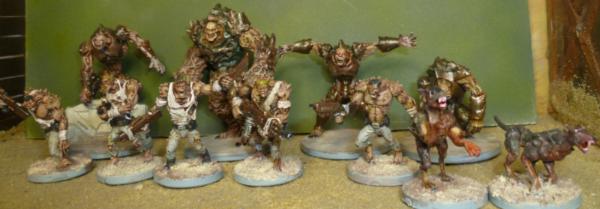
 I want to buy a chicken now
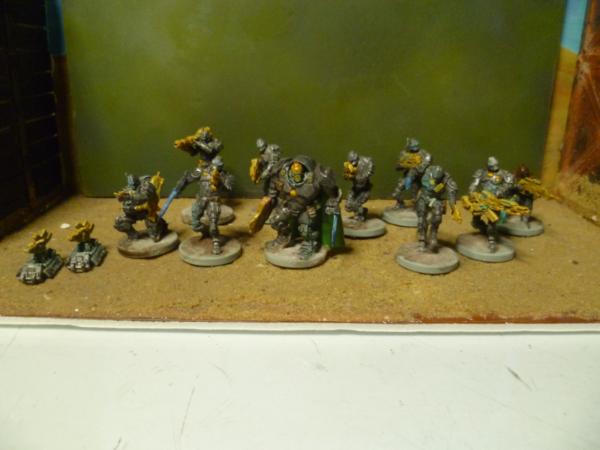


 . Think I'll have to try that on some terrain at some point, maybe just a smokestack or a blown up vehicle.