while i like jakes modular idea i had a thought cross my mind...why not make a coat of arms with a handy rivet gun? to show the tool for our craft? wouldn´t that make sense for a more general/all purpose look?
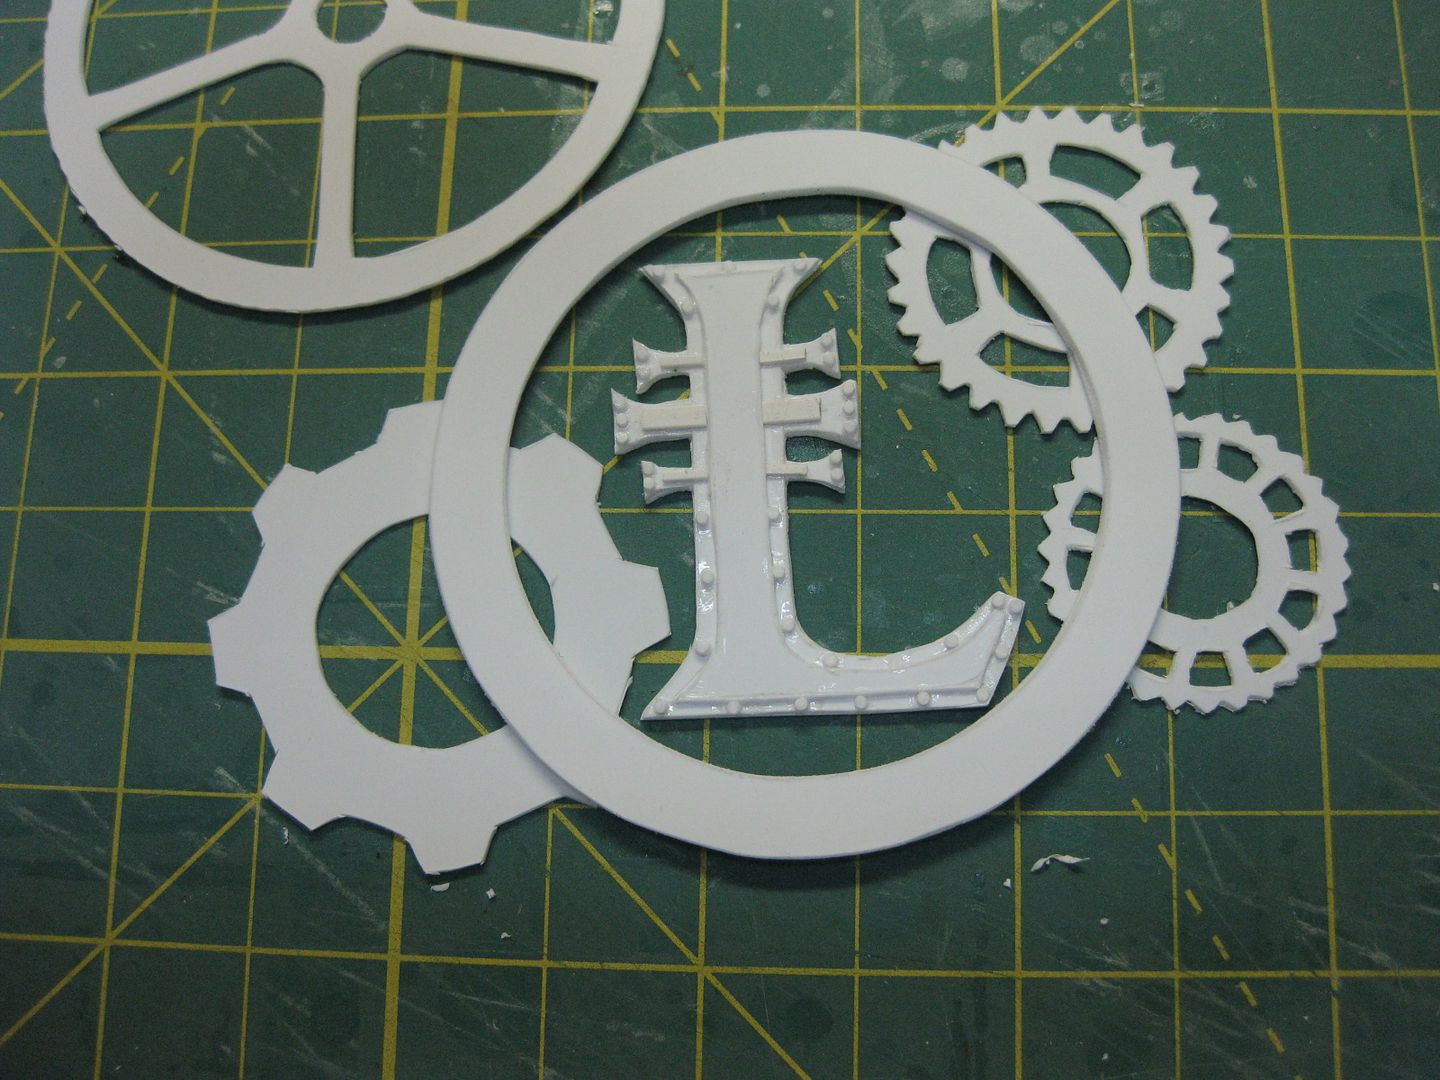
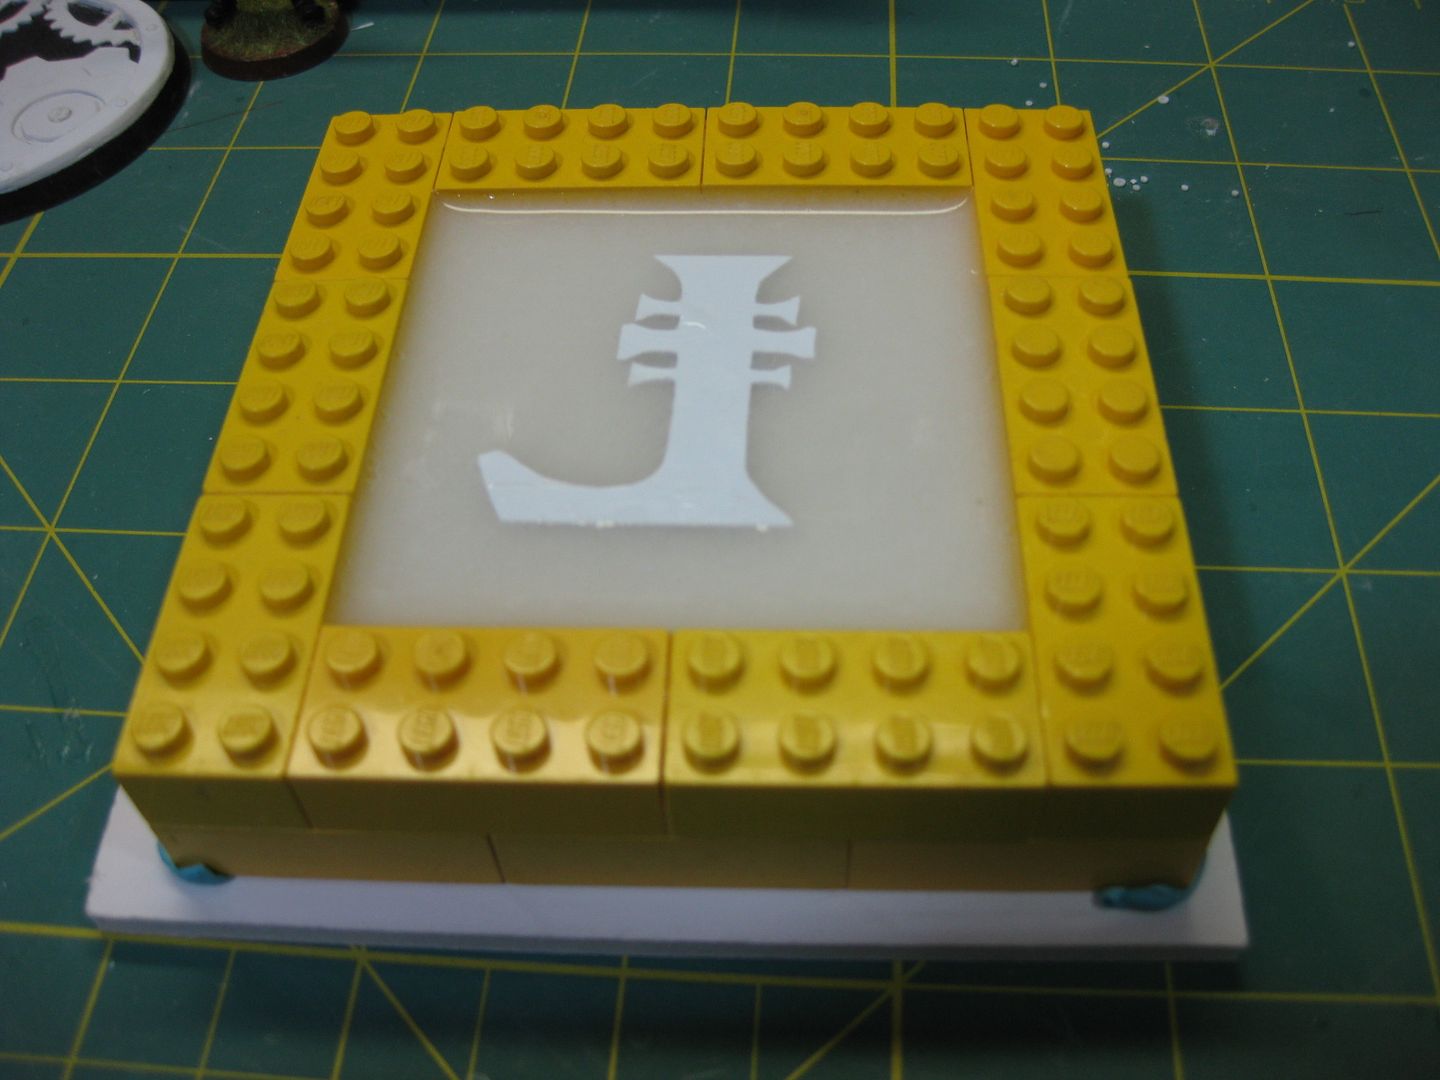
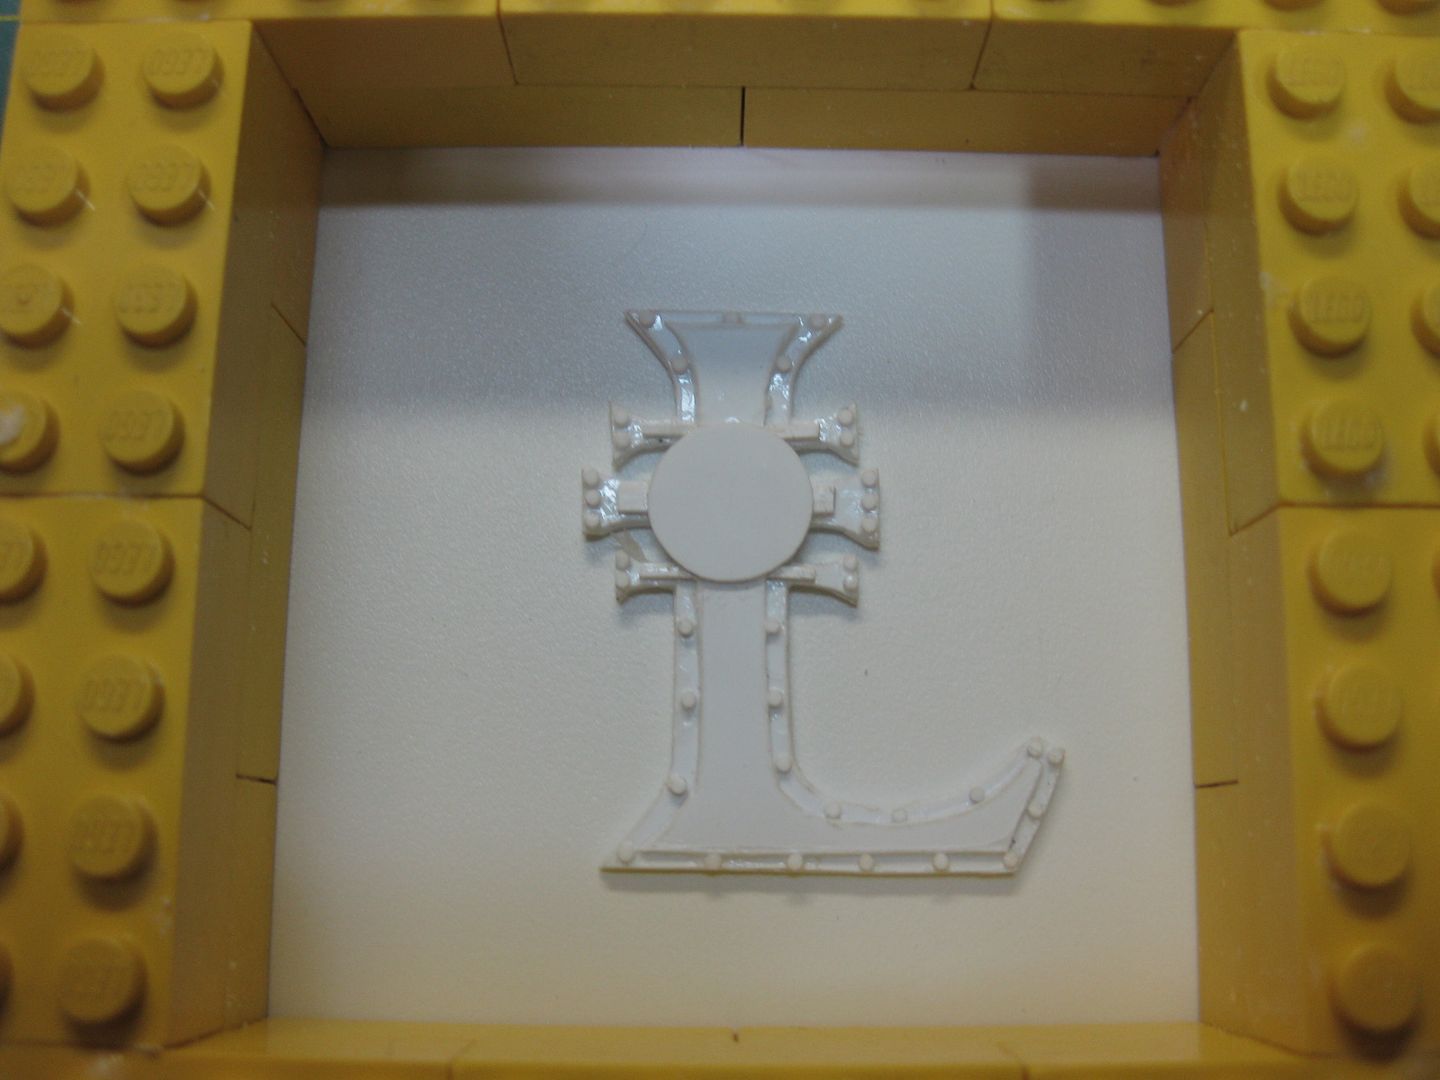
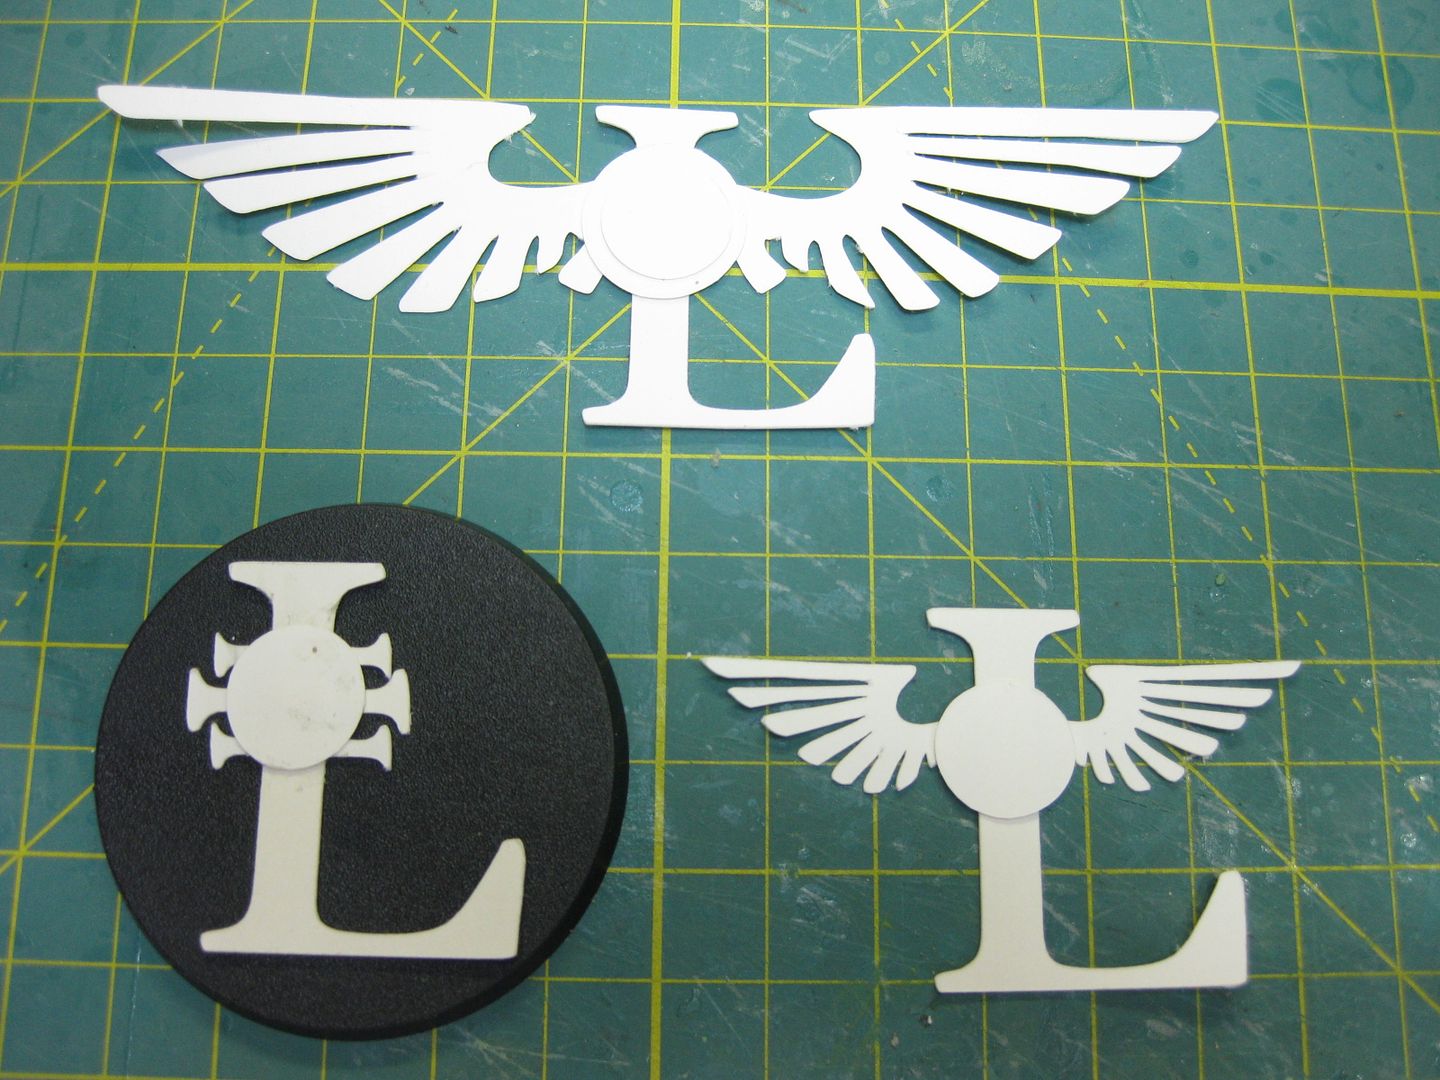
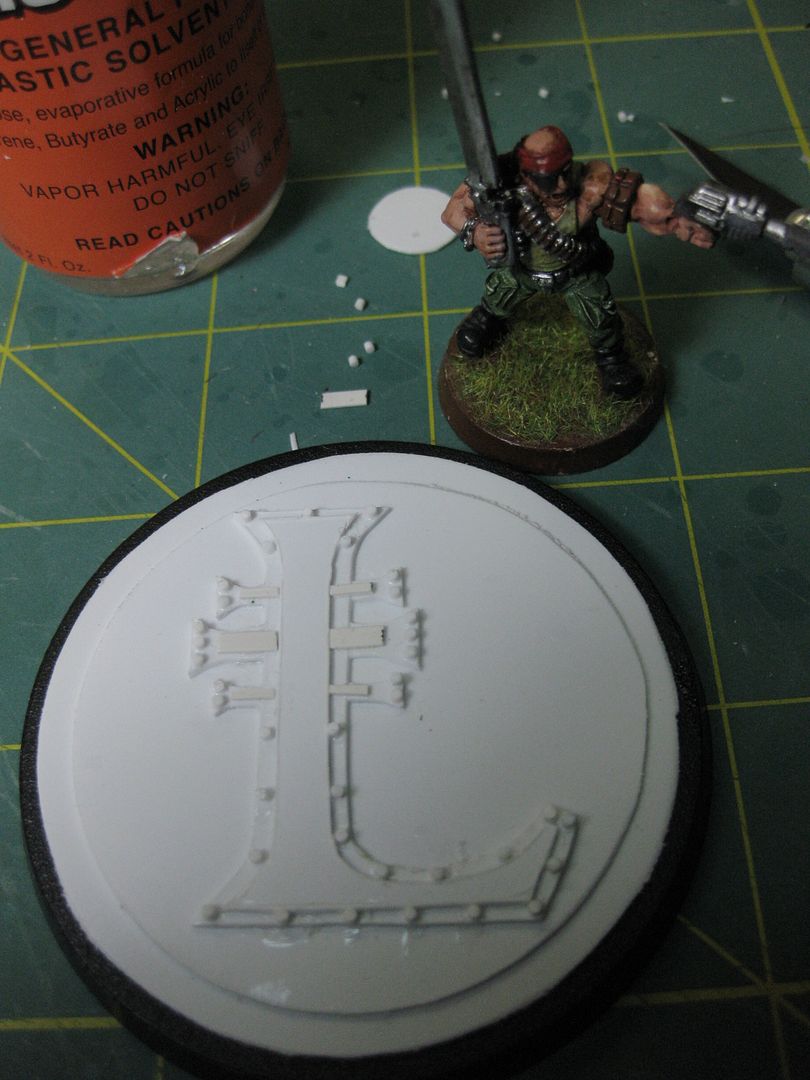
I suppose League Members could adopt their own Personal Heraldry icon (or paint whatever they want) for the center of their Logo, why not? I'll leave it just a blank circle on the base, but I'm going to include the skull cutout loose, just because it is a font and I like it, and because I can
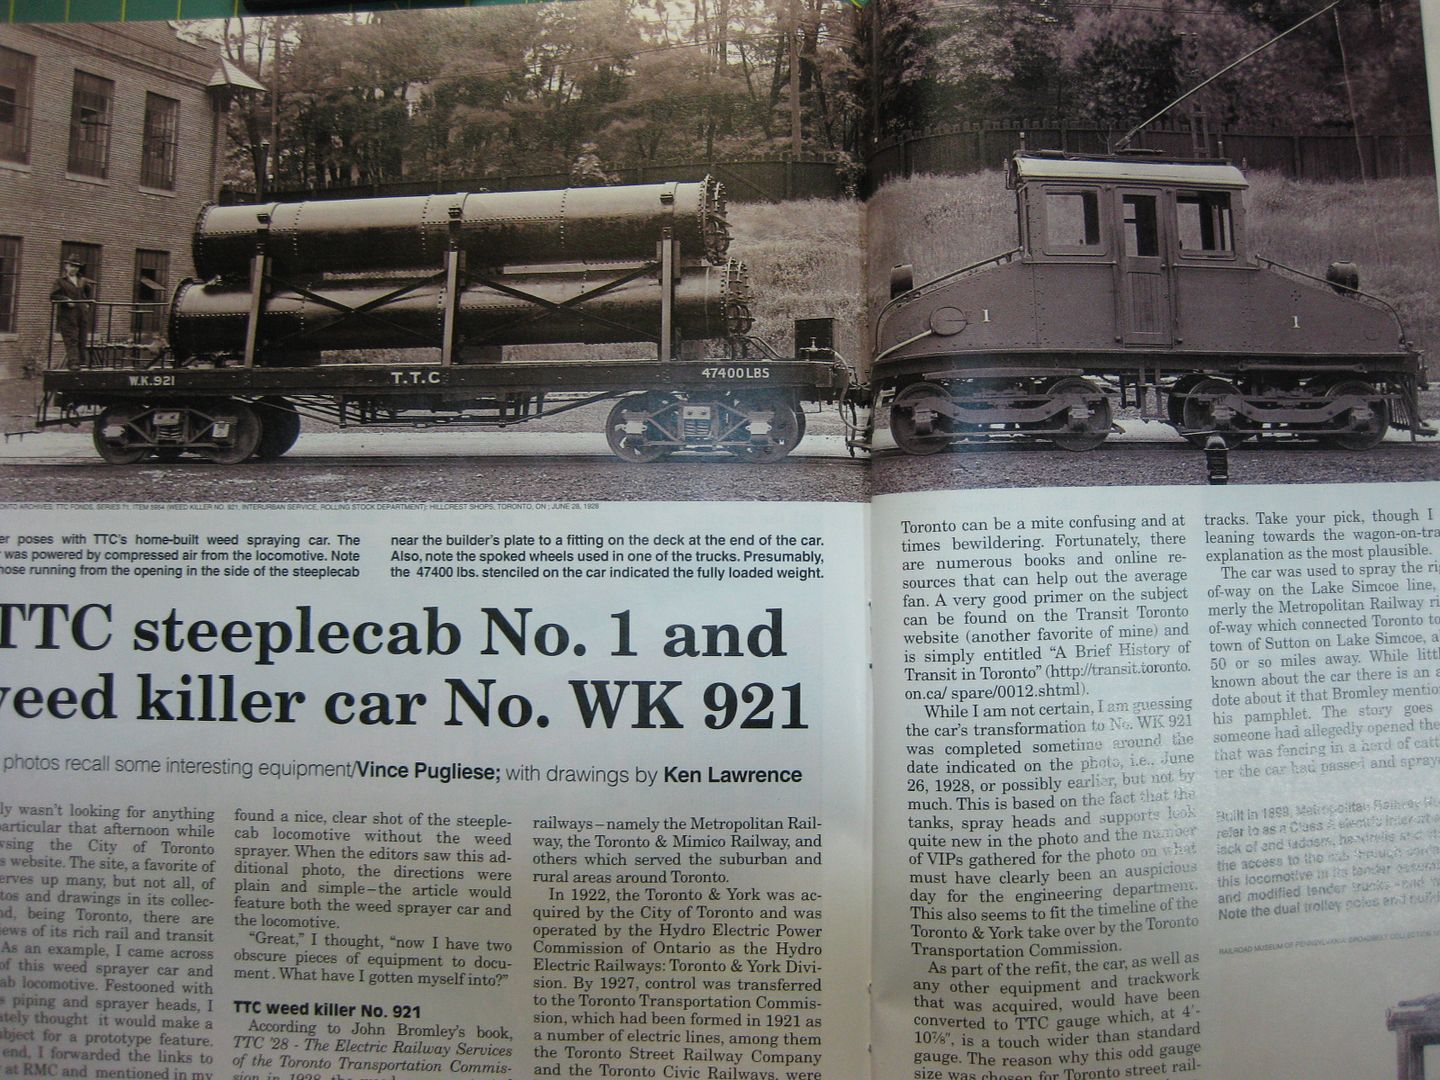
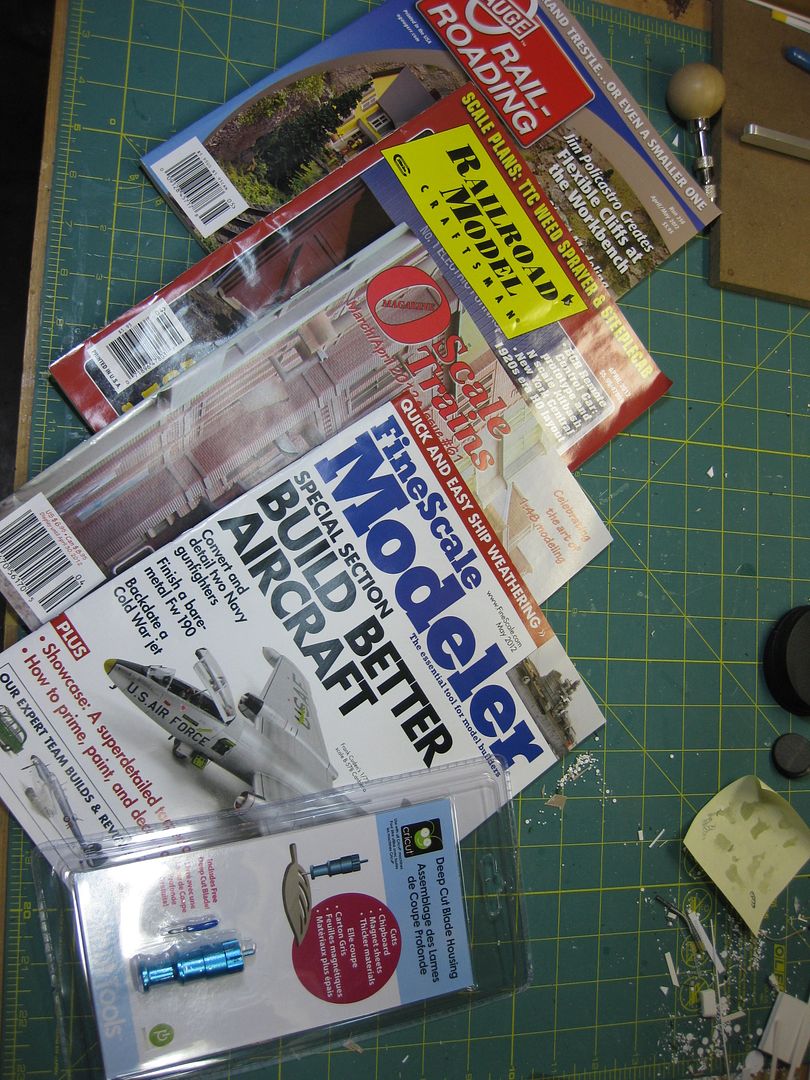
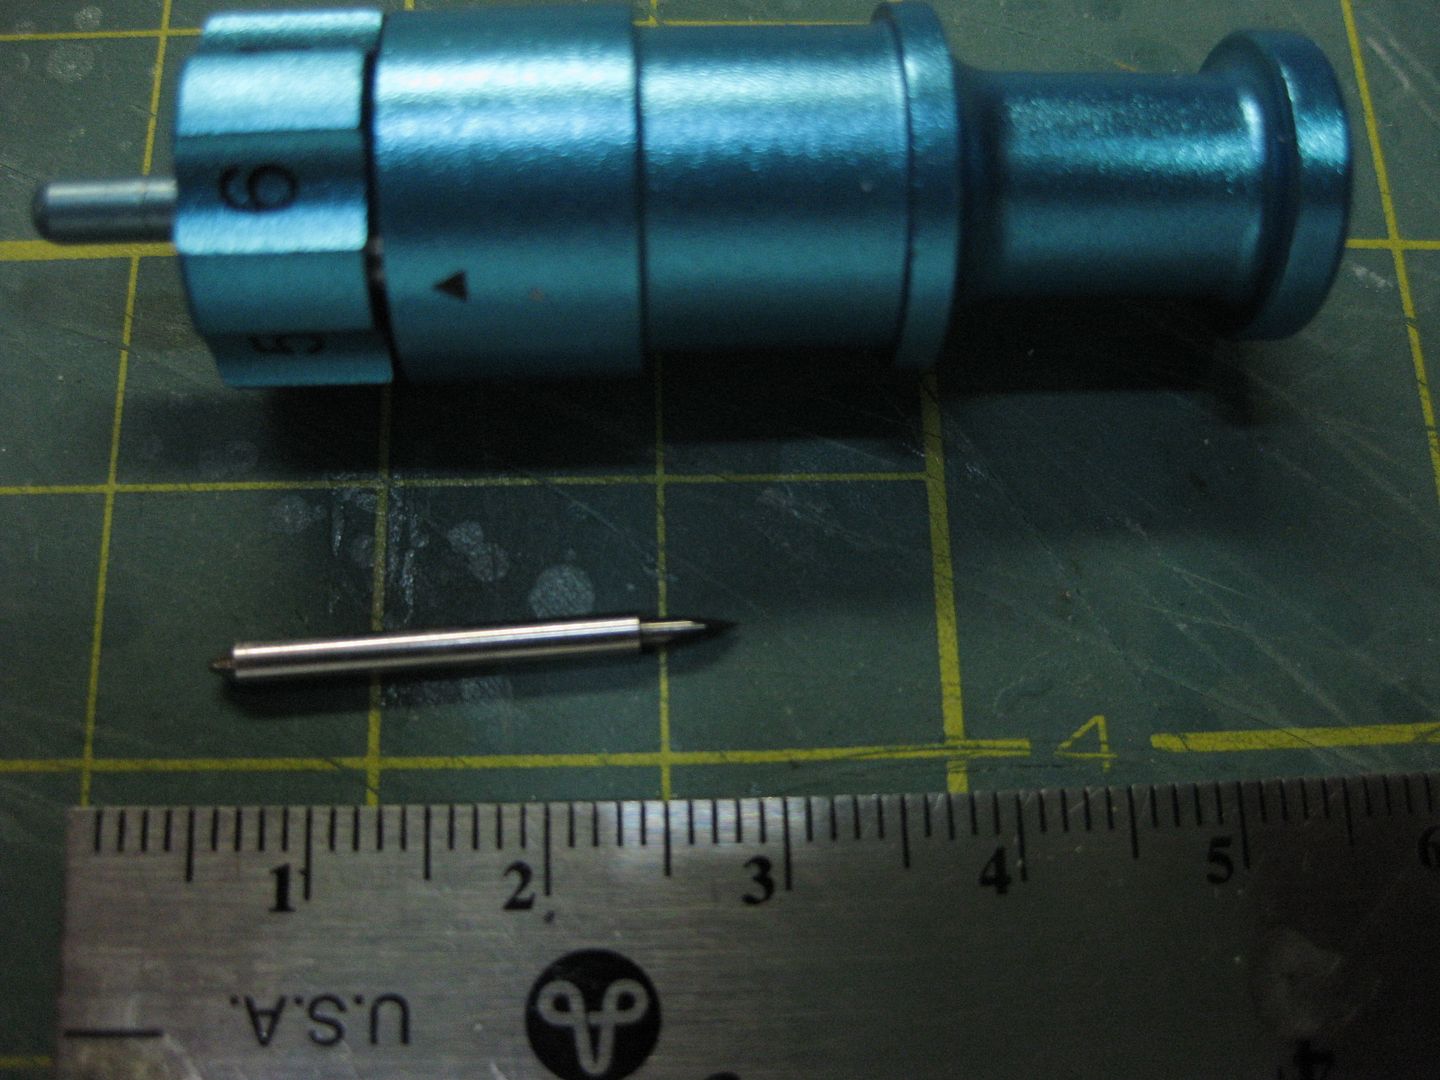
Scratchbuilding reasearch and heavy duty blade drop!
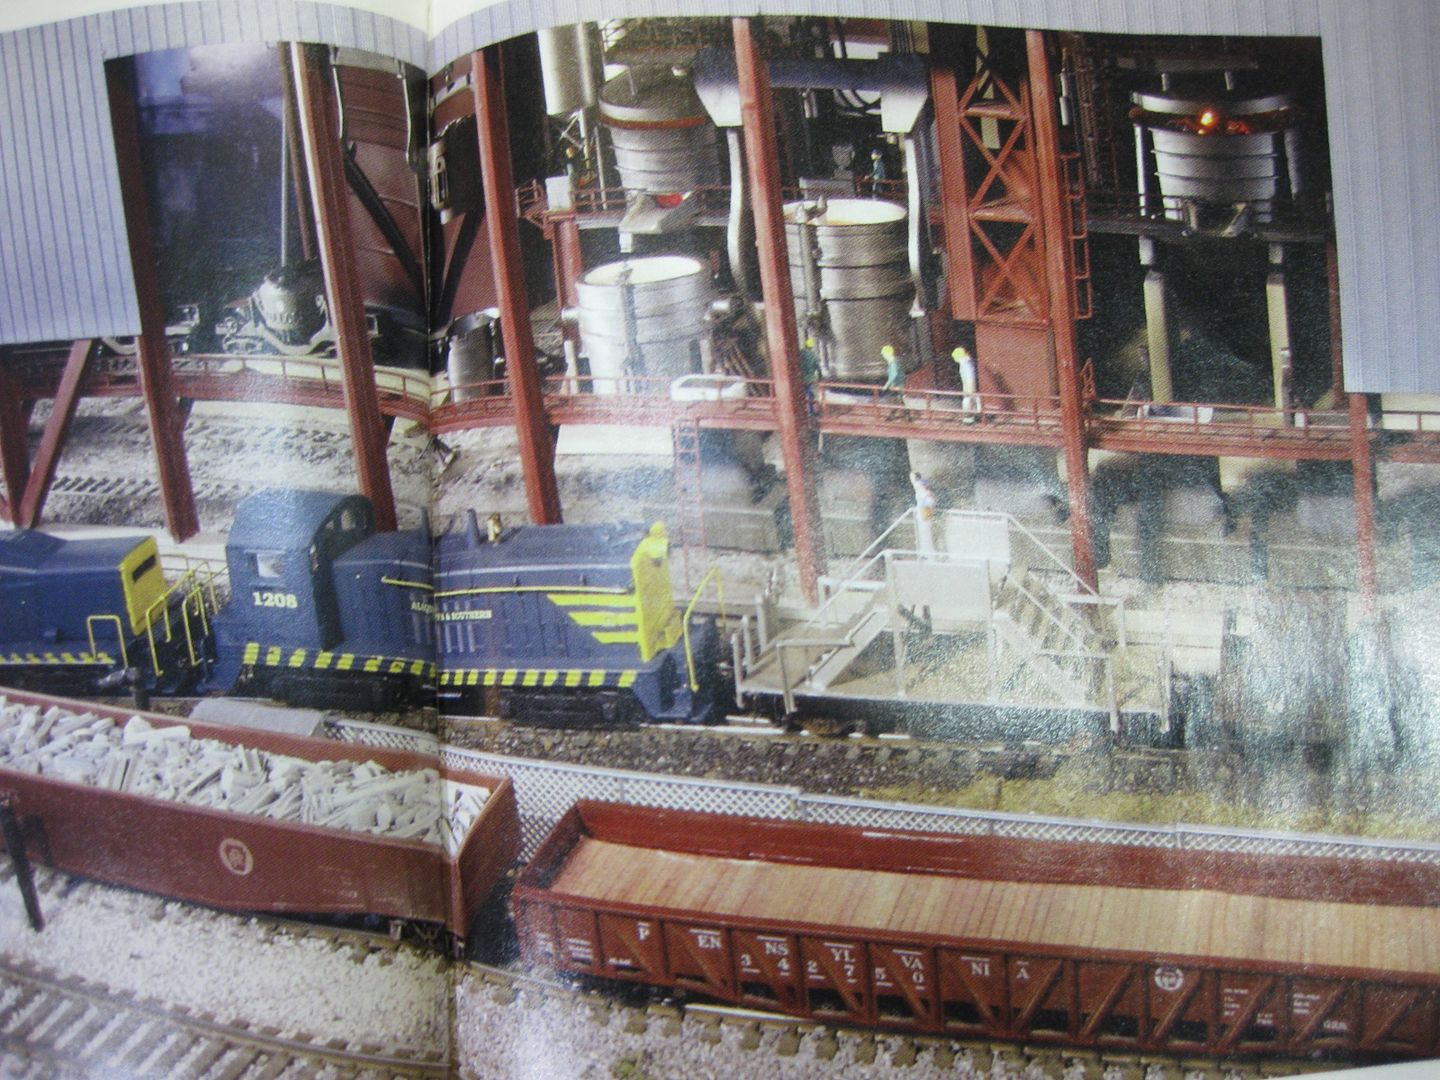
These magazines are for lunatics who look at blueprints of train cars and RR buildings scratchbuild them like I do! I have learned a LOT of techniques I apply to terrain from these mags!
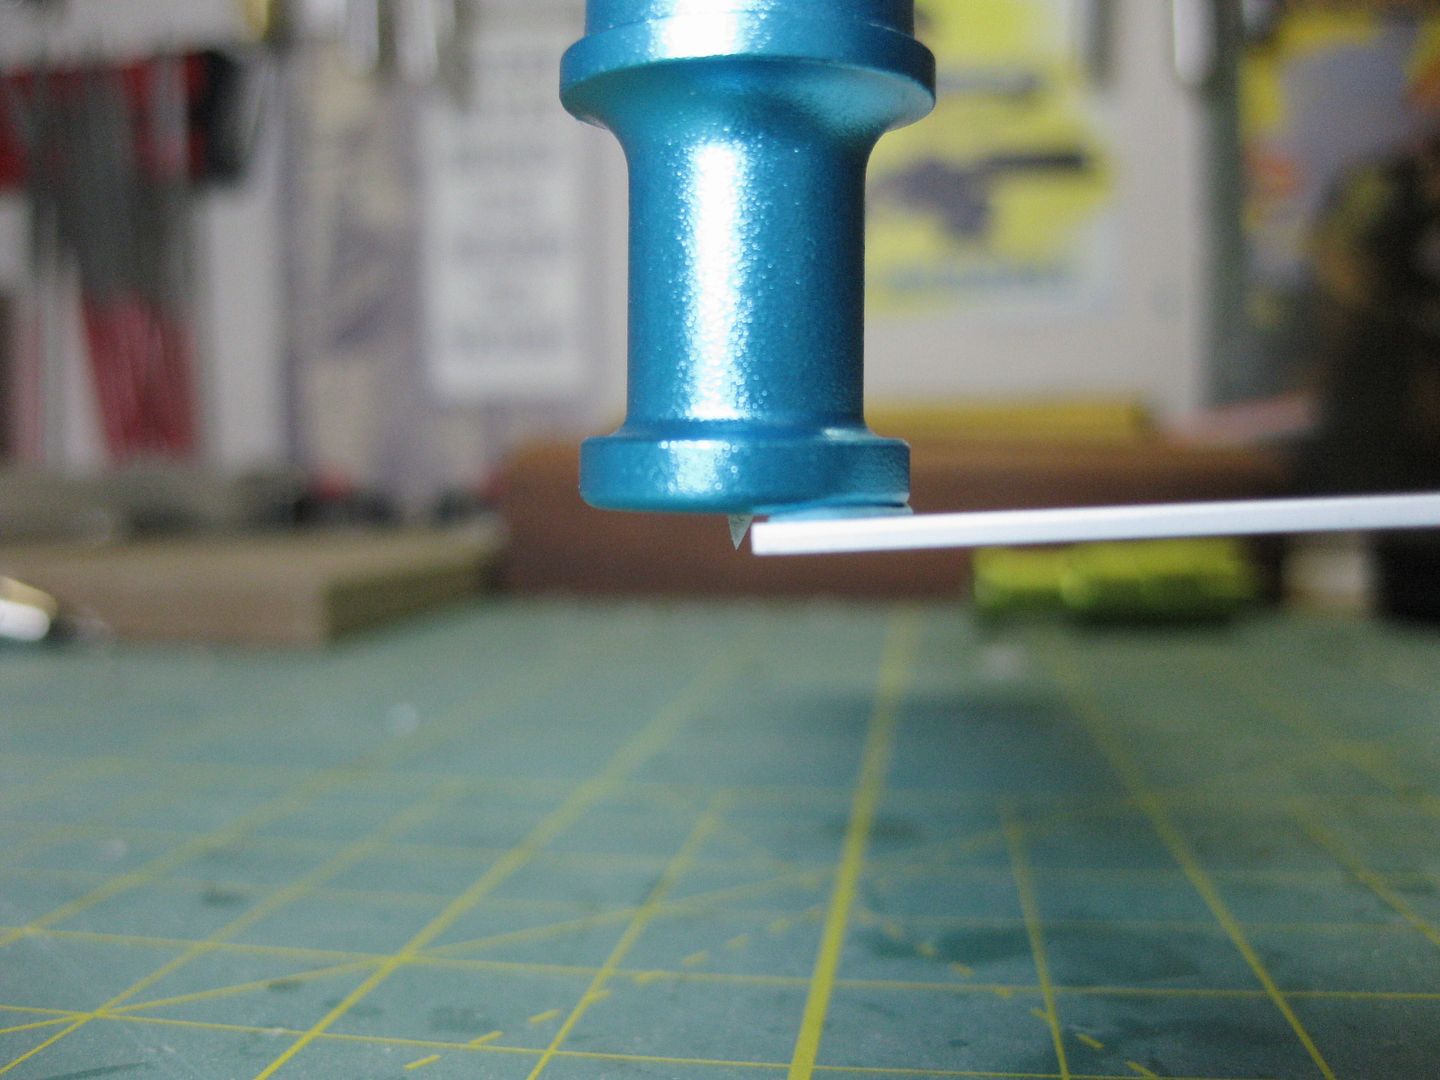
This Deep Cutting housing just may be what I needed! This is set to 5/6 possible depth setting (6 deepest) next to 1mm plastic
(blu-tacked-on to facilitate taking the picture at the right angle)
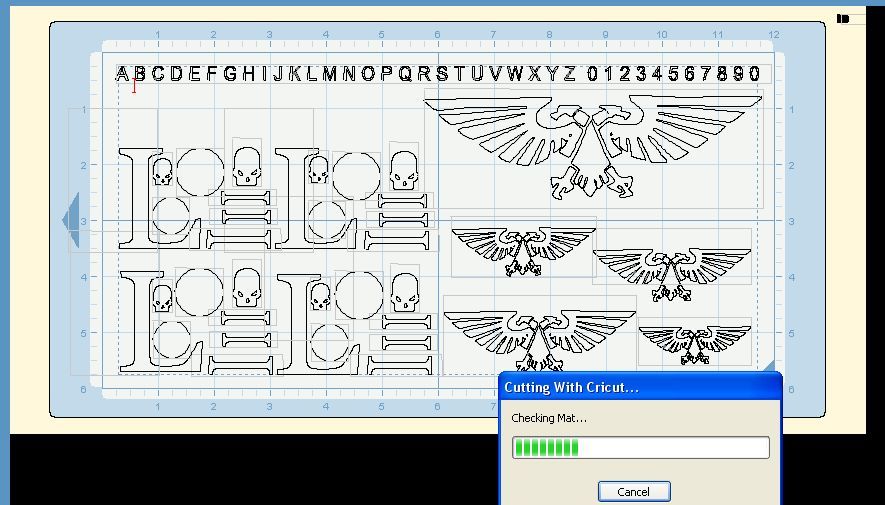
Automatically Appended Next Post: This app is the worst form of bad software ever made..
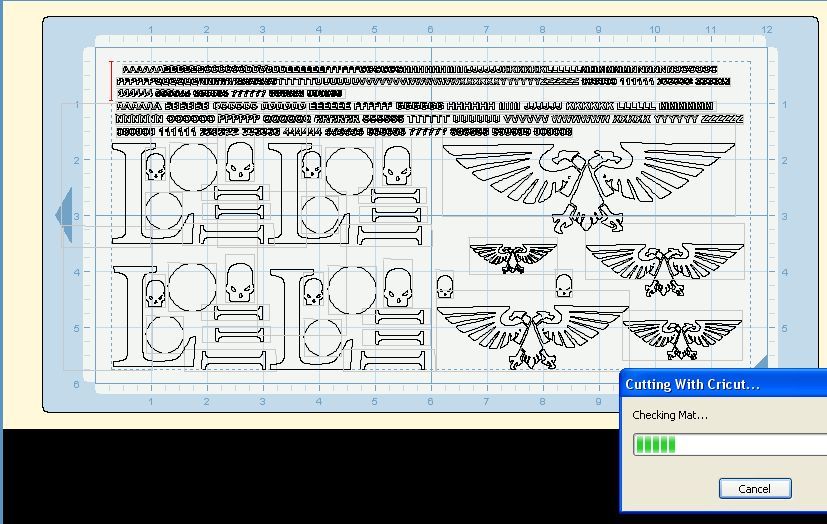
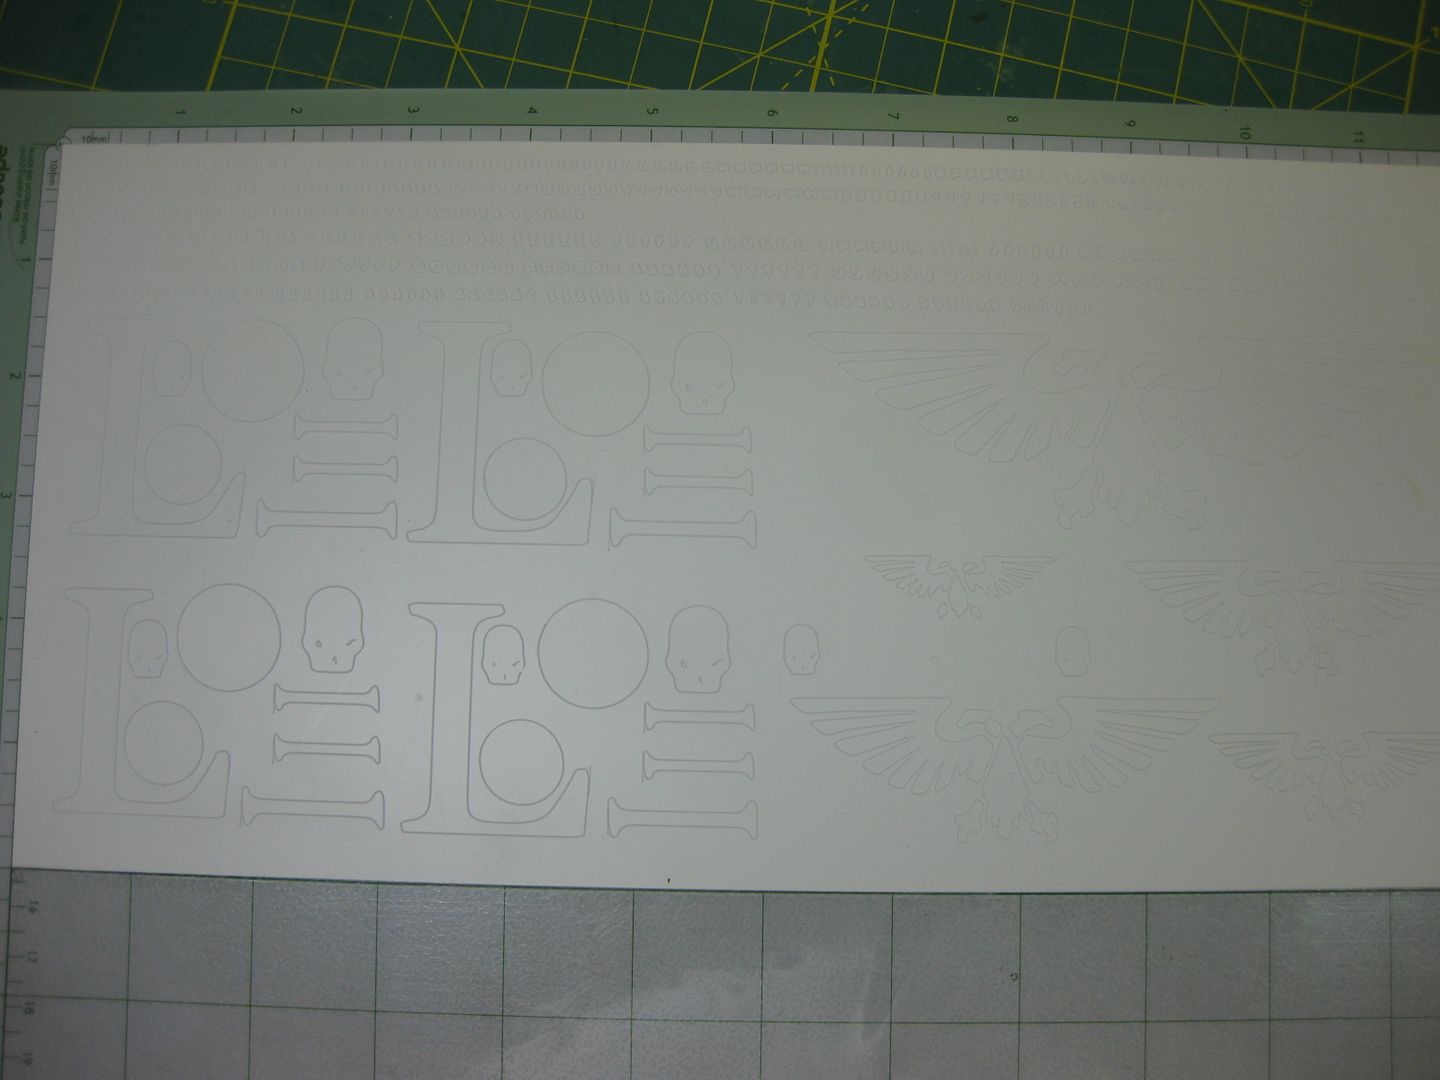
But here is the layout I planned for a 6"x12" peice of .020"
It is cutting now, but I'm afraid the small font is not going to come out right Jake, I'm sorry. 1/8" is just too small for this thing. I feel bad dood, I really thought it could do it.
The alphabet is trash, and it barely scored the surface...Will still need a knife to set the parts free... FAIL.
....piece of santorum! try again...live and learn
@Childe- I'm making a master for a League base with these...for...
No, not really- Sure Cuts A Lot is the layout software, you use GIMP or whatever for making images. It's just an image, it doesn't matter what you use to make the images.
Automatically Appended Next Post:
mxwllmdr wrote:Are you using a heavy duty blade?
Automatically Appended Next Post: And what program did you say you used to make the images?
dsteingass wrote:No, not really- Sure Cuts A Lot is the layout software, you use GIMP or whatever for making images. It's just an image, it doesn't matter what you use to make the images.
Automatically Appended Next Post:
mxwllmdr wrote:Are you using a heavy duty blade?
Automatically Appended Next Post: And what program did you say you used to make the images?
no, I am using a deep-cut blade.
So call me stupid (steady) but this is not the hack ware you used then
mxwllmdr wrote:SANTORUM DROPPED OUTTA THE RACE TODAY!!! HAHAHAHAHAHAHAHAHA
dsteingass wrote:I know, bout time!
what? so now he is officially admitting he is a baboon?
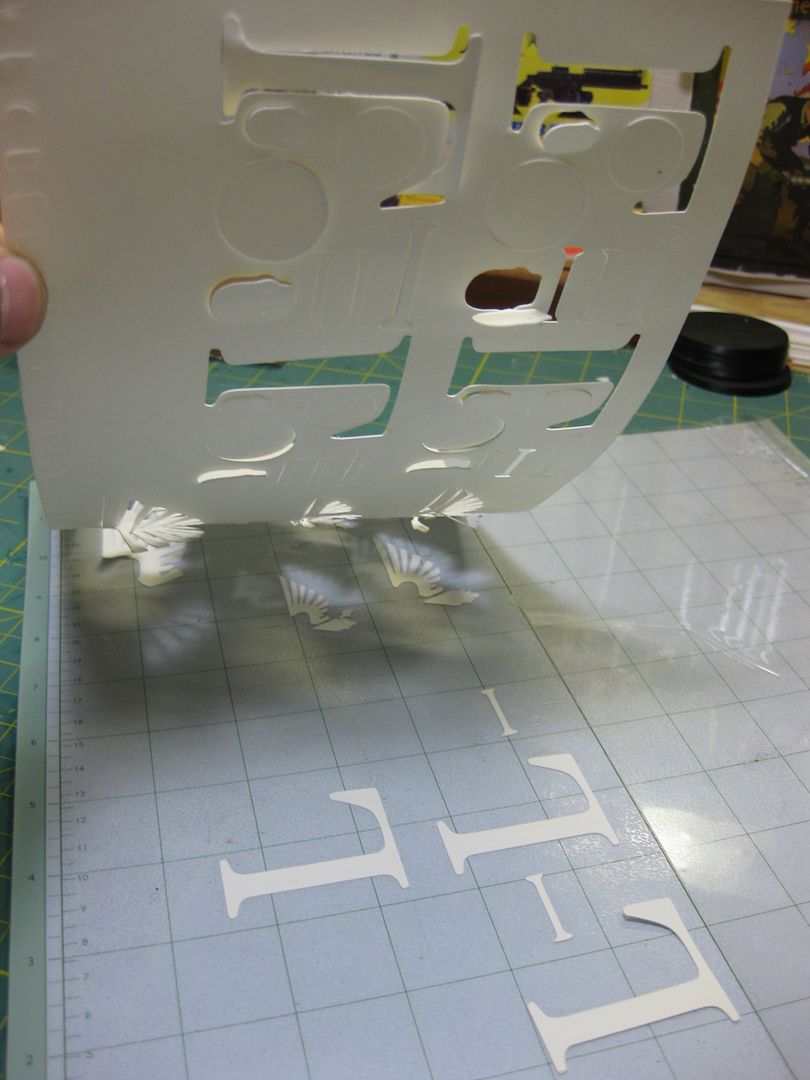
Anyways, this is what I want. This is what we call "fall off the bone good" The Alphabet is still gak at 1/4" too
It's cardboard, but you get the idea.
those look so cool dave! but how long can you experiment with all this stuff till you need a new blade? and what are the costs of such blade? guessing it is on the pricey side tho...
as for the designs... all three designs look very cool...tho i have to admit from the dimensions i like the lower right the best...here everything is just right!
ah...i thought the housing was part of the blade "cartridge thingy"
by the way... IF you want...as the chuch is and will stay all cardboard i would be honored to glue the cardboard tries on the wall? ...that would even justify a redo from scratch as i have reently found some nothces and glitches thus i could do better...
Automatically Appended Next Post: omg...that was so horrible english from me......
yep...that is true...and you have to keep true to that...beside..mixing materials makes only so much sense...i wear protective gloves whenever i use super glue... i have no need whatsoever to have my finger tips glued to something ^^
ouch...that is quite frightening me... also when it first happened it burned and sucked all moisture from my skin... never did i see such weird skin behavior...not even after burns or other unwanted happenings^^
Wow! I love the new bases that have been done with the "new riveting"! They are epic! The bases with the pipes and parts of a wall are soo good! I'm going to have to nick that idea! God if those bases were human I'd marry them all! I just love plasticard bearing in mind that I've only just porpperly discovoured it!
dsteingass wrote:No, not really- Sure Cuts A Lot is the layout software, you use GIMP or whatever for making images. It's just an image, it doesn't matter what you use to make the images.
Automatically Appended Next Post:
mxwllmdr wrote:Are you using a heavy duty blade?
Automatically Appended Next Post: And what program did you say you used to make the images?
no, I am using a deep-cut blade.
Yeah, that's what I meant. At thirty bucks for the housing it isn't a bad investment.
Lone Dirty Dog wrote:So call me stupid (steady) but this is not the hack ware you used then
dsteingass wrote:No, not really- Sure Cuts A Lot is the layout software, you use GIMP or whatever for making images. It's just an image, it doesn't matter what you use to make the images.
Sorry, again. I knew it wasn't a hack, per se. Sure cuts a lot just works. So does 'Makes The Cut' if you can find a hard copy of the original.
Automatically Appended Next Post: Gotta get and learn GIMP.....
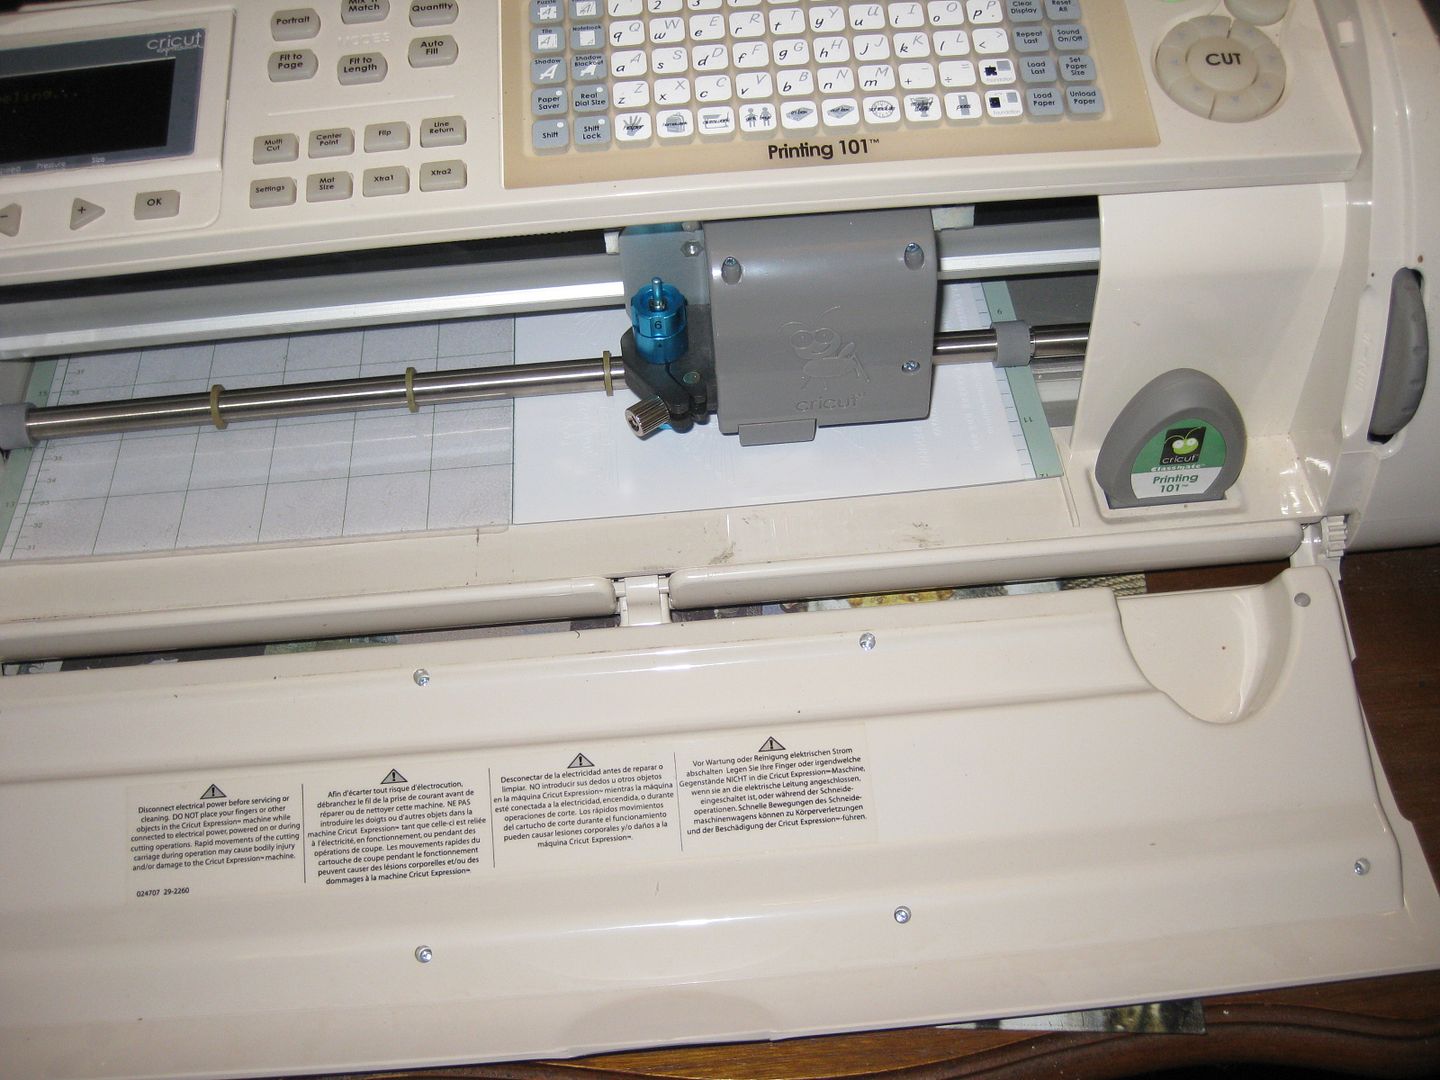
I am amused at the use of the cricut machine, D. And seeing it in action makes me want one, now. Thanks for being the guinea pig on this.
As a side note, I encourage everyone to explore other model hobby website and magazines. Many of the techniques currently being used to 'wow' people (for example, the Forge World Masterclasses on armor painting) are techniques that have been around for decades. Expand your horizons, and see what's out there.
Plus, you have cool reading material for the library*!
The real problem for me is tracing any other image file and getting a proper graphical path for the Cricut blade to follow- it can be done, but it's a bit tricky.
There are youtube videos out there teach the process (search cricut and SCAL) , but it rarely ever works for me. There must be an easier way to do it, I just don't know what it is. It also takes soo much time to learn the process.
Hi, first post on your blog after lurking for what now feels like years. going back to your bases, could you not combine your love of Lego and building and come up with some new type of modular base pieces with pegs and holes, this would make the parts much easier to cast and endless combinations possible. I was mainly thinking of the round 40mm and bigger, with the peg holes in the base. Keep up the good work.
No worries on the lettering Dave, thanks for trying! The -=]_,=- symols look great though!
A Cricut would be awesome, but I just looked them up and they are spendy, but I bet it would work great for making templates for my Airbrush Tattoos too. I think that may be a purchase for next year though.
I like it that I can choose any true type font. I am throwing my wife a Mad Hatter Un-Birthday party this year and the deco will be AMAZING now. I had used the cricut previously on lightweight plastic (Garage sale signs mainly) but now I will use it a lot more........
The learning curve can't possibly be that huge, either...
It sucks we can never update this software, though.
It's all about SCAL- it is designed for scrapbookers, and it assumes you want everything to have rounded corners for scrapbooking. If it were made for model builders, all the straight cuts would start and end straight. But it doesn't, it curves things. You can make any .SVG graphic in Inkscape or Illustrator, but SCAL will not cut it the way you want it to.
Another app, called Make The Cut seems like it promises more, but I dunno.
http://www.make-the-cut.com/ I don't want to waste money on it if it doesn't do what I want it to.
The learning curve is in the PATHING. Each time the blade has to change directions, that is another node in the drawing, the more nodes, the more stop/start cutting. - You know from wielding an x-acto that long, straight cuts are easier than curves, they cause less resistance on the blade. SCAL takes a 90 degree right angle (2 nodes) and turns it into a curve, instead of doing what we do with a knife, cut one way, then cut the other way to make the right angle.
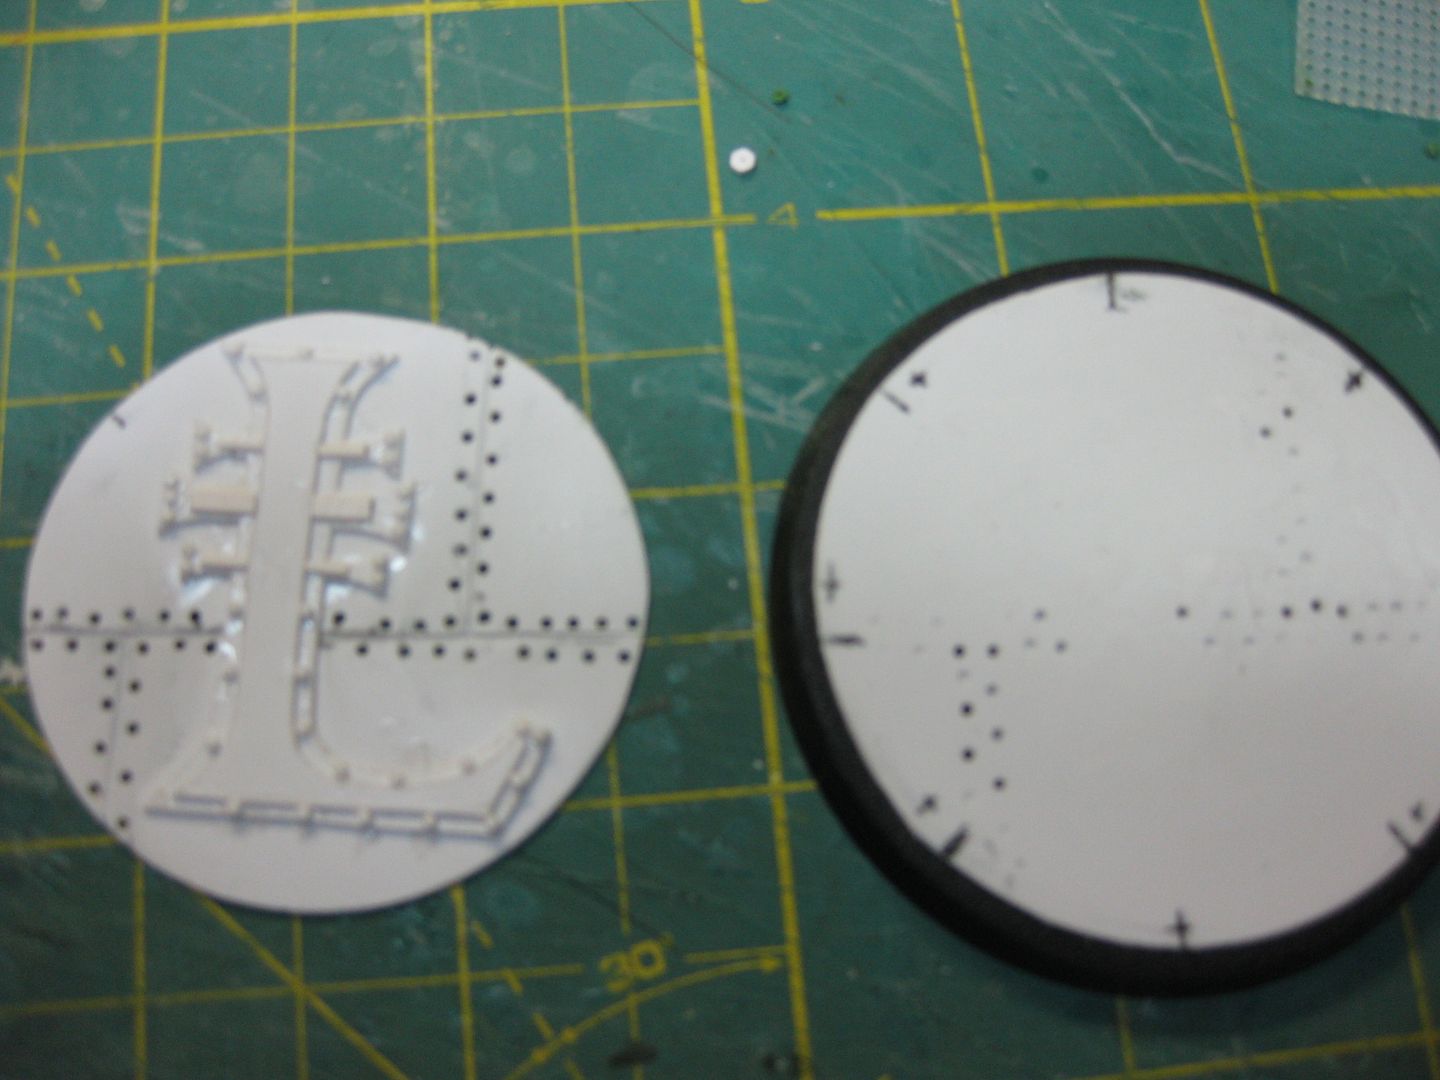
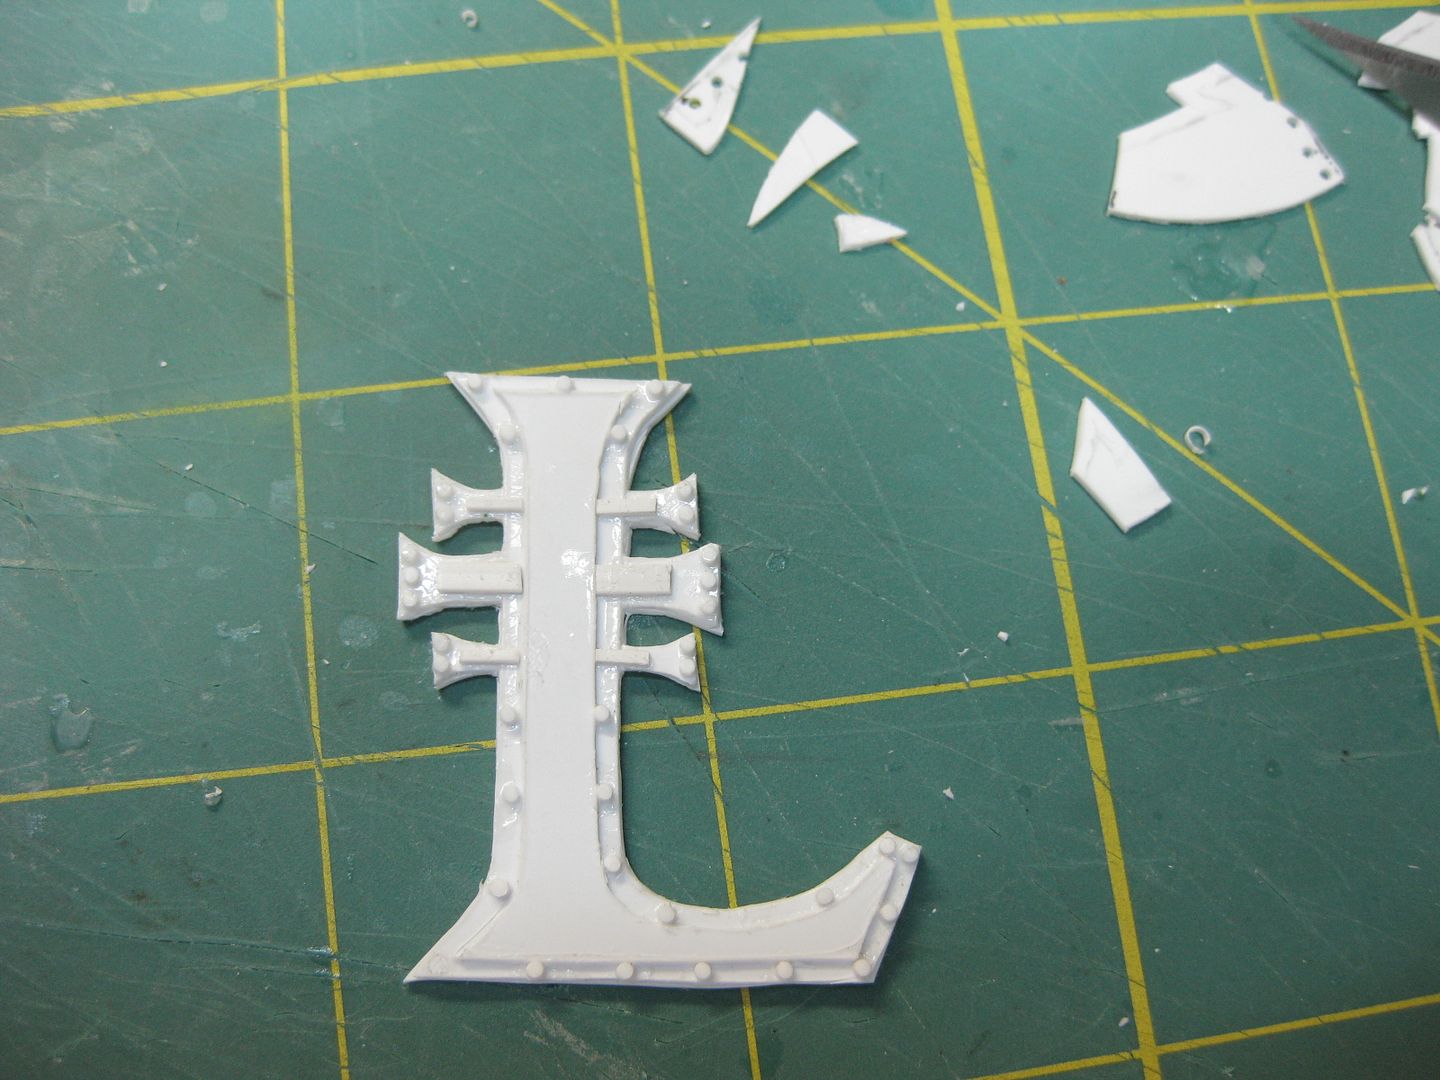
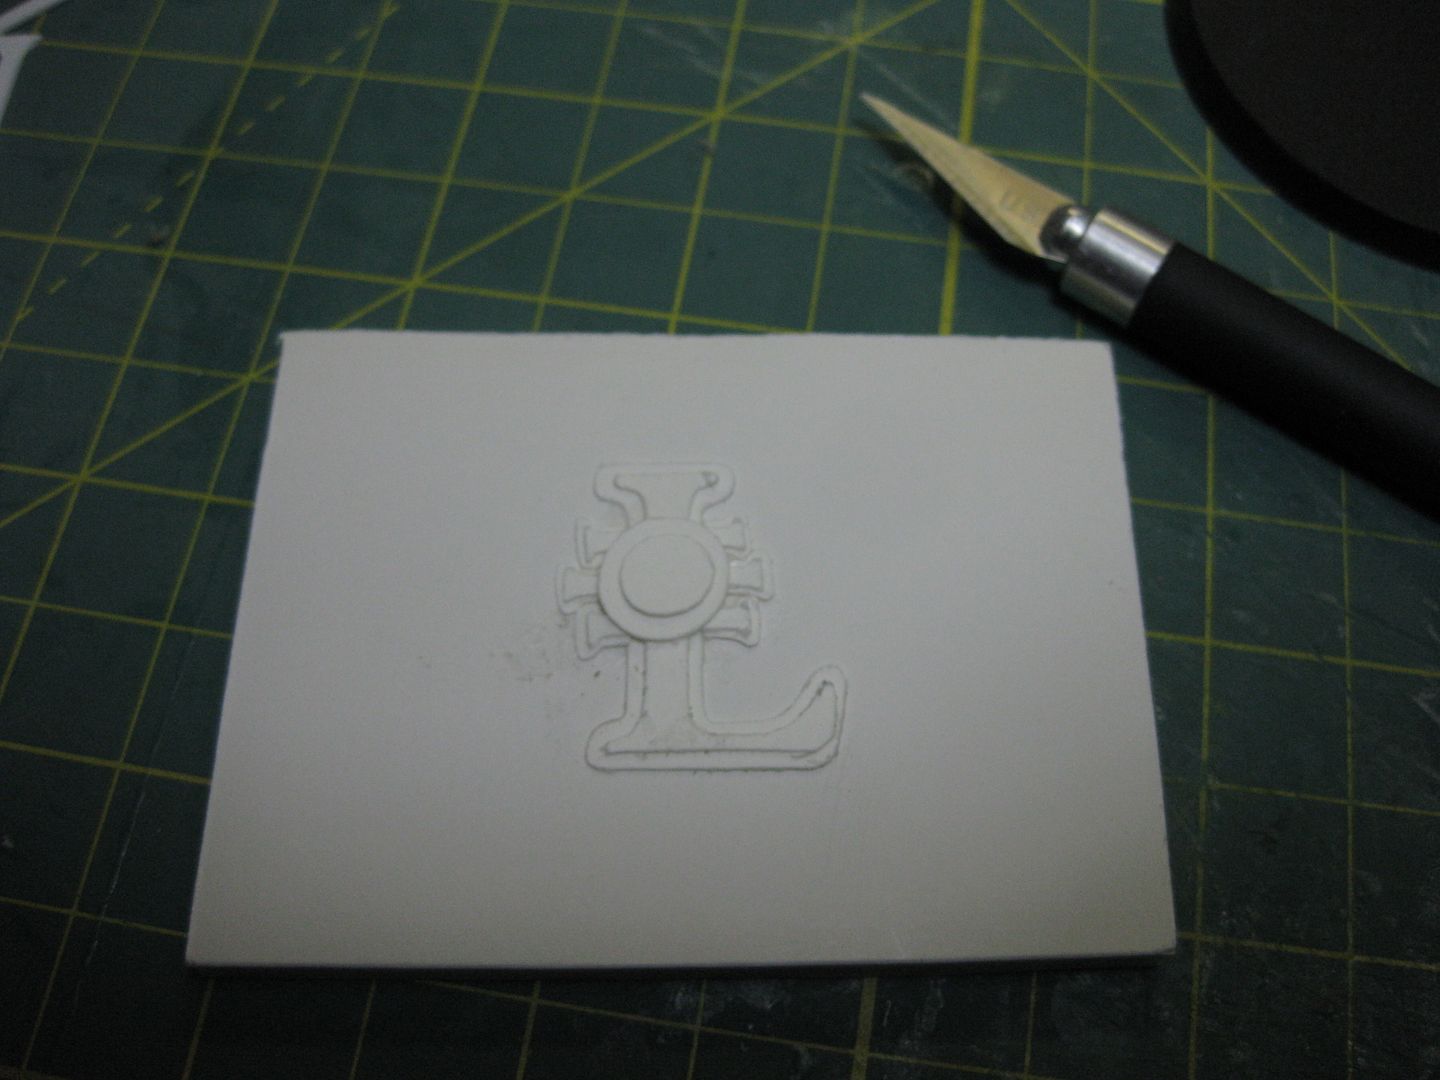
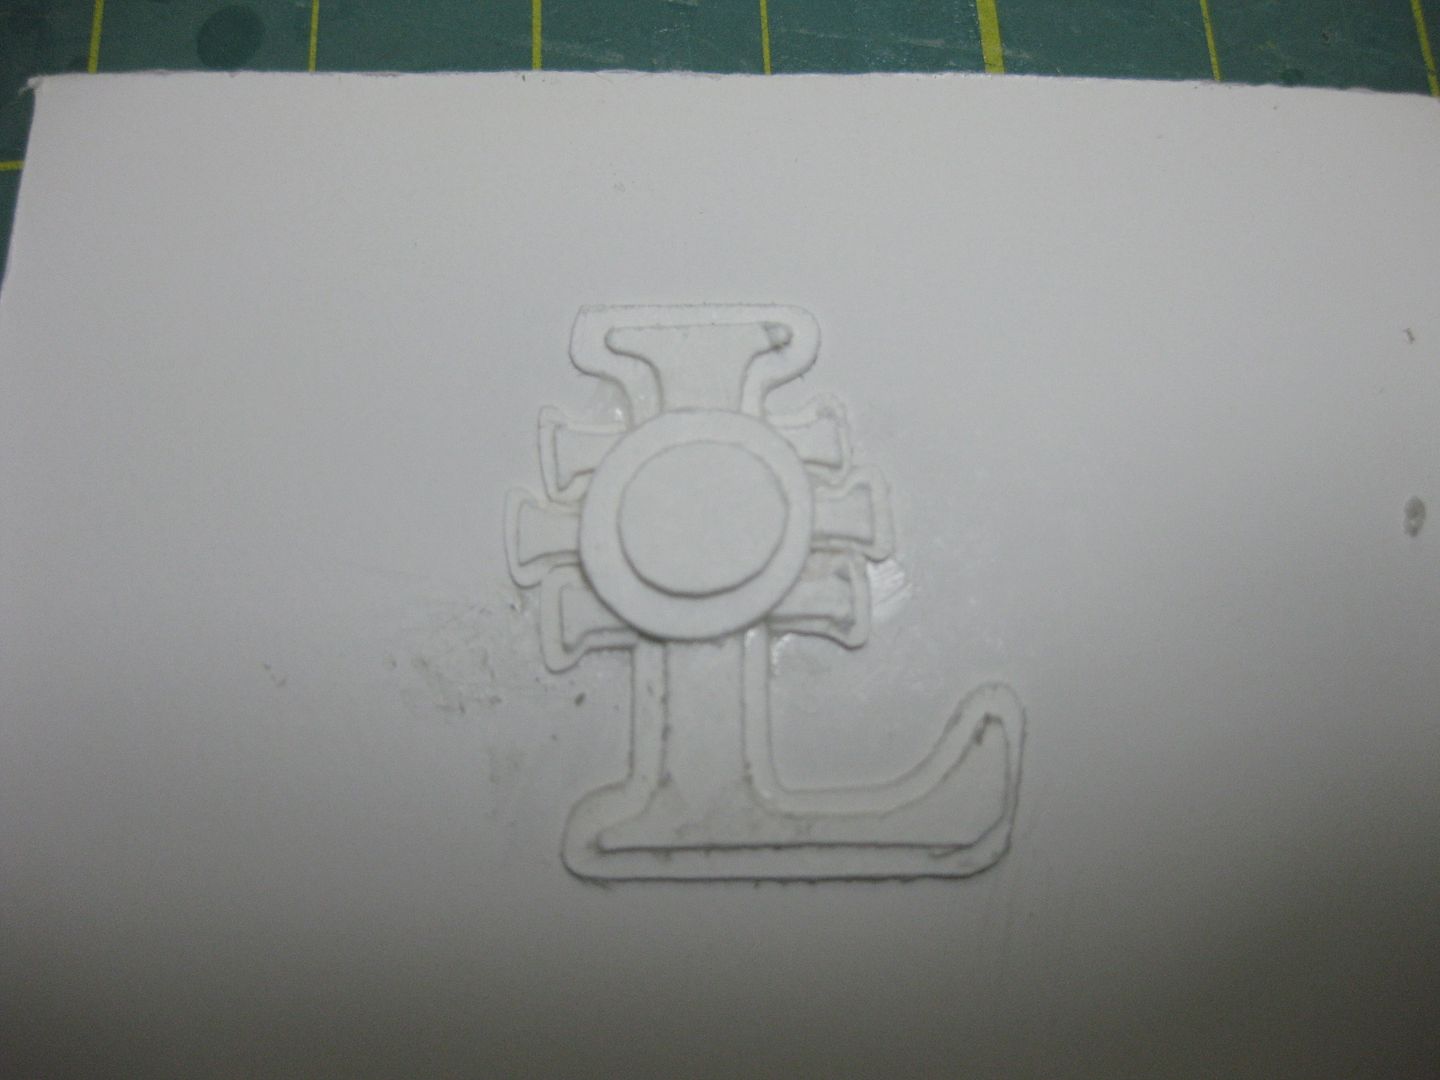
Automatically Appended Next Post: This is the .020" (.5mm) styrene Logo after trimming it out with a knife.
The greater thickness of the plastic and harder edges will definately be noticed over the cardboard.
I just wish the Cricut would give me "fall off the bone" with the plastic.
But still, very useful for SOME things.
Unfortunately, I don't see a way to cut stuff with sharper edges.
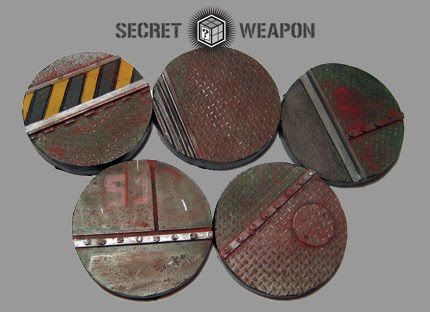
Automatically Appended Next Post: I like my bases better than these however..
Me too, please do man!
The Multi-Pass feature would be the solution IMHO, but if your plastic shifts even slightly on the cutting mat, or the blade gets caught and moves the plastic, the second pass doesn't line up and you have a mess.
me too...and thankfully mila yet again provided a very good looking disatraction
by the way...i feel like such a nerd for having thought of the fith element at first too^^
but all your finds dave show us one thing...there is a demand for such machines that one day would provide clean and straight cuts... i bet someone is jumping to that idea atm...or should! you never know who is reading this here^^
and yep...your bases look better than those of SW...
now that is a very nice design idea...tho...it needs a bit of finetuning ...but i like where this is going ...that layered look is looking very mature...! have you thought about adding rivets? of course you have
also...if the curves are what makes your problems...why not go with the flow and put in more curves? make it look more ornate ...of course this may produce even more difficulties...
Super cool! Makes me want to join the =L=…even though I'm not a Riveter!
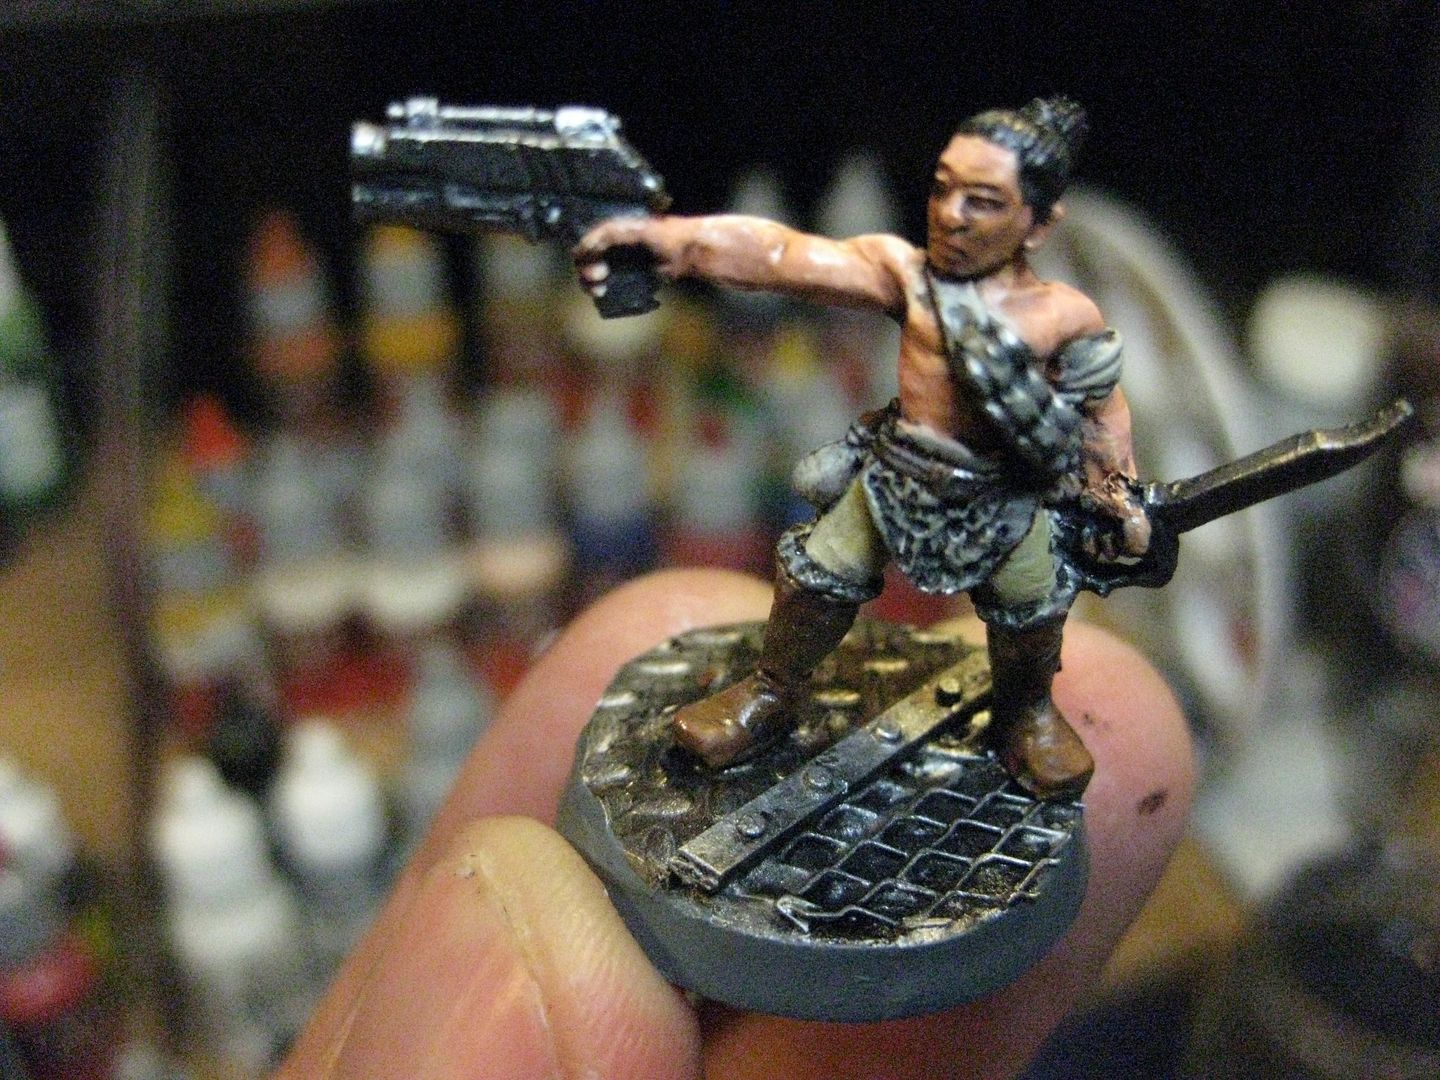
If you are looking to sell some one offs or a commission let me know. I have the perfect mini for that sniper base. I'd rather give you the money then someone I don't know.
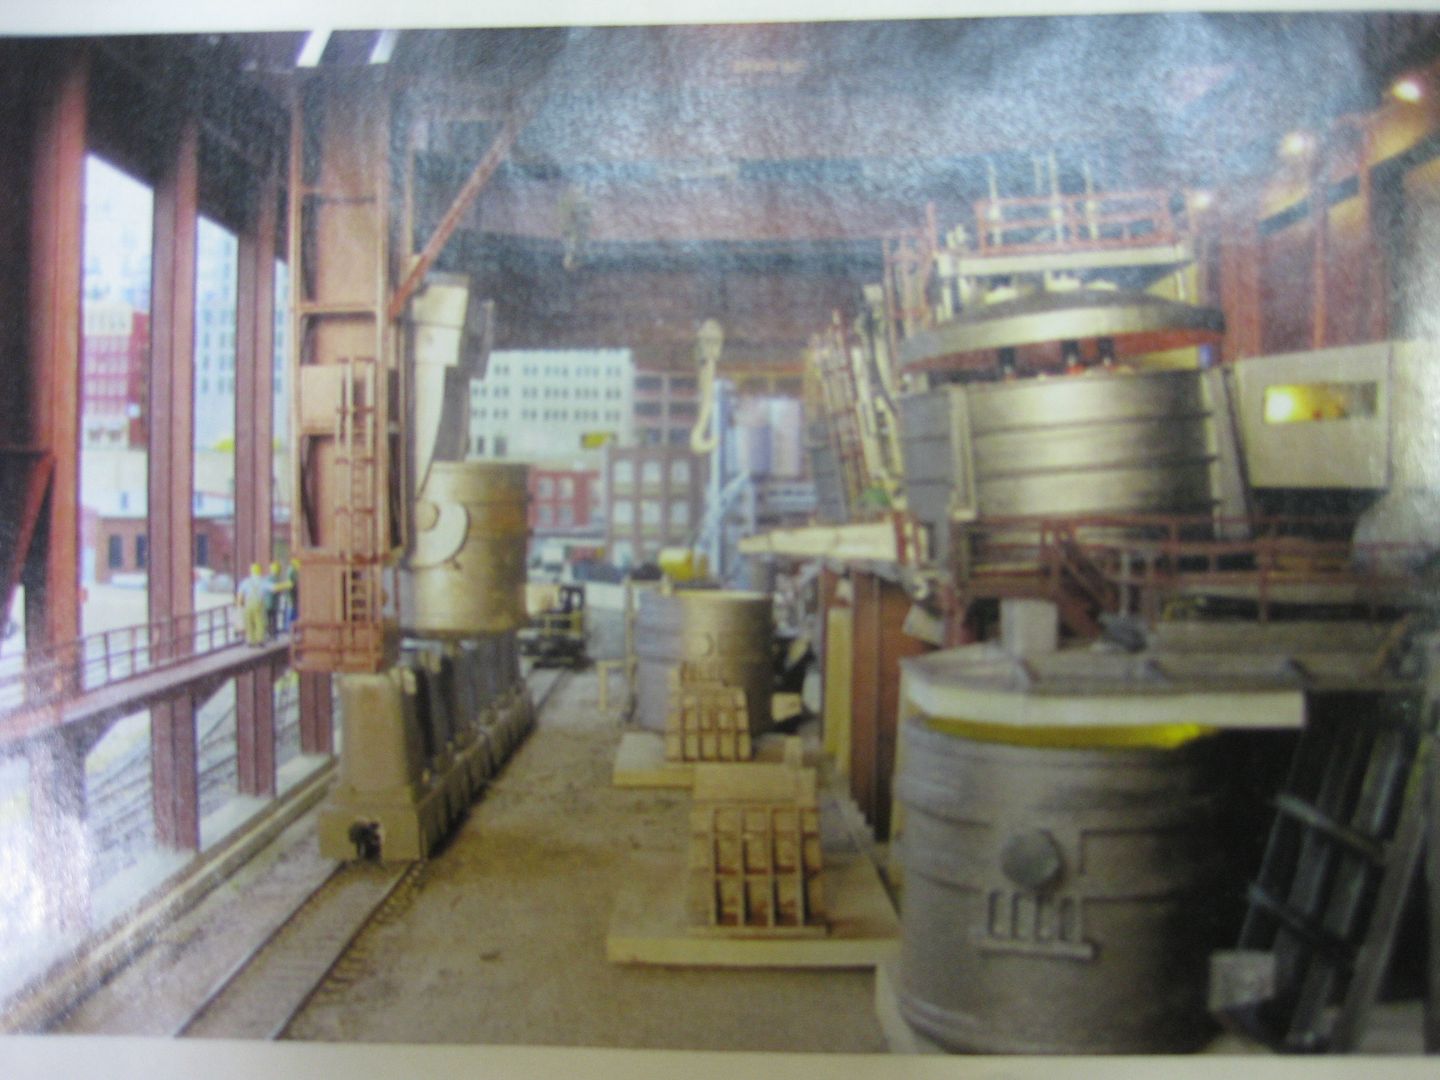
Briancj wrote:Gotta love steel mills and blast furnaces. My club's model railroad has a full complex. I should take some inspirational pictures for you, D!
Please Do! I'd appreciate it man! Thanks
Rogue Wolves wrote:dave, what scale diamond plating do you use?
O is always safe (bottom) , but sometimes, you can use different scales and get away with it-
Well WAS going to order it, (still might) but i found this little minature hobbies shop that might stock it so im checking there first.. but if it dosent. i have no idea where
now i am seriously wondering what you are up to dave with that big base of yours...will it be a scenic base for something or will you mke a scratchbuilt something on that? i am anxuious to know^^...and with the added rivets that thing looks supreme!
as a kid i had lots of stuff of the railroad theme...a whole trian set from playmobil and for H0 a big table in the middle of my room...shame that back then i wasn´t interested in the least in any railroad stuff then...my granddad did all the modeling then...maybe because i wasn´t involved in any making and building it was not interesting for me...just twisting the "go-fasta" switch wasn´t doing it for me...but now the old stuff sure smiles at a different angle to me...shame twice as all stuff is now gone...:(
lone dirty dog wrote:
I also wish I had not got rid of all my dads old railway modeller magazines now
The Model RR hobby is in danger of dying off with a generation, we must be open-minded enough to learn their Riveting methods!
Dude when he passed I inherited all his model stuff and collectables, storage was a real issue and my sisters "were unable to store anything" so things had to be sacrificed unfortunately and they were the thing.
However they did go to a good home some guy took them who was into model railways, so at least they will be used.
I have kept all his models and trains still, shame I have no were to display them.
@LDD, what scale are the trains? Any good locomotives or roling stock?
If your Grandfather was a hobbyist, he would have wanted another hobbyist to enjoy the stuff, not just dryrot in a box somewhere, he obviously enjoyed them.
What am I up to Vik? I don't really know. I'm just playing around. I have no real plan other thank I was just going to send it to Galorn for mold-making. Maybe cast them in resin for -=]_,-= Members personalized use. I dunno.
I have always been interested with RR layouts, mostly building them. Once it was built though, I think I would get bored with it too, that is why I settled on slooowwwly collecting Lego RR stuff instead, I'd rather have the option of infinite rebuilds if I wanted to
hmm...sounds good... but i see a good oportunity for you here to make a character plinth...with...of course a charcter of yours...and resin-up that beatuy...sounds charming^^
Well it can be a character base if you want it, or a Sentinel, or a hvy weapons team, or just glue it to a building, whatever!
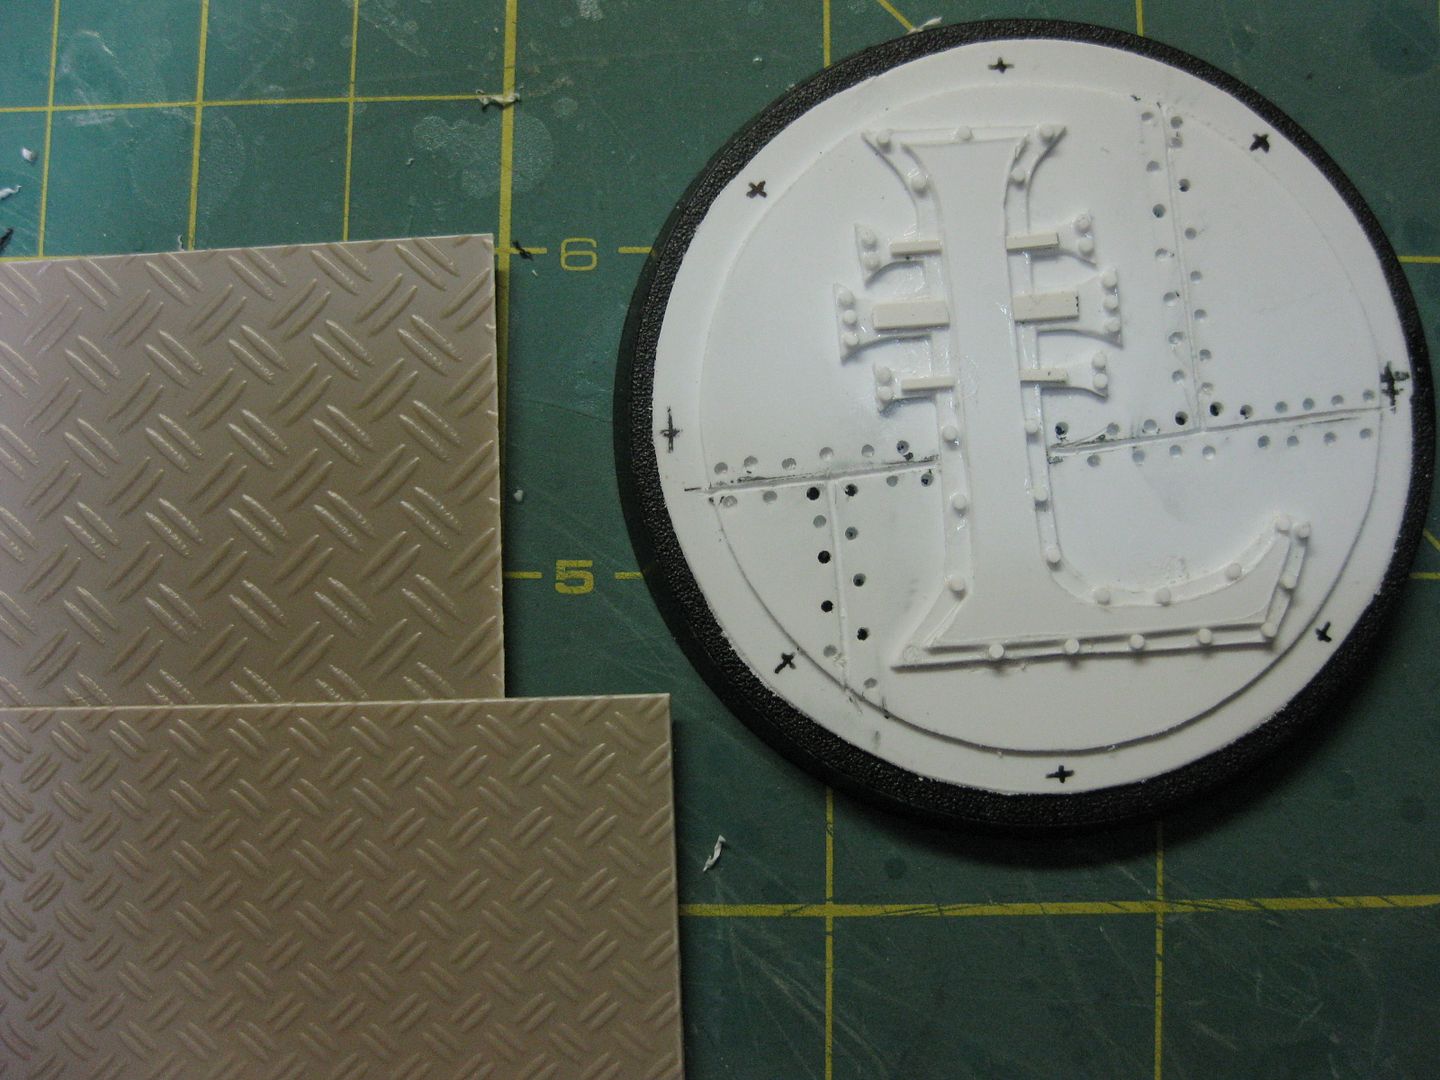
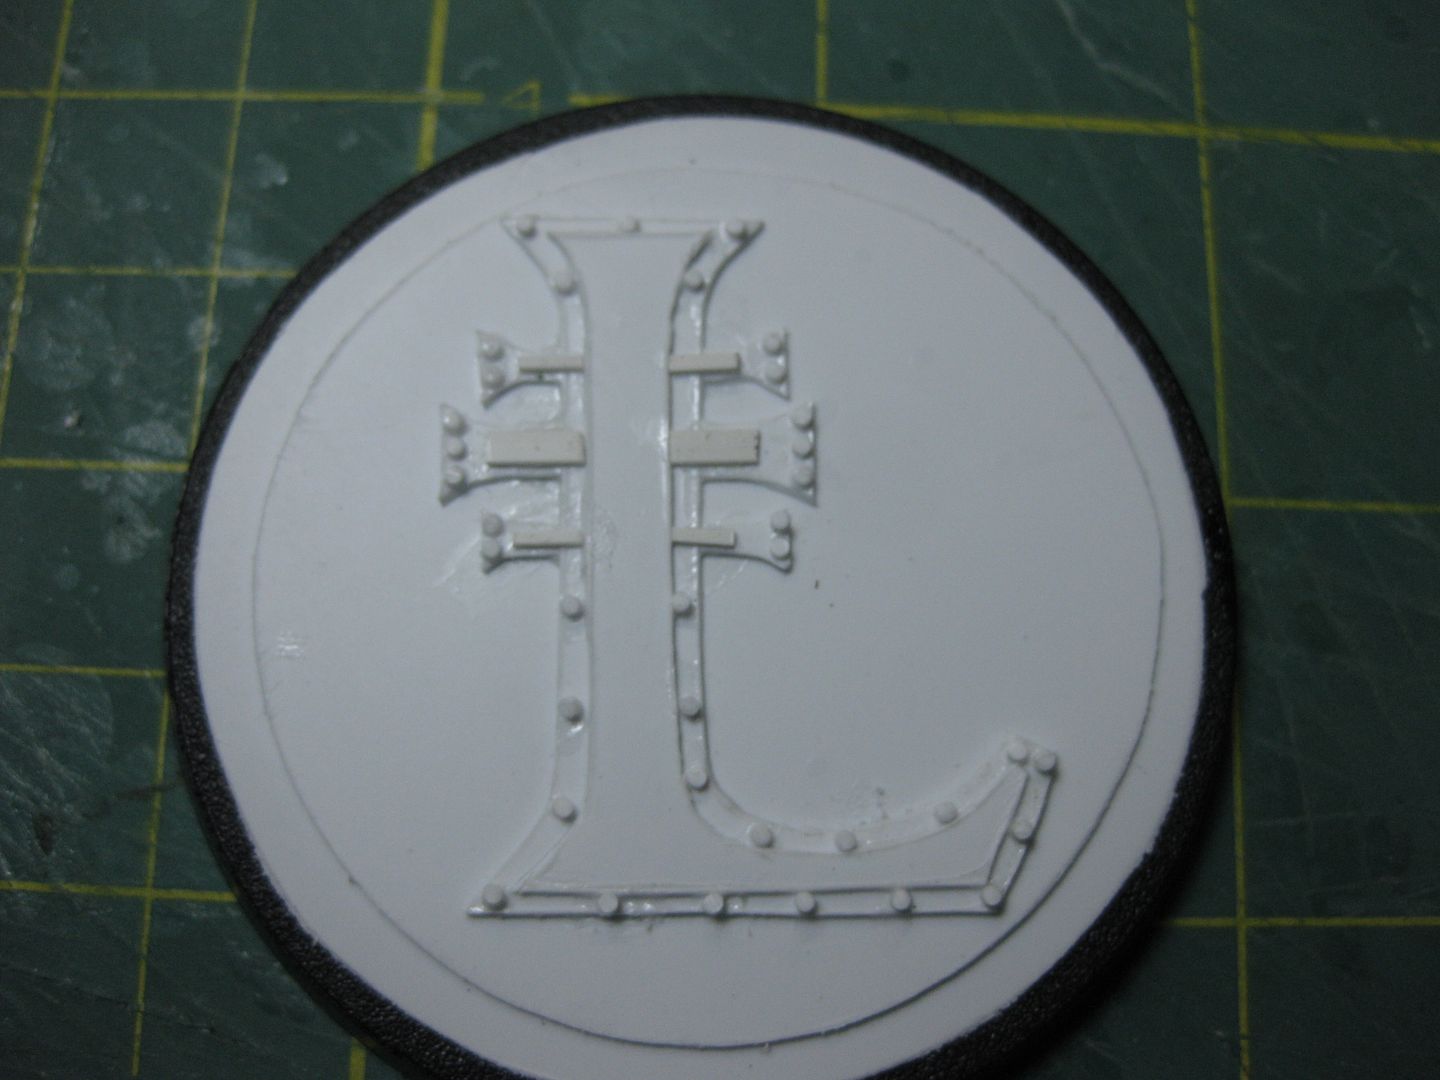
Automatically Appended Next Post: I'm not really sure what to do around the rim though....nuts and bolts? Rivet-tread plate? something else? ideas?
It has a slight stepped effect, but this can always be covered if needed, or not.
It's the -=]_,=- Logo, you will all have at least one copy...what do you want?
ok..think on this Vik......keep in mind, while a chain would look cool and all, would it cast up well? Or will it cause undercuts and a mess and ruin the whole base?
Cool. I am on leave and the wifes big project isbalmost over. gotta start putting warhounds together today. and tomorrow but there is time to play around.....
I think he meant a chain whith which to wear it around his neck......
but it was but a joke, ok?! lol...wouldn´t want to be caught dead with some bling around my neck lol
but in all earnest... i had a thought... and the result...i would like to see the brim of the base flush with the edge... and i imagine the base all done in metallwork... but on the brim nothing...for me i would paint it all flush in metall and be done ...maybe...just maybe a small scroll for the "wielders" name? on second thought... a scroll is not the right thing...more a plate that gets...wait for it...riveteted down to the base^^
The league logo is amazing. Love the idea that you guys are actually going to have official membership tokens - it'll mark you out as crazy bastards! And no, I'm not jealous, not at all
Have you thought about checkerplate mesh for the outer rim?
Even when he uses the same word three different times in three diferent ways in the same sentence, I ALWAYS understand what he means...It's our -=]_,=- Secret handshake.
But he used flush twice there, and my brain just could not compute what he meant with all the brims and edges
I usually understand him. I think I got the meaning he was trying to convey. The outer most upper edge of the actual baseplate and the botom most layer of PC should be even......
I think he meant I should give the plasticard the same bevel as the sum of the square of the root of the rivetside measurement, and give everything on top of the base the same bevel as the black GW base....lol
...But I meant that I need help with what to do around the top rim of the base, surrounding the League logo...
Scarper suggested mesh. I want some different mesh, but I can only find one kind.....IMHO the aluminum mesh I have bends too easily for that skinny of an area. -You've seen me use it on a bunch of stuff here. like this
Hahaha, aww, cheers for the invite guys! I'll have to rivet the crap out of something to work up some riveting skills before I'm willing to show you lot. Gotta develop that rivet-based wisdom
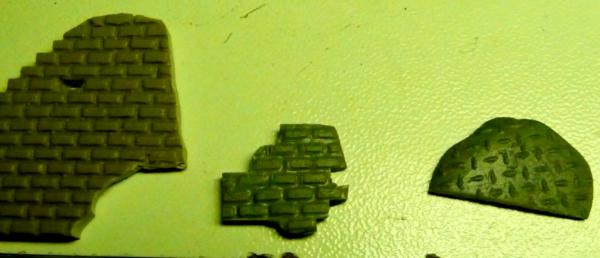
If it helps at all, have you got any instantmold, dave? It's pretty awesome for picking up textures to remould, and saving you money on plasticard stuff if it's just for basing -
Spoiler:
The one on the left is the original, and the middle is a grey stuff cast. The one on the far right is grey stuff of a mould i made off the back of a vehicle. You can get it much neater and flatter than this, was just something i threw together for basing!
'Rivet zen' is also an amazing thing to have associated with your name
Oh that is looking nice Dave, I will likely have to give the new address to send it to me once I am settled in. I will be offline starting April 19thg as the computer will be packed up and I will be waiting to load the truck the 20th!
dsteingass wrote:You'll have to add your own railings if you want them i'm afraid...you can't really cast that stuff. You can't have things that won't cast.
and I disagree..HO scale stuff has many, many, many uses in our scale...Railings, maybe
No, I meant add them after wards
As for the rail way I thought you were aiming more towards the trains themselves, as for scenery stuff I have not really looked at , I guess I will be going to the loft this weekend
see ya vik, and childe.... first cats, now spoilers... i think your like that robot from the disney movie "the incredibles" adapting to our every move, prepairing to attack.. im only curious to what you can get out of vik or ldd
I'm not planning on eating any of you... that just isnt fun... No, I'm planning on making you fight gladatorial battles weaing nothing but a spoon and lemon for a hat.
AnUnearthlyChilde wrote:I'm not planning on eating any of you... that just isnt fun... No, I'm planning on making you fight gladatorial battles weaing nothing but a spoon and lemon for a hat.
Rogue Wolves wrote:hahaha you think you have to MAKE me do that! so nieve... looks like its going to take much longer to become fully adapt.
Does sorta sound like a day at the park to me, too....
Automatically Appended Next Post: What exactly is on your funny little mind, Dave?
man dave!!! i am married man... you cannot tempt me like this! all that good stuff you are showing leads to wanting behavior... i could get into real trouble...you should really try to aim for something mediocre for once...sheesh...
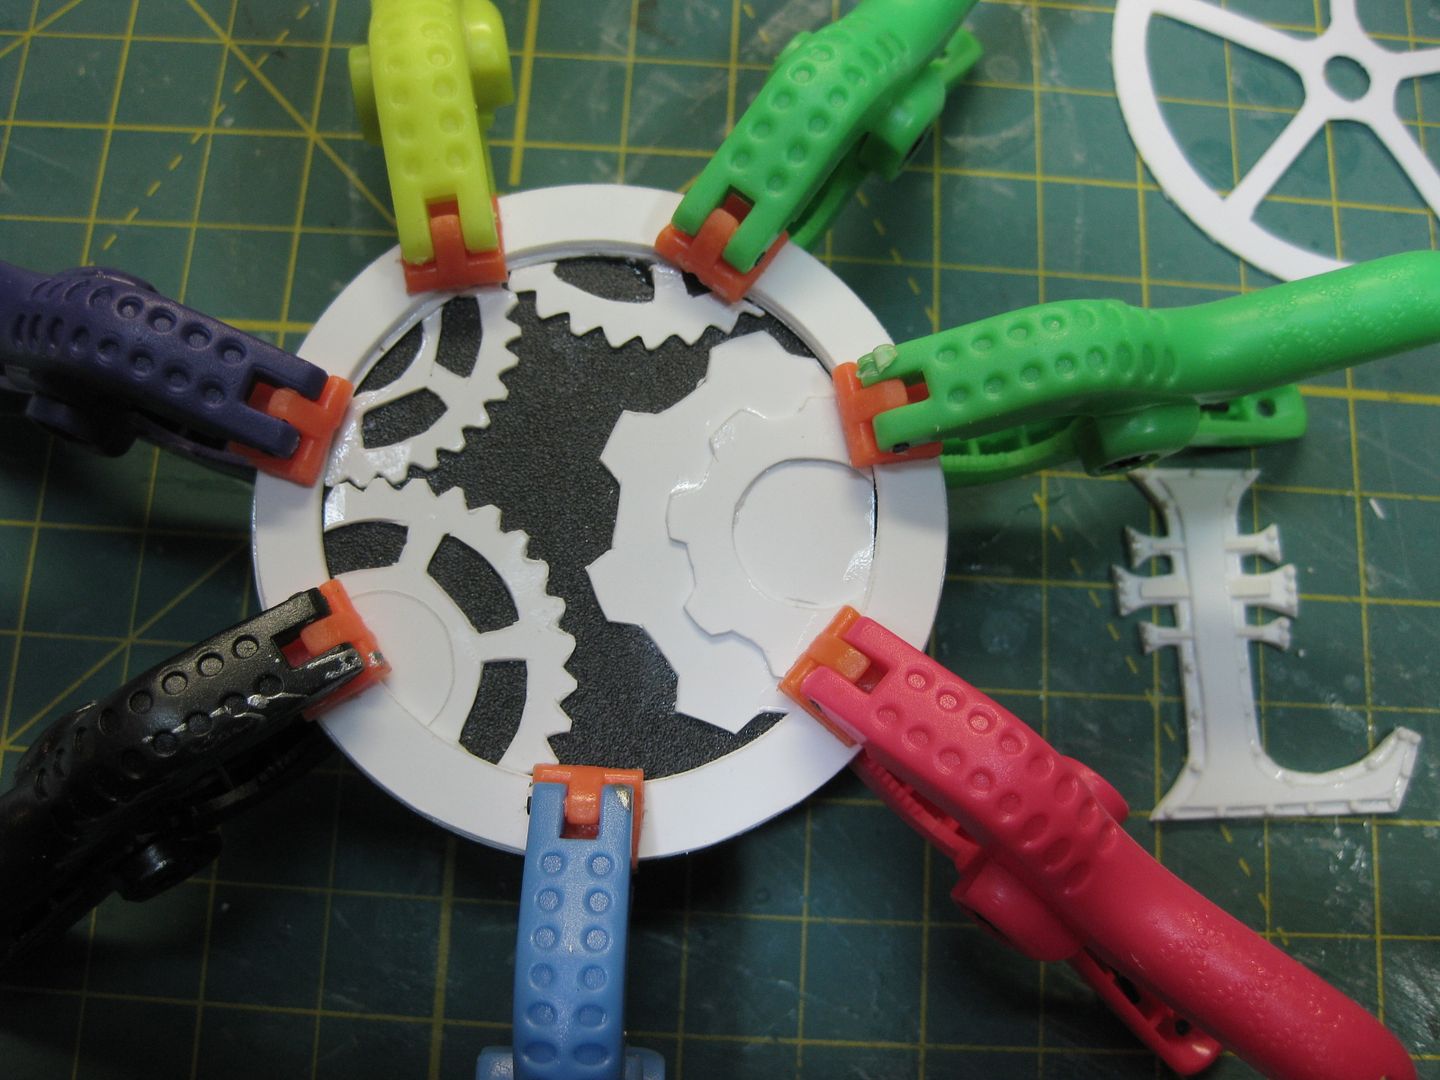
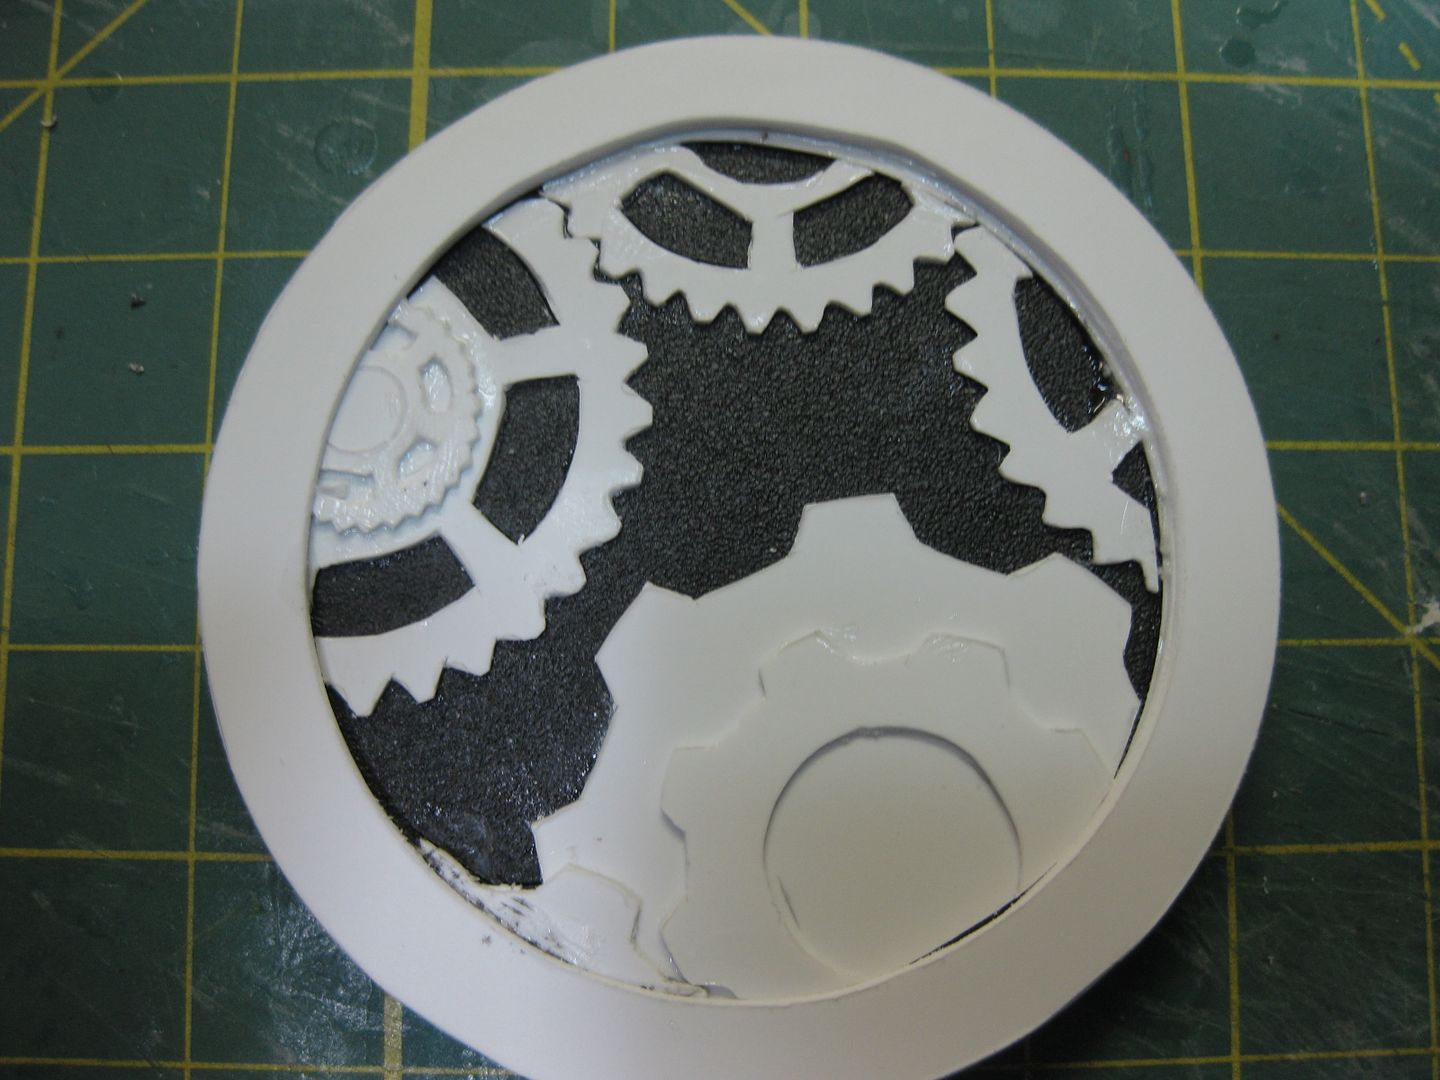
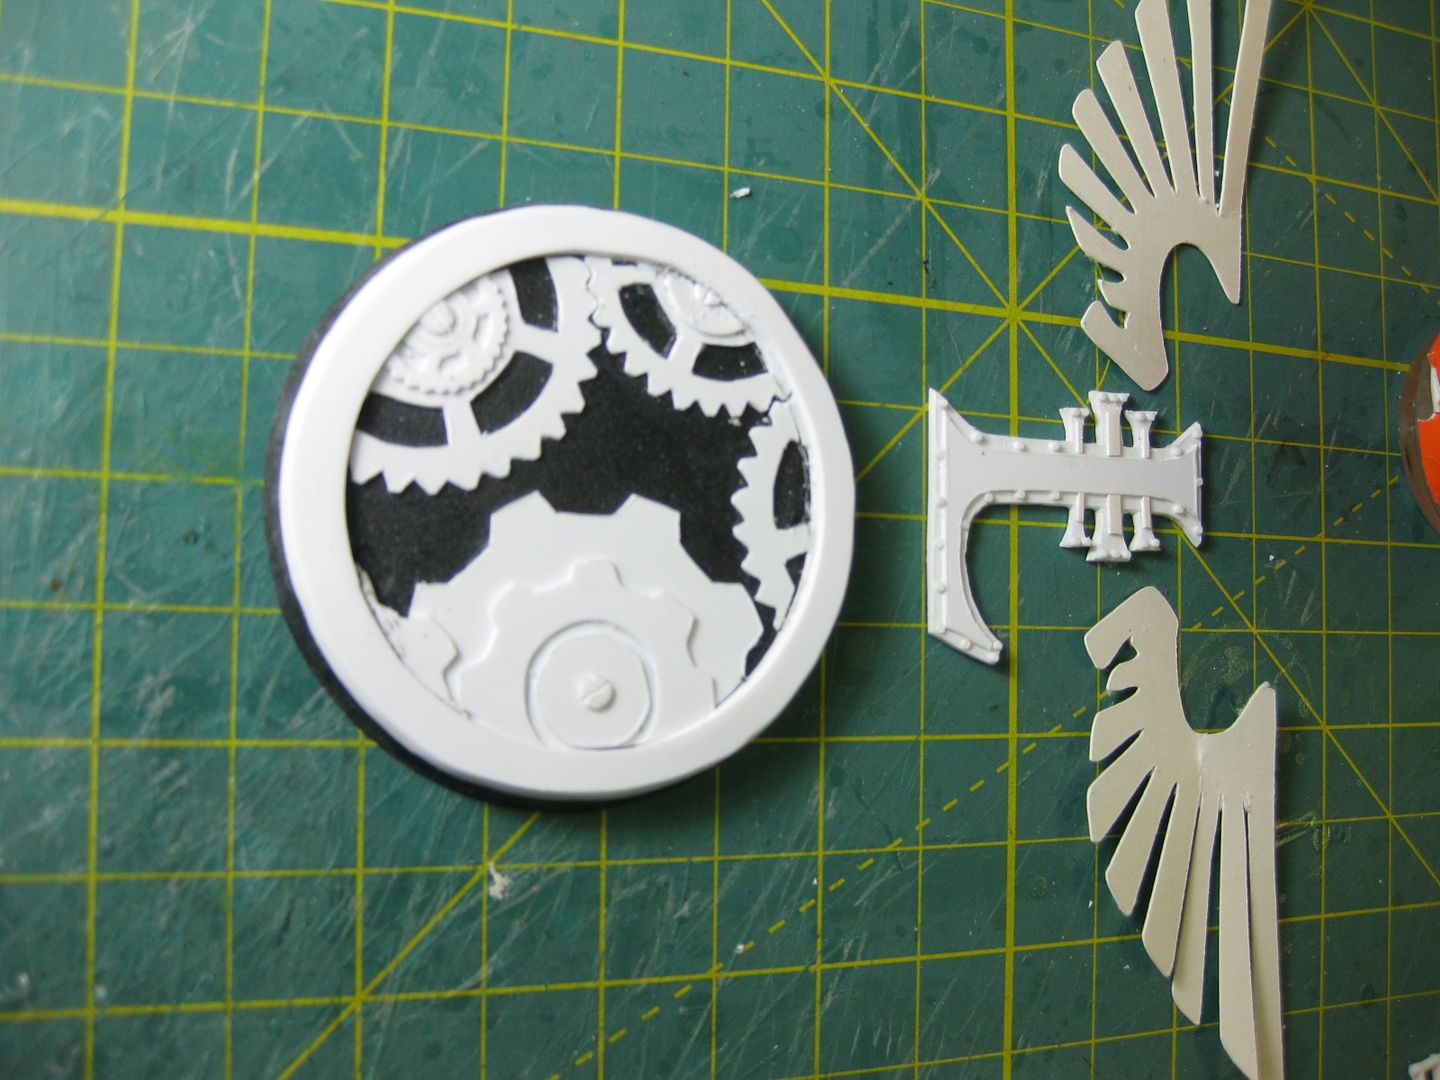
The possibilities are endless when you can create an infinite amount of .5mm thick gears in any size, but it takes A LOT of manual trimming with a knife (my wrist was wore out after getting as far as my previous pic) last night.
They still need cleanup, but do you think these will look right in the base? Real gears are so precisely machined, do you think I can get away with this rough plasticard look? If so, should I have some sort of DIFFERENT texture below all the gears and the League logo?? Or just more layers of gearwork? Or maybe just plain?
I find myself wondering if I use TOO MANY layers or textures that a miniature might not be able to stand properly? I dunno whether or not to approach it as artwork or a mini base now...Soo many ideas, sooo many possibilities!
i think all of your above given options have a lot going for them... i really love the gears!!! they make no sense in terrain mocking bases but i like them from an artist perspective! so i think one bog gear and some smaller ones...or more small ones for the small bases would loook lovely...as for the underlying structure or if you use too much layers...
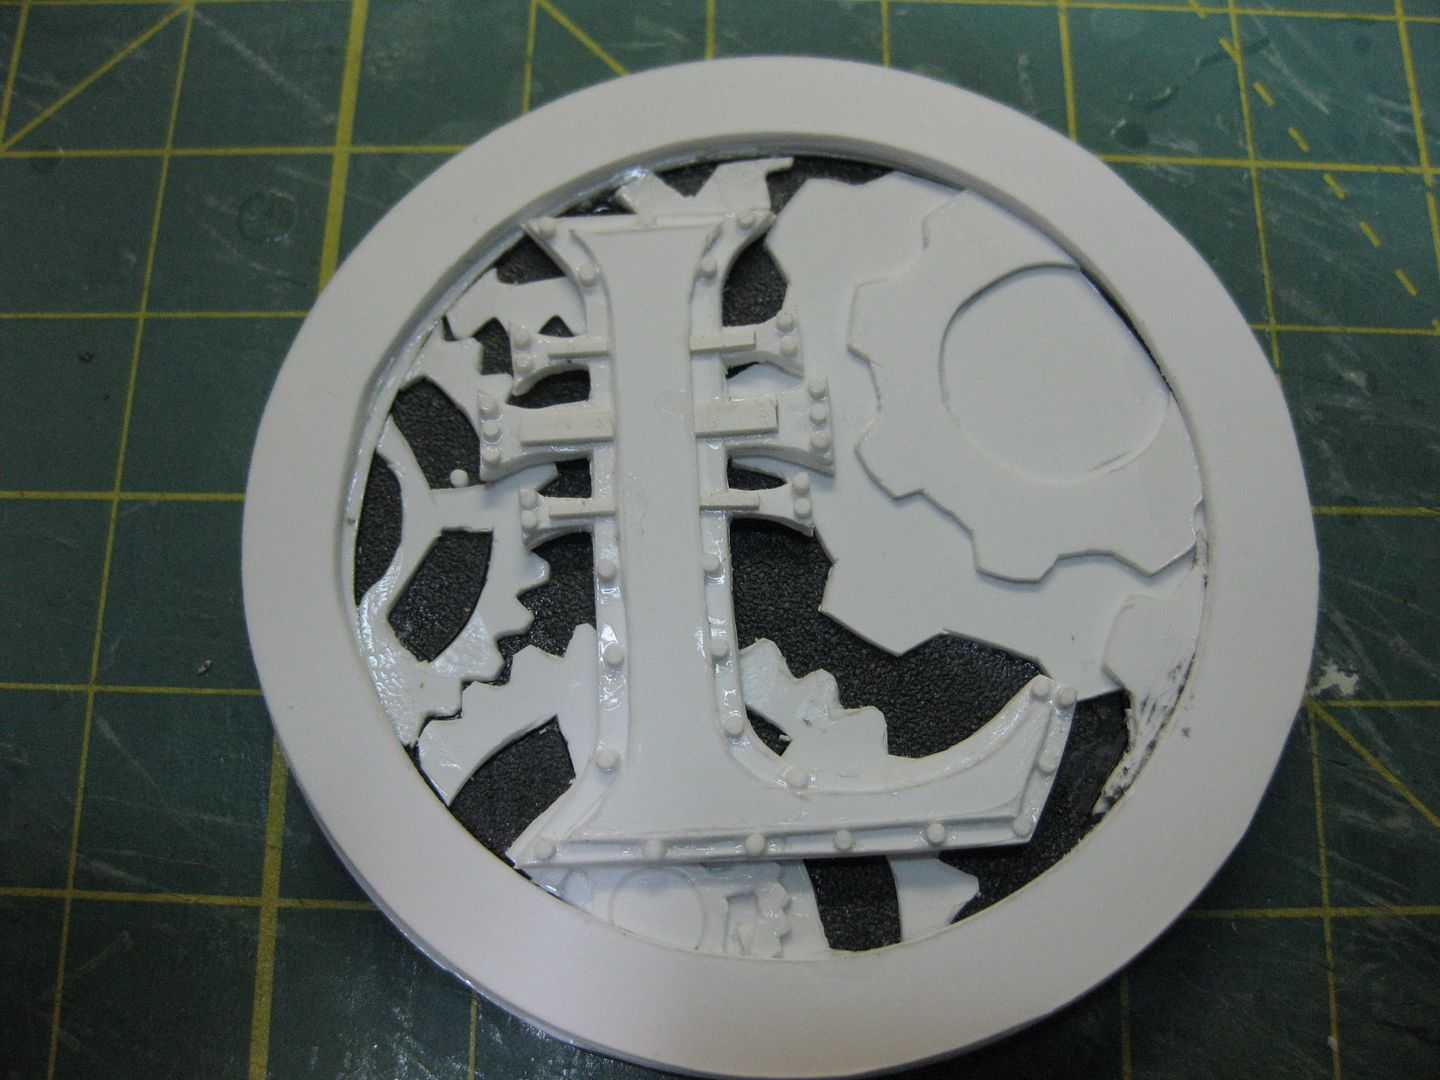
no, i think your stuff looks better multilayered...the way i imagine it looking painted is mainly metalics with washes afterwards...IF done in just one layer this would look to bare... you here created a look that will be quite cool! steampunky cool! as for whyt to use under the gears and the "L"...well i think the diamond plates would look good...but then the L has to be plain...(of course multilayerd too!)
and...i bet that was some hard cleanupwork...wouldn´t want to trade places here^^ because...i tried it one...but my designs looks bad...so i chuck them away... with yiur circut you get the basic shape done and then it is all your craftmanship again...! i like that devotion you show!
Man. I love those gears. One way that I would love to see them i standing at an angle on the base almost like they fell from a building. However this would not work so well if something were to be mounted to said base...
hey silver that lil 3d thingy looks almost like some artist price for some award... tho i would think less would look better...but the ruined clocktower sounds like a cool terrainidea nevertheless...i am looking in a certain dave-orientated direction here^^
how did you know? frim, tasty and one for each hand...that´s the winning ticket...always was and always will...gravity is for those who like them old and fat,..
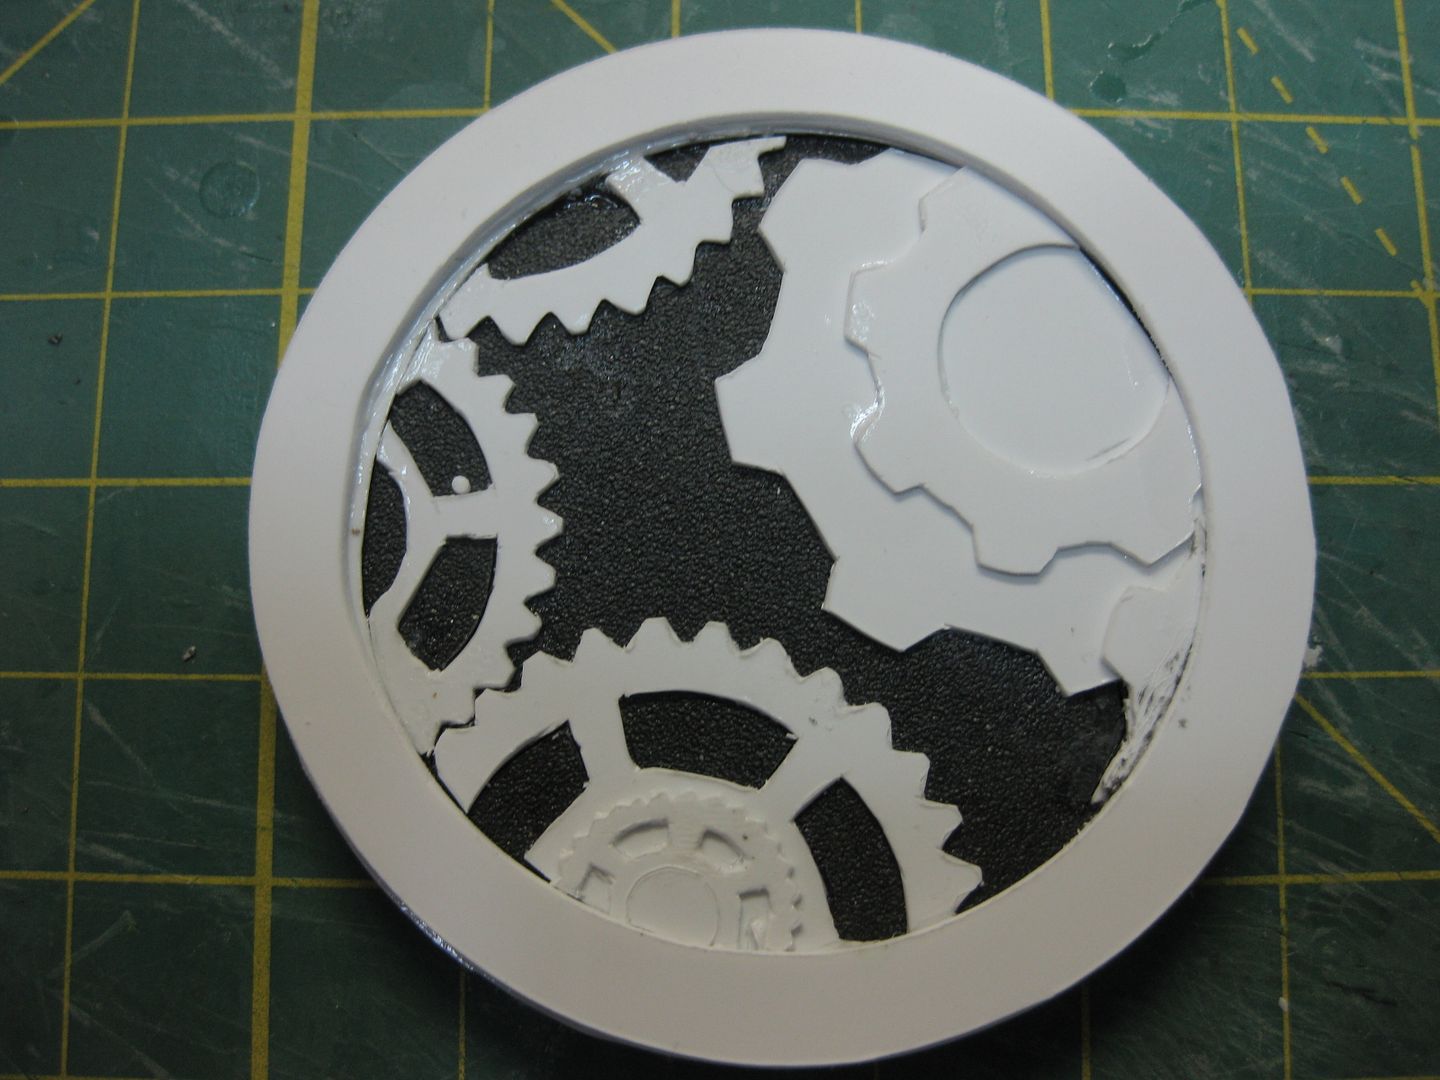
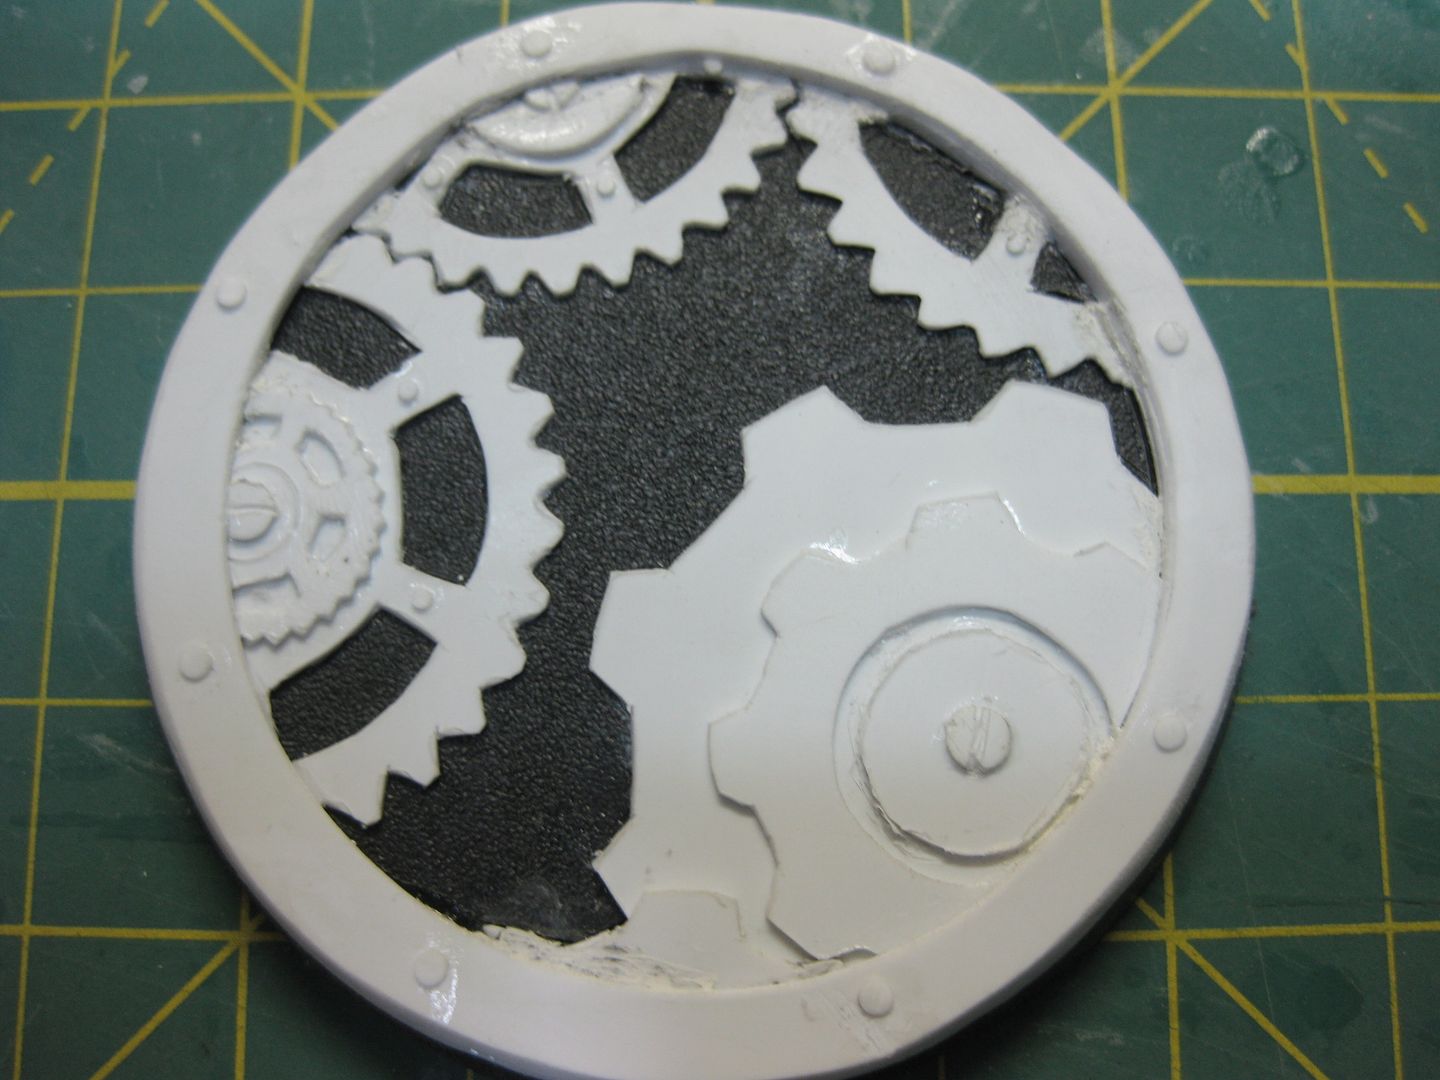
i think all cogs look great on this one...tho one minior issue i have to tell you...the right one...the one with the biggest teeth... it has no connection/ joint(?) with the other three? tho i think it looks also very impressive...!
Viktor von Domm wrote:i think all cogs look great on this one...tho one minior issue i have to tell you...the right one...the one with the biggest teeth... it has no connection/ joint(?) with the other three? tho i think it looks also very impressive...!
Doesn't mean there wouldn't be a connecting cog out of view Vik. I know what your getting at but logically, its sound. If it wasn't I'd have said, as I'm OCD about things that don't have logic/sense applied to them
Great work on your bases. Pure envy for the Cricut, which leads to my next point: Dave, you simply have too much fething time and money at your hands! Not only that you can afford the nicest toys (as working folk we can do such things) but you also seem to have infinite amounts of time to play with them (which an average adult doesn't have). What's your secret, mate? Admit that you have an army of slaves that do all the work for you...
If you don't question things Vik how can people learn or maybe adapt to make something better. Keep up the questions, as I love that in a person, especially with my current work at the moment.
Baiyan..I work like a dog, and then I go to my happy place, then I sleep, and do it all over again. I also have a well-paid, nerdkind non-narcissist GF, that is truly my secret
Automatically Appended Next Post: dave that reminds me of the chamber that the golden army was held in during the movie Hellboy 2 (which means i like it)
hmmmm.... that is a bit difficult... i am biased about it...
looks good with the L also without.,.. tho you have to say atm all in white the mucho whiteness drowns a bit all the good things... painted it might look complteley diffrent... if we do the L in brass and the cogs and such in steel...that could look lovley...
ok...granted...i see my error^^ (no really!) also: if you do it like: steel frame with rivets, brass cogs and then steel L it gets a nice tricolor look...
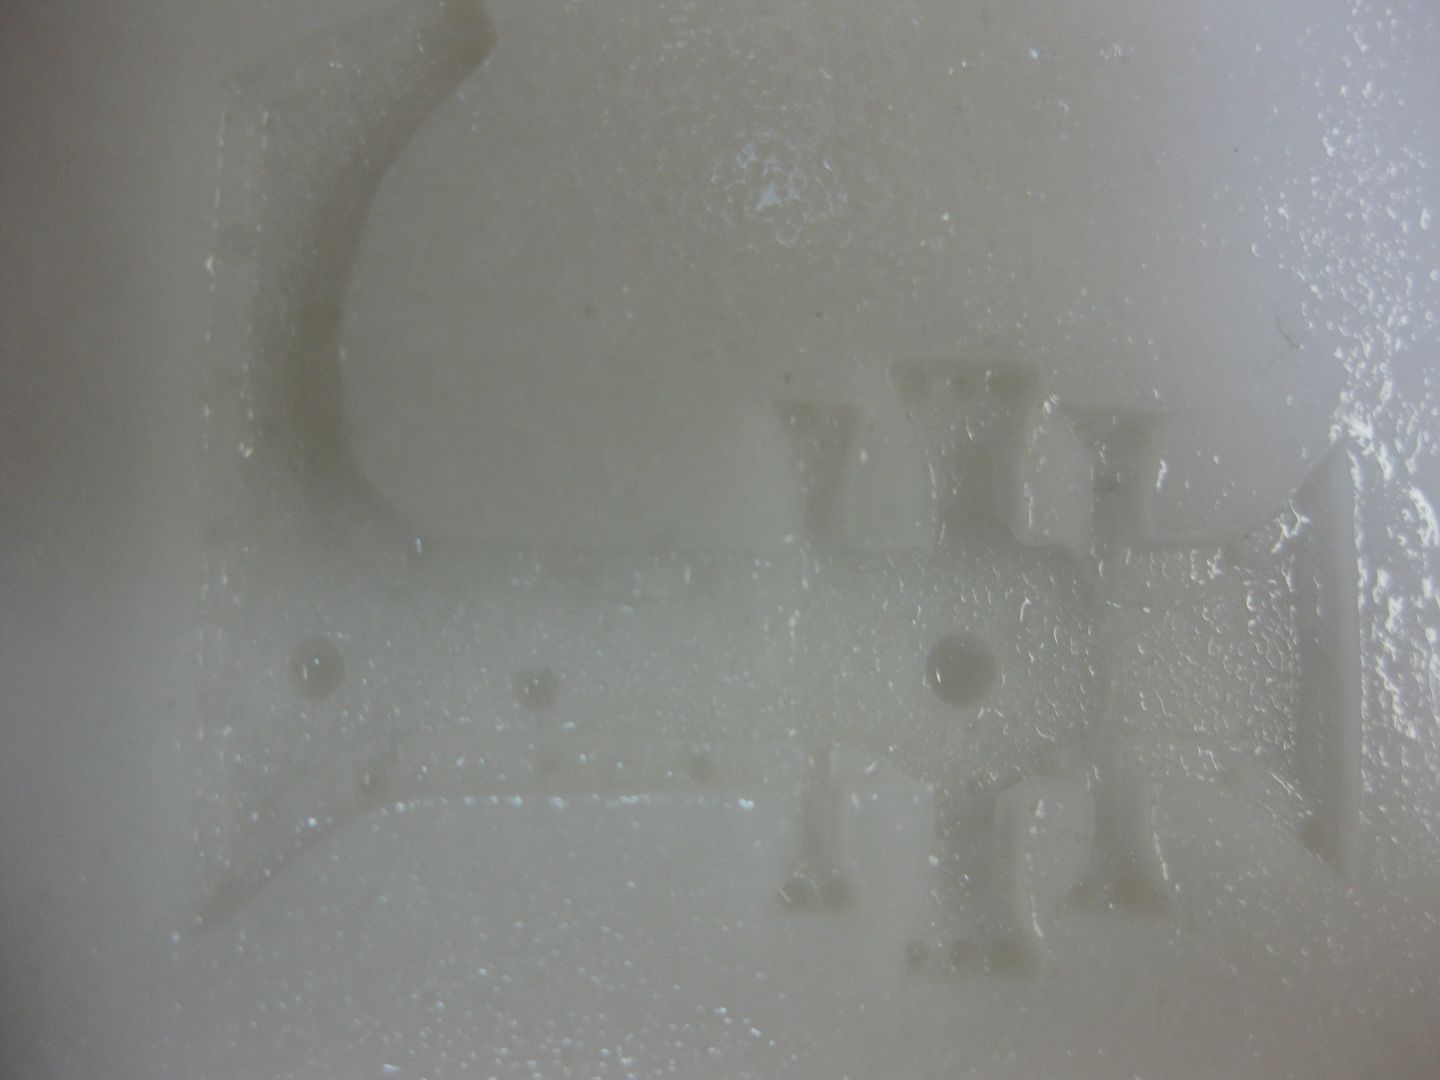
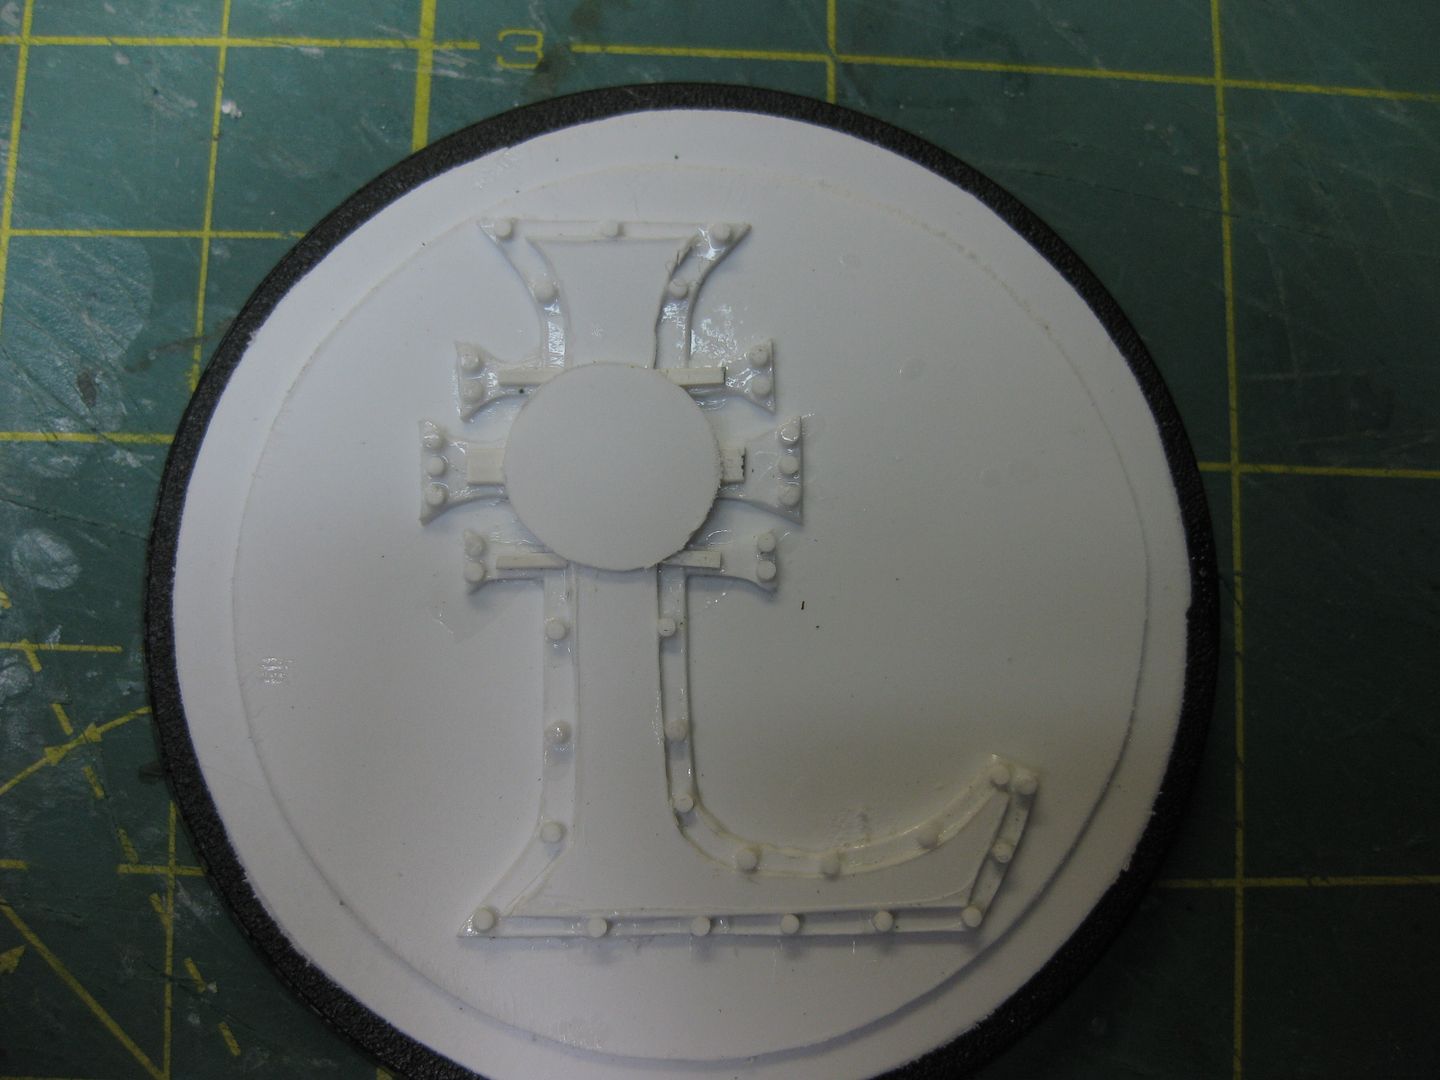
Tomorrow, I'm gonna go get some of that instamold stuff for the -=]_,=- Logo to be cast seperately from the bases...- It makes the most sense to me and will prevent me from regret gluing it..again.
SilverHayabusa wrote:I think he saw you as a lone dog.
WTF does that mean
Firstly just took a while to catch up (usual amount of weird crap to wade through) On the base design loving the cogs with or without the league motto works well.
I have had an idea you might like probably not though, as to the issue of the mini standing on the base and uneven stable issues, you could just use a clear plastic circle and raise it above the base design, to stand the mini on as if standing on a glass floor above the workings.
It could be quite easy to achieve I would think and you could cast the posts on the outside edge of the base readily to place the plastic circle.
@LDD- there is only .5mm lip between the gears and the top lip (less where the screws are) so a piece of clear would actually stick out abouve the lip.
Yeah, I though about several different things, but I've really got to keep the design open, if someone wanted to, they could use some REALLY thin clear stuff, (like overhead transparency plastic- like you use for window glass) but i'm afraid it would be too flexible to mount a miniature when you were done.
LDD, you're just going to have to figure that customization out on your own if you wish.
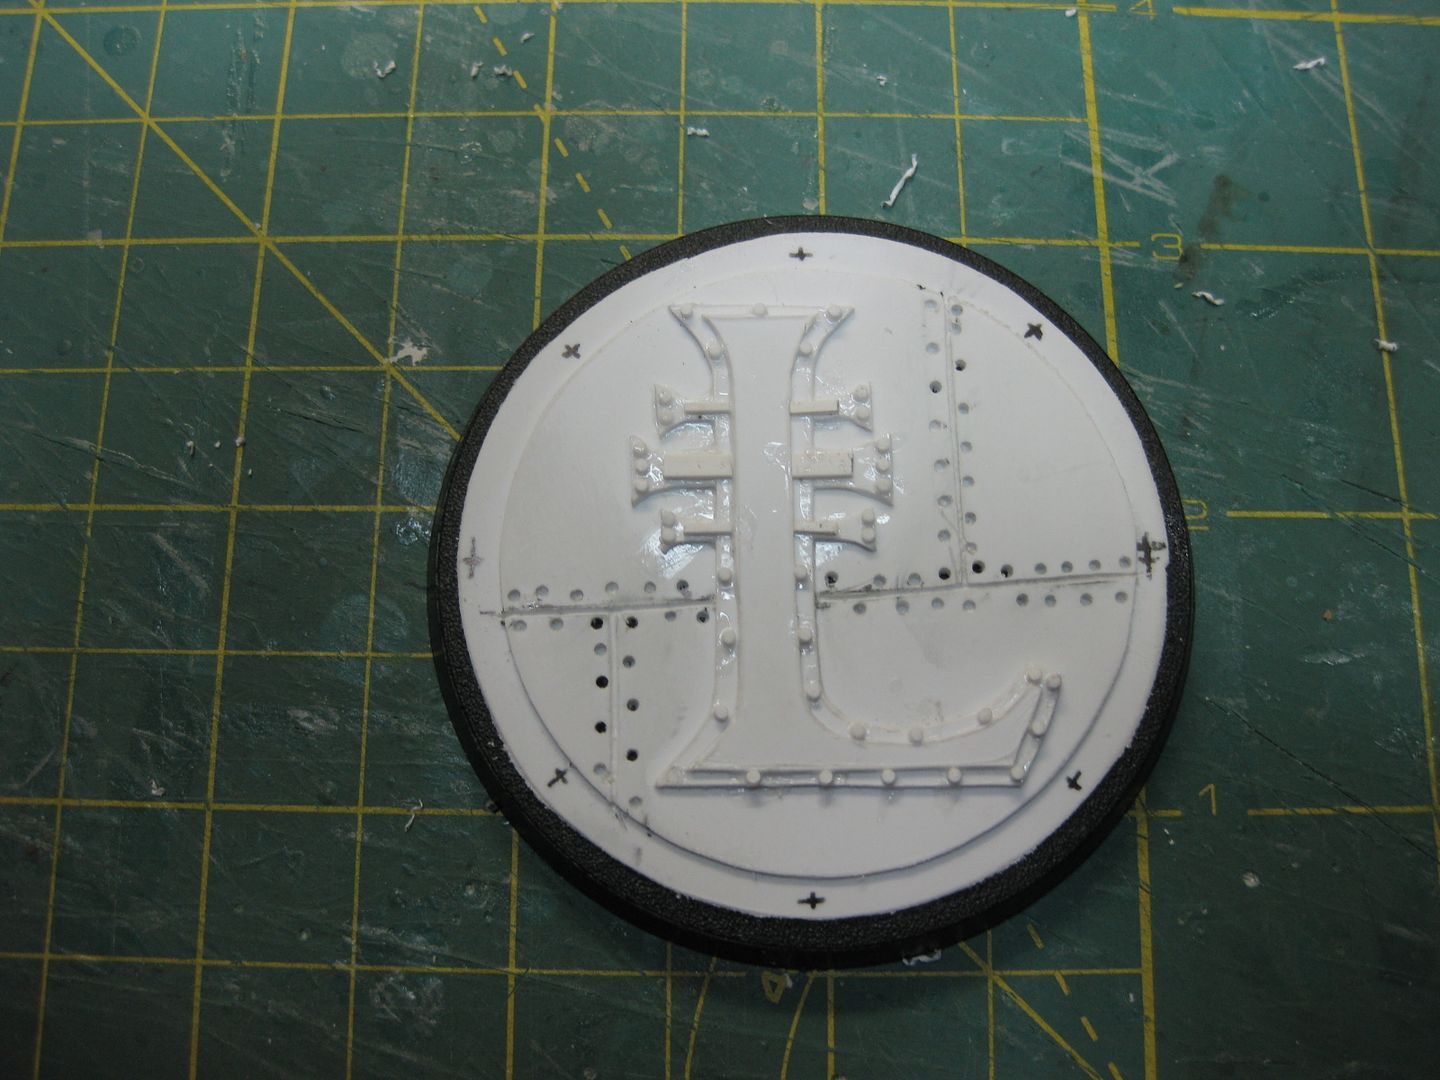
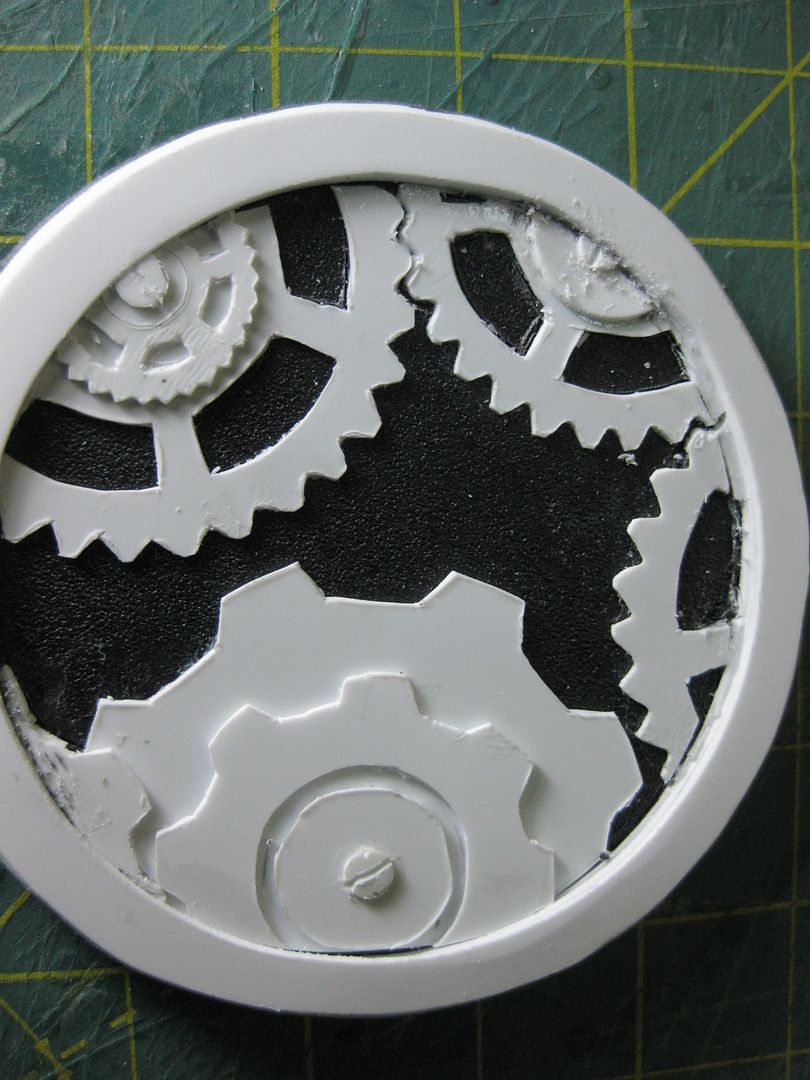
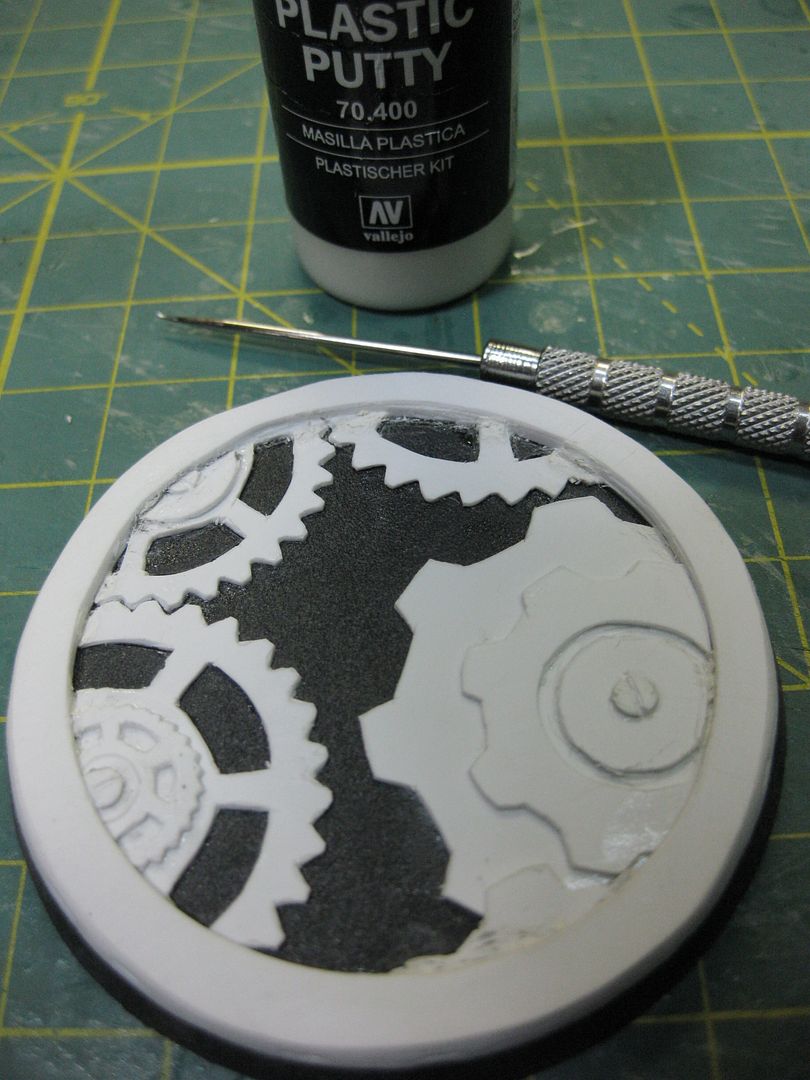
Automatically Appended Next Post: Cracks filled
Ready for rivets
Automatically Appended Next Post: I think we'll call this one finished...I need to move on now
I see your reservations concerning my clear plastic circle However I meant the white circle section that surrounds the cogs (which you have now riveted, in place of said rivets use longer lengths of rod all the same hight to sit the clear circle section on.
Plus I was thinking of using like a clear perspex for strength, it was only an idea
lone dirty dog wrote:I see your reservations concerning my clear plastic circle However I meant the white circle section that surrounds the cogs (which you have now riveted, in place of said rivets use longer lengths of rod all the same hight to sit the clear circle section on.
Plus I was thinking of using like a clear perspex for strength, it was only an idea
Please LDD, I wasnt scolding you brother was challenging you to modify yours in that way! I love the idea of the raised bits, you can easily make that mod to yours when you get it
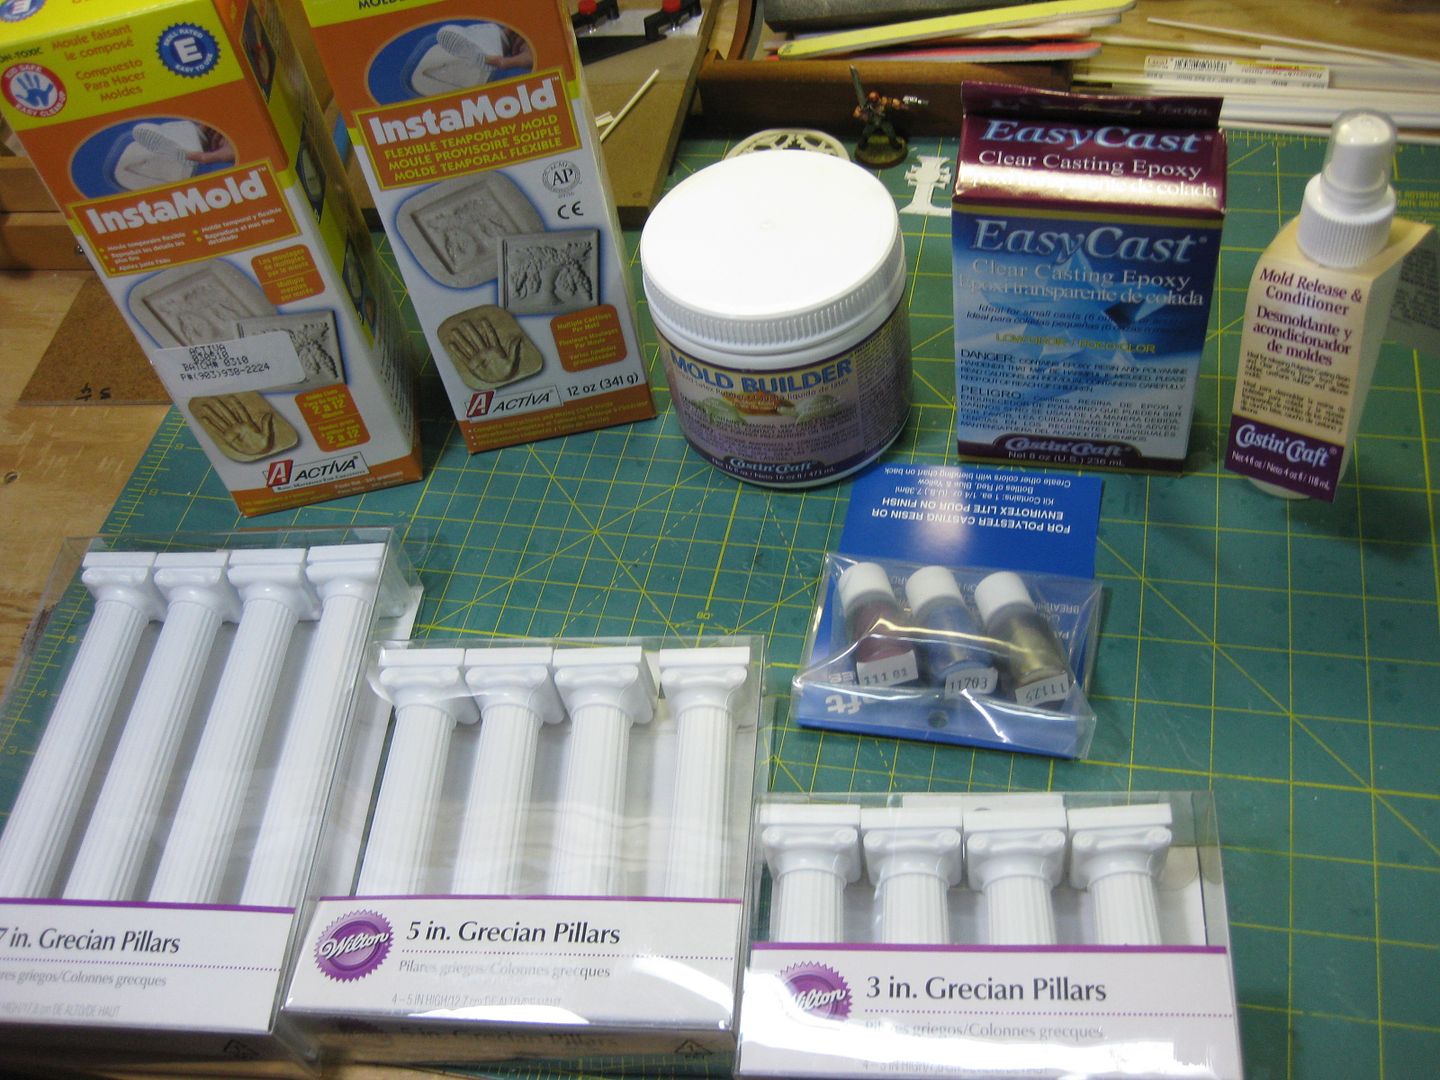
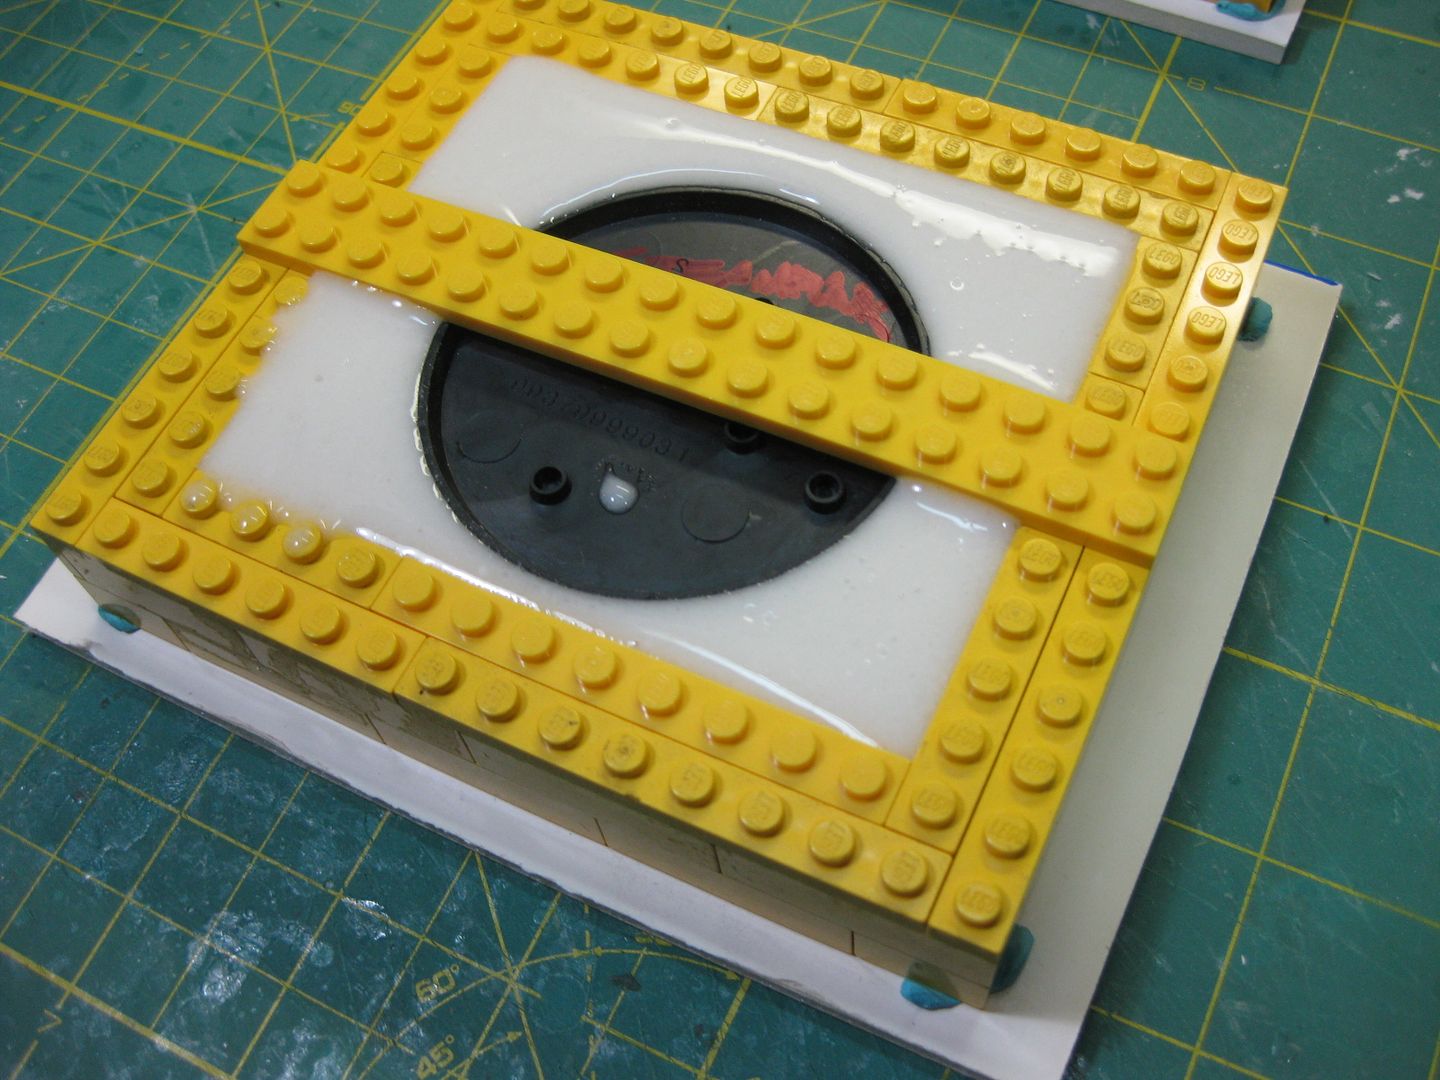
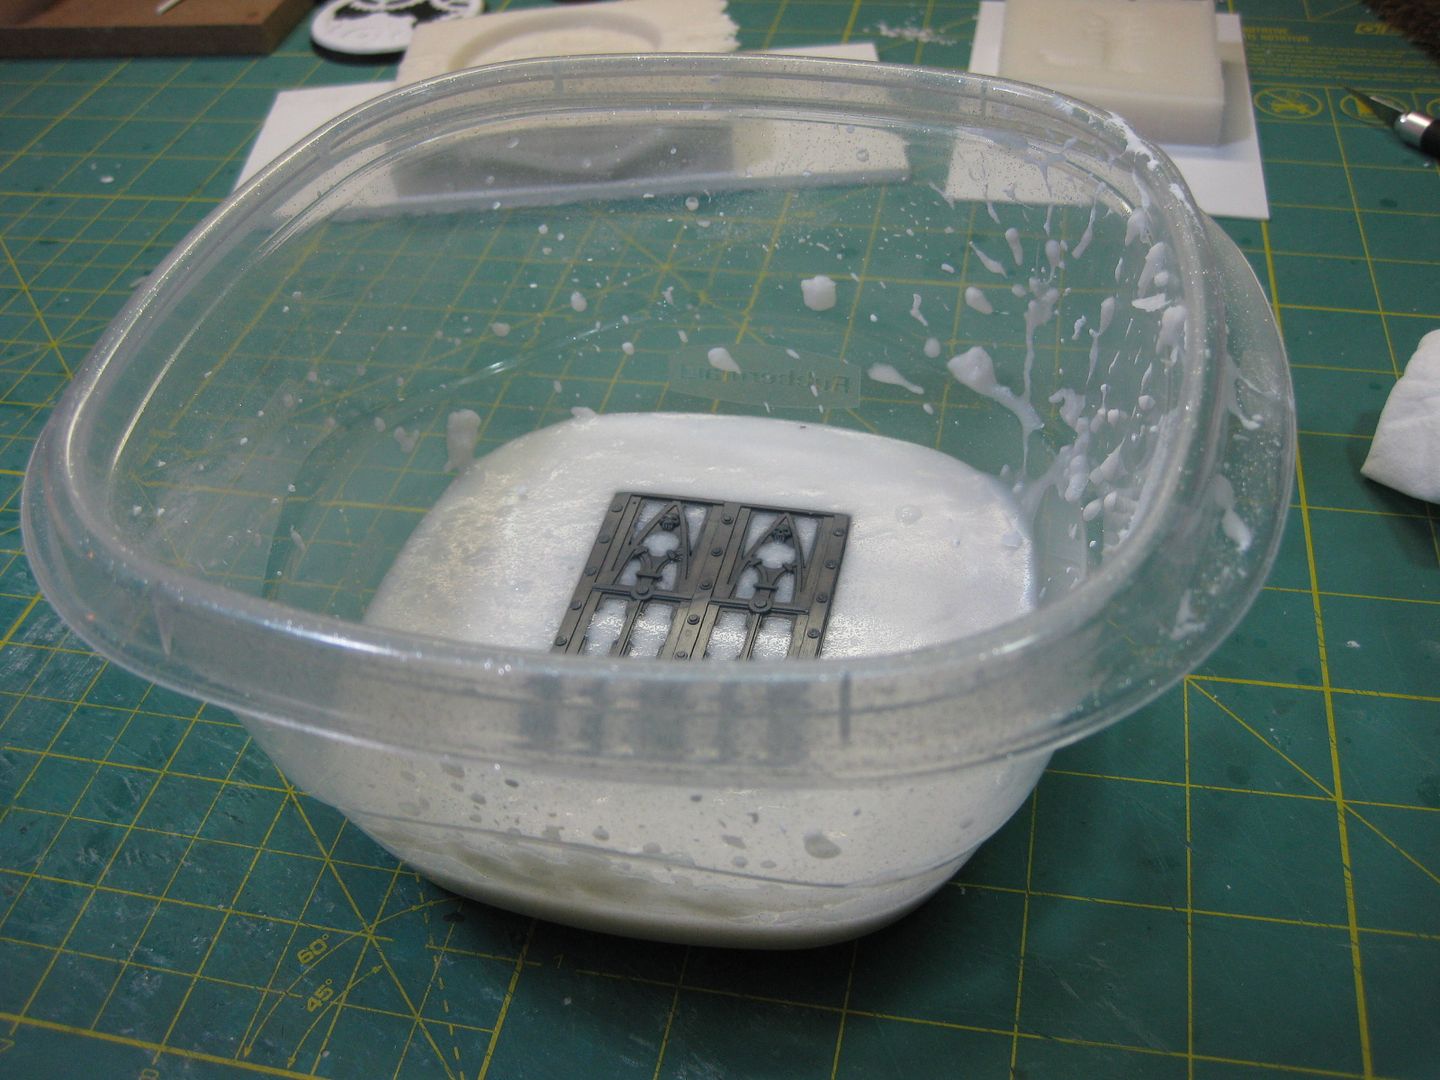
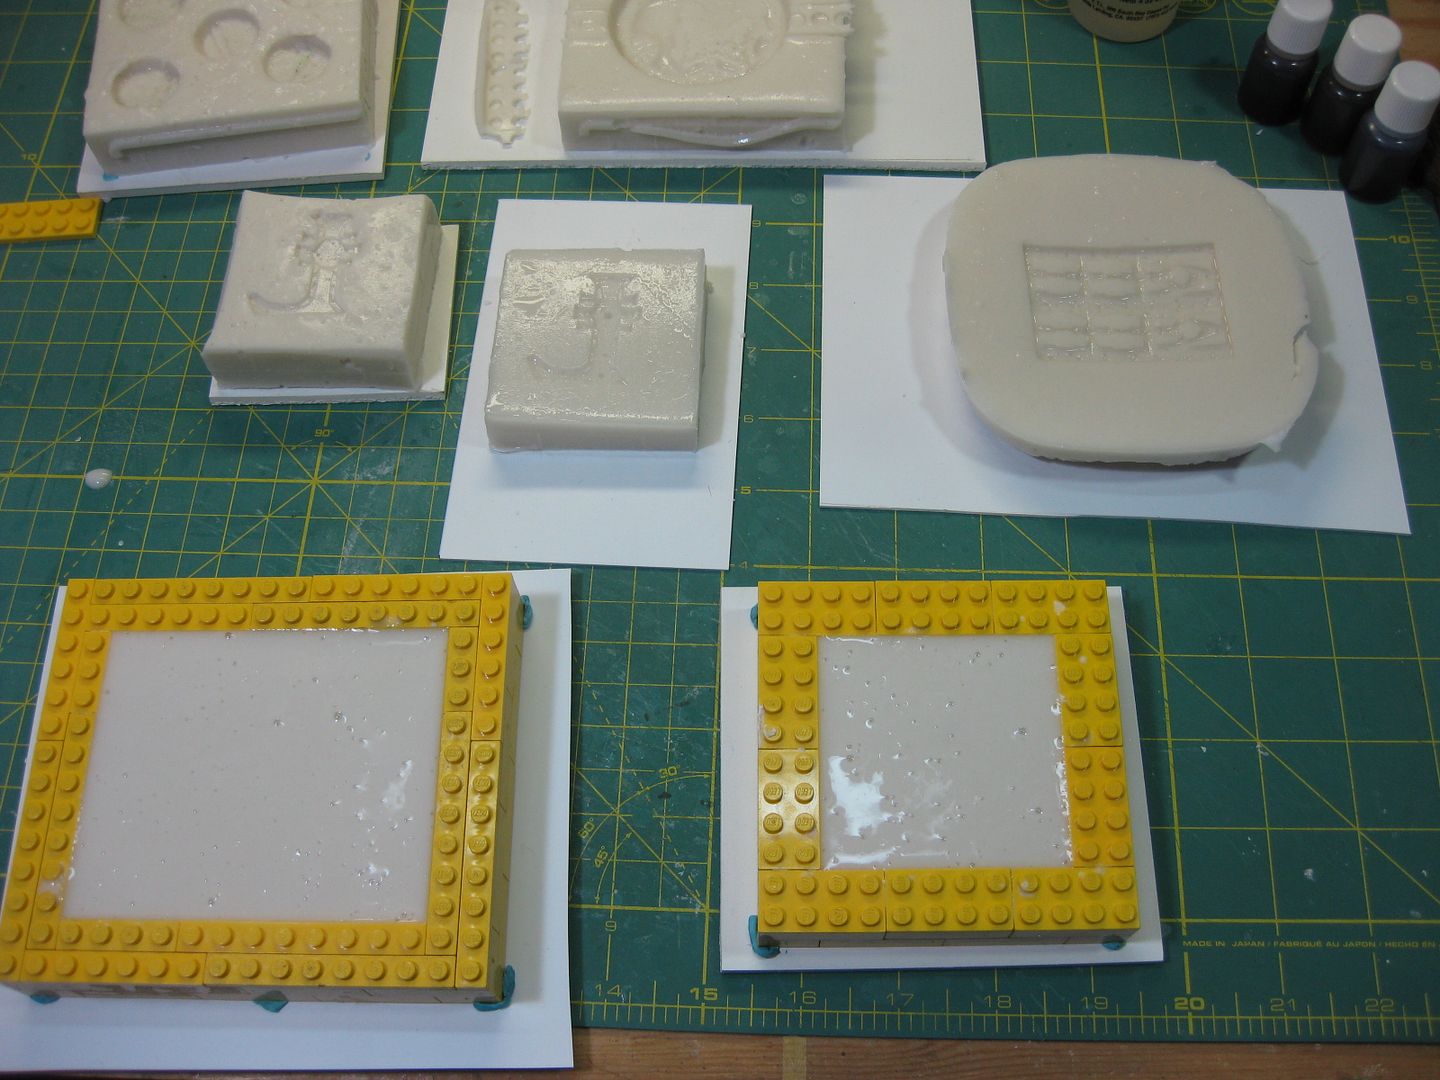
Automatically Appended Next Post: This is everything mold-making and casting-related that i can get in my local area (besides some big cans of polyester resin, which I don't know anything about), no 2-part silicone rubber to be found sadly...
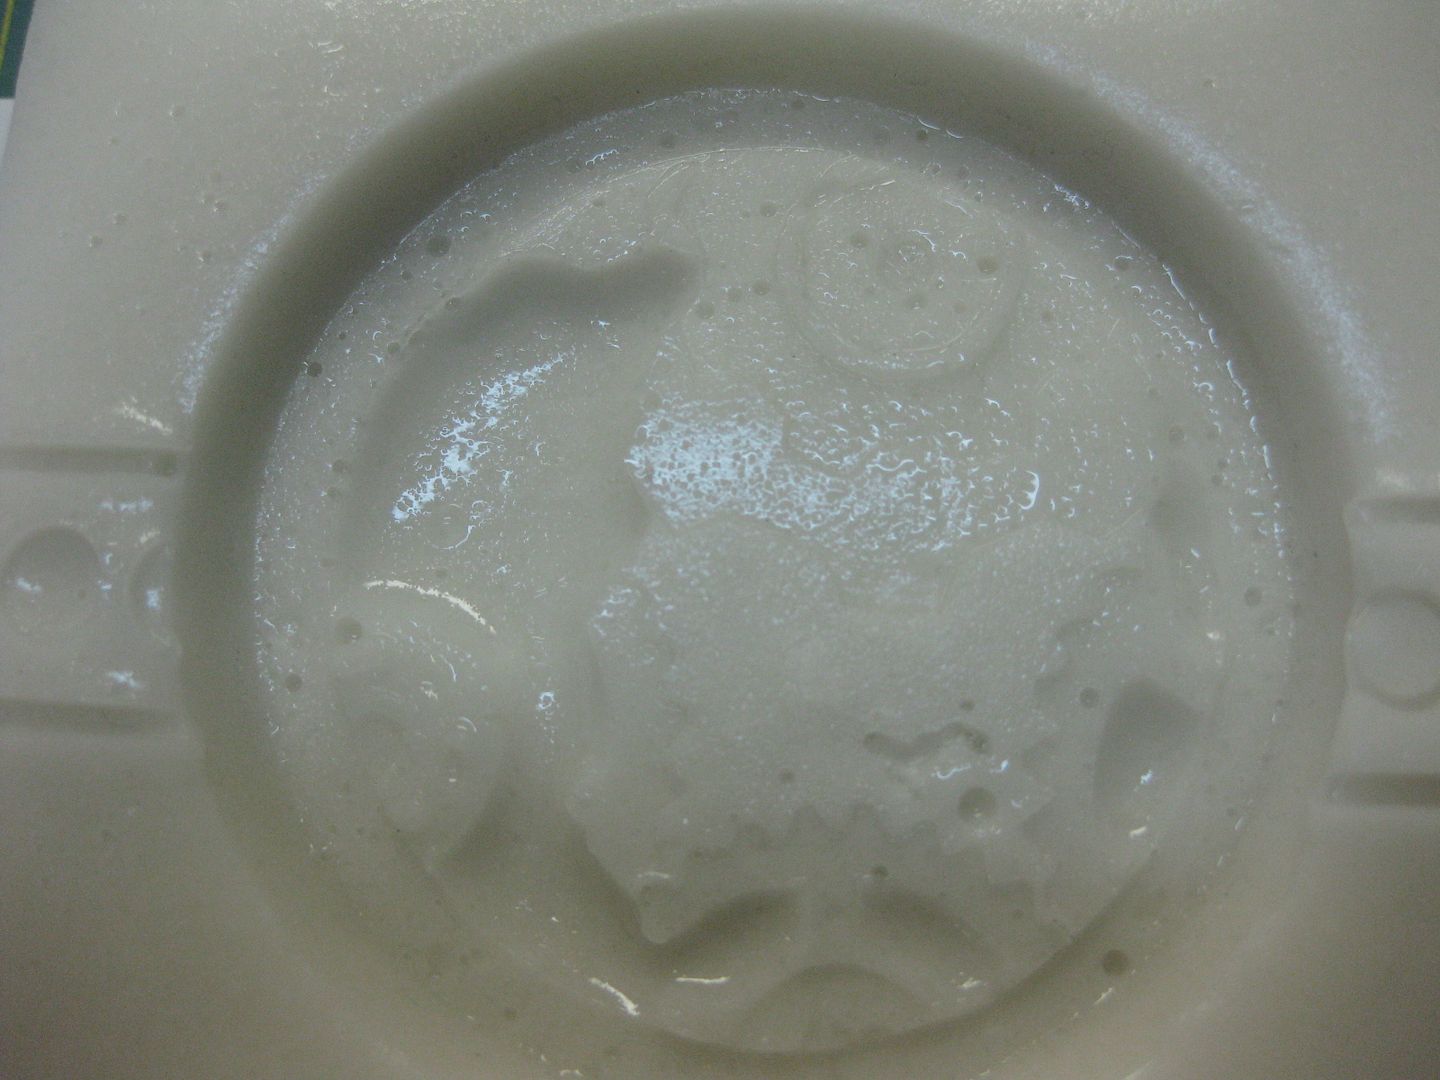
I have BIG plans for these columns! And it has to do with casting them!
So, we play with Instamold...
My mold-making virginity is now lost.
.....For the -=]_.=- !!
Please Note: No Heresy was committed here, all Legos used have lived a long, playful life, and are only dirty and/or scratched...They still serve!
i feel like a dog when i say:
"when, when, when, when, when, when,when, when, when,when, when, when,when, when, when,when, when, when,when, when, when,when, when, when,when, when, when,when,when, when,when, when..............................................
Automatically Appended Next Post: ohoh...dave used legos for a heretic use...the end is nigh....
and nice suply drop...i was a bit worried there wasn´t some nice saturday night extravagance in that department for us all^^
and...i know what you are atemting to do with those columns...but i aint tellin`
Automatically Appended Next Post:
Please Note: No Heresy was committed here, all Legos used have lived a long, playful life, and are only dirty and/or scratched...They still serve!
That League Logo Base looks down-right awesome! I'm constantly amazed at the amount of products that you put out over and over and that the quality is top notch. Due to your love of Legos, I thought I'd share this with you, if you haven't seen it already. It could give you some nifty Lego-kit bash ideas.
Dave the best way usually is to have a block of wet clay at the base within the walls, place the item you are wanting to mould face up, then pour the mould product on top. that way air bubbles rise to the top, and won't become trapped against the item your wanting to replicate. Always remember, air bubbles rise. so the product needs to be at the bottom for moulding.
I will try it when mine arrives I was thinking of using an old camera lens if it's the right size
Those columns look interesting what have you planned for us know any hints
I tap the side of my mould gently with a small hammer to get some of the air bubbles out with some success although the massager should work
Automatically Appended Next Post:
AnUnearthlyChilde wrote:Dave the best way usually is to have a block of wet clay at the base within the walls, place the item you are wanting to mould face up, then pour the mould product on top. that way air bubbles rise to the top, and won't become trapped against the item your wanting to replicate. Always remember, air bubbles rise. so the product needs to be at the bottom for moulding.
do you mean stick it to a flat sheet of plasticard then fit the lego around that if so I tried that with a sheet of plastic but for some reason clay, plasticine ect work better
Yeah thats pretty much what I mean Dave, except instead of sticking it to plasticard just line the base with clay/plasticene works a treat. (i make moulds all the time for making latex masks )
AnUnearthlyChilde wrote:Yeah thats pretty much what I mean Dave, except instead of sticking it to plasticard just line the base with clay/plasticene works a treat. (i make moulds all the time for making latex masks )
This is interesting what kind of masks horror theatrical or just weird pleasure ,,,,,,,
also, sorry it took so long to reply... sticking together gaunts is a royal pain...
Note to all... when talking about Monopose gaunts... never refer to them in conversation as Menopause Gaunts... as I did to my dearest mother... who looked at me like I was stupid
AnUnearthlyChilde wrote:also, sorry it took so long to reply... sticking together gaunts is a royal pain...
Note to all... when talking about Monopose gaunts... never refer to them in conversation as Menopause Gaunts... as I did to my dearest mother... who looked at me like I was stupid
AnUnearthlyChilde wrote:@LDD I make random ones, tis kinda of a hobby of sorts... started out as a uni project when I was there, now it's just a random continuation...
Automatically Appended Next Post: and now I return to sticking fething gaunts together
Have you any pics always something I wish I had gone into film props and that
That sounds risky fething gaunts do you have special tools for that
of course these are the rubber mold....silly me... but maybe your mix was too enthusiastic? like making creme but here you don´t have to stirr so much? i mean what is the cause for so many bubbles anyways?


 I meant this is the officially released software for personal designs
  ...that would even justify a redo from scratch as i have reently found some nothces and glitches thus i could do better...
 I just love plasticard bearing in mind that I've only just porpperly discovoured it!
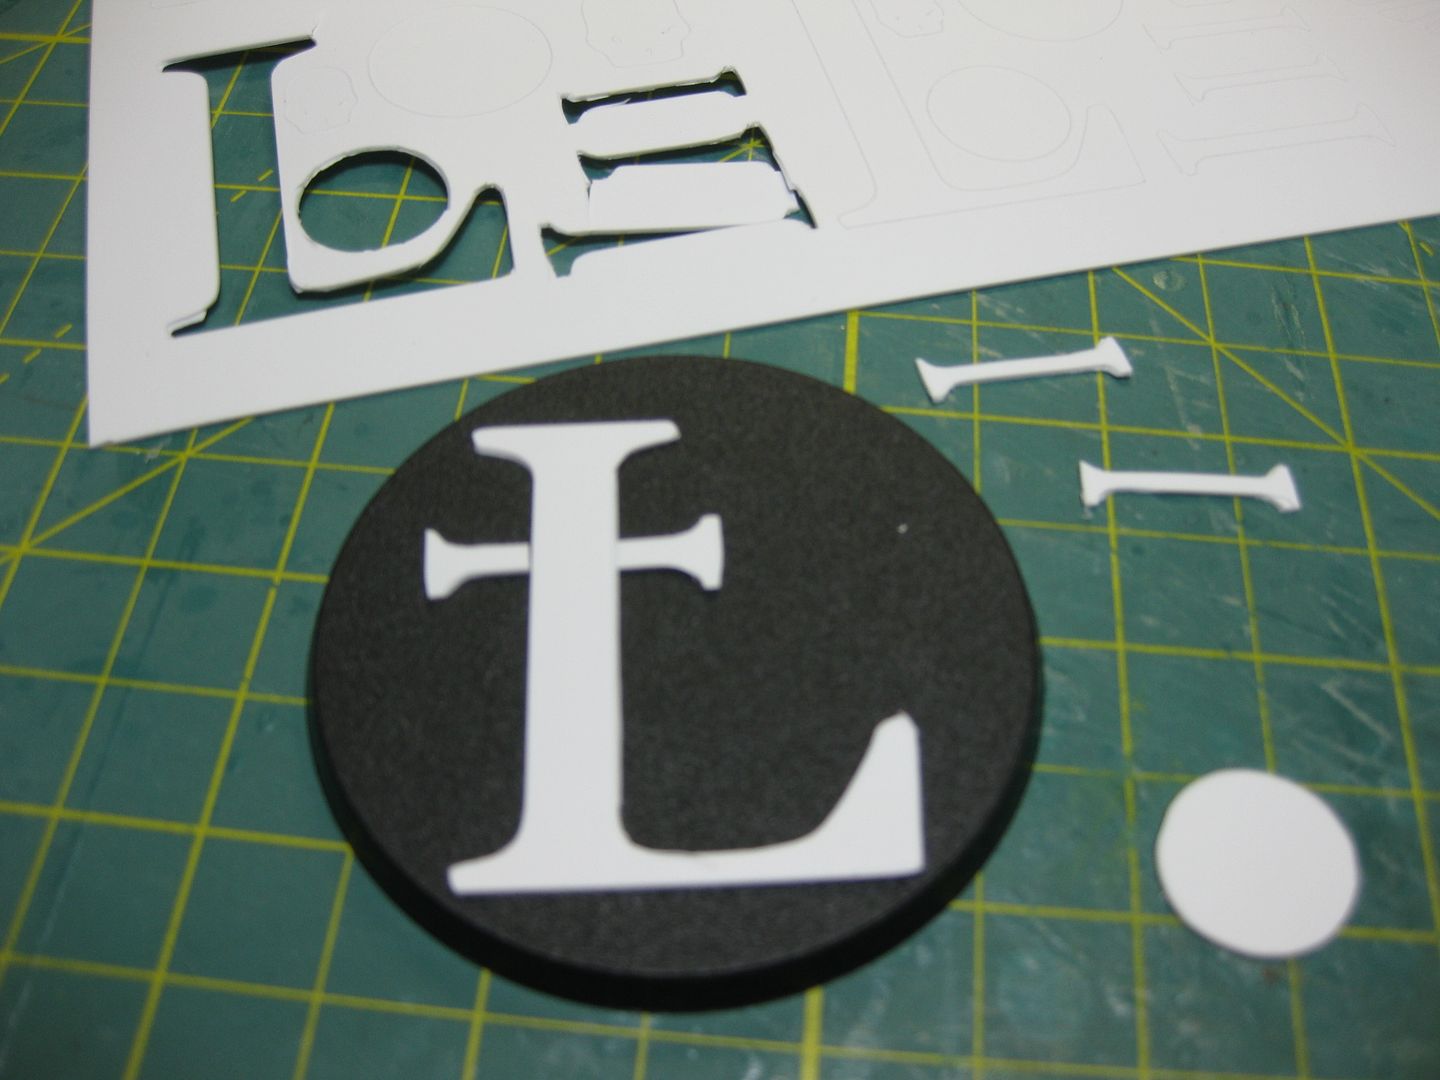

 -
-