33872
Post by: Turaxa
Hello denizens of Dakka. This will be an occasionally-updated log of my attempts to get back into miniatures painting after a rather long hiatus. Like many before me I hope that sticking my work online will motivate me to be productive. Let's see if it works...
This is the first model I had painted in ages. I did it mostly to check that I could stil use a brush to stick paint on a model, so excuse the quality. I shall leave him here in all his noobish glory in the hope that he will be surpassed!
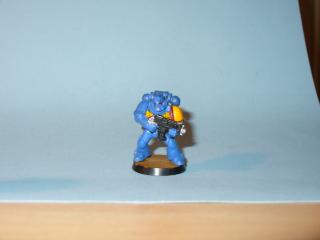
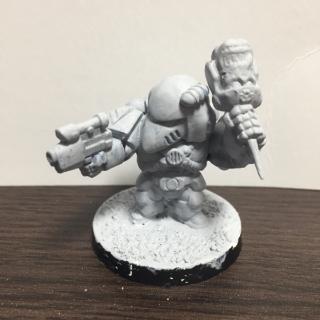
Below is my current project. It's one of the old school metal Long Fang models, who will be getting one of the new-style heavy bolters.
33872
Post by: Turaxa
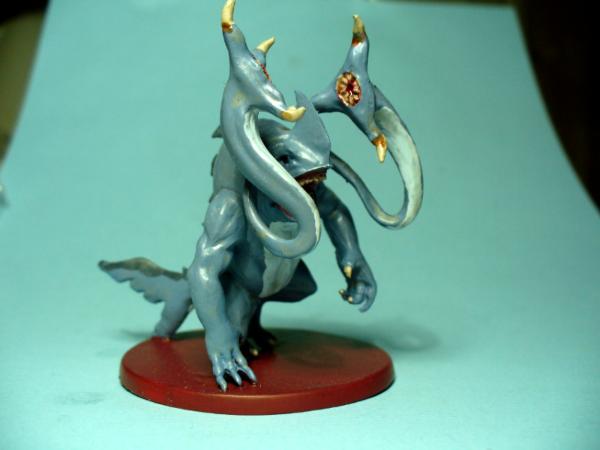
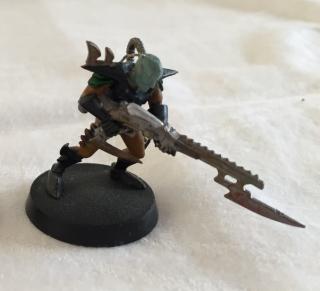
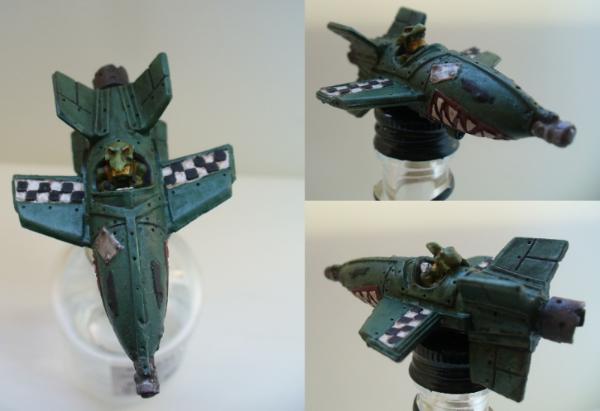
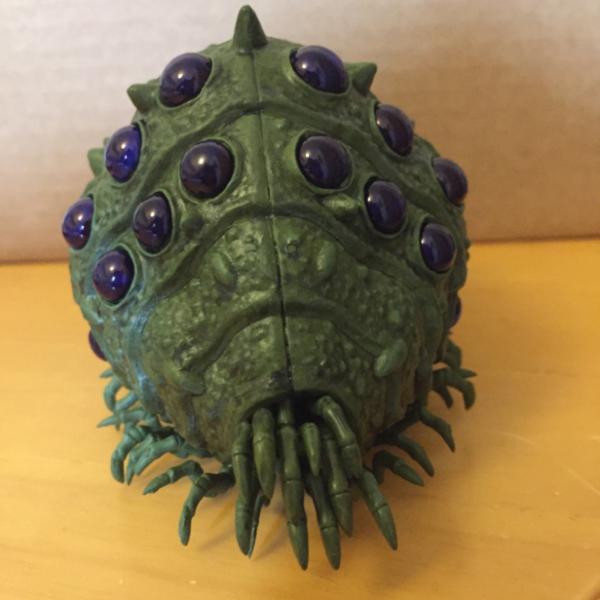
This is a 'Meroid' from the Descent boardgame. It's a sort of shark-humanoid with tentacles. This one belongs to a friend of mine who asked me to fix it after it became detached from its base. After fixing it I thought I'd go the whole hog and paint it as well.

33872
Post by: Turaxa
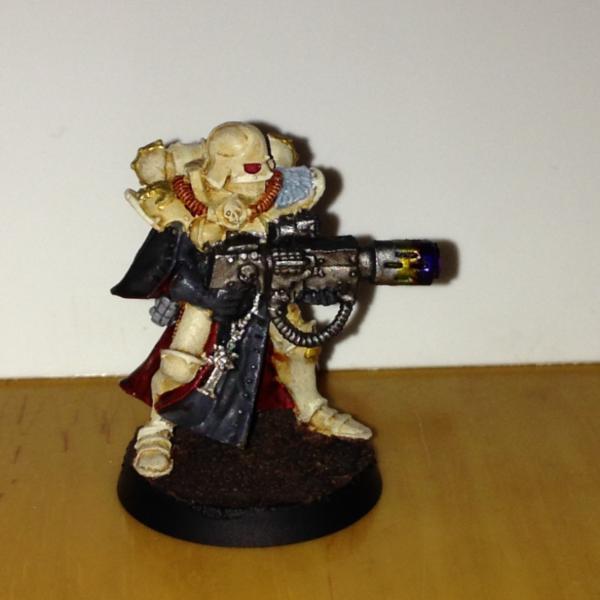
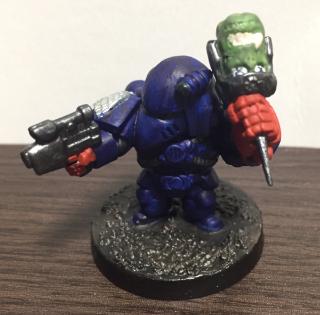
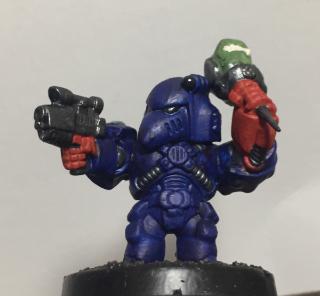
Here is the finished Space Wolf.
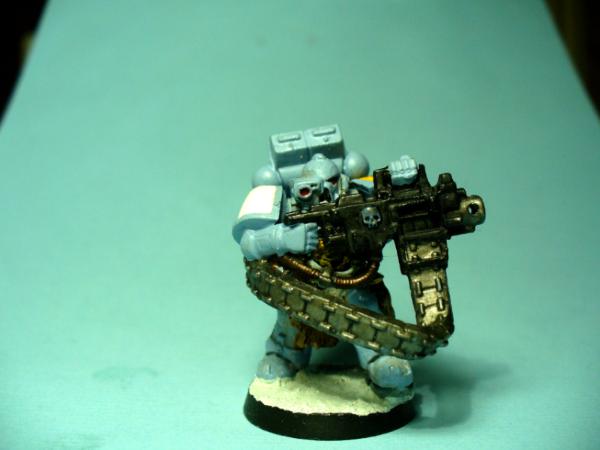
He's a Long Fang of Ragnar Blackmane's Great Company, although you can't see the shoulder icons in this picture. The scale creep between the metal model and the plastic arms meant that I had to fill the joins around the shoulders, and the gun obscures most of the detail on the torso, which is a shame. The base was done with Citadel 'Mourn Mountain Snow' texture paint. It's supposed to be snow but I'm not entirely happy with the result. Am I meant to use the texture paint in conjunction with another product to achieve a snow effect?
I'm also trying to improve my photography setup, so here is a better picture of the Meroid.
33872
Post by: Turaxa
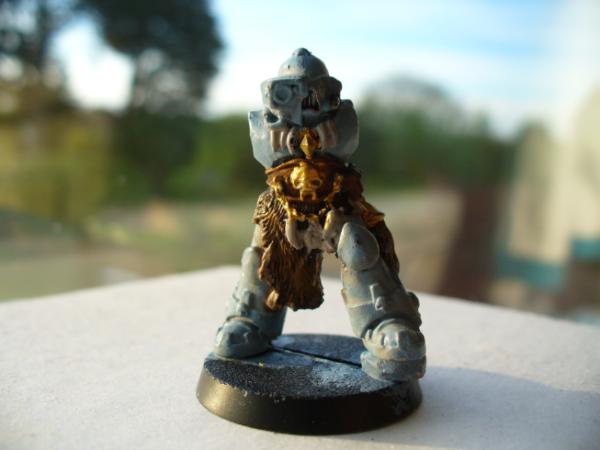
Below is my current project, a 54mm scale Space Wolf. I inherited this model as an unfinished project from a friend (thanks Nick!), so all the 'wolfifying' conversion work is by him, though the painting is mine. The rest of the model's components are all finished, which just leaves the main body and the head.
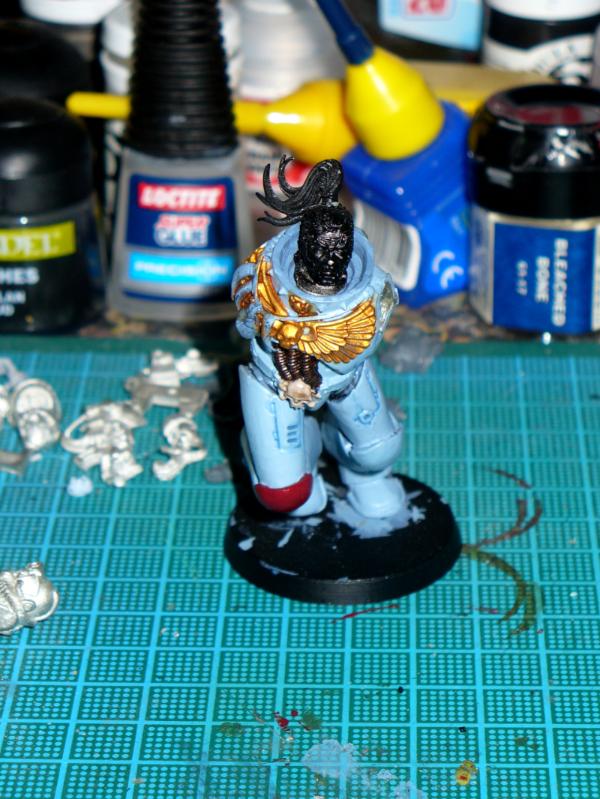
The head is the bit I am dreading, since I'm not great at painting faces. I also need to find a technique for doing red/ginger hair that doesn't make it look too much like an artifiicial colour. I'm not sure what to do with the base. The rim will be black and I'm thinking a metalic colour with an appropriate wash for the surface, but I'm not sure if that will be too plain.
More to come!
33872
Post by: Turaxa
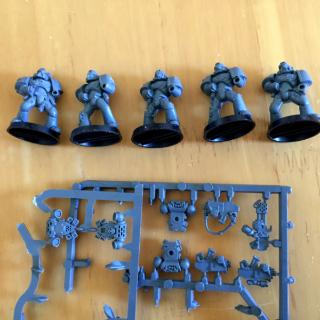
New project! They're mostly held together by blu- tac at the moment, hence why they look a little wonky.

33872
Post by: Turaxa
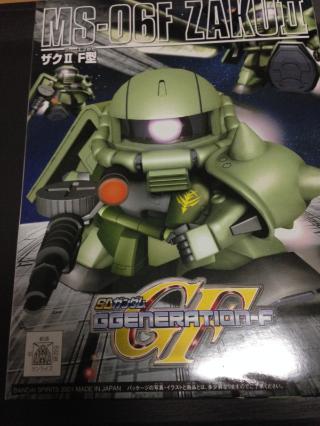
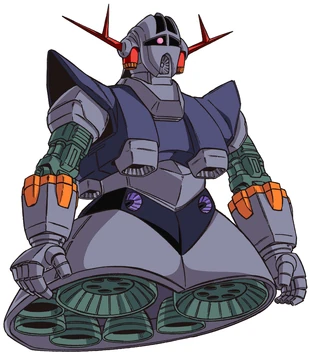
Something new - a "Zaku" from the Gundam series awaiting painting.
33872
Post by: Turaxa
Completed MS-06F Zaku II mobile suit from Gundam. This is the first time I've built an articulated kit. I'm quite impressed how big it is despite being in 1:144 scale. It went together quite nicely with the exception of the torso cables, which I ended up botching. It's a cheap kit though so I can always try again. Oh, and Vallejo Tinny Tin is actually more of a bronze, which was annoying.
33872
Post by: Turaxa
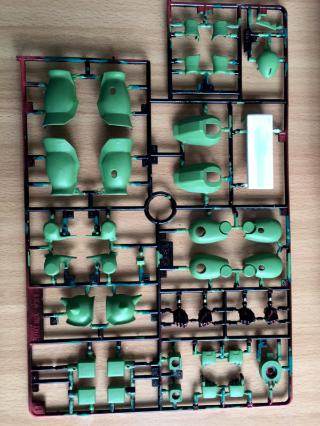
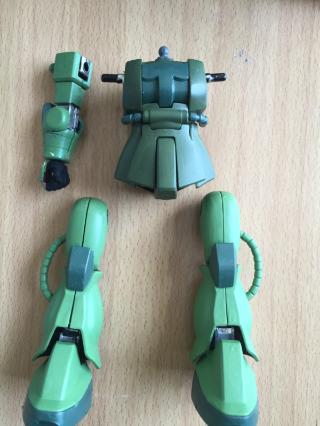
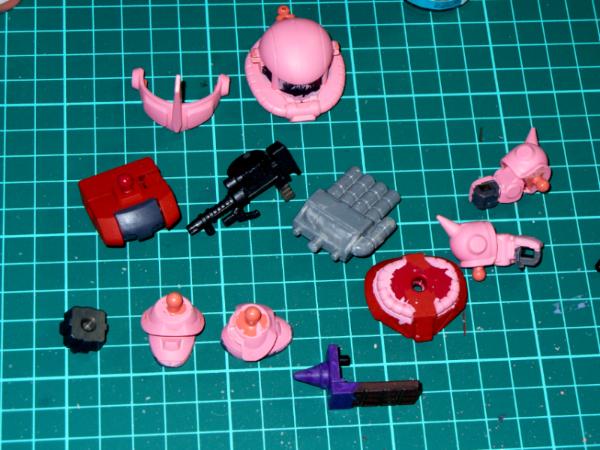
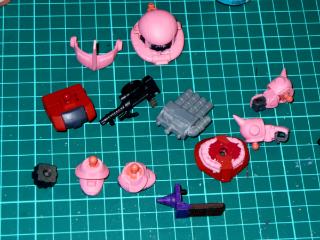
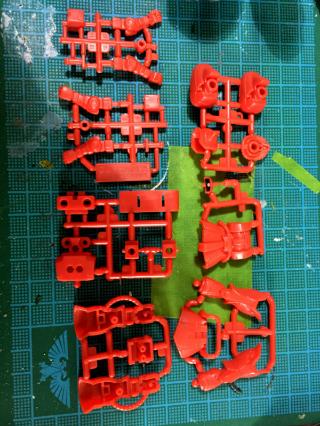
I wanted to have another go at a gundam kit, and improve upon my last attempt. The kit I got is of a red Zaku II, and is much more modern. "Red" turned out to mean than the plastic sprues were pre-coloured in shades of burgundy and salmon pink. Very clever, but not the colour scheme that I was going for, so it got the same green scheme as the last Zaku.
This is the sprue before I started.

I decided to paint all the components on the sprue, to avoid gumming up the joints with paint. Here is one of the sprues ready for assembly.
33872
Post by: Turaxa
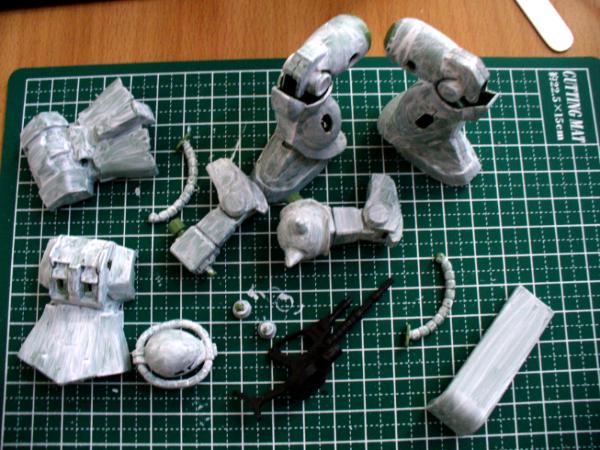
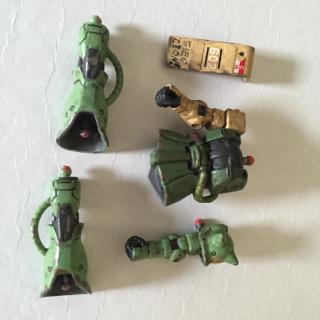
Sub-assemblies in progress. Some of the snap-fit joins weren't as tight as they could have been, so I'm going to have to get some liquid greenstuff to fill the gaps.
33872
Post by: Turaxa
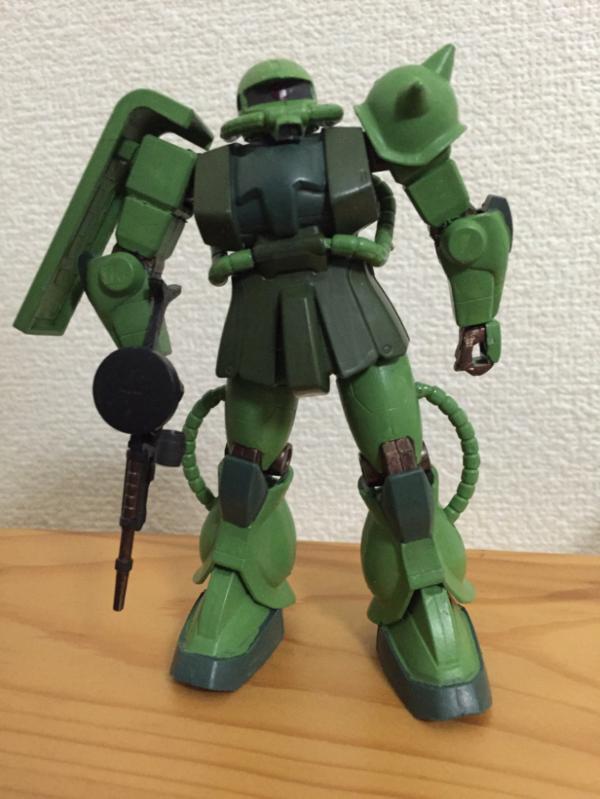
It's just as well this is a painting log or I'd be dabbling in the dark arts of threadromancy with this post! After a far longer than intended hiatus, I have finally finished the second zaku. This is an MS-06S Zaku II.
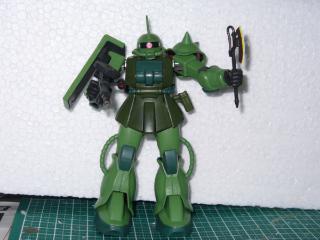  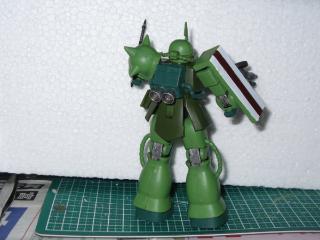
I realised after final assembly that I'd mixed up the left and right armour skirts  , but overall I'm quite happy with it. For some reason this kit lacks the back-pack thrusters which the older Zaku kit has, so I added some from an upgrade kit. I may go back and add transfers and weathering later, but I'm calling it done for now. Comments are welcome.
33872
Post by: Turaxa
With the Zaku out of the way I can start working on the Adeptus Mechanicus "start collecting" box that I have. I'm really impressed with the delicacy and detail of these plastics; no plastic Cadians these, though it makes them trickier to paint!
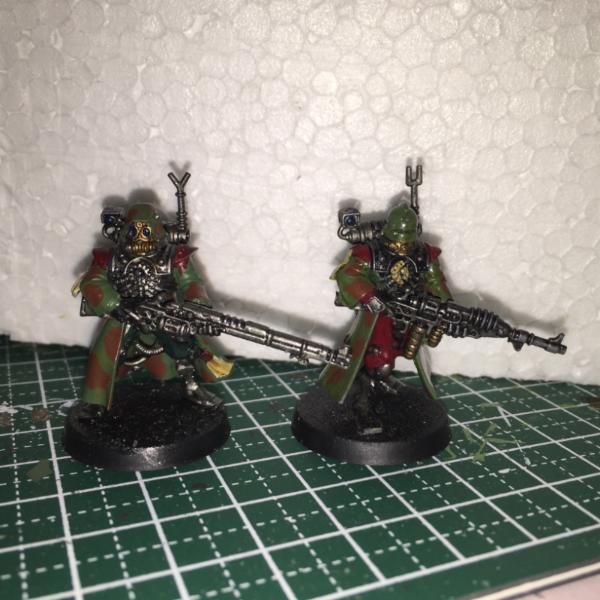
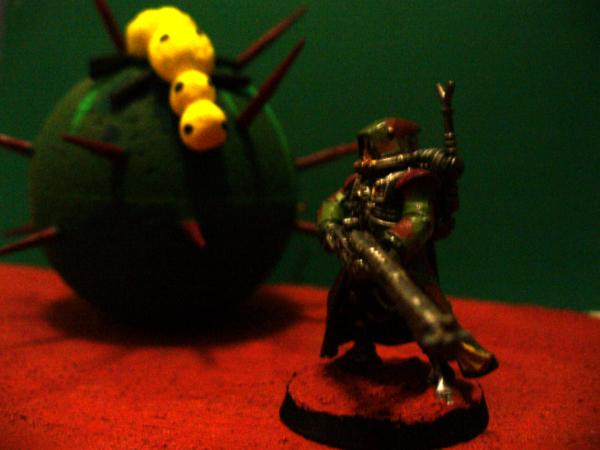
Below is a test miniature for the skitari. They are from the (home-brew) forgeworld of Volker Prime. I imagine it being covered by those red-spiked giant cacti which use to appear as terrain in White Dwarf battle reports, so I went with a camoflage scheme but kept some red on the shoulder pads.
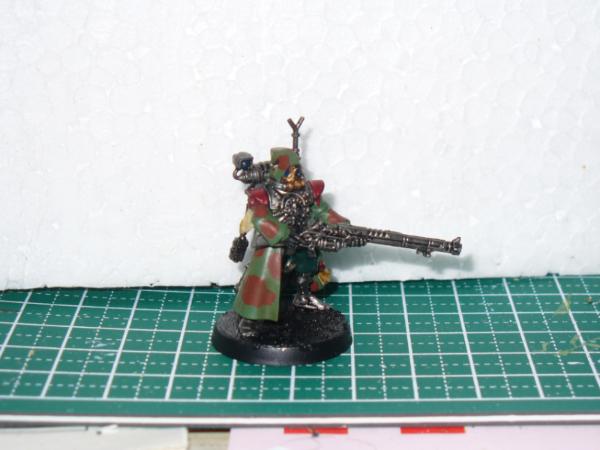
I'll be doing all the skitari models in this sort of scheme, so critique is welcome.
96054
Post by: corpuschain
The Skitarii is cool. I like the idea of rangers having camoflage. It might look good if the trousers were red though, as if it is wearing the normal Ad mech colour scheme, but with the camoflage cloak over the top.
81007
Post by: brushcommando
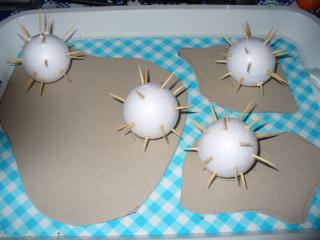
Nice! I have the 2nd ed Ultramarines codex that I use for reference material and those cactus things are in almost every picture. You should make a few if you ever get the time. Pretty sure they were just foam balls and toothpicks. Interested to see more of these guys. 
33872
Post by: Turaxa
Thanks for the comments guys 
@ corpuschain: I'll try out some red trousers on one of the next figures and see how it looks.
@ brushcommando: I'm not sure where I'd get foam balls from but I'll keep an eye out for something suitable, a couple of retro-cacti might be neat.
33872
Post by: Turaxa
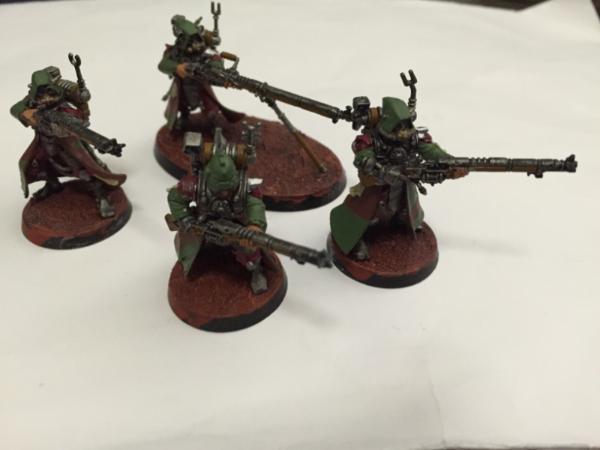
One month later and I have painted a whole other figure! Progress is sloooow.
This is a skitari assembled as the rad-trooper version.

I tried red for the trousers on this one, which looks good. I also used a darker wash on the metals for the torso and the gun. I'm not sure which to use for future figures, the lighter metallic look of the ranger or the darker look on this one.
Here they are together.
33872
Post by: Turaxa
This week, I have been working on some terrain:
33872
Post by: Turaxa
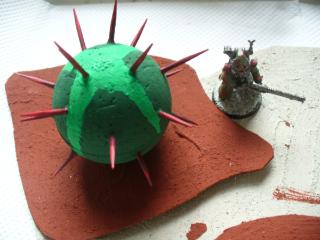
Progress:
33872
Post by: Turaxa
Finished! Second-edition-style red spiky xeno-cacti.
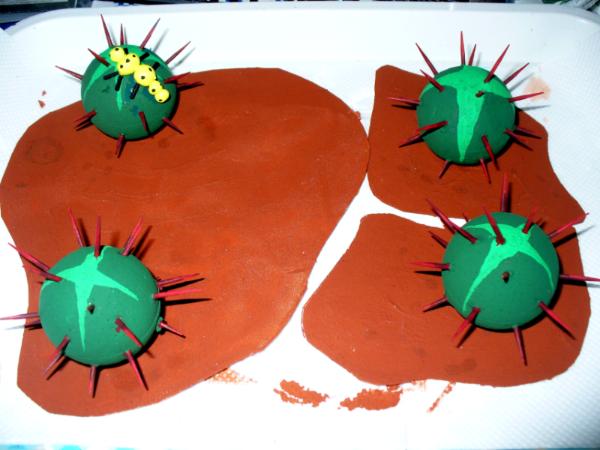
 Trooper T35T-M0D31 claims the cactus patch from the xenos threat.
33872
Post by: Turaxa
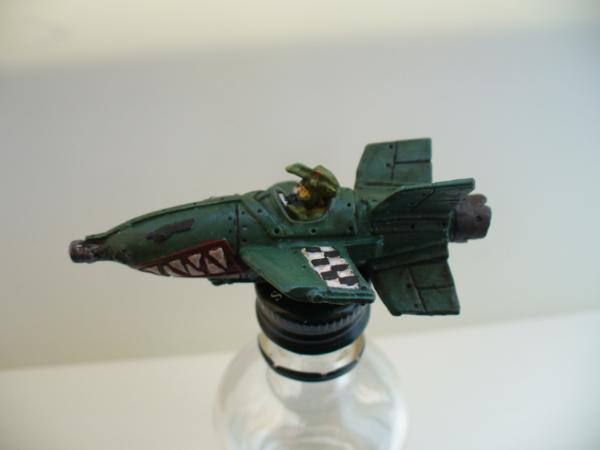
It's been rather a long time since I did any modelling, I spend far too much time admiring other's work on the net. So, I decided to correct this with something cheap and cheerful.

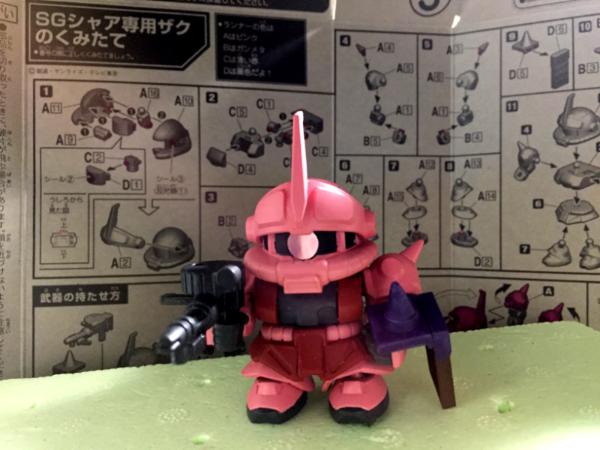
This is (or will be) a super-deformed parody version of "Char's Zaku", the initial mech piloted by the series' antagonist in Mobile Suit Gundam. I say "parody" because for some reason the shield this mech carries is sculpted to look like a bar of chocolate,
For a shokugan kit I picked up in the supermarket, I'm really impressed with the quality of it; the sprue clips away cleanly, parts snap-fit together well and nub marks are minimal. The only downside is that some components are moulded hollow rather than having a solid face on every side, likely to reduce cost.
It's moulded in mostly correct colours, but I'll be painting it anyway as I have some paints I want to try out.
33872
Post by: Turaxa
Looks like it was almost three months ago that I started this... 
Painting in progress now, almost finsihed.
121268
Post by: Gwyn chan 'r Gwyll
Looking back up a few posts, I absolutely love the camo scheme on the AdMech, it looks great! If you were to do vehicles in that scheme, how would you do it do you think?
33872
Post by: Turaxa
Thanks. If I was going to apply this scheme to a vehicle, I'd do it the same as on the infantry figures, which is brown patches over a green base. I think I might add a third colour to make the large areas of camo a bit more interesting, maybe small patches in an intermediary colour, or outline the brown patches with a black or grey.
The other approach would be to do the same colours in a splinter scheme. I was going to refer you to pictures of splinter-camo rangers earlier in the thread, but it seems I never actually posted them. Thus:
This picture doesn't really show the splinters that well, and my rather indelicate masking skills didn't really suit an infantry-sized figure (the splinters are too big), but I think it would look good on a vehicle.
Oh, and an area of the red somewhere. They are mechanicus after all.
What I'd really like to see though, from some-one with the skill to pull it off, is skitarii rangers wearing digital camo. I think it would really suit their theme.
33872
Post by: Turaxa
 Turaxa wrote: Turaxa wrote:Looks like it was almost three months ago that I started this...
Painting in progress now, almost finsihed.
And thus it remained for another month and a half! But it's done now. Quick and dirty pictures of the finished build:
The eye is a sticker which came with the kit. Everything else is paint.
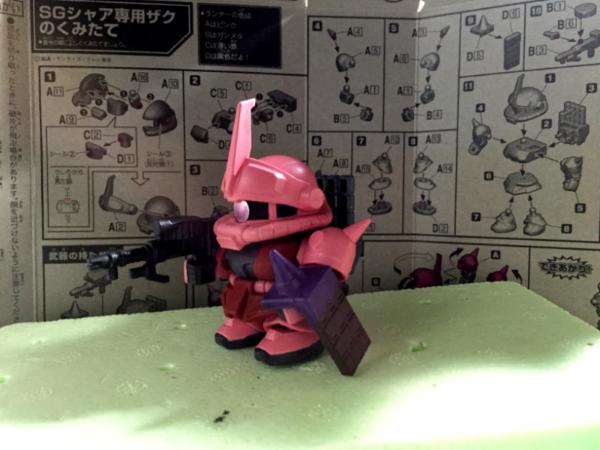
For some reason the shield is shaped like a bar of chocolate, so I painted it accordingly.
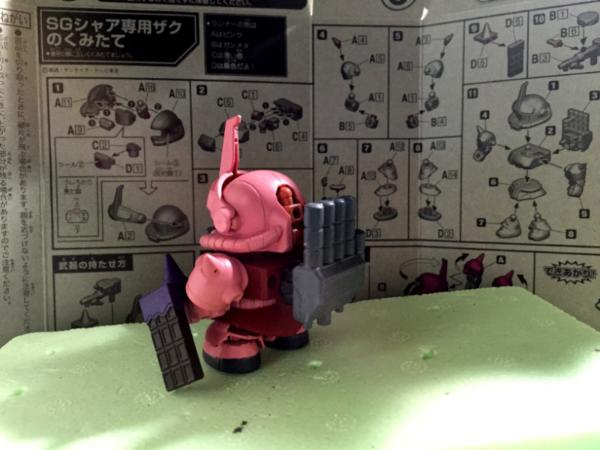
The hand-shaped backpack is actually "kibble" from the combined mecha these SD kits make. I think it's also a nod to the pilot's final boss battle mecha, hence the grey colour.
10667
Post by: Fifty
Turaxa wrote:Thanks. If I was going to apply this scheme to a vehicle, I'd do it the same as on the infantry figures, which is brown patches over a green base. I think I might add a third colour to make the large areas of camo a bit more interesting, maybe small patches in an intermediary colour, or outline the brown patches with a black or grey.
The other approach would be to do the same colours in a splinter scheme. I was going to refer you to pictures of splinter-camo rangers earlier in the thread, but it seems I never actually posted them. Thus:
This picture doesn't really show the splinters that well, and my rather indelicate masking skills didn't really suit an infantry-sized figure (the splinters are too big), but I think it would look good on a vehicle.
Oh, and an area of the red somewhere. They are mechanicus after all.
What I'd really like to see though, from some-one with the skill to pull it off, is skitarii rangers wearing digital camo. I think it would really suit their theme.[/quote
I think a third colour would be a good idea. Possibly a pale orange? Outlines or pale orange or grey, but I'd make it just partial outlines, rather than full.
I don't think you should worry too much about the red, unless you do their eyes or something else that could glow red.
33872
Post by: Turaxa
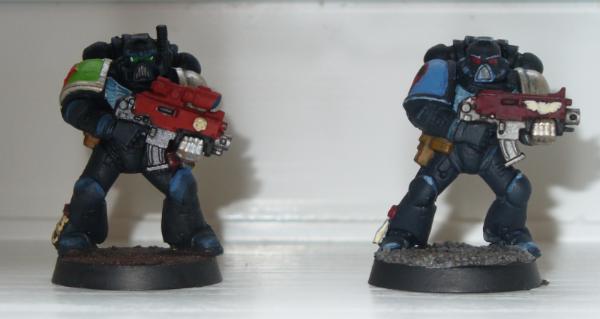
I decided to enter round 63 of the Dakka Painting Challenge, since I recently unearthed some very old school paints.
The plan was to paint these:
With these:
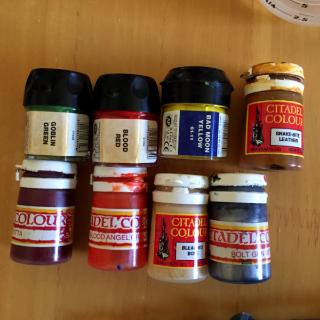
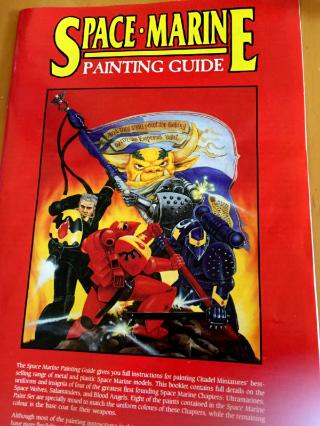
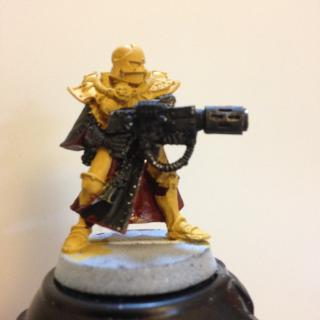
By following the guidelines for painting Blood Angels in this:
But it turned out that the bottle of Terracotta paint was actually mostly empty and dried out, and the guide also called for Sunburst Yellow when I had Bad Moon Yellow. I thought that I could substitute one yellow for the other, and swap Terracotta for Go Fasta Red. Red and yellow are red and yellow, right?
I was wrong......
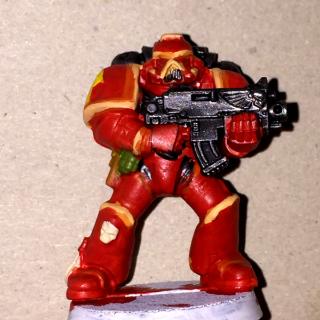
Oh dear, this looks even worse on camera than in person.  The first highlight was Go Fasta Red and Blood Angels Orange mixed together, but they are so close in colour that the highlight was hardly noticable. The next was Blood Angel Orange and Bad Moon Yellow, but that gave me a carrot orange, and it just got worse from there.
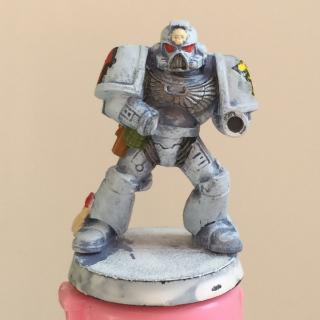
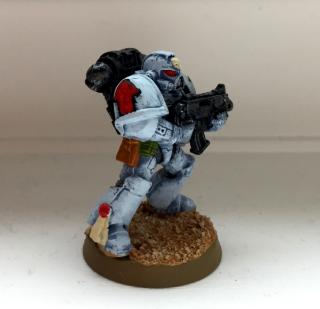
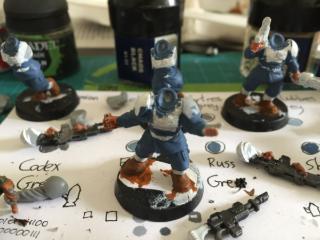
But I do have an unopened pot of original Blue Grey, so if I cheat a little and use Coat d'Arms Lupin Grey (essentially the same as Space Wolf Grey from the original Citadel Colour range) then I should be able to paint the other marines as retro Space Wolves.
33872
Post by: Turaxa
Retro Space Wolf painting in progress:
33872
Post by: Turaxa
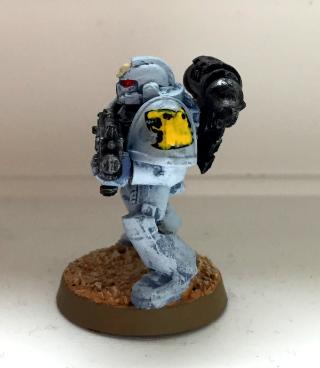
Retro Space Wolf finished.
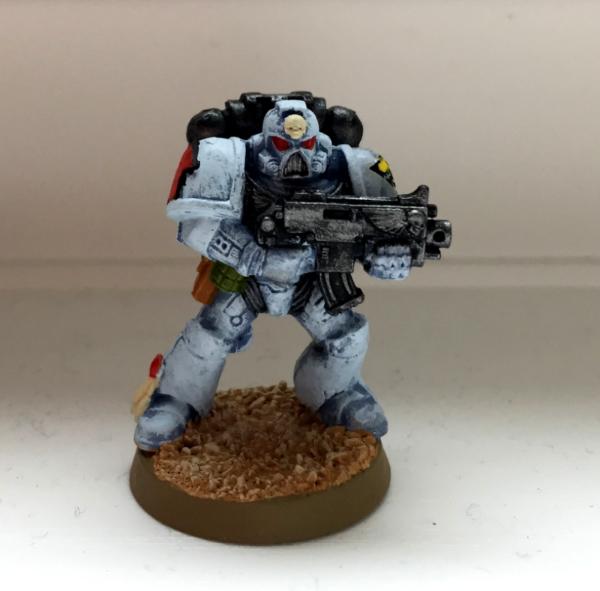
For Space Wolves, the Space Marine Painting Guide recommended drybrushing the figure. That probably wasn't the technique used to paint the reference figure in the Guide, but I was following the instructions for this project so a drybrushing it got. The result was....okay, but not good enough to motivate me to finish another four figures in the same style. If I ever return to retro Space Wolves I'll probably use the highlighting technique from the Blood Angels entry in the Guide.
The technique for squad markings in the Guide is to paint the icon with black, fill it in with white while leaving a black outline then overpaint the white with the desired colour. This figure had a sculpted tactical marking, so I used this technique on that. I couldn't freehand the old-school Space Wolves symbol though, so I used a modern transfer to provide the black layer and then overpainted it in white and then yellow. I'm reasonable pleased with the result, even if it looks more Shiba Inu than Wolf.
Although I think of Goblin Green bases when I think of old 40K, none of the figures in the Guide have them. Instead the bases are painted various shades of a brown I don't have, so I mixed Snakebite Leather, Bleached Bone and Blue Grey to get something visually similar.
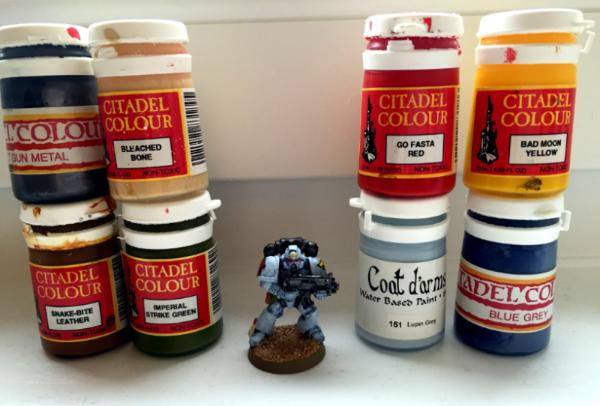
A final picture with some the paints used.
33872
Post by: Turaxa
Test of a darker Ultramarines scheme.
33872
Post by: Turaxa
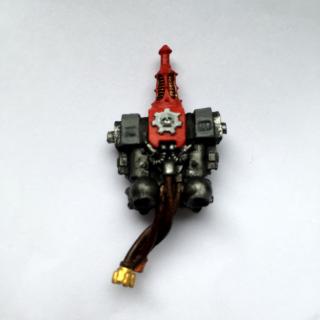
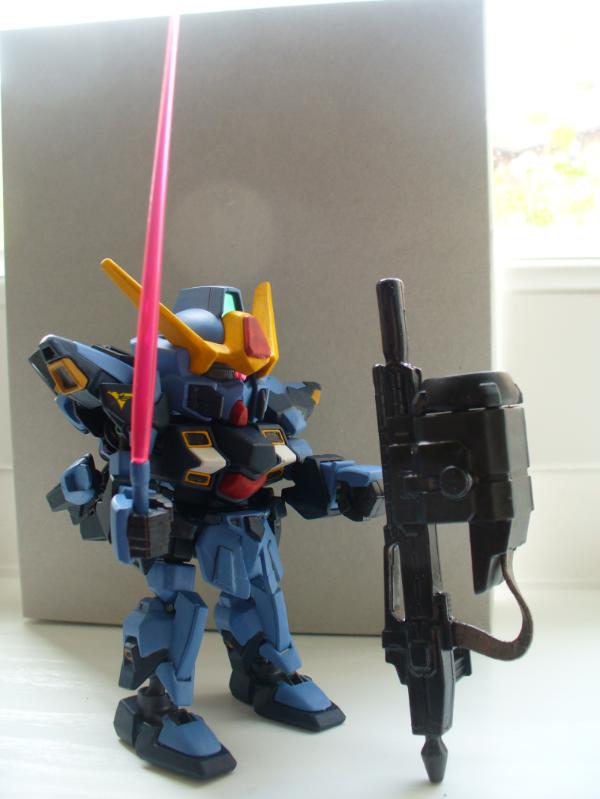
This is my entry for the Dakka Painting Challenge Round 64, a Space Marine Techmarine.
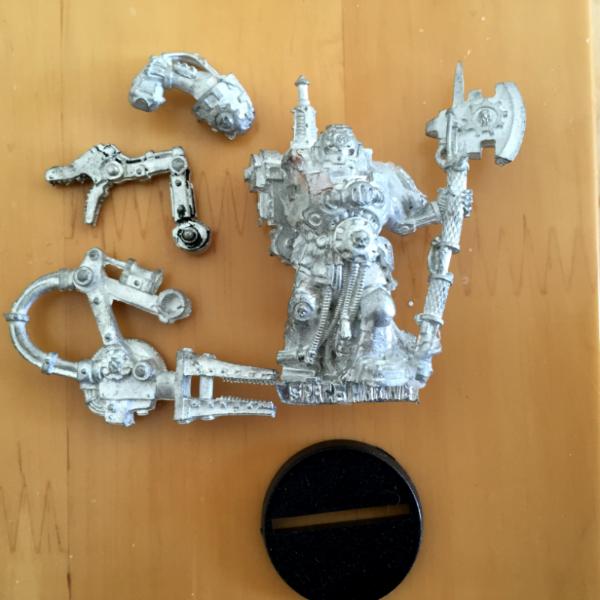
From looking at the official GW images of this figure I always thought it was a bit of a brick, but it actually has so. much. detail. This one was an Ebay purchase at some point, so it is missing two of it's servo-arms and has damage to another. Nothing a quick bit of converting couldn't fix though. Since I'm painting the miniature in sub-assemblies I decided to test my planned colour scheme and techniques on the backpack first.
33872
Post by: Turaxa
Some work-in-progress.
33872
Post by: Turaxa
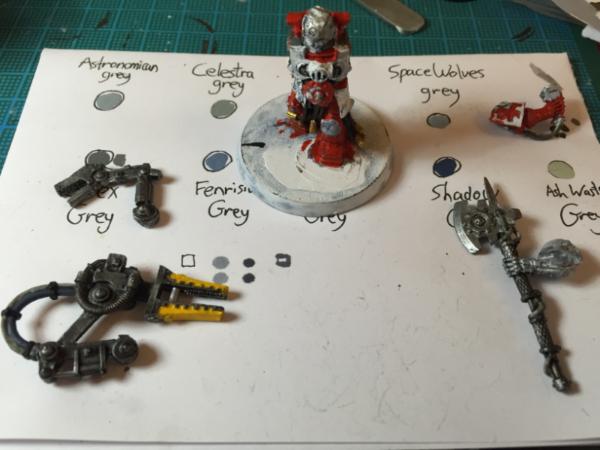
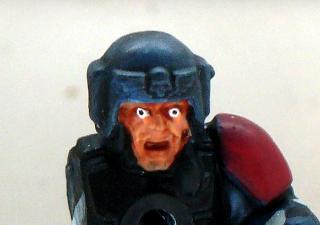
More progress. I tackled the model's head this time and had many hold-you-breath moments while painting it.
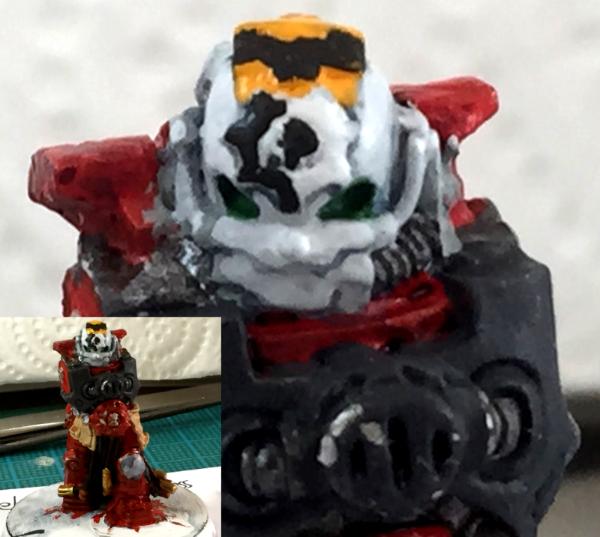
I decided to paint the figure with a veteran's white helmet to make the head stand out and break up the overall red scheme a bit more. This is the first time that I have tried to paint white with a series of greys rather than just using white paint.
I got some tips from this helpful thread. The layers were:
Celestra GreyShadow Grey washFortress GreyCeramite White + a little Fortress Grey (because pure Fortress Grey wasn't light enough)Ceramite WhiteIt's not the ideal white recipe but it's what I had to work with. The result looks better in real life than it does in the picture.
33872
Post by: Turaxa
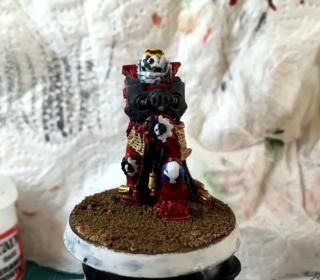
Nearly done.
126796
Post by: maxwin
Nice work! A few thoughts would be to thin your paints more, if it goes on in one coat its too thick, I usually have to apply three coats minimum to get a solid colour, also did you mean to have a gloss finish on the red?
As for the breathe holding, I used to suffer from that but i developed a technique to increase brush steadiness without suffocation! I rest the middle or ring finger of my brush hand on the model which makes them shake in tune with each other ;D (see pic)
1
33872
Post by: Turaxa
Thanks for the feedback. Some of the paints I have are rehydrated colours from GWs "bolter shell" paint pot days, so I had trouble with some paint going on too thick and other paint flowing where it shouldn't. Practise makes perfect though. The glossy red wasn't deliberate but I didn't mind the look so I went with it. Ideally I would put a final topcoat of matt varnish on it, but I don't have any just now.
33872
Post by: Turaxa
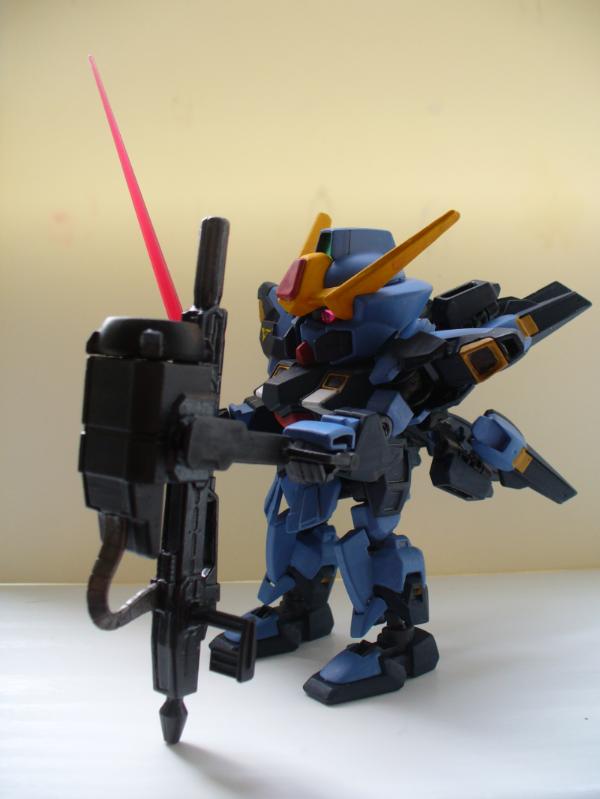
The techmarine is finally finished!
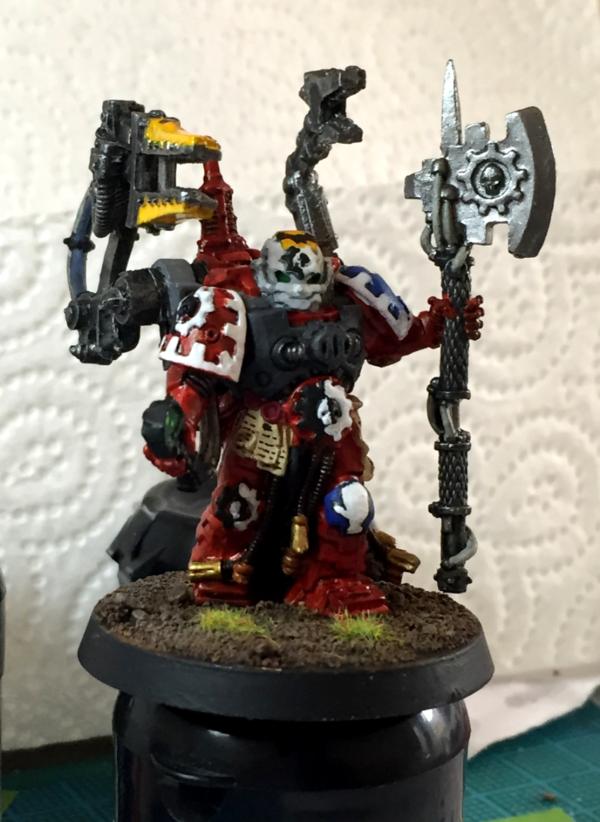
All the details got a bit maddening by the end, and there are many small mistakes on this, but overall I'm quite pleased with how it turned out. The glove-like symbol on the model's left knee plate is supposed to be a white hand. Before Second Edition 40K, techmarines weren't painted red (unless they were Blood Angels) and didn't display the Mechanicus symbol. Instead the Astartes symbol for a techmarine was a yellow hand. You can see an example of this from the old Space Marine Painting Guide below.
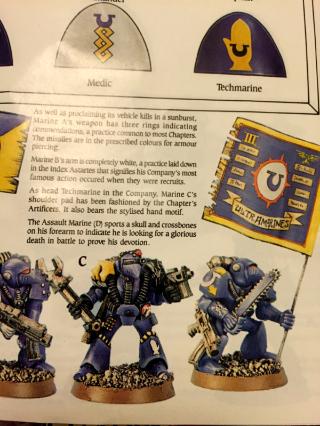
This page also shows an Ultramarines techmarine with the hand symbol rendered in white on his greave, so that's where I took the inspiration from. The black outline for this symbol and the writing on the parchment and purity seals were done with a black size 005 Pigma Micron pen from Sakura. It's the first time I've used one and it made getting the parchment scripts to look good much easier.
1124
Post by: Captain Brown
Keep at it Turaxa. You can see the improvement in each model you are painting.
Cheers,
CB
33872
Post by: Turaxa
@ Captain Brown: Thank you for the encouragement. 
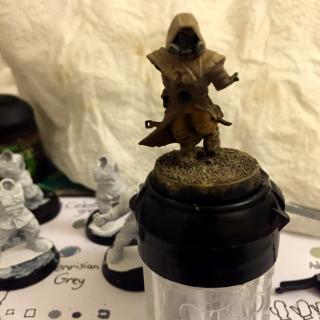
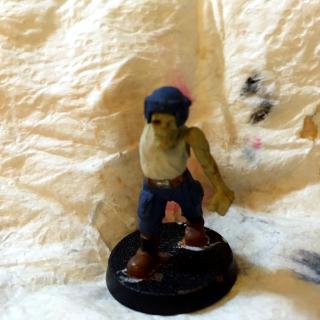
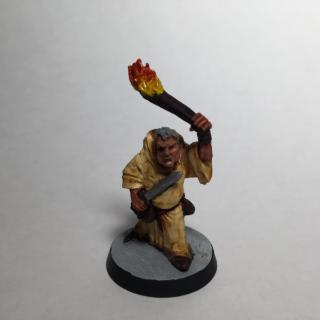
I recently picked some plastic Chaos cultists out of the pile of shame. Most are obvious renegades, but this trenchcoat-and-gasmask guy doesn't seem obviously chaotic to me. I get more of an "ash waste nomad" vibe from him so I'm painting him up in desert-ish colours.
33872
Post by: Turaxa
Desert-ish guy is done:
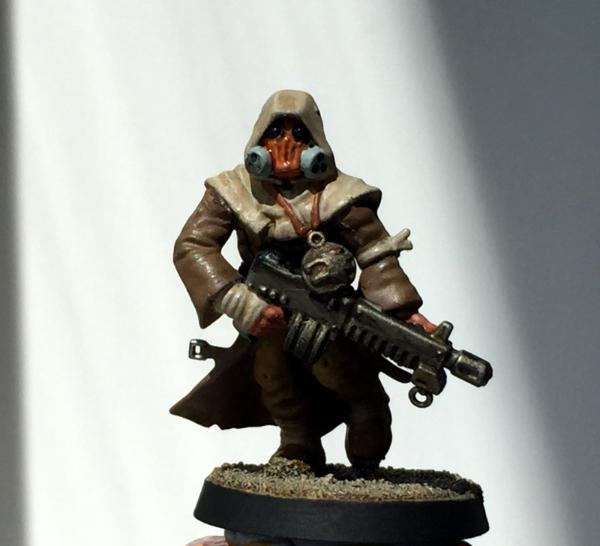 A nomadic raider of the ash waste deserts. Or something.
I was a bit unsure how this figure was going to turn out while painting it. Maybe the contrast between the legs, coat and hood should have been greater, but it wasn't bad once it all came together.
I also entered some guardsmen into the Dakka Painting Challenge round 65.
126796
Post by: maxwin
Looking good, if you are having trouble with the shade washes drying glossy make sure to give the bottle a good shake, and never take it out of the main pot as the Matt medium in these tubs settles out at the speed of light. I will often close it and re shake if doing a sizable bit of shading 
33872
Post by: Turaxa
@Maxwin: I didn't know washes needed to be shaken just as much as paints, thanks for the tip.
Some more progress on the guardsmen. The camo is a bit chunky but looks good enough on these chibi Cadians.
33872
Post by: Turaxa
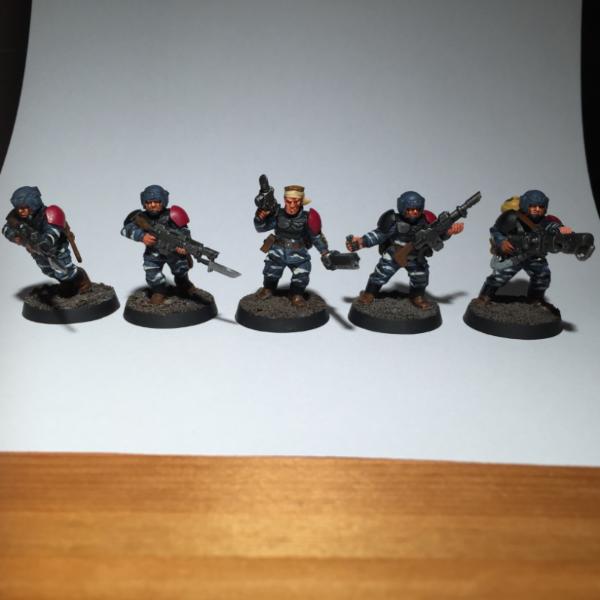
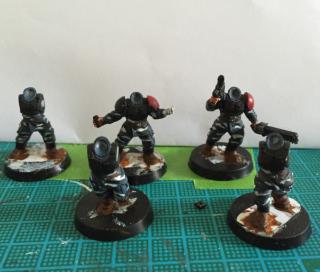
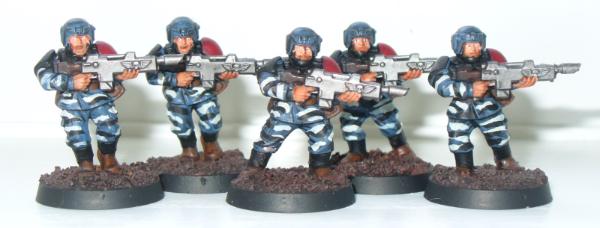
The guardsmen are finished. Building and painting these were a bit of a slog. For me they're in an awkward spot where, at five or six components each, they're not simple enough to just crank them out, but they're not detailed enough to be really fun to build or paint. I don't think these sculpts have aged well, but despite this they do have detailed faces and the flamer components fit together nicely. I also appreciate the inclusion of empty bayonet scabards for models with fixed bayonents, and sheathed bayonets for those without.
The left arm that can go with the grenade throwing arm is a bit of a fudge though, and I realised too late that I should have cut the hand at the wrist and rotated it so that it looks like he is actually holding the gun. Still, I salute all those guard players who build hundreds of these little guys and make them look good.
I found myself suddenly busy at the end of the month, so the bases are a bit of a rush job, Also I didn't have as much time as I would have liked to work on the faces, so no painted eyes this time.
You can see more images of these miniatures here. .
126796
Post by: maxwin
Nice work!
33872
Post by: Turaxa
Thank you
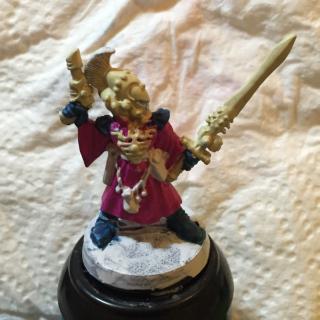
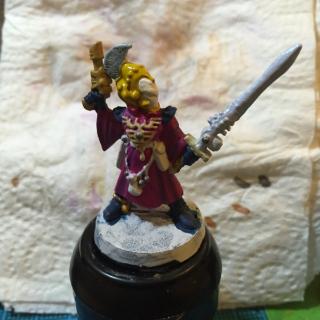
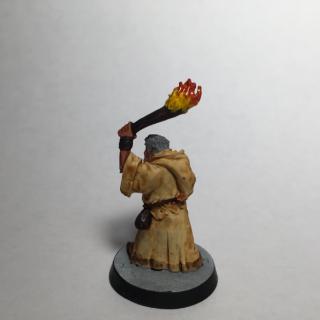
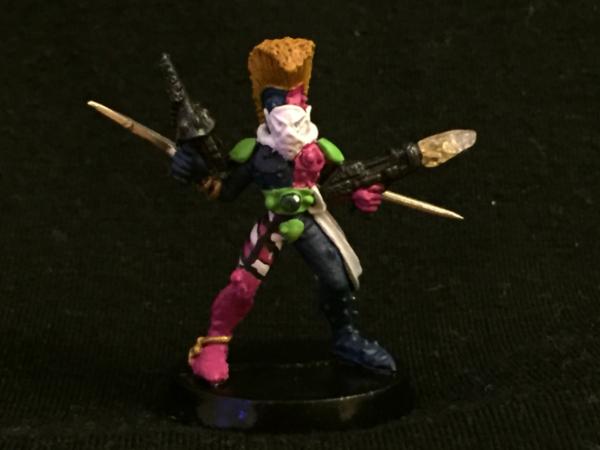
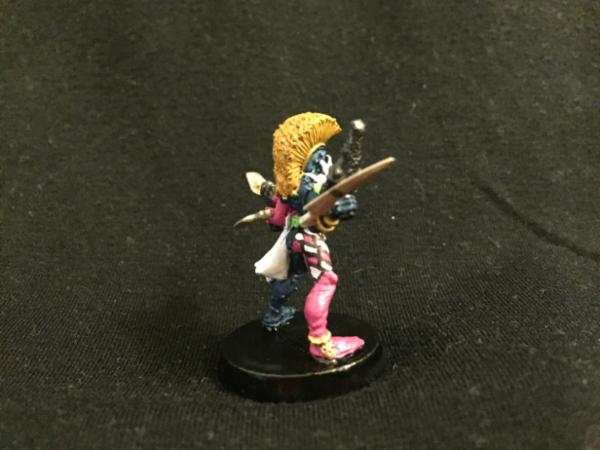
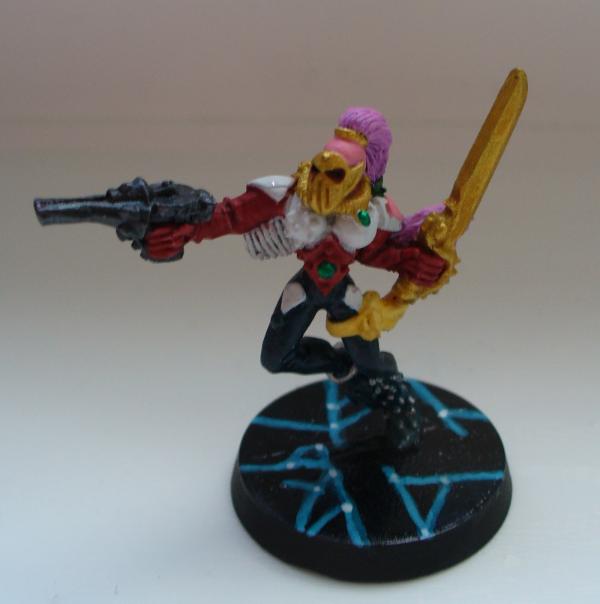
I haven't got much modelling done this month, but I did start this Warlock.
33872
Post by: Turaxa
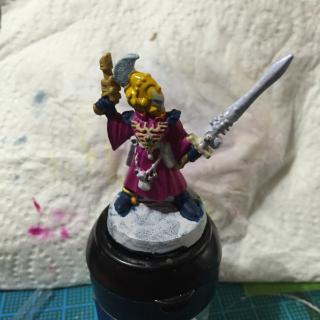
Some progress. Pleased with everything except the sword. I painted on a lumpy coat of elderly Bleached Bone in an efford to get decent coverage, then changed my mind about the colours and decided to try out Reaper's Sparkling Snow straight on top of it. I probably should have applied a white basecoat first.
33872
Post by: Turaxa
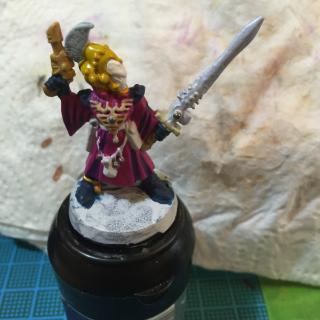
I decided to try and shade the folds on the model's robe, which I usually don't do because I'm rubbish at it. The first attempt was to mix the base colour with some purple wash (left), but that had too much contrast with the base and was too blue so I painted over it with the base colour mixed with a medium grey (right). This looked much more subtle, so subtle that it doesn't really show up in the photograph! It is more apparent in real life though.
33872
Post by: Turaxa
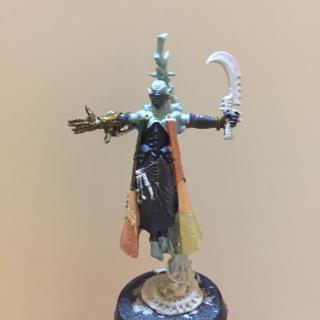
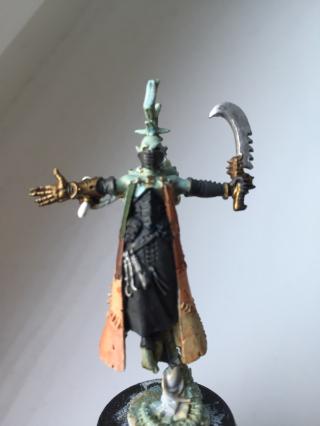
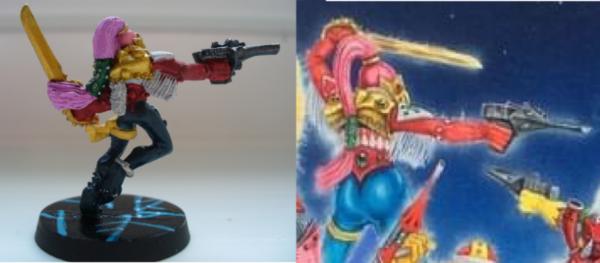
The warlock is finished:
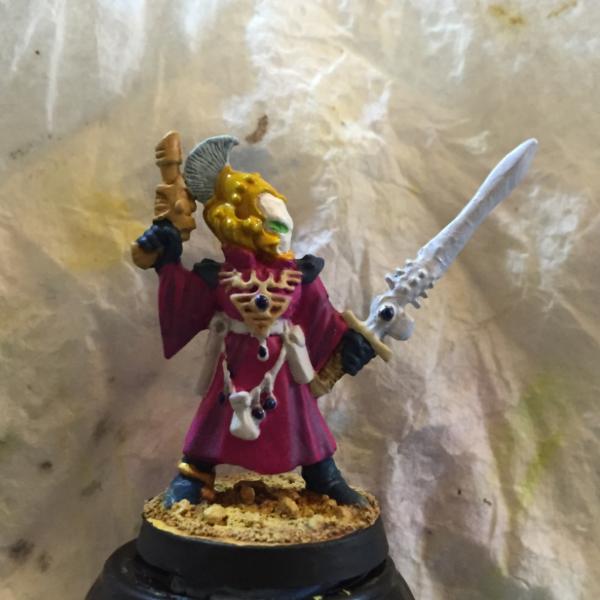
The red-purple robe and yellow helm were inspired by a painted warlock miniature which I've seen in some old 'Eavy Metal pictures. I decided to use blue as the contrasting colour for the figure's undersuit. I don't have many blues so decided to try Vallejo Panzer Aces Periscopes, which is a very blue-hued turquoise and turned out to be a perfect contrast to the red-hued purple I was using, VMC Magenta. They go really well together and it's nice to use them as main colours on a miniature since I've only previously used them to paint lenses.
When I was painting my Cadian 122nd guardsmen, at one point I experimented with painting yellow ink over Bleached Bone. Though I didn't keep it for the final colours I liked the result and decided to use the technique for this model's yellow helm. I think it works really well. I did something similar with the blue gems on the model, they are blue ink painted over Boltgun Metal. Nothing revolutionary I know, but I haven't used inks this much in a while and I'm glad it worked well.
Working not so well were the pearlescent paints I used on the faceplate and the sword. These were Reaper's Pearl White and Sparkling Snow respectively. The problem was that while they were perfectly liquid on the palatte, they dried so quickly that the paint on the miniature and the brush became tacky as I was painting, making it difficult to manipulate the paint and leaving a really uneven finish. I tried thinning them more with water but they quickly reached wash consistency. I've never used these paints before, so maybe some additives of some kind are needed?
This miniatures is also my entry in the Dakka Painting Challenge Round 66.
1124
Post by: Captain Brown
Turaxa,
The Guardsmen turned out nicely.
One suggestion on your Warlock is to do a brown wash on the belt, pouch, holster and the string of items. It will add some definition and make them look more natural.
My two cents,
CB
33872
Post by: Turaxa
@Captain Brown: Thank you. I was trying to go for a white leather/fabric look on the belts and pouches, and thought a wash might just make them look dirty. I'll go back and give a brown wash a try though.
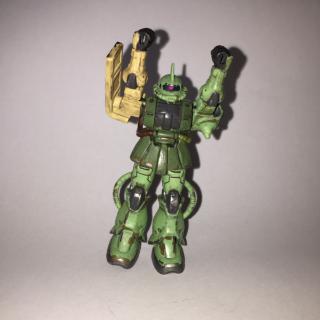
My entry for the Dakka Painting Challenge Round 67 is an MS-06S Zaku II from Bandai's Gashapla range. These are little model kits that are dispensed in capsules from a gashapon machine.

The runners are designed so that the parts can be snapped out without being cut. This particular figure seems to be a scaled-down version of one of the Zaku models from the main 1/144 scale Gundam The Origin kit line, and is quite detailed. I wish I had bought more when I had the chance.
So far I've almost finished the torso of the figure. I tried out Vallejo's Mecha Primer on this kit, but it didn't work well. When I applied the primer neat it shrank from some areas and blobbed in others. When I thinned it with water it pooled in the crevices of the model like a wash. It rubbed off easily when dry as well. I didn't expect to have such trouble with it. Can anyone recommend a good brush-on primer?

33872
Post by: Turaxa
More progress, most of the sub-assemblies are painted. I didn't have a base big enough for the figure to stand on, so I'm makig one from a jam jar lid and some cardboard.
33872
Post by: Turaxa
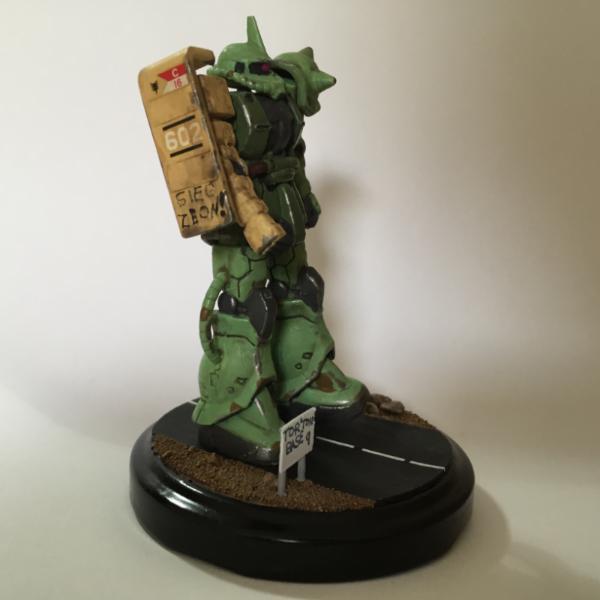
Finished! This figure is inspired by the Zeon Remnants who appear throughout the Universal Century setting of the Gundam meta-series. In Mobile Suit Gundam, the space-dwelling Zeon faction invades the earth and then later retreats, leaving some of its troops behind in the process. These remnants continue to fight sporadically for the next sixteen in-universe years.
The colour scheme is intended to make the model look war-weary, and like it has been repaired with parts from other machines. This is the first time I've tried painting on rust and chipping.

The kit didn't come with any markings, so I spliced together a couple of old model kit transfers on the shield and hand-painted the rank badge on the pauldron. My skills are not up to freehanding the Zeon symbol, so instead I added their slogan as grafitti on the shield.

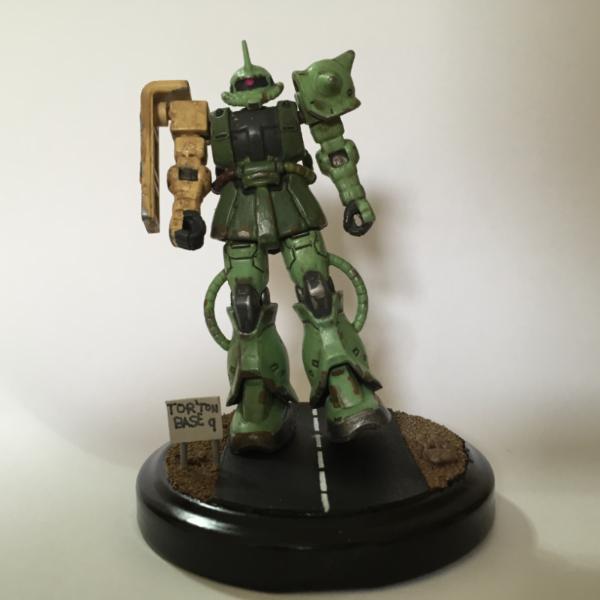
From the rear.
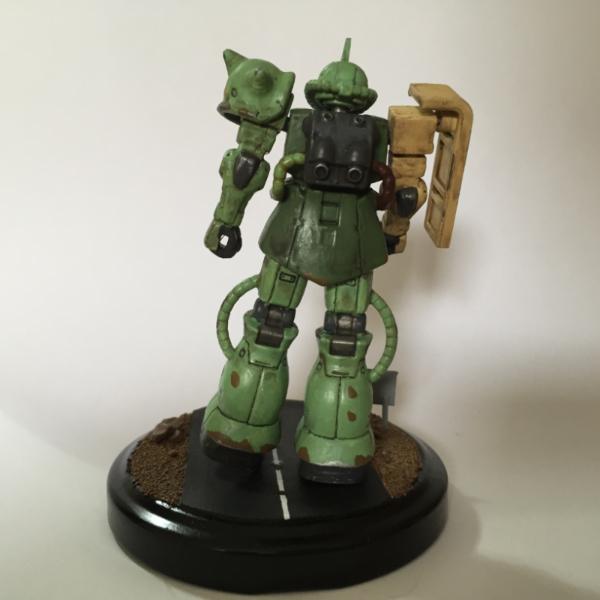
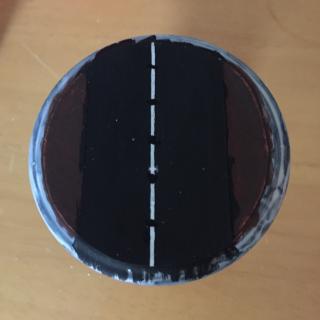
Unfortunately the ankle joints on the kit don't allow it to stand with both feet flat to the floor, leading to this "walking home from a bar" pose. The road sign on the base is a referrence to Torrington Base, where the Zeon Remnants had one of their last battles.
The base by itself, and the Zaku with a space marine for scale.
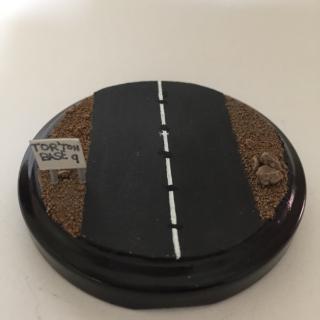 
Zaku, ikimasu!
24969
Post by: Good Old Murray
Love the vibrant paint job on the warlock; They're such good miniatures. Also the freehand on your space wolf shoulder pad is great.
Btw, I'm also using some 1994-era citadel paints. I recently bought some new vallejo ones, and I have to say that paints have got better over past 25 years.
Also you should see the coverage you can get on some of the new reds
33872
Post by: Turaxa
Thank you. I know what you mean about the newer paints, I got hold of some more modern ones and it really makes a difference. Having said that, some of the old ones I have are the really old kind that became the Coat D'arms range, and they're pretty good for their age.
33872
Post by: Turaxa
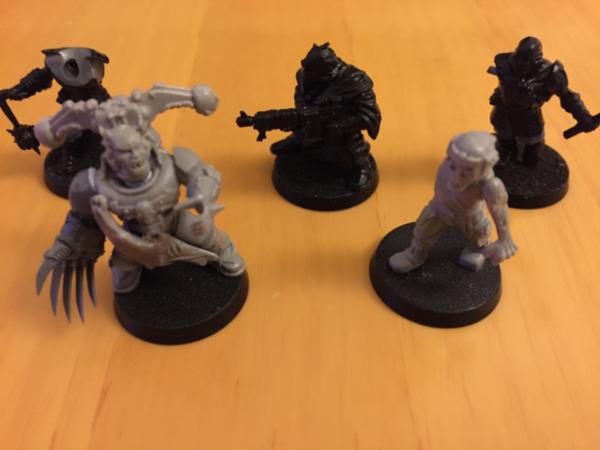
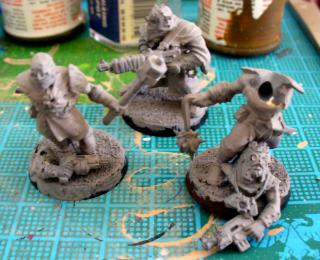
This month, painting up Desert Guy's buddies as actual cultists, and bodging together their boss from the depths of the bits box.
33872
Post by: Turaxa
Some more work on this pair. The chaos marine was supposed to be some kind of zombie-master-type character, but the bits aren't coming together well and I think he looks a bit derpy. Off to the back burner with him!
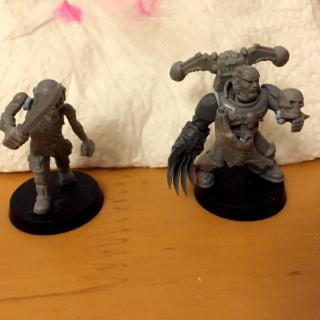
The zombie, however, came together nicely. Whittling down the zombie head so that it just about fits in the empty helmet from the Cadian kit was a bit of a chore, but I like the result so he gets some paint.
 This picture apparently taken with a GW-issue potato camera.
33872
Post by: Turaxa
The zombie is finished. He's my entry into the Dakka Painting Challenge round 68.
 Pte. Walker, formerly of the 122nd Cadian regiment.
33872
Post by: Turaxa
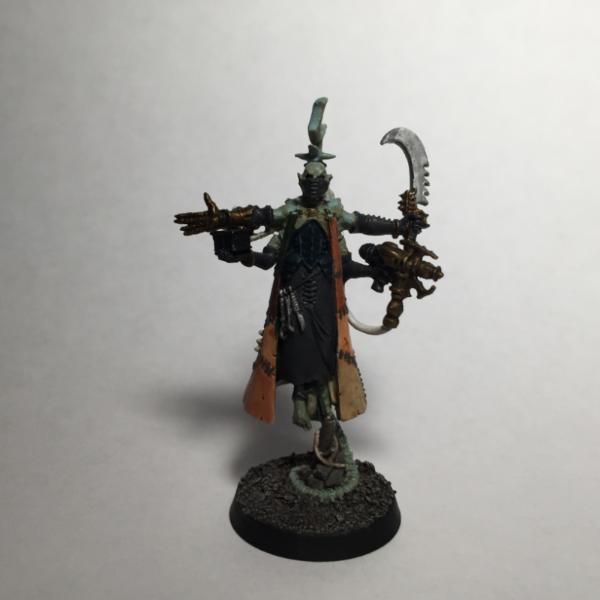
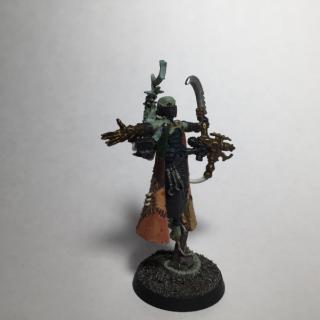
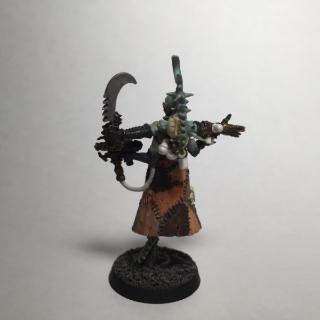
I wasn't really enjoying painting the chaos guys, so instead I pulled a Dark Eldar Haemonculus from the pile of shame. This was an Ebay purchase at some point. I think it's Finecast, but it's a surprisingly clean cast if it is with very little flash and only one miscast piece.
Now ages and ages ago I had the idea to do a Dark Eldar army themed around the Haemonculi, where all the troopers had a gribbly bio-tech look to them, kind of like the Eldar meets the Borg. Unfortunately I couldn't think how to do the hoses and cables that I wanted, so I only got as far as this one crude prototype before abandoning the idea.
Subsequently GW also had the same sort of idea (and probably cooler prototypes) and created the Haemonculi covens. Anyway I thought I would pay homage to my lonely prototype Deldar and paint the Haemonculus in a similar colour scheme.
I carried across the black armour, while the brown parts of the suit became the flayed hide cloak. I don't know what colours I mixed to get the original figure's skin tone, but I found a Vallejo colour that is close enough. I might give it a green or yellow wash later to bring it a bit closer.
33872
Post by: Turaxa
More progress on the Haemonculus. I like this miniature, but it has some absolutely tiny details.
122359
Post by: tzurk
Hey mate,
Nice work on the haemonculus - the skin cloak is looking great and suitably mismatched. I like the contrasting metallics too. Really cool skintone too - can see the Borg influence there!
Thanks for sharing - keep it up!
33872
Post by: Turaxa
@tzurk: Thanks for the positive comments. The Haemonculus is now finished.
While I was photographing it, I also took some better pictures of the miniature I entered into the 69th Dakka Painting Challenge. He's one of the models from the Mordheim Mob line.
You can see all the entries here.
My entry into the 70th Dakka Painting Challenge will be this pile of sprues here.
Hopefully to become a cool little SD gundam.
33872
Post by: Turaxa
One of my pet modelling peeves is models which have hollow parts which are not hollow in reality (or, for fictional things, in-universe). Like many SD Gundam kits, this kit had a couple of such parts, so I filled the offending parts with green stuff and PVA. A bit rough but it works.
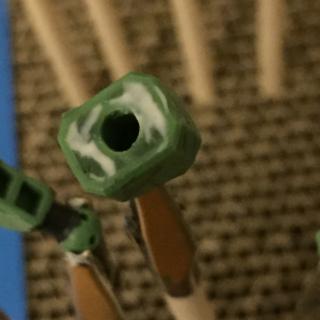
So far, painting this kit has been a pain. The kit has armour pannels attacked on top of an articulated inner frame. I tried to paint the frame joints that will be exposed once the kit is fully assembed, but as soon as I moved them the paint rubbed straight off. This was primer, paint and varnish, not just a single layer of paint. I think the Vallejo Mecha Primer that I'm using is really made for airbrush use only, thinning it with water and brushing it on has been nothing but problems.
But with that said,I am making some progress.
I also decided to update the paint scheme for my Crimson Rose Sisters of Battle. Here is a test model.
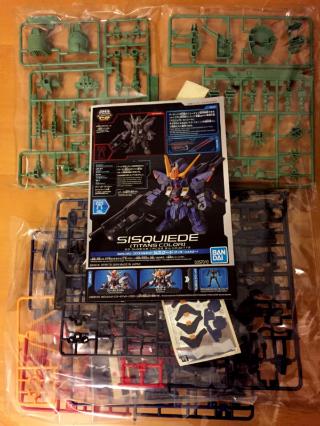
33872
Post by: Turaxa
Progress continues on the SD Sisquiede. The mobile suit itself is done, I was able to assemble it in time for the Painting Challenge deadline. Here are the sub-assemblies laid out:
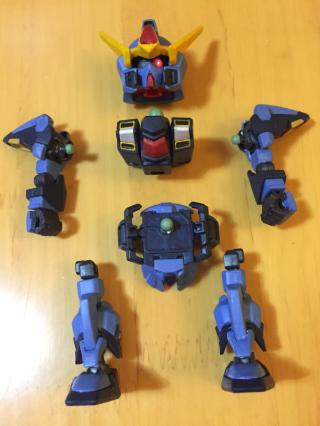
Next will be the huge gun and other weapons that it has.
33872
Post by: Turaxa
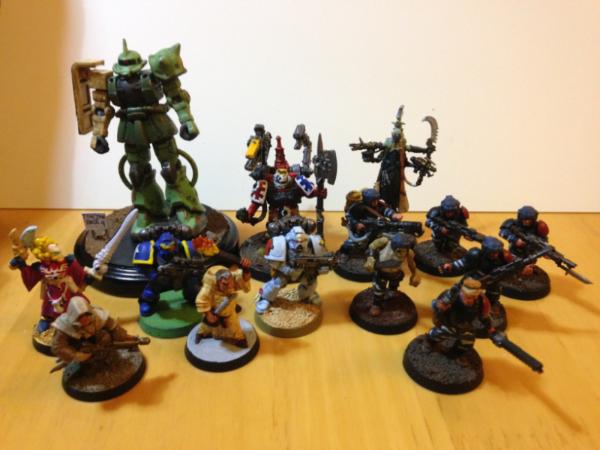
This is not, technically, my first post of the new year, since the one above this was made four hours and thirty-two minutes into January the 1st. Still, I've decided this will be my 'official' first post of the new year, so here is a group picture of all the miniatures that I finished painting in 2020.
This time last year I set this goal in the Fight the Pile of Shame thread (which now has a 2021 edition):
Turaxa wrote:I was thinking about this myself recently, so I'll join in. My plan is to complete at least one model per month. This might seem like setting the bar awfully low, but the models could be anything from tiny Reaper miniatures to full 1:144 kits.
I didn't literally paint one model in each calendar month, but over the course of the year I did complete twelve models. In large part this is due to participating in the Dakka Painting Challenge, so thanks are due to Paradigm and Nevelon for organising it each month.
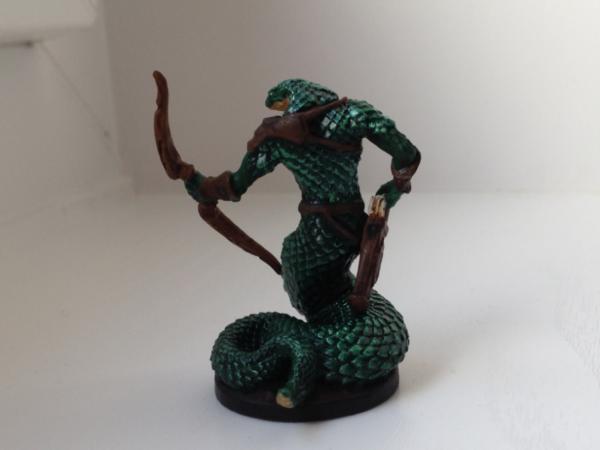
My entry for this month's Painting Challenge is this Reaper Bones miniature of..... a Naga of some sort?
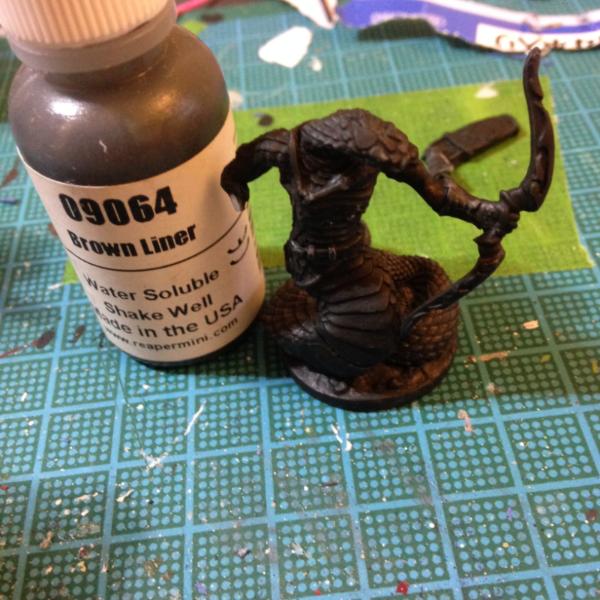
I got this miniature as a freebie with a Reaper order. I've tried (and failed) to paint figures made from Reaper's original white Bones formulation, and found them to be no better than boardgame PVC pieces, with soft detail and bendy extremeties. This figure seems to be made from a slightly different material. It was grey and has sharper detail. The theme for round 71 of the Dakka Painting Challenge is "new tricks". Since the line was released, Reaper fans have learned various techniques to paint Bones miniatures, which includes basecoating them with Reapers Brown Liner paint. So for me, this is a new material painted with new techniques.
1124
Post by: Captain Brown
Good luck with your progress in 2021 Turaxa.
Cheers,
CB
33872
Post by: Turaxa
@ Captain Brown: Thank you. Let's hope 2021 is a better year than the last one.
I started painting her last month, but the first model I finished this year is this Battle Sister.
I wanted to update the colour scheme from my old Order of the Crimson Rose Adepta Sororitas army. Below you can see this model compared to a similar one from the original army.
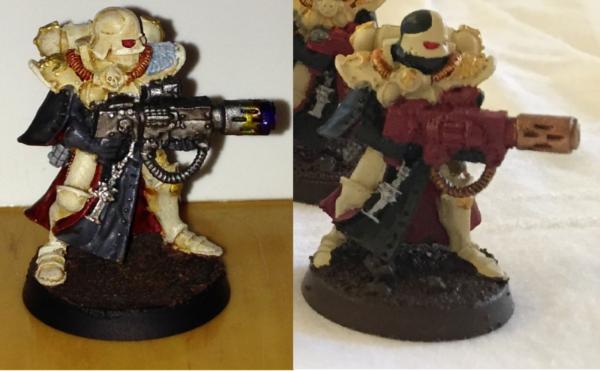
The original figure was undercoated with Citadel white spray paint and then painted with Citadel Bleached Bone, Chaos Black and Scab Red, with Citadel golds and a silver for the metallics. The only washes were, I think, a chestnut wash on the cables. The colours on the original lack depth and definition, and some of the gold doesn't "pop" against the cream-coloured armour.
The figure for the new scheme had already been undercoated with Citadel white spray paint, and got the following treatment:
Cream - Citadel Iyanden Darksun basecoat / Citadel Bleached Bone layer / Citadel Seraphim Sepia wash / Bleached Bone drybrushRed - Vallejo Hull Red basecoat / Citadel Scab Red layer / Citadel Chestnut Ink washBlack – Citadel Chaos Black basecoat / Vallejo Dark Rubber layer / Citadel Nuln Oil washWhite - Army Painter Spaceship Exterior layer / Dark Star Paynes Grey wash / Spaceship Exterior drybrush
I think this makes the colours less flat than in the original scheme. This time the metallics were done with Brass and Tarnished Steel from Dark Star. They have far better coverage and are much brighter than whatever I used originally. I also tried the thermal discolouration technique on the muzzle of the gun, using Citadel washes and inks. I think it came out alright, though old-school Citadel blue ink is really potent and overpowers the other shades a bit.
33872
Post by: Turaxa
I completed the Naga from Reaper's Bones lines.
I'll quote myself from the Painting Challenge Round 71 thread:
Turaxa wrote:This Grey Bones material is much better than the older White Bones. Some details on the head and the quiver were a bit indistinct, but overall the level of detail is comparable to older plastics. The limbs and bow, being slim parts, are bendy, but there was no distortion on my figure. I didn't find any mould lines. The material is "grippy" enough that I could push-fit some parts, but I had to superglue others. There is a noticeable seam between the upper and lower body that would have been easy to fill with poly cement if this had been HIPS. Overall this is a good enough material, but I still prefer HIPS or white metal.
Base-coating with Reaper's Brown Liner paint worked surprisingly well. It flows well and gives good single-coat coverage.
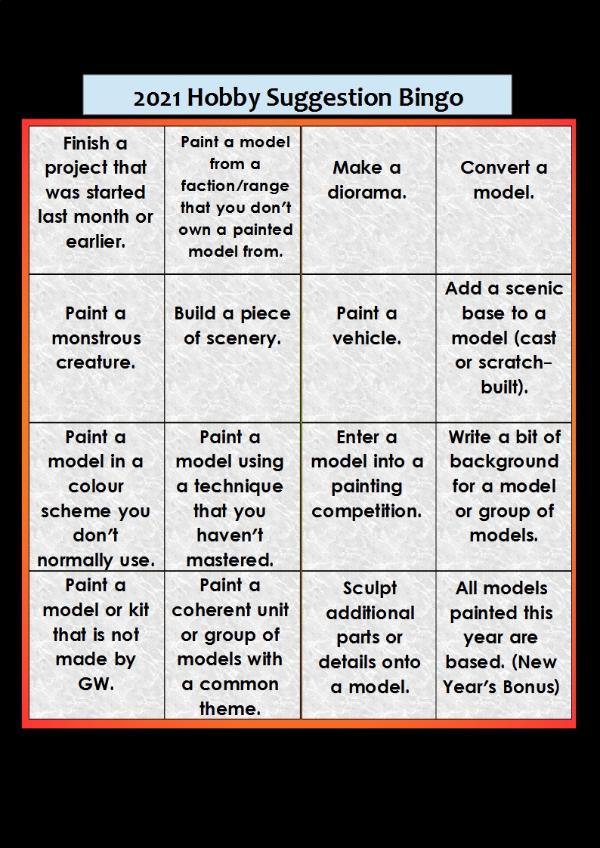
I've seen some Dakkadakka members posting checklists or bingo sheets of hobby goals for the year, so decided to gameify my own hobby aspirations. Let's see how many I can check off in 2021.
33872
Post by: Turaxa
I didn't intend to let this go un-updated for three months, but such is life. Update time!
I updated my showcase thread with better pictures of all the models I completed in 2020.
My entry for Round 72 of the Dakkadakka Painting Challenge was this harlequin. Actually it was supposed to be several harlequins, but this one took up all my time. It was my first attempt at freehand painting the harlequins' iconic diamond pattern, and it was really not easy, taking three attempts before it looked passable. I want to try it again but on something bigger, the classic harlequin figures are a bit tiny for practising this technique.
  Round 73
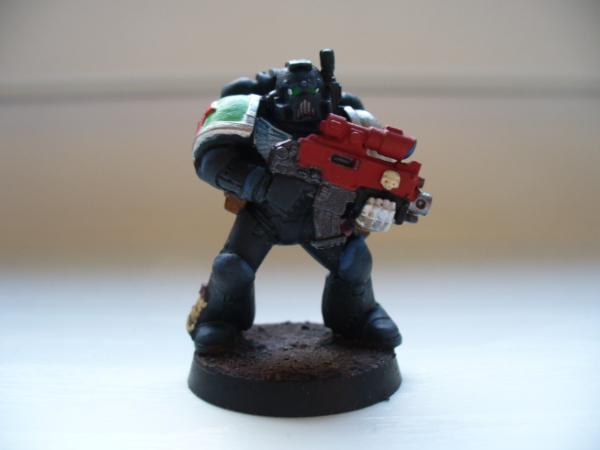
 of the Painting Challenge was the first of 2021. My aim this year is to enter something for all twelve months. Again, I planned to enter a group of figures but got bogged down on just one. In this case it was a space marine in the black armour of the Death Watch. I wasn't really happy with the finished scheme but I received some encouraging feedback on it, so I plan to revisit it in the future.
I also started a second marine in a Grey Knights colour scheme, but it wasn't finished in time. This one I was happy with, so I completed him after the challenge. The photograph makes the dark metal colour look very grainy, but in real life it's much smoother and shinier. He will serve as a prototype for some Grey Knights terminators which are lurking in my painting queue.
For Round 74 of the Painting Challenge I entered this Grot Bomb from Forgeworld. Once again the photographs are harsh on my paint job, this little thing looks better in real life and I'm quite pleased with it.
33872
Post by: Turaxa
This was my entry to Round 75 of the Dakkadakka Painting Challenge. It's the robot from Blackstone Fortress (that's totally not an Abominable Intelligence, apparently). I decided to paint it in Gundam-inspired colours. Unfortunately, after the basic colours were done it got caught in a very explosive paint spill from a faulty dropper bottle. So I had to wash it and retouch the paintwork, so it's a little rough around the edges.

Last month I also finally finished my Sisquiede kit. I finished the body of this mecha back in January, but didn't get around to its accessories. While finishing them I also went back and panel-lined the kit and added a faction symbol with a waterslide transfer. The big gun it carries is designed with swappable handled so it can be held ambidextrously, but doing that leaves holes in the side where the handle isn't attached, so I converted it to be right-handed only.
55682
Post by: JoshInJapan
Nice work on the SD Gundam. Did you do the panel lining directly over colored plastic, or did you paint it first?
33872
Post by: Turaxa
Thank you. It's all painted except the clear effect part for the beam and stickers for the eye and camera. I applied a coat of matt varnish before the panel lining. I've found that the lining markers seem to "dry out" more quickly when used directly on a painted surface, and sometimes the nib scratches the paint.
33872
Post by: Turaxa
For Round 76 of the Dakka Painting Challenge I entered these five guardsmen. Painted in the same 122nd Cadian scheme as the five from last year, these are from the push-fit box. They have many of the same flaws as the multi-part kit and suffer from softer detail on some parts, but have the advantage of being quicker to assemble. I didn't paint the eyes on 2020's quintet, but after getting lots of encouragement from other entrants in the competition I decided to paint the eyes on these guys. They're not bad, but I need more practise.
Also, recently the grot bomb which I painted back in April appeared on the front page of the Dakkadakka gallery. This is the first time I've seen one of my images up there, and I was (probably excessively) excited about it, so here is a collage of some more pictures of the missile and its unfortunately gretchin pilot.
55682
Post by: JoshInJapan
The eyes on those Guardsmen turned out pretty well. Next time, I'd suggest painting the whole eye black, then the cornea white, and then dotting in the pupil. I know someone in the Challenge thread compared that technique to eyeliner, but it really does help.
Having a model show up on the front page is a rush, isn't it?
33872
Post by: Turaxa
@JoshInJapan: Thanks, and sorry to respond so late. The eyes seem to have been a popular addition. I'll have to dig some unhelmeted models out of the pile of potential to get more practise.
For the 77th round of the Dakkadakka Painting Challenge I entered this Eldar Harlequin.
This sculpt was really nice to paint, it has no awkward shapes or vague details. The colour scheme is based on this miniature's illustration in the box art for the original Harlequins box.
I decided to attempt to do the base in the Blackstone Fortress style, but I don't think it was that sucessful. In fact, if I hadn't been painting it on the last day of the contest I would have been tempted to paint over it with something more conventional. More practise is needed.
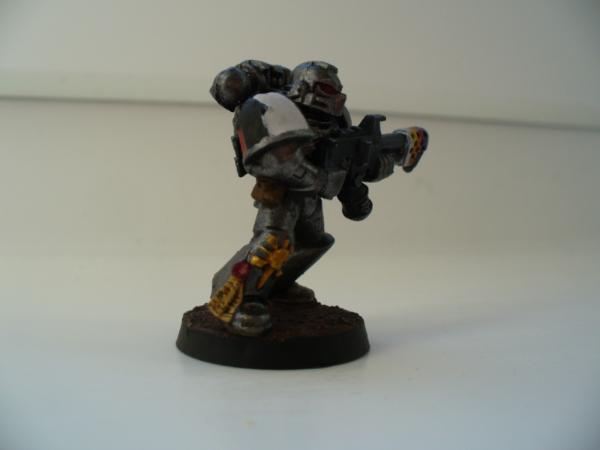
On the theme of more practise, I painted another erzatz Deathwatch marine to try and get a black armour technique I am happy with.
The edge highlighting is a little over done, but I think this one is better than the previous one (below left).
Lastly, this guy:
Has seen some drek, man. He's also become my most commented on image in the Dakkadakka gallery, and also the first one to accrue enough votes to display a rating.
122359
Post by: tzurk
Get some, Turaxa!
Congrats on the internet fame with Private Eyes over there and the grot bomb!
New highlighted armour definitely looks better!
Great colours on the harlie too, matches the art and looks like something out of an 80s sci fi anime.
Keep it up!
55682
Post by: JoshInJapan
Nice,classic work on the Harlie. The base looks like it will look fine at tabletop distances, which is the real test. The lines might benefit from another layer highlighting before you get to the pure white where the lines intersect.
I've pretty much given up on edge highlighting-- I just can't seem to get it right. I'll be following your efforts with interest.
33872
Post by: Turaxa
@ Tzurk: Thank you. Now that you mention it, the Harlequins do have a bit of an anime feel. I suppose they're like very flamboyant super sentai.
@JoshInJapan: Thanks. The result this time was much further from the real thing than I'd hoped, but I think I will try the Blackstone effect again at some point, it makes a nice change from basing with sand. I too usually avoid edge highlighting. I much prefer drybrushing and washing, but those techniques don't suit every miniature or colour scheme; black armour seemingly being one.
33872
Post by: Turaxa
These three Ebay-rescue cultists made a brief appearance in this blog back in October last year.
My previous paint scheme didn't work out and I ended up putting them to one side, but I've decided to revisit them for the 78th Dakkadakka Painting Challenge. The detail won't be great, since I primed them over my own half-finished paint job and the original owner's black spray, but I'm determined to get them done this time.
On the subject of primer, my search for a decent brush-on primer may be over. This primer is from Army Painter, and while it doesn't smell great it suffers from none of the bubbling and consistency problems that have plagued the other primers that I've tried.
33872
Post by: Turaxa
Yesterday I saw that my grot bomb had made it to the main Dakkadakka front page! This motivated me to actually update this painting log for once. So, without further ado, updates:
Turaxa wrote:These three Ebay-rescue cultists made a brief appearance in this blog back in October last year...I'm determined to get them done this time.
And get them done I did, and in a colour scheme I quite like as well.

My entry for the 79th Dakkadakka Painting Challenge saw this Inquisitor miniature finally seeing paint.
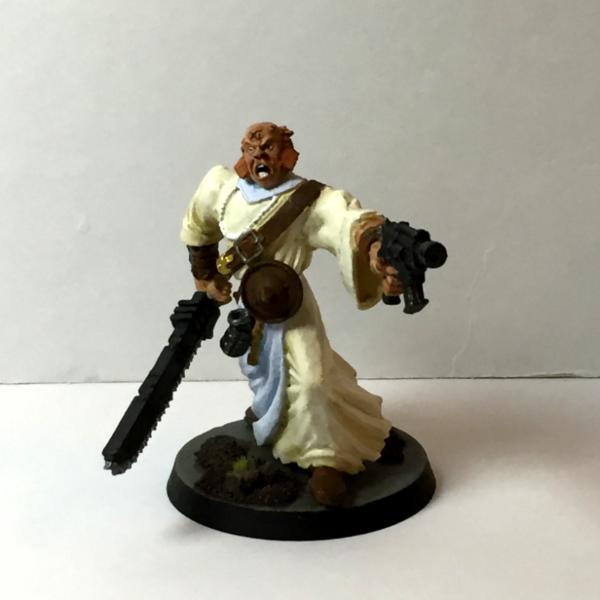
I painted the highlights and shadows on the fabric, rather than using washes and drybrushing like I usually do. It mostly looks good, but I'm not sure it looks that much better for the amount of extra work it took.
The brown leathers and warm/cool whites go well together, but I ran out of time on the weapons ; I think they could have done with more highlighting or some colour. Also I painted his face, including the eyes, which was so much easier at 54mm scale.
For the painting challenge Halloween round I painted this Damned Legionnaire. I built the miniature using as many bone-encrusted parts as possible for a seasonally appropriate skeleton theme, and added a fire-coloured effect to the base as a nod to the LotD's traditional fire motif.

For the Painting Challenge's 81st round I painted another Harlequin. Like the one I painted back in August, this miniature has a colour scheme based on its appearance in the box art of the original Harlequin boxed set. There was no way I was going to attempt those tiny red-and-white checks on the trousers though!

The base is done in the same style as the one for the LotD marine above. I painted a layer of varish, then painted lines of colour on top of each other while the varnish was drying to try to get a bloom effect. It sort of worked, but I'm not satisfied with it.
For December I painted Hello Kitty, Space Adventurer!
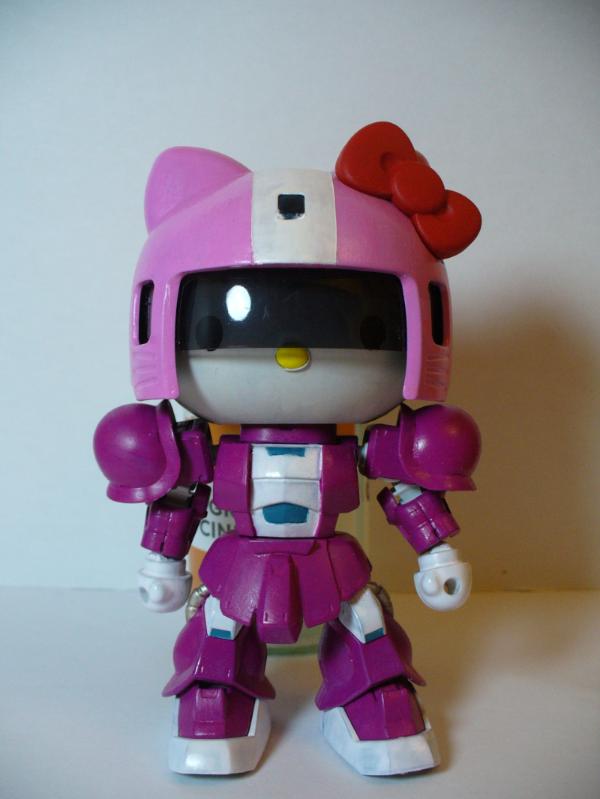
Twenty-twenty was a significant anniversary year for two famous Japanese franchises, Hello Kitty and Gundam. This is an official crossover kit marking those anniversaries. It lets you build an SD kit of a Zaku II mobile suit, and a small model of Hello Kitty, with the option to stick the Kitty head on the Zaku body for a sort of cosplay crossover.
I modified the kit with some upgrade parts to give it a more retro sci-fi look. I spent all month on this project, since this was painted as a gift. This was the first time that I used a medium to thin the paint rather than water, and that really helped to get the necessary multiple thin coats without the paint becoming too diluted.
33872
Post by: Turaxa
I missed the last two months of the previous Dakkadakka Painting Challenge cycle, but I'm back in the game for Round 85, the first round of the new Painting Challenge year.
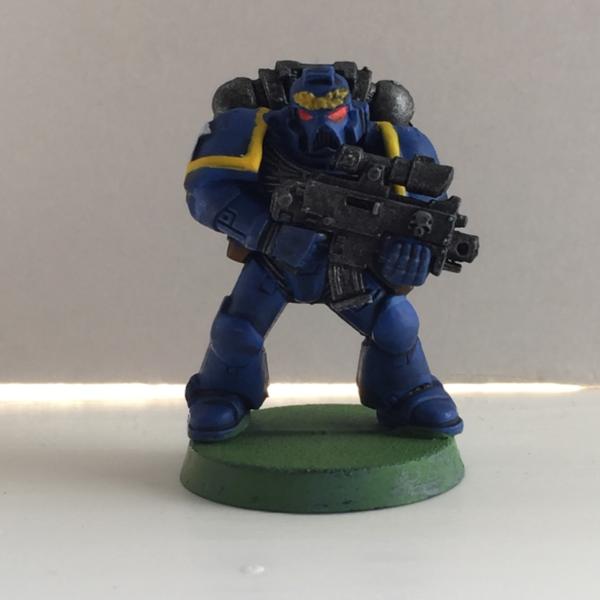
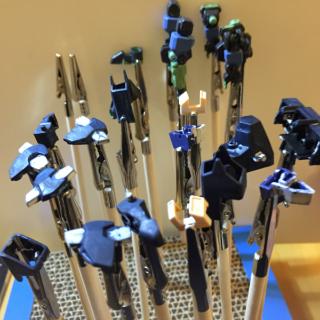
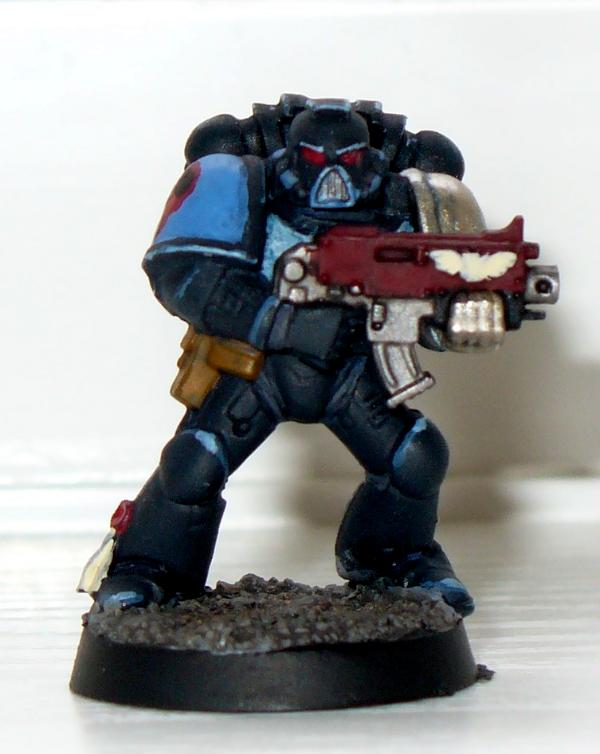
Since the theme is space marines, I'm entering this primaris-based marine below. I say "primaris-based" because, while the primaris do have more natural proportions than original marines, I also find them a bit boring by comparison. So I've tried to give this one more of an old-school marine look.
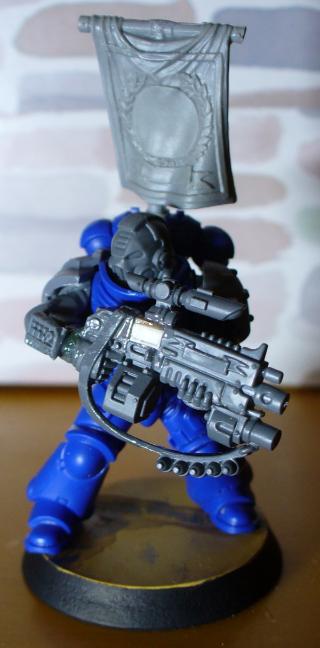
The most interesting thing about basic primaris infantry is their more granular variety of bolter types, and since I wanted all the "tacticool" accessories I did this:

Very fiddly, but worth it I think.
55682
Post by: JoshInJapan
Thanks for sharing your retrospective. You finished a lot of fun models.
I'm quite impressed with your bling-bolter. Your step-by-step looks like it was quite involved, and the final product is seamless. I look forward to the finished product.
33872
Post by: Turaxa
Thank you. I'm glad it looks seamless, I think that's the real test of any conversion.
33872
Post by: Turaxa
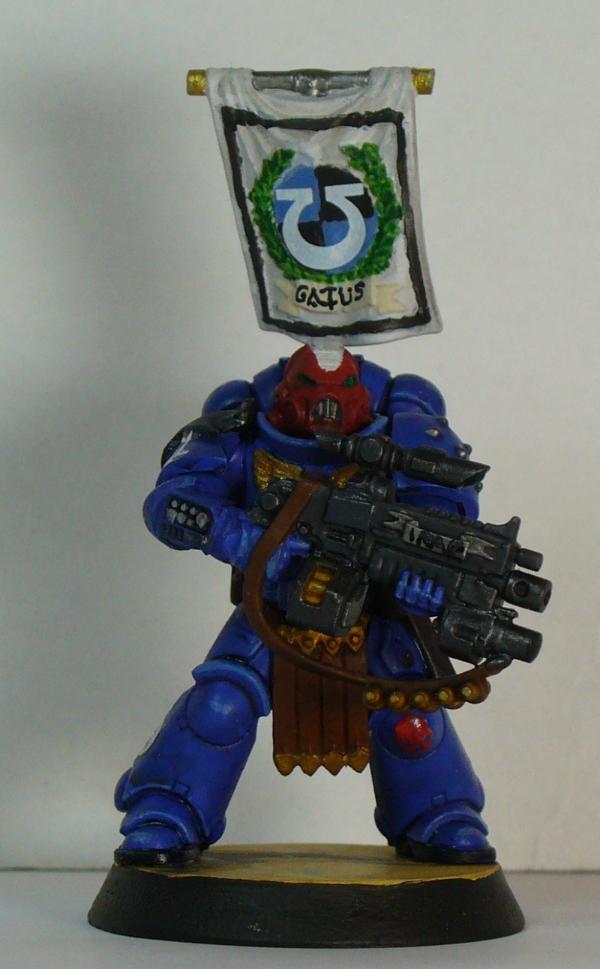
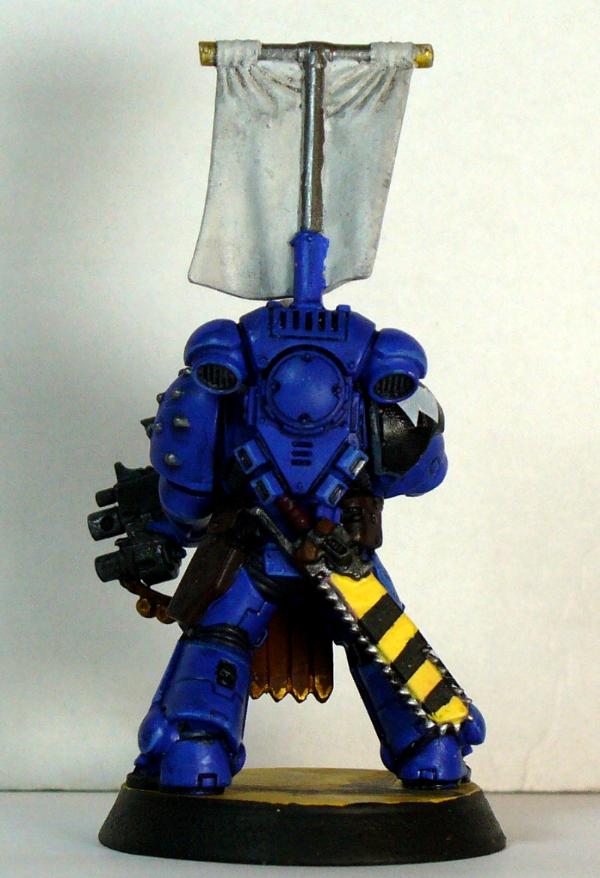
Here is the finished old-school-ified primaris: Brother-Sergeant Gaius, leading the 1st squad from the 5th Company of the Ultramarines. I think he came out pretty well.
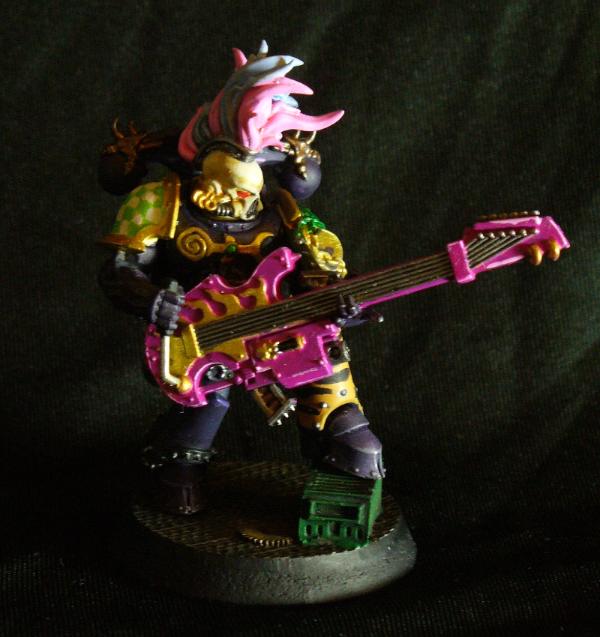
For Round 86 of the Painting Challenge I entered another space marine miniature. The theme was "reborn, remade", so I painted this 2018 plastic redux of the classic metal Noise Marine. I originally intended to make it more multicoloured, but I couldn't pass up the opportunity to paint purple and so gravitated towards the pre-heresey Emperor's Children colour scheme. I actually think that the darker main colour helps the more lurid parts of the colour scheme to pop more.
My entry for Round 87 of the Painting Challange is a kit of the Ohmu, a giant insect from the film Nausicaa of the Valley of the Wind.

33872
Post by: Turaxa
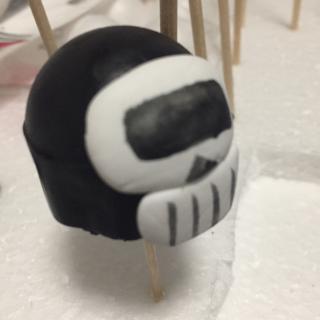
So it looks like I haven’t updated around here in almost half a year! I’ll do a roundup at some point, but right now I’m going working on a cheeky last-minute entry for this month’s painting challenge.
I’m going to give this kit a Hallowe’en make-over, and the main thing to change is the head. Surprisingly, the head in this kit has some nice internal detail that I don’t want to wreck, so I’m going to scratch-build a new head, because nothing says “last minute entry” and “weekend project” like trying some totally unfamiliar techniques
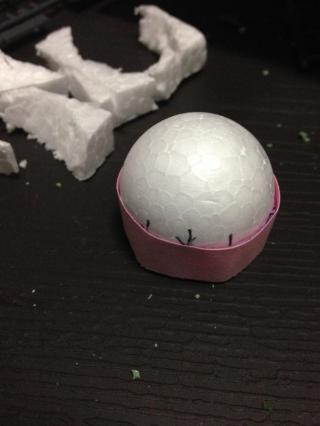
Carving expanded polystyrene without a hot wire cutter. What could go wrong?
The kit is mostly snap fit, so at least building it was quick and easy.
33872
Post by: Turaxa
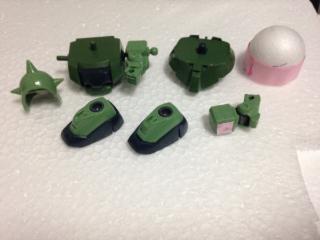
The unfamiliar techniques are going better than expected.
33872
Post by: Turaxa
Previously on DakkaDakka....
Turaxa wrote:
My entry for Round 87 of the Painting Challange is a kit of the Ohmu, a giant insect from the film Nausicaa of the Valley of the Wind.
Turaxa wrote:The militia are surely the underdogs of the Empire armies.

Turaxa wrote:Rright now I’m going working on a cheeky last-minute entry for this month’s painting challenge.
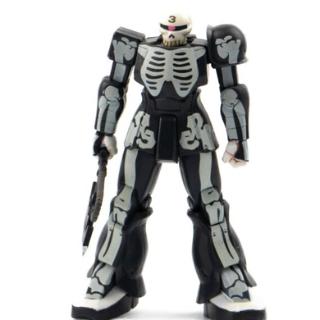
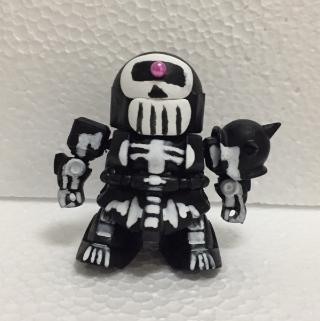
Turaxa wrote:From the depths of Gundam lore comes the menacing Dokoro Zaku.
This is an official figure of it, with my (rather less menacing) version for comparison.
(cut to opening credits and theme )
So I completed the big bug for Round 87 of the Painting Challange. I made a few mistakes when building it; painting the legs on the sprue turned out to be a false economy, I could have filled the seam line which runs the length of the kit and still painted it in sub-assemblies, and the eyes are a much darker blue than they should be. Overall though this was a fun kit to build, and I'd like to have another go at it at some point.
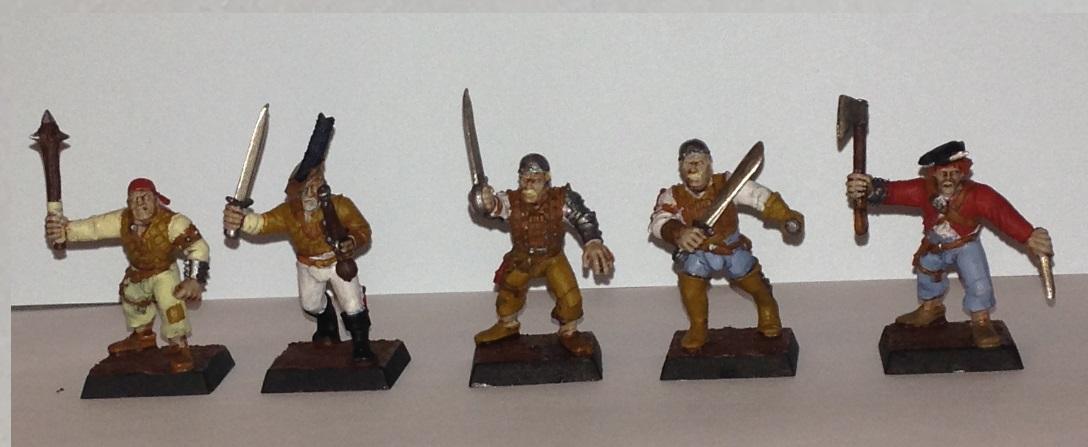
For the Dakka Painting Challenge Round 88 I painted some Empire Militia. These were part of an Ebay lot, so I didn't assemble them myself, but I have built other minis using bits from this kit before. The detail is surprisingly good, especially compared to some of the kit's contemporaries (looking at you, soon-to-be-replaced plastic Cadians), and I like the modularity that the kit has.
I actually decided to paint them in 'natural' colours because I couldn't remember any of the WHFB Empire uniforms, but making them a bit varied with a limited palette was fun in itself.
Last month's challenge entry was a super-deformed kit of a Zaku mecha from the Gundam franchise. I was recreating one which is modified to have a skeleton theme, so it was perfect for Hallowe'en. The head is scratch built and ended up looking a bit derpy, but that kind of fits the chibi aesthertic so it's fine.
33872
Post by: Turaxa
Time for another recap post, since it's been almost a year since I posted anything here.
Back in December last year I painted this commissar figure from the Warhammer 40K Chibi Figures Vol.2 gashapon range. They come pre-painted, but I thought I could make his uniform a bit more fancy.
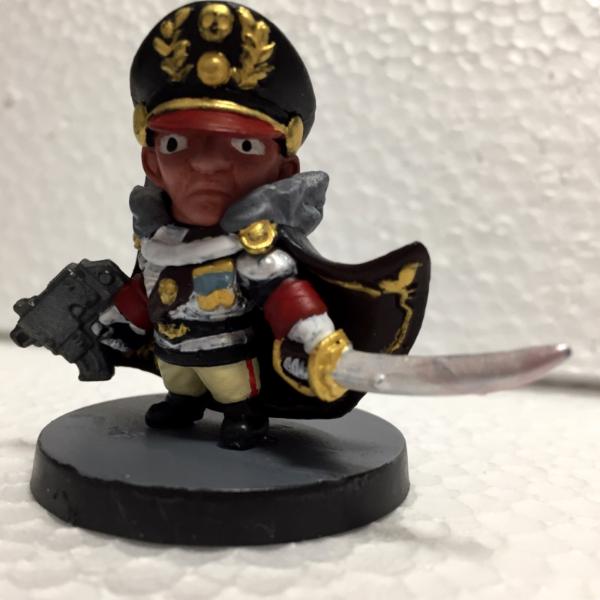
This is him before and after:
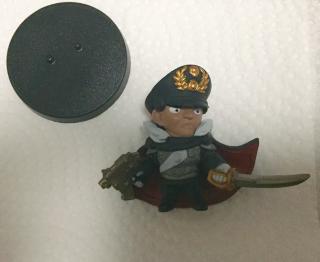 
At the time I only had a limited selection of 'craft store' paints, and the figure didn't take paint very well. So he's a bit rough, but I think he came out well enough.
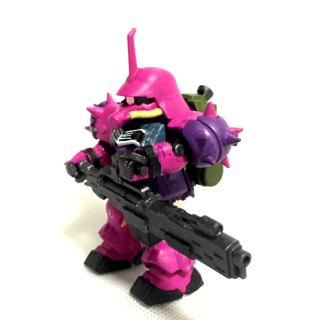
Then I had a bit of a hiatus until August, when I entered this very colourful SD mobile suit from the anime Gundam Unicorn into the 102nd Dakka Painting Challenge.
33872
Post by: Turaxa
When I was painting the pink mobile suit I decided to try building myself a wet palette, something I've wanted to try for a while. It was surprisingly successful, and much better than using a dry palette in terms of mixing paint and preventing wastage.
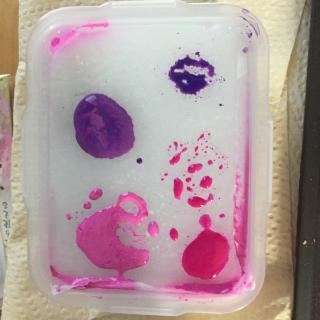
It is built using a sponge inserted into a Tupperware-style plastic food tub and topped with grease-proof paper, and has some copper wire in the bottom since I heard that can prevent problems with mould.
33872
Post by: Turaxa
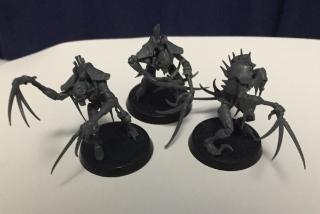
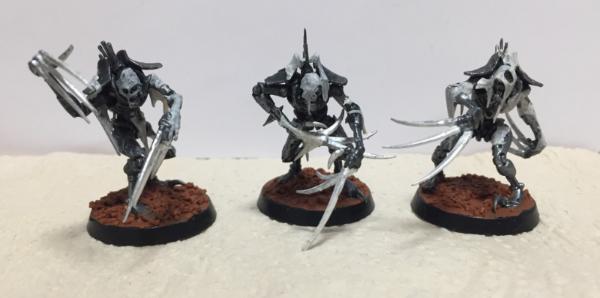
A trio of necrons, my entry for the 103rd Dakka Painting Challenge. It's very impressive that it's possible to make such delicate plastic models, but they were not fun to build, so much so that the last two are still on the sprue. All four limbs are separate pieces, and have tiny contact points. Trying to glue both legs at the hips whilst also trying to glue both feet to the base was an exercise in patience. Hopefully they are more fun to paint!
33872
Post by: Turaxa
No, they were not fun to paint! I think part of that was down to the slightly wonky poses they ended up in. SO much went wrong with these. Ugh.
121268
Post by: Gwyn chan 'r Gwyll
They're a real pain but you suffered through and they look good!
33872
Post by: Turaxa
Thanks! Good to know I'm not the only one to struggle with them.
33872
Post by: Turaxa
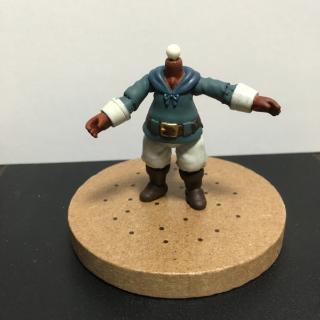
I recently build this gashapon capsule figure. It is snap-fit, and the parts can be twisted off the sprue, but some of the parts were a little difficult to force into position. still, the knee and elbow joints are moulded as a single articulated component on the sprue, which is impressive.

I'm repainting it for the Dakka Painting Challenge Round 106. Work in progress....
33872
Post by: Turaxa
And finished.
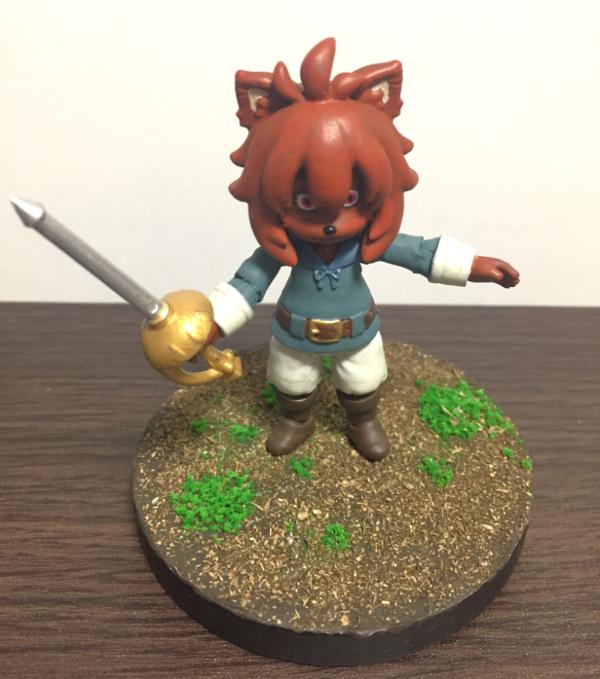
I enjoyed this one much more than those necrons. The eyes should have been larger and lower down, but for a first attempt at painting both anime-style eyes and an 'anthro' style face, I think they're not too bad. A bit thousand-yard-stare though. The base was covered with artist's texture paste and covered with model railway ground cover. The effect is pretty good.
122359
Post by: tzurk
Nice work! Looks like she's ready to buckle some swashes - repaint is definitely a significant improvement, love the decision to roll the shirt colour down the sleeves. Agreed that the base effect is nice and rustic!
33872
Post by: Turaxa
Thanks for the positive feedback. The base was a surprise success!
33872
Post by: Turaxa
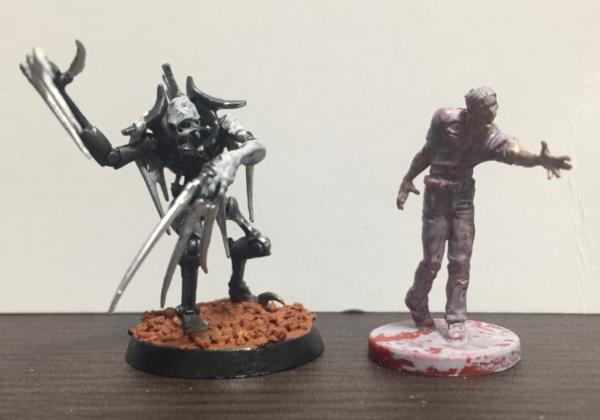
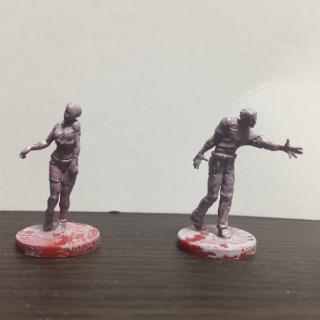
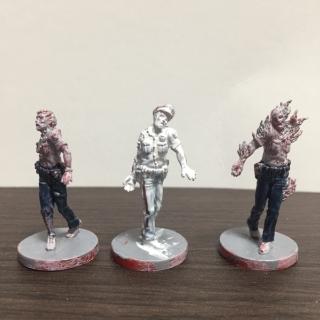
I've recently begun painting some of the miniatures from Steamforged Games' Resident Evil 2 boardgame. I was surprised by just how small they are. They're not short, an average male figure is about 30mm to the eyes, but they are quite realistically proportioned and therefore much more delicate than contemporary Citadel miniatures. Their integral bases are about 17mm wide.

A comparison with a Necron.
I've entered this pair into the February round of the Dakkadakka Painting Challenge. Time to break out the tiny brushes!

33872
Post by: Turaxa
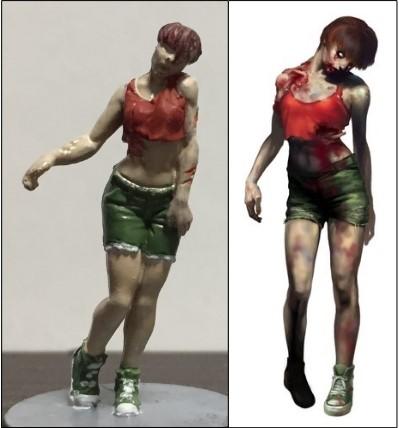
Two of the zombies finished.

The female zombie is painted to look like her promotional art.
33872
Post by: Turaxa
For the 109th round of the Dakka Painting Challenge I'm entering a repaint of a gashapon figure from the Warhammer 40,000 Chibi Figures Vol. 2 line. This is a chibi version of the miniature made for the 25th anniversary of Warhammer 40,000, which was based on the central marine figure from the original Rogue Trader cover art.
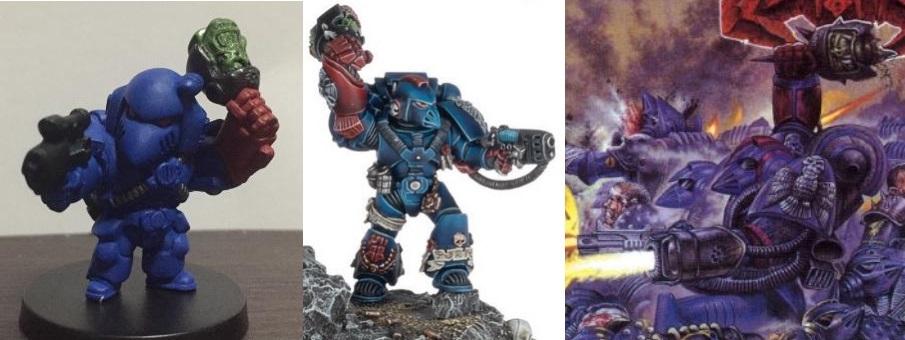
The chibi figure is mirrored compared to the other depictions, and has many small differences, but it is recognisably the same marine. In the original art the spike on the ork's helmet is sticking out of the bottom of the power fist, so I added that to the figure as well as one of the cables which link the pistol to the marine's armour.
33872
Post by: Turaxa
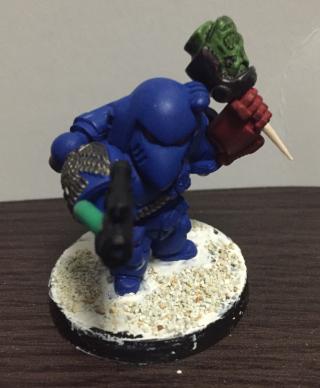
I decided to try priming the chibi marine with gesso per this Dakkadakka article.
It worked well and solidly covered up the existing colours. Unfortunately I then failed to adequately thin the base coat, and the only dark blue paint I could find had terrible coverage, giving a rather streaky finish. I'm a bit disappointed by the result, though the other parts of the model came out okay. I tried painting gloss vanish over the helmet lenses to give a glassy black look, but it only works when the light catches it.
The 110th round of the painting challenge is all about getting things finished, so I entered the last three Resident Evil zombies that I didn't finish in the January challenge.
|
|
