| Author |
Message |
 |
|
|
|
|
Advert
|
Forum adverts like this one are shown to any user who is not logged in. Join us by filling out a tiny 3 field form and you will get your own, free, dakka user account which gives a good range of benefits to you:
- No adverts like this in the forums anymore.
- Times and dates in your local timezone.
- Full tracking of what you have read so you can skip to your first unread post, easily see what has changed since you last logged in, and easily see what is new at a glance.
- Email notifications for threads you want to watch closely.
- Being a part of the oldest wargaming community on the net.
If you are already a member then feel free to login now. |
|
 |
2024/07/23 01:09:26
Subject: Re:sCratchBuilding CuStomiZing & CitbaShing: 16JUL: Main hull 100% Riveted
|
|

[DCM]
Boom! Leman Russ Commander
|
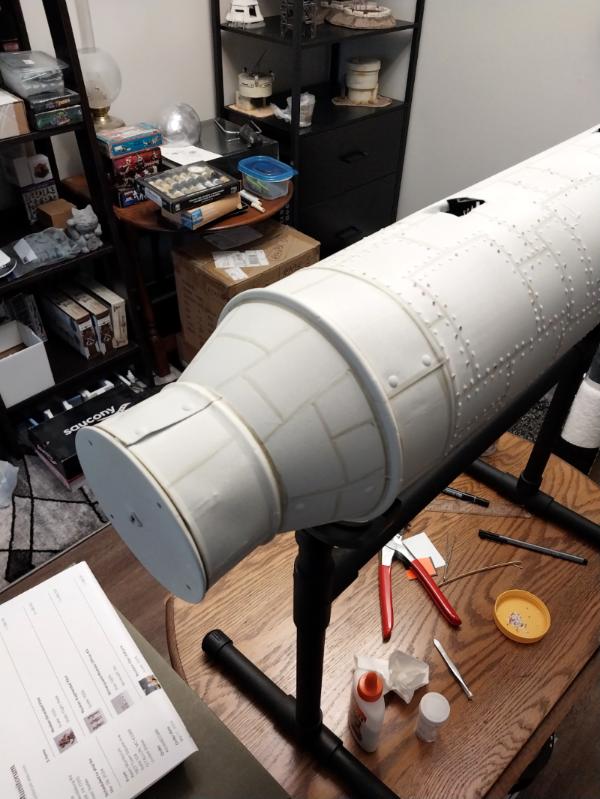
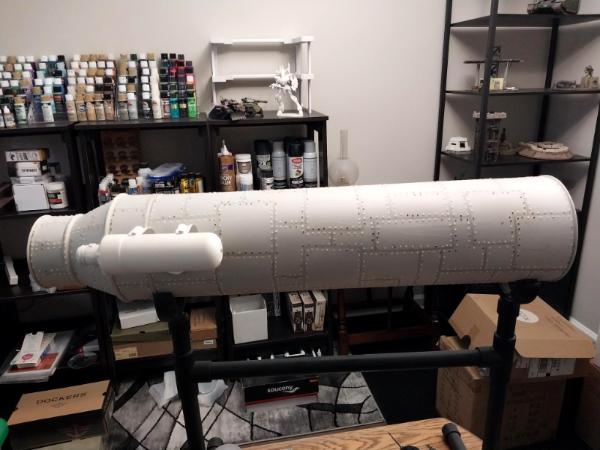
Got about half of the rear hull riveted tonight- first pic is of the blank slate: I can tell I always meant to add rivets, as I scored the stovepipe with the angle grinder to make the seams:
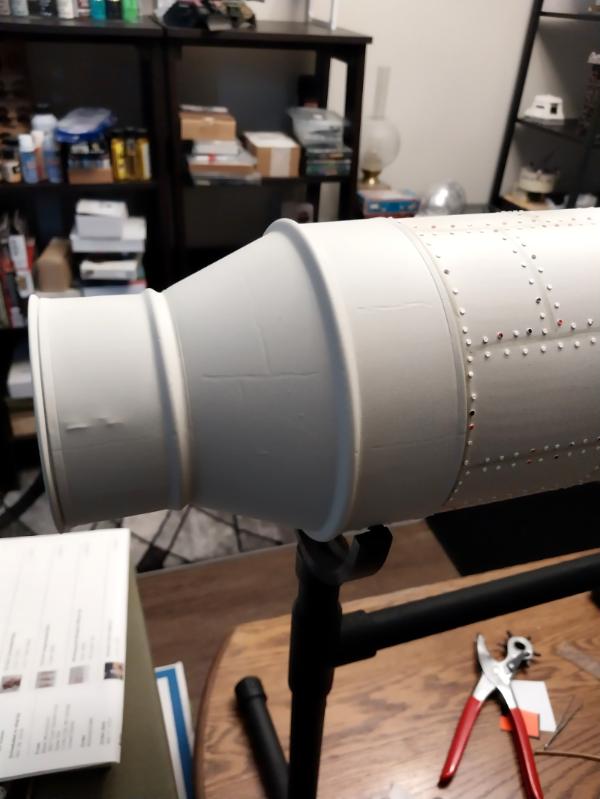
Then added the contrast with the paint pen (I think it is more or less an umber color?):
And had enough time to add about half the rivets needed:
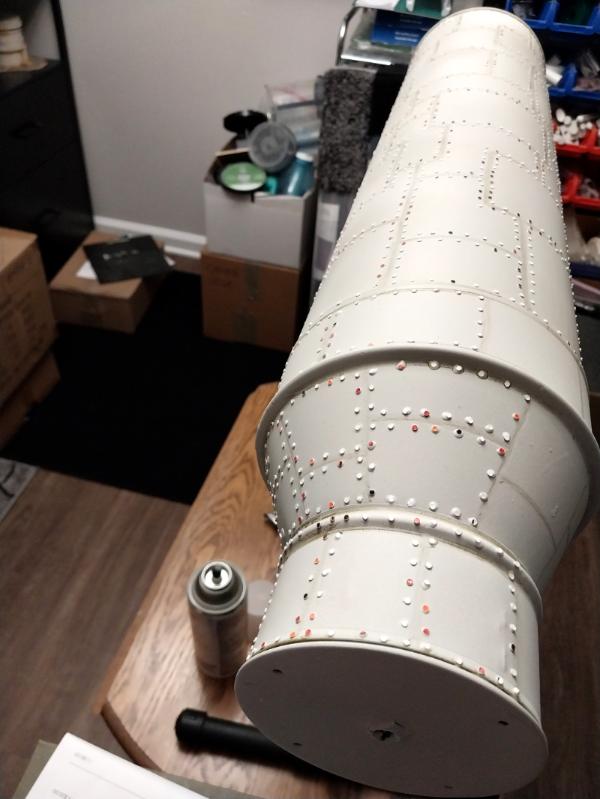
I may have to redo my estimate of 1000 rivets for the main hull; I counted tonight and so far I've used 373 rivets just getting about half done! 
Finished watching Keanu Reeve in Constantine and started watching Denzel Washington in The Equalizer 3. It makes the time pass so quickly!
More follows soonest.
|
"He fears his fate too much, or his desserts are small, who will not put it to a single touch; to win- or lose- it all."
Montrose Toast

|
|
|
 |
|
2024/07/23 22:39:06
Subject: Re:sCratchBuilding CuStomiZing & CitbaShing: 22JUL: Almost done with rivets
|
|
[DCM]
Boom! Leman Russ Commander
|
So, a couple of things done so far tonight:
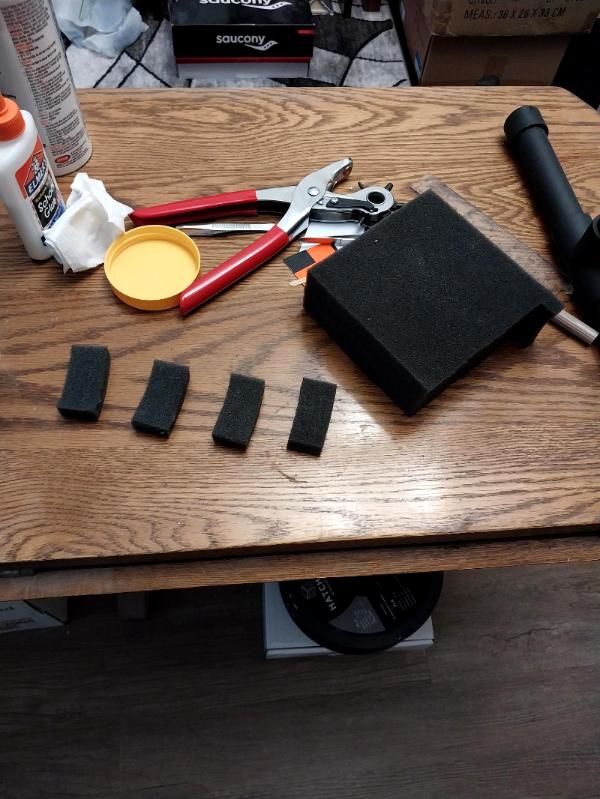
1) Given that the rivets were not part of my original vision for the Kittyhawk, I wasn't worried about them popping off every time I set the hull into the (hard, PVC plastic) cradle. To counter this, I pulled off some 'pluck out' foam from a pelican case we used at work (I grabbed it for 'daubing sponges' for weathering work) and added it to the points where the hull comes into contact with the cradle:
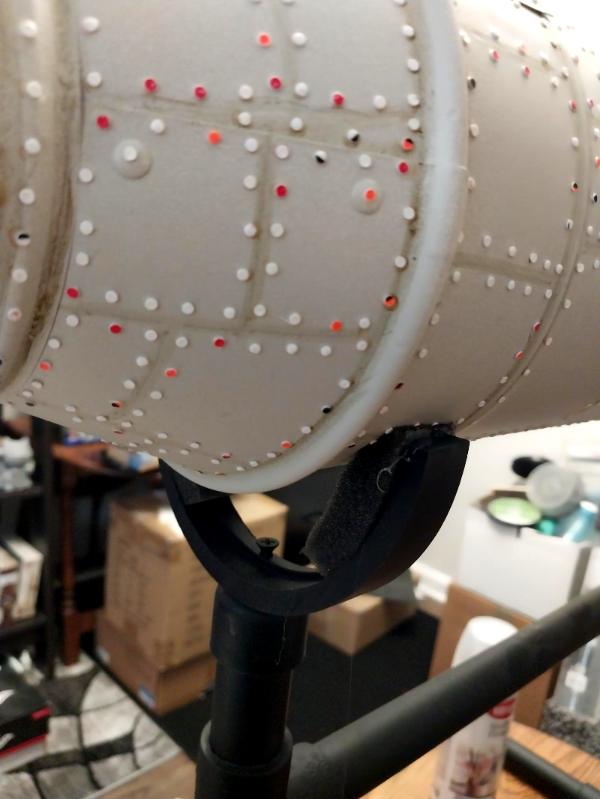
2) I finished adding rivets (at least for now, the engine nacelles may get some, but the hull is done). I dropped 283 more to finish the tail section, for a total of 656; this made me doubt my estimate for the main hull so I went back and did a bigger sample size area and recalc'd- now coming up with 1860; so about 2500 rivets all told:
I'm actually going to miss the riveting; it was picky work but within my talents and didn't require a lot of thought. I could half-watch a movie on YouTube and just zone out. Ah well, toujours en avant!
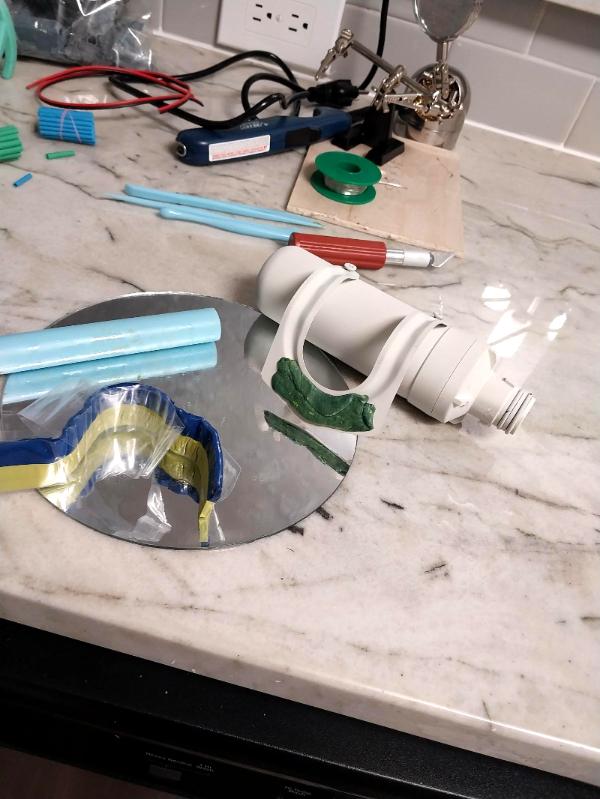
3) I've got all the parts I started with for the tail section; the one fin breaking off in moving (I moved it myself in my car, so nobody to blame but me! ) let me know that the whole thing is an accident waiting to happen; so I figure to run tiny machine bolts through the fins and the bit on the outlet box they stick to and glue them again. If I can't find little machine nuts and bolts small enough, I'll have to fabricate actual plastic rivets- drill a hole, push the solid plastic rod through, clip it off to length and peen over the end:
I think the aft running lights are going to have their own battery box to run a red portside light, a green starboard side light and blinking white topside light (if I can find the LEDs). I'm going to try and dig out a button battery clip tonight- I've seen at least one of my 'soldering stuff' boxes floating around recently.
Gotta admit, I'm taken with the idea of running a strip (or two strips) of LEDS along the underside of the hull, just because. We'll see. The advantage of going into a project with no complete plan is you get to exercise artistic initiative and flexibility; the disadvantage is not everything works well togehter and eventually you do have to 'finish' the project!
More follows (hopefully later tonight) soonest.
|
"He fears his fate too much, or his desserts are small, who will not put it to a single touch; to win- or lose- it all."
Montrose Toast
|
|
|
|
|
2024/07/24 20:21:48
Subject: Re:sCratchBuilding CuStomiZing & CitbaShing: 23JUL: Rivets complete, tail section next
|
|
[DCM]
Incorporating Wet-Blending
|
After all the zen meditation from riveting, I reckon you must have achieved enlightenment and are ready to move on to modelers' nirvana.
|
|
|
|
|
|
2024/07/24 23:11:04
Subject: sCratchBuilding CuStomiZing & CitbaShing: 23JUL: Rivets complete, tail section next
|
|

Alluring Mounted Daemonette
|
my god...it's full of RIVETS

Loving this build, thanks for keeping us posted.
|
t z you are k |
|
|
|
|
2024/07/24 23:21:29
Subject: Re:sCratchBuilding CuStomiZing & CitbaShing: 23JUL: Rivets complete, tail section next
|
|
[DCM]
Boom! Leman Russ Commander
|
Hey Josh! I am so zen that I believe I must be at the fifth exit at least for the Nine-fold path! Thank you for looking in!
As the old Irish song proclaims "The fever is on me now, lads", got quite a bit accomplished so far tonight:
1) Re-attached the vertical stabilizer fins using some small machine screws and nuts I found in my tool kit (no idea where they came from):
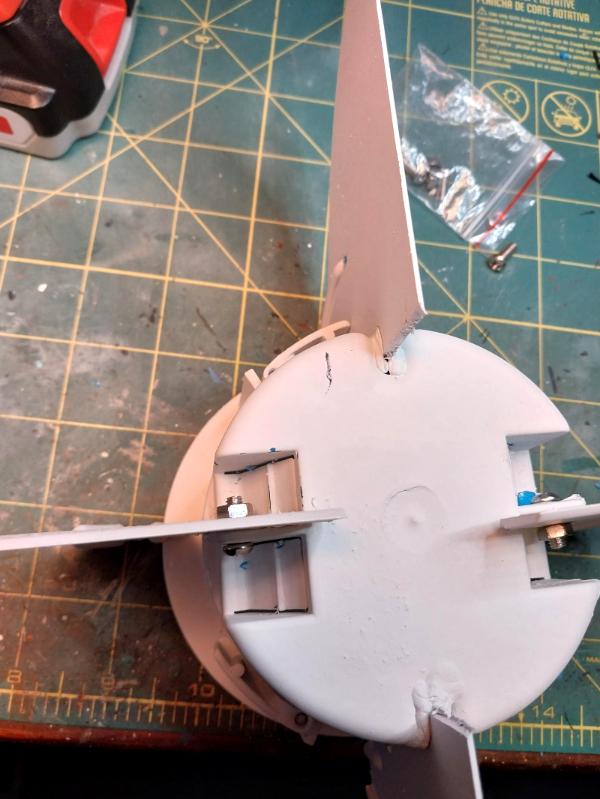
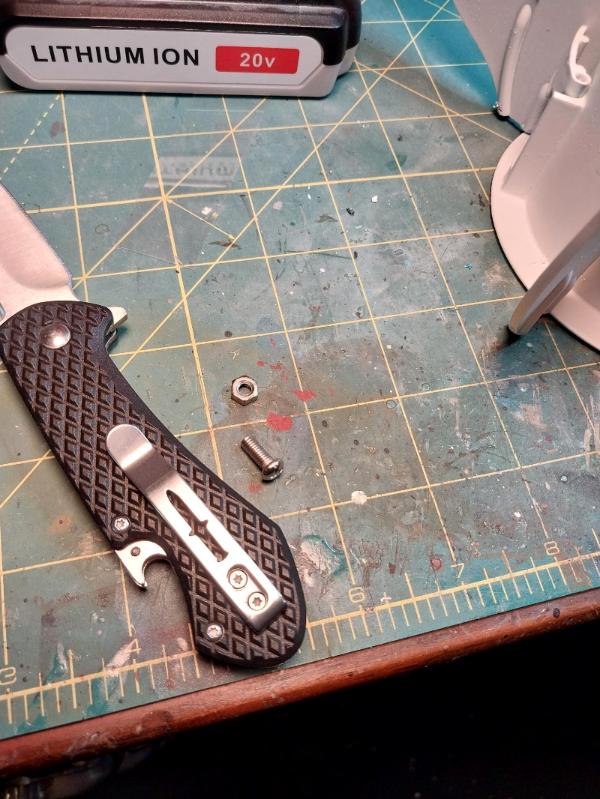
Just drilled a hole, fed the little screw through, fumbled the nut on, tightened with a pair of mini-pliers and Bob's your uncle. They are attached so tightly I didn't need to use any additional glue, epoxy or otherwise. The lateral stabilizer were attached a bit more tightly as they sit into slots already molded into the junction box and there is nothing to drill through into to fasten them to, so they stay as is.
Drilled some more holes to mount the LED sockets into for the running lights and glued the sockets in:
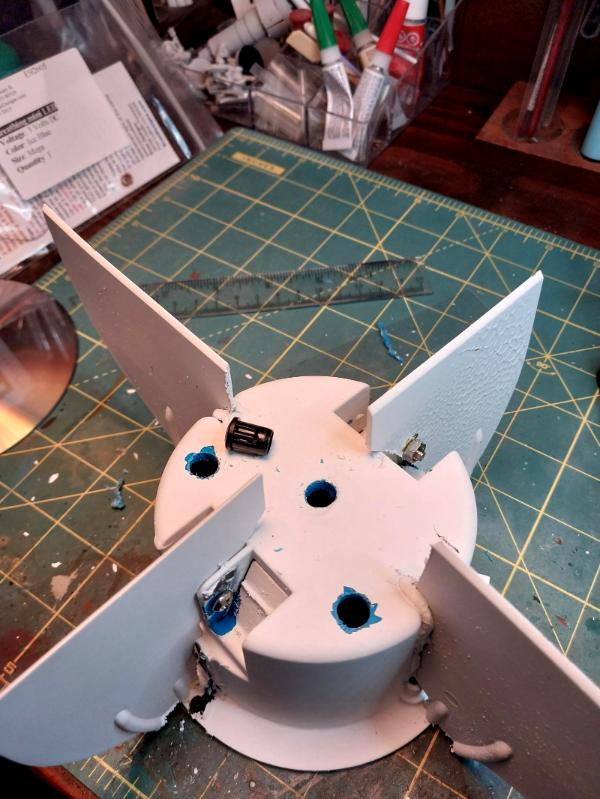
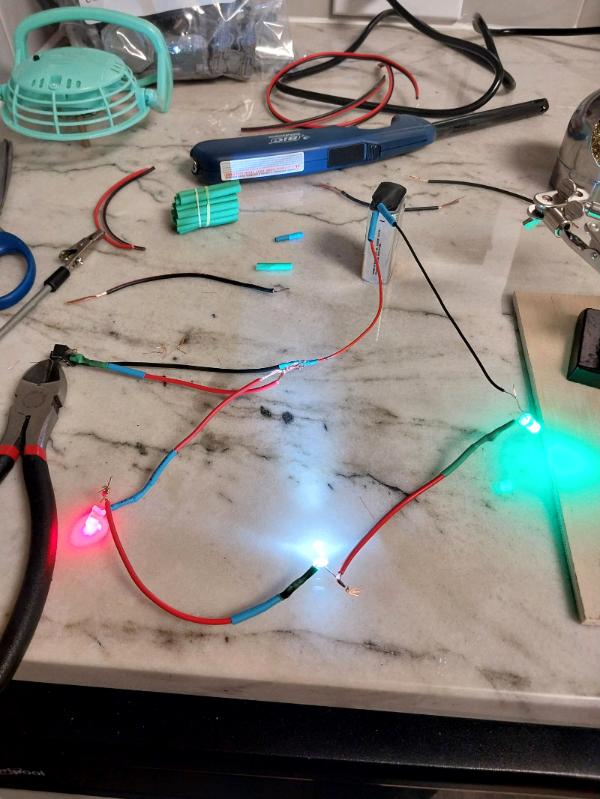
Next started soldering things together- so far have attached the postive (red) leads to the micro-switch, the battery holder and the three LED bulbs (red, green and white). Did a test rig with the everything in one series circuit and everything works (it's a miracle!):
Tomorrow night, Higher Power willing, I'll solder on the negative (black) leads, apply greenstuff to the tail section proper to smooth out all the rough, re-base coat the tail section and maybe have time for it to dry and hit it with the top color and some weathering solution (accidently home made). It would be great to fit all the electric gewgaws in and call the tail done, but that may have to wait. I also want to apply some plastic gubbins and signage- 'Remove before flight', 'Danger' and chemical explosive warnings, that sort of thing.
Really pleased with how tonight went but man- two hours of work without lifting my head and where did the time go?!
Thank you for looking in, more follows soonest.
|
"He fears his fate too much, or his desserts are small, who will not put it to a single touch; to win- or lose- it all."
Montrose Toast
|
|
|
|
|
2024/07/25 20:01:25
Subject: sCratchBuilding CuStomiZing & CitbaShing: 24JUL: The fever is on me now, lads!
|
|

The Dread Evil Lord Varlak
|
you.... are insane mate.
|
https://www.dakkadakka.com/dakkaforum/posts/list/0/766717.page
A Mostly Renegades and Heretics blog.
GW:"Space marines got too many options to balance, therefore we decided to legends HH units."
Players: "why?!? Now we finally got decent plastic kits and you cut them?"
Chaos marines players: "Since when are Daemonengines 30k models and why do i have NO droppods now?"
GW" MONEY.... erm i meant TOO MANY OPTIONS (to resell your army to you again by disalowing former units)! Do you want specific tyranid fighiting Primaris? Even a new sabotage lieutnant!"
Chaos players: Guess i stop playing or go to HH. |
|
|
|
|
2024/07/25 22:39:31
Subject: Re:sCratchBuilding CuStomiZing & CitbaShing: 24JUL: The fever is on me now, lads!
|
|
[DCM]
Boom! Leman Russ Commander
|
Hey NotOnline!!! Thank you for looking in; "Whom the gods would make great they first make mad"
Was surprised to 'get in a little work' and look up and another two hours have gone by since I got home from (pay the bills) work.
Tonight:
1) Finished soldering the negative (black) leads onto everything, assembled the bundle and tested it again (it worked- yay!) and soldered everything together and made sure I had shrink tubing everywhere so no shorts when I cram everything into the tail section.
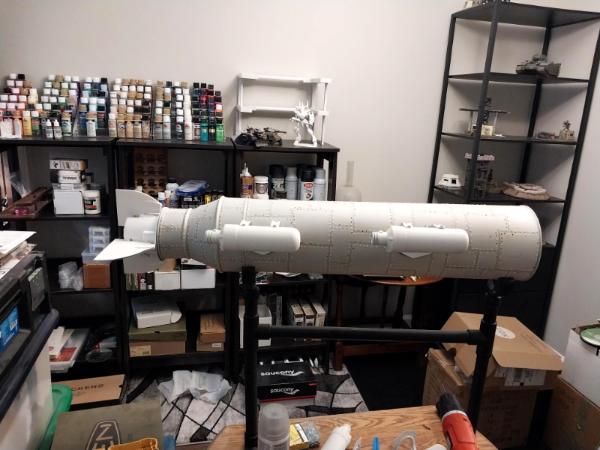
2) Used a relatively little greenstuff to patch gaps in the tail section and hit it with a layer of primer and then later what I thought was base coat. When I test fitted the assembly on the hull, it was beaucoup lighter/whiter, so hit it with another layer of base coat of the next darker/more tan shade and hopefully that matches well enough.
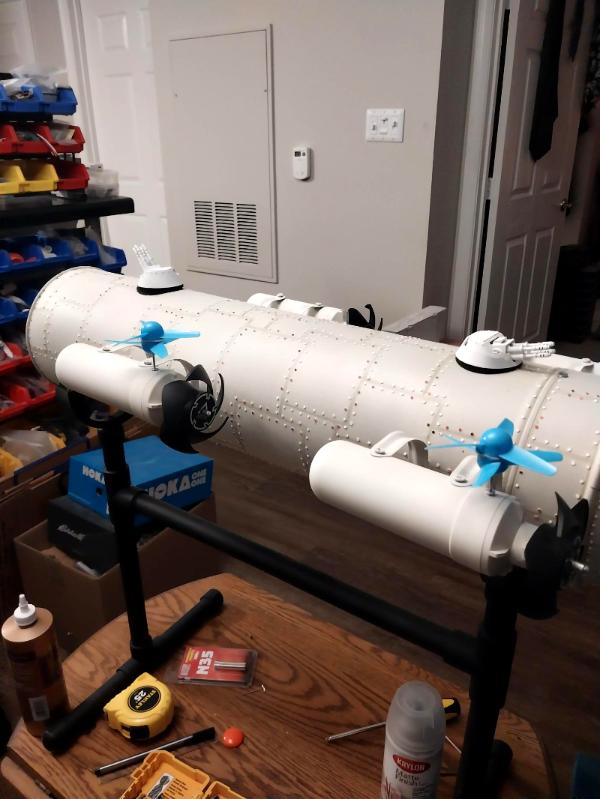
3) With that drying, I got a wild hair up my  and decided to throw caution to the winds and attach the engine pods. These started life as refrigerator filter cartridges and I've got cheap computer tower fans to provide the propellers and am going to have to add some doodads to hide the sheet metal screws and other imperfections. The struts are dollar store broom closet hangers. I also want to add navigation/running lights to them once everything is in place. Placing these is turning out to be a bit of a bear, but I think they appear to be level to the Mark I Eyeball and that's all I really want:
I was disappointed at how easily the JB Weld that I used on the fins broke away, so went to my strongest known adhesive- Greenstuff- to really secure these to the hull, not just sheet metal screws; torquing the screws down compresses the greenstuff and the bond seems really solid:
So far, I've only got the starboard engine pods attached, it took more time than I thought. On the one hand, I'm on a roll and would like to add the portside engine pods and be done with that stage, on the other I'm fair knackered from work and everything already completed tonight. I'll micro-ka-zap some dinner and we'll see what mischief we get into after that.
Here's a WIP with starboard engine pods and tail assembly in place:
I can also see that the pods are 'way too white to match the hull, so will hit them with the more tan color after I get everybody attached. And, looking at the tail assembly, I hadn't planned to add any rivets, but I really think it needs some, not a lot. So maybe the remainder of the evening will be making rivets- I'm almost out.
Thank you for looking in, more follows soonest.
|
"He fears his fate too much, or his desserts are small, who will not put it to a single touch; to win- or lose- it all."
Montrose Toast
|
|
|
|
|
2024/07/26 12:52:55
Subject: Re:sCratchBuilding CuStomiZing & CitbaShing: 25JUL: Running lights and engine pods
|
|
Krazed Killa Kan
|
Amazing work Meer! The number of rivets is mind boggling. And the reaching a Zen state is totally believable, when reading I felt like you handled the stand knocking off rivets much more calmly than I would have.
|
|
|
|
|
|
2024/07/26 22:14:22
Subject: Re:sCratchBuilding CuStomiZing & CitbaShing: 25JUL: Running lights and engine pods
|
|
[DCM]
Boom! Leman Russ Commander
|
|
"He fears his fate too much, or his desserts are small, who will not put it to a single touch; to win- or lose- it all."
Montrose Toast
|
|
|
|
|
2024/07/30 00:33:51
Subject: Re:sCratchBuilding CuStomiZing & CitbaShing: 25JUL: Running lights and engine pods
|
|
[DCM]
Boom! Leman Russ Commander
|
Some actually good work tonight, although much not in the direction I intended when I started- the advantages of not really planning anything and flying by the seat of my pants!
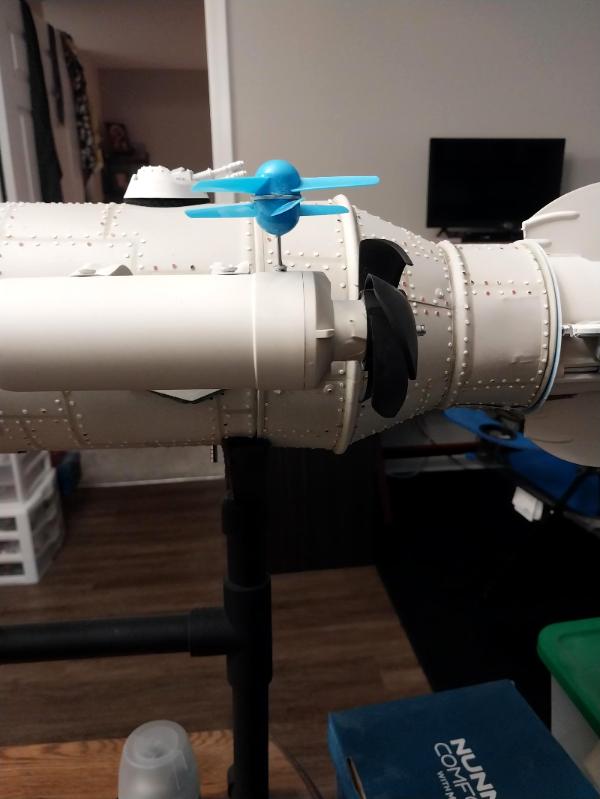
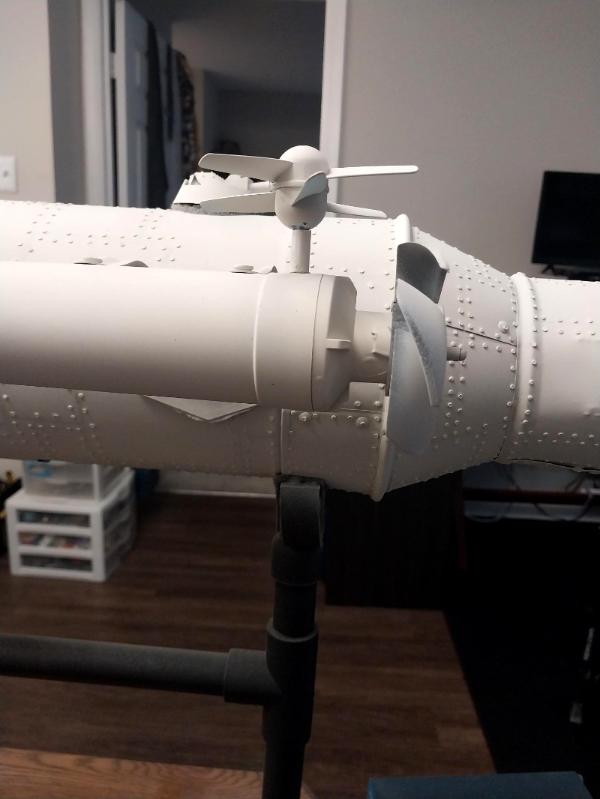
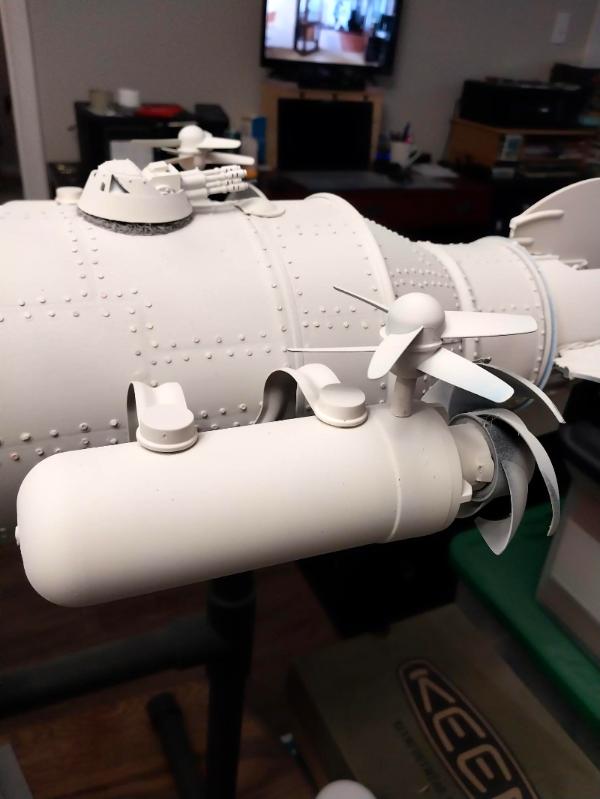
Firstly, all four engine pods are now attached. The broom-hanger struts have some flex in them (they are just pressed metal) so I can make some minor adjustment for cant and yaw to make everything look in alignment:

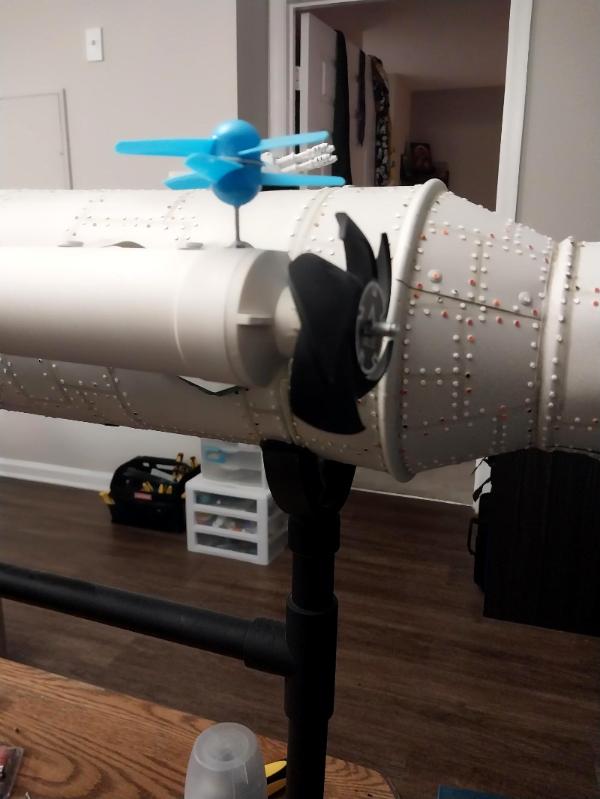
I also test fitted the 'pusher' props onto the pods- I think they look pretty good. Next on these will be the running lights and vertically oriented 'pitch props' that will help the horizontal stabilizer fins guide the zeppelin up and down:
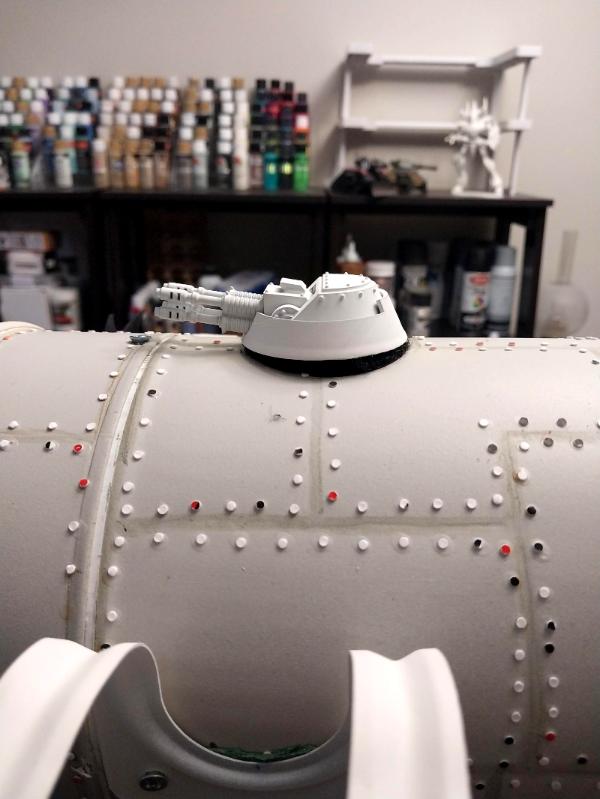
Next, instead of starting the soldering of the wiring harness for the engine pod running lights, I started mounting the dorsal anti-aircraft gun mounts. This started by installing a 5mm magnet in the base of each turret:
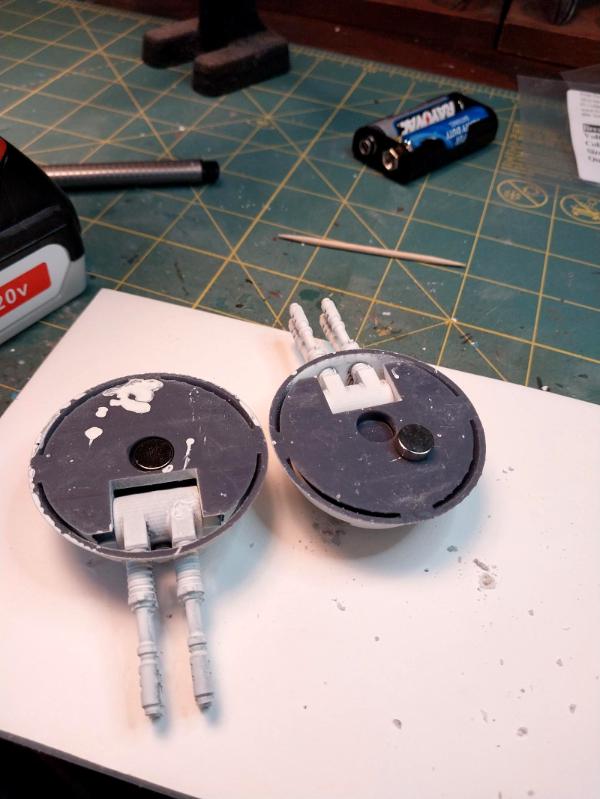
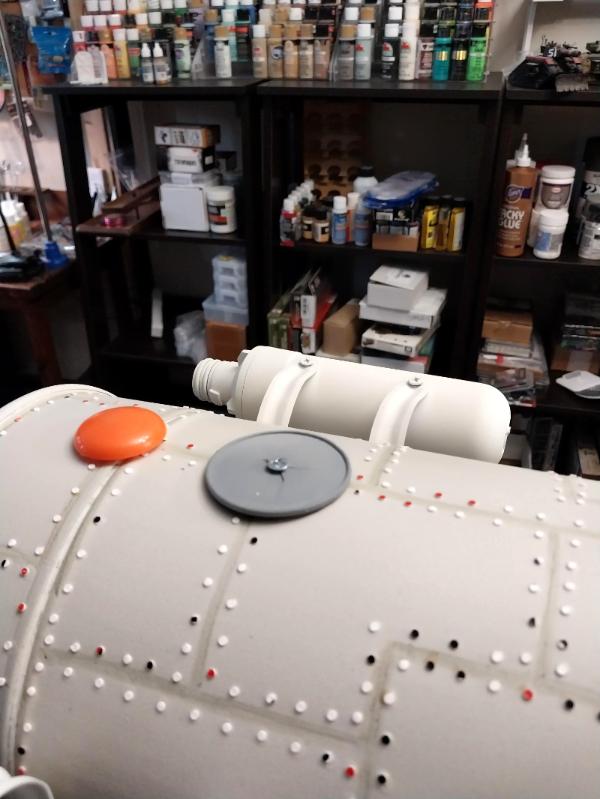
Then installing a plastic 'collar' on the hull, with a metal sheet metal screw (the orange bit to the left hides a similar sheet metal screw that I had to add because the weight of the fin structure was pulling the tail section off!):
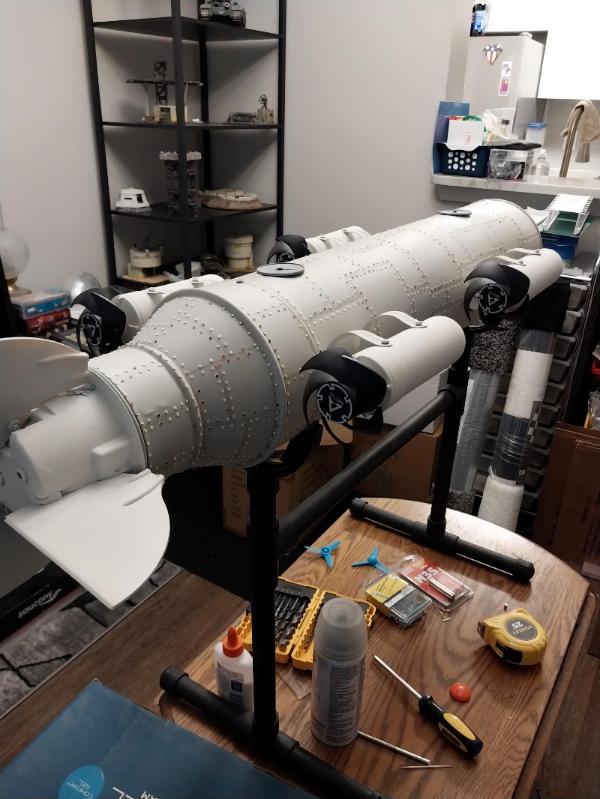
Finally yielding quad-barreled gun mounts that can elevate up to 90 degrees and rotate 360:

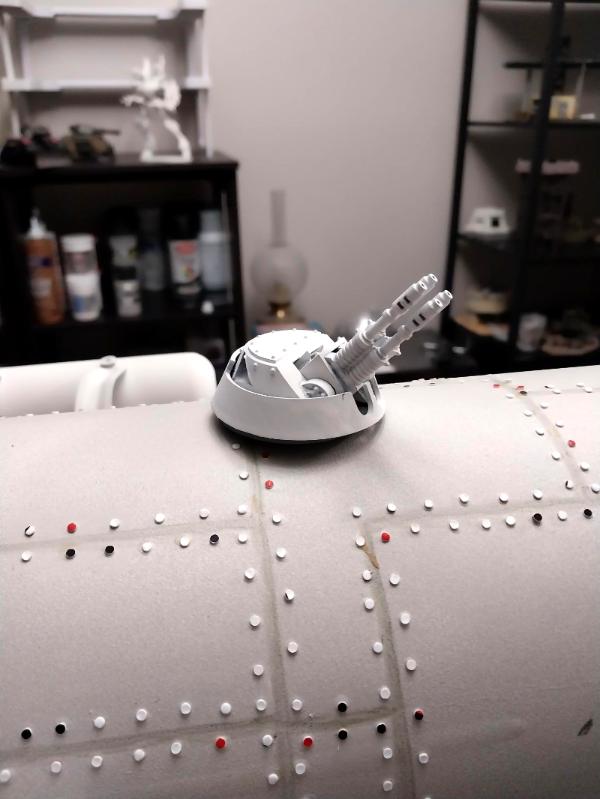
I was thinking of adding a rim around the base of the turret to hide the join between turret collar and hull, but seeing the photo, I'm thinking it may not need it, I welcome all y'alls thoughts on this.
Tomorrow, a start on running light harness, or a start on vertical prop mounts, or a start on the auxiliary gondola, which will hide the batteries for the weapons gondola and running lights. The bridge module I anticipate being the hardest to do and will leave for last. It will have its own battery pack for blue operational lights and red battle stations lights. I think I have a couple of book clip pen lights somewhere around (they clip onto the pages and shine directly down onto the page you're reading so tjhat you don't disturb others around on the bus or train, or something)- the light part is only about two inches long and I think I can mount them on the underside of the hull to act as searchlights.
More follows soonest, thank you for looking in.
|
"He fears his fate too much, or his desserts are small, who will not put it to a single touch; to win- or lose- it all."
Montrose Toast
|
|
|
|
|
2024/07/30 00:44:14
Subject: Re:sCratchBuilding CuStomiZing & CitbaShing: 29JUL: Pods, props and dorsal guns
|
|
Krazed Killa Kan
|
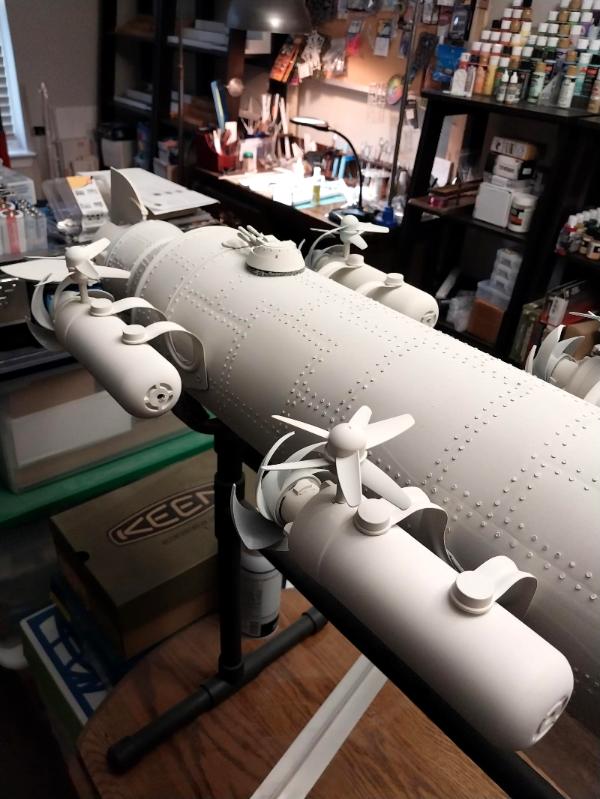
My god the Kittyhawk is enormous. I already knew that, but the latest pictures make it even more obvious. It's looking great, you are getting a lot done.
|
|
|
|
|
|
2024/07/30 00:58:50
Subject: Re:sCratchBuilding CuStomiZing & CitbaShing: 29JUL: Pods, props and dorsal guns
|
|
[DCM]
Boom! Leman Russ Commander
|
"Now witness the power of this fully armed and operational battle station. Fire at will, commander. It is unavoidable. It is your destiny."
|
"He fears his fate too much, or his desserts are small, who will not put it to a single touch; to win- or lose- it all."
Montrose Toast
|
|
|
|
|
2024/07/30 08:48:04
Subject: sCratchBuilding CuStomiZing & CitbaShing: 29JUL: Pods, props and dorsal guns
|
|

[DCM]
Lone Wolf Sentinel Pilot
|
Hiya mate, I hadn't checked in for a while, thought i'll look at the latest.... and err, wow, wtf! amazing. I'll have to skip back a page or two and find out whats going on XD
|
|
|
|
|
|
2024/07/31 01:09:11
Subject: Re:sCratchBuilding CuStomiZing & CitbaShing: 29JUL: Pods, props and dorsal guns
|
|
[DCM]
Boom! Leman Russ Commander
|
Thanks for looking in PaddyMick! I'm glad there's a thing or two here worth checking out!
I got home a bit late from work tonight, so didn't figure to get much done and planned to finish up punching out rivets and watching a movie, but "the fever is (still) on me now, lads".
First, tried something new for the base for the dorsal turrets. I think it looks slightly better and I'm not going to mess with it any longer. Bought a couple of cheap doodads at Wally World:
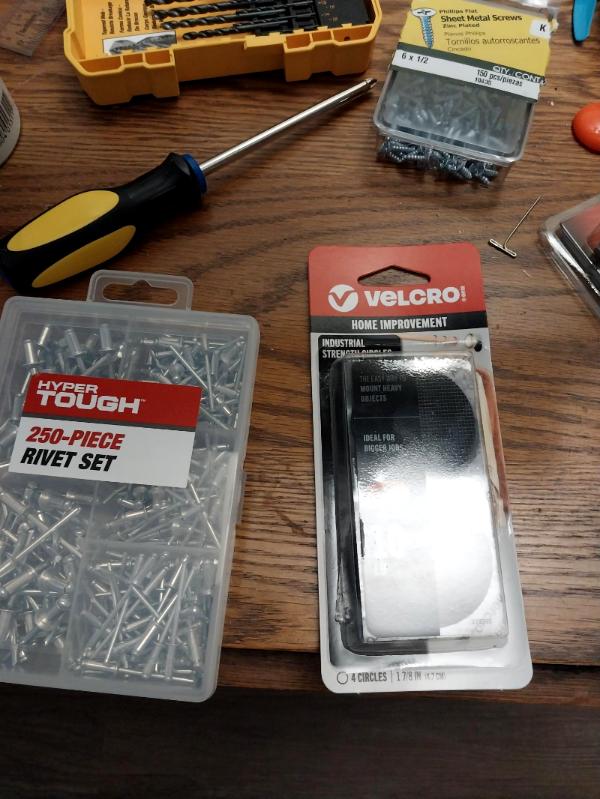
I tried laying down the nobbly side of a circular velcro patch to act as the base for the turret and it works pretty good- the sheet metal screw compresses the center of the velcro piece without flexing the edges up and makes the join to the hull look a little better:
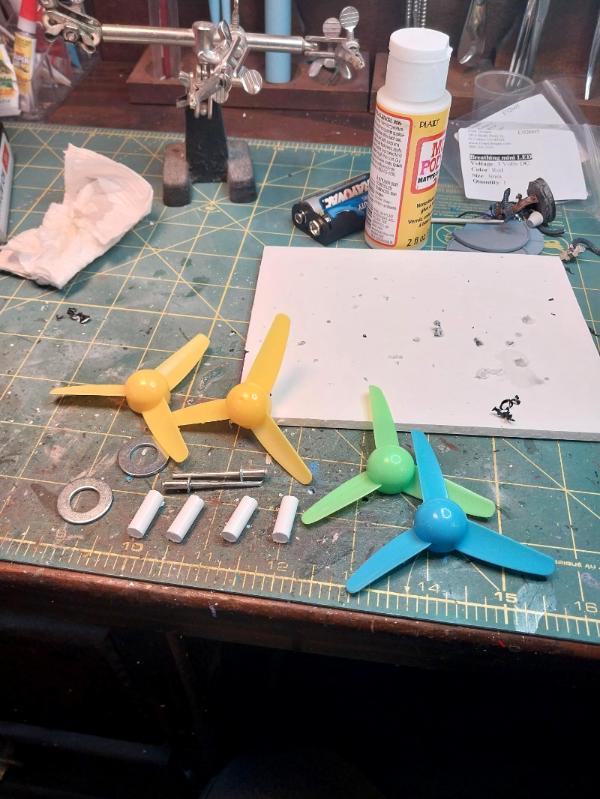
Next, I assembled the vertical propellers for helping the ship up-angle and down-angle. These are just two three-bladed cheap RC aircraft props using a washer as a spacer assembled onto a pop rivet:
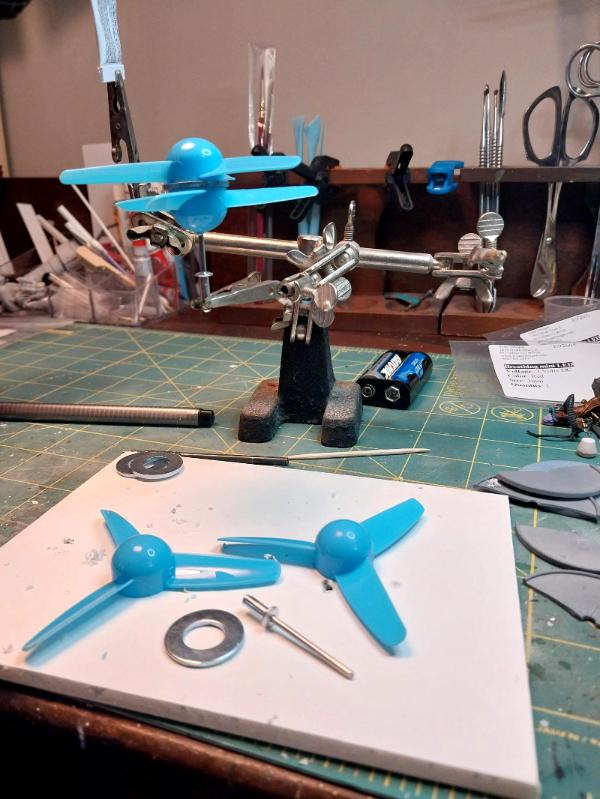
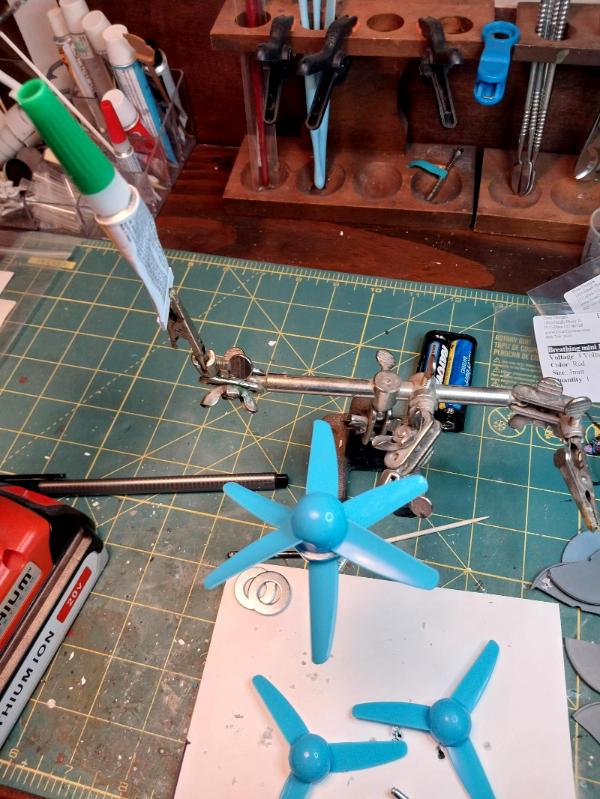
The not-so-funny story here is that I bought a lot of 20 of those little propellers on eBay for cheap- but with the move and everything could only find the four I had put with the zeppelin things thinking I would use them as the pusher props. Then I found the computer tower fans for cheap and wanted those for pusher props and figured to double up the three-bladed props for verticals and naturally can only find four when I need eight. So I had to order another set of 20 (about US$7, including shipping) and they'll be here this weekend, but man! I am gonna create project to use the other 32 three-bladed propellers! 
Then I drilled a hole in the center of each pusher prop to accommodate the largest pop rivet in the box to act as a spindle and a means of gluing the props into the engine pods:
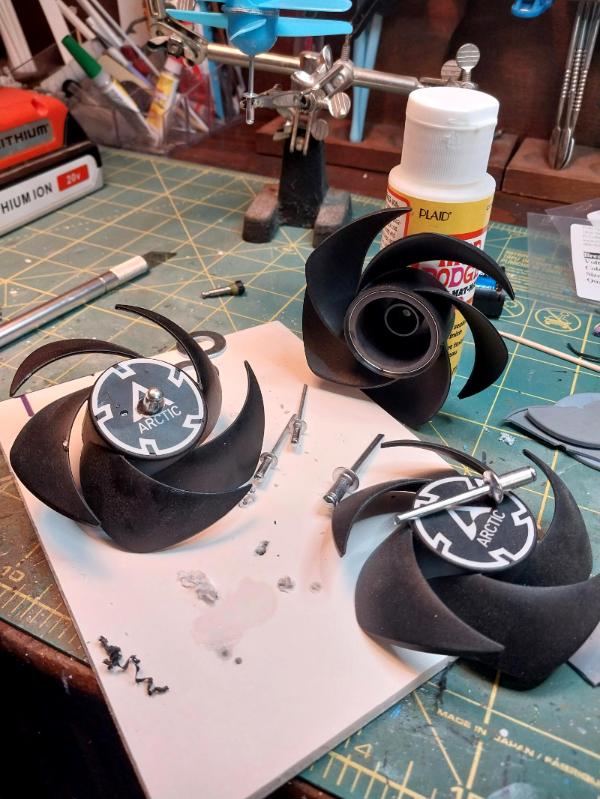
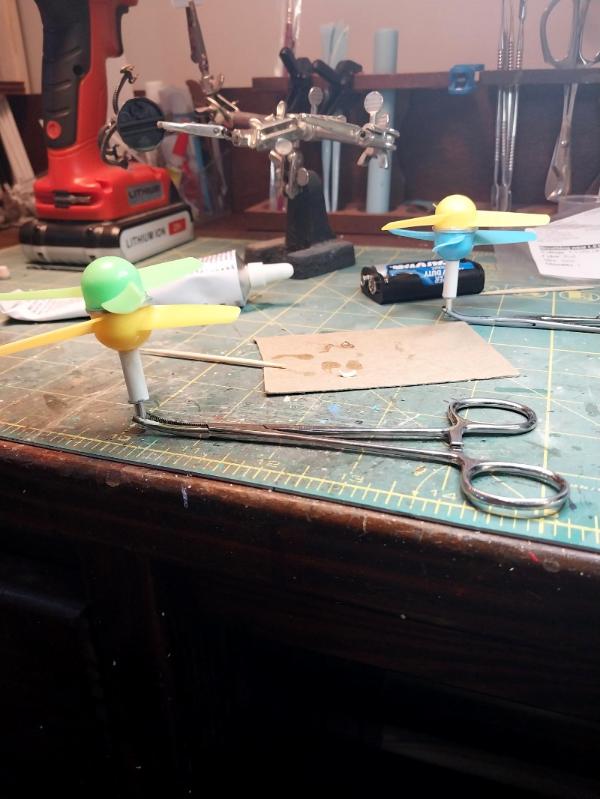
And the whole thing comes out looking like this:
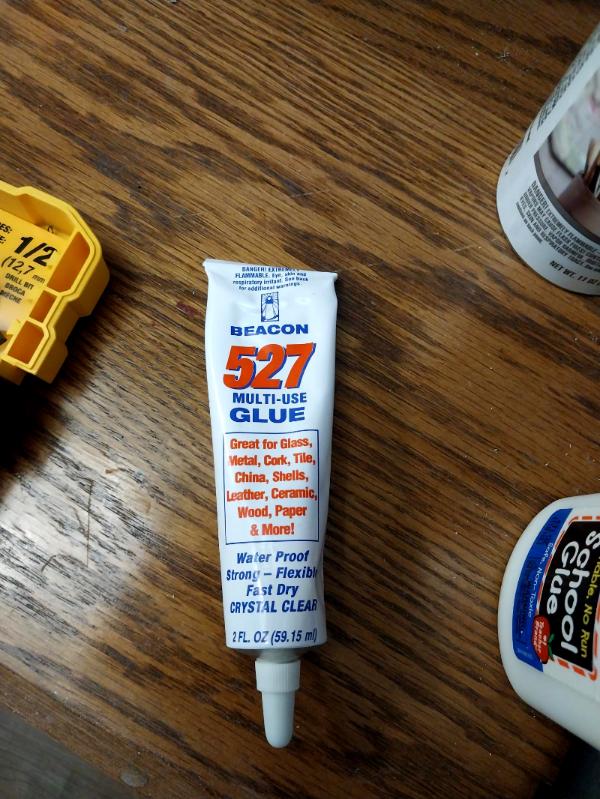
I couldn't find my jewelry glue either, but did find this 527 glue that says it'll bond anything to anything; I'll test and see how brittle it is when it sets and if it won't work, switch over to greenstuff or JB Weld:
With all the unplanned additions and changes of plan, I'm going to have to overcoat everything again and re-do my panel seam lines, but I reckon I can manage that. Not sure how I want to weather the propellers, both pusher and vertical, have to think on that. Also, I want to fabricate tiny chain drives for the vertical props, to give some substance to those skinny rivet shafts. I have copper gears small enough, not sure how to do the chains- maybe artist tape, which has some texture. The finest chain that I have I think is going to be two clunky. We'll see.
More follows soonest, thank you for looking in.
|
"He fears his fate too much, or his desserts are small, who will not put it to a single touch; to win- or lose- it all."
Montrose Toast
|
|
|
|
|
2024/08/01 00:50:34
Subject: Re:sCratchBuilding CuStomiZing & CitbaShing: 30JUL: More pods, props and dorsal guns
|
|
[DCM]
Boom! Leman Russ Commander
|
Not so much getting done tonight, but every little bit is that much closer to completion.
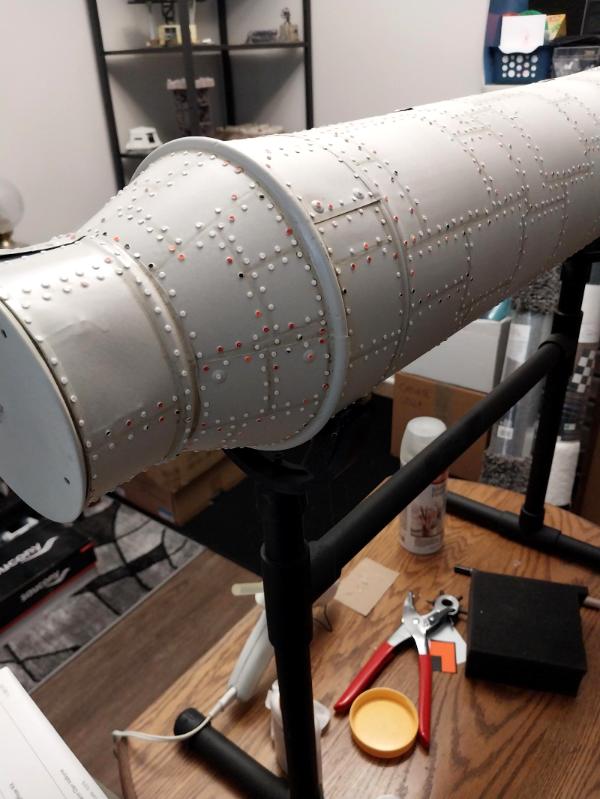
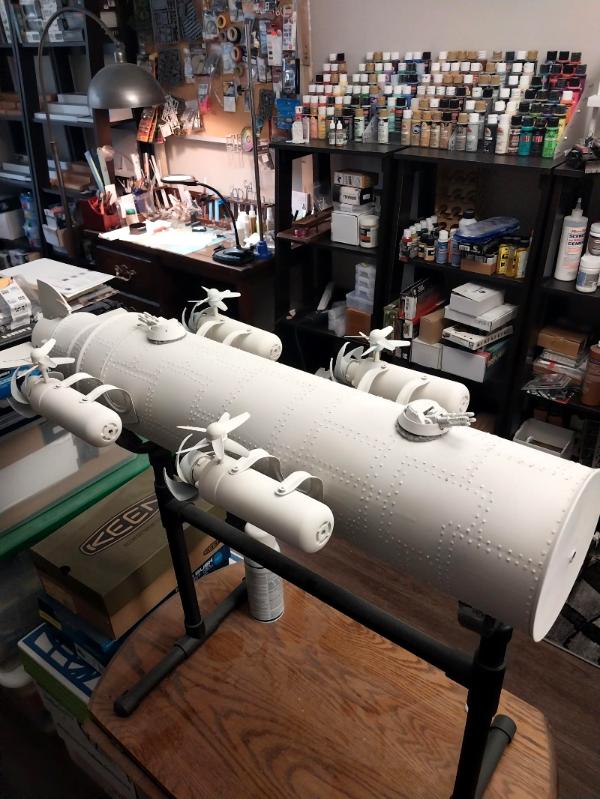
1) I overcoated the whole hull, engine pods and props (acts as a basecoat for them- I used Rustoleum Prime & Paint all in one) so now the rivets at least blend in. Funny, looking at it now, I'm not sure I want to redo the paint over the seams- the rivet lines do a good job of delineating. I may do a lighter line, just to provide some contrast on the hull.
2) I actually started tonight looking for how to run navigation lights on the engine pods. The problem isn't the wiring: I don't mind literally gluing the wires down to the hull, if necessary. It's where to place the lights themselves, in a spot where they can actually be seen and look somewhat functional. I may stick them top middle of the pods just to do and have the lights, although really they would be visible from astern. Of course, my iron-plated, smaller lift bag than weight carried, heavily gunned zeppelin isn't exactly a one-to-one copy of a rel one, either, I can do what I want.
3) I did punch out three or five hundred rivers whilst watching the classic 1942 movie Mrs. Miniver with Greer Garson and Walter Pidgeon. I didn't think I'd need the last 2500, need for more is bound to come up.
4) I've talked myself into putting the running lights on the pods top middle center- probably get started on that on Monday. 
More follows soonest.
|
"He fears his fate too much, or his desserts are small, who will not put it to a single touch; to win- or lose- it all."
Montrose Toast
|
|
|
|
|
2024/08/01 02:20:48
Subject: sCratchBuilding CuStomiZing & CitbaShing: 31JUL: Hull overcoated, rivets match the metal
|
|
Hurr! Ogryn Bone 'Ead!
|
This work is amazing. The level of scratchbuild detail is impressive and I feel like I would go crazy punching that many rivets!
|
|
|
|
|
|
2024/08/02 00:47:46
Subject: Re:sCratchBuilding CuStomiZing & CitbaShing: 31JUL: Hull overcoated, rivets match the metal
|
|
[DCM]
Boom! Leman Russ Commander
|
Thanks, blockade23!
I had the requisite number of rivets premade- must have had a wild hair up my a couple of years ago and made up more than I realized; if I sit down and punch out a 'reasonable number' per sitting, usually watching a show on my laptop, it never becomes a big chore. If I'd had to crank out a couple thousand on order to do a project- wouldn't have happened.
I'm building up my stock of 1/16" rivets now against the fever coming upon me, again.
Applying them was very relaxing, a few hours and done (over three nights) and almost didn't notice the time going by.
More follows soonest.
|
"He fears his fate too much, or his desserts are small, who will not put it to a single touch; to win- or lose- it all."
Montrose Toast
|
|
|
|
|
2024/08/05 13:04:07
Subject: sCratchBuilding CuStomiZing & CitbaShing: 31JUL: Hull overcoated, rivets match the metal
|
|
Mastering Non-Metallic Metal
|
Good progress. Looking like a proper zeppelin with the props on. 
|
     Mastodon: @DrH@dice.camp Mastodon: @DrH@dice.camp
The army-                  ~2295 points (built). ~2295 points (built).
 
* -=]_,=-eague Spruemeister General. * A (sprue) Hut tutorial *
Dsteingass - Dr. H..You are a role model for Internet Morality! // inmygravenimage - Dr H is a model to us all 
Theophony - Sprue for the spruemeister, plastic for his plastic throne! // Shasolenzabi - Toilets, more complex than folks take time to think about! |
|
|
|
|
2024/08/05 22:21:17
Subject: sCratchBuilding CuStomiZing & CitbaShing: 31JUL: Hull overcoated, rivets match the metal
|
|
Stealthy Grot Snipa
|
Wow. You are undoubtdly a stone cold lunatic my friend, but that is quite the creation!
|
|
|
|
|
|
2024/08/05 23:11:49
Subject: sCratchBuilding CuStomiZing & CitbaShing: 31JUL: Hull overcoated, rivets match the metal
|
|
Alluring Mounted Daemonette
|
Looking great man. Love the frankensteined little props. Can't wait to see this beast all painted up, but at the same time - enjoying the process!
Thanks for sharing.
|
t z you are k |
|
|
|
|
2024/08/06 00:29:40
Subject: Re:sCratchBuilding CuStomiZing & CitbaShing: 31JUL: Hull overcoated, rivets match the metal
|
|
[DCM]
Boom! Leman Russ Commander
|
Thanks very much for looking in Dr H! I agree, waiting for the props to be added made the zep look like I intended it to be rocket propelled, which even for steampunk is a bit outrageous (although in the galaxy of the 41st Millenium, there is only war- and rivets and ridiculous vehicles on their face ).
Some significant progress tonight, but all of it hard-won. Some nights you can't put a brush, or screwdriver, or whatever you're working with, wrong; other nights even the simplest things seem to become very difficult. Tonight was one such.
First up, the extra 80mm propellers did, in fact, arrive on Saturday, so I had all the components to build the last two maneuvering props:
And assembled- waiting for the glue to dry so I can basecoat them:
I retrofitted styrene pipe to the existing maneuvering props- the transfer shafts look much more realistic now (these are part of the build you saw in the previous pic):
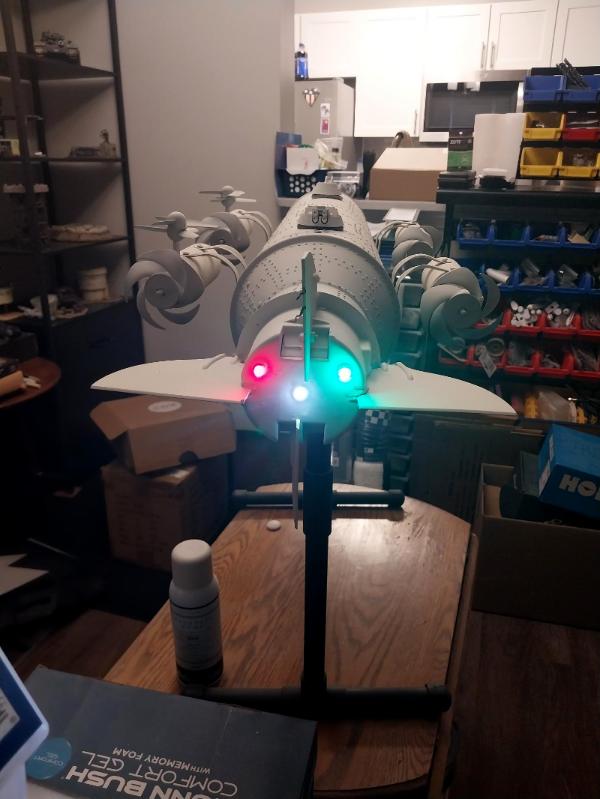
And I added the running lights to the tail section. Now, the fething magic here is that the bulbs would not fit through the sockets I installed- they would fit through the exact same socket easily that I got out of stores, but would not fit through the ones installed in the tail cone. I had to drill them out and finally got everything sandwiched in:
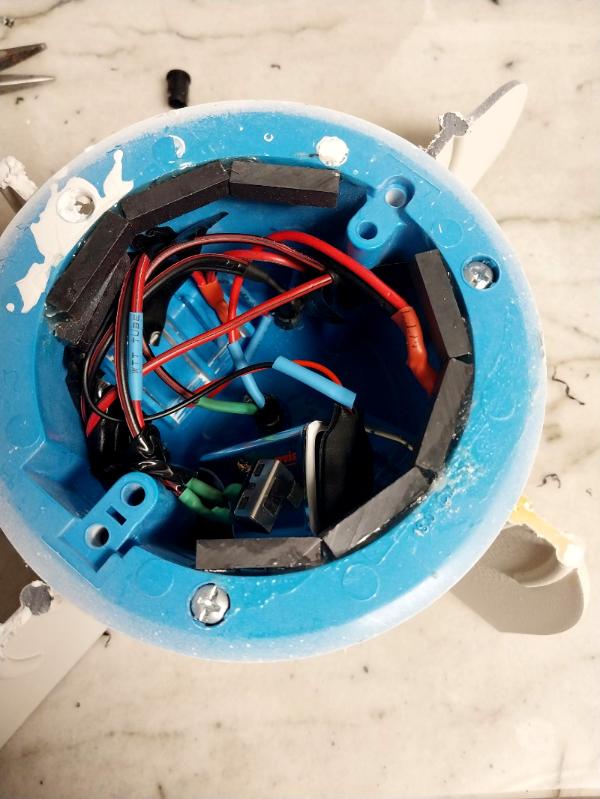
Nine volt battery and bulbs can (fairly) easily be replaced, as everything is held tight only with electrician's tape. And, the best part, all my monkeying around didn't break anything- everything still lights up:
I'd hoped to paint and install the last two maneuvering props, but it's late and I'm going to grab something to eat and then hit the rack, so I can get up and do it all again tomorrow.
Thank you for looking in. More follows soonest.
|
"He fears his fate too much, or his desserts are small, who will not put it to a single touch; to win- or lose- it all."
Montrose Toast
|
|
|
|
|
2024/08/06 22:51:32
Subject: Re:sCratchBuilding CuStomiZing & CitbaShing: 05AUG: Lucy in the sky with diamonds...
|
|
[DCM]
Boom! Leman Russ Commander
|
Some good work tonight, first up, finished building and painting the last two maneuvering props:
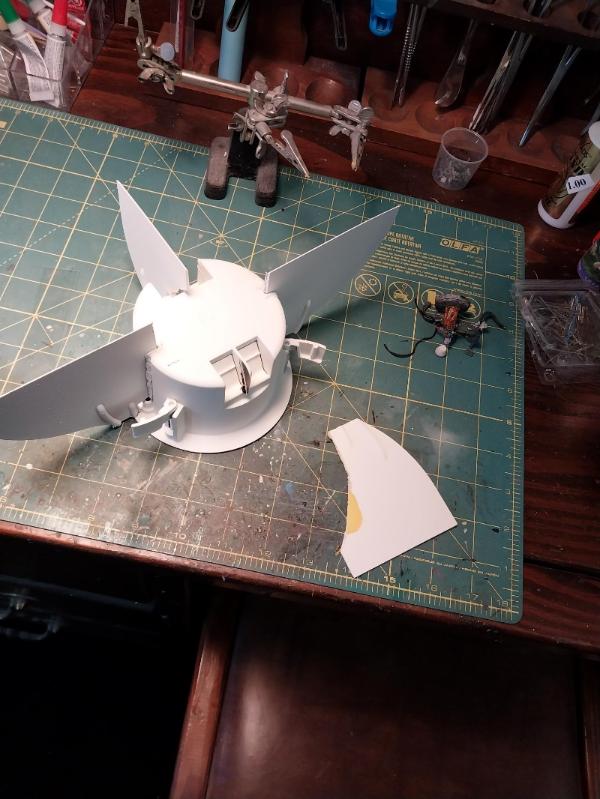
And secondly, started the first of the last two parts that I consider more challenging (not least because I don't have a real plan for them, flying by the seat of my pants, here): the weapons and battery gondolas (the last section being the bow/bridge section for which I have an idea of how the final product will look, but not a detailed plan on how to achieve that).
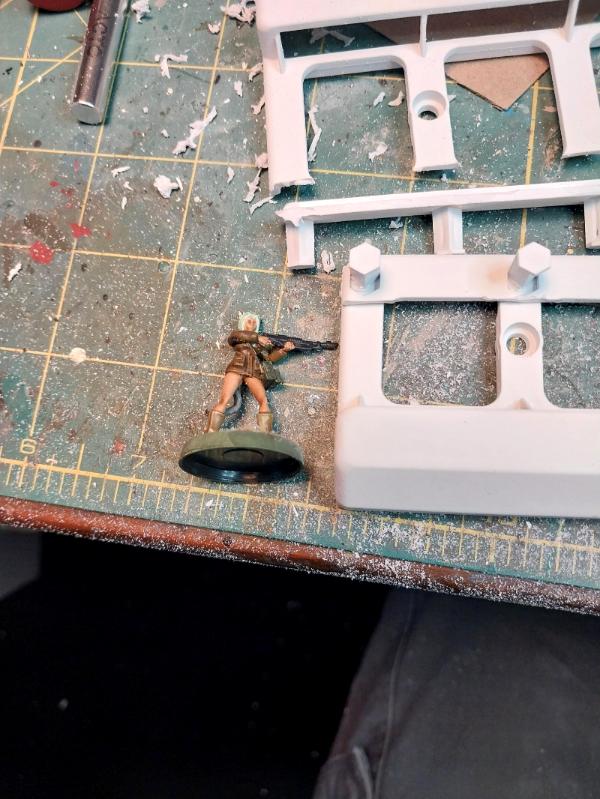
I had actually started gluing up the weapons gondola before the move and in seeing the hull and fins and all, realized it looked too deep/high in proportion (see the discussion going on at Camkhieri's blog, I think, regarding true scale, and making things that look in proportion to the figures when scratchbuilding). Here's a pic showing how tall the sidewalls would have been compared to a Doom Pixies riflecat:
Here's all the materials to build the basic 'box' that will be the gondola (the sidewalls started life as sets of key fobs with a hanger):
That 'plate' with the curved ends is the piece that will fasten directly against the hull and hide magnets to attach the gondola (I have to cut a hole in the center so that the wires for the gondola lights can feed back to the battery gondola- which is where the Defense Fighter Plane will moor or two Hellstrike Bomb Missiles):

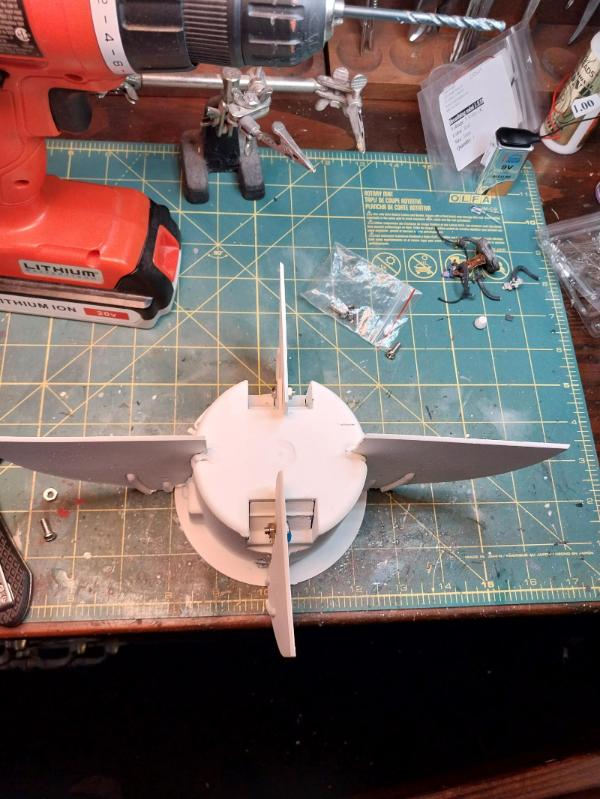
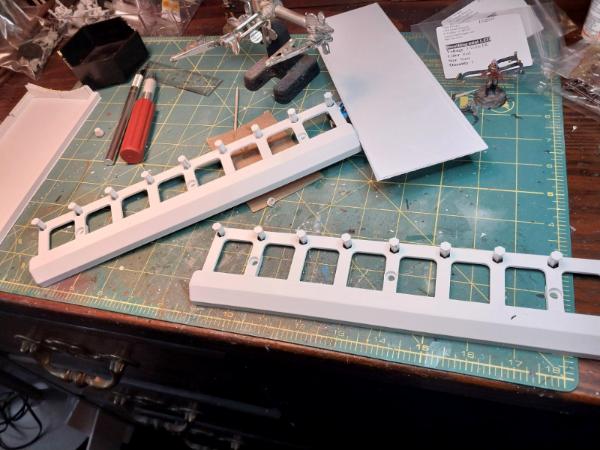
I cut the top rail off the key racks, cut a notch into the end so that the top piece would slot onto the bottom and Bob's your uncle- walls are now 3/8 inch lower:
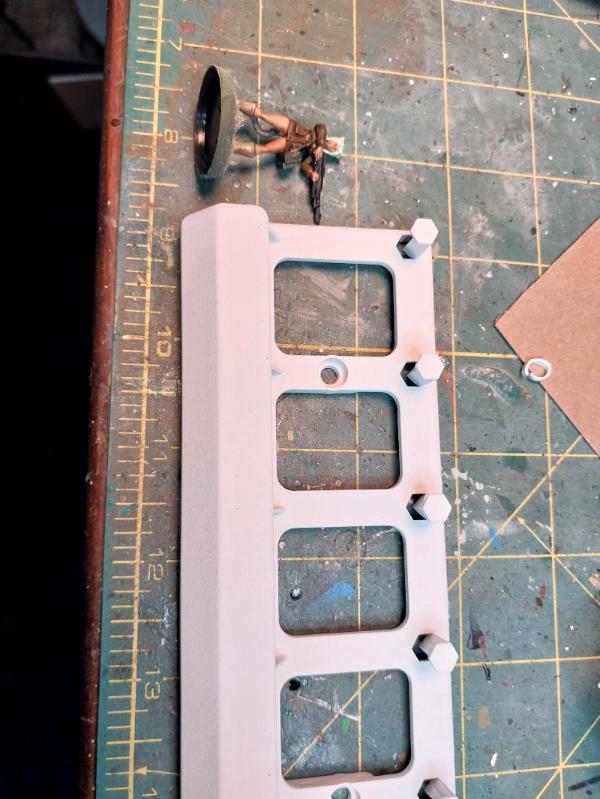
Those holes you see in the sidewalls are the mounting screw holes for putting the rack up to hang the plastic fobs from- they are natural locations for side running lights. I'll do some cleaning up on the right angles and smooth the rough spots out and I think these'll work just fine.
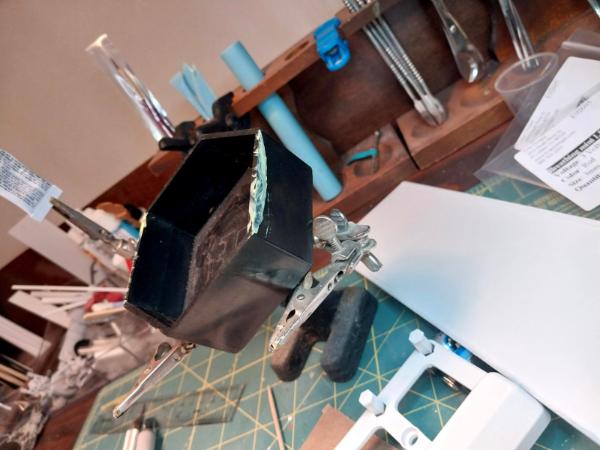
This bit of gubbin is a parts tray from Cobalt Keep (I picked up a couple of sets during the Kickstarter a couple of years ago and use them as much for project components as for sorting parts). It will form the (completely enclosed) hexagonal box that will be the battery gondola. The yellow areas are the material that I have to grind out so it will fit snug against the hull. It will also have magnets to make it removable to change batteries and turn on lights.
Still a fair amount remaining, but I believe the end is coming into view- weapons gondola and lights, battery gondola, bridge and lights, Aero Pixie crew and weapons load out. We're gettin' there.
Thank you for looking in. More follows soonest.
|
"He fears his fate too much, or his desserts are small, who will not put it to a single touch; to win- or lose- it all."
Montrose Toast
|
|
|
|
|
2024/08/07 23:59:09
Subject: Re:sCratchBuilding CuStomiZing & CitbaShing: 06AUG: Propellers and gondolas
|
|
[DCM]
Boom! Leman Russ Commander
|
A bit more progress tonight, but a lot of fiddly work, so it won't look like much until it's done.
First, found some doodads (caps from Strongid paste tubes) that work perfectly to cover the sheet metal screws that attach the engine pods:
Then, started assembling the weapons pod:

Originally, the gondola was to fit flat against the hull plate and so would have the same length and width. As I started fiddling, it seemed like a better idea to fit the gondola more closely to the hull and have the edges lock around the hull plate- so cut everything down and started figuring how to keep the corners square. I need more bar magnets.
I also started shaping the curve of the battery gondola with my Dremel tool, but it needs some more carving to fit snugly and I'll get at that tomorrow. Also need to redraw the seams on the hull with the paint pen.
Thank you for looking in, more follows soonest.
|
"He fears his fate too much, or his desserts are small, who will not put it to a single touch; to win- or lose- it all."
Montrose Toast
|
|
|
|
|
2024/08/08 11:50:21
Subject: sCratchBuilding CuStomiZing & CitbaShing: 07AUG: Gondolas underway
|
|
Hurr! Ogryn Bone 'Ead!
|
Amazing work - will you be playing a game inside it (I may have missed that). How will you access the gondola with the minis?
|
|
|
|
|
|
2024/08/08 19:29:35
Subject: Re:sCratchBuilding CuStomiZing & CitbaShing: 07AUG: Gondolas underway
|
|
[DCM]
Boom! Leman Russ Commander
|
Hi blockade23, thank you for looking in!
Yes, I would like the interior of the zep to be playable: the tail section doesn't really have any real catwalks are anything (it's where the aft running lights battery hides), but it comes off if needs be to simulate a move to disable the rudders or stabilizers. The weapons gondola will have a lot of room (for boardings or CQB, ship-to-ship main battery exchanges with calculated damages to weapons platforms and ship hull) and will attach by magnets to the hull for easy access. Unfortunately, the battery gondola won't really have any space in it- so even though removable (magnets again) to get at the actual hull running lights batteries, there doesn't seem to be much to game from. The wild card is the bridge/nose section. It will be removable, to get at the bridge lighting battery, but I can't see a way to get into the bridge itself to game. There won't be a lot of room anyway, but would be cool to effect a boarding in the wepps gondola, expend a certain number of movement points (a' la Space Hulk) to get to the bridge and then engage in desperate hand-to-hand to take control against determined Aero Pixies.
I haven't got to the bridge section yet, so will know better when I start fabrication. I may have to adapt a rules set just for my little Kittyhawk !
I hope to get some work in a bit later tonight. Hopefully, more follows! Automatically Appended Next Post:
So, not so much more done tonight. The 527 glue I used yesterday to bond the footplate to the sidewalls peeled right off, so I'm gluing up again trying Aileen's Tacky glue tonight. I haven't used superglue (cyanoacrylate) yet, as I'm afraid that without a catalyst (baking soda) it would prove to be too brittle, and it's a long thin area to glue up- not easy to dribble baking soda onto. So hopefully the tacky glue works.
I did repaint the panel seams on the hull, won't include a photo as you've seen it before. I fiddled with the footplate and sidewalls and hull plate and everything fits togheter quite nicely, it'll be easy to magnetize when the glue sets up.
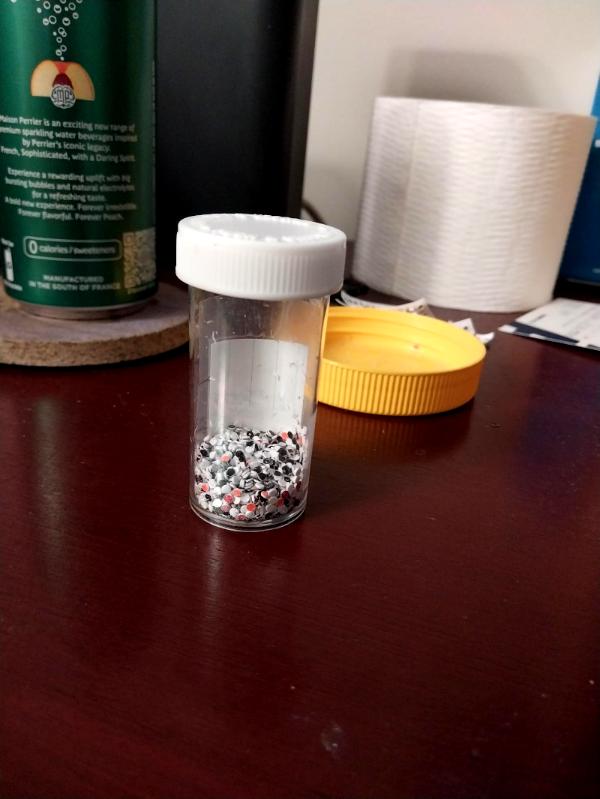
I also cranked out a few hundred more rivets, for 'next time' and here's what about two thousand 1/16th inch rivets look like:
When I get back from the farm on Monday, I hope to finish gluing up the weapons gondola and start installing the actual 'wepps'.
More follows soonest.
|
|
This message was edited 1 time. Last update was at 2024/08/09 00:15:35
"He fears his fate too much, or his desserts are small, who will not put it to a single touch; to win- or lose- it all."
Montrose Toast
|
|
|
|
|
2024/08/10 15:28:50
Subject: Re:sCratchBuilding CuStomiZing & CitbaShing: 08AUG: Regluing and more rivets
|
|
Krazed Killa Kan
|
Looks amazing Meer! Good luck with that gondola.
|
|
|
|
|
|
2024/08/11 02:00:10
Subject: Re:sCratchBuilding CuStomiZing & CitbaShing: 08AUG: Regluing and more rivets
|
|
[DCM]
Boom! Leman Russ Commander
|
Thanks, Syro! Hopefully more follows soonest.
I do have to take a little time for a different project- awhile back I mentioned that we lost one of our rescue Standardbreds, Chip. He'll need a shadow box and the first item to complete is to braid a bracelet from some of his tail hair to put in. What with one thing and another I fell off my battle rhythm, but I'm getting back up to speed now and need to get that done.
Hopefully have something to show soon.
|
"He fears his fate too much, or his desserts are small, who will not put it to a single touch; to win- or lose- it all."
Montrose Toast
|
|
|
|
|
2024/08/13 22:34:03
Subject: Re:sCratchBuilding CuStomiZing & CitbaShing: 08AUG: Regluing and more rivets
|
|
[DCM]
Boom! Leman Russ Commander
|
Not as much progress tonight, but not surprising as the gondolas actually require a plan and some fiddly work to accomplish; this is where I envy those guys that can take an Xacto knife and an old cookie box and carve a frigate in an afternoon.
I performed a minor flex test and both seams of the deck sole and sidewalls seem to be holding okay- the Aileen's Tacky Glue and the original 527. I'll add some crosspieces and reinforce corners where I can and hope for the best.
I did trim some styrene to make the end cabin walls- just flexed them into place and then dripped superglue down the seam. When dry, I'll use the curved wall itself to draw outlines for deck and ceiling plates, glue 'em in and done:
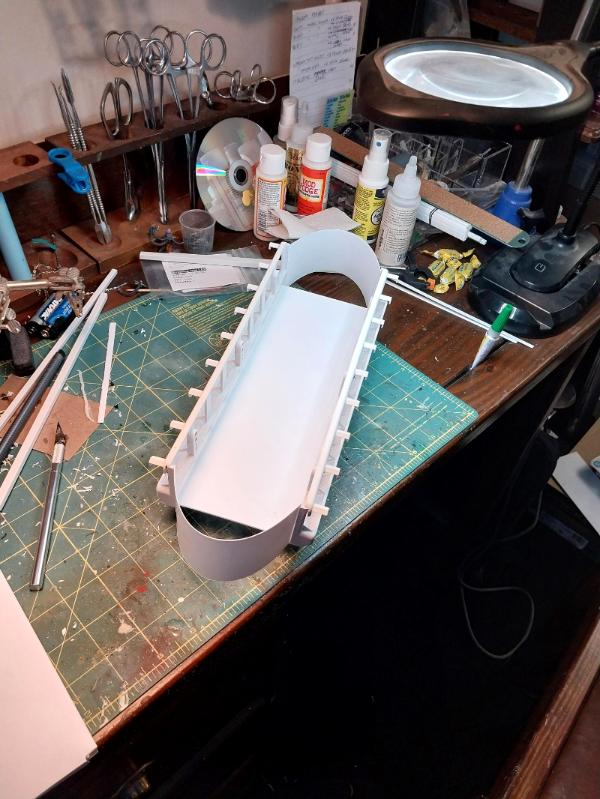
I really wanted to cut some forward facing windows in, but just didn't have the time tonight and am worried I'm getting bogged down. I may borrow a trick from Clanmac and glue on black-painted squares, streak them with white to look like reflections on glass and apply trim around the edges. It's highly effective on his work and I've used it before on my own Lunar Mouse Armed Research Crawler.
Part of what's cutting into my time is I'm moving forward on completing a shadow box for our rescued Standardbred Chip Marshal. He came to use essentially for hospice- he was 22 years old and had been used very harshly for much of his life. Started out as a sulky racing horse, then agricultural animal. We gave him as good as we could for two years and had the consolation of knowing that when he passed he wasn't afraid, knew he was cared for and wasn't hungry.
As a start, I've braided some of his tail hair into a bracelet to install:
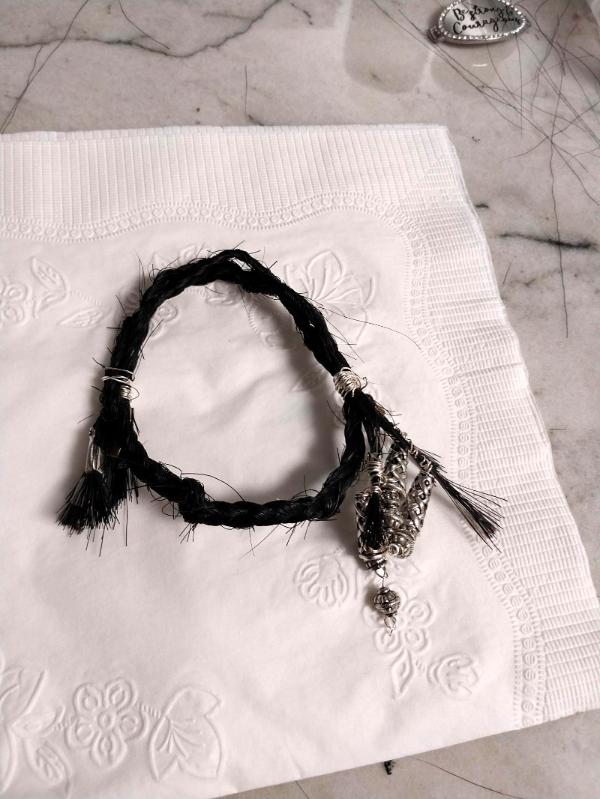
I'll trim the bits sticking out better- phots here are excellent for spotting your flaws. His shadow box will actually be a shared one with his barn mate Sammy; they loved to play tug-of-war with a rubber ball hung on a rope between their stalls and I'm going to reproduce that scene in the box. Chip and his bracelet and his best photos on one side, Sammy (when his time comes, he's 20 and has issues too, same background) to be added later.
I'm not going to electrify this shadow box, like I did little Ginger's awhile back.
I've tried to live by the rule 'one project at a time', but these are both on me now and must get done.
Thank you for looking in.
|
"He fears his fate too much, or his desserts are small, who will not put it to a single touch; to win- or lose- it all."
Montrose Toast
|
|
|
|
|
2024/08/14 07:13:27
Subject: sCratchBuilding CuStomiZing & CitbaShing: 13AUG: Wepps Gondola
|
|
Alluring Mounted Daemonette
|
RIP horsey boy. Glad to hear he had a good life with you for his last few years.
Detail work is coming along nicely! I like the sound of doing a cheat's windows tbh - that's a lotta time & effort saved and probably end up looking just as good!
Keep at it, thanks for sharing!
|
t z you are k |
|
|
|
|
2024/08/15 01:07:15
Subject: Re:sCratchBuilding CuStomiZing & CitbaShing: 13AUG: Wepps Gondola
|
|
[DCM]
Boom! Leman Russ Commander
|
Thanks very much, tzurk.
No work tonight, but I'm hoping to be able to sit down tomorrow and really get some scrim done on the gondola- bracing, ersatz windows, trim pieces (mostly to hide my egregious errors). I'm looking forward to doing some more soldering and getting the sidelights installed.
Hopefully more follows soonest.
|
"He fears his fate too much, or his desserts are small, who will not put it to a single touch; to win- or lose- it all."
Montrose Toast
|
|
|
|
|
|
|
