Da Dark Angelz invade Silver Sorcerer 2010 - Warhammer World, 20th-22nd August 2010
Silver Sorcerer - The thread that started it all - includes Mission Packs
Report - Chimera_Calvin's Overview
Report - Panic!'s Grots vs the World
Report - ArbitorIan
Apologies if I missed anyone! Also - a lot of pics here are *borrowed* from Panic!, endtransmission and Coerron - but there are some new ones too!
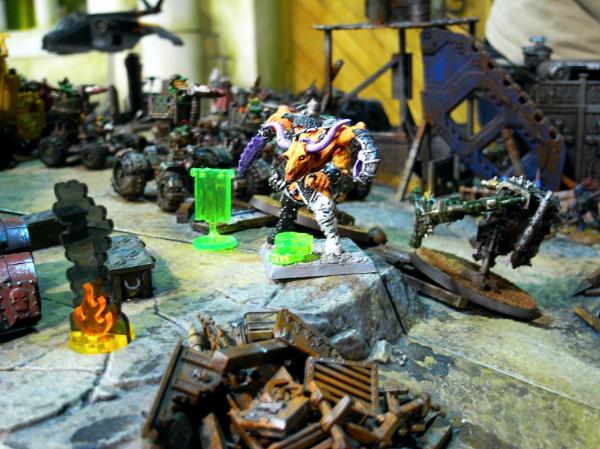
DA DARK ANGELZ
[
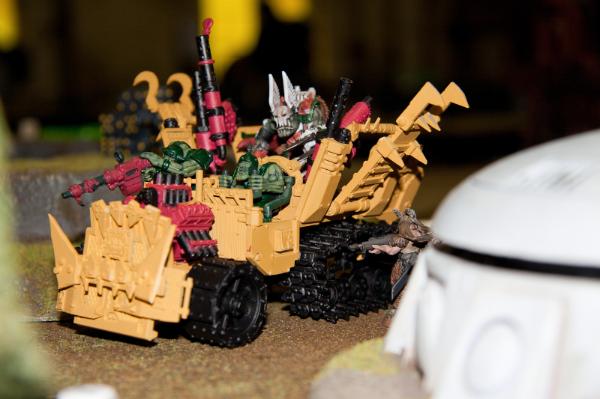
HQ] Morgrim "Da Lion" Grimork (Da Warboss): Mega Armour (Power Klaw, Twin Linked Shoota, Stikkbombs), Cybork Body (110pts)
[
HQ] Skarag Mekslag (Da Big Mek): Burna, Kustom Force Field, Mek's Tools (105pts)
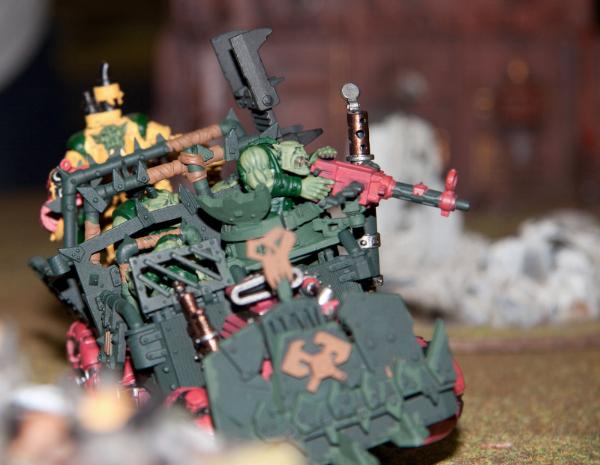
[TR] Grimskab Badwort (Da Painboy): 'Urty Syringe, Dok's Tools, Cybork Body, 'Eavy Armour and Da Inna Circul (5 Nobz): 2 Power Klaws, Big Choppa, 2 Choppas, 4 Sluggas, Twin Linked Shoota, 4 'Eavy Armour, Bosspole, Cybork Bodies in a Trukk: Big Shoota, Boarding Plank, Red Paint Job, Reinforced Ram (320pts)
[TR] Da Warboss' Taktikal Boyz - 10 Shootas including Big Shoota and Nob: Power Klaw, Slugga, Bosspole in a Trukk: Big Shoota, Boarding Plank, Red Paint Job, Reinforced Ram (155pts)
[TR] Skarag's Taktikal Boyz - 11 Shootas including Rokkit Launcha and Nob: Power Klaw, Slugga, Bosspole in a Trukk: Big Shoota, Boarding Plank, Red Paint Job, Reinforced Ram (166pts)
[
FA] Rav'nwing I - Deffkopta with Twin Linked Rocket Launchas and Buzzsaw (70pts)
[
FA] Rav'nwing II - Deffkopta with Twin Linked Rocket Launchas and Buzzsaw (70pts)
TOTAL: 996pts
endtransmission drove up on the Friday, swinging by Coventry to pick me up. We arrived at early afternoon on Friday, and after a tour of Warhammer World, got right into some practise games...
Game 1 - Practise Mission 3: Headquarters Raid vs endtransmission's Malfian IVth Guard
Rolling off for one of the four missions we would be playing on Saturday, we started with Mission 3: Headquarters Raid.

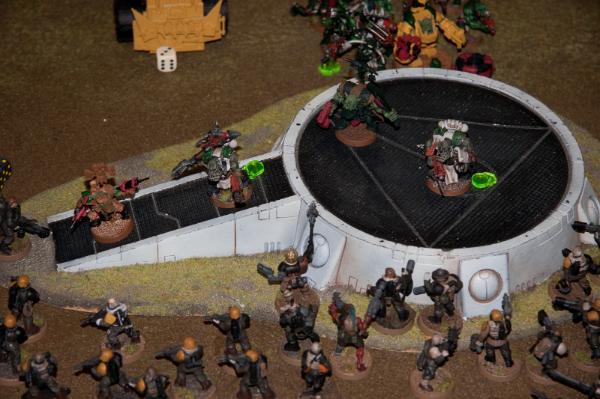
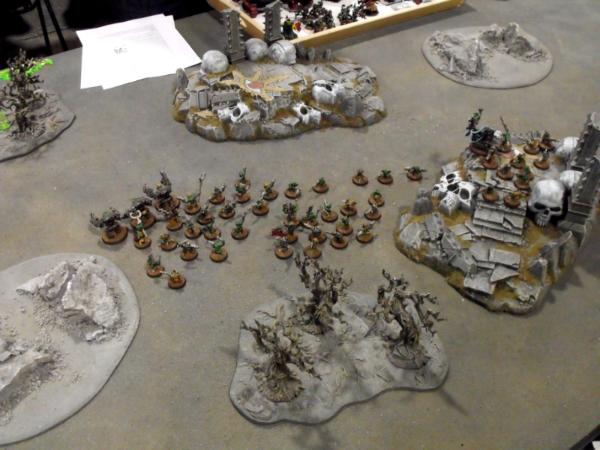
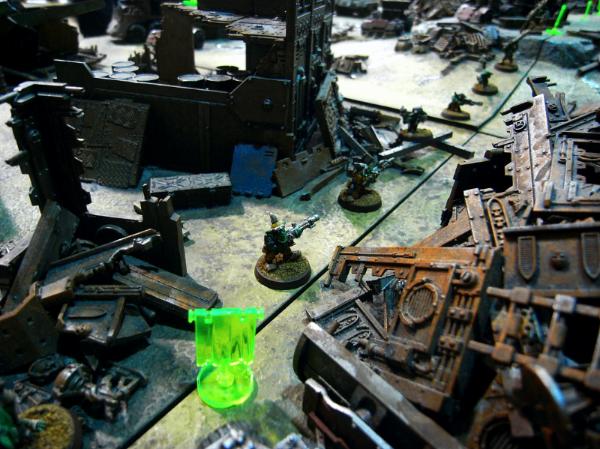
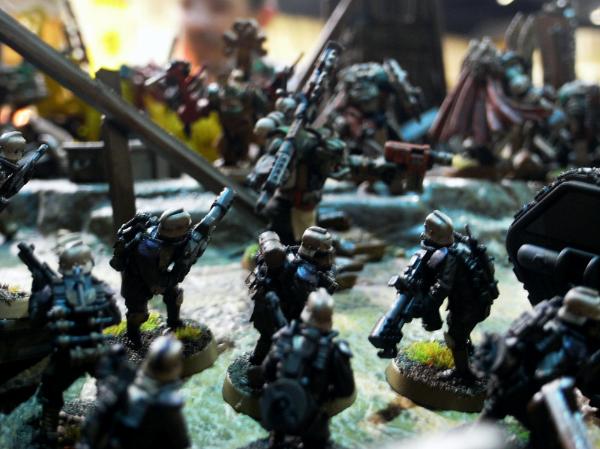
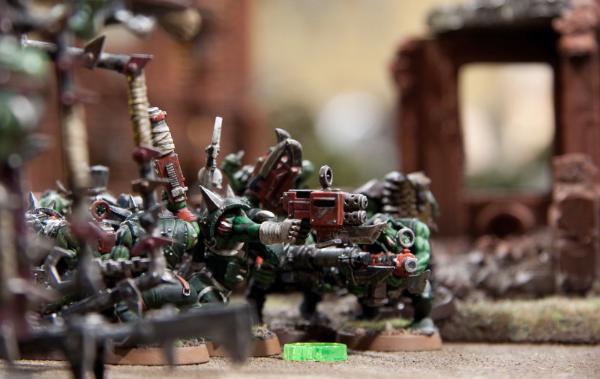
Da Dark Angelz are in position...
First thing to note - your
HQs (a piece of area terrain) have to be 24" apart. endtransmission chooses a central, forward piece of terrain (the landing pad) - which made mine the hill on the back right of the board - it was the only piece of terrain more than 24" away!
Morgrim moves out...
Da Inna Circul moves out...
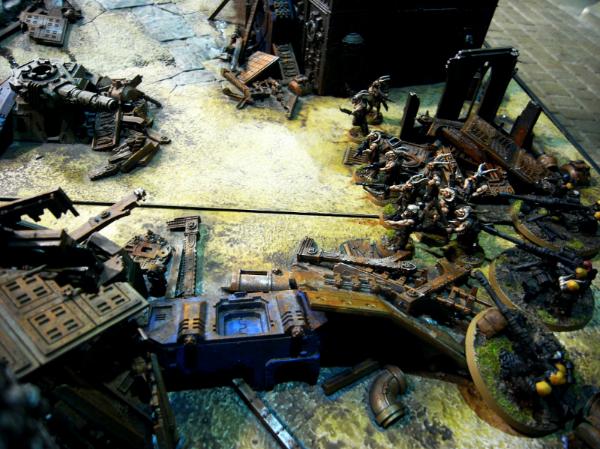
Da Inna Circul prepare to assault da Malfian IVth
HQ...
Da Inna Circul easily wrest control of the Malfian IVth
HQ from the heavy weapons team that was previously stationed there, and prepare for return fire...
Da Inna Circul secure da Malfian IVth
HQ...
Da Inna Circul weather da fire of da entire Malfian IVth!
Well - almost the entire firepower of the
IG - I see Morgrim lost his ride in the background too. I can't remember how many flamers, meltaguns, and rapid firing lasguns went into them - but I lost two Nobz (to meltaguns) and two wounds to everything else - not bad at all!
Unfortunately I lost another Nob (and wounded another) due to dangerous terrain tests, attempting to assault through to the
IG command. Didn't realise (someone would mention it later) that I could have taken my cybork invulnerable saves against them. Not a certainty, but twice the chance of failing the dangerous terrain test in the first place!
The
IG would swarm back into their base, ending up in their base contested, my base empty and no Commanders dead - for a 10-10 Draw. We limited the time to that for Saturday, and only got to the end of turn 2.
Turns Played: 2
Result: 10-10 Draw
Game 2 - Practise Mission 4: Into the Fire vs endtransmission's Malfian IVth Guard
Da Dark Angelz setup in standard formation (Deffkopta, Nobz Trukk, Big Mek Trukk, Warboss Trukk, Deffkopta) in the centre of the field.
Da Trukks prepare ta move out!
Skarag prepares to teach da penal legion da burny dance...
...and then gets stuck in wiv da boyz!
Connected with a lot more Guard this game, doing what Orks do best to Guard. Still only two turns - so the reinforcements didn't come into it - which would have suited the Guard, as they would then come on and burn Orks, who would then have to trek across from the other board edge again... No one took the central objective.
Turns Played: 2
Result: 18-2 Victory for Da Dark Angelz
We caught up with Panic! and TitanPrincept during this game, and shared drinks and conversation in Bugman's afterwards, before heading to the Travellodge to check-in. Saturday and the real event arrives!
Game 3 - Real Mission 1: Recon vs SilverMK2's CSM - The Chapter of the Black Hand
THE CHAPTER OF THE BLACK HAND
[
HQ] Daemon Prince, Wings,
MoN
[TR]
CSM x7 inc Melta, Champion, Power Fist, Dedicated Rhino
[TR]
CSM x7 inc Melta, Champion, Power Fist, Dedicated Rhino
[TR]
CSM x7 inc Melta, Champion, Power Fist, Dedicated Rhino
[
FA] Raptors x5, inc Melta x2
[
HS] Havocs x5, inc Autocannon x4
TOTAL: 995pts
I place an objective on the
CSM 12" deployment line, centre. SilverMK2 places his to my left, centrally.
Da Dark Angelz setup in standard formation (Deffkopta, Nobz Trukk, Big Mek Trukk, Warboss Trukk, Deffkopta) in the centre of the field.
CSM's set up with two Rhinos full of
CSM on the far left, Daemon Prince and Raptors to the right, empty Rhino and
CSM centrally and Havocs on the far right. Deffkoptas scout/turbo-boost up each side of the field.
Left Deffkopta explodes the right Rhino of the two on the left in assault, while the right Deffkopta kills a Havoc and then assaults in - takes a wound, fails to reciprocate, and luckily hangs in there. The Trukks simply flat out (through difficult terrain) forward towards the
CSM lines. The left Deffkopta is melta'd, while the Daemon Prince and Havocs move towards the Trukks. Melta fire fails to explode any. The left Rhino moves down the field, while the empty central one moves to block Morgrim's ride - which Morgrim promptly boarding planks into oblivion. The Havocs and right Deffkopta trade misses.
Skarag's boyz unload and assault the Raptors, wiping them, while Da Inna Circul do similiarly to the Daemon Prince - they consolidate towards the left objective. The Nobz Trukk tank shokks the
CSM from the previously exploded Rhino to no effect. Morgrim and his boyz jump out and assault the
CSM in the centre, wiping them and consolidating around the objectve whilst in the
CSM deployment zone. The right Deffkopta manages to kill a Havoc, but combat continues. The left Rhino moves down towards my deployment zone and empties the
CSM squad into it - doh! The tank shocked
CSM manage to destroy the Nob Trukk in his deployment zone with bolter fire and the Havocs finish off the Deffkopta - double doh!
In the end, we both had one unit in each other's deployment zone, however I held both secondary objectives, for a minor win to Da Dark Angelz. The ten minute warning was given during our second turn, so we elected not to continue. In hindsight, we probably could have made a turn 3. I don't think it would have changed the outcome though.
I should have had the left Deffkopta assault the left Rhino. I mistakenly went after side armour, forgetting that Rhino front/side armour is the same! This would have put the surviving Rhino closer to my boyz to deal with. I also should have tank shokked the central
CSM unit to put another unit in the
CSM deployment zone, as well as perhaps splitting off Morgrim. I was surprised to find out Havocs come with double close combat weapons for two attacks each - ouch!
Turns Played: 2
Result: 12-8 Victory for Da Dark Angelz
Game 4 - Real Mission 2: Seize Ground vs TitanPrincept's Ultramarines
ULTRAMARINES
[
HQ] Captain, Iron Halo, Meltabombs, Power Sword
[TR] 10 Tactical inc Sergeant, Flamer, Missile Launcher
[TR] 10 Tactical inc Sergeant with Powerfist, Meltagun
[
EL] Dreadnought, Assault Cannon
[
EL] Dreadnought, Twin-linked Lascannon
[
FA] 5 Assault Squad inc Sergeant with Meltabombs and Power Sword, Plasma pistol
[
HS] Vindicator, Siege Shield
TOTAL: 1000pts
I placed the first objective on his 12" deployment line, centrally. His first objective was far left, central (on my deployment line). My second objective was 12" right of this. His second objective was in the centre of the bottom right quarter. My bonus squad is my Nobz. His is a Tactical Squad (which he combat squads)
Da Dark Angelz setup in standard formation (Deffkopta, Warboss Trukk, Big Mek Trukk, Nobz Trukk, Deffkopta) in the centre of the field. Marines set up directly opposite - Vindicator centrally flanked by the Dreadnoughts. Tactical Squads combat squadded behind and to the right, as well as one in the far top right corner. Assault Marines in reserve. Deffkoptas scout/turbo-boost forward - one in front of the Vindicator, the other up the far right - eying off the top right combat squad that is part of my bonus squad to kill...
Warboss and Big Mek fail to commit and move northwards, centrally between two objectives to my left, and the Marines and one objective to the right. The Nobz flat out to beneath the difficult terrain containing the bottom right objective. Right Deffkopta turbo-boosts further into the top right of the board, while the left shoots and assaults the Vindicator for a stun result (doh!). Marines swiftly deal with the two Deffkoptas and also pop the Nobz ride.
Faced with a Vindicator about to become operational again, the Warboss and Big Mek finally commit and move towards the Marine force. Morgrim and his boyz unload and separately assault the Vindicator and a combat squad. Skarag's boyz prepare the boarding plank for one of the Dreadnoughts. The Vindicator is wrecked and the combat squad retreats. Morgrim's boyz consolidate to cut off one or both of the Dreadnoughts from assaulting Morgrim (can't remember if I had dealt with one of them at this point - don't think so...) The Nobz advance (slowly) around the bottom right objective. A combat squad moves towards the Nobz. A Dreadnought walks over the Vindicator wreck. The Captain can't make it to the Orks yet through the wreckage. Everything is a bit sketchy (memory wise) at this point...
Through boarding planks and/or Nobz, I deal with both Dreadnoughts. I have the top left objective secure, but no way to stop the Marines contesting it in their turn. The Nobz have the bottom right objective. The Marines contest the top left objective as expected. The Assault Marines come in, but veer widely off course (they were headed towards the Nobz) and mishap in trees, to go back into reserve not to come back (actually, I think they should have taken dangerous terrain tests - but they were outside of pistol range, unable to assault, and would therefore still have no bearing...) TitanPrincept didn't realise the Nobz were Troops due to the Warboss - and so a minor victory to me for holding a single objective.
Interesting game. I don't like dealing with Dreadnoughts, let alone two. I think after the last game only went two turns, and this being an objective game, I stuffed up with my second objective placement (should have been near the first) and then hesitated on hitting the Marine lines - made worse by the Deffkoptas inability to permanently disable the Vindicator on first turn. In hindsight, both Deffkoptas should have gone after the Vindicator and all Trukks in tandem (like you know, my *usual* tactics) should have gone straight towards the Marines and the *two* objectives that should have been there.
Somehow a discussion as to whether the Marines could benefit from the
KFF came up. The situation would never come up in this game though

Turns Played: 3
Result: 12-8 Victory for Da Dark Angelz
Game 5 - Real Mission 3: Headquarters Raid vs Panic!'s Awesome Grots Assault Force
AWESOME GROTS ASSAULT FORCE
[
HQ] BigGrotMek
KFF bionic parts
[
EL] 3 Mega Grots 1xTLshoota 1xrocket/shoota 1xscorcha/shoota
[TR] 20grots 3herders with 1 GrotProd
[TR] 10grots 2herders with 1 GrotProd
[TR] 10grots 2herders with 1 GrotProd
[
FA] 3 Buggies with
TL rockets
[
FA] 3 Buggies with
TL rockets
[
HS] 3 Kans with shootas
[
HS] 3 Kans with shootas
[
HS] 3 Kans with scorchas
TOTAL: 1000pts
Two Codex: Ork armies, with only a Big Mek in common. I won the roll-off and decided to go second (I would win the roll-off for all four games on Saturday!). This mission screws with my army - as my Big Mek ends up in reserves. On the upside - most of the danger in Panic!'s force - 9 Kans and 6 Buggies - are also in reserve. On the downide - they will come on in just the right spot to reinforce his
HQ...
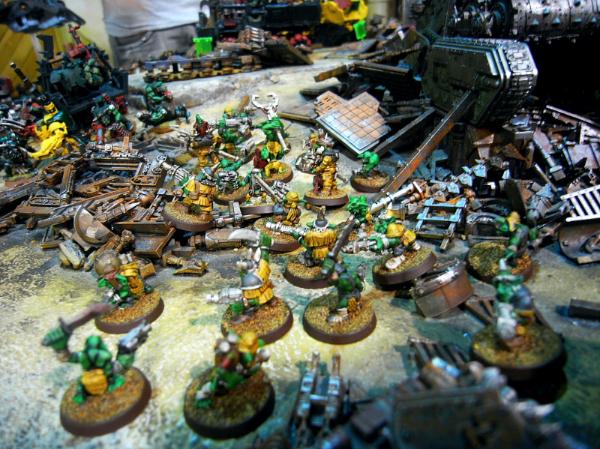
Da Grotz deploy!
Panic!'s deployment forced me into a corner. We had to actually move my
HQ terrain feature back so that my
HQ could deploy within it *and* be 18" away from the Grotz!
I would deploy my Nobz Trukk and Warboss Trukk in/near my
HQ - ready to deal with the oncoming usurpers - while a boyz Trukk would deploy facing Panic!'s
HQ.
I attempt to steal the initiative and... Panic! kindly points out that this is not a standard mission... and that it never happens anyway. I can concur - no-one managed in my previous Silver Sorcerer games to steal the initiative from me. Of course, this would come back to haunt me *next* game...
Da Grotz surge forward. Some twin-linked shoota shots fail to upset any Trukks. Morgrim moves forward, unloads and multi-assaults the grotz and Megagrotz with his boyz while da Inna Circul looks on.
Da Dark Angelz give a warm welkom to da Grotz... not!
The other boyz Trukk surges forward and... decides to assault the same Grot unit from the other end. (I was concerned about making the difficult terrain test to reach the Mek...) The Megagrotz would be run down, while a couple of grotz would run away, never to come back. We split (as I've determined afterwards) the grotz incorrectly between the two assaults - they should have been spread out to maintain coherency during their counter assault move. I need to add a
YMDC entry for who can attack in assault when no one survives in base to base or within 2" of you by your initiative (a nob with Powerklaw failed to swing) - but it was never going to really matter. (Both units needed snake-eyes to make morale).
The other Grotz would return fire, sending the left boyz unit packing.

Da Grotz make up for what they lack in hand-to-hand wiv shooting...
Morgrim's boyz, battered from the MegaGrotz, headed back towards my
HQ to meet up with my Big Mek, while Morgrim continued forward on foot and the Nobz headed towards the Grot
HQ. A deffkopta flanked in from the right but didn't do much. I think Panic! managed to get all of his Kans and Buggies in - he managed to pop the Nobz Trukk in his turn 3, pinning them (so they couldn't contest his base). He was unable to assault them with Kans though - while his base *isn't* difficult terrain for him, my Trukk wreckage was
Most impressive was my left Trukk tank shokking his Big Mek and grotz - over his
HQ to the back of the board. That achieved little. He then blew up the Trukk in his shooting phase, the resulting explosion managing to wound 10 or 12 of his 13 strong Big Mek unit! As most were out of cover, he started to remove them - and then remembered he was in
KFF range. He started to roll 5+s - and then remembered that my Trukk was in
KFF range! And of course, I promptly made the save and the explosion never happened... Regardless of our disagreement over whether the
KFF affects enemy units (from the previous game) - it would most likely not have mattered - he would have needed to a) failed four of 10 5+ saves (three if he took one on the Big Mek) - probable b) failed a LD8 check (Big Mek) and c) failed another LD8 check (Runtherd squig hound).
Da Dark Angelz fail to make da Grot
HQ...
Fun game. Ridiculous conditions for both armies. I was both concerned and relieved to be facing the Grotz in this mission, but would enjoy a rematch over a standard mission any day! In the end my tactics were just not sound. I think I was doubly scared off by both my practise match of this game on Friday and all those Kans coming in from Panic!'s board edge. Ideally, I should have set the boyz and Nobz up on the left and flat-outed both into his
HQ on first turn - thereby avoiding dangerous terrain, and forcing him to open my Trukks before he can get at my boyz (meanwhile playing tag with the Killa Kans and Boarding Planks
) The Warboss and boyz should have been able to stave off the Grots and MegaGrotz by themselves.
Turns Played: 3
Result: 10-10 Draw
Game 6 - Real Mission 4: Into the Fire vs Ketara's Praetorian Guard
PRAETORIAN GUARD
[
HQ] Company Command Squad, 3x Plasma Guns, Chimera
[
HQ] Primaris Psyker
[TR] Platoon Command Squad - 4x Meltaguns, Chimera
Infantry Squad - Plasma Gun, Chimera
Infantry Squad - Plasma Gun, Chimera
HWS - 2x Heavy Bolters, Autocannon
HWS - 3x Lascannons
[TR] Veteran Squad, Heavy Flamer, Meltagun, Flamer
[
FA] Vendetta Gunship
TOTAL: 1000pts
Ketara fancies himself a chance to win the tournament, so is looking to put the hurt on right from the get go. Small Elite Ork force, meet lotsa
IG guns! I win the roll off and of course choose first. Its a
KP mission primarily, only Troops recycle and I'm wary of the Vendetta, so I keep my Deffkoptas in reserve (outflanking) and set up the rest in standard formation (Warboss Trukk, Big Mek Trukk, Nobz Trukk) in the centre of the field. Ketara deploys the
HWS in the top left with his
CCS Chimera (including Psyker). The
PCS is central with an IS - both in their Chimeras. The last Chimera and Vendetta to the right. No scout moves. Unfortunately, between picking out the
HWS models and someone knocking the rest of his tray of models on the floor, we get off to a very slow start. Contrary to what I learnt last game, I let Ketara attempt to seize the initiative - and he does!
Ketara gleefully gives orders to his Lascannon team to fire on my
KFF Trukk with out cover saves

However, that and the rest of his army do not share his exuberance - 1000pts of Guard shooting - immobilises the
KFF Trukk. Yep. That's all. I flat out my Warboss Trukk towards the top left where his Command Squad Chimera and
HWS teams are. The Nobz flatout towards the centre. Skarag repairs his Trukk, and while the Orks wait for him, they take some ineffective potshots at the
HWS with the big shoota.
Ketara is still happy - the two other Trukks are now out of
KFF range. He moves the
PCS forward and disembarks in front of the Nobz Trukk. He repeats the orders of last turn, and this time pops the
KFF Trukk - which kareens forward, directly behind the Nobz Trukk before exploding - bringing the Nobz Trukk back into
KFF range
More Guard shooting sees Morgrim's ride exploded and Da Inna Circul's ride wrecked. As Ketara unloads plasma fire from the
CCS squad into Morgrim's disembarked boyz - we have a rules dispute as to whether they get Cover Saves for being in the exploded crater of their Trukk. Ketara calls Chimera_Calvin over who rules a 5+ cover save - not the 4+ I usally play, but I'm happy to get anything at this point

. At the end of his second turn, Ketara has 3VP - one for each Trukk - and has a lot of angry Orks on his doorstop. I should point out that his shooting rolls have been *abysmal* - I wouldn't be surprised if they have been worse than Orks
He hasn't given up hope yet...
One of my three Trukks decides to "come back" and flat-outs up the field, but neither Deffkoptas. Da Dark Angelz counter assault. Morgrim detaches and goes after the
CCS Chimera while his boyz move to multi-assault the
HWS teams. Da Inna Circul mult-assault the
PCS and its Chimera. Skarag and his boyz traipse through their wreckage towards the right IS Chimera and Vendetta, securing the central objective. At the end of my second turn, I've accounted for 2 Chimera, two
HWS and the
PCS for a total of 5VP, putting me 2VP ahead. I also have the central objective. I'm currently winning 16-4. Time has been called. Ketara (who doesn't realise he doesn't have a chance at winning the tournament - as the eventual winner blitzed this mission) understandably wants to continue - and so we go on...
Ketara manages to get *all* of his troops back from reserve this turn. The two
HWS won't be accomplishing much - other than keeping out of reach of my Nobz
- but two Chimera *with heavy flamers* and a
PCS *with meltaguns* come on from his edge right next to my Orks. The Vendetta and other Chimera swing around toward Skarag and disembark *flamers*. Oh dear... Ketara roasts two units of boyz, including Skarag, and pops the reappearing Trukk - putting him 3VP ahead and removing my claim to the central objective. Plasma and psychic fire reduce Morgrim to one wound, while meltas knocked off a Nob or two - continual poor
IG shooting and cybork to the rescue! We don't have time for my turn 3, and the game ends in a 6-14 loss.
Admittantly, there wasn't much more I was going to achieve in my Turn 3 - Morgrim would have charged the
CCS and Psyker, and assuming he didn't lose his final wound, would kill the Pskyer and perhaps run down the squad. The surviving Nobz may have been able to account for one or two reappearing Chimera. Its quite possible I could have taken this to a draw, or with a lot of luck - a minor win. We will never know.
I don't think I got to see Ketara at his best. Overly competitive, tired from lack of sleep, propped up on sugar - I am surprised, but thankful, that his bad luck at shooting didn't turn this into a disaster - and I certainly commend him for that!
Turns Played: 2/3
Result: 6-14 Da Dark Angelz Loss
With that, the tournament aspect of Silver Sorcerer was over. Da Dark Angelz finished equal 10th out of 19 - not really surprising given the 40/80 battle points accumulated. Overall, ended up 11th out of 19, with a respectable Sportsmanship of 8.5/10 but let down by painting (4/10). However, this time I wasn't the worst painted
I thought, based on the criteria, I might have scored higher - but realistically that would have simply been a slap in the face to all the other beautifully painted armies. We will get there eventually!
Had dinner in Bugman's, caught up with legoburner, got invited to a doubles friendly match!
Game 7 - Seize Ground/Dawn of War with Panic!'s Awesome Grots Assault Force vs ArbitorIan's Daemons and endtransmission's Malfian IVth Guard
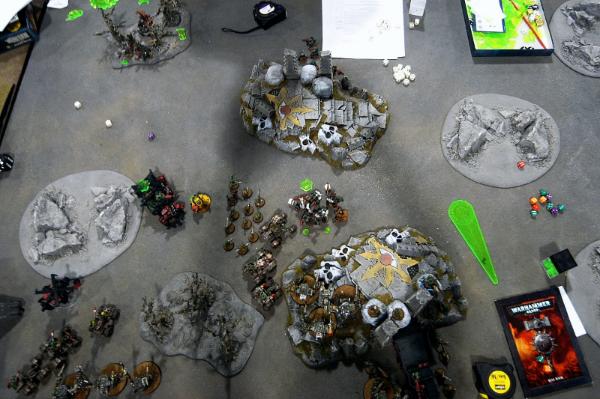
Combined Orks and Grotz vs an unlikely alliance of Daemons and Guard. We chose this board for our battle!
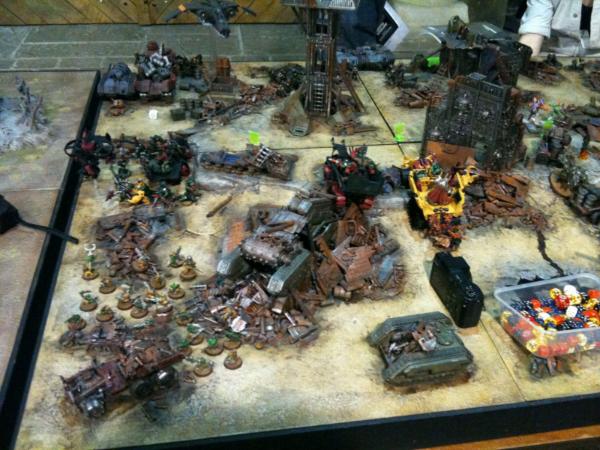
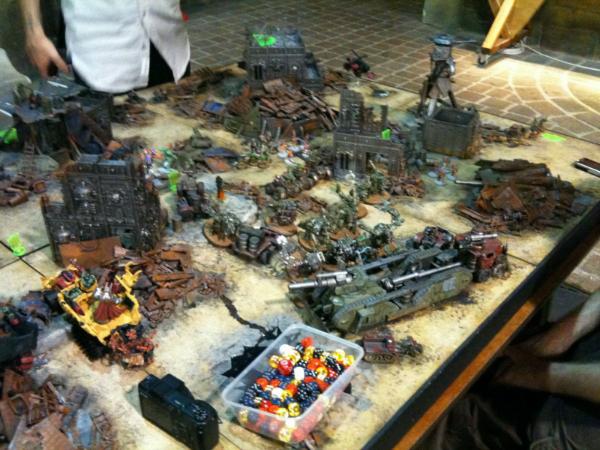
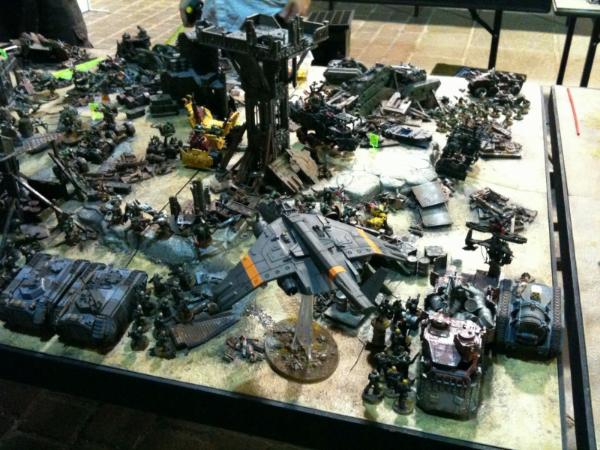
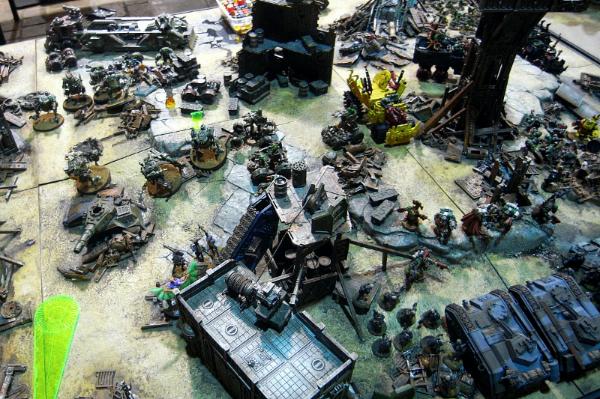
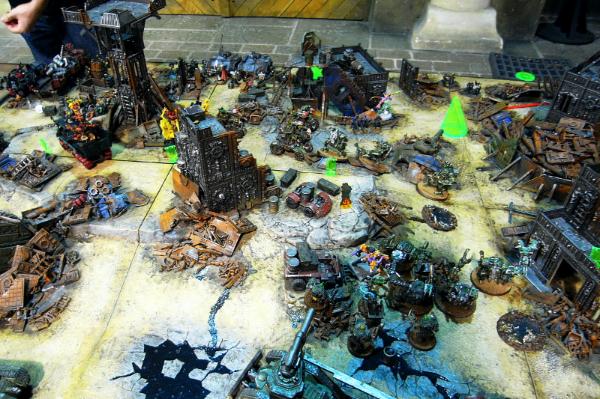
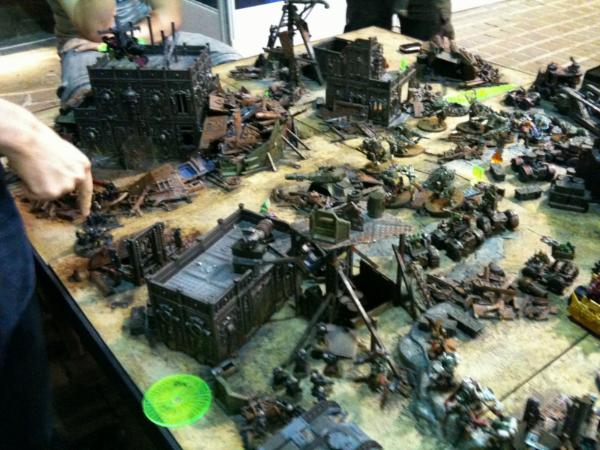
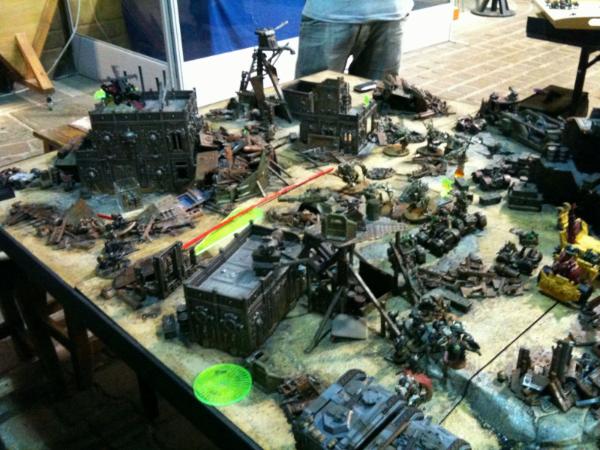
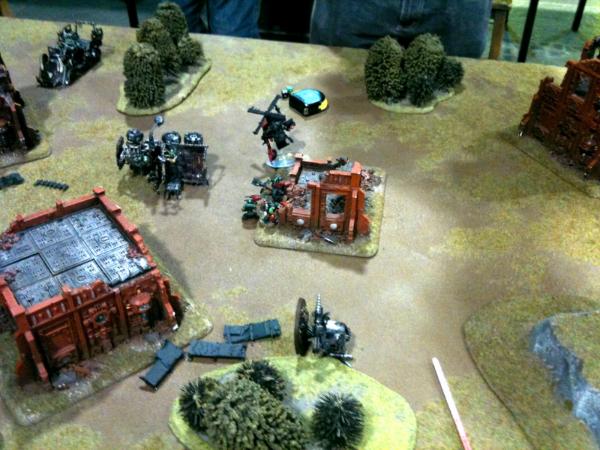
The incredible battlefield...
Panic! and I used our tournament lists. endtransmission made a couple of small changes based on his experiences during the day. ArbitorIan decided to see just how many monstrous creatures he could field in 1000pts - 2
KOS, 3 Daemon Princes and two lots of five daemonettes apparently...
We ended up with 5 objectives, which ended up pretty much across the centre line. Orks deployed first, and the Grotz took up objective holding and line pushing back duties. (We treated each army independently, so both players got to deploy 1
HQ and 2 Troops - not that this helped the Daemons...)
Grotz holding the objective line!
Malfian IVth hold the line, minus their Daemon allies...
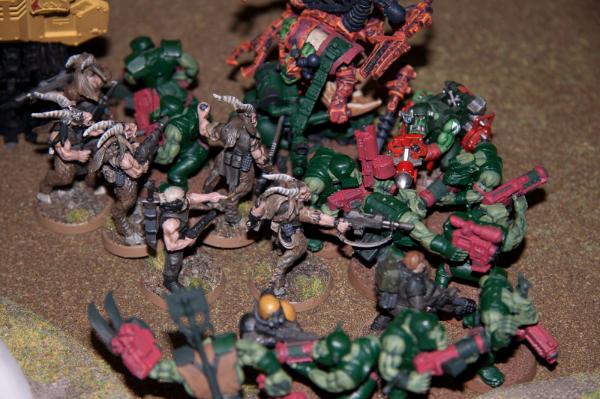
The Penal Legion, having rolled counter assault, furious charge and fleet, scouts towards the Grotz.
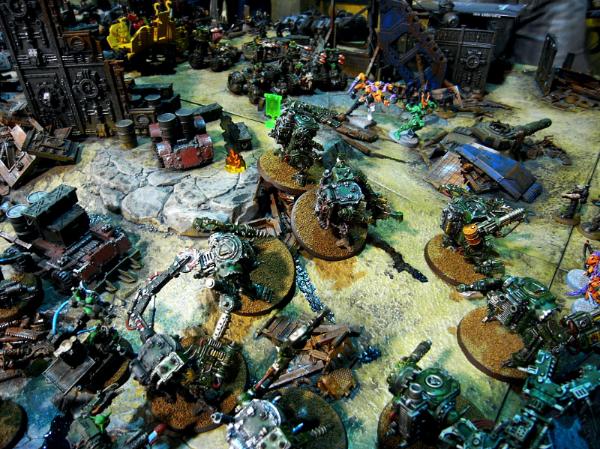
Turn one saw the mass of Ork vehicles jostling for position amongst the densely packed terrain. The Deffkoptas turbo boosted up the flanks while Morgrim sent his Trukk eastwards, as Skarag's and da Nobz Trukks flat outed onto the board behind him - everyone sailing over difficult terrain
The Kans, Buggies and Grotz had their own terrain negotiating issues further to the east. The grotz moved back from the central objectives, but it would turn out, not far enough. Between the spread out Orks and Grotz, and the difficult terrain, deep striking daemons were going to have... fun
The Daemons caught the wrong wave, resulting in a single Daemon Prince coming in on the left and two units of daemonettes on the right. The
IG rolled on, and managed to immobilise the Nobz Trukk through the darkness. To the right, Grotz were cut down by Penal Legion...
The left Deffkopta turned back to face the Daemon Prince. Morgrim's Trukk scooted over and he and his boyz disembarked, preparing to take out the Daemon Prince. Even da grtoz on the left moved up in anticipation of taking part. On the right, the Deffkopta moved further up and turned to take a pot shot at the daemonettes. Skarag disembarked his Trukk and moved over to the Nobz Trukk. The rest of the Grotz, Kanz and Buggies surged forwards towards the objectives. Skarag successfully repaired the Nobz Trukk. Ork firepower killed off the Daemon Prince - leaving Morgrim, his boyz, and da grotz on the left standing around wondering what to do.
Skarag fixes the Nobz Trukk...
I'm sure there was a Daemon Prince over here before...
The horde advances...
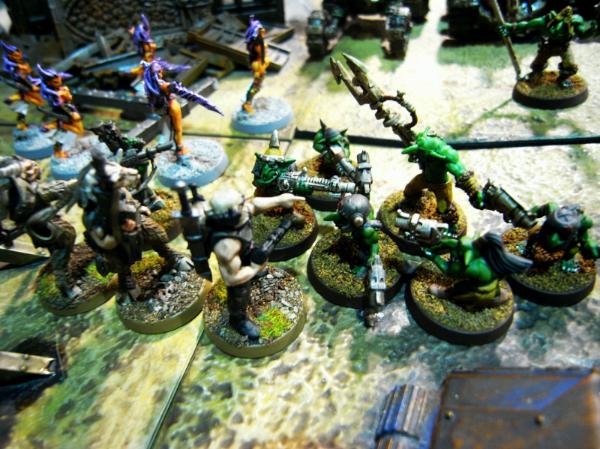
Grotz not up to a combination of Penal Legion and Daemonettes...
Da Grotz deal with Daemon incursions...
...many Daemon incursions...
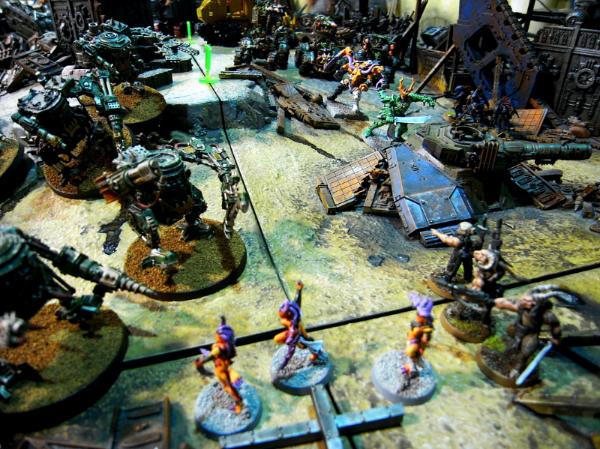
A Daemon Prince and Keeper of Secrets appear in front of the Grot Horde. The
IG blow up Morgrim's ride, forcing him to carry on on foot. Daemonettes start to work on the Kans. Meanwhile, Morgrim and the left Deffkopta leg it towards the
IG lines. Da Inna Circul cruises forward and disembarks, Skarag and his boyz behind - investigating an objective. Morgrim calls a Waaagh! and he and da Inna Circul run towards the
IG lines, before crashing into them. The left Deffkopta assaults the Devil Dog whilst the right flies up high on a building and takes pot shots at the
HWS.
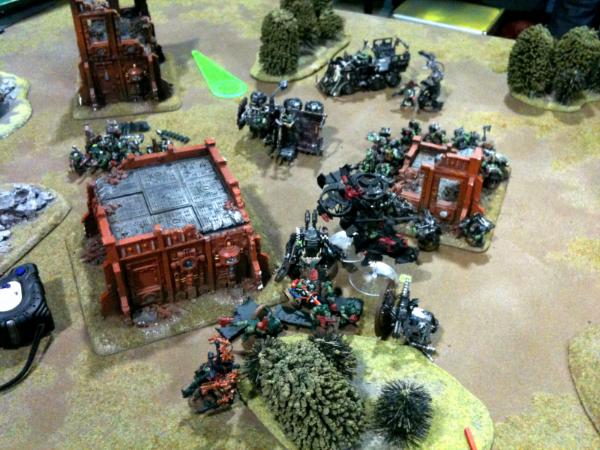
Aftermath of da Dark Angelz assault on da Malfian IVth...

Da mighty Grot horde...
The combined Ork and Grot assault makes its way across da field...
From da uvver side...
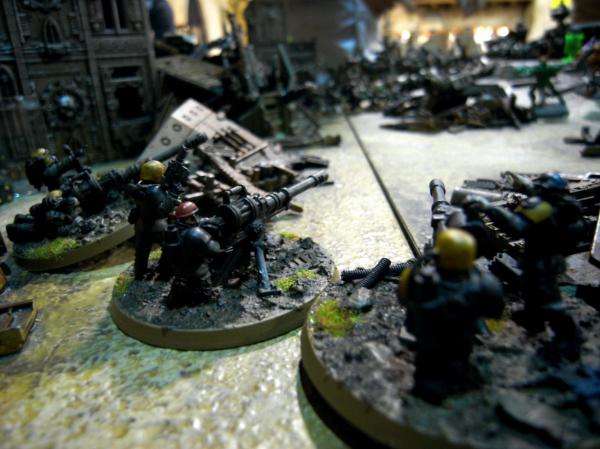
A Malfian IVth heavy weapons team view across the field...
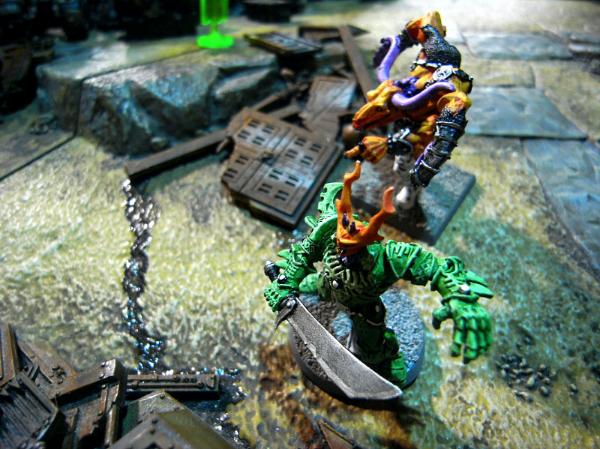
A Daemon Prince and Keepa ov Sekrits warp in in front of da Grot horde...
Grot firepower takes care of a Daemon Prince and leaves a Keepa ov sekrits on da edge ov banishment!
Daemon prince and Kroot snipers eye off da Kanz and Buggies...
Da right Deffkopta surveys da carnage...
Da Inna Circul bears down on da Malfian IVth...

Da Malfian IVth decides its better to charge than be charged...
Aftermath
Turns Played: 3
Result: Victory for Da Dark Angelz and Awesome Grots Assault Force!
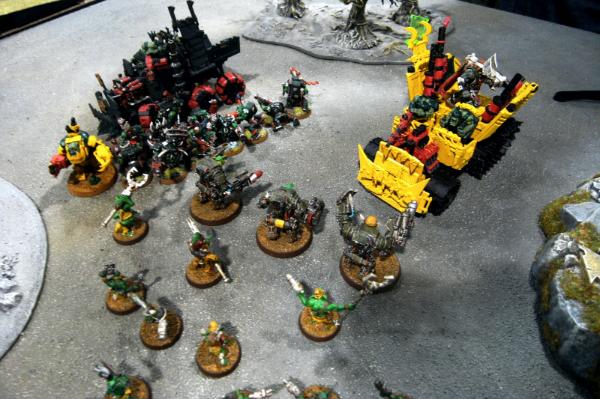
Game 8 - All-round Defence vs Coerron's Orks
[
HQ] Mega Warboss
[
EL] 6 Lootas
[TR] 3 MegaNobz, one with Combi-Skorcha, in Trukk
[TR] 12 'Ard Boy Sluggas, Nob with Bosspole, Power Klaw, Trukk
[TR] 20+ shootas, Nob with Bosspole, Power Klaw
[TR] 20+ sluggas, Nob with Bosspole, Big Choppa
[
HS] 3 Killa Kans, 2 with Rokkits, 1 Skorcha
Sunday - and the aim? To play a game past Turn 3! I would match up against Coerron's Orks from the tournament on Saturday. I'd brought Battle Missions - and after rolling Flank Attack (which was the only one I'd already played!) we re-rolled All-round Defense - a Space Marine mission. Coerron would take the role of the Space Marines, defending the centre objective.
Coerron deployed his two large squads of boyz (sluggas north, shootas central) and lootas (south) in the centre over the objective while I reserved my two
HQs (mandatory). Can't remember the rest of the order - though he finished before me. Ended up with 'ardboyz trukk on left, Warboss Trukk on right, Kans to south. I had Deffkoptas out of sight behind terrain bottom left and top right, as well as two hidden boyz trukks (bottom left, bottom) and the nobz trukk (top left). No scouting. No seizing. I begin turn 1!
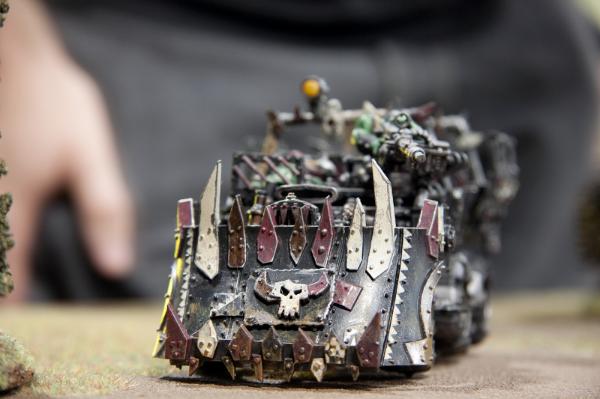
Coerron's Warboss Trukk
Left Deffkopta and Trukk head over to the 'Ardboyz Trukk, while the right Deffkopta flies over to the Warboss Trukk. Da Inna Circul move right and disembarks in front of the sluggas, ready to assault. Bottom trukk gets into boarding plank range of the Killa Kans. Shooting sees the 'ardboyz Trukk wrecked (by a big shoota!). Assault sees the Warboss Trukk shaken, the flamer from a Kan destroyed and another stunned (shaken), and the annihilation of the slugga unit. Da Inna Circul consolidates back towards their Trukk, hoping to avoid too much retaliation. Not as effective as I had hoped - I think Coerron was unimpressed as well
If my turn was a little disappointing, Coerron's was worse. The forcibly disembarked 'ardboyz shot and assaulted my left Trukk, immobilising it. The Lootas and Kans, in shooting and assault, immobilised and weapon destroyed my bottom Trukk, before the boarding plank Nob destroyed one, and ripped the arms off the other two (no more
DCCW for you!) The Warboss drove around to da Inna Circul, disembarked with his Meganobz retinue, flamed and shot them (with the help of the shoota boyz) - causing 3 wounds - and then assaulted. The aftermath? One da Inna Circul Big Choppa Nob (the only one to make his invulnerable of 7 saves!) and one Warboss with 2 wounds left. 7 wounds caused on each side. A Drawn combat! Not that I liked my chances...
Turn two. Skarag turns up and runs on from the bottom, hoping to save the bottom Trukk and join with da boyz. The Nobz Trukk tank shokks the central objective - which doesn't achieve much as they are all fearless! The left immobilised Trukk boyz disembark and shoot and assault the 'adboyz, winning combat, but failing to break them. The Deffkoptas move in towards the Kans, shoot - wrecking another, and then assault the last. The Killa Kan decides the Trukk is the most pressing and easily dealt with concern, and explodes it, killing 6 in the explosion, while the Deffkoptas are only able to stun it in return. In an amazing display, the Big Choppa Nob manages two invulnerable saves to keep the Warboss locked in combat!
With few visible targets, the Warboss Trukk heads left, and along with shooting from the shootas and lootas, explodes my left Trukk and the Nob Trukk - the explosion thinning out a few boyz
In the battle between the Killa Kan and Deffkoptas, a Deffkopta takes a wound and returns a shaken result, drawing combat again. Both Deffkoptas successfuly hit and run
The left shootas finish off the 'ard boyz and consolidate towards the central objective. The Big Choppa Nob makes *another* invulnerable save and the battle continues. Yes - Coerron was having *appalling* luck with his dice rolls...
Da Dark Angelz advance...
Turn three. Morgrim turns up from the top, and legs it towards the Nob/Warboss combat - calling a Waaagh! to make it. The bottom shoota squad assaults and explodes the Killa Kan, consolidating towards the central objective. The left shootas run and assault the Shootas on the objective, winning combat - and causing fearless wounds. The Deffkoptas shoot and assault the Lootas, killing two I think, but remain locked in combat. Morgrim and da enemy Warboss slay each other in combat - leaving the Big Choppa Nob to consolidate towards the central objective.
Coerron tank shokks his Warboss Trukk onto the objective, through my Big Choppa Nob, who deftly side steps. The shootas on the objective fend off my left shootas, while the Deffkopta/Loota combat rages on. One Deffkopta successfully hit and run's away.
Turn four. The freed Deffkopta moves to assault what remains of the shootas defending the objective, along with my shootas with Big Mek from the south. Da Big Choppa Nob assaults the Trukk. The combat whittles the defending shoota mob down further, but for the loss of my Deffkopta to a Power Klaw. They hold! The Lootas finally succumb to the last Deffkopta. The Big Choppa Nob fails to damage the fast moving Trukk. Combat continues in Coerron's turn - its all getting a bit hazy....
Turn five. Deffkopta shootas and assaults the Trukk. Big Choppa Nob assault the trukk. My shootas finish off his shootas. Deffkopta and/or Nob explode the Trukk. Explosion takes out the Big Mek, but otherwise Da Dark Angelz survive, holding the objective.
It's all over - with only 5 models left on the board!
This game (my only) on Sunday was easily the most enjoyable one I had the whole weekend - closely fought, ebbing and flowing with each turn, a tactically interesting game of elite Mech Orks trying to wrest their supply dump back from an entrenched rival Ork horde against a challenging opponent.
Realistically, I think Coerron should have won this. Coerron had the better list, all I had was the better luck! The titanic battle between my Nobz (Big Choppa one anyway) and his Warboss will live on in my memory for a long time to come!
Great example of why Orks need the charge - Coerron only got one charge on me - and all charges were initiated by the smaller/weaker unit.
Turns Played: 5 (to annihilation)
Result: Victory for Da Dark Angelz
AFTERMATH
It was an excellent weekend. 8 Games, 5 wins, 2 draws, 1 loss. I'm starting to get a good feel for Da Dark Angelz - extremely lucky, especially with
KFF saves. Extremely unlucky with reserve rolls
Just need to work my way up to 1500pts for Silver Sorcerer II - and have it all painted! (Some more choice to make a less elite list would help too!)
If you made it this far - thanks for reading - hope it was as enjoyable for oyu as it was for me to write (not to mention, participate)
Arakasi


 Imperial Knights: The Avengers Initiative
 Da Dark Angelz
 Arakasi vs Infinity
 ).
).

