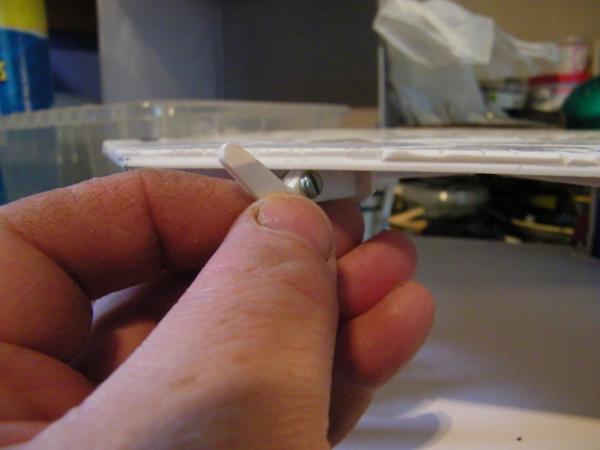
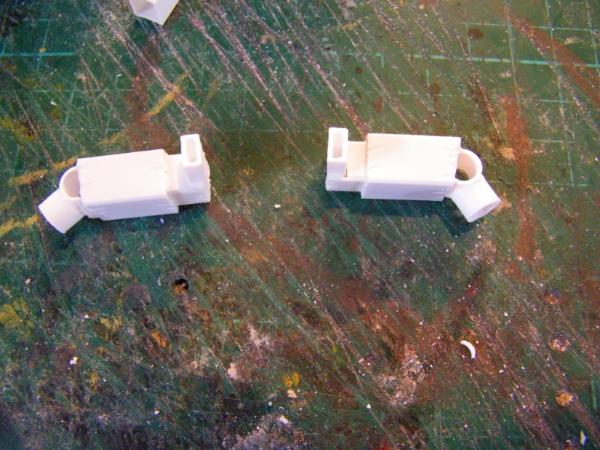
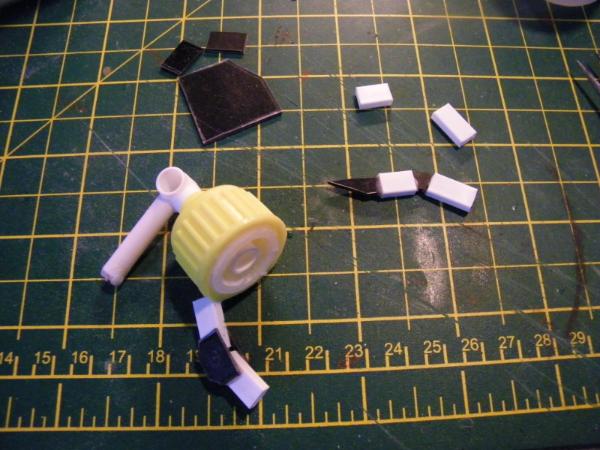
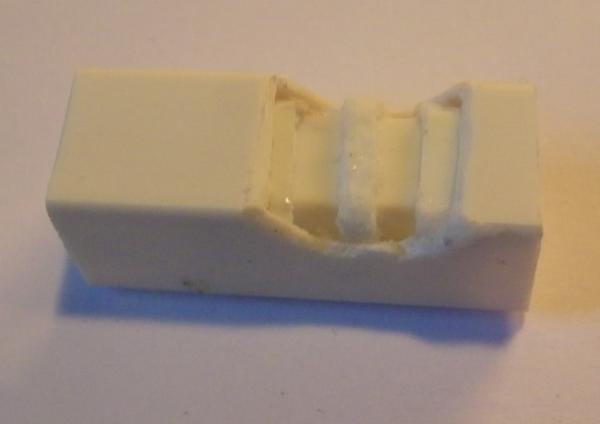
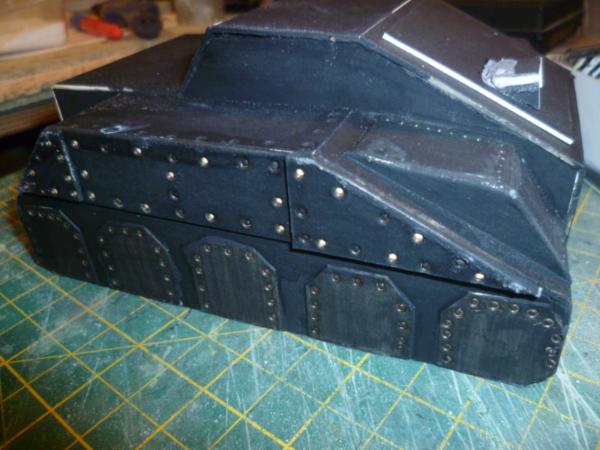
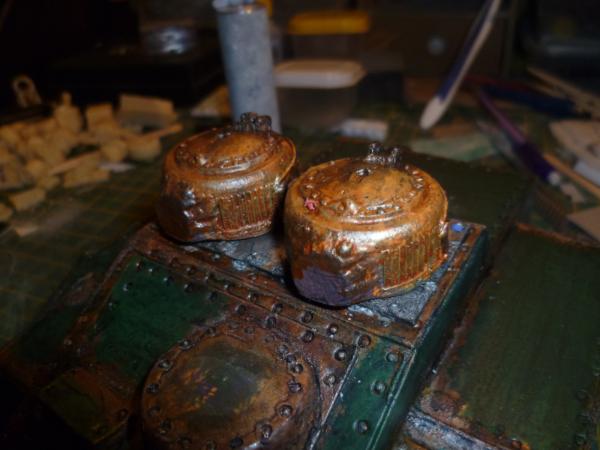
@ Red and Grim.....I am sure, it will work with any heated type iron thingy, the main reason I used this one, a large solid copper tip, easily workable. Might have to be careful with other types as they might be thinner material. I basically filed it flat then used my Dremel to put a holow in the tip to form the rivet head.
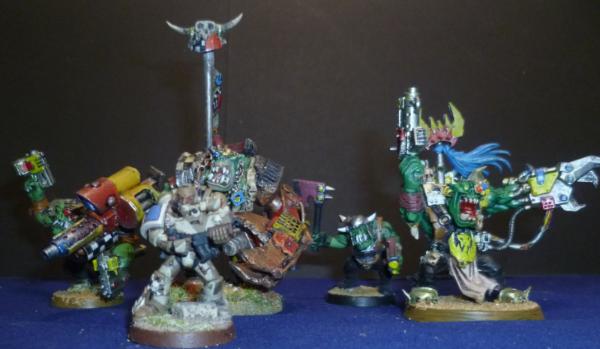
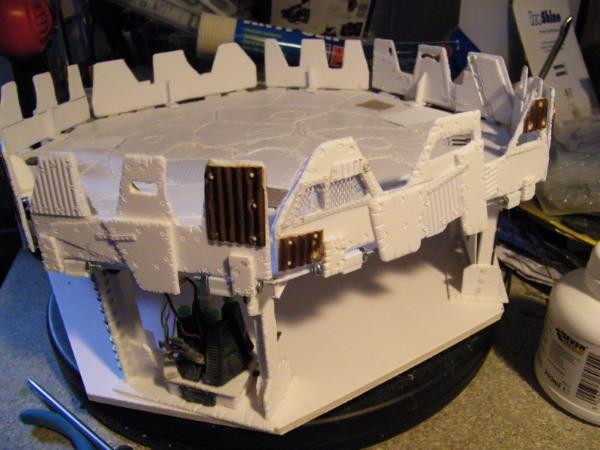
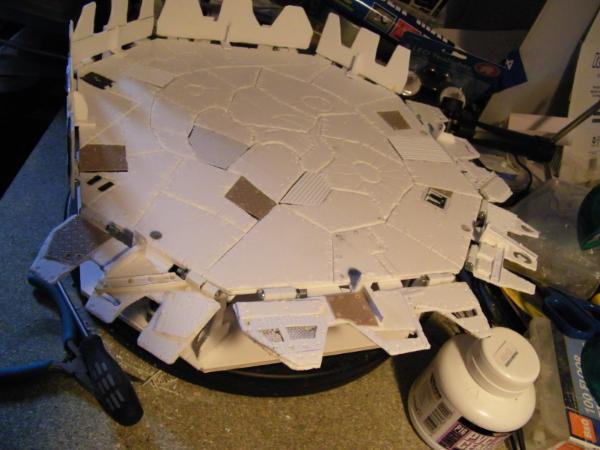
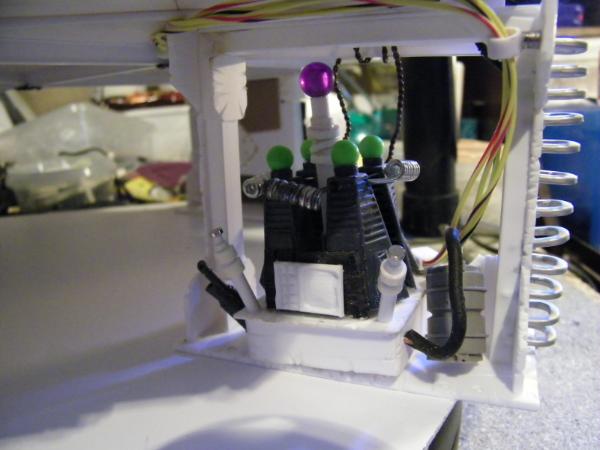
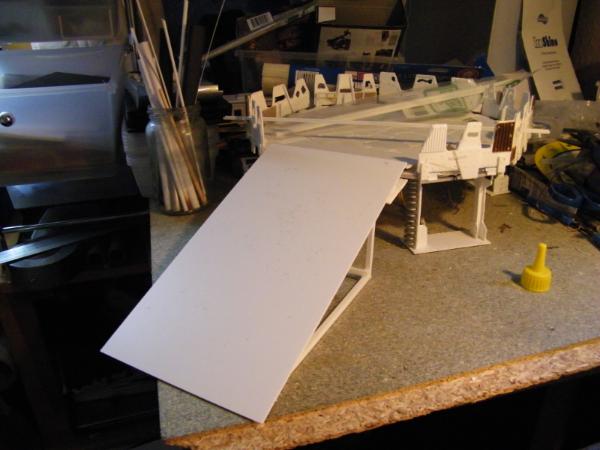
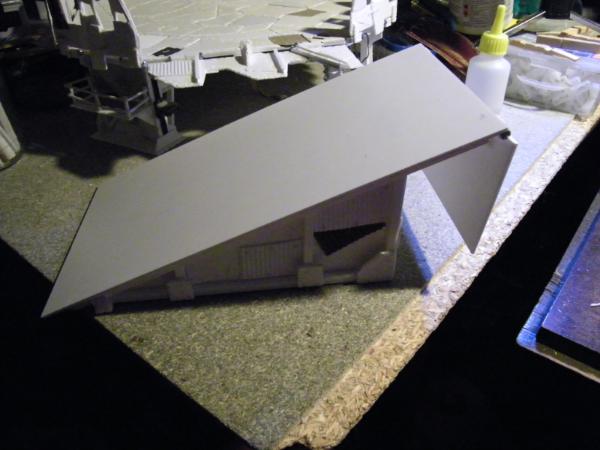
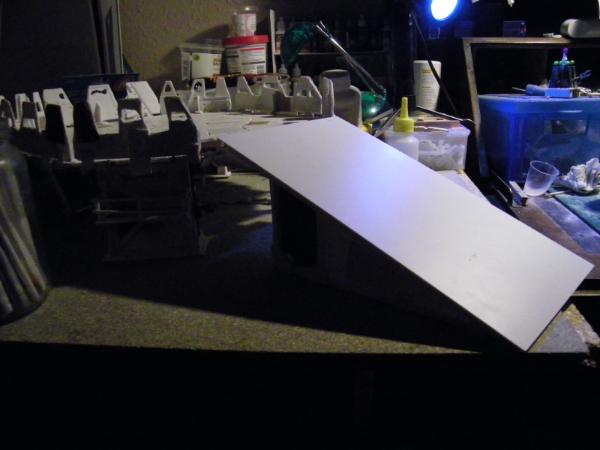
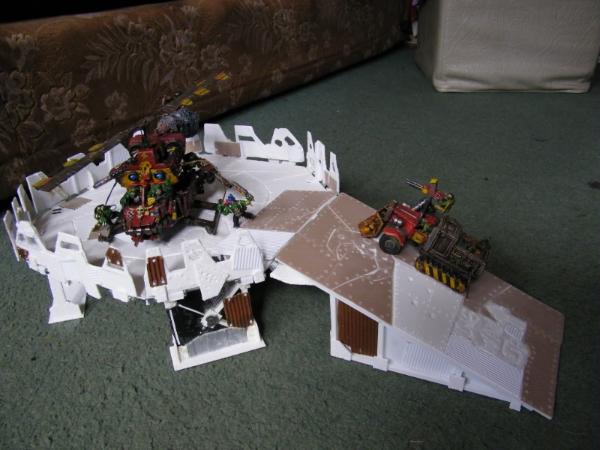
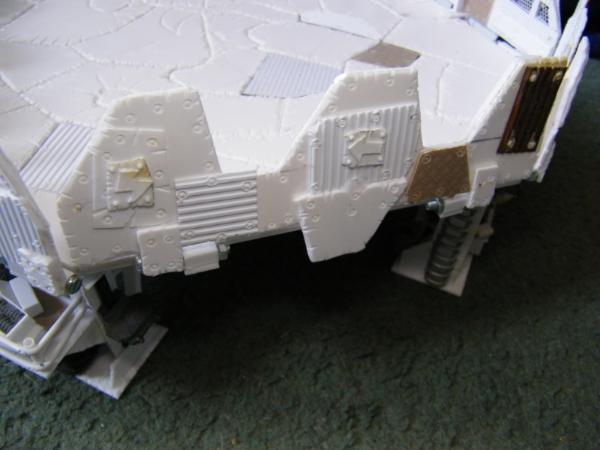
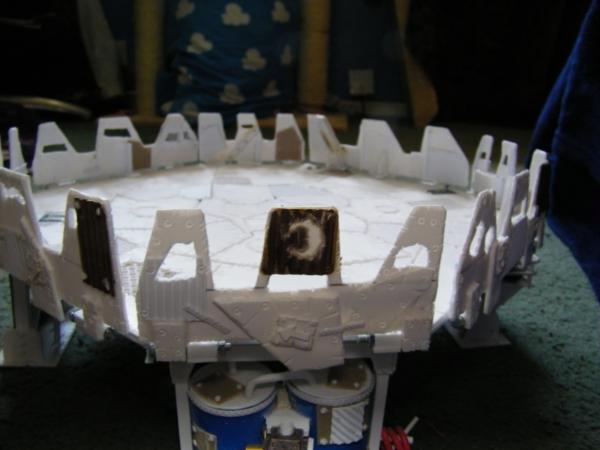
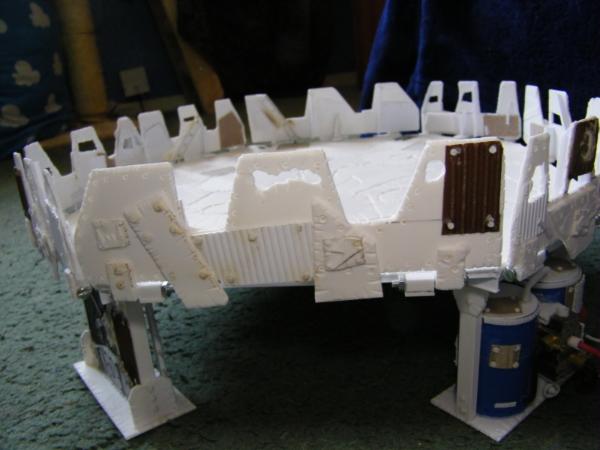
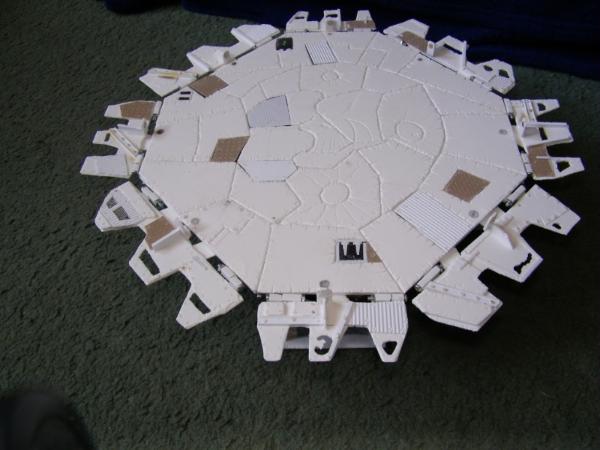
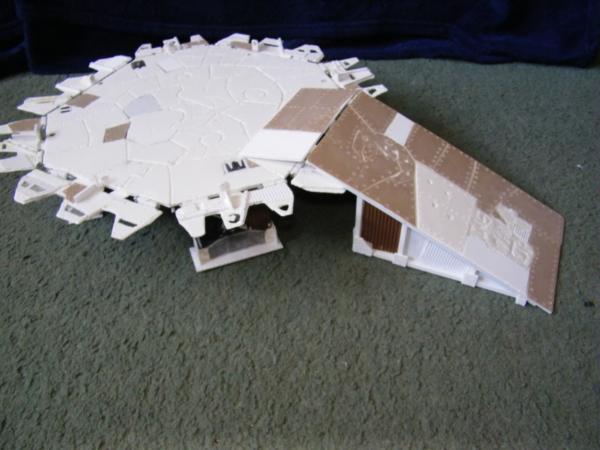
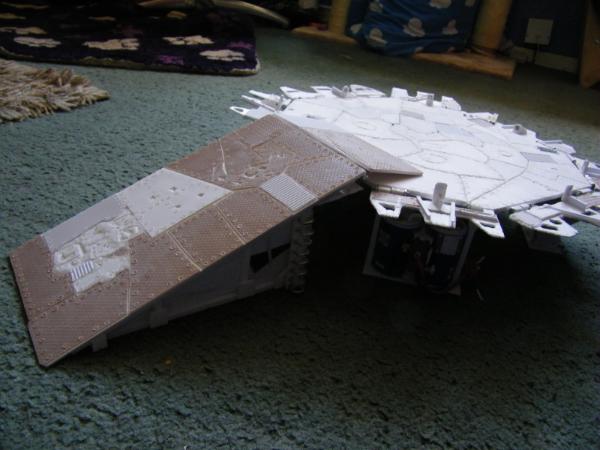
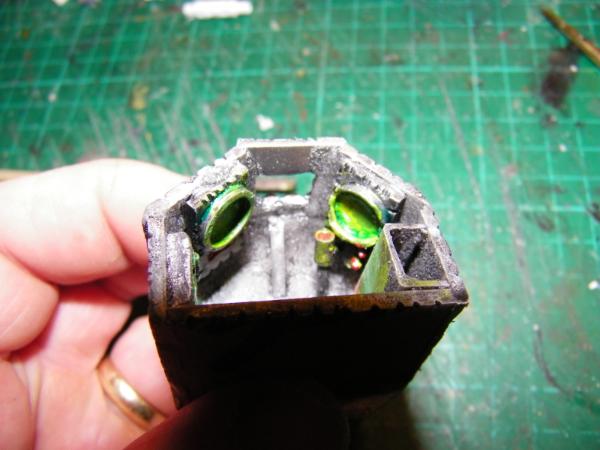
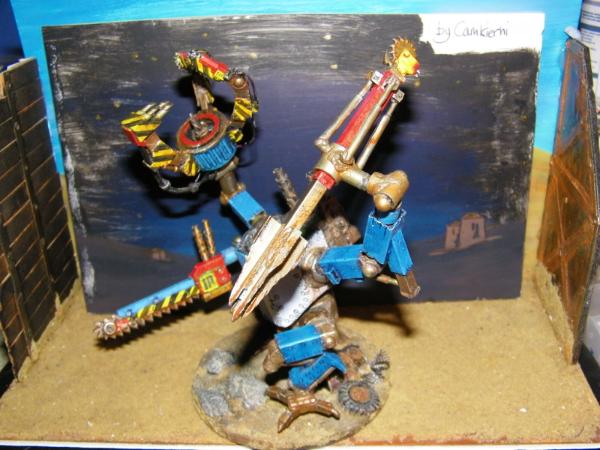
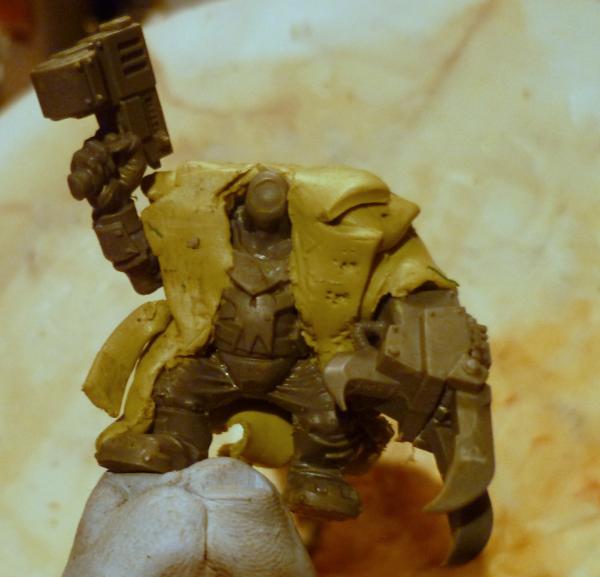
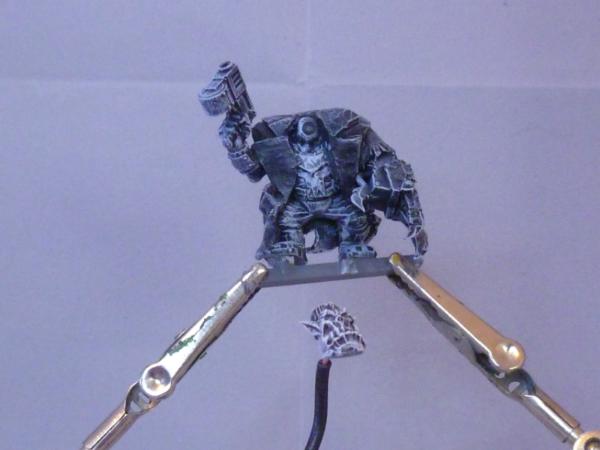
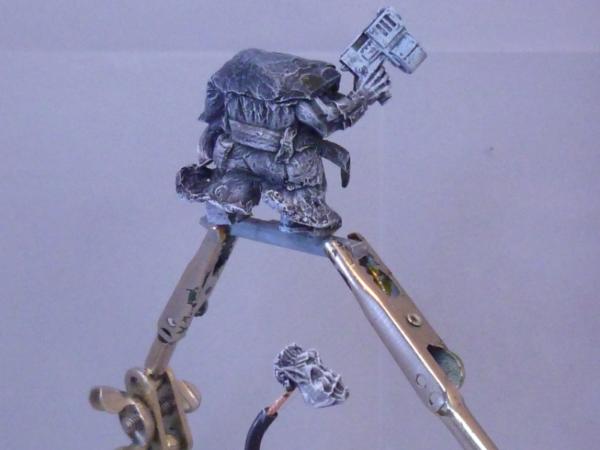
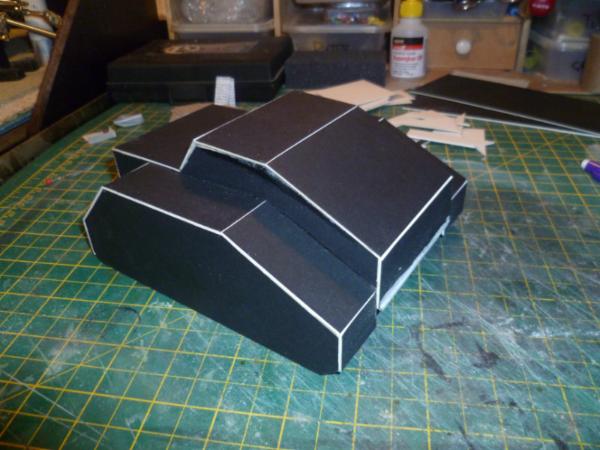
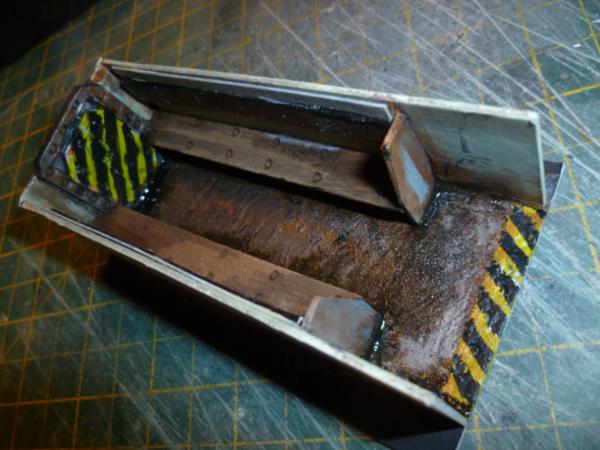
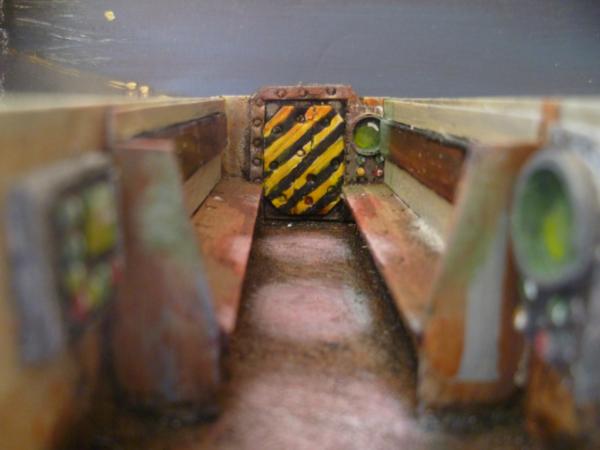
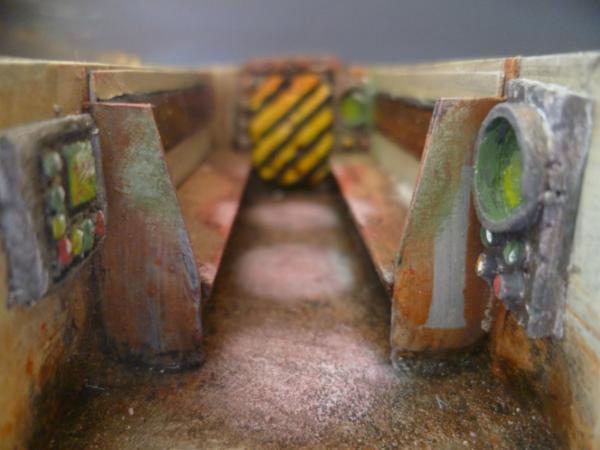
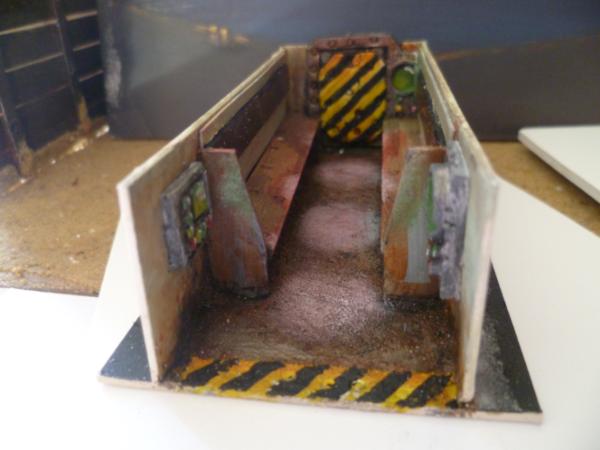
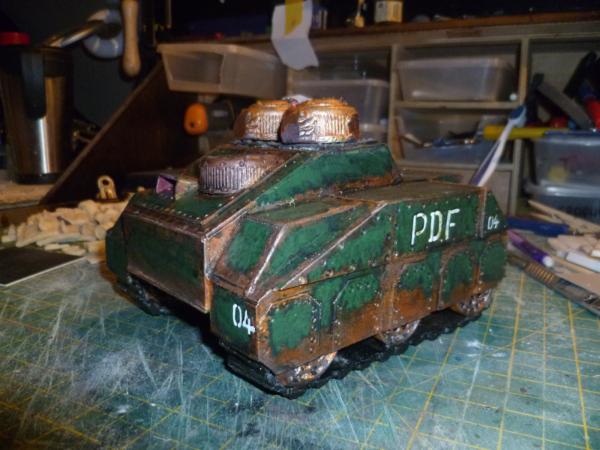
OK time to show off a bit, I am little happy with how this is looking......
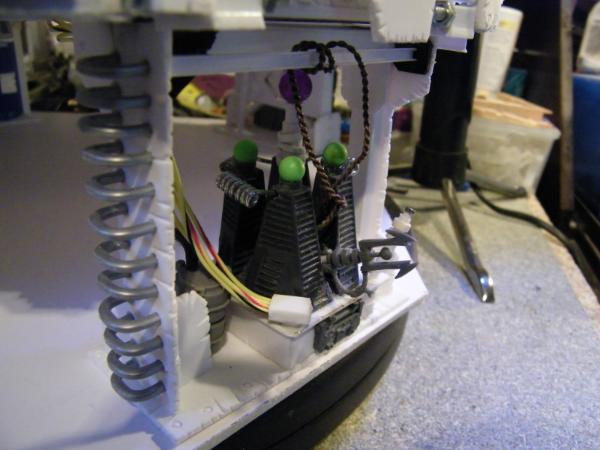
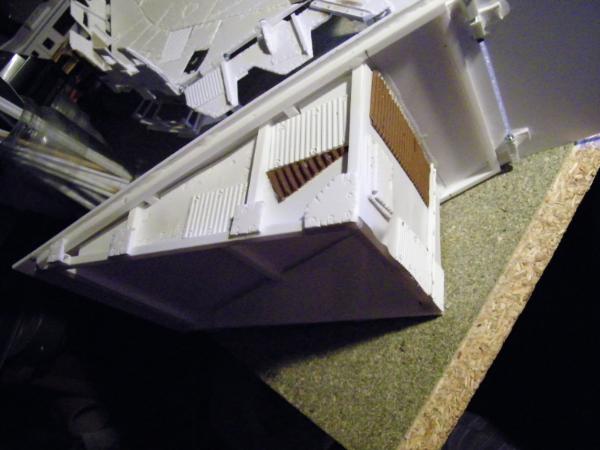
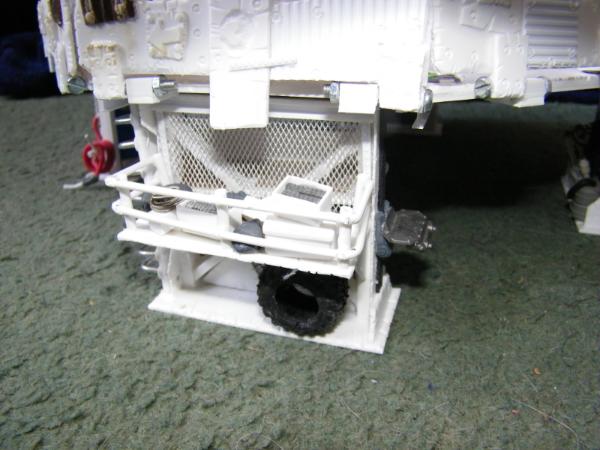
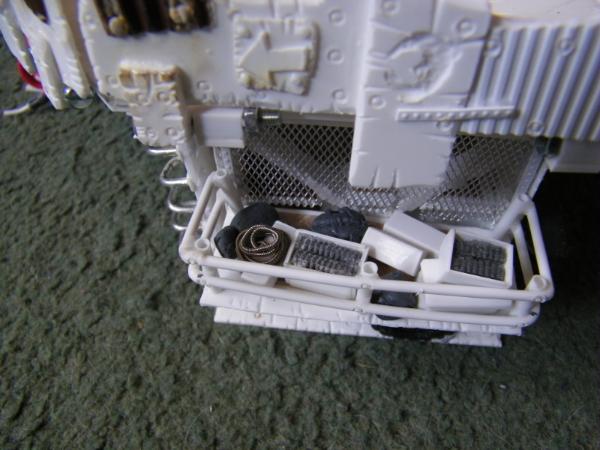
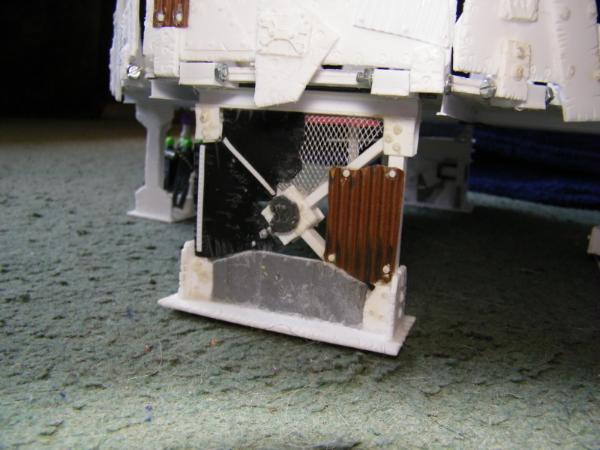
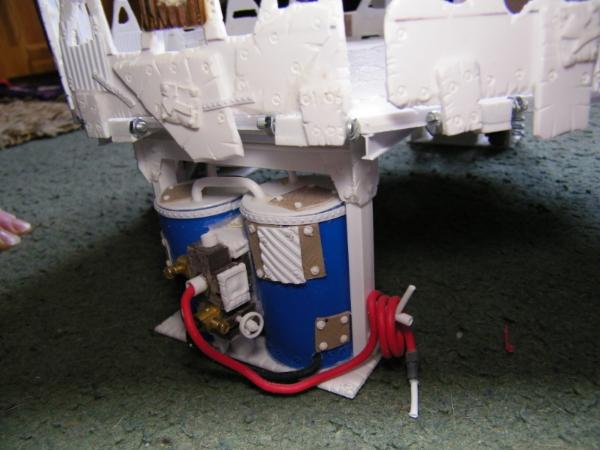
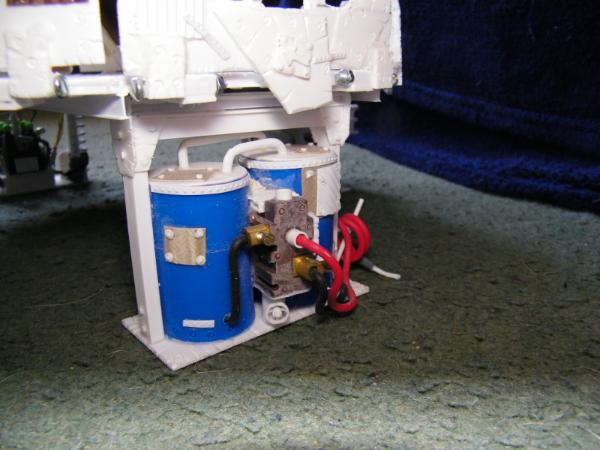
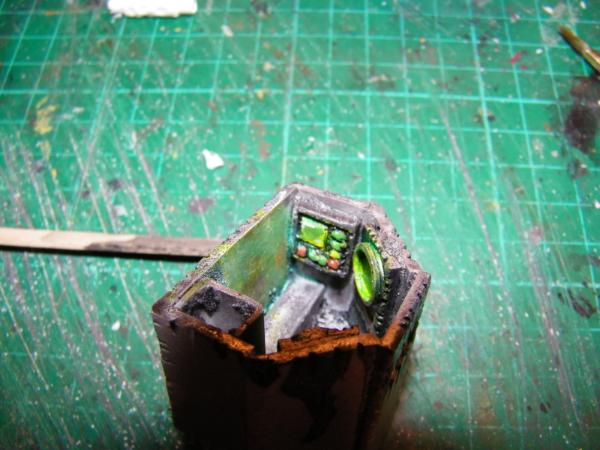
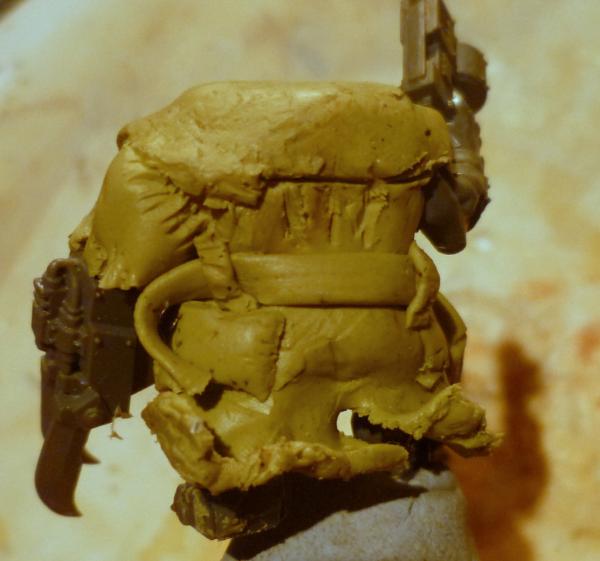
And underneath....
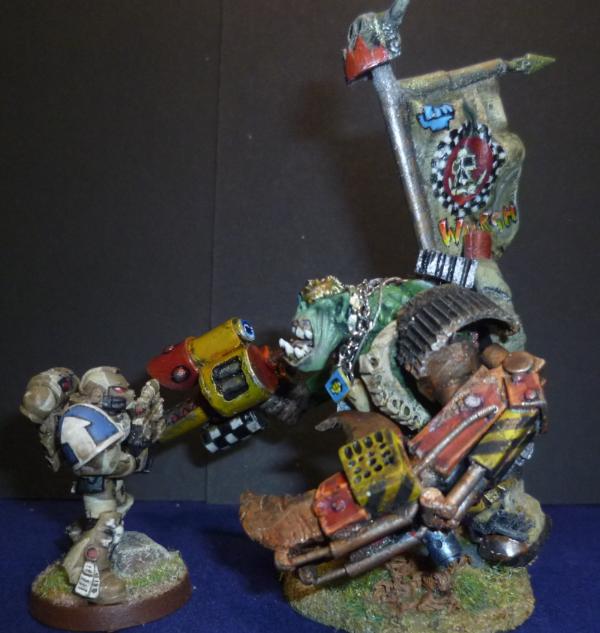
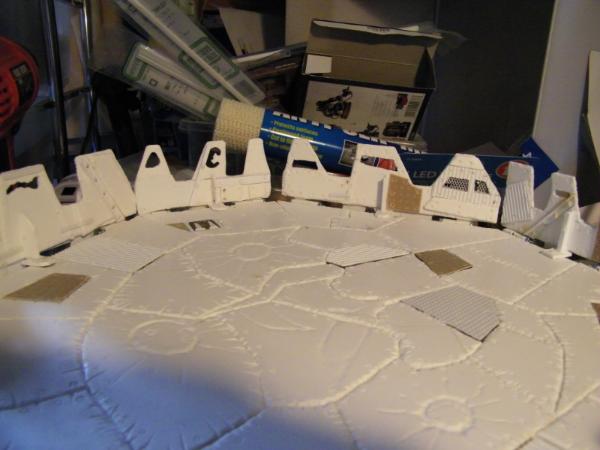
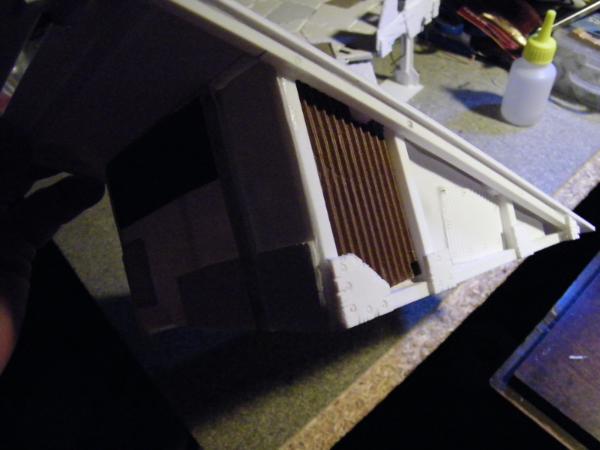
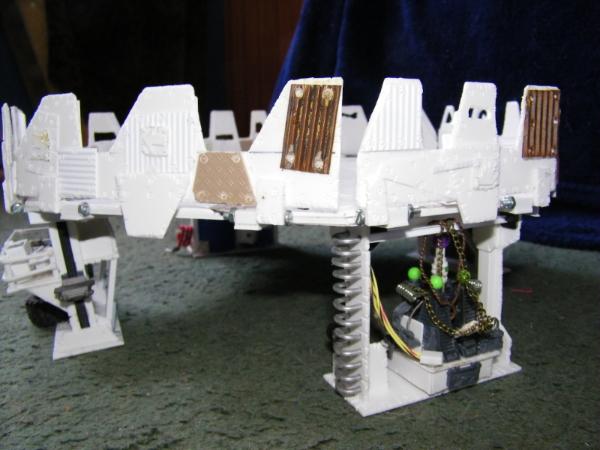
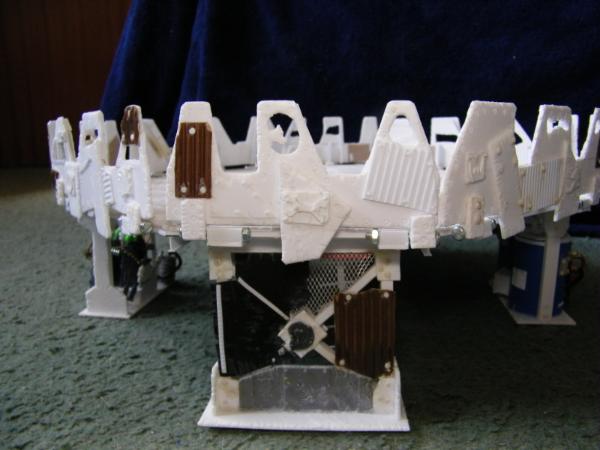
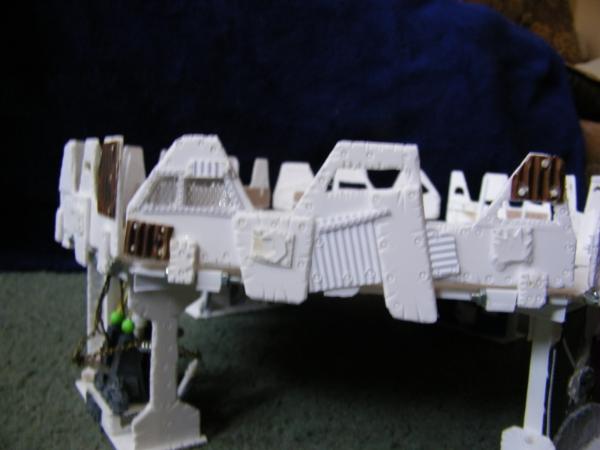
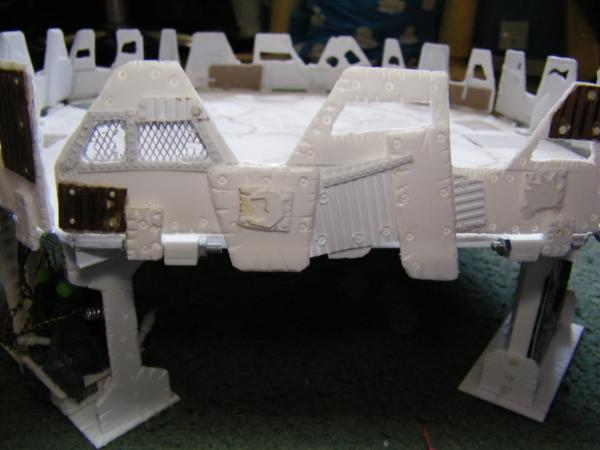
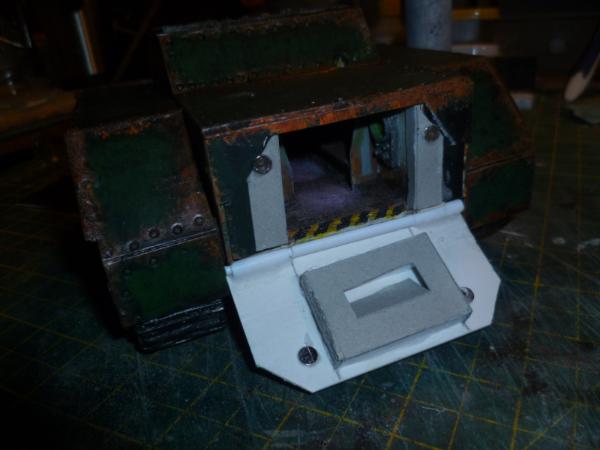
Next the "walls". And questions.....
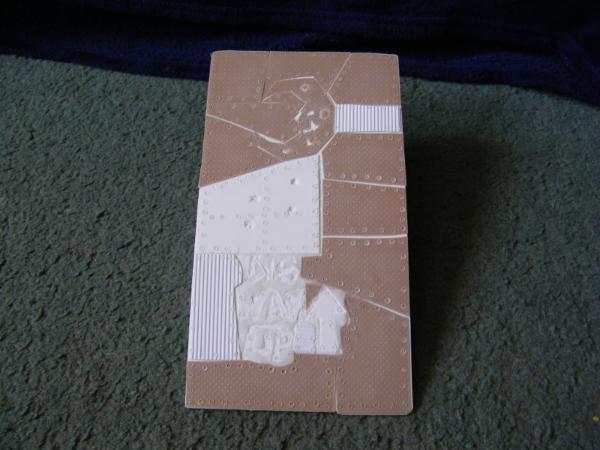
These are bare at the moment, they will be getting covered in Surface details.
But they have to be movable so was thinking along these lines.....
Thoughts would very much be appreciated....
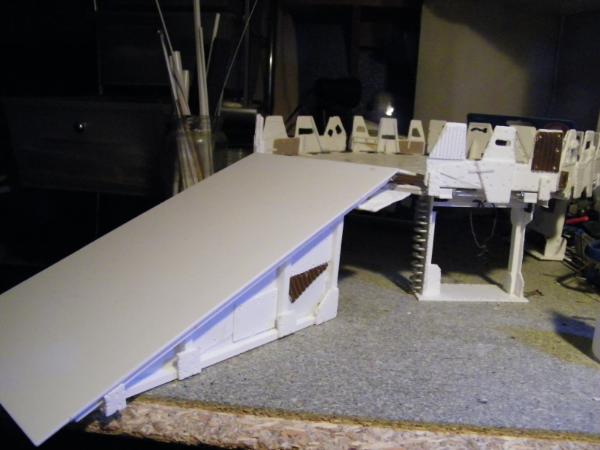
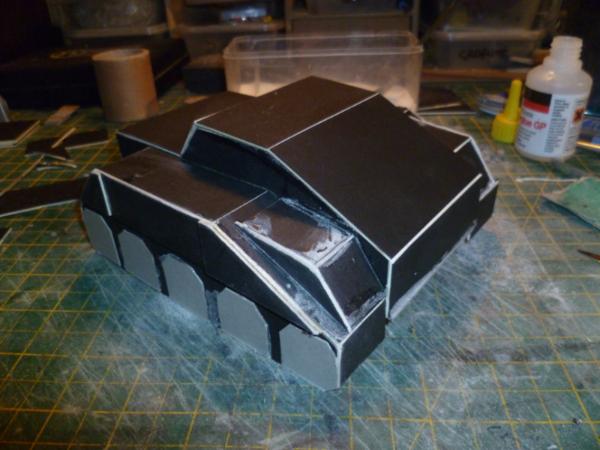
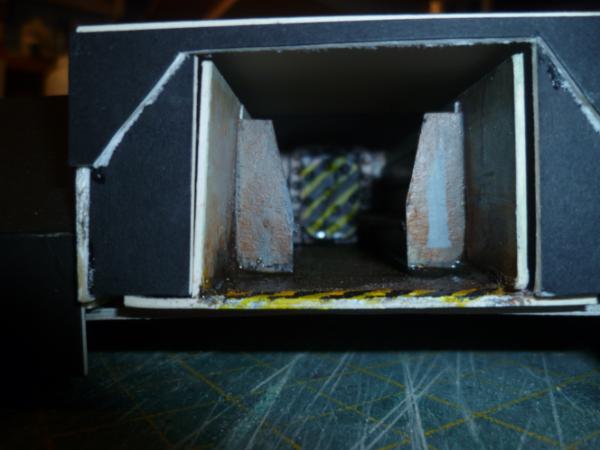
At the moment I got it easy enough to stop in the flat/down position, and if I have it tight enough it holds in the upright, but will probably be adding magnets to hold it some how in the upright position.
Please also remember this is not for me, this is a commision for Gits....I hope he likes it.
That moon in the landing pad... so much win Not sure I can offer any structural advice on the blast shields over the scratchbuild veterans you've got watching here, but I can tell this is gonna be ridiculawesome
If you have a local hardware store near you (Value, or one that isn't a "Big Box" hardware store) you should go and ask them to show you their 'small stuff' shelves for hardware. You might be able to find some tiny hinges you could use, and possibly some small latches as well.
Automatically Appended Next Post: Actually- just had an idea...
First off- do the current hinges work okay? If so, go ahead and leave them like that. If not, do the Hardware store thing.
Second- a Latch to keep the walls up. You could possibly set it up so you have another piece hinged on the top of the pad around the edges that could be lifted up, with a 'hook' on the bottom, that would then hook over the top of the wall to hold it in place- if that makes any sense?
I really still don't know why the wall would need to be folding anyway, but you have made an awesome job out of this detail! Looks brilliant in form and function!
So my beloved has sprung a surprize on me, we are apperantly away for a long weekend, the timing sucks but to be honest I probably need it.
Thanks for the comments, back Monday.
@ Dr H Thanks bud. had several goes at it, and even looked at dolls house hinges, but this I think works best.
@ Gits, Well you are the one that matters the most, so cool.
@ Shas. Thanks bud.
@ Vik. Only reasoning I can think of is if you need the space, maybe a thunderhawk sticks out a bit, since I don't have one could not tell you, but this thing is pretty much 300mm square (12") So something would have to be big. And thank you.
Well off to finish up some work (RL) before off this afternoon. Cheers Guys and dolls.Back soon. Hopefully with recharged batteries.
Well so much for a peaceful break......idiot drunks the police and childrens injuries, nuff said.
We are all OK and home safe, although much more tired than when I left. However in the true spirit of Dakkahood, I followed Theo's advice, (although I did not know it.)
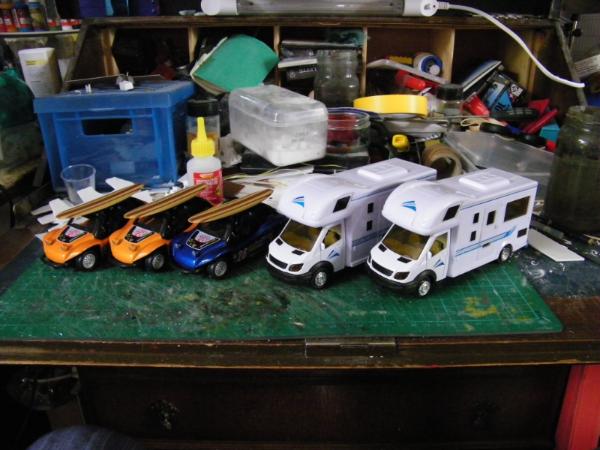
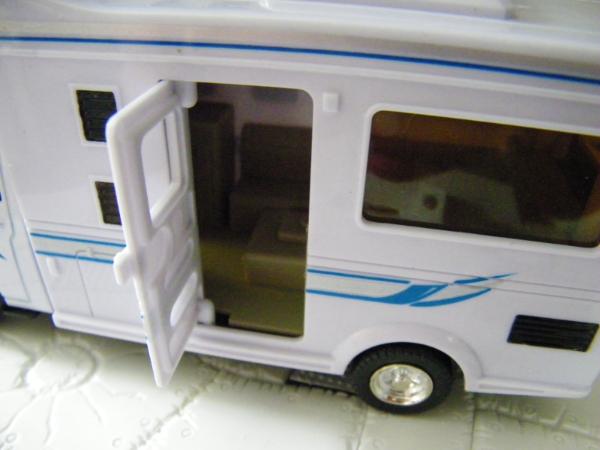
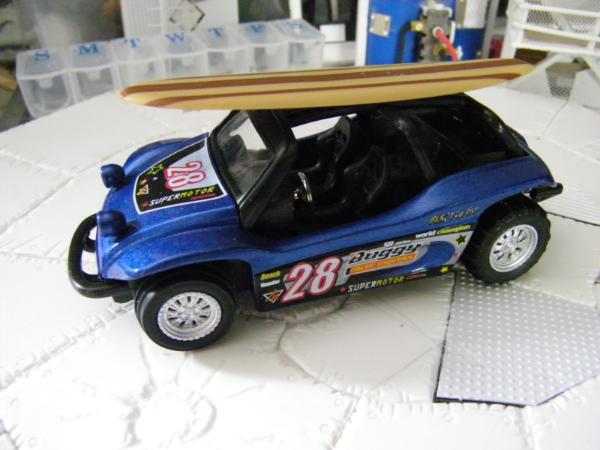
Found these in the shop on the camp site.
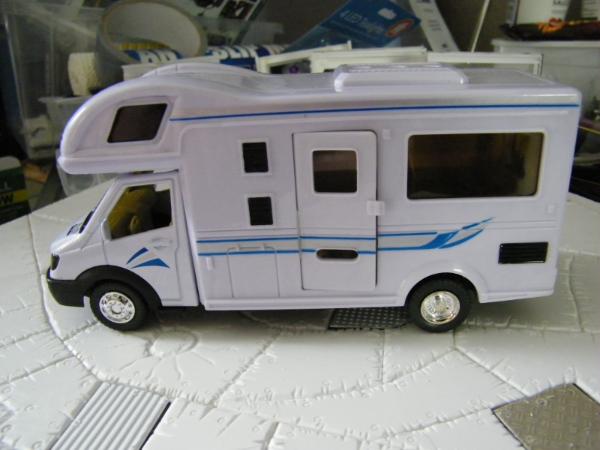
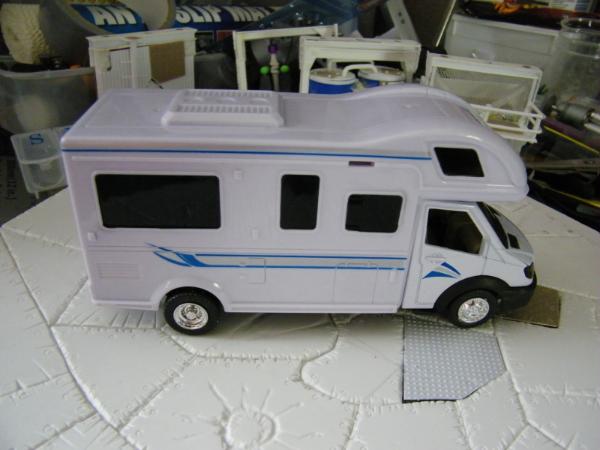
Camper....(£3.50 each)
Spoiler:
Buggies... (£3.00 each.)
Spoiler:
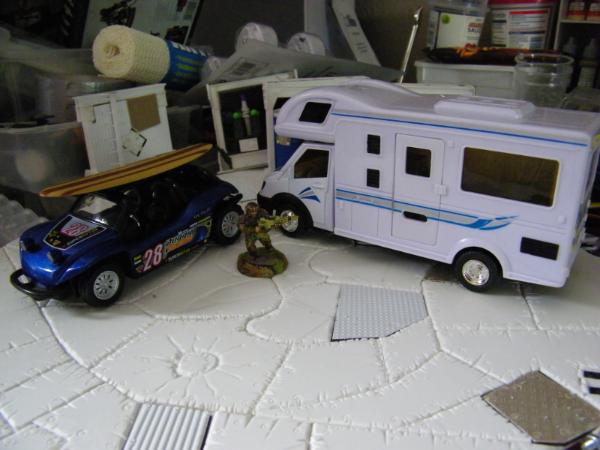
Scale shot.
Other recent acquisitions...
Camo netting, and lights?
Grimdork Dumpsters...
And some ladies for a dio I have i mind....
My thinking now is a nice scene with a camper (obligatory guy on roof with brolly.) And some nasty beasties. Wife Kinda fancies Walking dead type scene.
Second RV will be converted to an IG Ambulance.
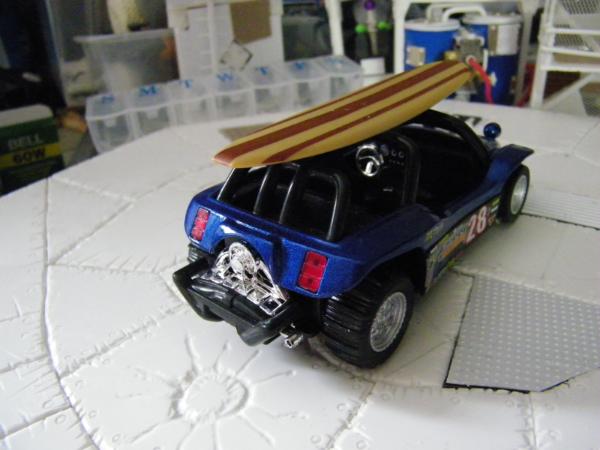
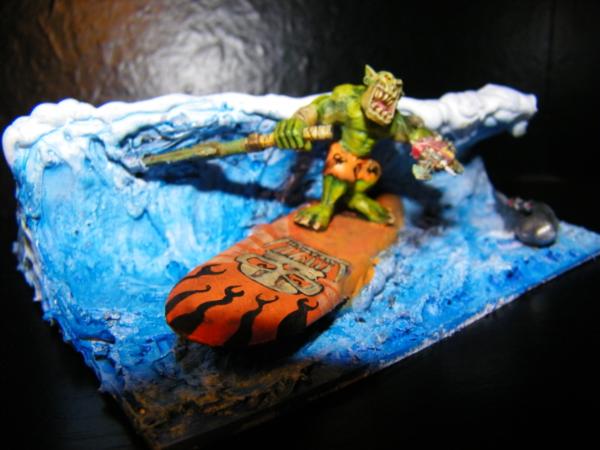
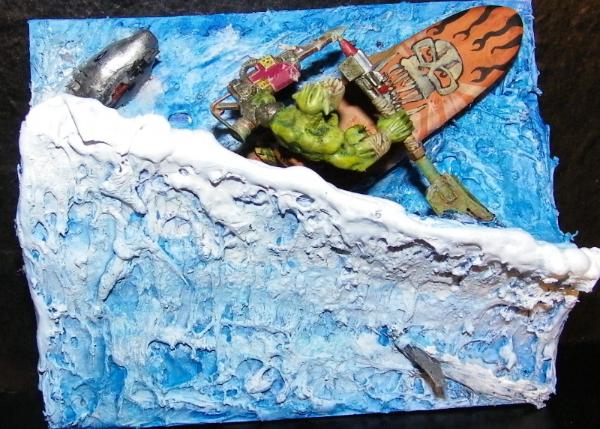
Buggies will be IG with surf boards removed and guns stuck on.
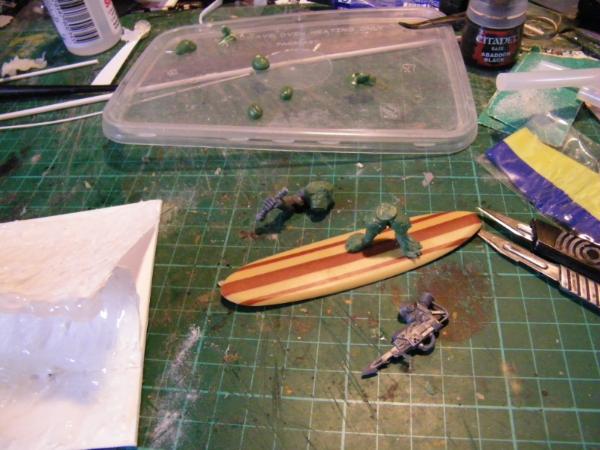
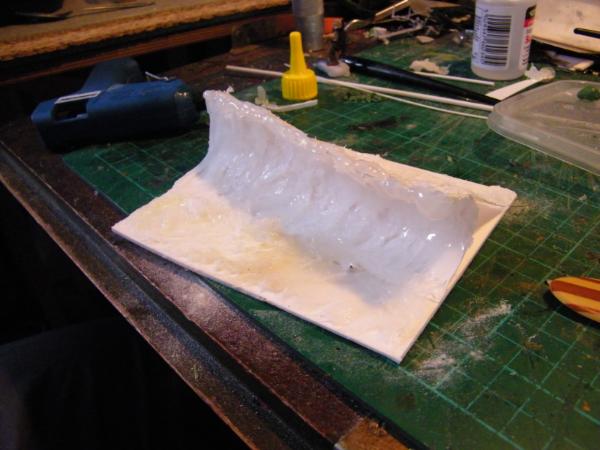
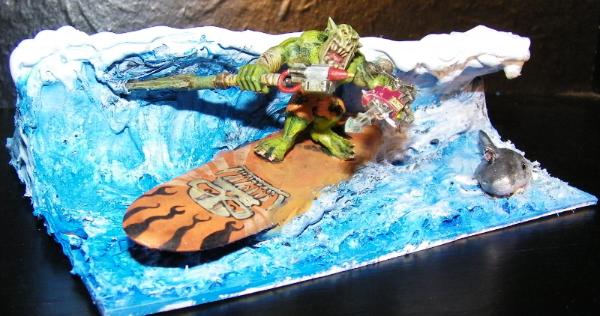
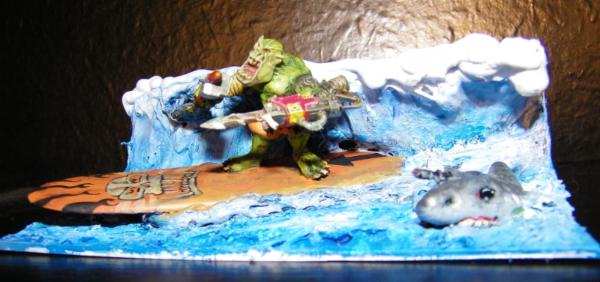
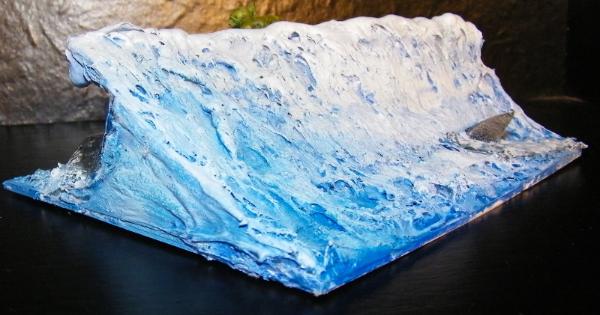
And already got plans for an ork surfin'.
Most of this will go on on my other blog, still got work to do on this Skyshield, which I am keen to get done.
Sorry to hear that things went south on you and yours Cam. Glad you were able to salvage something from it though. I'm sure it'll be brilliant, whatever you come up with.
ahh... shucks... I was hoping for a bit of relief for you and your loved ones...
sounds like you had a very hard trip...did you go to a hotel or a bed and breakfast inn?...
I hope you recover soon...and that the kids are not traumatized...
back to something good...I've shown my wife your landing platform and it got the wife seal of approval......she was literally mesmerized from the surface structure and when I told her the walls are moving she almost gawped...
the caravans are a cool find... I will be glued to the screen to see these converted...ork style of course....!!!
and no comment to the buggies... these are orky by nature....
and again... look to the letters on the pillboxes.... WTF....LOL...
and these candles... well...did some nice stuff with these already^^
So, the wife booked this weekend break, for us to get some serious R&R. 3 Days in a caravan park, north coast Scotland. Beautiful beach, quiet town, whole point. Rest, sleep and relax.
First night, kept up all night (literally) people drunk arguing, baby crying woman screaming, guys fighting. Police called, calms down about 6 am.
Second night, Repeat first night, but other people involved.
Even guy screaming "Let me out!" in back of police van for 15 minutes at 5 am.
Also completely seperate, my son is playing on the beach, beautiful white sands . Feels a scrap on his foot, turns out took a 25mm (1") slice of skin off the side of his big toe, not mega deep but clean off, and just deep enough to be constantly bleeding. He is fine. But can't play in the sand or go swimming or put his shoes on comfortably. Was a broken bottle in the sand.
So more tired than when we went, we decided to call it a day and come home a day early. All happier and safe and sound at home.
Son will probably not be going to school a couple days, as no way I can get a shoe on him. It's a clean wound now and will heal up fine, but must be down to nerve level because it is sore.
Camp been in touch and offered another break as comp, but not sure. The facilities and camp are beautiful, the area is lovely, but the clientelle are another matter. The police said they where regularly called out!! I should not judge it on the one bad experience but........
End result, spent a fortune, need a holiday now.
We live and learn, back to Dakka, you are so true Ruglud, RL blah! Dakka
Sorry to hear about the travails. Good news though, Kids heal, and in a few years, you and the Mrs will get a good laugh about the vacation. There's always a bright side.
LEDs? Yes! 1x10⁶ Yes! Keep your eyes open for submersible floral LEDs too. The Campers have some interesting potential. Now I'm inspired to make a trip to a few dollar stores and see what they've got for vehicles.
I thought you UK guys used the word 'Skips' instead of Dumpsters? Or is that something different?
oh man, I actually flinched reading that... I hope your son can cope with that and that he gets better soon... this will take a while...that´s for sure... my son had a major injury due to his parents stupidity some years ago and it sliced quite some big surface of is ankle... could have been avoided... well... took quite some time to heal and the scar is still there...feet are always nasty as the kids can´t be themselves for a certain time...
as for peeps being stupid...I avoid due this swimming bath... so many idiots to be met there... and with kids behind you, you are bound to stay patient and calmingly....*urgh*
Indeed, peeps should be avoided at all times. Thanks Vik.
Also curious about submersible LED lights?
Question:
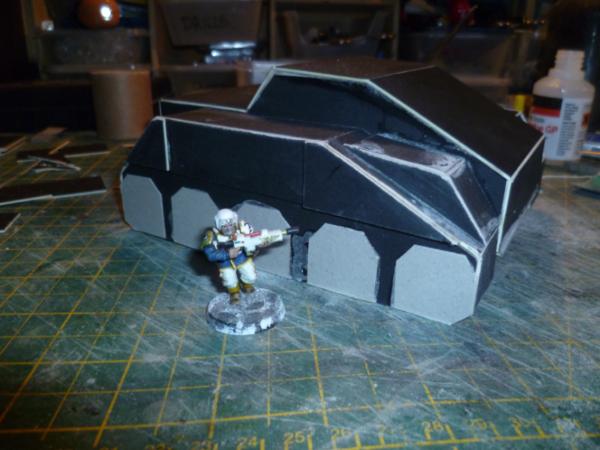
Are the walls supposed to be stood on when in the down position?
Asking because I am wondering about the inside face of the walls. Should I make them a continuation of the landing platform, or should I put struts and things on them, the "Official" one looks to have reinforcing beams on it, but how level should it be?
I am not worried aabout strength....(2 large metal minis)
even if they are as sturdy as you show them to be ... in game I wouldn´t see the point to place mini´s there... so I guess that a build to support look would be the best idea... no need for a flat surface there... but ultimate answer to this may only hold the customer^^
Ah, that does sound pretty .
Personally, I wouldn't go back. After what the police said. Maybe you'll get lucky and have a good time, but if you go on holiday you don't want to "get lucky", you want a good time to be guaranteed (even if that may be impossible).
I have a scar on the inside of one of my heels from where I dropped a glass between my bare feet as a child. It wasn't the first scar and certainly wasn't the last. Hope he heals fast and gets a cool scar to show off in the future.
Automatically Appended Next Post: Why do I always seem to be the one to roll your thread over...
Camkierhi wrote: Indeed, peeps should be avoided at all times. Thanks Vik.
Also curious about submersible LED lights?
Question:
Are the walls supposed to be stood on when in the down position?
Asking because I am wondering about the inside face of the walls. Should I make them a continuation of the landing platform, or should I put struts and things on them, the "Official" one looks to have reinforcing beams on it, but how level should it be?
I am not worried aabout strength....(2 large metal minis)
Thoughts?
I always assumed that you could place models on them. But I, like you Cam, don't know the rules.
I would make it look like support beams, but make it able for any model to stand on it.
Don't forget the old Orc rule of "it fits as many models as will stay on it, any that fall off roll on the chart" I say someone years ago make a battle wagon which was covered in Velcro. He stacked 60-70 orcs on it and it almost doubled in width, and only one model fell off, but lived .
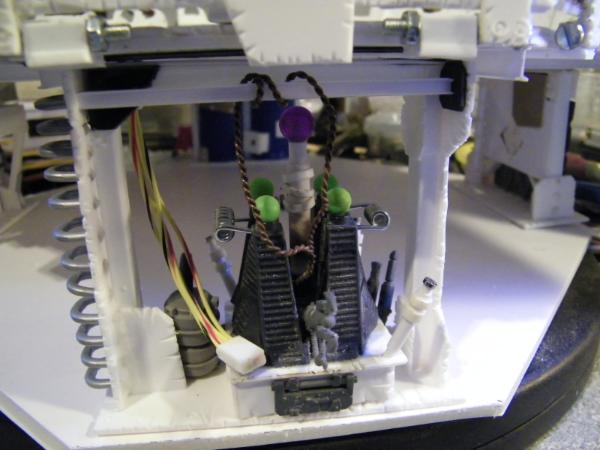
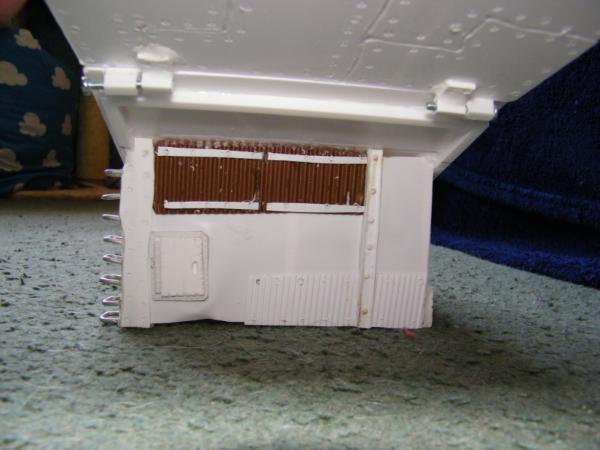
At the moment the walls are hinged via bolts. They do come off, thats how I am doing the extra, and should allow you to paint it Gits. Could take the bolts out and replace with magnets later so they can be removed easier.
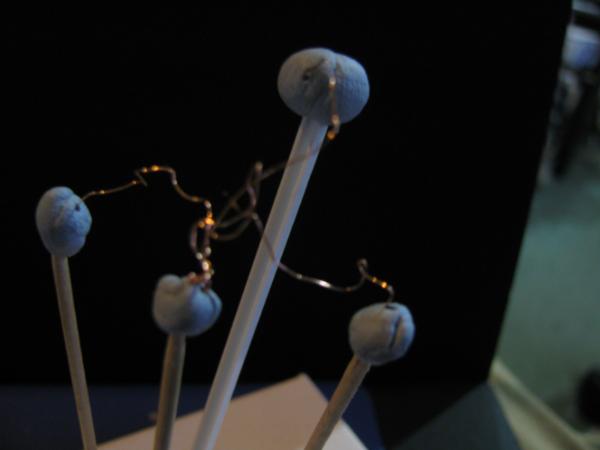
you have that really thin wire you can use for floral stuff or other artsy things?... I would add little lightning bolts to the little balls ..wire for the structure and then some sculpting to get the lightning zig zaging effect...
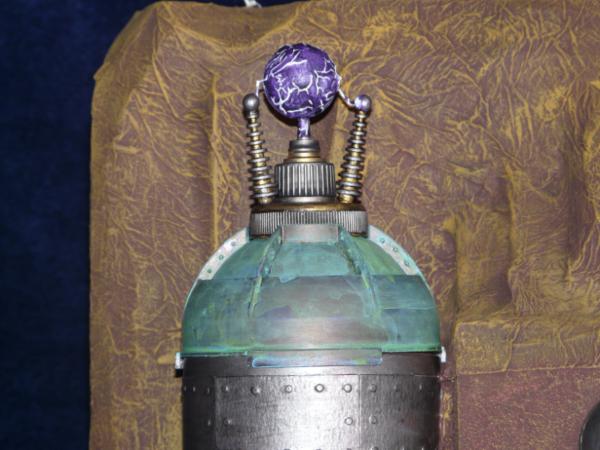
so that this might look like this?...
Spoiler:
and I am still not that sure about the runtherder stick you put in the middle......
Wirez...needz moar wirez....cover everythingz in wirez...lotz'n'lotz'n'lotz'n'lotza wirez. Then throw in a few more wires and a couple of cables just for good measure
Although....Gits may not be that fond of painting wires
Maybe just a couple of wires........
How about stripping some wire and using strands of the inner fine wire to represent electric arcs between the five nodes?
Just got to add all the little detail, and pop it in the post. Should I hope have it done today and posted tomorrow, but can't promise nothing just in case.
Thanks for looking, as always your feedback is very much appreciated, no honest it keeps me going.
However.....does this mean you need another ramp with 'dis way down' on it?
In the grimdork of 40k there is no down...only over the side . Also needs hazard stripes....or is everything orky hazardous anyway so they just forego that?
You have a ramp, now you need Tony H'Ork with his rocket powered skate board. He is immune to difficult terrain tests, counts as being jump troop (upgrades unit leader) and roll a d6 every turn to see if he is hurt by his own moves. But enemies are -1 ws, -1 bs, -1 initiative as they are cheering and clapping.
It's wondrous Cam. With that ramp, I can also use it as a set piece (instead of a fortification) along with the rest of my ork Mek-works terrain. Fantastic! Thank you! You are a true master of ork construction and I'm honored that you agreed to build this for me as I know it was no simple task.
Well the mix I am using says 2 hours, but taking longer, guess temp is affecting it a bit. Did one lot last night and left over night, was very happy, this is the second half if you like, and taking a while. Watched kettle never boils!!
It says to prolong the life of the mould not to use poly resin for 5-7 days, but there is no way I am waiting that long this time around. Should have something to show tonight.
Yes, temperature does affect the reaction (like all reactions). But it's not a huge change, mine says at 60deg it'll take half the time that is does at 24deg.
You've jumped right in to 2 part moulds, like I did. Good man.
Look forward to seeing what it is, that it is, that you are teasing us with.
So it took closer to 4-5 hours to cure. But I left it in a draft, so maybe it was a bit cool. Stuck it under me lamp for a bit and hey presto.
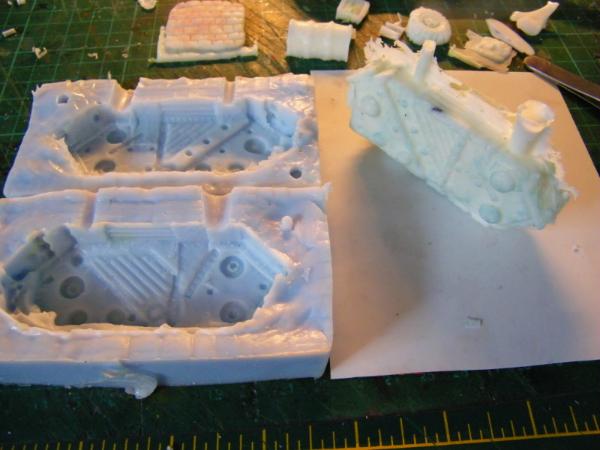
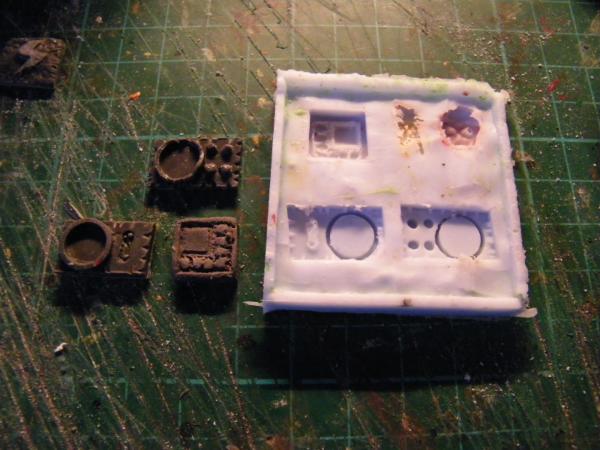
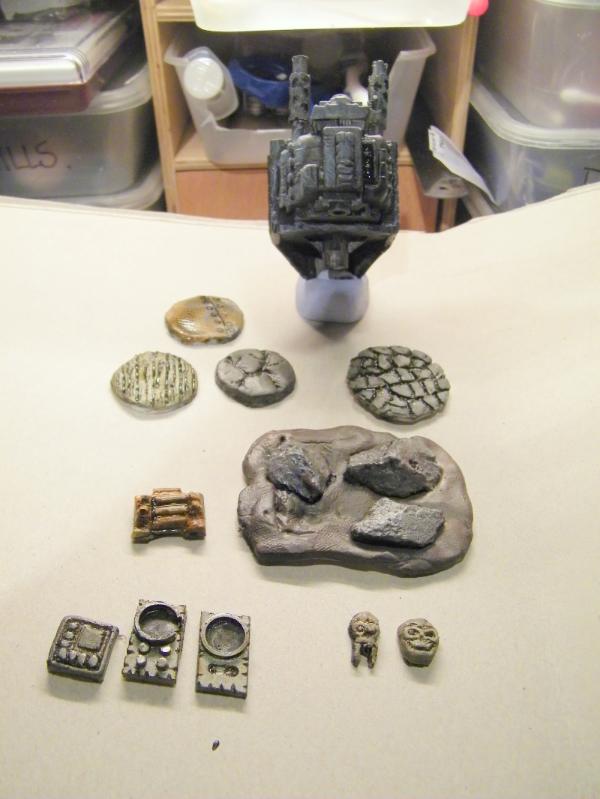
So what follows is a load of pictures. For this batch here I have used 200g of silicon for the moulds. This was excessive, but easier to calculate out. And then made up 100g of resin. Again far too much for the job, but that is something I can work on, and I am not after a profit here so it is no biggy. Using olive oil to help as a demoulder.
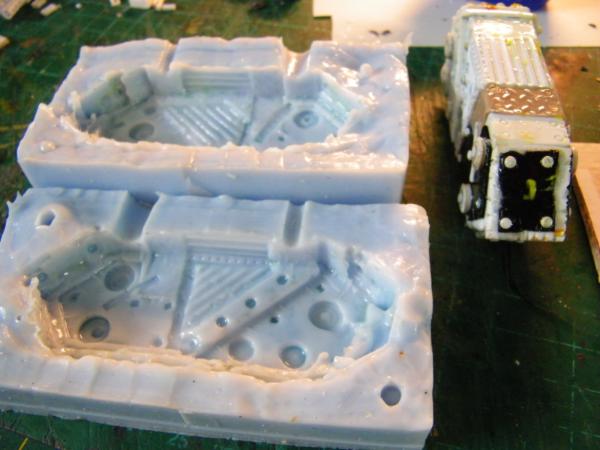
The moulds coming out.
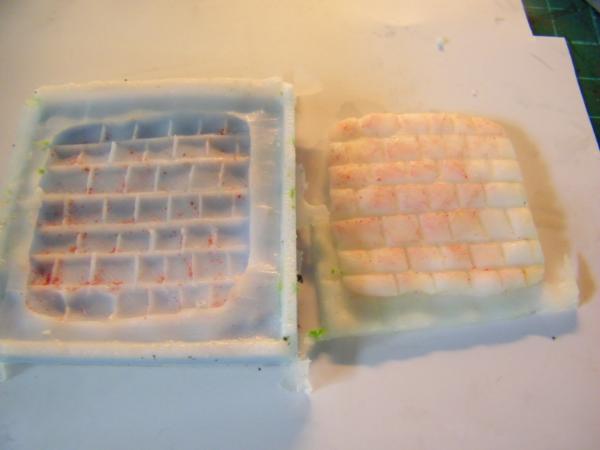
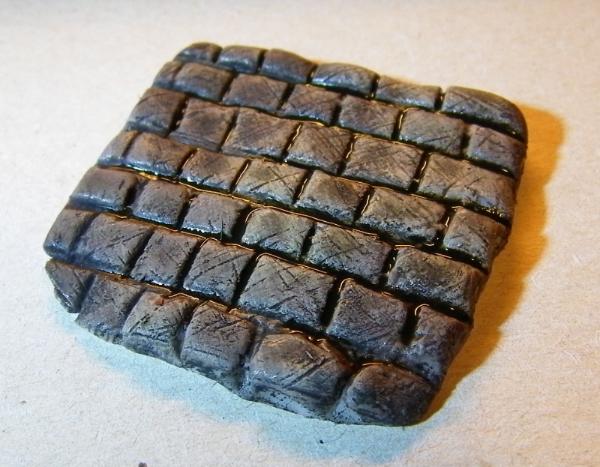
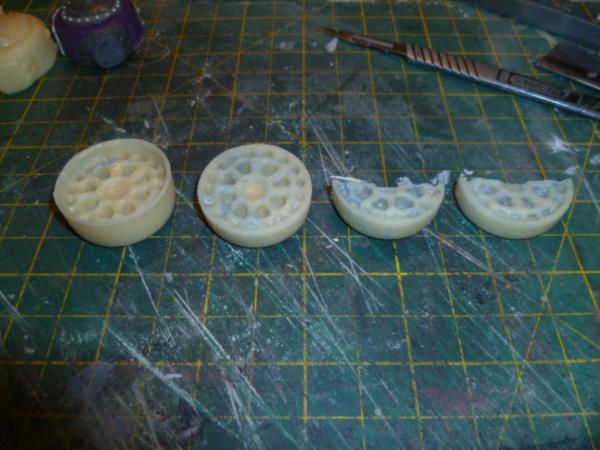
Bit of cobbled flooring. Just used plastacine to rough out, poured the silicon over and hey presto. Also you can see the ork icon mould, same thing, just sculpted up a bit of plastacine.
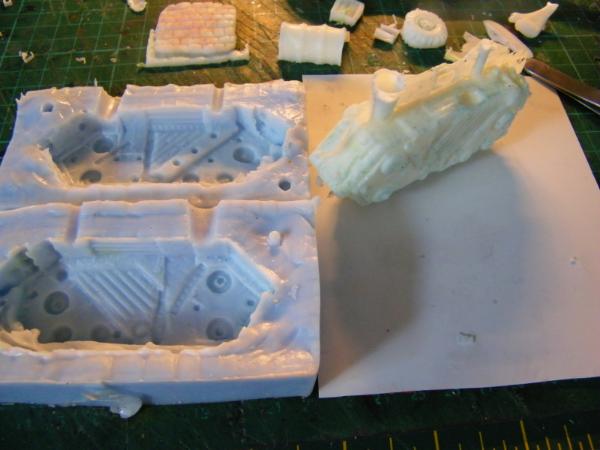
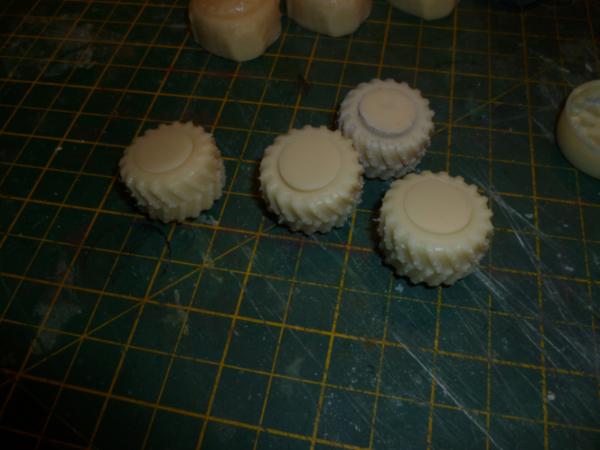
The Biggy. Ork track unit. Made it ambidextrous. ie, can be used mono, or on either side of a vehicle.
Made up a track unit in PC, laid it half buried in plastacine. Poured one half, then inverted and poured other half.
And so patience being my most lost forever of virtues....stuck resin in it didn't I......................
Now that only takes like about 20-30 minutes to be done so......
Most of this is old bits I have done up for use as scenery props. Just playing around trying to get a feel.
Then comes the track unit.
I did have a tiny problem with the unit, 2 air bubbles on the very top of it, might have to think on that one, however, already made them into battle damage. (it is orks after all.)
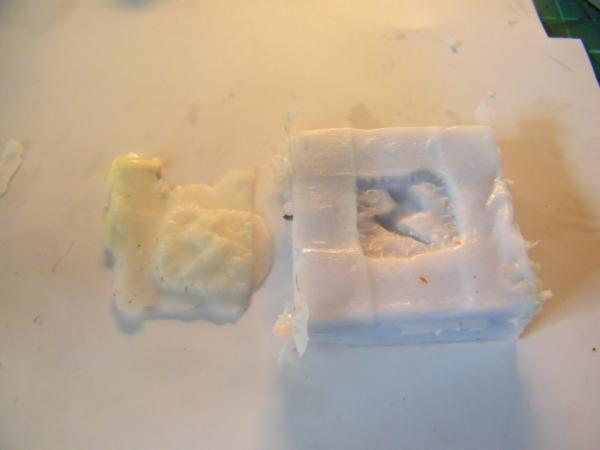
As I was using the resin I thought I had a lot left, so in a blind panic threw some plastacine around a rock, covered it in olive oil. poured some resin in and
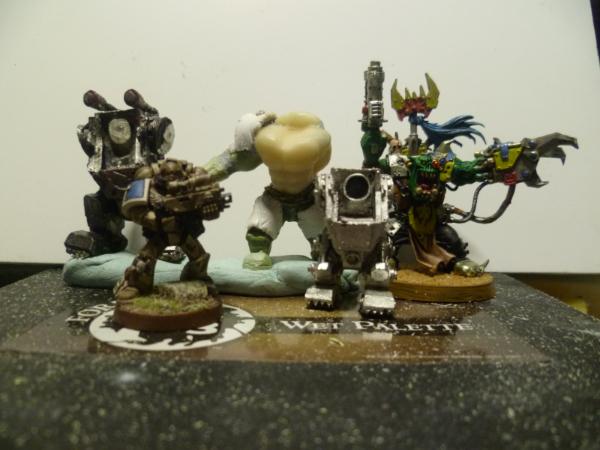
So group shot....
I will post a painted pic of the track unit soon, primer drying as I type.
For my first ever attempt I am very pleased and, barring the smell, everything was easy and straight forward, a bit ogf thought and a bit more accuracy in the amounts and I should be spot on. As I said it is really only for me, so happy enough.
A few things I can spot;
Could probably do with more registration keys in your 2-part moulds. Can never have too many appears to be the thing.
You may be using too much mould-release agent (olive oil). Difficult to tell from the photos, but thought I'd mention it. You only need a thin coat. Otherwise you can loose fine detail in the casts when the oil fills the holes in the mould.
And silicone moulds can be modified to prevent bubbles that show up. Find where the air is trapped and cut a groove into the silicone to release it (only needs to be a thin channel). They can go to the edge of the mould or the "out" channel, but don't join them to the "in" channel.
You can also place the mould at an angle to force the air to certain areas and out your newly cut release channels.
Also, for the resin into silicone, try using talc (unscented) instead of oil. It's supposed to act as a flow aid and prevents bubbles sticking to the surface as well as a release agent. Oil would be more likely to trap bubbles.
All taken on board, thank you. The "too much" oil bit in particular. It is not bad, but definitely lost some of the detail. And that explains it.
I know the track area looks a bit scruffy, but had to fill the gaps, could not have the mould running through, not sure if this is the right thing to do or not, did think of separate tracks, maybe on the next one.
Guns will be next, and feeling an itch for something nasty.
....cam... you truly are a man of so many talents...
that first batch is a very promising outcome! also with that track unit for me you have tackled the pinnacle of casting projects even in the first try.... you have balls xxxl size it seems! boldness but cunning and lucky too! you said the smell was off... how or what like did it smell? is it something you should only try in the cellar?...(I am asking this as I do my hobby stuff in our living room...)
I am very eager now to see primed and maybe washed at least casted objects....I bet you are all jiggly all over due to this immense success bravo!
Very happy with cobbles. I can trim them to fit bases if required, could also probably stick a bunch together for larger areas...
Oh and this.............
And next.....
Thanks for stopping by.....please feel free to comment.
Automatically Appended Next Post: Oh and Vik the smell.......I am in living room also, and wife complained a bit, but windows open and a fan going and it was soon gone. Bit chemically on the resin, silicon was fine, no noticable smell at all.
Yup it was a putty I got ages ago. It was called blue stuff. Absolutely brilliant, however these are probably the last I will get out of them as they are "crystalizing". ie the silicone is becoming brittle and cracking. Up to now I only used green stuff pressed into them and it worked pretty good. but they are stiffening up now. If it was not for your melty putty stuff, I would recommend it for some of your work.
WWOW... i have missed a lot here! Going to go back through it in some detail but looking really awesome!
That landing pad is inspired.....VERY orky but can still be easily recognised...
Surfing Ork..... well.. theres not much more to say about that!!
And casting aswell.... good stuff mate! You will have to share your recipies ( maybe you have in the blog... i will read and see)
Awesome stuff..... if i wasnt allready in a position of having about 4 unfinished projects... this blog would seriously make me concider an Orky addition!
Wow, ambitious. Very cool. And very good for a first time. Impressive.
A note on the release agent. I have heard that a small amount of liquid dish soap can make a great release agent for pewter casting. I have no idea about resin, but it is something to consider. It would certainly make clean up easier.
I'm wondering about the lack of really sharp edges on the castings. Is that due to the masters being that way or the nature of the resin?
man... cam you are a fast one... quite frightingly fast!!!! had a day off from work or what???I must be doing something wrong when I paint stuff... I never am so fast and good...
your casts now really are mindblowing... and I see where you mentioned the "battle damage"... turned out convincing enough after you worked on the areas...
as for stench... well I recently primed my halftrack on the balcony...and my wife also complained only little about the smell... when I use washes tho... curiously she complains way more....(I have to add that I have no sense of smelling of my own...so all a mystery land for me where smell is concerned...so I ask these as a guidline for future endeavors...)
and another question to you, you mad maker of wonders.... after your very inspiring work on the big shoota yesterday I tried my hand in some shoota work too... but I gotta say the drilling of the cooling holes in the barrels is a work that really tires my hands... how on earth did you get them so perfectly aligned and so even too? do you need a special tool for that? a pull down rig for the drill? or are you "just" the better and more patient worker?...
seeing all this I feel privileged to have you share your works with us mate!
Good job doing your first casts cam. Think of air traveling through the mold when you cast. This really means think of how the piece you are casting will sit, and how the mold will sit and how the flow through that piece will act. Look for pockets where things get trapped and add a thin channel. Best of luck.
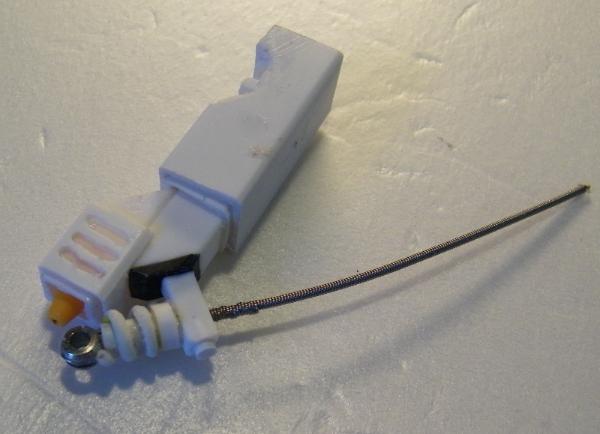
@ Vik. The smell isn't too bad. The gun barrel cooling holes. Well I pre drill by hand usually a 1mm hole then "ream" it out bigger with the tip of a scalpel blade. Trust me they are not that accurate. But it is quick.
lol...I did use a scalpel quite often in that fashion too... but well... feeble attempts at best... I think I am still at the low end of the learning curve on this one
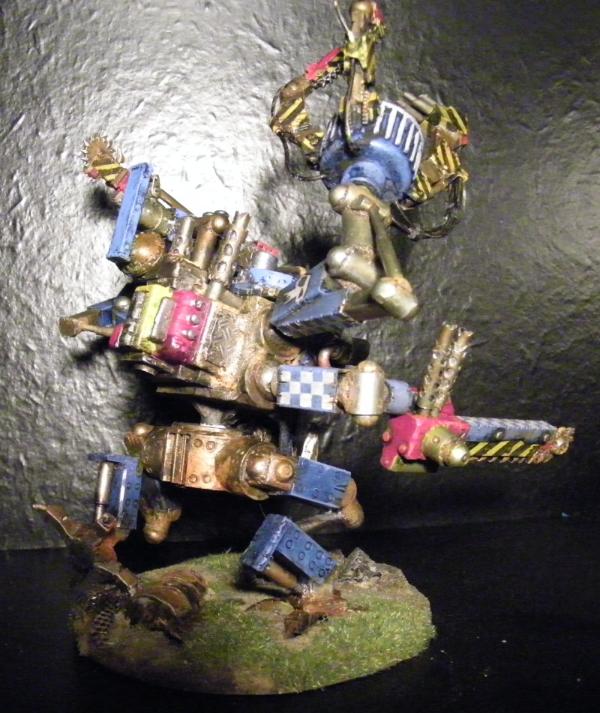
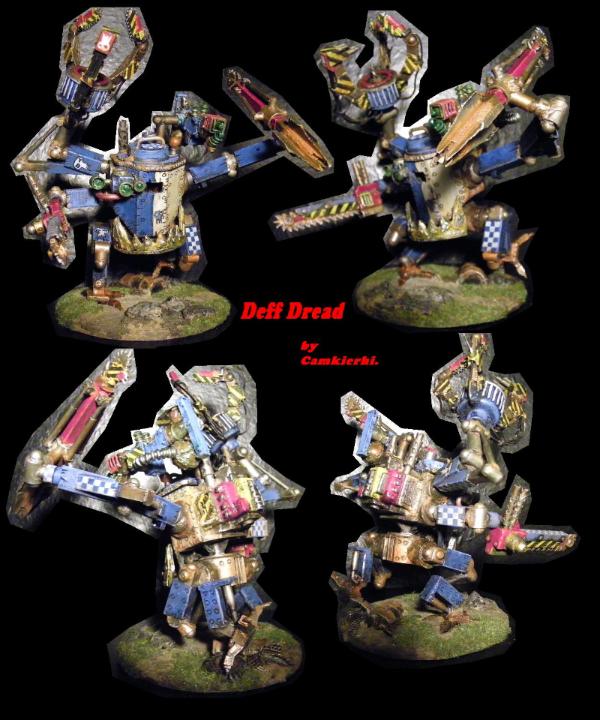
and no idea on the dredd....
Automatically Appended Next Post: but I'd be interested in some data on that subject too... and for that matter a kan too...
Bloomin auto append.
Kans are 50mm tall to the top of the bodywork, plus a few mm for exhaust. And width wise they fill and often overhang a 60mm base.
Automatically Appended Next Post: This is going to auto update on me but hey....
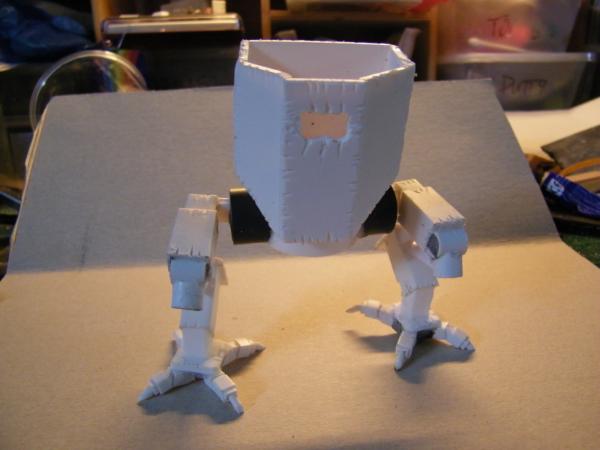
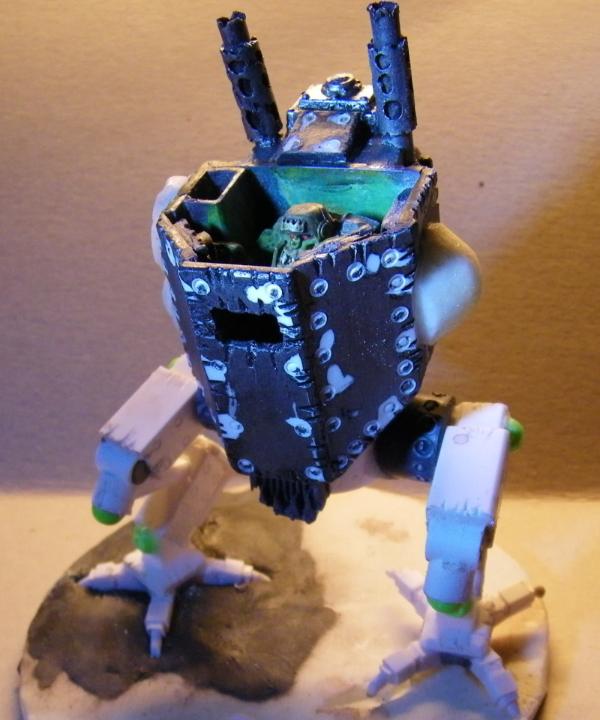
So todays efforts so far.
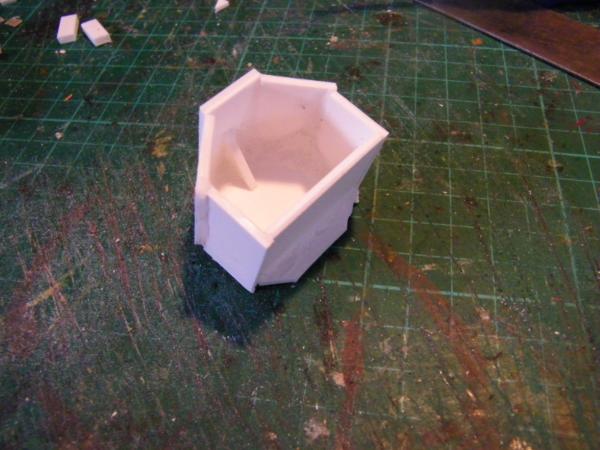
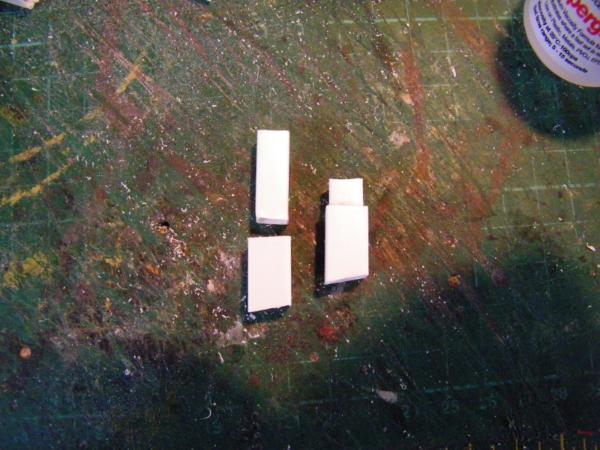
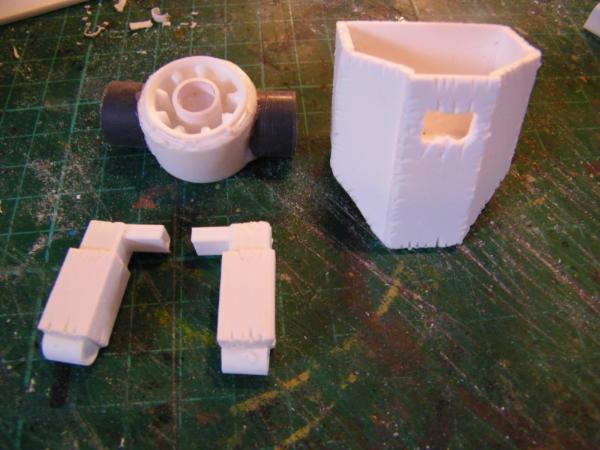
Made a box...
And every box needs either tracks or legs, ......legs it is.....
Some square tube....
Some hips... oh and rough up the box.
KNee's!....
Sorry skipped a bit, got excited......
And I am still mucking around with the casting/mouilding......
Onwards.... more later I hope. Hope he is not too tall, but then I don't really care.
Nice work with the molds, the track is looking awesome and I'll love to see some single tracked Ork-bots. The newest kan is looking promising as well .
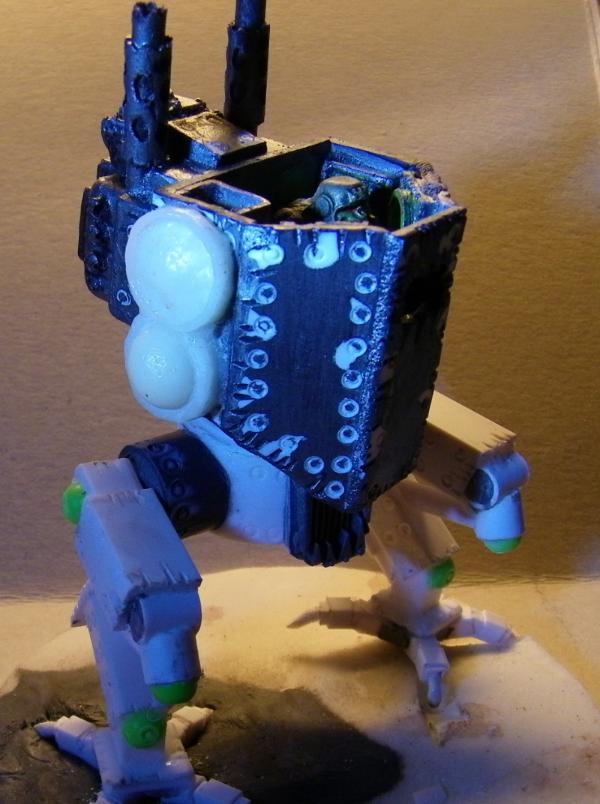
I really like the legs... they look like they might actually work! Y'know, unlike a lot of orky goodness, or marine dreadnoughts, these look like they could allow your dread to move at a frightening pace to close on it's targets, good work. Still amazes me what you can do with plasticard.
the dredd looks very good already... for this you build it unlike I would... so this is an interesting journey...
and indeed this looks like a fast pacer...
somehow I really have a hard time making convincing mechanics... this is a problem you certainly don´t have!
as for the casts... is your resin black/grey?...seldom seen...
but what has been casted in the top right corner???
You Scots may be getting your own Independence Day soon enough. The referendum is coming soon isn't it.
The legs and feet on that are great. I gather the resin doesn't hold sharp corners so well? I bet it will paint up nicely though. Lots of good detail to it.
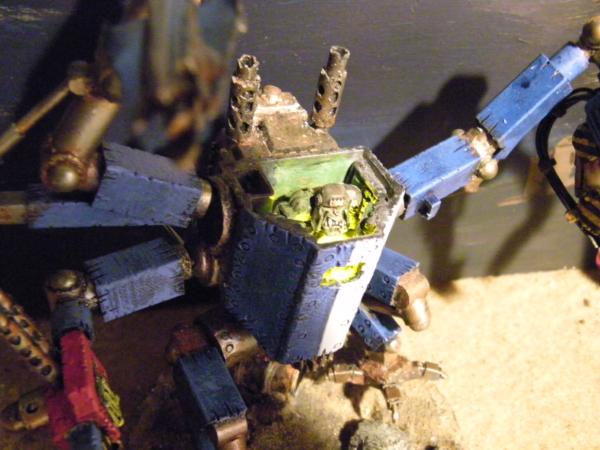
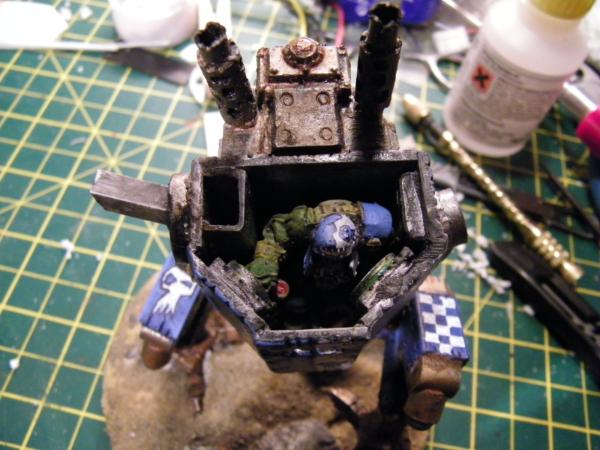
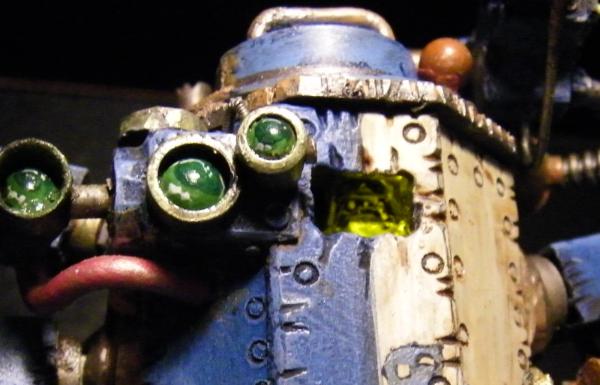
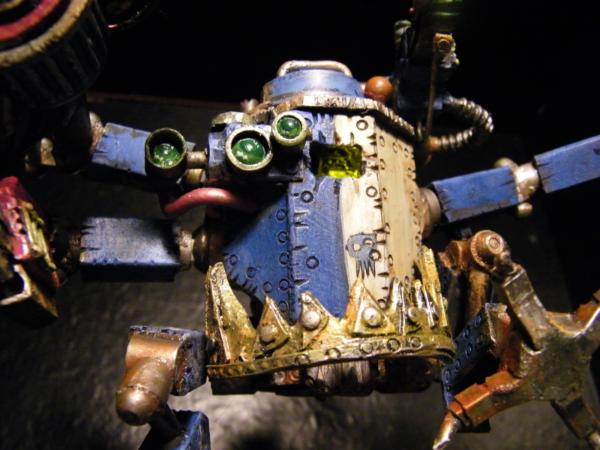
Camkierhi wrote: Thanks Grim, Probably just me. This guy might be afraid of the dark, pretty cramped in there..........
Cheers
Orcs are never afraid of mere darkness,, no matter how grim it may be.
SO thought I would do a little write up on my experiences with the moulding mallarky....
@ Da Butcha. I know what you mean, just thought I would be different, maybe next one will be more "wired in".
@ Gits & Shas. Thank you guys.
@ Red. Thanks. Not even going there on the Independants rubbish.
On the moulding/casting....
Actually the resin holds very well to the detailing, and nice crisp edges where they are. However my mould making skills maybe at fault here. Also I made the originals for some of this a bit too smooth in places, was worried about the silicon letting go of the resin. As it turns out I need not have bothered.
So my experiences, and pitiful advice I can pass on. I may miss bits and please feel free to correct anything I mess up, this is meant to be helpful.
1) Preparation. Preparation, preperation.
Get your self a clear area to work. Make sure you have all the kit you will possibly need. And think your way through everything TWICE.
2) Kit.
Work in a tray, you will spill stuff, nasty stuff you really do not want to explain to the other half stuck in the carpet.
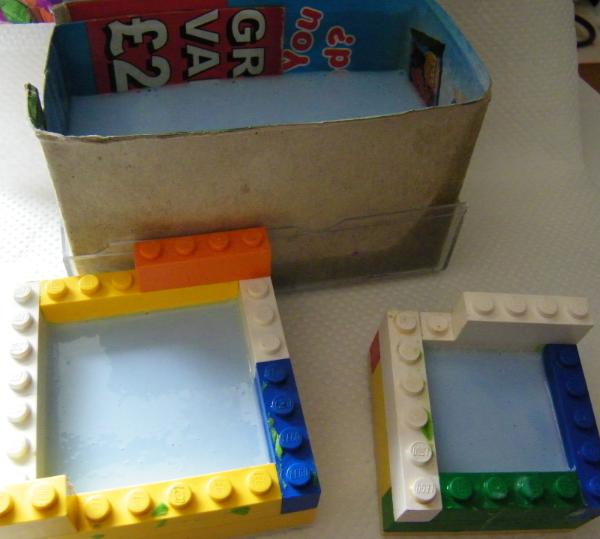
Measuring kit. I have now purchased a set of jewelers scales, they go up to 300g in 0.00g, so NOW I can accurately measure the ratio of silicon mixture. I have wasted a lot of the silicon, because I was working in 25:1g mixture. You end up making mould you don't really need and often are way too thick. I also got some disposable cups, some "normal" ones and some "Shot glasses". As it happens the shot glasses measure out a pretty good batch of resin. Strangly in fact, a shot of each component mixed makes the track unit, exactly!! Also something stiff to stir with. I have been using lollipop stick as "stirers" where too flimsey, and I have millions. Plastacine (modelling clay) this stuff has been great, need a quick mould to use up a bit of resin, plastacine, the cobbles and bases I have made here are from plastacine. I will try others, but I have used olive oil as a release agent. I learnt the hard way, you only need a very thin smearing. And in fact totally forgot on one batch and had no real problems. And finally Lego. There are lots of tutorials and I would not presume to even attempt to add to them, but one of the best bits I picked up was use Lego to make your mould "casings". It comes apart easy after you see. I made mouild in all sorts of things, But half the time they are a bugger to get things out of after. Lego for the win here.
I can honestly say brilliant. Easy to use, fast (cured in a couple hours most of the time.) excellent detail pick up.
I made mistakes, like too much olive oil. Making my originals too smooth. I was worried about tearing the mould getting the resin out. I need not have worried, it is amazingly resilient.
And again very happy. Easy as heck to use, plenty of time to do what you need (if you are prepared) and cures in 20 minutes.
I have had minimal problems with bubbles, the casts hold edges and detail well. The end product is strong, and not brittle.
5) Alternatives.
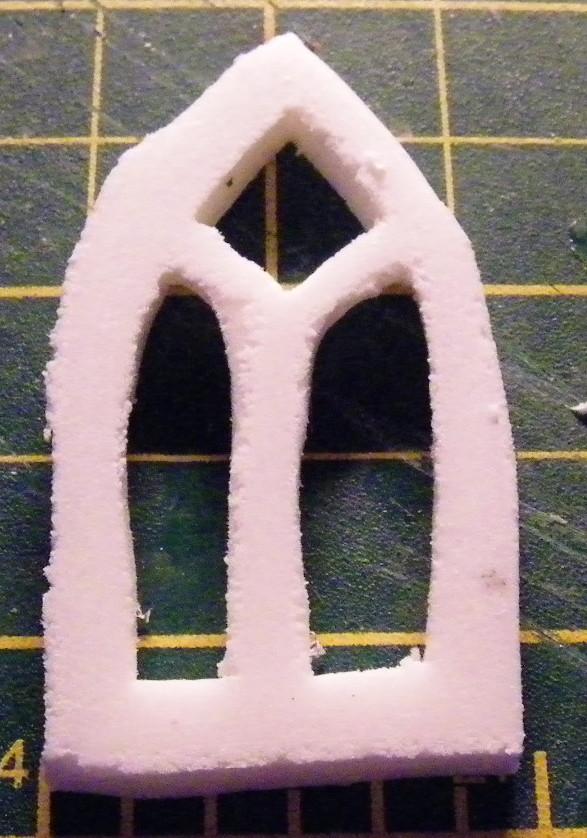
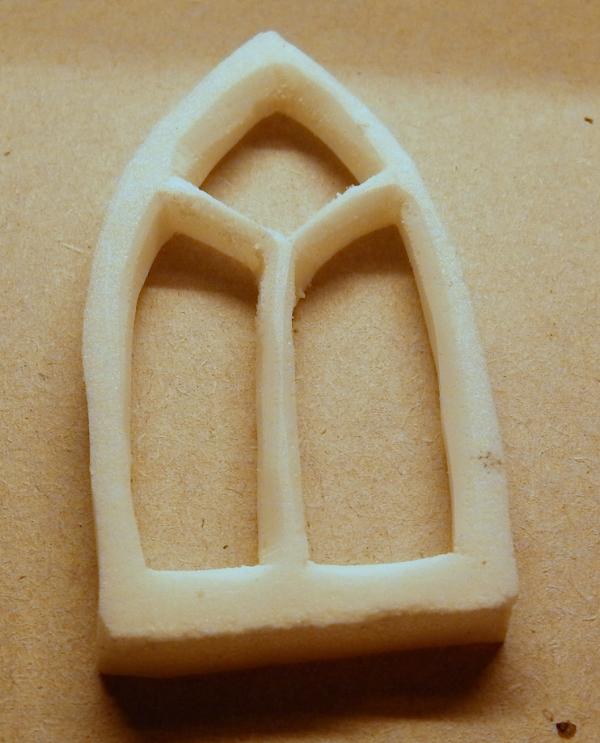
To make moulds, I have tried all sorts, blutak (Dont!), but others like plastacine, melty putty stuff(cant remember the name) have worked a treat. One surprise was you can use foam board. It only works once, as you have to destroy the foamboard to get your resin out. But I got a brilliant window frame out of a piece of foam board just a few minutes ago. (pics to follow)
Once you have your lovely moulds, you do not have to stick to resin. GS or milliput, or as I have used Quiksteel putty pressed in work brilliantly. The last one sets in about 2-3 minutes, so for quick bits!! you could also use plaster, I will be trying dental plaster later.
Right now I have used all the silicon, but got plenty of resin. Well worth every penny, and really feel daft because I was so nervous about this lot and I really should not have been.
I hope this info helps you, any questions ask away. And please feel free to correct me on any points. People have already mentioned you can use different release agents, talc etc. All very good stuff.
Thanks for the write up, i kind of plan to try this part of the hobby out at some point, so i appreciate the fruits of your experience in this matter. I may do it by baby steps and get the casting kit from hobby lobby to start though.
I think that is a very emotional and trustworthy description... detailed and also shows what my own troubles with starting in casting stuff hampers me...
what I am very eager now to see is that mentioned window frame... done with foamcore as a mold... THAT is probably what would be a way to get me into the whole thing...also... if you look at ebay and so on... there is a market for this ...doors and widows... that doesn´t cost you an arm or a firstborn.......just a hint
I figure it is for Scots to decide, so no opinion either way from me. But do vote.
Small Dixie cups or Solo cups work very well for me. I use then for mixing the epoxy for water effects. The clear ones are best, since you can pre-measure with water, and mark the line with a sharpie on the outside and label them. Dry them out thoroughly though, before using.
Good write-up. Have you encountered stuff cast from the dental plaster? (Around here people like something called 'Merlin's Magic' and another called 'Hydrostone' and they use it for Hirst Art molds.) It holds detail very well, but it is surprisingly heavy. It will be good for terrain. And wood glue or tacky glue works well with it.
@ Red I researched a bit about making floor panels etc. and many people say the dental plaster is much harder and stronger than standard stuff. I will let you know how I get on.
Window frame:
OK so I used a bit of 5mm foam board I had spare. This is the type with the foam as apposed to the polystyrene core. I peeled of one side of the card covering, then cut a rough shape of a window through being careful not to cut the card on the other side. Lifted out the foam I did not want, cleaned it up a bit and poured in some resin.
When it had set, I had to cut it out of the foamboard. It had bonded slightly with the foam. So this is a once only mould. Please bear in mind I am experimenting so not my best effort.
After a bit of a clean up with me scalpel.....
So now I have an exactly 5mm thick window frame. If I took me time and especially if did a less complicated shape I would get good results I am sure.
hmmmm.... I think we can call that a success.... my instant idea was ladders... I bet you could to lots of useful flat details that way... maybe even drainpipes?...
I think the foamcore method is a very good way to get flat prototypes for later multiple castings... very inventive!!!
and I see your dredd got the hot riveting treatment ^^
I've used pieces made from Merlins Magic, but never cast it myself. It is indeed very hard -- more concrete than plaster. However, it is pricey, and casting enough pieces takes a very long time unless you have many molds.
I did mention the Hirst Art molds, which are meant for the stuff. Here http://www.hirstarts.com/ Have a look around. Some interesting ideas.
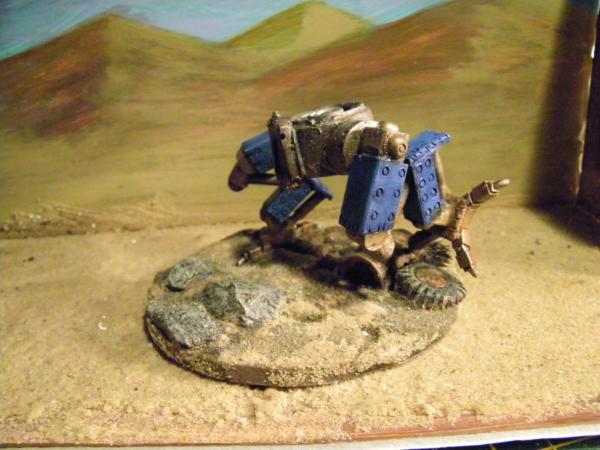
Blue is a nice change of pace from the regular colors one sees on orcy stuff. Good call.
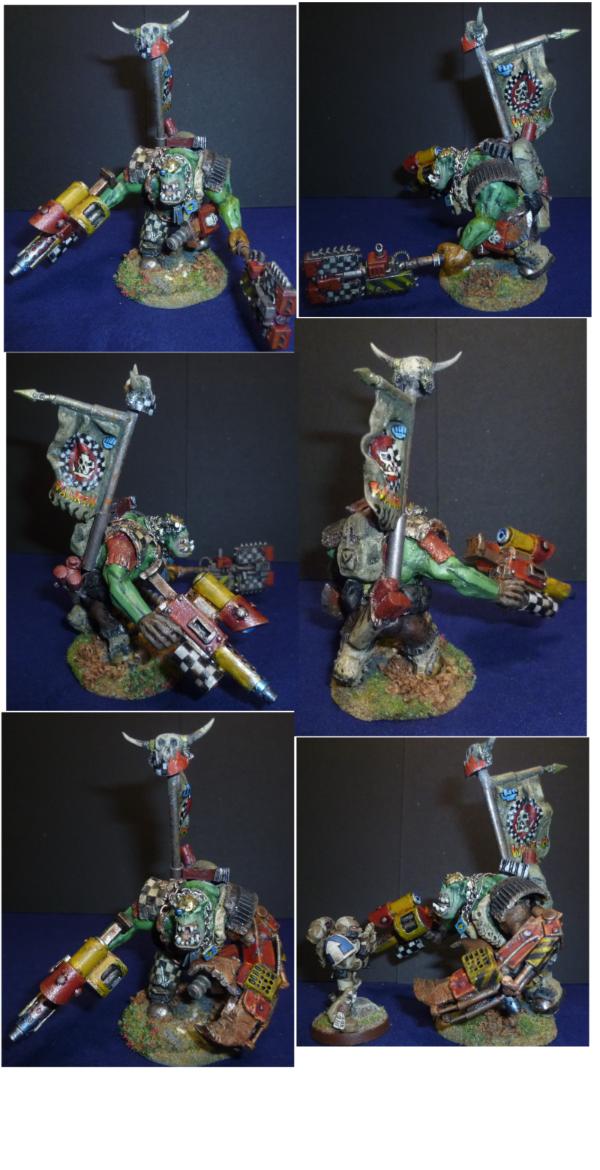
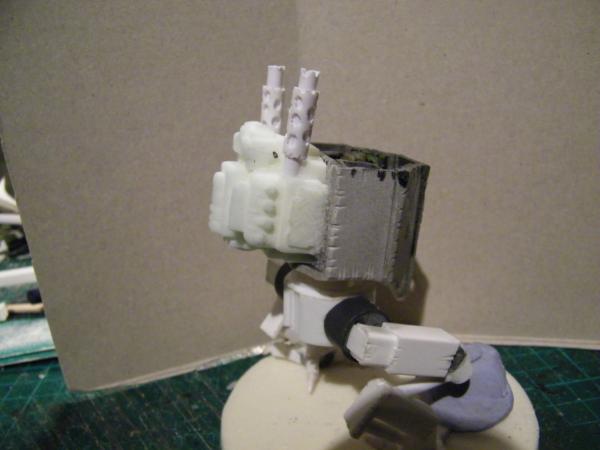
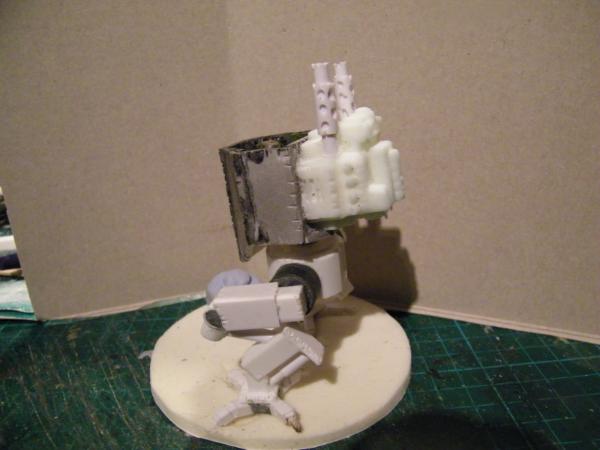
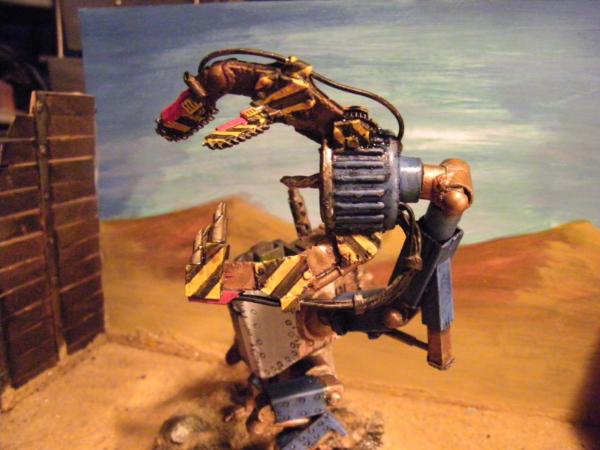
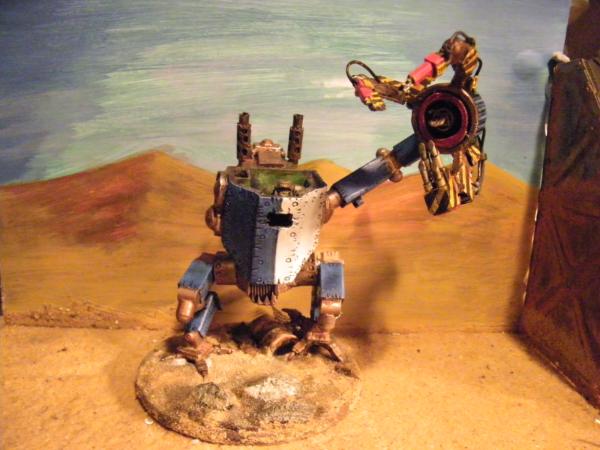
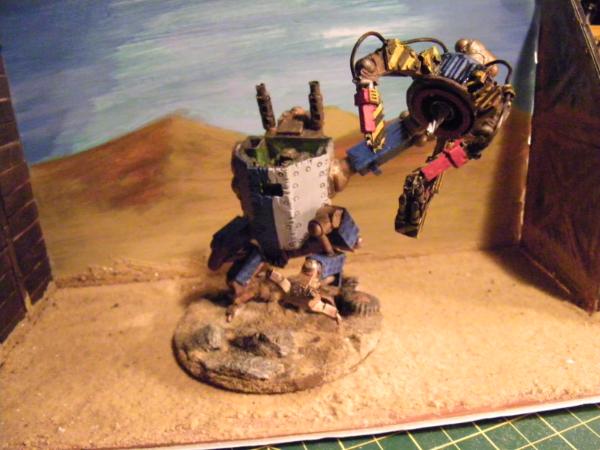
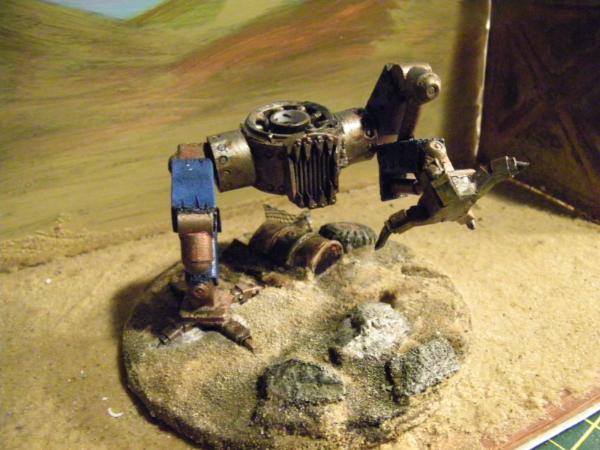
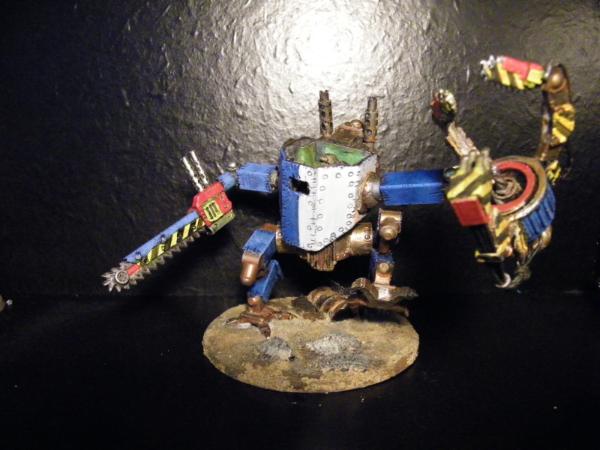
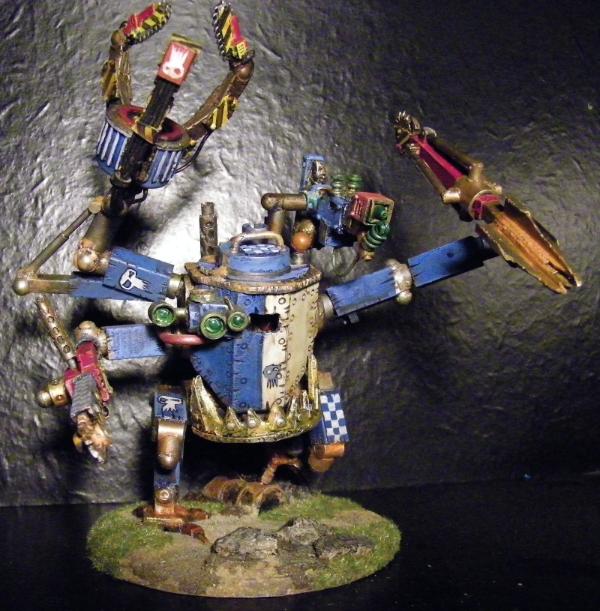
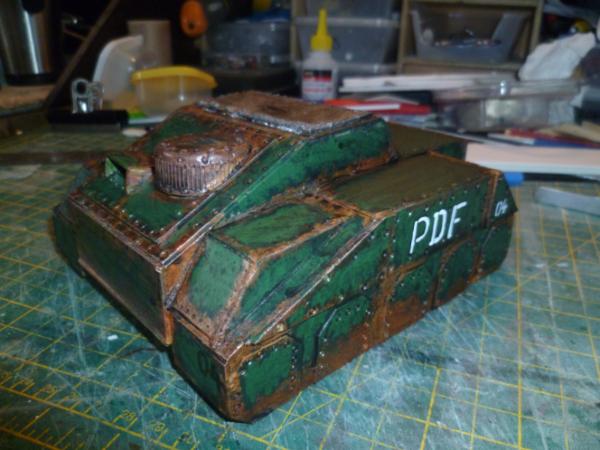
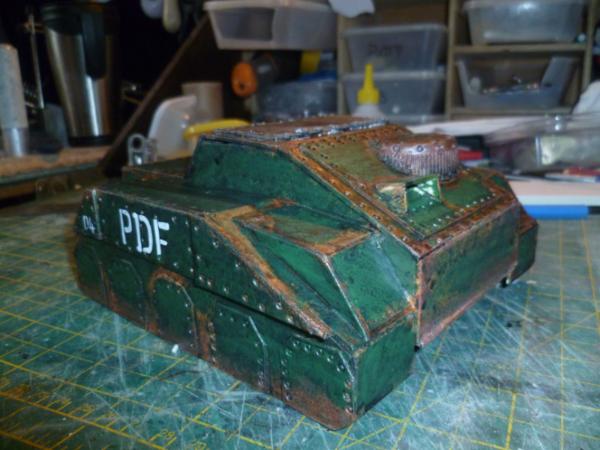
Well if your going to do a big claw, might as well do it BIG!......
This is articulated and magnetised. It is a bit delicate as the wait is a bit much for the shoulder magnet.
Oh and did some work on the legs and base. Magnetised the one leg.
Well obviously still WIP, off to work on other arms....
Well, Cam, you have been a busy boy, haven't you...
Let's see here...
Camkierhi wrote: So my experiences, and pitiful advice I can pass on. I may miss bits and please feel free to correct anything I mess up, this is meant to be helpful.
1) Preparation. Preparation, preperation.
Get your self a clear area to work. Make sure you have all the kit you will possibly need. And think your way through everything TWICE.
Very much worth emphasising this point.
2) Kit...
Casting is indeed a messy endeavour.
Some moulding and casting materials work on a volume basis, rather than weight. This has it's advantages and disadvantages.
And lego is definitely useful for mould boxes. Clean, easy, adaptable... perfect.
3)The Silicon.
As a chemist, I feel I should point out that silicon is entirely different from silicone.
and really feel daft because I was so nervous about this lot and I really should not have been..
Yeah, I get nervous/paranoid each time I pick up moulding/casting supplies. Spend ages just staring at it before cracking open the bottles.
And, good work on the kan/dread/stompy, spiky, killy thing.
that claw (way too short a ward for such a big tool of destruction...)...wow!!!! that thing is fit to rip open any tank....a true marine killer!!! (already I would consider that a friendly gesture thus )
and with all those magnetizing going on you really show me that I should get me some more magnets... would solve some issues I have with certain more challenging ideas!...
@ Vik. Magnets are great......sometimes. And thank you again sir.
@ Gorgrimm, Thank you. Yup got that insta mould stuff, heat it up in water etc. does work very well., not doing great with two part moulds at the moment for me.
@ Red Sorry still not tried the plaster yet, hopefully later tonight.
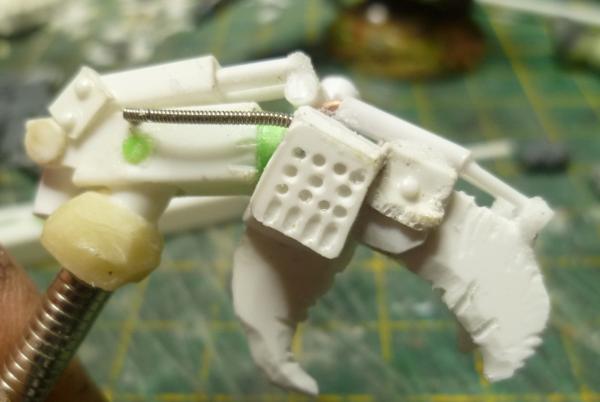
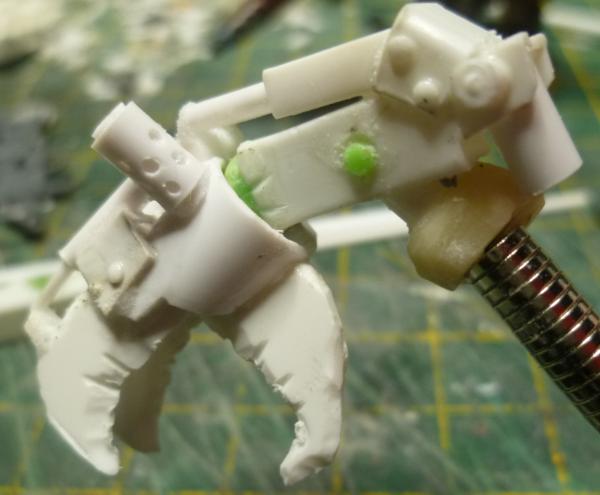
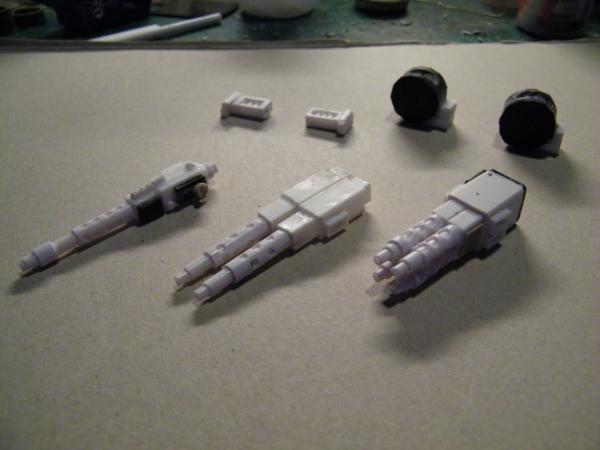
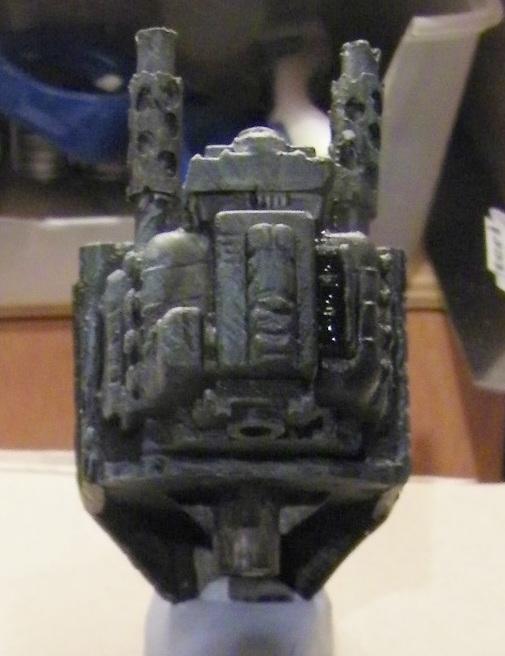
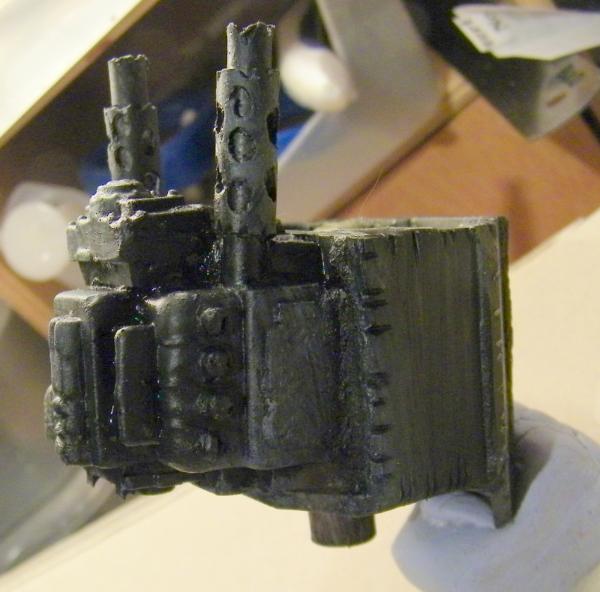
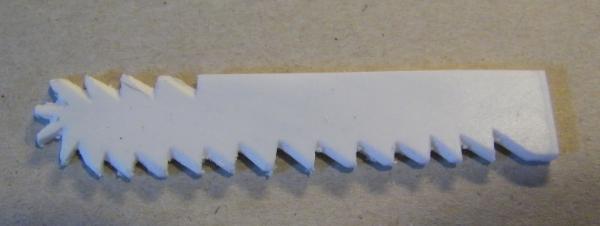
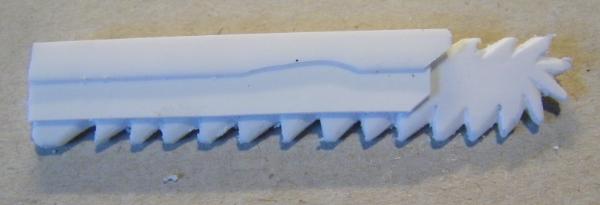
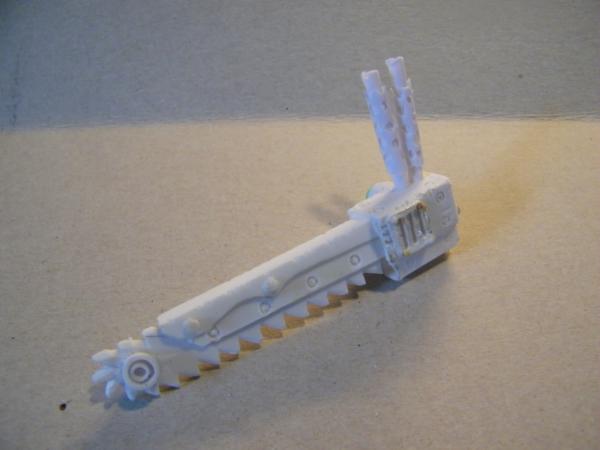
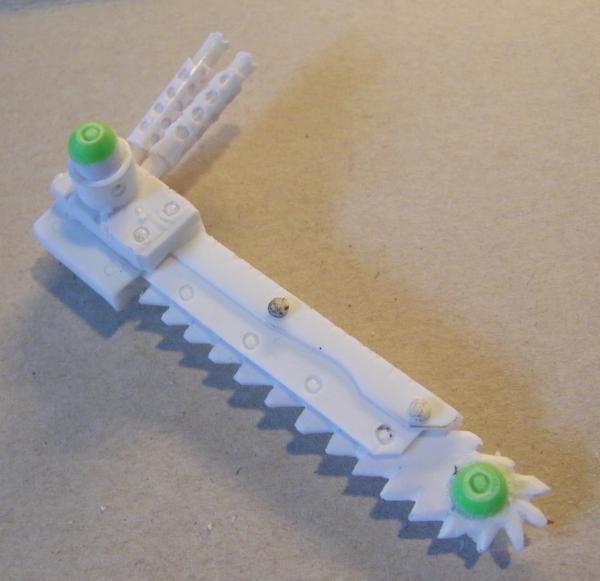
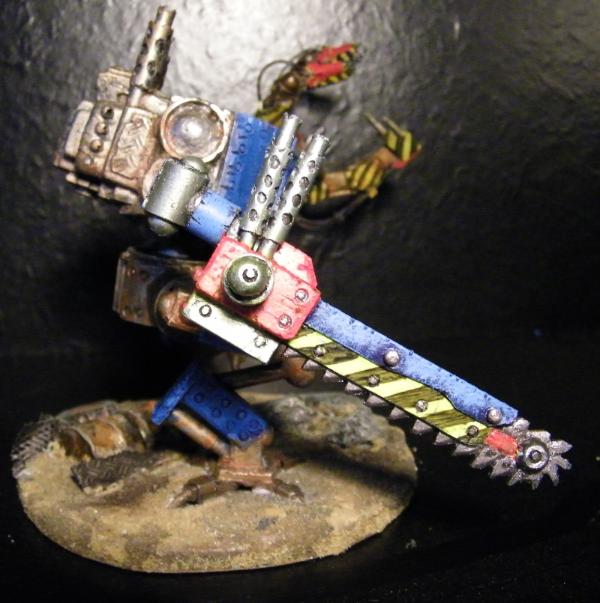
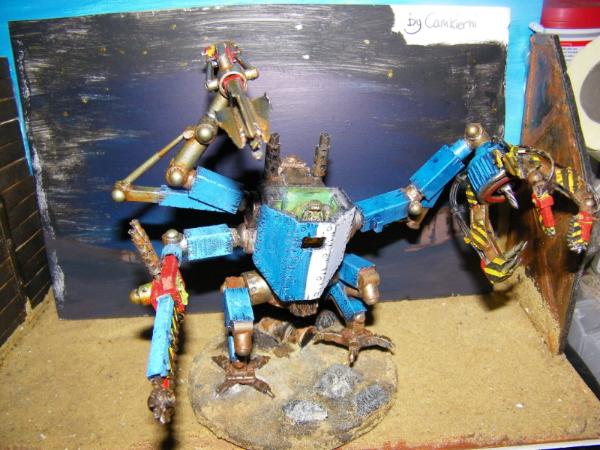
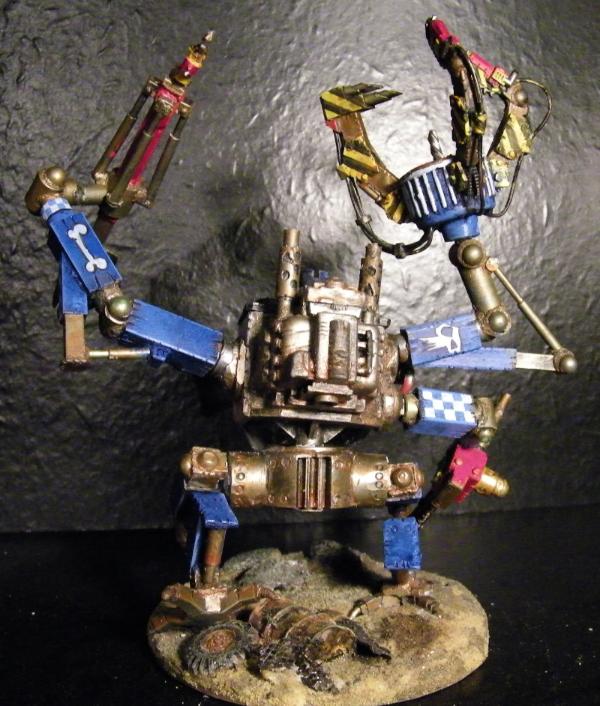
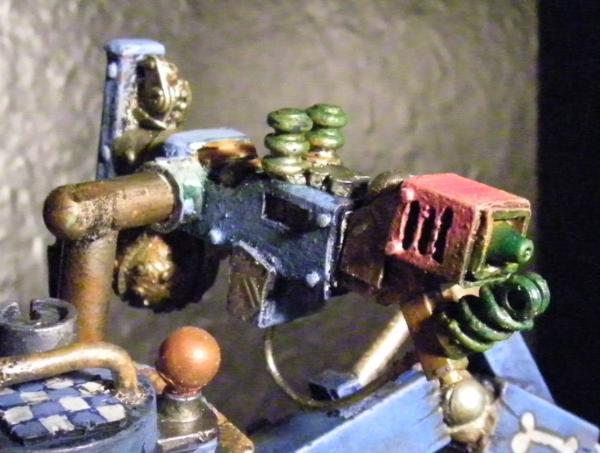
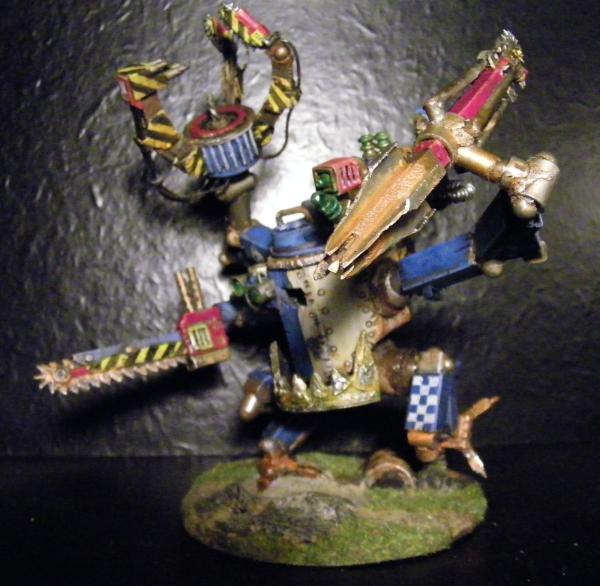
So next up, well got a klaw, guess it needs a sawy thing.
Making 2-part moulds with instant mold / Oyumaru (love this stuff) is tricky. But you can try and try again.
Using resin with it though is not great for mass production, as the resin gets hot when it cures and can lead to loss of detail in the mould. Though you can re-make the mould, it just adds time to the endeavour.
Good saw-arm, Cam. Your posts like this amuse me. My thought process goes; "good start, shows potential"
to "Ah, more details, yes that works"
to "Could maybe use...Oh, it's painted. Good work"
Wow. This Kan looks great. My only critique is that the "gun" arm looks a little too big. But that's just my opinion. Aside from that it's just stunning. I wonder if you could put a little LED light on the floor of the pilot's compartment facing up to shine on the great interior detail and under light the pilot's face through the viewport?
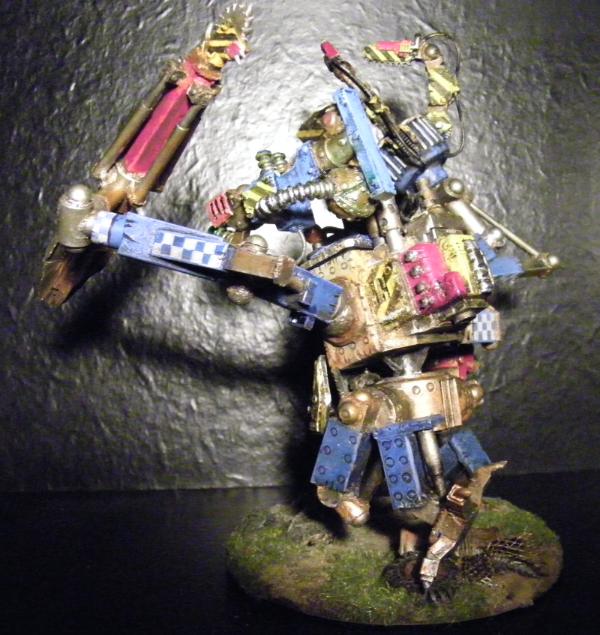
@ Waaazag. I hear you on the size. Might look at it again later. See what you think of arm swaps below.
@ Shas Thank you.
@ Dr H. Thank you and sorry, about the way I post things sometimes, just like for people to see the process some times.
First is a shot of a LED mounted in the bottom of the cab.....(blooming impoossible to get a decent shot of.....
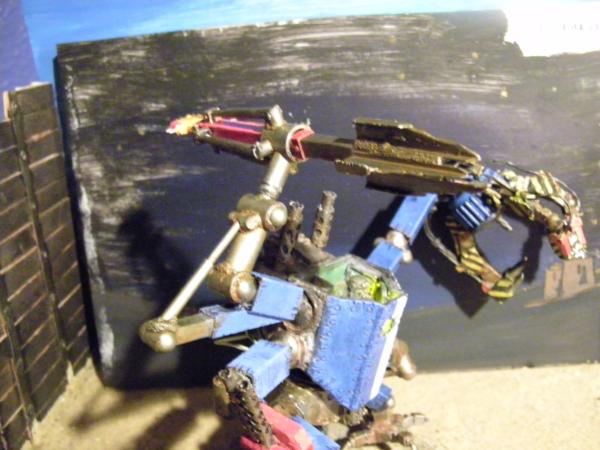
Then there is the last combat arm.....
And some of it is interchangable.....
The new arm is a hydrolic spikey thing. I think of the dredd grabbing with the claw then spearing it and the hydrolics tearing the spike into it's victims.
Thoughts?
Also Got the shooty bit to decide on, what do people think I should go with. Originally thought Rokkit rack on roof when I make it. But now I am not sure, maybe a skorcher between its legs!! Or just mounted low on his left. Your thoughts would be helpful here.
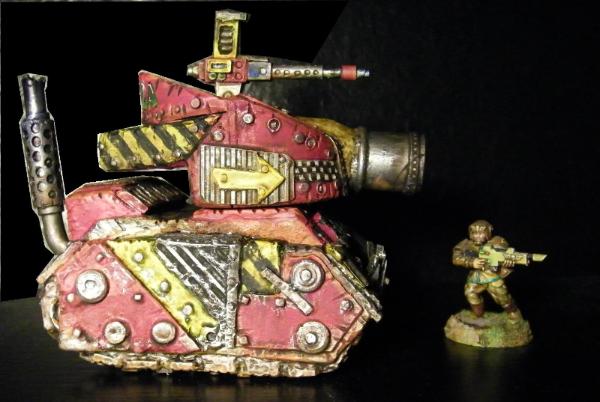
As to over all size, he currently stands 8cm ( 3" ) Tall to the top of the body. Exhausts and arms extend everything everywhere.
Thanks for looking in and c&C very much appreciated.
Camkierhi wrote: @ Dr H. Thank you and sorry, about the way I post things sometimes, just like for people to see the process some times. .
It's not a problem. Always good to see the process. It's just the way I go through people's posts and make a mental list of things to say and then cross them off as you answer them later in the post.
It's not like my posts, where each one of my updates is just a tiny tweak to the fraction of a model that I'm currently working on.
Good job on the spiky thing.
Can't really help with the weapon choice as my method is usually rummage in my box and see what I find that looks nice.
Although, I wouldn't put it between it's legs. Leave that sort of thing to NF or Theo...
I don think a flame weapon would be appropriate, I just don't see enough space for fuel cells. Can they have plasma weapons? Otherwise a big shooty gun.
I really love the knight lancer style pneumatic lance on the dread, it really put a smile on my face (also because it looks really well done). That chain claw is just plain nasty, in the nicest possible way.
Resin casting as well now! open casting for little stuck on details makes life easier, good choice of bits love the control panels . The engine looks really good Also you probably won't need a mould release unless it says
how about some sort of weapon system on the chest, I know you've gone and painted it now, but something like the ridiculous SM centurions would be cool. Or a skorcher on an arm with a pipe running down to 1-2 tanks on the back either side of the engine.
Cut "barrel"
Made "glowy bit."
Stuck body together.
Made a ball
Made what I guess to be an igniter...
Added some pipes and stuff...
Primed with rivets...
Lick of paint....
In situ...
And call that done.....
Last lot votable (Hint Hint!!) JK.
Your thoughts are very much appreciated. Don't know what's next. Open to ideas.
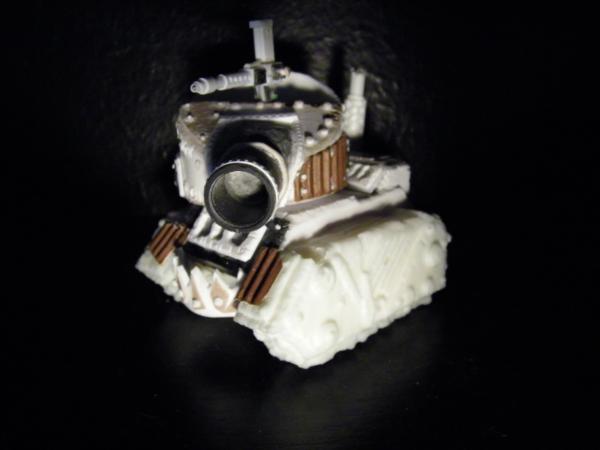
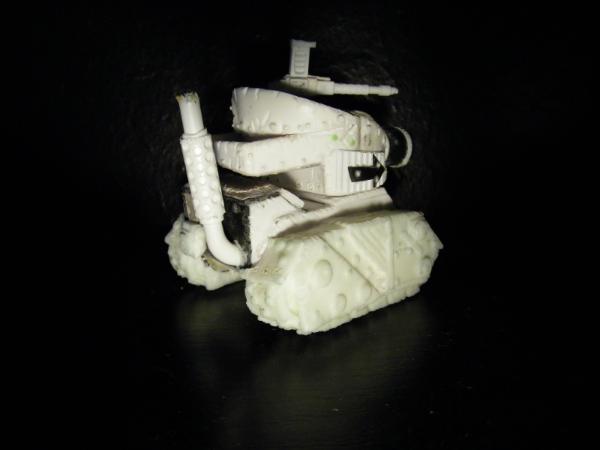
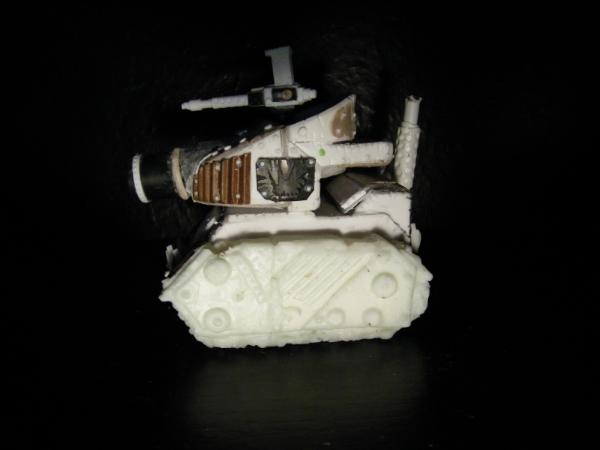
I think I am going to mess about a bit more with the casting over the next few days, probably put that on my other things thread. And probably knock out a silly little tank with the track units I have made so far. What are the approx dimensions for grot tanks? My track unit is 80mm long! maybe a bit big?
you don´t know how inspiring your stuff is...well...you would if you soon take a look at what I was up to
that flamer... making guns is really on that scale not for the faint of hearts! I can attest that...
but I hope you soon start showing progress on a new project of yours...it is most addictive and I need my daily fix
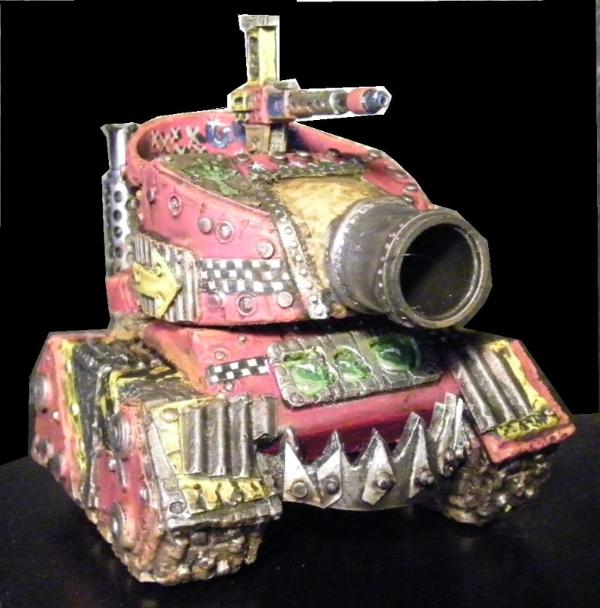
and as for the grot tank... the way I gather it...everything is allowed? I have seen so many different variants on that theme that it is hard to say which measurements would be allowable rules wise...
Last photo... good idea, but, what software did you use? A black t-shirt ( a clean one, of course) makes a good background for close ups of minis. As a gamer, I'm sure you have at least one Just drap it nicely and snap away.
Only C&C, apart from, Just wow man! is perhaps some raised rivets in selected spots next time. Or even add a few raised rivets to the flush rivets, that might be a neat effect.
Did you use a photo shop grab or something on the tank? Those images look way off to me. Only CC i got is there is no grot on said tank, but it is great.
Sorry about the pictures, I will sort something out soon on that one.
To answer the question, mucked about in paint blanking out the "shiney" background that lost some of the detail.
I am thinking of putting a blog in the showcase forum, just of my completed works, but I would feel a bit daft, not like they are that good to be "showing off".
Anyways, I have some projects in mind so please keep looking in, currently working on a terrain project on my other p&m blog.
but I would feel a bit daft, not like they are that good to be "showing off".
that...is the definition of being daft to think that way....
do it! I command thee!!! silly man...
and me being silly for lurking and not remembering to comment on that lil gem here... man... what a nice piece... looks a tad wobbly on its tracks...is it?...
Quit mucking about in that piece of MS Paint. Try this http://www.gimp.org/ or this http://www.getpaint.net/. Both are free. GIMP has an interesting learning curve but is quite potent. Paint.Net, I haven't used in a while-- won't run on Linux Mint-- but it was nice when I did use it. (on Vista... now you know why I ran to Linux.) Either will be better than MS Paint. I use GIMP all the time.
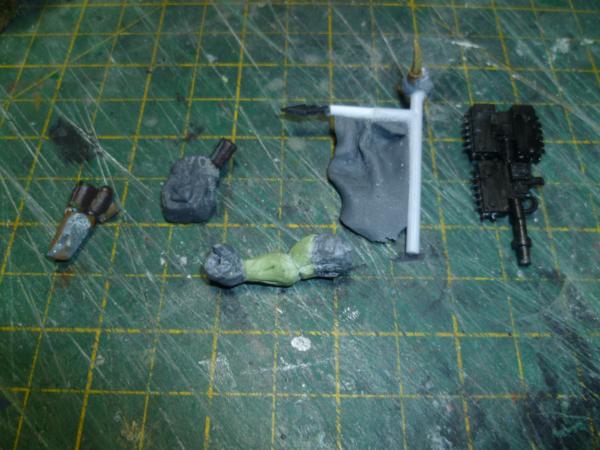
In the mean time I have a vision, but before I start I need some specialist parts, so been thinking out some of the bits.
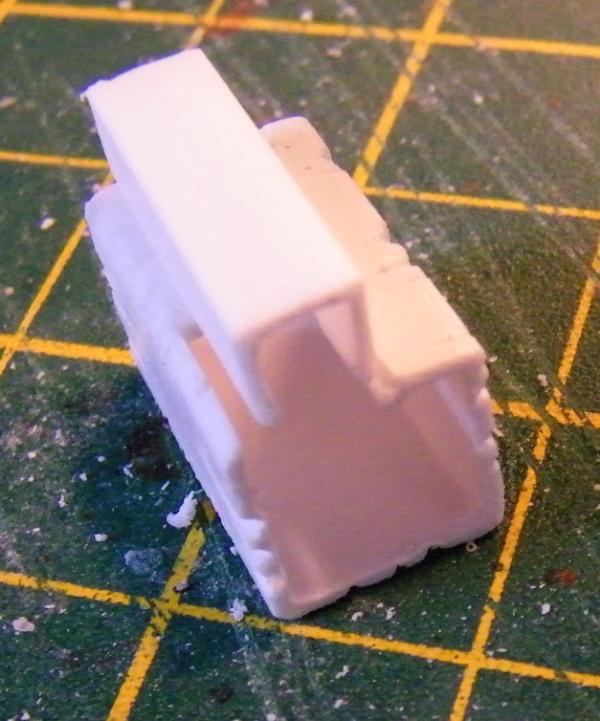
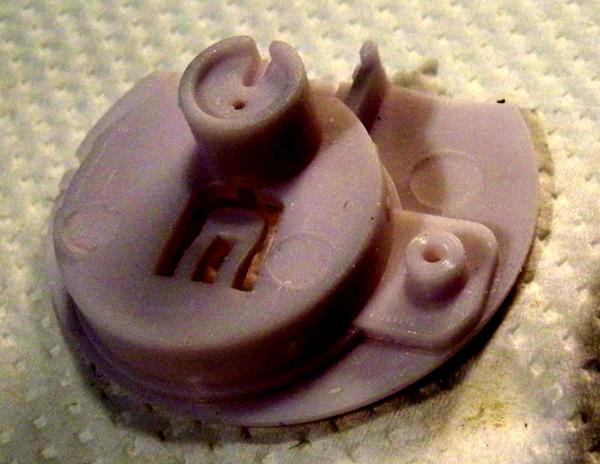
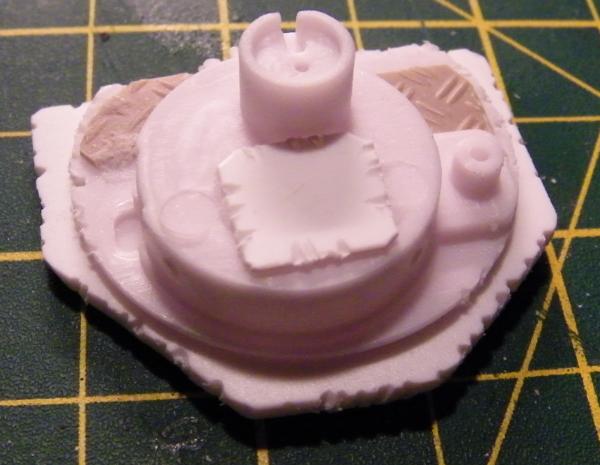
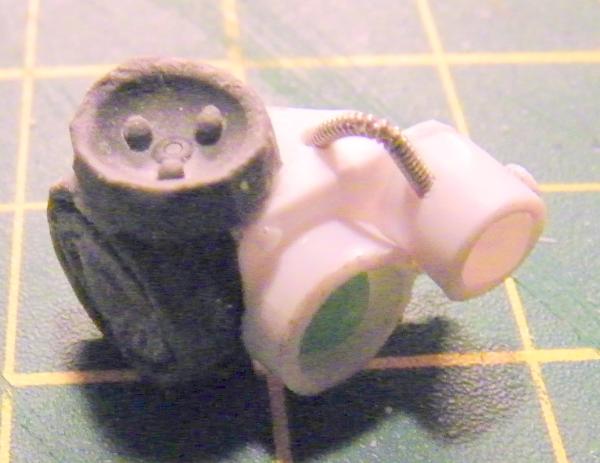
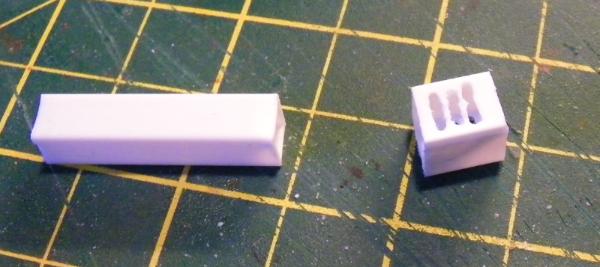
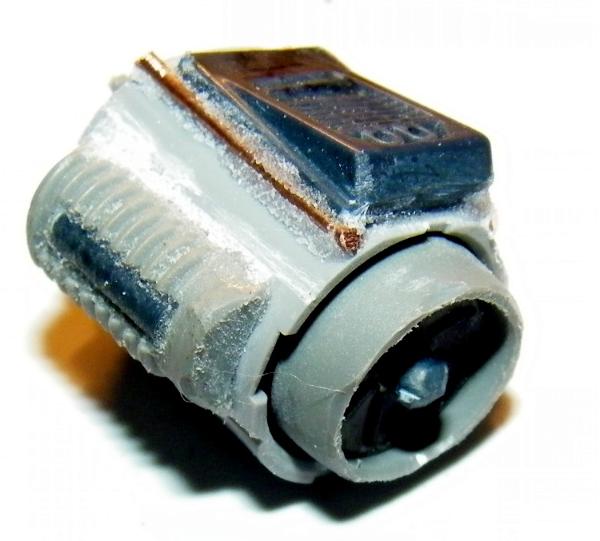
First up I got some bits together, This really starts with the funny looking threaded grey bit. Its a component used on drawer assemblies. But it has something about it, a certain kinda shape.
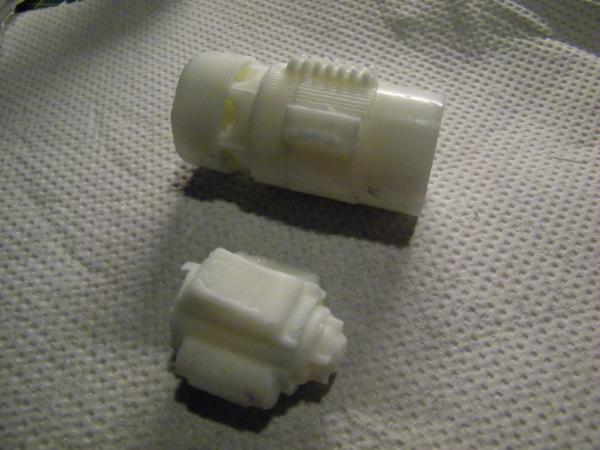
Then I got my mitts on a printer cartridge, but this one is different, it is more like a cassette. A roll of tape passes over a ribbon of inked tape and prints labels. However, once used you break it down and get a bunch of fun bits.
Now you fiddle about a bit and glue a bit and you get this....
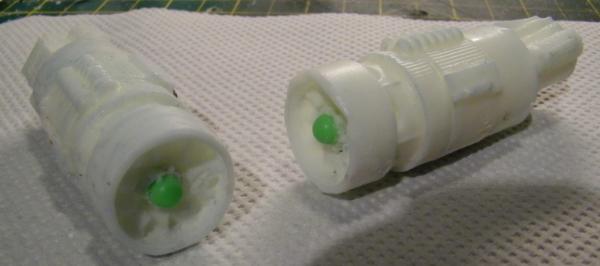
Which I intend to caste next time I am fooling about, which will hopefuly be the weekend.
Next I am working on extending it to form a full engine.
Here are my jet engines, for want of a better name. they come in 2 parts so I can use the smaller ones seperately for thrusters or maybe going to try a stormboy!!
Anyways.......
And I am thinking of a flyer, but not 100% which way to go at the moment.
Well been a while since I posted here on this thread so better sort that out.
Thank you guys for the comments, and Ruglud, Mmmmm ideas galore there!
So whell I have been distracted by competitions again, however, one of them gives me chance to revive some life around here...( Have started this particular project on my other stuff thread, but will work on it here from now on.)
I did think that if I was doing an Ork, it was a possibility to do the skin in the same way as was done on "that Yellow Bastard", only in green (obviously). You wouldn't then be able to do Marv's white plasters on him though, if that is your intention...
The skull on the chest is a possibility or just red blood splatter. The point of the colour is to emphasize one element and draw your attention to that item. So it depends on what impression you want to give for the character (what is important to him/her, or tells you about them).
@ Grim, Thanks bud, not sure yet but thinking something else at the mo.
@ DrH, Thanks, and good solid advice. Still thinking about it at the moment, got something in mind though.
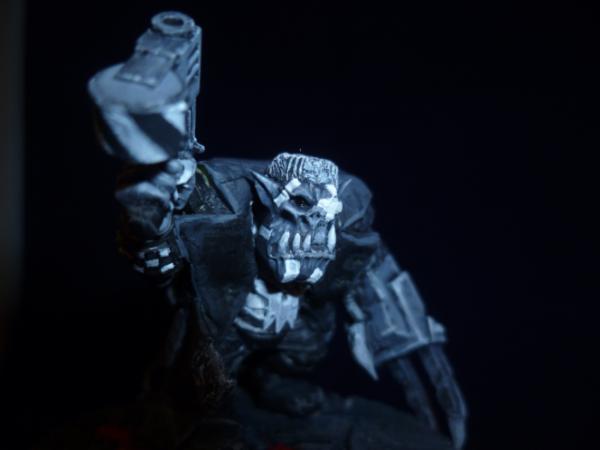
So little update, Painting in progress.
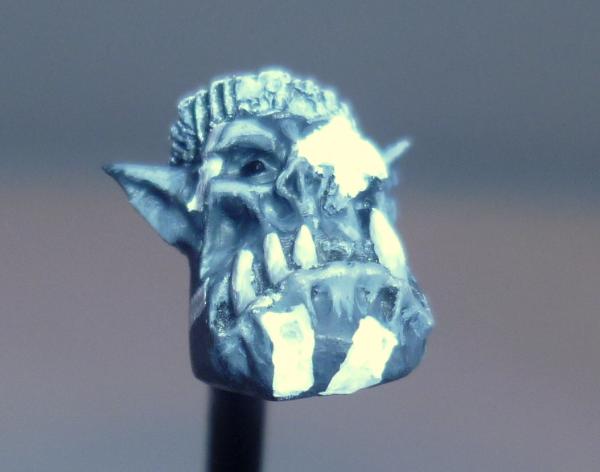
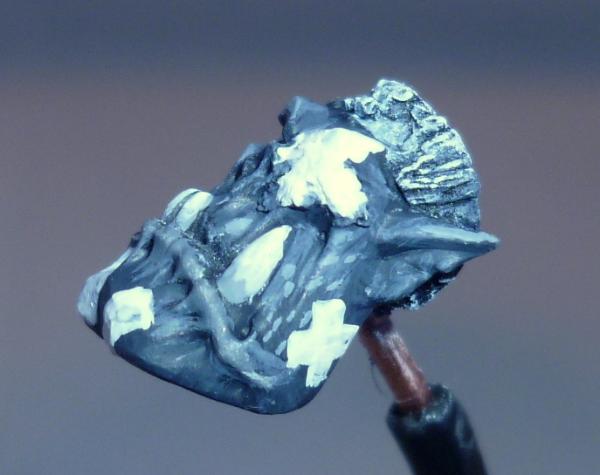
Head...
See you soon...
You ninja'd me Anvildude, again great idea, MMMmm.
Actually, I take back what I was saying about the eyes or skull. This model just screams that it should have an asymmetrical focus point, and I think some neon-vibrant blood on the tips and edges of that powerklaw would be fantastic.
That is so cool you have captured the character perfectly and the eye needs to stay black it really brings out the darker side of the model.
The red splatter is a cool way of adding the colour aspect good call, I always wanted to build a unit of orks based on bad ass charters I think I might have to borrow.......... no scrap that just steal this one as it's to dam good not
Hrm... See, the spatter is very nice. It's a good, vibrant red, a distinct piece of paint that helps tell a story, and works with the base.
However, I think it falls into the trap of being too centered on the model. I balances things too much, which kills a lot of the dynamism of it- the movement of Marv (I really can't think of a way to Orkify that- and I'm sorta suspecting maybe he was an ork anyways, with how he took damage) that you get from the cloak and position of the arms is pretty much halted to 'look at' the spatter.
What I was suggesting was to have the blood directly on the powerklaw blades- coating the tips and going up along the edges a little- just a tiny, little spot of bright solid color (no shading, no tones or highlights, no wash) to pull the eye off to one side so you get that visual dynamism of wanting to look at the face and upraised slugga but keep having your eyes wander across to the other side of the mini.
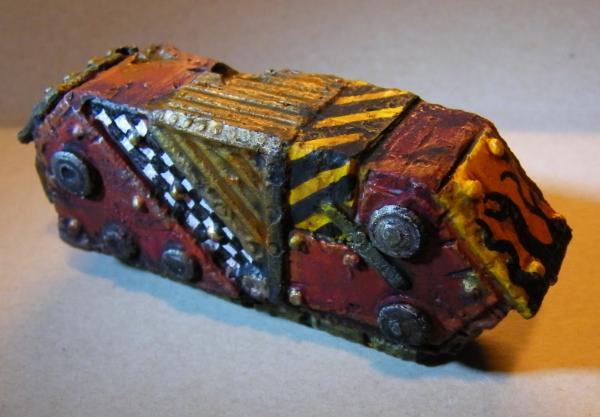
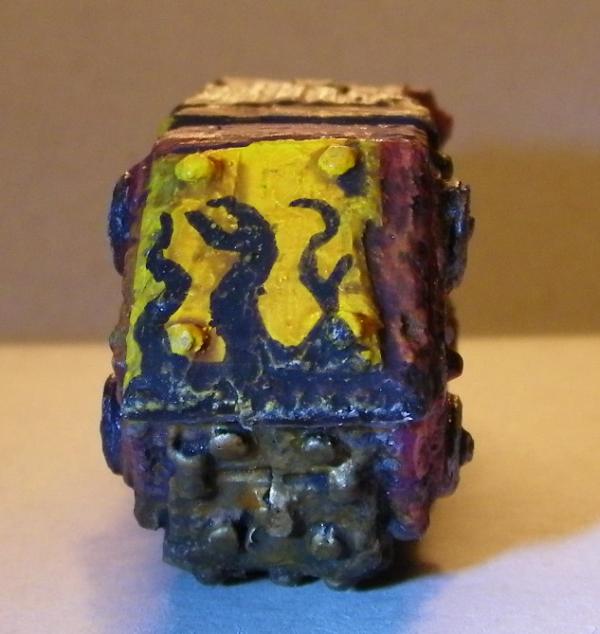
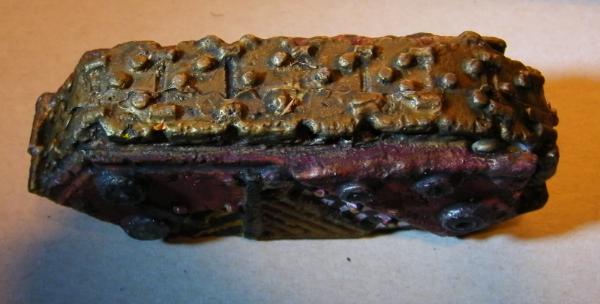
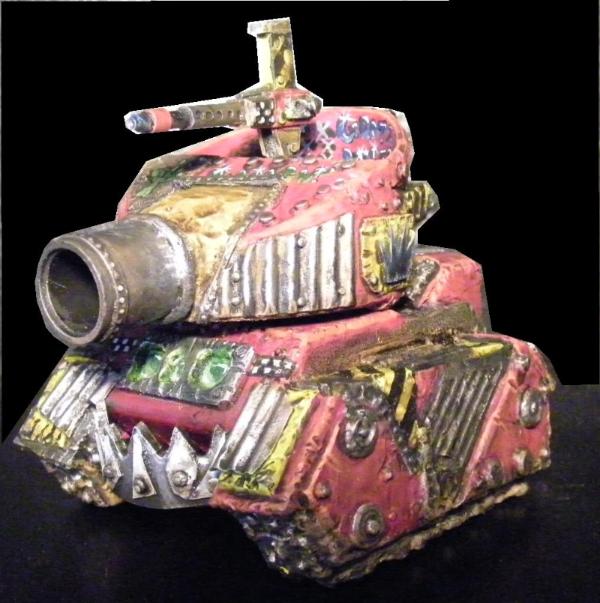
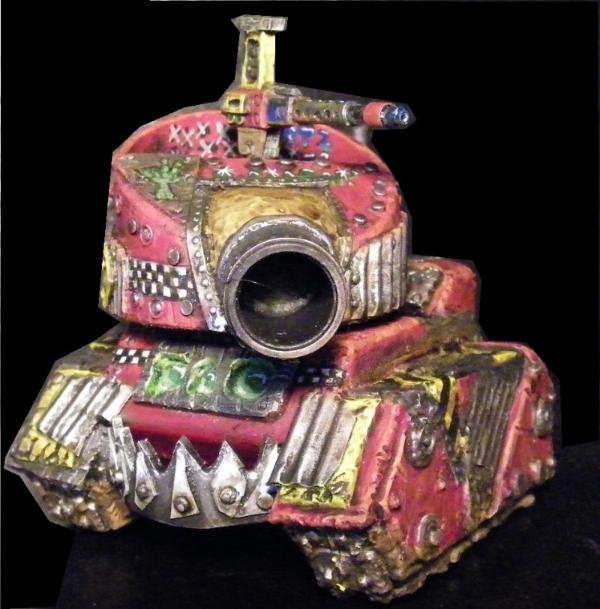
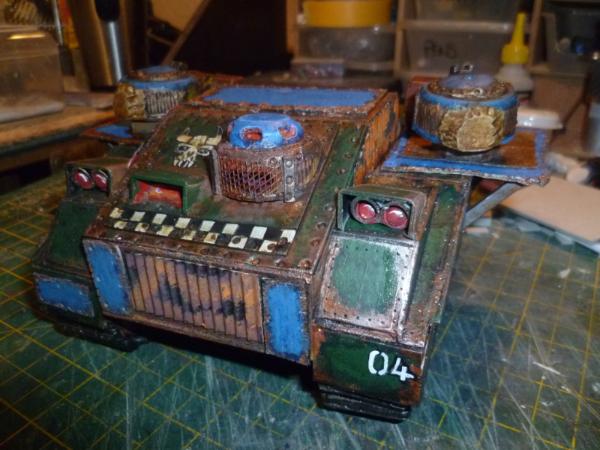
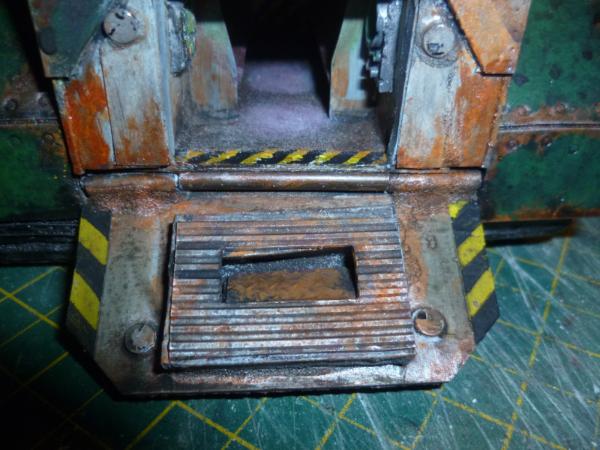
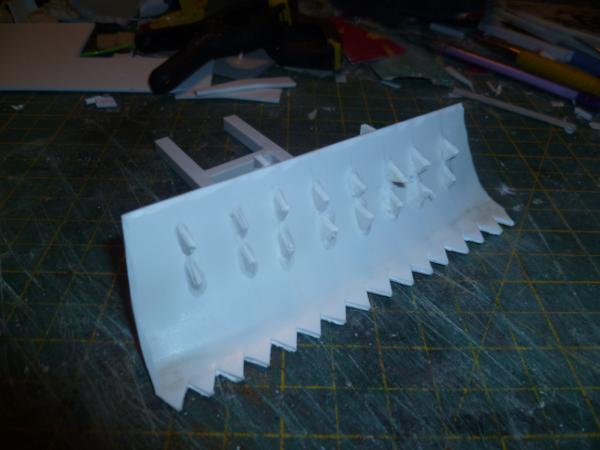
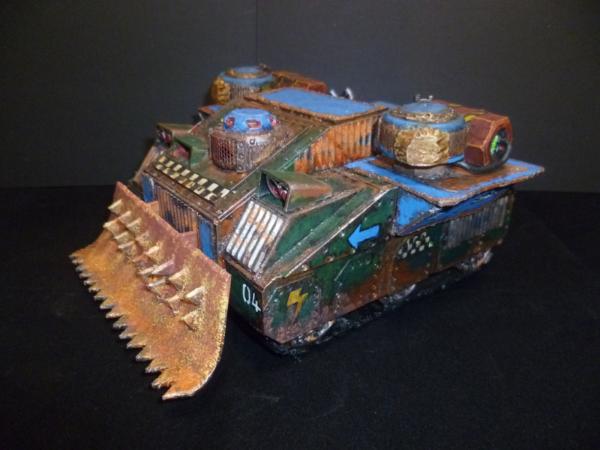
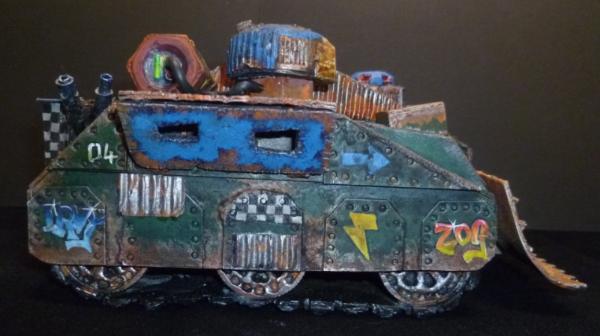
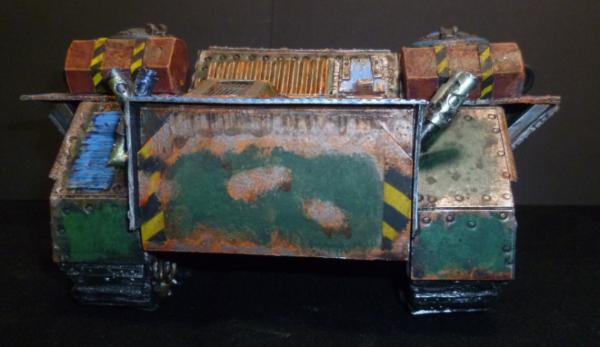
Needed a distraction, so felt like knocking up an APC, , so start with a basic shape, and then going to add Ork to it. Its not really based on anything that I know of.
@ Waaazag, thank you, and thats great, kinda what I am after.
@ Red, Marv was a great experience, did it for a competition. Got no hope in that one the others are well out of my league, it is mainly a painting competition.
@ Anpu-adom, Thank you
Well here is a little update for you, at least on what I may post.
A little fluffy bit....
Irvy da Mech looked at the derelict and shook his head. It was a wreck from a long time ago, not even Imperial. He would not even bother using it at all. But the huge chest of Teef , he had from Sniggar da Runtherd said he would pimp out this wreck for the grunts to keep up with the boys in.........
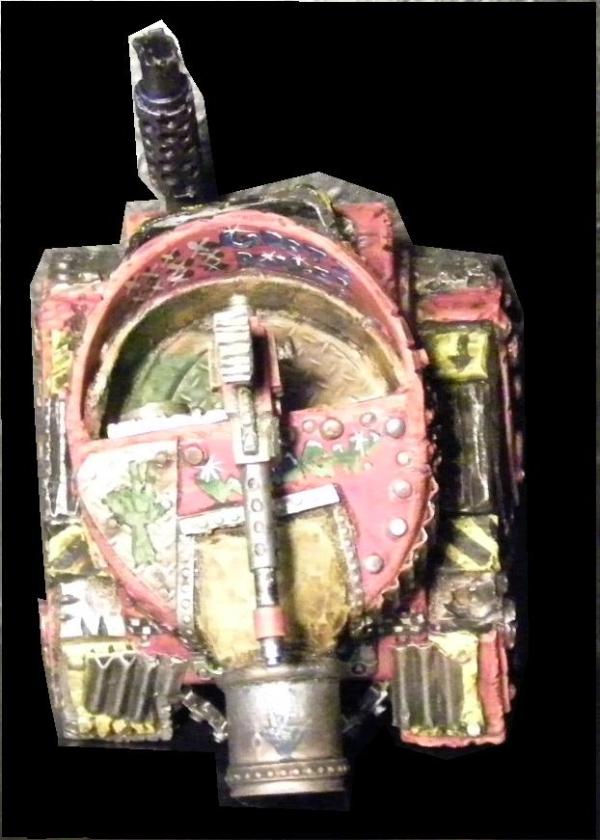
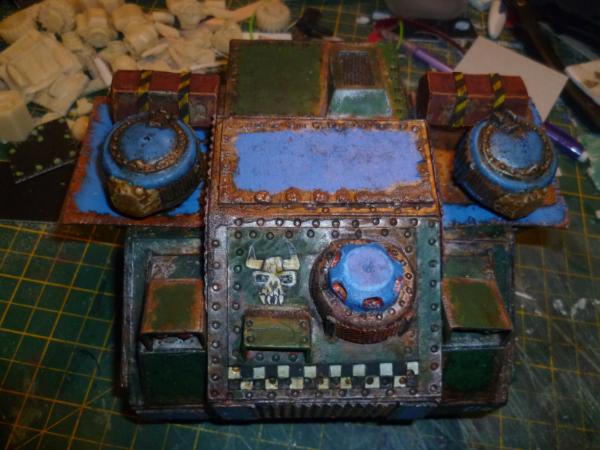
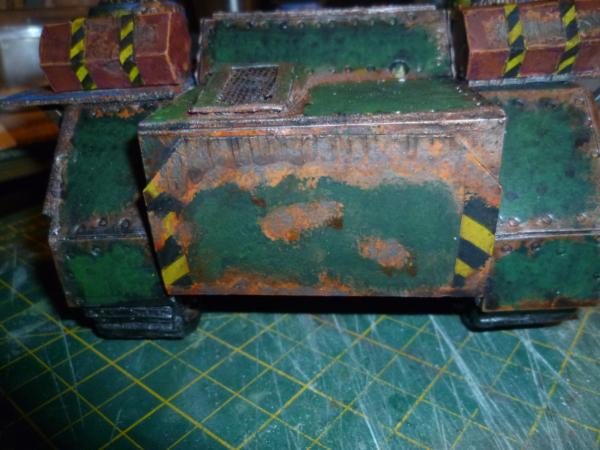
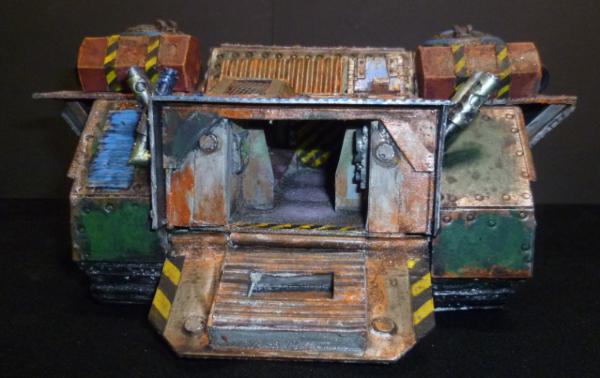
Interior finished.
Thanks for dropping in, please feel free to comment.
Those turrets look like they need a little substance under them. The shelves don't look like they could support a functioning turret. Paint job is awesome, though.
Not finished yet, need to sort out if I am putting a turret on it or not, and got to put a framwork on the back door to look like it has been strengthened.
The thoughts here are that under normal use this vehicle would be a heavy transport, say 20 guys, but for grots 30 seems reasonable.
Been far to long since I have been here. Sorry, I been distracted.
Firstly thank you for your amazing comments.
Been working on a little something, taken a few days to get together anything worth showing.....
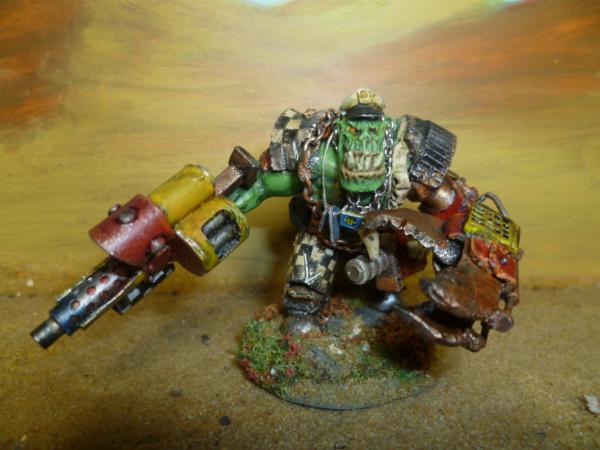
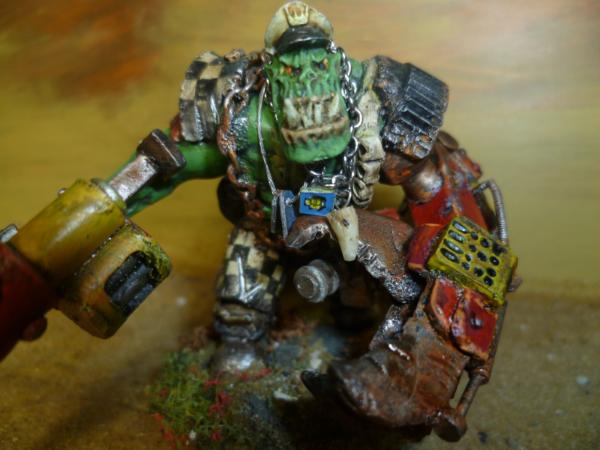
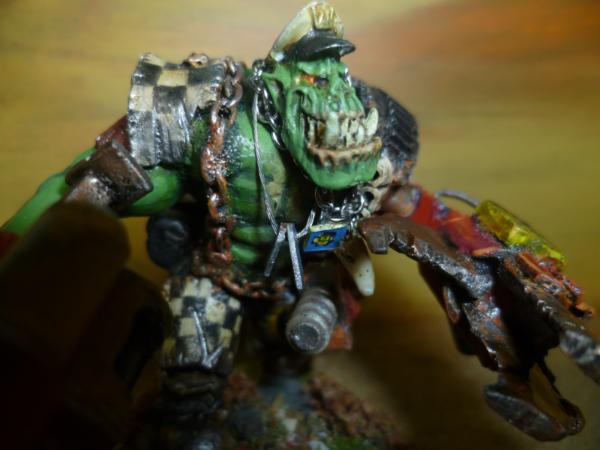
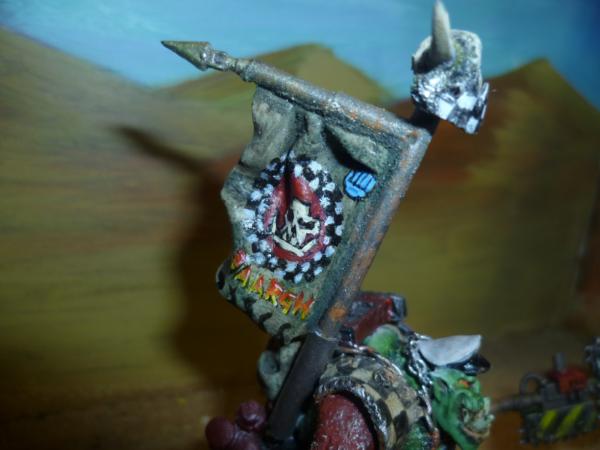
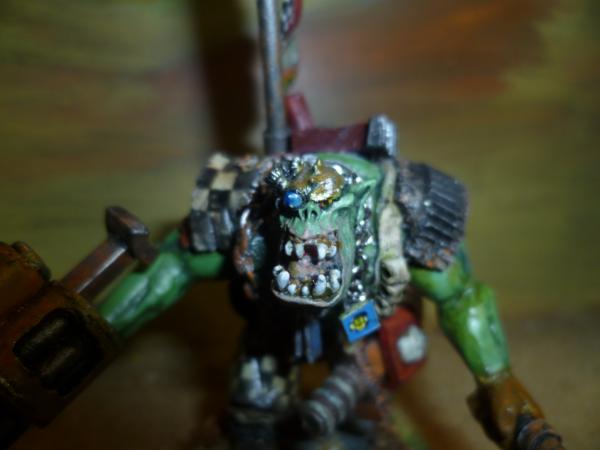
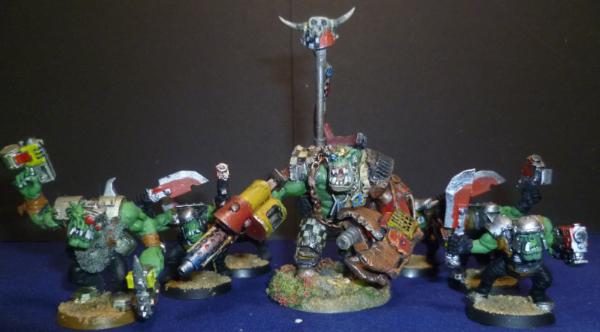
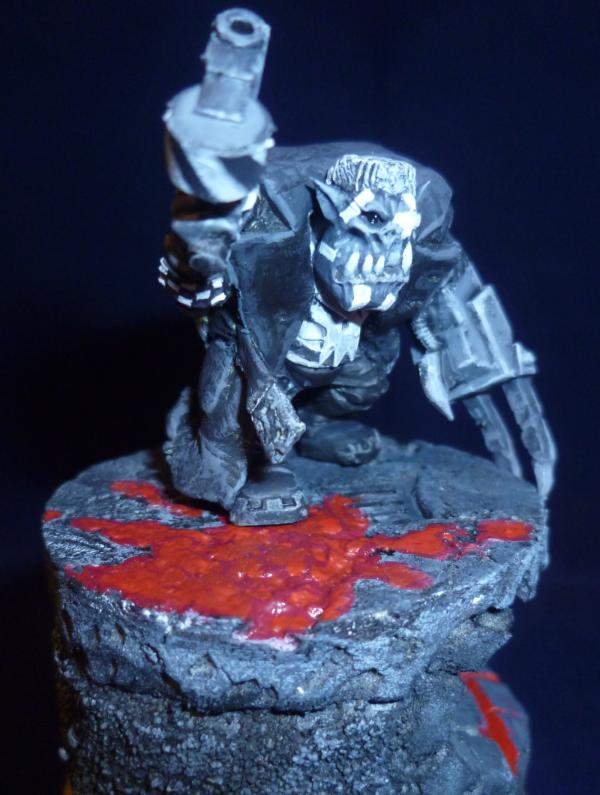
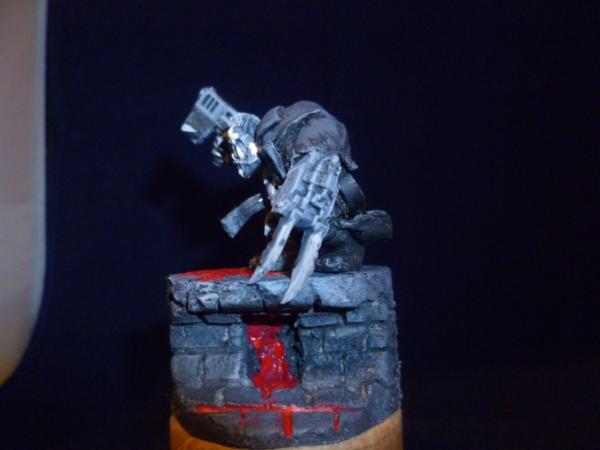
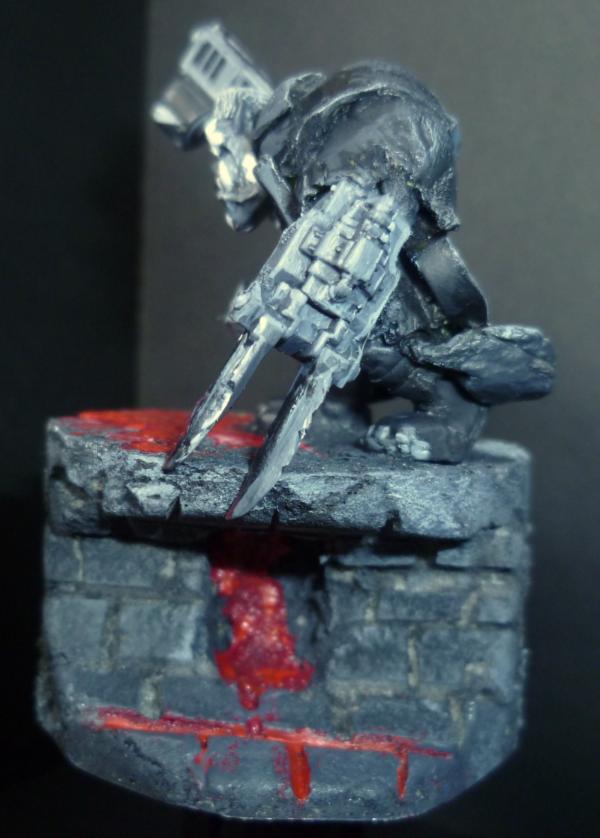
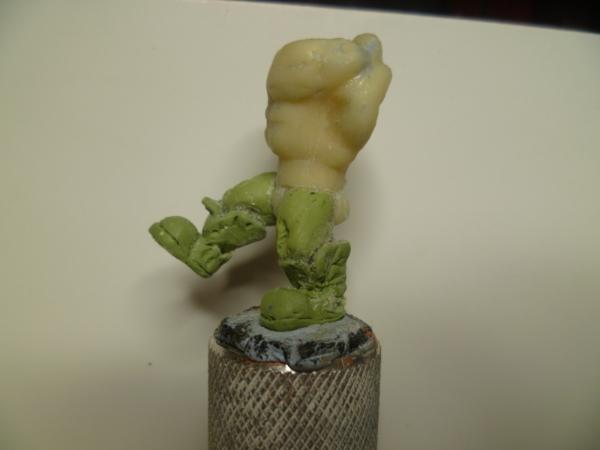
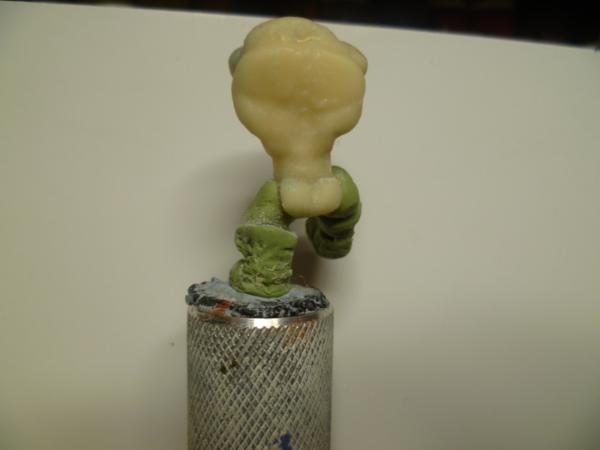
So, my thinking here, Combined effort really. I have wanted to do a proper Warboss for ages. I have done Warbosses, but my true Warlord supreme is Thunderfarter. this is his Third incarnation. So here comes Thunderfarter da Turd....
Now part of this is looking at the models out there, not many represent to me a true image of a Warlord, someone who rules absolutely by physical power and presence, the codex describes him as 10ft of brute power. Capable of ripping people apart with there bare hands. Now this puts in my head a true horror, massive, powerful, brutal. Now don't get me wrong, Ghaz is a great model and big and brutal, but not what I want. Thunderfarter may end up with armour, maybe even mega-armour, but I am going to do at least one incarnation with hardly any armour, charging in to battle fearless and terrorfying.
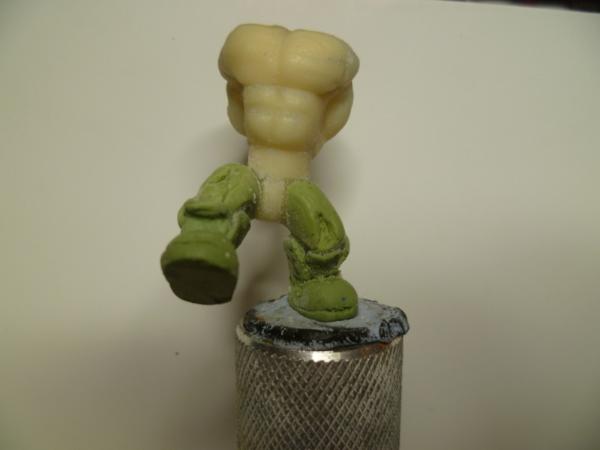
Made a mold, to make more if I need.
A bit more....
He will be about 45-50mm tall all in, by my calculations thats about 10ft, true-scale.
Any and all comments and thoughts and ideas are most welcome here.
I know his forearm is a bit long, but when I decide what I am doing for his hands will cut accordingly.
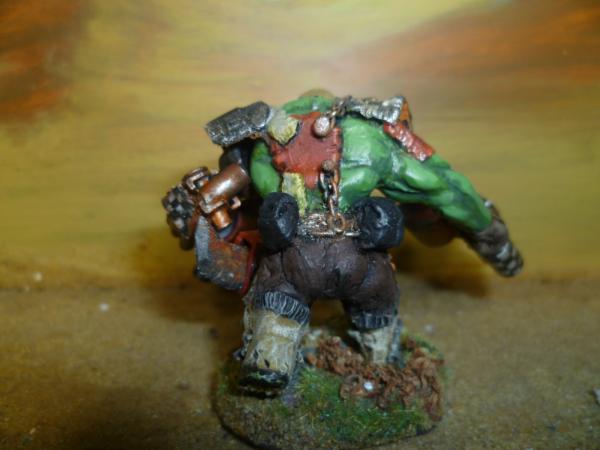
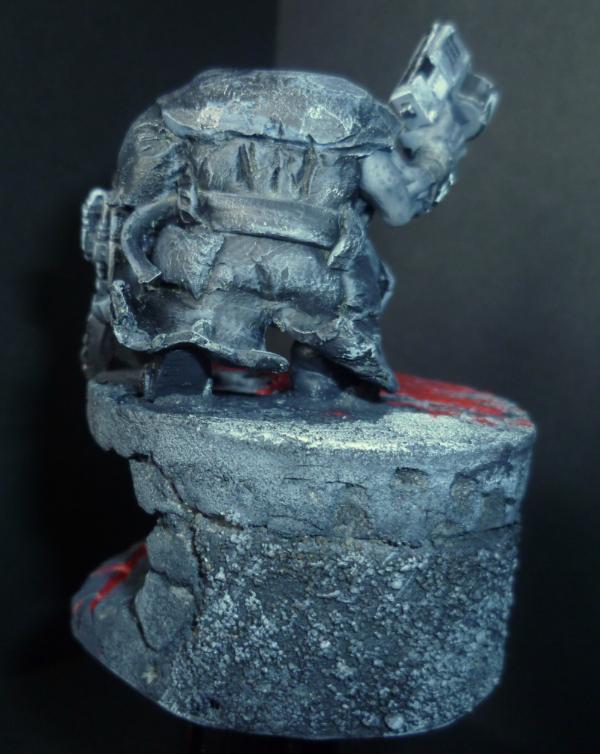
I know also the basic is a bit nude, but I figure if you want it to look right, you start from there, and got to say I think his Arse end looks better for it. This way I could change out the clothing, make him Fantasy, Make it armoured. At least I am not bulking out over clothing that is already there.
Anyways, as it happens I am on a sicky, dying of manflu, so am chaining myself to me workbench and enjoying my last few moment of life......
All thoughts and critique are gratefully recieved as always..
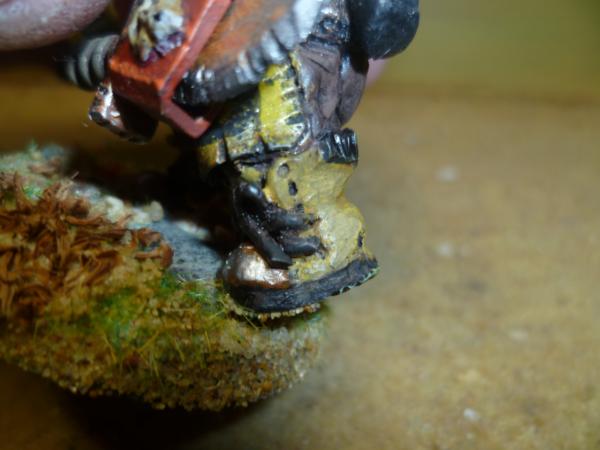
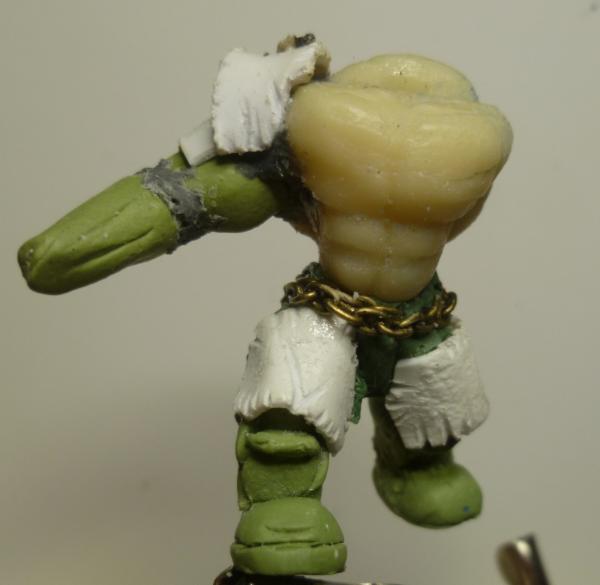
Thats better don't want to see the crack of dawn again thanks the armor and chain looks good and the base of the boots but you could do with shaping the top section of the boots a little taper them in to give more shape.
And materials wise, Greenstuff, Milliput, and Abrosteel, for putties. I use the three for there different qualities. Greenstuff gives a smooth finish and is easily worked, but sets "rubbery", Milliput is cheaper, stronger when set and can be better sanded and "Dremeled", but takes forever to cure, and Abrosteel, or rapid steel ( metal putty), is very fast curing, sets very hard and is workable with a Dremel etc, but is expensive, and you don't really get time to "sculpt" it to shape before it sets. I also combine the different putties to give me different results, they all knead together quite well, my favourite would be Milliput and Greenstuff, sets quick and gives a smooth strong workable finish, (check out the boots). It makes great cloaks or flags, because it is so rigid and strong even when thin.
Hope that helps.
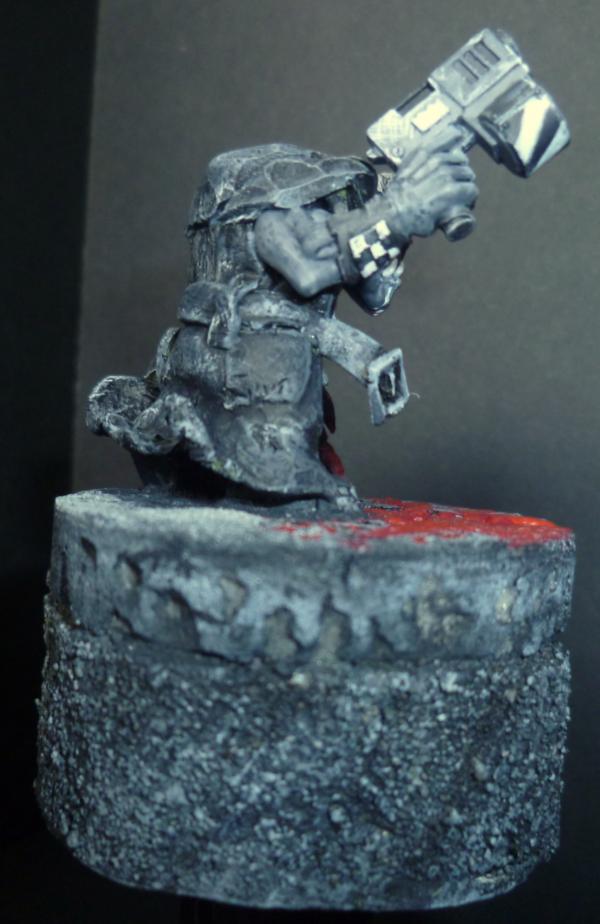
@ LDD funny was working on that as you spoke, good call, this any better...
Large and in charge......and then there's your Orcs . Nice work so far on the orc torso cast, and classy boots. Always wondered if there were orc cobblers as somehow they all have boots that fit them, and they aren't imperial standard issue.
Hey how else will you get better if we don't push your talents Looks great by the way and glad to see like a true ork the laces ain't laced
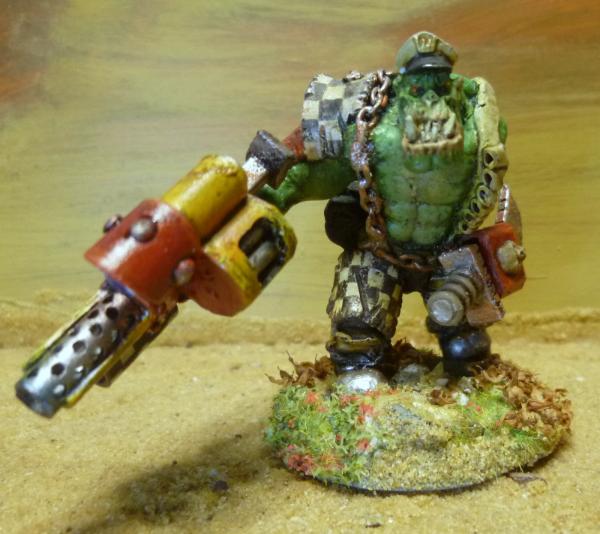
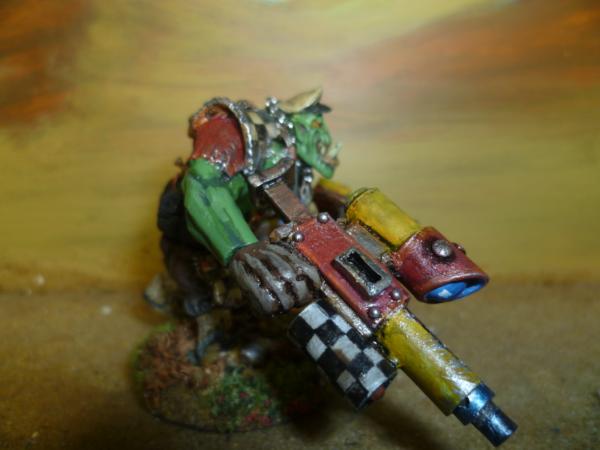
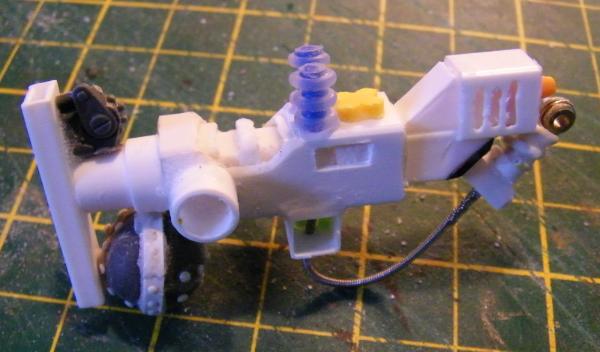
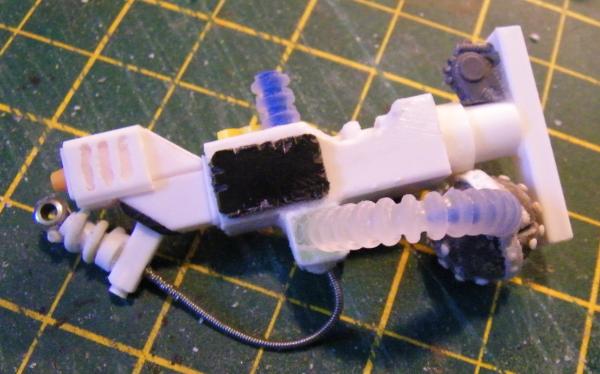
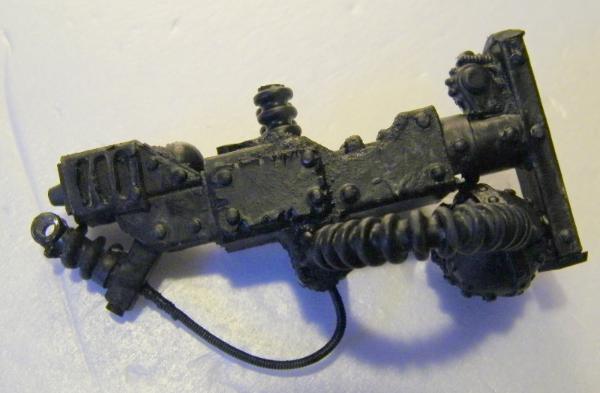
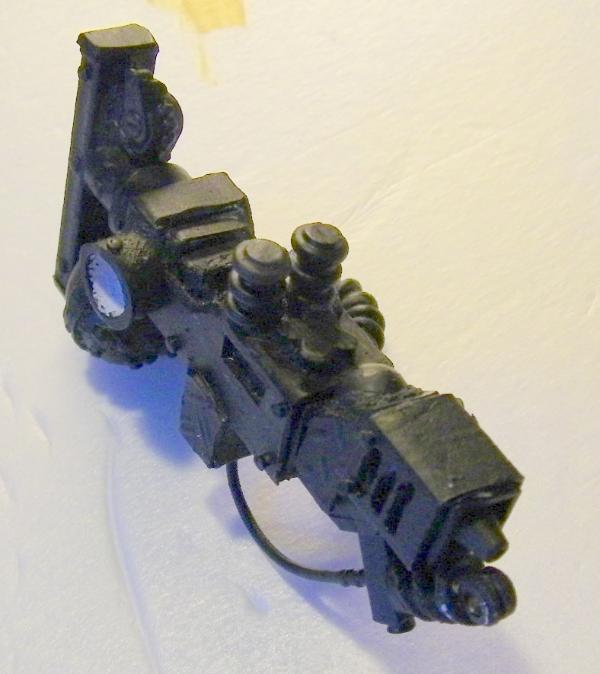
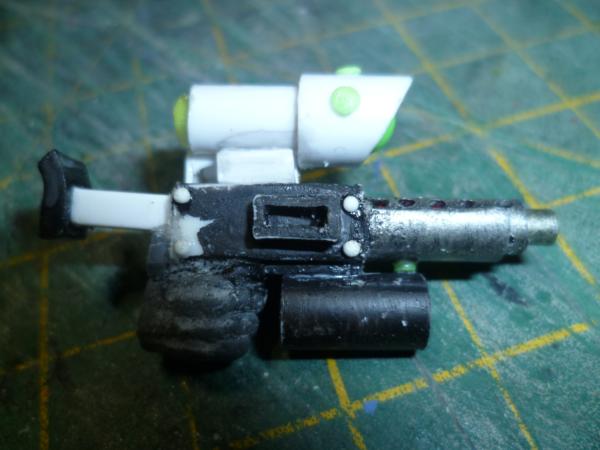
The gun is a hell of a combi looks like a mix of the old storm troopers, Kraskins and Imperial guard grenade launcher, nice blade as well what did you use for the handle ?
Truely what was missing from the new Ork lineup was a real scale Warboss. Something the matches the fluff. Very nice to see this progress.
Due to the Nature of the 'Beast' your conversion skills can be put to the test. Good Job so far.
Oh Thank you for the comments they mean a great deal, I think I must be somewhere in the ball park.
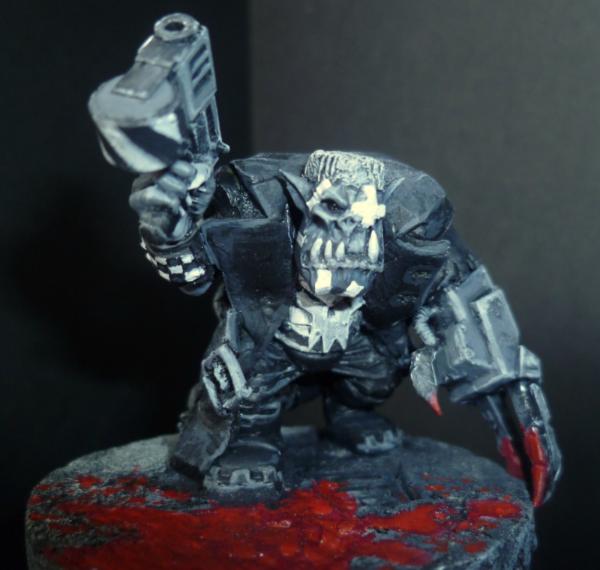
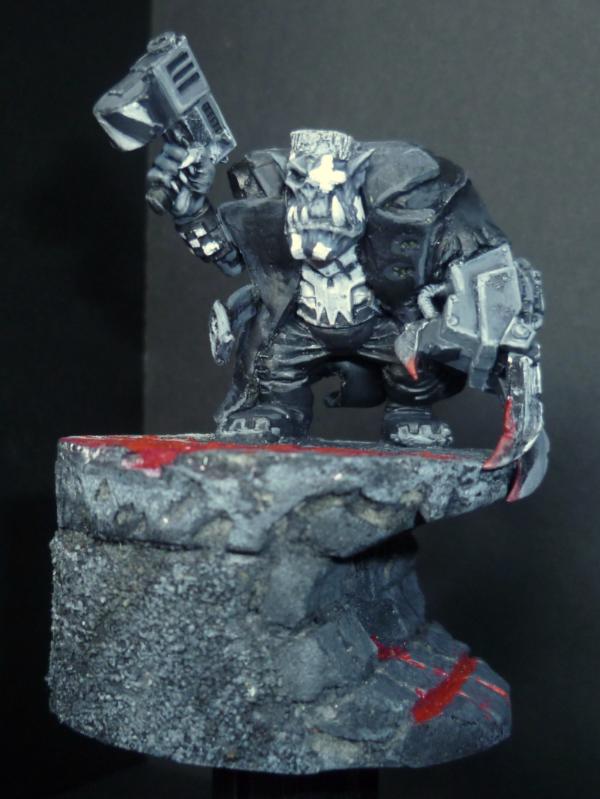
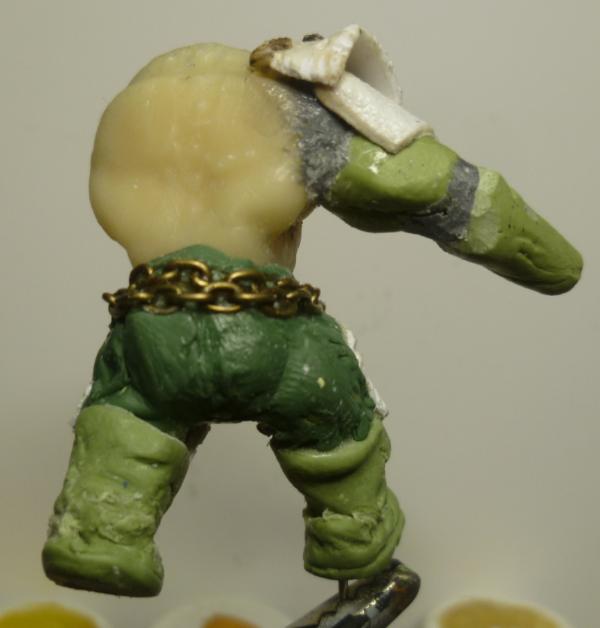
Splashed a little paint....
Still WIP mind, will be adding more details. And a left arm etc. Obviously.
Oh LDD the handle is some of this stuff, I think it is from Lego, Maybe the Bionical range, It is flexible rubbery stuff.
Well as always please keep the comments coming they are very much appreciated, and don't be afraid to say something is off, or you have a idea. ( Looking at you LDD....Bloody laces indeed.)
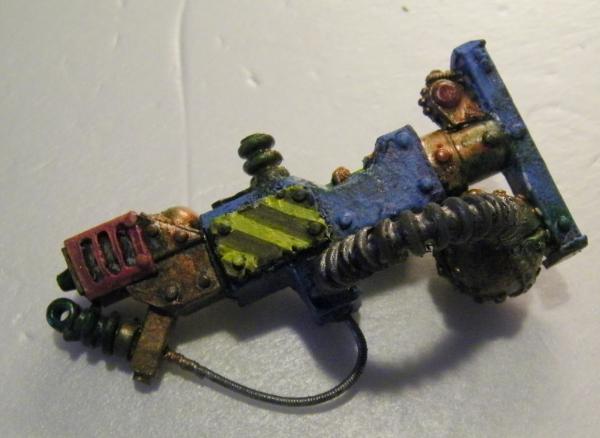
Paint as well bloody hell you just storm ahead don't you Liking the colour scheme very classic Ork with just a hint of outworld wastelander
Trust me I feel your pain when it comes to laces I got some Ork steampunk heads and decided to convert some torsos to go with the vibe still doing stitching lines
Just thought what about some kind of necklace thats orky with some kind emblem hanging from it
Cool idea using the lego ....... thing works a treat as a handle
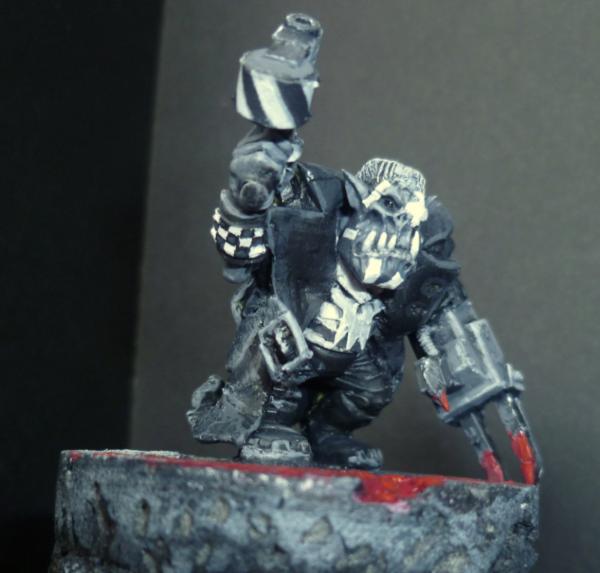
And on a bit, it is magnetised can be swapped out...
Also added some dangly bling bling for LDD...
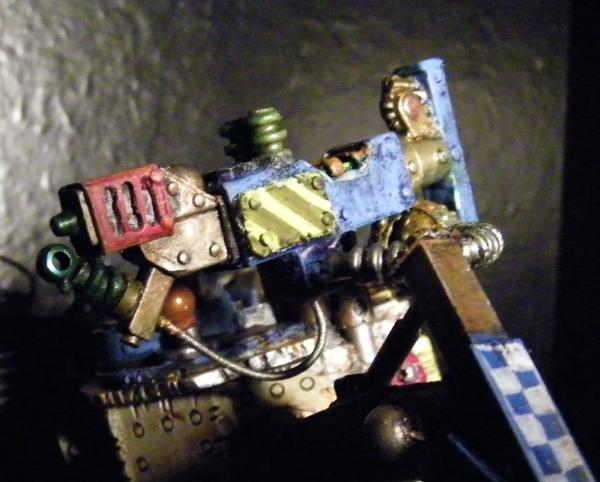
Still WIP, got a possible head swap, thinking on the Pipe Cigar thing, also adding a backpack, or at least some granades to his back. Also working on an alternative left arm, probly weilding a big chopper instead.
I like the first head option more... it so reminds me of poppey the sailor...
this is truly an epic warlord cam!... man... I wish I had your confidence when it comes to sculpting... that torso was a gigantic leap! looks awesome and then you just went further... even made hands... the choice to make them as gloves was a very good one... weapon tech is also something that flies of your hand with easy and success!
your man flue is a true blessing for us plastic crack addicted voyeurs ...
oh...and the boots are just plain sexy... and I am no fetishist here... but you literally nailed the look!!!
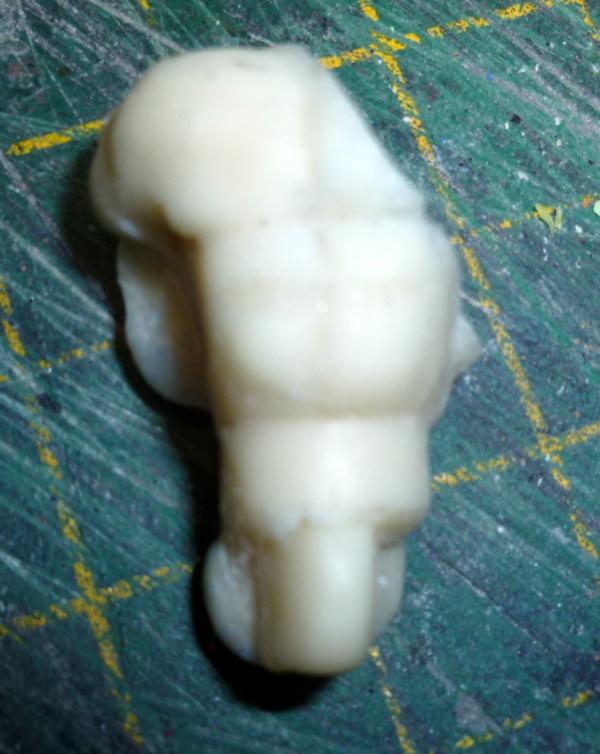
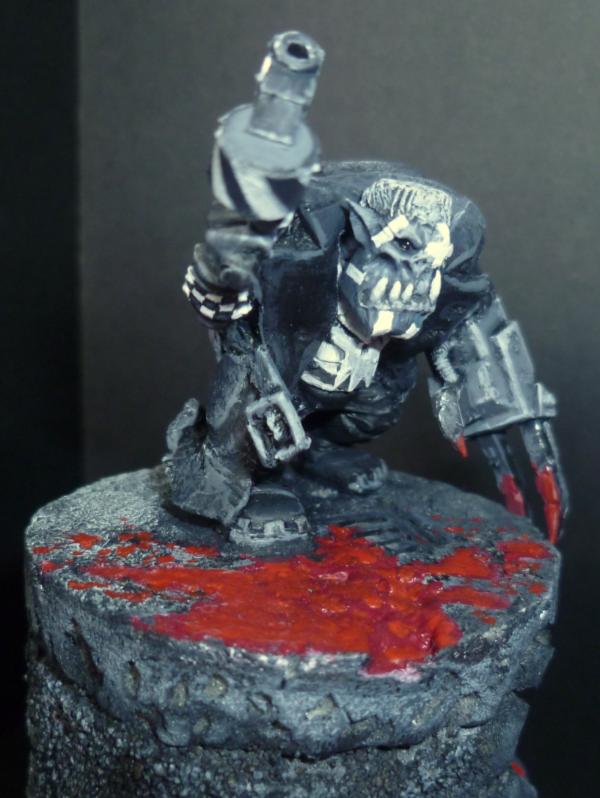
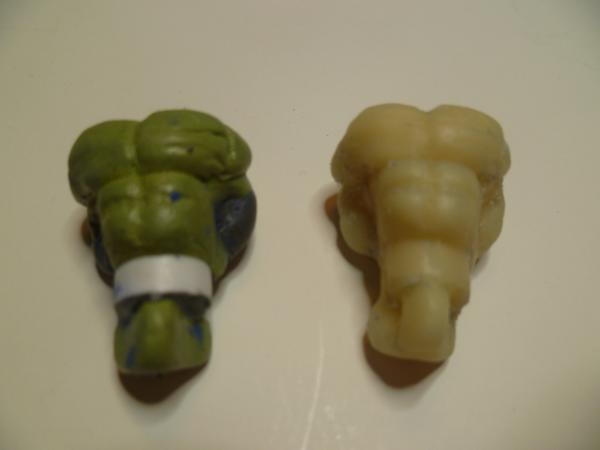
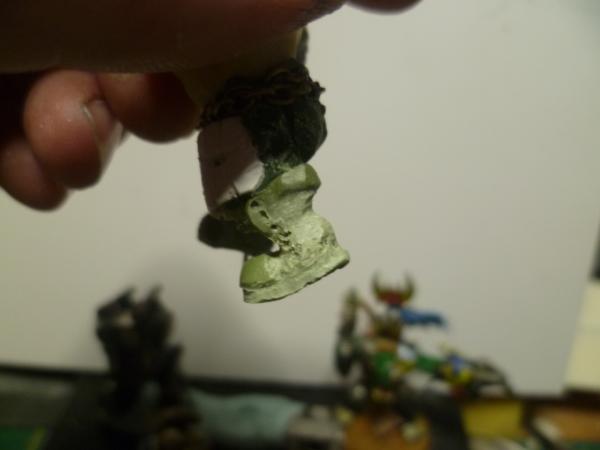
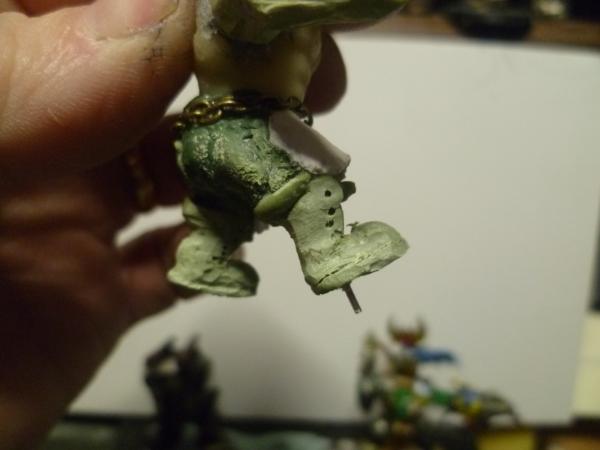
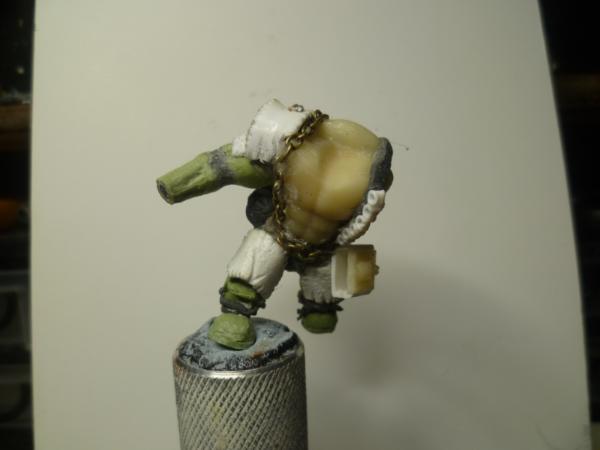
So I cast up a few more torso's, with the intention of doing a few varieties of the Warboss. One went slightly wrong....
So I figure, I think I will make this one a Mega Armoured Warboss....The tease is I am not going to show you the MONSTROCITY on my desk right now.
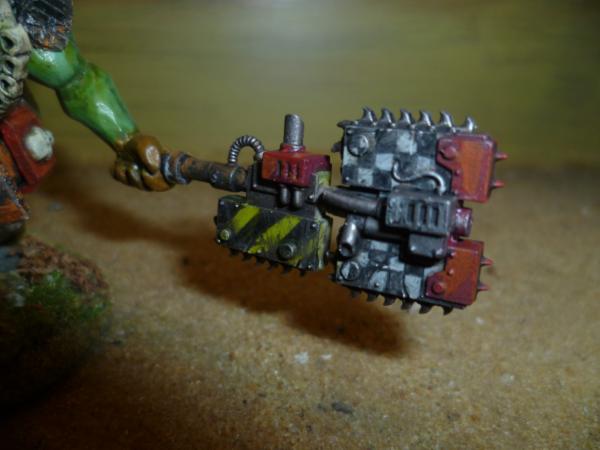
The question is, how mental can you go with weaponizing a Warboss, if I go by current rules I think it's pretty dull, I mean Ghazkull used to have a specally modified combi-weapon made from a Ripper gun, but now I think he just gets a big shoota?!! I want to be ridiculous, and rules don't realy matter to me, but??
I'm a personal fan of having paired hand melee weapons with a shoulder/back mounted gun myself. It's Orkz, so a good option would be chainsaw powerklaws- and that way you could run them as PKs or Ripper Sawz as you wanted. Warbosses don't really get options for 'big boom' weapons, moar dakka instead- maybe a water-cooled shoota could look nice?
Aside from that, it's all power gubbinz and armour whotzitz and fiddley bitz that the mek put on to make whistling noises.
You could (this is me, where anything is possible) make him into a squad leader of some lootas. That explains why he's bigger and you can give him any crazy weapon you like.
Or if you're thinking close combat, a squad leader for whatever Orks have for CC troops.
Or a warboss and just counts-as the weapon.
Or a big mek, don't they have crazy weapons?
In short, I say go for it... but I would, wouldn't I?!


 Not sure I can offer any structural advice on the blast shields over the scratchbuild veterans you've got watching here, but I can tell this is gonna be ridiculawesome


 Looks like a good base item for it too
 .
.

 ...
...


 I got some Ork steampunk heads and decided to convert some torsos to go with the vibe
  with some kind emblem hanging from it