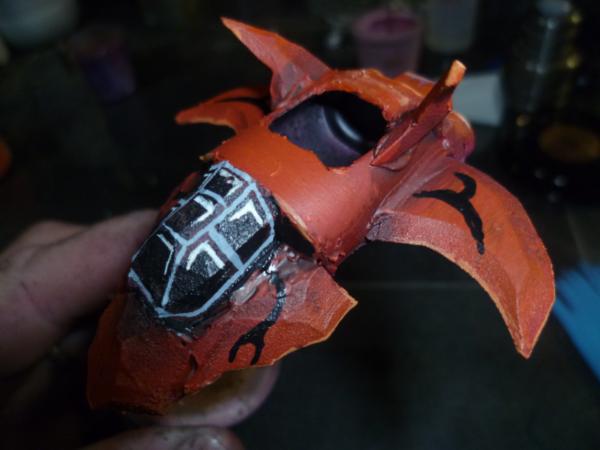
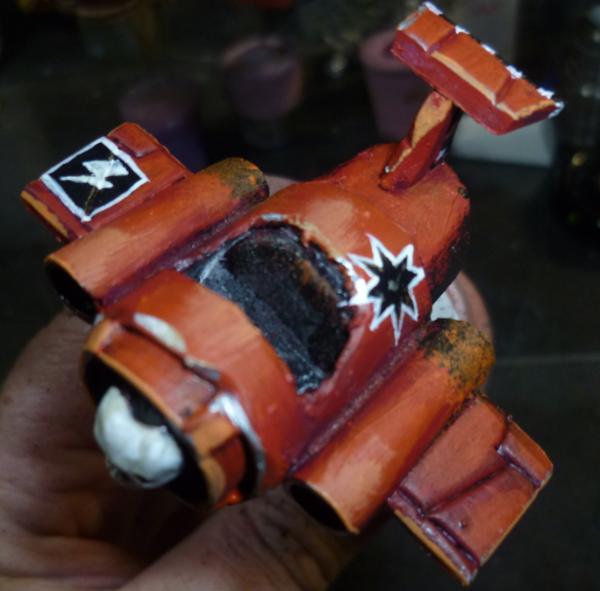
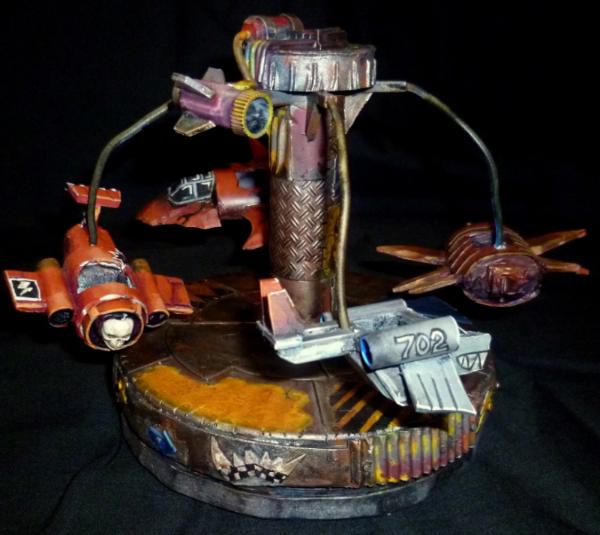
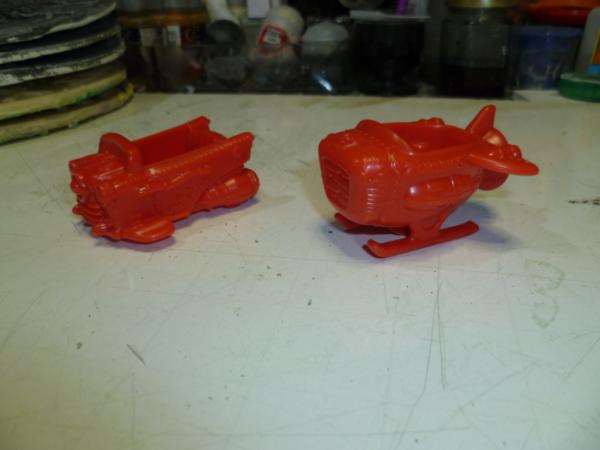
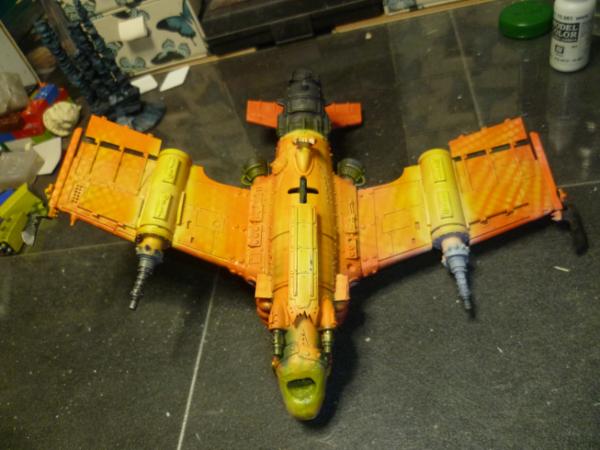
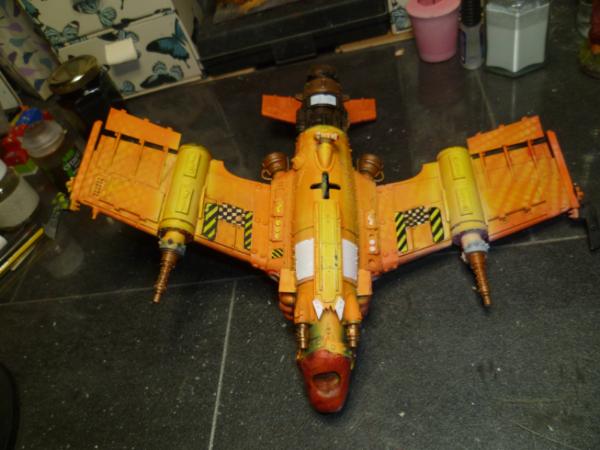
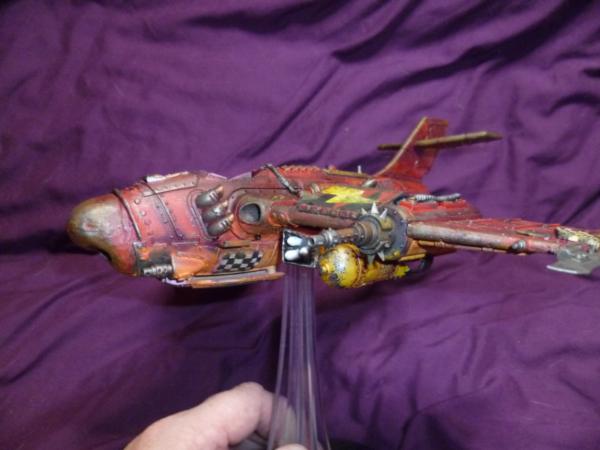
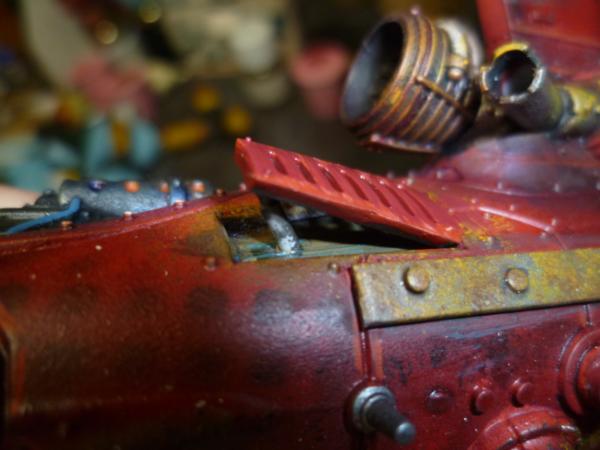
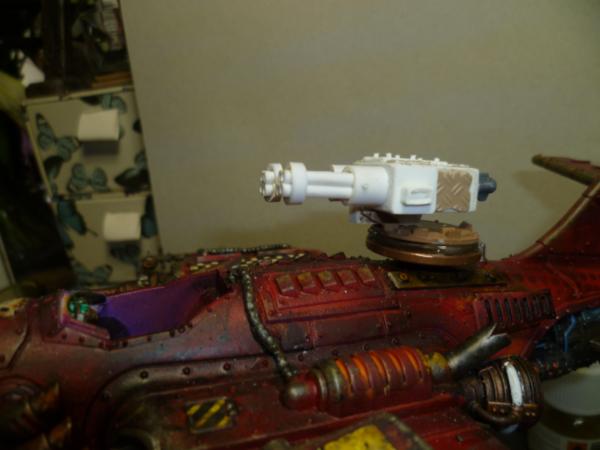
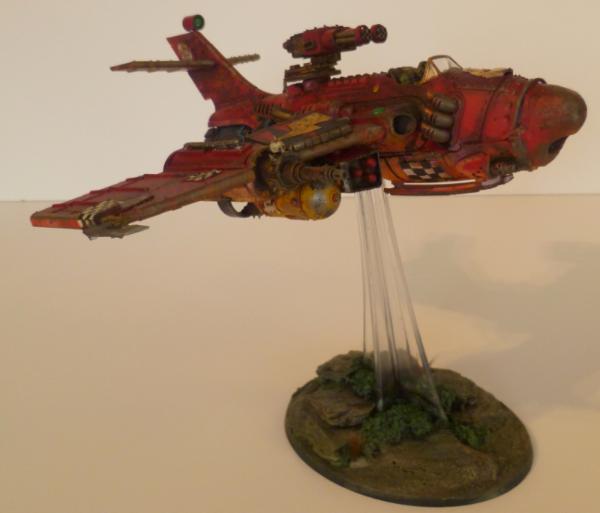
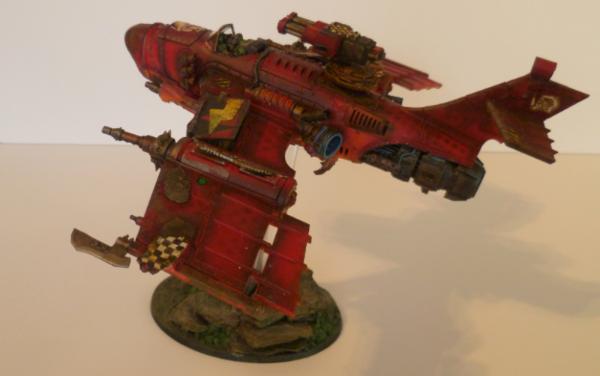
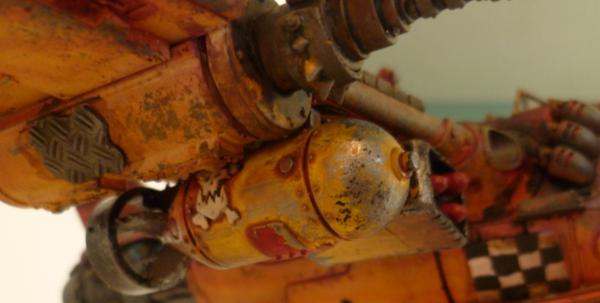
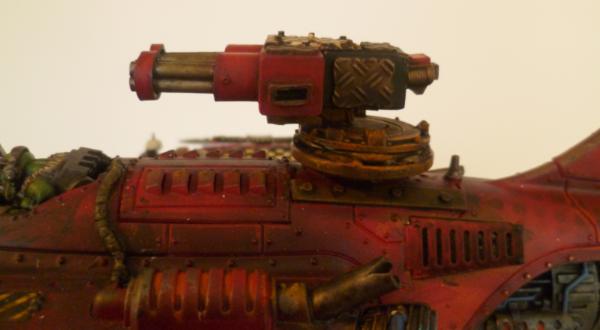
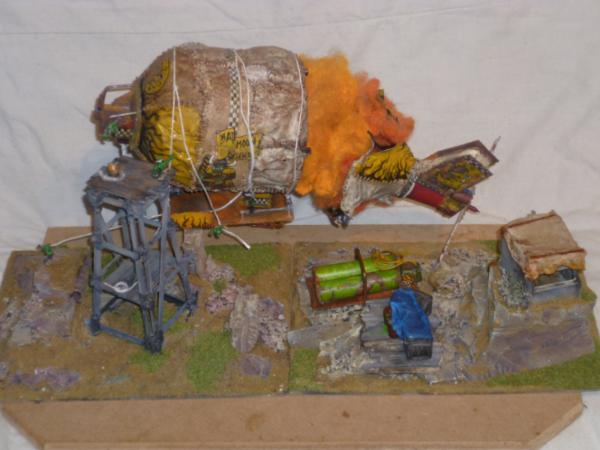
Thank you, I actually remodelled the nose, Nerdy had made it the other way up and no grill, cut it off and flipped it, cut a hole/vent in, done a few bits more and started laying down some base colouring....
Played a little with the airbrush and quite happy with where it is going. Such a big model, lots of details to be added yet.
Thanks for looking, thoughts as always appreciated.
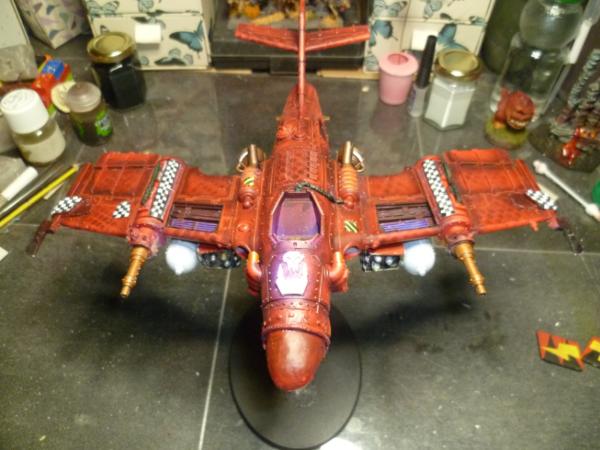
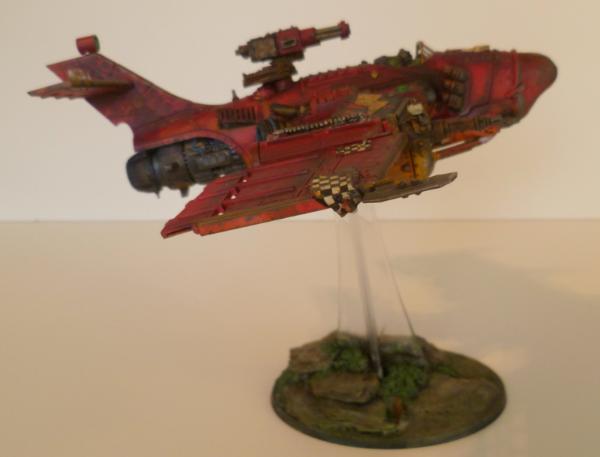
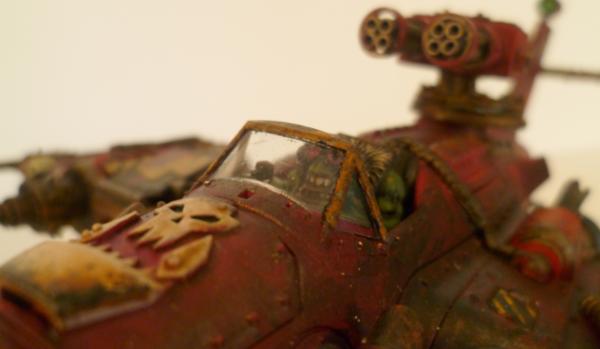
Love the paint job with the spots on the wings. Also hadn't noticed the choppas on the wings , watch out landing deck crew, better not try and wave him off . Then again maybe he likes flying really low and seeing how many heads he can take off .
Thank you all, enjoying this build and paint, very much appreciate the feedback.
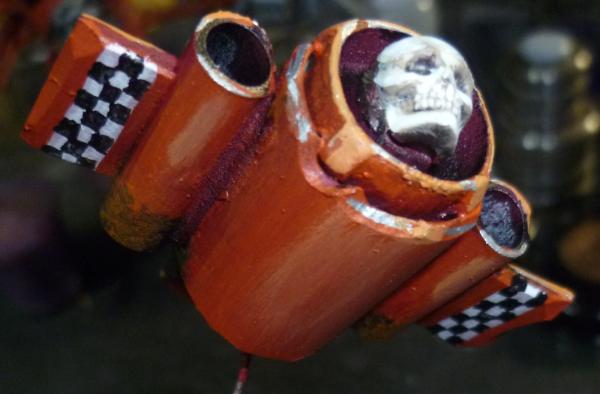
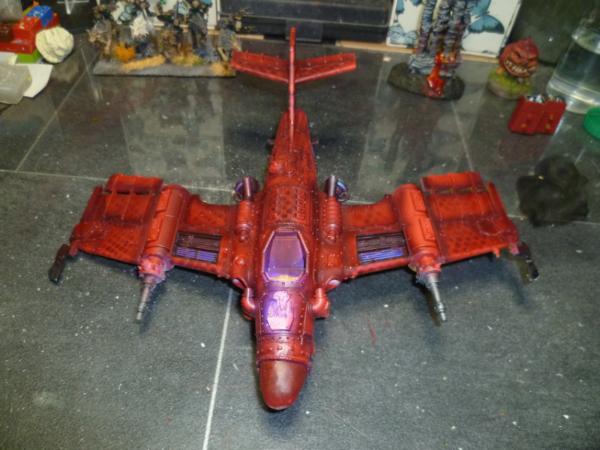
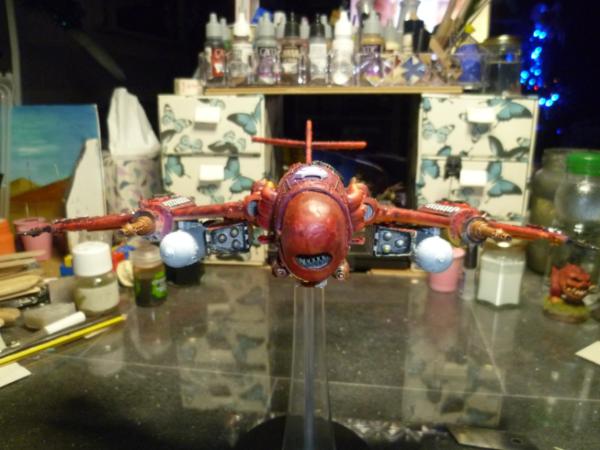
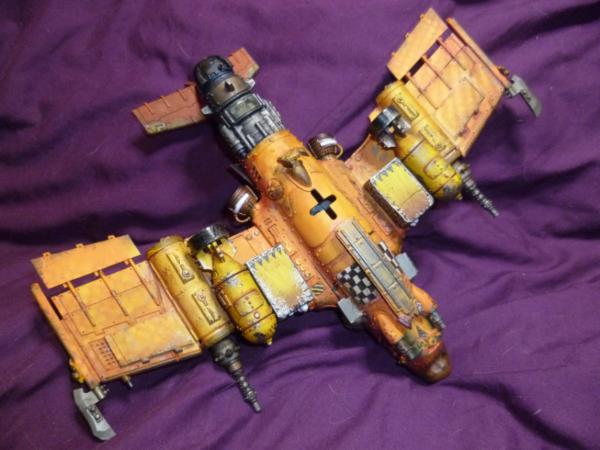
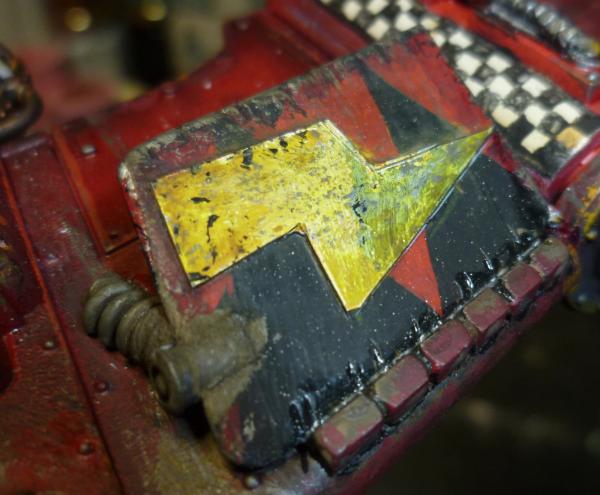
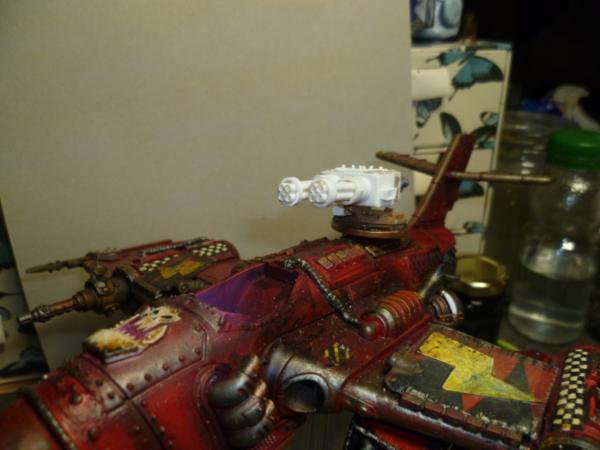
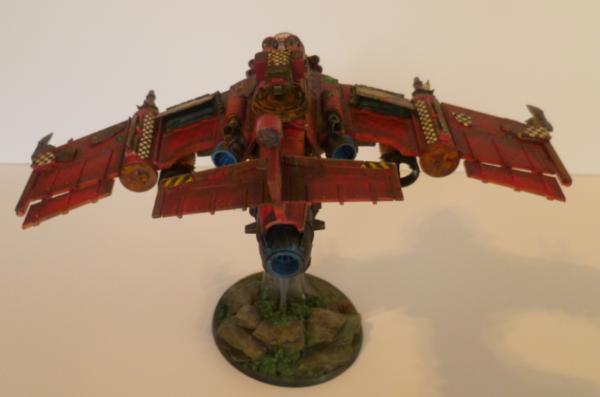
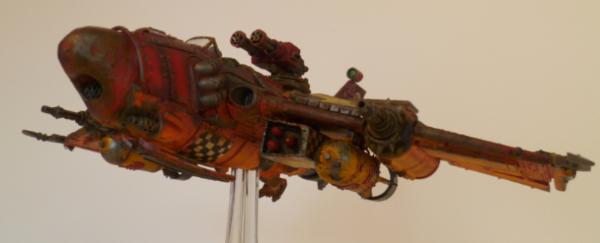
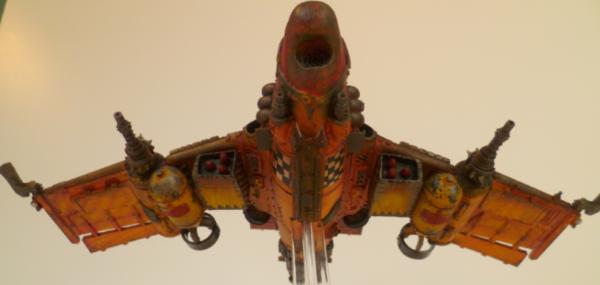
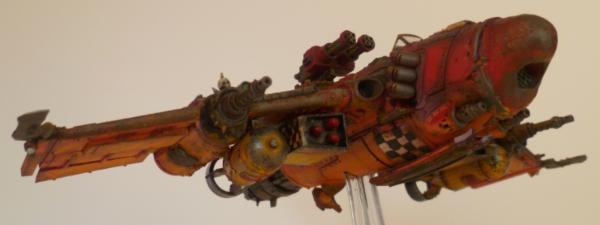
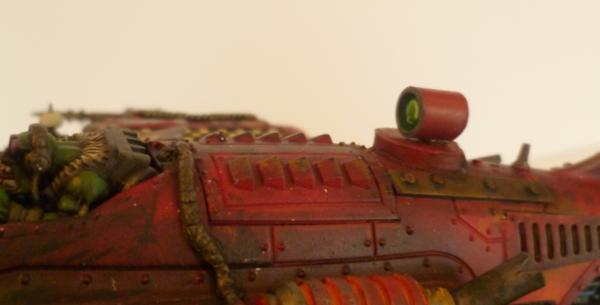
Starting to put in some of the detail paintwork...
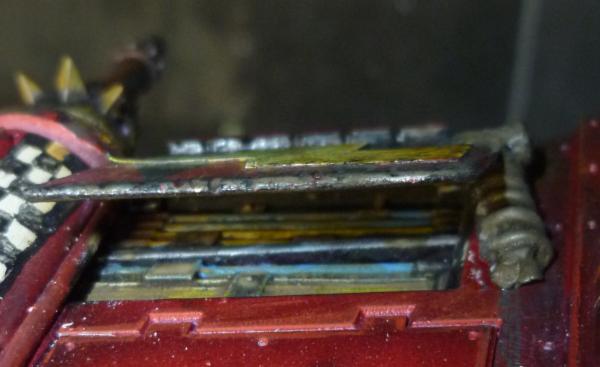
Please can someone explain the load out for this, I have a rocket launcher for each wing made up and a couple giant bombs, can it carry it all? They are magnetised at mo, the hazard stripe areas under the wings are actually strips of metal.
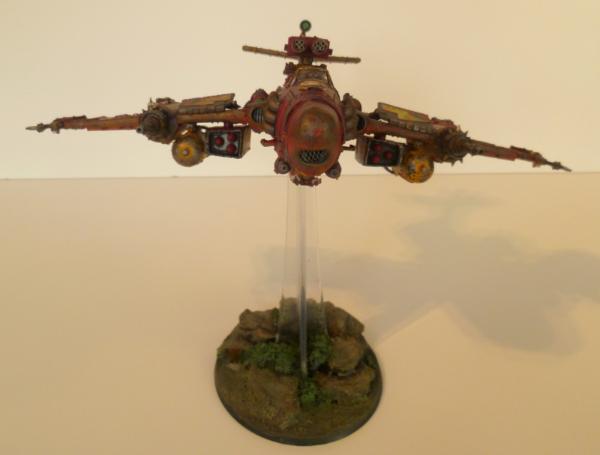
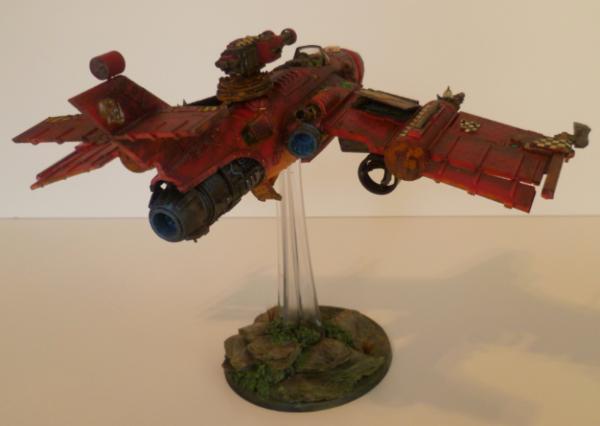
Want to try and make it official as I will be sending this to some unlucky soul, don't really have much use for it myself. Would rather see someone get the use of it. Any takers?
Still a little to go yet, would very much like to hear your thoughts.
Please can someone explain the load out for this, I have a rocket launcher for each wing made up and a couple giant bombs, can it carry it all? They are magnetised at mo, the hazard stripe areas under the wings are actually strips of metal.
Fighta-Bommer right?...going by it's rules in Imperial Armour VIII, it's wargear is:
- 4 hull-mounted big shootas with anti-aircraft mounts
- 1 turret-mounted twin-linked big shoota
- 1 payload of 8 bomms
- 2 supa-rokkits (can be swapped for 2 burna bomms for free)
- optional - can equip up to 2 grot bomms for 20 points each
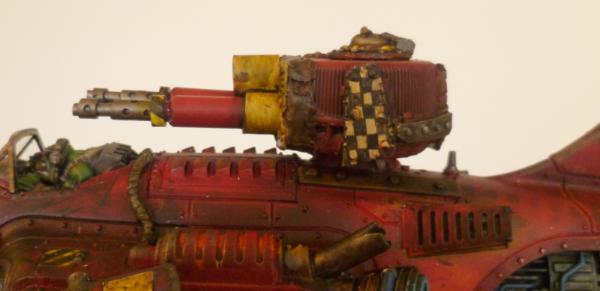
...rocket launchers count as the payload of 8 bomms?...the two big bombs could be the supa-rokkits/burna bomms (or the optional grot bomms)?...looks like you've got the 4 big shootas, on the hull/wings...any room on there for a little grot turret with a twin-linked big shoota or something maybe?
looking good though man ...actually I've just looked through the last couple of pages and there's a lot of great stuff here man...nice work!
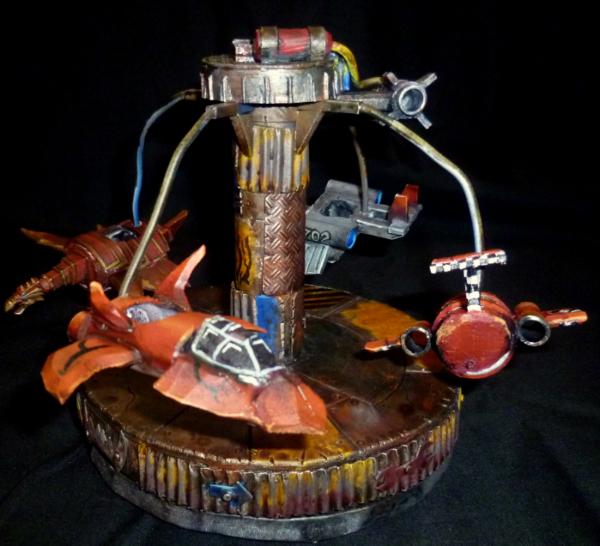
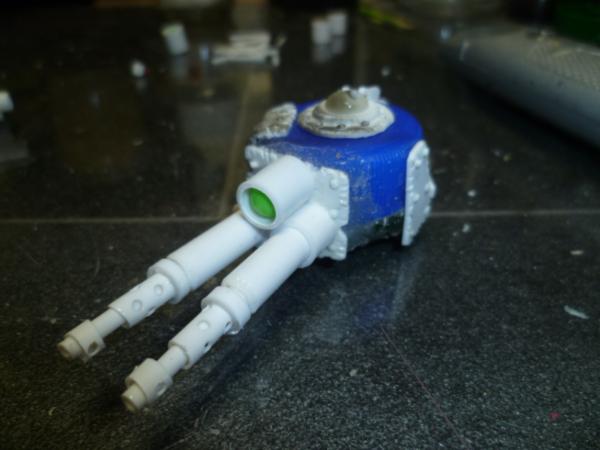
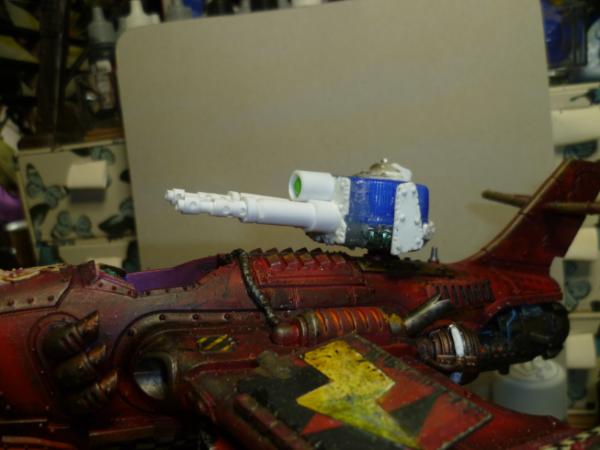
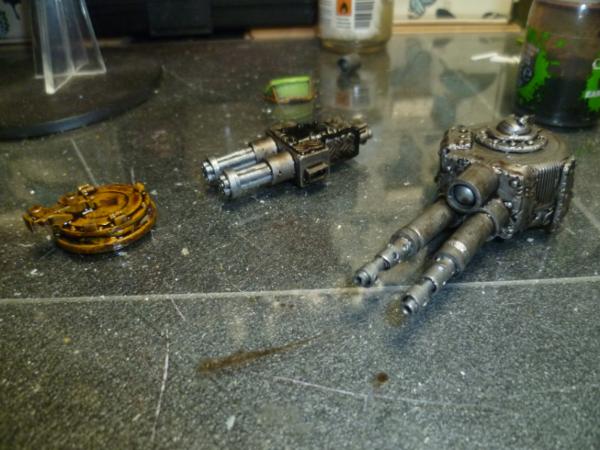
Would it be possible to beef-up the connection between the turrets and the fuselage, they look a little precarious?
Assuming you have them rotate-able, maybe a cylinder of "armour", cut to match the plane at the bottom and flat on top. It just needs to sit on the fuselage and the turret attaches as normal and can still rotate. Looks like it's supporting the turret, but is just for show.
Thank you all for the comments, been messing about a bit with other things. But this has been itching me for a little bit now. And had a thought. While I am at the build and paint I think I will try and explain more "how" I am doing things. I have changed the way I do somethings, a lot has been gained from the net, with so many proper modellers out there, I have stolen so many ideas and have filtered them down to a set of bits that help me, so think I will share them with you. If I do it right, I think I will start a Tut blog on the the tutorial section. Really am intrigued by doing videos, but so many people out there doing it, and (though I have you wonderful few) not many follow me, so not sure I would be benefiting anyone.
Anyway to the build.
More talk!
So GW do these Gorkanaut and Morkanaut figures. I have looked several times and don't really see what the point is. but they are orky. And I like the idea of a lumbering KFF to go with some kans and dredds, maybe a mob of boys. (please remember that I only play in my head, no game in like 12 years now.) So looked again at these monsters. And again. £65 for this thing. Hmm I can do better! Maybe.
So looking at the model I have one big prob. Now Imp. Knights and all the other races have giant robot thingies, on legs and though probably ridiculous in reality, they look like they could maybe work, but the orky stuff being bipedal looks daft, like anyone on top of that thing would be thrown of with the swaying movement if it could walk at all. I get that it is a representation of the Ork gods. but just really does not work for me. So I have the bare bones of an idea, I hope you will like it, tough if you don't.
This is a trukk and a set of Kans, cost on ebay less than £40 delivered.
Now admittedly I will be adding bits to it, I will try and keep to mostly these 2 kits.
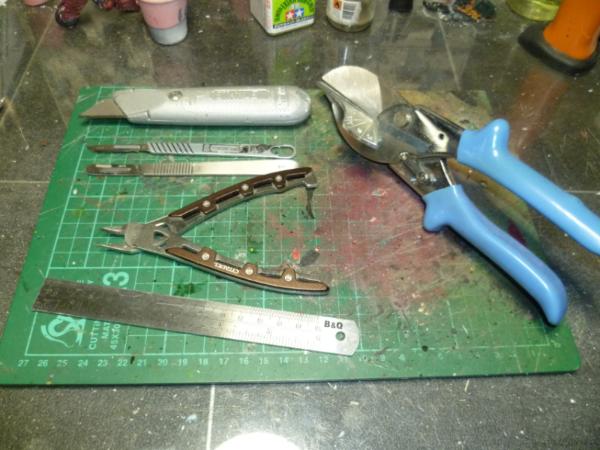
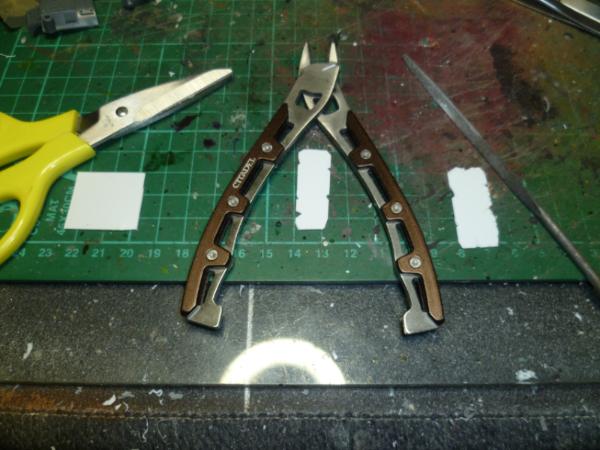
Tools, I have too many, but the staple diet of my chopping stuff up are..
A proper utilty knife, stronger and easier to use than silly modelling knives.
Scalpel obviously
Scalpel based razor saw thingy (new but love it sooooo much) truly excellent at cutting things up with minimal waste.
Side cutters, tried loads they are all the bloody same, yes these are a GW set that are very expensive and i am gutted that I have nicked the blades within months of having them.
Steel ruler, doubles as cutting guide, I have stuck a sheet of rubber to the back of mine to stop it slipping about.
And the Styrene cutters, somewhere about £15 off ebay, speed up cutting tremendously.
So many other tools you can use and will use and I am a tool/toy junky so I have boxes and rooms and sheds full of them, but these are my staples.
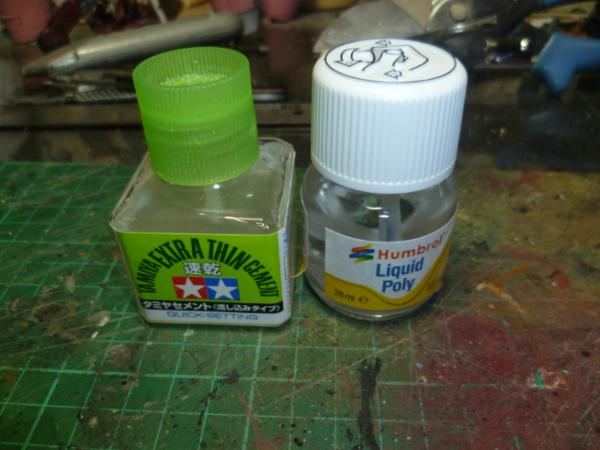
Glue..
Just about all plastic work I use these in combo. Apply the Humbrol to area, stick it together and then run around a bit of the Tamiya and it is solid.
I use various others, superglue and contact adhesive, hot glue, pva and epoxy, On these others I have no favoutrite, over the years I have tried many and they are all as bad/good as each other.
Enough boring stuff for now, build time.
Have found some dimensions on the net, (if anyone has one please send me dimensions, pretty please) But main body seems to come out at 12cm front to back, 6cm wide and 13 cm tall.
Spoilering this as it is quite big...
Spoiler:
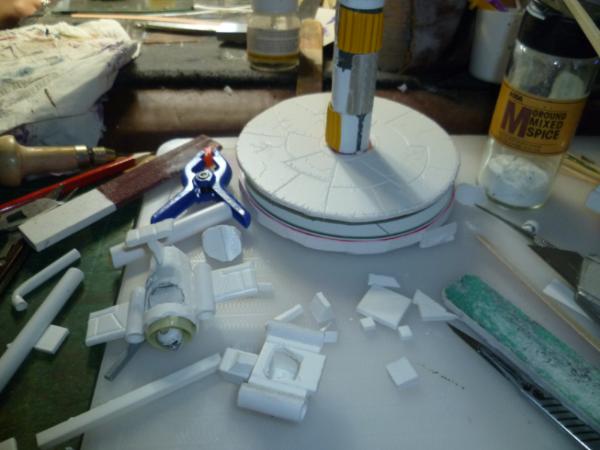
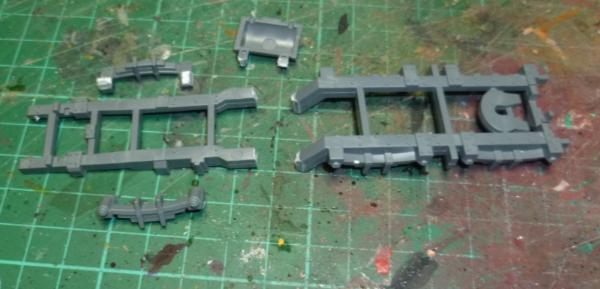
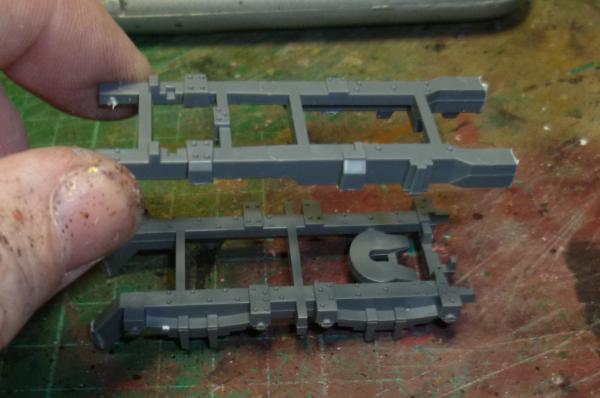
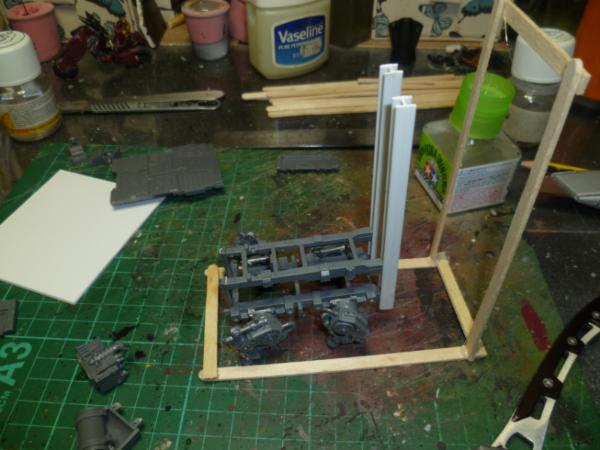
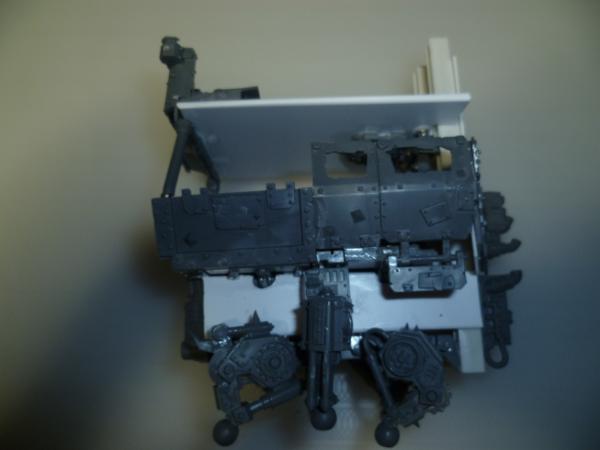
Cut up the trukk chassis...
Dont want the fuel tank there, Wont need that front suspension attached and also removed the hitching plate.
Going to build this up in layers..
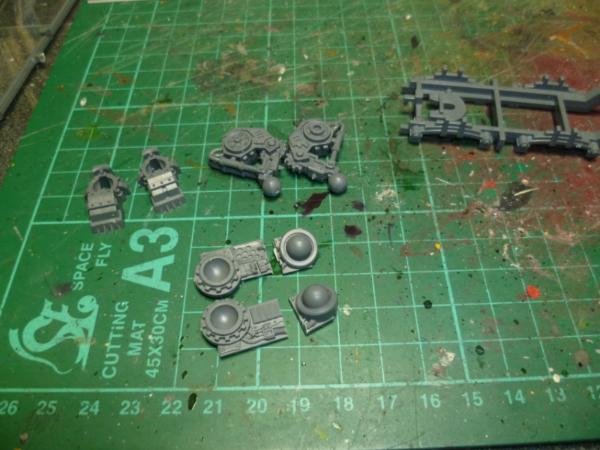
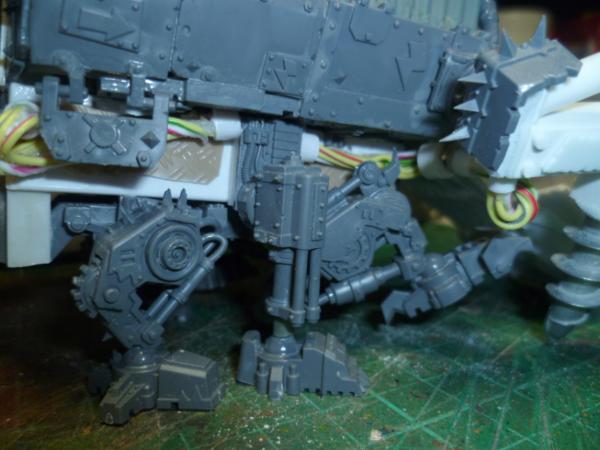
For the legs thought I would go with a multiple leg design, got a bunch from the kans soooo.
Cut the ball joints for the legs off.
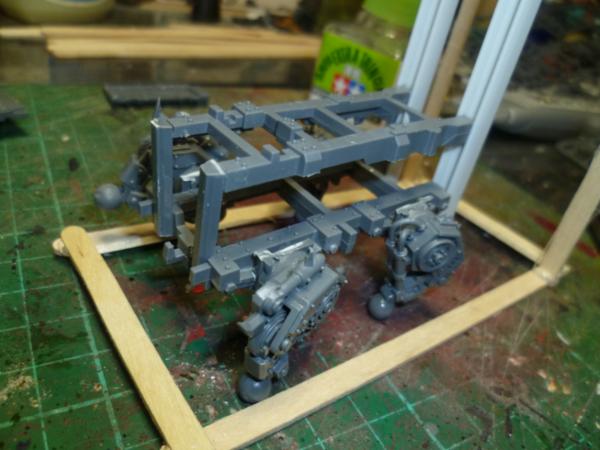
Started to attach some legs..
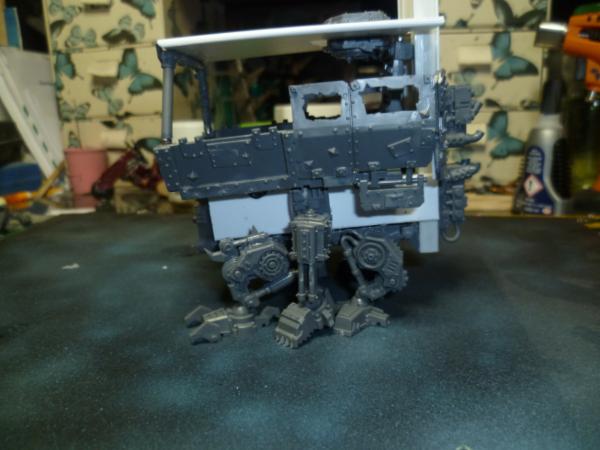
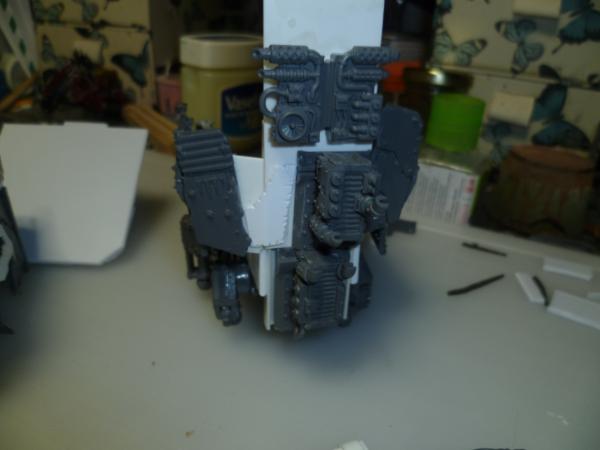
Added a bit of sprue, and two H beams that will act as a spine for the kit. Note the coffee stirrer frame, just hotglued together, that is a rough guide for the size of the model, a 12 x 6 x 13 box the body needs to stay within.
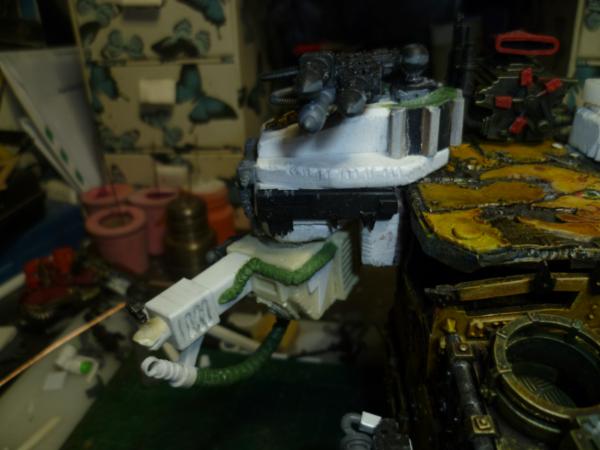
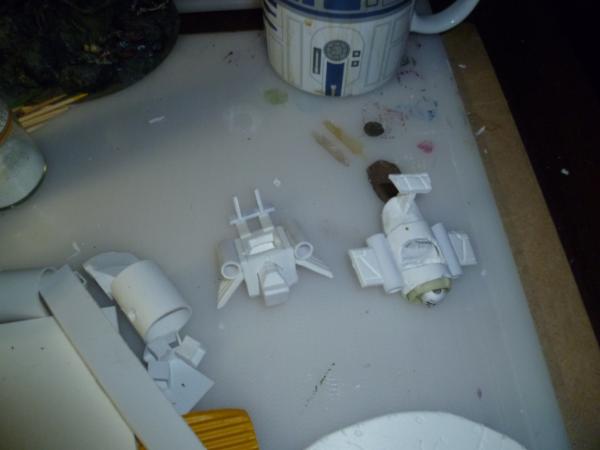
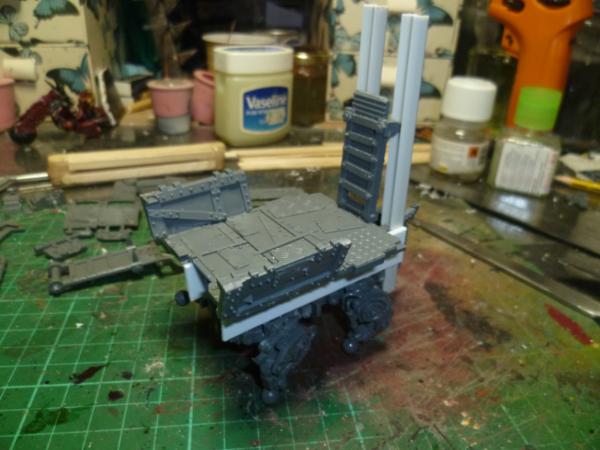
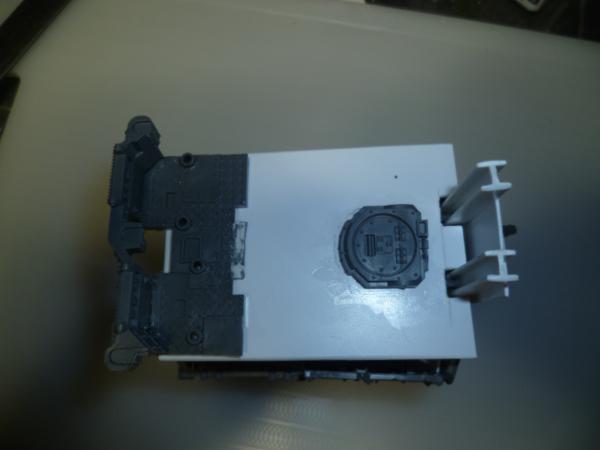
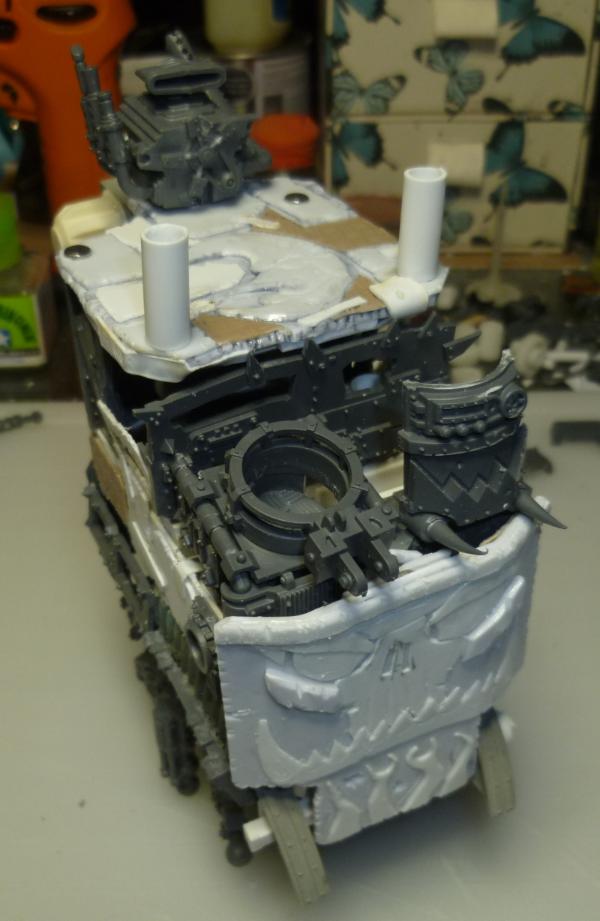
Added the trukk bed, this will be the "transport" are, also ladder to upper llevels.
Second level, manetized so can be removed to paint.
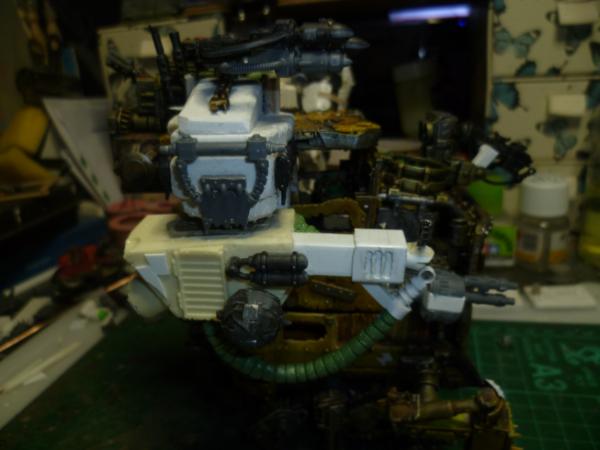
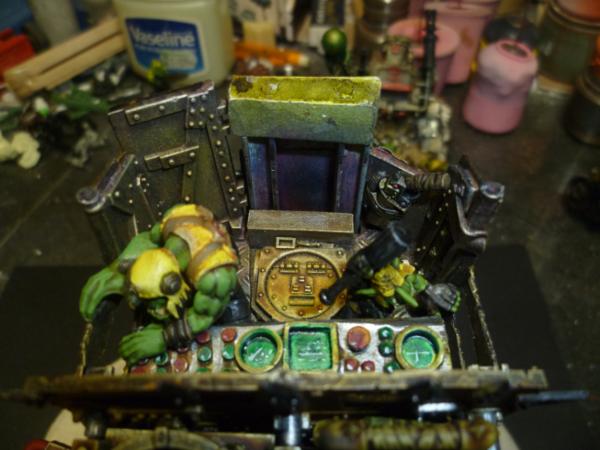
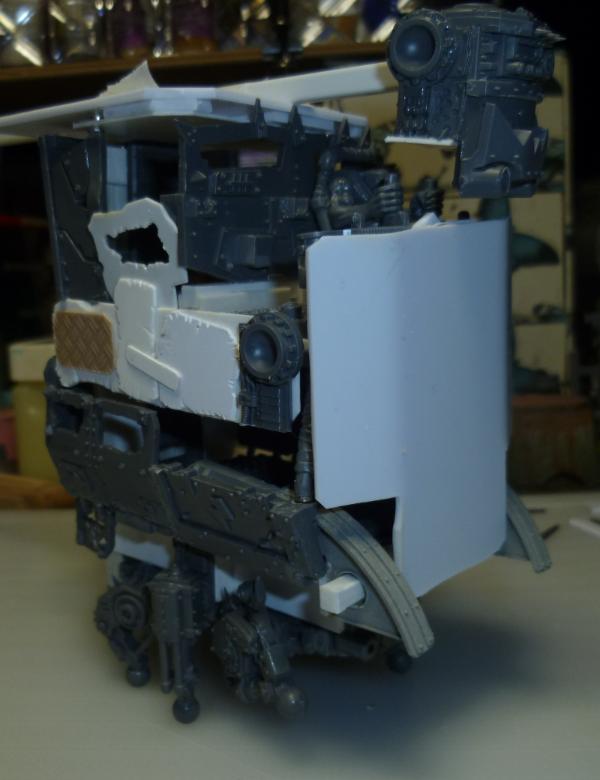
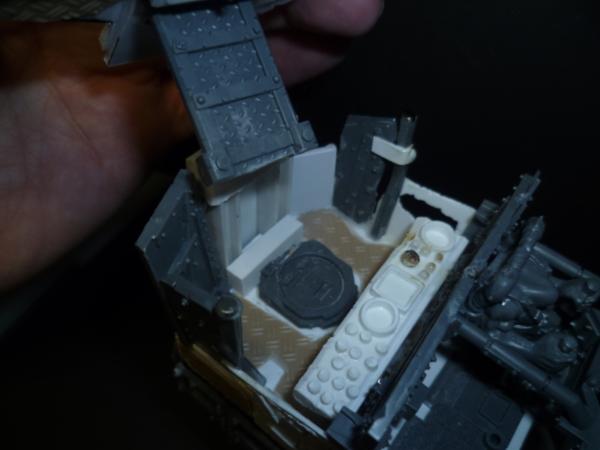
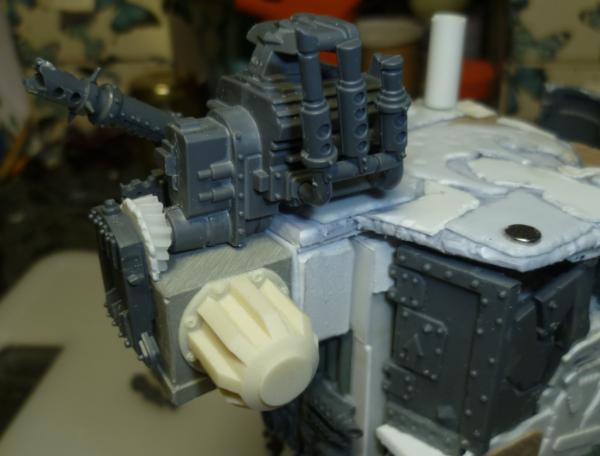
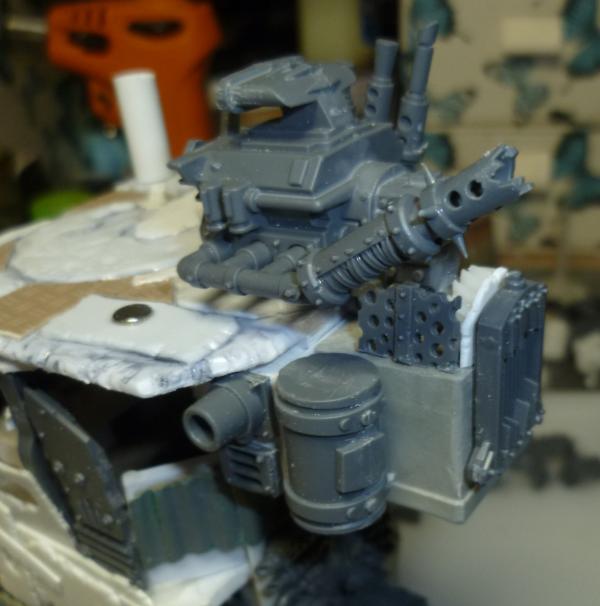
Added cockpit area.
All six legs in place, fit well.
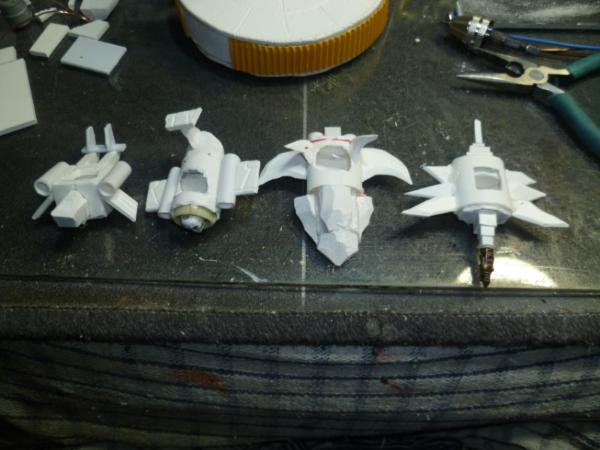
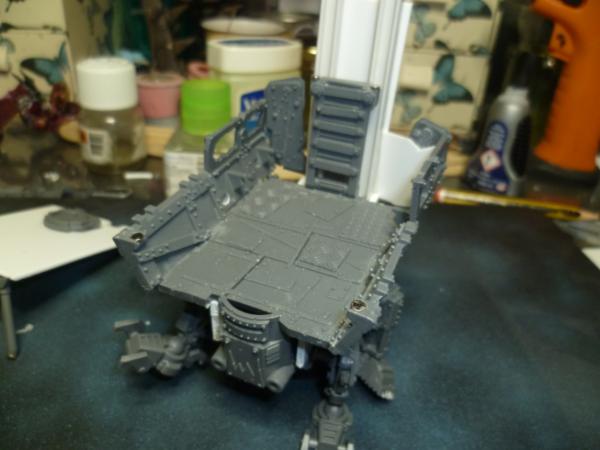
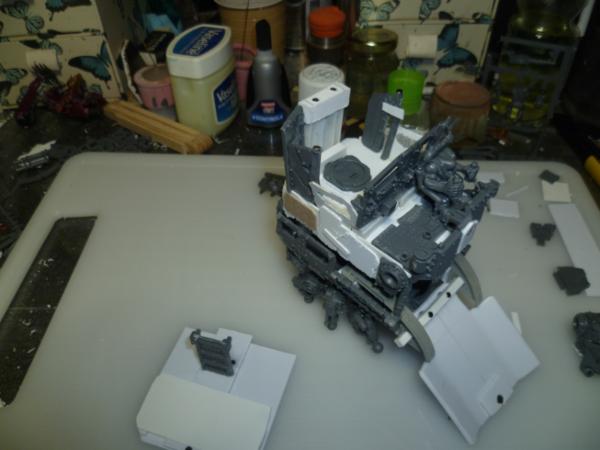
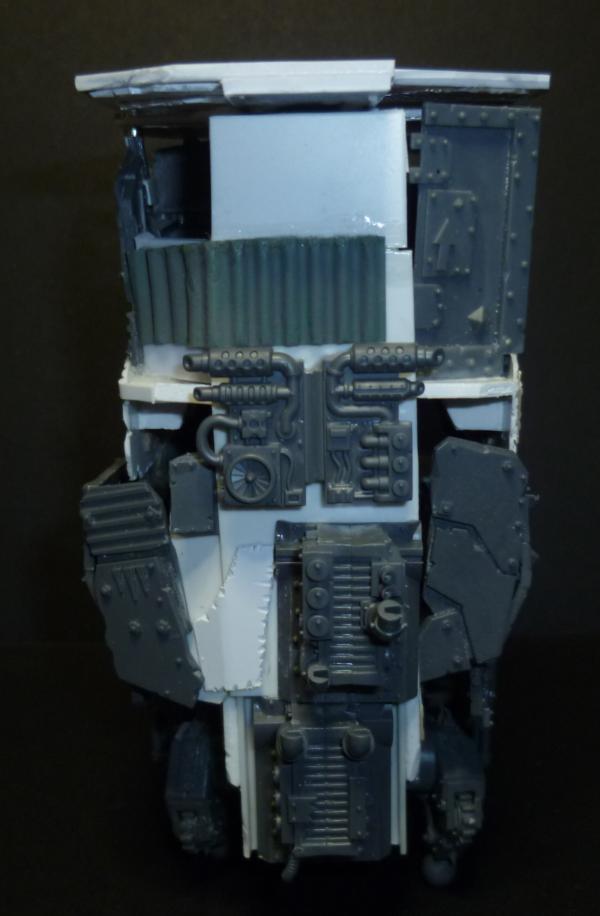
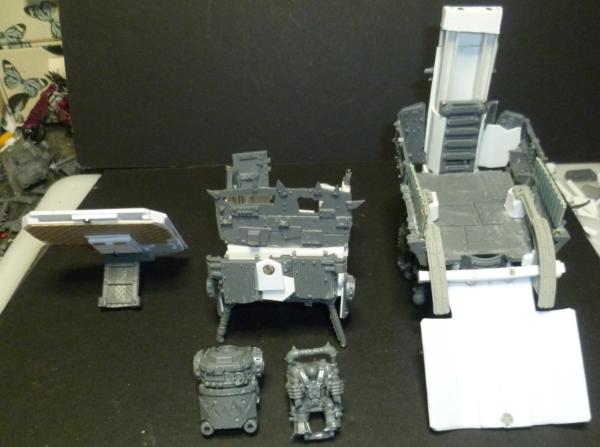
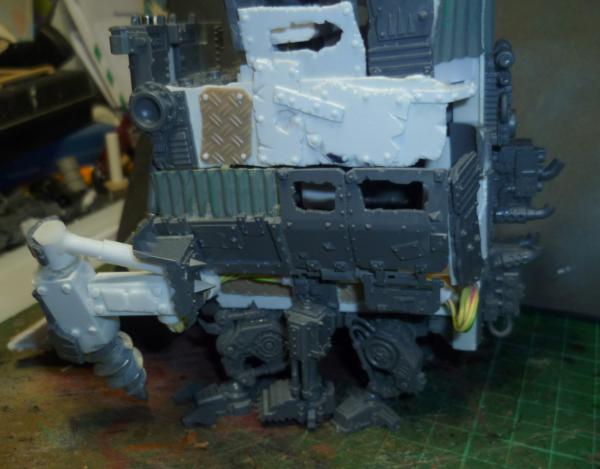
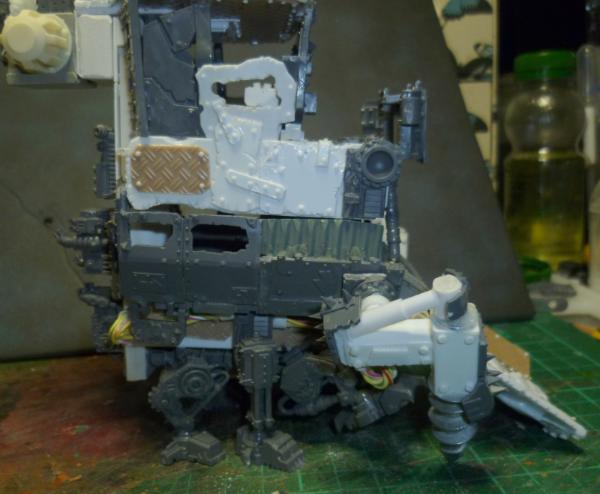
Now fast forward a little...
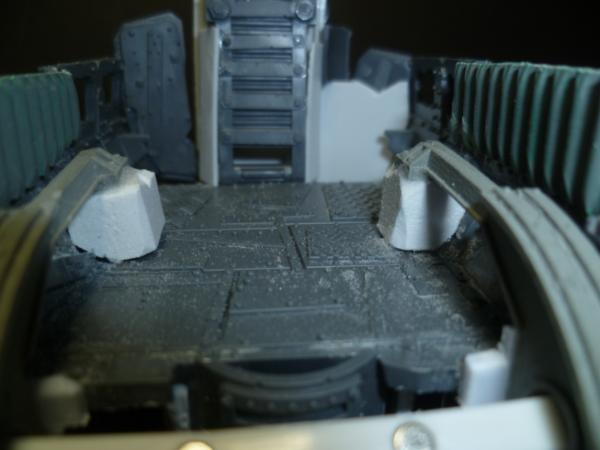
Three levels each is a magnetized snug fit so the model is easier to paint inside and out. Will go over how I do my magnetizing soon.
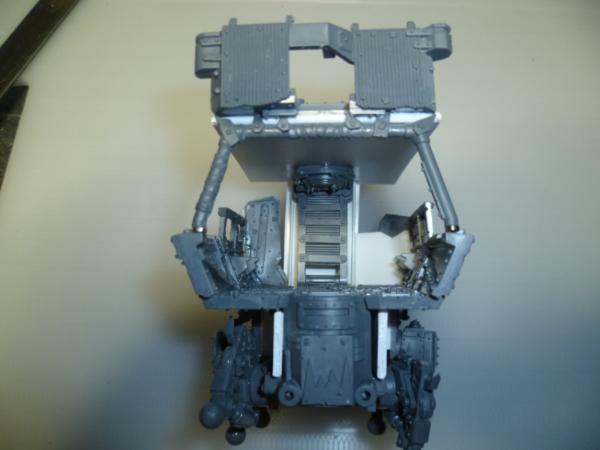
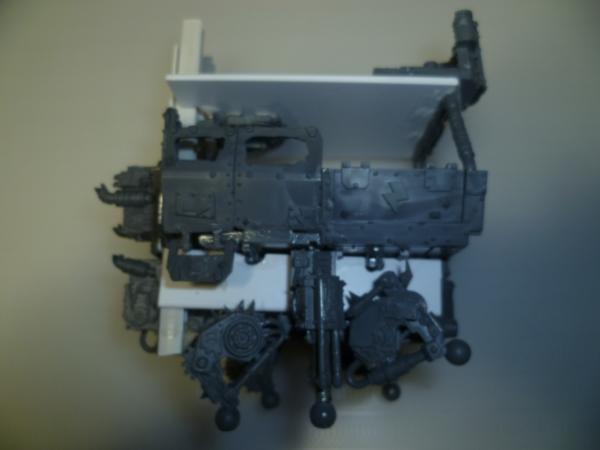
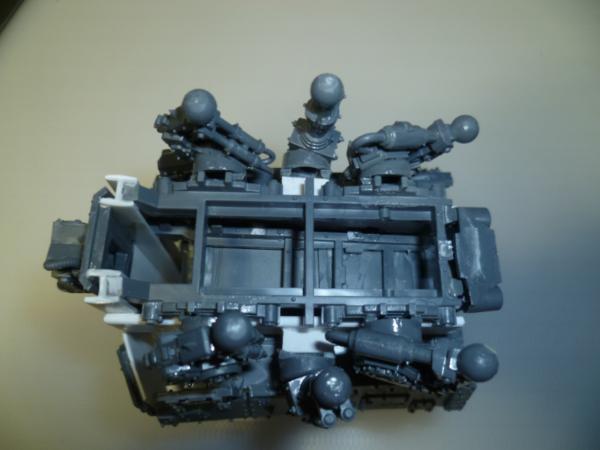
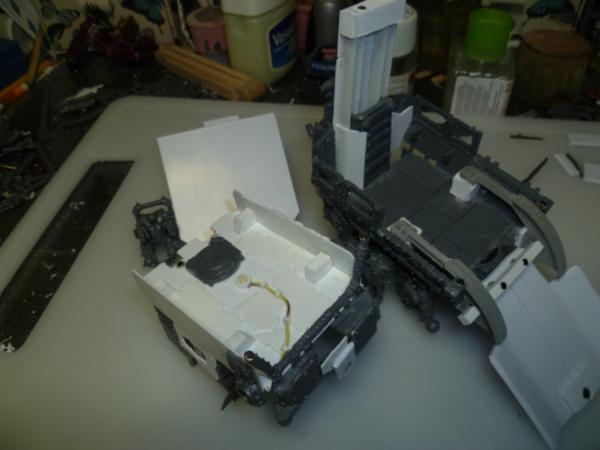
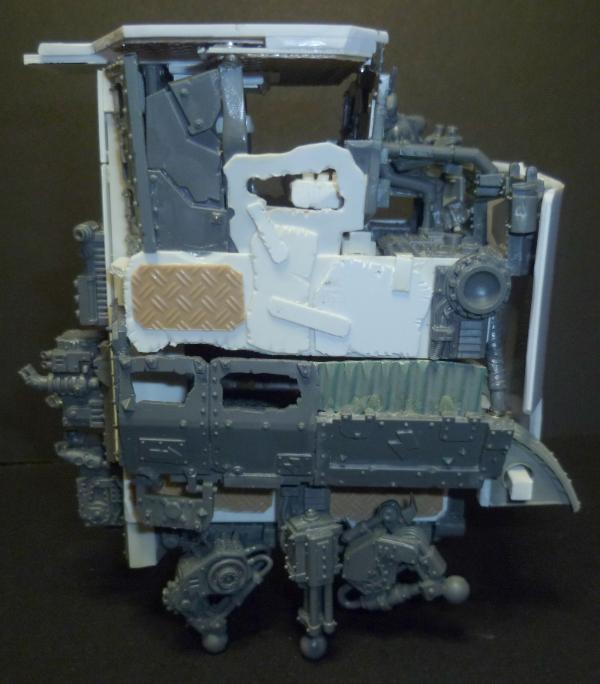
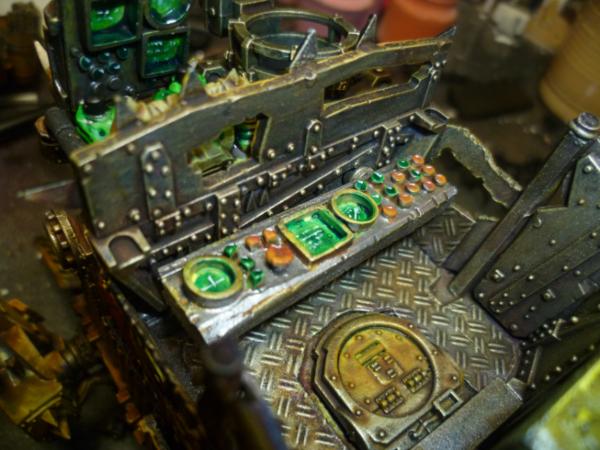
Top layer off.
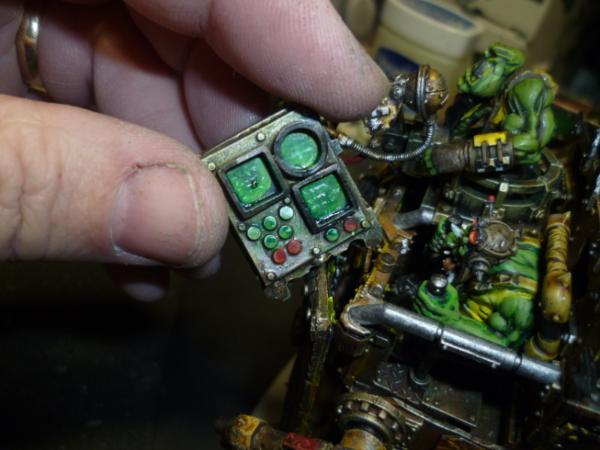
Mid layer off, note the detailing of the roof.
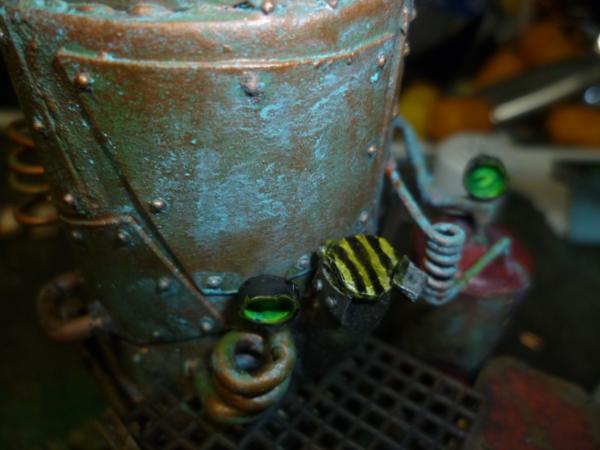
That light is a piece of styrene tube glued on then a drop of hotglue to form the lens. Talk about ork panels in a bit.
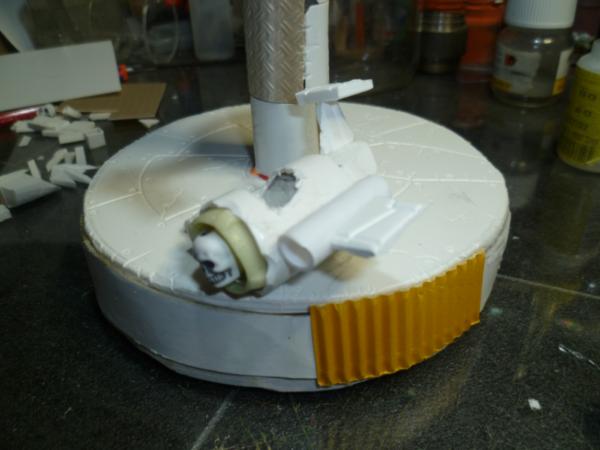
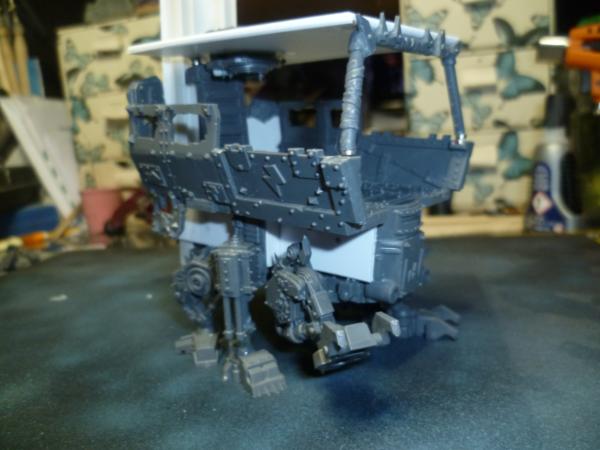
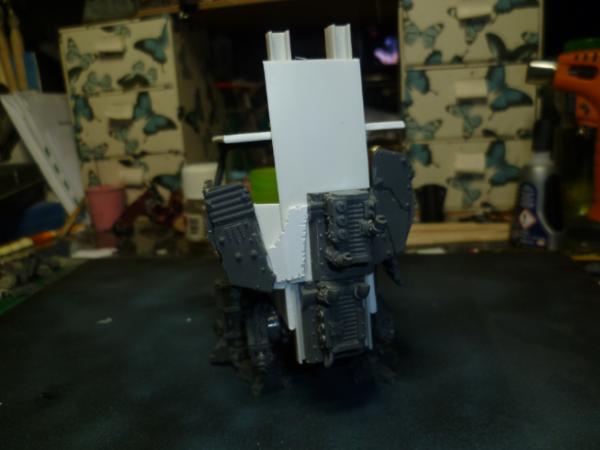
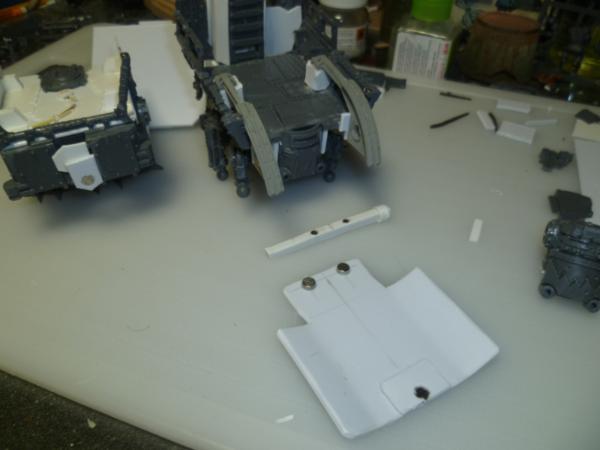
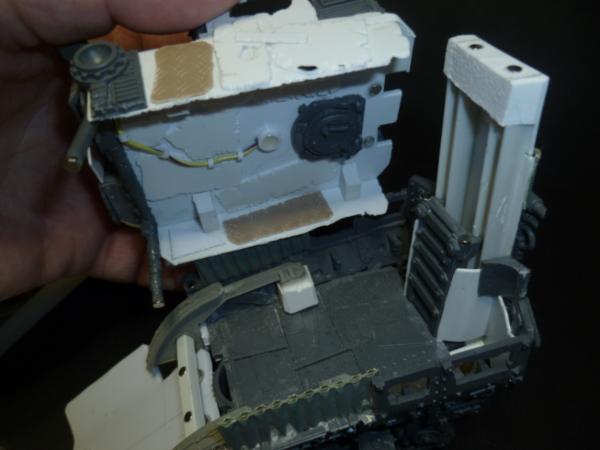
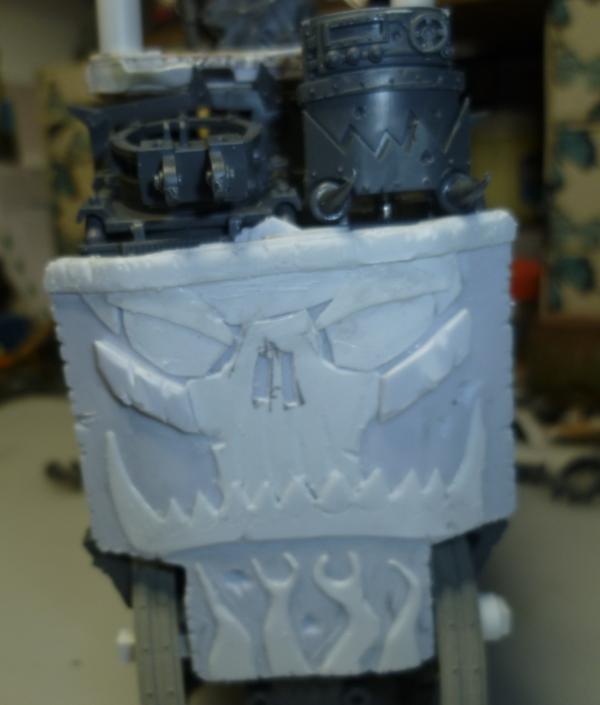
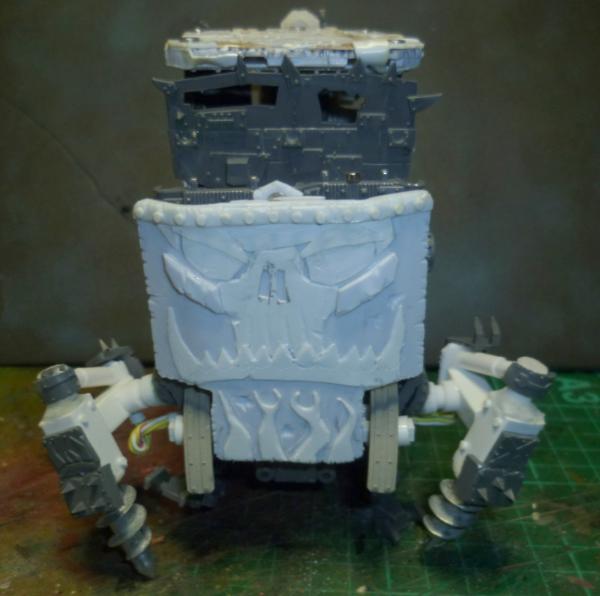
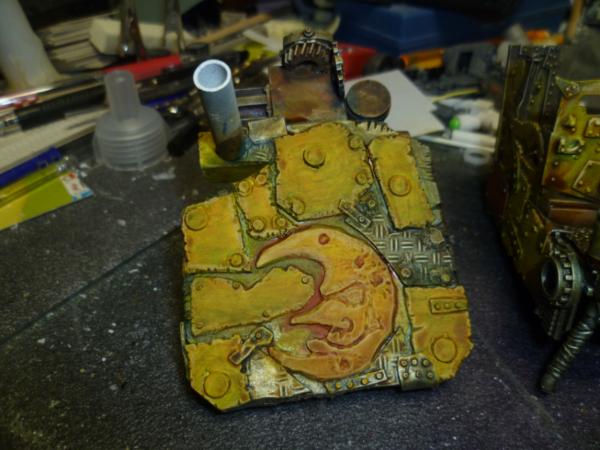
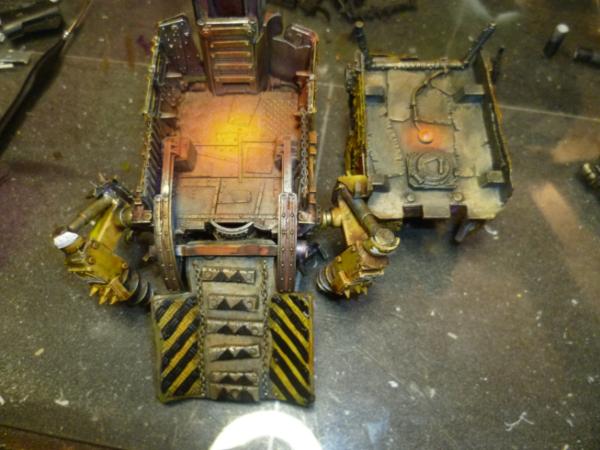
Front ramp/armour.
Magnetized for ease of painting.
Here is the back,
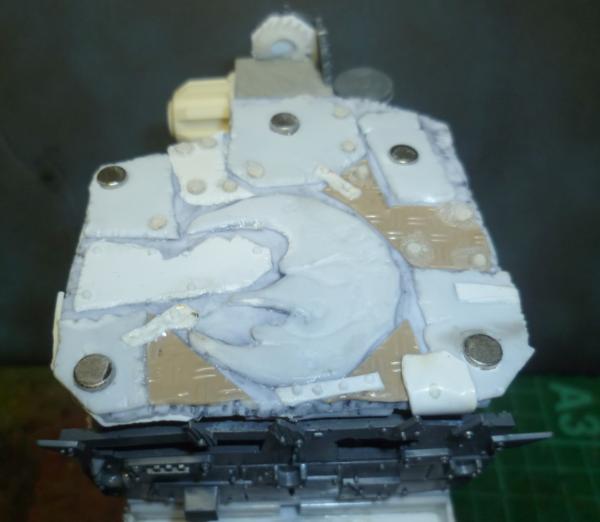
A quick note on Orky panels...
Cut out an uneven piece, can be card or anything. Nibble at the edges with clippers, then file vigerously with a triangular file, clean up with a quick sand, it does not take long and is so worth it. There are a lot of orks out there who cut very straight and clean lines!
Now that was massive and wait until I get the paining thats the real muck about.
I really would appreciate your thoughts everyone. I am not trying to teach anyone to suck eggs here, but more a record of my curent methods. Thanks for looking.
Only 13 CM tho? I thought they were taller :( that's a bit disappointing. I've not got one either obviously. My understanding is they're not horribly good in game (not that I've played much)
To be honest I think this could be he is best conversions yet ( although there are many great ones, love the staff car just because of it simple but elegant lines and for it's pure 100% scratch build works perfectly and I a must envious of it, also this was to long of a sentence to put in brackets ) as for this latest build it's the creativity and reuse of kits that has blown my mind with the build and it it's Orks
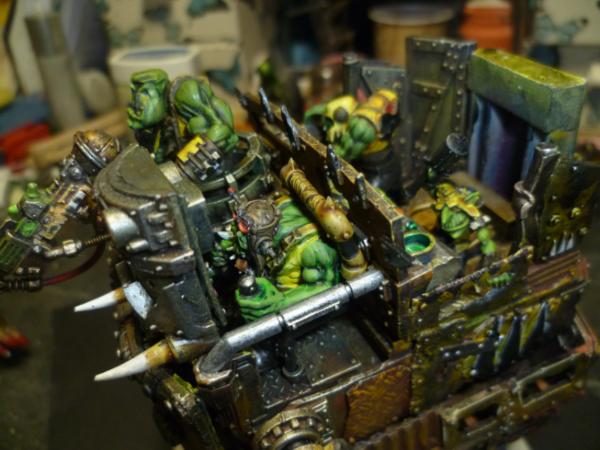
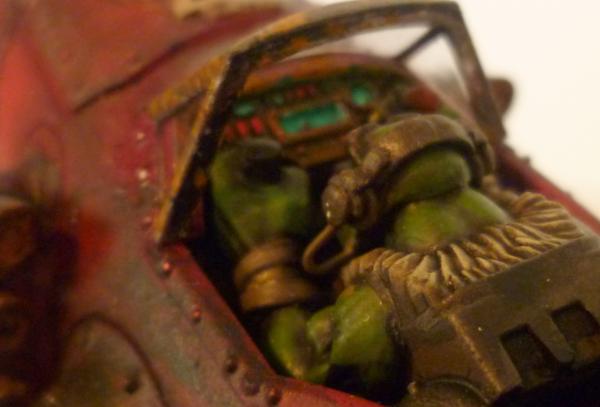
The levels aspect is great and the fact that it seems like a multi purpose vehicle, the kan body being used as a cockpit section with the seated Ork behind I love.
Oh hello there! That popped up quick, your creative vent has an insatiable thirst for plastic. I'm guessing a big Orky face is about to materialize itself on that ramp? That would be wonderful.
@ Guildenstern, Thank you , I am hoping to get some accurate measurements but to be honest I am not worried.
@ Zobo, Thank you @ YnneadwraithMade, your post makes me really happy, glade to help.
@ Vik, Thank you sir.
@ Stonned, It does have a certain something..
@ LDD Thank you @ dsteingass Thanks Dave, and very probably, definately something growing in my........um sorry.
@ Casey, you read my mind, just how close do you live?
@ Red I used to use them in a previous job working in PVC, these are really sharp, give a nice clean cut and have handy guides on the anvil. Link below to similar on ebay.
http://www.ebay.co.uk/itm/MULTI-HEAD-PVC-CUTTER-SET-plastic-window-cut-trim-pipe-/361011323585?hash=item540df3a2c1:m:mv7GGdxHREhnFnN-MvtOKRg @ EDC Thank you sir.
Did a little work today....
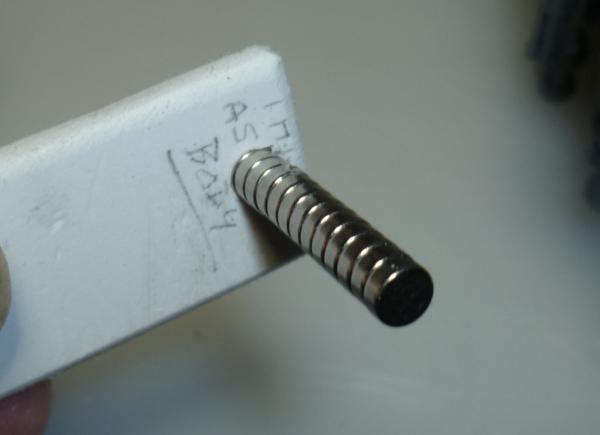
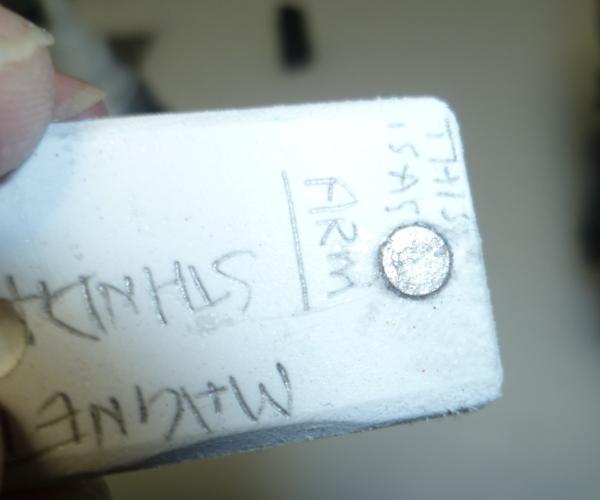
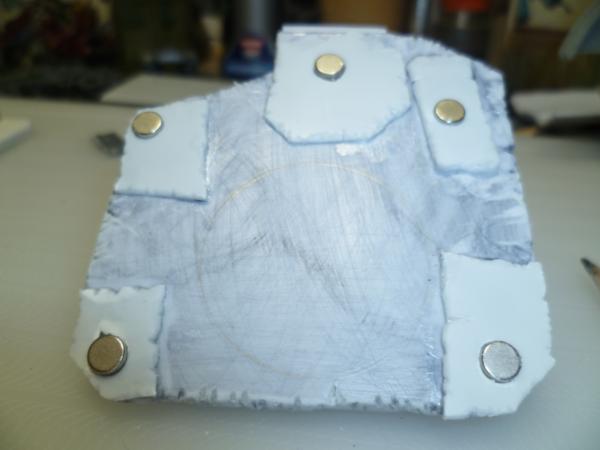
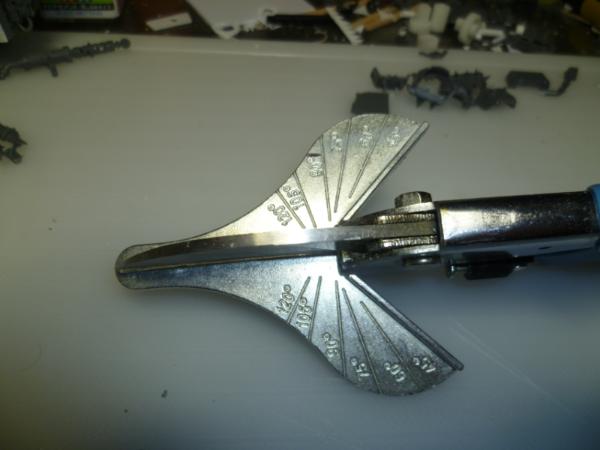
First lets talk about magnets a little. We all know they are available in many sizes and shapes. Tey are incredibly useful for offering options on models, and I use them alot during construction to enable a model to be made in sections. One of the problems you get is the polarity of the magnets, so I made a simple little guide...
This means as I work away from the body all my magnets on all my models have the same polarity. Also helps to stick magnets in place easier.
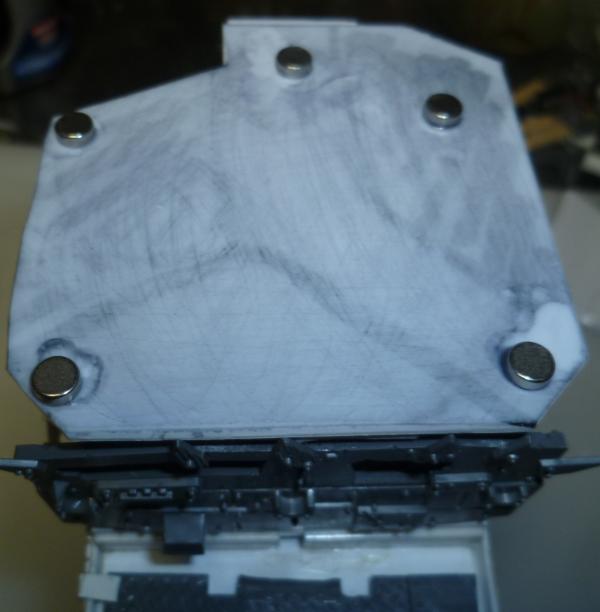
Now I am sticking a bunch of magnets on the roof, these will be to hold some static parts, that under most circumstance would end up snapping off, and also will enable the "arm shoulder" joints to be mounted later, and if I do it right, they should allow some movement of the arms.
Next I will put panels around them to keep them nicely in place and bury them. In this case I did not want them burried fully as I want the surfaces to have a slight gap.
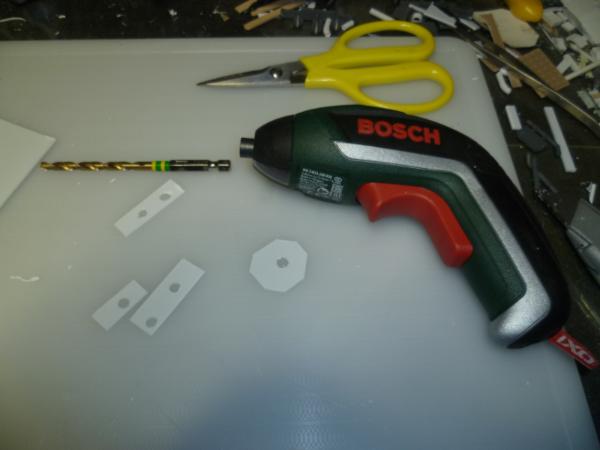
You could fit the panels, or just drill into the plastic, I do many different methods myself, but here I chose to place the magnets, get them stuck down with superglue, and them start to build up a panel effect. One of the things here is drilling the holes. I have for some time used this...
Bought a set of hex drive drills ranging from 1mm to 10mm in 1/2 mm increments, did not cost a lot, also bout the hex drive micro chuck.So can handle drill bits down to 0.3mm. The drill is a screwdriver, and has very low rpm, but high torque and a brilliant battery life. Basically it is small comfortable, and easy to control, highly recommend. This one was about £40
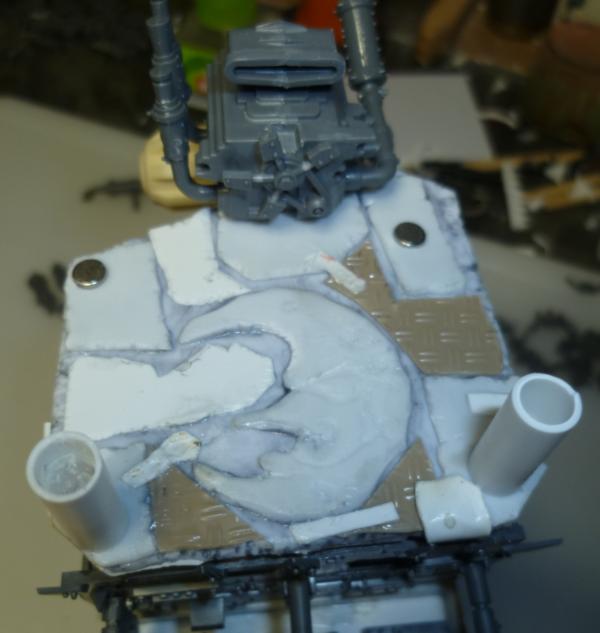
So a few more panels on the roof and ..
And Casey I sware this was done before your comment...
Then there is this unit which will be the KFF...
Well folks, thank you so much for your comments, I cannot tell you how wonderful it was to open my blog just now and see all these wonderful words.
Only had a few hours today, hoping to get a full long day at it tomorrow.
Thoughts as always appreciated, thank you so much for looking.
Magnets? Bah! Have a bunch of them. Never used them. I probably should...
A rotary tool like that in which one could chuck a pin vise would be awesome. I can fit my pin vise into my drill chuck, but that is just asking for disaster... I can fit my bits into a collet on an attachment for my dremel, but the RPMs are too high. ( it goes no lower than 5000 rpm) I'm going to take a closer look at those screwdrivers. Hmm.
@ Dave, oh yes those were the days...stopped that a while ago, and not looked back. Must be the Bloodaxe in me, conforming some of my methods.
@ Red, Magnets are really useful. Especially like this or for buildings, were you want the thing to stick together but you also want to be able to access the interior. I will always be able to pull this apart to look at the interior. Or you could have a building section removable for access or even to represent damage. Also see below for tool thingy whatsit...
@ CommisarKhaine, thank you sir, and great thats why I am here.
these cutters are on my shopping list for years...but somehow i never allowed them myself ... yet....
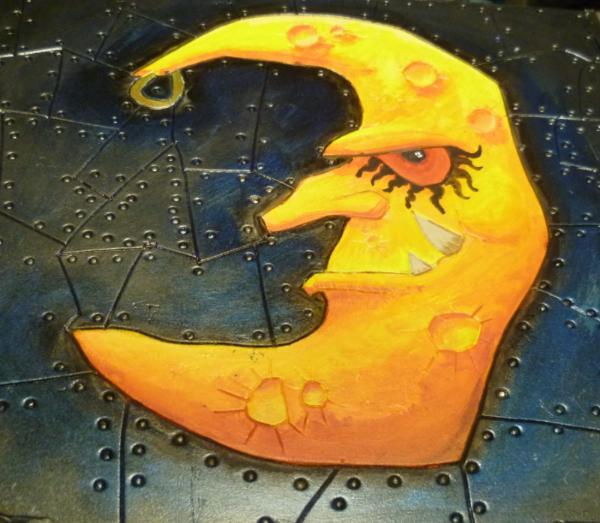
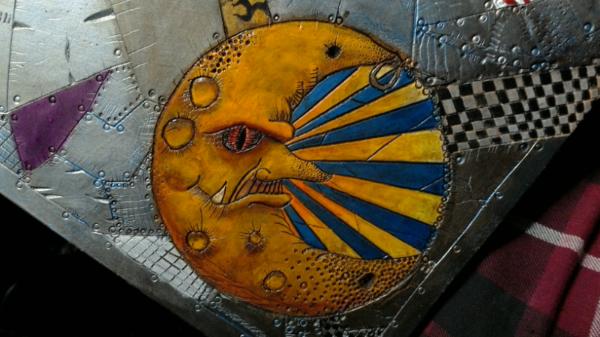
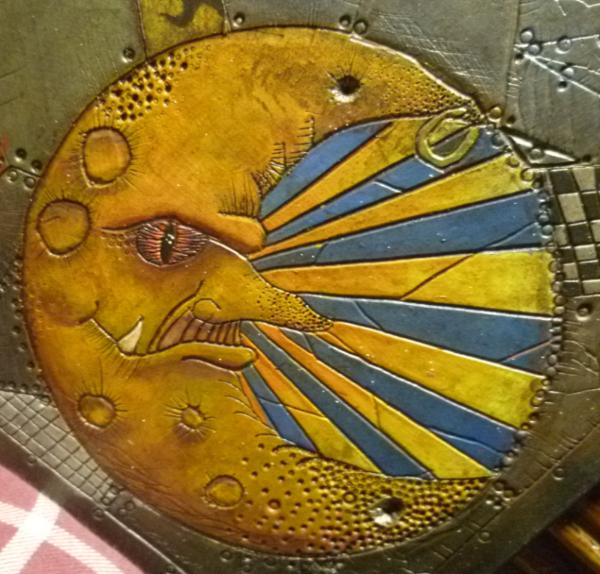
the detail work is awesome...that moon and the face!!!
but as always...your tutorials and dare i say lifehacks is what truly makes ones day! i only truly ever used magnets...and that went down a wobbly lane...in the end i found my way...but you sow it can be done with brains...instead of frustration...
and yes...screwdrivers are for hobby purposes way better as a drill...i have that bit holder thingy for years and it is a most precious tool!!! i even use it to make wire spin into thick ropes (dunno if that came through the right way^^)
Have to agree the detailing is top work mate, the moon really is top work really has that classic Ork feel to it ....... classic Ork that's like saying traditional modernism
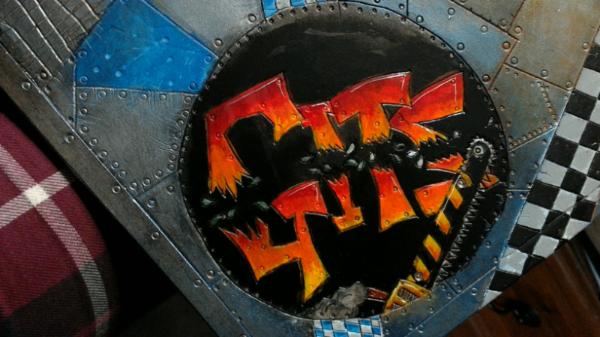
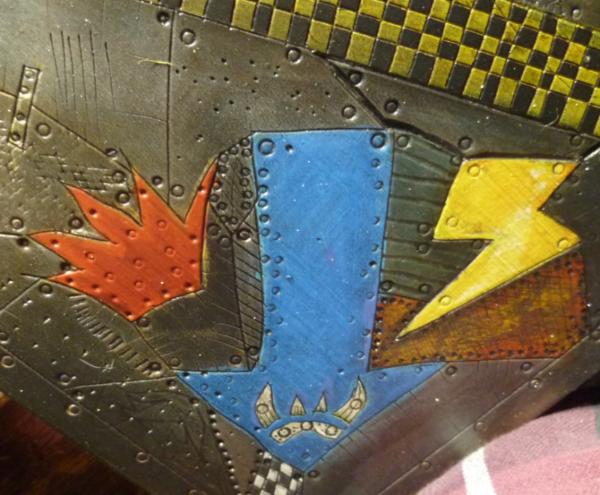
The door hatch detail is great work nice and aggressive looking can't wait to see it painted.
As for the magnets good idea to work out a system for the polarity, I was following a build on FB and the guy had fixed some of the magnets the wrong way round not a happy chap plus he had sunk them within the model so it was not a simple pop it out and reverse job.
@ Anpu, yep
@ Casey, Thanks bud.
@ Vik, Thank you, And does make sense, I use it that way too, just put 3 or 4 or more strands of wire in the chuck tighten it up and hold the other end with pliers, 30 seconds later you have a nice twisted wire.
@ LDD, thank you sir. Think twice I always say. And paint is coming,
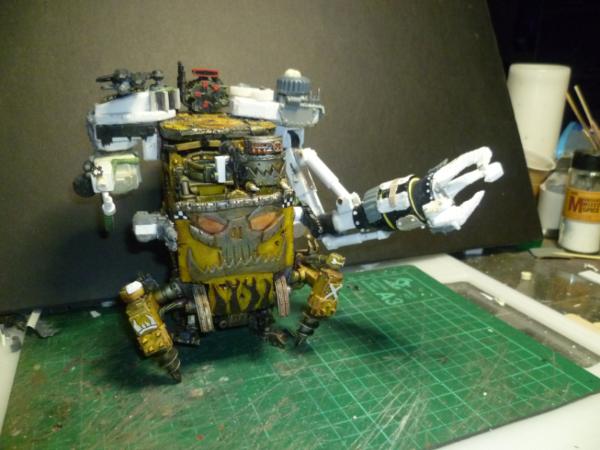
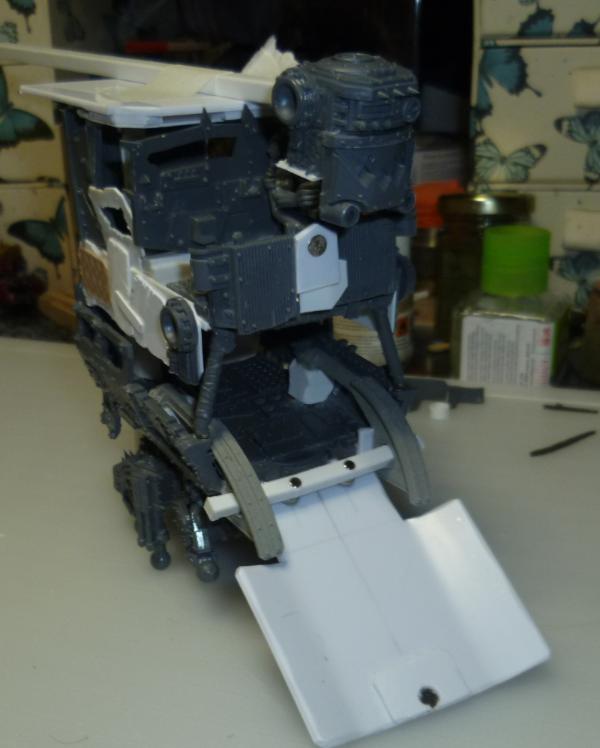
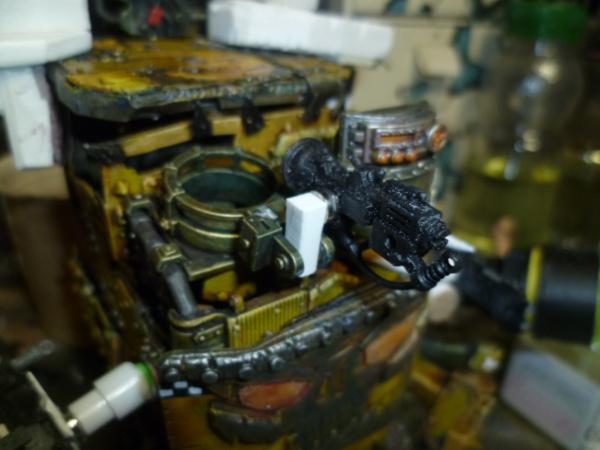
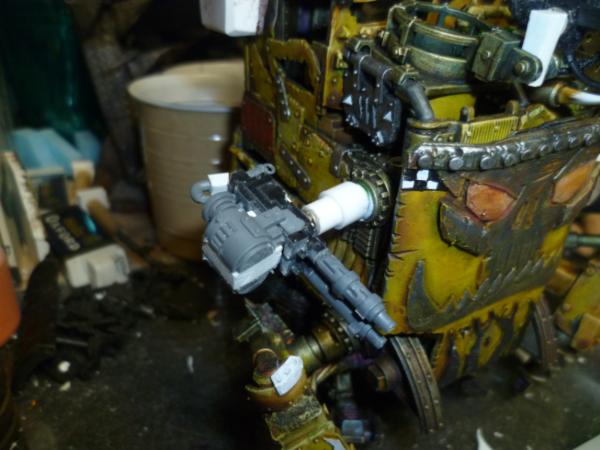
Been doing a few more details. Want your opinion on the front legs here, wanted to make it more spider like, but not sure...
So as you maybe see, I have added rivets, some cabling few extra panels, and a pair of legs at the front. Next up will be paint.
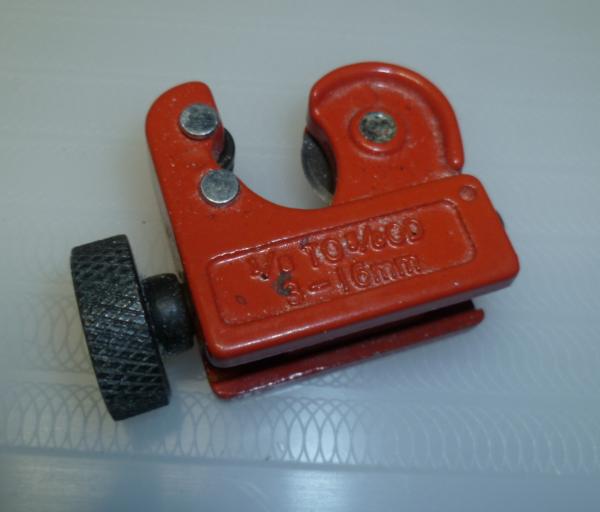
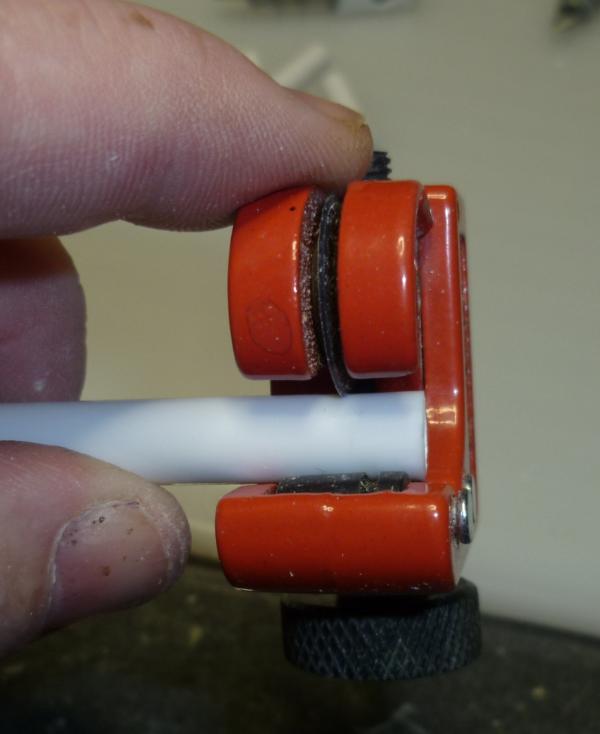
As a quick note used this little blighter today and thought I would share, I use it all the time to cut styrene tube nice and neat...
Literally a couple pound gives a nice finish to the tubes with no clean up required.
Again thank you all so much for the wonderful comments, thanks for looking.
i got me that tube cutter after dave praised its use...but curiously i had difficulties with mine...somehow the blades wobbled and i often lost the "track" and cutted spirals instead...
and yes, you´ve described it way better than i did^^
and i see the spider...or maybe an ant...with big mandibles...
Nice work on both, building and making my shopping list longer.
Good details, I appreciate the wires/pipes underneath for the leg hydraulics.
When I used magnets on the Helbrute conversion I avoided the polarity issue by only using one magnet per join and a piece of metal in the other half. Was plenty to hold on weapons, but wouldn't do for heavier joins.
Looking good really pulling all together with the finer detailing (rivets of course) I forgot for a miniute it was on legs ha ha after all that.
Good idea with the cabling (wire) adds to the realism and mechanics, loving the two new front leg drills, metal raw plugs by chance.
@Vik it's not you mate mine did the same thing, when I use it the blade wobbles slightly and the cut comes out slightly angled. I bought a slightly more expensive version, it cuts spot on every time.
@Dr H I considered that if a metal strip on one side and magnet on the other would work as well ?
lone dirty dog wrote: ...@Dr H I considered that if a metal strip on one side and magnet on the other would work as well ?
It's all a matter of the magnet's strength (and it's size), the weight of the pieces being held (and if they have additional support), and the distance between the pieces across the gap.
For all the weapons I made for the Helbrute, the magnets I used were strong enough if I kept the gap very small.
Best case is the have the magnet contact the metal, obviously. But I wanted a really clean finish to the "stump" and overlaid the metal pieces with the thinnest plasticard I had (0.25mm) so that there was no risk of them being pulled free of the model, any thicker and the magnet wouldn't hold. The magnets were puttied in and sanded over to a flat surface.
That's what my concern was with the metal too magnet set up that it would be a weaker bond, I think personally I would go magnet too magnet just for that extra reassurance but it's an option to consider.
lone dirty dog wrote: ...That's what my concern was with the metal too magnet set up that it would be a weaker bond, I think personally I would go magnet too magnet just for that extra reassurance but it's an option to consider.
It will be weaker than magnet to magnet, but some cases don't require that much hold. You can always try out a piece of metal glued on and if it doesn't hold, pry it off and drill in a magnet.
The main reason I used magnet / metal on the Helbrute was to cut down on the number of magnets used. For two arms I had 10 main weapons. Those were attached using 2 magnets, rather than 12... That's just one model (there were other magnets for minor bits too), multiply that over an army and you have quite a saving in magnets.
That drill chuck, yes, I must get one. I had not idea that such a thing existed. The pipe cutter, these days they come in standardized sizes. I have for for 1/2" and 3/4" copper pipes. Very convenient. For plastics, a razor saw and a mini miter box work well for me. I'm quite used to using a miter box though.
It definitely needs a desert-esque paint scheme. Spider like? Add some chelicera. They might work underneath the gate on front. Also, lenses grouped on the front in a pattern similar to spider eyes.
Casey's Law wrote: Oh no I've been rumbled! That rustling in the bushes is definitely not me...
Would like to reply to you all but a general Thank you will have to do.
@ Dr. and LDD, yes a strip of metal works well on many joints, and a lot of what I have done on this model you could probably get away without magnets at all. On the Ork jet I used metal strips on the wing mounted bombs. Works well. However any time you need a bit more security Magnet to magnet is best. On a slight not, I have also used ball bearings with magnets and they work really well.
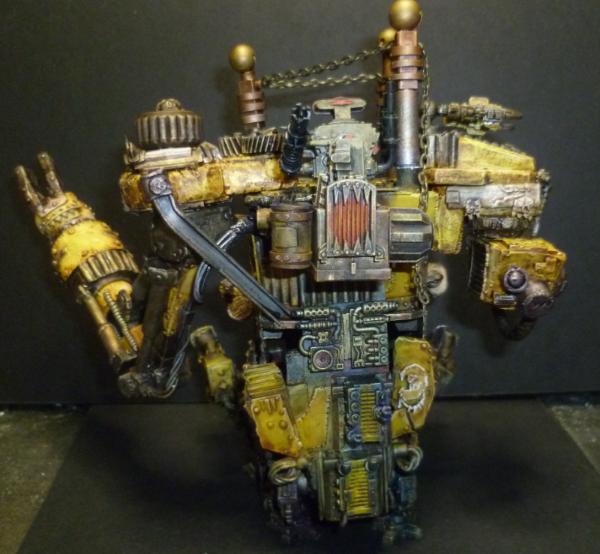
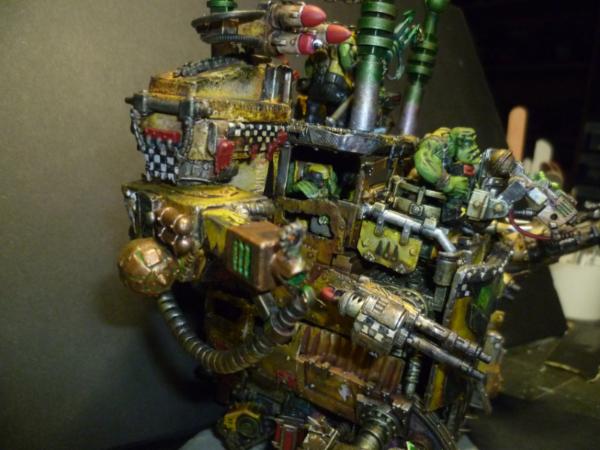
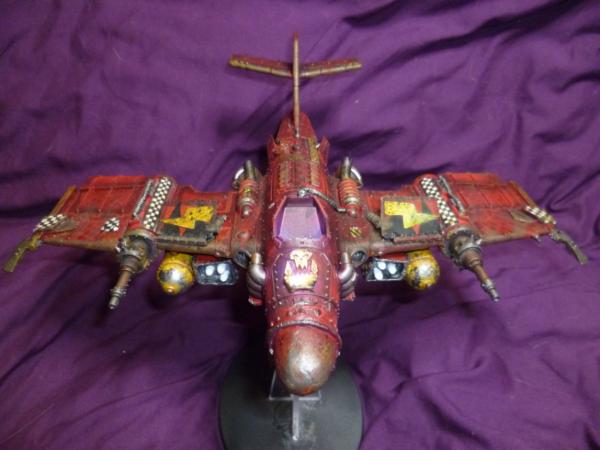
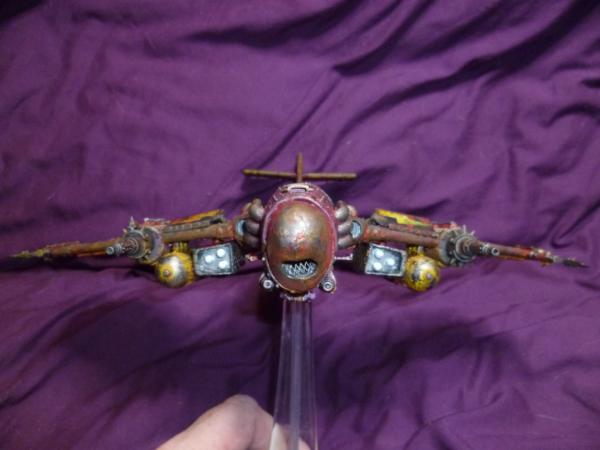
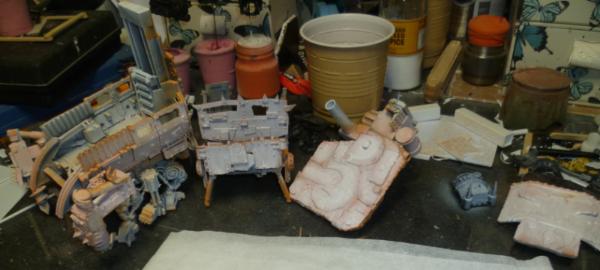
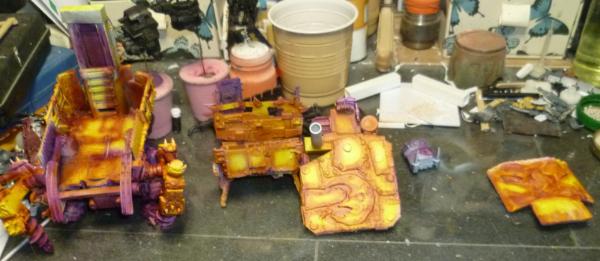
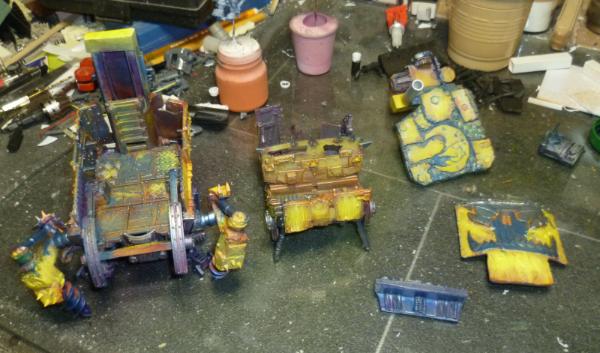
So painting has started. This does not mean it is complete on the modelling side, I am just at a stage I want some paint on it. As I have said many times I am no painter, and much has been stolen from various sources, I am always a mess until I get near the end and tidy everything up.
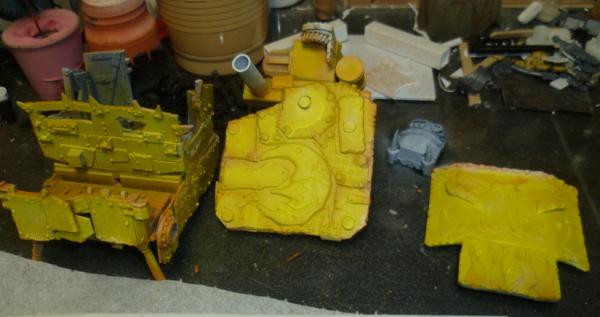
Ok so a prime of black and white zenithal rattle can primer. Then a complete coat of Fiery Orange then a build up in the centre of all the panel centres.
Then a coat of an ancient yeelow ink wash.#
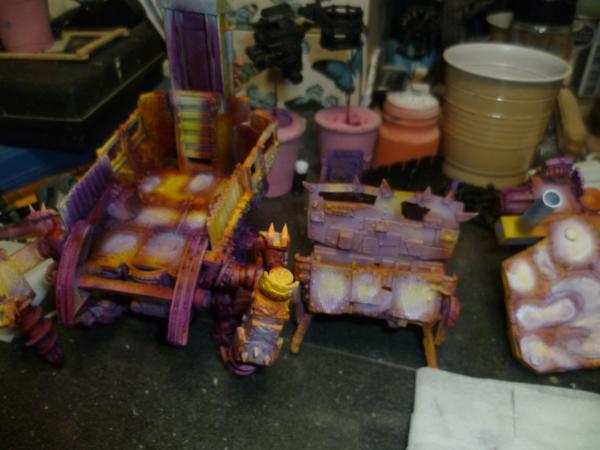
Then a airbrush to run around the panels etc in purple.
Then a repeat of the white to the centre of the panel
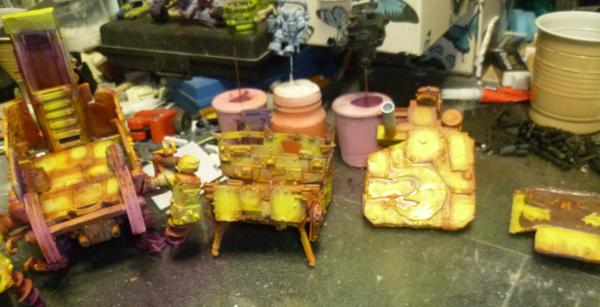
Yellow...
Then I gave it a go over with chainmail on the metallic parts.
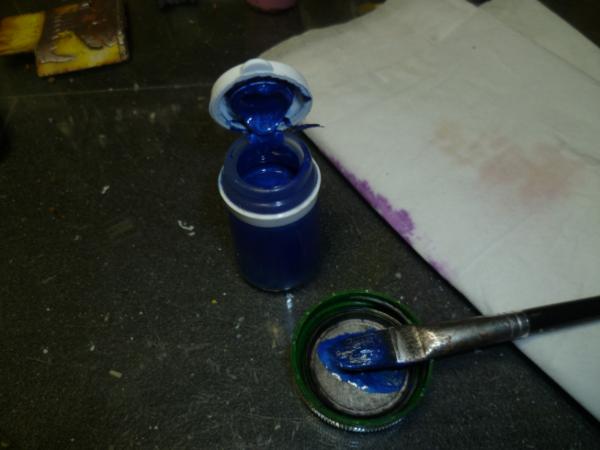
Then went over the metallic sections with a blue metallic This paint is an antique,
Then it looks like this...bit crap but hey.
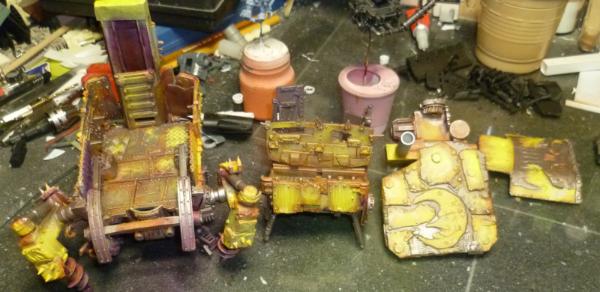
So results as it stands
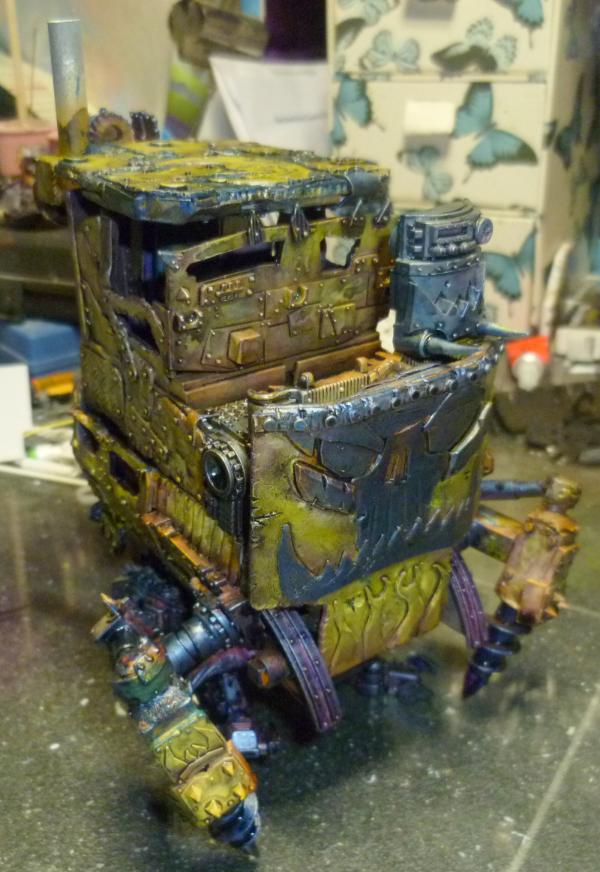
Then with a black wash over the whole thing.
@ Red I will be bringing it into that ideas, Love the multi eye .
Looking great, don't give yourself such a hard time about painting. If you're not being judged on your technique then the point is to achieve a certain goal. I think your paint jobs are spot on, they bring the miniatures to life, isn't that the aim?
@ Casey, I am happy enough, wish I was a bit better.
@ CK Thank you, and I do not know, trying to think on it at the moment. Suggestions accepted.
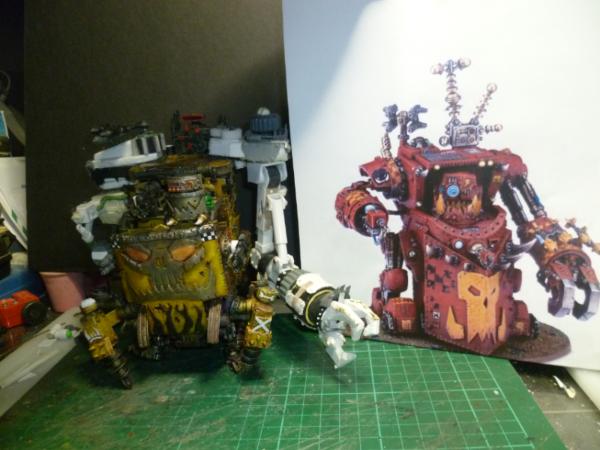
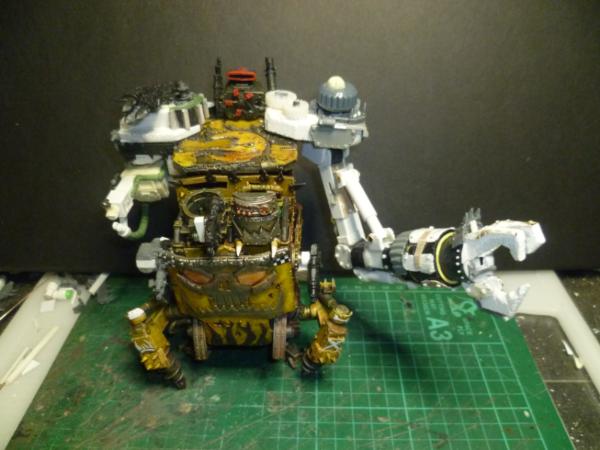
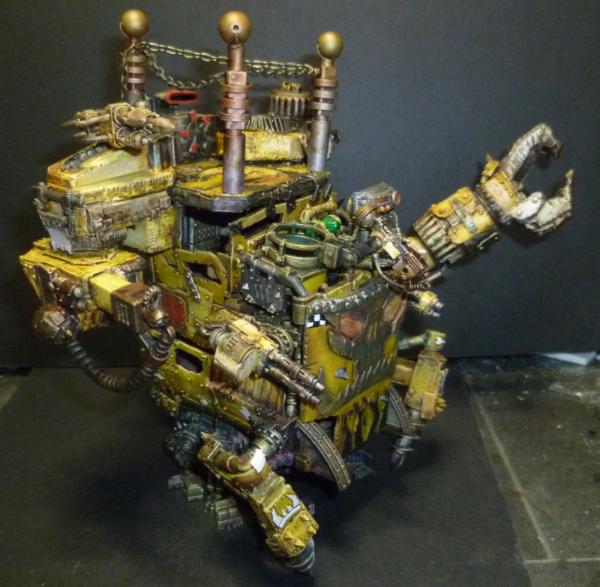
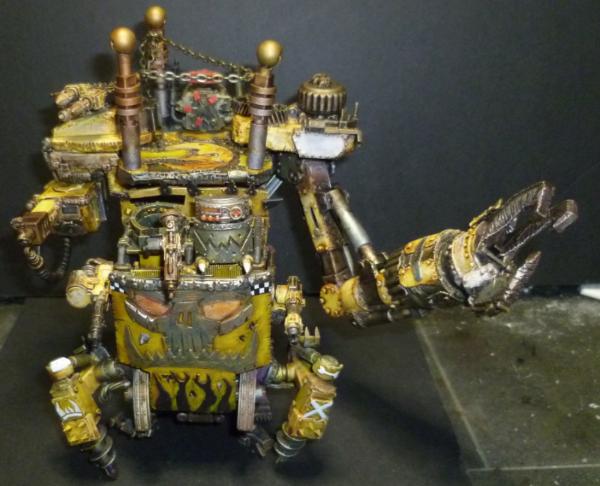
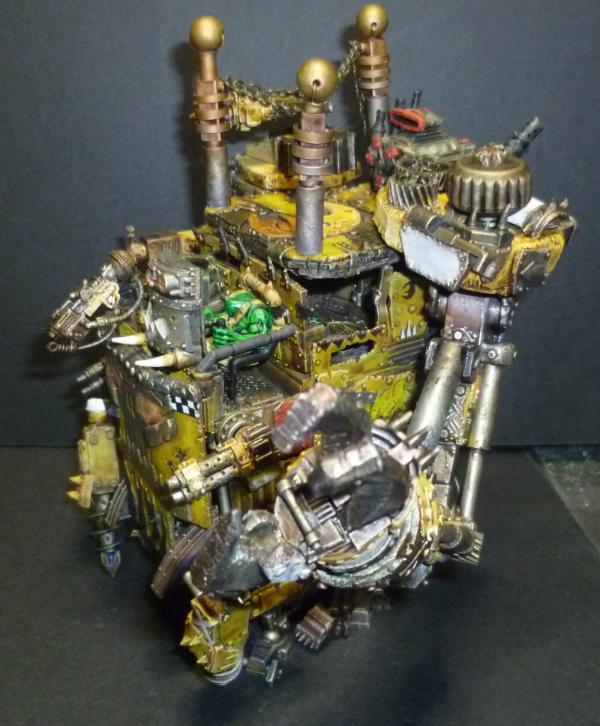
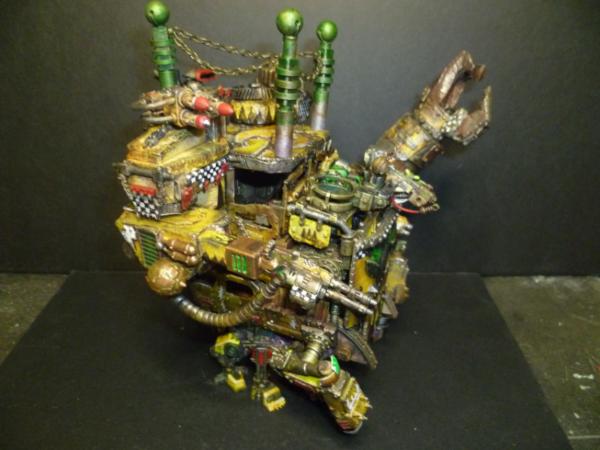
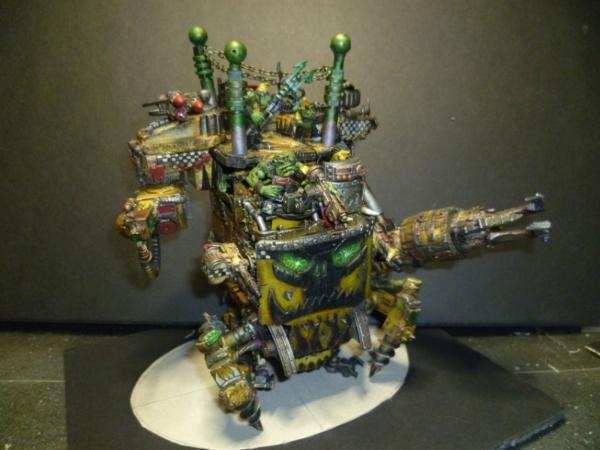
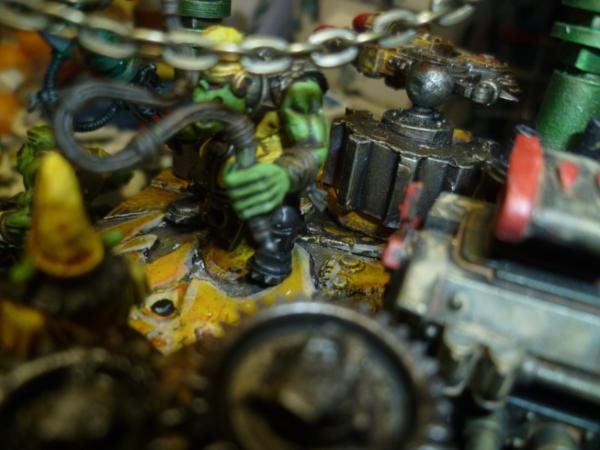
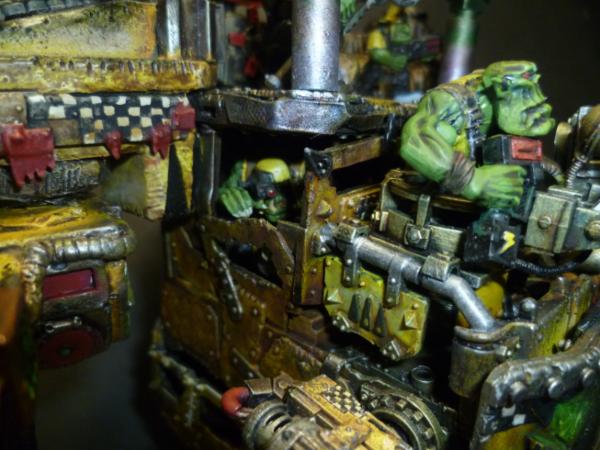
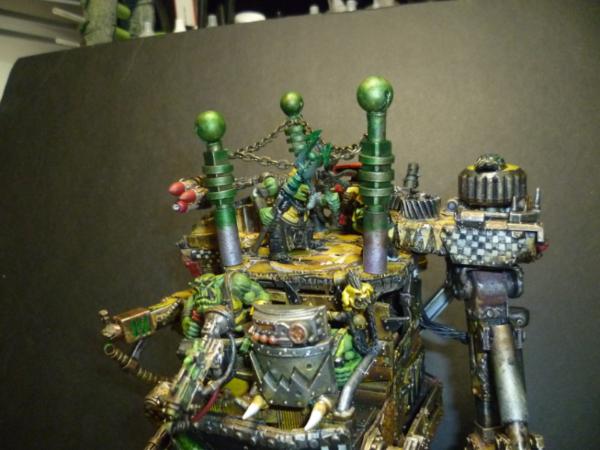
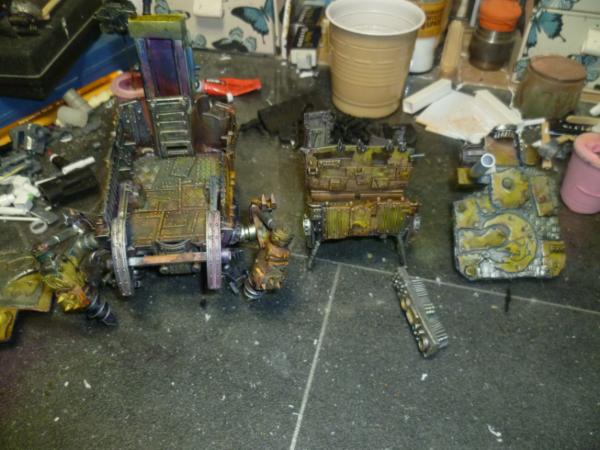
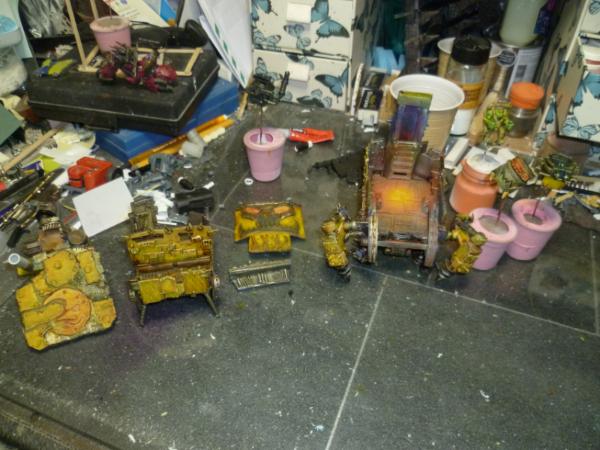
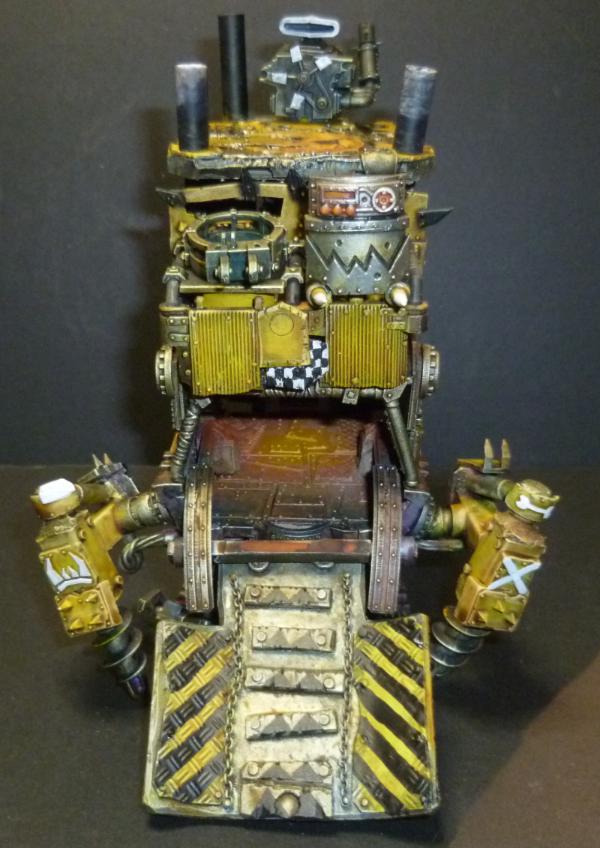
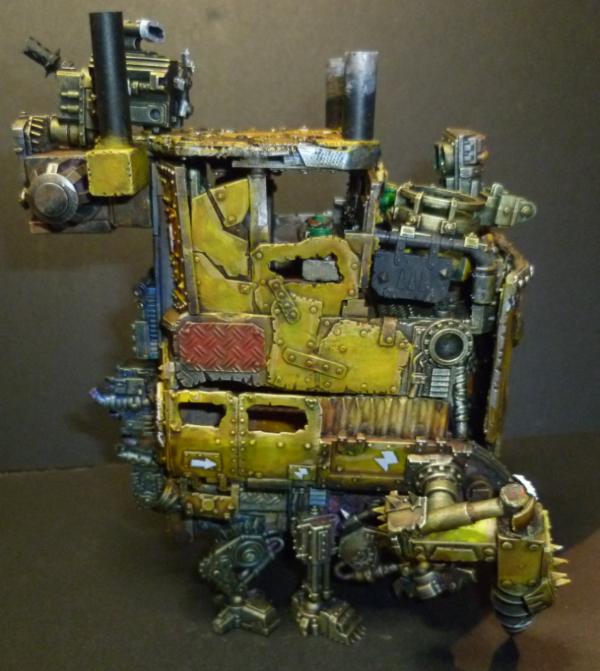
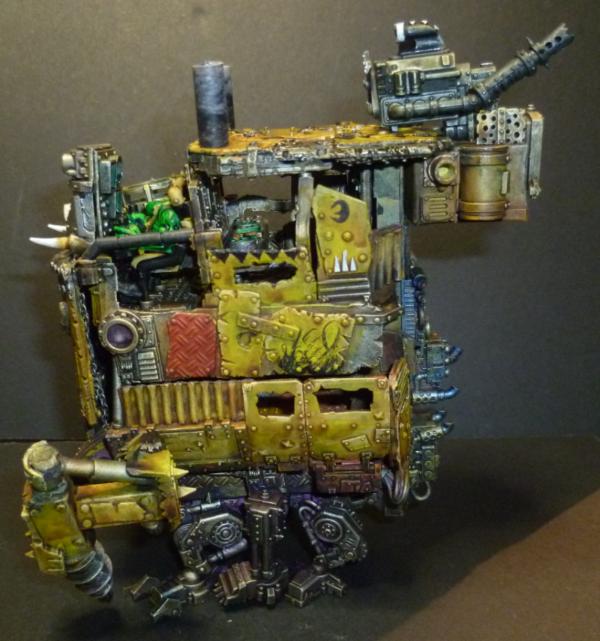
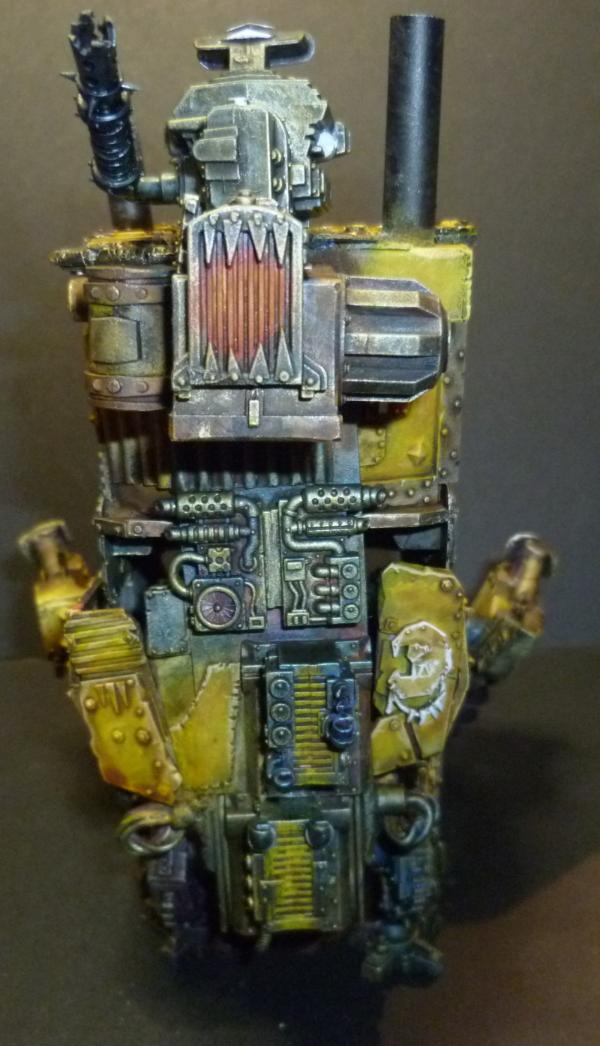
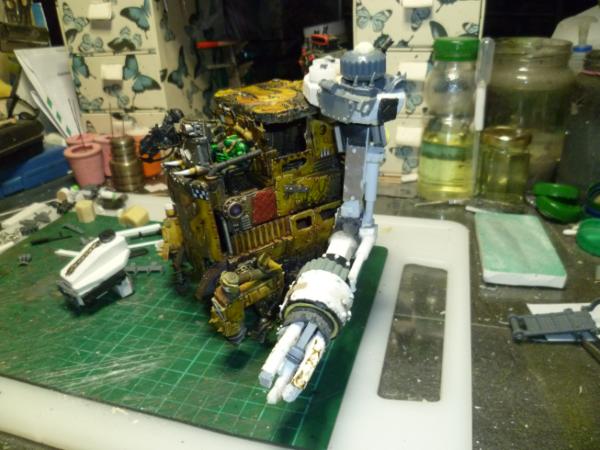
Well here is a couple pics of it together, I have been picking down on to the detail stuff. Please remember there are two very big arms to go on this thing yet as well as the other weapon systems, and I would like to add a few more details, as well as a crew.
And some of the detail..
Once I get this up to a point I will have to get the rest of it built and painted before weathering the whole thing.
Thanks for looking and really appreciate the comments guys.
I love it, all those little details, it's got buckets of visual interest. If I had to offer something more constructive than praise then I'd say it's very balanced and symmetrical. So maybe some kind of balcony/weapon platform haphazardly built onto one side would give it a nice asymmetry. I don't know, you probably have plans already.
Edit: I mean from the front and back, there is a nice asymmetry from the side.
Camkierhi wrote: ... and I do not know, trying to think on it at the moment. Suggestions accepted....
That all depends on what Orks think of as important...
My first thought was to have bright glowy eyes, but then I remember that orks have a thing for teeth. So maybe the teeth should show up more. Think along those lines; what would an ork do?
I'm fairly out of my depth with ork aesthetics, so can't be more precise with ideas, for that or anything else. Looks OrKy to me.
@ Casey, I am happy enough, wish I was a bit better.
@ CK Thank you, and I do not know, trying to think on it at the moment. Suggestions accepted.
Well here is a couple pics of it together, I have been picking down on to the detail stuff. Please remember there are two very big arms to go on this thing yet as well as the other weapon systems, and I would like to add a few more details, as well as a crew.
And some of the detail..
Once I get this up to a point I will have to get the rest of it built and painted before weathering the whole thing.
Thanks for looking and really appreciate the comments guys.
Very nice.
I'm beginning to think you have the soul of a true Ork.
one possible small improvement though maybe?...the physics of the thing look a bit too off, even for ork standards ...maybe wedge another piston in there?
@ Anvildude Yes I will add more spiky bits, or do you mean "fingers"! in which case I am not sure, may do something with the fingers yet though.
@ Zobo, Agreed see below.
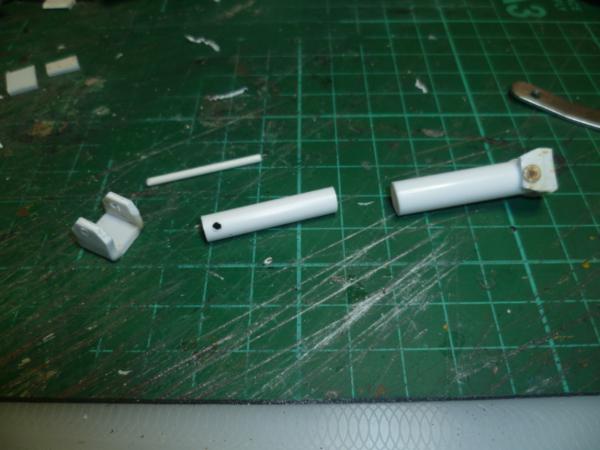
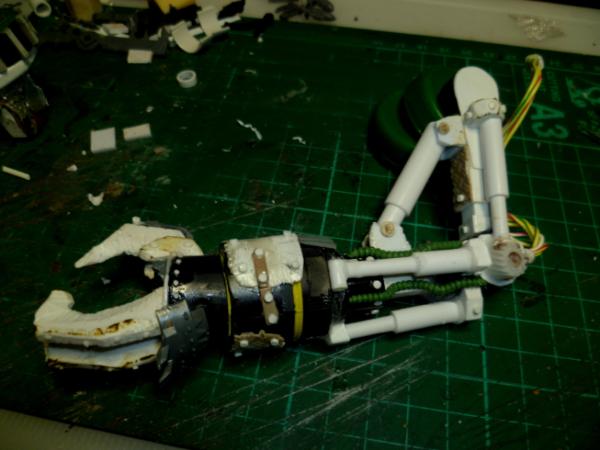
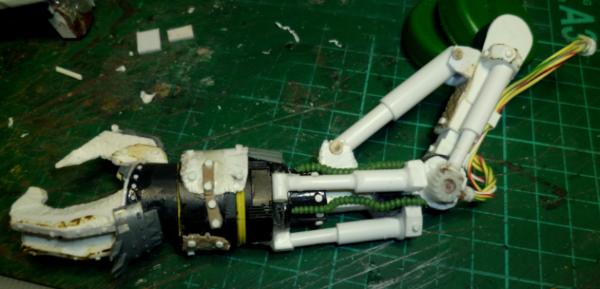
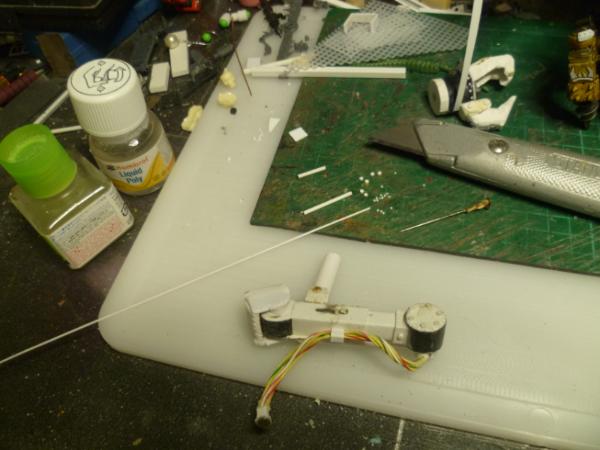
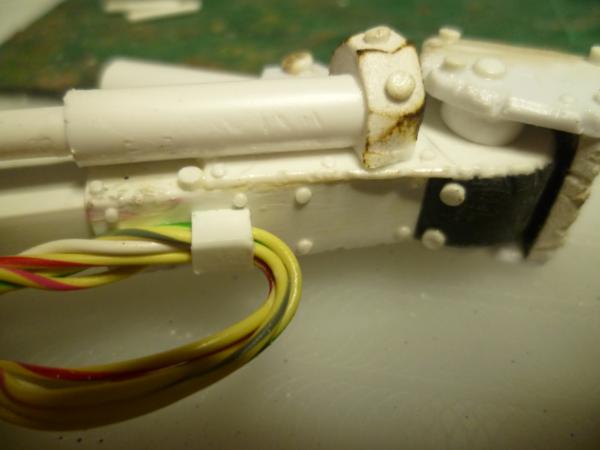
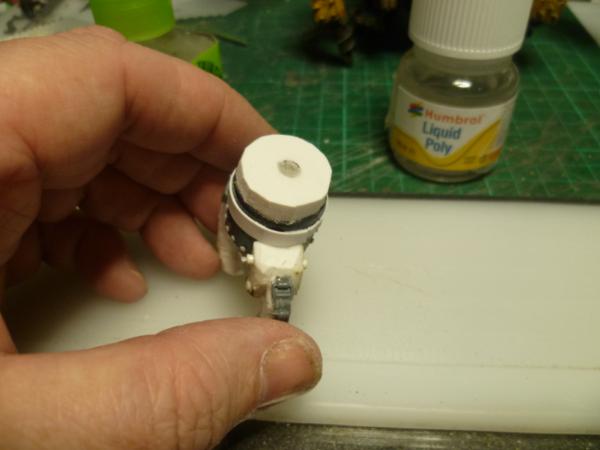
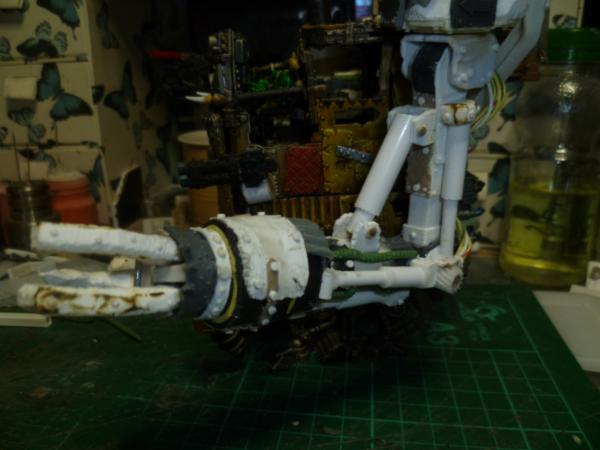
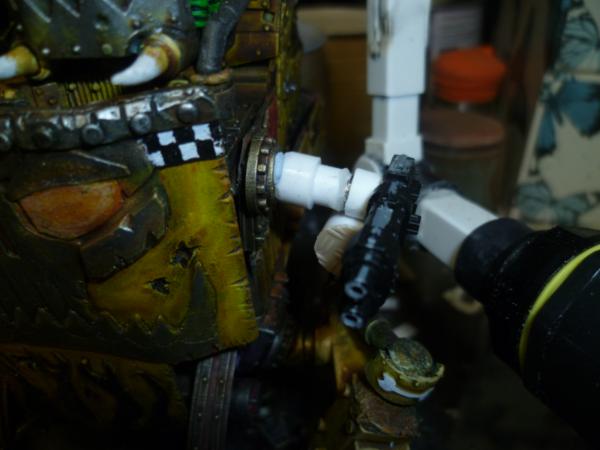
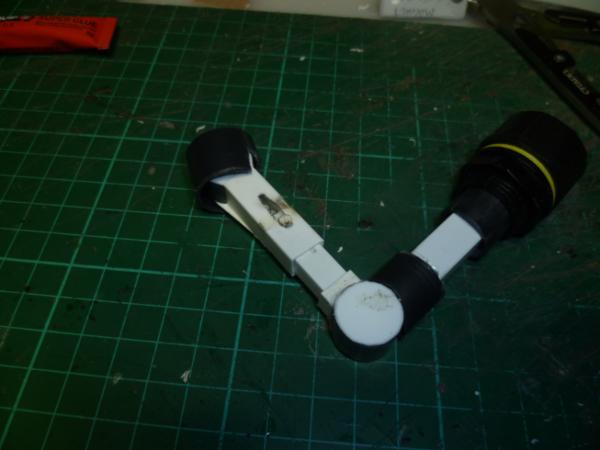
So pistons, easy, pistons that move and pivot! Easy.
Parts....
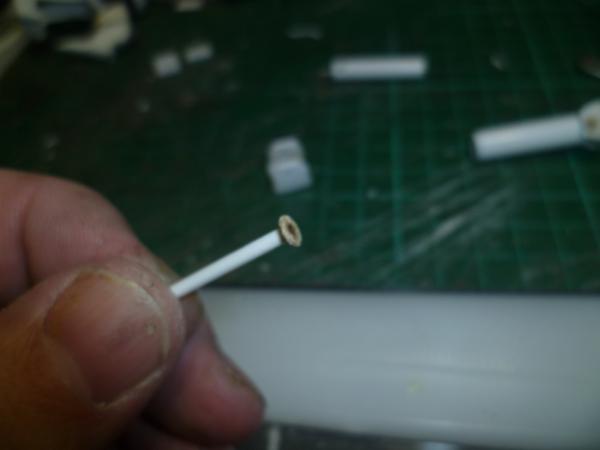
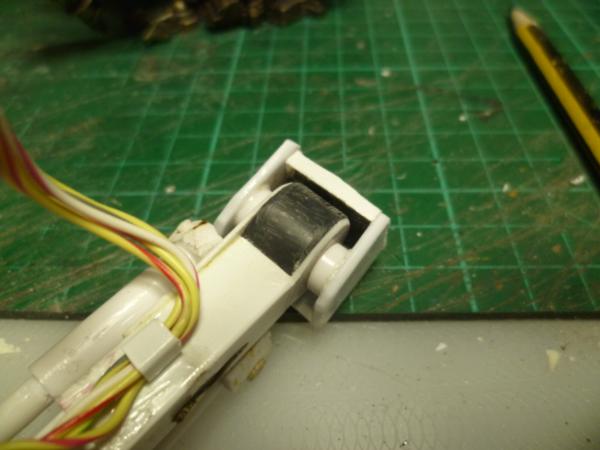
Tubes that go inside each other. One on left is the bits, one on right is complete half.
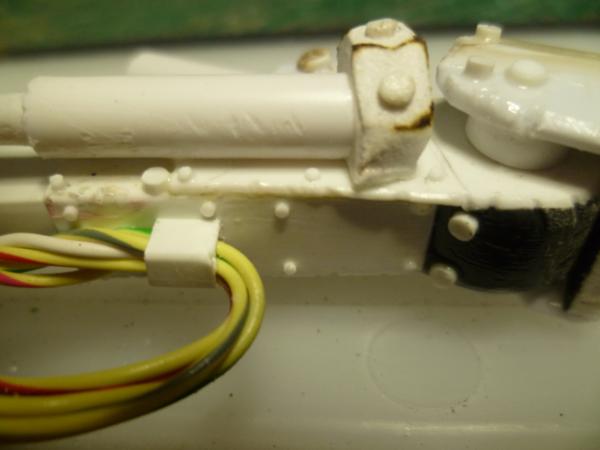
You will need to make pivot pins, I use plastic rod, melt the end, press it flat on the desk.
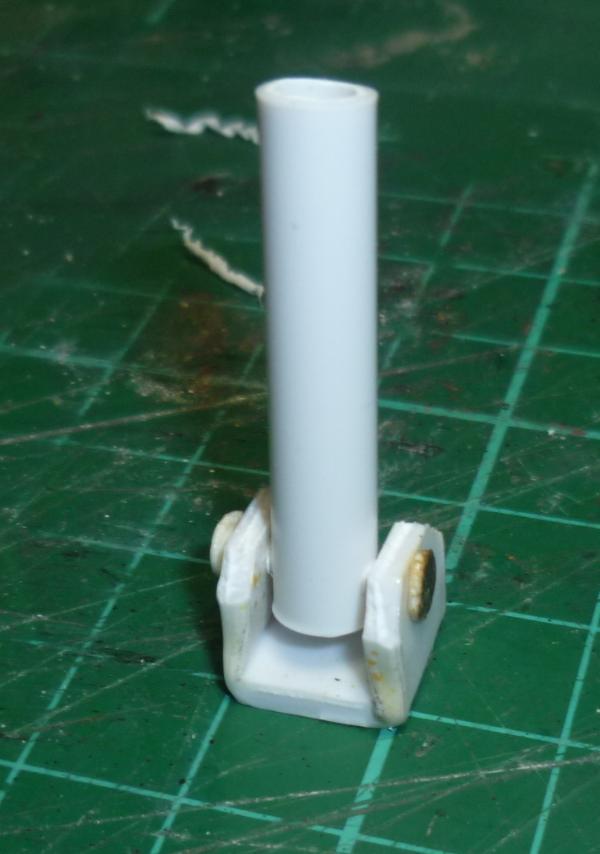
The bracket is made from a piece of styrene sheet heated and bent to shape. the pin is inserted through...
Then heat up the other end of the pin and flaten with the end of your tweezers or pliers., Any flat surface.
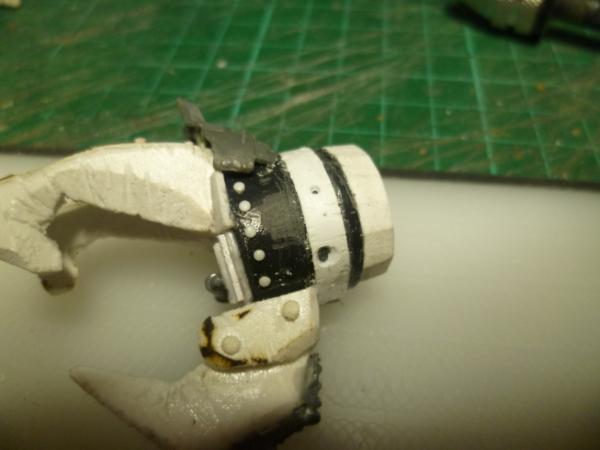
Then glue in place only glue the brackets in. The tubes where cut a little over half the distance I wanted the minimal articulation to be, with the smaller tube being slightly longer. If over extended they will seperate.
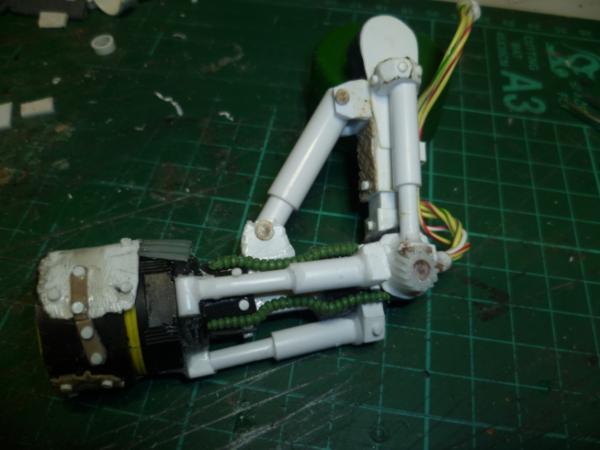
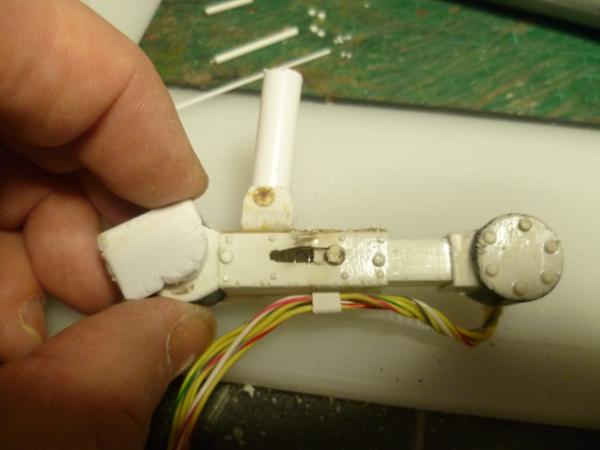
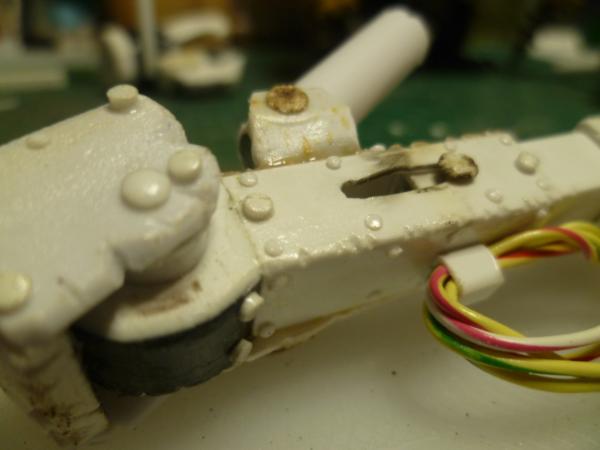
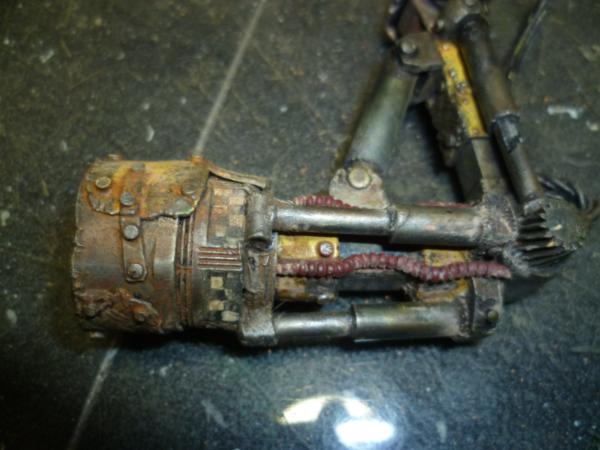
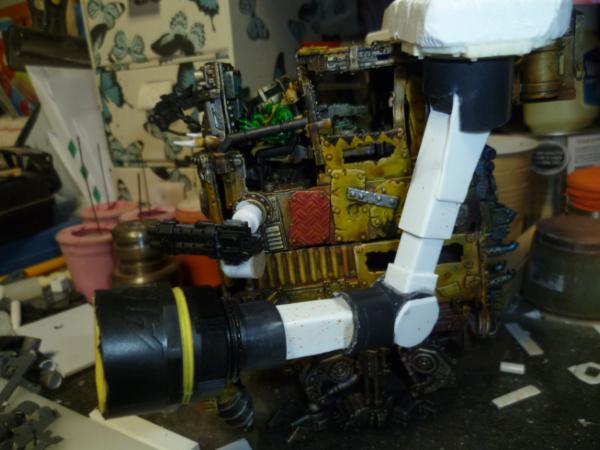
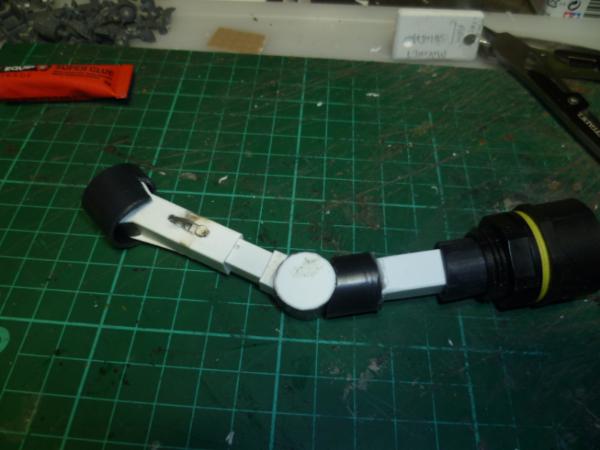
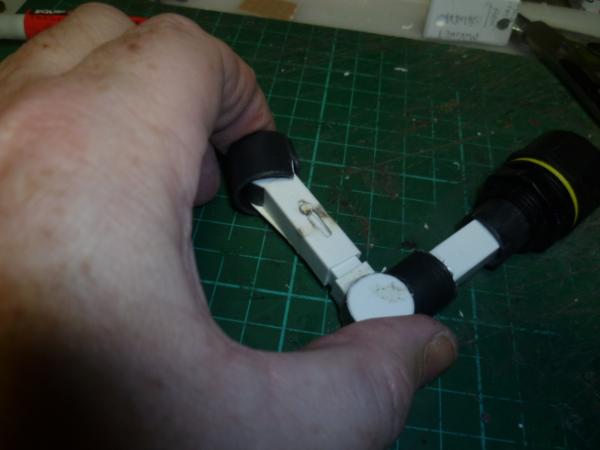
So the arm currently looks like this...
And still articulates...
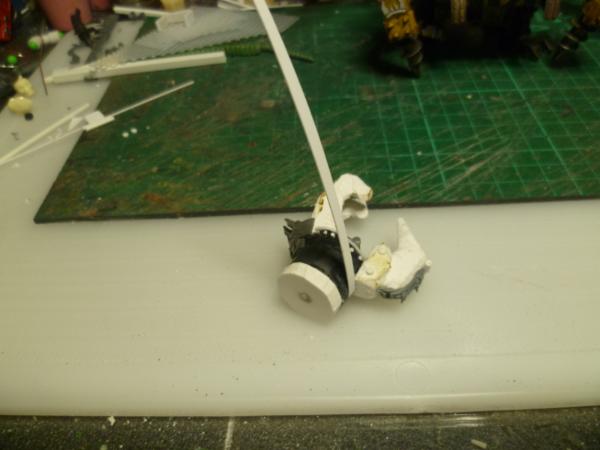
The claw is a separate piece that can rotate in its "cup", and I will have to work on the sholulder as the joint is not stiff enough for my liking.
Amazing tutorial on that piston... melting the pins... I would have been trying to glue them. I'll have to remember that. Besides being easy, they perfectly fit the aesthetic.
*eyes old laptop* maybe there is something in there I can...
Brilliant as usual Cam, definitely go with more of these "how to" bits in the future; I think your process is just as exciting as the end result, and I have often wondered "how'd he do that" with a lot of your other work.
Well in the spirit of teaching you all to suck eggs.....
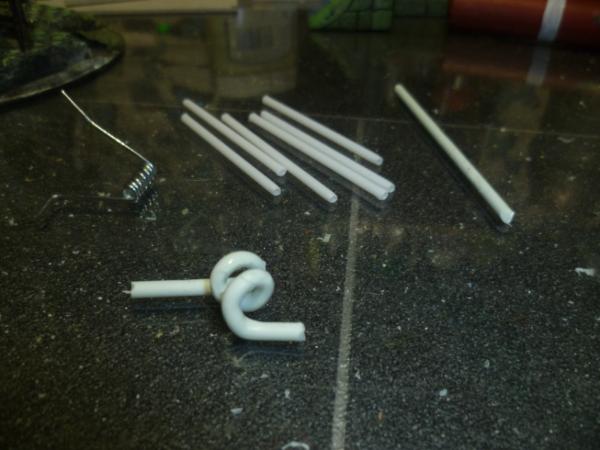
Rivet tut incoming, but first....
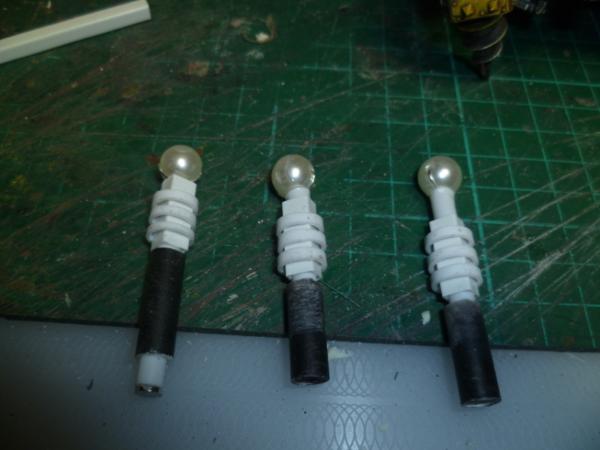
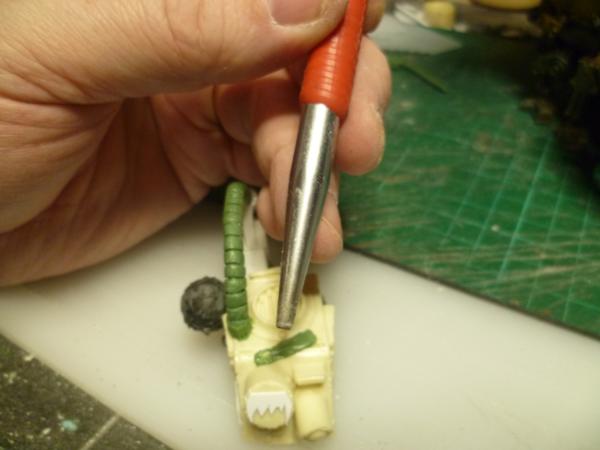
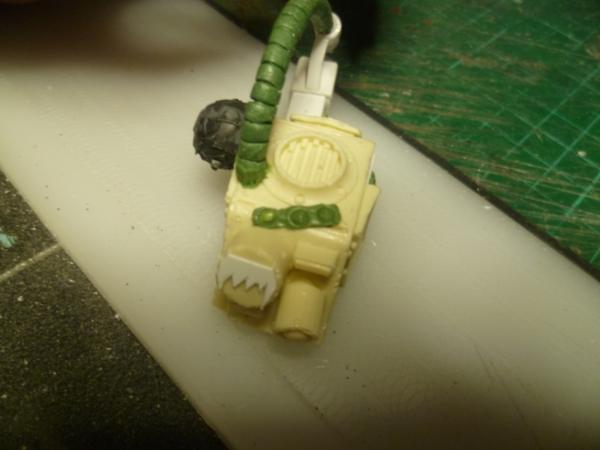
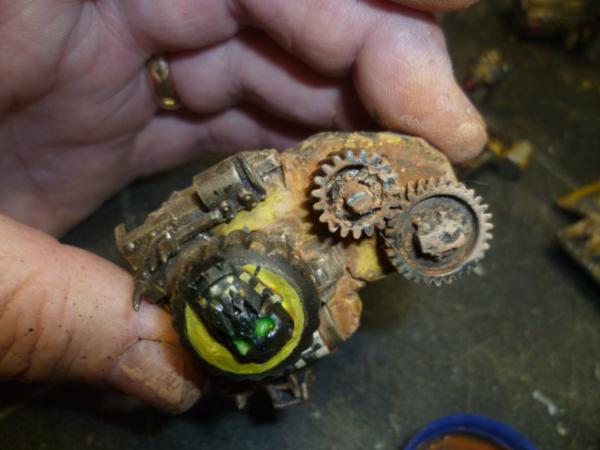
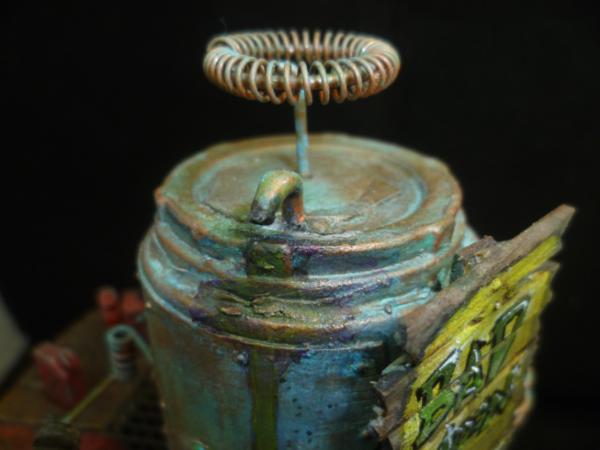
KFF....
Some tubes any size will do, cut thin strips and space out to lok coil like. The "balls" are from christmas decs, mistletoe I think.
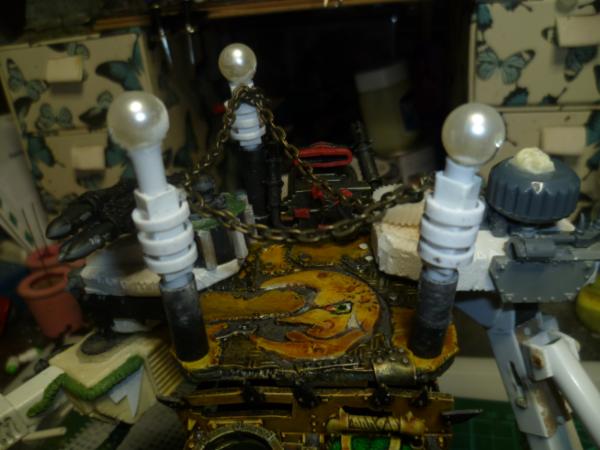
In situ, small magnets so that they can be taken off for transport.
Put a small magnet on each and fed a chain around, removable, going to paint this lot all glowy, not sure which colour glowy!
OK
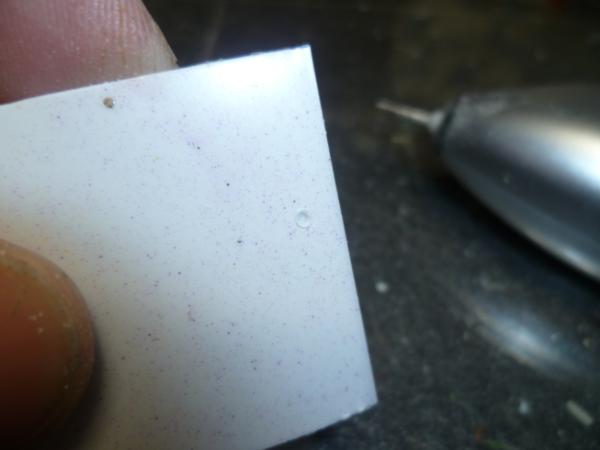
Rivetting stuff....the way I do it anyway
Standard rivetting, Prepare the kit...styrene rod of your choice. Here I have 1mm and 2mm, I cut it with the knife, about a dozen at a time.
The needle is a sewing needle with a silly bit of melted plastic to assist with grip. Use this to place rivets. I tend to put down poly cement, then rivet then come along after with thin Tamiya. This I find seals the rivets well in place.
Optional extra here, I flash a blowtorch over the rivets and I get a more domed top ...
Place your rivets in a relatively logical manner, even orks would do this, not very tidally but rivets where needed.
OK so you want to put a band of rivets around something...
Start by getting a thin piece of styrene, glue just the first few mm and allow to dry properly.
Then once dry you have an anchor point to pull the band around tightly. These are orks so my band will overlap. Again I put down a coat of poly cement, give it a second or two then place the part, while holding it in place a run a bead of Tamiya around it, letting it wick in, this sets really fast, so you should only have to hold it for a few seconds. 10 minutes and it is set solid.
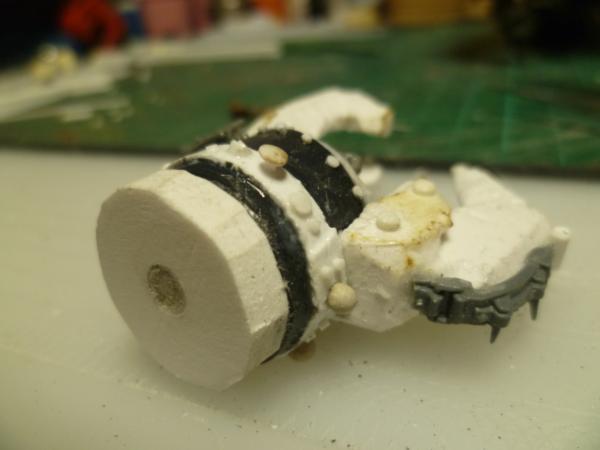
Drill some holes, some will remain holes, some will have another form of rivet in, you do not have to drill for every rivet.
The really round rivets are an idea from DrH, the beads from the silicone packs you get in stuff to keep the moisture down, these have to be superglued in, and I drill a small divot for them to go in. Once dry you can sand them down. Here they just add variety.
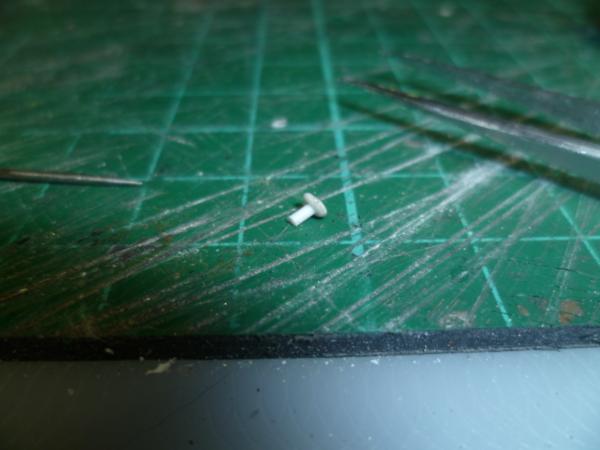
You may notice I have a loose rivet, I like to add these as it really adds to the ramshackle appearance, this is just a 1mm rod with the end heat treated and flattened on the bench. Cut off and a hole drilled for it to be glued in...
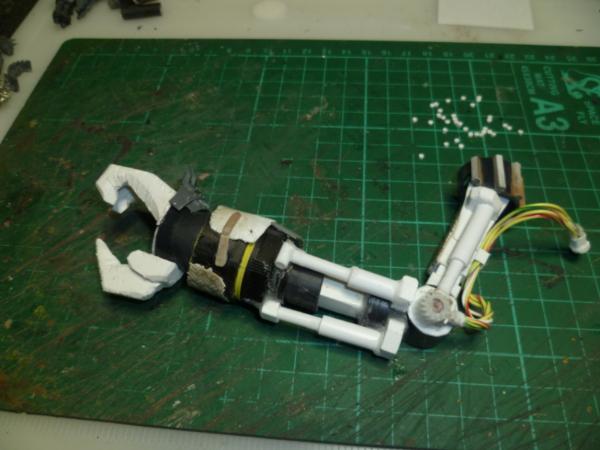
And thats that arm just about ready for paint...
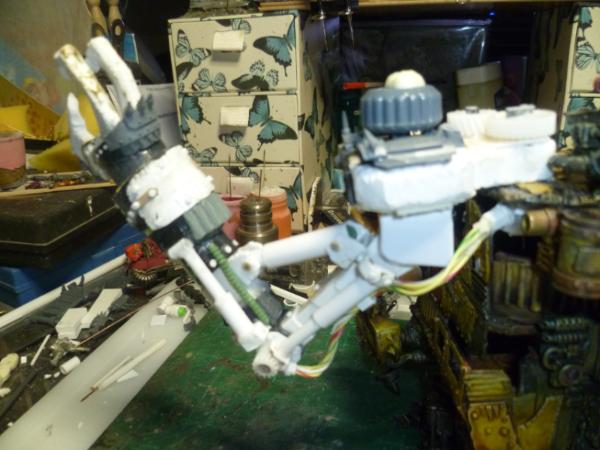
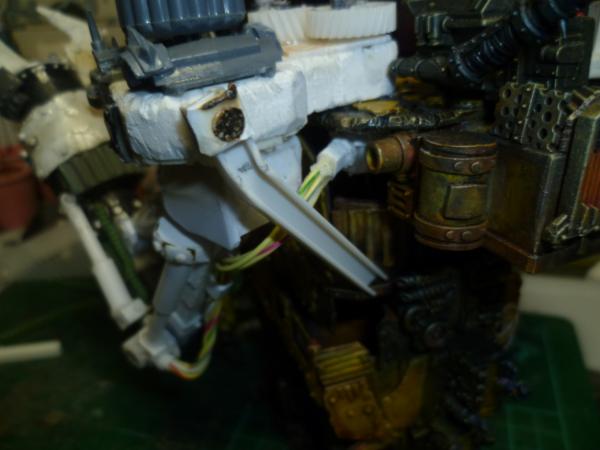
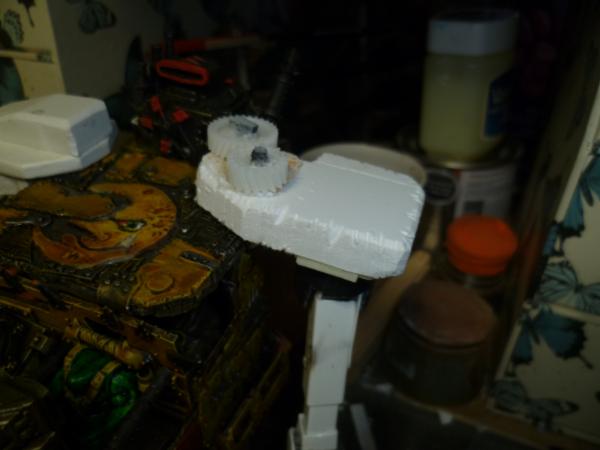
Wanted to put a support in for the shoulder so..
Oh the shoulder kept bugging me because it was so heavy it dropped a little, so fixed a piece of sheet material behind the rotating shoulder joint witha piece of sand paper stuck on the inside to add friction. unless you are daft with wagging it back and forward it should last a long time and the friction means the arms stays exactly where you put it...
And finally, not the last method I use but another option for rivets and banding...GS...
This is good if you have an uneven variable surface, place a bit of GS on and make a strip..
Take a nail punch, various sizes available and
Press in where ever you want a rivet...
Now I hope I have not upset anyone, I hope it is useful to somebody. As I have said this is my way, I find it very therapeutic and zen like settling down to rivet up something. dsteingass is a master here as is Viktor von Domm, Many years ago on Dakka Arakasi used to do some amazing work as well, Check these guys out. There are many others who inspire me, just mention these as my early influence.
Your thoughts and comments ideas and critism is all welcome here, thanks for looking.
That 'squish' rivet technique (which is, ironically, the most realistic) could work very well to create things that you hang textiles and softs from- things like ropes or wire bundles or banners.
I miss Arakasi, last I heard he was away to do laser cut scenery, but that was years ago.
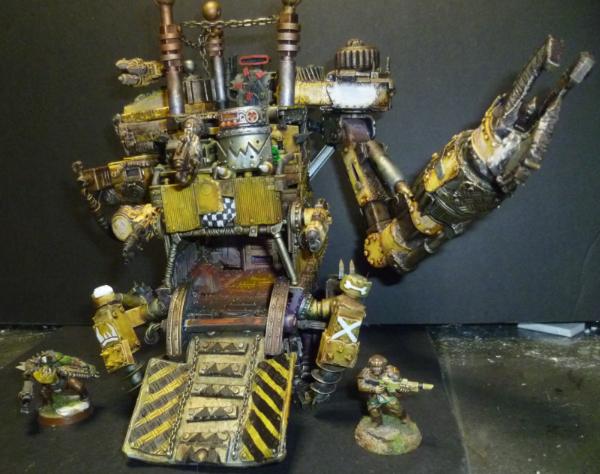
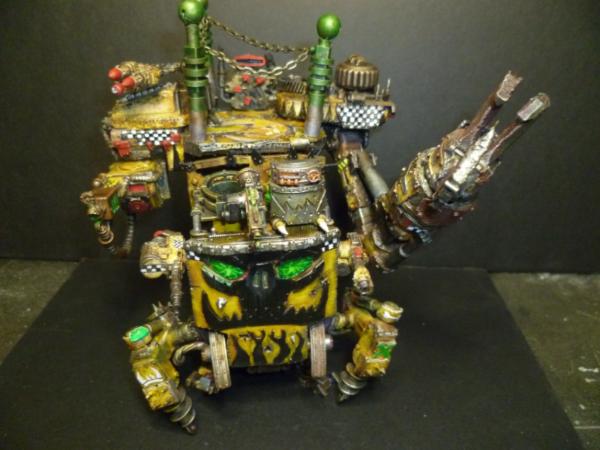
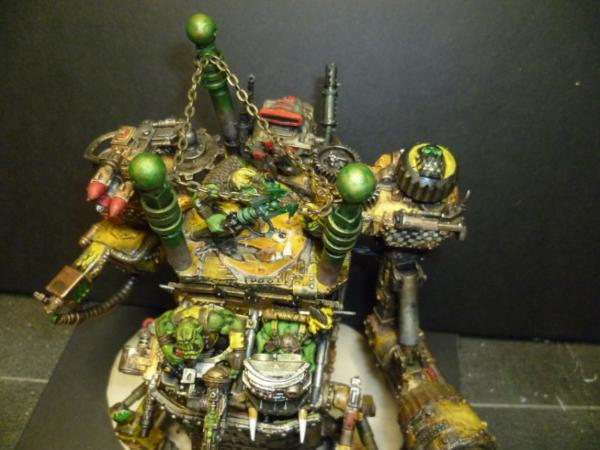
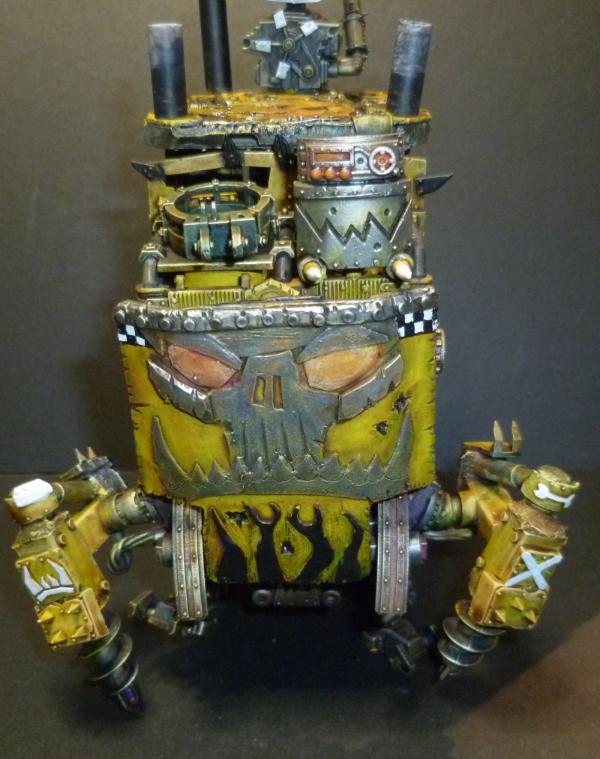
OK got a bit of painting in...
Scale shots..
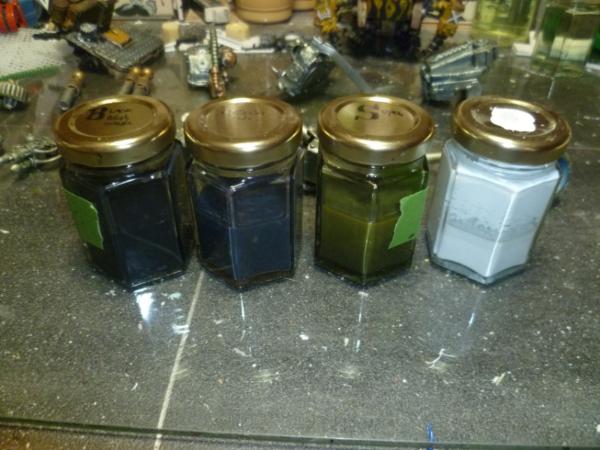
Quick word on washes, I use Winsor and Newton Inks and Pledge Multi-surface. Bought these jars at Hobbycraft, 12 for £3, and made up a bunch.
These work brilliantly, flow well, and easy to use, but leave the area glossy, that's not really a problem for me. Very cheap compared to "the Good stuff"
Good God that's amazing looks for all the world like some demented scuttling beast that would scurry across the battlefield and nip your arm off...except it's the size of a 4-storey house!
I've missed the last few updates so let me just retroactively add a series of increasing "Wow!"'s first off
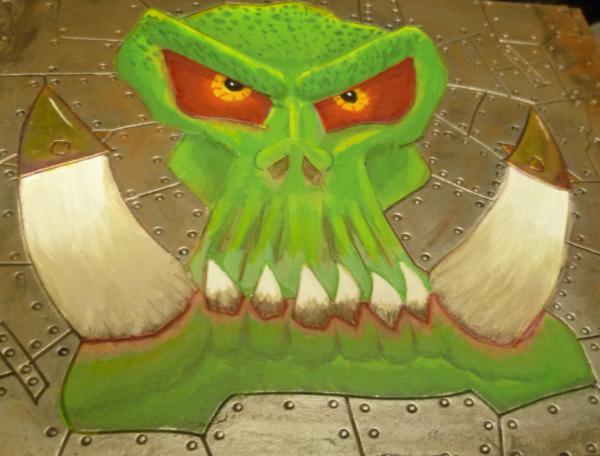
man that's looking great now that the arms have some paint on them!...and making the big skull on the front black, with the cool green zappy eyes, really gives it some pop...lovin' it!
Thank you all, going to take some time on this for a change, want it to be as good as I can.
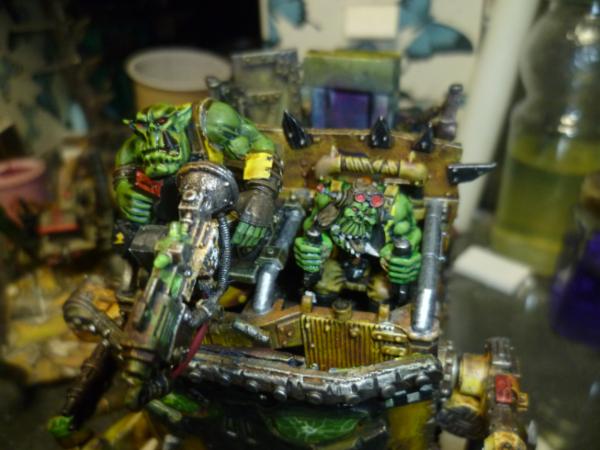
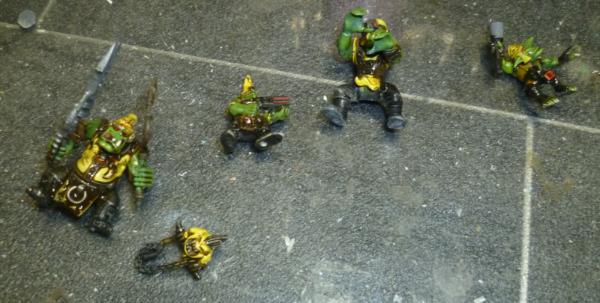
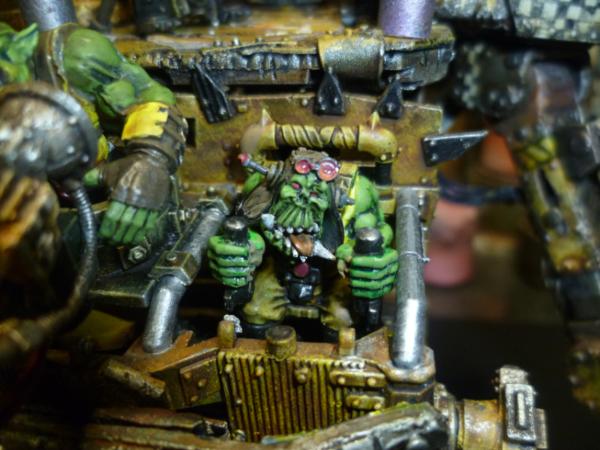
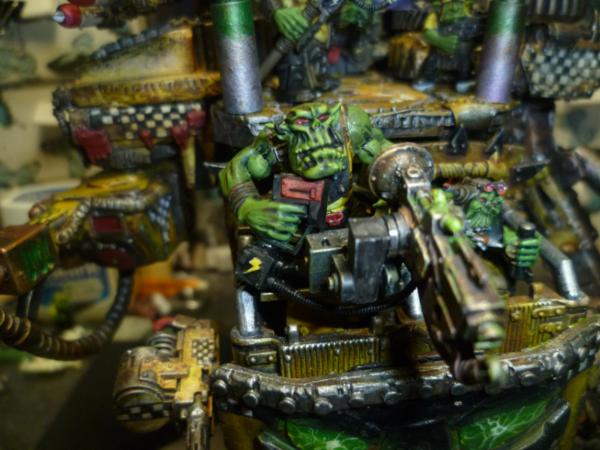
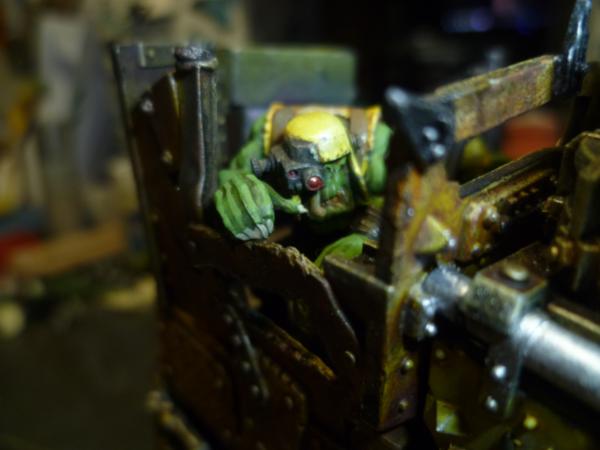
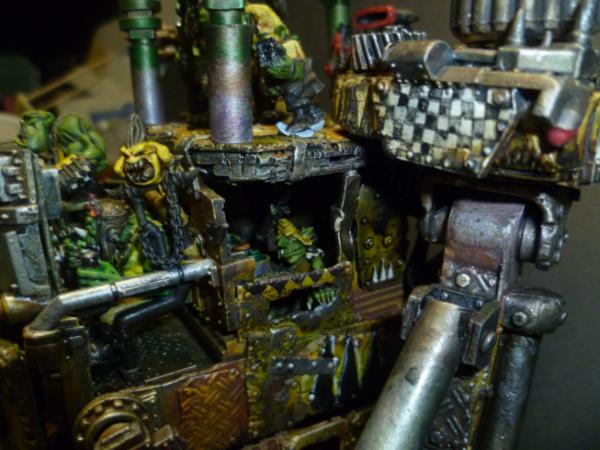
And so crew....still very WIP, got a fair way to go on the paint before I will be happy..
And a quick tip/silly thing.....
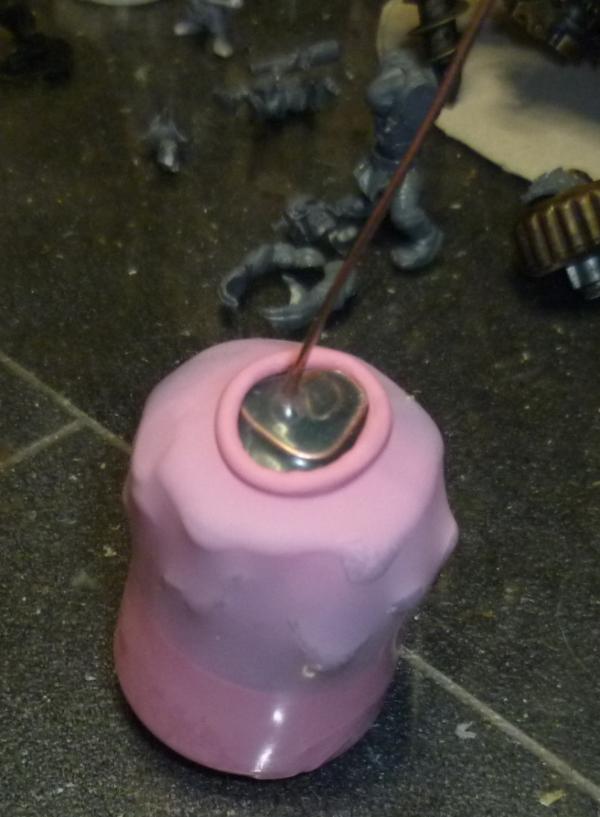
I have tried many different silly things for holding the mini whilst I work on the build and the painting, but a little while ago I had a brainfart and came up with this....
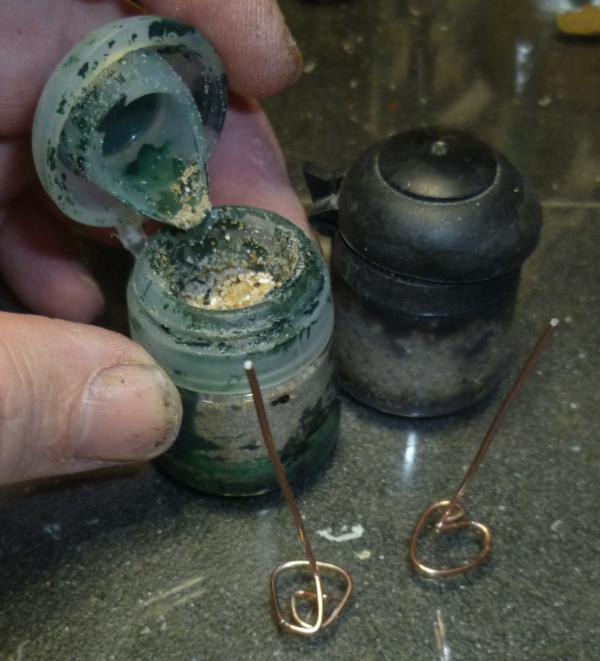
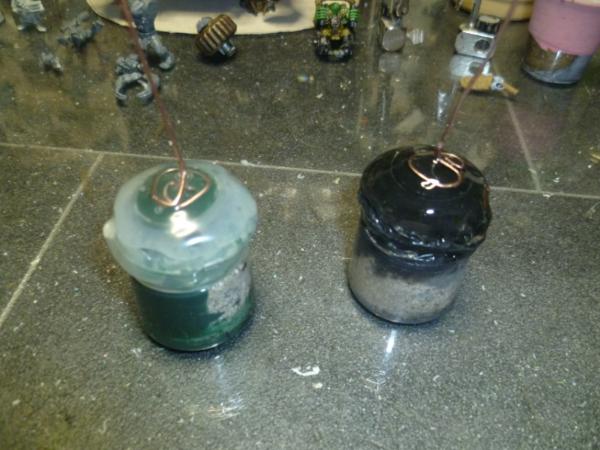
Old paint pot or I also use disposable shot glasses, the plastic ones. Fill with sand and "cap with Hotglue.
Notice the copper wire...
You could stop there, the sand adds weight to the base so it stands well, and the copper wire enables you to drill a small hole to mount the model easily with superglue. When done a twist and the glue breaks and you can remove your model.
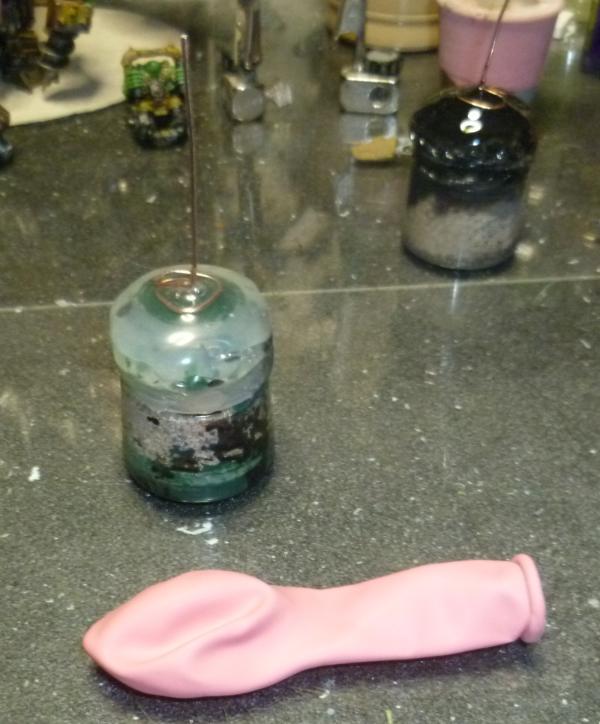
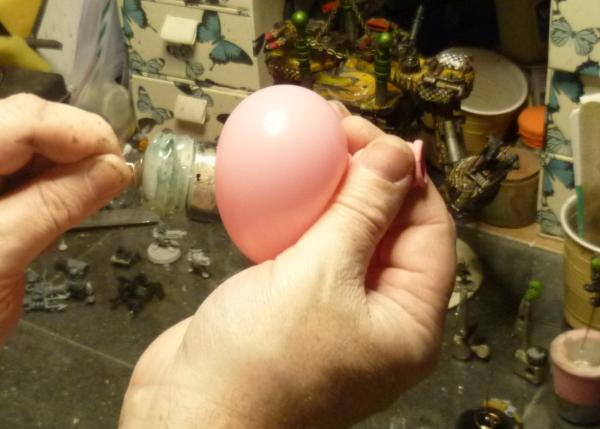
As an extra, for grip...
Took a small water balloon. Blew it up and push the bottle into it as it deflates...
Pull it around a bit till your happy and there you have a rubber grippy coating to it.
The ballon idea was from the old UTUB, one of those life hack thingymagiggers, You can do it to your phone to make a cover.
Anyways just thought I would share. Maybe help someone.
Thanks for looking, and as always comments welcome.
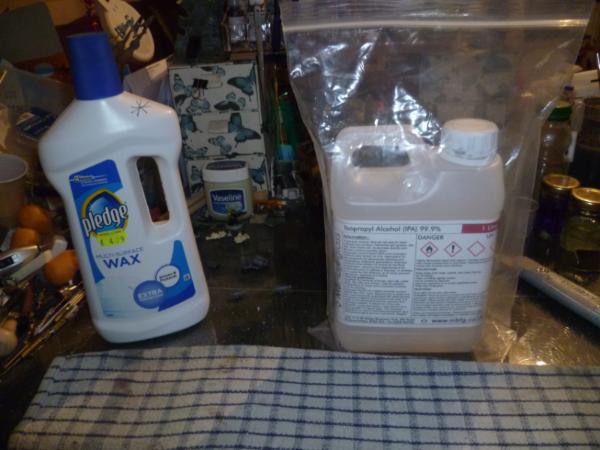
And todays silly sucking of eggs...not really secret ingredient...
Thats flash polish for washes, and I use the Iso Propanol to thin my paints. Not sure where I got this from, but what I do is make up a jar full of this. 70% water, 2 drops of Washing up liquid, and top up to the brim with Isopropanol Alcohol. This makes my paint dry quicker, but fully retains the colour, This stuff is great.
Now too tired to type.
Well back to i, thank you for stopping by, all c&c welcome. Still got more to do before.....
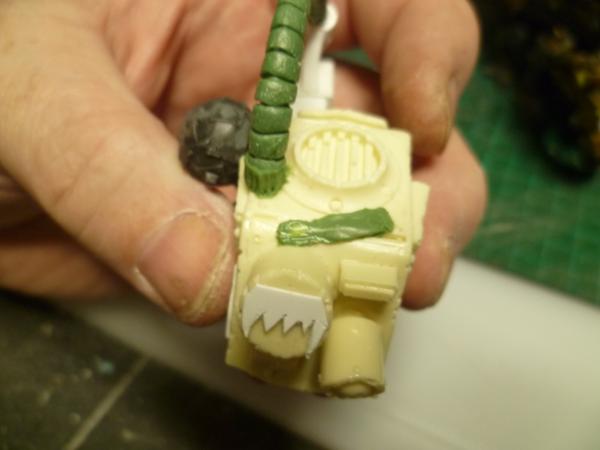
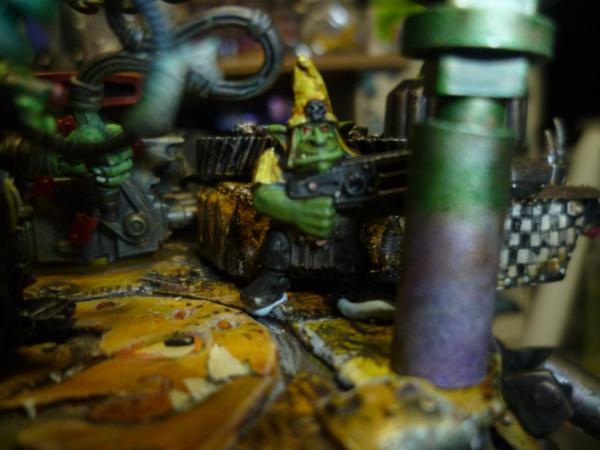
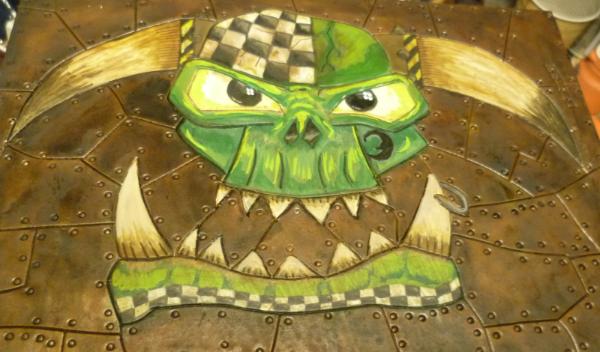
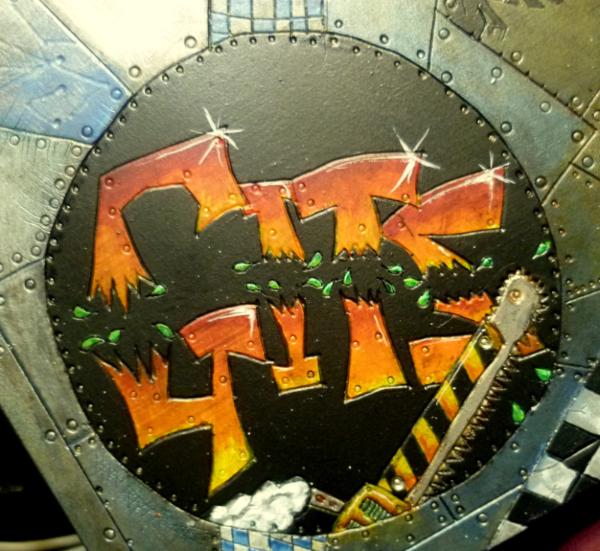
I just love the big face in the front of it! The details you've put all around it are just spectacular. So many little touches that breathe life into it...
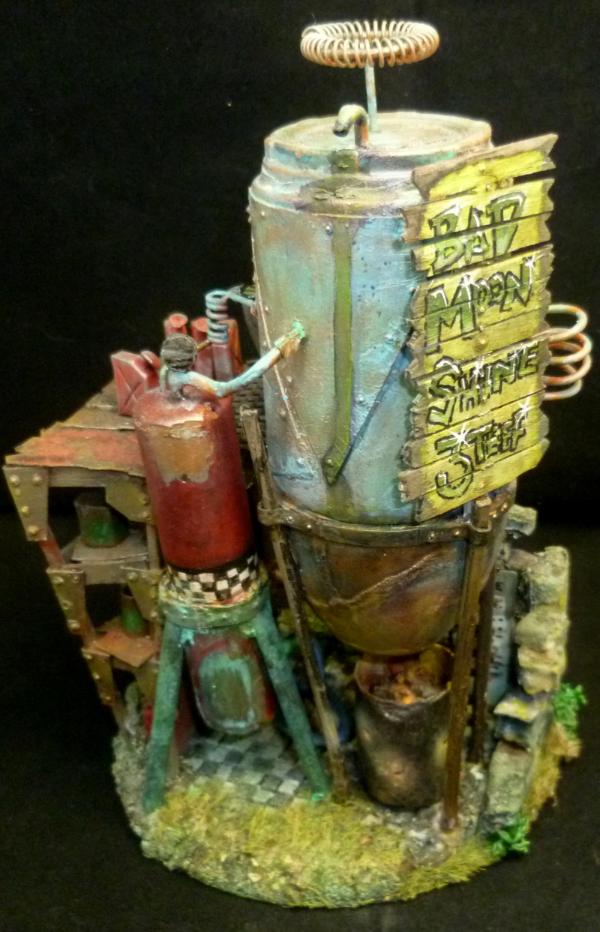
First, you snuck in a 2nd ed Grot, so you're awesome. (His custom hat is a nice touch too.) Second, I love how the eye in the Bad Moon icon is looking at the Grot. Intentional, or happy accident? Third, because of the blur, it almost looks like an action shot or still from a movie.
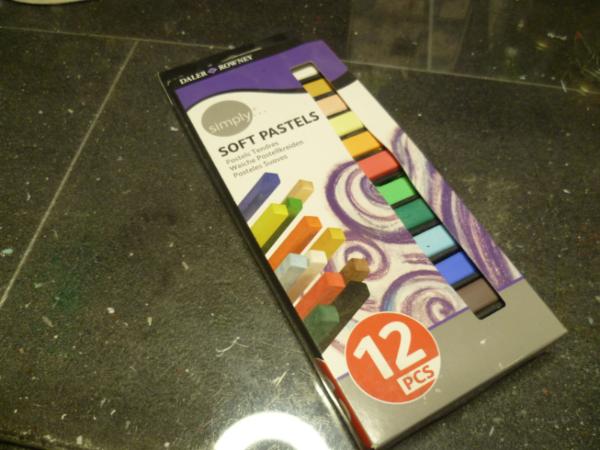
Well it's time for me to be silly again....had a brainfart and bought these....
Weathering powders.
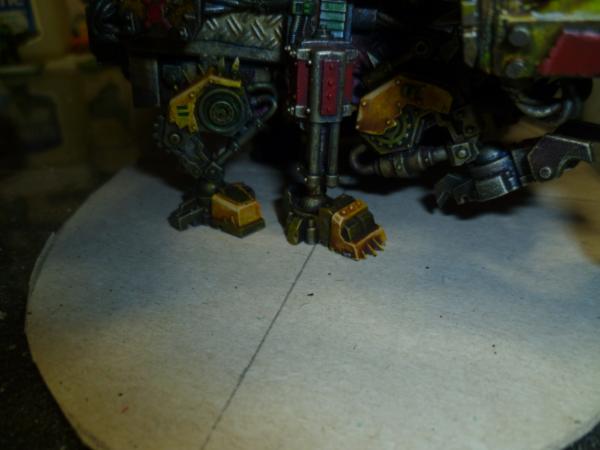
OK someone will have done this before I am sure, but this is how I have been doing it for a while....
Before...
Scrap some off the side with a old knife..
Dus off with a soft brush...
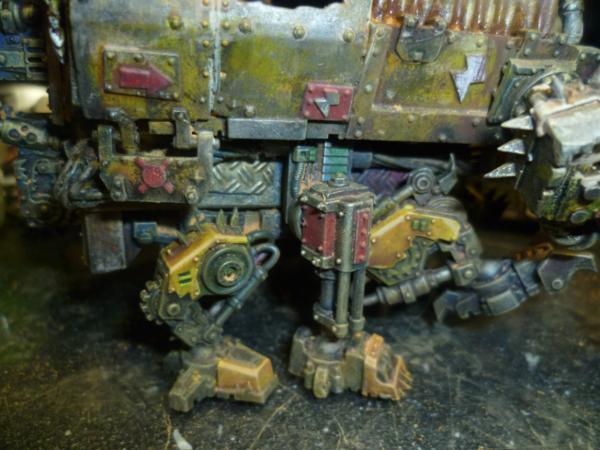
And you have a dusty ankled whatsit...
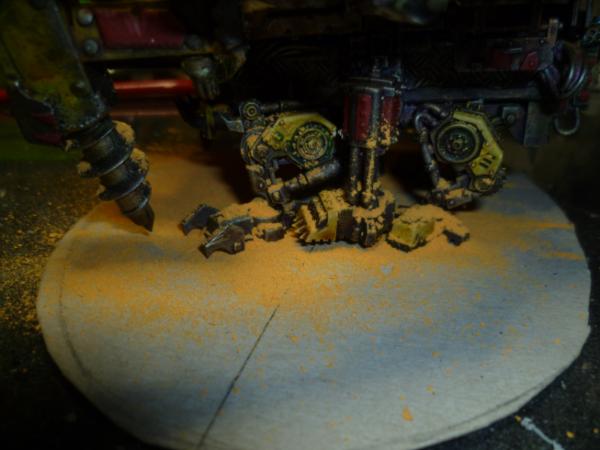
Of course then you grab the excess dust an d mix it with a little water, or in my case my homebrew paint thinners (70:30 water and isopropanol Alcohol) and liberally spread...
End result...
Thank you for looking in, thoughts as always appreciated.
Thank you all so much, really appreciate the comments.
RL issues: Been a bit quiet as RL has really messed me up the last 2 weeks. (only read if you don't mind personal
Spoiler:
Been off work since November with Stress and Depression, Dakka has helped me. And My work place has offered an olive branch, and for the last 2 weeks I have been back at work. I have a different job, and a lot less pressure, however I have to train a guy who has come in to do my job, yes that's right, I have just started a new job and I have to train my replacement already. The job was also a promised 08:00 to 17:00, but I leave the house at 6 every morning and have not been home before 19:00 yet, one day I did not get home until 22:00. I am also driving 300 plus miles a day, around country lanes. I am already regretting going back and my beloved wants me to jack it in. Mostly too tired to do any modelling, which has really peeved me.
Please forgive me this lapse, and this rant. A problem shared and all that.....
In the mean time, when I have sat down and done anything, it is this, which is a surprise for a brilliant friend who inspires me and makes my life a little brighter......
Thank you for stopping by and thanks for your patience, sorry it has been a while, hoping to have a day of it tomorrow so back tomorrow night with an update. Please feel free to comment as always.
Good heavens man... your painting has just gotten to be phenomenal! I couldn't dream of replicating that! Wow. Talk about inspiring.
Spoiler:
I know life sucks at the moment Cam... but there are things... OK intangible things... they don't pay the bills... but there are things of real value that no one can take from you. Your talent, creativity and your dedication to your art are on display here every day... and holy crap son... you are special, one-of-a-kind.
Keep your eyes forward. Make the best decision you can with the information you have. Trust the people who care about you.
Suffered from a burn-out myself; so I can relate. Spend time with your partner (it helps! a lot even), and keep on breathing. Things get better after a while. And consider other job opportunities, if that's what it takes. Most of all, take time to enjoy the little things we tend to take for granted. Oh, and modelling helps, took me while to find out, but I find it quite therapeutic - if not necessarily cheaper than a therapist .
Nice paintings, Cam'. Like the moon in particular.
Spoiler:
Keep your chin up.
It's nice to hear that work is trying to help though, not something you hear often about companies.
Long days are enough to wear down anyone.
Focus on the positives (easier said than done, I know) until the clouds clear and you can find a better (or at least, nearer) job.
And keep snatching those moments with the family and the models.
I suffer from a serious depression and anxiety disorder so please believe me when I say that I really feel for you, mate. Surround yourself with good people, do things that make you happy, shed the things that don't. Hope things start looking up for you soon.
Your work continues to astound. Those faces... truly brilliant work.
Spoiler:
I don't think that anyone around here minds personal stuff. We all need time and space to vent, to share, and to receive support. You should never feel guilty about sharing your burdens. Keep getting up, and we'll all keep cheering you on.
Thank you all, this is why I love Dakka dakka so much, what a great community, if only RL was half as good.
So boxed up da Morky, will be off travelling by the end of the month, next up here is the latest LoER Competition entry. Well kinda. I have 2 great ideas this one is easy so going to crack it out toot sweet, The other is a lot more complicated and will be on my other blog shortly. If I finish them both I will decide which is best and go from there.
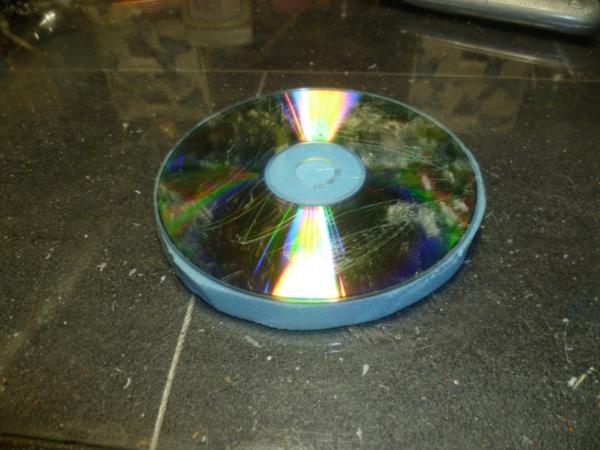
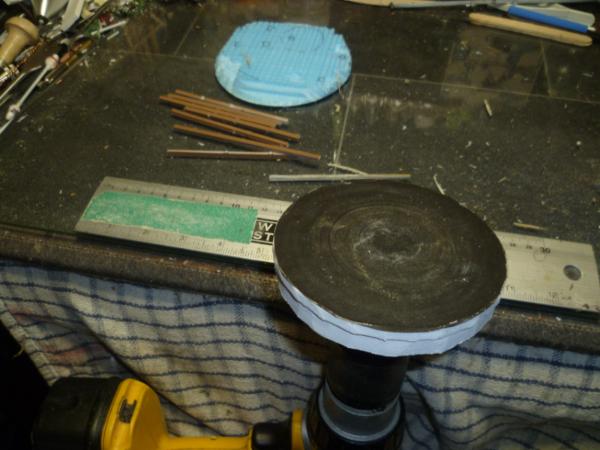
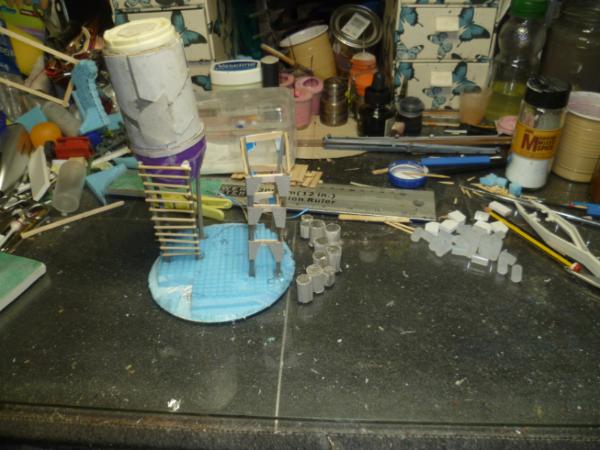
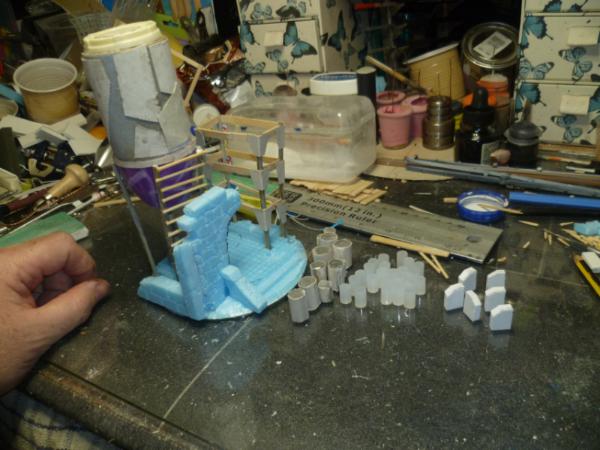
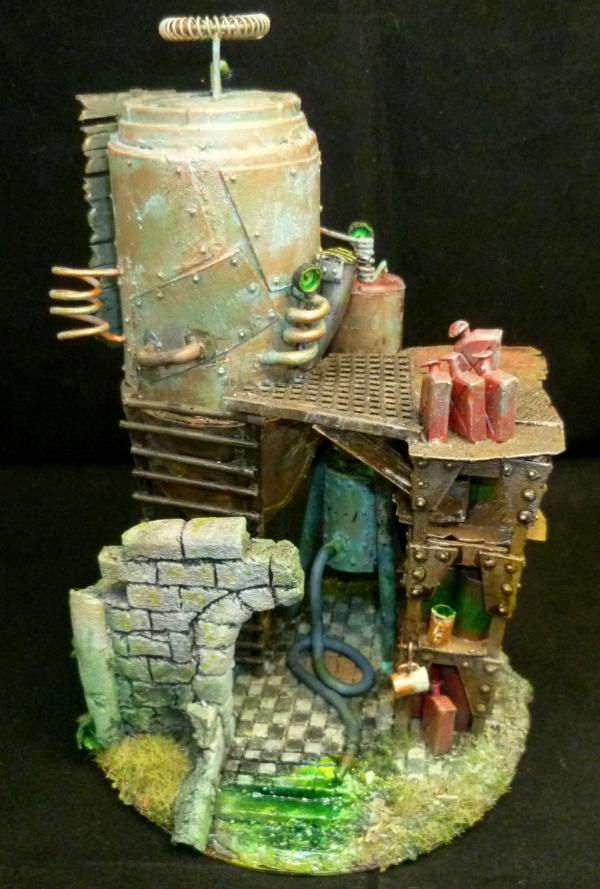
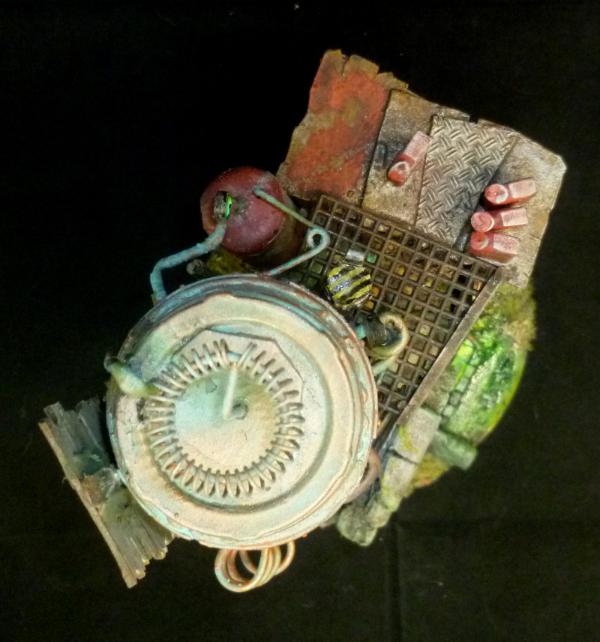
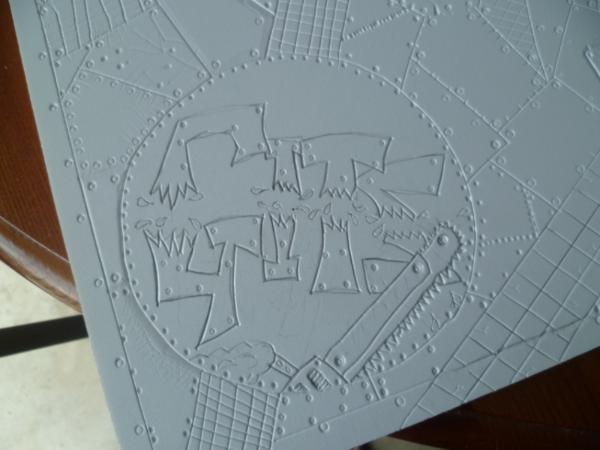
Well Here we go.....
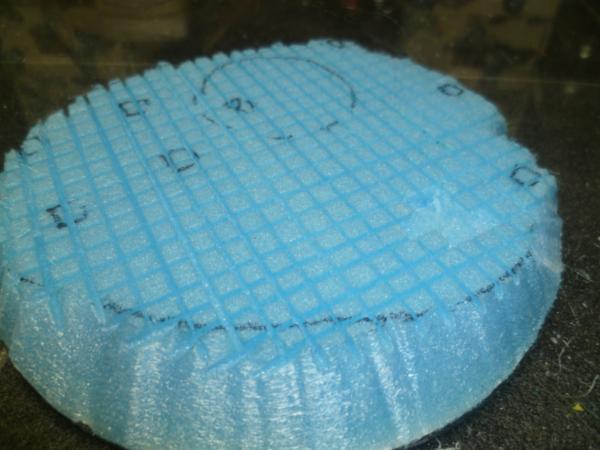
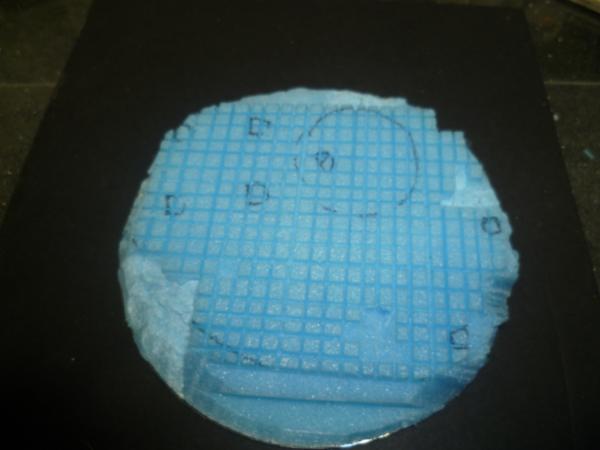
Take a CD, and a bit of foam.....
Carve up dat foam a bit....
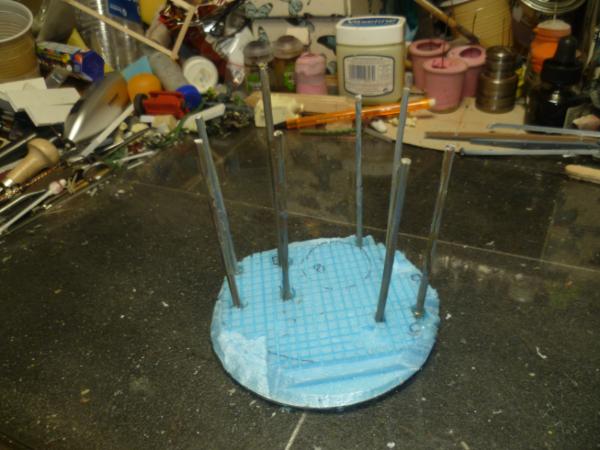
Get some old sprue, and sand it down...
Glue in place to start making the structure...
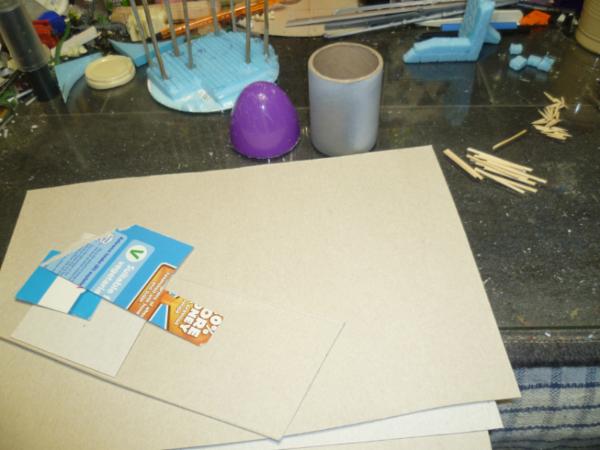
Grab some ordinary bits...
Start adding some structure to the frame...
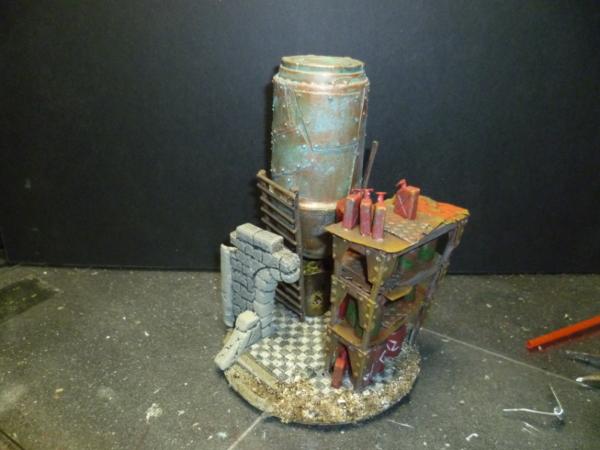
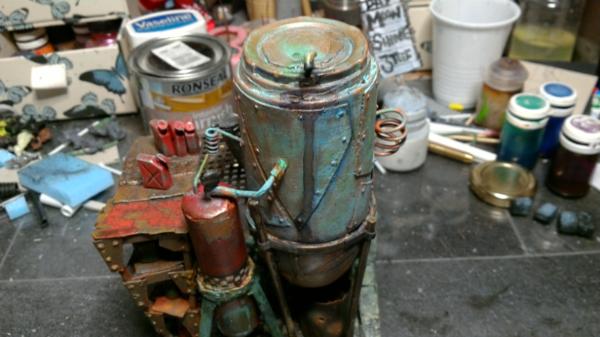
And a large tank...
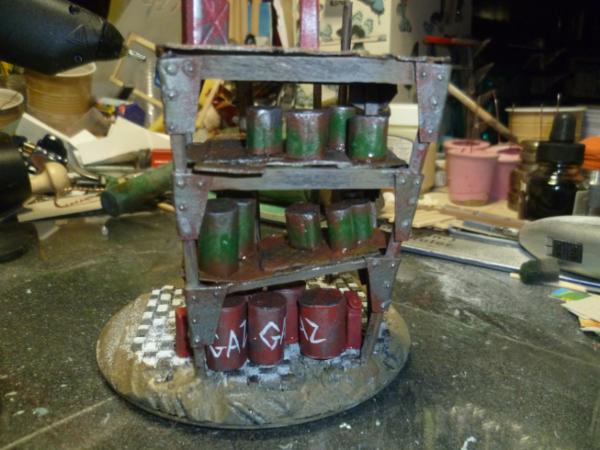
You may also notice the mass production of barrels....
So that is where I am, Thoughts C&C all welcome.
Spoiler:
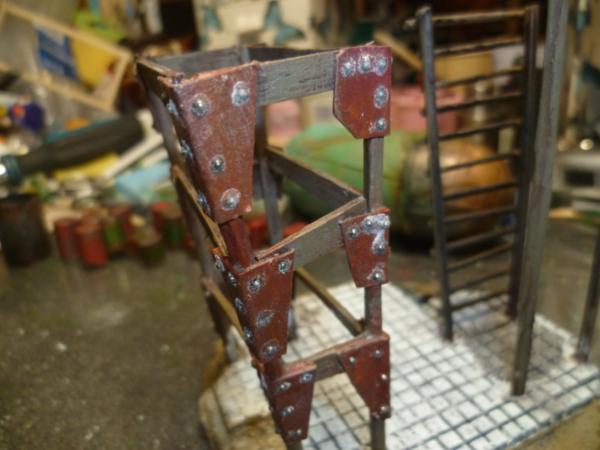
Life is not getting any easier, but your support means a lot guys, thank you.
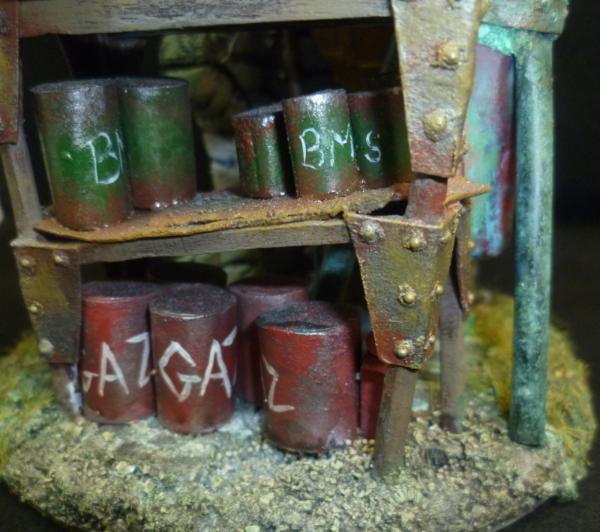
And yes that is a new method for me of riveting, 1mm steel ball bearings, superglued into divots made easily in card stock.(cereal box)...
By sprinkling a little Bicarb onto the surface it sets the glue quick and adds a nice rusty texture around the rivet. I will be trying to do these neater when I try them on Imperial stuff soon.
Some nice progress! The ball-and-divot technique is nice, but I find it very time consuming - especially since I mainly work with plasticard. Still, it's a nice additional variation of doing rivets
@ CommissarKhaine, I agree about it being time consuming, but not too bad. And really on a par with cutting rivets from styrene rod.
@ Ruglud Thanks bud.
@ Solar_Lion, Thank you, and have to say I agree I like the combo.
@ GrimDork, Great to see you sir, welcome home. Thank you for the comment.
@ DrH, Thank you. And the rivets seem to be holding up very well, none have come loose. Quite liking this method.
@ Cleatus, This is all your fault......Thanks bud.
RL
Spoiler:
Unfortunately it has not let up, this contract relies heavily on good response times and the operatives passing certain vetting processes, I of course passed with flying colours, it seems to be a problem for alot of others though, so I am one of very few who can actually do the job. The good news is they took away my trainee, the bad news is I am doing 16 hour days, and travelling upwards of 350 miles every day, and some of the roads are not what you would call easy going. Anyone here driven around the very north coast of Scotland? Got so tired I got very low, so my beloved gave me an ultimatum, and I made a decision. I handed in my notice, 2 weeks and I am out. Gods know what I will do, but I will have my family and hopefully my sanity.
I really cannot thank you guys enough for being here, I am not sure how sad it makes my life that the only people I have to talk too are a bunch of grown men playing with toy soldiers, but you guys and reading your wonderful blogs really helps me. Sincere thanks.
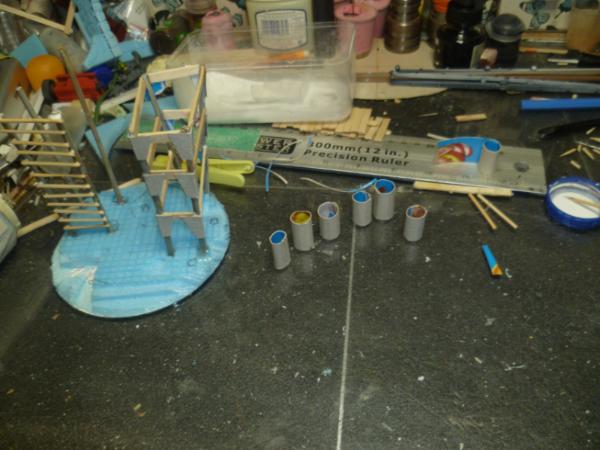
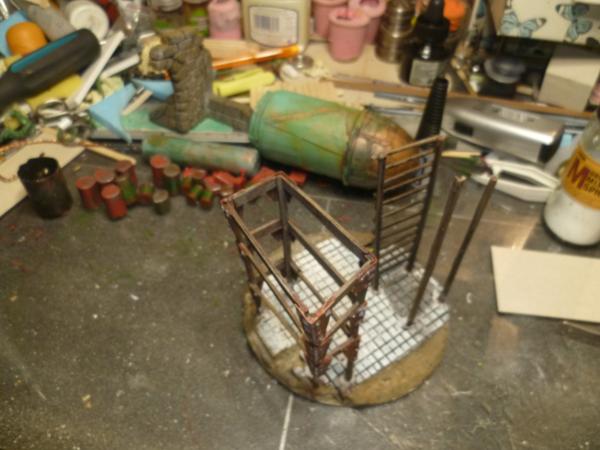
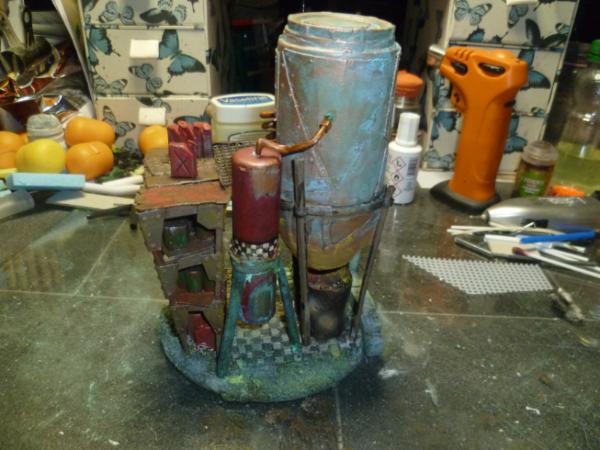
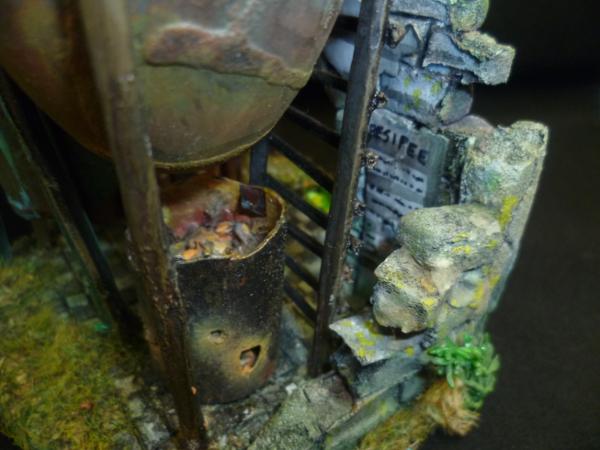
And in proper news, did a little more somehow, OK I can't sleep most nights, so sitting putting rivets on is about as relaxing as it gets....
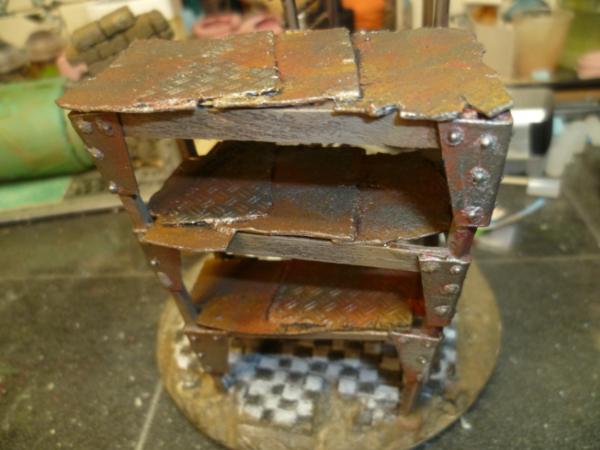
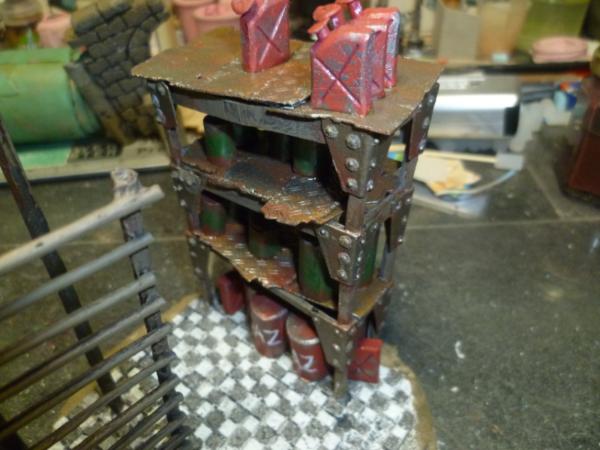
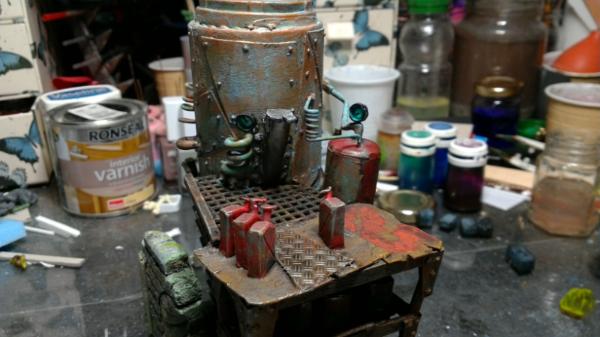
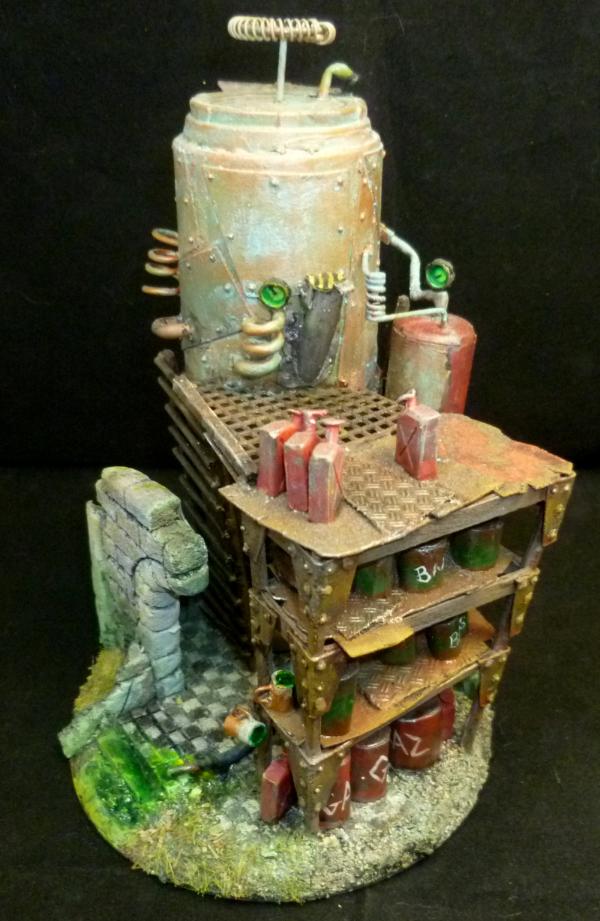
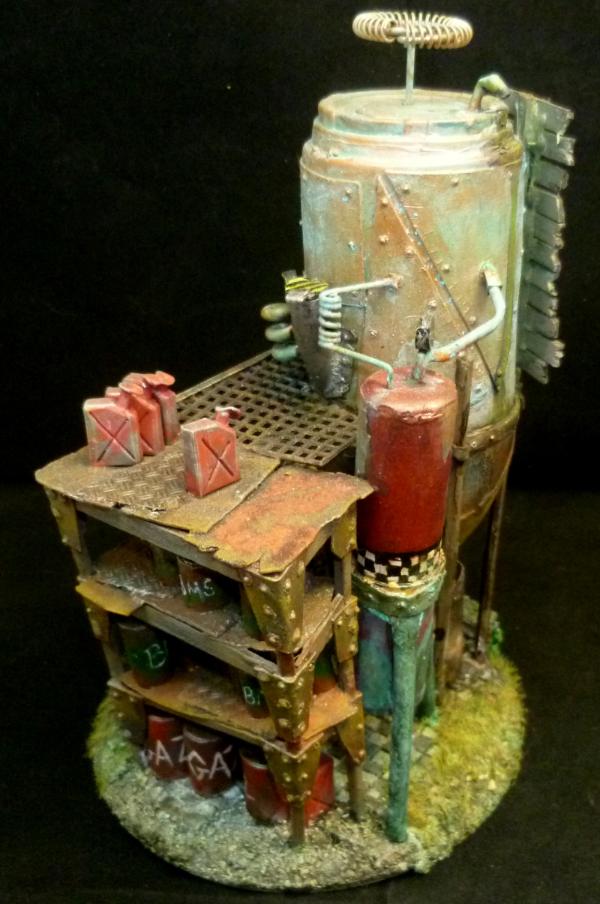
Shelves....
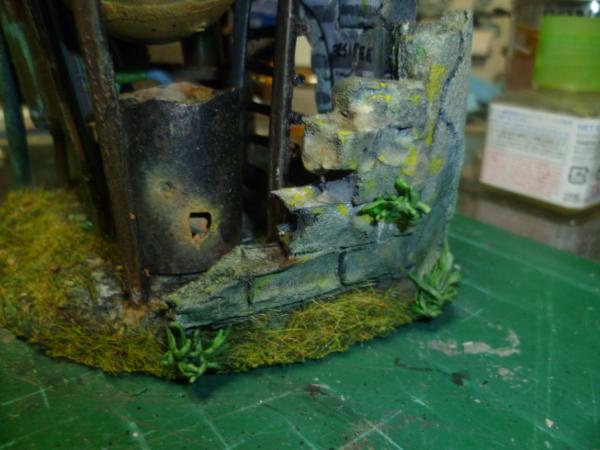
Red cans are gas, green are grogg....
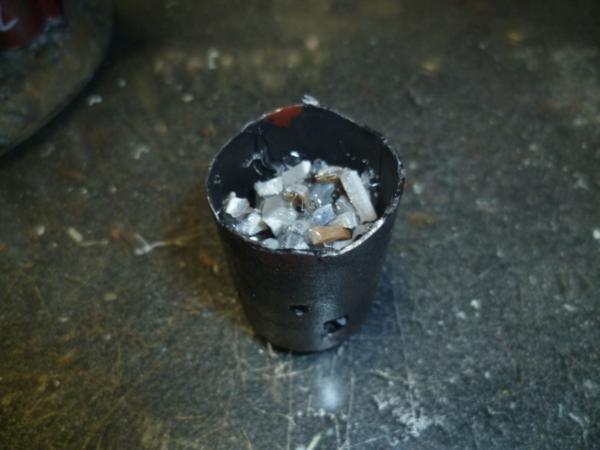
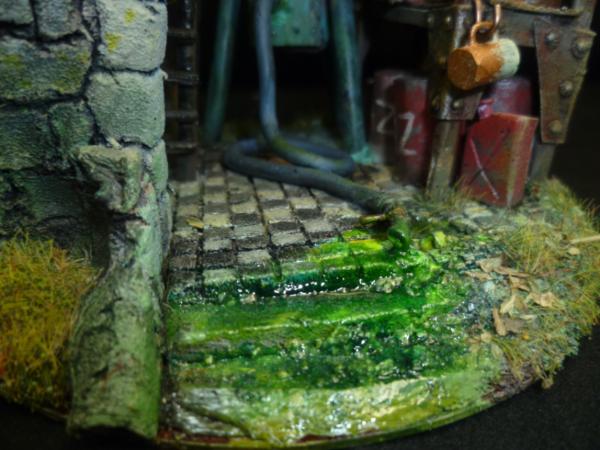
And started on a fire bucket ...some sprue clippings and hot glue....
In the spirit of the competition I am using relatively ordinary materials, card etc. with a small cheat on the checker plate. I could go styrene etc, but I don't feel that is in the spirit of the comp.
Thanks for looking in, and please feel free to comment in any way.
Make your models, cast them, create more, sell them... Not going to make a fortune from the start, but given time and patience, you could well be on to a winner - having attended Salute this weekend, I can tell you that there are folk out there who would buy your models, as I saw them buying stuff that was vastly inferior to what you've produced on these pages...
Realistically, at best it could be part-time. However, it can bring in some extra £s (or will it soon be €s in Scotland?) while Cam searches for his next gig.
I get the impression that very few of us spend much time playing with the toy soldiers. Too busy modelling and building for actual play.
Cam, you'll sort out the RL stuff. I have absolute confidence in that.
The painted faces(?) look spectacular. What size are they? And what are they for? Aside from looking super-kewl, of course.
@ CommissarKhaine, I agree about it being time consuming, but not too bad. And really on a par with cutting rivets from styrene rod.
Really? The drilling takes up longer for me, and I'm always worried about the depth of the divot.. Maybe I'll experiment some more with it.
I'm loving the ramshackle brewery you've got going there. Will you be adding squigs as well?
Spoiler:
1. It's an easier to get a decent job than it is to get a true significant other. This one sounds like a keeper .
2. It's just easier to talk to strangers about things like this; simple fact of life. Add to that that dakka is a mature and helpful community, and.. well...I've always joked that dakka is a support group, but there is some truth to it.
Already commented on the build over in the LOER thread.
Cam, thank you for sharing your personal struggles.
Spoiler:
Seconded on the idea of casting and selling some of your creations. I'd buy them.
The publishing world is in flux, but have you considered the possibility of putting some of your work into a book? I mean, people still hunt down copies of "How To Make Wargames Terrain" on eBay etc. What if you made something like that? And sold it as an eBook on Amazon? Not a lot of money in that either, but hey every little bit helps. And once you put the effort into creating something like that, it would be available forever. Just an idea.
Another idea: perhaps a YouTube channel? I don't think I'm alone in saying that I've learned so much from you. I think if you did some videos, and maybe tacked on a Patreon link, people would be happy to support you. It wouldn't be a full time job, but hey that's beer money. Or glue.
@ Ruglud, Thank you. I have thought about it many times, not sure anyone would buy my stuff, and also the world is full of people trying to do it it seems.
@ Red, Thanks. and agree, I could happily do it full time providing I had a minimal income to keep me afloat. And do people buy this stuff! On the faces, they are the sides for a box BTW @ EDC, Thank you sir, really appreciate it.
@ CommissarKhaine, Thank you, and damn it got to go take a picture now.....hang on......OK see below...
@ Cleatus, Thank you. I have very often recently thought of the youtube bit, but not to make money at it, just easier to show you guys what I am upto. Book on it could be an interesting idea. Keep meaning to properly index and collate my stuff on here, just keep ploughing through new stuff though. Think about a Showcase blog to try and get more visibility, just too unsure of myself at present. I am happy to give bits away, with the full knowledge that if the unlucky recipient doesn't like it they can do anything they want with it, and no harm no foul. Would worry if people were paying for it and the pieces are not up to scratch.
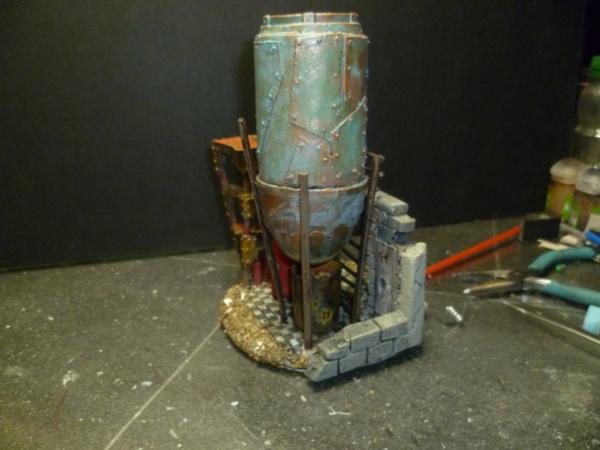
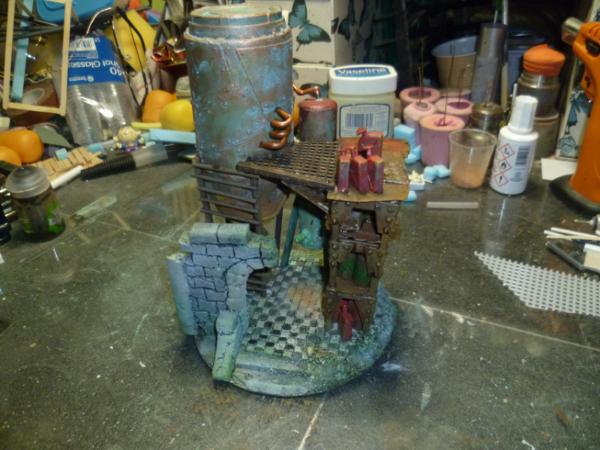
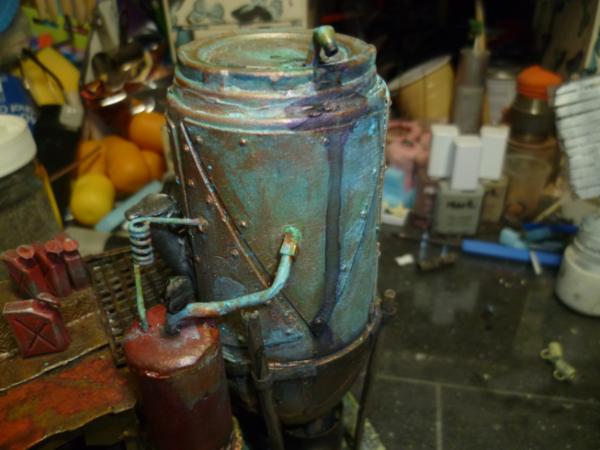
First up done a bit on the piece....
This is not glued together yet and I have a lot of "tubes" to add yet...
And for you CK....home modified rivet divot maker.....
Cost about £6 from the Nickle and Dime store, it is a battery operated coffee stirrer. I cut the shaft, and sharpened it to a blade, similar to a very small flat head screwdriver. It is much quieter than the Dremel, couple pound for some rechargable AA batteries, and away you go, it is not the most powerful thing you will ever wield, but it does enough to divot Styrene sheet in a couple seconds.
Thanks for looking in, and your support is truly a huge help.
Cam, you have made a motorized bradawl. Very clever. Did you know that the tool would have a name? Technically, a chisel point bradawl, from the looks of the photo. There is also something called a gimlet. Not the cocktail, a woodworking tool. It is threaded though, an odd combination of a screw tip and a drill bit.
A Youtube channel may be worthy of consideration.
Box sides... intriguing... and awaiting more photos, of course.
Looking great, Cam, as always. The struggle is real and I completely identify. The dakkadakka has gotten me through more than my fair share of rough times for sure.
Nice idea for divot making.
I just use my normal hobby drill / pin vice and a suitable drill bit for the divots for my water-filter bead rivets. But they are more variable in size than standardised metal ball bearings... obviously.
And yes, I do measure them with a micrometer to select the correct drill bit. Of course I do.
@ Red, Thank you, and yeah knew about bradawls, use them all the time Got to look into videos now. And I am afraid the box is gone now, beyond my ability to take pictures. We may one day see it round here somewhere.
@ Warboss, Thank you and Thanks for the thoughts very much appreciated. Dakka keeps me ticking at times.
@ Ruglud, Been a sub to Mel for some time, caught a few of his streams as well, and Jan's streams on twitter when I get my timing right.
@ CK Thanks and your welcome. And join the club bud I think there are a fair number of us old gits about.
@ DrH, Thank you sir.
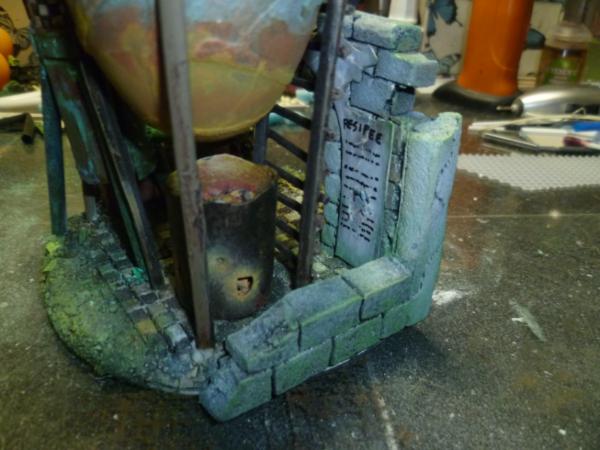
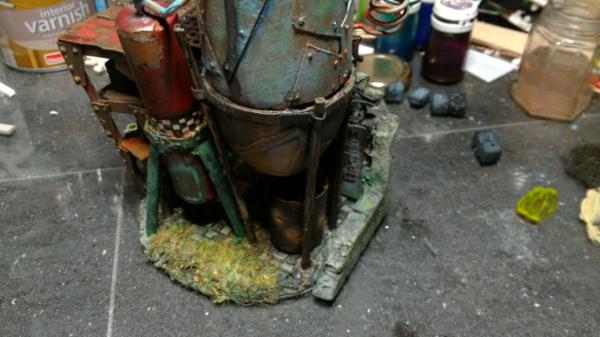
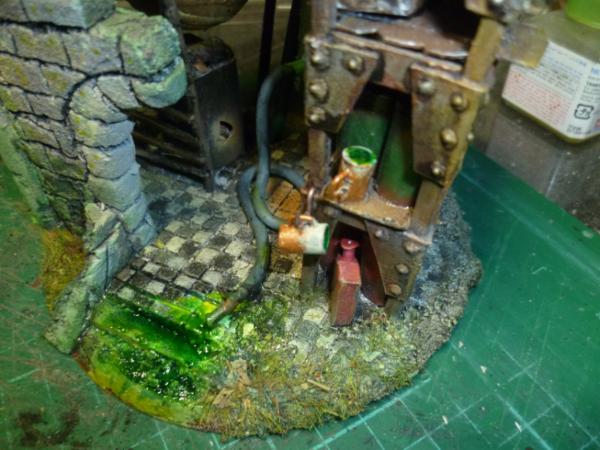
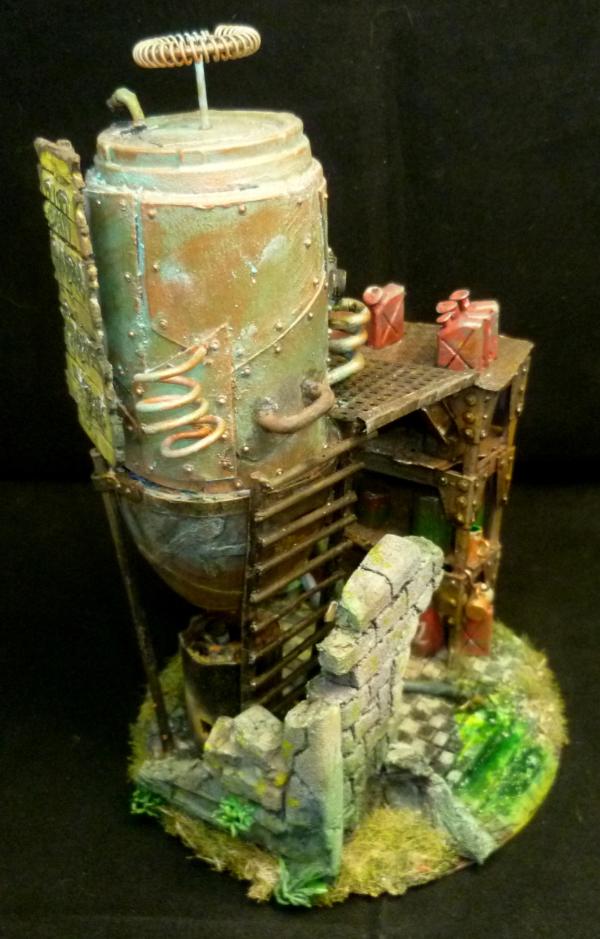
And here is a little progress, need to get my head straight here, so not an awful lot going on, but progress....
Maybe some soot on the bottom of the "tank" from the fire, rather than just the OSL. Somehow within the glow area; darkening the lower point rather than blackening it?
Hell yea thats lookin nice! I feel like the fire barrel is a missed opportunity though. You could of easily used a battery powered tea light candle. Those are cheap as cheap gets and are made to simulate actual candles. Ice seen a 2 pack of those at a dollar store.
Either way, the rest is looking nice and Orky to my eyes!
Again Cam your ability to put together gorgeous terrain and give it such character with your painting skillsastounds me. Looking forward to more of your projects.
Thank you all for the comments, very much appreciated (needed) seriously thank you.
Changes...
Spoiler:
Well after a few very dark and long days, I quit. Have been working out my notice. Thus not much activity here, as they have made sure I give my last pound of flesh. Been away this week, they forgot to arrange accommodation, so ended up sleeping in the van, not a great experience at my age, just on the cusp of aching joints and bad backs.
I have got visitors coming this week, parents are up for the week, so again things will be a bit slow here, sorry.
After that I have got another job, much less stress and less hours, a lot less hours. Finances will be tight, but money is not everything. Time with my family is. And with a bit more time on my hands I can start seriously looking at this hobby.
A really big thank you to all of you for helping me through this, still a long way to go, and still have dark days, but your words and interaction, be it nice comments or constructive criticism spurs me on, and looking at your works inspires me, so many ideas. THANK YOU.
So will post something later as I have done a little work.
In hobby news, I am selling off, will be posting in the swap shop, but if anyone wants any of my models, PM me. Willing to post anywhere, and to be honest I tend to give things away so you may get a bit of Dakka Karma coming your way.
Thanks again, and back soon with something for you.
PS @ Yorkright, did you mean in person or on his blog?
Fine work Cam, what you've done sounds like a solid step in the right direction. Maybe i'll check out what you've got sellin' if I can keep MTG from my wallet.
@ Commissar Khaine, Thank you sir, and selling off because fed up of looking at this lot sat here never getting played with.
@ Shas, Ta bud.
@ DrH, Thank you bud, much appreciated.
@ JustaerinAtTheWall, Thanks bud, will have a thread up shortly, struggling to find the time right now.
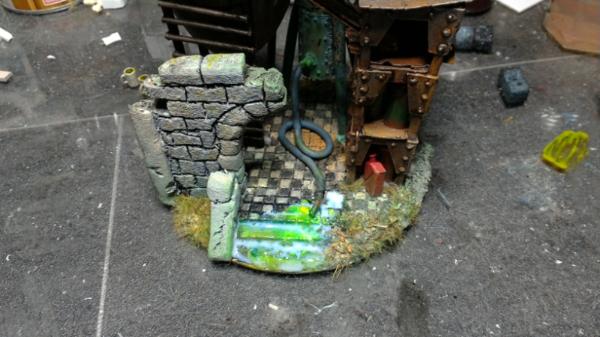
OK so small update, still more to go on this but....
RL was just about to settle down a bit and I could concentrate on getting my head together. Due to start my new job tomorrow. Had parents up for a visit, seeing dad was a shock, cancer SUCKS! Then today my Brother who is suffering acute Kidney failure amongst a string of nasty stuff, throws a wobbly, so dropped parents to airport, then down to brothers, persuaded him to go in to hospital. At the same time as putting my gak in perspective, gets me even more down, and more pressure as people look to me to be the strong one. Surely this can't be it can it? Why is this life so bloody hard, and when I stop and think about what some of you have gone through this last while, (looking at you Theo, but several of you have been up against it.) I feel so foolish, and weak.
Sorry for bleating on, kinda hope no one actually stops to read this, just good to put it out there.
Thank you for looking in. As always comments welcome. Just about ready to call this done, until I think of something else to add.
Good luck with the new job.
That's a lot to deal with. You're doing great.
Everyone has their burdens to bear, just because someone else may objectively have things worse it doesn't take away from what you are dealing with.
I don't see weakness here; you've gone through all that, AND gone out and got a job (something I've not managed in longer than I care to admit).
I could tag on all manner of clapping/bowing gifs here, but I'm not going to make light of your achievement. Little steps bring you closer to better times.
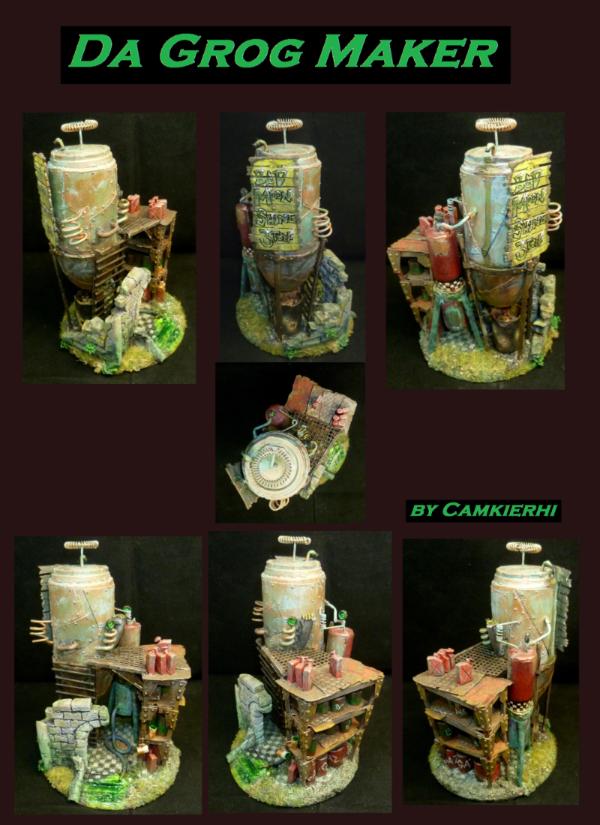
Another awesome piece, I've seen others try something along these lines, but you truly channel what I believe to be the orc spirit . Bad Moon Shine takes the trophy
Thank you all for your comments and wonderful support.
First here are the final entry pics for the LoER comp. There is probably no difference to what you have seen before, but lots of pics, all votable.
Few close ups..
RL:
Spoiler:
Thank you so much everyone, your support is really helping me. My brother has been in Hospital now for weeks and they still cannot tell us what the deal is, they have started him on full dialysis, where they swap out your blood. This seems to have improved things. Dad has been for more scans, and reports that he is doing OK, but I feel he is not being completely honest, I am not close enough to get hold of the doctors. Things are finally settling down on the work front, though they are asking me to do a lot of hours at present.
Mentally I still have bad days, have often thought of ploughing the van into a tree, then I think about my family and (crazy I know) you guys. And I obviously think of those who are less fortunate. We have spent some time raising funds for a charity for a little 6 year old with a heart defect. Wish I could do more. Poor wee soul, lost the fight, it was one of those inevitable things, but I think of his family, I know the parents and grandparents, and just can't imagine how they are coping. My pathetic issues are so tiny in comparison.
One of the big ones on my mind is the world today. I stick my head in a hole every day to try and not think about where we are going and what we are leaving our children, some of it gets me so mad, and some so down. Why the hell can't we get along. I think about the little things that make life so special, and can't fathom why people are so stuck up their own arse they don't realise how wonderful we could be. What we should have achieved by now depresses me, when I think of the wasted lives and time.
Now I am doing better guys, still obviously a way to go, your few words on here, and even just seeing the view count go up, helps me tremendously. Reaching out to all of you talking on your blogs, and the honour I feel when some of you, truly great artists actually listen to me, is a mega boost, I feel part of something special, a legacy. You may think I am talking gak here, but one of humanities greatest gifts is art, expressing ourselves. You don't have to be great at it, but having a go is the main point. Don't give up. Some of the art I have seen in the gallery and across your blogs is something to be proud of. Inspiring others to produce art of their own, that is a legacy worth fighting for.
Thank you all once more, and please feel free to comment, critique is most welcome. Of to work on a little orky side project for one of you true friends. Back soon with update on Orkishness.
it is really something like a phenomenon...someone hurt and exhausted is still able to chuck out such cheerful and heart lightening stuff like this little gem...
by the way...misread the sign at first... as in :"bad moonshine jeff" LOL...
as for the world...you know that hope was left last in Pandoras box...i think that s nowadays even more true than ever... when i think about all these murderous maniacs out there trying only to destroy...i force myself to the thought, that all our achievements in art, music technology won´t ever be ruined by such a still way too low number of idiots... the momentum of progress since the dawn of time is not to be slowed or even halted..."they" wish for that... but in the end they wont even be remembered for their dirty deed for too long... others have failed at this task before...and are now dust...
The brew shack is great, so characterful and unique. Love all the little touches, and you have definitely rubbed off on your son skill wise.
The world sucks.....no doubt about it, but we each add something to each other's lives. You and your work bring a smile to my day when I get the chance to pour over the pics and friendly banter. There's a reckoning coming soon I'm sure of it. The way things are happening and just how tired everyone has become from seeing all the bull is hitting epic levels and I think the media will bare the brunt of it. I don't think times are worse now than in the past, it's just that media and social media have brought all the bad so boldly to the fore that we are all forced to see it. They look less on what positive is happening like your efforts to raise money for that family, and more on the few instances of people stealing from charities . I don't do social media, except dakkadakka, because of such stupidity. Am I better for it? No, but unless if something is actually affecting me or my loved ones (which I consider all of you guys too.) then I don't need to be brought down by it.
As for the 'other' or RL stuff... Theo makes a good point - this RL gak has been happening ever since mankind crawled out from the sea and started on the road of 'civilisation' its' just today's turned on, tuned in, 24hr media circus is transmitting it all for everyone see. However, if our comments and appreciation of your hobby time can keep you away from that tree then maybe, just maybe there is some hope for us all??
Hope you had a great Father's Day mate, savour the time with your loved ones. Making sure your kids are well rounded individuals is a great step to sorting out the future for them as they hold the destiny of our small rock...
RL is hard, but the hard stuff is worth doing. it makes a difference in those around us. It;s not always rewarding or is it always apparent; but true champions are not the ones whom talk about the number of times you have taken the blow but by the number of times you got back up. Tomorrow is another opportunity to be that Champion. I wish you and your family the best of all outcomes.
Thank you all for your silly and kind words. Much appreciated.
Been a bit busy, work (not in too bad a way) and RL ups and downs.
@ Vik, Thank you sir, I can only guess that they say many artists/ comedians suffer behind the smile. Not that I believe myself to be either. And RL, I hope you are right.
@ Theo, Thank you, (Shinigami-Ren) is my daughter, but thats OK, I have two sons who I hope will follow suit. One of my biggest fears is the reckoning that is coming. They are bad and even close to evil things happening, but what it could ignite will be biblical, I feel it myself, praying for restraint, when I watch the latest atrocity.
@ Llamahead, Thank you, praise indeed.
@ Grimdork, Thank you.
@ DrH, Thank you, and hehe, much appreciated.
@ Ruglud, Thank you bud, and really appreciate the thoughts.
@ Shas, Only da bestest for da Ladz.
@ Solar, Thank you so much sir, really appreciate your thoughts.
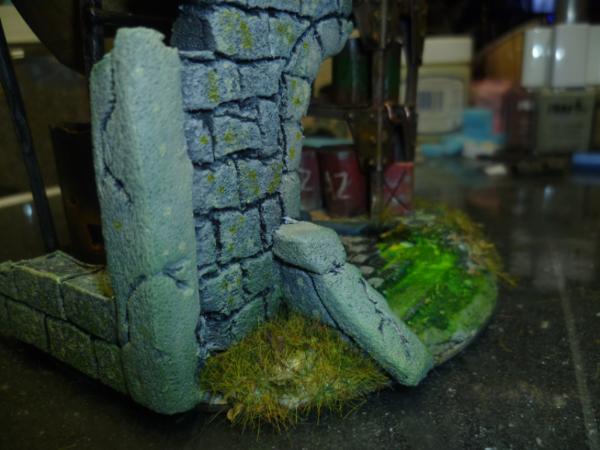
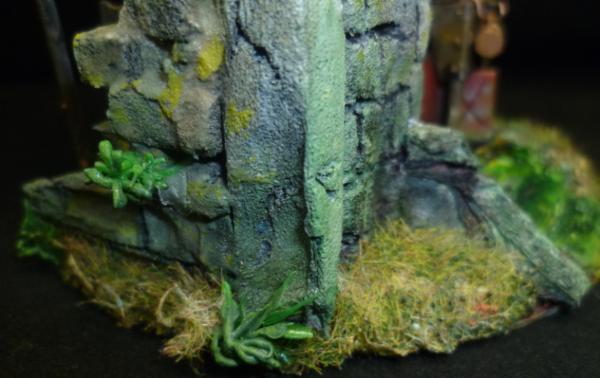
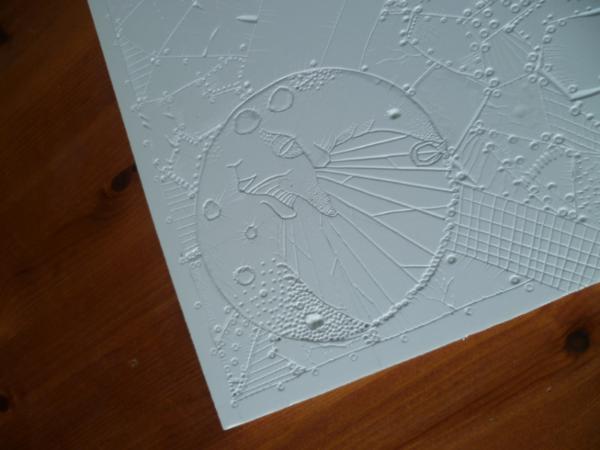
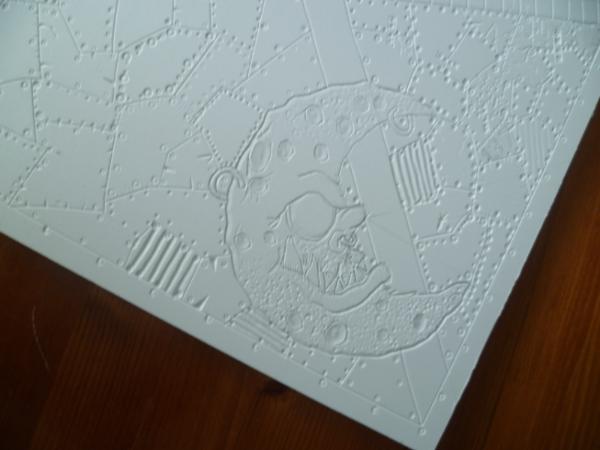
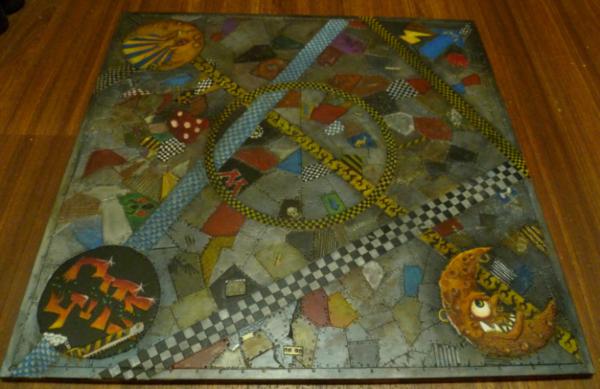
Thought I would pop on and do a little reveal/ update. Gitsplitta has requested a board to go with his box I sent him. So started working on it earlier this week.
It is 2' (600mm) square, 10mm thick EPVC sign board. Did a bit of scratching here and there...
And with a little progress and paint...
I hope he likes it once done, thoughts appreciated as usual. Thanks for looking.
Not much to show, and not going to be too much progress over this week as working 6 out of 7 days, and 4 of those will be 15 hour shifts. But it is all good I guess.
@ Dave, Thank you sir.
@ Tom, Thank you.
@ Gits, Have to bring my best game for your amazing orks, great to hear your Waagh!!!ing again.
@ Vik, What is this sanity you speak of?
@ Yorkright, Hope it lives up to the hype.
@ EDC, Thank you and that makes me very happy.
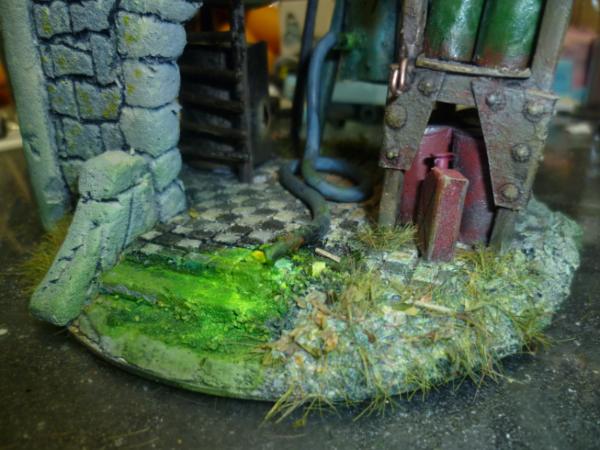
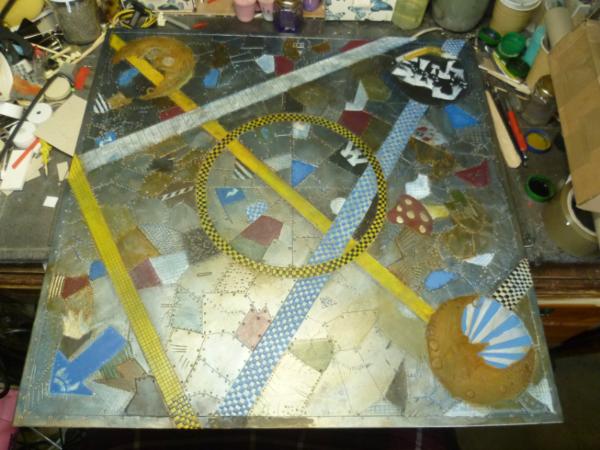
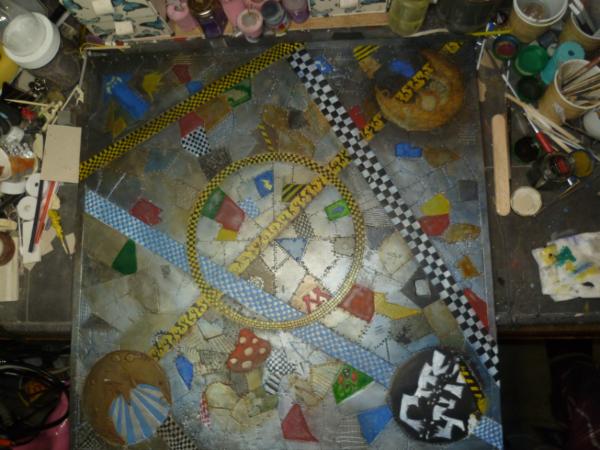
OK bit more paint, not much progress, RL interfering, but progress is progress, things are settling a little now so hope to have this done and away in about a week.
my grandfather used to paint on cardboard...plain stuff...because canvases were too expansive...and you´re from similar stuff... you find a canvas almost in everything...
that moon looks awesome... and the shading on the slashed name is superb!
@ Vik, Thank you, I feel that is a truly great compliment you have just given me, ref: your grandfather.
@ Dave thank you sir.
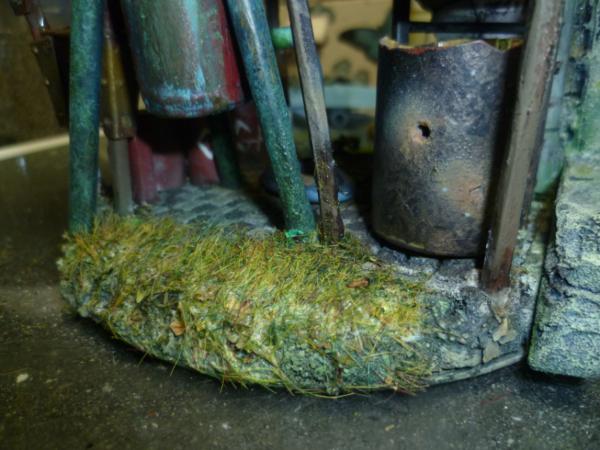
So getting real close, in fact so close I have given it 2 coats of Varnish, and a coat of Plasticote matt sealer on the top, could still tweek a few bits yet, and I have a bit more to do to this before it goes across the pond. I just hope I have done well enough for Gits.
Real bugger to get a good pic of, and this is the third lot I took. It will do. These are very zoomable so would encourage investigating the image further in the gallery.
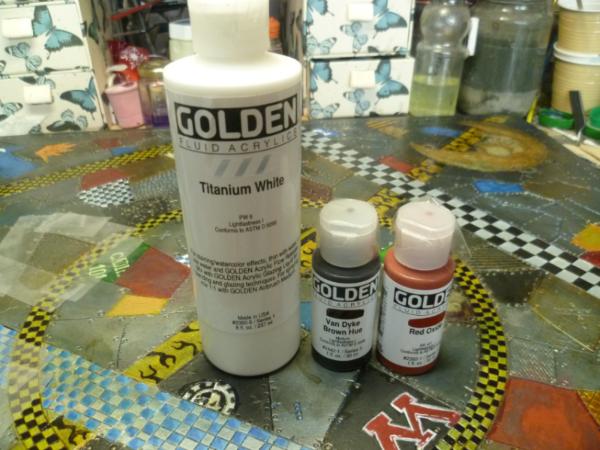
Also just want to say thanks a bunch to Dave and Red, over on Dave's blog https://www.dakkadakka.com/dakkaforum/posts/list/13620/399826.page they where discussing the merits of good white paint, A few days and a few £ lighter, I got these...
Excellent paint, used the brown and red already, the white has been used but mixed in and messed about, all are really good and well worth the money.
OK thank you for looking, would apreciate any feedback you may have, and if you can see any thing wrong please shout out, I would like to fix anything before I send it.
I show you my heart and soul, and you pick up on the fact that I used surgical tape to mask off sections for rustifying earlier? Thank you Theo. Got a job lot a while ago, it sticks very well, get hardly any bleed and comes off without any issues. So yes it is clear medical type tape you can see in the background.
Good lord, that is bloody gorgeous mate! brilliant work!
...it's the kind of thing you could just spend hours looking at...so many different little textures and details going on, both physical and painted on...stunning
Camkierhi wrote: I show you my heart and soul, and you pick up on the fact that I used surgical tape to mask off sections for rustifying earlier? Thank you Theo. Got a job lot a while ago, it sticks very well, get hardly any bleed and comes off without any issues. So yes it is clear medical type tape you can see in the background.
Well I hope surgical tape wouldn't allow much bleed .
Gits, your not allowed in here , were talking about you, and it would become awkward if you were here .
Man, the level of depth you are getting on those moons while still having a mostly flat surface is wonderful. Your inner Ork is really showing through. Biggest problem I see is that Git's Orks are going to get overshadowed by the display board they are standing on.
@ Vik, Thank you, I feel that is a truly great compliment you have just given me, ref: your grandfather.
@ Dave thank you sir.
So getting real close, in fact so close I have given it 2 coats of Varnish, and a coat of Plasticote matt sealer on the top, could still tweek a few bits yet, and I have a bit more to do to this before it goes across the pond. I just hope I have done well enough for Gits.
Real bugger to get a good pic of, and this is the third lot I took. It will do. These are very zoomable so would encourage investigating the image further in the gallery.
Also just want to say thanks a bunch to Dave and Red, over on Dave's blog https://www.dakkadakka.com/dakkaforum/posts/list/13620/399826.page they where discussing the merits of good white paint, A few days and a few £ lighter, I got these...
Excellent paint, used the brown and red already, the white has been used but mixed in and messed about, all are really good and well worth the money.
OK thank you for looking, would apreciate any feedback you may have, and if you can see any thing wrong please shout out, I would like to fix anything before I send it.
Damn, dude. That is just pure awesomeness. And suitably Orky.
@ Shas, Good shout, going to do some trawling this avo.
@ Sir Donlad, Good idea, but bit big for what I am after, I will explain below.
@ Grotrebel, Those are really nice and could be a serious contender.
@ Whalemusic360, That is a good question.
OK, yeah better explain a bit I guess.
So I have had a fart rattling around my head for a bit, I like crows, the scruffy rag tag dark menacing, cool as chips type of thing. And yesterday a true brainfart produced the idea, Ork Storm boys, but not storm boys....Storm Krowz. Dropping out a gunship using feathery type wings like a chute, maybe a rocket in there somewhere for speeding things up, elite airbourne unit, I even have some oversized M16 guns to rain bullets as they drop. They may or maynot end up as a dio or a legal unit. Just something I have kicking about. Got an itch and need to scratch.
Look at some of the DE stuff... they have good feathery wings.
HOWEVER... being orks I'd see more of a metal frame wing with feather-like plates riveted on haphazardly for that rag-tag... "we deny the existence of aesthetics" look.
This might be a good place for building a single set & then casting the crap out of them.
Yeah, looting some Dark Eldar Scourges would be a good go to. Or even some Stormcast Prosecutors, if you didn't want them quite as organic. Reaper also has a set of wings that could work well for you. https://www.reapermini.com/Miniatures/bits%20wings/latest/03181
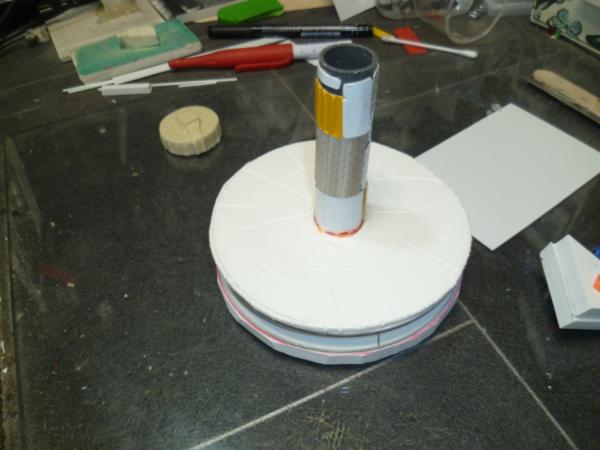
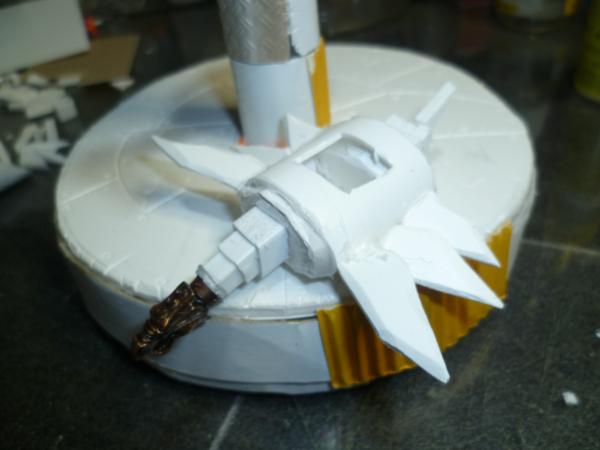
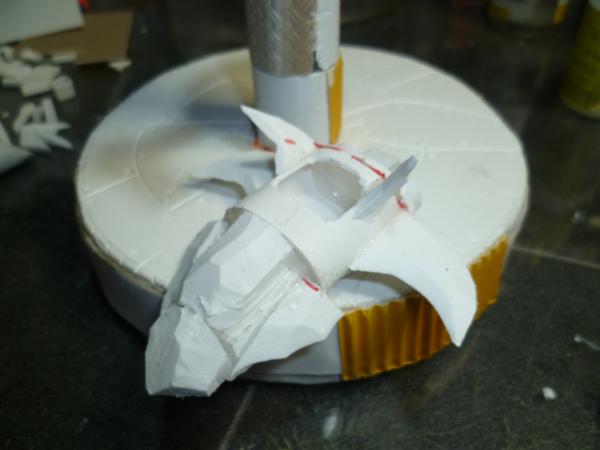
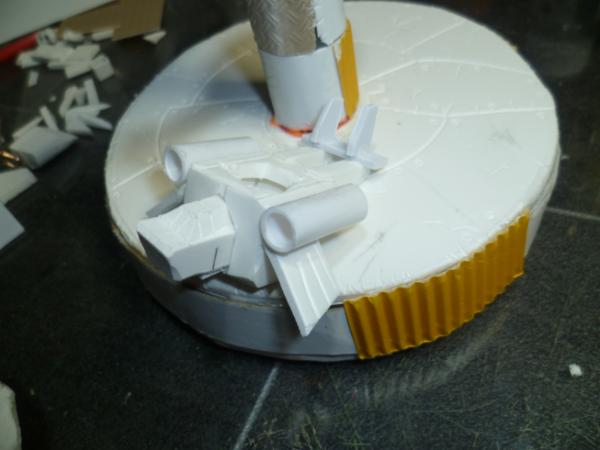
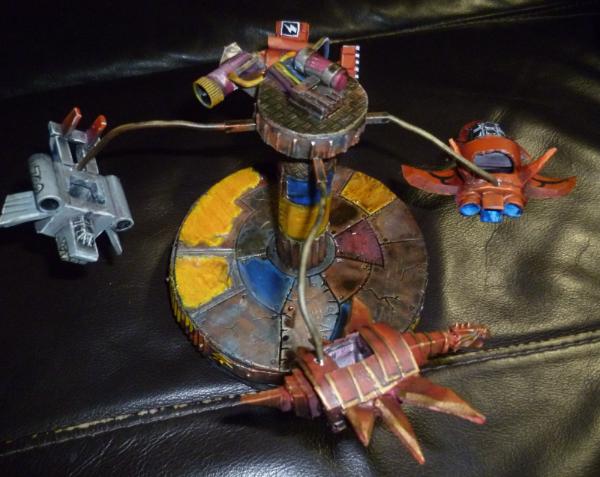
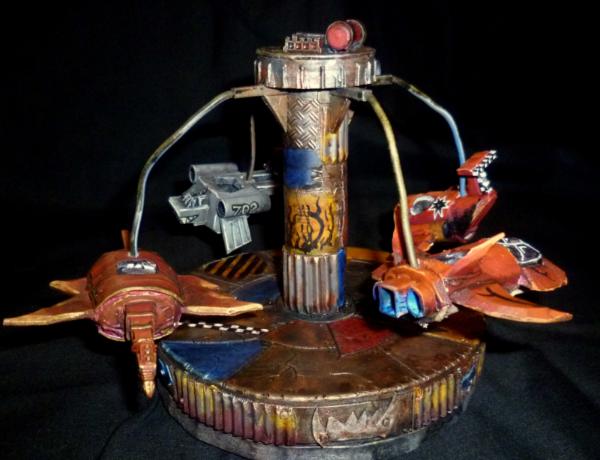
A quick little something just to get my Ork juices flowing. LoER Comp, need to do something, title is Child's Play. Several ideas, but it is getting short so go with one idea.
So yeah a orky amusement ride, little merry-go-round type thing, but orky.
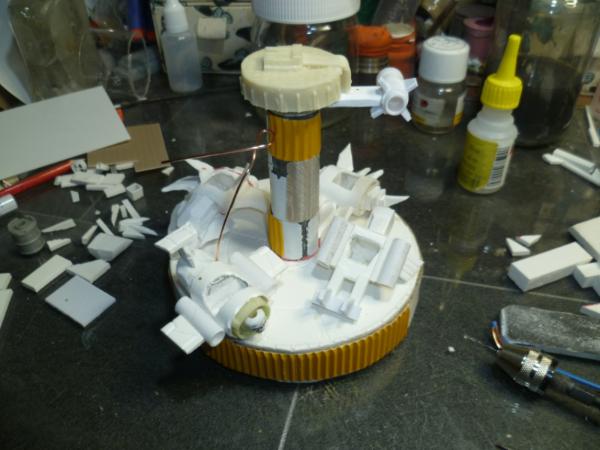
Cam, you are the best you just brightened the rest of my day sir. I love your orky ideas.will this actually spin? I've seen items at checkout stands that are small motorized toys that spin which could fit underneath the base.
Theophony wrote: Cam, you are the best you just brightened the rest of my day sir. I love your orky ideas.will this actually spin? I've seen items at checkout stands that are small motorized toys that spin which could fit underneath the base.
@ Gits, Ta dude. Anyone who wants it it will be up for grabs soon.
@ Ruglud, LOL thanks.
@ SirD, Thanks, I will think on the blonde.
@ Anpu-adom, Thanks and yes well I had to stop and make a brew now and then, sorry it took so long!
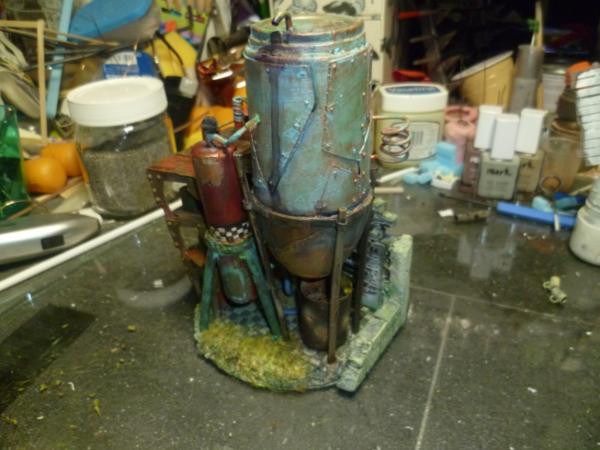
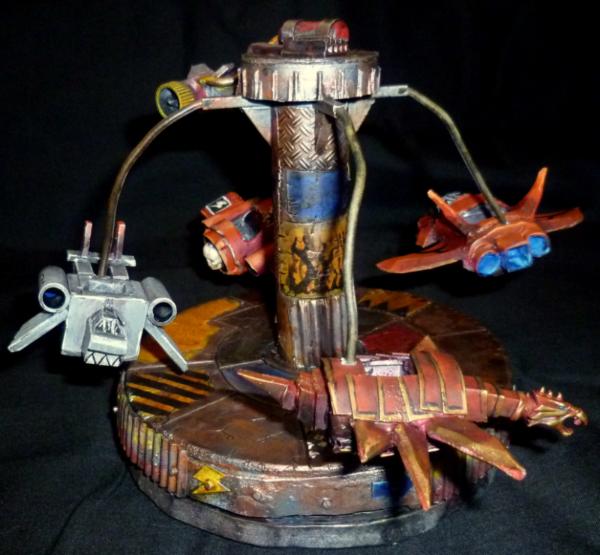
So here are some nice-ish shots. Think this is not done yet, got lots of ideas kicking about, so will; probably add to it.
Thank you all so much, really appreciate the comments.
Sorry not been very active here, lots going on, work is hectic, kids have invaded Dads room and taken over the computer, or at least the screen, got a visit from Papa Nurgle which is hanging about a bit. All pitiful excuses sorry.
But my orky itch is strong at the moment, I have some other things on the go which I have to do, but feeling an itch deep down for some orky goodness.
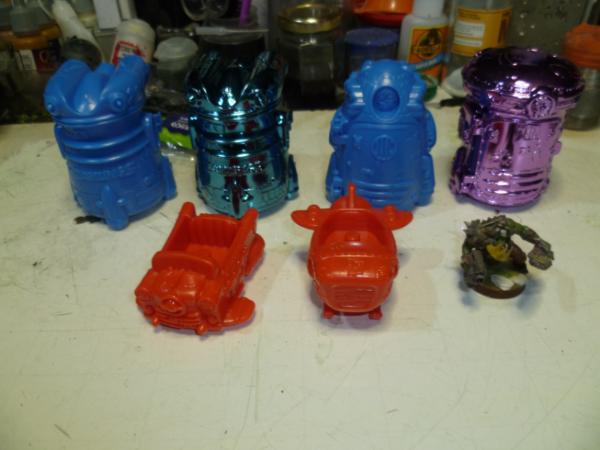
With that in mind, I saw these in the supermarket the other day, A magazine for kids. "Zomlings", well I see all sorts of potential, and a couple quid later I have this lot..


 . Then again maybe he likes flying really low and seeing how many heads he can take off
  .
.


 ) as for this latest build it's the creativity and reuse of kits that has blown my mind with the build and it it's Orks


 not a happy chap plus he had sunk them within the model so it was not a simple pop it out and reverse job.


 ...maybe wedge another piston in there?