| Author |
Message |
 |
|
|
|
|
Advert
|
Forum adverts like this one are shown to any user who is not logged in. Join us by filling out a tiny 3 field form and you will get your own, free, dakka user account which gives a good range of benefits to you:
- No adverts like this in the forums anymore.
- Times and dates in your local timezone.
- Full tracking of what you have read so you can skip to your first unread post, easily see what has changed since you last logged in, and easily see what is new at a glance.
- Email notifications for threads you want to watch closely.
- Being a part of the oldest wargaming community on the net.
If you are already a member then feel free to login now. |
|
 |
2014/06/21 02:20:02
Subject: Re:Homemade FW-style realm of battle terrain boards/buildings (5/13 first set of marble)
|
|

Dakka Veteran
|
|
|
|
|
 |
|
2014/06/25 00:12:11
Subject: Re:Homemade FW-style realm of battle terrain boards/buildings (6/18 back and more marble!)
|
|

Longtime Dakkanaut
|
Great job there buddy, made me interested in building a urban table !
Good to see you back !
|
|
|
|
|
|
2014/06/25 19:07:32
Subject: Homemade FW-style realm of battle terrain boards/buildings (6/18 back and more marble!)
|
|
Ragin' Ork Dreadnought
Deep in the Outer Boroughs of NYC
|
I love the way those stairs came out.
|
|
|
|
|
|
2014/08/06 06:56:52
Subject: Re:Homemade FW-style realm of battle terrain boards/buildings (8/5 New stuff for BAO!)
|
|
Dakka Veteran
|
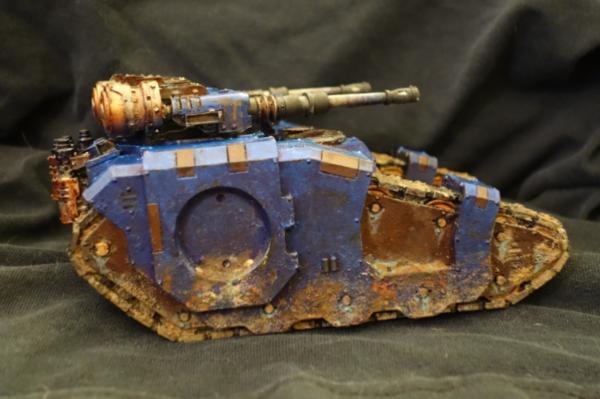
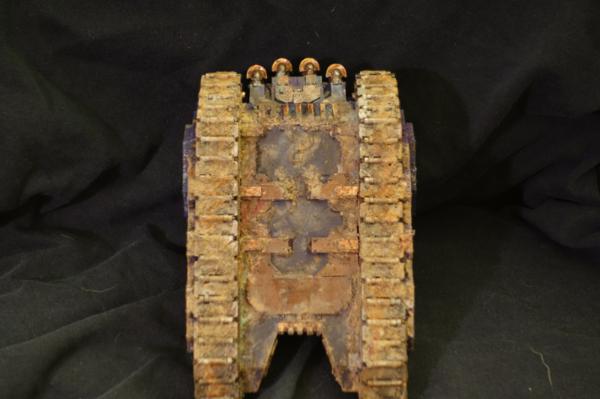
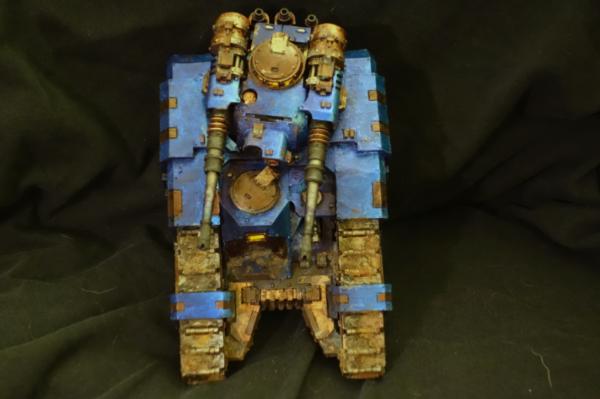
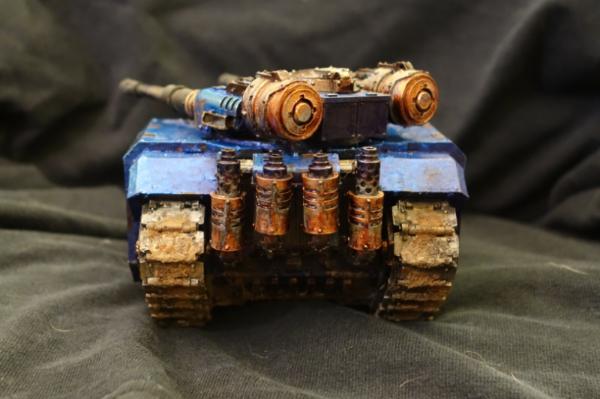
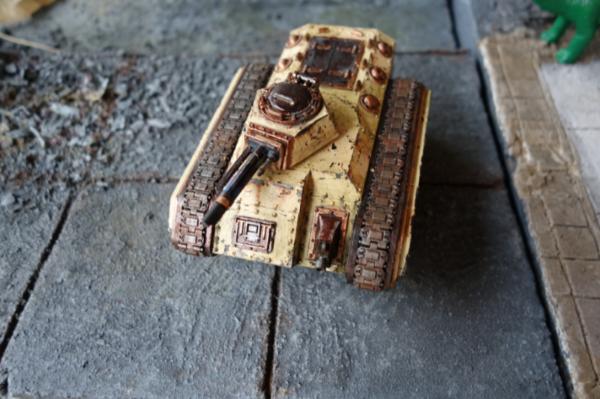
Hey all, sorry for the lack of updates, i spent the last few weeks painting madly for the BAO, so in lieu of something new fo rthe table i bring you the results of that.
First up is a sicaran!

|
|
|
|
|
|
2014/09/19 15:23:01
Subject: Re:Homemade FW-style realm of battle terrain boards/buildings (9/19 Modular Bridge prototype!)
|
|
Dakka Veteran
|
Gah! So i've been terrible about updating this thing but i havent been idle.
Aside from the new sicaran we also have sternguard, wyverns, and a lot of bikes that i've been madly painting for BAO. All will be shown in time once i figure out better ways of making pictures. Ill have a post about the difficulty of such a process in a bit but for now im looking at trying a photo tent to see if that calms down my lighting difficulties.
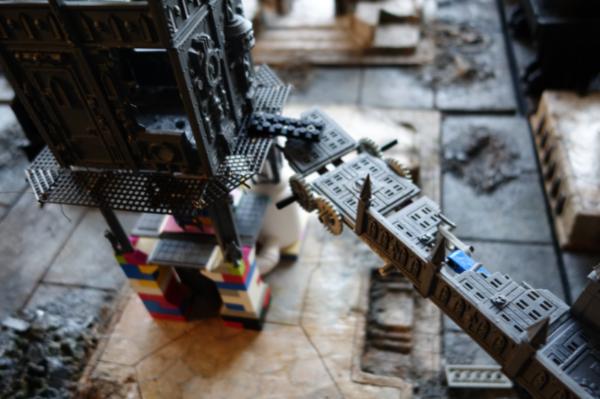
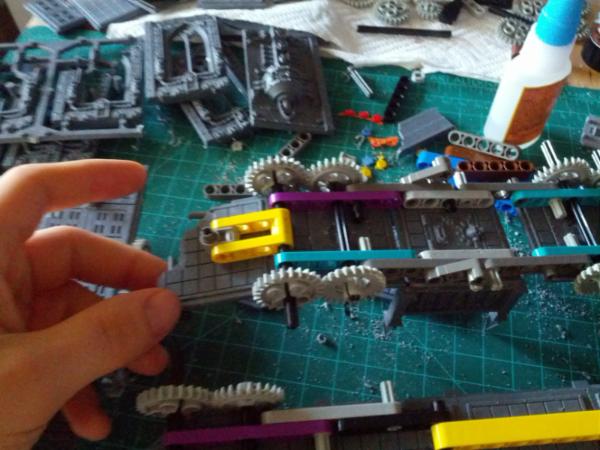
In the meantime though one of my co-40kers had a brilliant idea of using legos to make the attachments for the bridges so i had to test it out.
A few notes:
it actually works quite well and the attach points seem reasonably solid. It's also very flexible and with the gears should be able to handle a full level transition, as long as the bridge is long enough. Most bridge legnths would be longer, with more in the middle, but i just made a 3 length for now, though even that's not actually set in stone, as each piece detaches from the other just fine.
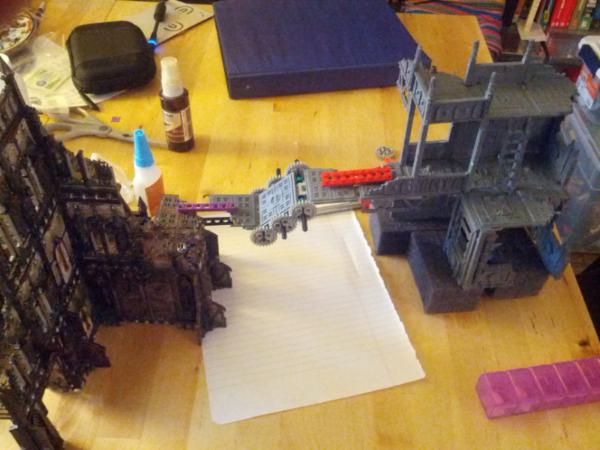
It can also rotate! so you can attach from any angle.
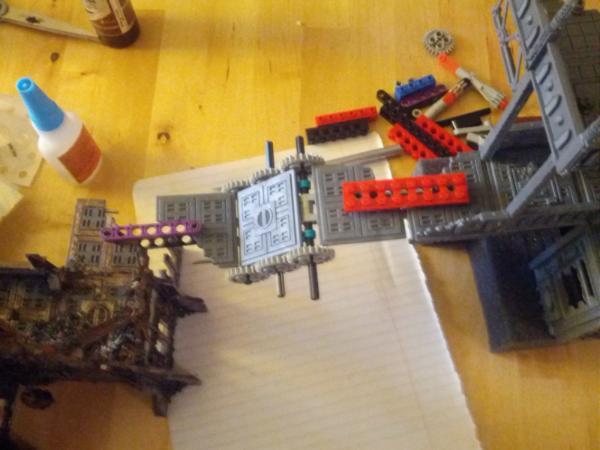
Some thoughts on the connections:
i think the bigger connection plate actually works better, as it makes more sense as a walkway that would hafe been made to keep the bridgfe usable. Obviously when finalized id cut off the studs and probably remake the connection studs to make it just that much more flush, but the concept seems to work quite well.
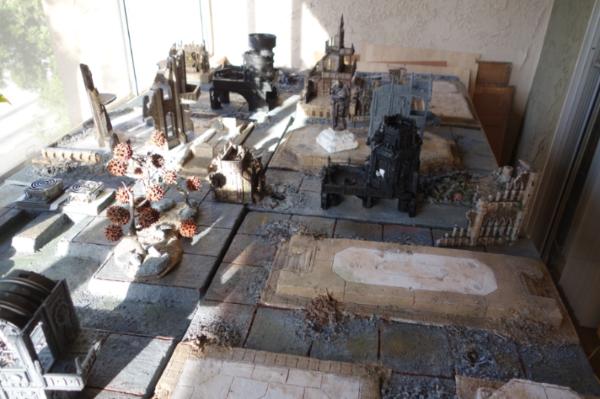
Automatically Appended Next Post: What else i've been working on! More angles (and figures) later once i get my light box!


|
|
This message was edited 3 times. Last update was at 2014/09/19 16:08:31
|
|
|
|
|
2014/09/29 16:26:03
Subject: Re:Homemade FW-style realm of battle terrain boards/buildings (9/29 more bridges!)
|
|
Dakka Veteran
|
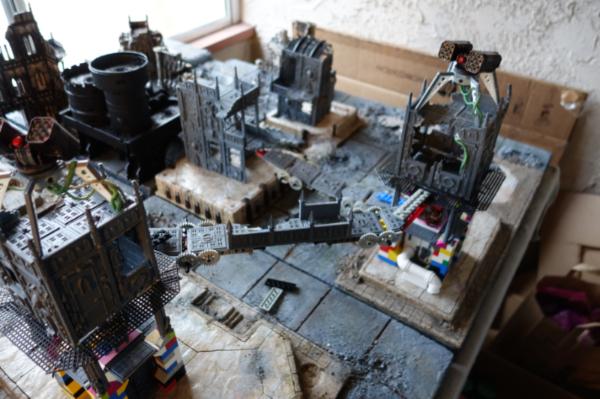
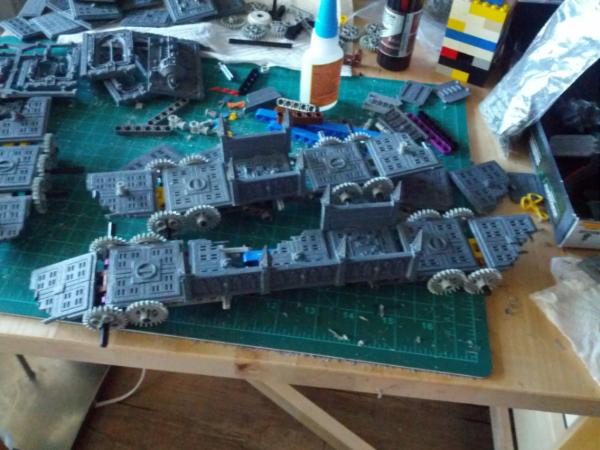
So some progress on new construction, we have more bridges!
The basic formula is 2 ends, each of 2 tiles (where a tile is one of those floor things from the cities of death kits) llong. And then a variable "middle" length. Thus the bridge lenghs are a minimum of 4 tiles wide up to however long i've made a middle.
So far i've made a 3 length brridge (the only one with "inflexible" length), a 5 and a 7 lenght. It seems that these odd numbered lengths tend to work best across my board, as any 2 tiles equals about 1 square of board, so having 1 tile extra in length gives me the wiggle room to make the bridges work.
A few other notes:
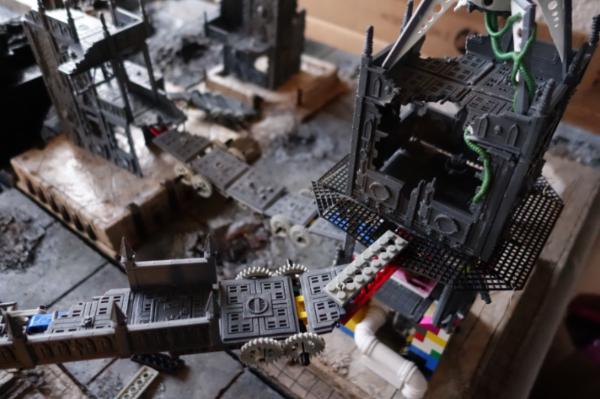
the system overall works really well but it's going to be vital to either pin down the connection points or switch to beefy magnets. If they break off the whole thing will collapse.
Otherwise though the bridge itself is very sturdy, and all the legos hold up very very well.
One thing i have noticed though is that the buildings need to be weighed down. Adding the bridges basically also links the buildings together, so just trying to add on additional bridges can start tipping over the buildings if i'm not careful. Thus I need to focus on adding some weight to each so they are less likely to fall over.
So far i have enough bits for 4 total bridges, though given how effective they are at adding more life to the board i think eventualyl i want something like 3 5 length bridges, 2 7 lengths, and 1 3 length. Or possible a T intersection bridge.
|
|
|
|
|
|
2014/09/30 16:54:02
Subject: Re:Homemade FW-style realm of battle terrain boards/buildings (9/29 Super long bridges!)
|
|
Dakka Veteran
|
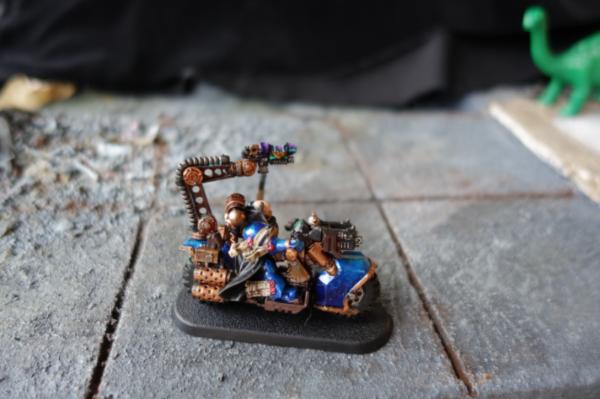
So along with bridgemaking I hit upon this bad boy:
http://www.warseer.com/forums/showthread.php?249494-Defense-Laser-Speculation

It's gigantor and awesome, but also has bridges! which got me thinking about those standalone flak turrets. They look great and, with a few modifications, would actually fill in a few holes in my current terrain loadout.
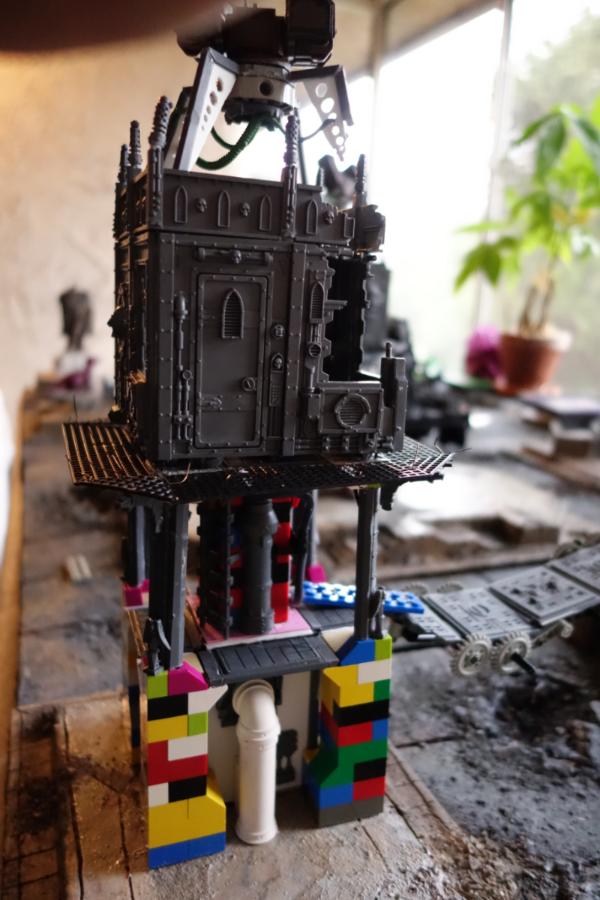
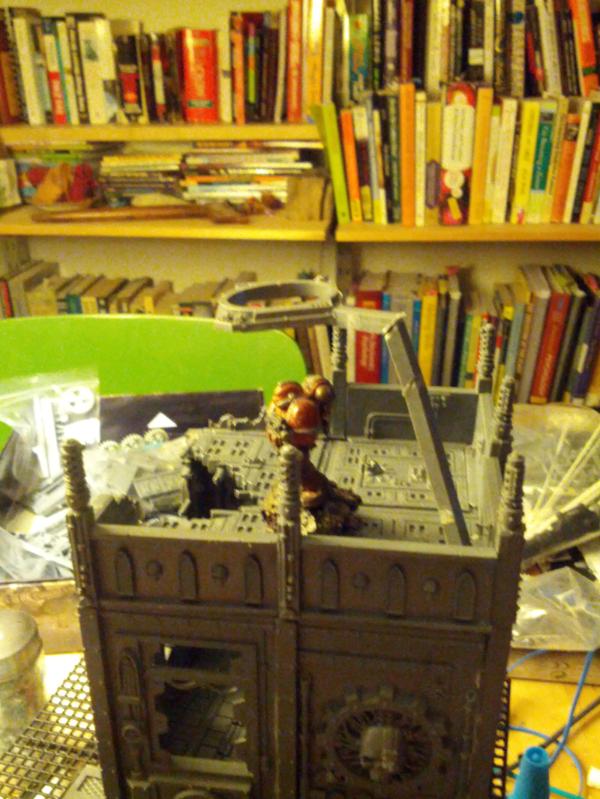
In the new era of bridges and "second layers", i definitely need tall towers that have multiple bridge points that also serve as LOS blockers but dont take up a lot of room. From a necromunda/city perspective it would make sense that you'd have the open aired type towers which served as defense and just key linkages throughout the city for people to walk on.
Thus the flak towers are perfect candidates, i just need to add more walkways to floors 1 and 2.
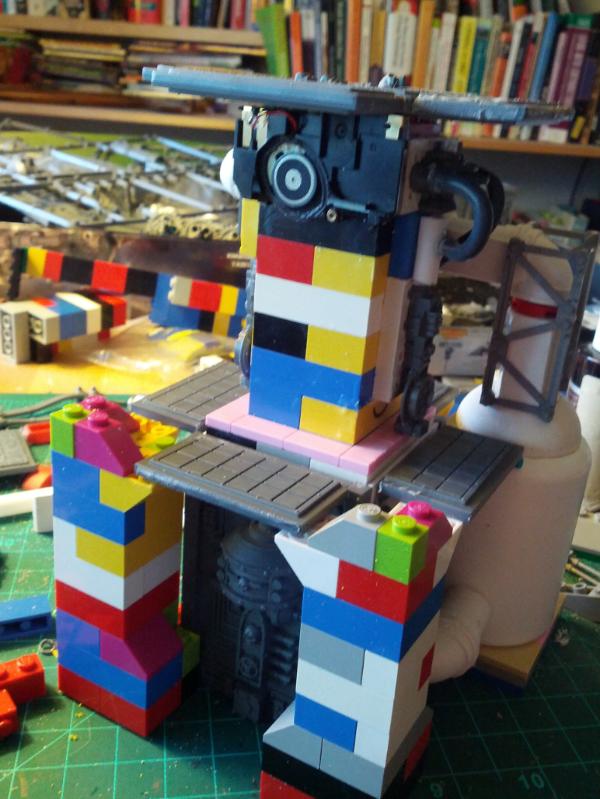
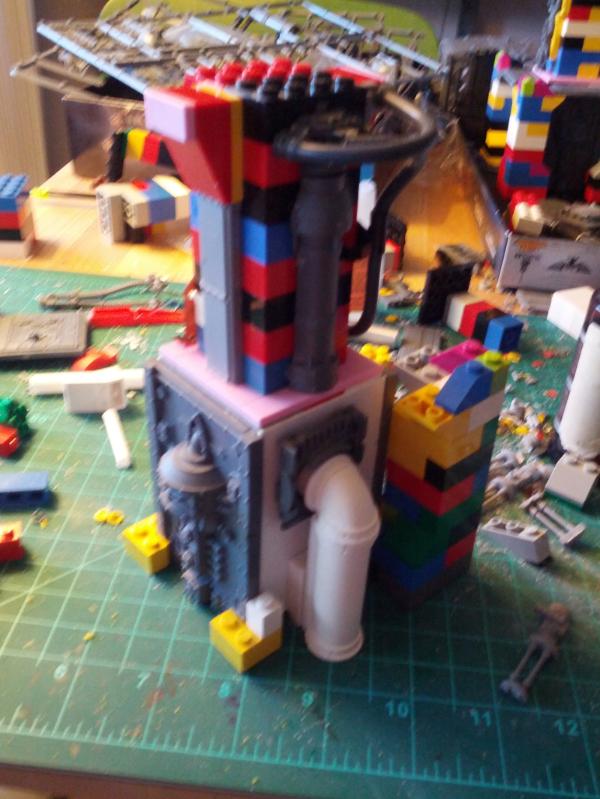
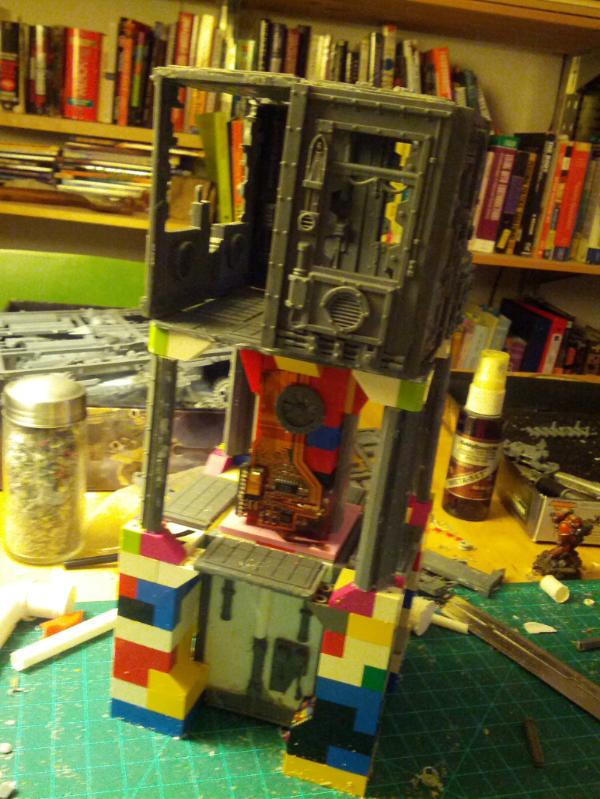
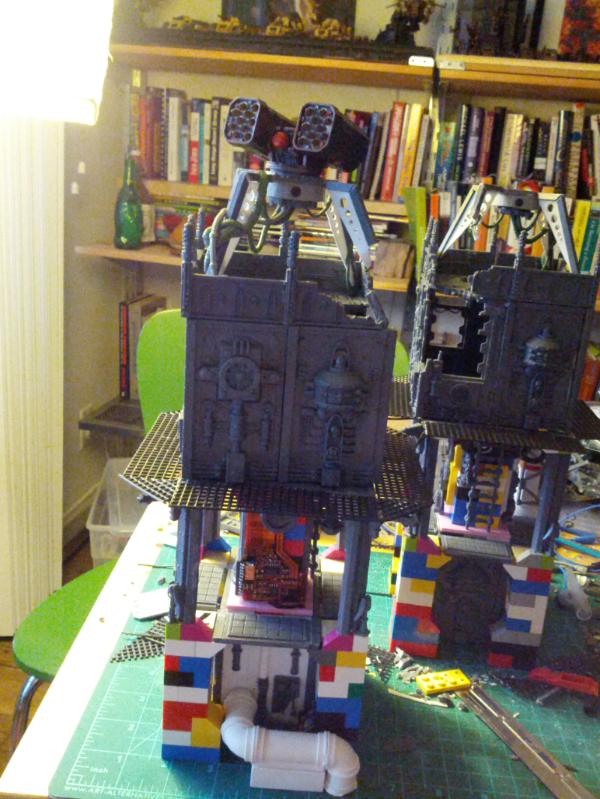
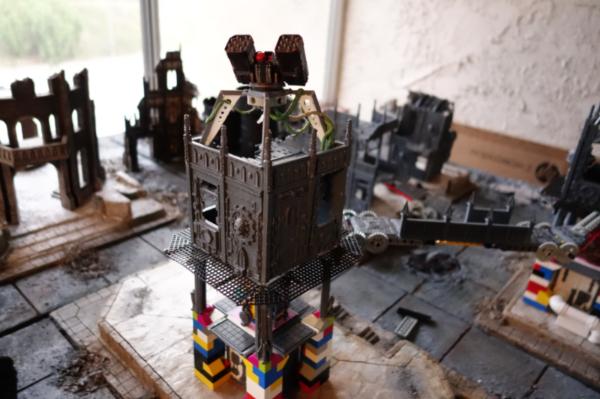
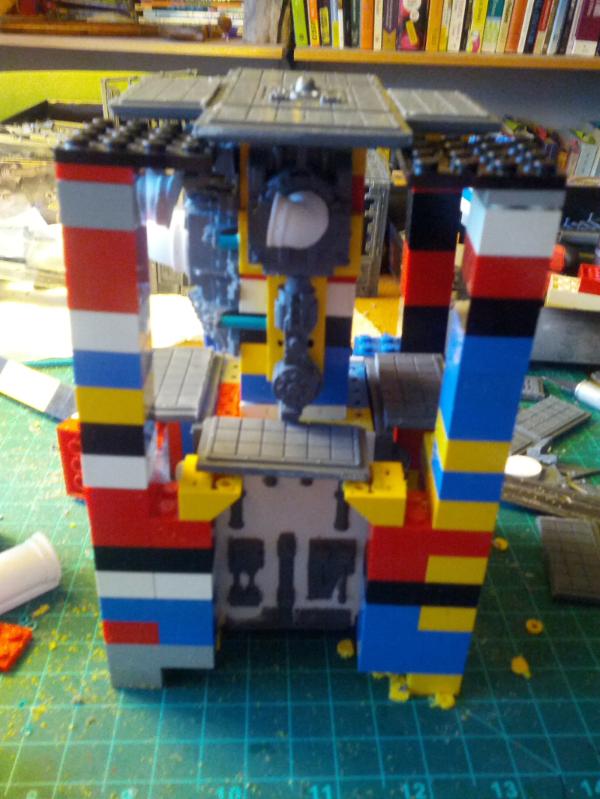
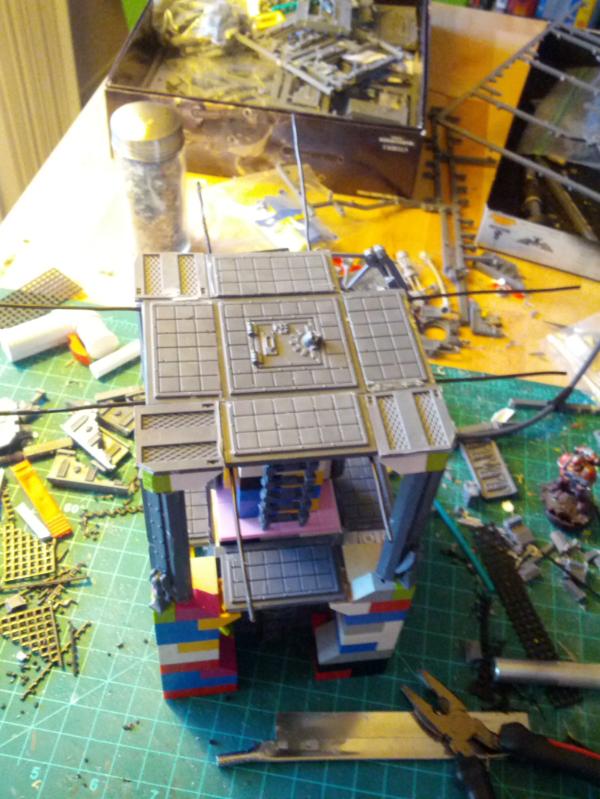
So my current design is more like this:

With the icarus gun and such on top.
It's nice and tall, and has a full 3 floors of usable space to put people on (i'm envisioning a parapet around level 2). It also has a LOT of bridge points for me to use.
Not that the floor 1 section would have panels down, they just arnt glued yet.
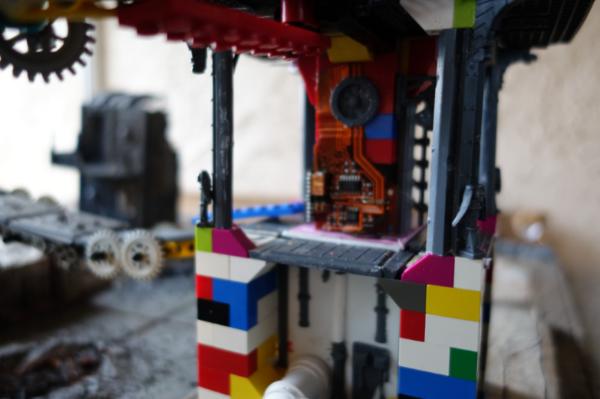
The main trick here is the use of lego. It's great! I just need some more finishing pieces so ic an add some better architectual details, so that's something of a concern at present.
|
|
This message was edited 1 time. Last update was at 2014/10/01 18:52:48
|
|
|
|
|
2014/10/01 17:38:00
Subject: Re:Homemade FW-style realm of battle terrain boards/buildings (9/29 Super long bridges!)
|
|
Dakka Veteran
|
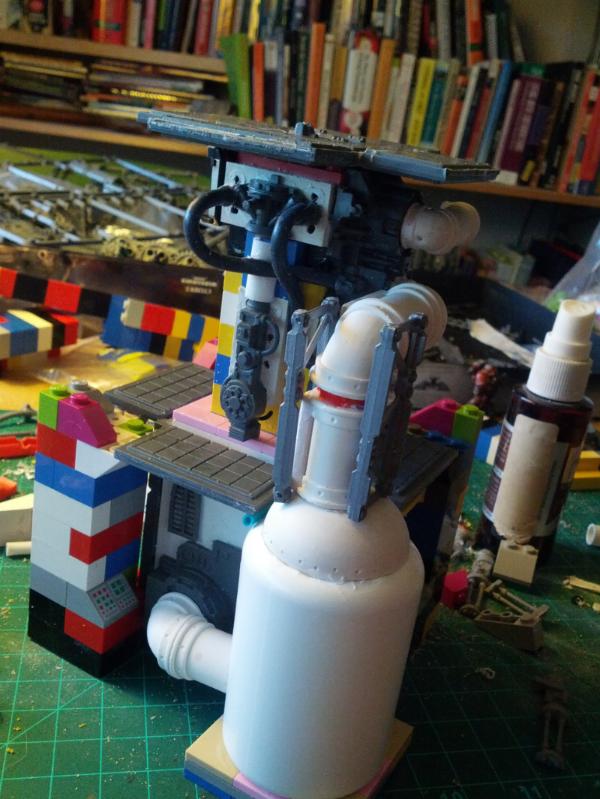
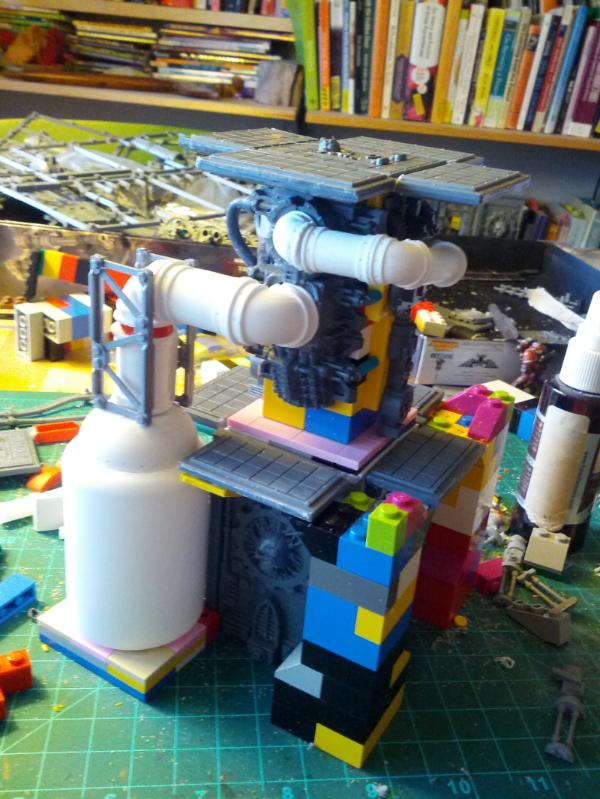
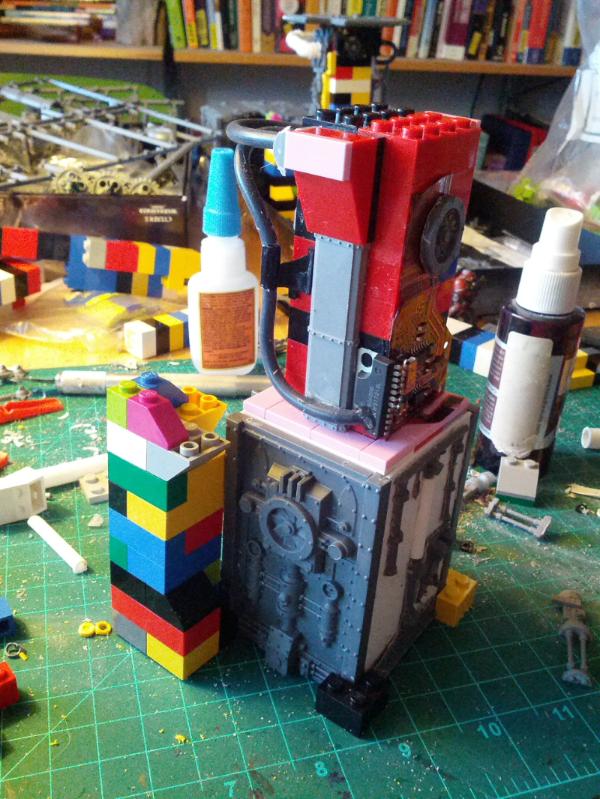
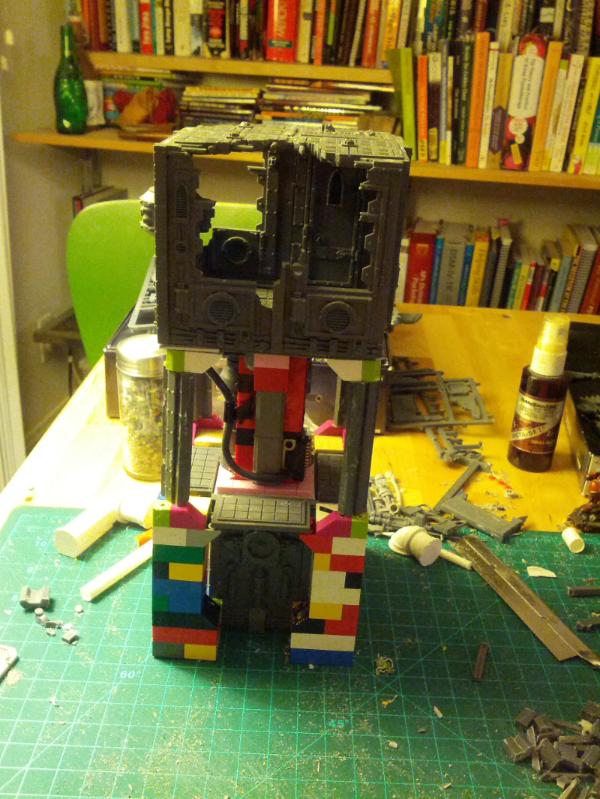
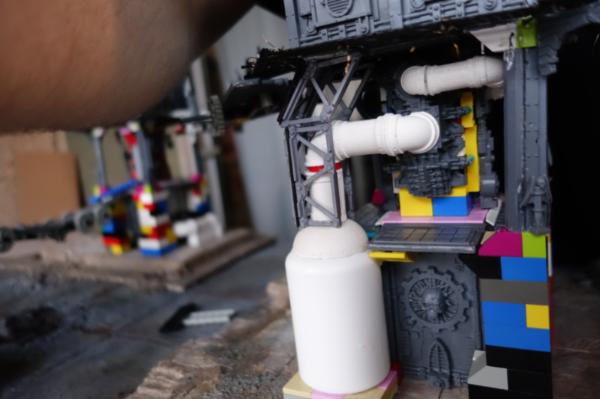
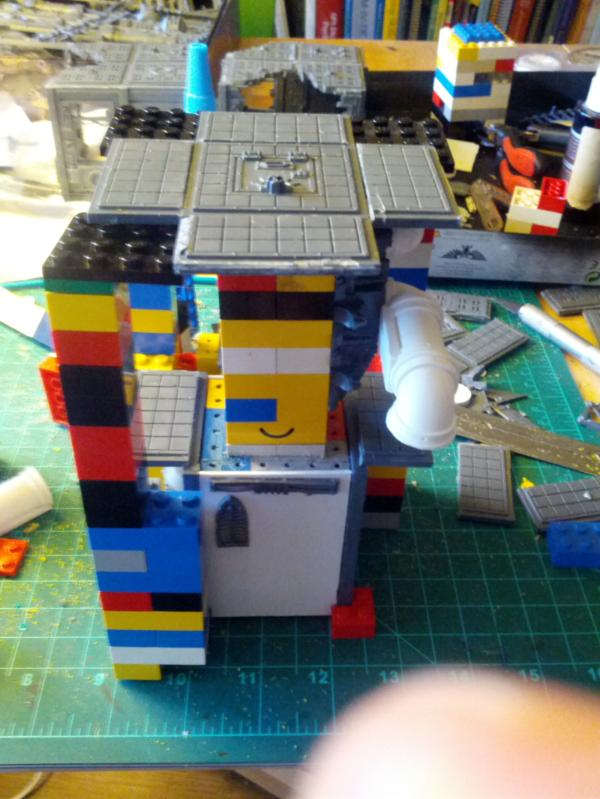
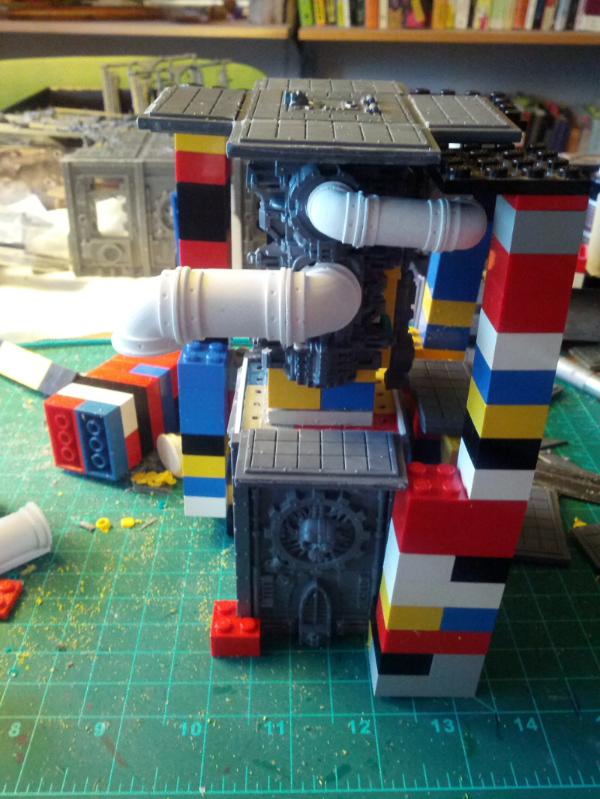
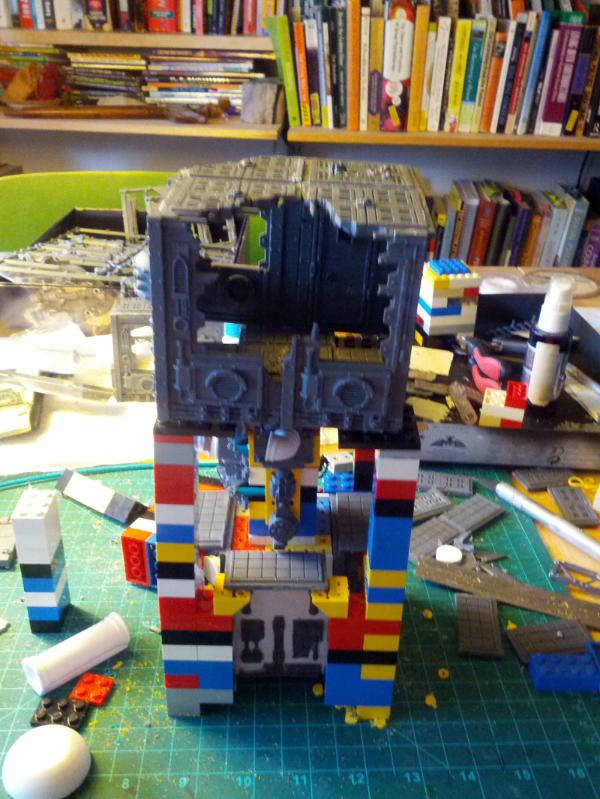
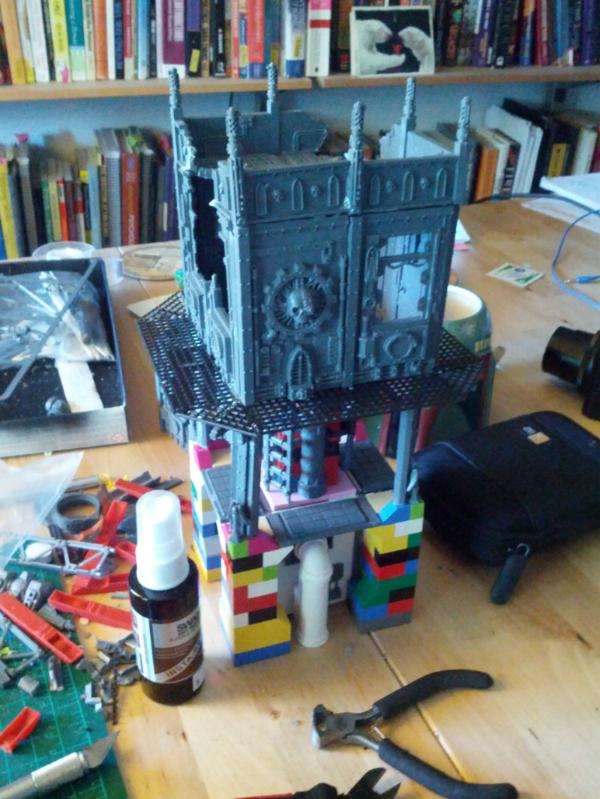
More work refining the towers.
Just adding deteail work and figuring out how it all fits together.
So far I like the bottom base size a lot, but i think the support struts from floor 1-2 are too thick, so I'll probably be replacing those with non-legos here pretty quickly.
|
|
|
|
|
|
2014/10/03 18:06:48
Subject: Re:Homemade FW-style realm of battle terrain boards/buildings (8/1 Walkway Defense towers)
|
|
Dakka Veteran
|
|
|
|
|
|
|
2014/10/05 07:30:22
Subject: Re:Homemade multi-level city terrain boards/buildings (8/3 Walkway Defense towers detailing)
|
|
Dakka Veteran
|
|
|
|
|
|
|
2014/10/06 15:39:32
Subject: Re:Homemade multi-level city terrain boards/buildings (8/3 Walkway Defense towers detailing)
|
|
Dakka Veteran
|
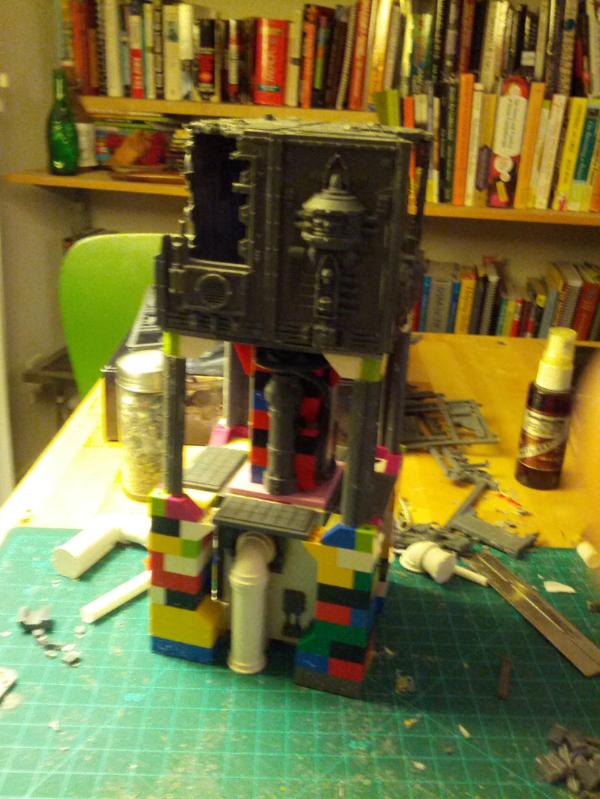
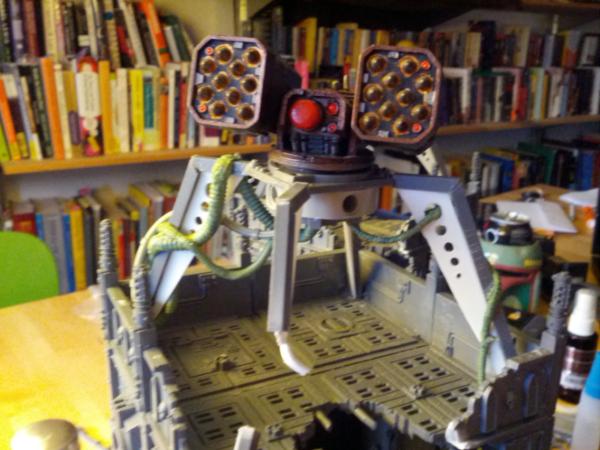
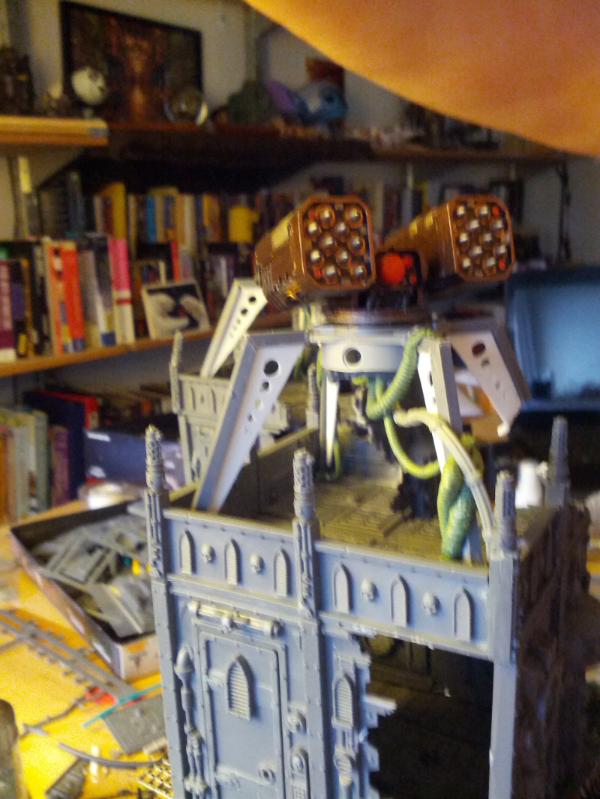
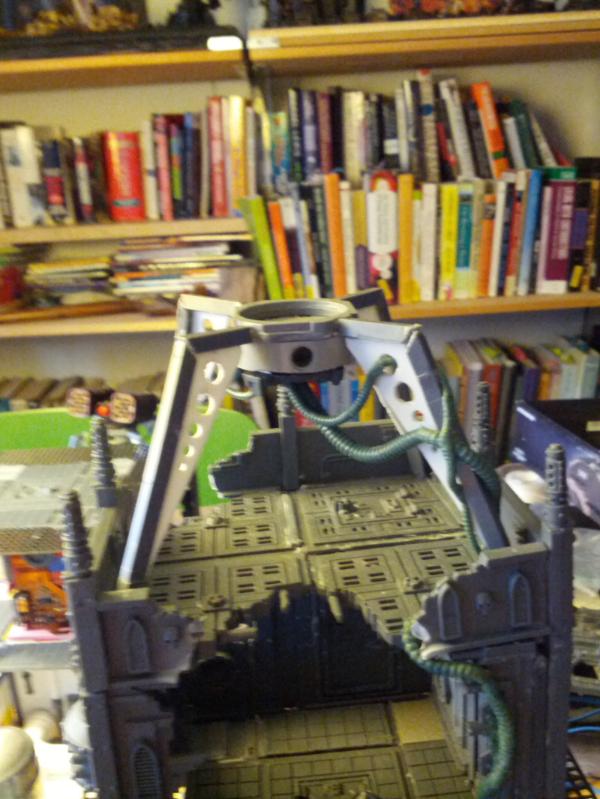
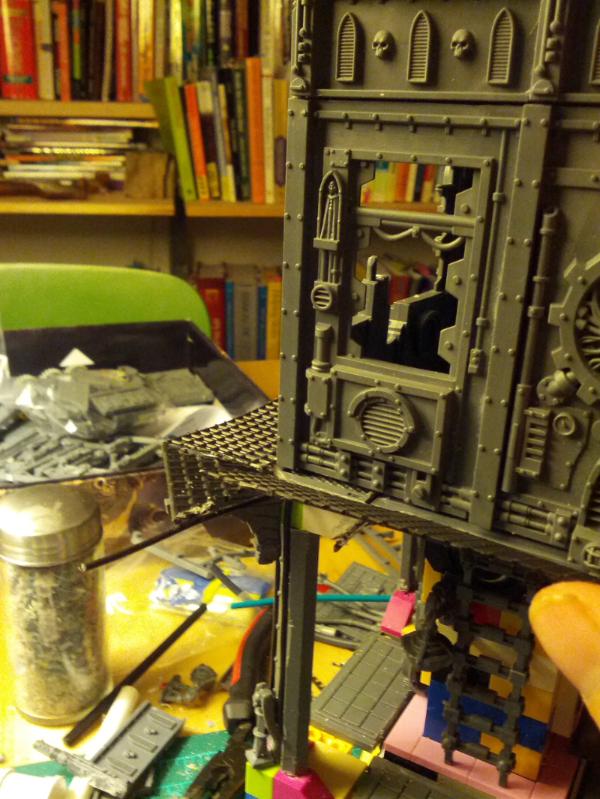
Time to add the second floor parapet!
while happy with the mesh.. it's defintiely hard to make sturdy, hence the wire. I might have to add some more though at each of the triangular sides though, im concerned it's not quite sturdy enough to attach bridges onto jsut yet. In the final stages now just need to add the gun on top and clean up various seams and such. Also note that the third floor is loose so that i can actually paint up under there.
|
|
This message was edited 1 time. Last update was at 2014/10/06 15:39:59
|
|
|
|
|
2014/10/08 04:17:29
Subject: Re:Homemade multi-level city terrain boards/buildings (8/3 Walkway Defense towers detailing)
|
|
Dakka Veteran
|
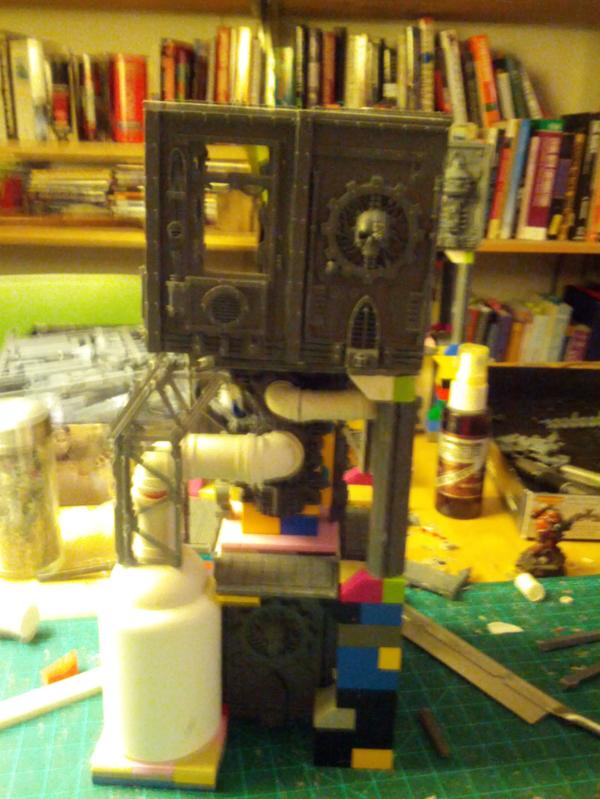
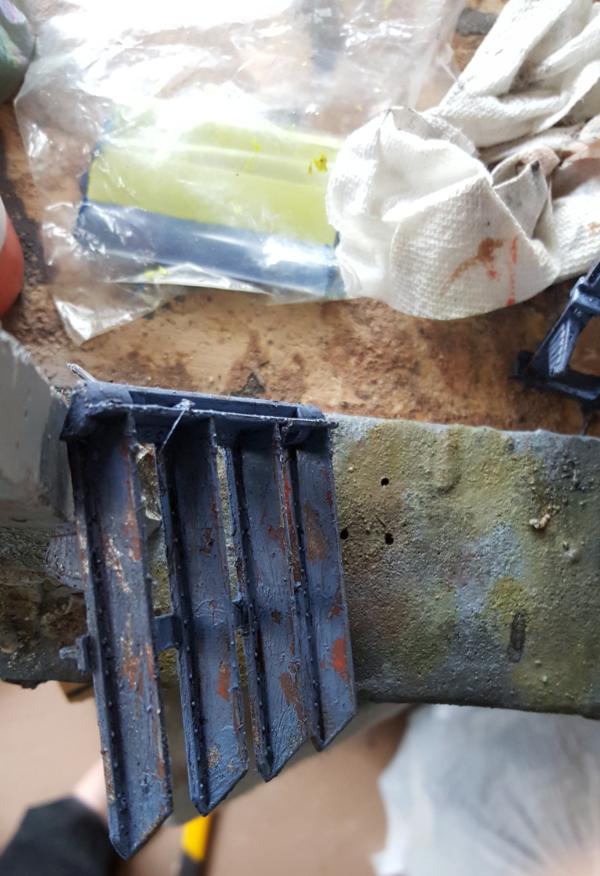
So while attempting to add the walkway to the other building I ran into an interesting lesson with this whole DIY thing: be careful with your plastics, and be prepared for when they dont react quite right.
The backstory is that at some point somewhere i picked up a sheet of this plastic grating and am now finally using it. This is all well and good and im sure it was cheap, but as it turns out it's not the same as GW plastic, which means that it just peels right off of superglue. So while i was adding the second walkway and adding some more metal wire underneath it to strengthen it.. bits would just start peeling off the existing wire and plastic edge they were glued too.
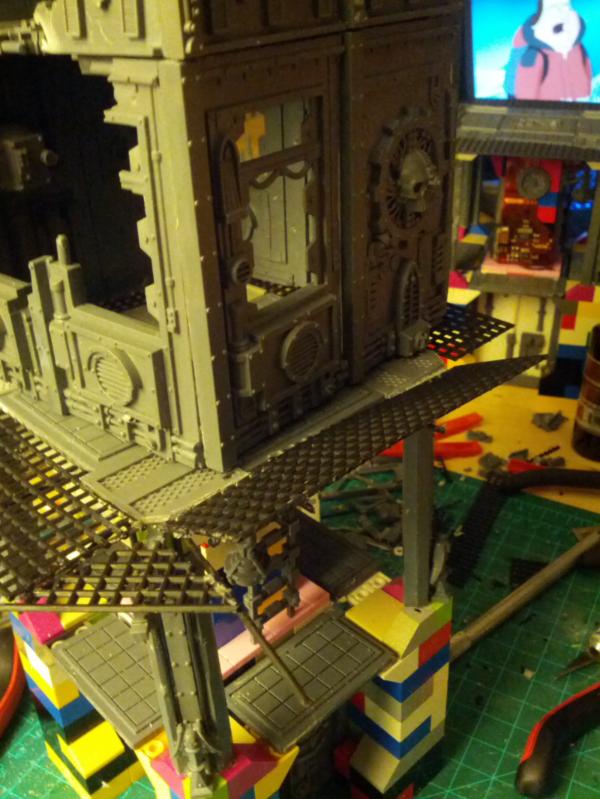
This is a pretty serious problem because i need these walkways to be rock solid for when i start to attach bridges to them. While it normally wouldnt be such a hgue deal if they were only lightly attached to the wire, since attaching the bridges ususally involves verticle motion as well to get all the legos in there, it means it has to be a LOT sturdier. Soo.. basically i have to also tie it down to the metal and thats.. just frustrating. To avoid doing that i also started thinking/laying otu the final turret section:
|
|
|
|
|
|
2014/10/08 15:34:43
Subject: Homemade multi-level city terrain boards/buildings (8/6 Defense tower walkways and turrets)
|
|

Did Fulgrim Just Behead Ferrus?
|
Curious how that turret will work out. So far the building looks really interesting!
|
|
|
|
|
|
2014/10/10 16:59:12
Subject: Re:Homemade multi-level city terrain boards/buildings (8/6 Defense tower walkways and turrets)
|
|
Dakka Veteran
|
|
|
|
|
|
|
2014/10/13 18:36:41
Subject: Re:Homemade multi-level city terrain boards/buildings (8/610 Defense tower turrets almost done!)
|
|
Dakka Veteran
|
So ill have some pictures tonight but i'm basically done with the work i wanted to do on these guys for now. A few notes:
I rejiggered the second floor mesh walkways a LOT and basically redid all the wire. The problem, as always, is that the support wires tended to pop off as i was bending and fenagling them to attach to the mesh. Thus in order to really make it work i had to take all the wires that were falling off and pin them in the structure. That made it a lot sturdier and meant i could actually tie the mesh down.
Speaking of which i tied it all down and it works great! more or less. The problem is still that the mesh isnt yet sturdy enough to actually support a bridge. Sure it could hold the wieght and be fine there, but the act of actually attaching a bridge causes enough stress in enough directions to make it still not something i feel comfortable doing. But I came up with a solution where i basically just extend out supports on each side specifically for bridges and then attach to that. it's super strong, all pinned down, and even helped the mesh even more because i have to poke one of those lego things thro the mesh to make it all work.
I also added pins for the third floor sot hat way even i had a relatively sturdy way to attach it without having to glue it down.
All in all im very happy with these guys, they stand out, make sense as defense towers in a city, but add just a tremendous amount of bridging opportunities. They will have 8 bridge points across 2 floors for maximal modularity. They look good to boot, though i think i may add a smidge more bulk to the bottom colums somehow. They just seem a bit too sharp and skinny to make sense. I cant disassemble the legos to add some unfortunately, but we'll see what i can come up with.
|
|
|
|
|
|
2014/10/14 17:11:48
Subject: Re:Homemade multi-level city terrain boards/buildings (8/14 Defense tower pics!!)
|
|
Dakka Veteran
|
|
|
This message was edited 1 time. Last update was at 2014/10/14 17:19:19
|
|
|
|
|
2015/08/04 22:29:52
Subject: Re:Homemade multi-level city terrain boards/buildings (8/4 the 7th tile, dioramas)
|
|
Dakka Veteran
|
I'm back! Hello!
So aside from regular life stuff I've been super busy painting up for my army for LVO/ BAO, which is why there has been such little progress here. I'll have pictures up of that progress in a bit.
However at the recent BAO I was made saddened by the fact that part of my paint score came fom the fact that my board.. sucked. I've used one of my big tiles before but boy is that bulky and heavy at a tournament. For a while I've had shelves which I put some of my models on that also served as baords but they had no detail at all, so I figured it was time to fix that.
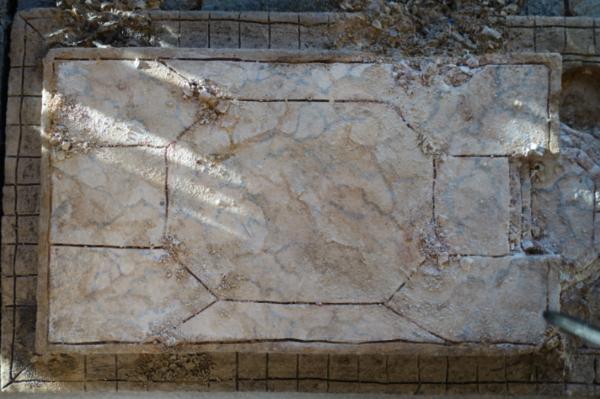
Originally I was going for some sort of "muddy" look with an SM base, but given that I've needed a 7th blank tile anyways, it seemed the perfect tiem to just make my boards city themed as well.
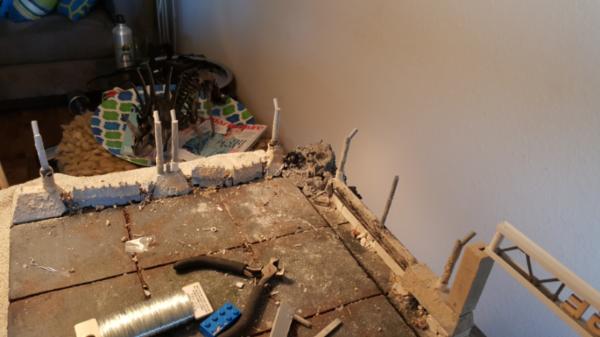
Unfortunately there was a problem, the shelves at something like 14 x 31 1/2 in size, which doesnt really line up with 4 inch squares. So what ive done is basically make the shelves breakable so that within that 14/32 I have a 12/24 half tile, and then I just have a broder of extra detail to spruce it up a bit.
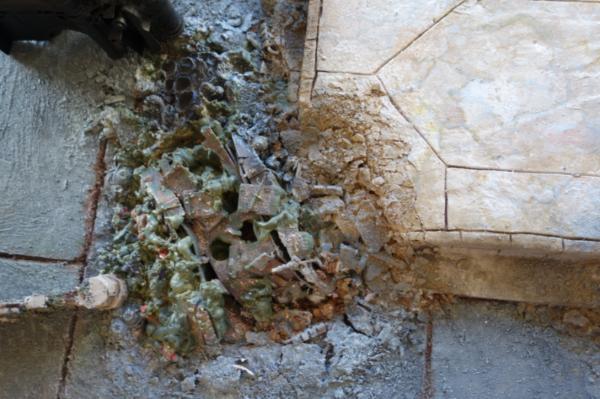
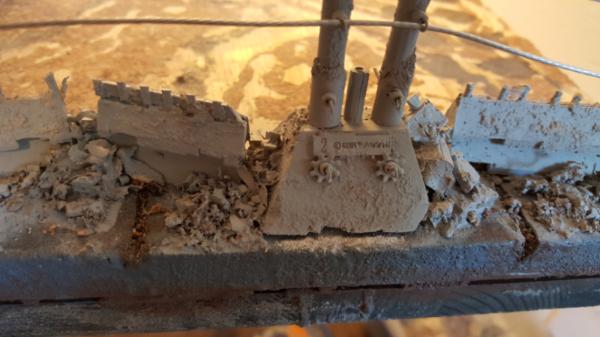
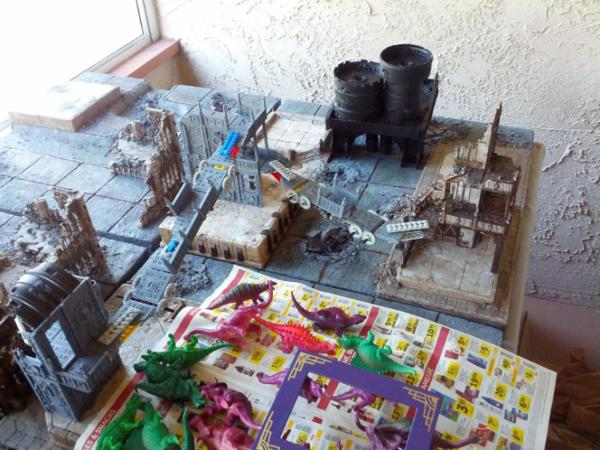
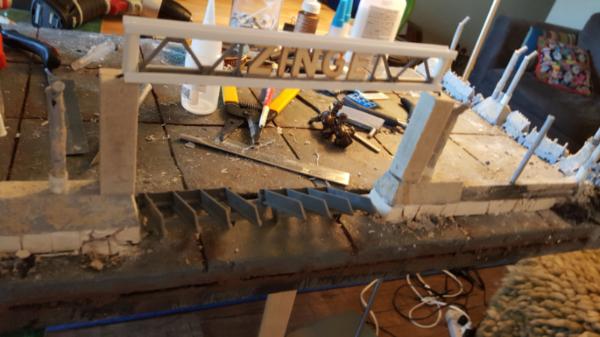
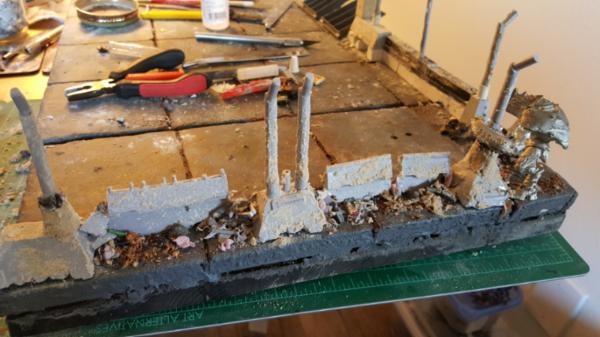
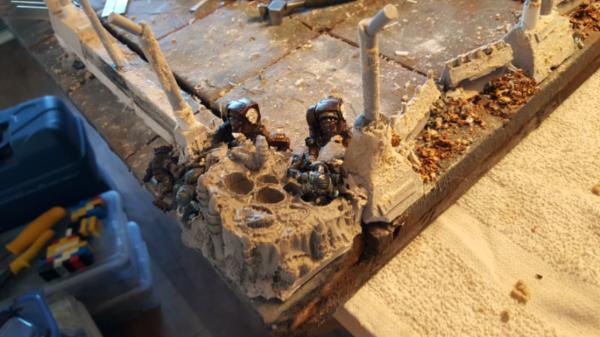
The first shelf is the more destroyed/non military shelf. Welcome to zinge industries (they make awesome bits and some of their resin blocks had their name on it so i just stuck with that for the whole tile)
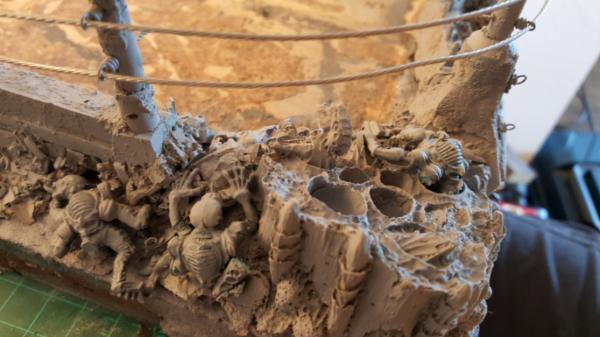
As you can see the general idea is to have this particular complex surrounded by an electric fence (the psots are up, the wire fence isnt yet) ala jurrassic park, which the nids are in the process of overrunning.
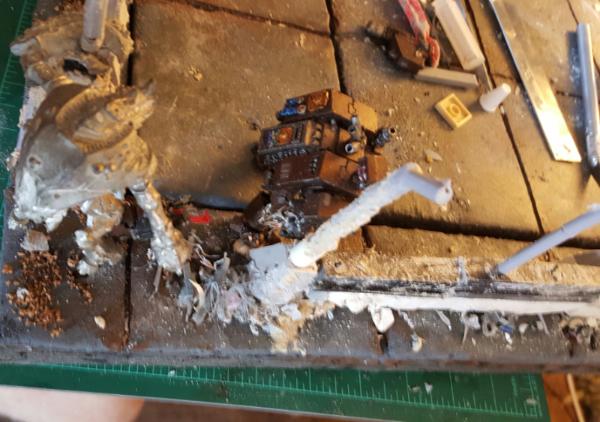
The first side of hero detail: old school old one eye vs dreadnought. Dreadnought just lost his arm (hard to see but it looks great)
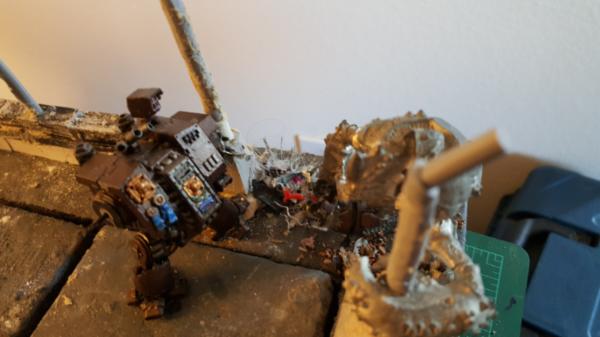
Hero detail 2: terminators vs genestealers! Im hoping to (when this is painted) have lots of scorch marks on the nid side to represent the terminators attempting to burn away the corruption. This is also just the first "dead" layer of stealers, when this is all painted ill add on 4-5 more living stealers just to reall sell the impending doooom
|
|
|
|
|
|
2015/08/05 17:08:19
Subject: Re:Homemade multi-level city terrain boards/buildings (Im back! new dioramas/tile)
|
|
Dakka Veteran
|
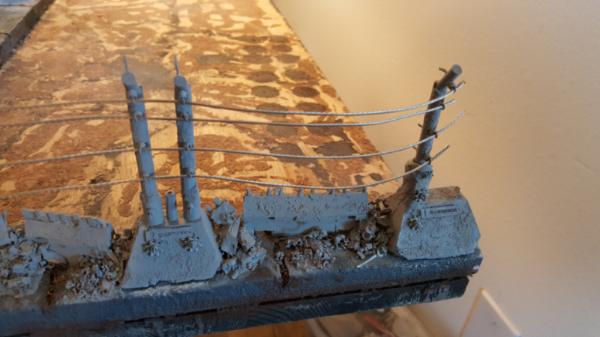
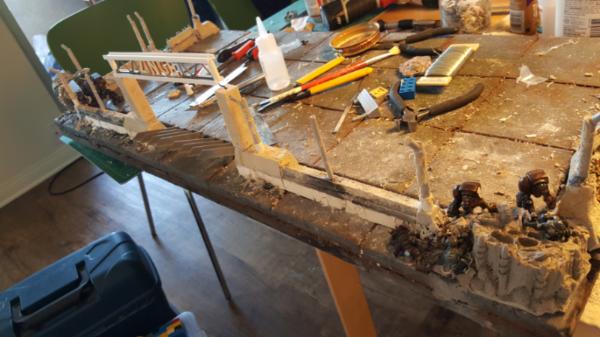
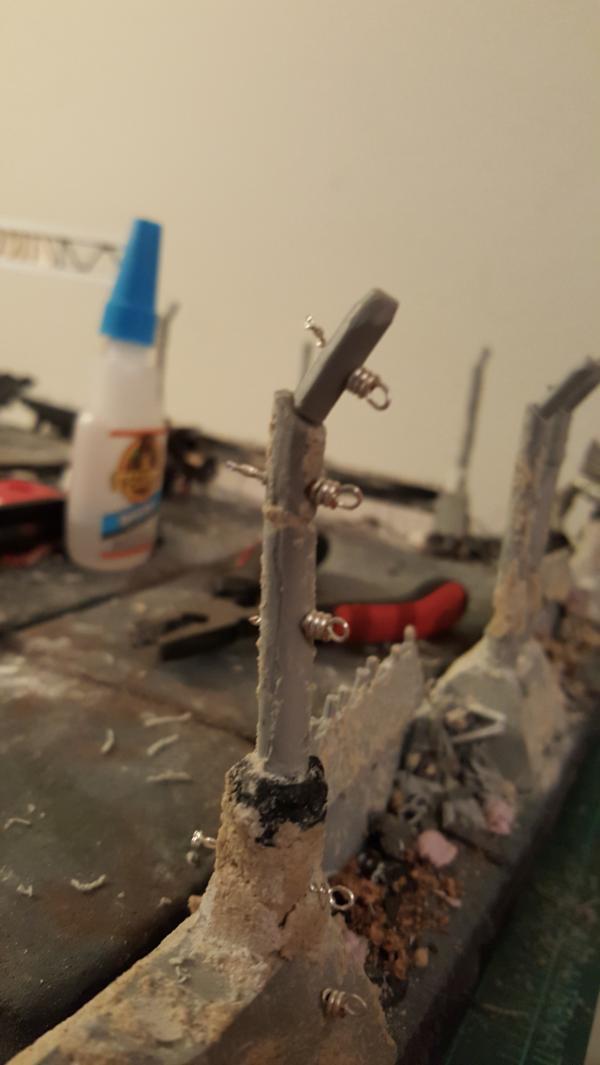
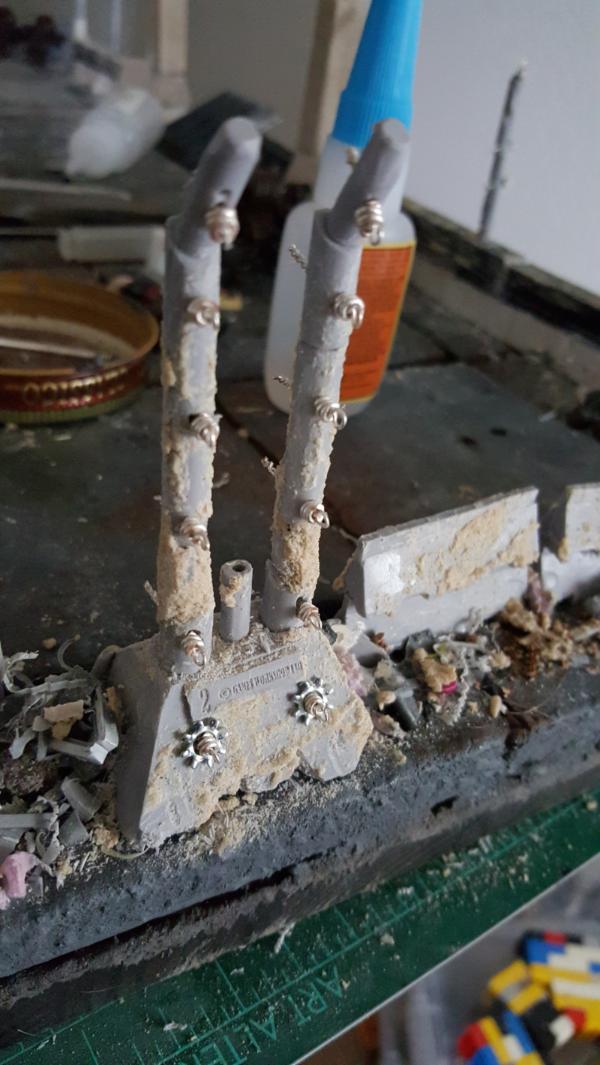
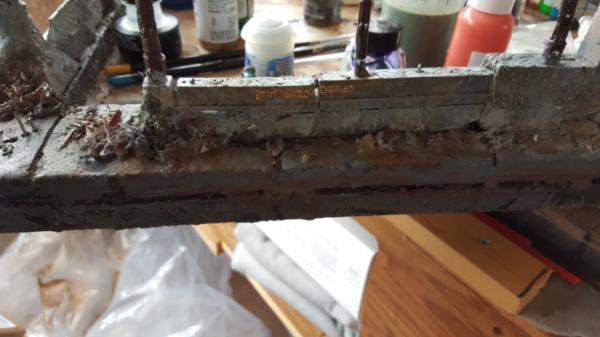
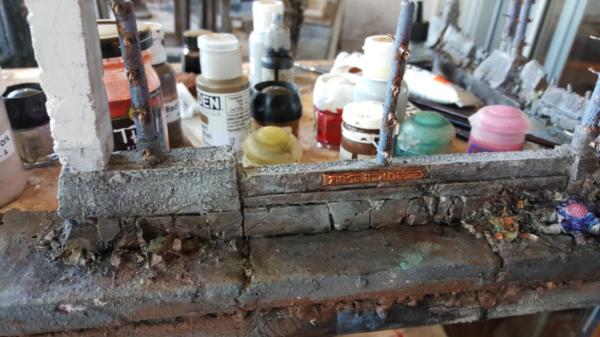
Electric fence work!
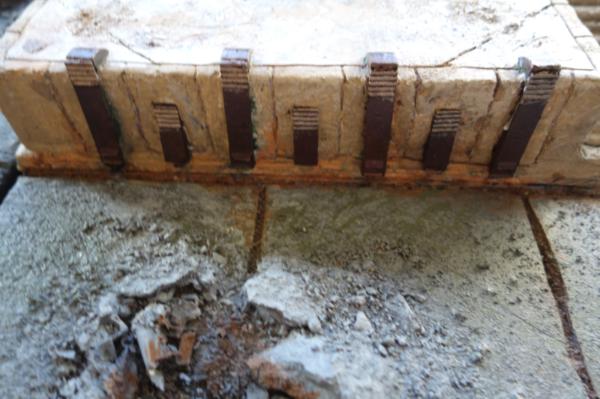
But before we get there I just wanted to point out one thing: there is a lot of pinning in this board. With some of the pictures you will notice blocks that have cracked very nciely, I'm using leftover plaster cast blocks that I had from all the other tile work. THey smash great, look very convincing, but after you smash them they tend to completely fall apart. So it helps having a nice strong steel wire in there to keep it together/have something to glue it all back too.
Furthermore in order for this at all to be sturdy (the general idea with this wall is to also serve as a barrier to prevent my models from falling off in the event of earthquack) pretty much every block has at least 1 if not 2 pins into the board as deep as i can go, and each fence beam is also pinned into their respective blocks (the goal is to bend the CRAP out of the electric fence afterwords, based on where the nids are attacking, so I wanted it fairly structural so that I could get more realistic damage)
ANyways, back to the electric fence work!
my reference:
http://img2.wikia.nocookie.net/__cb20111103234347/jurassicpark/images/3/39/JPTRexPaddock.png
First part is getting those nice small loops, this is (more or less) what im doing for that:
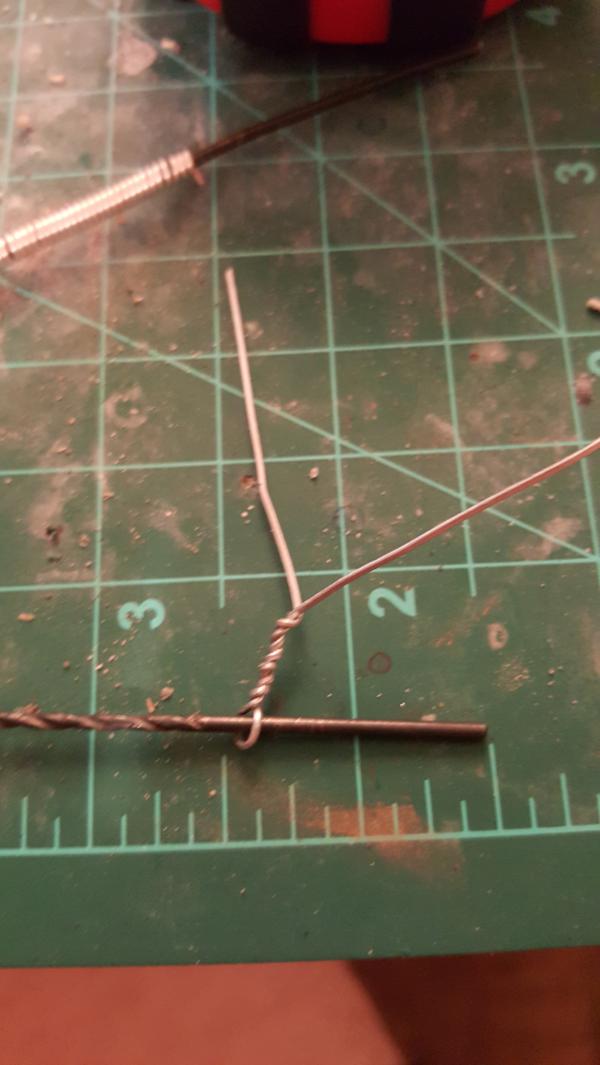
1/16th drill bit for the looop size, and gauge 24 wire to wrap around it. Works pretty well (the wire shown is a bit too big but it's just an example)
Then I need those spacers/stress reliefs you see in the picture. For that I wound as tightly as I could some 20 guage wire around a core which I can remove easily:
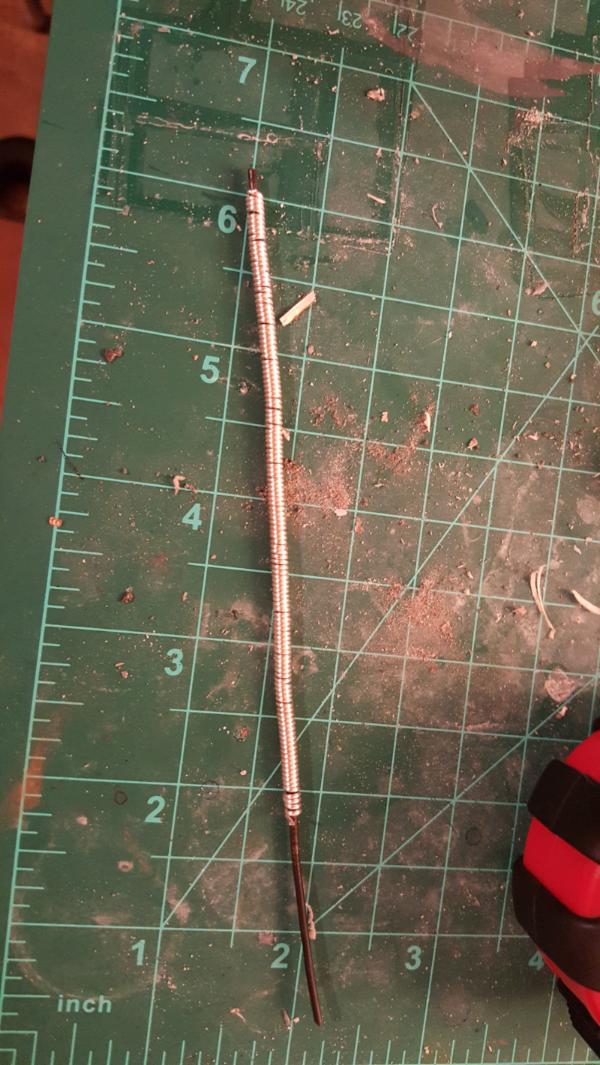
Leaving me with this:
It's sticking out the other side so i can potentialyl reinforce the joint as needed, i really dont want these pulling out when I start pushing/pulling on my cables to bend the beams.
|
|
|
|
|
|
2015/08/06 22:01:37
Subject: Re:Homemade multi-level city terrain boards/buildings (Im back! new dioramas/tile)
|
|
Dakka Veteran
|
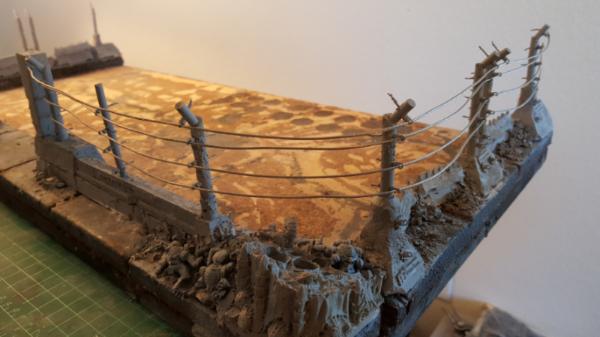
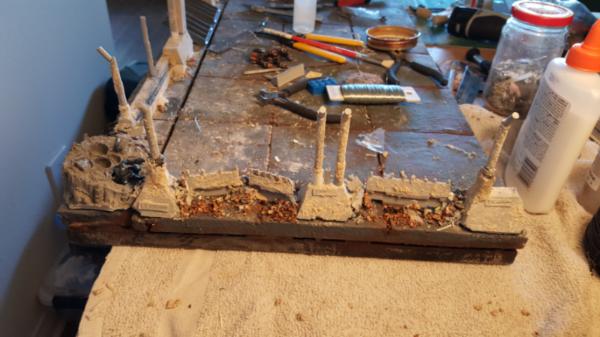
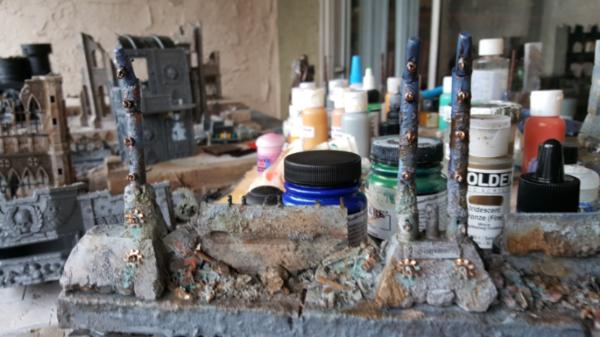
More work, I added some base detail for the lower rings, it helps "set" it into the base/concrete and doesnt look as wierd. I was hoping to do it all the way up the posts but the gear things i got (cheap things from home depot) dont bend easily, so i cant "wrap" them around the posts.
|
|
|
|
|
|
2015/08/08 18:20:24
Subject: Re:Homemade multi-level city terrain boards/buildings (8/6 - electric fence work)
|
|
Dakka Veteran
|
|
|
|
|
|
|
2015/08/11 00:59:29
Subject: Re:Homemade multi-level city terrain boards/buildings (8/10 - beetle nid tests!)
|
|
Dakka Veteran
|
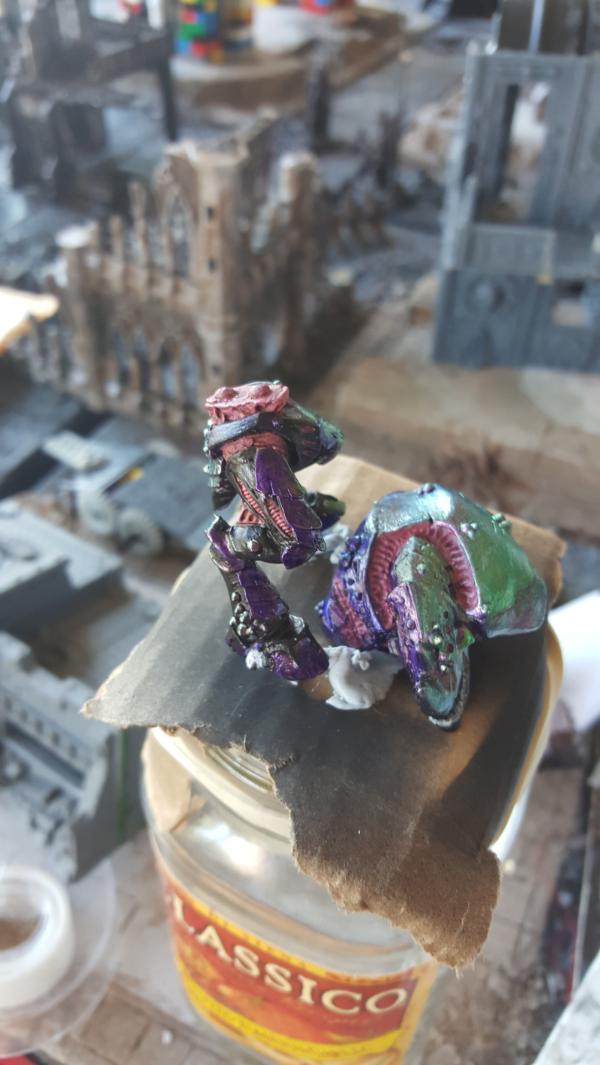
Time to paint it up!
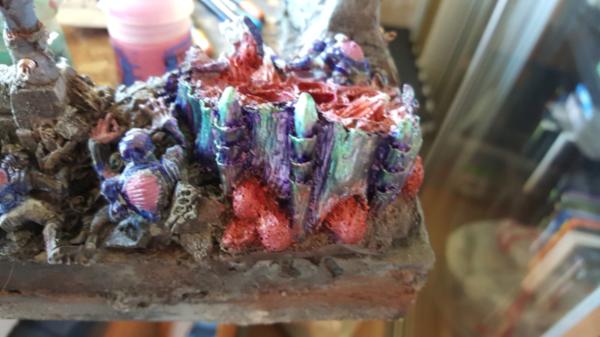
So we're starting up painting, and first Ifigure I hitt he hardest part to figure out: the waves of nids.
The goal is to create a beetle like back with all that 2 tone goodness.
Some reference:
https://upload.wikimedia.org/wikipedia/commons/0/01/Alder_leaf_beetle_from_the_High_Tatras_(7663242448).jpg
http://www.ent.iastate.edu/images/coleoptera/dogbane/dogbane_beetle.jpg
https://iloveflowerbeetles.files.wordpress.com/2010/09/sagra_buqueti_edof.jpg
http://www.webexhibits.org/causesofcolor/images/content/15D_beetles.jpg
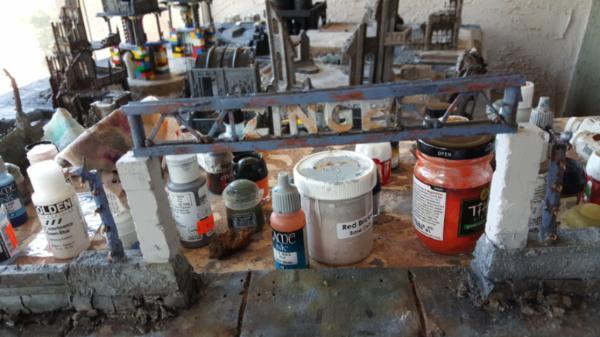
So that's the goal. Paint wise we're working with some pearlesent paints, inks, and a dual color intereference CT paint.
http://www.goldenpaints.com/products/colors/interference-colors
for a while dual color paints were strictly spray only but the CT intereference does work via brush, and works quite well.
The basic premise is from this tutorial:
http://arcanepaintworks.blogspot.com/2013/11/pearl-and-color-shift.html
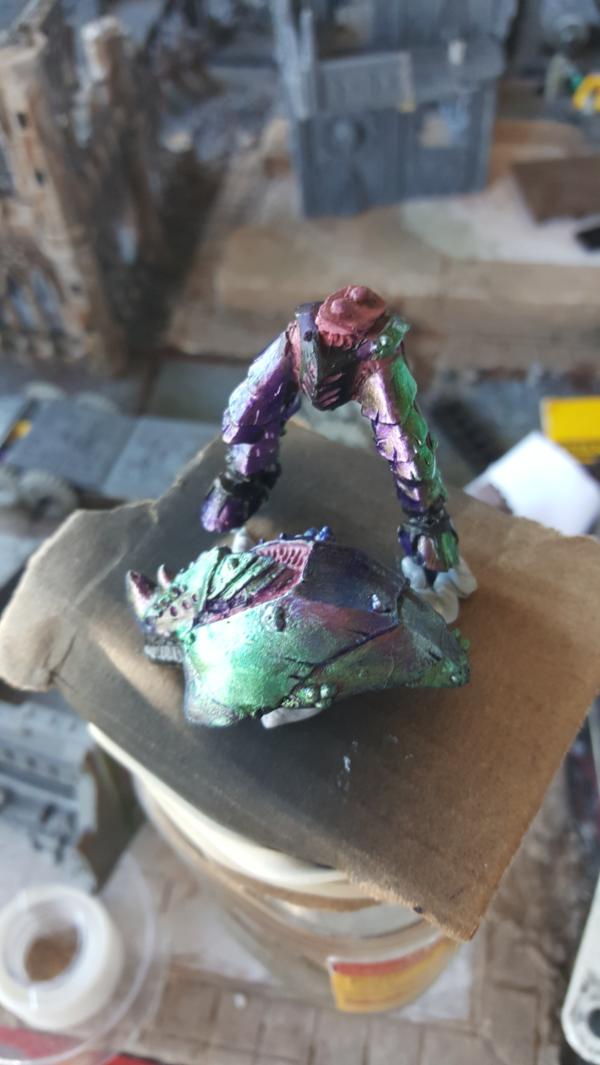
you paint ur highlight green, ur darker violet, and then the middle range you reserve for the dual color paint of choice (with like 8 layers of it). At first I stuck to the traditional nid painting method where all the armour edges are highlighted and the results are this:
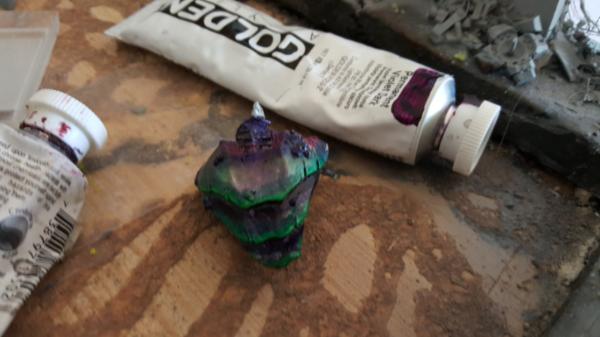

And its.. ok. It's very standard nid, the dual color (hard to see with the lighting) does work. BUt man it doesnt work well for the smaller armour plates, just gets kinda.. wierd.
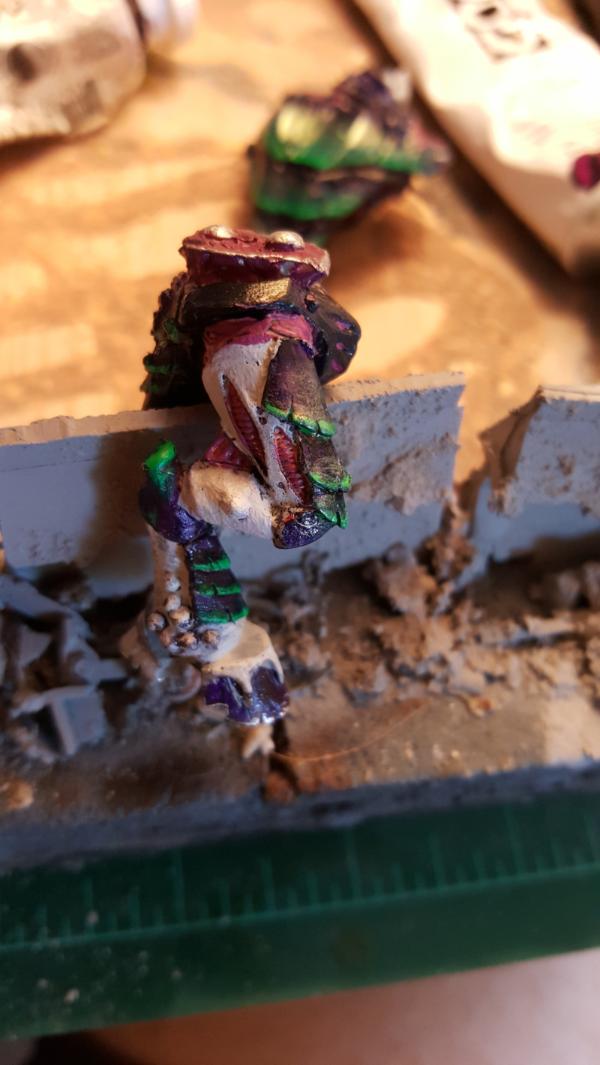
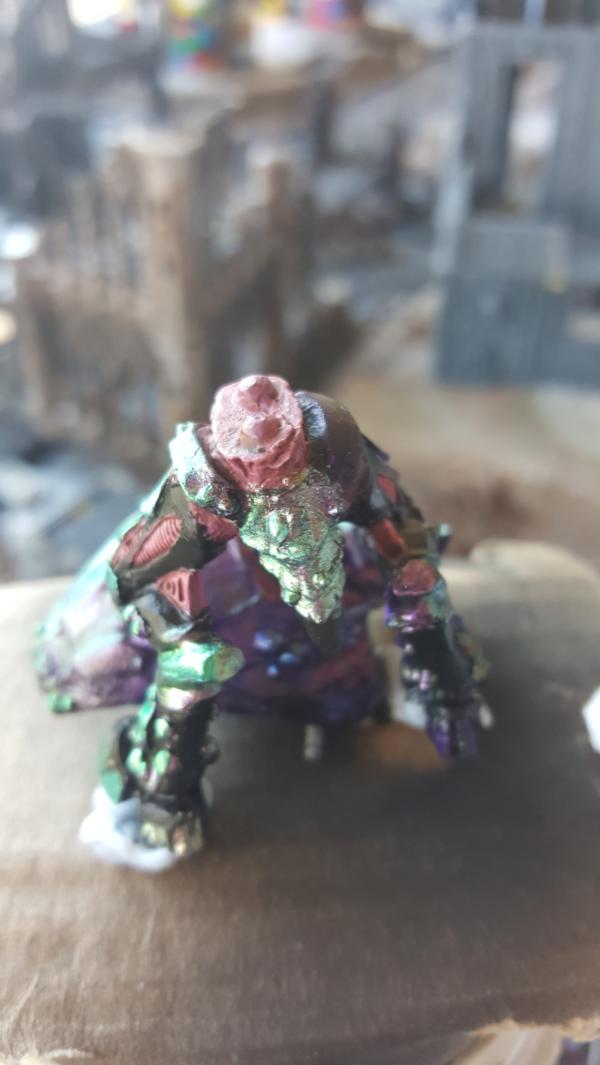
So i switched it up and went for a more "reaslistic" lighting look and gave it a green hotspot with this result:
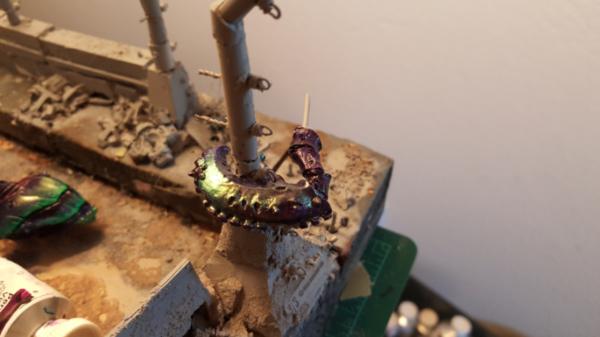
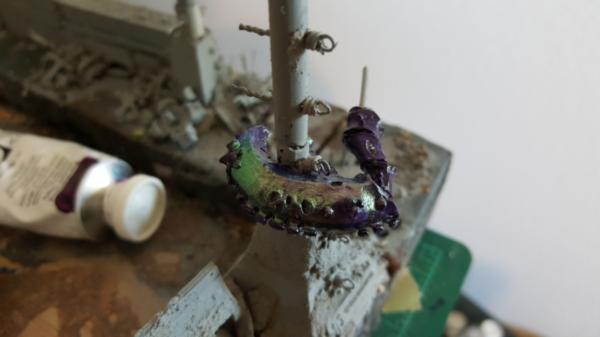
which looks SIGNIFIGANTLY more realistic, and even better in sunlight/bright lights let me tell you. I still ened to add some of that blue from the references, it gets a little TOO violety, but overally its a GREAT start. Now to strip the shell/legs!
|
|
|
|
|
|
2015/08/11 16:39:03
Subject: Homemade multi-level city terrain boards/buildings (8/10 - beetle nid tests!)
|
|
Avatar of the Bloody-Handed God
Inside your mind, corrupting the pathways
|
Awesome work on the fence and board in general. I think the realistic nid scheme is looking much better than the edge highlights as well.
|
|
|
|
|
|
2015/08/11 18:00:38
Subject: Re:Homemade multi-level city terrain boards/buildings (8/10 - beetle nid tests!)
|
|
Dakka Veteran
|
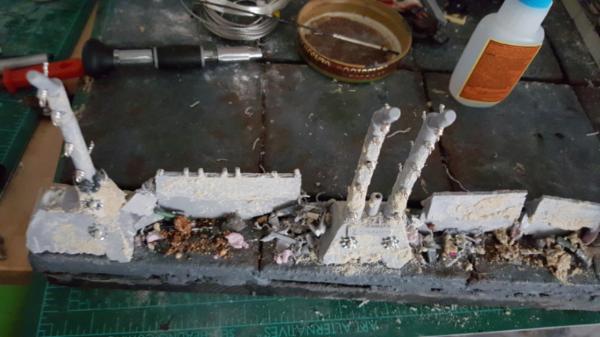
Thanks!
More progress:
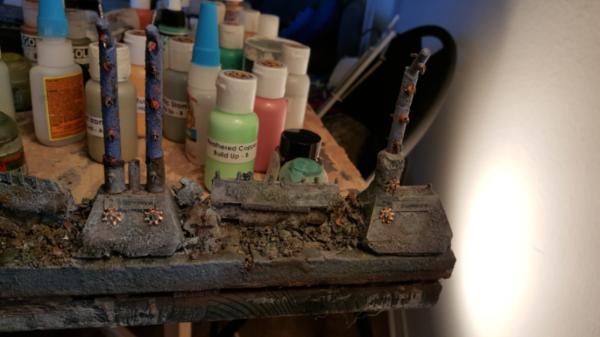
in general i like the blue but the posts on that side arnt working, i think because the middle posts have too much sand on them, so its unclear if they are concrete or a painted metal pillar. So Im gonna sand off some of it to clear it up.
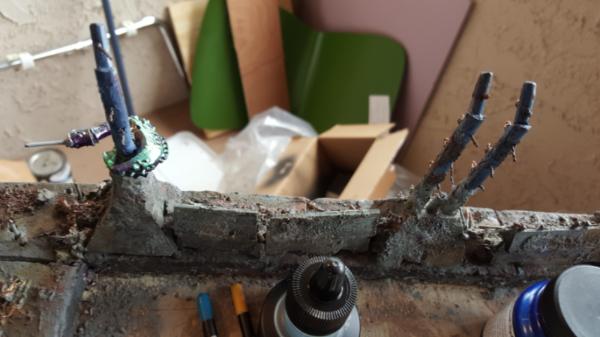
The 2 right ones are the oens to which i refer, their base is wierd/needs to be smoother.
|
|
|
|
|
|
2015/08/12 21:24:45
Subject: Re:Homemade multi-level city terrain boards/buildings (8/10 - beetle nid tests!)
|
|
Dakka Veteran
|
|
|
|
|
|
|
2015/08/13 02:01:29
Subject: Homemade multi-level city terrain boards/buildings (8/10 - beetle nid tests!)
|
|
Ragin' Ork Dreadnought
Deep in the Outer Boroughs of NYC
|
Excellent weathering. Looks great so far.
|
|
|
|
|
|
2015/08/13 08:49:03
Subject: Re:Homemade multi-level city terrain boards/buildings (8/10 - beetle nid tests!)
|
|
Dakka Veteran
|
Great job. Can't wait to see it all painted up. Simply wow!
|
|
|
|
|
|
2015/08/13 18:23:09
Subject: Re:Homemade multi-level city terrain boards/buildings (8/10 - beetle nid tests!)
|
|
Dakka Veteran
|
Thanks!
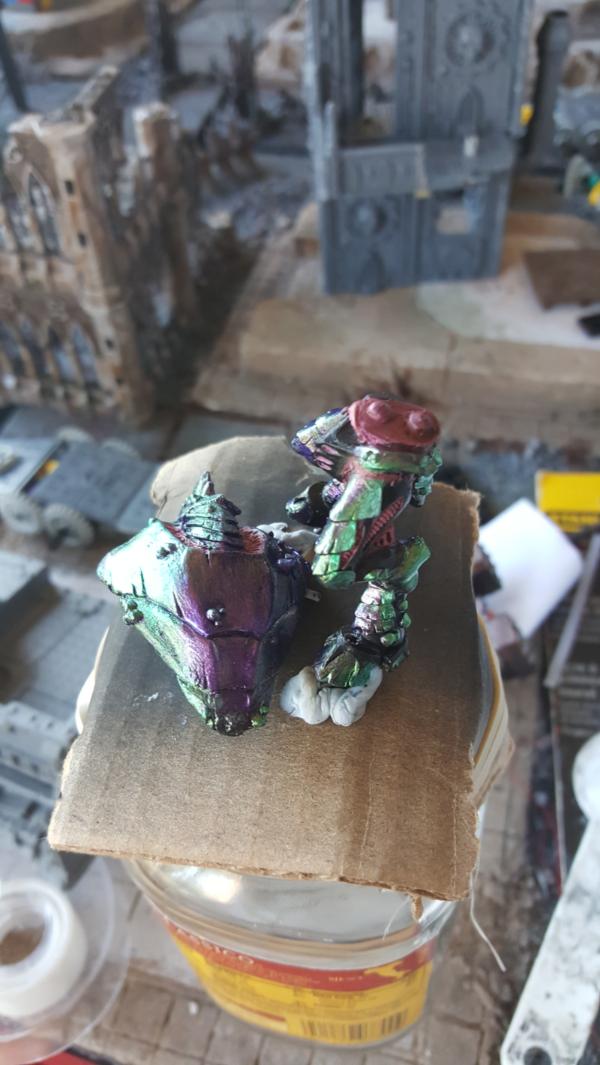
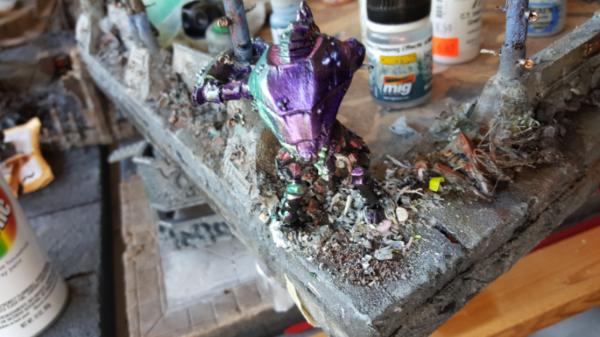
Took a break from the board to work on the hero Old One Eye detail, I think the green-puple is working quite nicely.
FOr the other side though I think i MIght go with green-blue for the gene-stealers. I dont need as much contrast given that there will be a hoard of them and blue-green feels a bit more "sneaky" anyways. The black/pinkish flesh colors should remain the same though. Not sure what colors to go with the tyranid infetation though but we'll see, something bright to really show off the burned look (probably a lot of th epink color)
|
|
|
|
|
|
2015/08/14 02:50:07
Subject: Homemade multi-level city terrain boards/buildings (8/10 - beetle nid tests!)
|
|
Speed Drybrushing
|
I'm really digging the shiny tyranids.
|
|
|
|
|
|
2015/08/14 03:56:44
Subject: Re:Homemade multi-level city terrain boards/buildings (8/10 - beetle nid tests!)
|
|
Dakka Veteran
|
Thanks! the effect looks signifigantly better than the pictures show to boot. It looks best in "normal indoor" type lighting, which is where we are typically playing to begin with, its just hard to capture said lighting without the phone picing up a giant specular highlight as well that ruins the look. I have a lightbox i just need to set it up and mess with it, and it wouldnt fit the board as it stands anyways. But someday...
|
|
|
|
|
|
2015/08/14 20:33:26
Subject: Re:Homemade multi-level city terrain boards/buildings (8/10 - beetle nid tests!)
|
|
Dakka Veteran
|
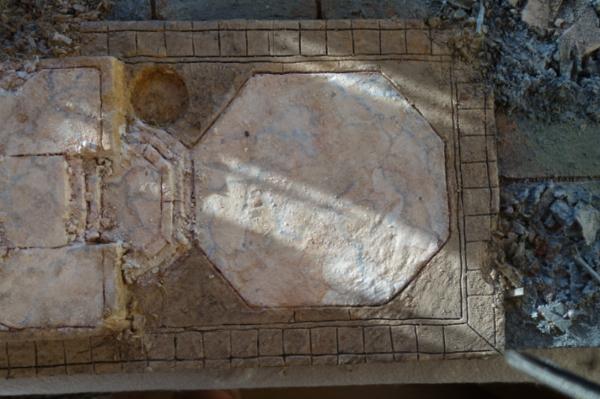
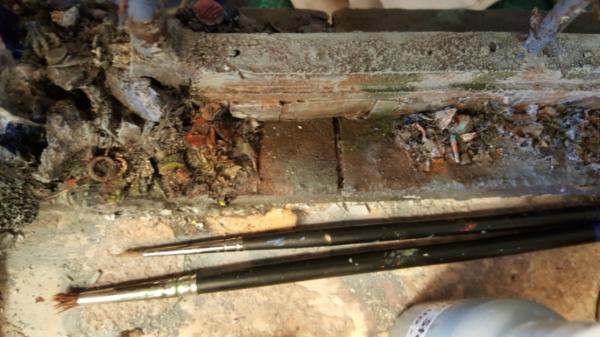
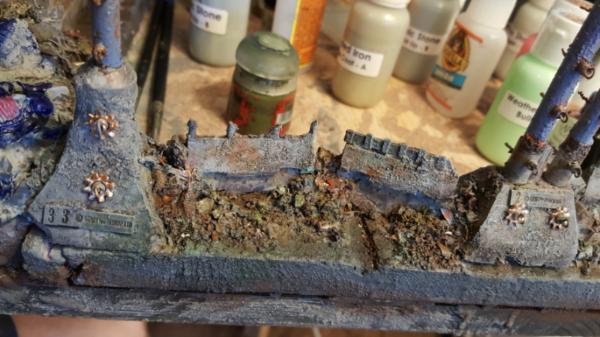
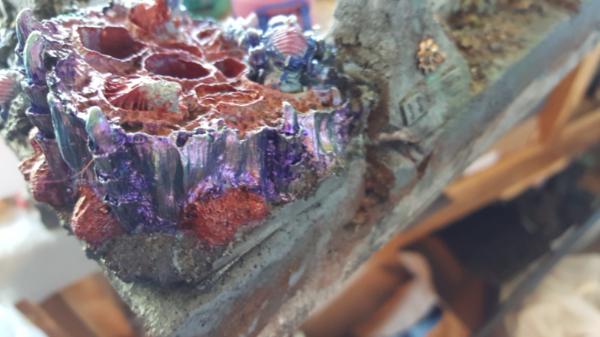
More progress. the colurmns are white because I want to marbleize them. Its fun anddd good practice.
the only downside to the cracked concrete look is.. good grief is it hard to get it all dark. There are little white crevices everywhere.
He stands! with lots of rubble underneath him to ease the transition (and hide the 4 pins holding him down)
Definitely gonna need to make those stealers a different bug color set, this is working nciely but the stealrs will get lost in it.
|
|
|
|
|
|
|
|