| Author |
Message |
 |
|
|
|
|
Advert
|
Forum adverts like this one are shown to any user who is not logged in. Join us by filling out a tiny 3 field form and you will get your own, free, dakka user account which gives a good range of benefits to you:
- No adverts like this in the forums anymore.
- Times and dates in your local timezone.
- Full tracking of what you have read so you can skip to your first unread post, easily see what has changed since you last logged in, and easily see what is new at a glance.
- Email notifications for threads you want to watch closely.
- Being a part of the oldest wargaming community on the net.
If you are already a member then feel free to login now. |
|
 |
2009/11/26 12:49:56
Subject: FW Chaos Reaver Titan Update Dec 2nd 2011 completed!
|
|

Been Around the Block
|
Hey everyone,
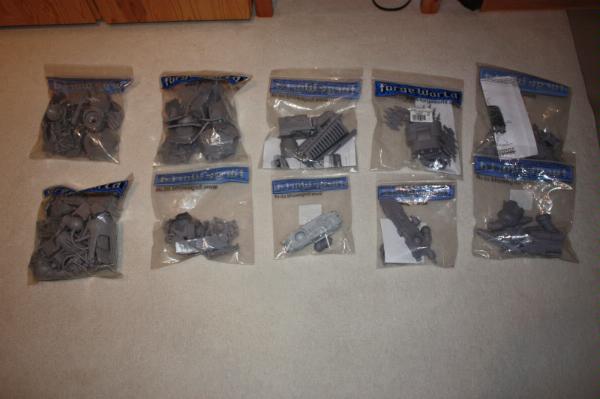
I just got my Chaos Reaver Titan from Forgeworld, I got it last week and have been working on it since. I've decided to post my progress for everyone here to see.
What I ordered:
1x Chaos Reaver Titan Body
1x Melta Cannon arm
1x Laser Blaster arm
1x Power fist arm
1x Apocalypse Missile Launcher Carapace Weapon
1x Warhound Plasma Cannon arm (Which I will convert to a carapace weapon)
1x Warhound Vulcan Mega Bolter arm (Which I will convert to a carapace weapon)
I do plan on making all the weapons inter-changeable. It will take a lot of work, but I think it will be worth it. I still need to order magnets for this. I also have to green stuff and modify the plasma/vulcan megabolter weapons to be more uniform, that way it will looks better mounted on the carapace.
I'm currently about 80% done trimming all the parts. After that I will need to wash them.
Anyway here are the pics:
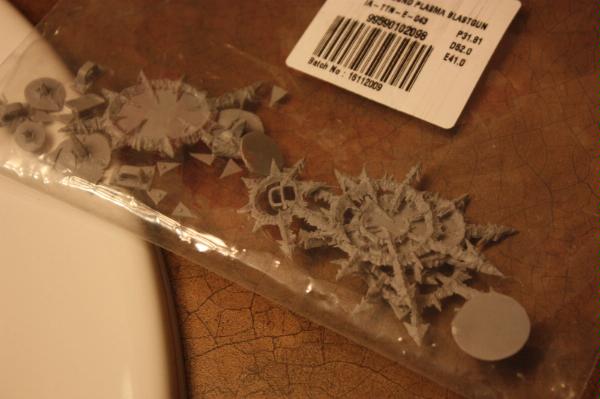
All the parts as they were received:
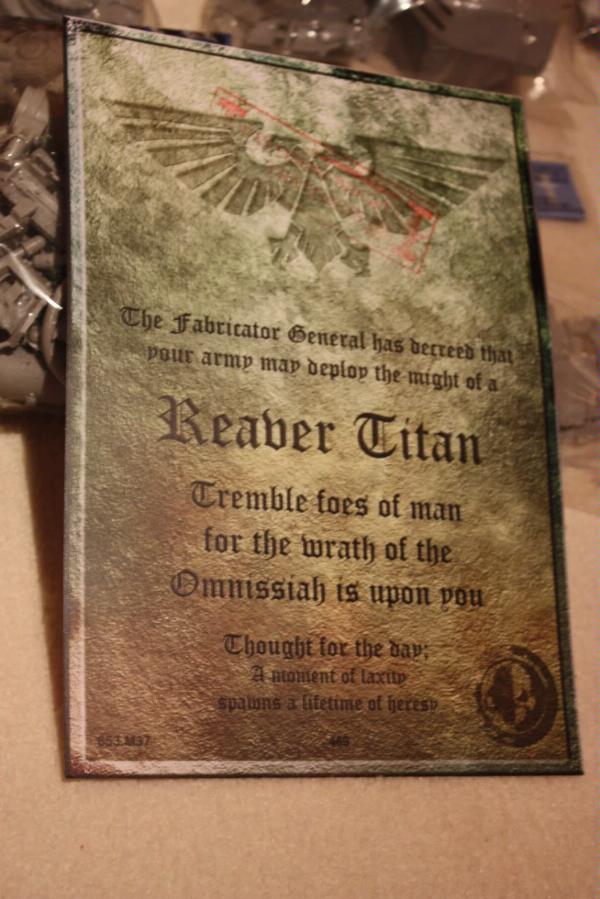
I gotta love that my Titan is number 469. I'm assuming that this is the number of total Reaver Titans casted to date, including both Loyalist and Chaos models. 
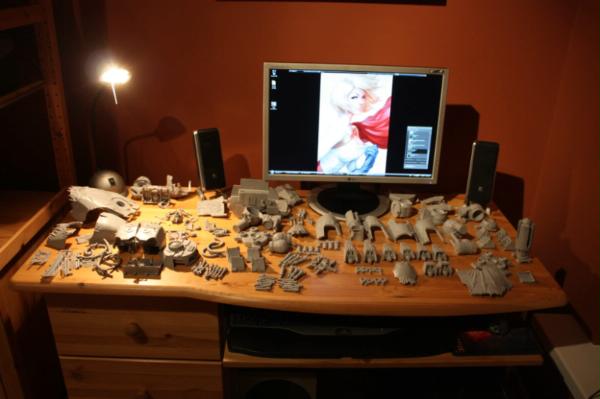
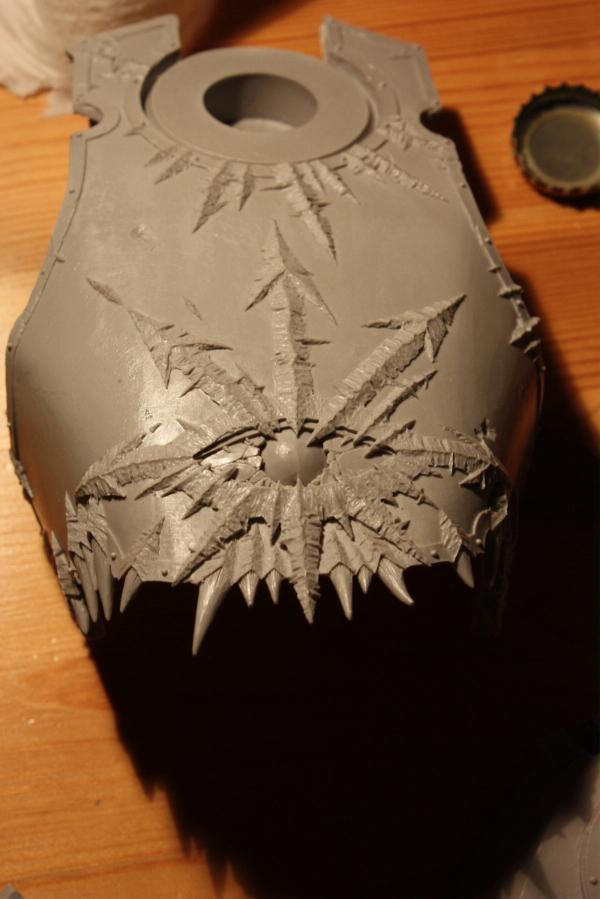
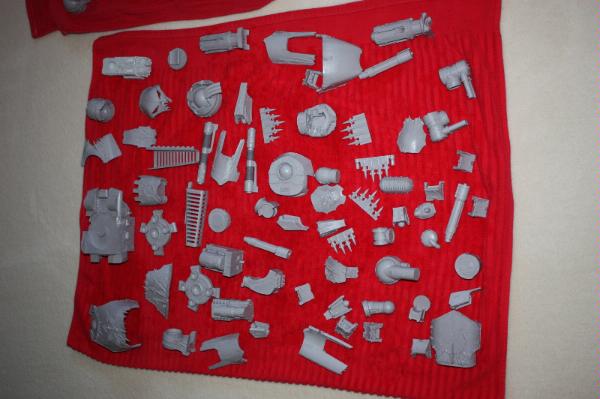
All the Main Body parts:
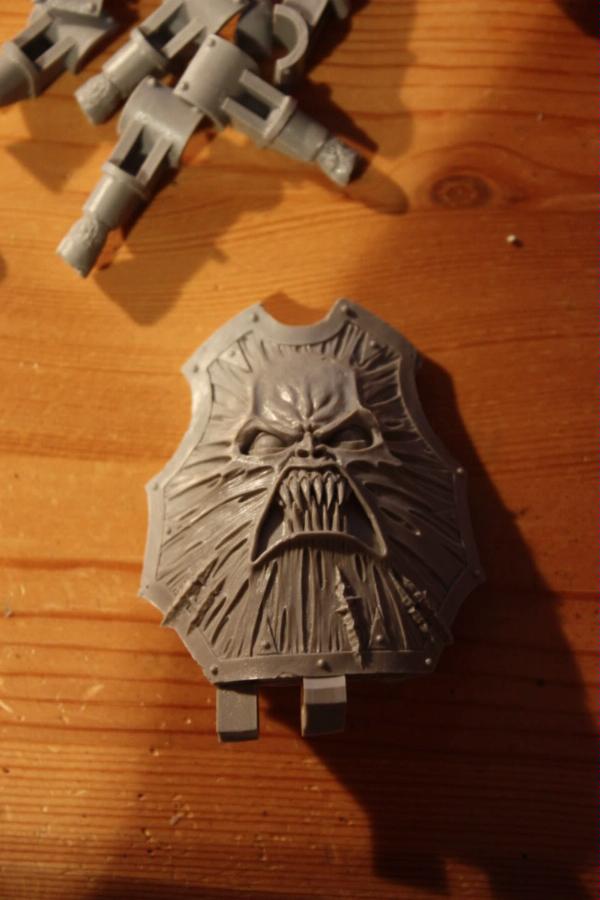
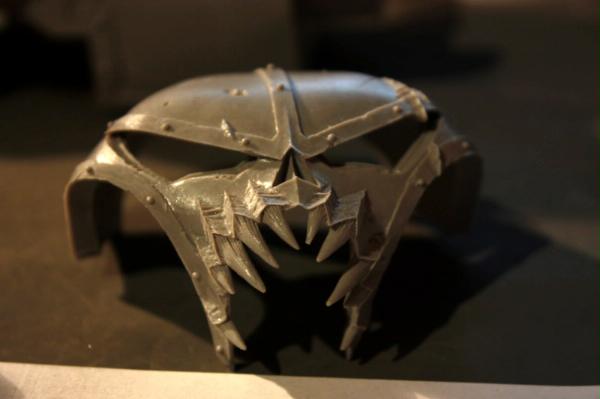
Super angry knee!!!
Crew:
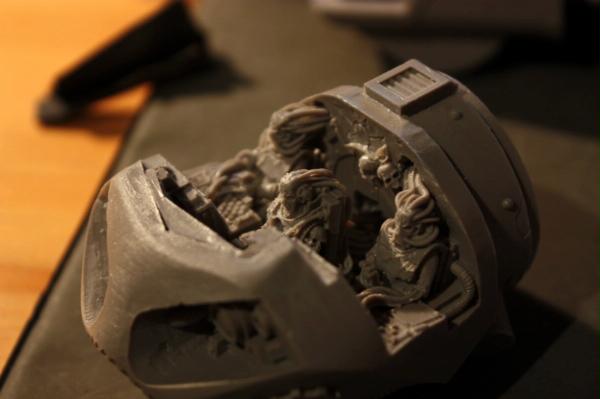
The head:
Truly, the level of detail is amazing:
|
|
This message was edited 19 times. Last update was at 2011/12/02 19:40:12
|
|
|
 |
|
2009/11/26 12:54:55
Subject: FW Chaos Reaver Titan WIP
|
|

Junior Officer with Laspistol
|
|
|
|
|
|
|
2009/11/26 13:18:30
Subject: Re:FW Chaos Reaver Titan WIP
|
|
Been Around the Block
|
Wow, that has to be the most epic reply yet.... 
|
|
|
|
|
2009/11/26 13:52:35
Subject: FW Chaos Reaver Titan WIP
|
|
Power-Hungry Cultist of Tzeentch
|
The chaos reaver has to be one of the best looking forgeworld models to date. I cant wait to see how you find building it as I am tempted to get one my slef, but the whole thought of building it kinda makes me scared...
|
|
|
|
|
|
2009/11/26 18:02:27
Subject: FW Chaos Reaver Titan WIP
|
|
Been Around the Block
|
Tzarinchilla wrote:The chaos reaver has to be one of the best looking forgeworld models to date. I cant wait to see how you find building it as I am tempted to get one my slef, but the whole thought of building it kinda makes me scared...
heh, tell me about it man... I'm somewhat worried how things will play out, especially with the fact that I will be magnetizing the weapons... I hope that turns out ok and that I don't botch it horribly.
In the end, as long as you take your time, read the instructions carefully, and do some research online, everything should work out in the end.
|
|
|
|
|
2009/11/26 18:06:25
Subject: FW Chaos Reaver Titan WIP
|
|
Lord of the Fleet
|
Good luck with it. We could race, who builds their Reaver first! That would be fun =)
|
|
|
|
|
2009/11/27 01:09:00
Subject: FW Chaos Reaver Titan WIP
|
|
Been Around the Block
|
Valkyrie wrote:Good luck with it. We could race, who builds their Reaver first! That would be fun =)
We could, but so far it looks like you are a head of me. 
|
|
|
|
|
2009/11/27 08:14:55
Subject: FW Chaos Reaver Titan WIP
|
|

Arch Magos w/ 4 Meg of RAM
|
Wooh, subscribed! This is going to get good.
|
|
|
|
|
|
2009/11/27 09:16:00
Subject: FW Chaos Reaver Titan WIP
|
|
Blood Angel Terminator with Lightning Claws
|
Make it very detailed (so I can reference when I build mine!)
|
|
|
|
|
|
2009/11/27 09:53:48
Subject: FW Chaos Reaver Titan WIP
|
|
Been Around the Block
|
jabbakahut wrote:Make it very detailed (so I can reference when I build mine!)
Will do!
Just a question for ya though, when you finished painting your titan, what did you use for the finish coat? I'm guessing a Matt finish, but what kind of brand. I also couldn't find the reason why you didn't go with the magnet arms, unless I'm just blind. :p
|
|
|
|
|
2009/11/27 10:09:39
Subject: FW Chaos Reaver Titan WIP
|
|
Blood Angel Terminator with Lightning Claws
|
It was definitely a matt spray, I don't recall the brand. I can't say I've had any bad experience with a matt spray, so I've never paid attention to which I buy. Probably a $10 bottle from the hardware store (specialized hobby sprays do tend to be overpriced for what they are).
The problem I had with the magnets seems to be unique to just me. Plenty of people are using magnets all over their models now. With the titan resin parts-they are heavy and articulate from an unbalanced point. To compensate you must use the large and stronger magnets. My problem was that the magnets broke the chemical bond of the glue-but they still were too small to hold the arms in their proper placement. When I do my Reaver-I plan on trying the magnets again (for arm variants). I will only try this if I can find a way to really secure the magnets-ideally with a bolt.
|
|
|
|
|
|
2009/11/27 10:14:14
Subject: FW Chaos Reaver Titan WIP
|
|
Been Around the Block
|
jabbakahut wrote:It was definitely a matt spray, I don't recall the brand. I can't say I've had any bad experience with a matt spray, so I've never paid attention to which I buy. Probably a $10 bottle from the hardware store (specialized hobby sprays do tend to be overpriced for what they are).
The problem I had with the magnets seems to be unique to just me. Plenty of people are using magnets all over their models now. With the titan resin parts-they are heavy and articulate from an unbalanced point. To compensate you must use the large and stronger magnets. My problem was that the magnets broke the chemical bond of the glue-but they still were too small to hold the arms in their proper placement. When I do my Reaver-I plan on trying the magnets again (for arm variants). I will only try this if I can find a way to really secure the magnets-ideally with a bolt.
Hmmm too bad, I did have some ard coat, but I used it once, and it didn't seem to turn out very well... :x
I may look into getting something else then.
Ya, I tried magnets on some CSM Terminators, but they just didn't feel very secure at all when picking them up. Probably didn't help that I had magnetized the shoulder pads too though. For this Titan though, I really want to try and make it work, since I don't want to buy a Titan for each weapon load out... :|
|
|
|
|
|
2009/12/04 05:01:57
Subject: Re:FW Chaos Reaver Titan WIP Update 2
|
|
Been Around the Block
|
Hey everyone, got an update.
So I finally finished cutting/trimming all the flash on the resin pieces. So, next step for me was to clean/wash all the parts.
Bath time for the reaver bits!
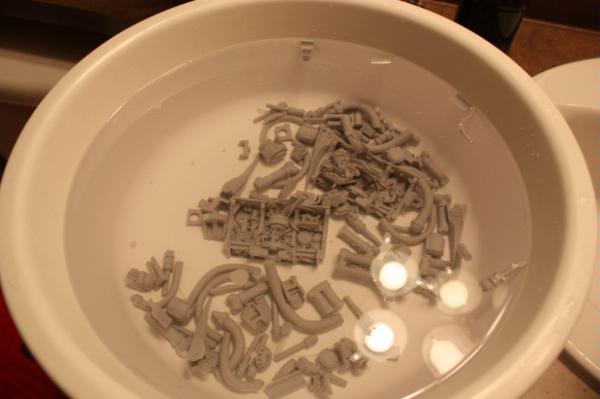
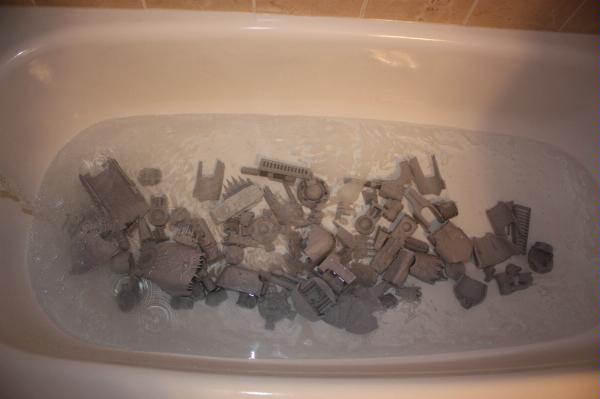
These were a pain to clean, mainly because they were so damn small...
First, I poured some Mr Clean Floor cleaner into the water, dunno how much exactly;about as much as I felt necessary.
After that, I let it sit for about 1/2 an hour. Then took a tooth brush and scrubbed the pieces thoroughly. Then rinsed them in warm water, before scrubbing them again with soap, and rinsing them one last time.
Finally, I layed out all the pieces to let them dry.

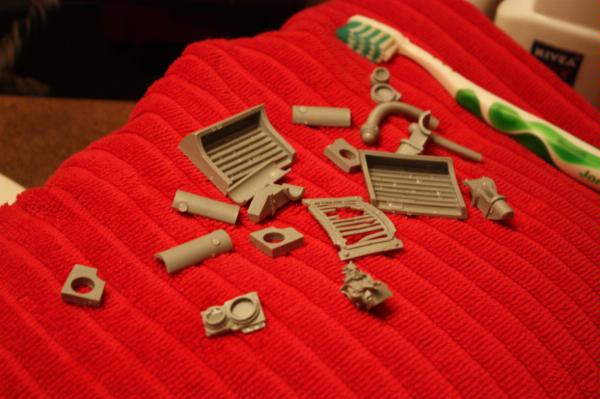
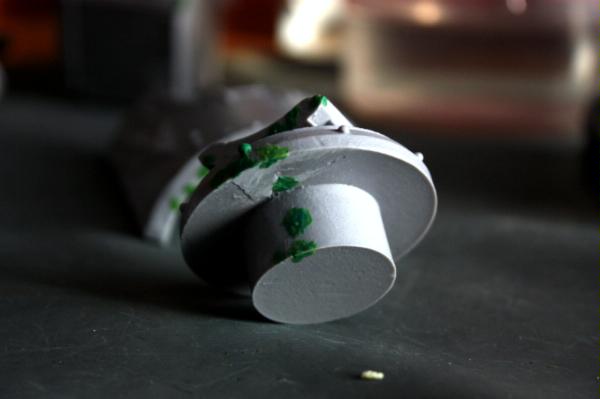
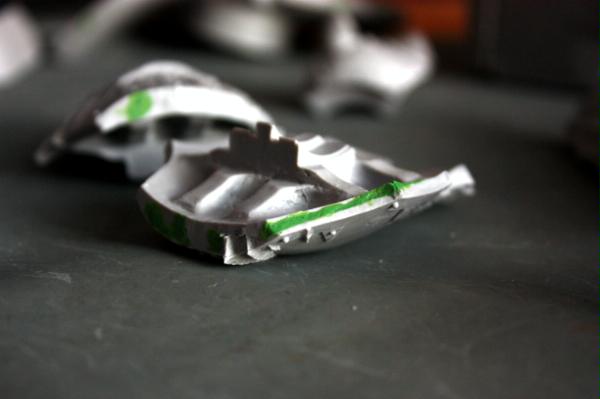
So, after a night of drying, I had to start patching up all the air bubbles on the pieces, I did this two ways, using green stuff for the bigger holes and super glue for the smaller ones.
This piece was probably the worst as you can see:
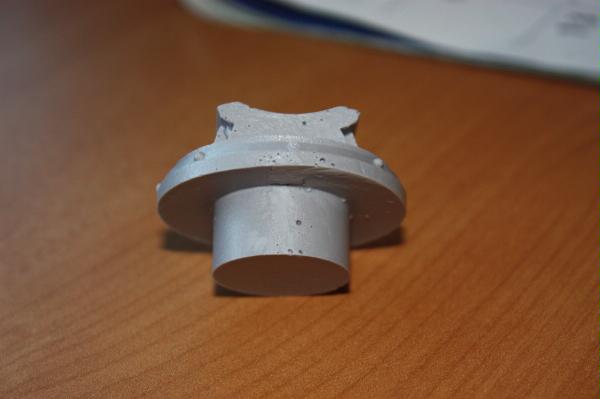
After the green stuff finally sets, I'll sand down all of it to make it nice and smooth, once that is done, I can finally start to glue/prime it.
|
|
|
|
|
2009/12/04 05:08:23
Subject: Re:FW Chaos Reaver Titan WIP Update Dec.03/09
|
|
Sagitarius with a Big F'in Gun
Grass Valley CA
|
WOW! 
Thats a nice mini
|
Deathbot wrote:Point out to Ahriman that he's spent 10,000 years failing to get into a library guarded by clowns.
|
|
|
|
|
2009/12/04 05:12:25
Subject: FW Chaos Reaver Titan WIP Update Dec.03/09
|
|
Automated Rubric Marine of Tzeentch
|
This is the reason I call them "models" and not "minis". With stuff like this, it isn't very "mini" anymore.
Can people explain to me why and how I you wash resin pieces?
|
|
|
|
|
|
2009/12/04 05:20:32
Subject: FW Chaos Reaver Titan WIP Update Dec.03/09
|
|
Been Around the Block
|
ZacktheChaosChild wrote:This is the reason I call them "models" and not "minis". With stuff like this, it isn't very "mini" anymore.
Can people explain to me why and how I you wash resin pieces?
Forgeworld themselves offer a good explantion/instructions:
http://www.forgeworld.co.uk/resinmodels1.htm
Essentially, you want to wash to get rid of the release agent that might still be on the pieces, otherwise when you go to paint or primer the model, it will just flake off. I has this happen to me with my Brass Scorpion, luckily I had just started painting it and had not primed all the pieces.
|
|
|
|
|
2009/12/04 06:16:59
Subject: Re:FW Chaos Reaver Titan WIP Update Dec.03/09
|
|

Monstrously Massive Big Mutant
An unknown location in the Warp
|
Battle Brother Loken wrote:WOW!
Thats a nice mini
It's more like a nice biggy...
|
|
|
|
|
|
2009/12/04 06:54:07
Subject: FW Chaos Reaver Titan WIP Update Dec.03/09
|
|
Blood Angel Terminator with Lightning Claws
|
I don't know if it was just my warhound, I haven't don the reaver yet, but the pieces look cleaner-but my warhound was impossible to clean.
|
|
|
|
|
|
2009/12/04 07:08:03
Subject: FW Chaos Reaver Titan WIP Update Dec.03/09
|
|
Been Around the Block
|
jabbakahut wrote:I don't know if it was just my warhound, I haven't don the reaver yet, but the pieces look cleaner-but my warhound was impossible to clean.
Well, oddly enough, some of the pieces had a much more kind of glossy look to them, like the apoc missile launcher, which I tried to see if it would scrub off. I washed it a few times more, even with a stronger concentration of the floor cleaner to no avail. I'm hoping it wont be an issue, I'll find out once I start to prime this thing.
|
|
|
|
|
2009/12/04 10:51:32
Subject: FW Chaos Reaver Titan WIP Update Dec.03/09
|
|
Blood Angel Terminator with Lightning Claws
|
That is the exact issue I had. The only thing I didn't try was maybe a fine sand paper, because the paint does have a difficult time sticking to the shinny areas.
|
|
|
|
|
|
2009/12/04 12:50:26
Subject: FW Chaos Reaver Titan WIP Update Dec.03/09
|
|
Been Around the Block
|
jabbakahut wrote:That is the exact issue I had. The only thing I didn't try was maybe a fine sand paper, because the paint does have a difficult time sticking to the shinny areas.
Hmmm, I think I got me some 800 grit, I'll try using that one those areas, hopefully it helps. I did google this, and on one forum someone had said that it is just the nature of some resin material to appear glossy like that, that it is not the release agent.
|
|
|
|
|
2009/12/04 14:25:16
Subject: FW Chaos Reaver Titan WIP Update Dec.03/09
|
|

Calculating Commissar
|
One thing I've tried that's not let me down yet is shooting the model with some old Citadel matt varnish, then priming it. Apparently the varnish bites onto the model far better than the primer does. An alternative is to use hardware store primer
|
The supply does not get to make the demands. |
|
|
|
|
2009/12/04 15:55:25
Subject: Re:FW Chaos Reaver Titan WIP Update Dec.03/09
|
|
Alluring Sorcerer of Slaanesh
Union, Kentucky United States
|
Honestly for all of your effort I would use a "paint on" primer just applied with an air brush. This will illiminate "cat hairs" (those little hair fibers primer picks up). Testors flat black has components that are indicative of primer, and works great with a nice smooth finish.
|
Listen, my children, as I pass onto you the truth behind Willy Wonka and his factory. For every wonka bar ever created in existance, Mr. Wonka sacraficed a single Oompa Loompa to the god of chocolate, Hearshys. Then, he drank the blood of the fallen orange men because he fed them a constant supply of sugary chocolate so they all became diabetic and had creamy, sweet-tasting blood that willy could put into each and every Wonka bar. That is the REAL story behind willy wonka's Slaughter House! |
|
|
|
|
2009/12/04 23:07:15
Subject: FW Chaos Reaver Titan WIP Update Dec.03/09
|
|
Lord of the Fleet
|
Wow that's going to be an incredible model. Can't wait to see it finished.
|
|
|
|
|
2009/12/05 01:12:38
Subject: FW Chaos Reaver Titan WIP Update Dec.03/09
|
|
Been Around the Block
|
Agamemnon2 wrote:One thing I've tried that's not let me down yet is shooting the model with some old Citadel matt varnish, then priming it. Apparently the varnish bites onto the model far better than the primer does. An alternative is to use hardware store primer
I've read about that as well, I might actually just do that, although i'll still give all the parts one more wash, but I'll pick up some matt varnish and spray down the parts with a nice thin layer.
|
|
|
|
|
2009/12/08 16:39:34
Subject: FW Chaos Reaver Titan WIP Update Dec.03/09
|
|
Rotting Sorcerer of Nurgle
|
acolite wrote:jabbakahut wrote:I don't know if it was just my warhound, I haven't don the reaver yet, but the pieces look cleaner-but my warhound was impossible to clean.
Well, oddly enough, some of the pieces had a much more kind of glossy look to them, like the apoc missile launcher, which I tried to see if it would scrub off. I washed it a few times more, even with a stronger concentration of the floor cleaner to no avail. I'm hoping it wont be an issue, I'll find out once I start to prime this thing.
Unfortunately it will be an issue. That glossy stuff rteally repels the paint. Even if you flood an area, half hour later there's resin showing.
You have to sand, scrape or brush the area (I use a brass brush - it sounds brutal but it works really well.) Also try a glass fibre pen for small areas. But becareful of the bits of fibreglass that come off - they itch like h*ll!
I also have an old Oral B electric tootbrush (the ones with the rotary heads) to help with cleaning. Works ace!
|
Check out my gallery here
Also I've started taking photos to use as reference for weathering which can be found here. Please send me your photos so they can be found all in one place!! |
|
|
|
|
2009/12/10 19:03:06
Subject: FW Chaos Reaver Titan WIP Update Dec.03/09
|
|
Been Around the Block
|
bubber wrote:acolite wrote:jabbakahut wrote:I don't know if it was just my warhound, I haven't don the reaver yet, but the pieces look cleaner-but my warhound was impossible to clean.
Well, oddly enough, some of the pieces had a much more kind of glossy look to them, like the apoc missile launcher, which I tried to see if it would scrub off. I washed it a few times more, even with a stronger concentration of the floor cleaner to no avail. I'm hoping it wont be an issue, I'll find out once I start to prime this thing.
Unfortunately it will be an issue. That glossy stuff rteally repels the paint. Even if you flood an area, half hour later there's resin showing.
You have to sand, scrape or brush the area (I use a brass brush - it sounds brutal but it works really well.) Also try a glass fibre pen for small areas. But becareful of the bits of fibreglass that come off - they itch like h*ll!
I also have an old Oral B electric tootbrush (the ones with the rotary heads) to help with cleaning. Works ace!
Hmmm, well all I can do is see what happens, I did sand those areas down a bit, hopefully it helps. I hoping to start priming this thing some time in the next week or so, haven't had much time to work on this beast lately.
|
|
|
|
|
2010/03/19 06:18:10
Subject: Re:FW Chaos Reaver Titan WIP Update Dec.03/09
|
|
Been Around the Block
|
*cough*
Hey, so apparently I've been working on a Titan for a while now and I kind of forgot to update what has been going on here.
Anyway, I have been working on it, on and off. Last couple of months has kept away from it, Christmas, New Years, Olympics and work.
So, here is my rather massive update on it so far, I won't go into too much detail of what has been done over time, if you are really curious you can check out my project blog page: http://www.acoliteart.blogspot.com/.
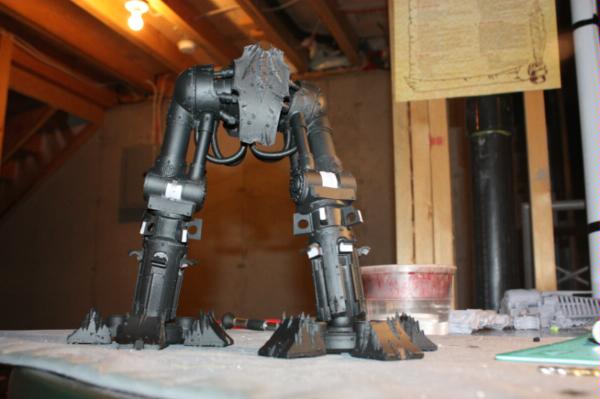
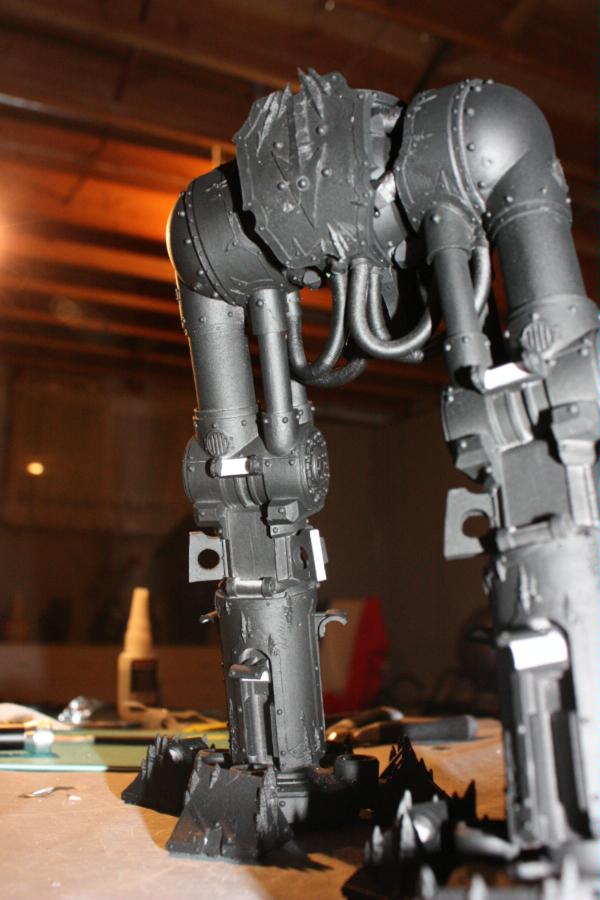
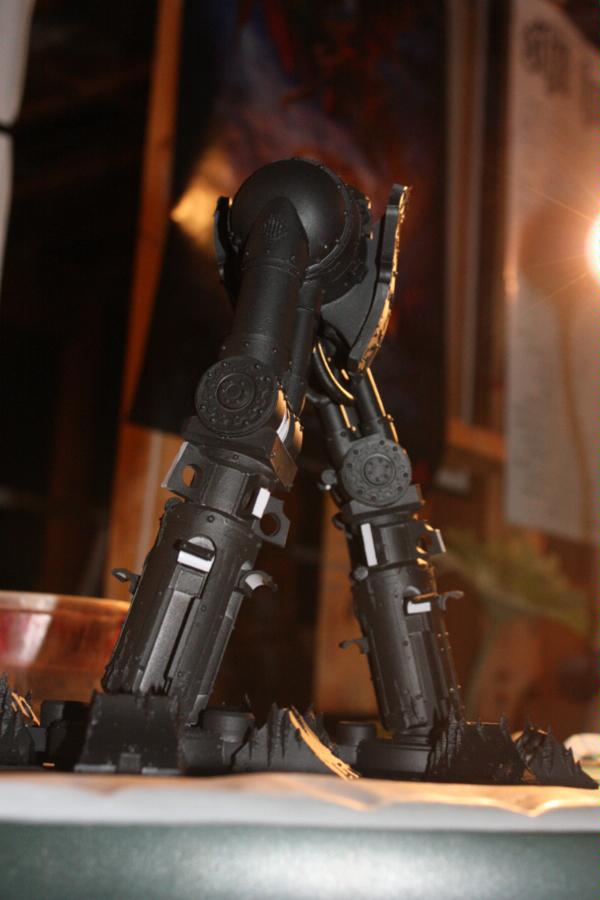
Basically I've come to the point where I have glued and primed everything I need to for the legs. I will start to paint them in the next week or so.
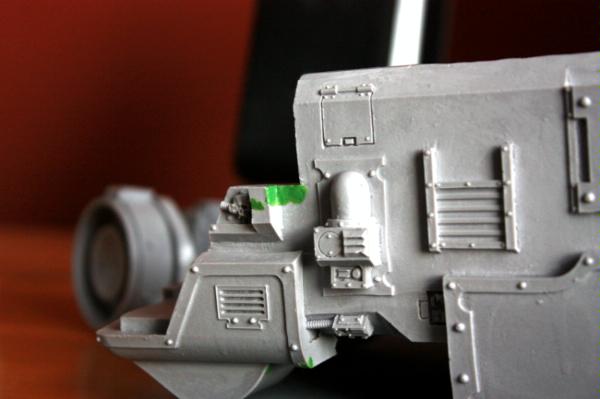
After cleaning it, I went and glued/pinned and fitted all the parts. After that I primed it using the following method:
I first prepared all the parts by applying small pieces of painters tape to all the areas where I'd be gluing things together.
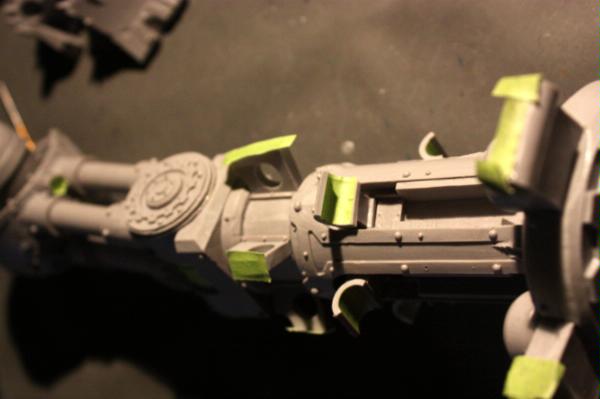
Then used the Matt Varnish first, since it adheres better to resin than regular spray paint. I did about two light coats on each piece. It dries quite quickly, only takes about 15 minutes, once that was done, I sprayed the pieces with the Chaos Black spray paint.

After letting it dry over night, I went back to check how it turned out. After rubbing all the pieces, none of the primer came off. Success!
I learned things the hard way with my Greater Brass Scorpion, it was quite terrifying to see the paint peal off as I painted.
Finally I ended up gluing all the pieces that I could, that would not interfere with painting any areas.
|
|
|
|
|
2010/03/19 10:18:19
Subject: Re:FW Chaos Reaver Titan WIP Update Mar. 18th/2010
|
|
Neophyte Undergoing Surgeries
Sydney, Australia
|
Oh wow. If there is anything that would make e start worshipping chaos it would be the promise of getting one of these babys if I did 
great blog, will be following attentively  And I hope to the blood god you are mounting this on an awesome base full of smushed loyalists
|
Getting back into the swing of things 
|
|
|
|
|
2010/03/19 10:38:25
Subject: Re:FW Chaos Reaver Titan WIP Update Mar. 18th/2010
|
|
Been Around the Block
|
Btone wrote:Oh wow. If there is anything that would make e start worshipping chaos it would be the promise of getting one of these babys if I did
great blog, will be following attentively And I hope to the blood god you are mounting this on an awesome base full of smushed loyalists
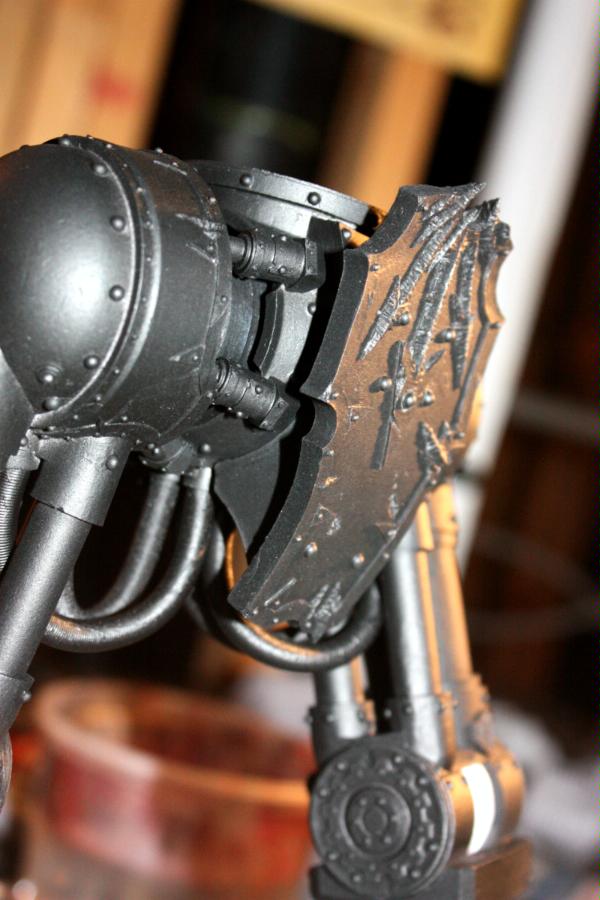
Initially I wasn't thinking of doing a base for it, but more and more I think about I might.
It would also make the legs a bit more secure and the overall model more balanced.
I'm just worried about how much mobility on the board the Titan will have after I do.
|
|
|
|
|
|
|