Forum adverts like this one are shown to any user who is not logged in. Join us by filling out a tiny 3 field form and you will get your own, free, dakka user account which gives a good range of benefits to you:
No adverts like this in the forums anymore.
Times and dates in your local timezone.
Full tracking of what you have read so you can skip to your first unread post, easily see what has changed since you last logged in, and easily see what is new at a glance.
Email notifications for threads you want to watch closely.
Being a part of the oldest wargaming community on the net.
If you are already a member then feel free to login now.
2015/09/23 18:18:21
Subject: Re:Custom multi-level city terrain (9/21: nid bases picture dump, generic bases
Lotta new pics, ill update this post as the day goes on/i have time.
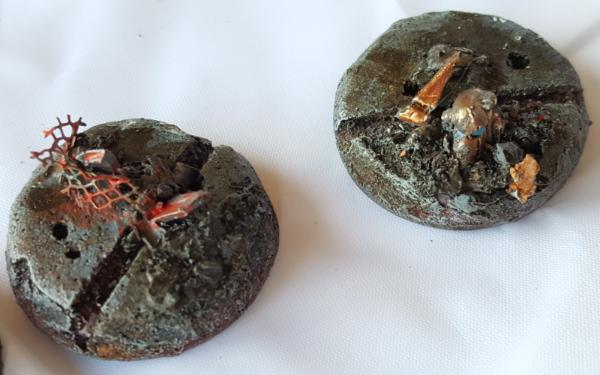
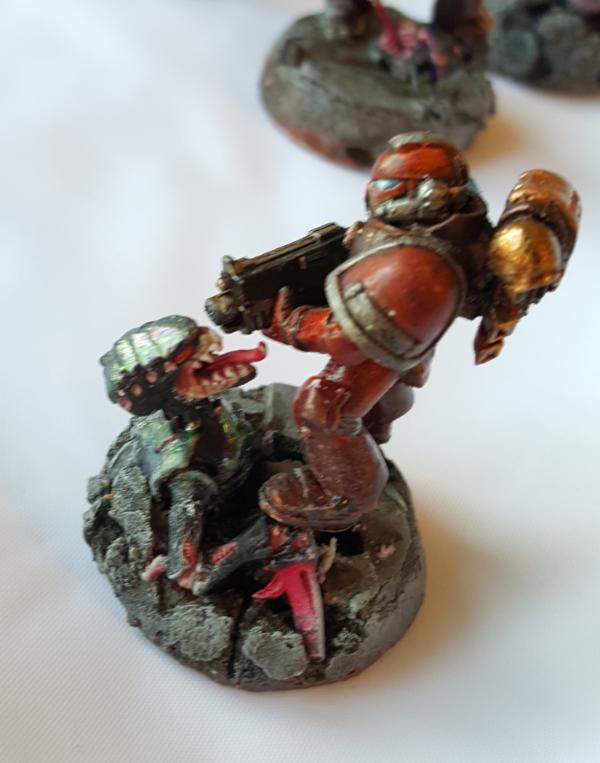
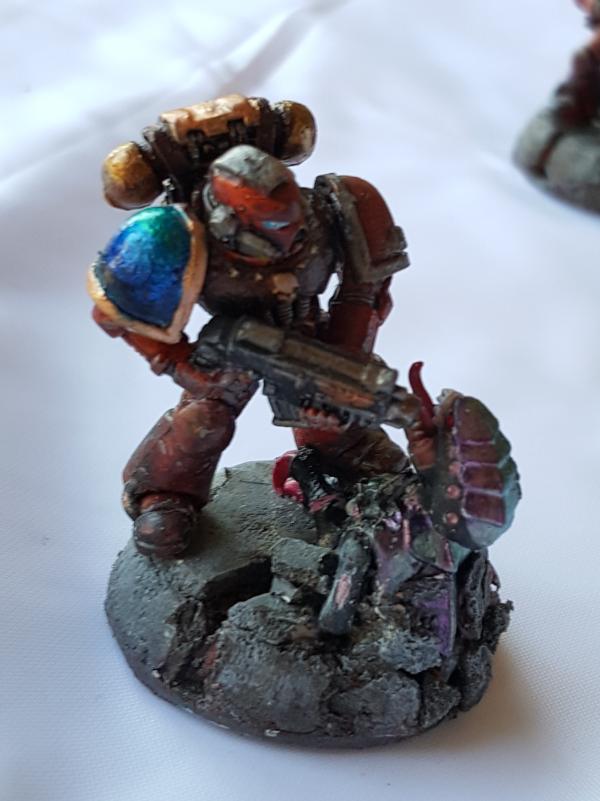
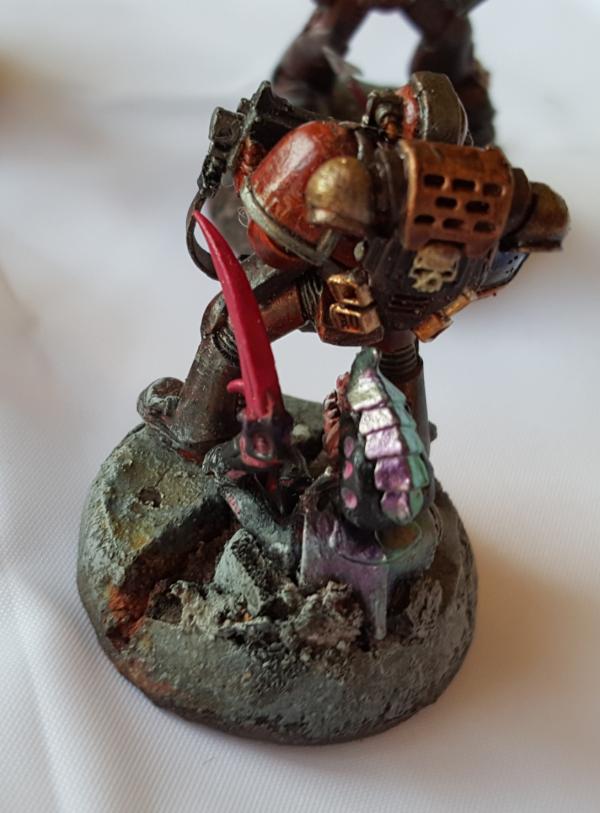
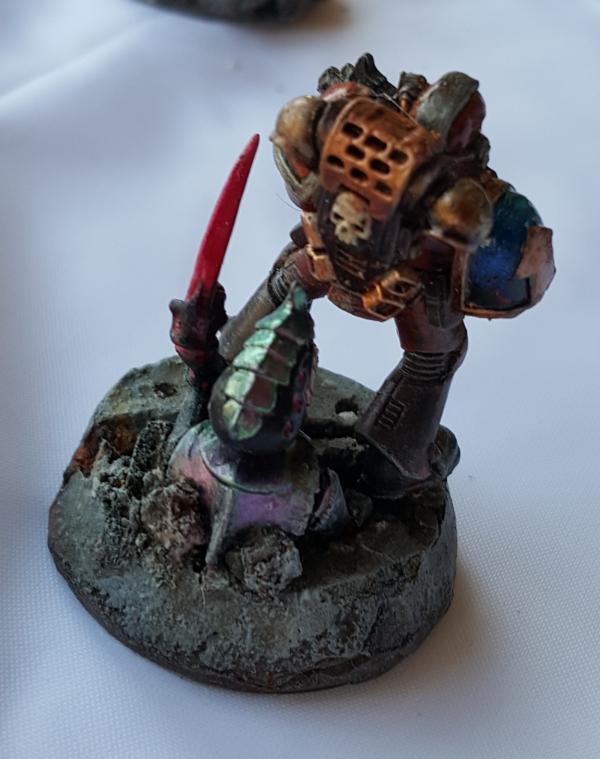
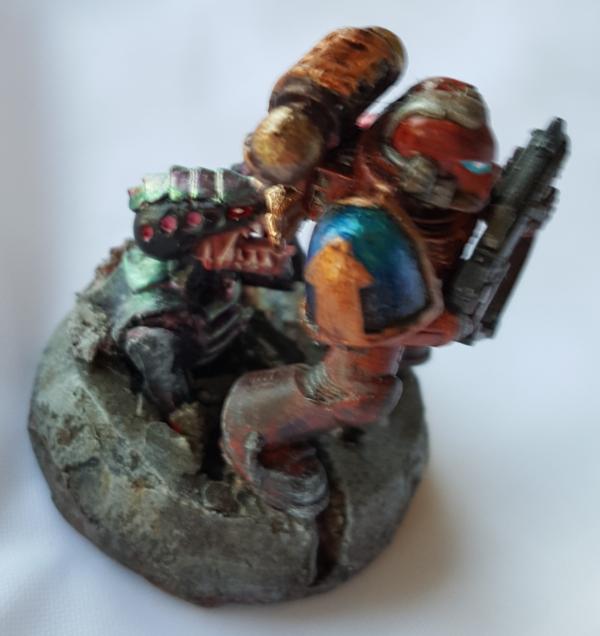
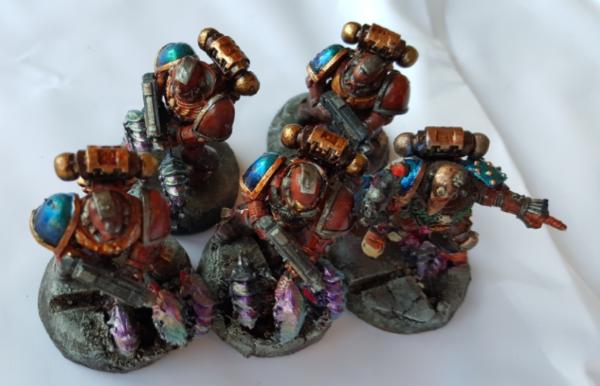
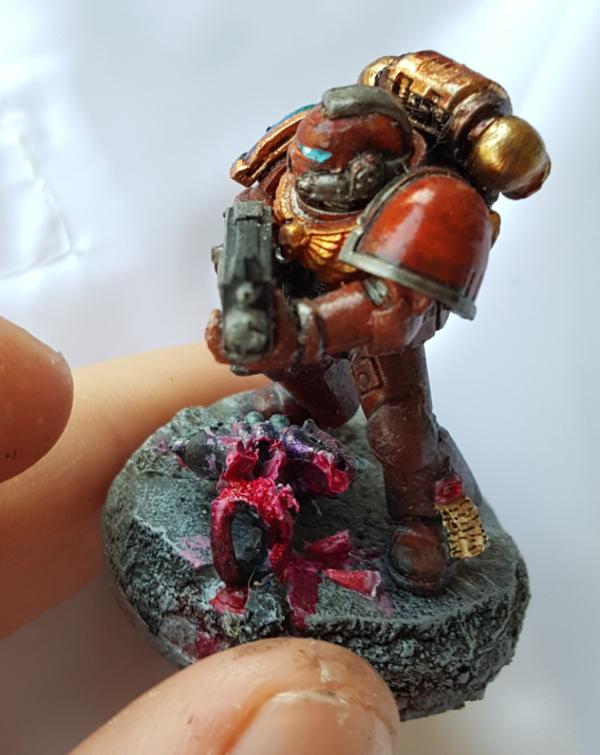
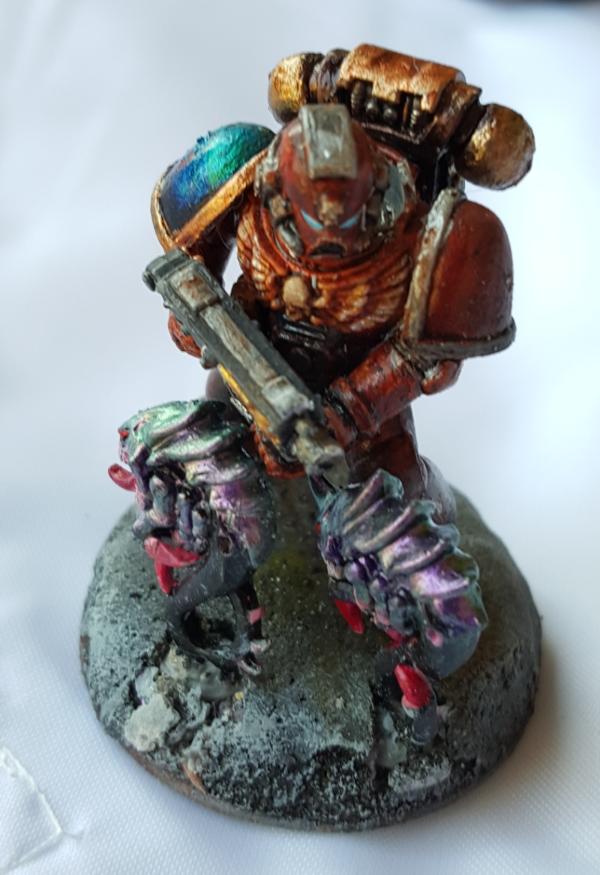
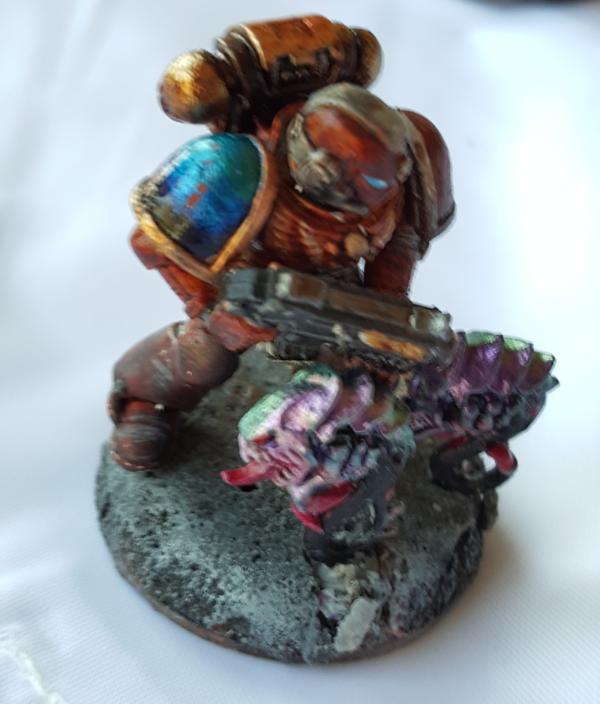
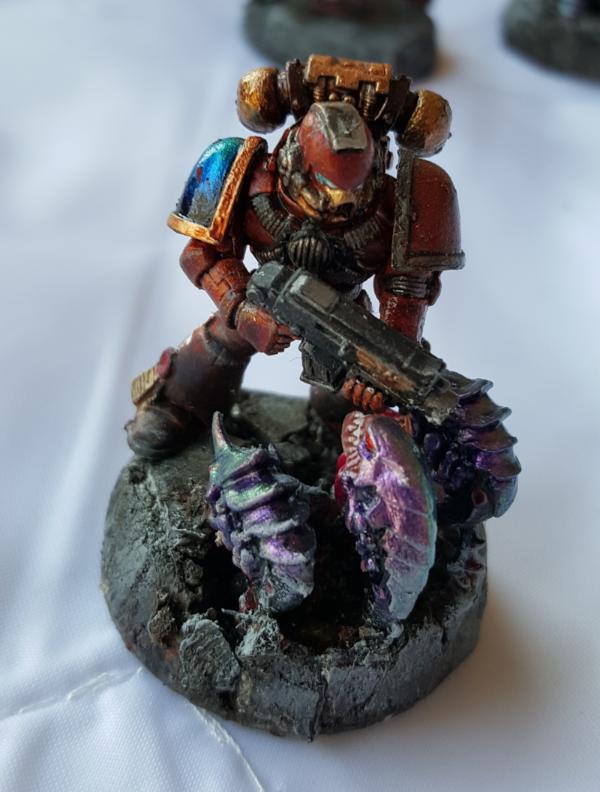
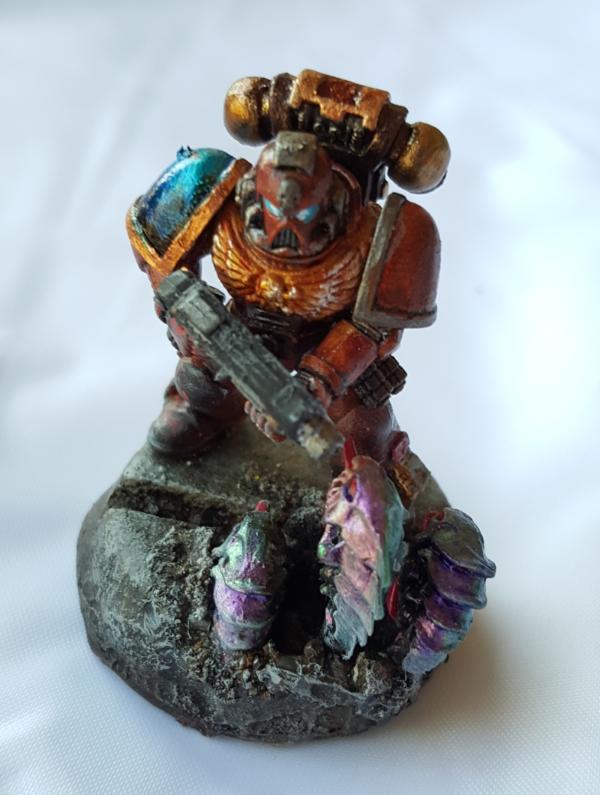
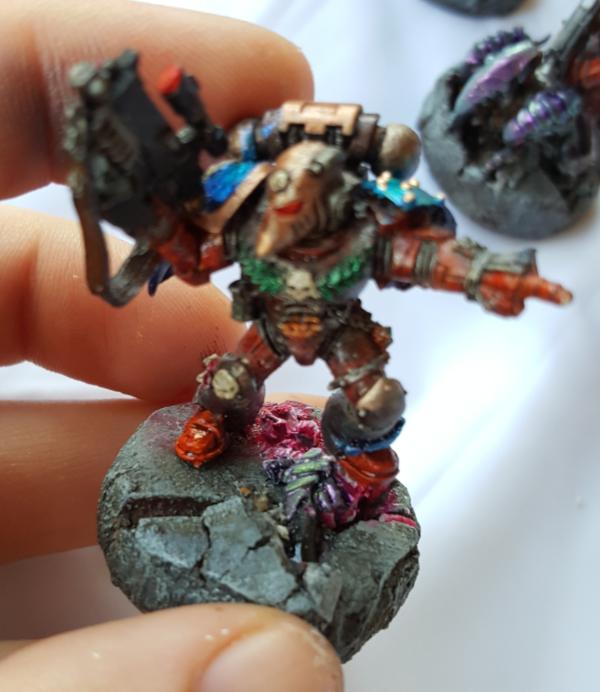
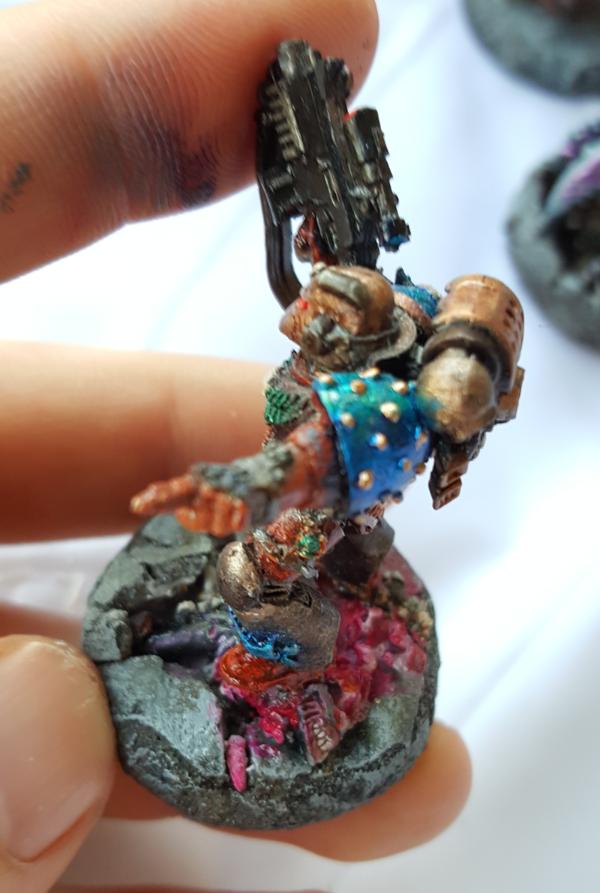
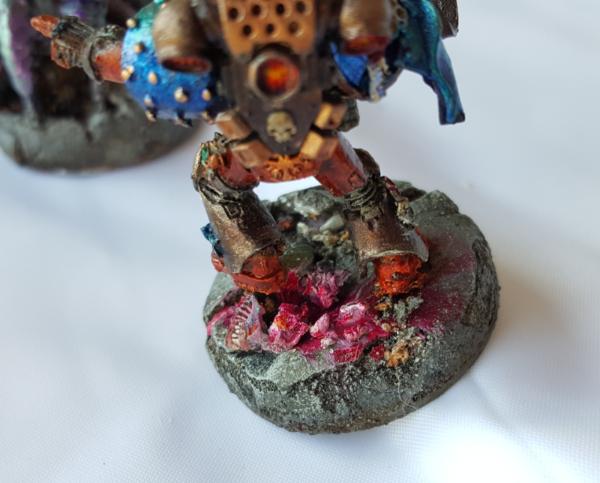
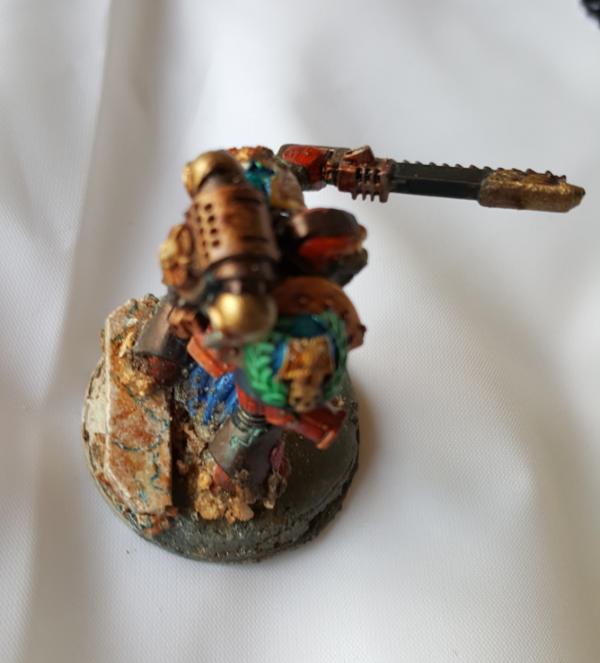
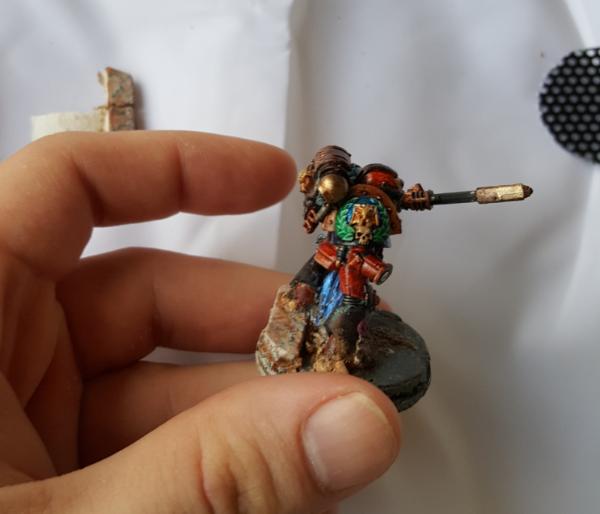
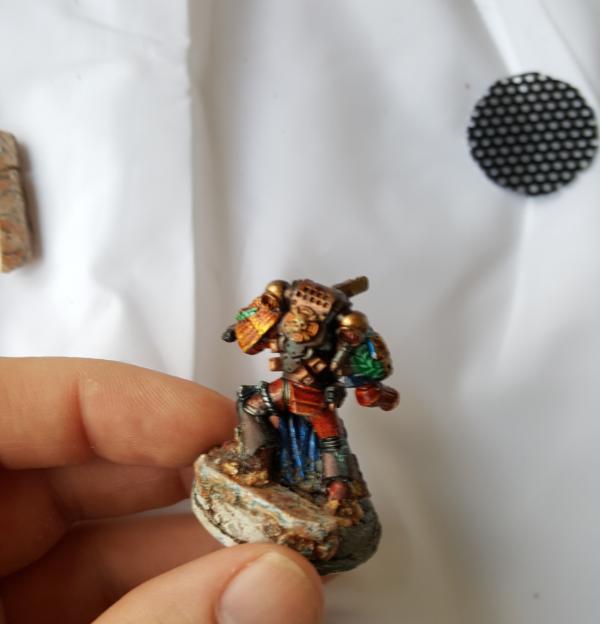
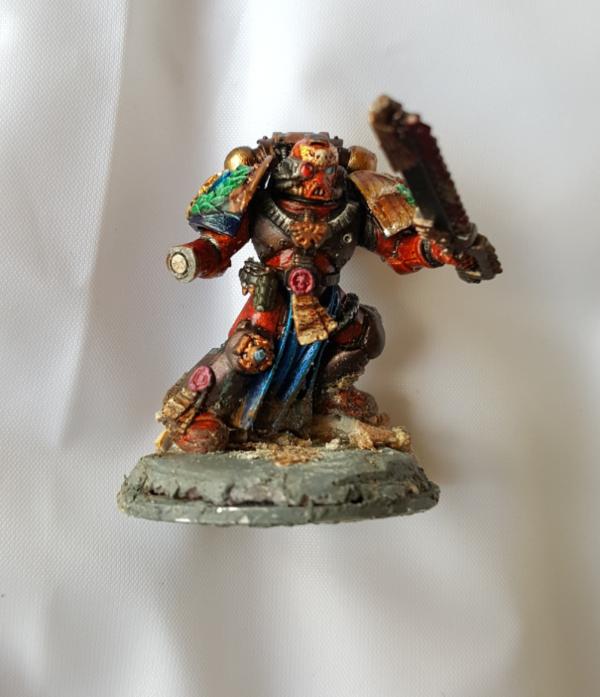
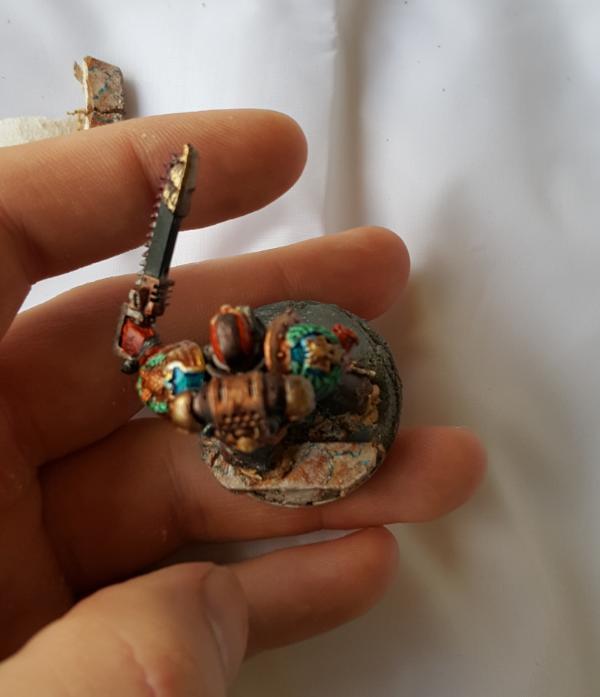
First, working on my generic base set. Remember that for any given group of 5 marines, 1-2 will need to be swapped out potentially for different special/heavy weapon marine bodies along with different seargents. Thus if the body im swapping out for was part of a base theme.. it wouldnt look right, so they need to be generic. Right now I have 5 sets of 5 "done" so that leaves me with 5 generic bases to make (4 special weapons guys and 1 seargent)
Once I figure out the 6th base set Ill have another 1-2 generics to figure out.
Still need to do some washes/highlighting/blood ink pass but they're getting there:
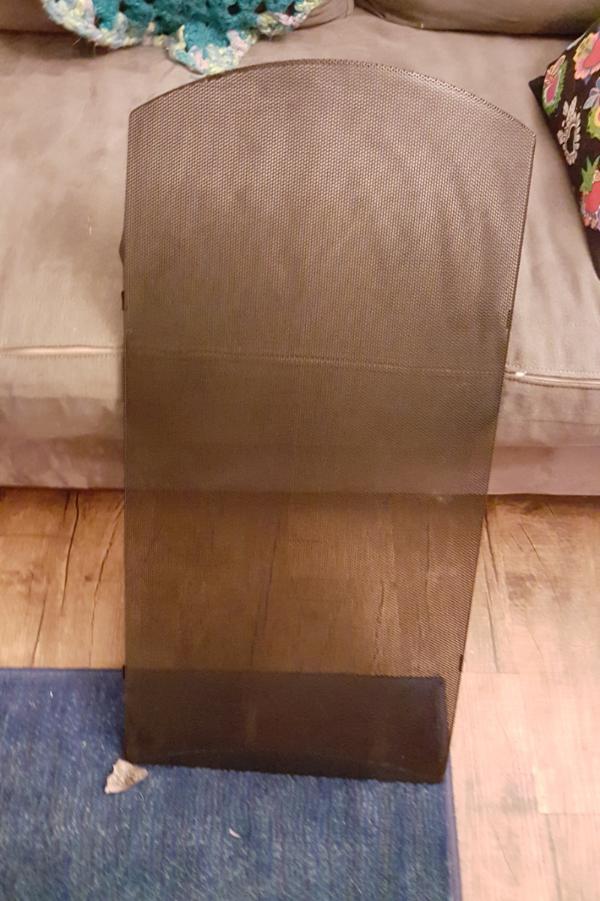
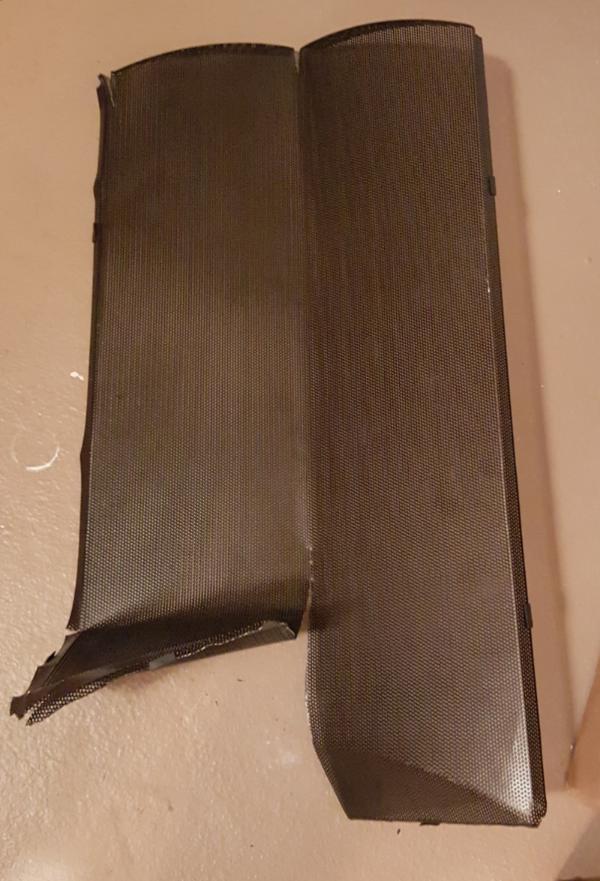
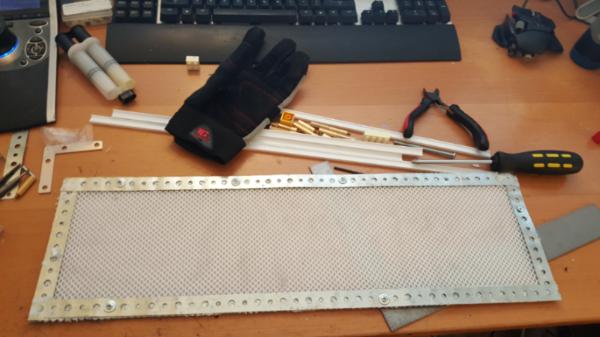
First of all, i found some mesh! I went to my local electronics junk shop (Apex Electronics) and they had, among many many other things (zomg pictures to come. best store ever for mechanicum/city terrain) these great speaker mesh chunks for super cheap. Instead of 15 bucks for a 2"x4" brass square I got that whole thing for 2 bucks.
Of course now i have to cut it. I have metal snips so I started with that and.. well.. you have to bend half of it to get the other half. Ergh.
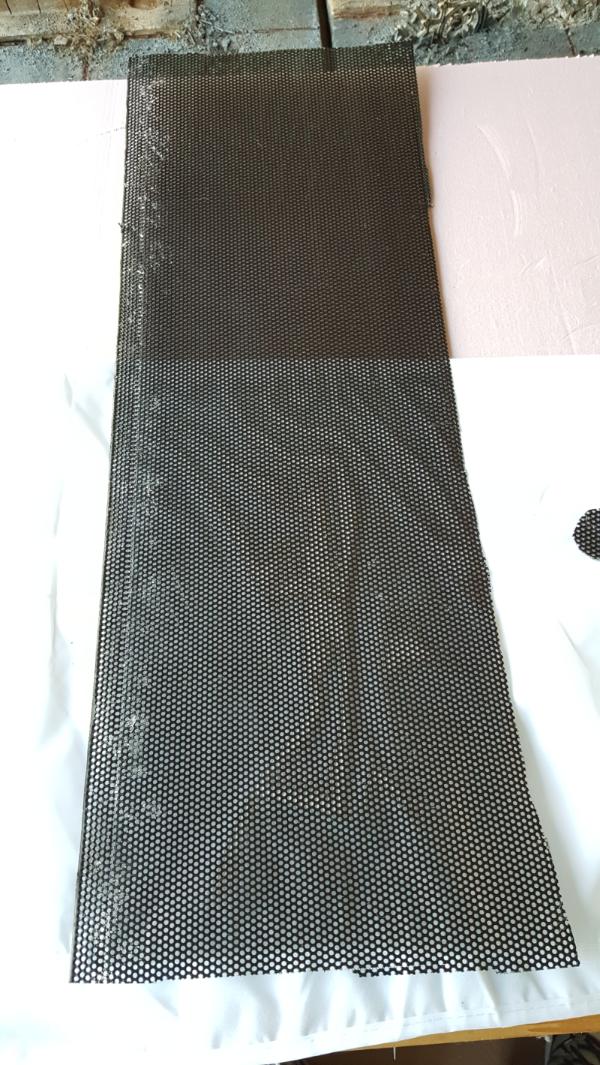
so then I realized I could just bend the whole thing along the crease over and over to cause metal fatigue and break it that way. Much easier, produces fewer metal splinters, and leaves me with less bent metal in the end. I even managed to keep a nice finished edge too!
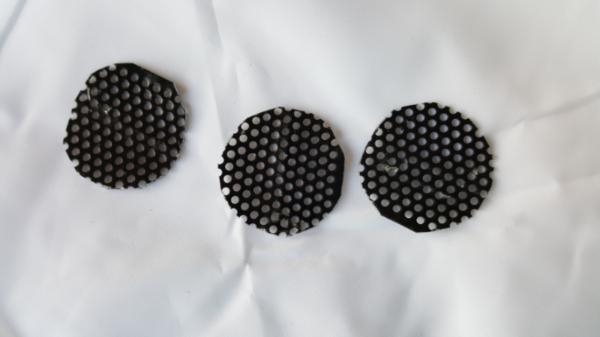
Next we take some of my scrap i cut off and start cutting out little circles.
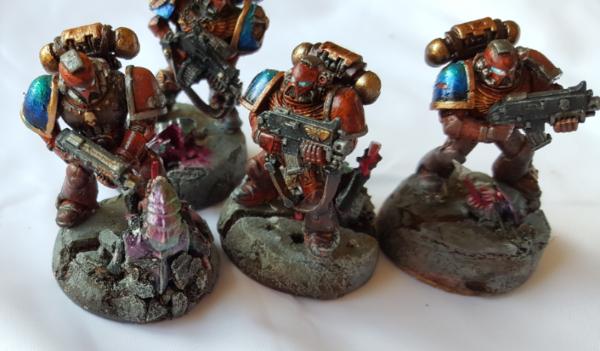
Some very inventive conversions on the bases for those marines, I like it
IceAngel wrote:I must say Knightley, I am very envious of your squiggle ability. I mean, if squiggles were a tactical squad, you'd be the sergeant. If squiggles were an HQ, you'd be the special character. If squiggles were a way of life, you'd be Doctor Phil...
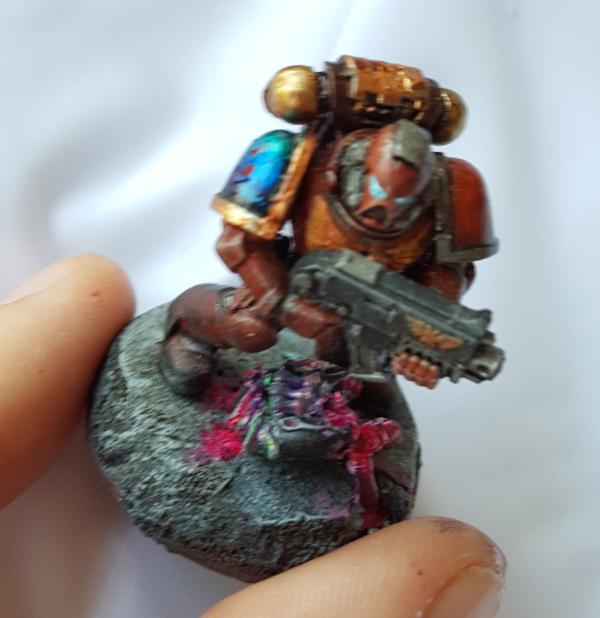
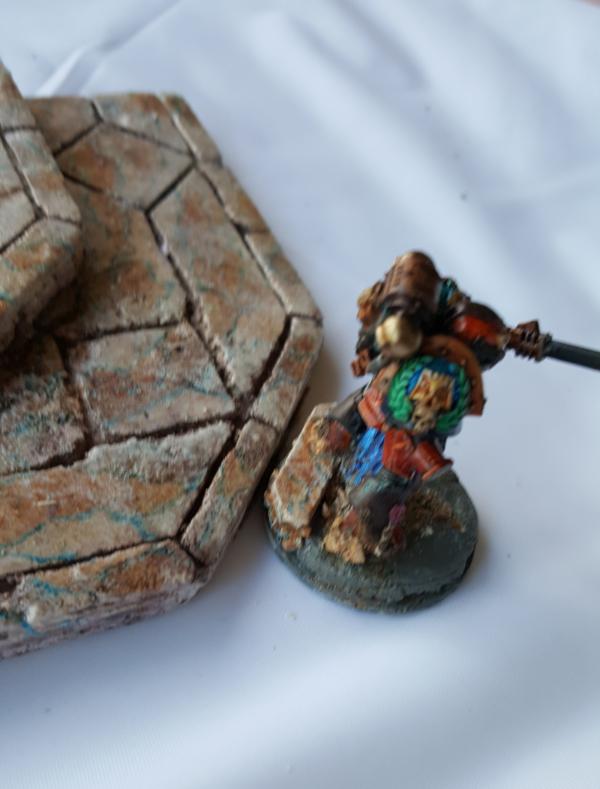
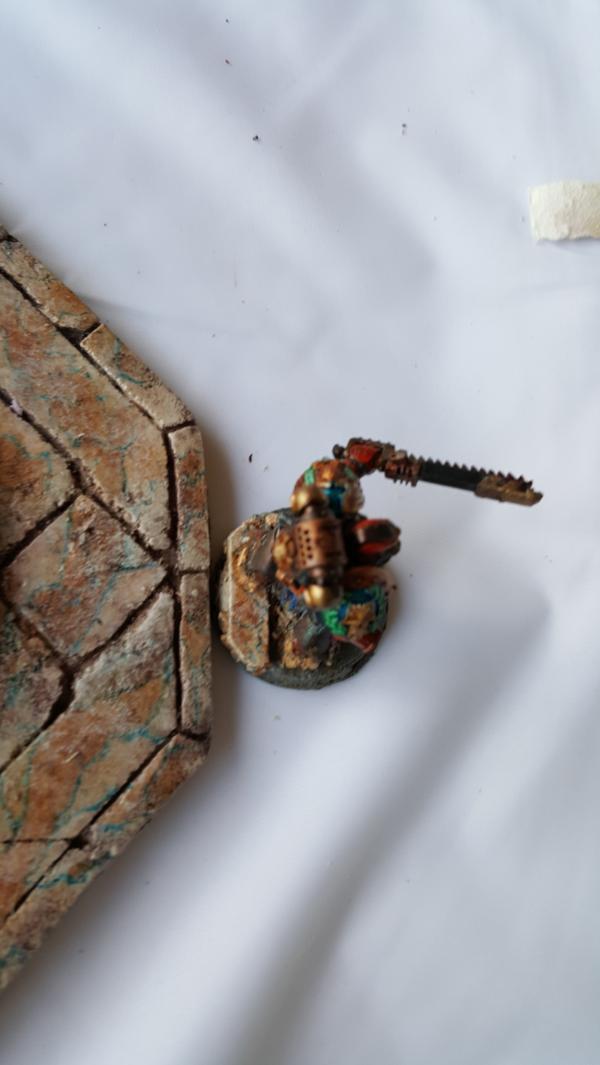
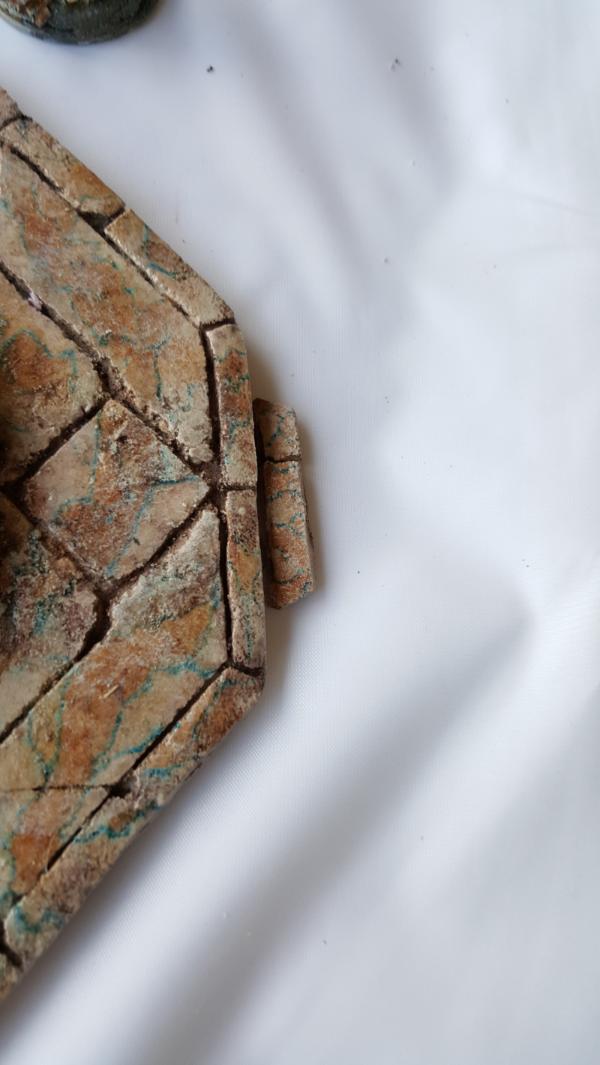
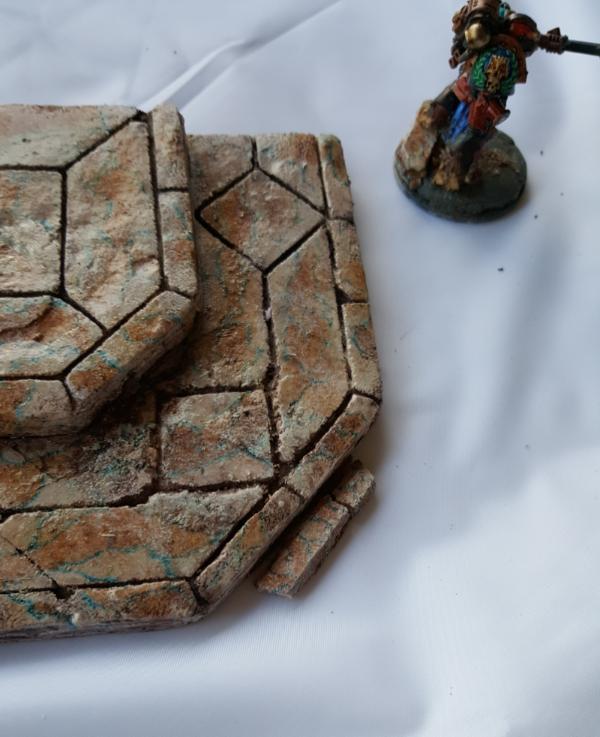
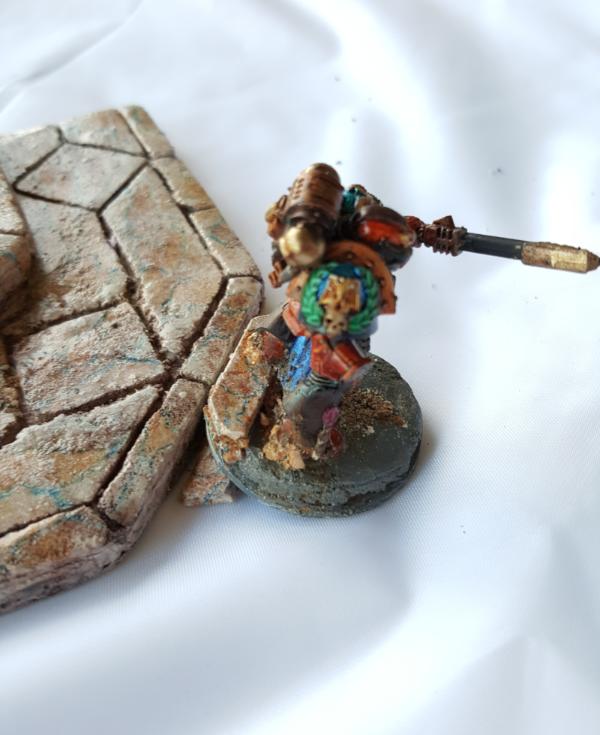
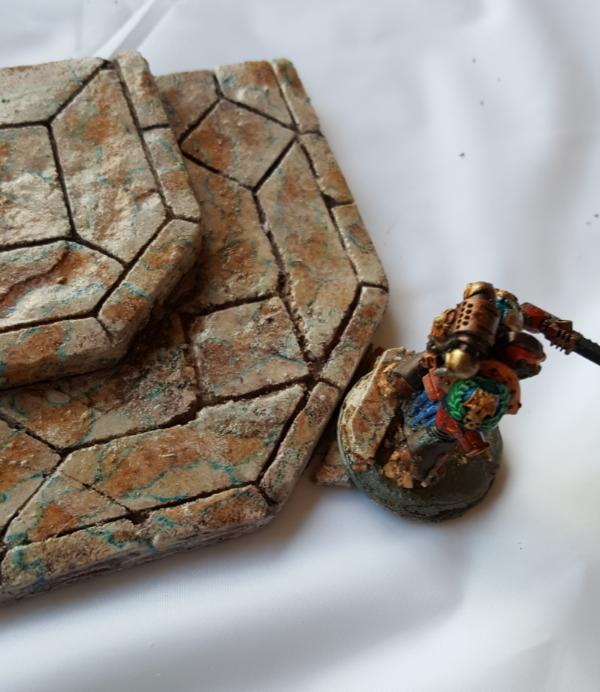
Quick update, working on the last of the marble bases, the 10th guy "stepping off" as it were.
It's coming along but the one part thats wierd to me is the step itself. I tried i ta bit bigger and that looked off, but having the step both on the base AND the marble "underslab" is wierd because it makes the base tilted when everything is in scenic position. So its a bit.. hrm.
Im back! there was abit of a break there to do some army painting, mostly painting some special weapons, fixing up a couple of guys, doing other projects, etc. Nothing really noteworthy or worth showing but we're back to terrain/base stuff!
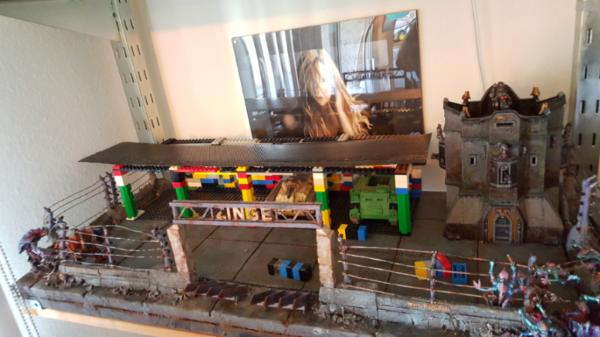
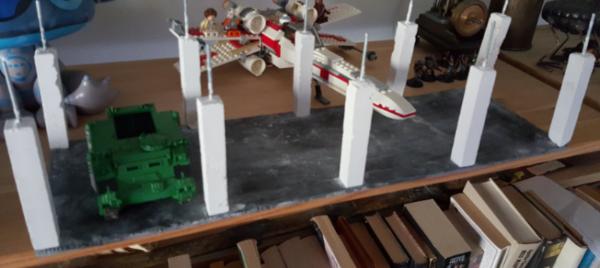
First we have the change in pace. Originally I was going to do my second shelf tile where i have a "military" base that has the flak tower/a rhino workshop and more nids attacking. I still want to do this of course but the wall I want to use (made by quantum gothic) isnt yet available, nor can I really afford it in the lengths I ned it to bem (and I dont have time to do it all in given my other projects)... so yeah, that plan's something of a bust right now. . Furthermore the flak tower is also a pretty.. hefty build. But i still need some extra details on this tile and the extra room the garage will provide, so I figure I just make that standalone and as time goes on build the other pieces as i get to them. After all the garage will work fine on my completed shelf tile, so as long as I make it tile detachable im good.
And after some consultation magnets should be strong enough to do just that! In fact It may lead me to magnetize the entire board so I have regular positions I can securely put buildings but we'll get to htat later.
First the garage design:
Fairly basic. it's ending up around 6 inches deep, 20.5 wide and 4.5-5 tall. It's.. bigger than I would have originally thought but I need the extra room for all the greebling. I want to have shelves with stuff on them, tools scattered about, random engins, cranes holding engins, etc.
As you can see for the "roof" I intend to have the walkway already cut up. It's technically a bit odd of course, you'd expect it to be a solid roof buttt it will help with lighting and preventing it from getting too dark in the garage. I can always cahnge my mind later.
The pillars will be cast just like the marble ones on the zinge sign.
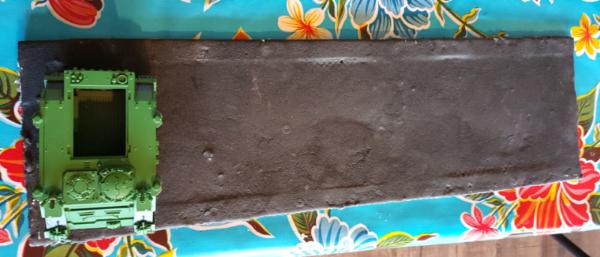
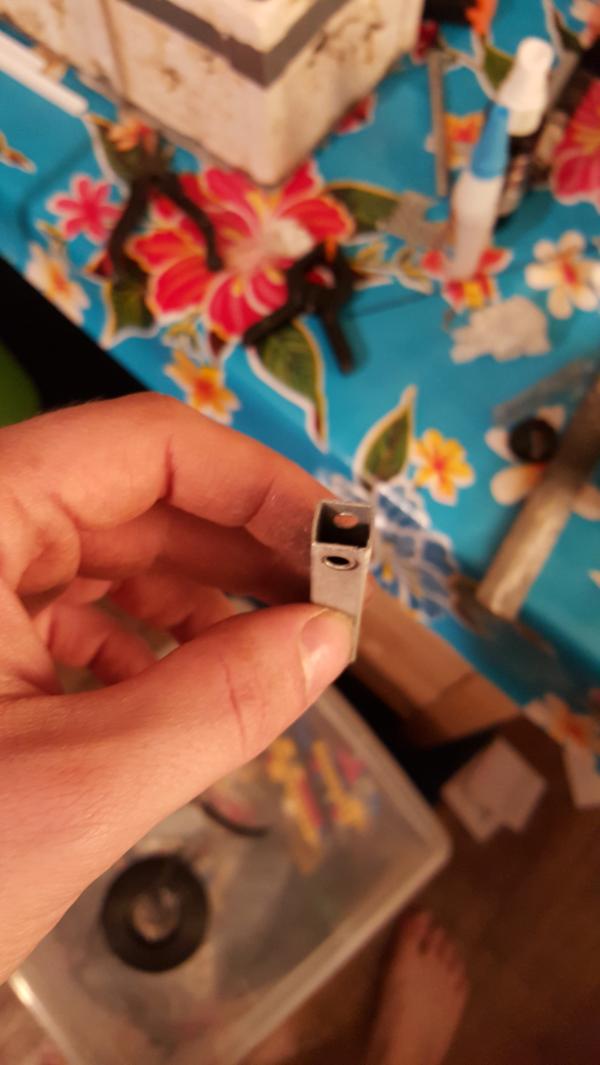
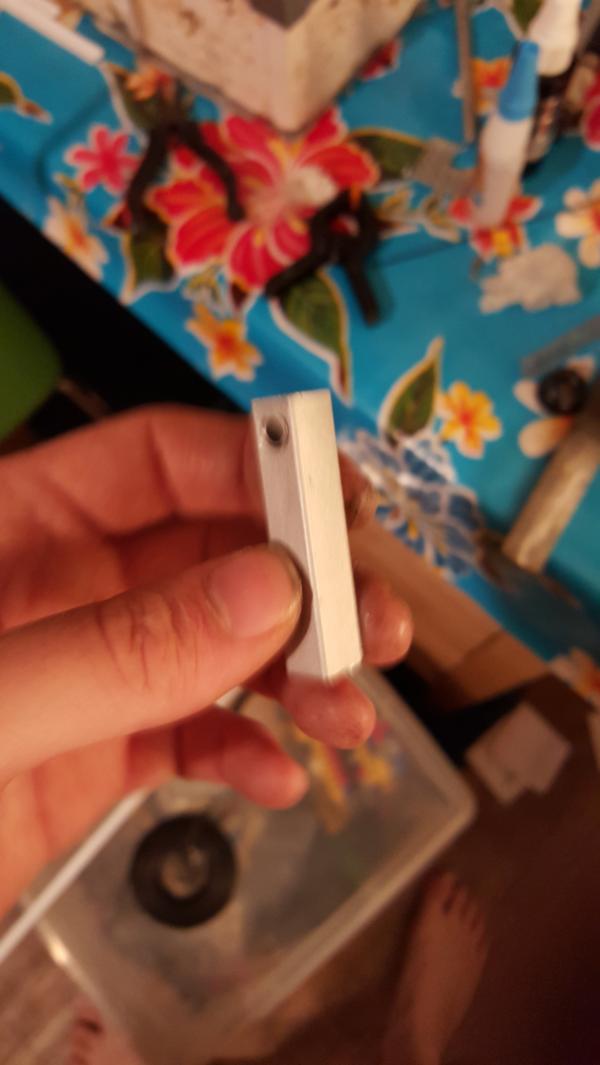
So first we start with the floor and.. this is where it's already getting tricky: I cant use foamcore. I need this building to be standalone and pretty sturdy, its big and isnt going to have a lot of cross supports (necessarily). Ideally id make a skeletonized version of the structure in erector sets, but those arnt cheap to find and there is no "generic" kit that has lots of flat pieces. So instead I bought pipe hanging material which has the holes and a 1/8th acrylic sheet and drilled it in there. I had to cut off some tips but that wasnt too bad with my dremel.
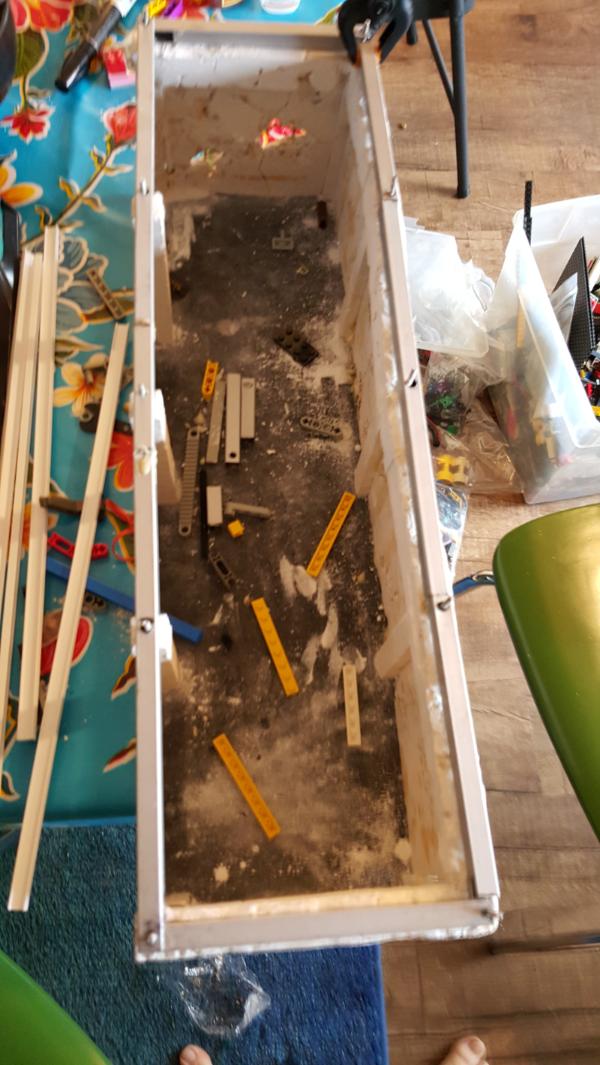
The mesh you see is to give the foamcoat something to hold onto, otherwise it would just slide right off the acrylic.
First I foamcoated up the floor tile. As you can see i might even need a bit more, the inner section really filled out (which is good! the more crevasses it fills the better)
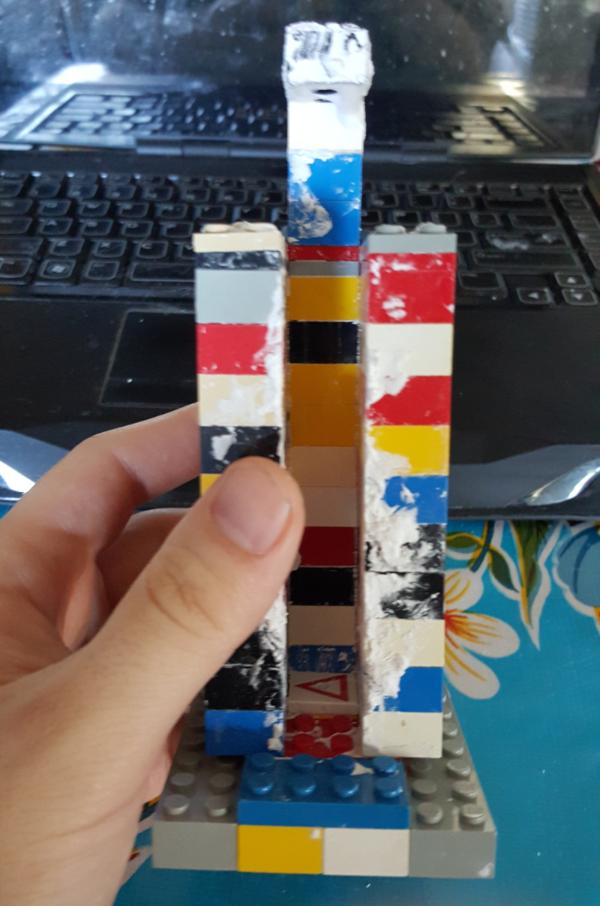
Next up is beginning pillar work. Now while I made the pillers for the zinge sign out of foam coat, that wont work here for one main reason: i'm running out and have to save it for more bases (bike bases to be exact)
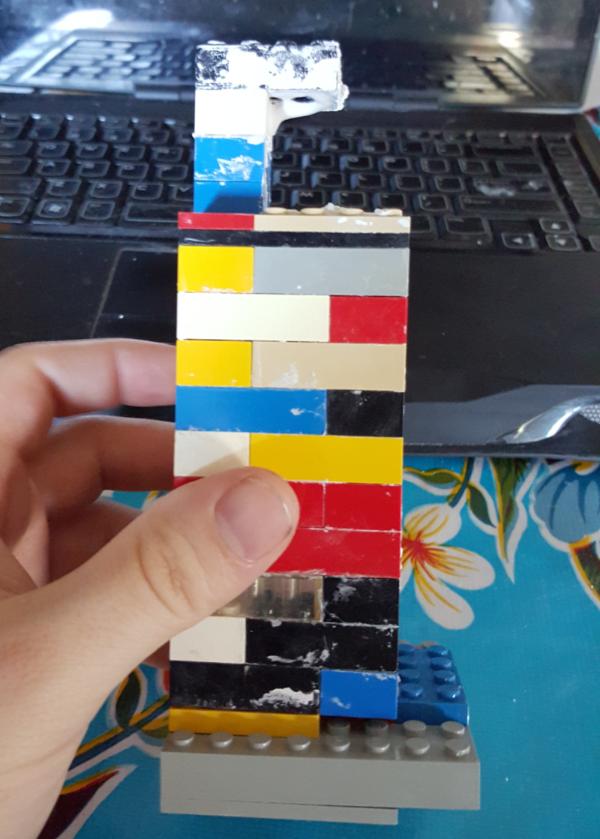
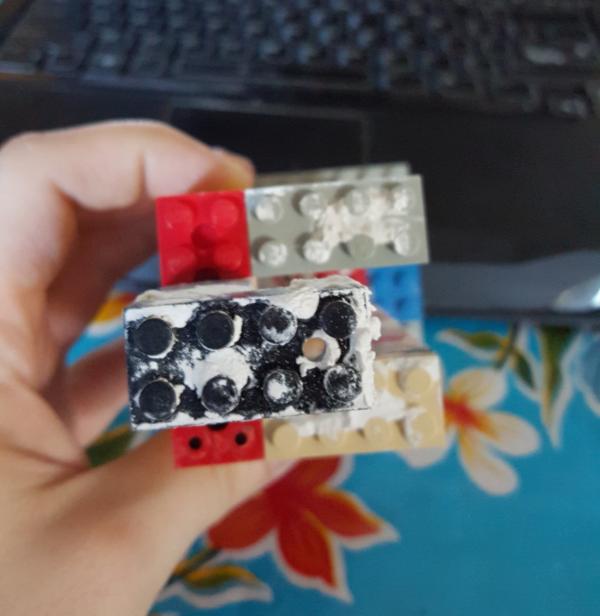
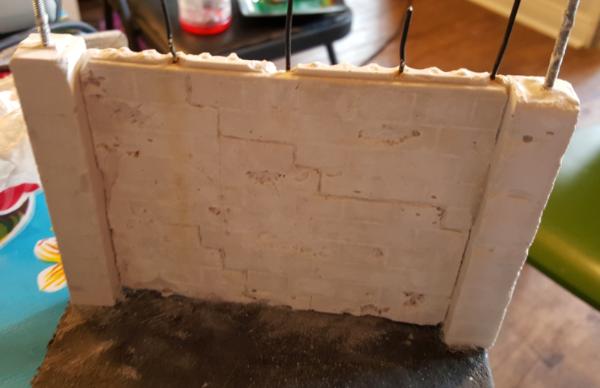
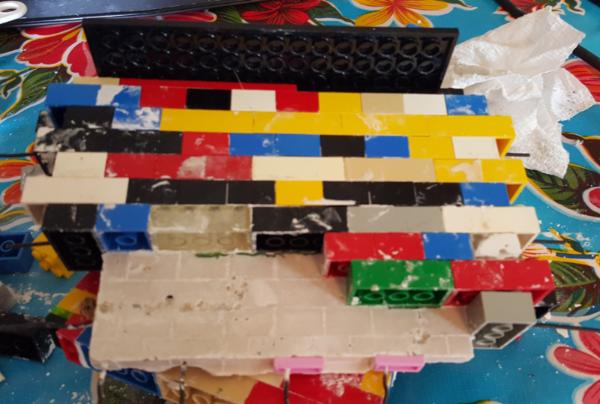
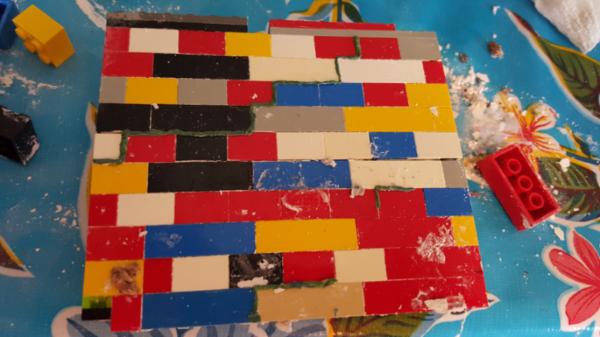
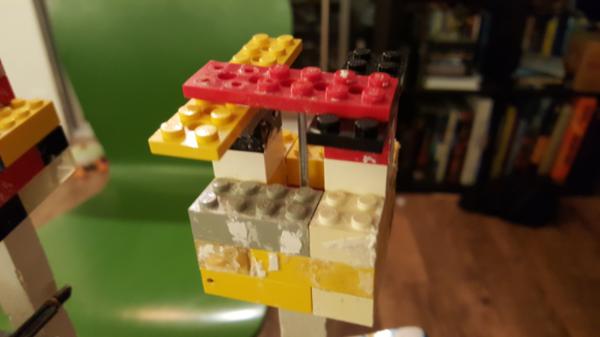
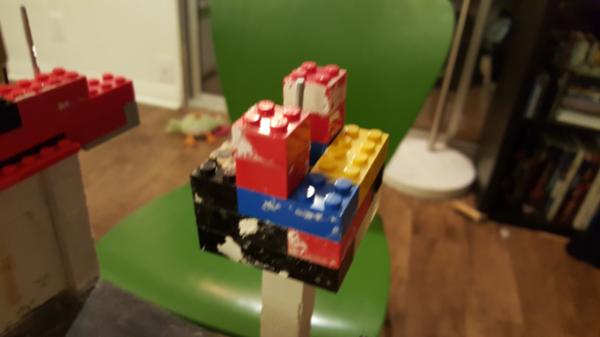
So i went by my kraft store and picked up hydrostone, a super hard version of plaster. I also made some casts out of lego. Notice that wall has to be inserted.. tahts because hydrostone isnt nearly as fluid as foamcoat and so cant be poured into a mould, you sorta have to pack it in there and close it up behind it.
at the top and bottom are threaded rods that I am running down the length of the cast so i can screw this into the board.
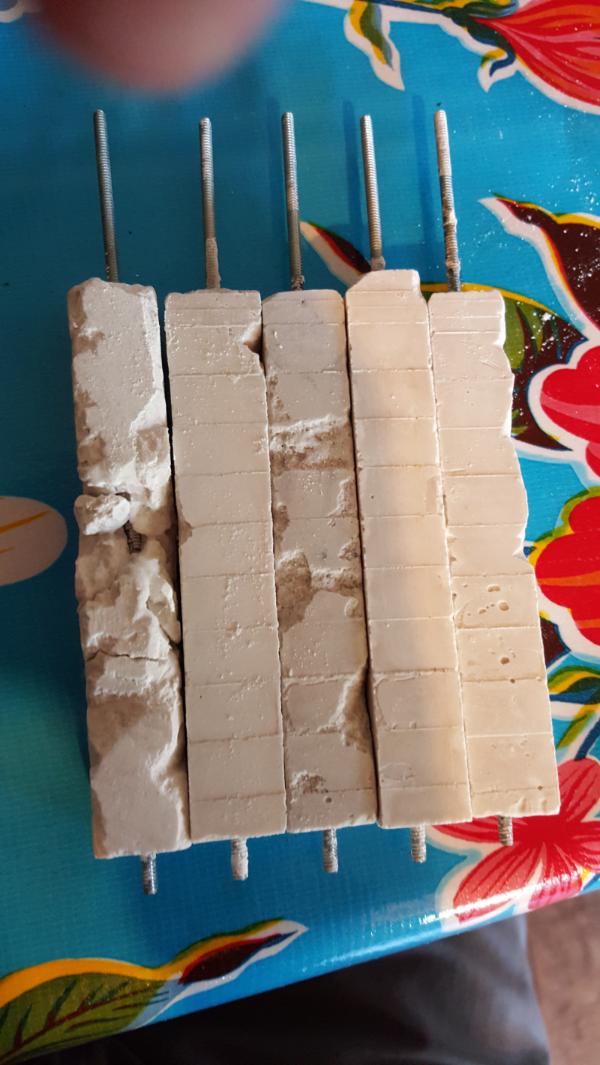
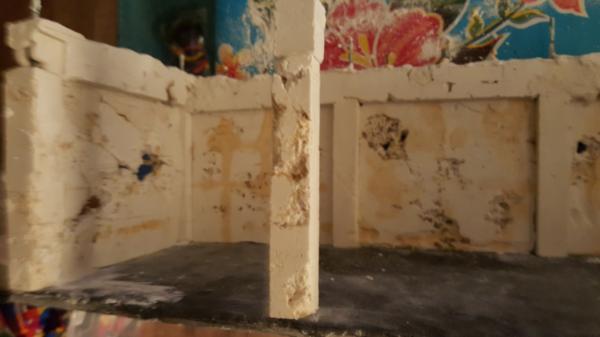
The results: first not that hydrostone is TOUGH, man it's awesome to feel and play with without worrying abotu cracking. I deliberatly cracked the last pillar because of a miscast (it had a lot of residue from my other casts so it set up REALLY fast and i didnt get time to press it into shape so it was too thick, i may throw it out.. havent decided yet, having a cracked wall section would be fun as always)
It also captures detail pretty well BUT does go pretty smooth, as you can see the one pillar that has awesome "aged but not too damaged" detail was lucky, the others came out extremely clean. So i need to try and rough up my lego blocks a bit more to add in some extra weathering detail, or glue down some sand. we'll see. Still all in all im happy and will make my side walls otu of the same stuff. its' super fun
This message was edited 1 time. Last update was at 2015/10/21 21:11:25
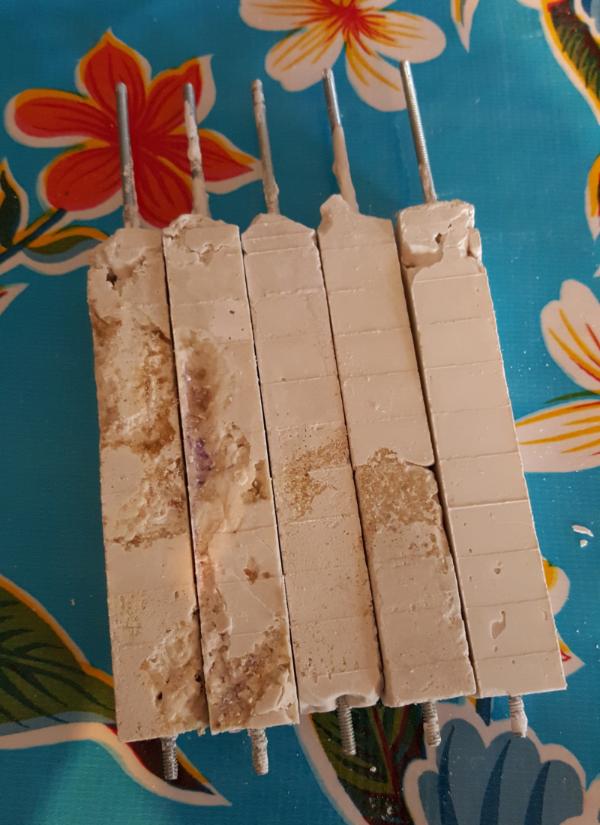
Im getting better at adding details too with these 5 (which will clearly end up being the front 5/the ones you notice more). The key was adding dabs of wood glue coated in sand into the pillar mould before putting in the hydrostone. I could, of course, let the glue set and so forth but that would just mean i have 5 identical pillars. THis way if I pull the pillar out just as it sets but not after I can pick out the gooey sand and get a relief of the texture.
Finergrand sand looks good but doesnt pick out as well, so the right most pillars probably wont be as neat looking once they are painted, most of the snd is still stuck in there. Still some washes might bring some of it back.
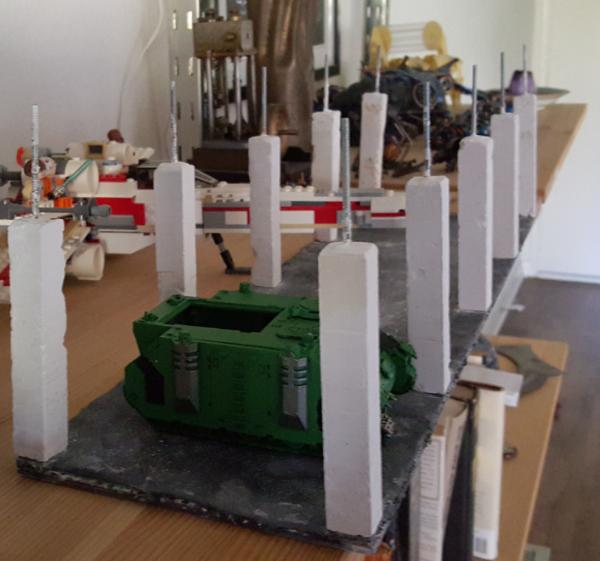
Okayyy well now we're into the pillar attachment phase. The downside of the metal bands is drilling throught he board becomes difficult. The upsides is that the pillars just screw right in, so they are suppper sturdy. Still took some doing getting them mostly striaght though, the walls inbetween will become crucial.
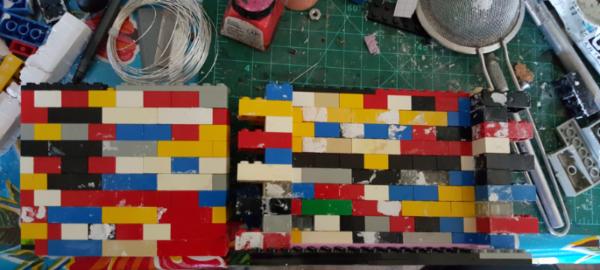
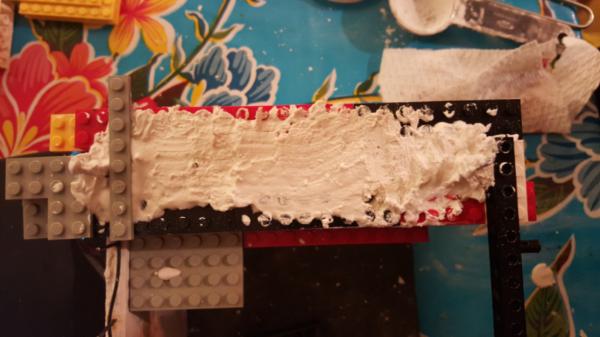
Speaking of which this is the mould for the sidewalls (about 5.5 inches or so, the backwalls are more like 4)
It'll be 1 lego unit thin and thats the pattern, a mix of 4 blocks and 2 blocks. Doing just 2 blocks got a bit busy and i didnt have that many, even if the scale is more accurate. But doing all 4 blocks also looked a bit off, hence this hybrid pattern.
Thanks! yeah they turn out great, super realistic, super tough, and they are pretty easy. It helps having legos around, the make casting a snap (so to speak).
Downside is the legos arnt really going to be good fo ranything but casting, they get COVERED in plaster coats. But hey. still woth it.
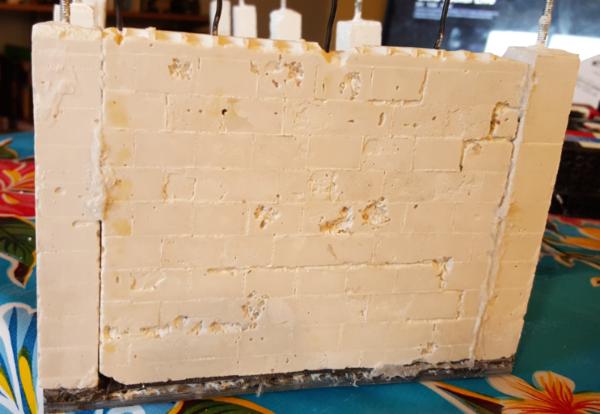
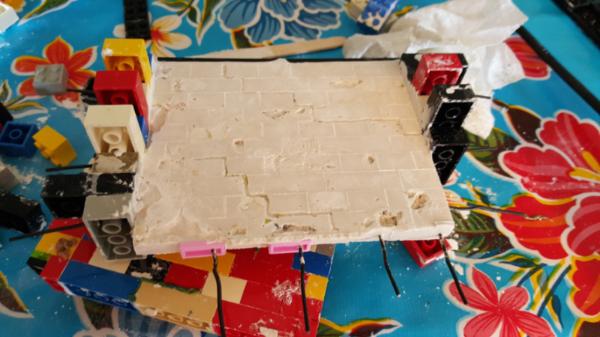
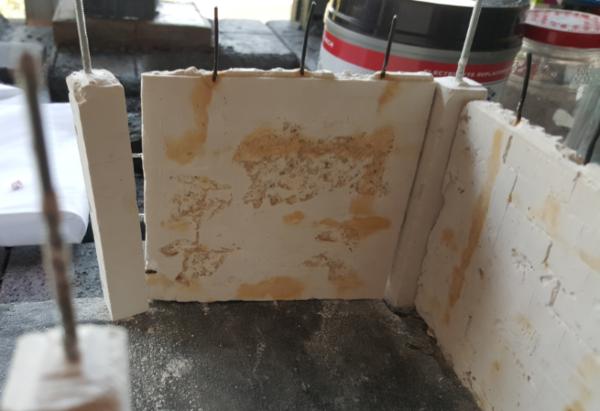
Turned out well, fairly standard. This is the "inner" wall of the garage. So its the side of the garage that will be closest to the flak tower/recieves the least amount of damage. One thing I forgot to mention is all of these walls have rebar int hem for extra strength and for otpional destruction. The downside of this is it basically forces me to take apart the moulds almots completely between casts.
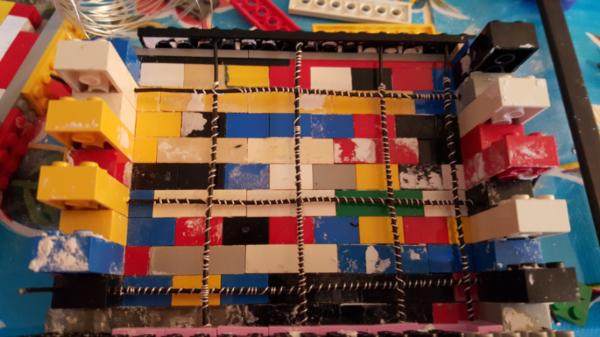
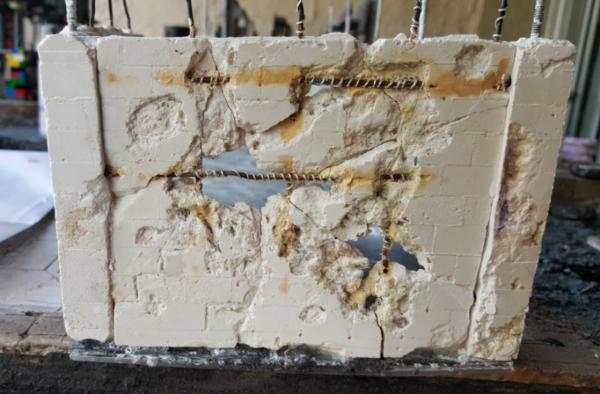
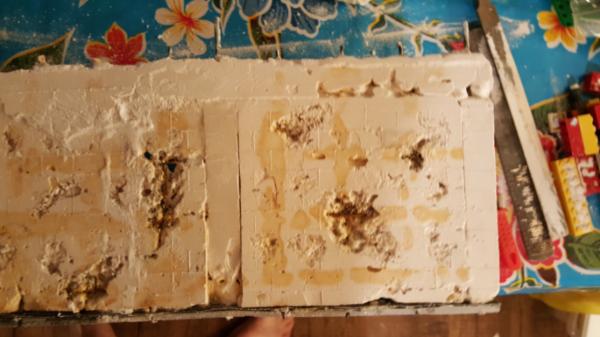
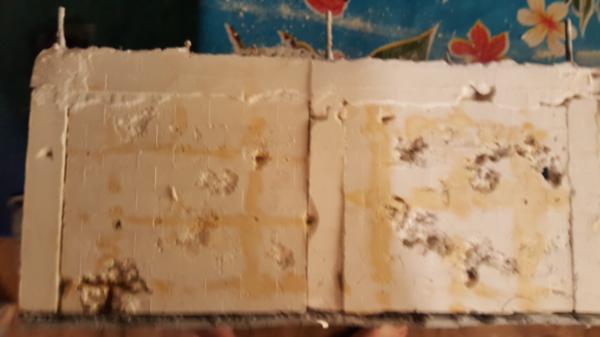
Next up is wall 2. You can see the rebar (i even added extra wire wrap detail for this wall specitically.) Now since this wall is on the outer side of the garage iw ant it WRECKED. Like shell/carnifex/etc just rammed into it wrecked. The reason being is that if I can have some holes/sense of falling apart then i get some extra window space into the interior and more light. The more light the better.
Unfortunately what you dont see is what I did to get this effect, which is PACK this mould with wood glue. Basically the idea is for a given mould you coat the areas you want to be 'war torn" with wood glue, and then cover that with cork bits an big sand granules. it is UNECESSARY to let this dry Then do the cast as normal and when you pull the wall off the wood glue is still wet (even if it was dry before it's made wet again by the heat/moisture of the reaction) and you can pick our the cork and sand. This leaves a perfect texture in the concrete and makes for a very realistic effect.
The other half: (again pre-glue, sadlyt, didnt get a pic of that)
If you build your cork/sand/wood glue slurry up tot he rebar layer than yo uwill have rebar showing when you eventually pick it all out, veyr cool.
This message was edited 1 time. Last update was at 2015/10/25 23:20:06
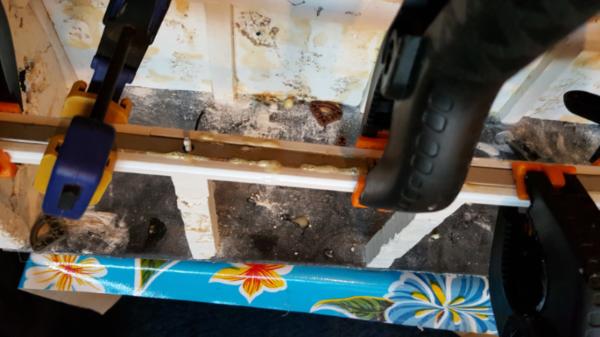
So there are some consequences to using materials so sturdy: tough to drill through them.
So remember a few things:
Each wall segment has a rebar running through it horitzontally and vertically. The vertical section of rebar is ment to hold the evnetual roof and also firmly attach it to the floor (just punch a hole and bend the rebar around into hole, voila done)
The beams then screw into the bottom to further anchro it down.
The bottom is made up of an acrylic sheet with 2 bands of steel pipe strap screwed into it.
Then the horizontal wall rebar needs to pin into their beams, so we're drilling holes there as well.
Okay with that re-explained, the construction process has been so far: get the corner sections up and then figure out the middle. Basically yyou have to line up the rebar with it's holes in both the verticle beam and horizontal steel reinforced floor and just slowly pull it into place. Its tough since you're doing both axis at once. A better solution would probably have been to first drill/glue all the walls/beams to each other and then to the floor, removing an axis in each step. But hen it would force me to line up 30 odd holes into the floor which would be.. also problematic given that drilling a hole in the floor involves a LOT of walking of the drill bit and has broken 3 so far (halting my progress last night).
FInally the other problem is somehow through all this i ended up 3/8ths off. Somehow the casting + measuring + walking drill bits + legos having a strict size per next "unit" process led to the middle wall sections needing to be pretty signifigantly smaller than other wall sections. It's symmetric so not a huge deal look wise, but ZOMG A GIANT PAIN IN THE BUTT TO SAND DOWN. (remember when i said hydrostone was super duper tough? yeah.. thatst he one problem. Worth it, of coruse, but be sure to constantly keep checking yourself)
Sorry, this has ended up a bit of a rant post, but needless to say it's never too late to check your measuring once more, because mistakes have led to you not seeing a pretty picture of the all the walls up, and instead me tired of 4 hours of sanding/grinding/drilling trying to get all this to line up and fit properly. And a broken drill bit instead of holes into my floorplate.
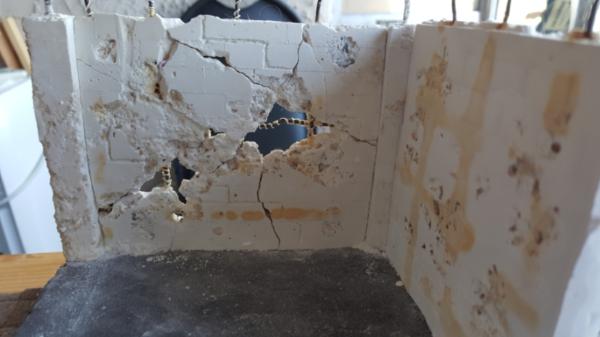
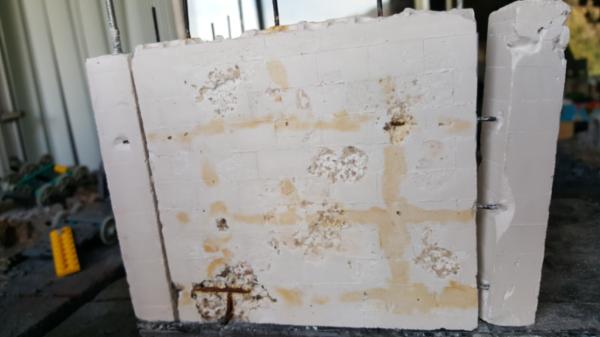
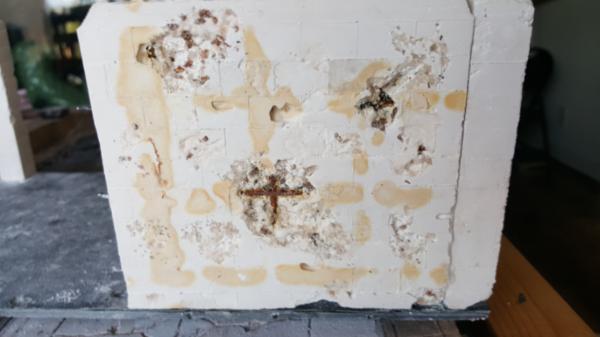
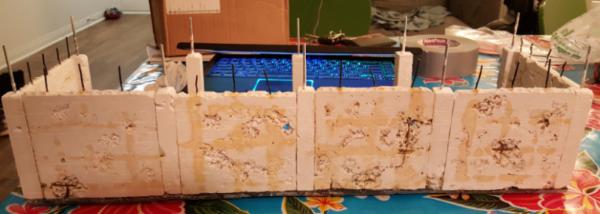
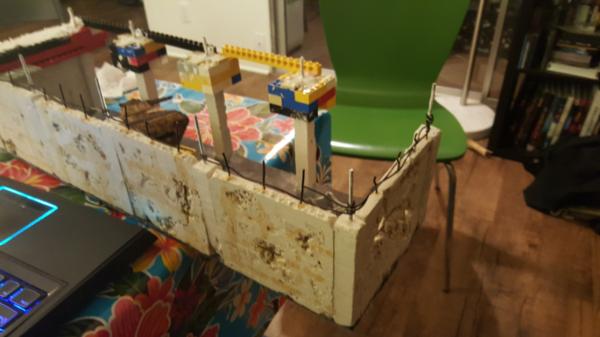
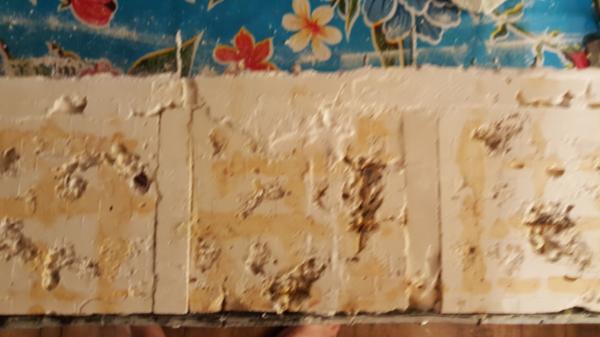
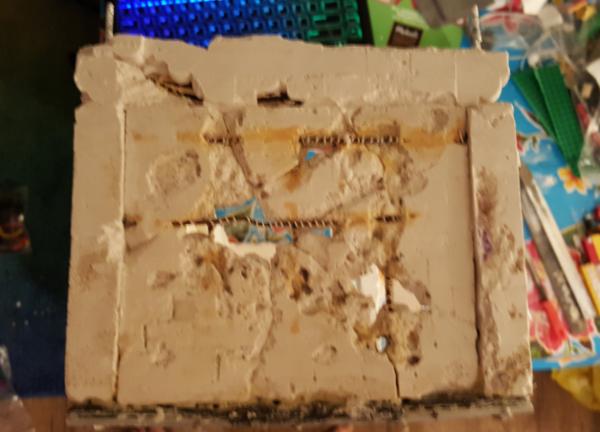
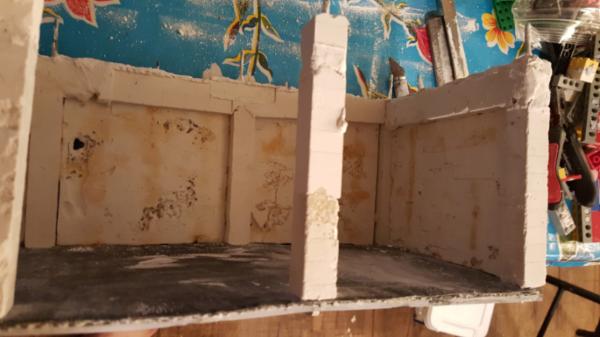
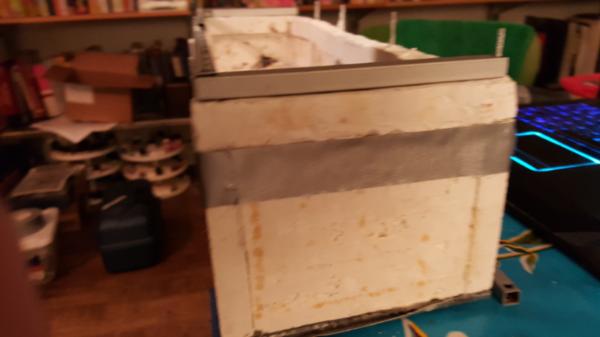
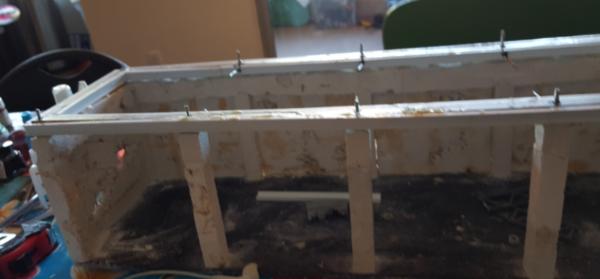
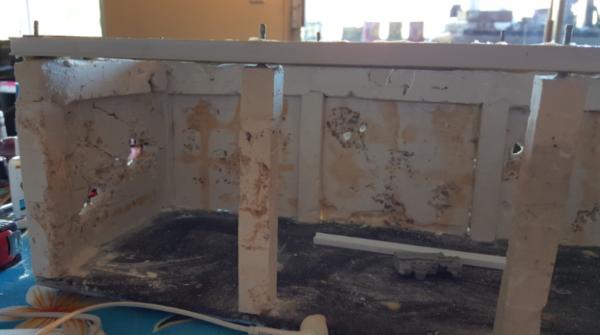
Still here are some pictures of the wall that are up, and you can see the super broken wall that im happy about. Note that the orange are natural rust stains! apparently the rebar in my moulds rusted quite quickly (at leasst the other later) so im getting this fun stain for free where the rebar is.
The outer sidewall of the outer corner:
THe back wall of the inner corner:
The other side of that back wall:
I dont remember which wall this is but it's an outer wall (all the partially exposed rebar will be on an outer wall, since that's what would take the most damage over time)
This message was edited 1 time. Last update was at 2015/10/27 18:12:08
Thanks! the fact that it naturally rusts was a pretty neat added bonus.
Itr's also keep to keeping it all together, the uber cracked one would never have held together (or been re-assemblable) without the rebar. Once you pick out th esand/cork from the drying cast you still need to hit it with a hammer to get the final impact cracks, and thats where it would have compeltely just fallen apart without the rebar.
I finally got through the remaining holes into the lfoorplate. It cost yet another bit meant to drill through metal, but I finally did it with slightly thicker bit. In the end that proved key, as they had the strength to survive the slippages and whatnot drilling through the metal. Having bigger than necessary holes also ended up being fruitful as it helped wiggle in that last wall.
I'll have pictures later tonight, forgot to take them this morning.
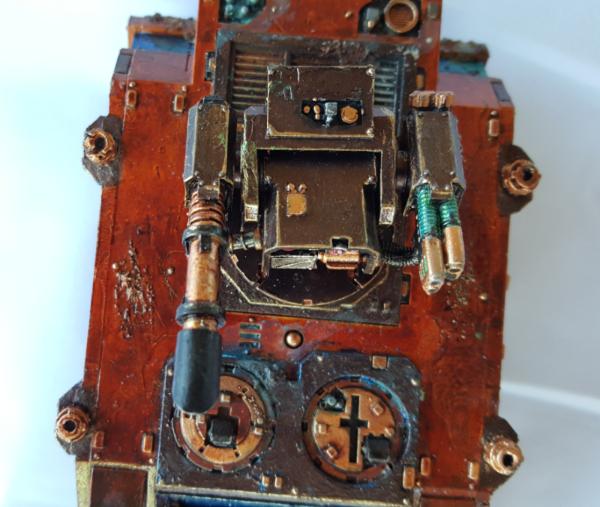
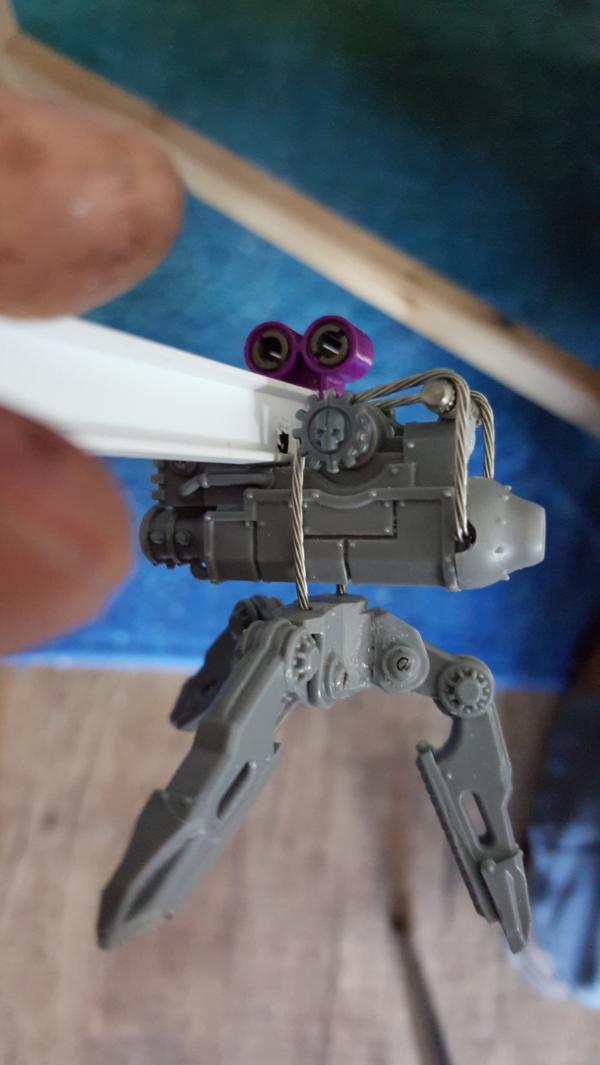
they make for some great cranes and would be excellent additions to the garage. The idea being id have 1 magera holding a turret id sacrifice to the cause (hello heavy bolter turret) with cables and stuff strewing from the bottom of said turret as if it was mid install or uninstall.
Then for the other claw I was thinking it would be in a corner holding a half dissasembled dreadnought (sensing a trend? I had 2.. never used!).
Getting a bit more height would also let me build in a "top shelf" of fun parts like knight heads and so forth, epic weapons, etc.
The downside is that this thing would be nearly as tall as it is deep, and requires more casting. Boo. The ratio bothers me a bit less once I looked up some reference and saw that car shops have ceilings that are more like 3x the height of a car, which matches well with my rhinos.
The casting part is more troublesome but i *think* i can cast in place. Just build bricks around each pillar and cast 2 more bricks on top.
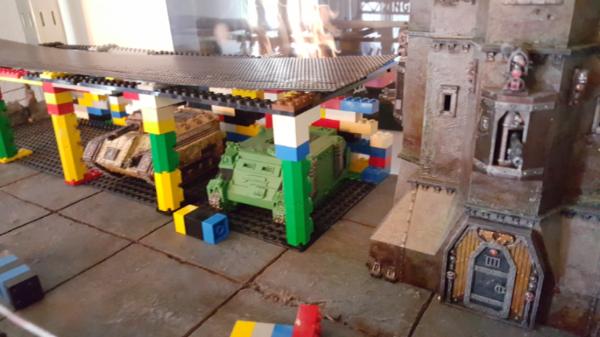
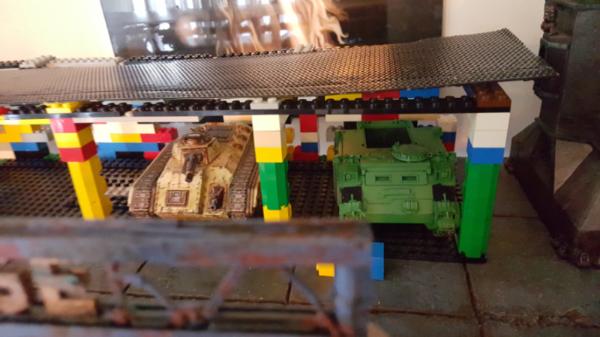
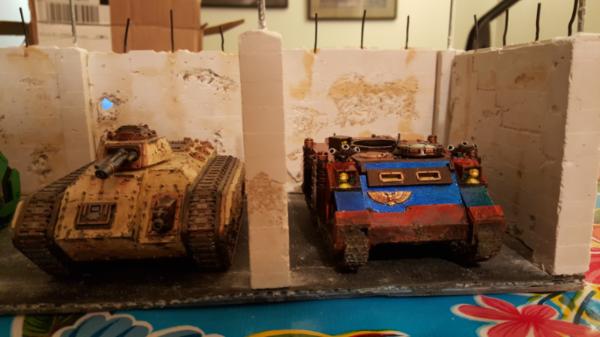
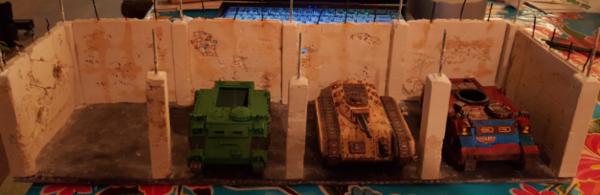
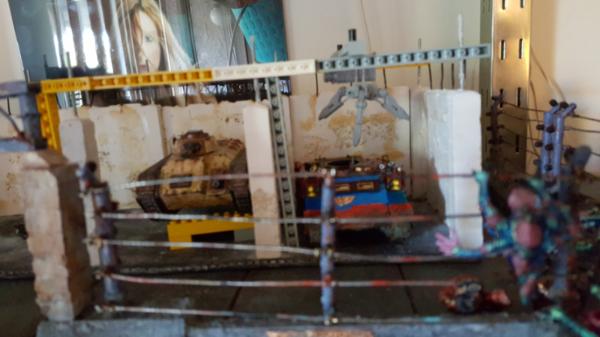
ANother benefit of the height is that I can have tanks that are up on the stands as well and stll be comfortable, as you can see by the chimera raised up.
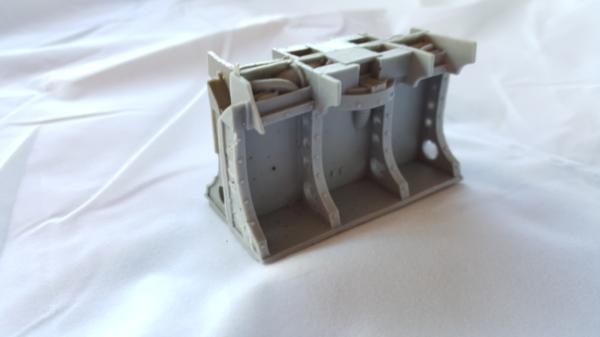
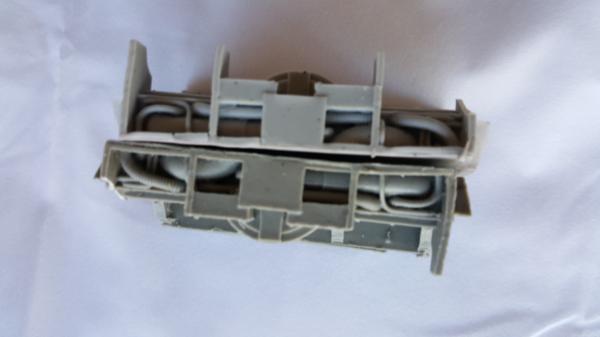
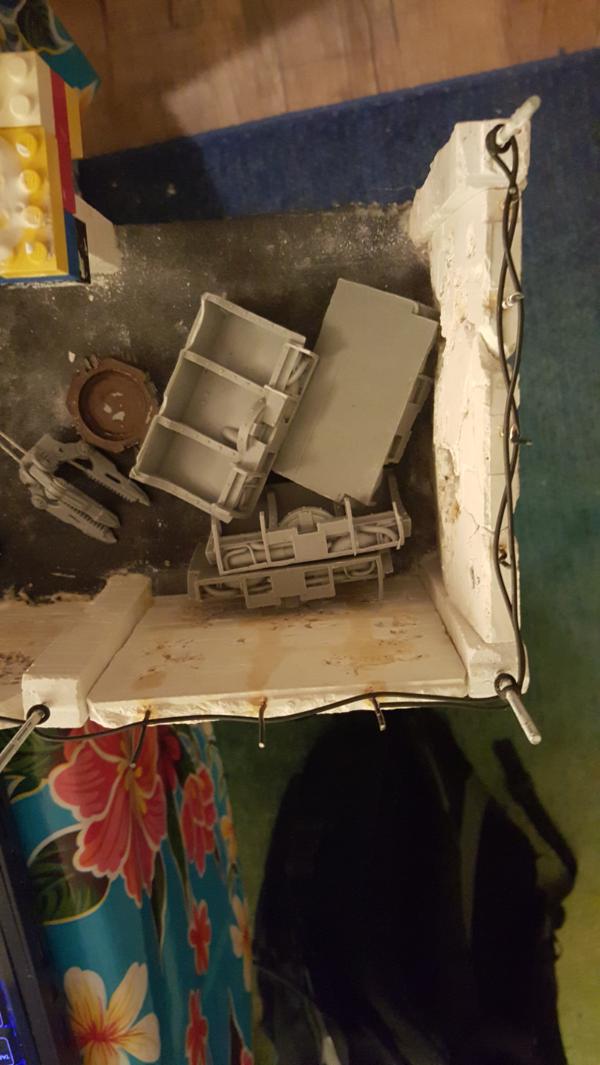
First we have the bits trade of epicness. I trade some stuff with a friend (mostly other bigger terrain bits I had been collecting) to get som edetail bits. This also brings up a bit of a mini rant: why do titans have all the good stuff? Seriously there were titan shelf bits, computer stations.. I'll give pictures of it all later but for now just check these babies out:
Those are perfect for holding books/stuff in between my pillars! I have 4 so 2 sets of 2 each leaving some space in the areas with the cranes for bigger stuff. fW has all this PERFECT terrain pieces just holed up in random sprues for giant casts like titans that few can afford. It's nonsensical.
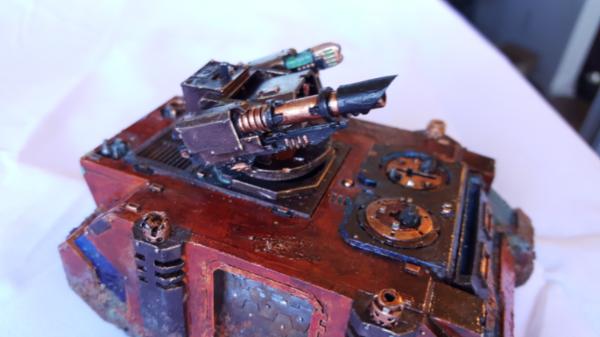
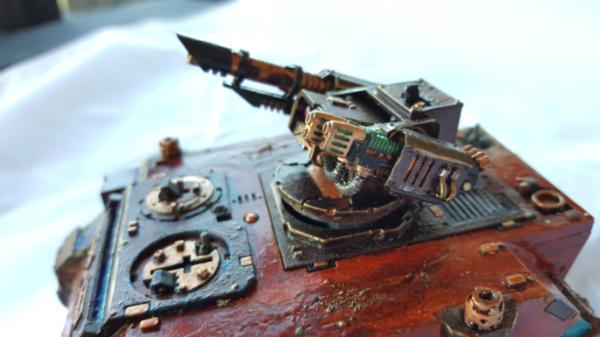
Anyways the main work i've been doing is lots of little BC things. For example, lasplas turrets (note: still needs a wash)
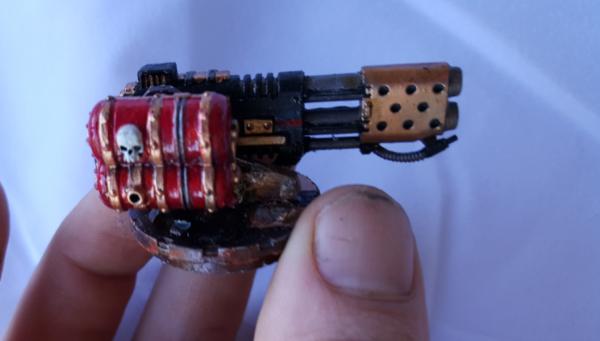
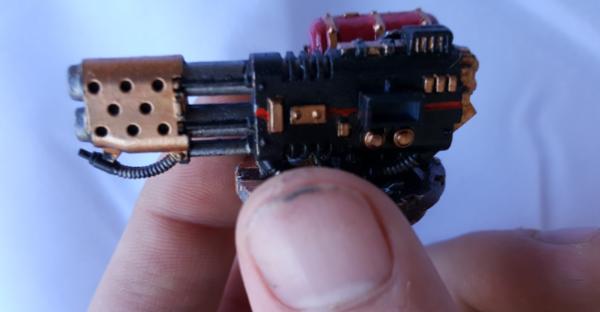
Next we have the heavy flamer turret. Now sadly FW doesnt make one of these, but I happened to have some spare ones for the LR redeemer so I just used those and they work perfectly (and look super cool)
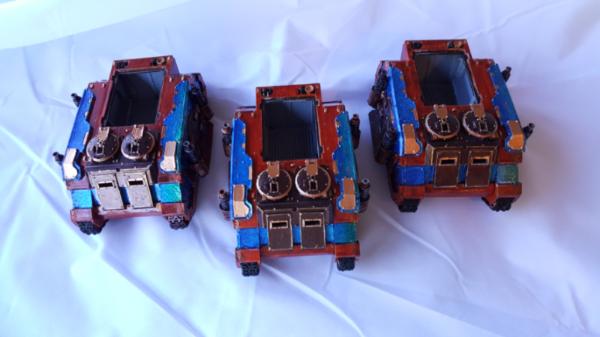
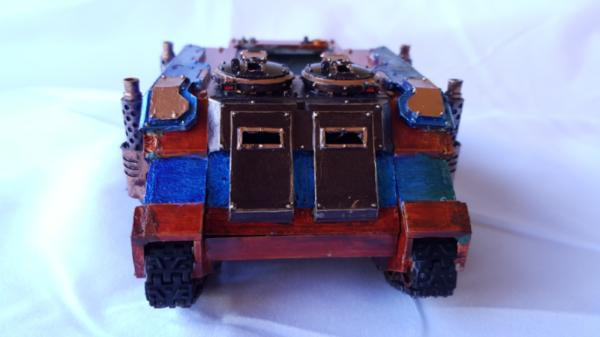
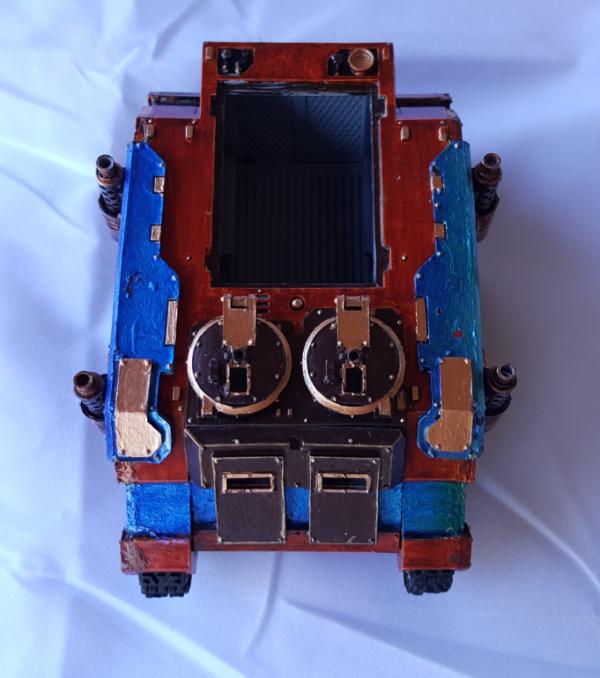
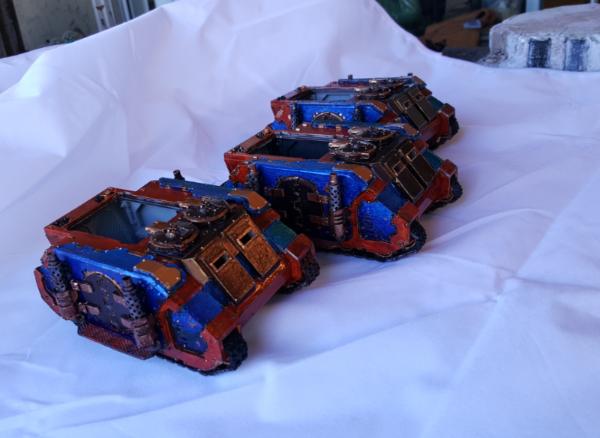
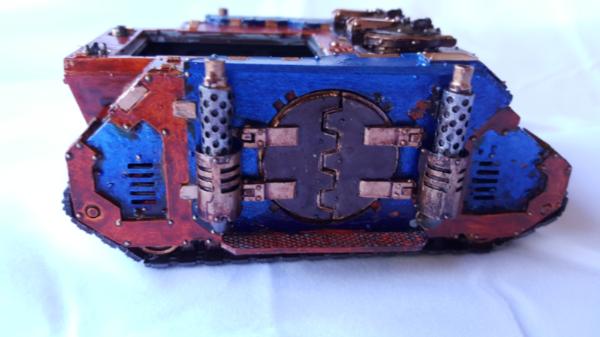
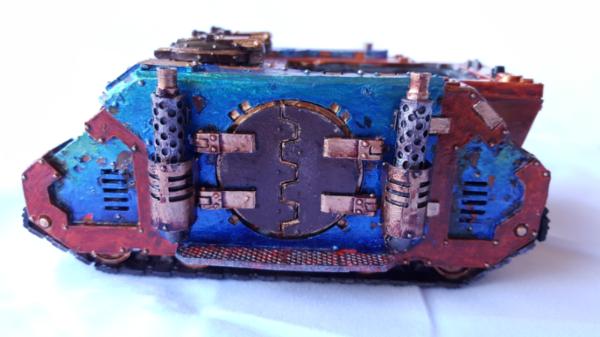
Finally we have the deimos rhinos. They are still a WIP, needing some work on the tracks and washes in certain places/various cleanup of paint marks. But Im pretty happy and it's only taken me a week or so to get all 3 here, which is great (for me) givne the amount of detail they have.
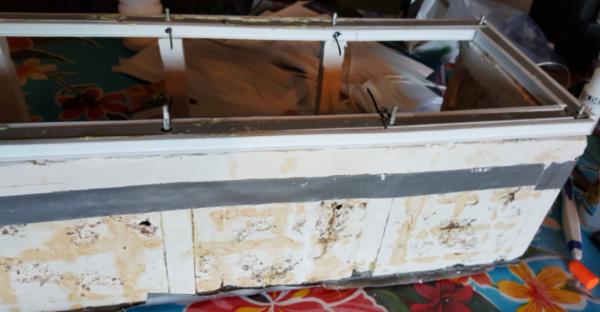
So I took a brief vacation and am now back with some work on raising the walls.
As previously discussed i kinda.. changed my mind about how tall I wanted this garage to be. Once I saw how cool the cranes were, and got my ideas for hanging dread/turret it just.. all kinda went downhill from there.
So cranes it is, which means I need about another inch of height to really fit in on there. Downside is that this means casting IN place. Welcome to lego fun and fragility!
So now you get to see my moulding process and my thinking for it. I went ahead and built out as much moulds as possible first so any excess material would immediatly go into another mould. Turns out im running out! (i've BURNED through 5 lbs of it doing all this, i should end up with JUST enough to finish the extensions)
Now we need to make sure that the pillars are broadly even with each other so I attached some helper legos between them to try and ensure this, with reasonable sucess:
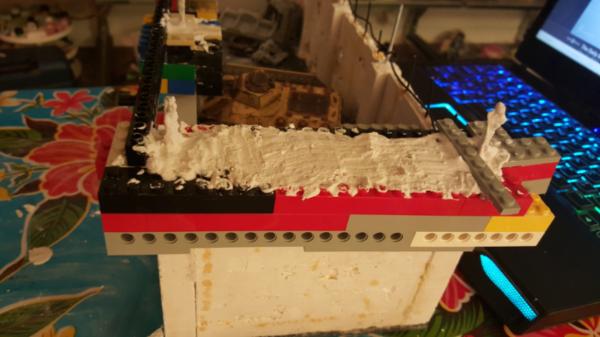
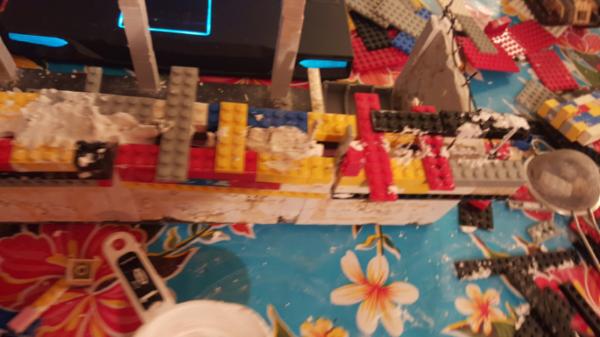
Next up was the first sidewall. Now I had 2 options here. One option was to just extend the 2 pillars and the inner wall seperatly. But Look wise if it didnt line up perfectly it would.. look wierd. Instead I figure (and realistically this seemed the better option anyways/what theyd actually do) i do one giant slab across the whole surface as a capstone. This seems to match actual construction techniques and would be much easier to sand smooth. Thus notice that im actually casting with an overhang over the thin wall/need the smooth pieces.
Also notice more rebar! So now the entire thing will be even MORE interconnected and strong. I really like terrain that wont fall apart. Have i mentioned that?
I sense a lot of sanding in my future:
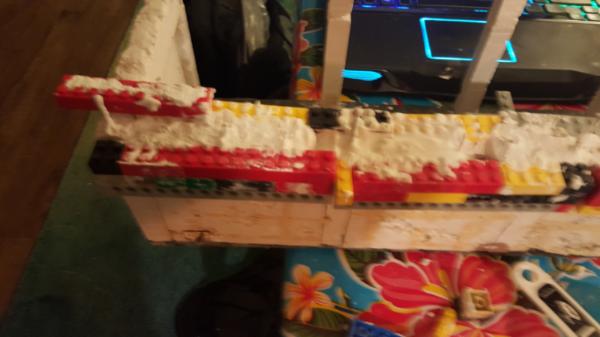
Finally we have the looonngg back wall. This is where things get interesting. In keeping with the "big slab" idea I figured I would just cast the entire thing at once. But this is also the wall that had allt he shortening/measuring/oh god why did the bit slip issues. So it's not straight as an arrow like legos are. Welcome to lego jiggering! where each section is straight and mostly held to the other section with lego tension! it worked.. barely. But fell apart more than a few times in trying to get it all together.
Sorry! got a few days behind. Its been supper busy trying to work on this thing.
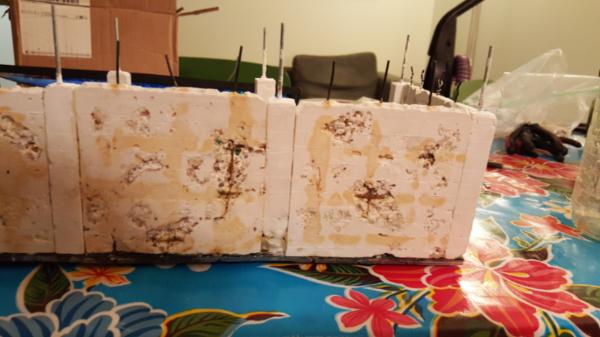
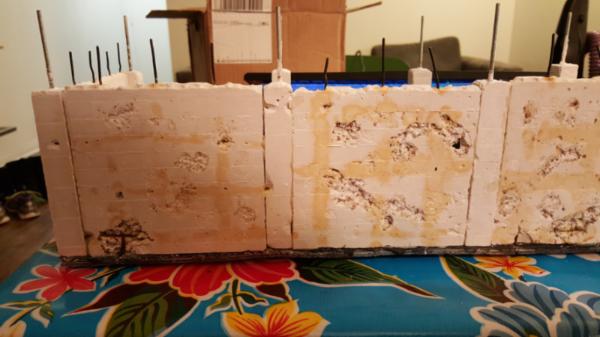
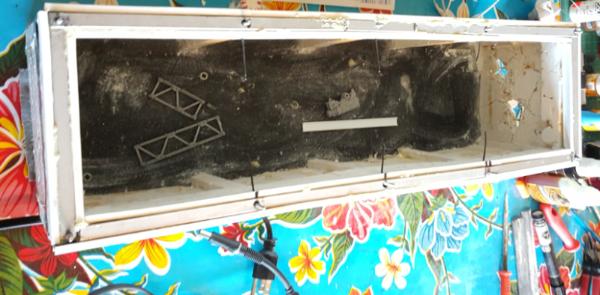
Anyways here's the result from my "in place" casting process.
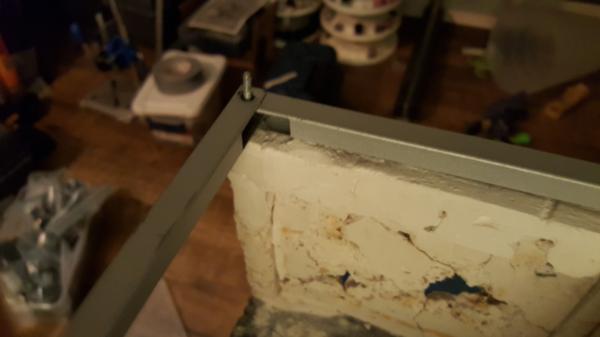
One result you can see here was leaking. The legos didnt quite seal with the bottom and so in one section a whole bunch of hydrostone leaked out and covered over previous work. Kinda lame but not the end of the world. In the future I should use blu-tak to fill in those gaps or just cover everything else in tape to prevent such a result. For this i just sanded it down to create an edge defining the upper beam and ill coat the "leakage" in sand and paint it to look like aging of some kind.
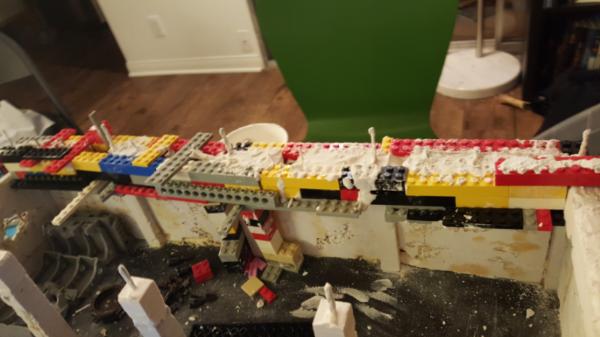
These pictures clearly indicate another problem that can happen: holes/patches in the cast. This is the result of just not being able to pack in the hydrostone well/its not particularly fluid. So sometimes it doesnt fill all the cracks. Not a huge deal, easy enough to just mix up a small batch and fill in the holes.
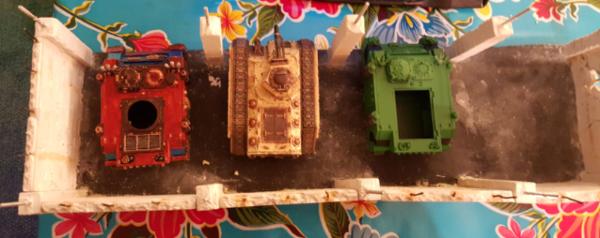
Finally the interior look. Im very happy with how this this out, it really anchors the structure by having it hang over a bit. Very pleased.
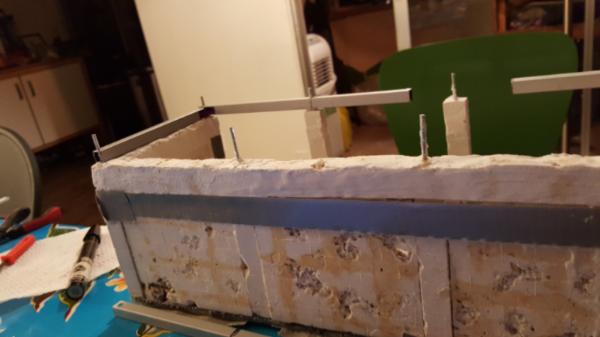
You can also begin to see my metal roof frame. The basis for this frame came from this square metal tubing I got from an ikea lamp i dissasembled
Light and sturdy it seemed like it would be a good material to make the frame out of, as a lot of stuff will be hanging off of this thing. Unfortunately I had to drill a few holes in it to get it to line up with all my posts and therein lied the problem. Drilling in it took.. forever. I dunno why, but even with a cobalt drill bit (theoretically meant for steel) drilling 8 pilot holes took something like an hour and a half to do with my dremel + press.
Maybe I wasnt lubricating enough or wasnt putting enough pressure (i had lost enough bits already), but man alive that took a while. Once i had the pilot hole going up in size went quickly enough, but that first hole was a doozey. Cutting it was easy though so thats a relief i guess, and its done with now.
to secure the frame to itself I used gorilla glue on top of lego inserts (NOT superglue) which is this super sticky expanding stuff and lego sliders. It's neat, and effective, and very strong, but not quite as hard as superglue (though i suppose that makes it less brittle). As a result in some areas I either missapplied or didnt use enough water to catalyze it and the frame could bend. Annoying but something I can stiffen later. Either way its good stuff because the expansion helps fill in holes and stuff and you get a looott more of it for the cost of superglue. VERY VERY sticky though, my hands are STILL coated in it.
This message was edited 1 time. Last update was at 2015/11/16 21:43:48
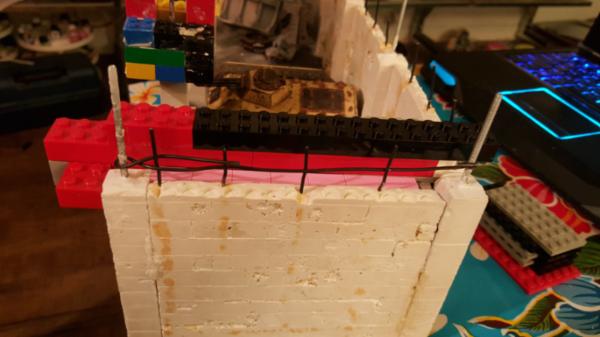
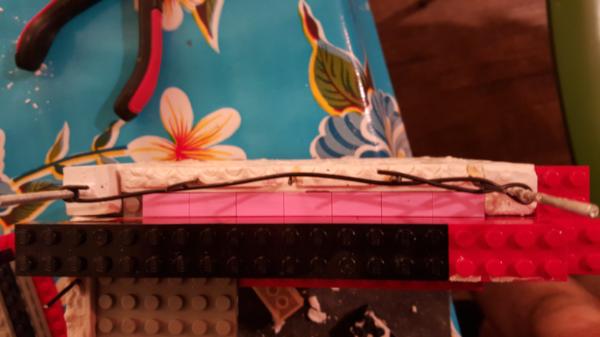
Now its tiem for the finishing on the frame. As you can see the frame isnt as big as the pillars/walls around it. But I figure i glue I-beams on either side to thicken it up and it'll work just fine.
Furthermore I can hide wire on the glue side of each i-beam on each side to further strengthe this and make it more resistent to bending/fix my earlier mistake.
Downside is that since I'm using the expanding gorilla glue (the ideal glue for this tyupe of thing, I WANT to fill in all the cracks) i have to wait.. a long time. It took all day to do all 4 sides. But the result is suppper strong and looks good (the corners need work but thats easy enough to do later)
So we have 4 bays total and here's how I envision it going down:
2 bays with tank lifts to get underneath the tanks, this would alos be where tools and stuff for standard repairs are. I figure I have a couple of robot arms hanging down to assist with welding and such, ala iron man type of deal.
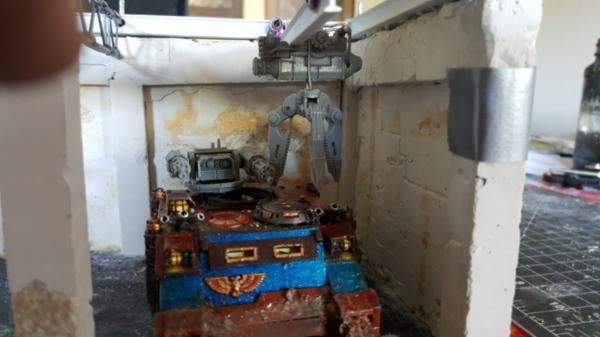
2 bays with big cranes to install/fix bigger ticket things on the tank. One crane would be holding a razorback turret ring with cables and such hanging down and the other would be carrying a dissasembled dreadnought to be worked on the the corner (have i mentioend the rules for dreads arnt worth it? this be why they show up in my dioramas lol)
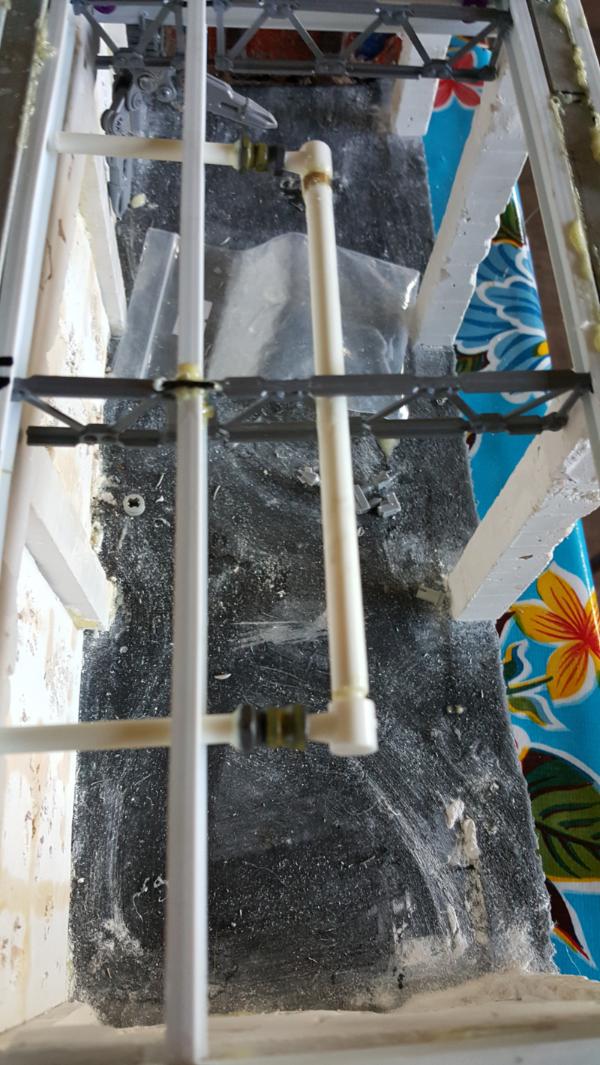
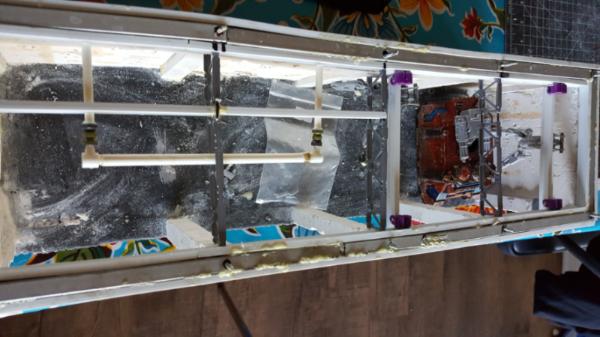
so for the tank lift bays the ceiling is then composed of some ibeams and mostly piping and such, to match a real car bay. Here is the start of that:
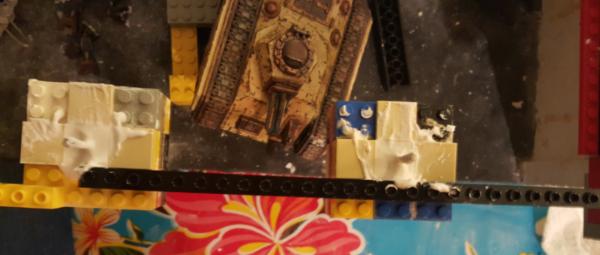
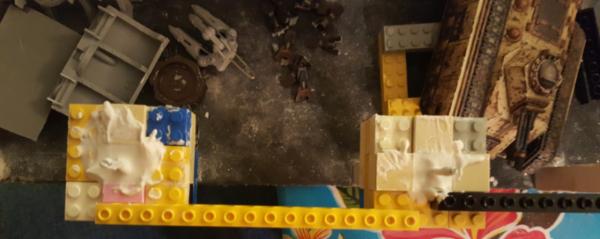
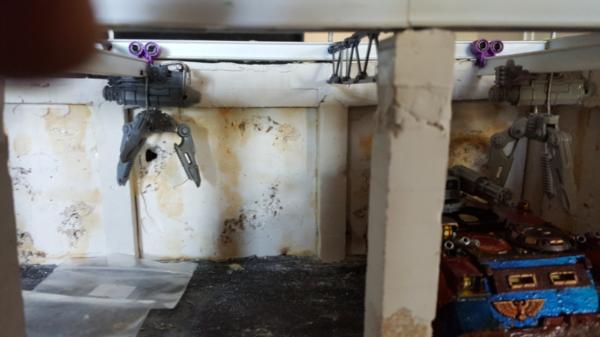
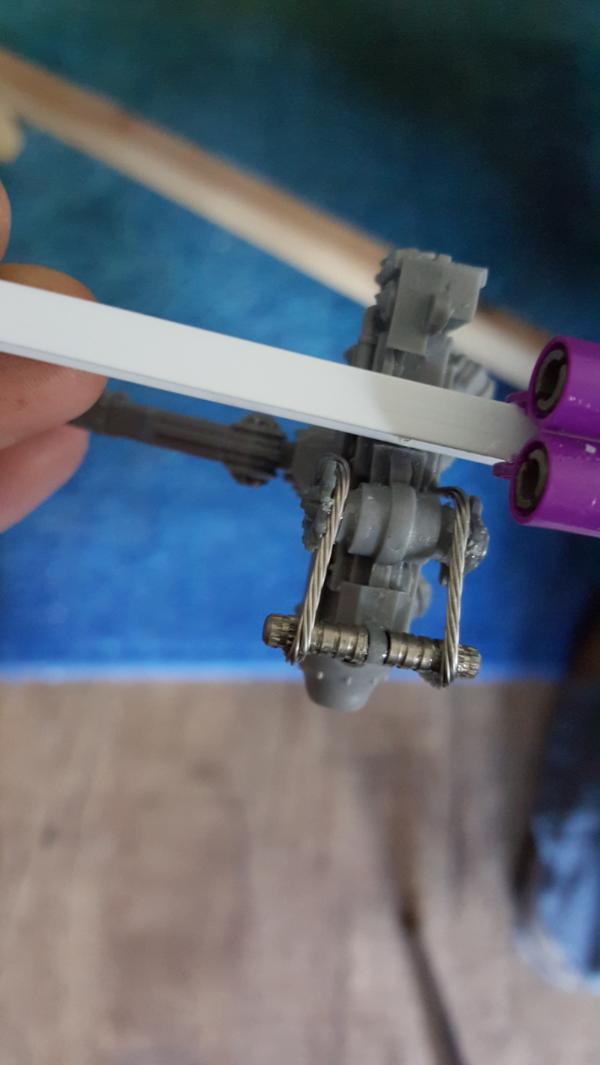
and now for the cranes:
These took a while to figure out but im very happy with the result, they look pretty realistic and while Istill need to add the wheel for them onto the ibeam the effect is nice. The only downside is they are big enough that the distance between them and the tank is less than id like. They arnt so much hanging over it as barely out of its' way. Still the effect is cool enough that it works. At some point ill cap the legos to hide the fact that the other tracked part is legos but i havent figure out with what to cap it yet, and it would be super hard to see anywayss... so we'll see.
So we have 4 bays total and here's how I envision it going down:
2 bays with tank lifts to get underneath the tanks, this would alos be where tools and stuff for standard repairs are. I figure I have a couple of robot arms hanging down to assist with welding and such, ala iron man type of deal.
2 bays with big cranes to install/fix bigger ticket things on the tank. One crane would be holding a razorback turret ring with cables and such hanging down and the other would be carrying a dissasembled dreadnought to be worked on the the corner (have i mentioend the rules for dreads arnt worth it? this be why they show up in my dioramas lol)
so for the tank lift bays the ceiling is then composed of some ibeams and mostly piping and such, to match a real car bay. Here is the start of that:
and now for the cranes:
These took a while to figure out but im very happy with the result, they look pretty realistic and while Istill need to add the wheel for them onto the ibeam the effect is nice. The only downside is they are big enough that the distance between them and the tank is less than id like. They arnt so much hanging over it as barely out of its' way. Still the effect is cool enough that it works. At some point ill cap the legos to hide the fact that the other tracked part is legos but i havent figure out with what to cap it yet, and it would be super hard to see anywayss... so we'll see.


 6th Skylight Patrol Contingent
 = 131
= 131