| Author |
Message |
 |
|
|
|
|
Advert
|
Forum adverts like this one are shown to any user who is not logged in. Join us by filling out a tiny 3 field form and you will get your own, free, dakka user account which gives a good range of benefits to you:
- No adverts like this in the forums anymore.
- Times and dates in your local timezone.
- Full tracking of what you have read so you can skip to your first unread post, easily see what has changed since you last logged in, and easily see what is new at a glance.
- Email notifications for threads you want to watch closely.
- Being a part of the oldest wargaming community on the net.
If you are already a member then feel free to login now. |
|
 |
2018/09/26 23:14:50
Subject: Armies on parade: Krieg 239th siege regiment. Board done!
|
|

Sinewy Scourge
|
Hey all!
Decided to make another thread for this little project.
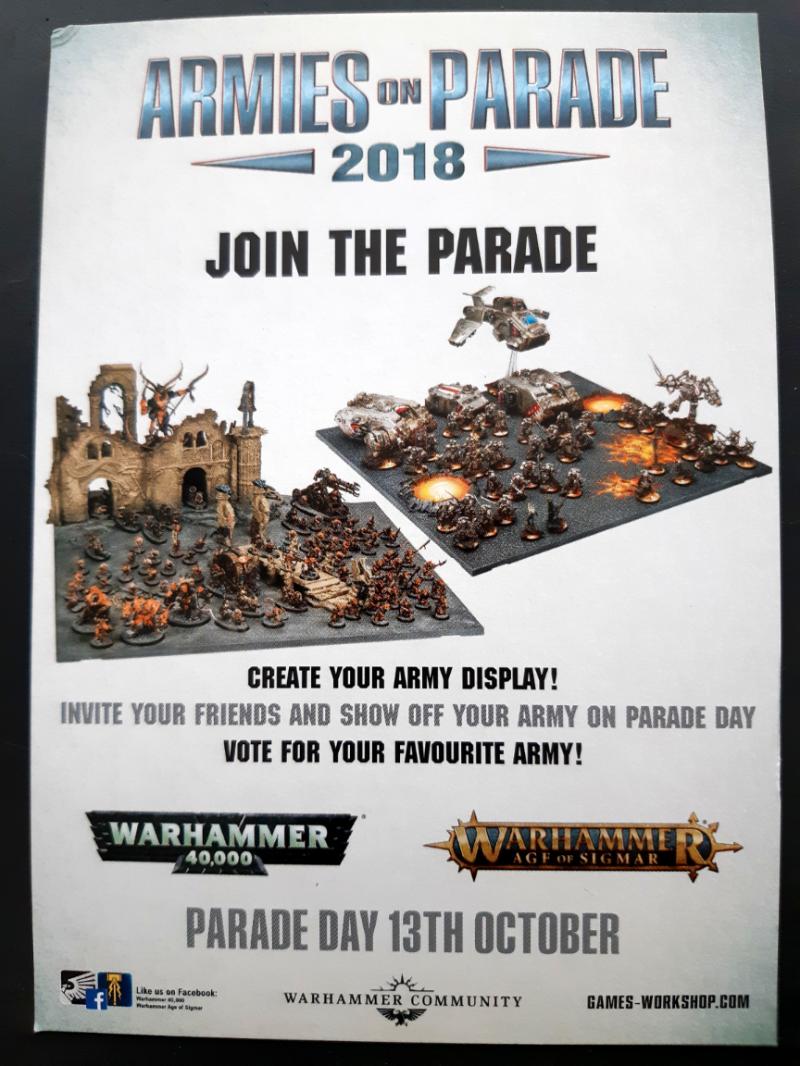
I have always wanted to take part in the Armies on parade contest, but never had the time, ideas, models etc. lame excuses.
This year I finally decided to do it!
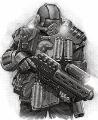
The board will display some of my DKoK units, from the "239th siege regiment" in a winter trench setting.
You can see some of the models in the gallery or in my general hobby blog.
It is allowed to use up to 24" by 24" board, but I decided to go with a smaller 14" x 22" size. This way I can fit the finished board in my vitrine.
And I don't even have room to store a bigger board right now.
Even though Armies on parade is a contest, I'm not creating this to win per se (of course it would be cool), but to test new techniques and learn something in the process.
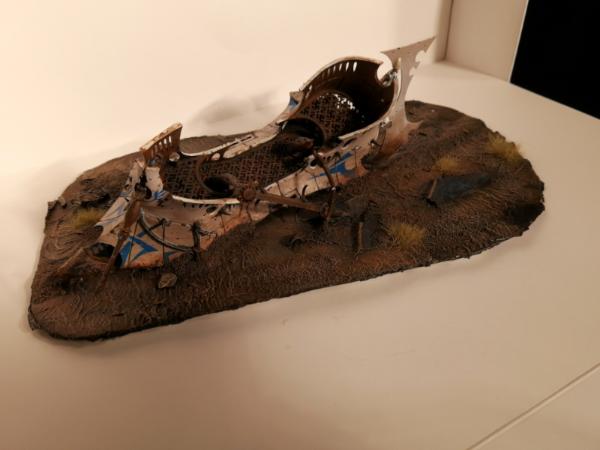
I have always loved to create small terrain pieces, like this one:
So I really look forward working with this board.
The design will be world war 1 stylish with somewhat realistic elements. It will not be perfectly historically correct though.
The first step was of course looking for reference images. I browsed through a whole lot of WW1 trench line images and other DKoK dioramas for inspiration.
After a few hours of browsing and discussing with some of my hobbyist friends some goals were set:
- Zigzaggy trenchline (as they were in real life, to prevent artillery shells wiping the whole trench or from invading enemies to have a clear shot)
- Lots of barbed wire
- A bunker
- Emplacement for artillery
- "No man's land"
With my astonishing drawing skills, I created the first draft:

As can be seen from this drawing, the first idea was to put a Leman Russ (perfectly clear am I right) on the left corner and an barricade for the artillery.
After further discussing with my friends and even more research, I decided to ditch the panzer and create a pothole for the artillery piece too. This way the board would look more unified and it would be more realistic(?).
So, without further ado it was time to start building. When writing this, I have already been working on the project for a few days.
Sorry in advance for bad pictures. I took all the photos quickly with my phone while building.
First step was to create the bunker from 1mm thick foamcore. I actually got the inspiration for this from a Miscast Terrain channel in Youtube, so thanks for that!
Also used an electric keyhole saw to cut a piece of styrofoam to the correct size to make the base.

Next up was to cut the top pieces to make the actual surface and trench walls using a hot wire cutter. First time using this tool and boy it was fun!
Made an awful smell though.

Some sanding and test fitting.
And as you can see, I made quite a mess when playing with the cutter.

These steps were really messy, especially the sanding. Had to use a breathing mask and safety glasses the whole time.
The grage where I usually fix cars was a perfect place for this. I could only imagine the look on my girlfriends face if I did this at home 

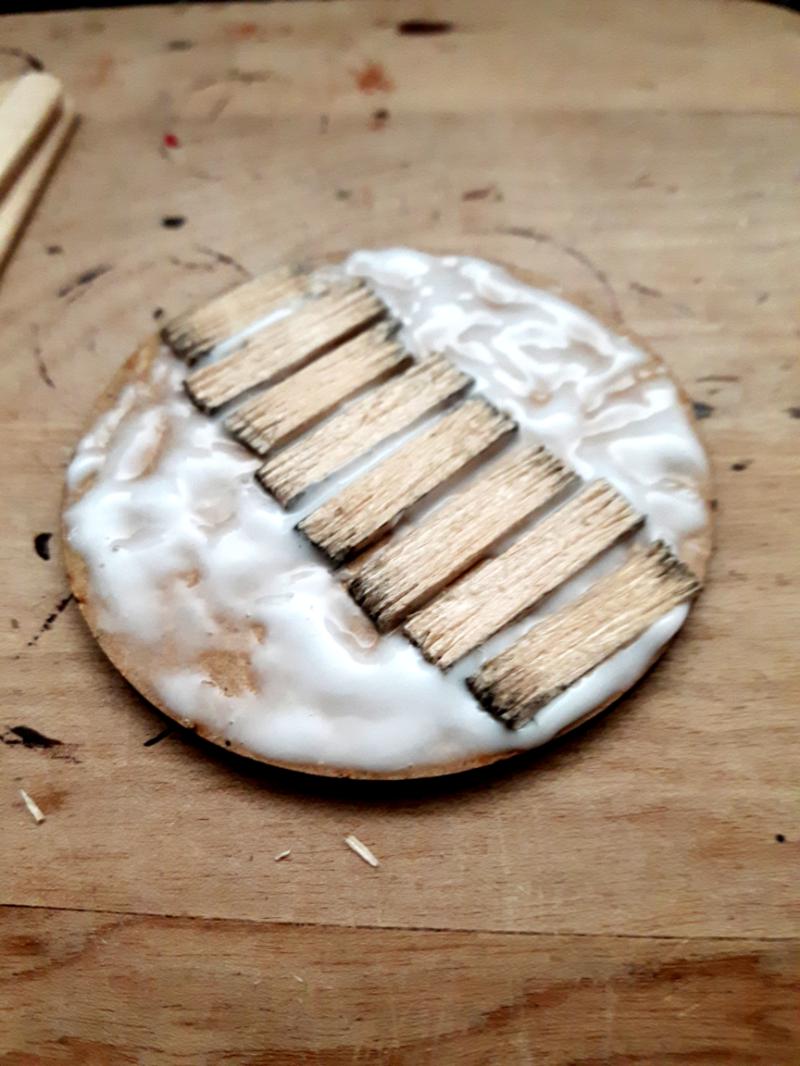
After I was relatively happy with the foam pieces, It was time to put some test coating on the smallest one of them.
I used some Noch rock compound, which is mixed with water to create goo like stuff that hardens to a muddy / rock like hard surface.
This was really good find, never actually used this stuff before.

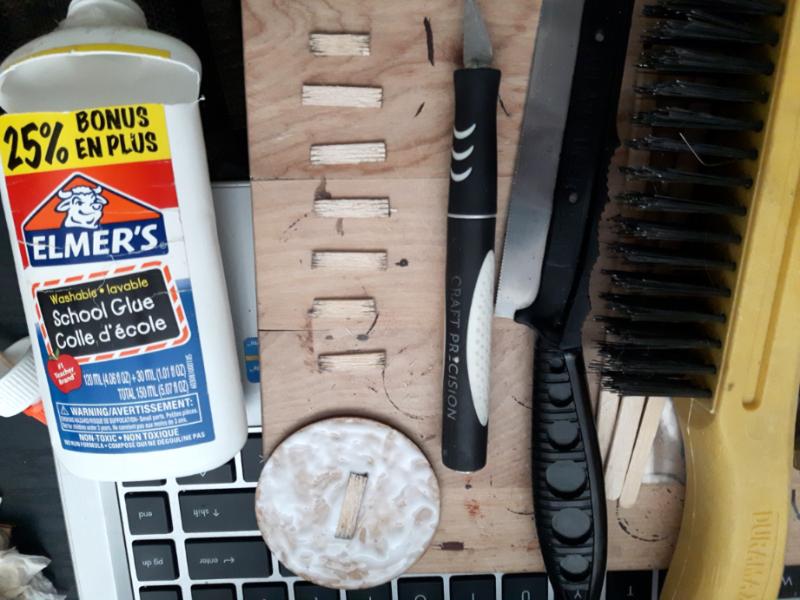
Meanwhile the rock compound was drying, I started cutting some planks from a 1mm thick balsa wood to cover the trench walls.

Oh so many planks!

Next up some hot glue! Yes, it was really hot. And yes, I managed to get it on my fingers. Multiple times.

Hot glue was really good for this job, as it dried really quickly. This step too was really messy and some extra glue can be seen in the planks that I had to clean up.
I tried to place the planks more or less randomly and not thinking too much about logic, to make them look like they had been put in place in a rush.

With all planks in place, it was time to base coat the piece with black acrylic paint. I chose acrylic because it was cheap, sufficient and works perfectly on foam without damaging it.
And that's all for now. I have a load of other pictures, but it's 2 in the morning and I have some work to do tomorrow, so will post more later.
Thanks for reading! Hope you liked this and please leave a comment if you have any ideas for improvement.
Keep on rocking!
Edit: Made the images smaller for easier reading.
|
|
This message was edited 7 times. Last update was at 2018/10/13 02:14:27
|
|
|
 |
|
2018/09/26 23:21:36
Subject: Armies on parade: Krieg 239th siege regiment
|
|

Painlord Titan Princeps of Slaanesh
|
Promising start.
|
|
|
|
|
|
2018/09/27 02:17:41
Subject: Re:Armies on parade: Krieg 239th siege regiment
|
|

Guard Heavy Weapon Crewman
China
|
Looking Good. I will be following this with interest, as I hope to one day create an Armies on Display board for my Imperial Guard Cavalry Army
|
|
|
|
|
|
2018/09/27 04:44:47
Subject: Armies on parade: Krieg 239th siege regiment
|
|

Giggling Nurgling
cold darkness of the far north
|
Jealous of the space you have, excited to see where this ends up/goes!
|
"Do you hear something in the hold?" Frigate Einstein circa M31 |
|
|
|
|
2018/09/27 11:34:12
Subject: Armies on parade: Krieg 239th siege regiment
|
|

Rampagin' Boarboy
|
Looks good so far, looking forward to see how this progresses!
|
|
|
|
|
2018/09/27 12:47:05
Subject: Re:Armies on parade: Krieg 239th siege regiment
|
|
Sinewy Scourge
|
Minigiant wrote:Looking Good. I will be following this with interest, as I hope to one day create an Armies on Display board for my Imperial Guard Cavalry Army
Checked your thread and I gotta say that the project you have going on is purely awesome!
I will follow your progress as well.
acrowsperch wrote:Jealous of the space you have, excited to see where this ends up/goes!
I rented the garage (34 square meters) couple of years ago to work as a winter storage for my summer car and to hold all the tools needed for repairing / restoring it (and other vehicles I have since acquired). Never realized until now that the place actually works really well for making bigger wargaming projects too! For actual painting it is a bit too dusty place, so that will still happen at home.
Thank you all for your interest in this, will post more progress pictures tonight.
|
|
This message was edited 1 time. Last update was at 2018/09/27 12:47:21
|
|
|
|
|
2018/09/27 16:15:37
Subject: Armies on parade: Krieg 239th siege regiment
|
|
Decrepit Dakkanaut
|
Looking good so far - how has the "mud" material you used dried out?
|
2021-4 Plog - Here we go again... - my fifth attempt at a Dakka PLOG
My Pile of Potential - updates ongoing...
Gamgee on Tau Players wrote:we all kill cats and sell our own families to the devil and eat live puppies.
 Kanluwen wrote: Kanluwen wrote:This is, emphatically, why I will continue suggesting nuking Guard and starting over again. It's a legacy army that needs to be rebooted with a new focal point.
Confirmation of why no-one should listen to Kanluwen when it comes to the IG - he doesn't want the IG, he want's Kan's New Model Army...
tneva82 wrote:You aren't even trying ty pretend for honest arqument. Open bad faith trolling.
- No reason to keep this here, unless people want to use it for something... |
|
|
|
|
2018/09/27 23:39:55
Subject: Armies on parade: Krieg 239th siege regiment
|
|
Sinewy Scourge
|
Picture time!
Base coated the planks with the same black acrylic used for the styrofoam as well. Then added the base color for the ground.
I like to use this piece to try out all the steps rather than do the whole ground together. This way I don't have to redo it all if I mess up.

 Dysartes wrote: Dysartes wrote:Looking good so far - how has the "mud" material you used dried out?
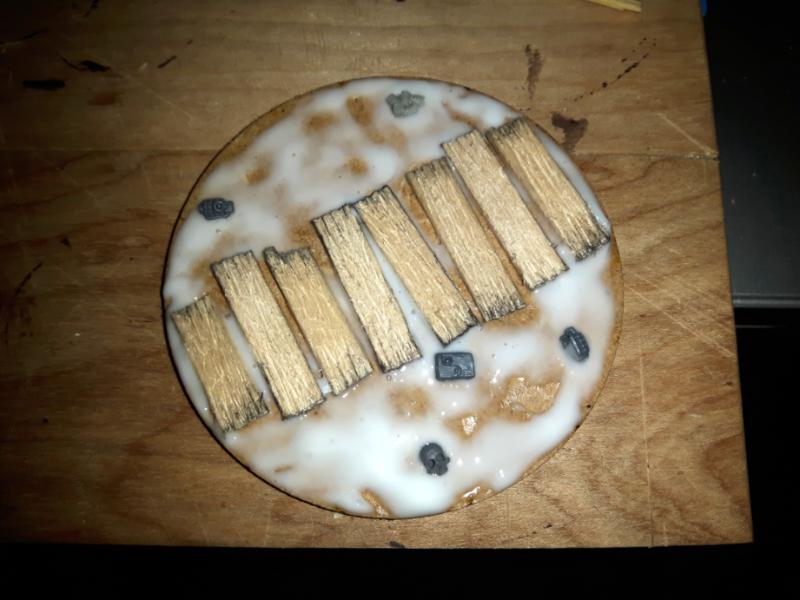
This is the dried result. Some of it is painted and the grey stuff is the actual compound.
I dries pretty quickly, varying from 15 minutes to one hour depending on how much water I use. Less water = harder to spread but easier to mold, more water = harder to mold but easier to spread. I found that 1 part of water and 3-4 parts of compound works best.

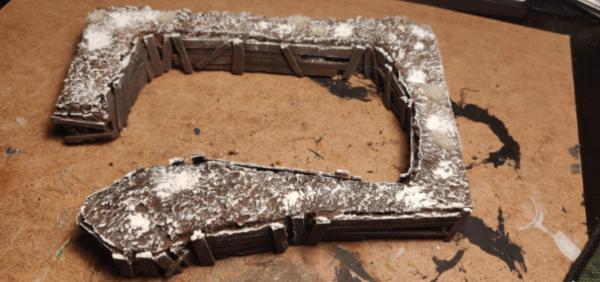
Here is the largest piece covered with compound.
After basecoating and painting it brown I was able to see all the shapes and I was not happy with the result. So I added some more "goo" to the edges of the craters and the trench.
I might add some more shapes too. And a lot of debris etc.

With the basecoat all dried out, I started drybrushing lighter shades to the ground. I'm slowly aiming towards a sort of a late autumn look. I want the mud to look like it's frozen after some light snowing and a few weeks of cold nights, rather than fully cover it with snow. May have to do another even lighter layer, or just add some snow to it. We'll see.
Also painted the planks using the same brown as I did for the ground and used a brown shade to darken it up.
To make the ground have more character and smaller details as well, brushed some stirland mud technical paint here and there.
(A really bad picture, sorry).

This technique worked okay, so I proceeded to the next pieces. The larger one shown above is in the same shape as seen in the picture.
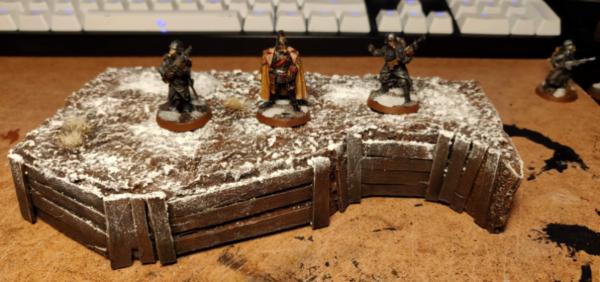
Here is the dugout piece for the quad launcher. Added the models there too to see the scale.


And here is a test picture on top of the large piece, to see how it would look like with some texture on the bottom.

Next did some planking for the bunker too!
Painted them with the same steps as above. Also did a small table, which is still lacking legs.

As I stared at these pieces, I realized that the planks were in way too good shape to be in the middle of a war zone, so did small changes to fix that:


Next step will be gluing some planks for the larger piece, add some more texture to it and then starting to play with snow!
I also need to think about some small details to add inside the bunker. It will have a removable roof, probably made out of thick round wooden sticks. That way it should look like it was made from tree trunks.
Still have a bit over two weeks to finish this. I have so many ideas, but with couple of school projects pressing I might have to cut some of them. Still though, the progress has been a lot quicker than I originally thought. With the right tools and a bit of luck I have managed pretty okay so far.
|
|
This message was edited 3 times. Last update was at 2018/09/27 23:51:52
|
|
|
|
|
2018/09/27 23:59:04
Subject: Armies on parade: Krieg 239th siege regiment
|
|
Legendary Master of the Chapter
|
I like where this is going
|
 Unit1126PLL wrote: Unit1126PLL wrote: Scott-S6 wrote: Scott-S6 wrote:And yet another thread is hijacked for Unit to ask for the same advice, receive the same answers and make the same excuses.
Oh my god I'm becoming martel.
Send help!
|
|
|
|
|
2018/09/29 00:46:34
Subject: Re:Armies on parade: Krieg 239th siege regiment
|
|
Sinewy Scourge
|
Phew, did quite a lot of stuff today for the project. Had a day off, so decided to put those hours into good use.
But before we jump to the stuff I did today, I will show some pictures from last couple of days. Snow games, yay!
So as I mentioned, I want the ground to look snowy, but not fully cover it.
I wanted to aim for something like this:
Note, this picture is NOT taken by me, so I don't have any credits for it.
Well the first logical step was to try out the snow flock I had lying around. Worked well for small infantry bases, why not here too. Right?
Hmm... no it did not.

The picture makes it look a bit more tolerable than it actually is. Maybe using a white primer on the snowy areas would have worked better, but still meh.
So, I headed to search some ideas on how to make atleast semi realistic looking snow. Many suggested using baking soda.
At first I was a bit doubtful about it. Still though, decided to give it a shot.
Huzzah, with 3 minutes of mixing and 10 minutes of brushing the result looked like this. I was positively surprised!

1:4 white acrylic paint, 1:4 pva glue and 2:4 baking soda, mix it up and apply with a brush. With this kind of mix I got just the right kind of consistency, making the snow look a bit frozen.
Need to play around and try to mix up some sort of melted snow to the bottom of the trenches, but that will happen sometime later.
And now we jump to today:
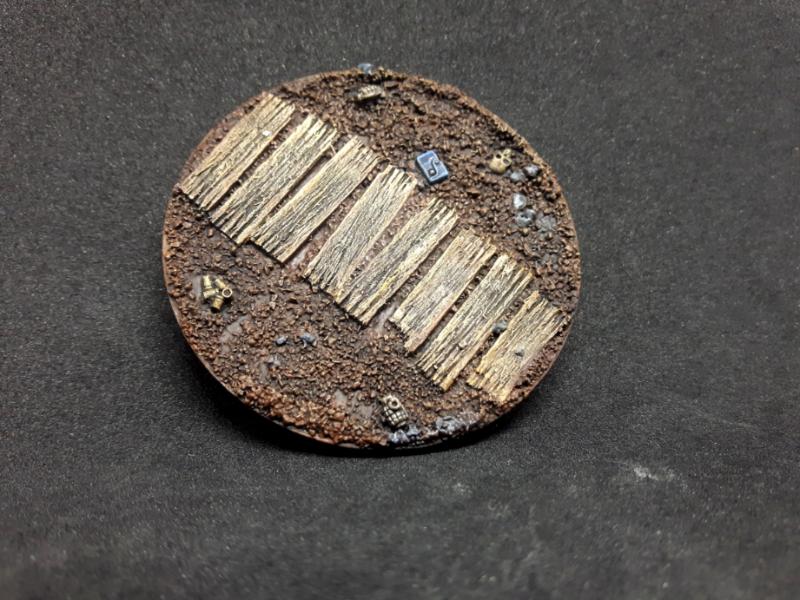
For the planks I drybrushed some really light colors to bring out the shapes a bit more, and make them look a bit frosty. Might do a very gentle drybrush with white. Not sure yet.


While I was painting, I suddenly realized that it has been forever since I actually measured these pieces. As they are not yet glued to the bottom layer, it is sometimes easy to forget that they should work well together. I have placed them side by side quite often, but not actually measured the distances with an actual ruler. The exact size would not matter if this was just for the armies on parade, but it has to fit in my cabinet. With small sweat drops running down my brow I stuffed the pieces inside the cabinet...
Boom, the width was perfect! Not one more millimetre could fit. The depth on the other hand was not that good. I managed to get it in place, but the trench was too narrow from some areas.
I don't have a miniature in this picture to compare, but the gap was so small the standard base could not fit. Picture is taken on the floor with a ruler next to the pieces to get the proper depth.

So, took my hobby knife and fixed the situation. At this point the smallest piece was covered in snow and most details painted, the second small piece was primed and the largest piece was still just covered with compound.

Did that same thing for number of places too.
And when I was left with the leftover pieces, it gave me an idea:
Used them to make the "firing steps" for the guardsmen to fire down to the no man's land. It did not just make the trench look more realistic, but actually now I can put a couple of firing korpsmen there with their lasguns actually aiming above the edge.

Once again as the compound and the primer after that was drying on the newly cut areas, I decided to do some small details for the bunker.
As I suck at freehanding, I had to use a stencil to create the basic shape of the aquila. Then added some dripping marks and the grey lines. I did not try too hard to make the lines too straight, as the guardsman painting this would have done it in the middle of a warzone looking trough his respirator.
Then just a little drybrushing to make it look dusty and aged.

Made a small map and thought it was a fun idea to put some "miniatures" on the table with a stick to move them around. Well this was more of an whim rather than a planned idea.

I was not at all happy with the result, as I still suck at freehanding, I did it in a rush and the whole thing looks a bit cartooney in the middle of a "photo-realistic" environment.
Decided to remove all that stuff and started planning on making a new map. Thought about using water + pva glue on a paper, as a friend of mine suggested. Still have to somehow make the actual map texture. If all else fails, I will print a piece of a real map or something.
Also made weapon rack for the troopers to hold their weapons while holding out in the bunker.

To finish off the night, I started adding planks to the largest piece.

At this point, the hour was running late and I decided to quit for the day.
Lots of text, but hope it's not too much. I can also try to do smaller updates more frequently.
|
|
|
|
|
|
2018/09/29 08:04:11
Subject: Armies on parade: Krieg 239th siege regiment
|
|
Rampaging Reaver Titan Princeps
|
Brilliant stuff really realistic.
|
"But me no buts! Our comrades get hurt. Our friends die. Falkenburg is a knight who swore an oath to serve the church and to defend the weak. He'd be the first to tell you to stop puling and start planning. Because what we are doing-at risk to ourselves-is what we have sworn to do. The West relies on us. It is a risk we take with pride. It is an oath we honour. Even when some soft southern burgher mutters about us, we know the reason he sleeps soft and comfortable, why his wife is able to complain about the price of cabbages as her most serious problem and why his children dare to throw dung and yell "Knot" when we pass. It's because we are what we are. For all our faults we stand for law and light.
Von Gherens This Rough Magic Lackey, Flint & Freer
Mekagorkalicious -Monkeytroll
2017 Model Count-71
|
|
|
|
|
2018/09/30 00:24:09
Subject: Re:Armies on parade: Krieg 239th siege regiment
|
|
Sinewy Scourge
|
Some small work done today:
So finished with the planks for the large piece. It Took a lot longer that I initially thought it would.
Still have to do some cutting and scratching to make them look a bit battle hardened.
Some are primed so they won't show very well in the picture.

Made small hole where a guardsman could store some ammo during a firefight. After researching more about trenches, I learned that soldiers actually did this.
It's fun to add all sorts of small details like this.

A small wooden bridge used to safely move over the trench. I decided to round the edges of the planks, especially from both ends of the bridge. This way they look like that hundreds of boots that have run across have been eating the wood away from the corners. This is not very well seen in the picture.
Will do the same for the planks at the firing steps.

Then some paint and snow.

This bunker piece got the same snowy treatment as the other ground piece.
Here is the current state of the board.

Regarding the positions of the miniatures I thought of the following:
- A commander, vox caster and maybe one or two guardsmen in the bunker standing next to the table
- Some guardsmen running in the trenches and a few standing and firing on the firing steps
- A thudd gun at the pothole with a few crewmen
- Deathriders running from the top left corner over the bridge to the no man's land
- Maybe some guardsmen charging forwards in the no man's land
At first I wanted to add a "machine gun" nest using an autocannon heavy weapon squad (because the autocannon model is just gorgeous) and make a cutout for them, but my forgeworld order has not arrived. Luckily a friend of mine was able to borrow the deathriders, as I really really want to use them here. None of the miniatures will be glued on, as all the units displayed are from my playable army. Though I admit that it would look so much cooler without the bases.
This of course makes the trench line pretty unrealistic, as in real world you would never have a command bunker and artillery piece in the same trench positioned right in the front lines. Or maybe it's just the krieg way. Then again it could be that the bunker is just a holdout for the guardsmen to rest, and the command squad is just making some last minute plans before they charge to battle.
Also are the images large enough? I can also take more pictures from different angles if requested.
Automatically Appended Next Post:
Thanks! Glad you like.
|
|
This message was edited 2 times. Last update was at 2018/09/30 16:42:37
|
|
|
|
|
2018/09/30 11:32:46
Subject: Armies on parade: Krieg 239th siege regiment
|
|
Painlord Titan Princeps of Slaanesh
|
Yeah, this is brilliant stuff.
I wouldn't sweat the realism too much, you'd never see field artillery sat right on the front lines yet Basilisks are a mainstay of most Guard armies.
Alternatively, artillery companies have officers too.
|
|
This message was edited 1 time. Last update was at 2018/09/30 11:33:38
|
|
|
|
|
2018/09/30 16:46:14
Subject: Re:Armies on parade: Krieg 239th siege regiment
|
|
Sinewy Scourge
|
Thanks!
Yeah not trying to think too much about realism.
I just usually like to think why everything is where it is when I make terrain pieces. Sort of like telling stories with small details and such.
|
|
|
|
|
|
2018/09/30 17:42:46
Subject: Armies on parade: Krieg 239th siege regiment
|
|

Bounding Assault Marine
|
Terrain looks awesome, I'll keep checking this out definately! Love the realistic wooden boards!
|
|
|
|
|
|
2018/09/30 17:50:50
Subject: Re:Armies on parade: Krieg 239th siege regiment
|
|
Krazed Killa Kan
|
Looking great so far, I'll be coming back to check out more
|
|
|
|
|
|
2018/10/02 00:05:28
Subject: Re:Armies on parade: Krieg 239th siege regiment
|
|
Sinewy Scourge
|
Thanks guys!
So the progress has slown down a bit due to being neck deep in school assignments.
Not too much real work done, other than base coating the largest piece and drybrushing all the planks. Will take some pictures when the wash is dry.
In the meanwhile, I did quite a lot of experimenting with different things, as one of the reasons for this project is to try new things and learn in the process.
Failing and finding new techniques through those failed attempts is part of the fun! And if and when some techniques would not work, I will still share them, as someone else might learn not to do the same mistakes or have some better ideas.
So, let's cut to the chase:
As I was not happy at all with the little map I made with plasticard and some test colors, I decided to try another approach.
Tried to draw a couple of versions and covered them in yellow wash.

Then covered them in 50/50 mix of water and PVA glue.

Finished result. Looks a lot more like an actual map, but still not sure about them. I think I will use one of those for now and try to do better if I still have the time. More important stuff needs to be done first, like finishing the actual board.

As seen in the image above, made a weapon crate too. I might do one or two more of these to be placed somewhere in the trench.

Another very experimental test. I collected some twigs, glued them together and covered with toilet paper and the same 50/50 mix of water and PVA glue to make a nice texture.
This is a technique I used to make the ground for the crashed dark eldar raider terrain piece shown in the first post. Decided to try it here. Just wanted to see if these had any potential as some sort of destroyed trees after a coat of paint. We'll see.


Every trench should have at least a couple of sandbags am I right? The first iteration was made using green stuff, but those turned out so horrible that I wont even dare to show them. Looked more like bricks. Nothing wrong with greenstuff mind you, I just failed horribly. But after that failure, I realized that it might be a bit too expensive stuff to be used here, so I bought some two part epoxy paste and tried it out. This new stuff was a bit harder to work with, as it dried out very quickly and started to crumble. Had to moisture it up very often.
The result was decent, some turned out better than the others.


Maybe have to do a couple of more batches and pick the best ones.
Test fitting:


As mentioned before, a lot of barbed wire is needed. Here is the first assembled piece and the only one that was worth taking a (bad) picture of. Still not too fond of the "out of the box" barbed wire though, even if I used a drill to fold it in two layers. Works on small bases sure, but on this scale It does not look good enough in my opinion. I have a few ideas to try later on.

Some small details in the ground: blown up planks and a few pieces of wire.

I think I will keep on experimenting a little bit and likely covering the main piece with snow tomorrow.
Depending on how I get my boring "real life stuff" done, I will try to start working on the bottom layer at the end of the week. It has to be done at the garage, so I need to dedicate atleast half a day for cutting etc.
|
|
|
|
|
|
2018/10/02 00:23:58
Subject: Re:Armies on parade: Krieg 239th siege regiment
|
|
[DCM]
Boom! Leman Russ Commander
|
What a fantastic project! Great painting, terrific imagination, wonderful progress! I look forward to more installments! 
|
"He fears his fate too much, or his desserts are small, who will not put it to a single touch; to win- or lose- it all."
Montrose Toast

|
|
|
|
|
2018/10/02 00:52:01
Subject: Re:Armies on parade: Krieg 239th siege regiment
|
|
Krazed Killa Kan
|
I really like those little maps
|
|
|
|
|
|
2018/10/02 04:48:41
Subject: Armies on parade: Krieg 239th siege regiment
|
|
Painlord Titan Princeps of Slaanesh
|
I would print off an actual map from an actual battle, if I were you.
|
|
|
|
|
|
2018/10/02 13:00:01
Subject: Armies on parade: Krieg 239th siege regiment
|
|
Sinewy Scourge
|
Thanks a lot!
Thanks for the idea!
Thought about this too after a friend of mine also suggested it. Two reasons I have not tried it yet:
1. Wanted to try drawing / painting first, so I could say that the map is completely self made.
2. I don't have a working printer right now
I think that I'll try to print something in school or at work some of these days.
|
|
|
|
|
|
2018/10/02 23:51:43
Subject: Armies on parade: Krieg 239th siege regiment
|
|
Painlord Titan Princeps of Slaanesh
|
Yeah, not everybody is big on incorporating real life into 40k. I'm a bit of a history nerd, though, so I love cramming in incredibly obvious historical references to 'Kronstaat' etc. etc.
|
|
|
|
|
|
2018/10/04 06:12:54
Subject: Armies on parade: Krieg 239th siege regiment
|
|
Hurr! Ogryn Bone 'Ead!
|
A wire brush works wonders to add weathering to the wood and sandbags; just keep the fingers you hold the piece with out of the way as the wires can poke skin!
|
|
|
|
|
|
2018/10/04 11:02:00
Subject: Armies on parade: Krieg 239th siege regiment
|
|
Sinewy Scourge
|
Excommunicatus wrote:Yeah, not everybody is big on incorporating real life into 40k. I'm a bit of a history nerd, though, so I love cramming in incredibly obvious historical references to 'Kronstaat' etc. etc.
Yeah. I usually take a lot of inspiration from real life though, but rarely make straight references.
Adding history references sounds cool though!
Private Benjamin wrote:A wire brush works wonders to add weathering to the wood and sandbags; just keep the fingers you hold the piece with out of the way as the wires can poke skin!
Not a bad idea at all, have to give that a shot.
I have a few wire brushes, but I think they are all covered in rust, brake-cleaner or some other oily gunk from car parts. Gotta go shopping!
|
|
This message was edited 1 time. Last update was at 2018/10/04 11:02:16
|
|
|
|
|
2018/10/04 22:03:41
Subject: Re:Armies on parade: Krieg 239th siege regiment
|
|
Hurr! Ogryn Bone 'Ead!
|
|
|
|
|
|
|
2018/10/05 16:34:07
Subject: Re:Armies on parade: Krieg 239th siege regiment
|
|
Sinewy Scourge
|
Wow, great stuff!
Now I definetly need to do that (if you don't mind) atleast for the planks that are going to go to the bottom of the trench.
Maybe even to some that are on the walls.
Still no progress yet, as I need to finish a couple of assignments by the end of this week. But as the deadline is in the saturday of next week, I gotta start working with the base as soon as possible.
|
|
|
|
|
|
2018/10/05 17:28:26
Subject: Armies on parade: Krieg 239th siege regiment
|
|
[DCM]
Procrastinator extraordinaire
|
Some brilliant stuff in here! Really like the work you're doing and the little maps are great!
|
|
|
|
|
|
2018/10/05 18:43:36
Subject: Re:Armies on parade: Krieg 239th siege regiment
|
|
Hurr! Ogryn Bone 'Ead!
|
 Ezki wrote: Ezki wrote:Wow, great stuff!
Now I definetly need to do that (if you don't mind) atleast for the planks that are going to go to the bottom of the trench.
Maybe even to some that are on the walls.
Still no progress yet, as I need to finish a couple of assignments by the end of this week. But as the deadline is in the saturday of next week, I gotta start working with the base as soon as possible.
Hei, kuinka voit!
Are you getting ready for the Armies On Parade on October 13 th ?
|
|
|
|
|
|
2018/10/05 22:05:04
Subject: Re:Armies on parade: Krieg 239th siege regiment
|
|
Painlord Titan Princeps of Slaanesh
|
Ezki wrote:
Still no progress yet, as I need to finish a couple of assignments by the end of this week. But as the deadline is in the saturday of next week, I gotta start working with the base as soon as possible.
Sisu...
|
|
|
|
|
|
2018/10/07 22:21:14
Subject: Re:Armies on parade: Krieg 239th siege regiment
|
|
Sinewy Scourge
|
Thanks! I think I will stick to the maps as they are.
Excommunicatus wrote: Ezki wrote:
Still no progress yet, as I need to finish a couple of assignments by the end of this week. But as the deadline is in the saturday of next week, I gotta start working with the base as soon as possible.
Sisu...
Sisu is needed indeed..
Private Benjamin wrote: Ezki wrote:Wow, great stuff!
Now I definetly need to do that (if you don't mind) atleast for the planks that are going to go to the bottom of the trench.
Maybe even to some that are on the walls.
Still no progress yet, as I need to finish a couple of assignments by the end of this week. But as the deadline is in the saturday of next week, I gotta start working with the base as soon as possible.
Hei, kuinka voit!
Are you getting ready for the Armies On Parade on October 13 th ?
Voin hyvin! (I'm doing fine!).
And yes, I'm indeed getting ready for that!
Sorry to say, not too much progress still.
Managed to get some test pictures though with my horrible phone camera (I think the focusing mechanism is broken, so the pictures really are bad).
Testing out with some models:
Without the leman russ.

And with the leman russ.


Some random shots:


After a whole day (and half of the night) doing school assignments, I thought it was a good idea to play with the snow effect.
Without thinking it trough, I just used the same method to cover the whole piece:

Granted the poor picture makes it look a tad better, but in reality it looked really flat. Had to fix that by removing most of it and basecoating some parts again.
Will add the snow effect little by little, so I wont cover it completely and make it look a bit more random. So this is still work in progress.


I also found very mixed reviews about using baking soda in wargaming terrain.
Some say it is "the best stuff ever" and some say if turns to sludge after a while. Well I sure hope it does not, but we'll see.
Tomorrow I will head to the garage after work for a few hours and start working on the bottom piece!
Time will surely catch up on me, but I will try to do my best!
|
|
|
|
|
|
|
|


 Imperial Guard - Emperor's Talons Sentinel Walker Company ~
  Imperial Guard - Vendetta Gunship flyer eBay Recovery ~