| Author |
Message |
 |
|
|
|
|
Advert
|
Forum adverts like this one are shown to any user who is not logged in. Join us by filling out a tiny 3 field form and you will get your own, free, dakka user account which gives a good range of benefits to you:
- No adverts like this in the forums anymore.
- Times and dates in your local timezone.
- Full tracking of what you have read so you can skip to your first unread post, easily see what has changed since you last logged in, and easily see what is new at a glance.
- Email notifications for threads you want to watch closely.
- Being a part of the oldest wargaming community on the net.
If you are already a member then feel free to login now. |
|
 |
2016/05/07 17:34:43
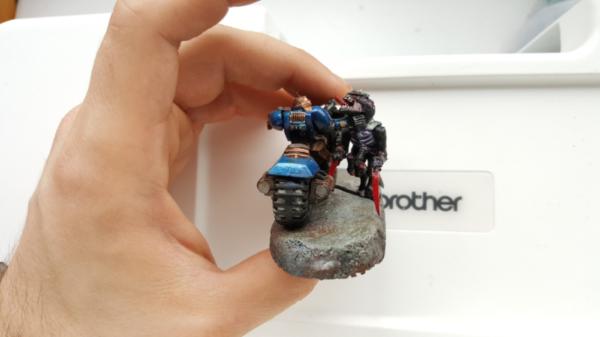
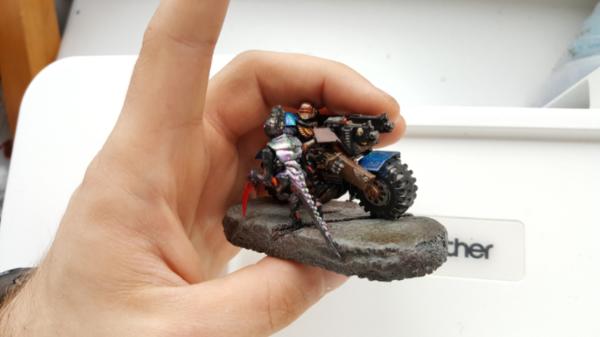
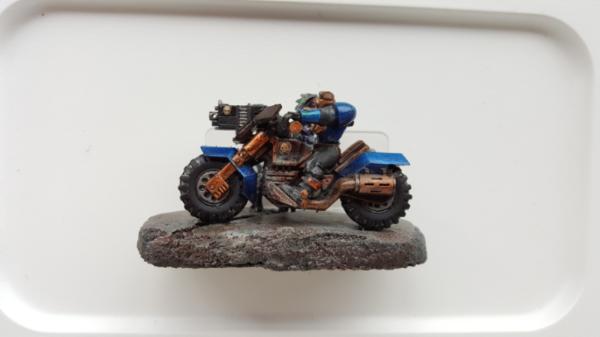
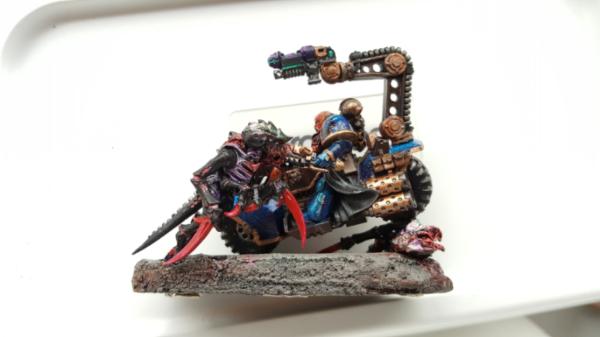
Subject: Re:Custom multi-level city terrain (5/7: bike vs hormagaunt bases done!)
|
|

Dakka Veteran
|
|
|
|
|
 |
|
2016/05/08 05:46:15
Subject: Re:Custom multi-level city terrain (5/7: bike vs hormagaunt bases done!)
|
|
Dakka Veteran
|
Missed a few pictures:
|
|
|
|
|
|
2016/05/08 13:49:33
Subject: Re:Custom multi-level city terrain (5/7: bike vs hormagaunt bases done!)
|
|

Stalwart Space Marine
|
Love the look of the models, the bases give them loads of character!
|
|
|
|
|
|
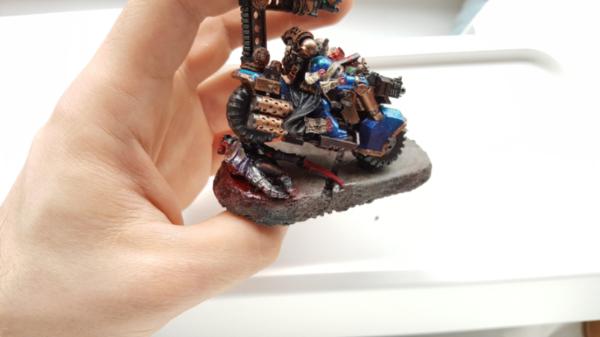
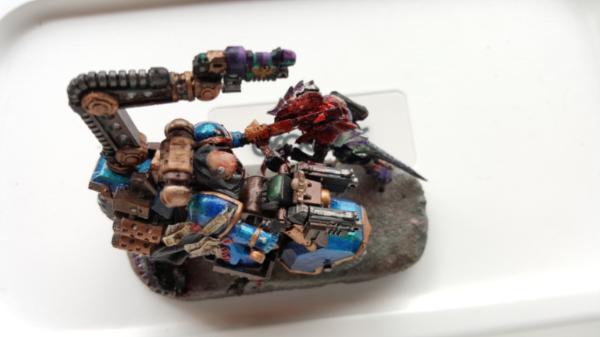
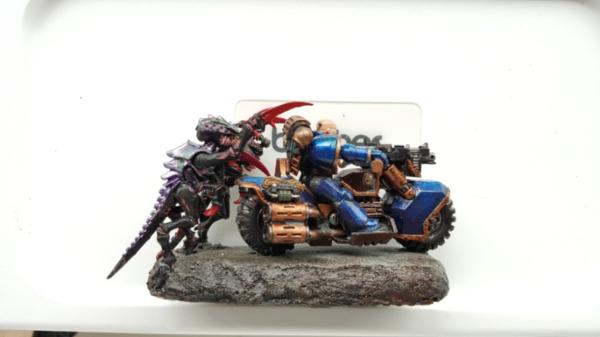
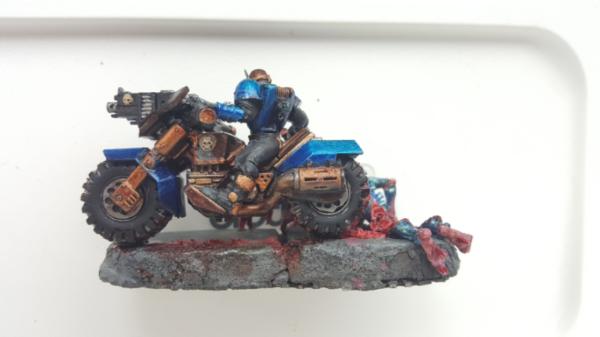
2016/05/09 21:42:39
Subject: Re:Custom multi-level city terrain (5/7: bike vs hormagaunt bases done!)
|
|
Dakka Veteran
|
Thanks! Yeah while the original set of marine bases were fun, I have to say that these bike ones have really made me happy, they've added a lot of dynacism to this setup and now that I have a good guts setup too its been fun really digging into the models with my soldering iron and making big bloody wounds.
|
|
|
|
|
|
2016/05/10 22:39:35
Subject: Re:Custom multi-level city terrain (5/10: random repair/base work)
|
|
Dakka Veteran
|
Bit of amish mash today, but had a mish mash kind of weekend.
Basically the goal was to prep a friend begin his own blog with a titan tile:
 http://www.dakkadakka.com/dakkaforum/posts/list/0/690356.page#8644073
So I've been giving him some of my bigger foam chunks, and on sunday we also did the planning and cutting of the dig site.
Anyways, since he will also be using foam coat, i figured id go through any and all last coatings i wanted to do and give him any remaining that i had (which, as it turns out, is zero, i used it all perfectyl! lol), so hence the mish mash.
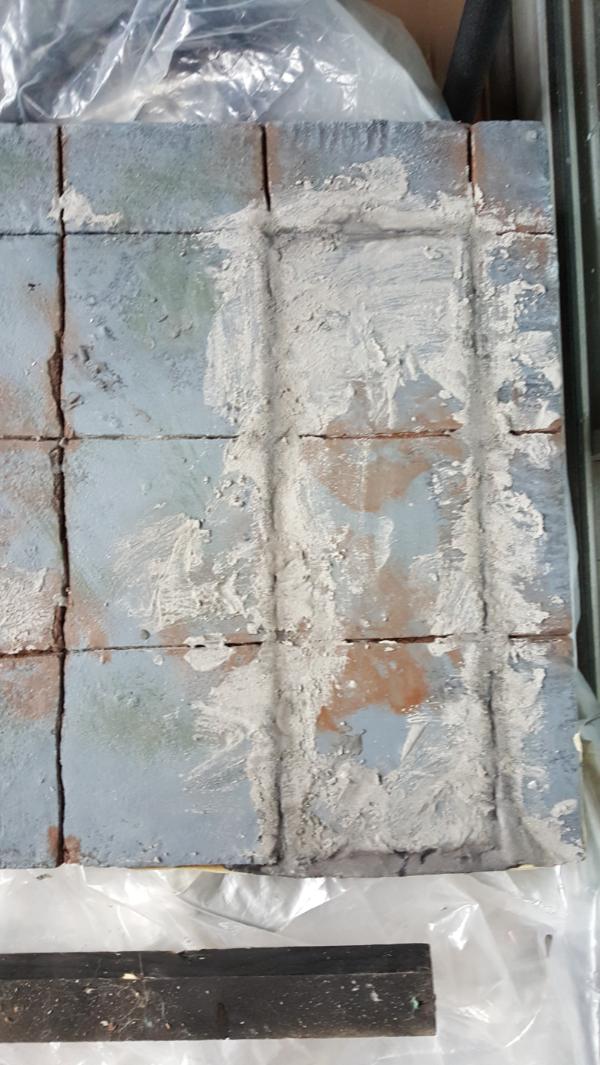
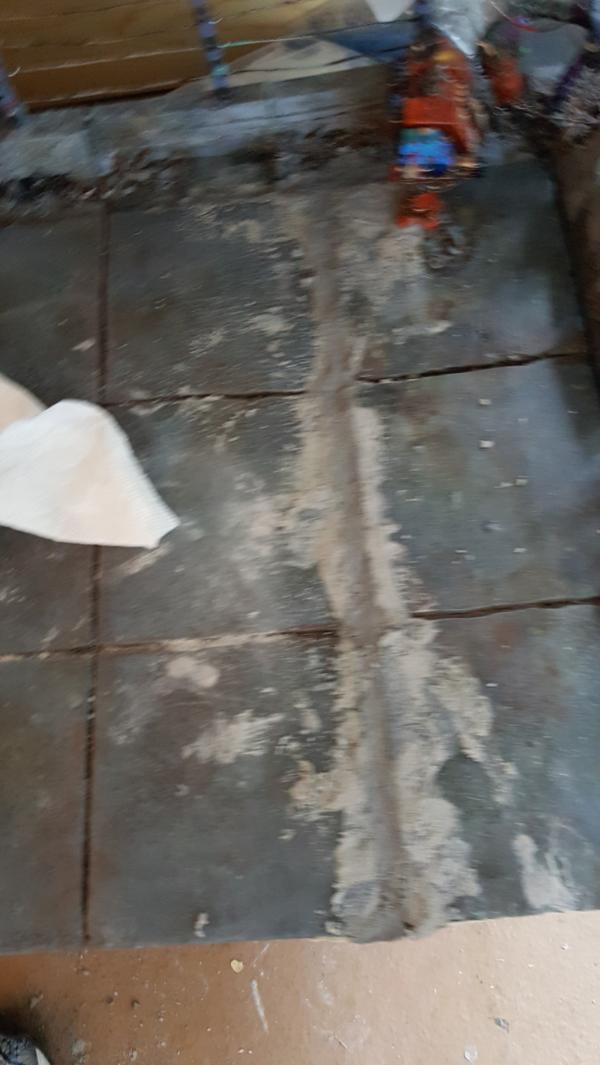
First up is filling in cracks. So as I look to making expanding my display board with a fuel/garage depot cousin, i wanted to go ahead and permenently install the tiles in my shelves. While having tiles that i could pull out was a neat idea, now that im fully on display, i need to just have it all permenent so i can add more fun details later. Since i didnt have the foamcoat to keep my half tiles and make new ones for the shelves. (nor wanted to spend the time), i just glued and screwed them down. There were, however, some cracks:
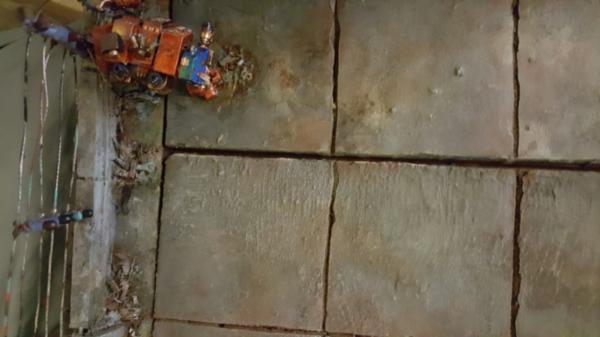
and things that needed to be sanded down:
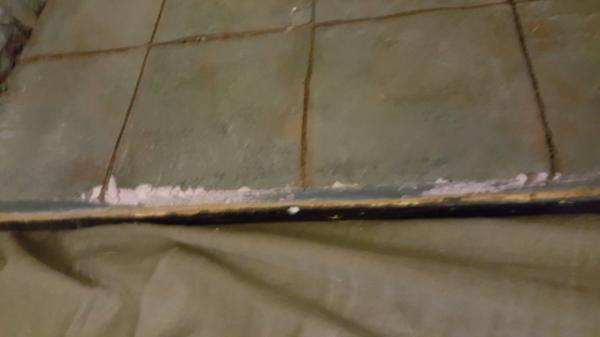
So foamcoat to the rescue, more specifically a more watery form of it to fill in the cracks so i can re-cut them straighter:
I also needed some bigger display bases for Khan. So there are 2 khans i plan on making, one on the bike (already done) fighting a neurothrope (not done) that is currently lightning bolt attacking him (gonna be funnnnn to do), thats on a 40mm "bike base"
second we have a ground khan fighting a tyranid patriarch, that will be on a 60mm base
I also wanted 2 more bike bases so id have, after i finish the genestealer bike set, a total of 4 remaining unused bike bases. I plan on eventually using them for some black knights/apothecary in case i decide to play around with that.
|
|
|
|
|
|
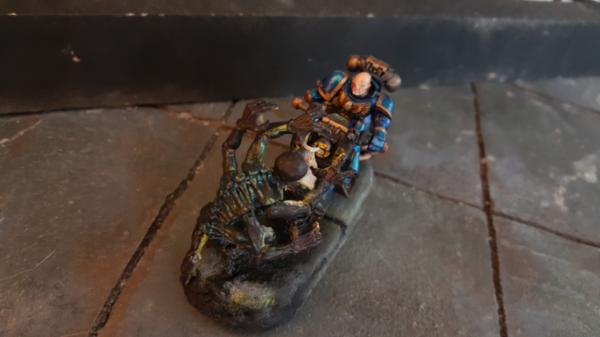
2016/05/12 21:05:35
Subject: Re:Custom multi-level city terrain (5/12: marine vs gaunt CC bases)
|
|
Dakka Veteran
|
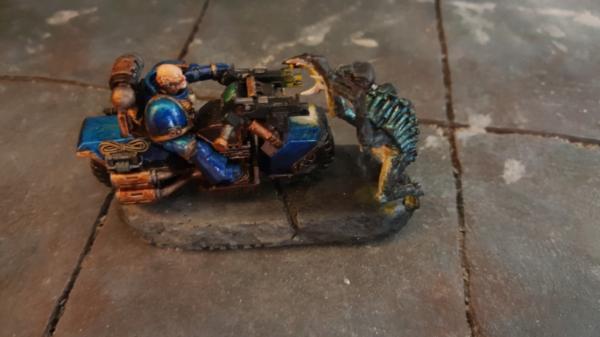
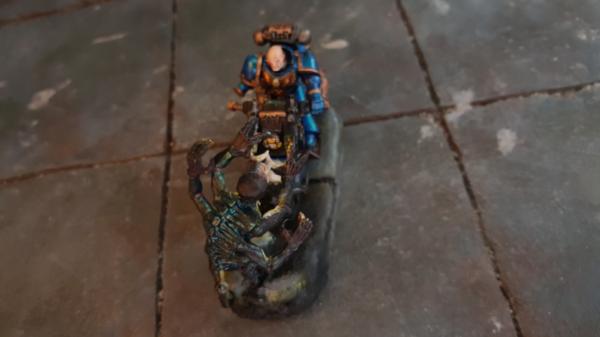
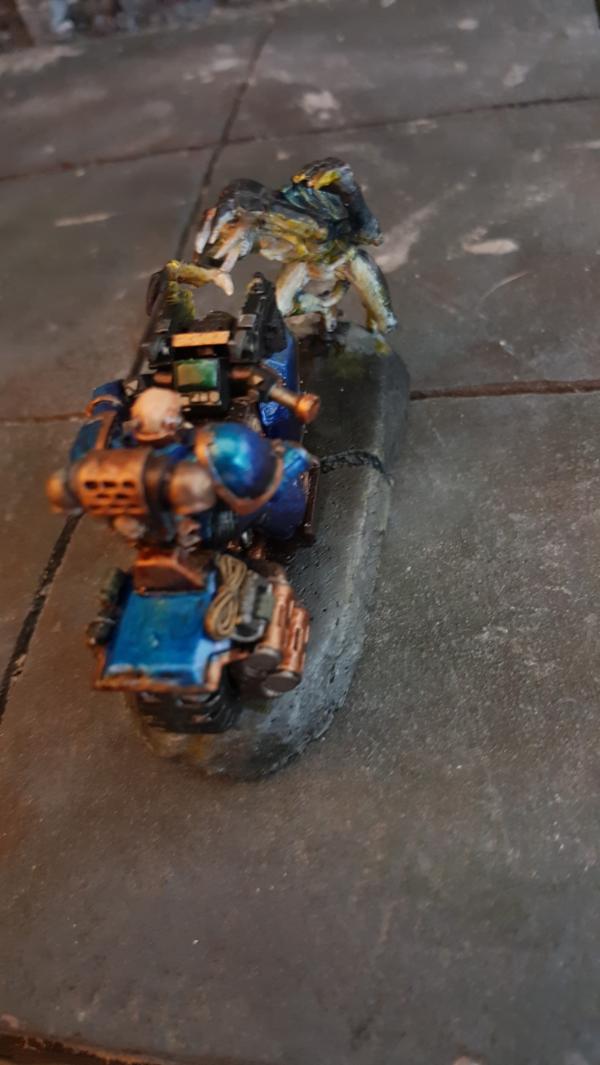
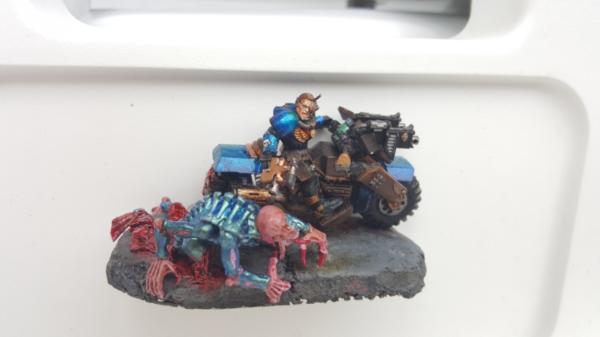
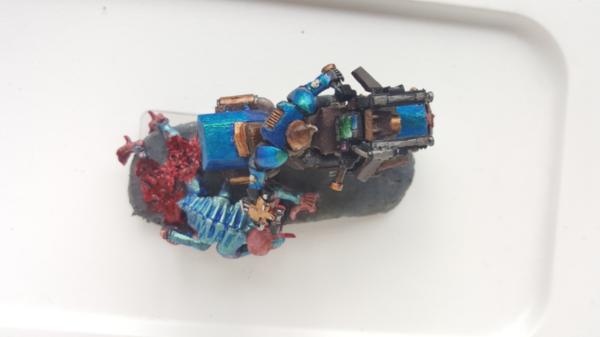
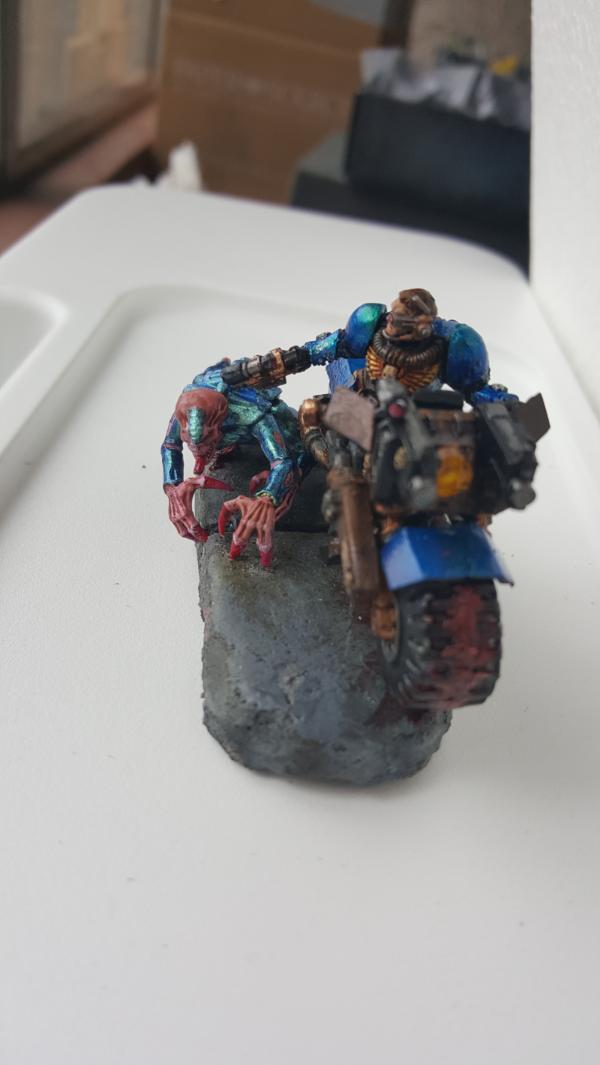
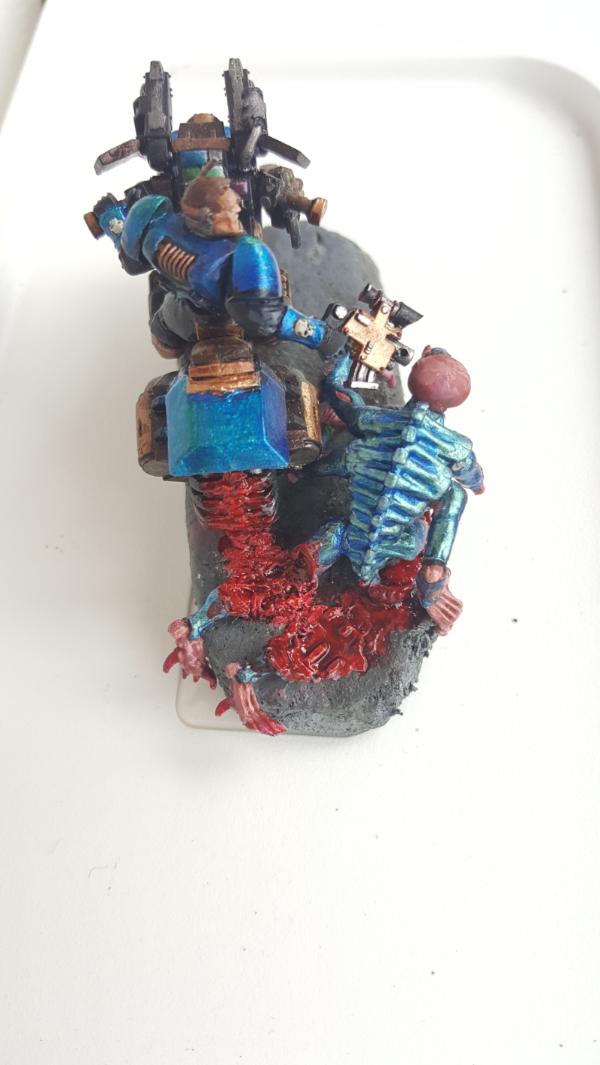
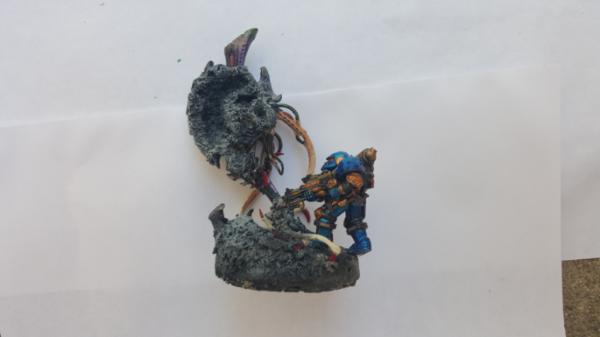
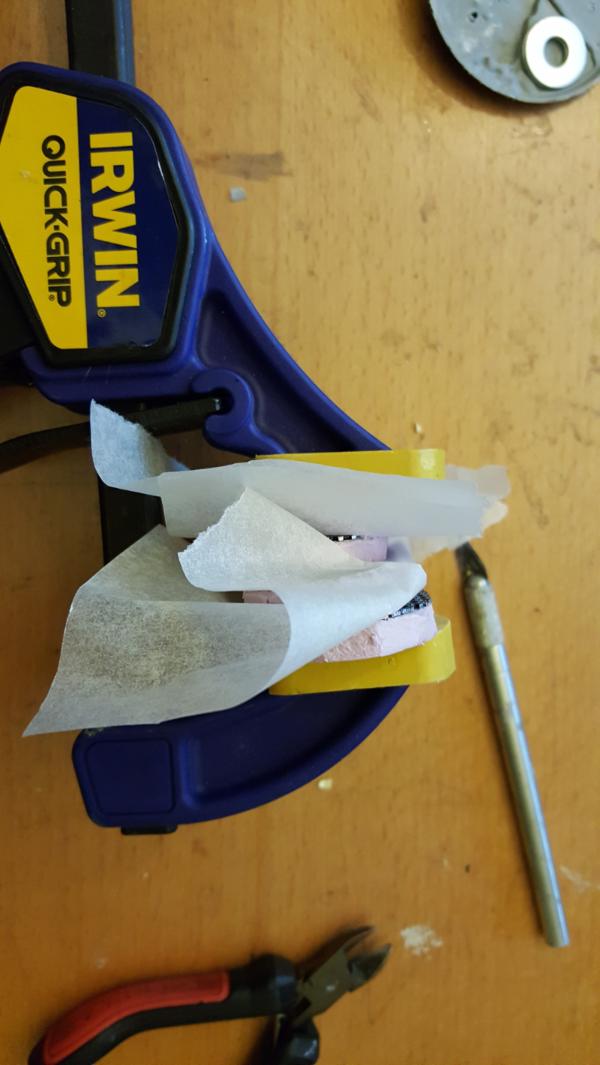
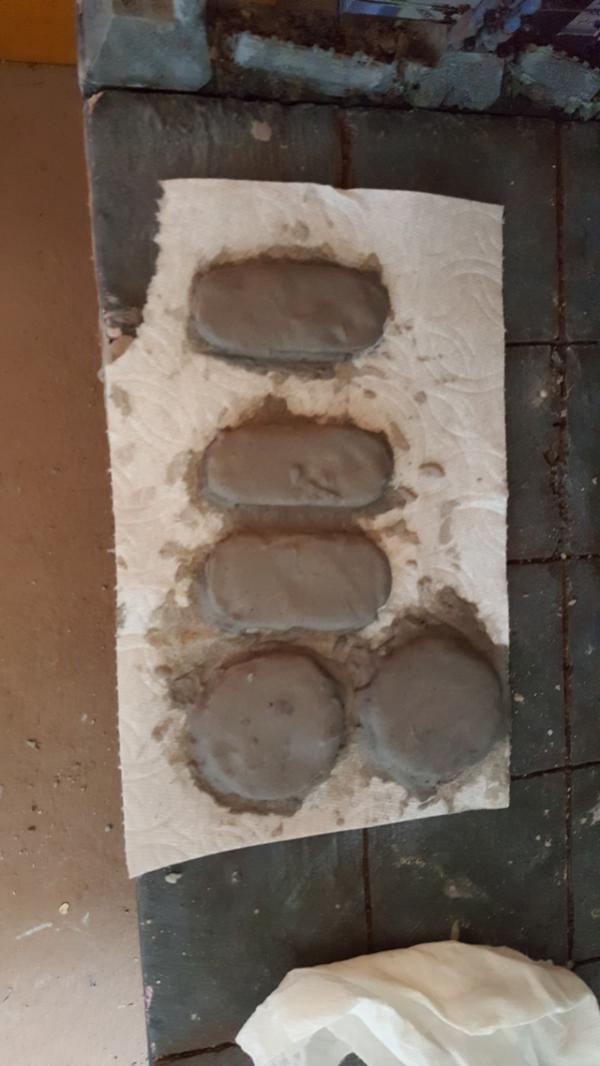
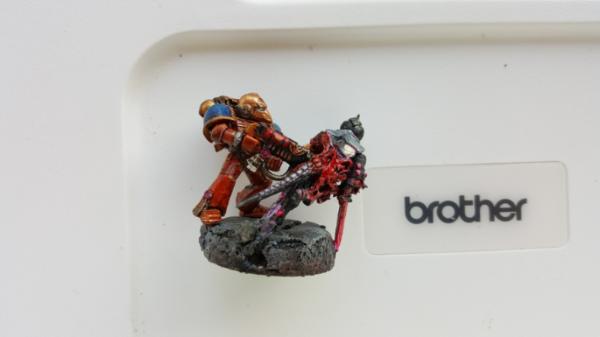
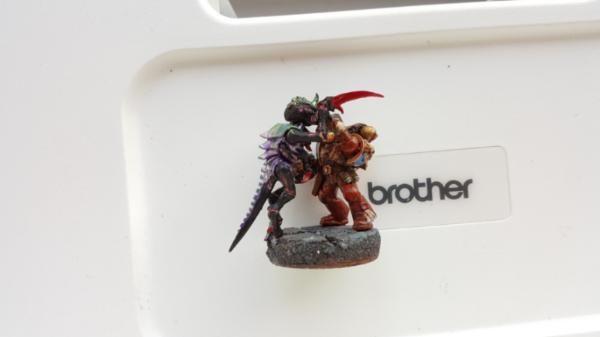
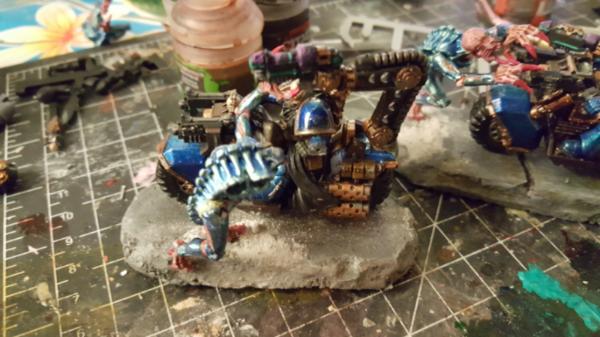
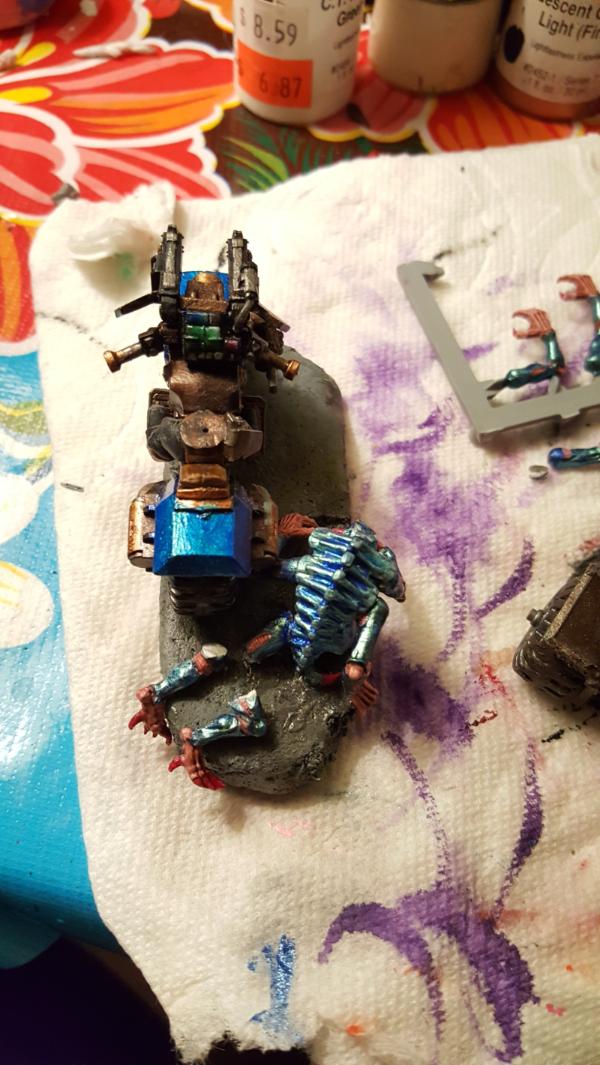
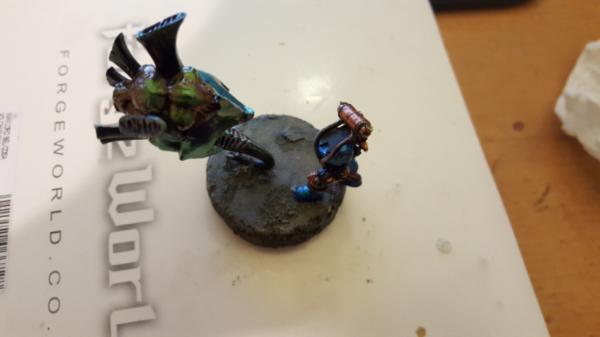
Whew, so these have been in decent shape for a few days but its tough to find a good time to take pictures (IE: morning, when the lighting is the best).
Either way I'm barreelly managing to stay track of 1 set of bases per week, which will end once i finish up the stealers bases, but hey its b een a good productive ride up until then. Either way we have marines in direct CC with gaunts!
No more gaunts popping up out of the ground or anything like that, just full on close combat. there are 2 reasons for this:
1. I now have a 10 man marine unit thats thematically similar (gaunt bases) but still easily distinguishable, very handy.
2. I wanted to see how it'd look andhad a good idea for it? And i didnt know what else to do with this last base set.
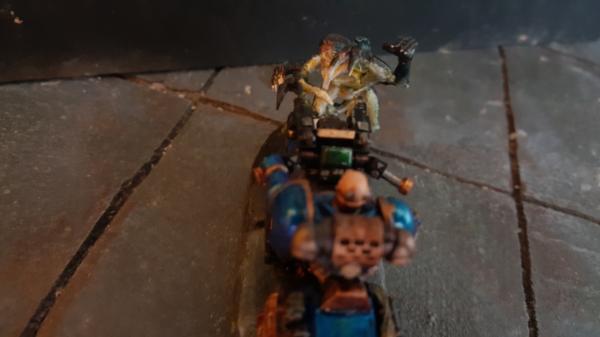
First up, the flunkies, bringin up the rear, but hey, still dealt with their gaunt first...
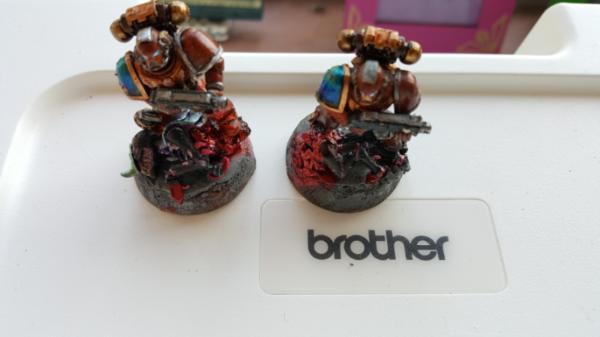

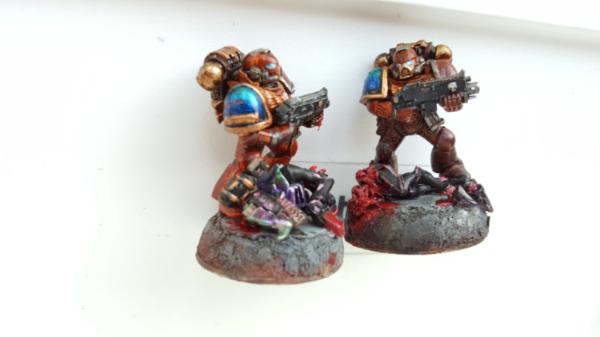
Next up with have the mid melta shot. Lotta fun melting the crap out of this gaunt as it's innards get blown out. Took a lot of time though to make the hole big enough so that the melta gun (which is still magnetized) can be swapped out for other guns. It's not perfect, but it looks great and should work for the tabletop okay.
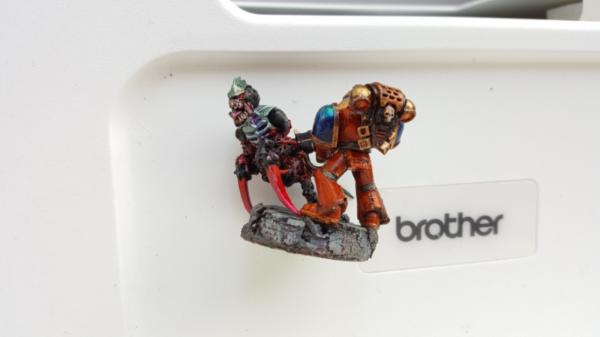

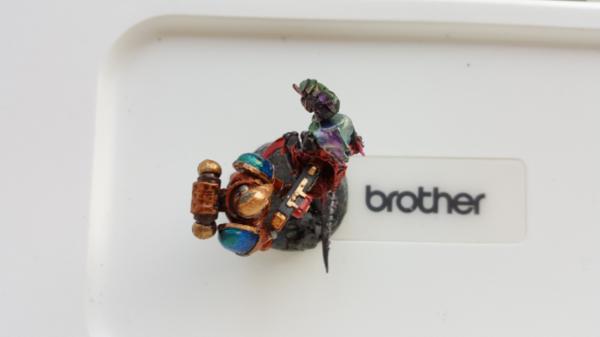
Next up, the yoga pose: you really get a sense of the two tone effect in these picture stoo, im happy.
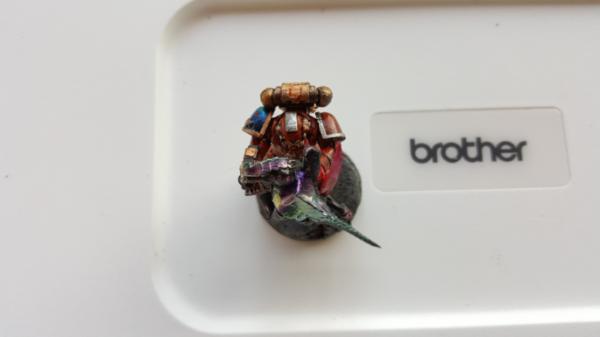
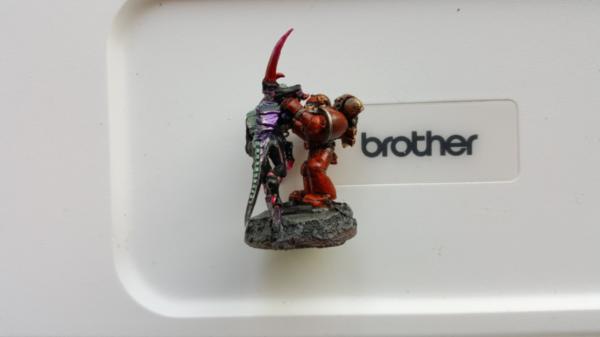
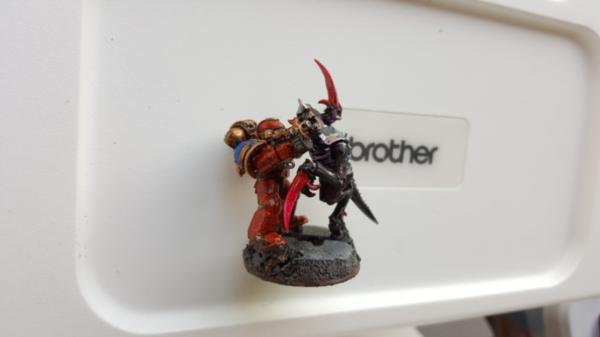
Finally we have the sarge holding on:
|
|
This message was edited 1 time. Last update was at 2016/05/12 21:07:01
|
|
|
|
|
2016/05/14 21:13:25
Subject: Re:Custom multi-level city terrain (5/14: bike v genestealer bases WIP)
|
|
Dakka Veteran
|
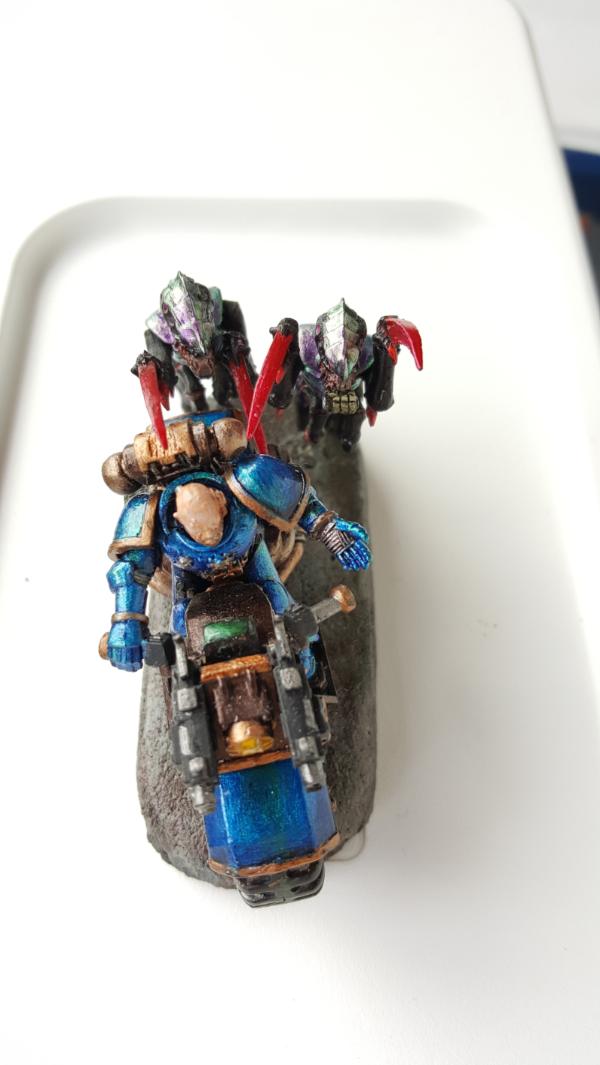
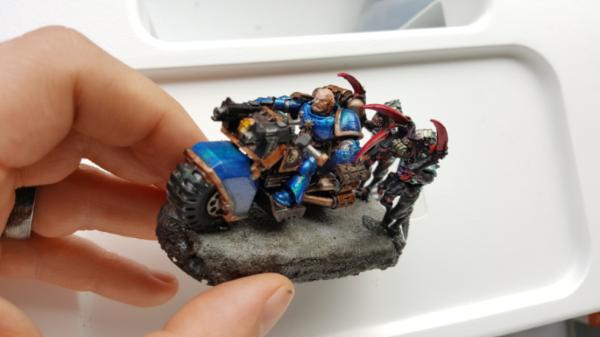
Workin on me some genestealer bases. Definitely takes aw hile to figure out the pose. Its one of those things where you are trying to minimize any overhang, but still leave room for a proper pose, as you acn see by my discolored patches.. it ends up with lots of holes in the base as i figure it out. THankfully because of the wire mesh backing its still easy to really secure the stealer/bike, and given the foamcoat it's easy to fix that too.
The goal of this one is to hit that "deer in headlights" kind of look. so there will be some OSl experimentation
off with his head!
roadkill. Gonna melt most of the legs and see if i cant make some tire impressions.
|
|
|
|
|
|
2016/05/19 00:06:28
Subject: Re:Custom multi-level city terrain (5/18: bike v genestealer bases done! (ish))
|
|
Dakka Veteran
|
|
|
|
|
|
|
2016/05/26 20:45:47
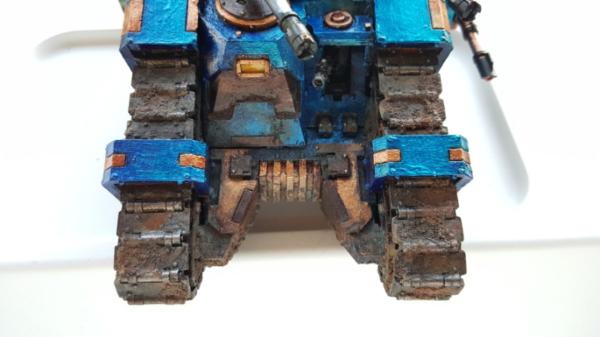
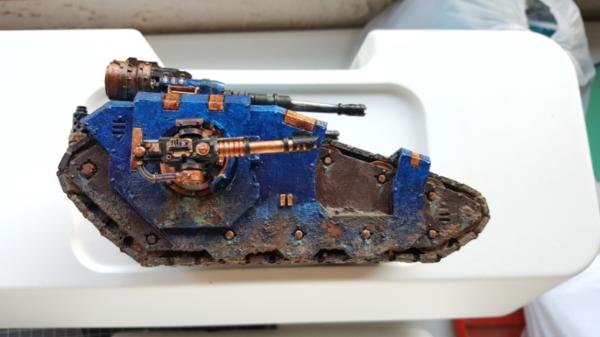
Subject: Re:Custom multi-level city terrain (5/26: Sicaran V2)
|
|
Dakka Veteran
|
|
|
This message was edited 2 times. Last update was at 2016/05/26 20:46:28
|
|
|
|
|
2016/06/07 23:39:46
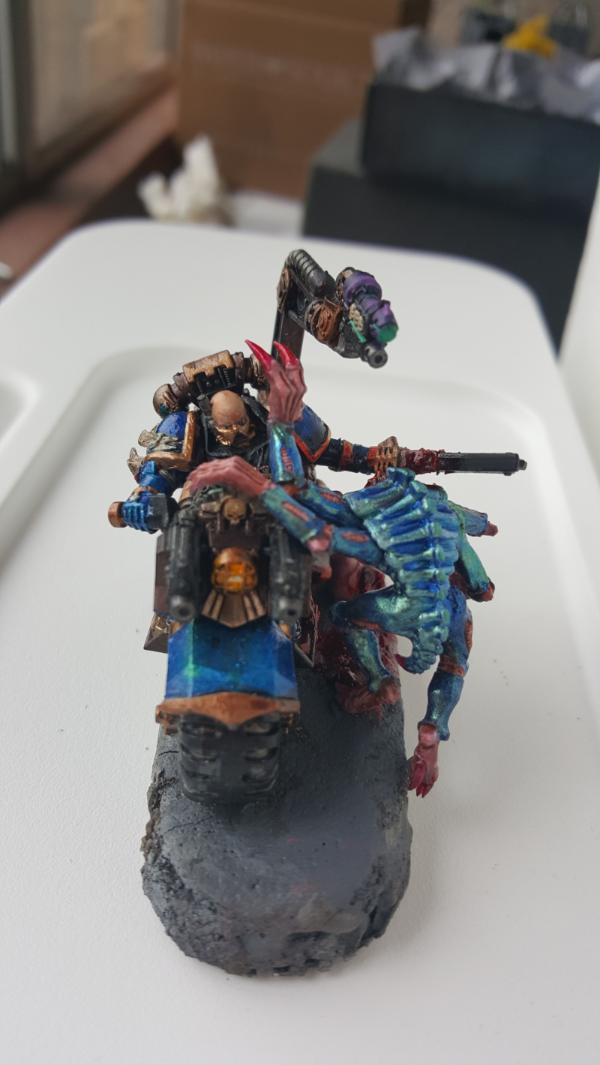
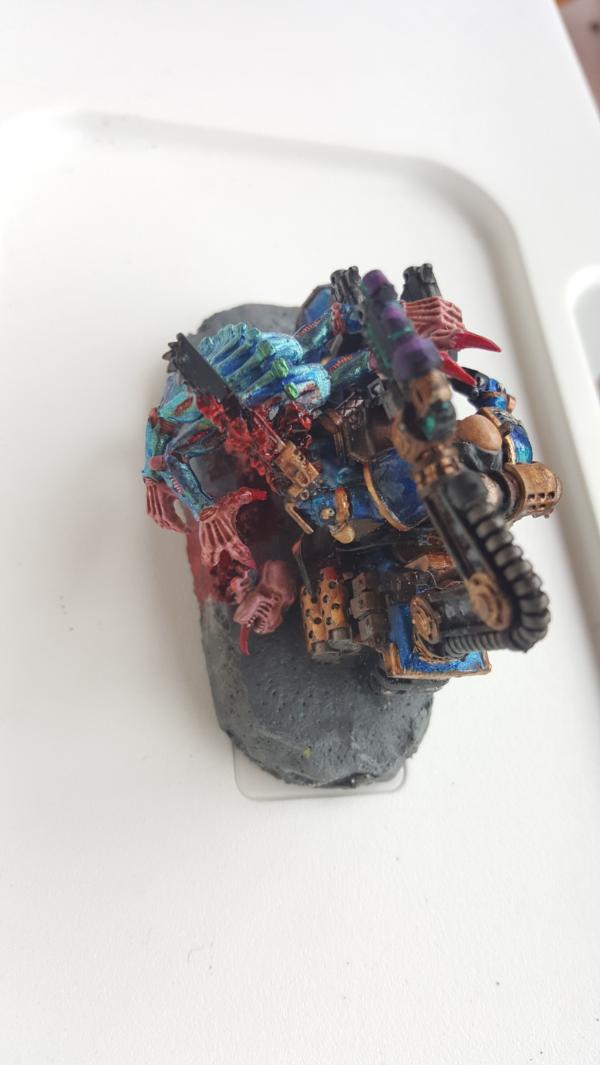
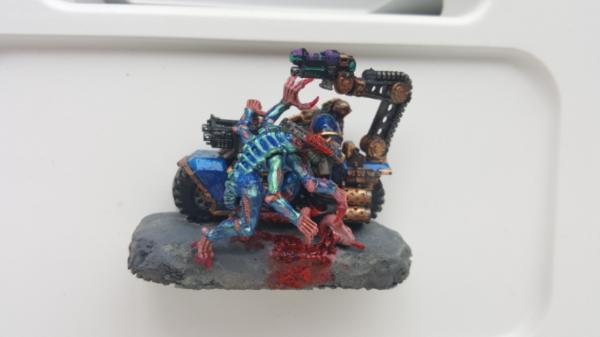
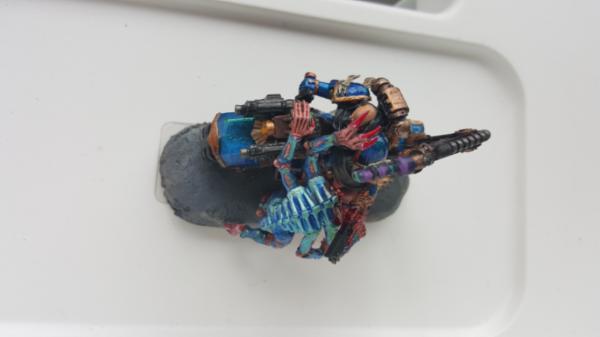
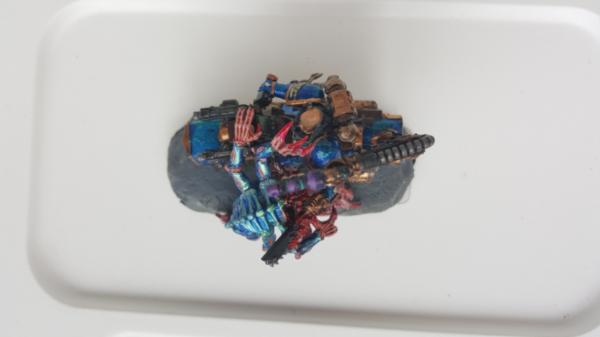
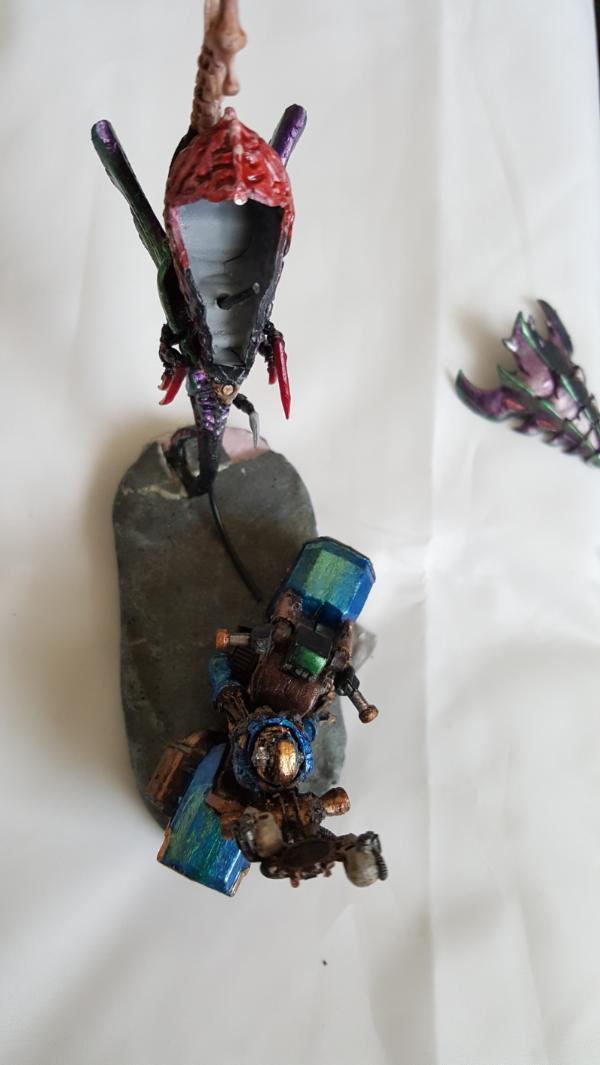
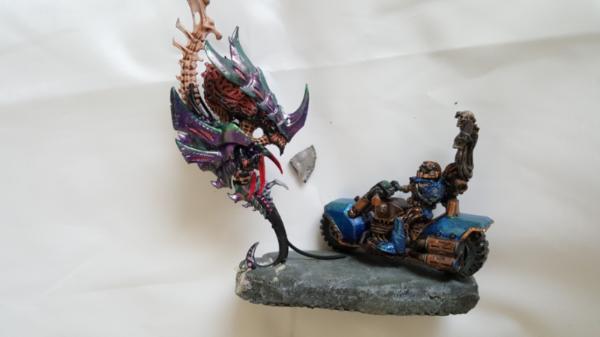
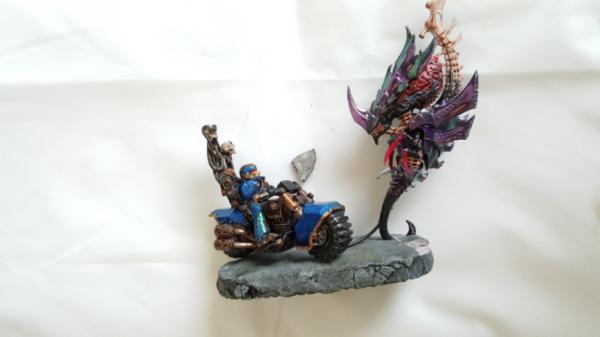
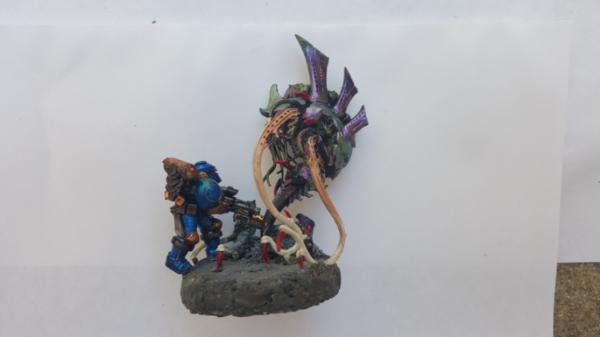
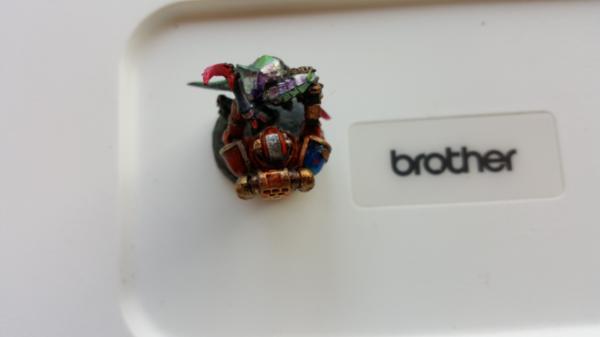
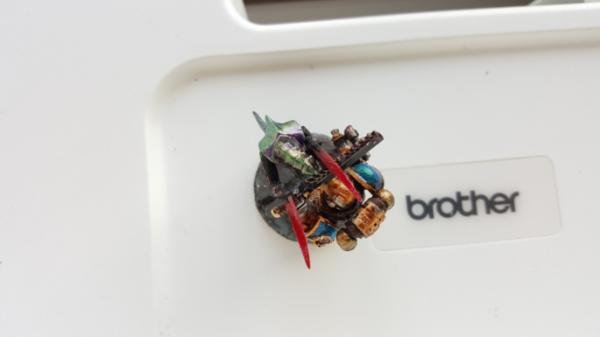
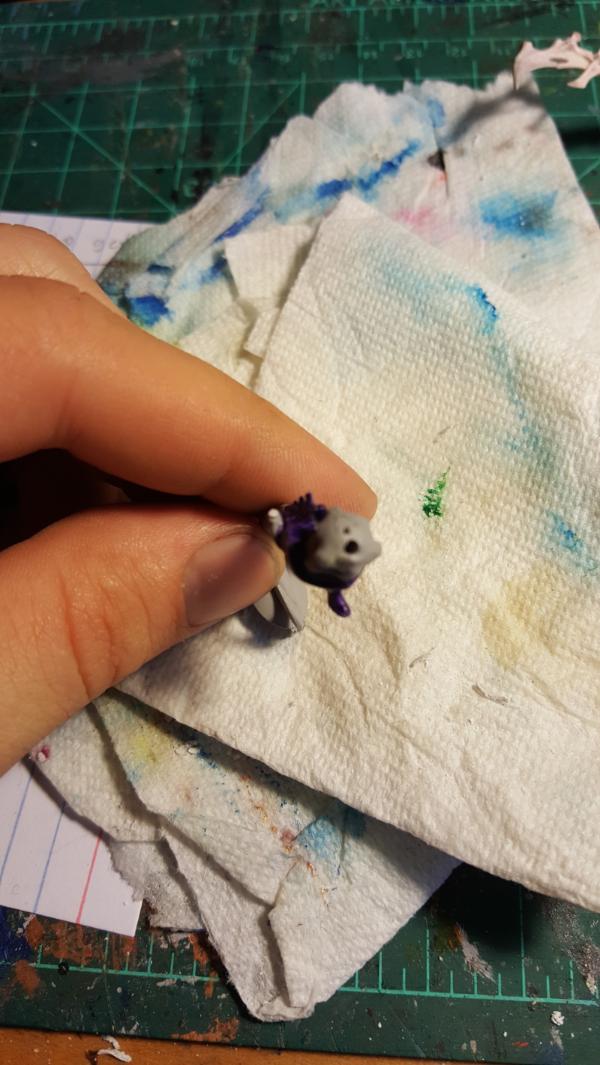
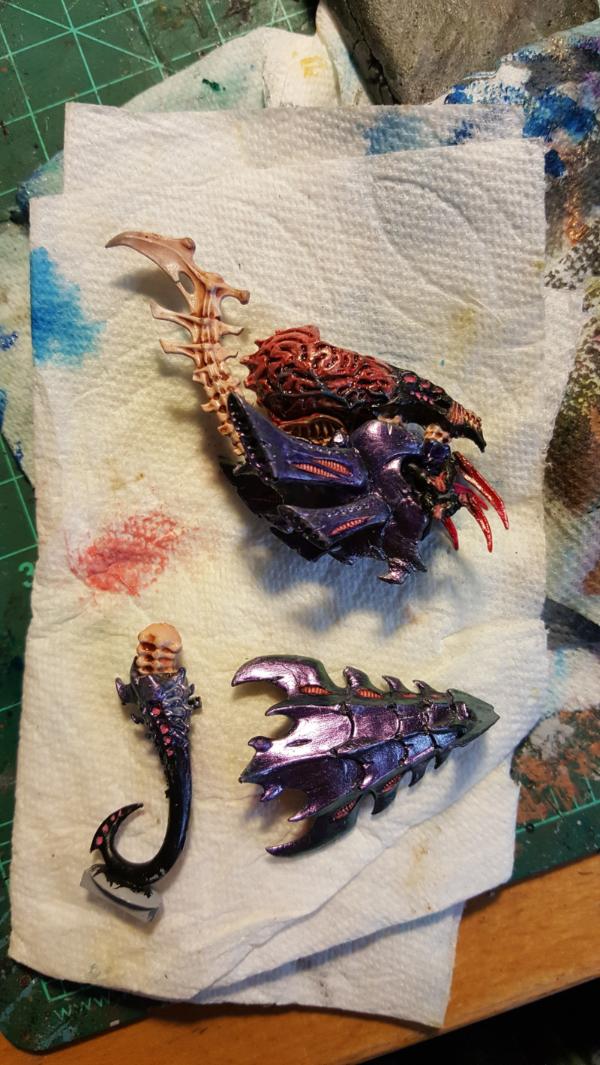
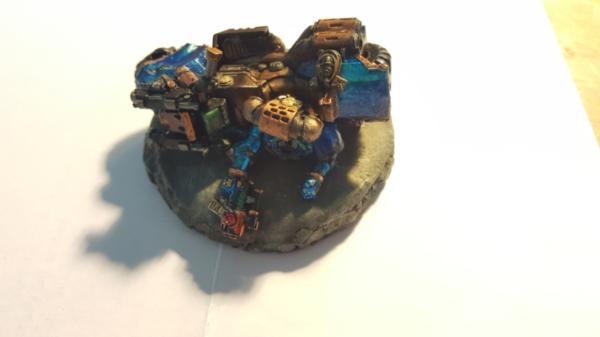
Subject: Re:Custom multi-level city terrain (6/7 neurothrope vs khan base wip)
|
|
Dakka Veteran
|
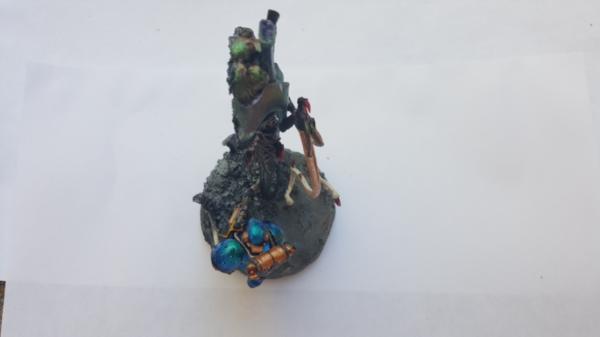
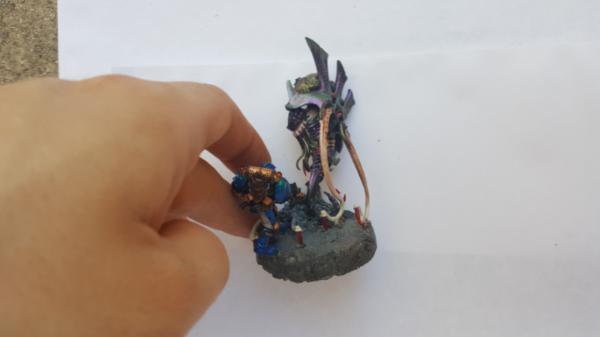
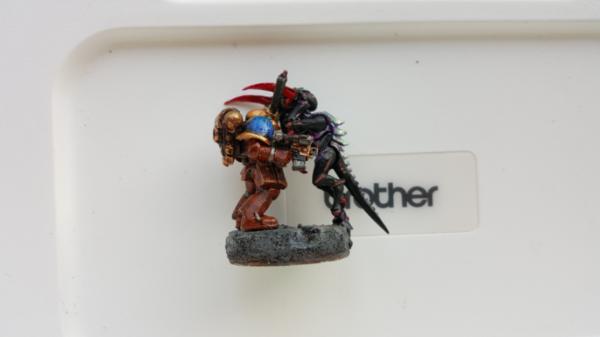
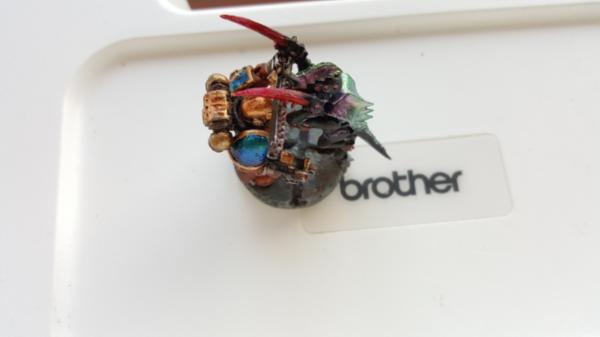
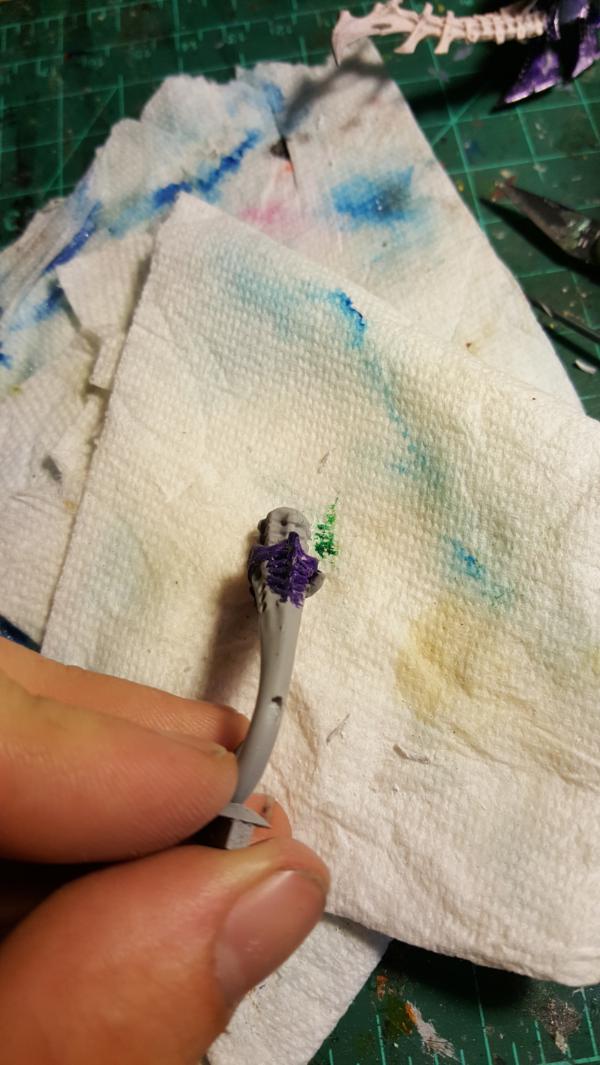
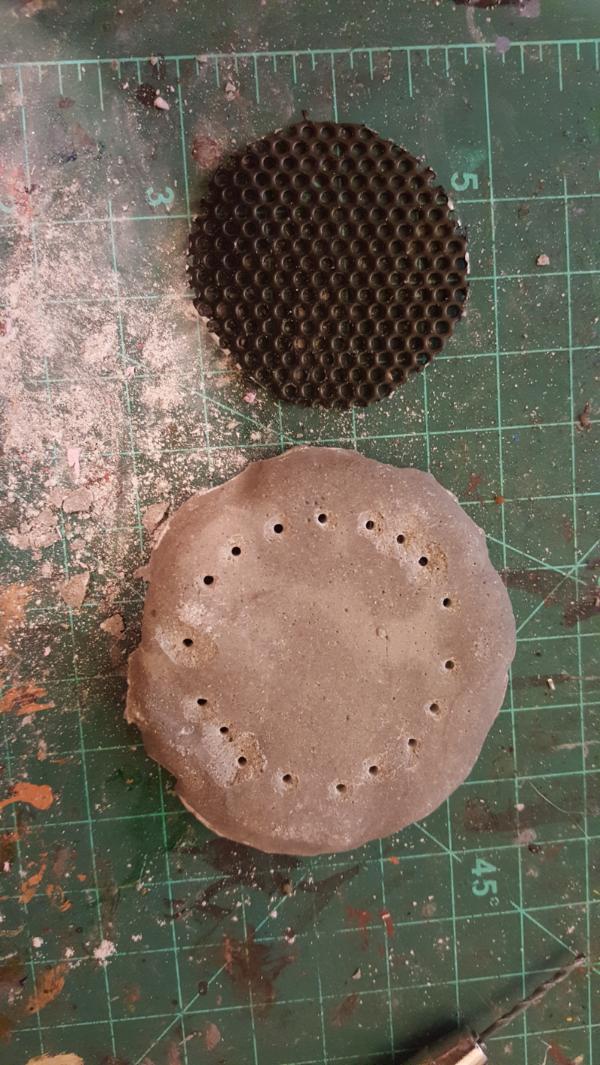
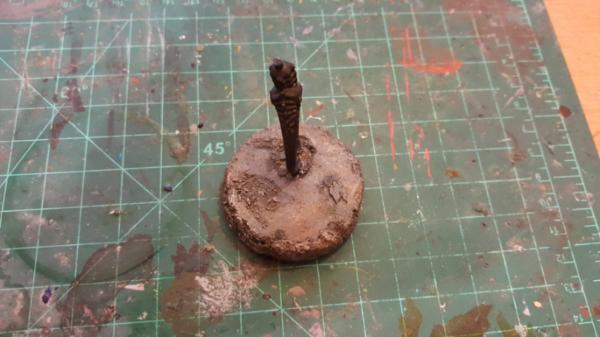
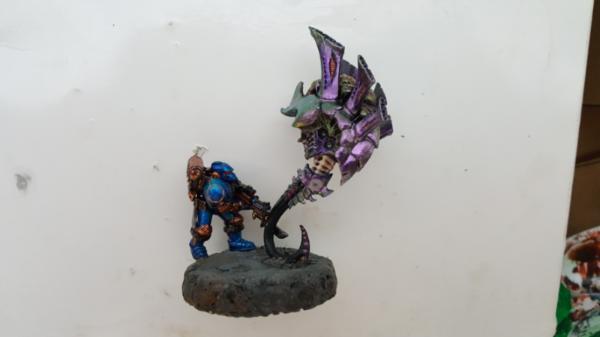
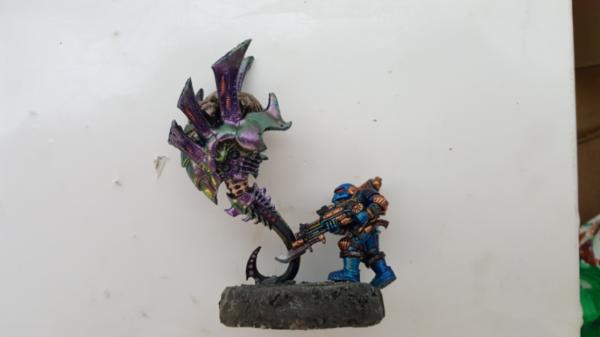
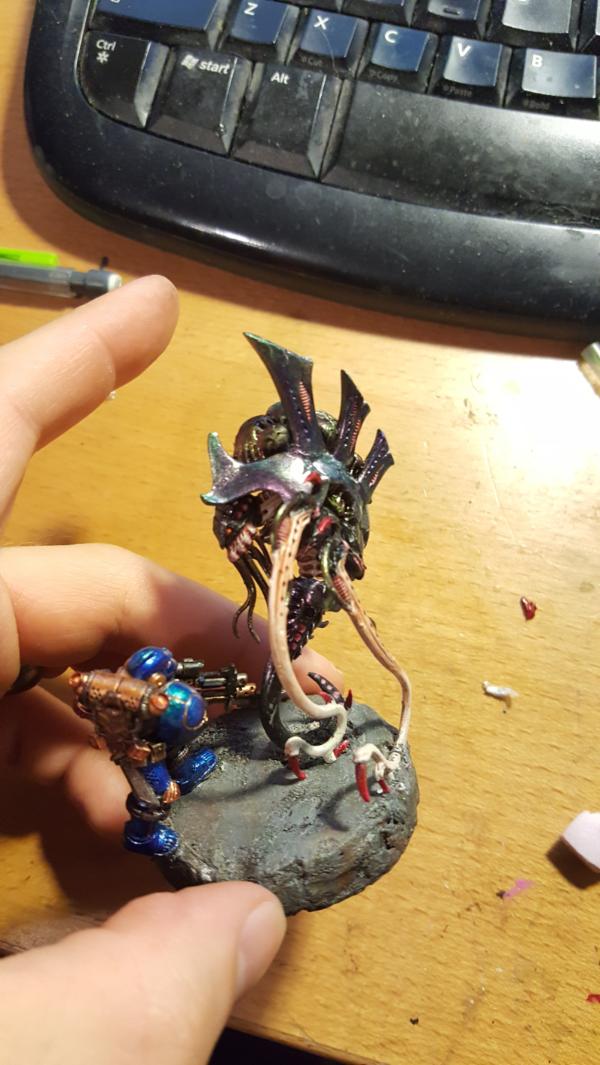
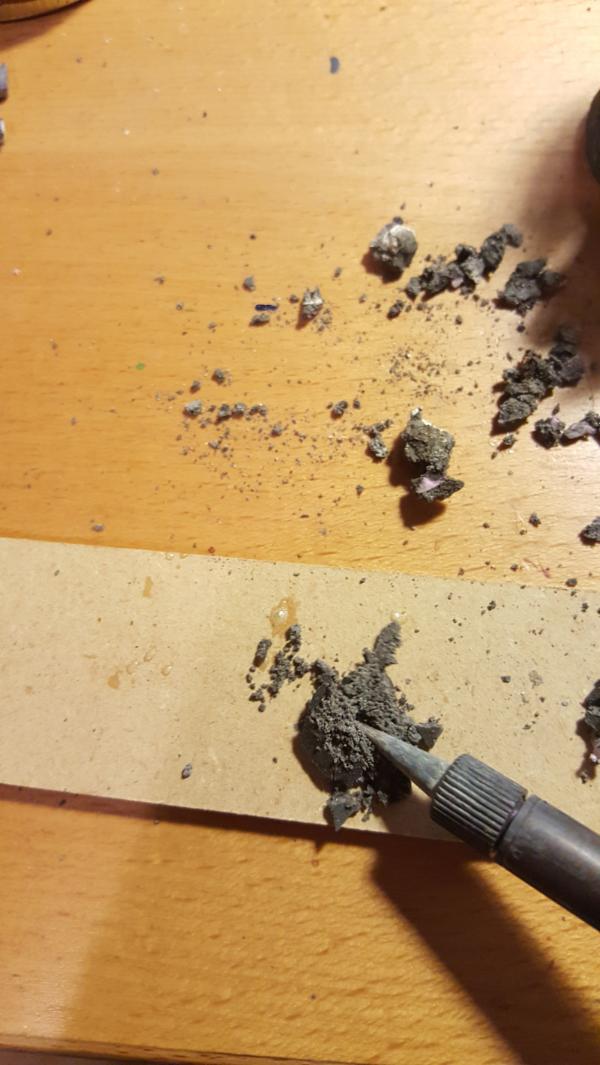
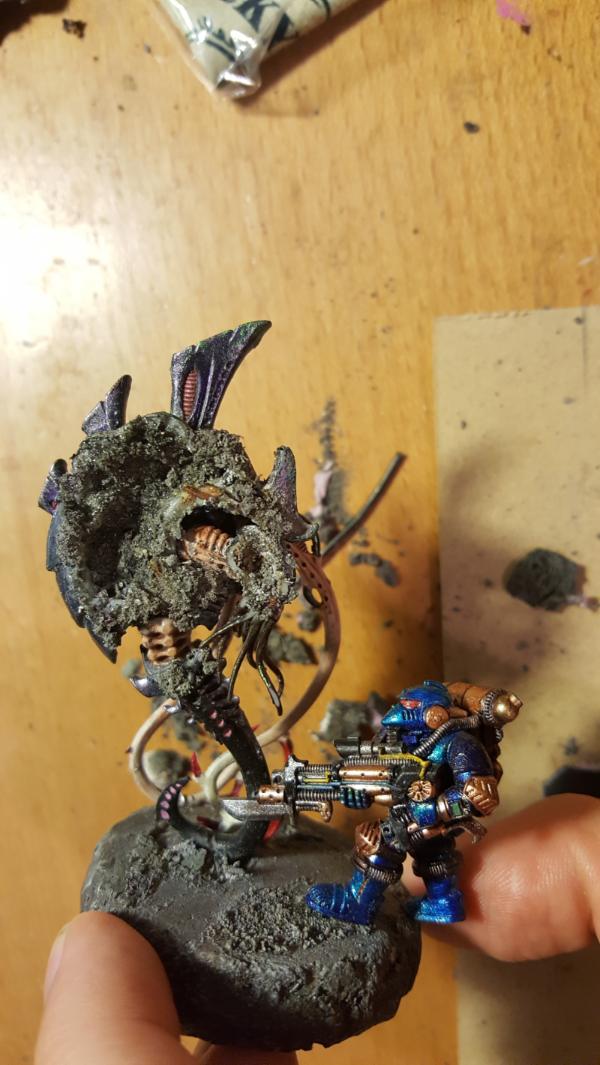
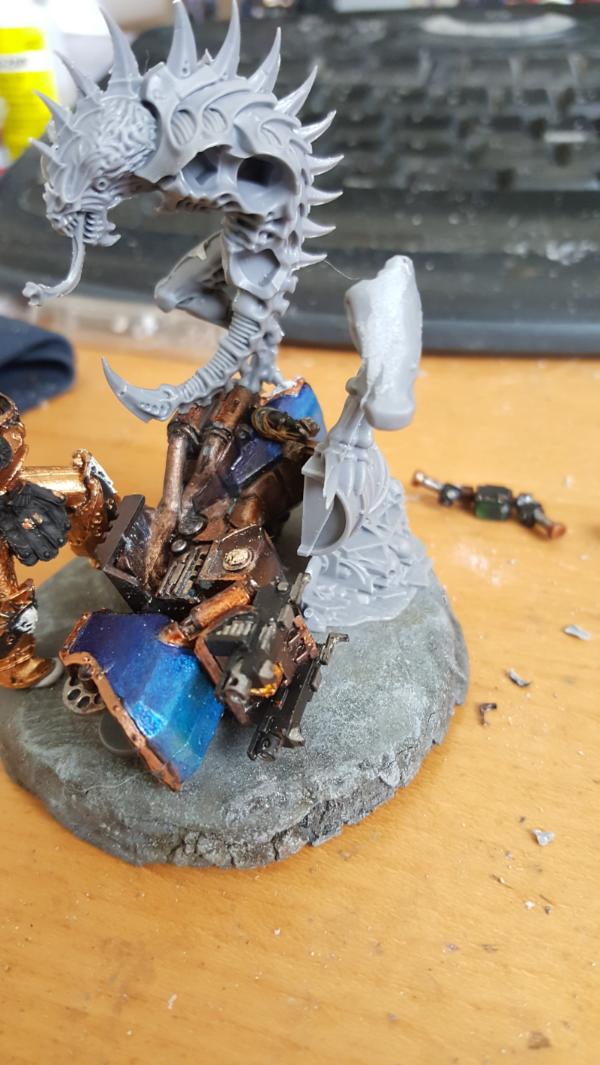
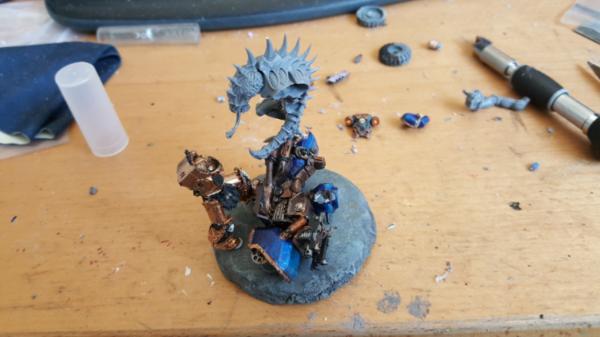
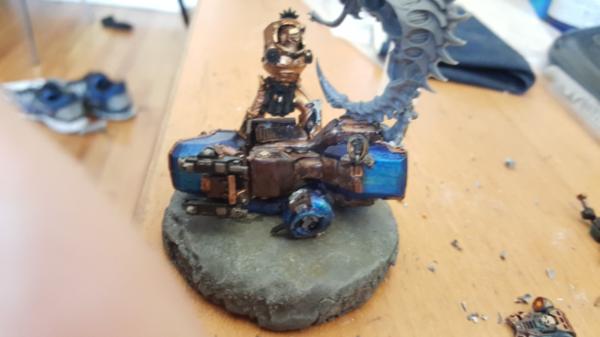
Hey look it's time for another base. More specifically one of the main 2 khan/hero bases. Since it's my el capitan, I figure he gets something bigger. In thise case the bike khan is fighting a neurothrope thats mid psychic attacking him! should be.. interesting to try and do.
FIrst up we have the neurothrope, which, conviently, has a really big head.
I mean just look at that gap! perfect for batteries and LEDs and things. So there are 2 parts to my lighting scheme. First I want the crown to light up (you can see holes in it that i drilled out) and I want it to be shooting off an EL wire lit lightning bolt which I plan to 3d print.
all the pieces:
In order to get all this lighting to work I need a place to put my wires. EL wire is somewhat unique in that it needs an Inverter to work, as it runs on AC power. As such the size requirements of the base for EL wire are a bit bigger than just a penny battery, so I need to hide it in the base somehow. For now thow I need a cabling running from my head to the base, so I gotta hide it in the stalk. Let me tell you drilling through 1.5 or so inches of resin in a straight line such that it mostly worked took.. a good hour. Each bit slightly bigger than the last and you'd have to every few turns pull it all out to get out the filings. Any wrong move and the whole thing would snap. Ugh.
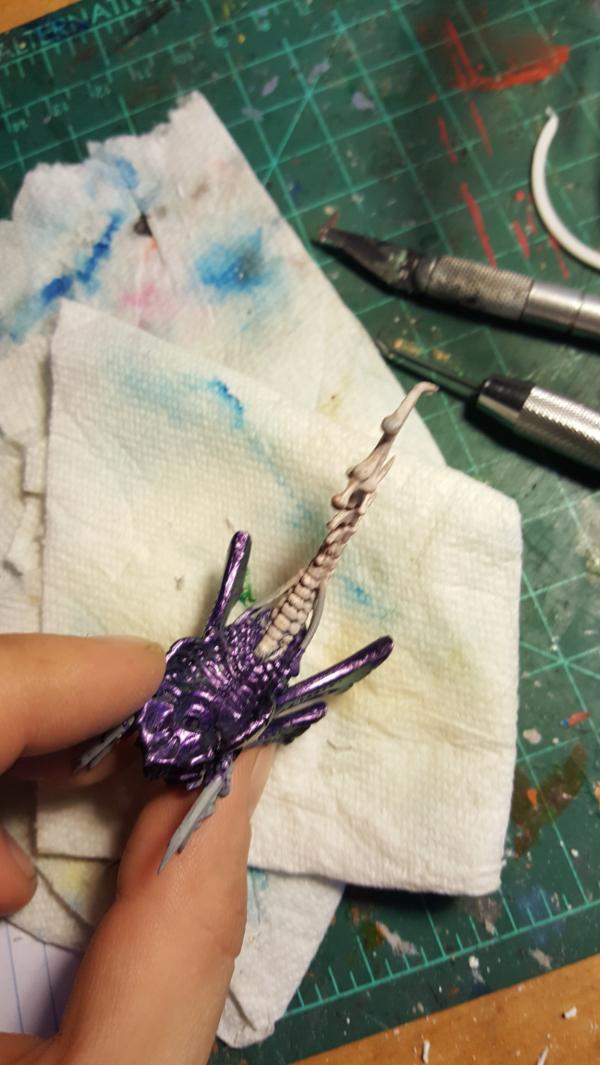
Next up painting; Pretty standard now for my nids, nothing too different: I wanted to keep the spine more bone colored than making it purple. I had the spine for the vivisected warrior that way and it really helps the contrast.
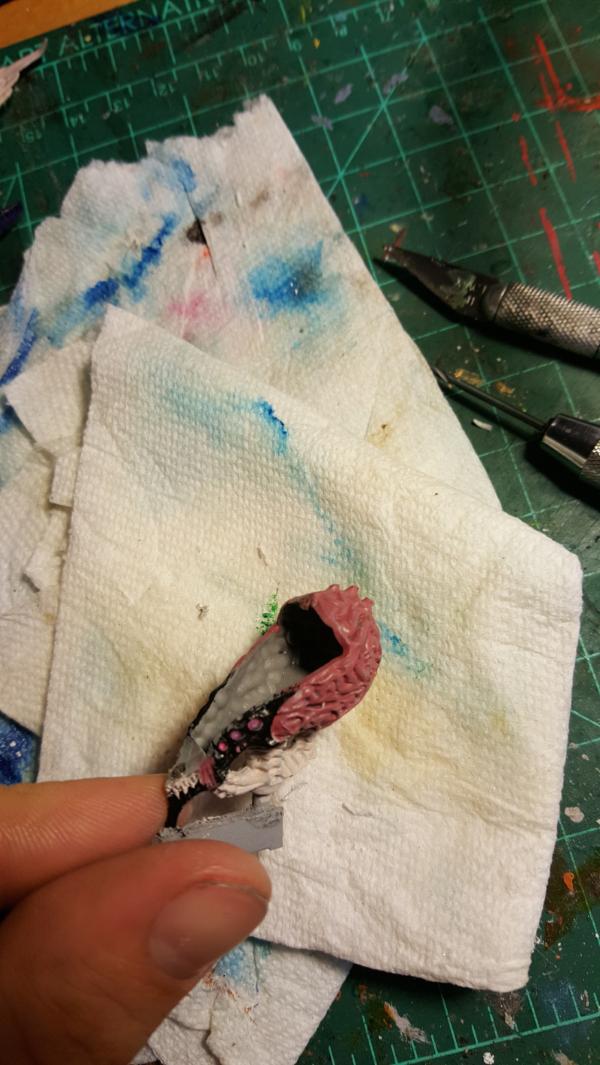
and finally where i'm at. I added some smoke/red to the brains just to make them look juicier.
|
|
|
|
|
|
2016/06/08 22:13:25
Subject: Re:Custom multi-level city terrain (6/7 neurothrope vs khan base wip)
|
|
Dakka Veteran
|
|
|
|
|
|
|
2016/06/10 17:34:27
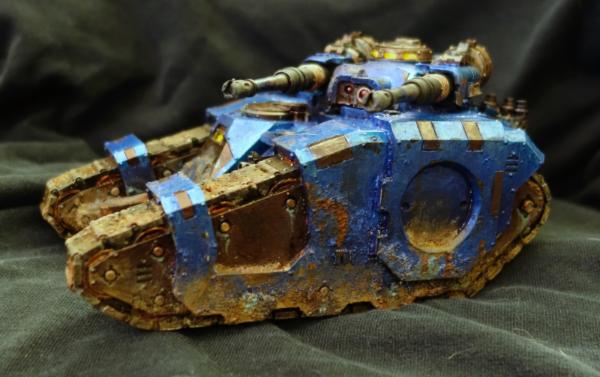
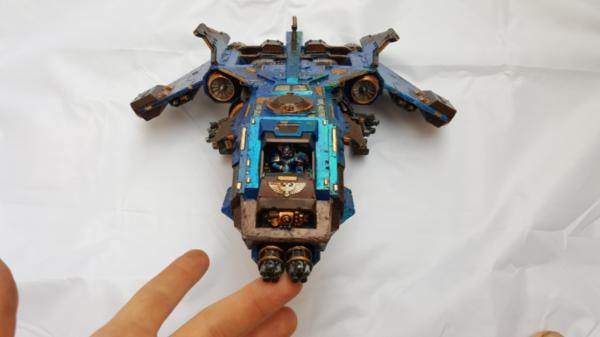
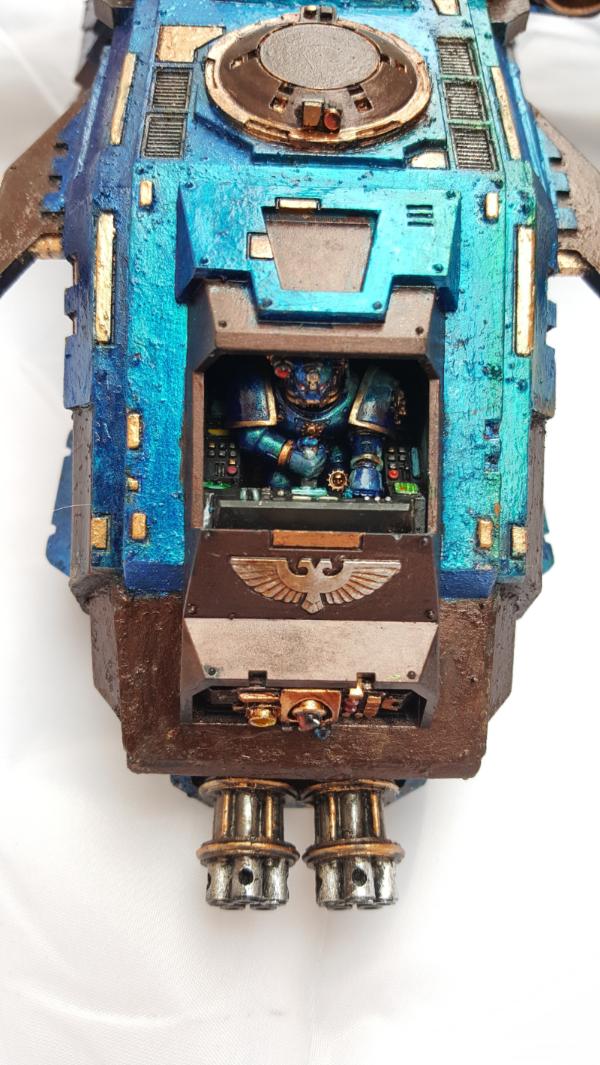
Subject: Re:Custom multi-level city terrain (6/9: fireraptor!)
|
|
Dakka Veteran
|
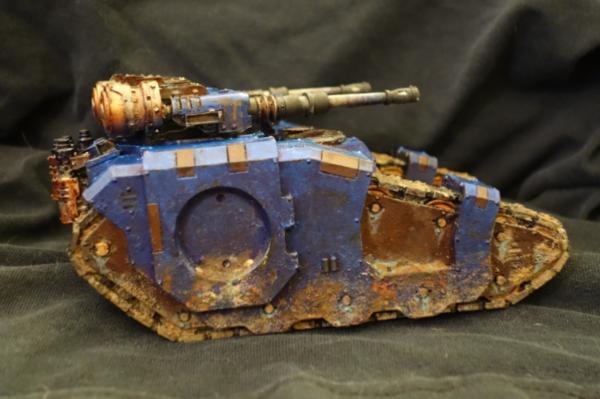
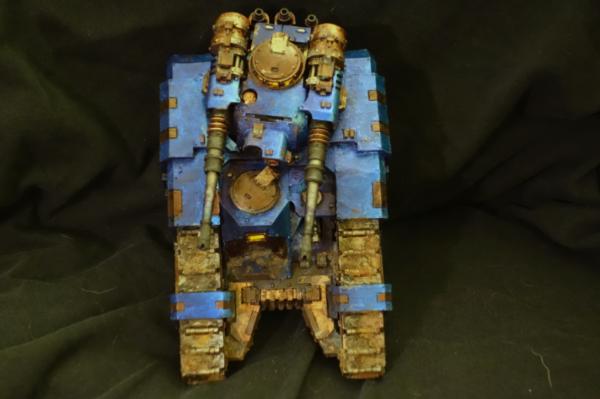
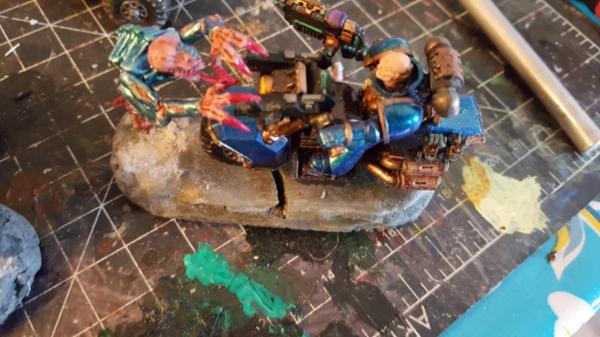
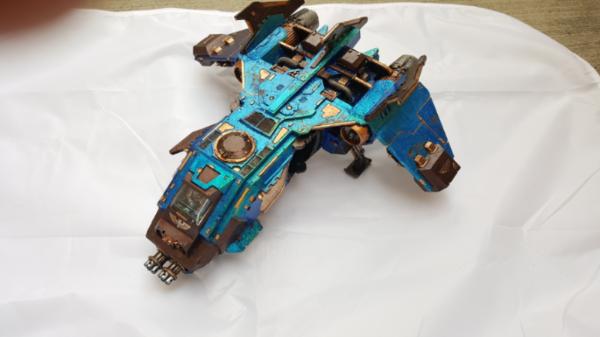
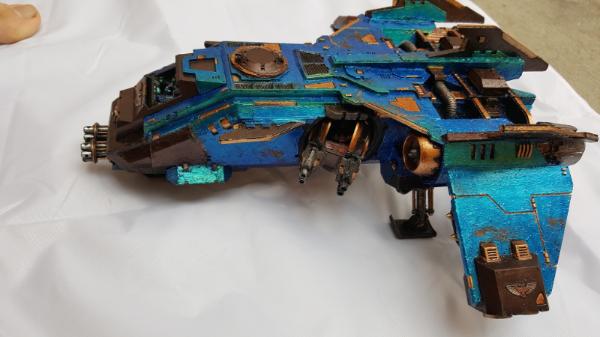
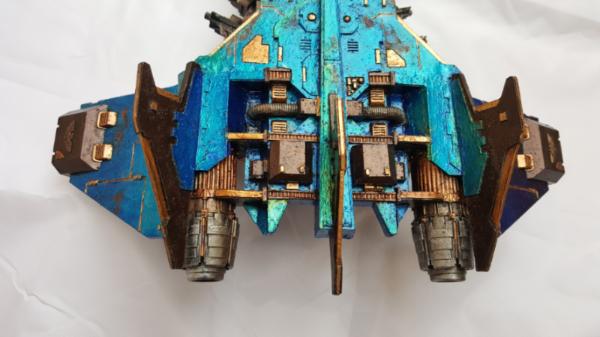
Okay, fireraptor time. So this was the other big thing that I wanted to just finish off on my plate. This is also somewhat a story of woe.
Basically as we all know I like to add chipping, sometimes (most of the time) too much of it. I really like the blue effect and when youg et little orange chips on it it can really work well. So for the fire raptor I decided to really sell it, but the problem is the best way to get the little chips is with bits of sand that you flake off. This is expectially true for resin because if you try to use a razorblade or whatnot to pull off the paint it will likely just pull off ALL the paint (including the primer) and not just the blue. Resin sucks.
Thus sand/salt embedded in the chipping fluid gives you something to chip at and makes for more relaiable chipping. Unfortuantely sometimes it either gets VERY firmly embedded, or comes off immediatly. So in this instanced I erred on the side of way too much sand and.. none of it came off w. Suddently I went from a moderate to heavy chipping to sand in every crevace and it just.. didnt look good. It looked crazy dirty and wierd and I got sad and moved on without finishing it.
Instead of redoing it (i was mostly done when i stopped), which, in retrospect, i probably SHOULD have done. I decided to flowly over time clean off the sand and get back to a more normal state, then repainted the bits that were raw/chipped off the primer, and this is the result. In the end, not bad. Not perfect, not gonna win any awards, but good enough to be done and move on. There will always be some grit to it, but, its a LOT better than it was. 10% of the amount of original sand.

|
|
This message was edited 1 time. Last update was at 2016/06/10 17:34:59
|
|
|
|
|
2016/06/10 18:06:20
Subject: Custom multi-level city terrain (6/9: fireraptor!)
|
|
Legendary Master of the Chapter
|
How did you do the blue? it looks fantastic.
|
 Unit1126PLL wrote: Unit1126PLL wrote: Scott-S6 wrote: Scott-S6 wrote:And yet another thread is hijacked for Unit to ask for the same advice, receive the same answers and make the same excuses.
Oh my god I'm becoming martel.
Send help!
|
|
|
|
|
2016/06/11 04:50:10
Subject: Re:Custom multi-level city terrain (6/9: fireraptor!)
|
|
Dakka Veteran
|
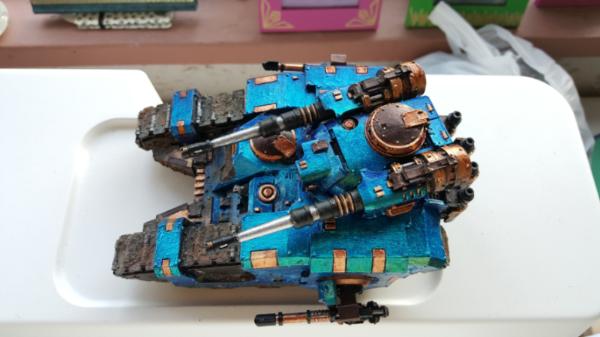
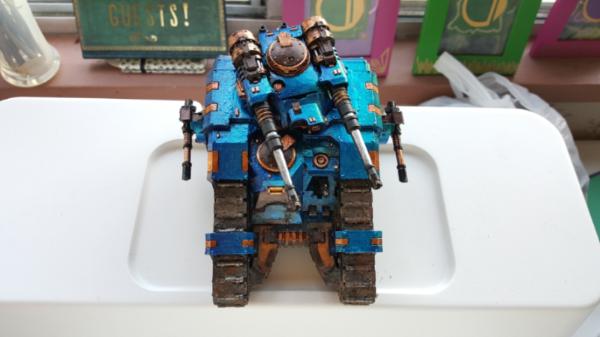
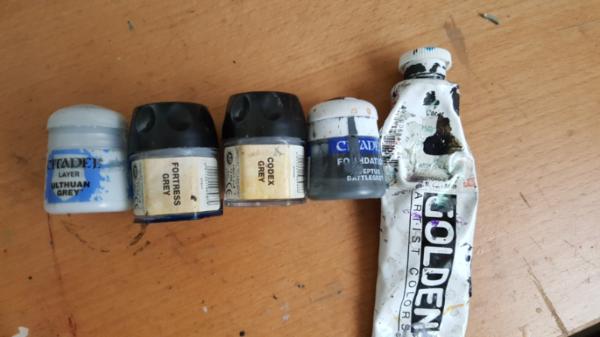
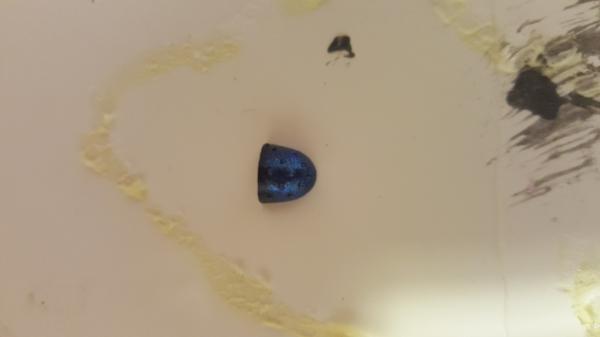
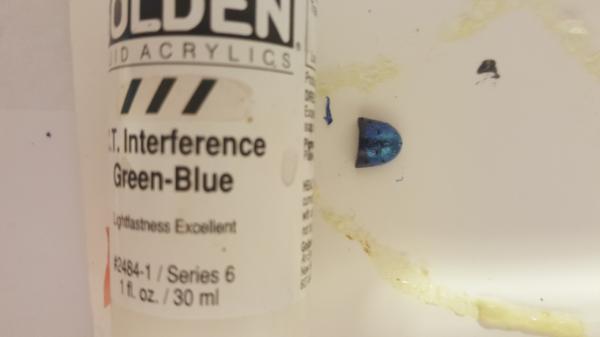
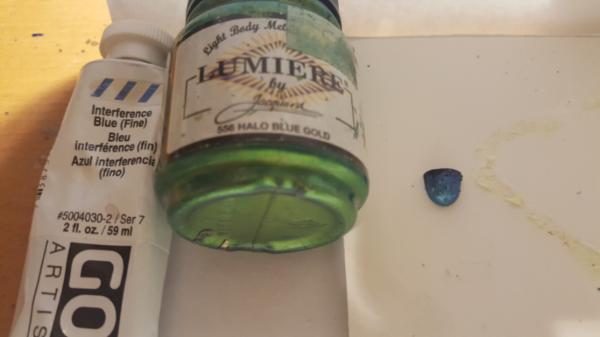
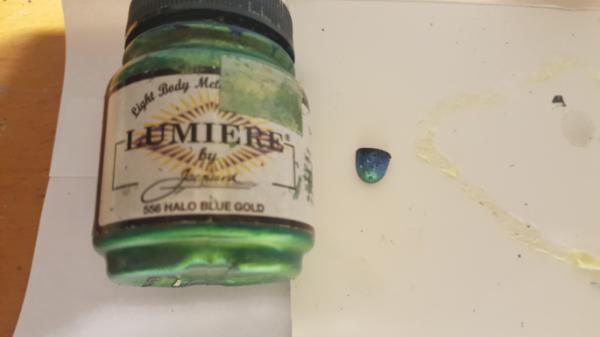
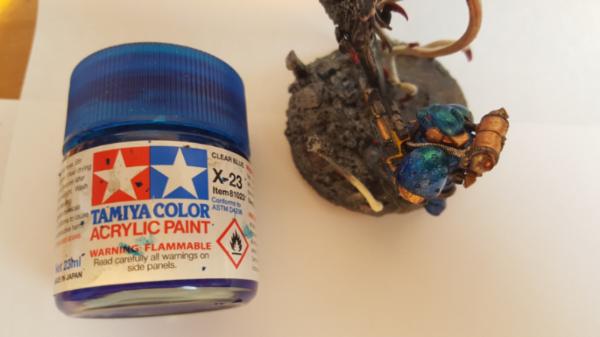
I shall make a tutorial of this process, but basically it involves my favorite color of all time
Phthalo Blue (either shade but in this instanced green shade)
This, along with Dioxazine Purple, Viridian Green, and Phthalo Green, are probably the most striking and ethereal colors out there. They have a richness to them that's quite unlike any other color on the spectrum and are, crtiically, not fully opaque so even in tube form they are more of a tint than a full on base color.
Thus the general idea is to gradiate from black -> phthalo blue -> lumiere pearlescent blue -> intereference blue/intereference blue-green -> lumiere halo blue gold on the model. There is a short version (whats listed), and a longer version that first starts with some base colors and then on top adds the intereference/pearlescent tones. But the short version should work to keep you sane. I'm just insane.
Anyhoo once you have the gradiation you basically bring it all back down to blue with a nice coat of Tamiya Clear Blue. BIG HUGE NOTE. Those new "gem" colors that GW just released would also likely be good candidates for this as well. As (assuming they are a gem affect) I would imagine that they are like the "inks" they used to have and have a similar consistency to tamiya.
Baiscally the Tamiya Clear X (blue, red, green, oj, yellow) are thicker acoholo based acrylics that tint and dry shiny. So you get a really nice layered look where the green is shining through but still colored blue.
|
|
|
|
|
|
2016/06/11 07:34:51
Subject: Custom multi-level city terrain (6/9: fireraptor!)
|
|
Pious Palatine
|
Awesome looking fire raptor.
Cool little diorama with the Librarian and neurothrope too.
EDC
|
|
|
|
|
2016/06/16 21:02:38
Subject: Re:Custom multi-level city terrain (6/9: fireraptor!)
|
|
Dakka Veteran
|
Thanks!
Dont worry, the diorama aint done yet  This is jsut stage one. I have.. plans to make it more epic
|
|
|
|
|
|
2016/07/05 23:19:15
Subject: Re:Custom multi-level city terrain (7/5: 30th anniversary marine vs venomthrope)
|
|
Dakka Veteran
|
So the librarian/neurothrope diorama has been put on hold for now, but I did get in my 30th anniversary marine so its time to start working on that.
Unfortuantely I didnt want this diorama to be on a 60mm base, just a 50, so the question is... how do you cut down a (really thick) foamcoat base to size? very.. very slowly. With lots ofl ittle holes
Unfortunately I dont hae pics of the next steps cause I'm a dumb dumb, but basically I had to rebuild the side walls with the bits i cut off, so lots of gluing and pinning of the sides, and then sanding it all down to get it back to being smoothed. Took a little bit but worked out well in the end:
And thats all for now! I'm doing a spurt to finish off this particular base so lots of updates soon.
|
|
|
|
|
|
2016/07/06 18:02:15
Subject: Re:Custom multi-level city terrain (7/6: 30th marine vs v-thrope, the face off begins)
|
|
Dakka Veteran
|
More progress:

|
|
|
|
|
|
2016/07/07 20:00:05
Subject: Re: multi-level city terrain, marine v nid bases (7/7: 30th marine vs v-thrope, marine almost done)
|
|
Dakka Veteran
|
Almost there. Im saving the shoulderpad for last so I can make a blue paint tutorial.
|
|
|
|
|
|
2016/07/07 21:05:02
Subject: multi-level city terrain, marine v nid bases (7/7: 30th marine vs v-thrope, marine almost done)
|
|
Legendary Master of the Chapter
|
Wow that looks really good.
was this also the various lumiere pearls and interference paints?
|
Unit1126PLL wrote: Scott-S6 wrote:And yet another thread is hijacked for Unit to ask for the same advice, receive the same answers and make the same excuses.
Oh my god I'm becoming martel.
Send help!
|
|
|
|
|
2016/07/07 21:22:28
Subject: Re: multi-level city terrain, marine v nid bases (7/7: 30th marine vs v-thrope, marine almost done)
|
|
Dakka Veteran
|
Indeed! There shall be a tutorial about the blue shortly. The nids I can do... one later when i paint up the primarch.
|
|
|
|
|
|
2016/07/08 18:55:29
Subject: Re: multi-level city terrain, marine v nid bases (7/7: 30th marine vs v-thrope, cutting it in half)
|
|
Dakka Veteran
|
Oh hey this is coming along nicely...
WAIT WHAT ARE YOU DOING?
SAWWING SOUNDDSSS
So anyways, why did i cut my pretty venomthrope in half? cause it's a 30th anniversary marin! and 30th anniversary marines are broken as all get out and have the "disentegrator" gun. So I figured id disintegrate this venomthrope. Since the marine is in stand down position, the venom is just.. sitting there, seemingly perfeclty normal and terrifying, until you realize that the pile of ash on the other side is where half its face was.
Thats the idea anyways, step 1 is sawing it in half. This worked pretty well with a dremel. Downside is that dust got allll over my lvoely paint job. Le sigh. Next time cover with plastic ya? still, after lots of spraying with water the marine is clean at least, and while certain crevaces of the venom never got fully dust free a light coat of ink fixed it right up. Now to figure out a good ash effect...
|
|
|
|
|
|
2016/07/11 20:34:03
Subject: Re: multi-level city terrain, marine v nid bases (7/11: 30th marine vs v-thrope, making ashes)
|
|
Dakka Veteran
|
So, experiments in ash commenced and were.. satisfactory!
So the first thing I tried was MDF dust. You run a file over some MDF bits you have lying around and pretty soon you get this nice fine powder that seems like it would be good for ash. The problem? its hairy, and looks hairy, so that was out.
Instead I went back to my old standby of Foamcoat scraps with the knowledge I got from it from my acid base: putting a soldering iron makes it crumble.
Foamcoat, in brief reference, is a plaster like material that coats pink foam. I use it for everything, it's my base material for my terrain/bases/etc. very solid and realistic.
https://hotwirefoamfactory.com/025_All_Purp_FoamCoat.html
Okay with that out of the way lets MAKE IT HOT.
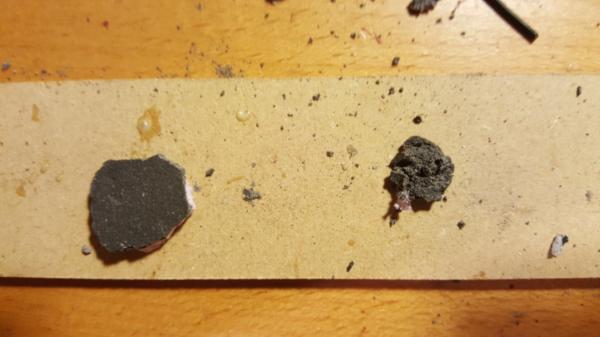
Step 1: get some scrap foamcoat. If you are a true believer like me/have made any big terrain piece you will have lots of leftover scrap bits (the bit on the left, the bit on the right is what we are converting it to)
Step 1a: Make sure to have pink foam on the back your scrap. This is actually pretty important. When foam is subjucated to high heat it shrinks and becomes this sticky blobby goo that, when it cools, hardens into something more like plastic. This is PERFECT at holding your ash together JUST long enough to glue it down onto something like Gorilla glue. Just putting down a layer of glue and scattering foamcoat bits over it works okay but you dont get that cracked lookt hat you do here.

Step 2: Take soldering iron, make it at your hottest temperature. Just kinda press it ont your scrap.
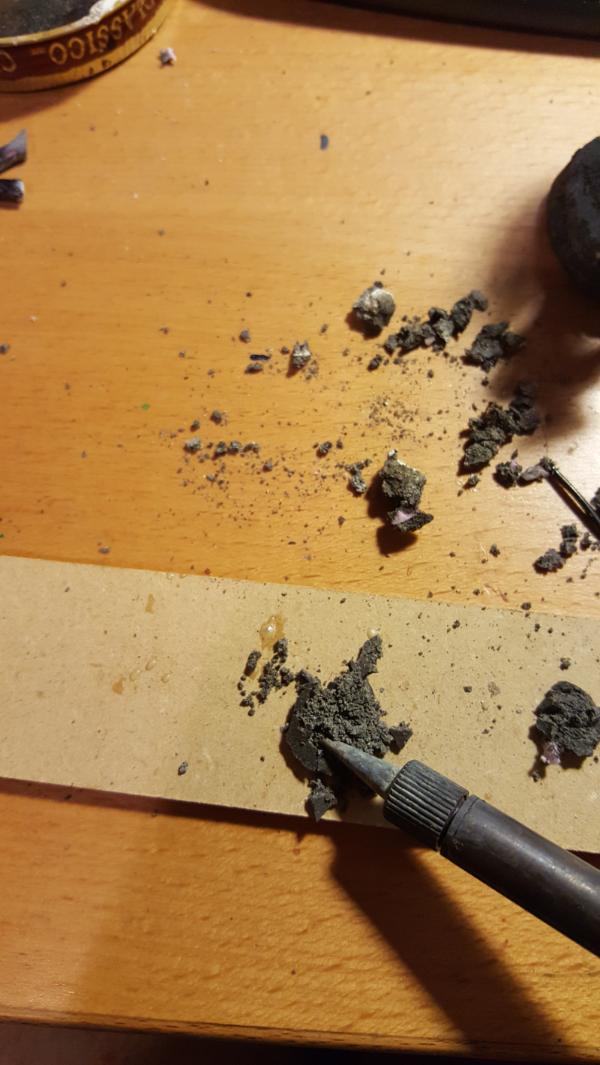
Step 3: Wait. Within.. a few seconds (or longer for really thick pices) the coat will fail and you can press through. you are now in prime "ash" stage and you kinda just press it down in the area and watch it crumble/crack/etc. ALl that fun stuff.
Step 4: wait to cool and then paint! Woo! Ill explain that next but first a WIP of it coming together:
Now to paint it. These are the colors I used, pretty straightforward greys though the lighest is just ever so slightly blue, looked really good and vibrant. But yeah, pretty much as you expect. Start with black and then drybrush your way up tot he top. One interesting wrinkle is that I used (not pictured) a semi-gloss coating over the tops of the ash piles. This helped sort of meld it goether and reduced a bit of the contrast from the black to the bright grey and also gae it a touch of sheen, which charcoal at least definitely has.
|
|
This message was edited 1 time. Last update was at 2016/07/11 20:40:52
|
|
|
|
|
2016/07/12 18:33:07
Subject: Re: multi-level city terrain, marine v nid bases (7/12: 30th marine vs v-thrope done!)
|
|
Dakka Veteran
|
|
|
|
|
|
|
2016/07/14 20:29:46
Subject: Re: multi-level city terrain, marine v nid bases (7/14: blue carpaint style tutorial)
|
|
Dakka Veteran
|
Lets talk blue paint tutorials!
Now this is the newer method thats abit shorter than before. It produces about the same effect and requires much fewer passes, so I am just going to show this method. Originally I did the gradient in flat paints, then added iridescent paint on top but that takes a whiiileee. lol.
Anywoo, paint is shown next to the progress to help really illuminate what I'm using. The point is to make the green "highlight point" at wherever you expect your light to be, so that means edges or the corner of a shoulderpad, etc. It helps to be consistent across the model as that sells that you are getting a consistence "green" response so to speak.
First up, black primer, and pthalo blue (the base color this is all based around)

Then lumiere blue. A really pretty iridescent blue look, just looks.. awesome.
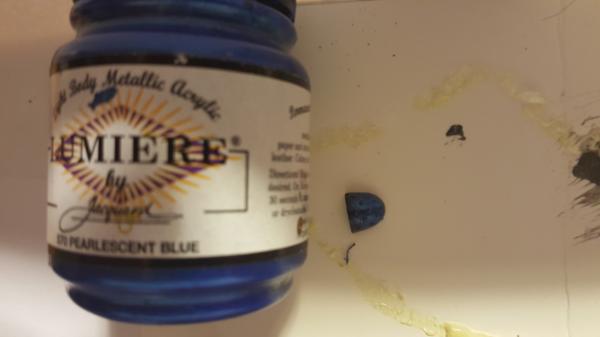
A recent addition, but I add a bit of blue-green 2 ton paine early to build up brightness, should help with the shimmer look.
My standbys, mix them together to make turqoise
Finally the green highlight.
And now we tone it all back and get it darker and add in that extra depth. I used to use an blue ink wash with gloss on top, but this clear blue does the job in one go so its my new tool. It's thicker though that you expec tso some watering (with alcohol) helps. You can spray this on too with enough thinner.
|
|
This message was edited 1 time. Last update was at 2016/07/14 20:30:04
|
|
|
|
|
2016/07/15 18:37:37
Subject: Re: multi-level city terrain, marine v nid bases (7/15: Moloc vs Patriarch Genestealer posing)
|
|
Dakka Veteran
|
So normally there would be a bit of a break as I figure out my next big base setup, but last night everything just clicked and I got started right away!
Anyhoo the plan was to have my "ground" khan be the Moloc model from the Ivanus Enkomi and Asterion Moloc pair. I've already painted up ivanus model earlier, and they are both excellent, so that seemed a natural fit.
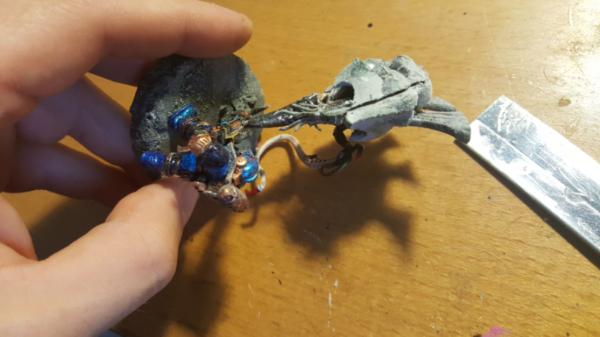
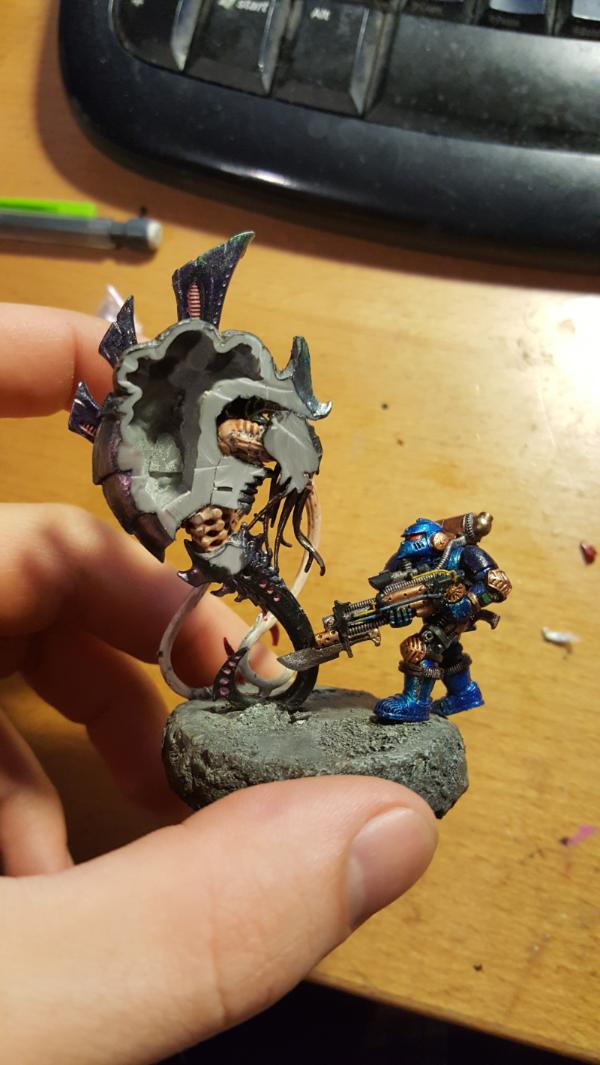
The question, of course, was who to face him against? It needed ot be someone pretty big but not too big as the Neurothrope battle is still top dog, and any other power levels would get too big for the base (i kept it to 60mm), so I went with the patriarch genestealer. But his pose only really works when he is standing on something tall, and the sewer pipe, while cool, doesnt quite fit in the area i plan to place the model (but dont worry, you will see them soon, too cool!).
http://www.belloflostsouls.net/wp-content/uploads/2016/02/Genestealer-Patriarch.png
https://www.forgeworld.co.uk/en-FR/Asterion-Moloc-and-Ivanus-Enkomi-of-the-Minotaurs
Furthermore any dirorama has to account for the fact that moloc himself is ALSO standing on something so yeah. hrm. The original lan was for each to be standing on a pile of corpses (terminators/stealers/etc) but that seemed a bit lame and very time consuming for an effect that coul dbe visually very.. distracting. Then I realized that the patriarch model has in his hand a space marine head
and it all clicked! he crashed one of the bikes attacking his genestealers and ripped off the dude's head! and moloc is wading in to fight him off. It works, bikes are tall enough, and it fits the narrative really well. Bikes going to the rescue of the terminators/ramming stealers, patriarch takes out one of the bikes, moloc/khan moves in vs the patriarch.
So here is the beginnings of the posing. You can see the height matches up pretty well, so I'm pleased about that.
the marine, pinned, will be desperatly reaching for his weapon before he lost his head.
Moloc/khan is standing on his foot to get in range of the patriarch! Kinda cold.
|
|
This message was edited 2 times. Last update was at 2016/07/15 18:38:49
|
|
|
|
|
2016/07/23 20:04:57
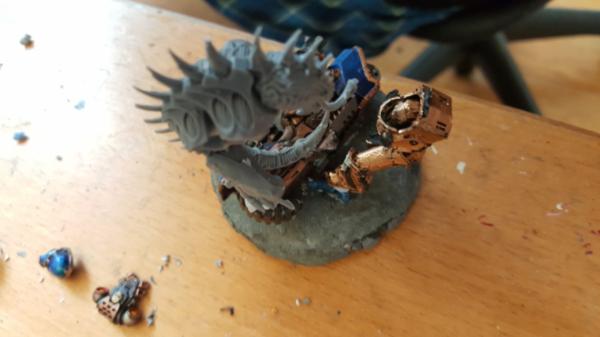
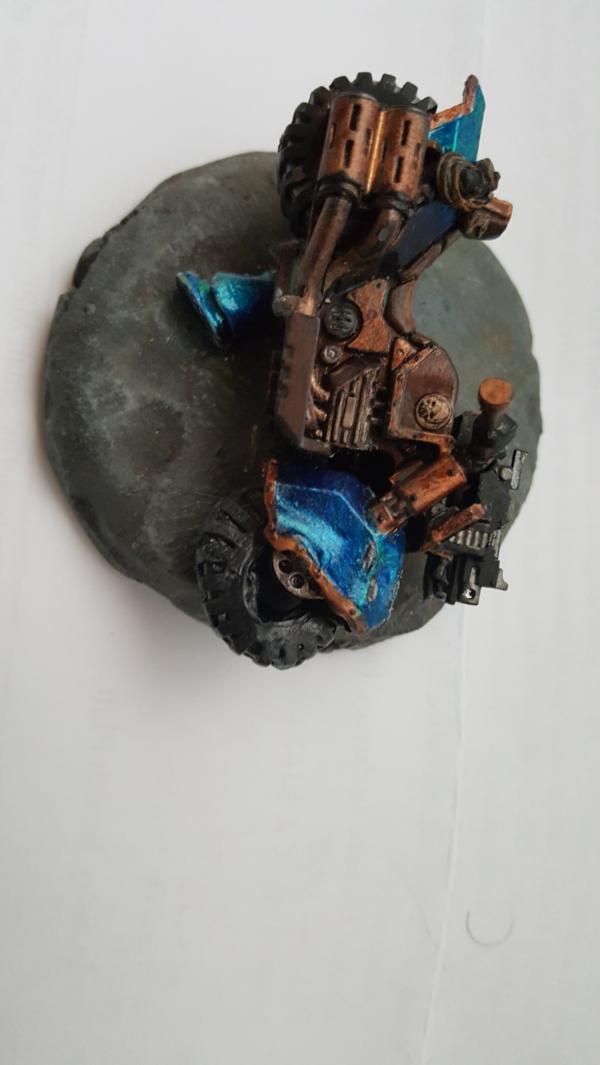
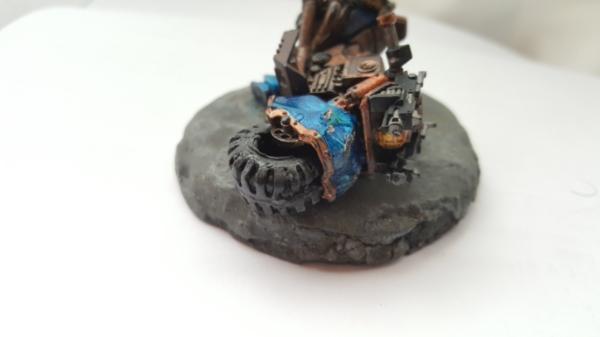
Subject: Re: multi-level city terrain, marine v nid bases (7/23: crashing a bike)
|
|
Dakka Veteran
|
Busy week but had a little time to start working on the bike pose. Basically I needed to melt/carve out the underside to leave room for the legs, but also still not LOOK like it was carved. I think it worked pretty well, i cheated a bit and embedded part of the less visible leg into the base, so its harder to tell. I'll show a side shot later to illustrated. Either way you hardly notice.
Im pretty happy with how the crumpling turned out. Basically I used my trusty soldering iron in the wheel well and sorta just waved it around but not quiite touching the plastic for 30 seconds or so. That made it nice and pliable and easy to crush. The tire was a bit more directly melted but also turned out well. I might tighten it up to the axel a bit more (its not glued down yet) but we'll see. The shape of it is really nice though, looks like rubber messed up.
|
|
|
|
|
|
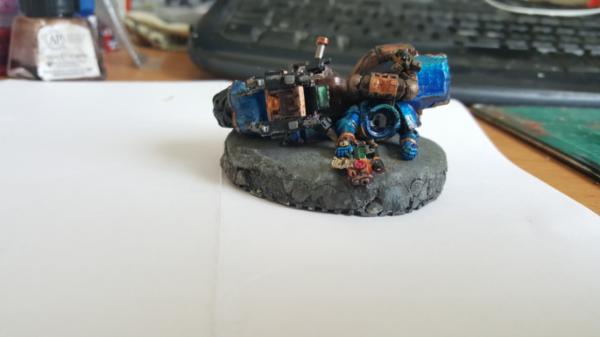
2016/07/26 00:01:15
Subject: Re: multi-level city terrain, marine v nid bases (7/25: crashing a bike, marine work)
|
|
Dakka Veteran
|
more work, slow but getting there. So far I'm not entirely enthused with the TL bolters in front, i might have giant claw marks in there just to add some more damage.
|
|
|
|
|
|
2016/07/26 17:56:24
Subject: Re: multi-level city terrain, marine v nid bases (7/26: crashing a bike, marine spine, clawmarks)
|
|
Dakka Veteran
|
Spine time!
I also decided I wanted the claw damage so i cut off part of the bolters. I still need ao add a third clawmark on the left and make the one on the right bigger but it works pretty well i think.
|
|
|
|
|
|
2016/07/27 06:59:55
Subject: multi-level city terrain, marine v nid bases (7/26: crashing a bike, marine spine, clawmarks)
|
|

Guard Heavy Weapon Crewman
|
The terrain is so awesome, so I can't say anyhting... very unexpected use of lego for me, nice trick! Awaiting for further works!!!
|
|
|
|
|
|
|
|