At the time of posting this, this project is finished, but I'm still posting this project log from my regular blog to give the Dakka regulars a chance to see how this huge project came about without navigating off-site.
The good news about this is, is you won't end up stranded halfway through a
WIP log, you can be assured this project was and will be completed in this thread

This project started when we were contacted by a client about a potential project to convert a whole set of
GW "Realm Of Battle" modular battleboards to a chaos-themed wasteland. After agreeing on the particulars, and being given some amount of artistic license to let our imagination run wild.
I took this project on almost by myself, but eventually had to enlist the help of one of our lead artists, MisMuse, who is a miniatures master in her own right, although her background comes from dollhouse miniatures and miniature food jewelry. Really.
If you're not familiar, the Realm Of Battle is a set of 2' x 2' plastic boards with landscape molded into them, designed to fit together in various configurations and then stack together in a carrying case. Details can be had
here. The usual technique for these boards is to prime, paint, add flock and play. We already decided that we wanted to do something different based on our client's request for something different from the usual "golf courses" that most gaming tables look like.
Our client had purchased a setof these boards and had
GW deliver it right to our workshop. We had planned on this being a simple job finished within a month or so, but when I pulled out these huge tiles, I knew already that it might end up a bigger project than I had anticipated.
Before we could really start anything, we needed to do some preparation. First of all, some factory plastics contain residue from their demolding agents, which can keep even primer from adhering well. We make a habit of cleaning plastic parts before use.
Warm soapy water works best, since most demolding agents are some form of paraffin or other petroleum based wax.
We had a fair bit of planning to do even as the boards were being prepped. One of the first things we noticed was that even though the Realm Of Battle board has some skulls molded into it, we would need a lot more for a proper chaos-scape.
We accelerated one of planned projects just for this occasion, a project which we nicknamed: “Skulls skulls skulls.”
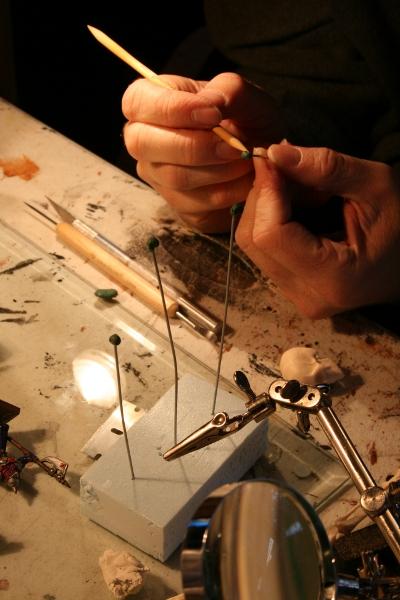
I sculpted sets of skulls, bones and piles of bones, rib cages and other nastiness out of green stuff. All of our added accessories were to be cast from resin. I wanted to be sure that anything we attach to the boards will be strong enough to withstand years of play and shuffling around in their case.
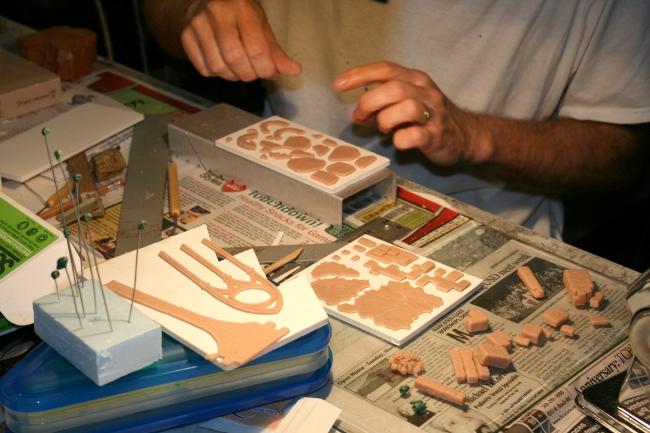
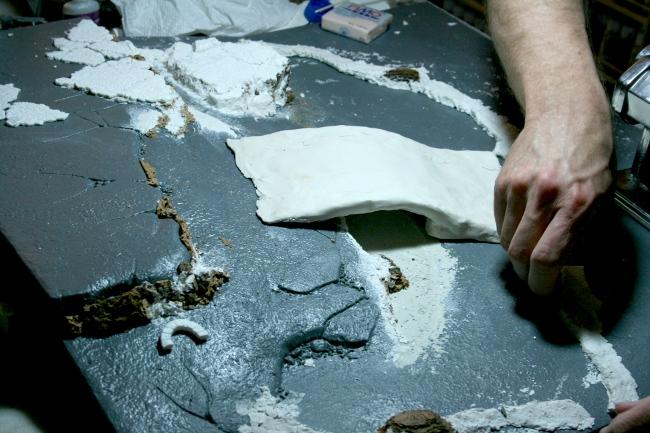
I also needed a lot of rubble and pieces of ruins, such as pavers, cobblestones and ruined gothic architecture to represent the crumbling and destruction wrought by chaos. These pieces were generally sculpted in Super Sculpy and textured realistically with natural stones and pebbles from out in the desert. Higher detail pieces like skulls and bones were done in Green Stuff. Everything gets glued down to foamcore before casting begins.
Many days later…
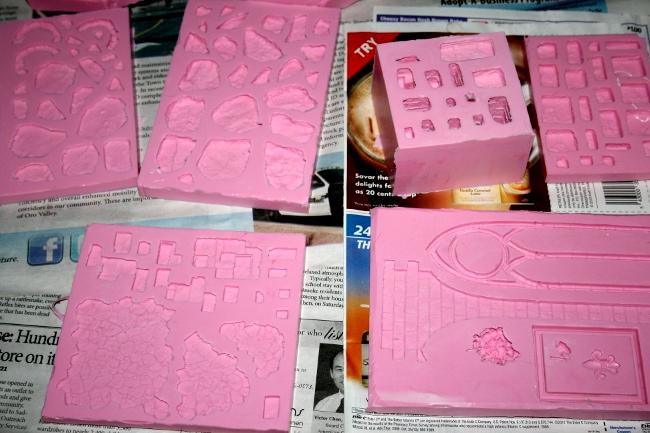
We started casting pieces immediately, and were almost constantly casting all the way through the process. We use tons of mold release all over everything, so every piece has to be washed by hand to get the grease off.
There are plenty of guides out there for how silicone molding and casting is done, so I’ll spare all the tedious details. Imagine this is like one of those cooking shows where the host finishes mixing ingredients and says “I prepared one earlier!” and whips a finished pie out from under the counter.
Instead of pie, we cook with 2-part liquid polymers, and after several days we had a HEAP of pieces that needed to be cleaned and trimmed carefully.
Hard to tell right now, but this is a pile of skulls. And yes, we all have band-aids all the time.
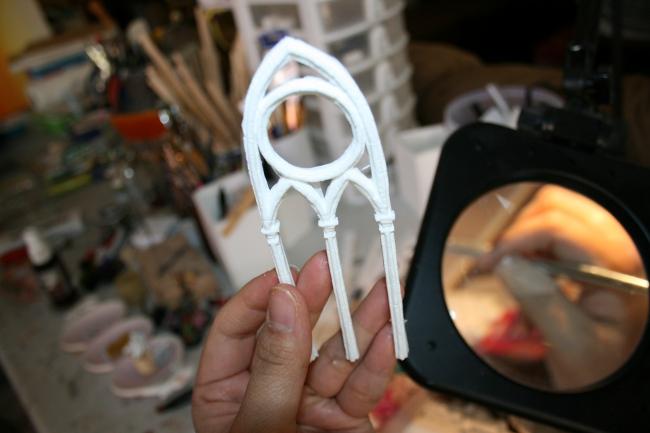
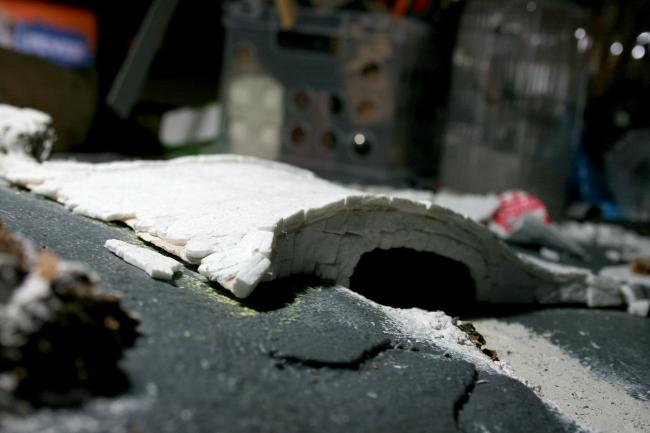
This is a gothic style arch that MisMuse had designed for another project she’s focusing on, but it also fit with some of my plans for the battleboards, so we were able to kill two birds with one stone.
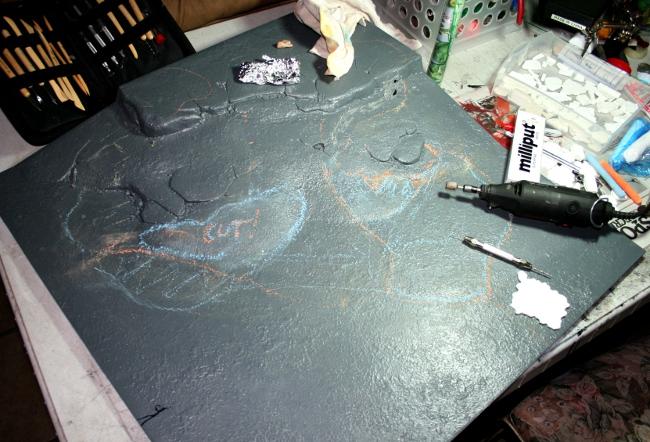
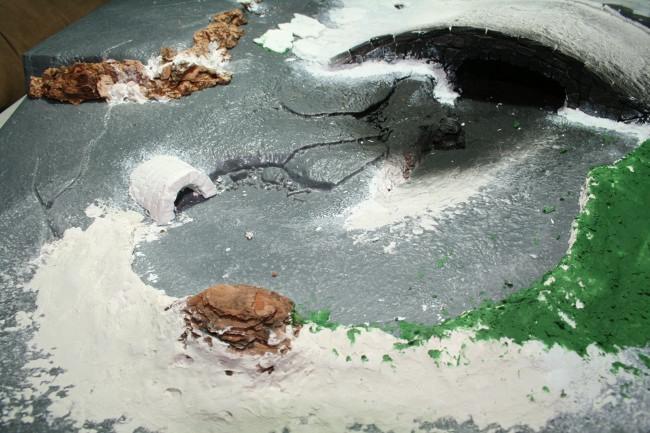
My plan going into this was simple, and by simple I mean insane and somewhat complicated. Most of these board will have at least some kind of minor modification or two carved into the plastic in addition to the details we’ll be adding, and for the most part we’re leaving the basic structure of the boards intact for playability and storage. However on one of the “mountain” boards, I wanted do something special.
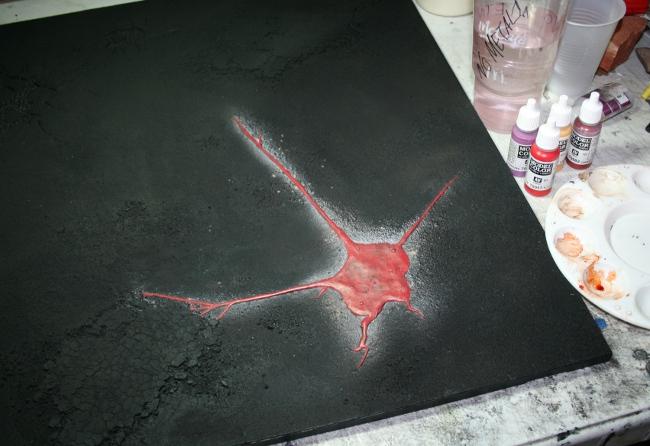
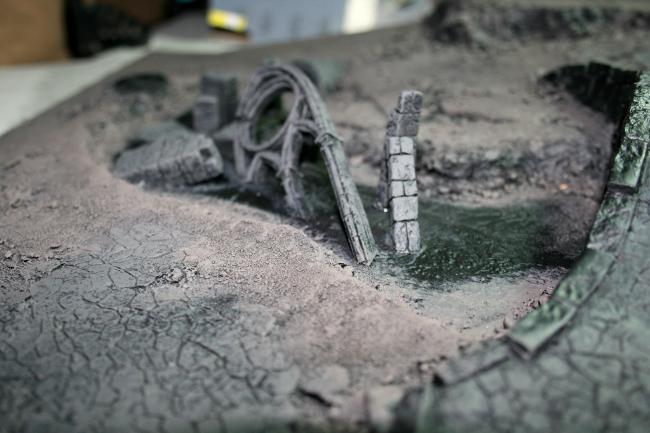
The basics of the plan involve pools of “liquid” flowing from a couple of culverts near the top of the hill, and a handful of ruins crumbling into (or rising out of?) the pools. In order to keep accessibility for troops, I would be making a bridge where the slope is currently, and that would mean making a few changes.
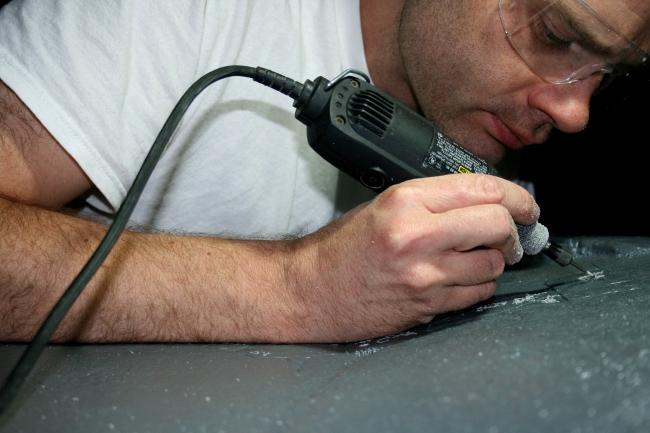
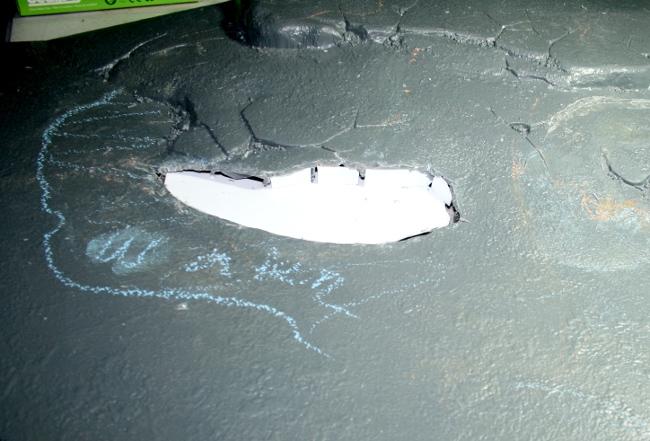
I used chalk to mark where I would be cutting, and where certain details would be, and once I was finally confident with my layout, I fired up Mr. Dremel and got to work.
 GW
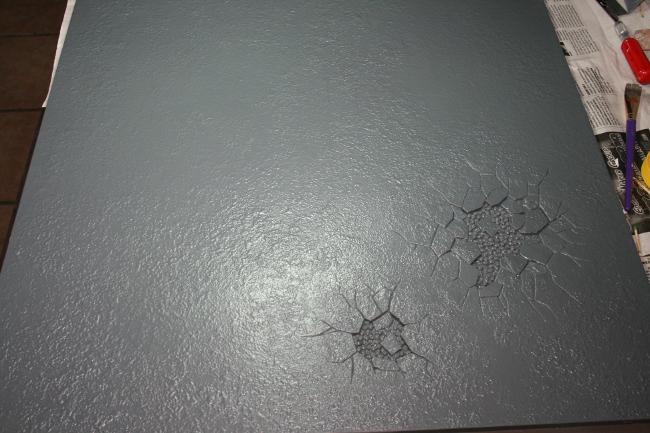
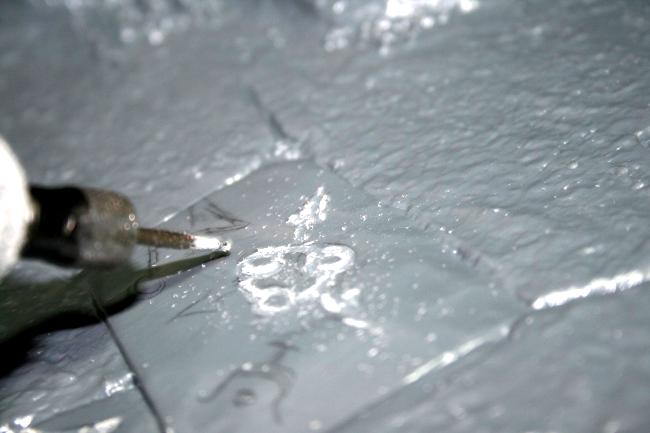
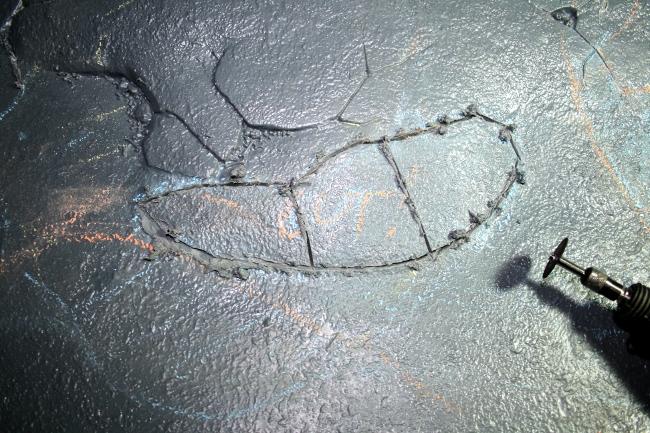
GW makes these things tough. I made a nice, deep cut and the plastic didn’t even budge. So I made a few cross cuts and pried at it a little. Still nothing.

Seriously, what the heck is under this thing? A few more cuts, and some muscle, and finally I started to get it open…
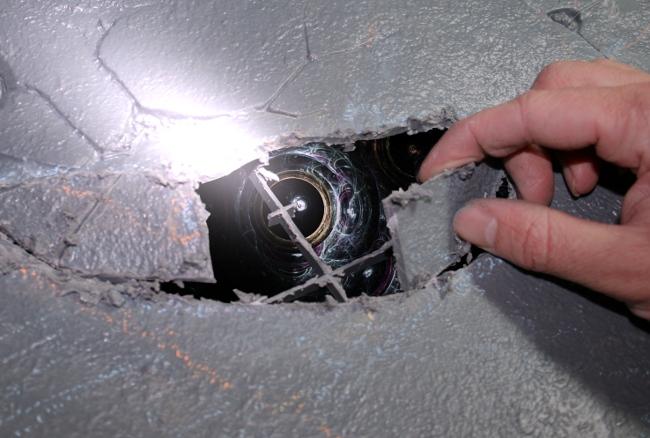
FFFFFFFFFFFFFFFFFF-
Okay so that’s their secret. I figured it would be best to get this thing covered back up as fast as possible, since the howling cacophony of madness emanating from the rift was rattling our shelves and made Mikey jump out a window clawing the flesh from his face. I proceeded to shape a few sheets of plasticard and wedged them into the opening with a combination of epoxy, plastic glue and holy water.
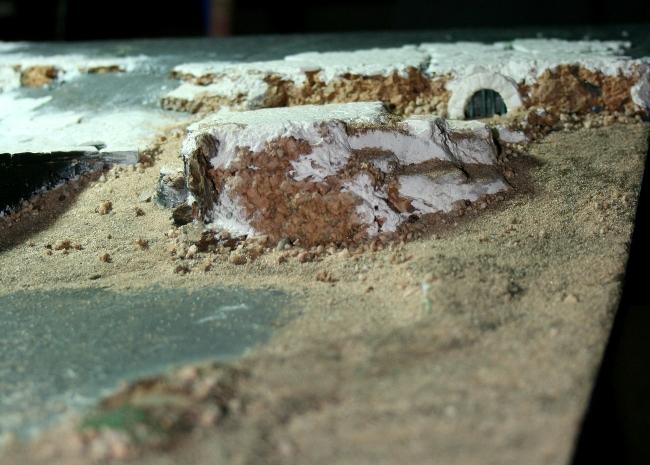
With the basic patch nice and secure, it was time to make it look natural, and for that I use Milliput.
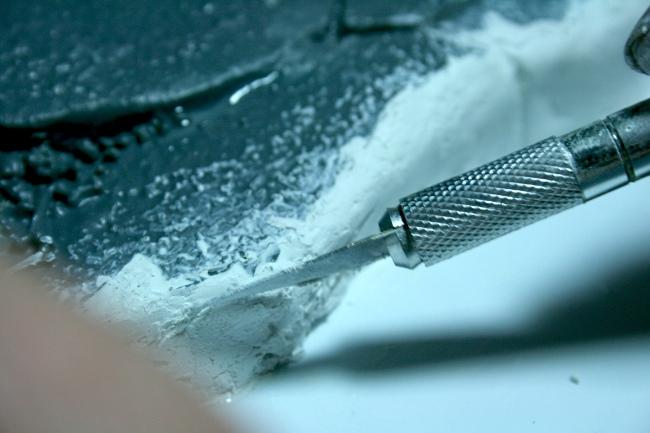
Milliput is great stuff. It’s gummy and and can be sculpted, it smooths easily with water, can be textured to look like stone or brick, and sets extremely hard.
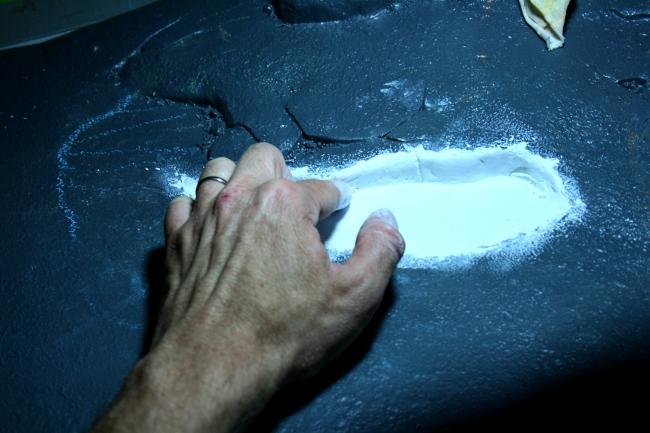
I finished blending the edges smooth and then filled the bottom with Squadron white putty. I didn’t try to blend the bottom perfectly, since it would all be textured and then painted and submerged under “liquid”. While this area set up solid I started working on building up the other areas of the board.
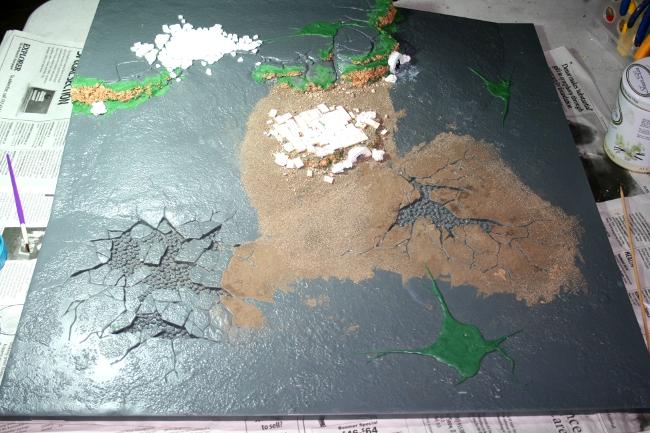
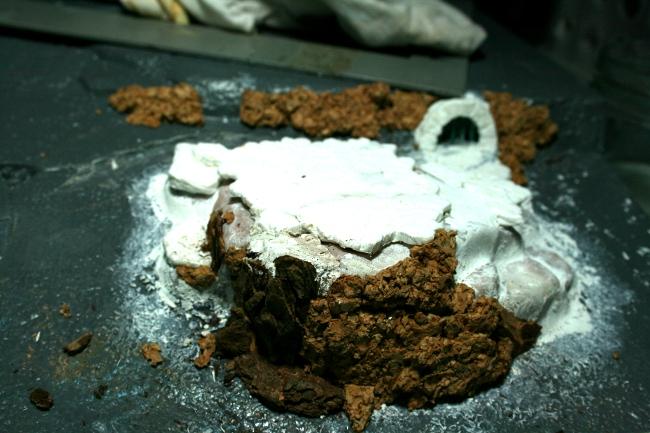
Some of the slope needed to be built up a little to accommodate the bridge and the look of the ruins and to provide some unique dimension. This was done with a combination of Sculpy, Milliput and resin accessories.
Another feature we’re adding to all of these boards is the rocky cliff faces. Don’t get me wrong, the
GW boards are very nicely detailed, but the cliff faces are smooth enough that if they were real you could slide on them. In order to stand apart and look suitably dangerous for a chaos-scape, I wanted to make the exposed rock look sharp, detailed and realistic. Cork and bark bits together look exactly like sharply weathered, and perhaps earthquake shattered strata. This is a look I’ll make as a theme across the boards.
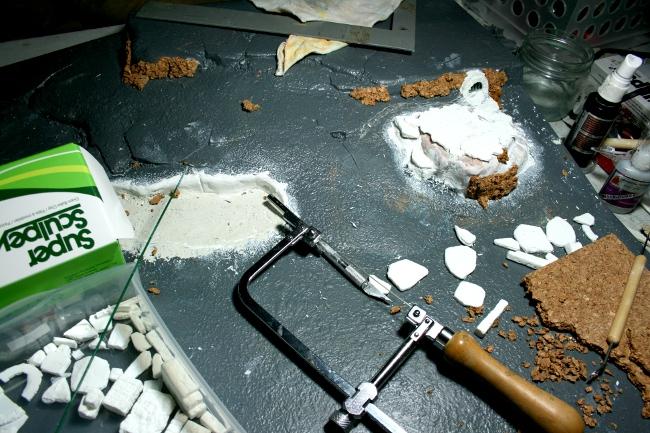
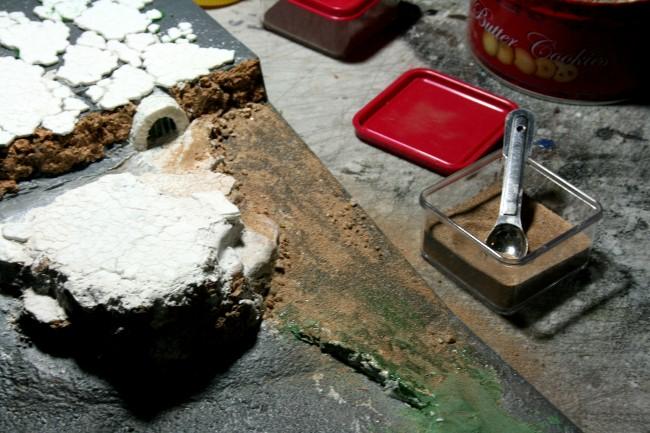
Next I wanted to define the “shore” of the pool, which has to have raised edges to contain the resin liquid we’ll be pouring at the end.
This is basically plaster powder and paper-pulp that you just add water to, I won't mention the brand, because honestly the label wore off the bag. I have a ton of it and have been looking for good applications for the stuff.
I shaped the edges and added a few chunks of bark to look like boulders and keep it from looking so much like a crater. Now, some of you might be wincing and shaking your head still at the prospect of using
plaster.
This would be a good time to mention issues of material compatibility. I’ve been involved in some heated debates around here when I notice one of the other artists trying to use materials that don’t bond or react badly together, such as PVA glue and plasticard, or spray paint on styrofoam, or nylon with just about anything else. I speak from a lot of experience and melted heaps of plastic on this matter.
So that being said, the plaster I slathered onto these boards will
not stick to the styrene. Plaster has great compression strength but zero flexibility, and as a result, when the board is picked up and bent even slightly, all the dry plaster pieces release from the slick plastic like an egg off a Teflon skillet.
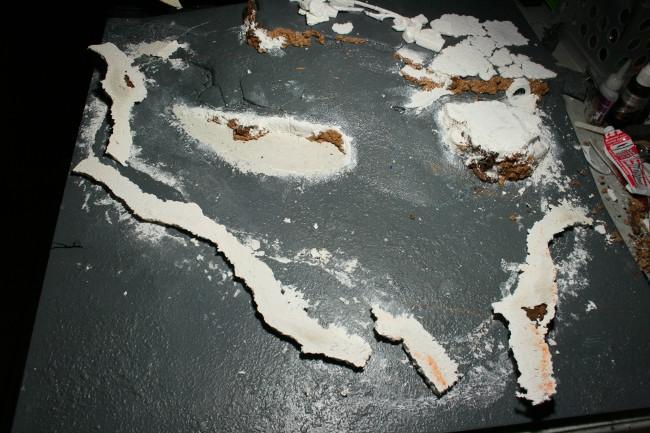
See? comes right off. Fortunately, I knew this ahead of time, and counted on it. I wanted to make the shore hard, lightweight and not have to use 4 boxes of milliput on this single board. I broke the larger pieces up after they had dried fully and pushed them aside, to be securely glued down with epoxy later. On to the next step.
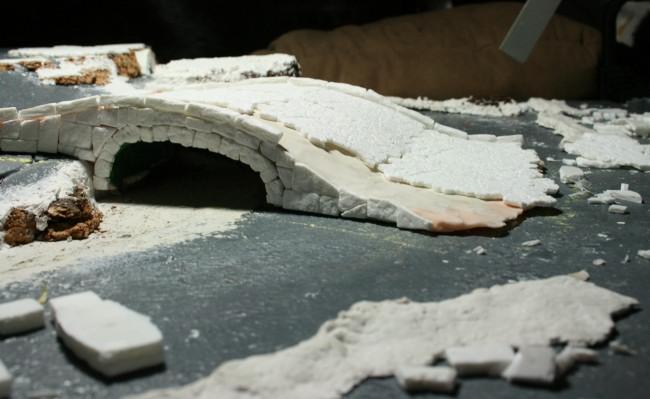
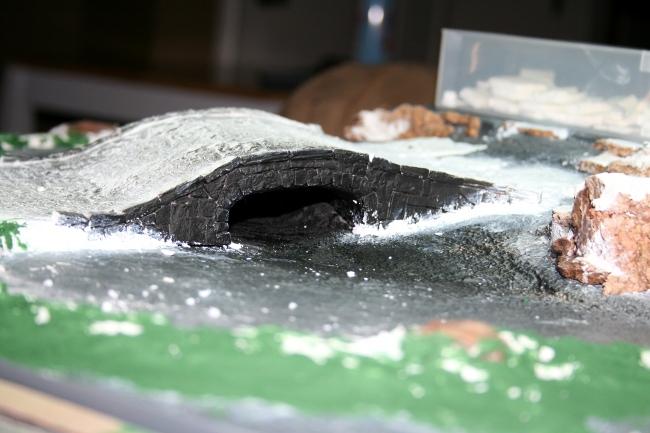
This board had a big ol’ pool planned, but I wanted to maintain accessibility while adding something really eye-catching, so I started work on the stone bridge. I shaped the basic form out of a thick layer of Polymer clay over a framework made from aluminum foil and chopped up soda cans. At this point I spent a lot of time on the logistics of placement, paying special attention to the position of the other battleboards when stacked. I didn’t want the weight of the other pieces resting squarely on the bridge arch.
I also wanted to make sure this bridge would be wide enough to move squads and vehicles over, so extended the sides a couple times until a Leman Russ could pass over comfortably. I still haven’t glued the plaster shore pieces down yet, only placed them loosely to check the overall layout.
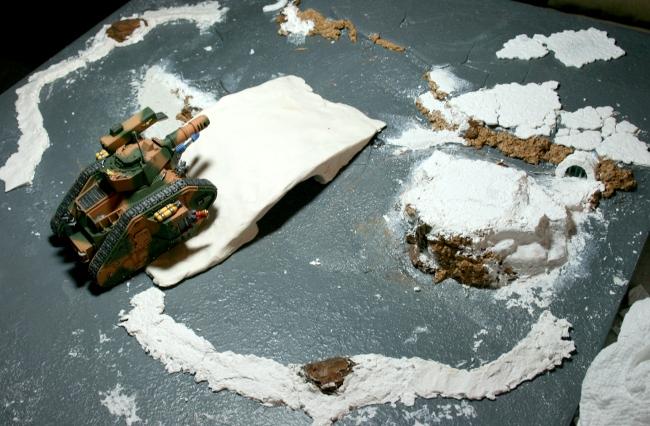
I made sure it was wide enough to move vehicles over. After deciding on the position, I carefully lifted the bridge and baked it hard, using another aluminum scaffold to help it maintain shape while cooking.
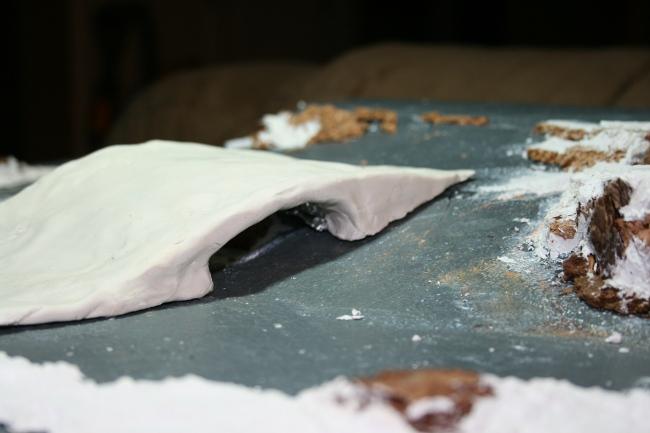
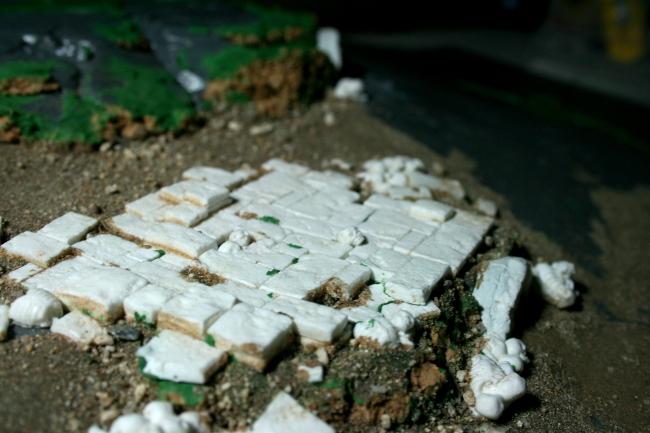
I couldn’t glue the bridge down yet either, because I knew what a hassle it would be to try to texture and paint beneath it later. I just settled it into position and got to work trimming, clipping and fitting resin cast pavers and bricks to glue over the bridge.
Lots of bricks.
Lots and lots of bricks.
clipping, cutting, trimming.
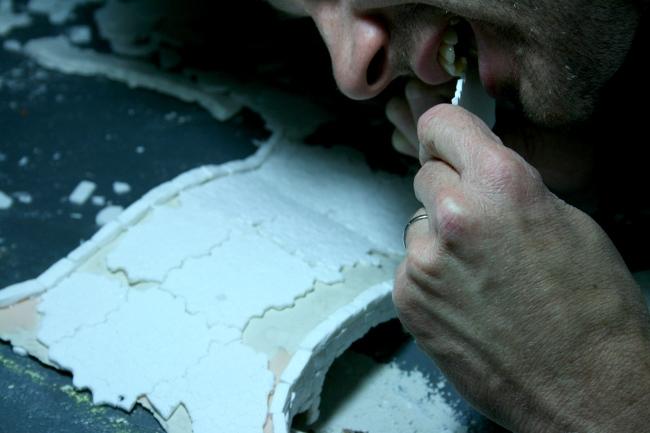
Chewing, gnashing, growling.
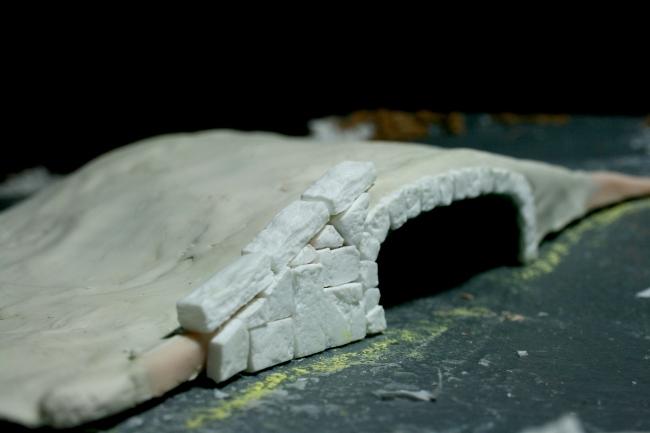
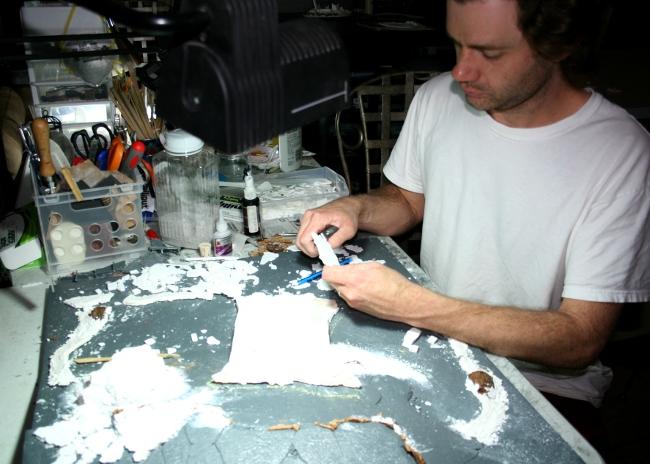
Well, that was tedious, but at least I had made some of the paver sheets interlocking for the top of the bridge. Next I had to mortar the gaps with milliput, smoothing over the seams between pavers and then sculpting in details to keep the pattern continuous.
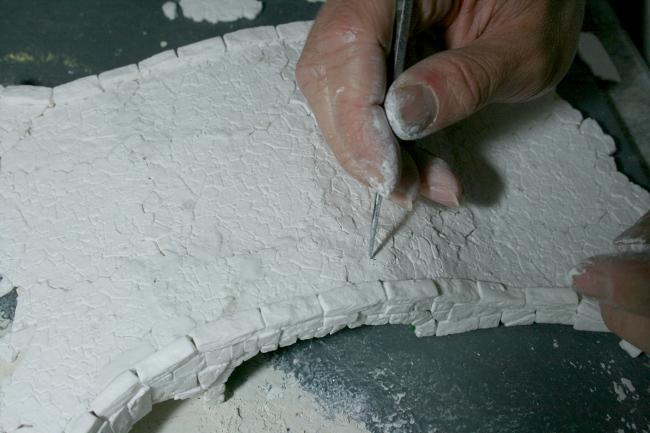
By the time the bridge was finished, it had a layers of squadron putty, followed by a layer of hard resin cast cobblestones, followed by milliput epoxy putty gluing everything together. The underside of the arch was sculpted entirely in Green Stuff epoxy putty. I could probably stand on this thing.
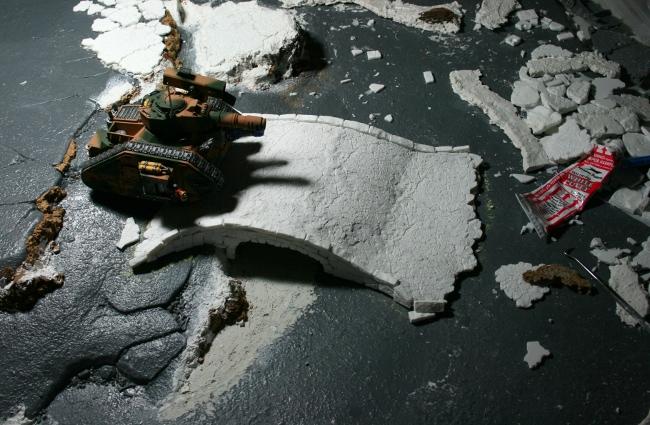
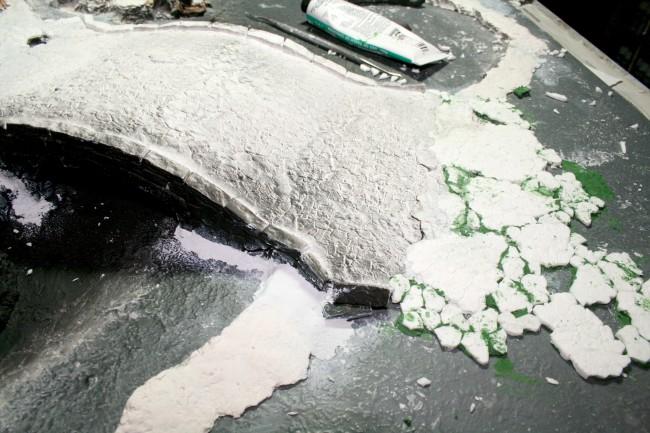
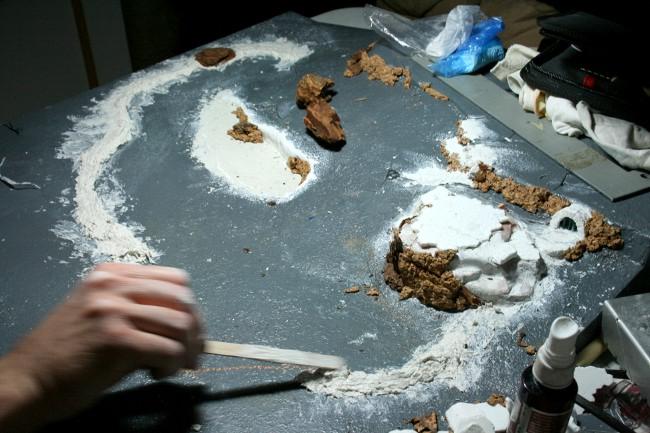
Now I finally glued down the shoreline, glued sand texture under the bridge where the water will flow, primed the inside areas of the arch black and started using filler and pieces of cobblestone sections to blend the bridge into the surrounding landscape. I used milliput extensively to fill gaps and bond the pieces to the board securely. I ran out of white squadron putty and opened up a case of green. Squadron green has a finer grain, but since all the board will be textured and made to look like dirt, foliage and horrible little chaos details, it wouldn’t make any noticeable difference.
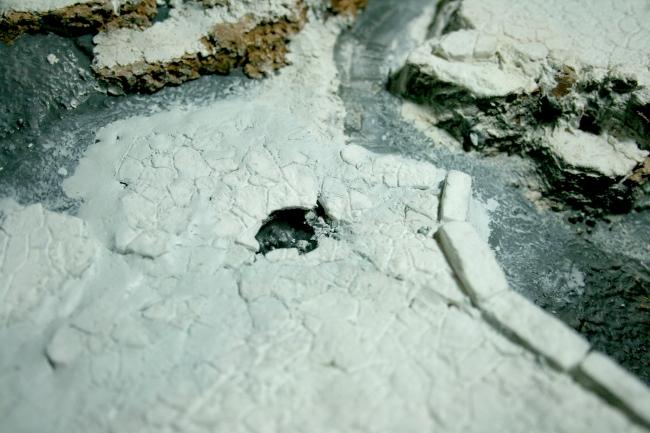
I left a little gap in the upper area of the cobblestones, keeping some of the board-sculpted details intact. The end product will look like a pothole with skulls inside. This is the kind of detail that will carry through all the boards in this project.
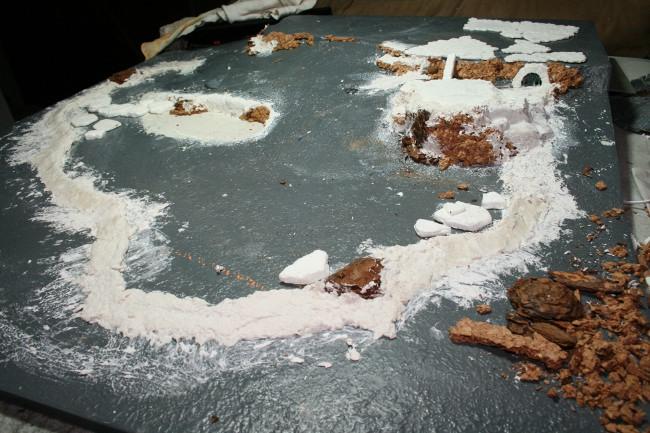
I sanded down the plaster shoreline and then used the same combination of milliput/squadron putty to smooth the edges. While that set, I started working on the second culvert. I didn’t put the bars in this culvert, because I plan on this one being “occupied”. More on that later.
With the shoreline smoothed and finished, the bridge glued down and the cliff-faces textured and detailed, I was just about done with the major portions of this board.
I added more cobblestones around the bridge, bringing the ground area up almost level with the shoreline in places, which would help the effect a lot. I added resin cast skulls and bones everywhere I could, tucked into cracks, beside culverts, at the shore edge, Etc.
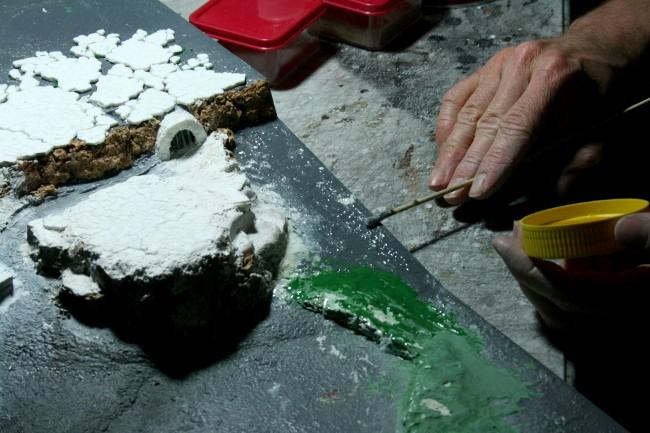
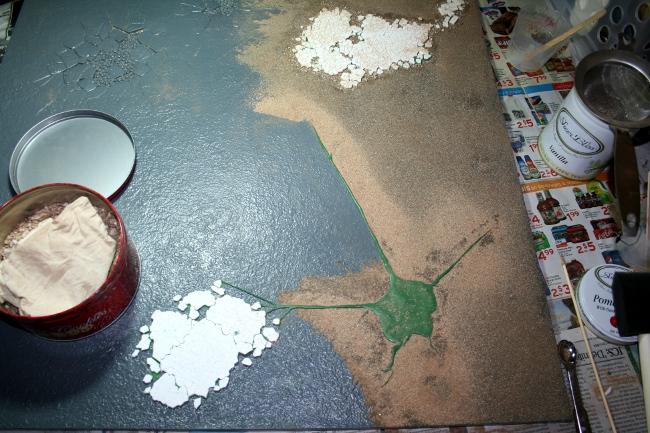
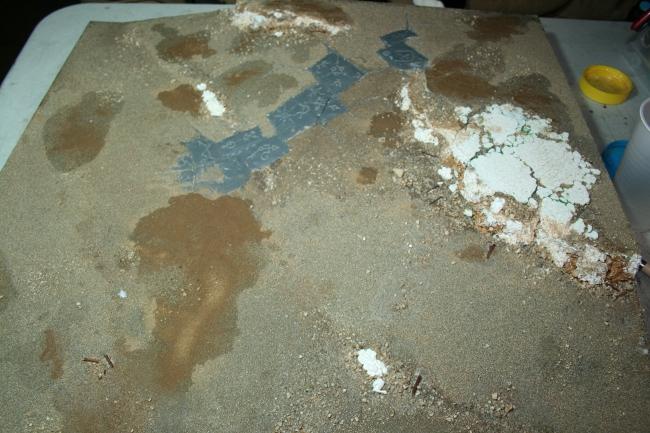
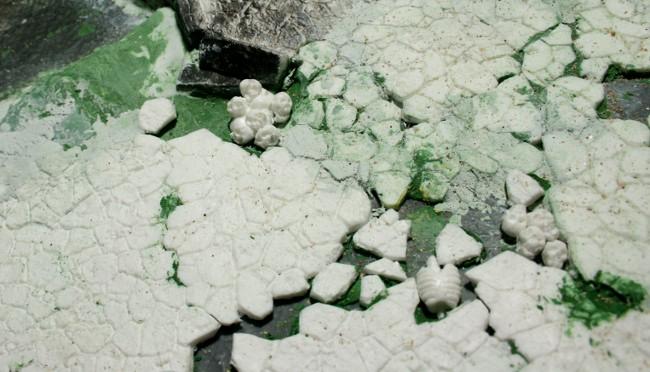
I use a 30 minute, 2-part epoxy glue as the base for my texturing process. Nothing else would really have the hold between the plastic and the sand that I’ll be using. I cover the board in small areas at a time so that I can work the epoxy into all of the board’s pre-cast textures and other gaps.
I work in small areas, laying down glue, followed by areas of loose rocks and “boulders” represented by coarse gravel, and then followed an even layer of fine grit, sifted sand. I work in small areas also because 30 minutes is not enough time to get even a 10th of the board textured at a time.
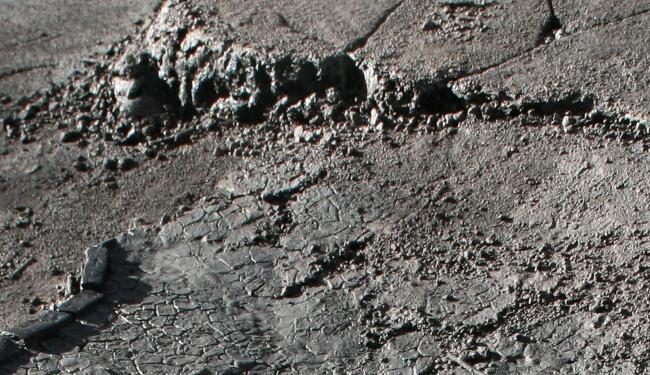
After a few areas of glue and sand, the board is starting to look less like a threatening chaos-scape and more like a soft, sandy beach. I have to explain frequently to dubious passer-by’s that what I’m doing is the textural equivalent of a coat of primer. After this layer is glued down with epoxy, I can use PVA glue and cyno glues to further texture and detail everything up.
When I make scenery, I follow the same principles that I would for figure painting, and I don’t feel that just because a project is supposed to be a large area of dirt, debris or foliage, that it should be an excuse to take shortcuts and not treat every square inch like it’s a real, living part of an over-all model. You start with a clean, even base coat or coat of "primer" to work on. Make sure that all gaps are filled, and that there’s nothing running outside the lines. Once your base tones are complete you begin to highlight, shade and detail.
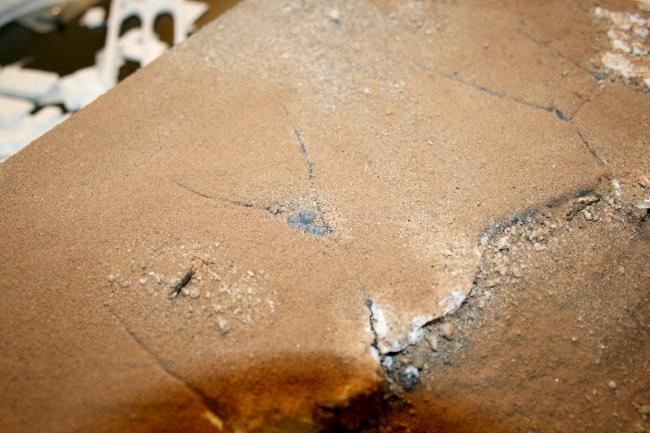
In the case of this model, my pallet of highlights consists of different grades of sifted sand, from small pebbles all the way down to sand that’s been sifted through cheesecloth. Essentially fine dust. These go on in patches and in amorphous areas to look like outcroppings of crumbled stones, piles of debris that collect into corners and gaps in pavers, kicked by countless boots or blown by wind and rain, and areas of hardened mud. I also scatter a few tiny branches here and there, making sure any piece I use has girth and knots of proportionate scale of real fallen logs for 28mm miniatures.

I continued to work on textures, using watered down PVA glue to make sure everything was solidly attached to the epoxy sub-strata. After drying I shook off the loose excess and then brushed it with a toothbrush to make sure anything that was going to come off, came off now.
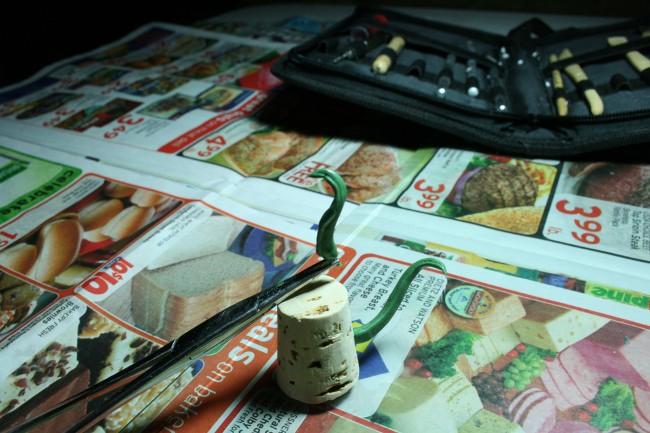
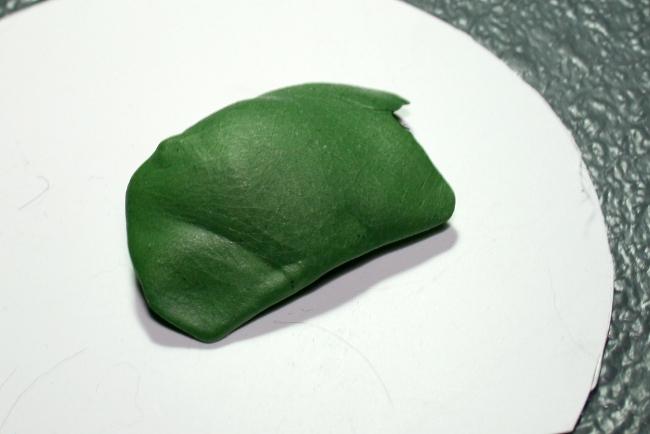
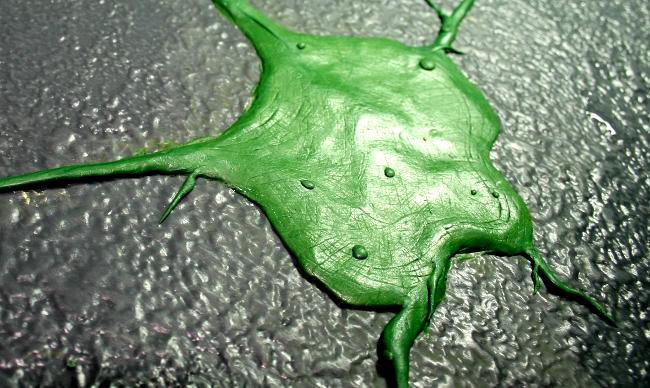
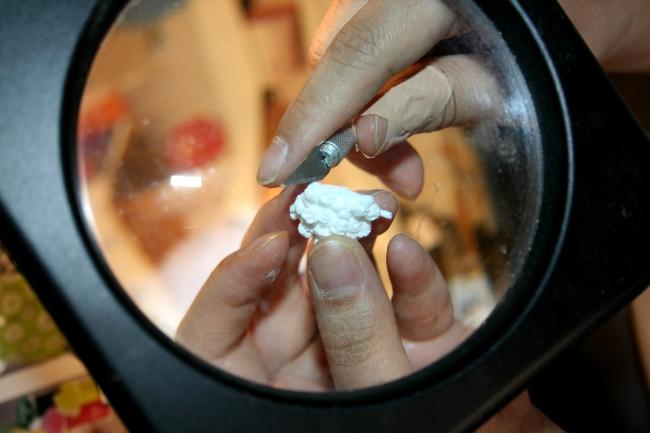
While those coats were drying, I used my time to work on the “occupant” for the lower culvert that I had mentioned earlier. For this I broke out the handy ol’ Green Stuff, some wire, cork and sculpting tools.
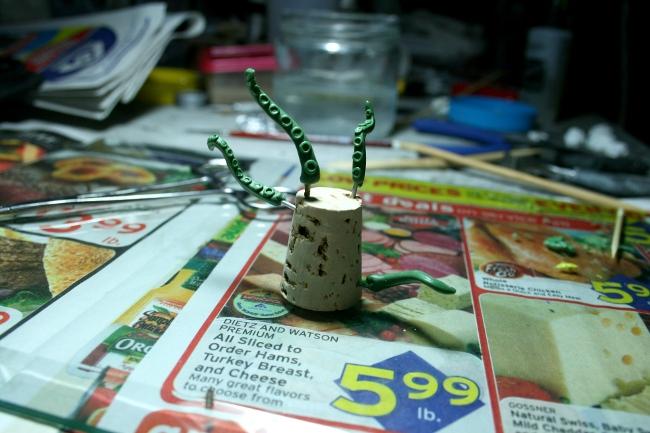
I shaped and smoothed the basic forms, using multiple passes from wooden tools with a lot of water lubrication, and let it harden for about about an hour then added the suckers.
Hey, that’s still too expensive for sliced ham. I get it for half that price at my deli.
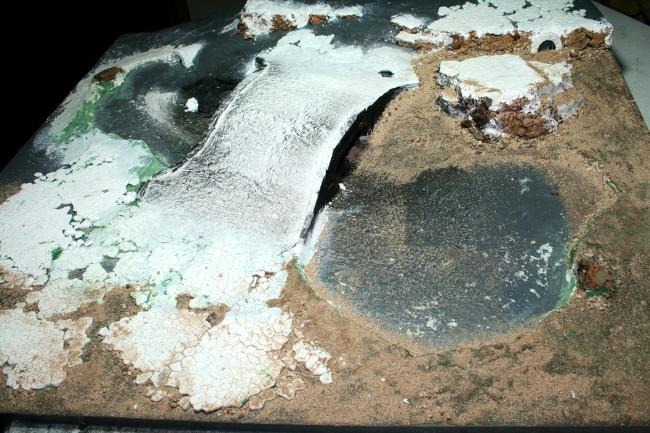
Back to the board. From here I had a couple of final decisions to make. I had a few various ideas for what I wanted inside the liquid pools, some ideas were scrapped for being too bland (simple stepping stones to get across) to being too impractical (massive clockwork fortress rising from the depths) but in the end I decided to find a nice balance and make the feeling of some sunken ruins that would still allow figure access and playability.

I glued a few resin ruins and part of a gothic arch into place. All the time, I continue to pay careful attention to how the boards will stack together when stored. So far this whole board fits neatly even after all these modifications.
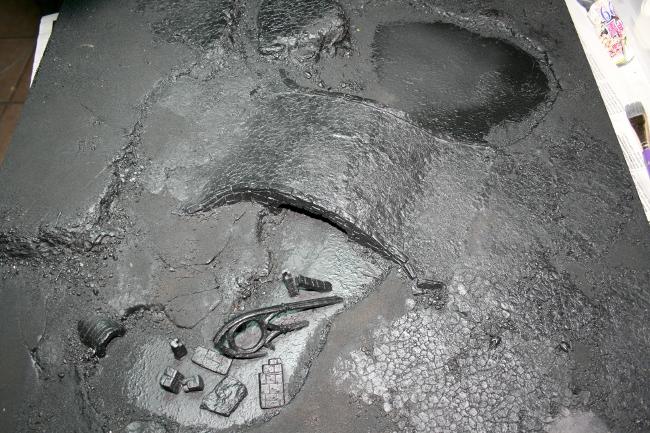
Since there was no reason not to, and I was getting a little excited, I went ahead and primed the whole thing flat black. I had a few more ruins to add, but I wanted to make sure everything was looking how I had planned it. I wanted to see how the textures and shapes looked before I got any deeper into this project.
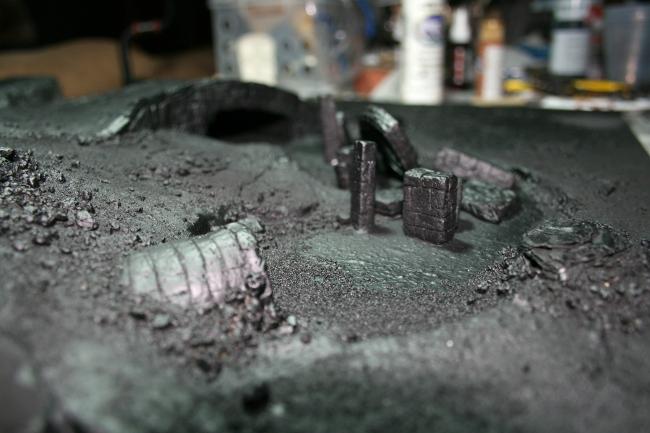
The verdict was in: Perfect. I ran a little ahead of myself and even started base-coating the ground a little, already trying to imagine what colors I’ll use together.
The textures picked up color perfectly, so now I was going to glue in the final pieces of ruins, both in the pools and some outside of the pools. A few more blasts of primer and this piece was nearly finished except for paints and resin. With the sun setting after another quick round of spray primer, I snapped a couple pictures of the details and rocks in natural light.
You can almost hear the wind howling and feel the glaring heat baking down on your skin. Wait, I really am out in the desert, those sensations are real.
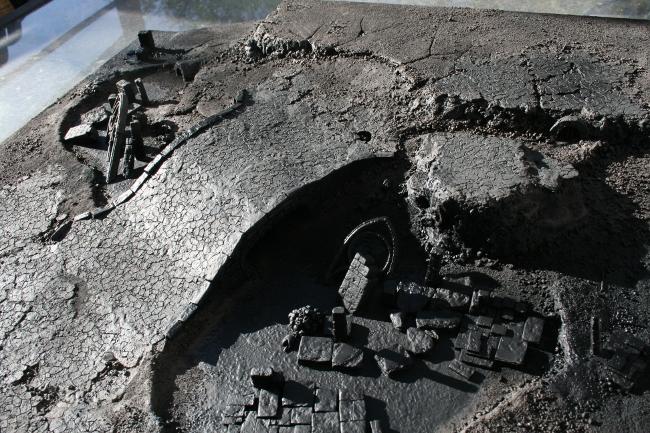
Looking pretty good and it’s not even painted yet.
I held off painting any further though, because I wanted to paint them together so that the colors would match between them. So now it was time to set this guy aside and start another piece. That’s it for now, tune in for the next part where we’ll get another board or two finished up.


 )
) 
 <-- Finally, level 666!


 Kreig - 2850 pts
 Skaven - 3450 pts
 Orks - 1950 (pro painted)


 Nids - 1500 Points
  - 1000 Points
  In progress


 ???
???
 -affiliated Traitors -
  -STOLEN !
  - Astral Claws
  3000
3000 


 Keep it up!