GG - Cheers bud! Concentrating on the fighta and trukk(s) for a while seemed to get a few ideas brewing ready to leap out when I went back to the boyz. And these latest vehicles, well. That started as a simple decision to build that mono-fronted trukk, and hey, maybe document the process. What I should have done was get a concept built up, check the rough layout, etc before starting.
Doing one of my more impetuous builds means it's already gone off the rails

schank - Well I had to come to some arrangement with the painting and modelling gods. Basically I had to sacrifice my painting speed.
And now you've made a classic megalomaniacal mistake. You need to rehearse your monologues, get them looked at by someone other than a flunky who's just going to say 'Yes Boss, sounds good!'. Otherwise you end up making mistakes like threatening to destroy someone, and then capture them. Works so much better the other way round : capture, then there's the ever-present threat of destruction on a whim.
Also, if you are looking for a better class of minion, one who could help out with your monologues, maybe even ask pertinent questions to help propel the plot, then you need a good class of base. And what does any classy base require?
Sharks.
Nudge-nudge, wink-wink. You know, sharks with you-know-what's on their heads. I can help you out there at very reasonable rates

Hope you bamf'd out from not being under my bed before I put those squig-traps under there.
Big Mek Dattrukk - Thanks, if you need a replacement skull-filla I've got a few bits around here somewhere. Hmm, yes. This should do it. Hold still, this should fit in without too much of a squeeze...
Colour, shading - A modeller craves not these things, mmmm.
CK - Yup, always sed you woz a proppa mek. I'll sometimes plan things, sometimes I have a rough idea of what I want, but sifting through bits looking for interesting conjunctions is both the most relaxing and stimulating method. Toying with bits is relaxing, but then when you find that spark from a couple of pieces your mind bounds off with ideas. Sometimes.
So possible configurations - looted deathstrike, grot bomb launcher, pulsa launcha, deffkopta karrier. Think there's some possibilities there, all switchable of course
Glad to hear you're all sorted.
I grabbed a bag of watch bits off e-bay some time back, but that's not the most economical way to get them.
Arakasi - Not quite that big, well might be actually, I'll have to see if I can dig out that trukk under-chassis for a size comparison. It'll JUST fit 2 of those smaller versions on. Another interesting possibility.
I figure an empty sprue and a piece of plasticard is probably cheaper than the equvalent size foam-board, plus easier to create hollows, inserts, holes etc.
Rogue Wolves - Thank you, glad you find it inspiring, always nice to hear.
bigfish - Always happy to bask in other's recognition of my inherent genius.
I'd be very suprised if no-one has used a similar idea before, probably for terrain. They could make great bulkheads.
With a few magnets or pins & tubes you could probably make a modular terrain system. The sprues sizes are able to mix'n'match quite well, a bit like the actual models.
And why did you toss those sprues, after the assorted plastic you used on your pieces you should have been well aware of the potential lurking in those funky bits holders we call sprue.
Arakasi - You sure youse not a Bad Moon? Youse got da same merkantile stylee.
bigfish - Ahh, but then you'd have to clip off all those annoying model bits to get at the spruely goodness.
Had actually planned to paint a bit today, but messed with those trukks instead. They were calling me. Pitiful cries, I couldn't ignore them. I do feel bad about he painting though, not so much about my stuff, but there's still a few pieces for other people waiting to be finished. Still the weekend though.
So what happened to those bits then? (sorry guys, this turned out a little longer than I thought)
On with the smaller version. Spent a few moments looking through the Ramshackle tracks, looking for the cleanest casts. Didn't want to spend too much time cleaning up, and the resin they use is a bit tempermental. It can be very brittle, and sometimes you'll easily lose a chunk when trying to cut a bit of flash away. Gave the chosen pieces a quick wash and rinse, then drilled a couple of holes in the top of each. I tend to drill the hardest material first when pinning mixed media, if I miss the mark slightly I find it easier to adjust the drill point on the plastic.
Look, I don't know why. I just do okay? You can do it your way, it won't affect anything.

Do make sure you've got a nice ventilated area and your dust mask if you are going to be drilling and sanding resin though. I drilled these right next the window, if I lived elsewhere I probably would have held the tracks outside. I'd hate to think what that stuff would do to the greedy ducks and fish that would swarm on the dust asi t hit the water though, so I'll just bin it instead.
Used the same copper wire I use for cabling for pinning, added a little touch of
GS as those tracks aren't smooth on top. Superglue along the top and on the pins, and I find it comforting to run a little Revell glue along the sprue. Normally I'd give it a touch of Plastiweld aorund the edges once I'd superglued it, but as I'm out of that
atm I revert to comfort gluing
And over application of glue too looking at the pic. You don't need that much. It won't help stick it if there's more.
Obviously there was
GS left over, even after only making a small ball to start with

Just enough to adjust part of the robes on another Mekanikus guy, add a bionik eye to a grot head, and roll a tiny piece to be cut for rivets later.
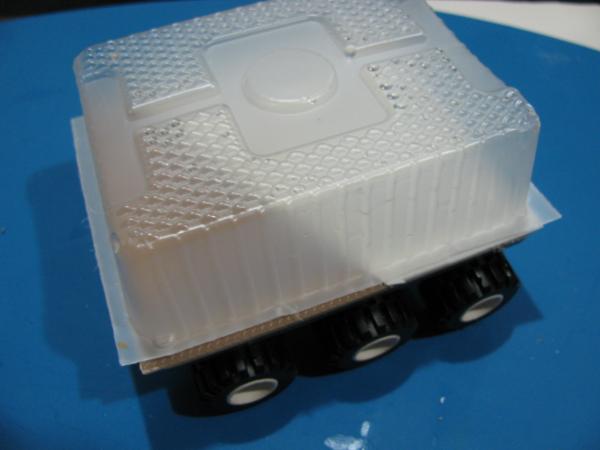
Whilst that's drying I think about the top of the flat-bed. I'm going to have it all one sheet this time, if I'm going to have a few based on the same design I'm going to have to go
wth them being looted rather than built by meks. Although I plan for un-standard configurations, it should be evident there is a standard design at work. They'll be in various states of repair, and I decide this one will have it's original flooring intact. (Also, although not of grave import to me, there's the fact that really ramshackle floors with lots of hand placed rivets aren't always that good for practical gaming use. Those rivets can catch on base rims for a start, pulling off the rivet or toppling the mini.)
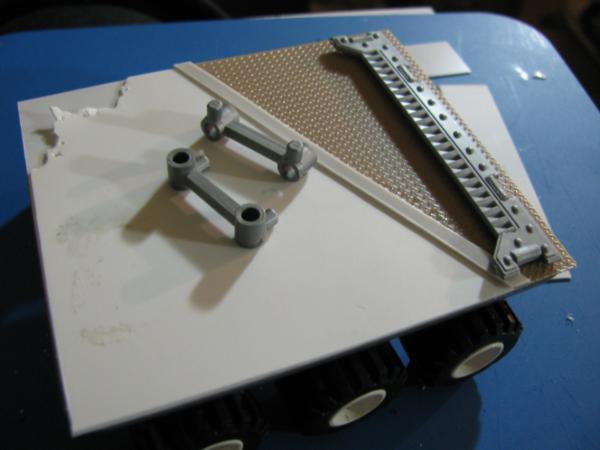
I'll go for some of the smaller tread-plate, and I think there'll be a base-plate mounting for a variety of dakka.
A quick scrabble comes up with an old rhino hatch. Think I'll put it on another plate, and rather than shave down the plastic on the underside of the hatch I'll carve a hole in the plate.
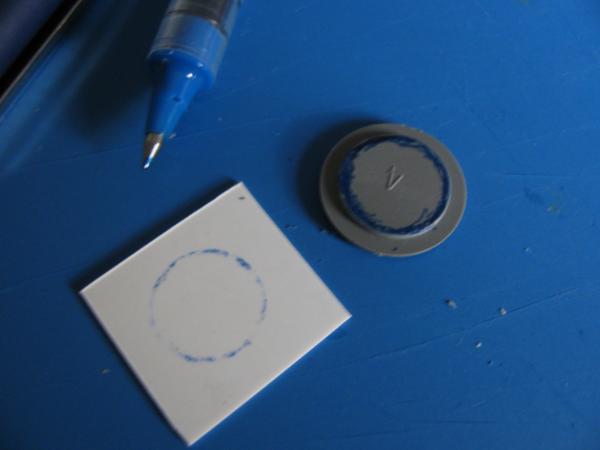
Cut a piece of plasticard to size and mark out the hole by running a marker round the edge of the under-hatch and pressing it to the card. It's a bit small for my poor excuse of a circle cutter so I just use my scalpel. I tend to keep a scalpel, a curved blade and a straight blade fitted in my knife handles as they're the ones that get the most use. I do have a turny-blade type thing for cutting curves, but I haven't seen it for a while, scalpel will do. Should use the straight blade and keep the scalpel for just fine work, but it's in the most comfortable of the handles
Cut it small rather than large, then filed away to get the correct fit. I'm not looking for a neat circle here, the lip on the hatch will cover minor wonky bits. The bit I cut out goes into a little box (well, blister part in this case). All these little off-cuts get kept, when I need detailing I can cut away at these rather than hack up large sheets for tiny squares. All the sprue bits that were clipped off to clean it up went into another box (or an upturned landraider lid holding ork sprues(attached) in this case). They'll get used in rubble piles somewhere.
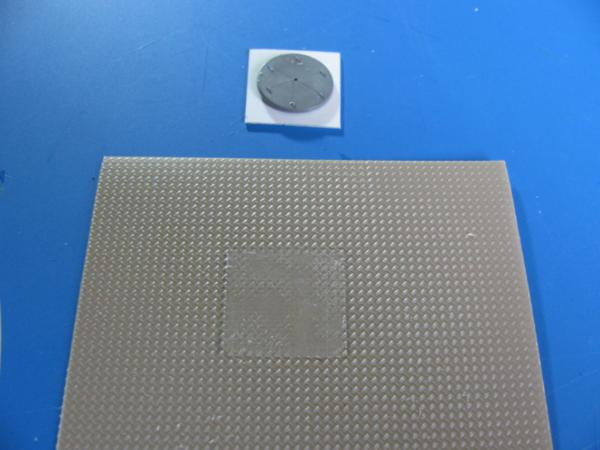
Penciled in where the mounting was going on the tread-plate, then shaved down the detaiing in that area, get a closer fit for the mounting. Also drilled a hole in the centre of the rhino hatch. Not sure yet of what attachments I'm going to need there, but I'm fairly sure a central hole is going to be useful
Glued the hatch and mount to the tread-plate, and the whole lot to the tracked sprue frame.
Then went looking for wheels, both for the mono-wheel cab and the other flat-bed (which has had a sheet of plasticard attached). Best grab that old chaos biker box, and hmm, that jiffy full of lego wheels too. Oh look, there's an orky wheel, best have that.
On a side-note for those that were wondering, the marine wheel sprues, if used in a similar manner, would make walls just high enough to block
LOS to your average infantry mini.
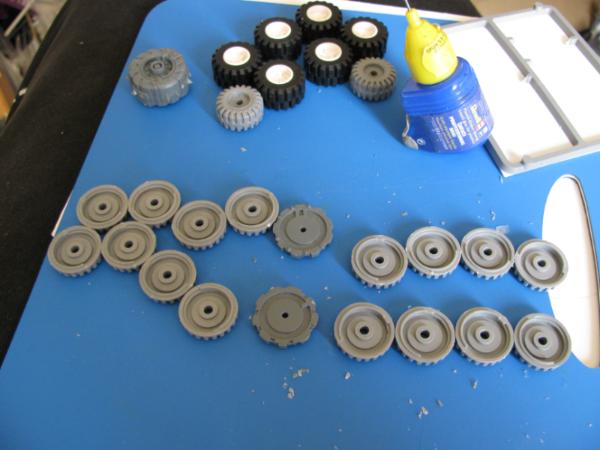
I won't say anything about having a wheely great time if you don't. Clean up the flash and glue them together. Whilst they set grab a cup of tea and a lemon slice. Lemon slice is optional. Tea isn't. Don't try this without tea kids, it'll end badly.
After the citric goodness has gone I delve back into the murky world of whatever-the-hell-this-is-I'm-doing.
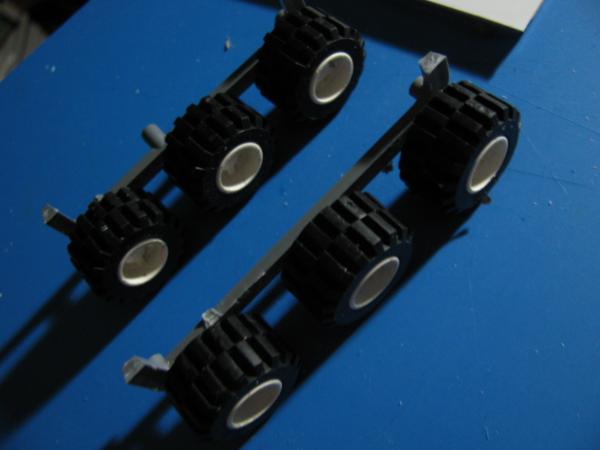
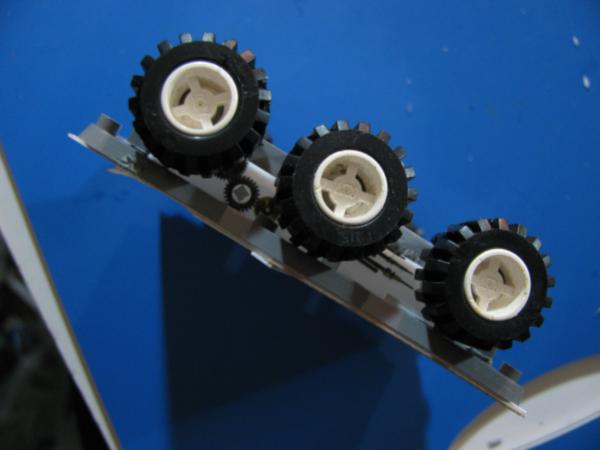
A few comparisons later and I'm having a marine bike wheel for the cab, and lego on the buggy/trukk/train/thing. Now I know a lot of people equate lego with fail in modelling terms. I'm not one of them, as far as I'm concerned the only fail in modelling is failing to utilise something that you could. And they look suitably chunky and orky to me. The hubs should be covered though, most don't look good.
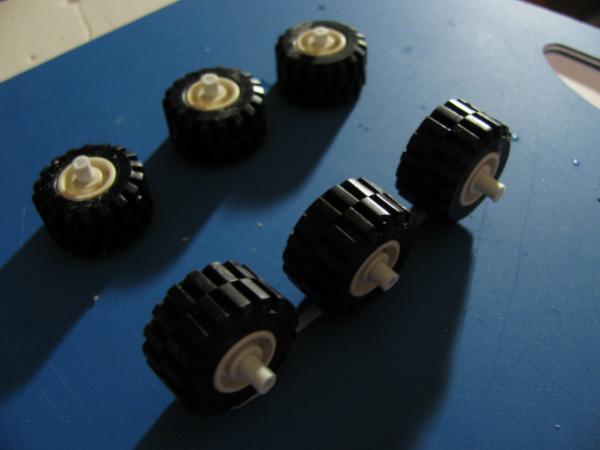
These ones don't have the word lego on the tyre, but they do have some numbers. Not all bad, but I'm going to shave them off with the scalpel. This is the kind of task it should be used for. I don't do a fantastic job of it this time round, but I do scar up the tyres a bit as I go, cutting odd chunks out here and there. A few bits of plastic rod get used as axles and the ends get filed flat. Using a mitre to cut the ends straight would be a much better idea, but I don't have one small enough for this kind of work. I really should get one someday.
Anyway, I'm not too bothered if they're not completely level, slight variation in tyre alignments helps show they're independently sprung
Well now, how can I attach the wheels to the body anyway? Three seperate axle systems is a bit much for these, I want something easier
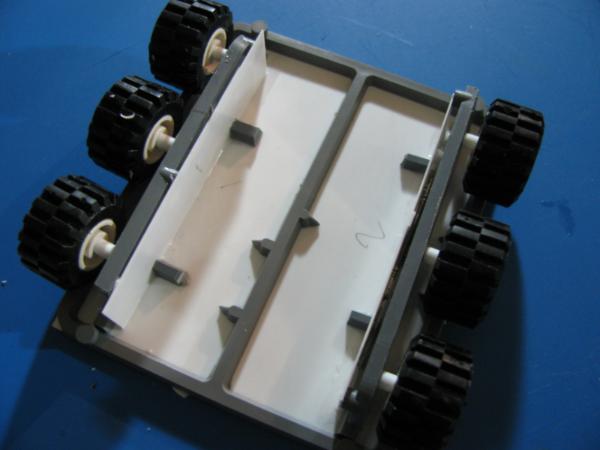
Maybe just solid walls down? Another little play to confirm whether I want the wheels inside, outside or half-and-half in relation to the flat-bed edges. And I decide another couple of bits of sprue will make good supports again
Glue the axles to the sprues (after trimming the sprues to size and leveling the cuts) and test-fit to the body whilst they're drying.
Oops.
Quick eye-ball measuring before cutting the sprues meant I'd cut at the wrong level. These would have to be glued to the sprue frame itself to get clearance, so the wheels would be outside the flat-bed's footprint, and I wanted half-and-half.
Hang on, there's a sprue sized difference to make up? Well, that's easily solved.
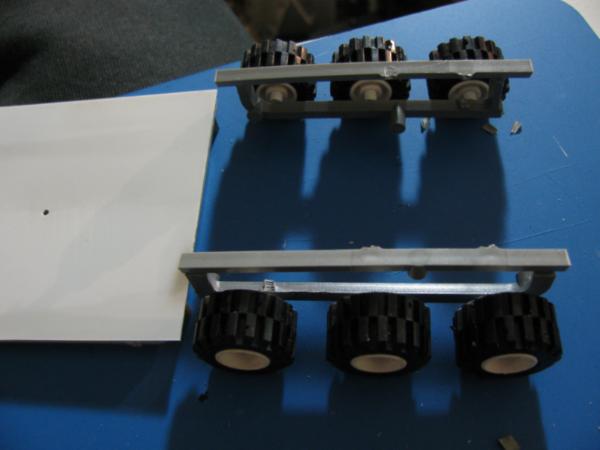
Yep, sprue will fit sprue sized gaps. How marvellous. So a length of sprue gets stuck to the sprue wheel supports, and then to the actual flat-bed. Which has had a hole drilled in it's centre, again for future attachment usage. I made sure that I was drilling into a bit of sprue support under the plasticard. I don't want to be drilling into the structure whislt it's under construction if I can avoid it. Now to detail the floor.

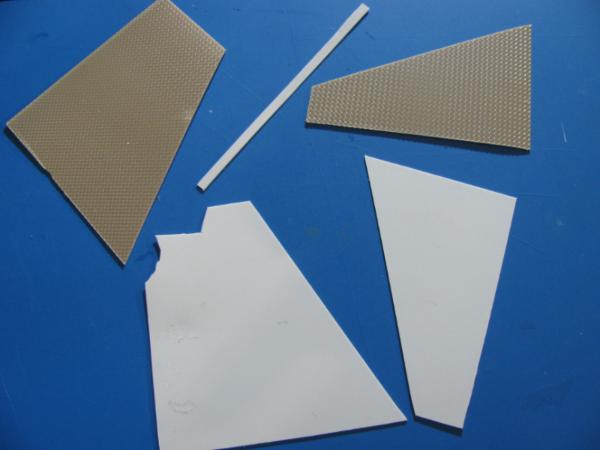
Marked out the area of tread-plate to be cut, and scored it along the underside. That wiggly cut at bottom left shows why we score the underside. After scoring a couple of times I'd normally just flex the plasticard to break along the cut line, but that wiggly bit will likely go as well, so I make sure I cut through that part first. This time I'm going for a two-tone feel to the flooring
So I cut the same shapes out of another sheet, and a thin strip to use as the join. There's a chunk missing from the piece I chose, but that's not important. That gets trimmed a little to resemble battered metal.

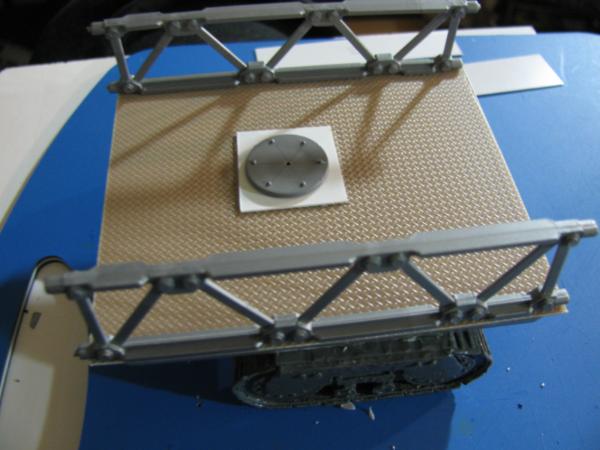
The first part goes down, and a 2mm magnet gets dropped in that hole I drilled earlier. Also a couple of mysterious numbered bits of card have appeared. Occasionally I will mark bits up so I know which is which
Once I've put the floor down I want to add some gubbinz to those pieces.
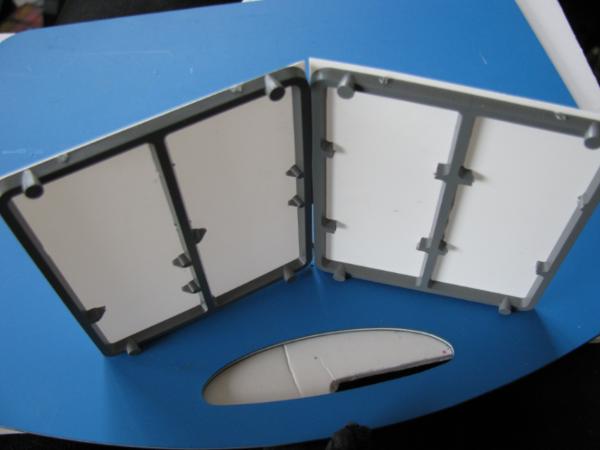
Whilst searching for said gubbinz I come across some more terrain bits that I think might fit. And, lo, almost perfect. Isn't it nice how all these disparate parts fit so well together. Those may very well become walls for some of these wee beasties.
And on the second pic we se some other parts that are almost perfect across the width. Low railings, bumpers, rear detailing? Keep hold of a couple of those too. And those push-together bits. I had been thinking of having the replacable cabs/couplings/whatevers attach to the flat-beds by harnessing the mystical powers of magnetism. But lo-tech push together may be viable. It'll need to be a bit looser than these fit, don't want to strain to pull lovingly crafted bits apart
You can see where the cut chunk on that plasticard has been hacked at a bit more, and bent up. If I'd thought it through I'd have maybe put some tread-plate showing where that's up, at the moment it's the original plastic sheeting showing, not sure whether to leave it as is, cut out part of that, need to decide just why that top sheeting is damaged like that first.
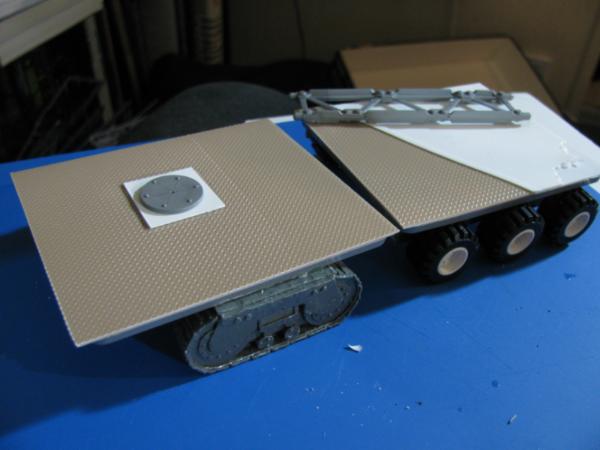
And a quick check to make sure the two stack up equally against each other. And they do. Excellent.
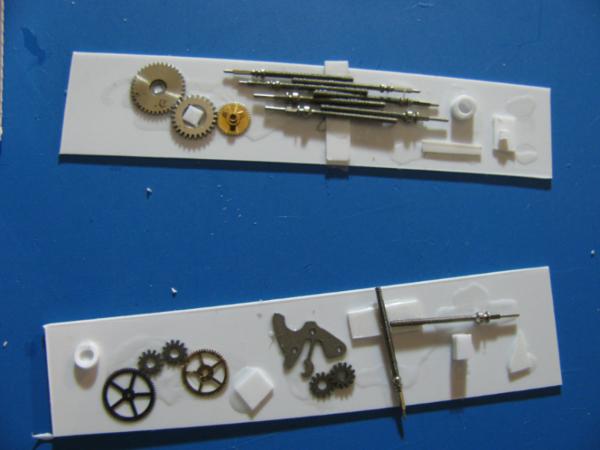
Also found some bits for detailing duties, a few cogs and some bits of plasticard (some of those bits I saved earlier). Not too bothered about what's being represented here, or the aesthetics too much, I just want to break things up a bit. It can be a bit messy.
The panels get glued inside the wheel supports, with bonus support coming from some more bits of sprue. And now there's something going on behind the wheels. Doesn't matter what in this case due to it's hidden nature, but a plain blank wall would stand out. I may even put a thin bar down on the outside, add some another layer to the detail. But for now, it's back to the cab.

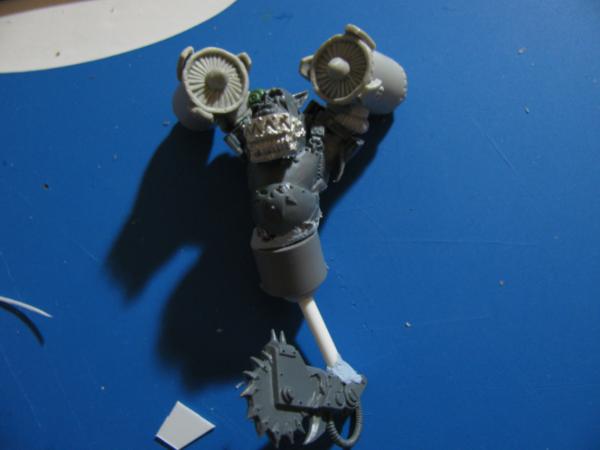
The hinges and aquila have been shaved off the door as that won't be getting much usage. Even managed to save one of the hinges intact. Still not entirely sure on how the driver's getting sorted, but I'm fairly confident there won't be too much of the existing interior detail visible, so no need for pre-painting anything here. The plan is to have two arms/panels coming down from the front or middle of the cockpit, reaching down to the axle of the marine wheel. I grab a couple of wheels just to check everything still looks ok now the flat-bed is 'together'.
And spot the shuriken cannon as I do so. That was going to become forks on a bike or boar, maybe I could use it here instead.
A quick play with some blu-
tac and copper wire (threaded through the wheel and twisted round the cannon to form an axle if you must know) and a new plan is in place. Cutting the rear of the cannon off leaves a nice piece which will fit nicely up against the angle where the cockpit nose drops, leaving angled forks coming from the centre of the cockpit.
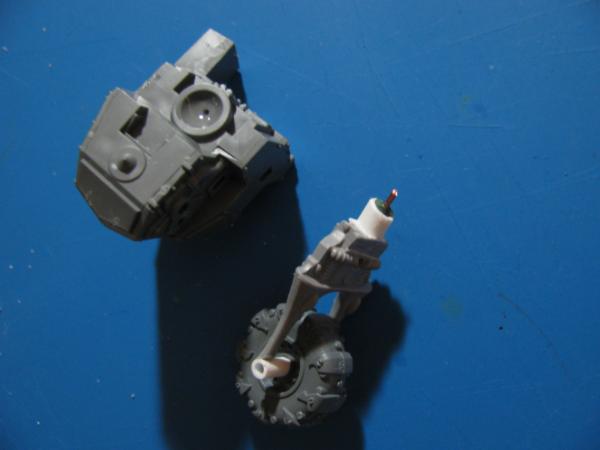
As I'm working I think that it would be a shame to waste that nice round socket that's been provided with. Surely the forks could come from there instead. A couple of tries later and indeed, that is what happens, with the axle moving to the bottom of the forks, mainly for ease
The axles actually closed up without me noticing during gluing. There was a thinner axle running through the wheel and into the larger tubing, leaving a few
mm visible either side. The larger tubes seem to have slid down and glued themselves to the wheel now.
Pinned and
GS'd for a bit of extra durability.
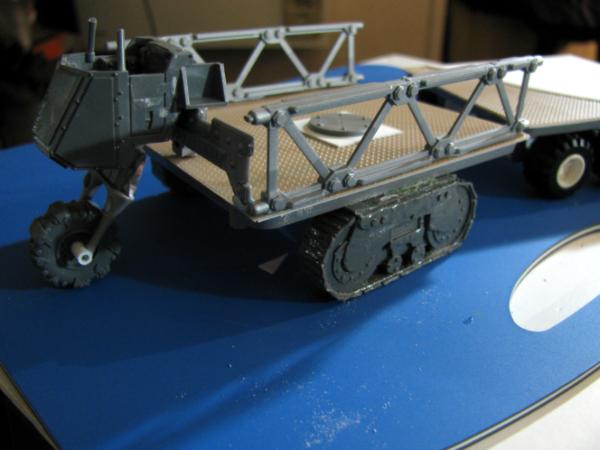
However, those last changes added a bit of height to the cab.

Doesn't nestle so close to the body now. Going to need some extra bits in there, and probably time to figure out just how I'm going to make these bits inter-changable. I'll sleep on that one
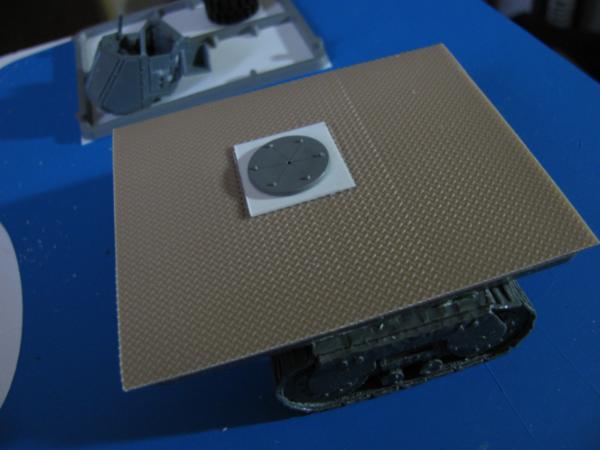
That's the basics out of the way really. Oh, except for Mr Big. He's been patiently watching whilst his younger siblings get all the attention. I think it was patiently anyway.
Well, haven't glued the tracks on yet as final placement might depend on what possible configurations there are. Or because I was doinfg something else. Maybe a bit of both. Possibly with some of that thrown in too.
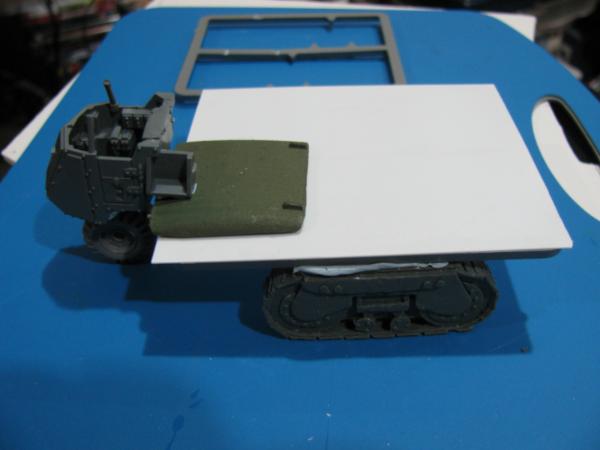
And before I toddle off, here's that size comparison I thought I'd get:
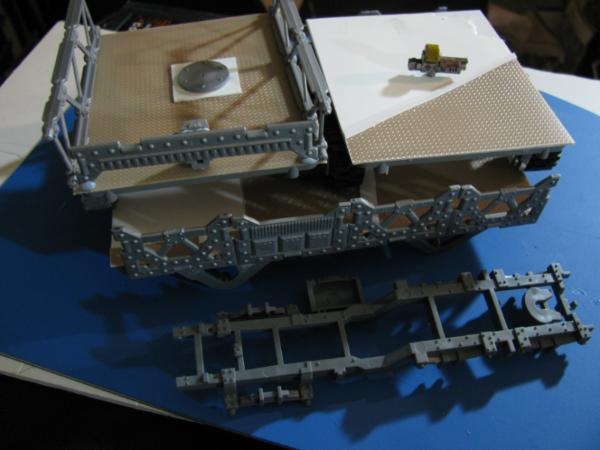
Big trukk, with little trukks on top, ork trukk chassis in front. Probably would fit then, depending on what sides it got.
Well, nothing other than the trukks today it seems. Sorry about that, see if I can't sprinkle something else in next time.
Oh my.
I've just realised it's taken me 2 hours to write this up
I do hope you haven't fallen asleep trying to read all that. There were some pwetty pictures to look at too though. Well, some pictures anyway.
Okay, see you all later..
Kapitan's Log - Addishunal :
Just for those who were wondering (you know who you are), the lemon slice packets do fit rather nicely:
Possibilities for a generator carriage for the land train maybe?


 2
2  2
2  1
1 1
1  3
3  2
2
 4
4  5
5 
 ) . I'd vote making it a mobile orkcraft carrier, a launch platform for either grot bombs or pulsa rokkits.
 Imperial Knights: The Avengers Initiative
 Arakasi vs Infinity
 (I have a whole box - haven't thrown away anything yet...)


 's in my life!