| Author |
Message |
 |
|
|
|
|
Advert
|
Forum adverts like this one are shown to any user who is not logged in. Join us by filling out a tiny 3 field form and you will get your own, free, dakka user account which gives a good range of benefits to you:
- No adverts like this in the forums anymore.
- Times and dates in your local timezone.
- Full tracking of what you have read so you can skip to your first unread post, easily see what has changed since you last logged in, and easily see what is new at a glance.
- Email notifications for threads you want to watch closely.
- Being a part of the oldest wargaming community on the net.
If you are already a member then feel free to login now. |
|
 |
2011/07/08 06:19:50
Subject: Da Dark Angelz (Ork) - Scared? Catchup post on page 50
|
|

Ragin' Ork Dreadnought
|
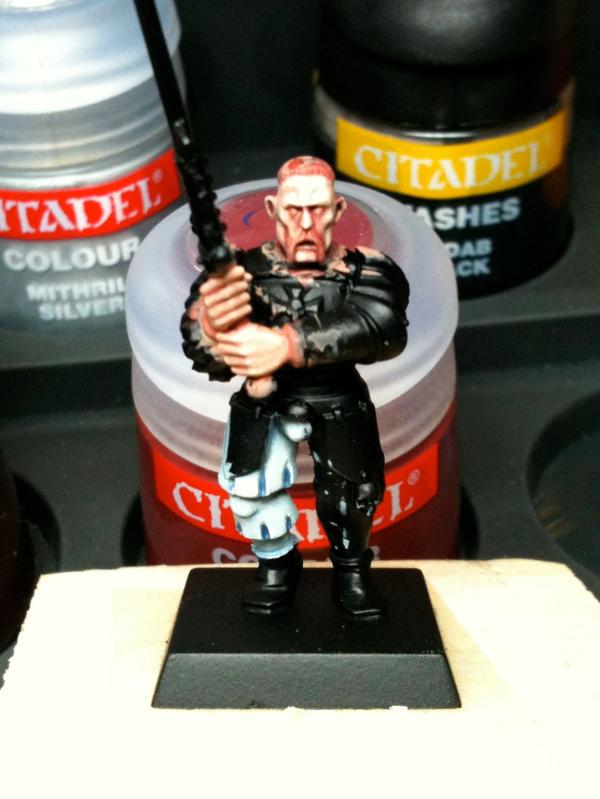
I think that's every colour for me to dislike now... I have some new bitz for da Deffwing - so some choppin' an' stikkin' seems an appropriate goal for next week (plus I found more 2mm plasticard strip  ) Maybe I'll look at Morgrim again too...
Definitely sticking with it! I think I've finally got the paint thinness correct - I can tell because a) it's not creating distinct lines and b) I feel the need to go over it again with another coat (or two!). Thing is, the multiple layers take time and patience - both of which I start running out of - but I need the practice if I want to improve my painting and my speed. And what better place to practice, over and over again, than on boyz? It's frustrating because I just want to be *done*. But I know I'll kick myself repetitively later if I take too many shortcuts now...
It's all in preparation for doing an awesome job on Morgrim/Da Deffwing - at least that's what I keep telling myself!
Thanks for the continued support guys. I really do appreciate it. Apologies for not chipping in as much in your threads...
|
|
|
|
 |
|
2011/07/08 11:57:18
Subject: Da Dark Angelz (Ork) - Scared? Catchup post on page 50
|
|

Death-Dealing Dark Angels Devastator
in ur head eating popcorn
|
It all looks great and makes me wish I could just throw some dough into restocking all my supplies and get back to workin on all my stuff.
|
My honor is my life, to fail is to dishonor, to dishonor is to die.
The fallen shall not be forgotten!
Ever searching for that Black Pearl...    |
|
|
|
|
2011/07/08 12:54:57
Subject: Da Dark Angelz (Ork) - Scared? Catchup post on page 50
|
|
Calculating Commissar
|
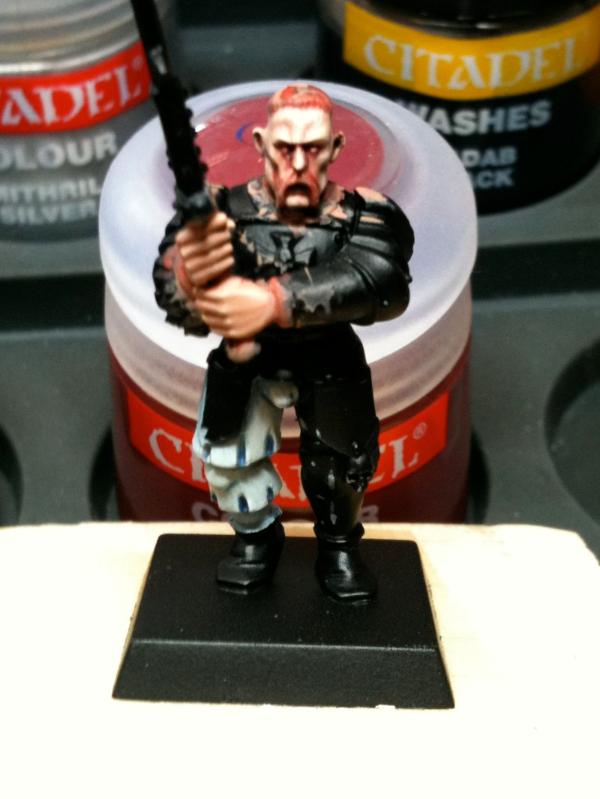
The tattoos look great with the washes over. Keep up the momentum and you'll soon be able to start on the Dark Eldar 
|
|
|
|
|
|
2011/07/08 13:28:58
Subject: Da Dark Angelz (Ork) - Scared? Catchup post on page 50
|
|
Ragin' Ork Dreadnought
|
Shhh!
|
|
|
|
|
|
2011/07/11 08:43:43
Subject: Da Dark Angelz (Ork) - Scared? Catchup post on page 50
|
|
Death-Dealing Devastator
|
I have really enjoyed watching those stormboyz evolve over the last few months, they are really nice models indeed, i'm totally jealous.
|
|
|
|
|
|
2011/07/11 12:31:59
Subject: Da Dark Angelz (Ork) - Scared? Catchup post on page 50
|
|
[SWAP SHOP MOD]
Decrepit Dakkanaut
OH-I Wanna get out of here
|
I really think that with the storm boyz you are approaching GD levels. While not the hyper realistic that we see a lot of from there, it has a certain stylized look that is great.
|
|
|
|
|
2011/07/11 13:19:11
Subject: Da Dark Angelz (Ork) - Scared? Catchup post on page 50
|
|
Ragin' Ork Dreadnought
|
@Asylum_Inmate: Glad you have enjoyed watching the (slow) progress I've said it before, but I'm glad I made two - or I'd be jealous too - or Gitsplitta may not have ever received his
@whalemusic360: It's kind of you to say so - but having seen mine and GD level ones up close, it's really nowhere near. On the upside - plenty of room for improvement! I think the crappy iPhone photos must be obscuring imperfections I can agree to them being the best I have completed or near completed so far - and reiterate my response to Asylum_Inmate above - I'm glad I made a second for me to keep!
|
|
|
|
|
|
2011/07/11 14:23:07
Subject: Da Dark Angelz (Ork) - Scared? Catchup post on page 50
|
|
Death-Dealing Devastator
|
Slow progress is always better than no progress, also better than progressing too quickly, nothing worse than rushing to the end and realising you have missed something out (like I did)
I think in this case it was worth the wait
|
|
|
|
|
|
2011/07/12 08:39:30
Subject: Re:Da Dark Angelz (Ork) - Scared? Catchup post on page 50
|
|
Ragin' Ork Dreadnought
|
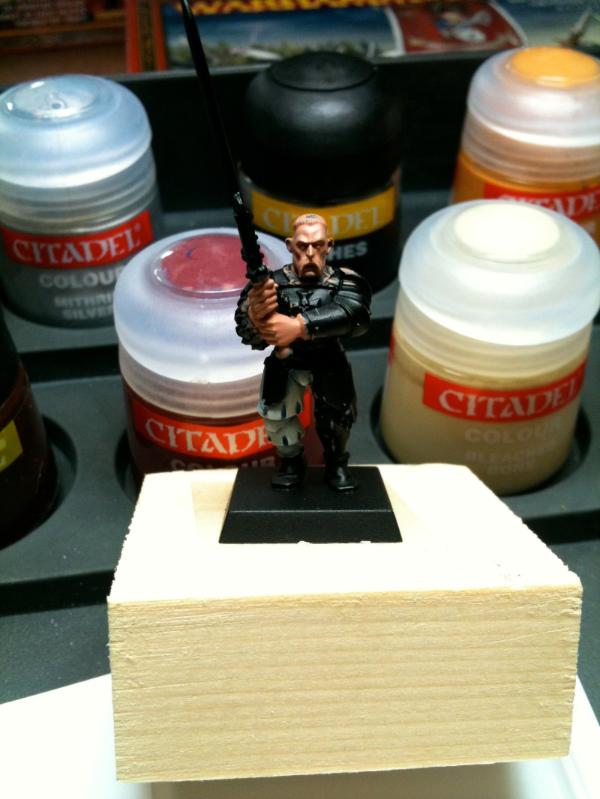
Arakasi (and endtransmission) go to the 'Eavy Metal Masterclass 3rd July 2011 at Warhammer World
Our hosts from the 'Eavy Metal team were Mark and Dave.
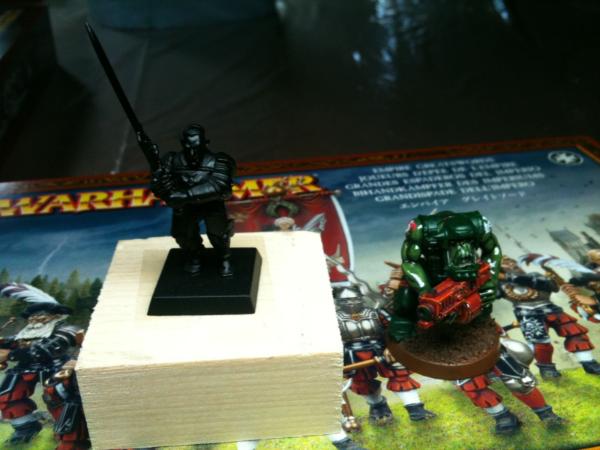
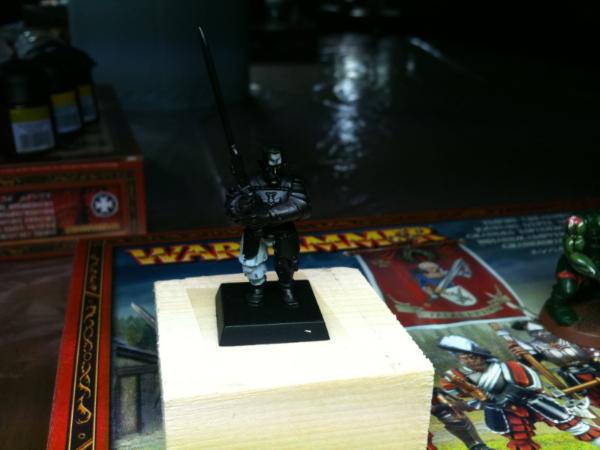
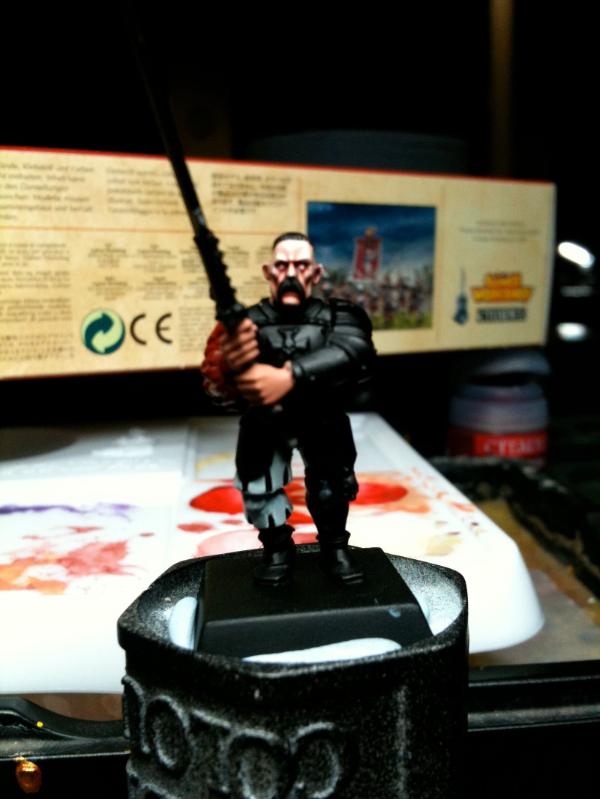
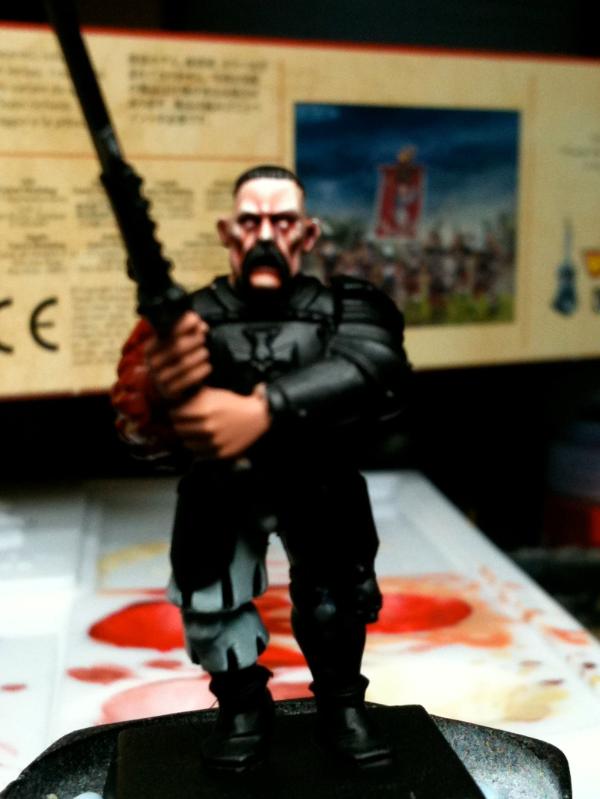
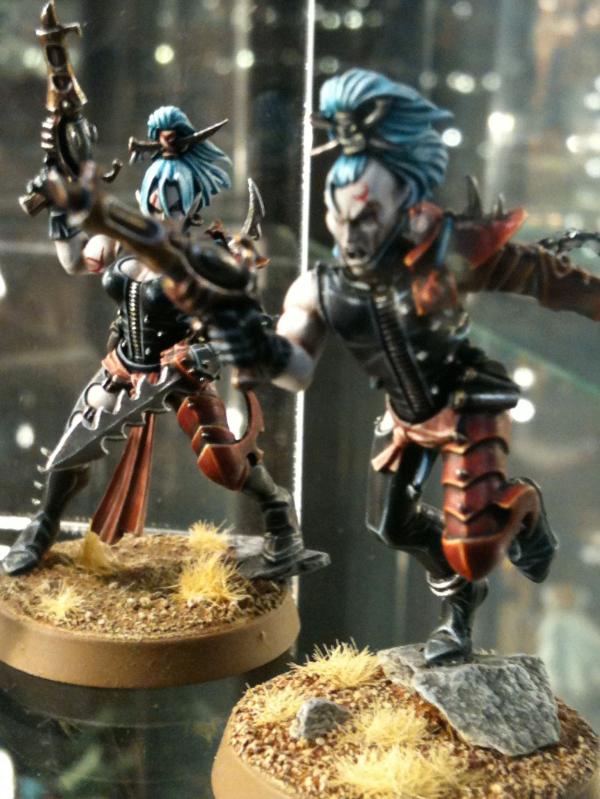
Our undercoated Great Sword - ready for painting mastery - on top of his box of mates. The fella to the right is one of Da Dark Angelz Orks - looking for advice on his tattoos... They had stuck the Great Sword to a piece of wood with double sided tape. Before we started, the 'Eavy Metal guys seemed unsure of this and offered blu-tack and spare paint pots to stick him on instead. I should have taken them up on this - the wood block was a bit large and would get in the way - especially doing the legs...
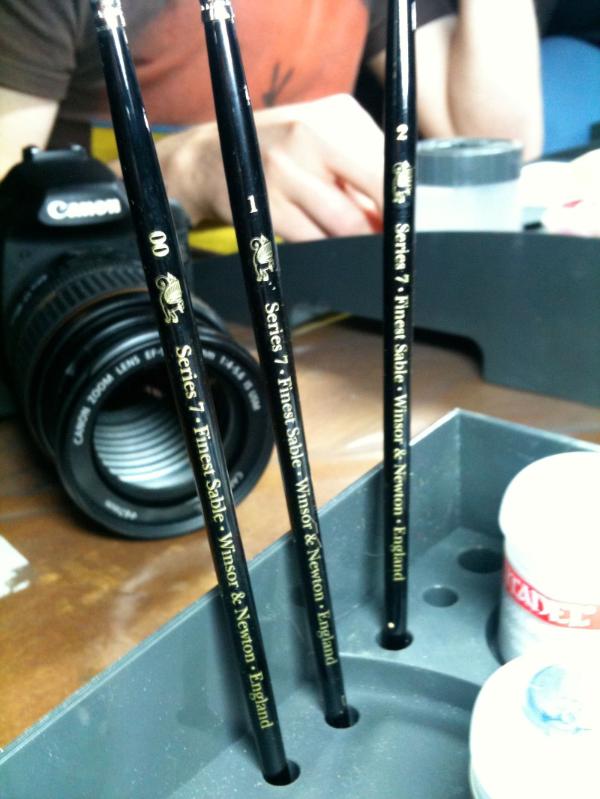
Our supplied brushes. Wait! These aren't GW brushes! (or are they?) Side note - apparently Forgeworld were told that, as soon as they released an airbrush, they could do airbrush masterclasses. Apparently the same limitations don't pertain to 'Eavy Metal... On the upside - we got to keep these too!
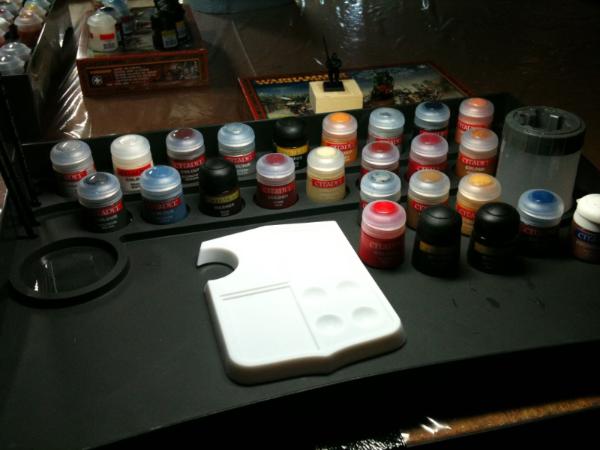
Our paint station in all of its glory. No green  . Ended up feeling quite crowded...
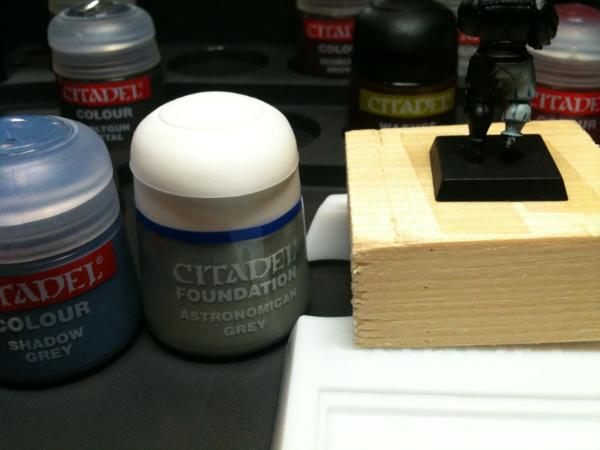
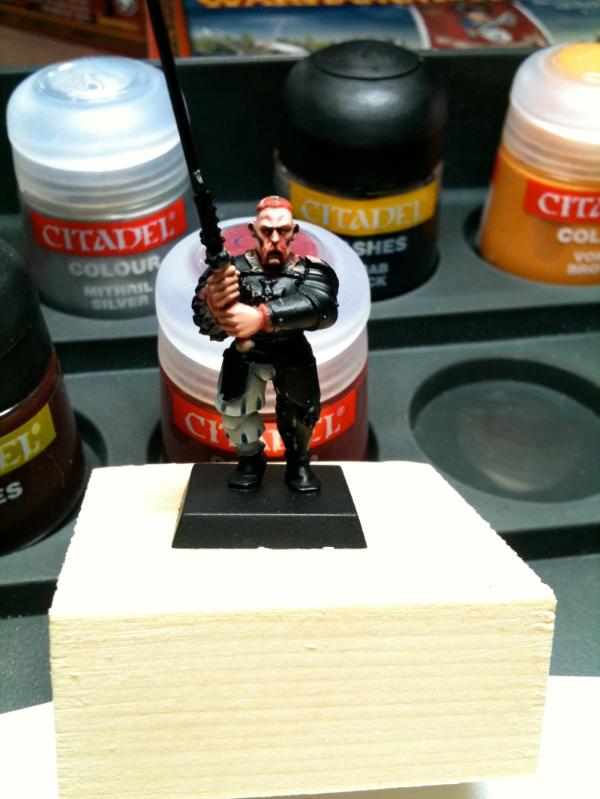
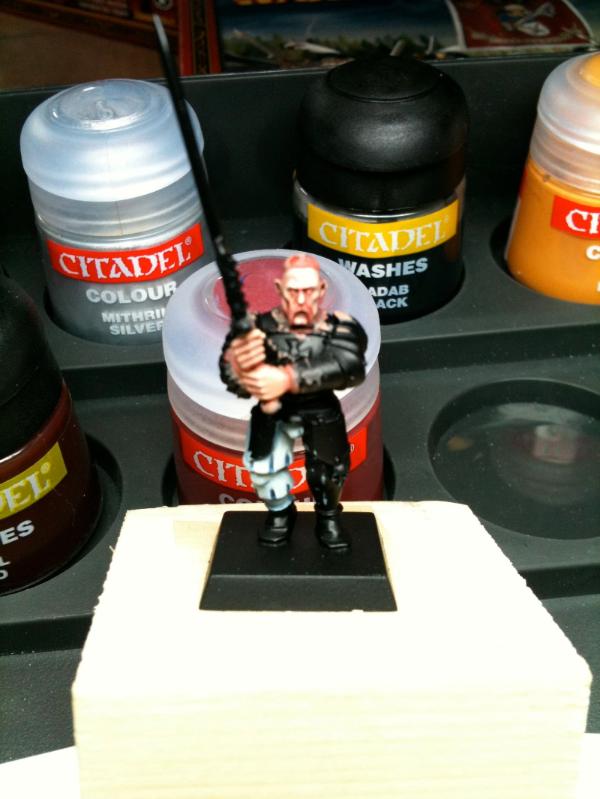
And we are off! First up, white. Starting with a base coat of Astronomican Grey. Reinforcing the usual instructions - water down, apply multiple thin coats (waiting for each to dry in between) - the first coat *won't* cover the black undercoat. Also - with each coat, vary the direction for better coverage (ie left to right for the first coat, top to bottom for the next and so on)
I think I took this to remind me of the colours before I started jotting down notes
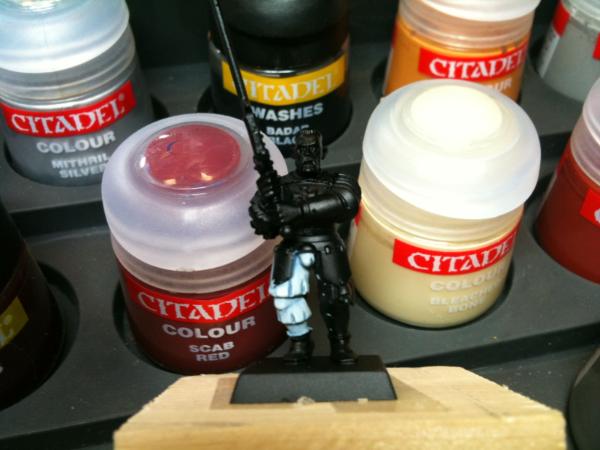
Next step, mix Shadow Grey 1:2 with Astronomican Grey (watered down) and shade towards where the shadows should be - the idea being that the bulk of the paint will remain where you lift off. If you are having trouble seeing it in the photo - well - it's a crappy iPhone pic - but I was having similar issues in real life too... It's all about slowly building up (or down) the colour... Suggestion was that you could be a bit sloppy here and retouch with the base coat colour as need be.
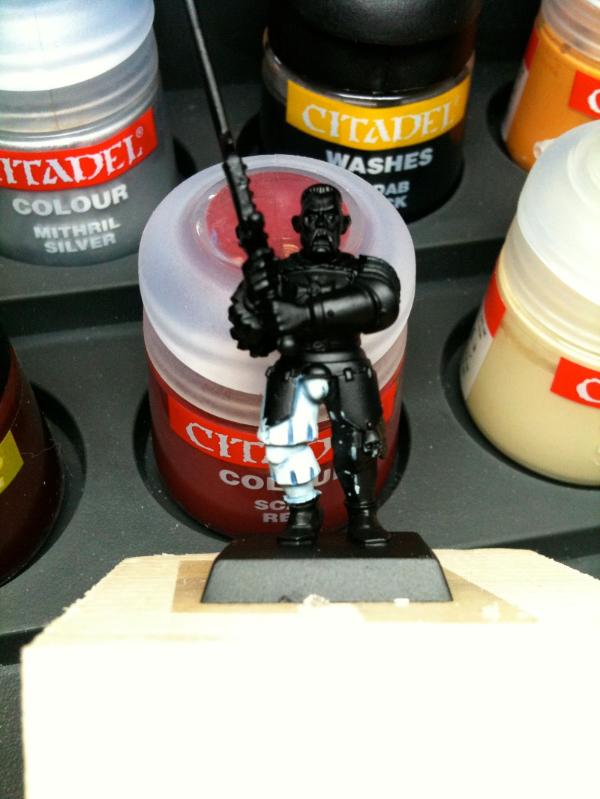
I think I may have missed some photo steps here We mixed White 2:1 with Astronomican Grey to highlight, this time drawing the brush towards the light edges. Again, several thin coats - not one thick one! Pure White was then used for edge highlights (very fine!). A darker shade ('Eavy Metal used Black, I used Shadow Grey) was painted into the creases - 'Eavy Metal is all about contrast - the very dark in the creases meeting the sharp white line highlights on the edges...
We broke for lunch, having not made it onto red - the quip from the Forgeworld Tank Masterclass resounding in my mind
After lunch and straight into skin. Base coat here is 1:1 Tallarn Flesh and Dwarf Flesh, again done in multiple thin coats (sensing a pattern?).
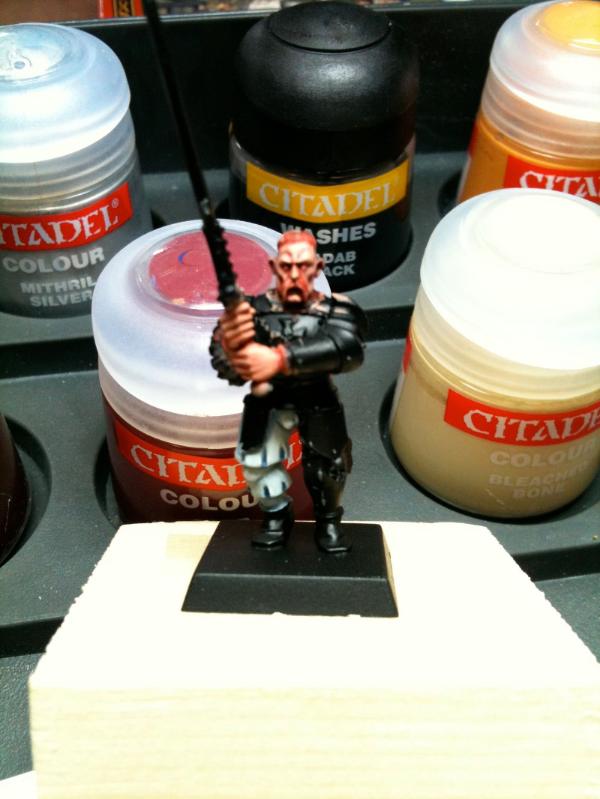
A wash of 1:1:1 Dark Flesh, Devlan Mud and water was applied into the cracks and crevices, again towards the darker areas, and then the base touched up if necessary. (Devlan Mud was mixed in to assist the flow)
Dwarf Flesh highlight - at least 50% water - towards the raised areas.
Followed by 1:1 Dwarf Flesh and Bleached Bone...
Finally, Bleached Bone applied to the very highest areas. You are supposed to be able to see all of the layers you have applied. There is also supposed to be a *lot* more contrast. I'll show the 'Eavy Metal models at the end - which look a lot better (mine tended to look washed out. I did three attempts, without much further success - though rushing certainly doesn't help!)
Leviathan Purple was washed into the eyes, around the nose and into deep crevices - creating greater contrast in the centre of the face and therefore drawing the attention there. A final (final?) highlight of 1:1 Bleached Bone and White was the finishing touch.
I must have been discouraged, or simply concentrating on redoing the skin an additional two times unsuccessfully, as I have no more pictures of my model from the day. Interestingly, all of the 'Eavy Metal team have different methods of painting and achieving different effects. The two present didn't seem to understand why you would do eyes as two white dots over black - when its easier to do a single black dot over white for example. One of the guys was using a home made wet palette.
We went on to do the sword metal - starting with a Boltgun Metal base. Doing a quick and simple technique, Devlan Mud and then Badab Black was washed on, controlling the wash to pool at the top and bottom of the sword. Mithril Silver was then used as an edge highlight. The edges of the blade are simple to do, but the line down the centre requires a delicate hand and much practice! Chipping was applied as fine lines to the top and centre - where the sword would get the most use. Rust could be added with thinned down Bestial Brown and then Vomit Brown - tapping around and into recesses, building up in layers.
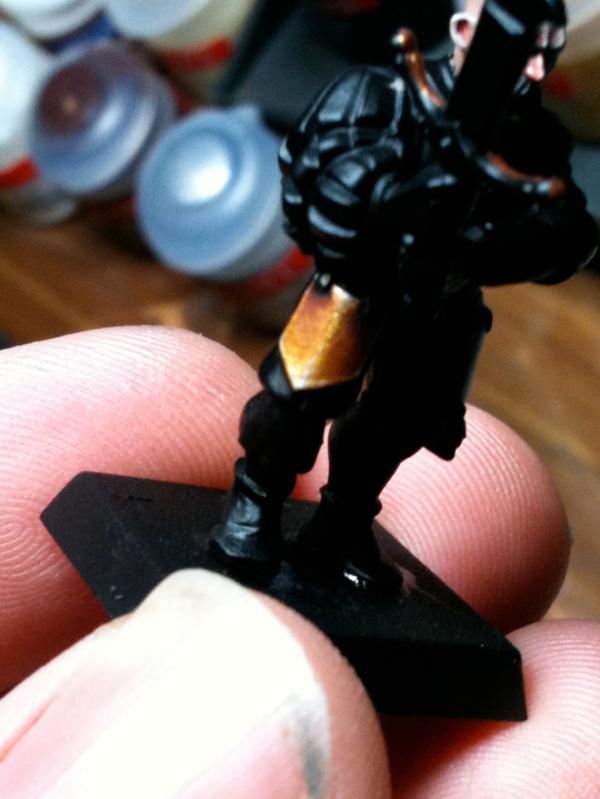
Moving on, we did the shields at the top of the legs in gold, starting with a 1:1 Scorched Brown and Shining Gold base. (Shining Gold has very poor coverage by itself). In fact, 'Eavy Metal often mix Foundation paints with others in the range for base coats - getting the coverage from the Foundation paint and the colour/brightness from the mixed in paint - for example Blood Red mixed with Mechrite Red - due to the Foundation paints generally being on the dull side We continued building up layers of Shining Gold towards the highlight before moving on to Burnished Gold. Thinned Scorched Brown was applied into the darker areas, from the centre out. 2:1 Mithril Silver/Burnished Gold was blended into a fine line down the middle. 1:1 Scorched Brown/Black was used to shade down more. Mithril Silver was applied as a final edge highlight. I hadn't been able to see exactly where they were applying the shading, so my shield didn't turn out great. Theirs was flawless (as you would expect...) From here, you could also apply various washes for various effects - Red for a warm gold, purple for a cool gold etc. They would re-highlight the points after any washes.
As the day was coming to a close, red was quickly touched upon. 1:1 Blood Red/Mechrite Red as a base, shade with Scab Red/Black, Blood Red highlight, mix in Blazing Orange and then Vermin Brown to highlight. Baal Red glaze followed by re-picking the highlights.
And the leather - Scorched Brown base, wash Black, add Bleached Bone to highlight.
We had a great day. I think patience is probably the biggest lesson I learnt. It was helpful to have the guys on hand to look at your work and make suggestions. We did end up getting through more than just the legs - but we could have covered so much more. It was sort of limited by the sheer number of layers and waiting for layers to dry really. Oh - and I did get some ideas for my Ork Tattoos - which have already been applied!
And that's all I have! Well - except the actual 'Eavy Metal pics!
'Eavy Metal white (sorry - poor pic!)
'Eavy Metal skin
'Eavy Metal perfect gold!
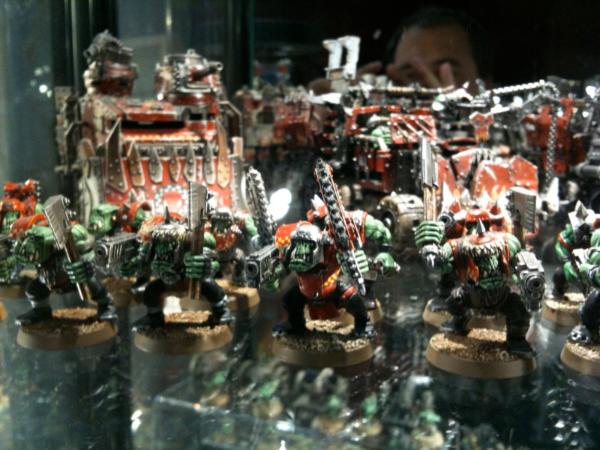
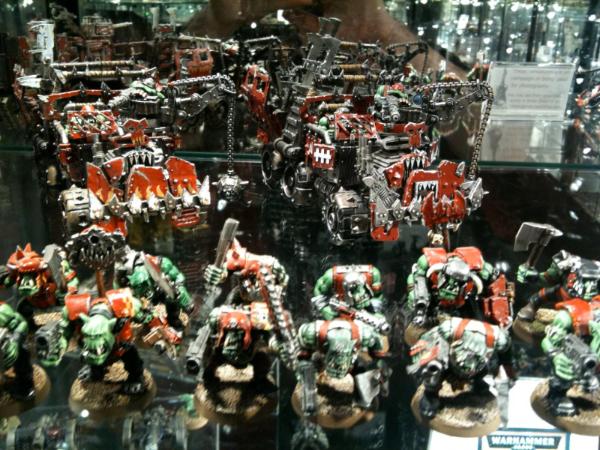
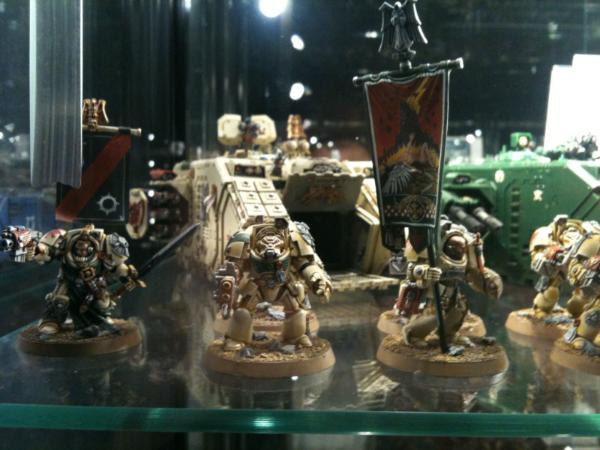
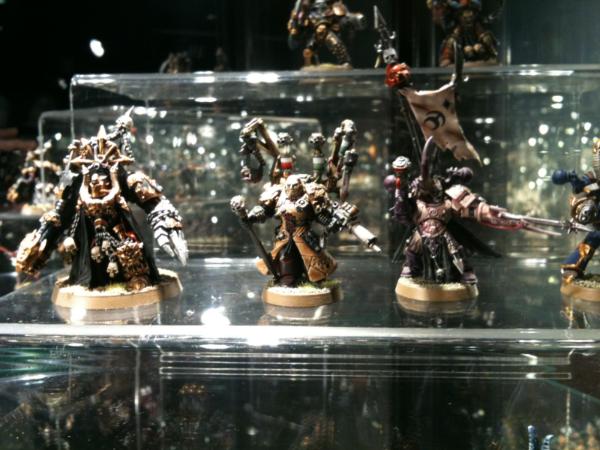
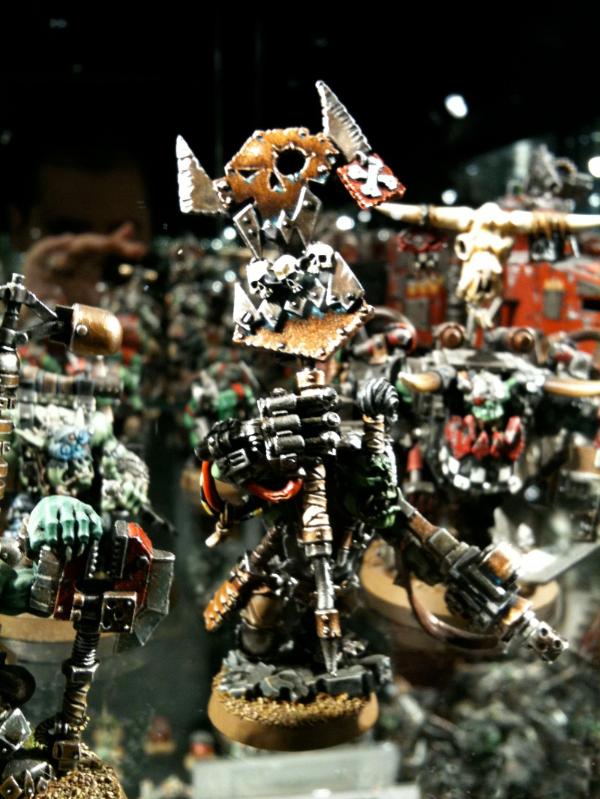
Some pictures from the display cabinet they had at the event:
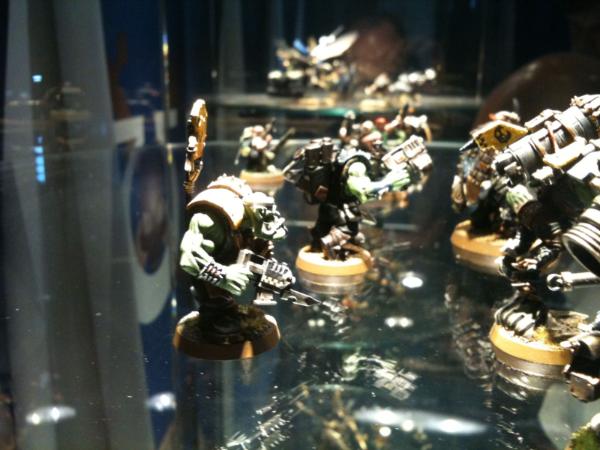
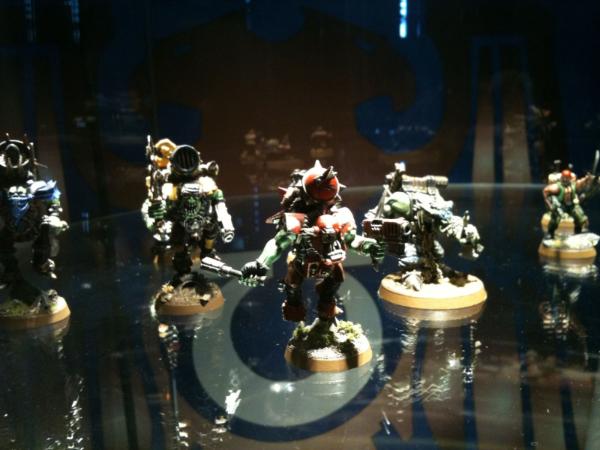
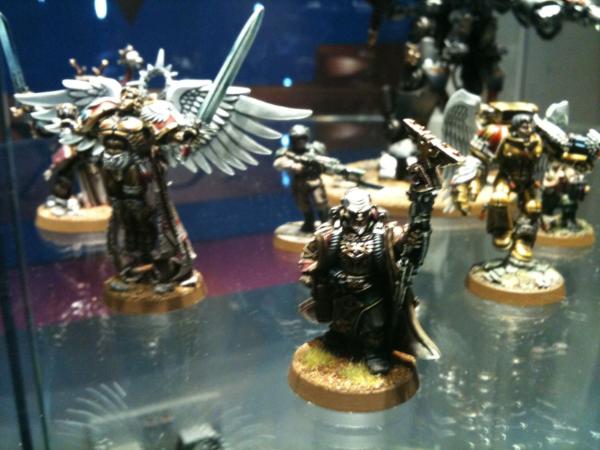
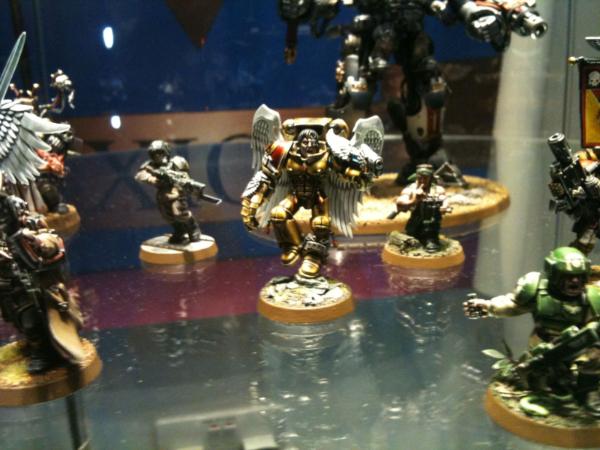
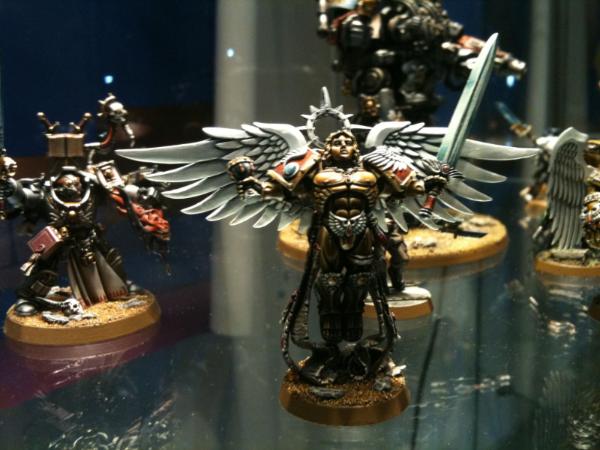
Some pictures from the Warhammer World display cabinets:
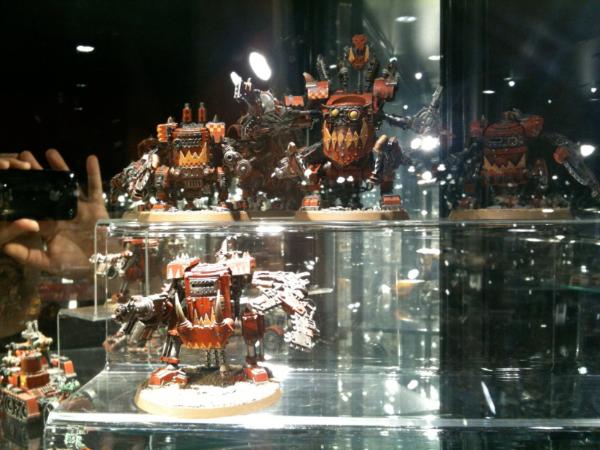
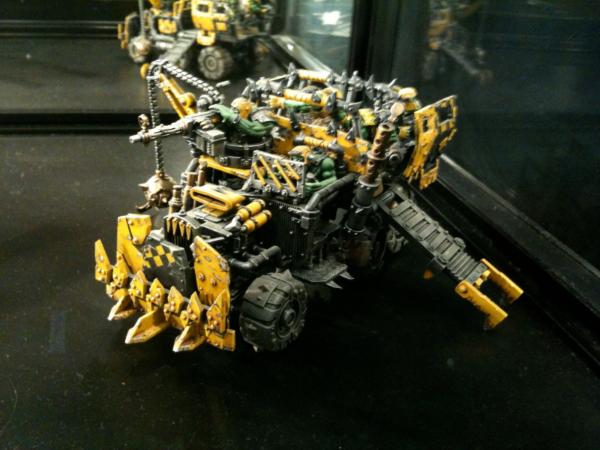
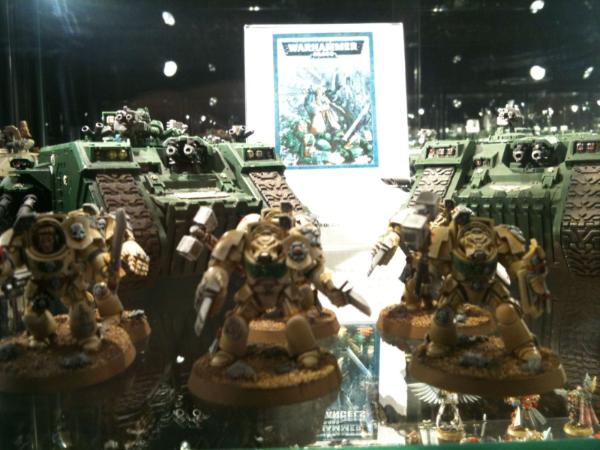
Some pictures from the Warhammer World display cabinets from when I went to the Forgeworld Tank Masterclass:
|
|
This message was edited 1 time. Last update was at 2011/07/12 11:43:30
|
|
|
|
|
2011/07/12 11:15:42
Subject: Re:Da Dark Angelz (Ork) - Scared? Catchup post on page 50
|
|
Death-Dealing Devastator
|
Very cool and very useful summary, thanks
Waaaaaaaaaait a minute, you time travelled, this is an article from the future
Arakasi wrote:Arakasi (and endtransmission) go to the 'Eavy Metal Masterclass 3rd August 2011 at Warhammer World
|
|
This message was edited 1 time. Last update was at 2011/07/12 11:16:22
|
|
|
|
|
2011/07/12 11:43:59
Subject: Da Dark Angelz (Ork) - 'Eavy Metal Masterclass
|
|
Ragin' Ork Dreadnought
|
Just seeing if you were awake - you passed! (Fixed)
|
|
|
|
|
|
2011/07/12 12:19:36
Subject: Da Dark Angelz (Ork) - 'Eavy Metal Masterclass
|
|
Death-Dealing Devastator
|
I dont know, I kinda like the idea of learning what painting techniques will be like in the future
PS the only reason I am awake is something to do with 2 bottles of mountain dew and a strong coffee
|
|
This message was edited 2 times. Last update was at 2011/07/12 12:20:41
|
|
|
|
|
2011/07/12 12:19:59
Subject: Da Dark Angelz (Ork) - 'Eavy Metal Masterclass
|
|
Calculating Commissar
|
Good write-up of the day
Their other suggestion for the sword was to do some thinned washes of blue or purple to the sword before the edge highlighting if you are doing a power weapon.
It's also important to note that this method of painting metals is what they use when painting regiments of troops, not character models. They would use a MNMM approach to those.
|
|
|
|
|
|
2011/07/12 12:23:10
Subject: Da Dark Angelz (Ork) - 'Eavy Metal Masterclass
|
|
Death-Dealing Devastator
|
Never tried NMM, looks quite difficult without a airbrush.
of course im guessing its all down to preparation and practice
|
|
|
|
|
|
2011/07/12 23:29:23
Subject: Da Dark Angelz (Ork) - 'Eavy Metal Masterclass
|
|
Decrepit Dakkanaut
|
Wow... that looks like quite the experience! Thanks for sharing!
|
|
|
|
|
|
2011/07/13 00:20:38
Subject: Re:Da Dark Angelz (Ork) - 'Eavy Metal Masterclass
|
|
Ragin' Ork Dreadnought
|
Thanks for reading!
Although my Chaos Black arrived today, some bitz beat it - so back to some modelling, Deffwing style!
Meganob WIP - Codename: Predator
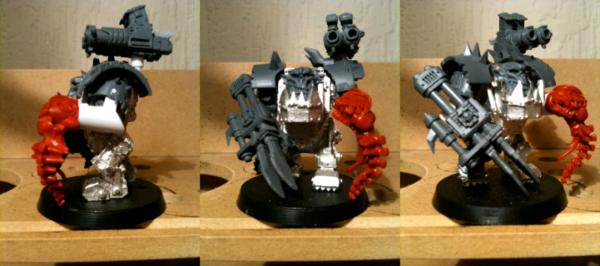
Nid - as suggested by... someone...
Meganob WIP - Codename: Warmachine
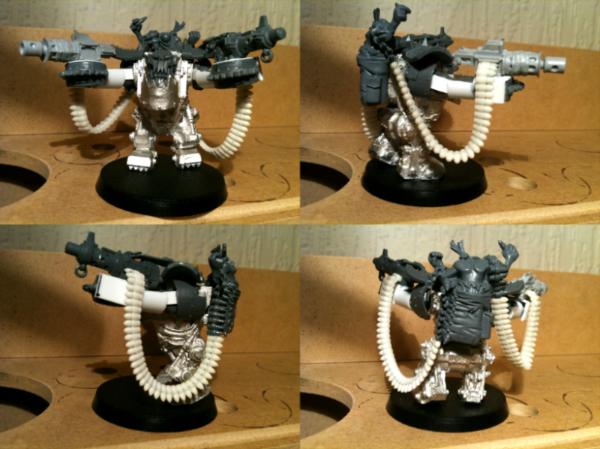
Two lots of "small bullets" from Zinge Industries Large Ammo Belts  Decided to do away with the back mounted polearm in favour of a grot and ammo pack. The saw shoulderpads are trying to masquerade as the Power Klaw "counts as" - oh well...
Still lots of detailing and stuff to do. Yes - I know the right barrel needs drilling!
Night!
|
|
|
|
|
|
2011/07/13 09:56:10
Subject: Re:Da Dark Angelz (Ork) - 'Eavy Metal Masterclass
|
|
Nasty Nob
|
 Impressed
Those mega nobz have really come on since last time i saw them, almost tempting to buy mega nobz now.
Keep up the good work
|
|
|
|
|
|
2011/07/14 07:24:50
Subject: Da Dark Angelz (Ork) - 'Eavy Metal Masterclass
|
|
Ragin' Ork Dreadnought
|
Thanks bigfish!
Decided to break in the new Chaos Black with some more shading - 3:1:1:1 Dark Angels Green, Chaos Black, Gloss Varnish and Water (may need to double the Gloss Varnish and Water next time...) Only got through three boyz before I was knackered - though that would be partially the previous late night/morning working on Warmachine catching up with me...
Tonight - attempt to finish the Stormboyz!
Catchya!
|
|
|
|
|
|
2011/07/14 07:50:45
Subject: Re:Da Dark Angelz (Ork) - 'Eavy Metal Masterclass
|
|

Regular Dakkanaut
|
Love how the Nobz are coming off - I particularly like the 'Warmachine' nob, as I can really picture him walking down a battlefield, guns blazing!
The 'Predator' one looks good too, however I now may need to model one of my Nids with an Ork head just to put us on an even footing
|
|
|
|
|
|
2011/07/15 18:39:45
Subject: Da Dark Angelz (Ork) - 'Eavy Metal Masterclass
|
|
Ragin' Ork Dreadnought
|
I'm liking "Warmachine" too - but it could just be because he is furthest along I had picked out ejecting shells for the guns and piles'o'shells for the ground - but realised later - as you mentioned - he will be *walking* down the battlefield (well, at least once is has (forcibly) disembarked his ride...) - so no piles'o'shells for him! I'll have to make my own and have them litter back in two lines
Some wonderful contributor (probably monkeytroll, but I'm too lazy to check back at the moment) suggested the Space Hulk Powerfist holding Nid spine - had nothing to do with your Nidz - we haven't even faced off yet! Still - that *does* give me an idea for a Nid corpse colour scheme...
Hmmm... just realised I have left the Meganobz metal gobz removable for easier painting. But "Predator" will need "hair extensions" eventually - not sure I'm going to manage to do that and keep the gob removable...
Right - no pic update, but an update nonetheless... Tidied up the Stormboyz Nobz base rims. Painted the missed Powerklaw cables. Added some final Mithril Silver highlights. I'm calling them DONE! Well - painting wise anyway. Still need to glue together (they still come apart in three pieces currently - still haven't decided if this is the best idea for Gitsplitta's...), add flock to mine (Gitsplitta wants to flock his own - I'm going to be concentrating around the feet - as the "rocks" don't come all the way up due to the previously mentioned separation ability...) and Matt Varnish Spray. (Or should that be Matt Varnish Spray and *then* flock? Not sure if the spray will have the same dampening effect my brush on varnish had on the flock...). All of that will happen next week - so with any luck, your Stormboyz Nob, my first GMS trade, my first complete model this year and in over a year, might be winging its way to you as early as next weekend Gitsplitta!
|
|
|
|
|
|
2011/07/15 19:57:17
Subject: Da Dark Angelz (Ork) - 'Eavy Metal Masterclass
|
|
Renegade Kan Killin Orks
|
Everything is looking so awesome. The two MANZ are coming out great. The nid spine really sends the Predator theme home! I like the addition of the Grot backpack on Warmachine, the attached ammo belts are great too. I like how the hands ended up, too. The saw blade pads are a good choice.
|
|
|
|
|
|
2011/07/15 21:32:44
Subject: Da Dark Angelz (Ork) - 'Eavy Metal Masterclass
|
|
Lead-Footed Trukkboy Driver
|
YAY! First one is complete. And what a model too.
|
|
|
|
|
2011/07/20 11:44:49
Subject: Da Dark Angelz (Ork) - 'Eavy Metal Masterclass
|
|
Ragin' Ork Dreadnought
|
@The Good Green: Thanks. I wasn't sure about the hands (still not 100%) - but I'm glad you like them!
@Artsoldier35: Thanks. We will get to finishing yours (did a little more on the Twin Trukk last night...)
Stuck the Stormboyz Nobz together. Gloss varnished for extra protection. Applied flock to mine. Just waiting on the Purity Seal and appropriate weather now
Did some more dark green shading on da boyz - only two more to go...
Did some more work on the Twin Trukk grill. That 2mm plasticard strip I found is more like 1.8mm, but that's okay - it's Orks!
Apologies - no pics - didn't feel there was enough progress to justify.
Model on!
Automatically Appended Next Post: Stormboyz Nob (mine) finished!

While I was out wrestling the Purity Seal (more on that in a second), thought I should finally do the last of the Nobz endtransmission painted for me...
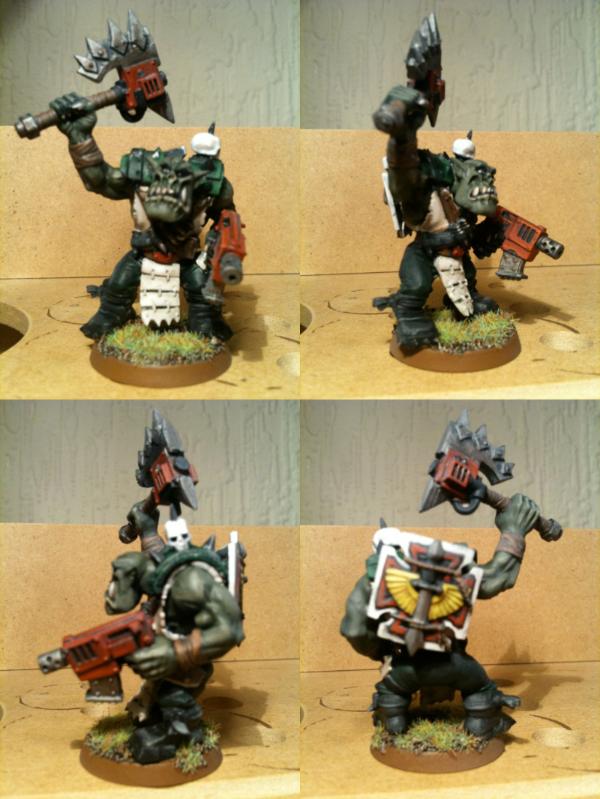
Where's Gitsplitta's Stormboyz Nob for the GMS trade? Well... he had some "issues"...
Though its probably not obvious from the photo...
So, I've had this can of Purity Seal for quite a while, never been used. I shook it up real good. Tested on my Forgeworld Masterclass Tank - all seemed good. Did the vanilla Nob above first, then mine, then Gitsplitta's - and then noticed... frosting! Aaaaargh!
Got them inside and put the hairdryer to work. My two Nobz seem to have made it through acceptably at least, but there was more frosting on Gitsplitta's than I cared for.... Grrrrr.... So back out came the Gloss Varnish. You can probably see the difference better in the following pictures:
The frosting is worst on the banners (especially the red one), the Rokkit Pack jets and the Slugga. First picture is "as was". Second the red banner and part of the Rokkit Pack are Gloss Varnished. Third I've put the Gloss Varnish just down the middle of the Slugga.
So I did the whole lot in Gloss Varnish again (extra protection!) and will try again tomorrow...
Oh and Gitsplitta? Those banner poles are pretty delicate. Managed to break the yellow one for you in a hairdryer/dropping incident. Glued back on now of course, but I would try to avoid dropping the miniature (or anything else) on them...
|
|
This message was edited 1 time. Last update was at 2011/07/20 22:06:36
|
|
|
|
|
2011/07/21 00:08:03
Subject: Re:Da Dark Angelz: Stormboy Nob finally complete!
|
|
Fixture of Dakka
|
Wow, had some catching up to do.
Thanks for the write-up on the masterclass, sounds good, and bonus, 3 series 7's, very nice 
The MANZ looking excellent, very nice ammo feeds, I forsee some of those in my future Good to see you swinging to the side of cyberising with the addition of the single-eyed ammo grot
Don't think I was the one to mention the fist with nid, as I'm not overly familiar with the termie sprues, I was thinking it was Major Tom or Sageheart for some reason. It was a good idea whoever, looks good. Good to see you swinging to the side of cyberising with the addition of the single-eyed ammo grot
Finished stormnob looks the bomb, sorry to hear of purity seal frostiness though, that always sucks, and never happens to a scrappy test-piece, always the showcase piece for someone else. Hopefully the gloss will resolve most if not all of the issue.
|
|
|
|
|
|
2011/07/21 02:10:15
Subject: Da Dark Angelz: Stormboy Nob finally complete!
|
|
Decrepit Dakkanaut
|
LOL! OK Arakasi... no dropping... got it.
|
|
|
|
|
|
2011/07/21 02:19:16
Subject: Re:Da Dark Angelz: Stormboy Nob finally complete!
|
|
Raging Rat Ogre
|
And no Areoplaning it around the room or throwing it like a dart to see if he can fly either.
Just awesome Arakasi really nice to see it done, now get back to work on the rest and your trukks.
|
|
|
|
|
|
2011/07/21 19:20:26
Subject: Da Dark Angelz: Stormboy Nob finally complete!
|
|

Dominating Dominatrix
|
Some fantastic conversions here. A great looking theme-army!
|
|
|
|
|
2011/07/22 06:50:50
Subject: Re:Da Dark Angelz: Stormboy Nob finally complete!
|
|
Ragin' Ork Dreadnought
|
@monkeytroll: Thanks. That's not an eye... Purity seal frostiness is mostly resolved (a bit of the red banner is less than perfect ) - now waiting for appropriate weather to try again...
@Gitsplitta: I just hope it survives transportation... (still, it's all plastic (except the actual banners, oh and the helmet wings, and the pinning... okay - so it's not *all* plastic...), so plastic glue is your friend...) And what Santobell said
@Santobell: Yeah yeah. Trukks and Boyz. Painting enthusiasm is waning, so probably more modelling next week... (working on a different hood ornament for the Twin Trukk - but didn't get far enough along to be worth photographing...)
@Anung Un Rama: Thanks!
Until next week... (well, for any actual progress anyways...)
Oh. At some point past there was a suggestion to put a tarpaulin covered 'Nid in the back of the GMS Trukks - any ideas on what particular bug would be most suited? I'm thinking Hormagaunt, but Dakka advice is always welcome! (Before I buy some....)
|
|
|
|
|
|
2011/07/22 07:43:44
Subject: Re:Da Dark Angelz: Stormboy Nob finally complete!
|
|
Regular Dakkanaut
|
Depends on what sort of effect your after. If you're looking for lots of tendrils poking out from under the tarpaulin (as per Independence Day), then I would go for a venomthrope (though you may want to wait for the finecast version so you can manipulate a resin mini rather than metal...).
Hormagaunt is a good stock Nid, but the legs are built in such a way that it may be hard to manipulate to how you want it, depending on how much of the model you want to expose...
Genestealers are easily manipulated into different poses, and the new resin lictor is a very sweet model that could also be manipulated easily (and be large enough that you'de expect limbs to be hanging out here and there...)
|
|
|
|
|
|
2011/07/27 06:46:39
Subject: Da Dark Angelz: Stormboy Nob finally complete!
|
|
Ragin' Ork Dreadnought
|
Hmmm... maybe Genestealers then, though the Venomthrope *is* appealing, just not at £12.30 x2 (and not released in Finecast yet, and will only get more expensive, and not convinced Finecast issues are over yet...) Will ponder some more...
In the meantime - did some more work on the Twin Trukk hood detailing. What does every Trukk need? A hood ornaork of course!
|
|
|
|
|
|
|
|
 Imperial Knights: The Avengers Initiative
 Da Dark Angelz
 Arakasi vs Infinity